Badger
Part of things
 
Posts: 250
|
|
|
|
Back in January (and after eight years of saving) I was fortunate enough to buy my own house - and most importantly, one with a garage! Since then the house itself and finishing off my kit car (in my parents garage) has had the priority for my time and tight funds, but with the house mostly together and the kitcar now on the road I'm hoping to crack on with it more. Without further ado, I present Badger's Lair (or Sett). 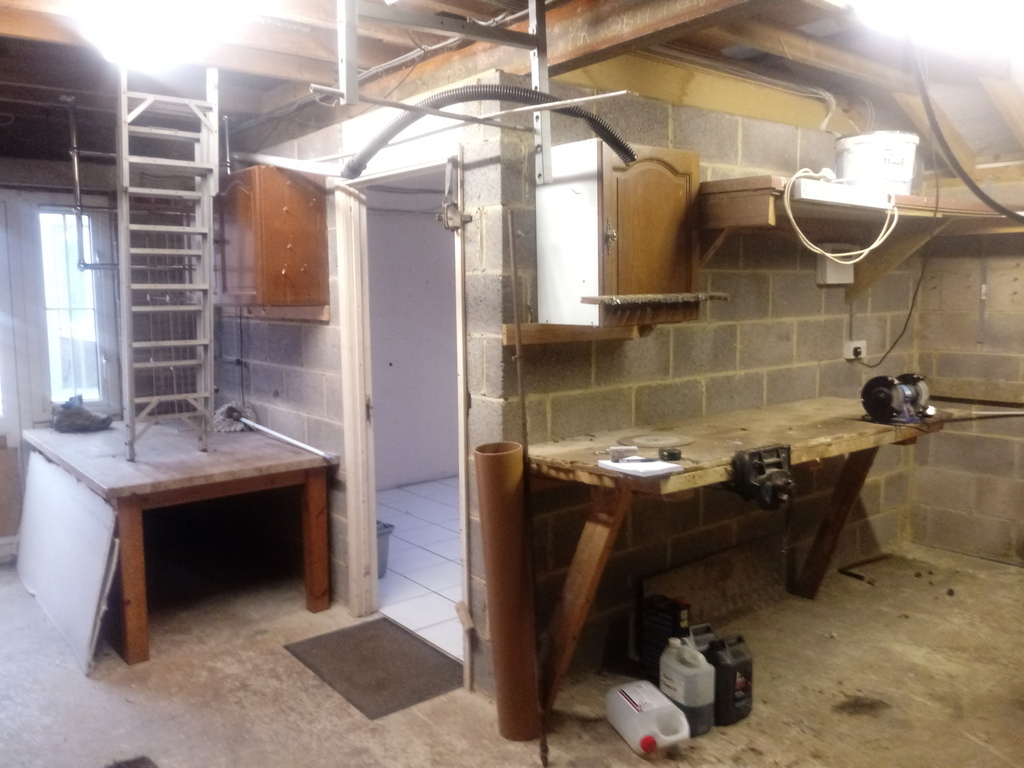 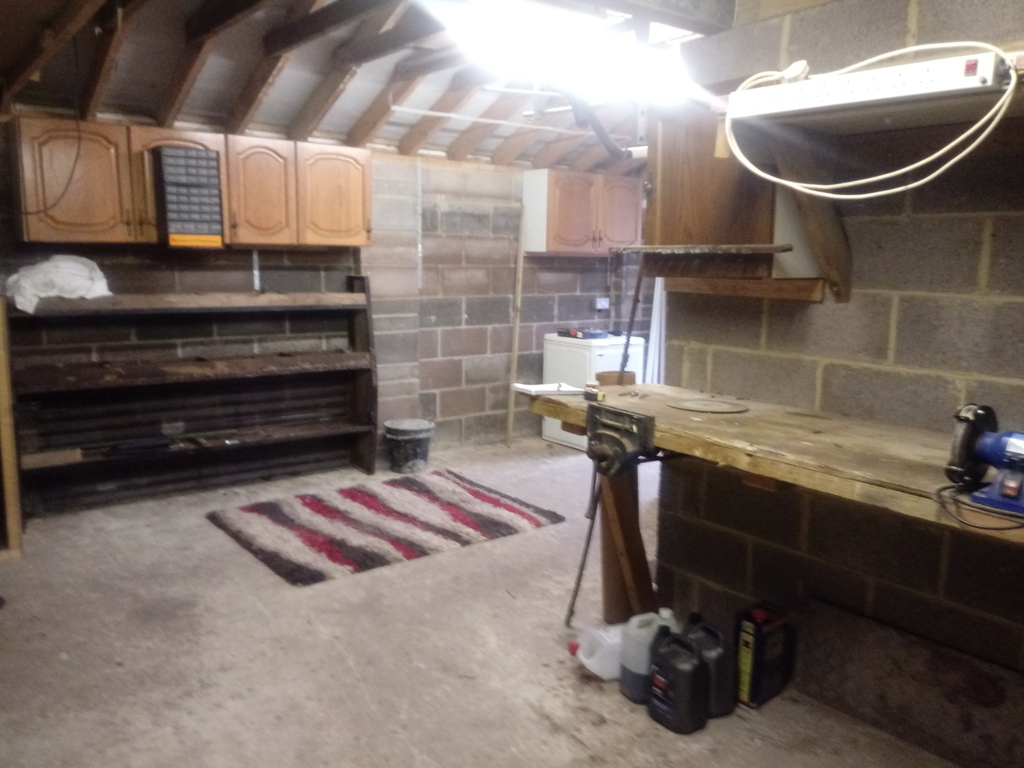 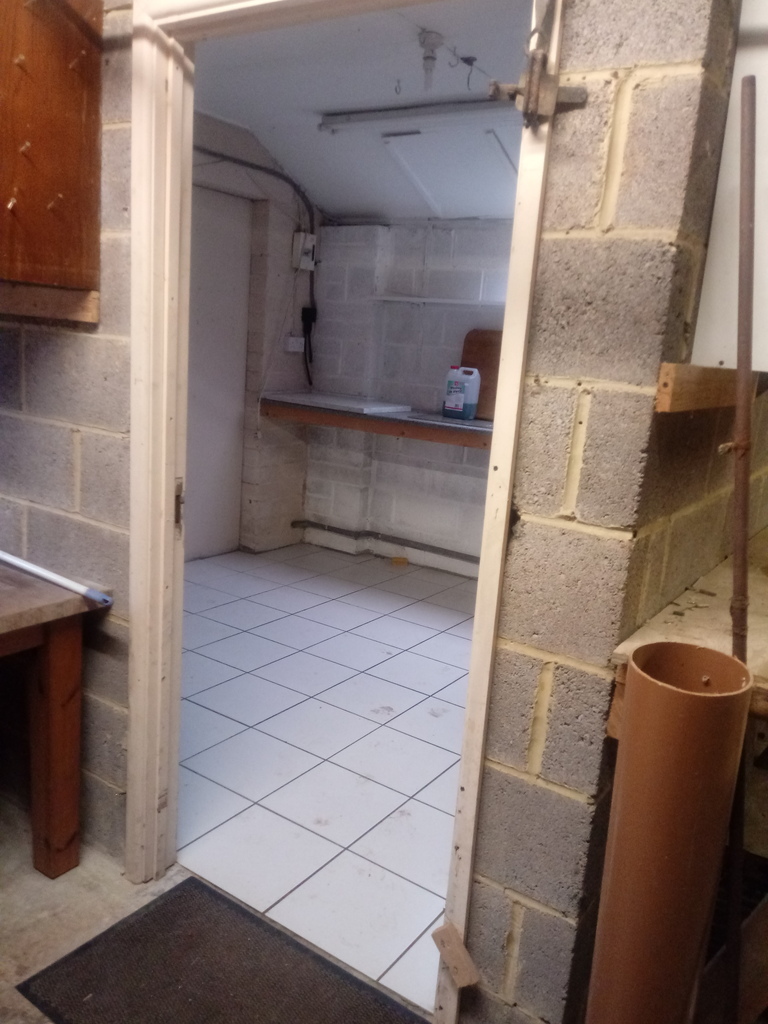 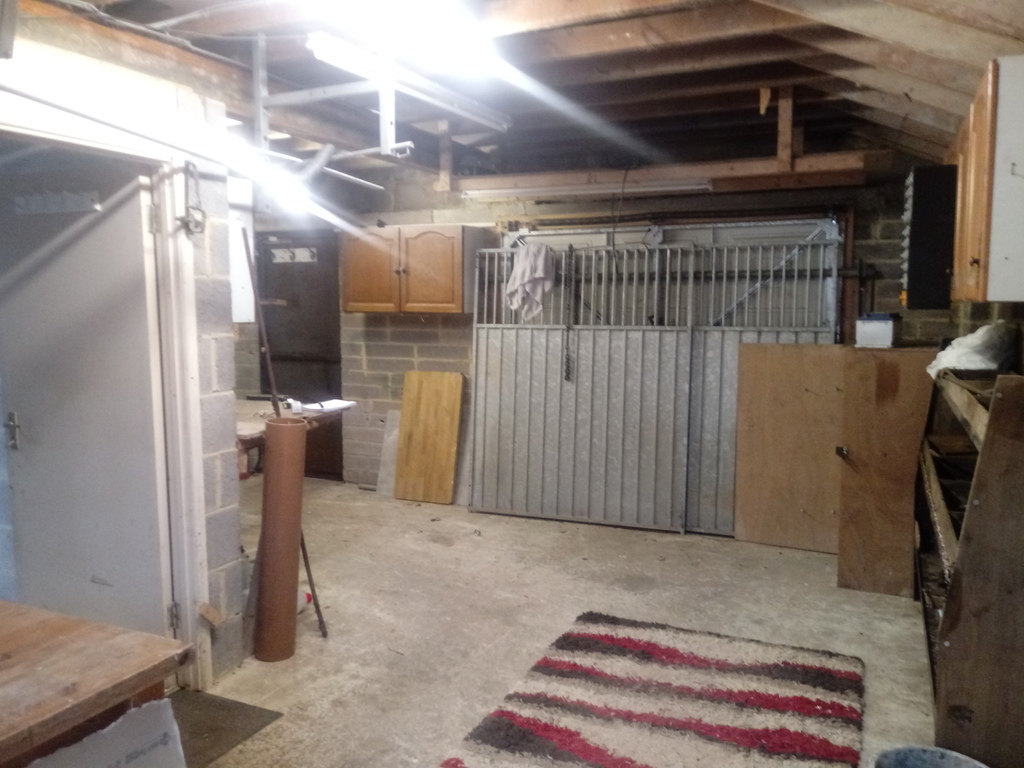 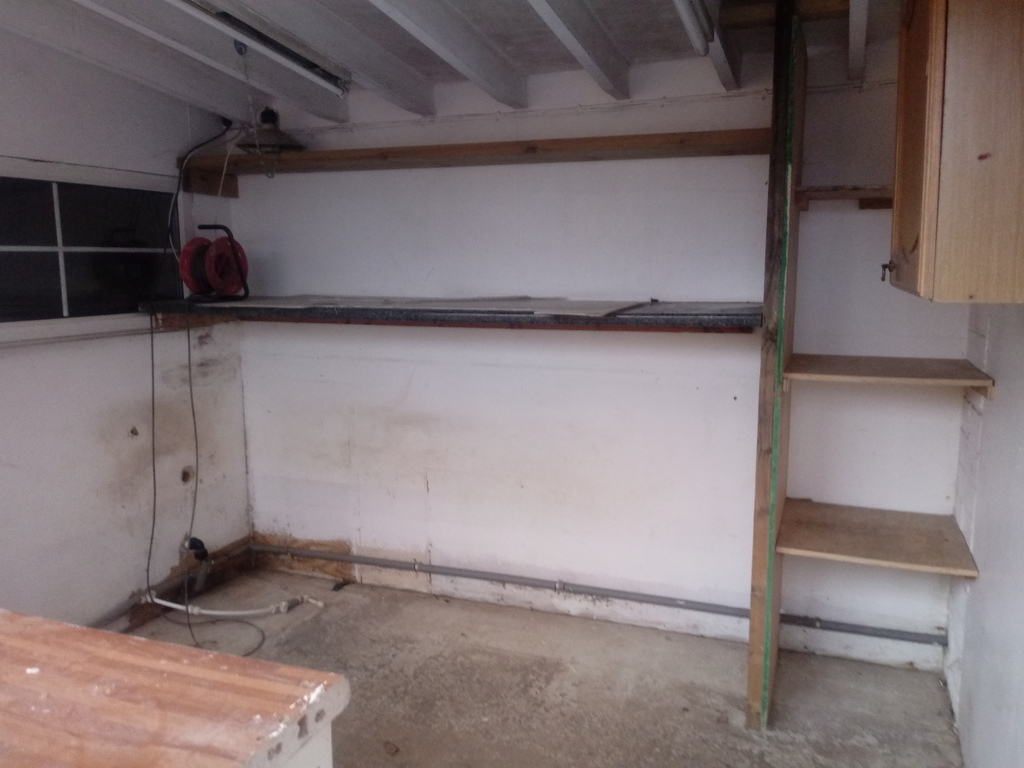 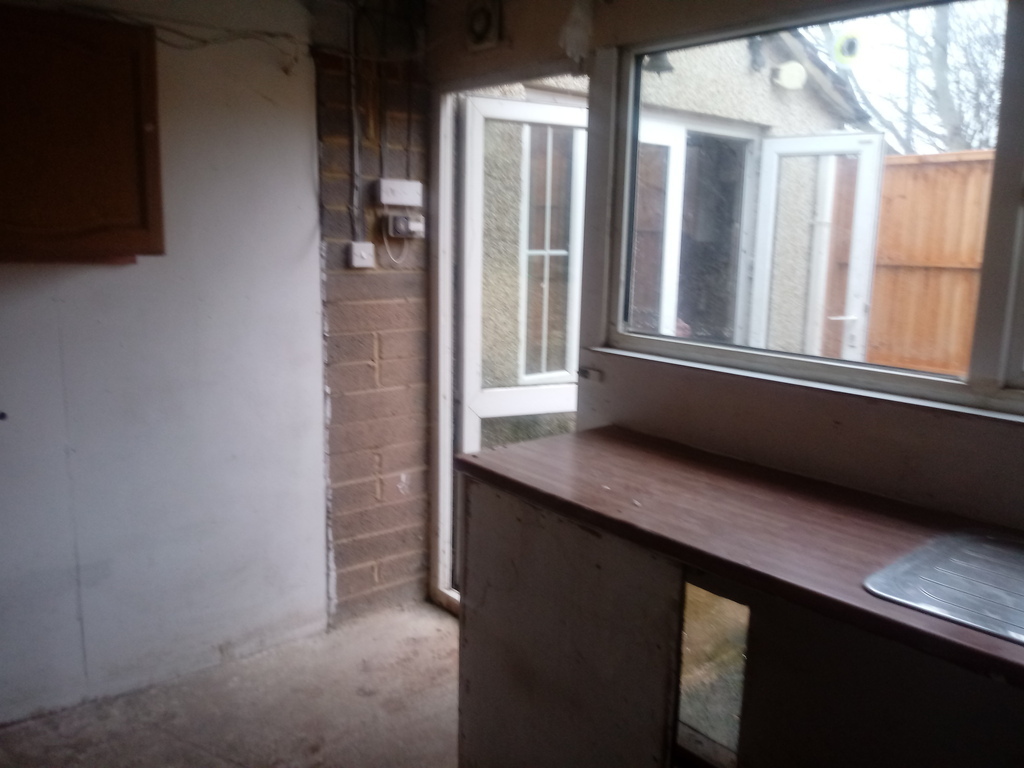 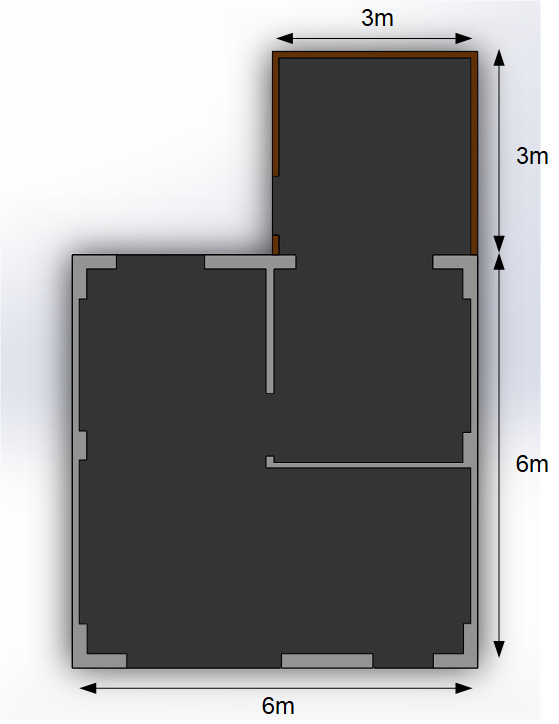 It's a bit of an odd one - about 6x6m for the main part, with a walled off "Murder Room" (named by my mate - the previous owners were keen on hunting, I think this is where they butchered their victims). There's also a wooden shed, used as a dog house but about 3x3m, separated from the main area by a stud wall. My current plans are to knock down the dividing wall to remove the murder room (in progress), make the shed weather tight again and remove the stud wall. It'll then be onto sorting the electrics (pretty shocking right now), boarding the loft up, fettling the floor, new doors... well a load of stuff. Ultimately I want to use the wooden part as a home for a lathe, mill and my 3D printer as I think it'll be more temperature stable. The shed has 1\2" plywood facing which is unfortunately fairly warped on the front, though not too bad on the back. For the front I'm thinking I'll remove and board up the window and door, add a damp proof membrane, batten it and then shiplap clad it (either wood or uPVC). The rear should just need a new coat of preservative and the ends of the plywood protecting - it's mostly sheltered by the fence. Well that's it for now - afraid I can't promise regular updates, but hopefully it may be of interest to someone  |
| |
Last Edit: Jul 11, 2021 17:06:53 GMT by Badger
|
|
|
|
|
|
|
|
|
|
Can you lose the murder room and have a full size shop?
|
| |
|
|
Badger
Part of things
 
Posts: 250
|
|
|
|
Can you lose the murder room and have a full size shop? Yep, in fact it's already all down except for a stub where the water line went through. I've since found the stopcock, so can start removing the plumbing and finish the job! |
| |
|
|
|
|
|
|
|
|
That looks like it has great potential.
|
| |
|
|
|
|
|
|
|
Yep, in fact it's already all down except for a stub where the water line went through. I've since found the stopcock, so can start removing the plumbing and finish the job! I'd be tempted to keep the plumbing and have a small sink in there for hand washing etc. |
| |
|
|
Badger
Part of things
 
Posts: 250
|
|
|
|
I'd be tempted to keep the plumbing and have a small sink in there for hand washing etc. I probably won't have to make the decision for a little while yet, but it is something I'm considering. For me the big issue is that the drains there at the moment just go through a hole in the wall and dump it outside - no soak away or anything. |
| |
|
|
Badger
Part of things
 
Posts: 250
|
|
Jul 10, 2021 22:09:23 GMT
|
Here's some pictures of what it looks like as of today - murder room disassembled, most random cabinets and shelving dismantled, the dividing wall between the garage and wooden extension dismantled. 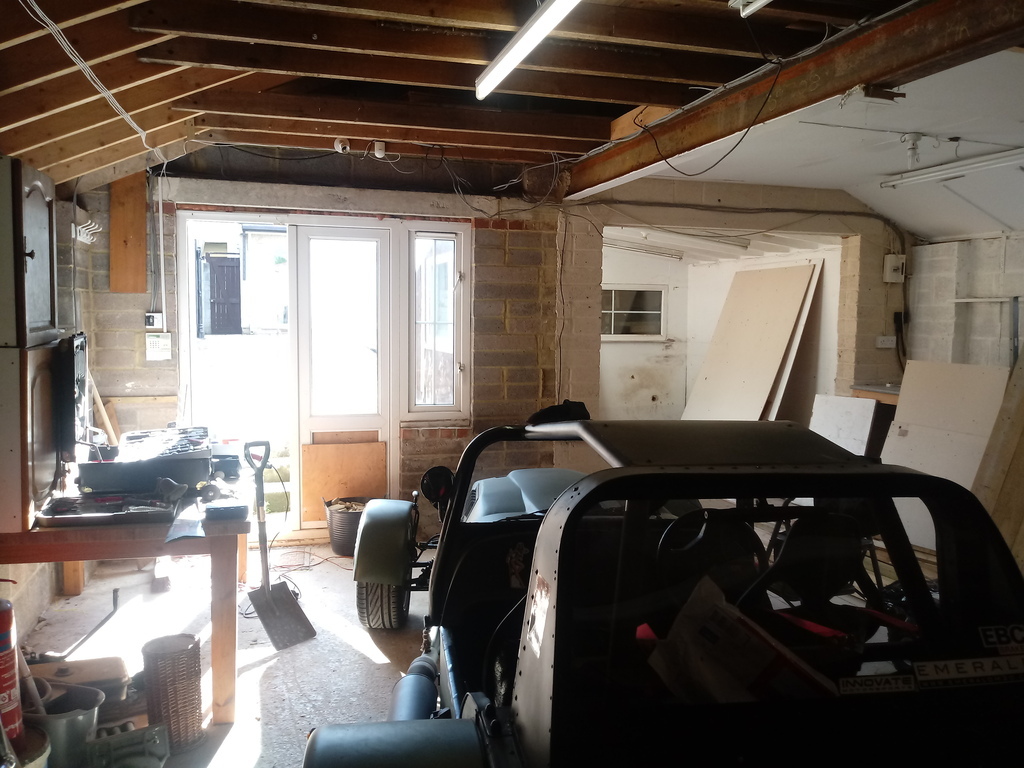 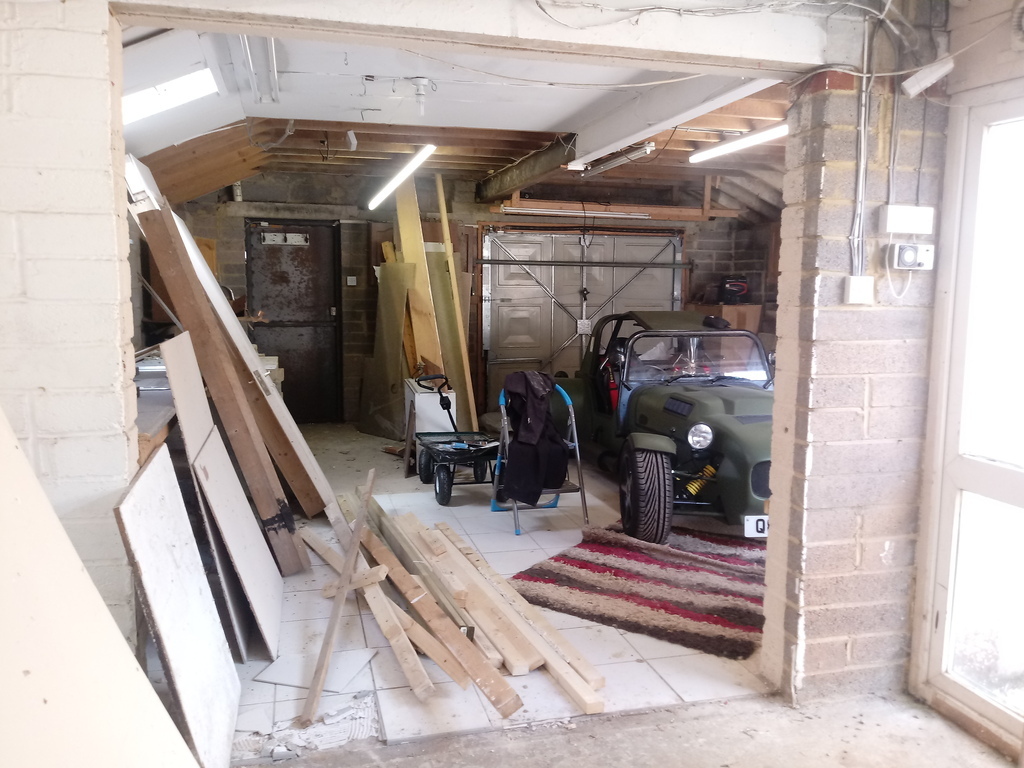 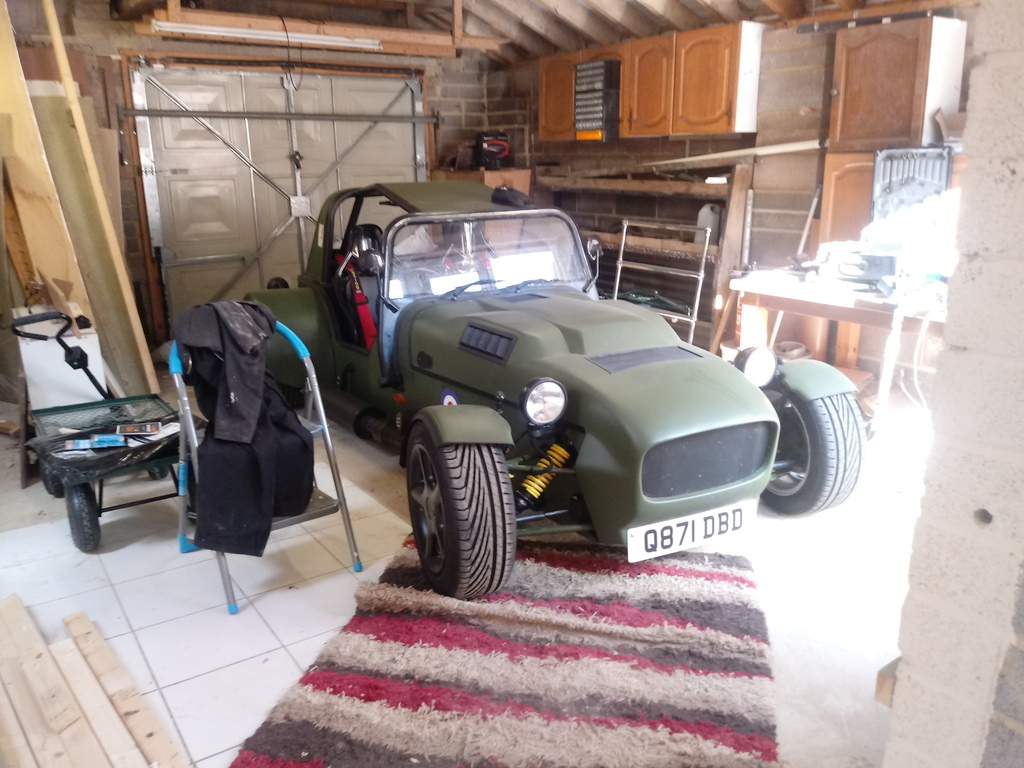 The kitcar is in temporary residence until I clear a failed venture in Volvo 940 ownership from my parents garage - they're quite happy with it living there, which is awesome. 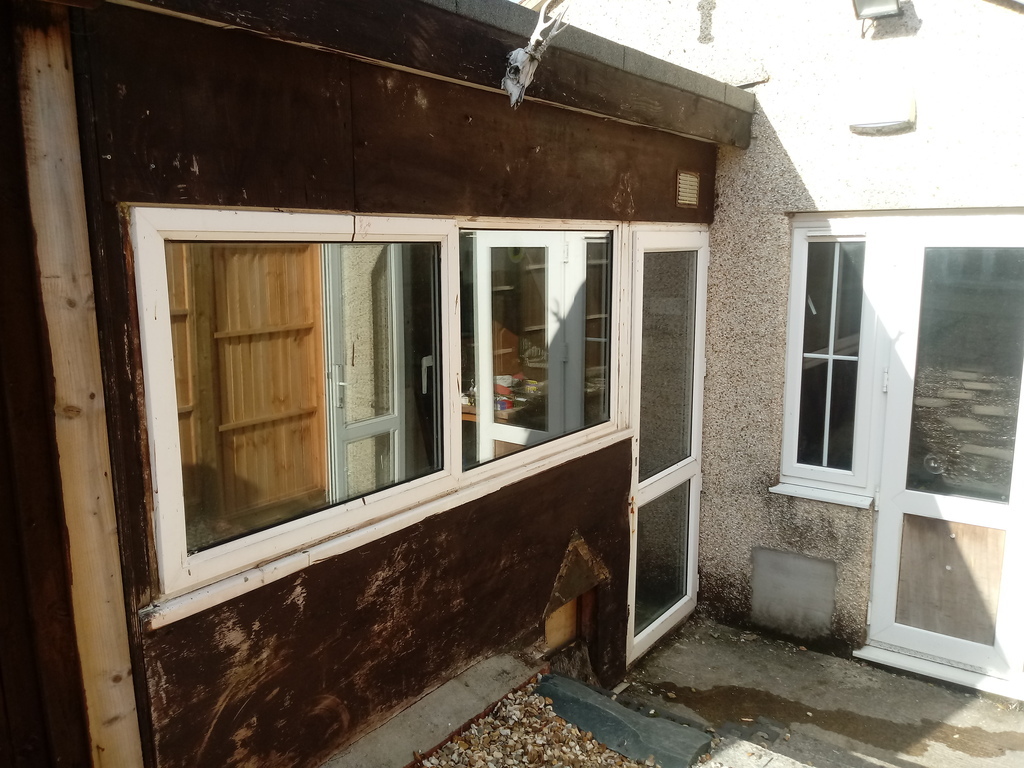 My current plan with the extension is to cover the front of the extension with a weather proof membrane and wood cladding, including over the windows and door. This is because they are utterly shot and not really weather proof, but fairly structural - it's a bit of a bodge but should be strong enough. Once I put some OSB on the inside it'll be like they're not there. Note the big hole in the bottom - that was access for the previous owners dogs! 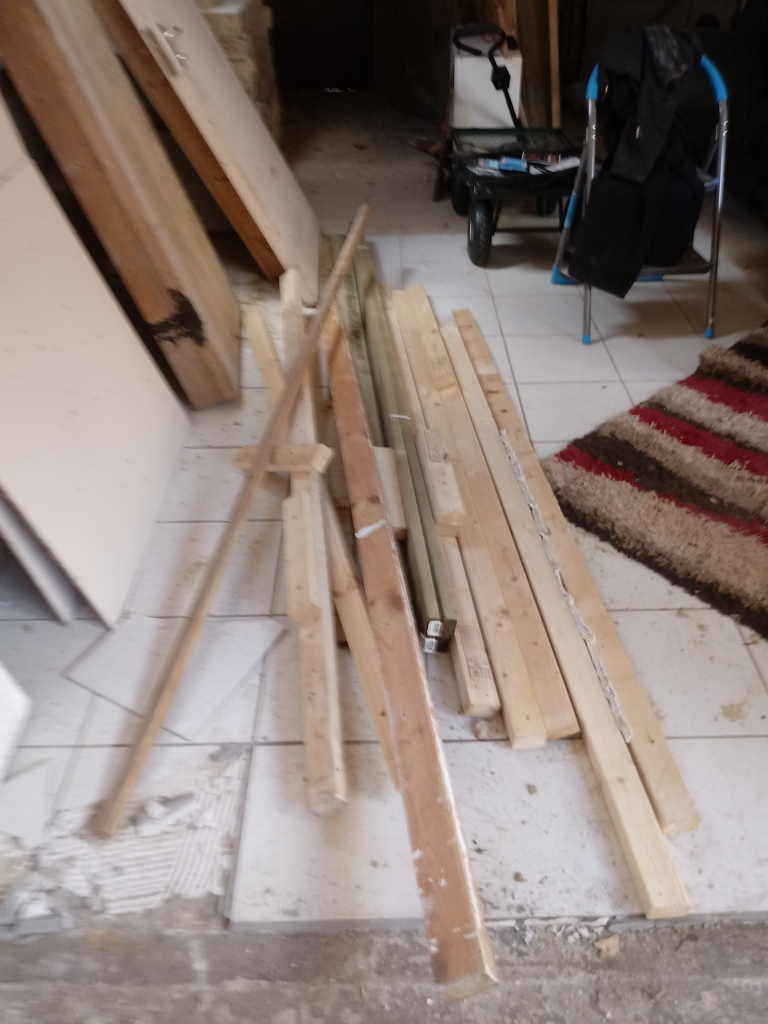 I've got a fair amount of wood from dismantling everything, a lot of which I'll reuse around the garage in various projects. Unfortunately I broke a couple of tiles removing the dividing wall - I'm still considering whether to lift the tiles and paint the floor or tile the entire thing. Weather permitting I'm hoping to get the membrane and battening done tomorrow, order up the cladding (which will take a while to arrive), and also bung up the water feed for the sinks so I can get to dismantling the current set up. |
| |
Last Edit: Jul 10, 2021 22:09:45 GMT by Badger
|
|
Badger
Part of things
 
Posts: 250
|
|
Jul 11, 2021 17:06:16 GMT
|
Today's progress: Dog hole patched: 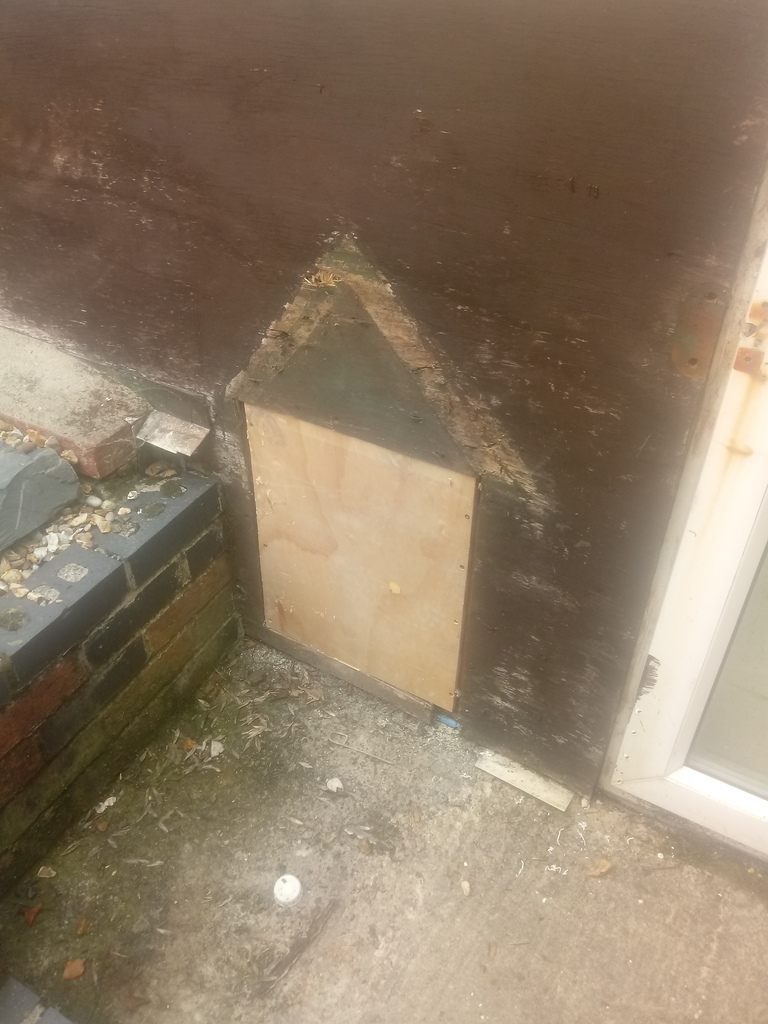 Weather proof membrane applied and battened: 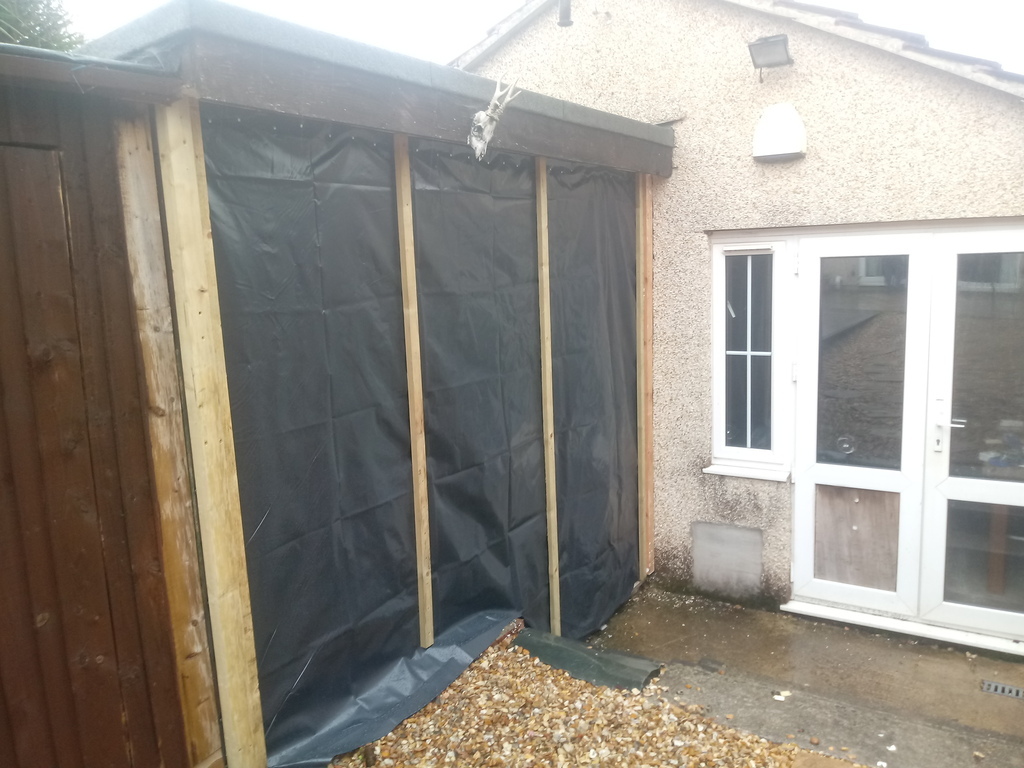 (For some reason the pictures make it all look really wonky - I promise you it isn't!) Water supply capped off until I know how I want to route it: 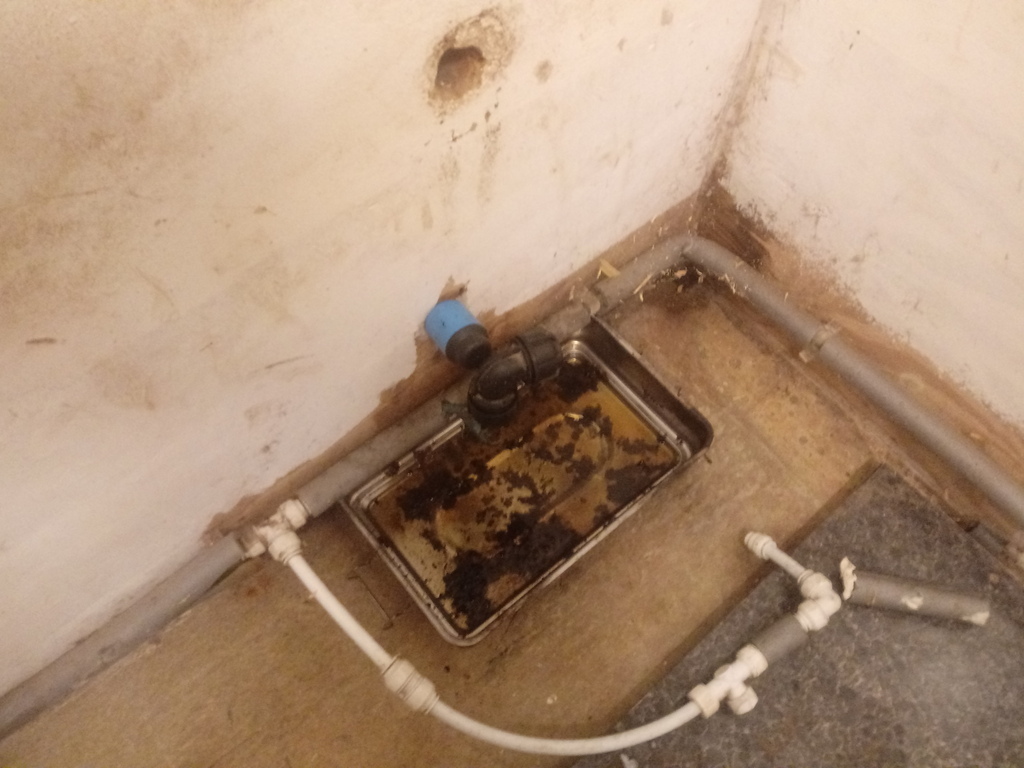 I'm also thinking that fitting a stop-cock where it comes out of the house would be useful, as otherwise I have to shut off the water for the whole house. Sink and water heater removed from wooden extension: 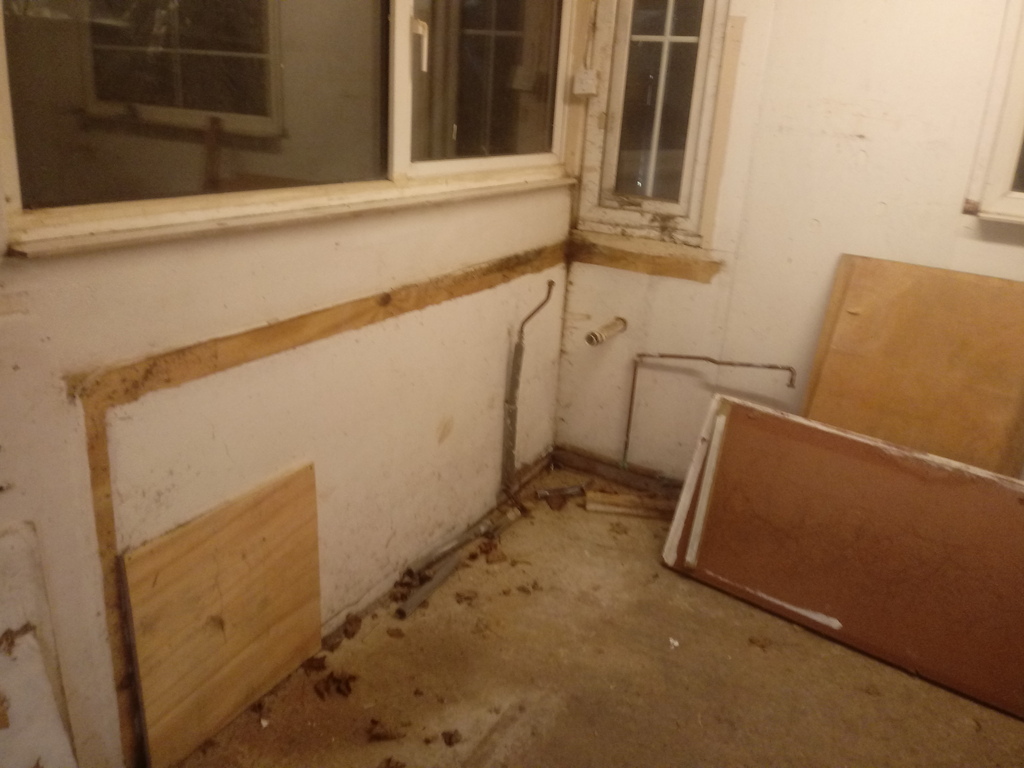 Unfortunately there's some sign of damp and rot in the corner; the way the shed was put together, the end of the ply board was open to the weather and it's found it's way inside there: 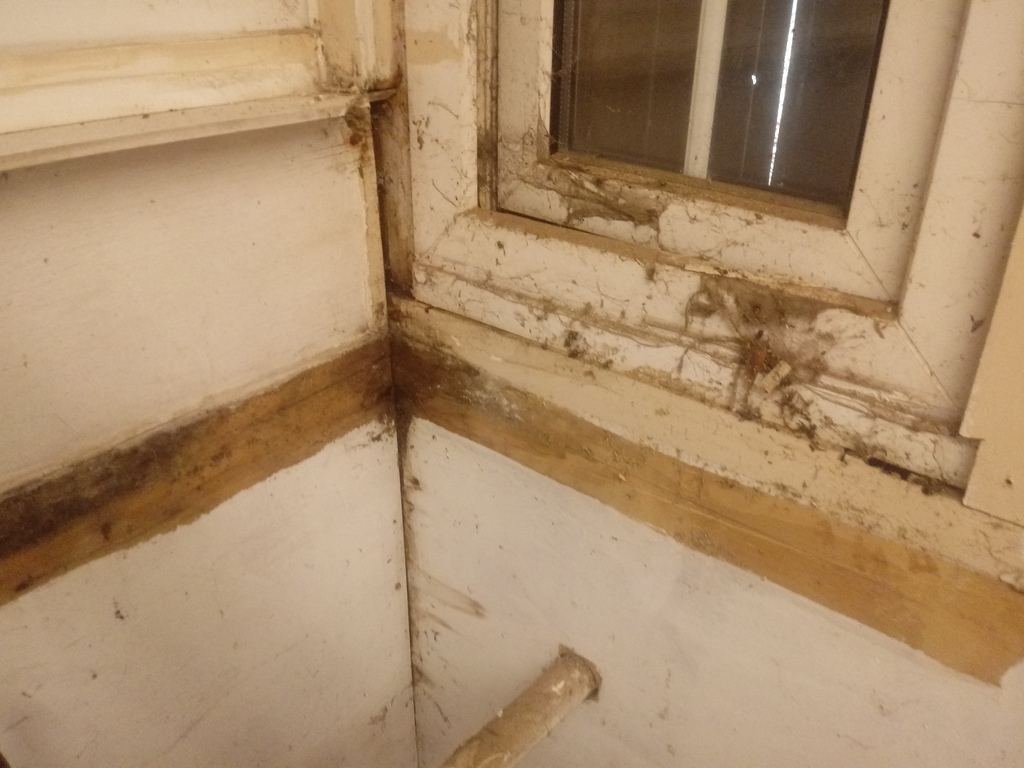 It's not too bad - the wood seems solid still, so I'm hoping that now it's weather tight again it'll dry out and be OK. Now I need to go around the uprights with a bit of sealant and order the actual cladding - likely feather edge as it's fairly cheap. Then coat everything in a half decent timber preservative - likely inside and out! |
| |
|
|
|
|
|
Jul 16, 2021 20:16:53 GMT
|
|
nice space !
i’d be tempted to keep the 3x3 as a mancave
|
| |
|
|
Badger
Part of things
 
Posts: 250
|
|
Jul 25, 2021 19:52:02 GMT
|
nice space ! i’d be tempted to keep the 3x3 as a mancave Ta! To be fair that's kind of what it will be - hoping to get a fairly chunk milling machine and lathe in there, and also my 3D printer if I can fit it all in. I've got the loft room as my office/man cave as well  Not much of an update I'm afraid - I've been splitting my time between working on my 940 estate and random jobs for mates, so only limited time available. I've installed a fairly hefty extractor fan in the workshop section, and have just finished getting the shiplap cladding up - unfortunately I only just had enough and one plank has a very significant warp in it, but not much to be done about that now  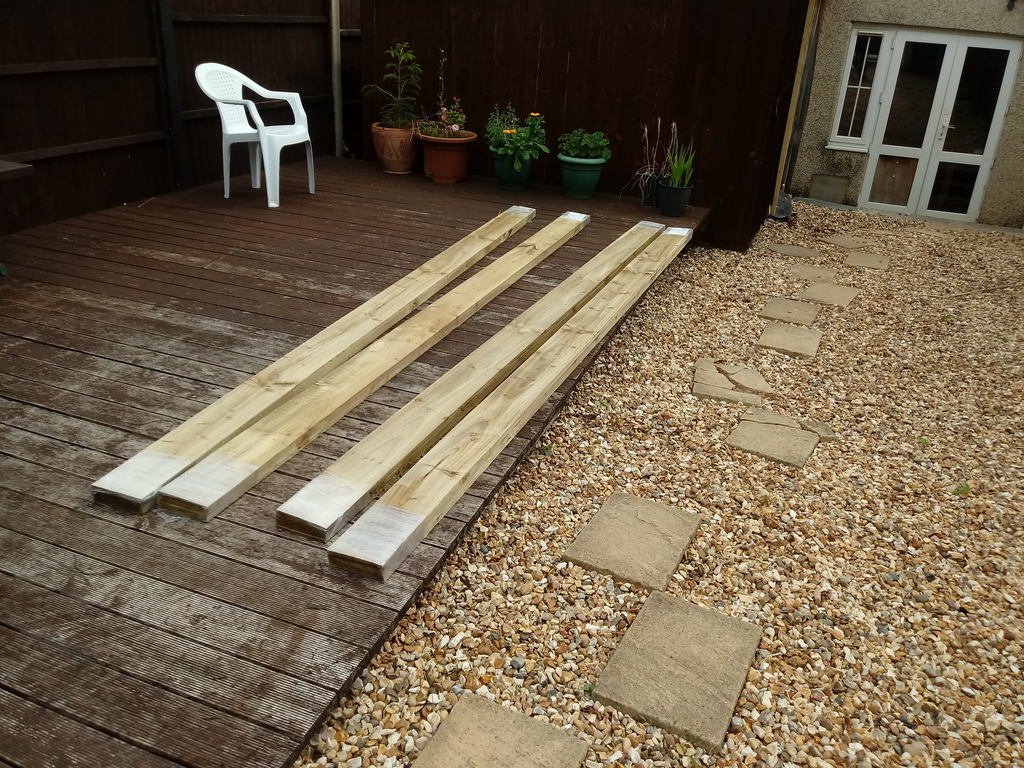 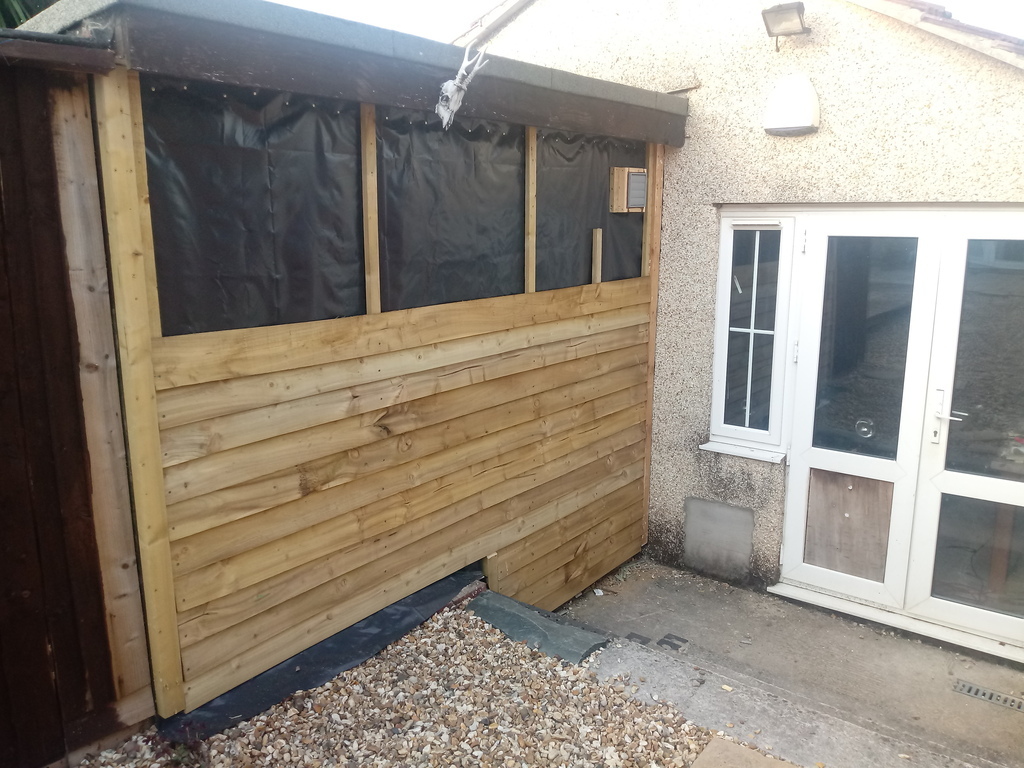 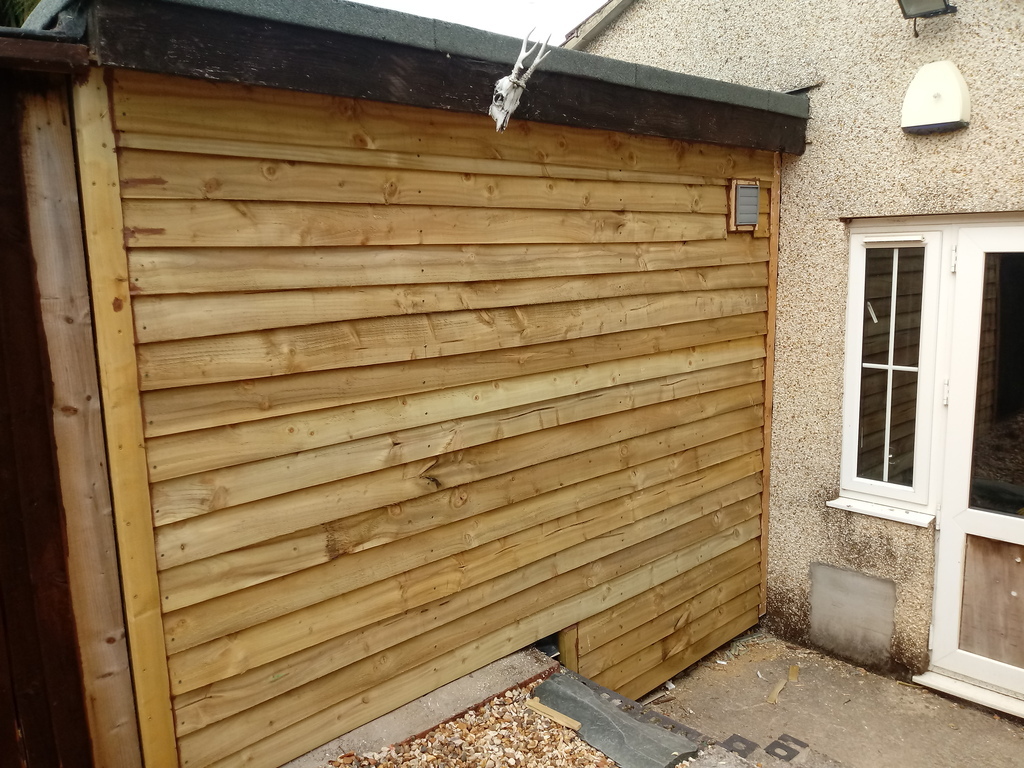 Once I've got it painted it's probably time to finish whipping out the existing plumbing and sorting the very dodgy electrics. |
| |
|
|
|
|
Badger
Part of things
 
Posts: 250
|
|
Sept 2, 2021 21:23:37 GMT
|
Only a quick update I'm afraid, other projects have rather had the priority recently and time has been short! I managed to give the cladding a couple of coats of paint - this was just after I finished and the paint was still wet, so it doesn't look so mottled anymore: 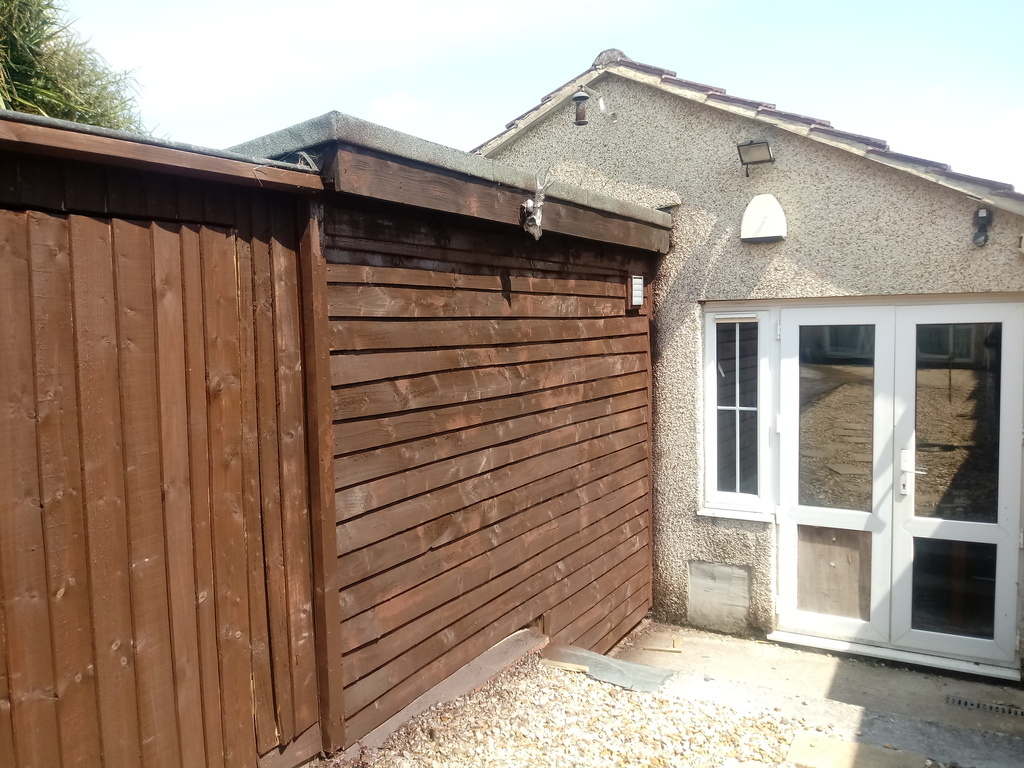 I've started boarding up the interior of the workshop with 1\2 inch ply mostly salvaged from the shelves, and will have a top skin of thin ply salvaged from the old dividing wall just for appearances. This is where I got so far with that: 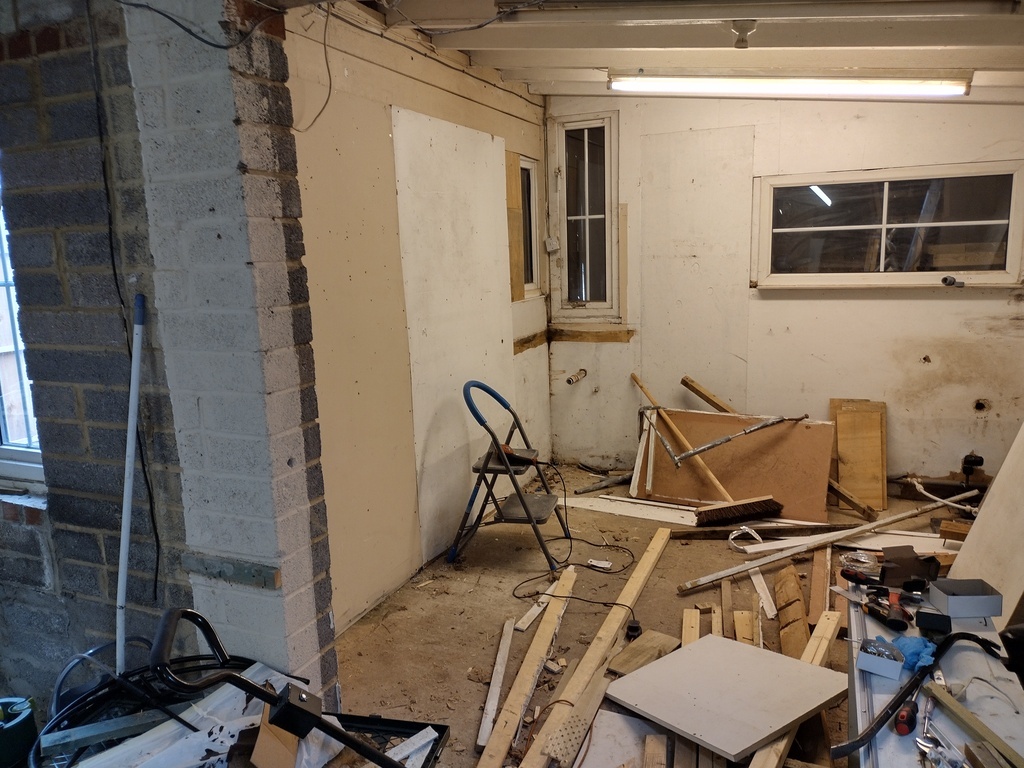 Unfortunately I then mangled my finger slighty - though not a huge cut the end turned instantly black and went numb:  It's healing OK now I think but is still fairly painful! Then to top it all off we had some massively torrential rain which caused the paved area outside the door to flood and water come in at the joint between the concrete and the wall. Rapture. 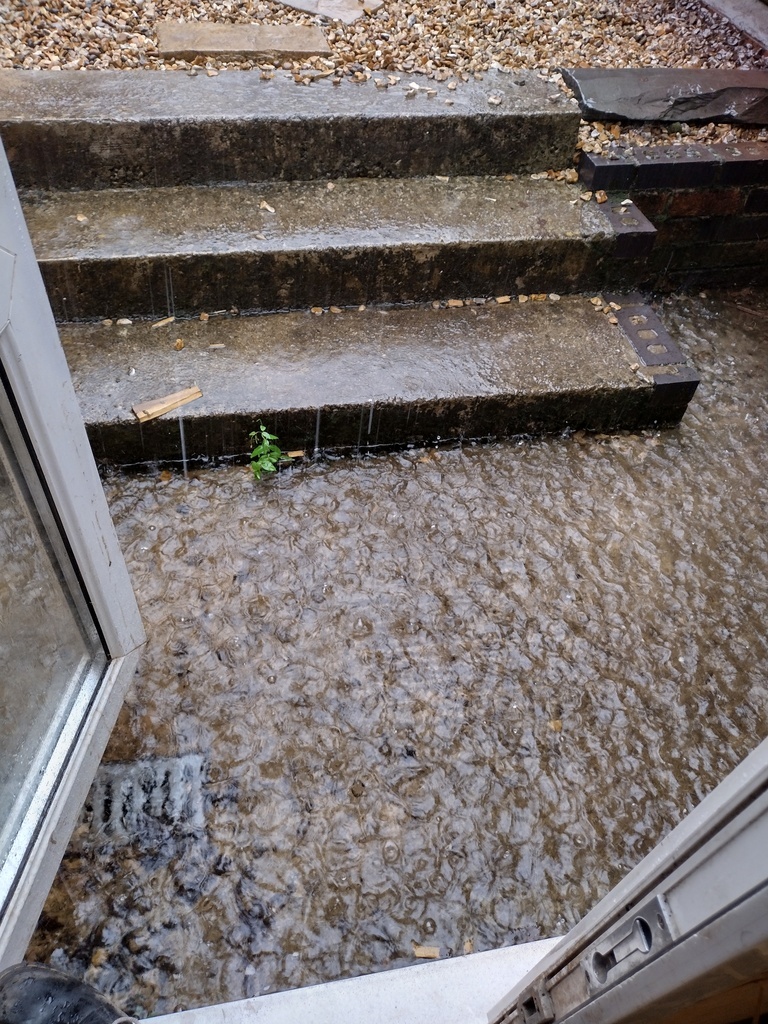 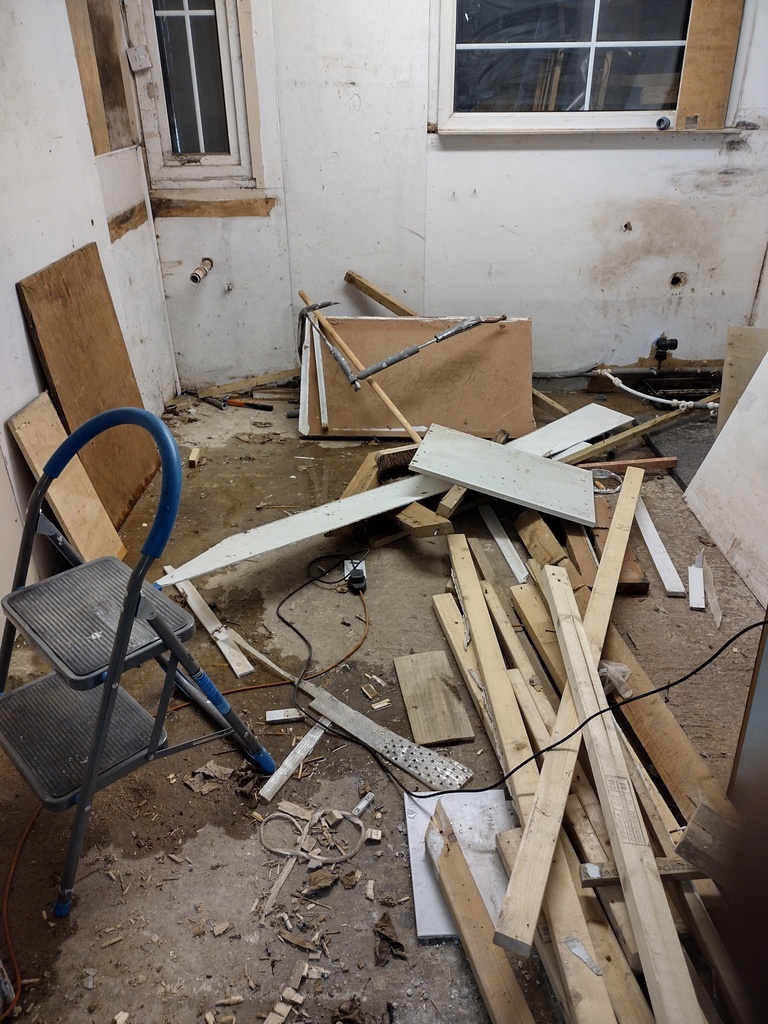 In fairness it drained fairly quickly when the rain stopped - it's all graded to the drain, which is good - it was just overwhelmed. Mind you it was raining hard enough that I was starting to consider building myself an ark. So I've given the drains a thorough cleaning (and they were fairly disgusting), and have squirted a load of expanding foam in the area to fill the gap as a pro-tem measure. I'm considering laying a course of bricks along the bottom to create a barrier to hold back the water while it drains, or maybe using a sheet of plastic to create a barrier. It's a rare occurrance but I need to make the lot weather tight if I'm going to be bringing tools in, and want a fairly permanent solution. |
| |
|
|
|
|
|
|
|
|
could you build a french drain or add those drainage channels around the edge leading to the main drain ?
|
| |
|
|
|
|
|
Sept 5, 2021 19:18:56 GMT
|
|
Putting an acco channel round the perimeter world help assuming it had somewhere to run to.
|
| |
|
|
skinnylew
Club Retro Rides Member
Posts: 5,710
Club RR Member Number: 11
|
|
Sept 6, 2021 10:34:28 GMT
|
Looks like there's already some Acco under the door. I have a similar issue with my garage, sandbags aren't much cop now  |
| |
|
|
|
|
|
Sept 6, 2021 11:47:21 GMT
|
|
Do you have guttering around the whole building? If not you could add some and have the downspout draining into the least used drain.
Also worth checking the size of the pipe that drains from the acco, might be too small to handle the volume of water.
If that is all good than maybe look at drains under the gravel as you look to be below that and get the run off from it.
|
| |
|
|
Badger
Part of things
 
Posts: 250
|
|
Sept 6, 2021 14:03:47 GMT
|
|
Thanks for the replies guys - unfortunately it's a mass flow issue rather than anything else. The water drains away fine, but with really heavy rainfall the drain that's installed just seems to get overwhelmed - it goes under the garage or onto the neighbours property somewhere by the looks of things, so no real chance of upgrading it either.
It doesn't help that most of that bit is under ground level, so there's no easy place to add another drain to it. The garage fully guttered, with the workshop draining towards the other side and only one half the garage into this sunken area.
On the flip side it was raining about as heavily as I think likely, so I'm hoping clearing the drain and making a dam will suffice for now - in the long run I'd like to extend out the concreted area and put a roof over it so I can use it for painting etc., and I'll likely make a new soakaway drain as an addition, but that's in the long term!
|
| |
|
|
|
|
|
Sept 6, 2021 18:45:17 GMT
|
|
dig a soak away and add a sump pump as back up
|
| |
|
|
Badger
Part of things
 
Posts: 250
|
|
Sept 7, 2021 19:39:54 GMT
|
|
To be fair I've just taken delivery of a breaker that will hopefully allow me to finally demolish the pond/bunker in the front garden, so digging out a corner of the standing should be fairly easy. Will have a ponder - to be fair I think I'll still add a course of bricks to the area anyways. It doesn't hurt to create a barrier!
|
| |
|
|
Badger
Part of things
 
Posts: 250
|
|
|
|
A fairly long and overdue update - I've only been able to spend the odd hour here and there on this but got some stuff done. I put in a concrete lip to hopefully stop water running into the workshop; it's tucked under the cladding and fairly heavily angled. May have overdone it on volume of concrete, the shuttering slipped and made it a little squiffy. It's not pretty but it drains well. 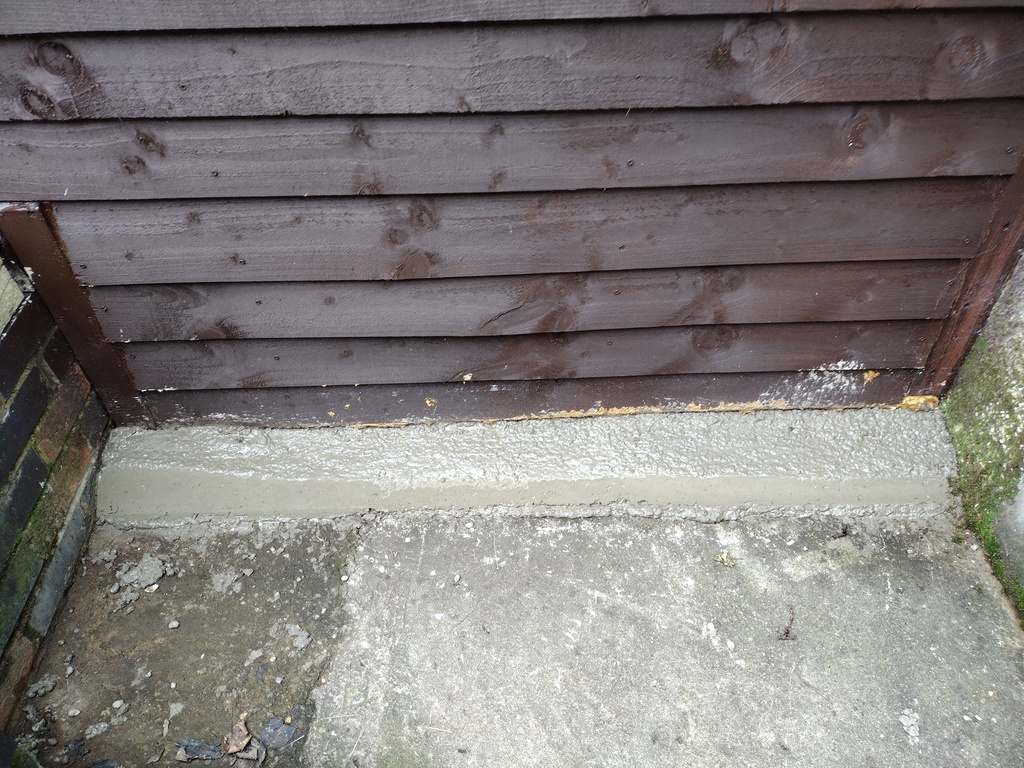 I finished boarding up the workshop, had a tidy and moved most stuff into the workshop, removed the sink/bench and got rid of the existing ceiling - mainly to check for water ingress around the skylight. Seems OK, if a bit untidy in terms of how it was put in. 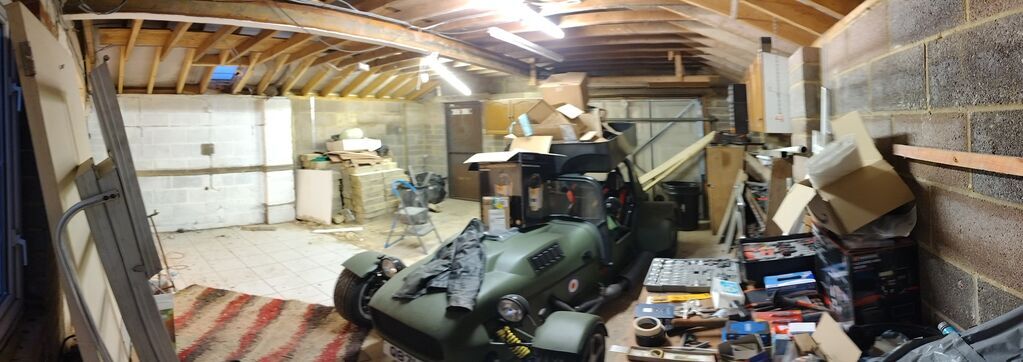 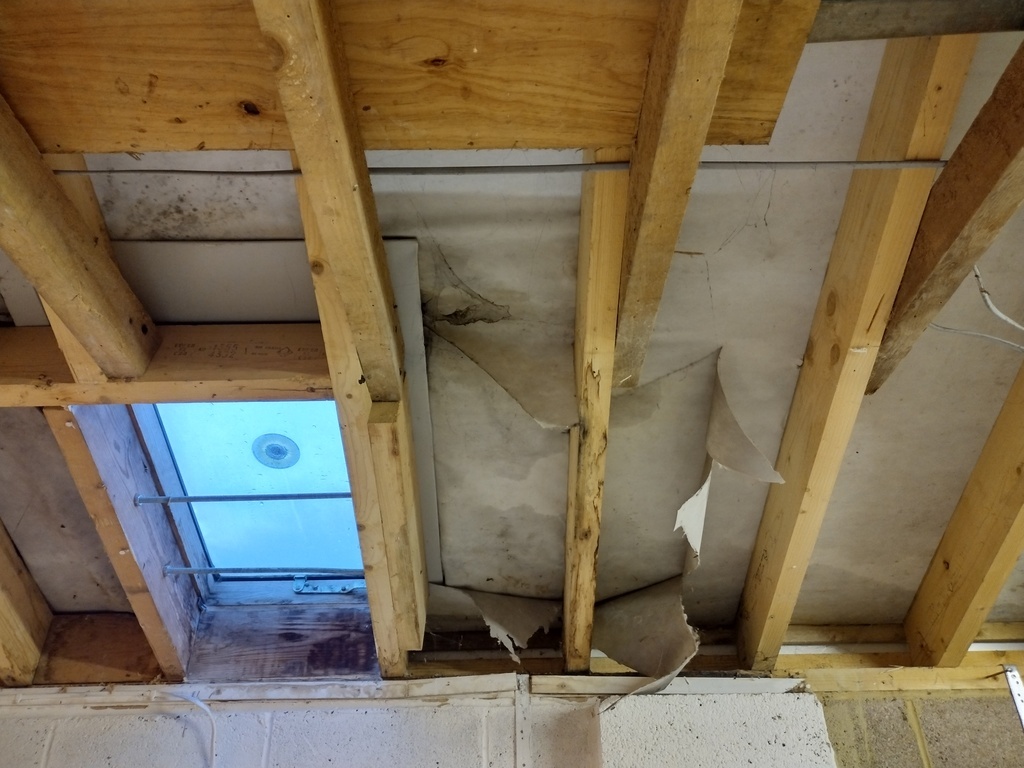 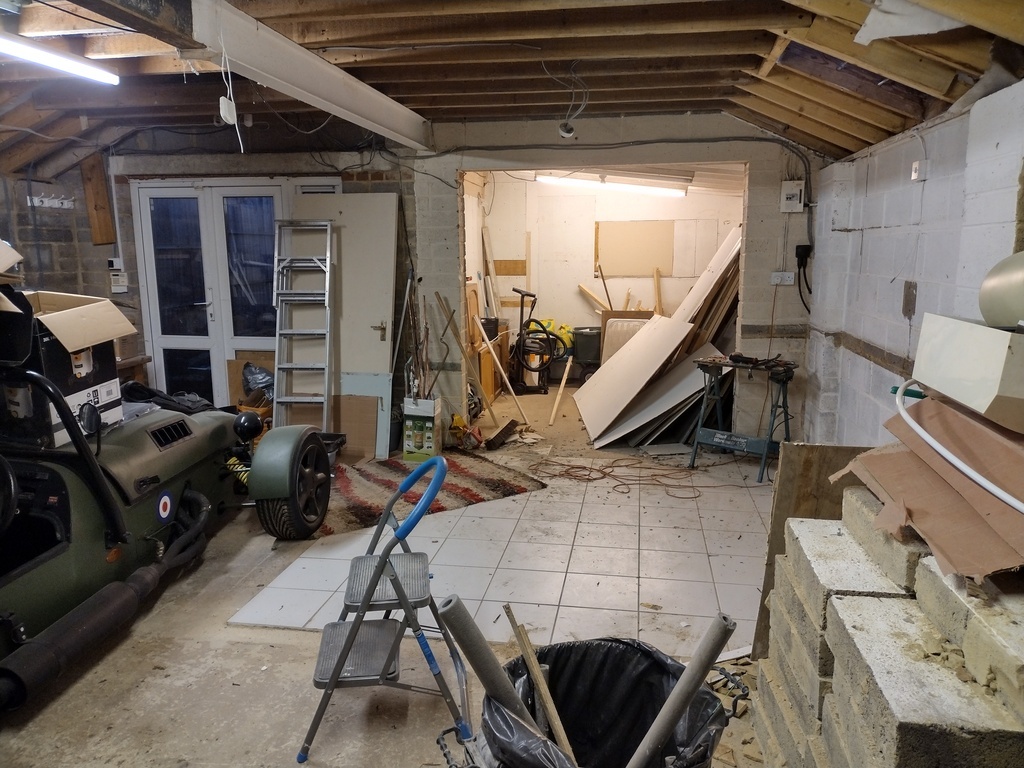 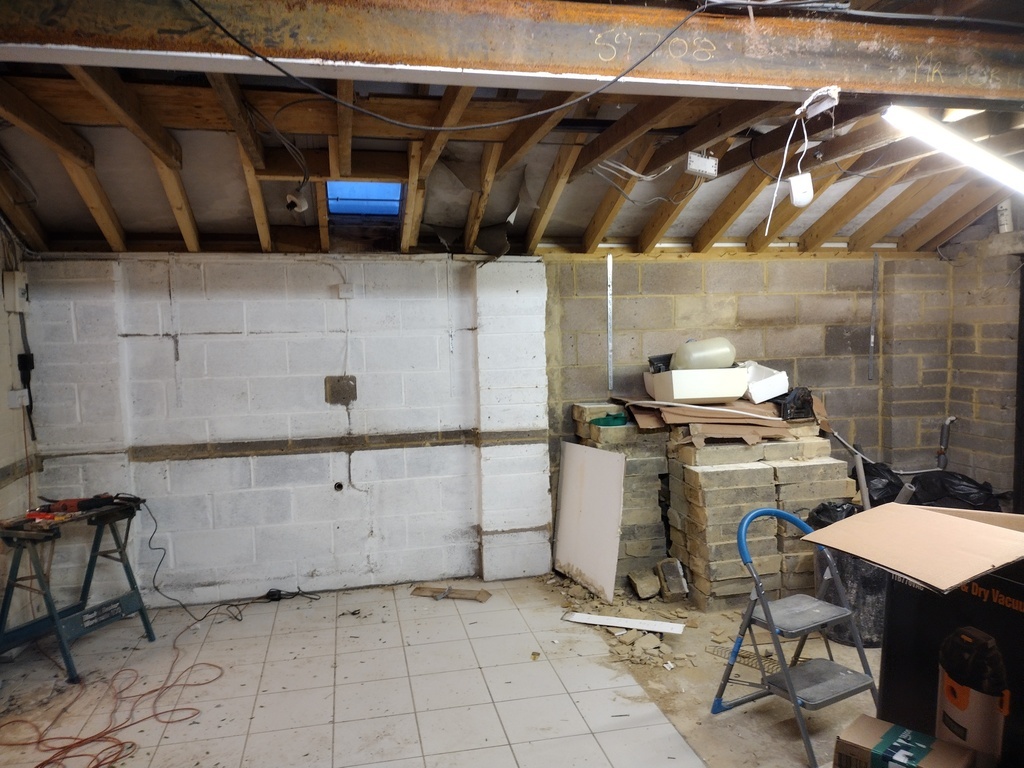 My current plan is this: - Rationalise the lighting and socket circuitry to a minimum.
- Insulate the roof.
- Board the loft.
- Insulate the walls.
- Rewire the place - new lighting arrangement and more sockets. Probably a new consumer unit. 16a sockets; don't think the supply out to the garage could handle 32a unfortunately.
- Fit a plasterboard ceiling. This one is probably just for looks and may be canned.
- Paint the walls and ceiling white.
- Sort the floor; I'll need to lift the tiles, tidy it up and probably paint it. I did entertain the thought of tiling the lot, but that's probably more cost and time than I can justify.
- New garage door to replace the plop top hinged one there now. Thinking just simple metal framed, hinged doors.
- Move in.
At my current rate of progress I'll be lucky to move in before 2025! I may even have a working car by then... |
| |
Last Edit: Feb 6, 2022 21:53:28 GMT by Badger
|
|


 Ax GTi Turbo


