|
|
|
Mar 30, 2024 11:51:56 GMT
|
Derek highlighted the profile of the B post and asked how the door would go from angled at the rear to vertical at the front? It has been something bothering me too and is the result of a mistake I made a long way back. There were reasons why it came out like this but I'll not bore you with the reasons which turned out to be invalid anyway. 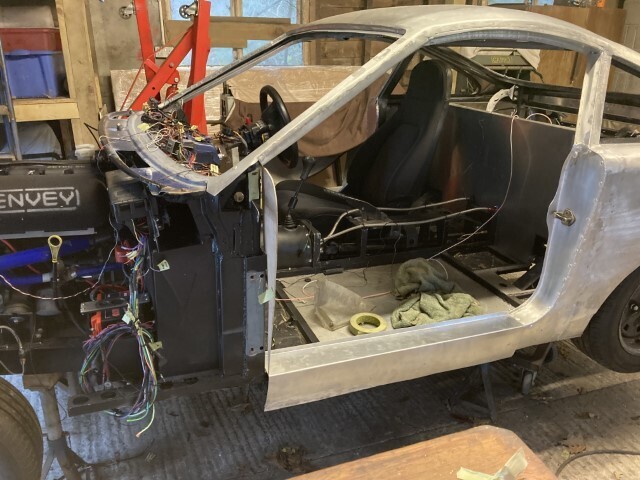 He recommended reshaping it to match the line of the bonnet 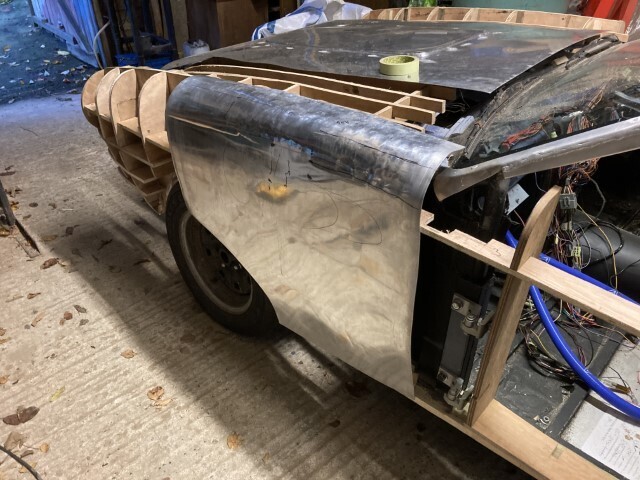 I don't think an awful lot of unpicking will be needed to remodel the shape and the benefit down the line when I come to make the door make it well worth doing. The added bonus is that the door will be thicker, outside to inside at the B post and this may enable the fitting of wind up windows. So, here is a question please. Can anyone who has the relevant experience recommend an electric window winder regulator that might suit? I have a feeling that a modern Mini might be worth looking at. |
| |
|
|
|
|
|
|
|
Mar 30, 2024 15:56:17 GMT
|
Following on from the above I've just gone back through the RetroPower Morris Minor build archives and discovered that they are using a MiniSpares electric window conversion kit for pre-'97 Minis www.minispares.com/product/Classic/MSSK2000.aspxThis might be just the ticket. |
| |
|
|
Zagato
Part of things
 
Posts: 80
|
|
Mar 30, 2024 19:00:46 GMT
|
I have been using these with good effect in a kit car. They are very easy to adapt and wire up. Cheap as chips too…. 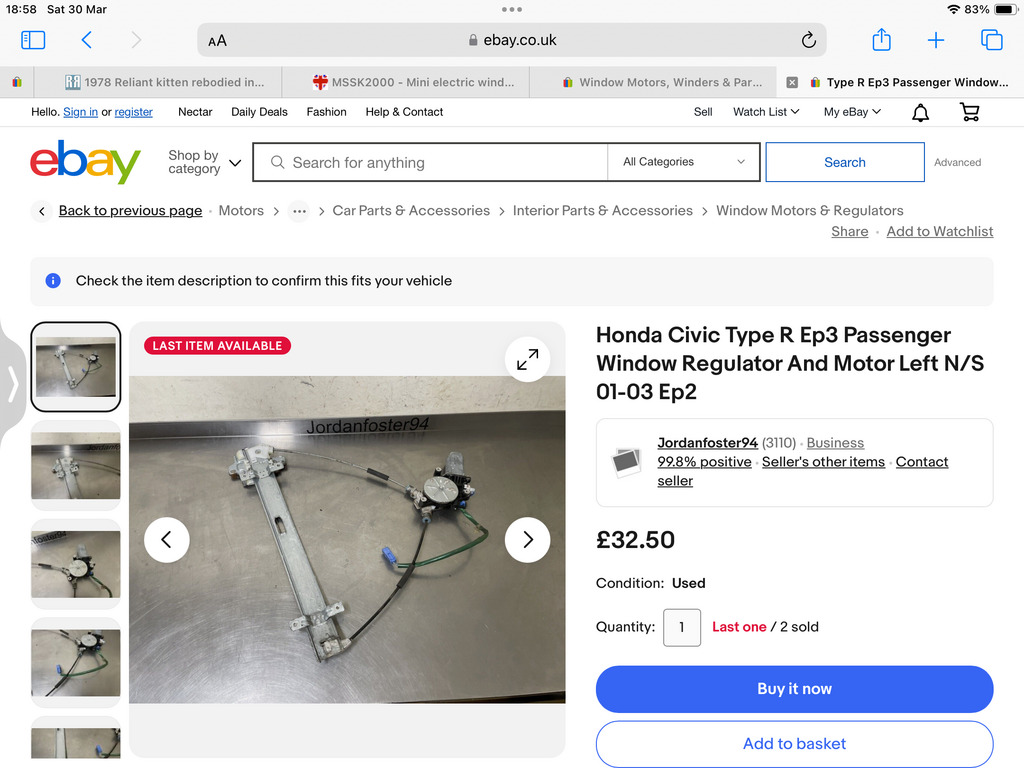 |
| |
1959 Abarth Double Bubble resto project
1989 Lotus Esprit LHD
1997 Lotus Eprtit GT3
1996 Jaguar XJ6 Sovereign manual gearbox from factory
Porsche 356A Coupe replica
Formula 27 Super Seven replica Alfa Nord powered
|
|
|
|
|
Mar 30, 2024 19:41:11 GMT
|
|
Thank you, good information. I was hoping that someone would come back with some personal experience. Do you have any photographs of the installation in you car to give me some idea of what I would need to provide for fixtures?
Thank you.
|
| |
|
|
Zagato
Part of things
 
Posts: 80
|
|
Mar 30, 2024 20:39:56 GMT
|
|
Annoyingly l have some videos of the mechanisms working but they won’t load as photos.
I will take some still shots for you but they are super easy to adapt to almost anything!
At £20-30 it was worth the risk and paid off….oem motors are so much better than eBay generic electric window motors.
|
| |
1959 Abarth Double Bubble resto project
1989 Lotus Esprit LHD
1997 Lotus Eprtit GT3
1996 Jaguar XJ6 Sovereign manual gearbox from factory
Porsche 356A Coupe replica
Formula 27 Super Seven replica Alfa Nord powered
|
|
jimi
Club Retro Rides Member
Posts: 2,228  Member is Online
|
|
Mar 30, 2024 21:45:48 GMT
|
|
If you have a Google account upload your videos to uTube and post a link to them to here.
|
| |
Black is not a colour ! .... Its the absence of colour
|
|
|
|
|
|
|
I have been using these with good effect in a kit car. They are very easy to adapt and wire up. Cheap as chips too….  Ordered. We'll give it a go. I really appreciate your reply. thank you so much. |
| |
|
|
Zagato
Part of things
 
Posts: 80
|
|
Mar 31, 2024 19:39:37 GMT
|
|
[/quote]Ordered. We'll give it a go. I really appreciate your reply. thank you so much.[/quote]
Nice.
If you run into any problems let me know.
I used generic power window switches off eBay, you are basically reversing the polarity to go up or down.
It’s very simple but clever at the same time.
I used VW T2 bus window channels to join my glass to the Honda brackets on the mechanism, that worked very well too.
Good luck!
|
| |
1959 Abarth Double Bubble resto project
1989 Lotus Esprit LHD
1997 Lotus Eprtit GT3
1996 Jaguar XJ6 Sovereign manual gearbox from factory
Porsche 356A Coupe replica
Formula 27 Super Seven replica Alfa Nord powered
|
|
|
|
|
Mar 31, 2024 20:00:27 GMT
|
Ordered. We'll give it a go. I really appreciate your reply. thank you so much.[/quote] Nice. If you run into any problems let me know. I used generic power window switches off eBay, you are basically reversing the polarity to go up or down. It’s very simple but clever at the same time. I used VW T2 bus window channels to join my glass to the Honda brackets on the mechanism, that worked very well too. Good luck![/quote] That's great, thank you. I was thinking of bonding the glass to a metal channel which would have a bracket to line up with the holes in the traveller which is perhaps the way you have done it too using the VW channel. Although the windows are way down the list, everything has to be thought of and designed in at an early stage to avoid difficulties further down the line which is one of the reasons I'm finding the whole process of building a body from scratch so difficult, everything has a knock-on effect. An example of this is the cabin fuse box in the Fiesta loom. It should be accessible from a hatch in the dashboard by the steering column but when I made the dashboard and had it covered I had no thoughts of using that loom. I was going to make one from scratch. So that's given me a big problem, butcher the dashboard or put the fuse box somewhere else which is what I've done. It meant cutting through the double skinned firewall and bringing it out onto the scuttle. A lot of work which could have been avoided with a different thought process. |
| |
|
|
|
|
|
|
|
|
Easy solution.
Design the body around Landcrab doors.
Phil
|
| |
|
|
|
|
jimi
Club Retro Rides Member
Posts: 2,228  Member is Online
|
|
|
|
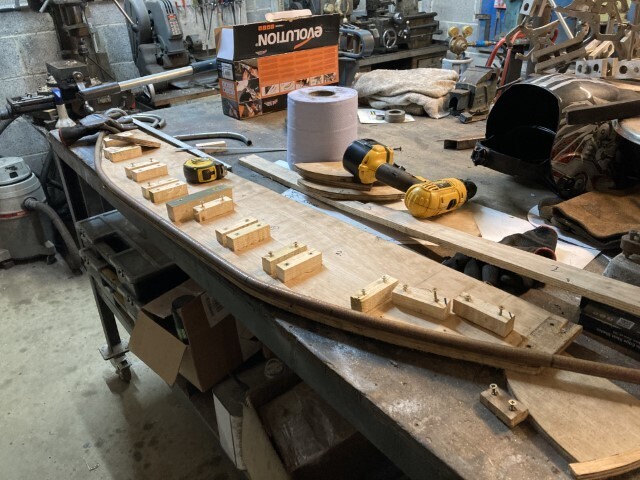
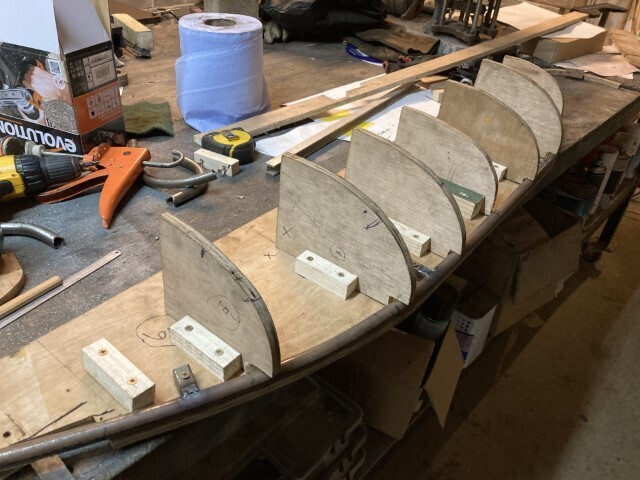
As I mentioned, I'm taking a break from panel work and making a start on the tubular frame that will support the bonnet skin and front valance. The aluminium will be clenched onto a steel sheet fence in the superleggera style. I'm using 15mm diameter ERW round tube and using the bending beam rather than heat to shape it. I've mentioned the bending beam before and it is a great tool for bending round and square tube without kinking. It is also very controllable and it is easy to creep up to the desired angle. 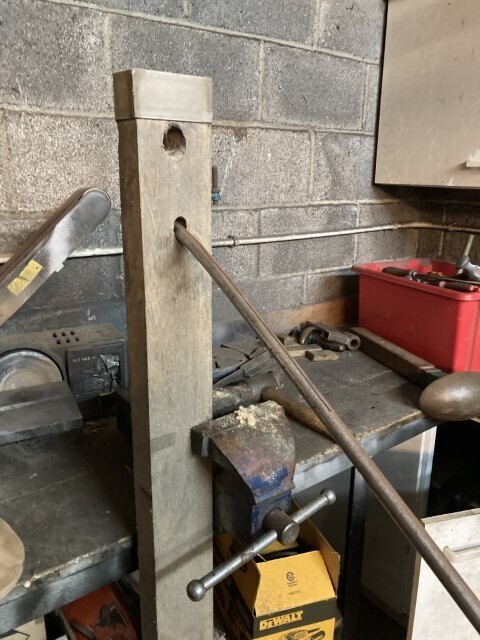 When I was an apprentice I was taught to bend electrical conduit with a pipe bender and with a beam like that, once you get the hang of it (it takes a bit of practice 😉) it's a great tool. Been a long time since I even thought about it, your picture instantly took me back 50 odd years. Great to see that the technique is still in use, thanks for posting the picture  |
| |
Black is not a colour ! .... Its the absence of colour
|
|
|
|
|
|
|
|
Just catching up on this and it's still endlessly impressive!
Haven't seen one of those bending beams before but it looks a lot more controllable than a pipe bender. More flexible for different sizes of tube as well as you just need to bore the correct size hole rather than get shaped sets of dies...
|
| |
|
|
|
|
|
|
|
Just catching up on this and it's still endlessly impressive! Haven't seen one of those bending beams before but it looks a lot more controllable than a pipe bender. More flexible for different sizes of tube as well as you just need to bore the correct size hole rather than get shaped sets of dies... Correct size hole in the wood and file a nice smooth lead in on the front and exit on the back just to remove the sharp shoulder of the drilled hole. All for the cost of a length of 4 x 2 hardwood. |
| |
|
|
|
|
|
|
|
|
so do you jut wop it in the hole and pull downwards john , then edge it out a bit and repeat, i assume the lead in curve stops the kinking ?
|
| |
|
|
|
|
|
|
|
so do you jut wop it in the hole and pull downwards john , then edge it out a bit and repeat, i assume the lead in curve stops the kinking ? Spot on Ivan. Gently Bentley and you can just ease it round a little bit at a time. It takes a bit of care and you have to make sure that the bends are in the same plane. A straight line on the diameter may help here. |
| |
|
|
|
|
|
|
|
so do you jut wop it in the hole and pull downwards john , then edge it out a bit and repeat, i assume the lead in curve stops the kinking ? Spot on Ivan. Gently Bentley and you can just ease it round a little bit at a time. It takes a bit of care and you have to make sure that the bends are in the same plane. A straight line on the diameter may help here. thank you john , whats the wall thickness it can work with ? regards robert |
| |
|
|
|
|
|
|
|
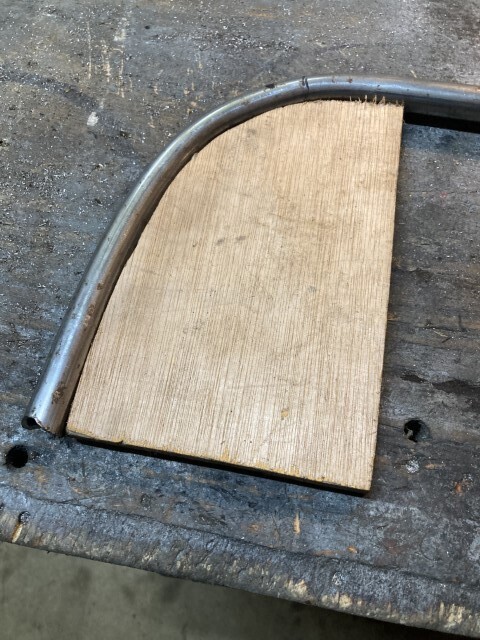
Spot on Ivan. Gently Bentley and you can just ease it round a little bit at a time. It takes a bit of care and you have to make sure that the bends are in the same plane. A straight line on the diameter may help here. thank you john , whats the wall thickness it can work with ? regards robert I'm using 1.5mm wall without any problems. However, for the next bend which needs to come out horizontal is a bit more taxing so I have decided to approach things in a different way. Using 3 x 25mm flat I formed the radius I need and then tacked it to the round tube to give me a former to work to as well as putting the bend in exactly the right place. I have to admit that I'm winging this having no idea whether it will work, but the tube has come round nicely and with any luck it will be horizontal and pointing down the side of the car which is the intention so it's looking promising  . 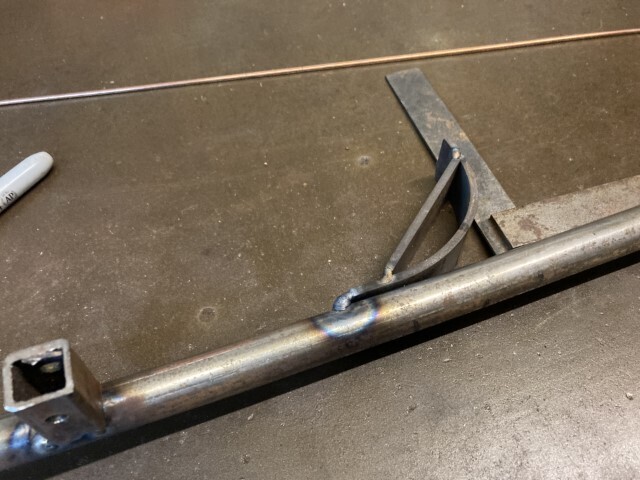 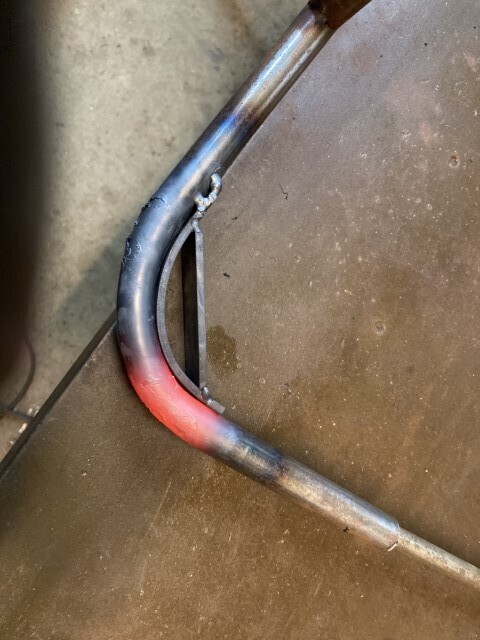 |
| |
|
|
|
|
|
|
|
The rest of the job has gone well and I'm relieved that, unusually for me, I made no mistakes and the finished tube with all its bends fits the buck nicely. Just a couple more photos to complete the record of the day's work. 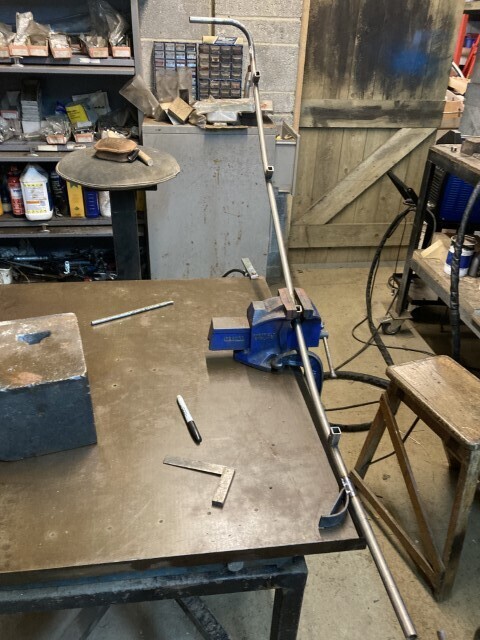 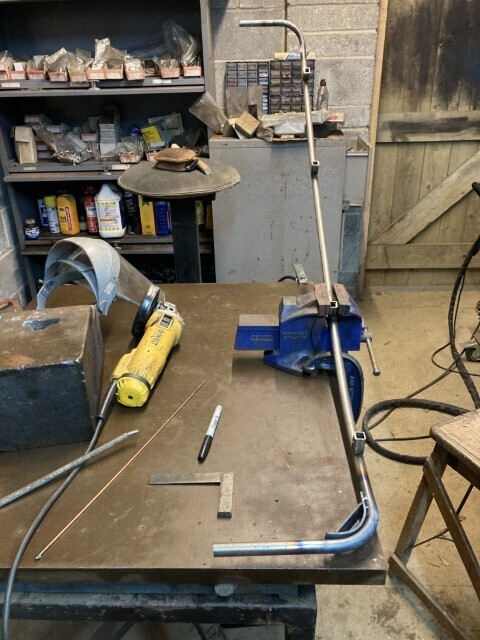 |
| |
|
|
|
|
|
Apr 10, 2024 12:05:27 GMT
|
|
What is the tube for?
|
| |
|
|




 .
.


