|
|
|
Sept 5, 2022 11:33:30 GMT
|
|
in front of the screen is high pressure, so there's a fine line as to where to put them, normally you would have the opening at 40% of the radiator area, expand the incoming air into as big a radiator as possible , then speed the air up again to rejoin the main airflow
this boxster video is pretty informative
|
| |
|
|
|
|
|
|
|
Sept 5, 2022 15:33:13 GMT
|
I loved that video. A great find and thank you for sharing. Something darkspeed might like to play with. Drag is not something I need to bother with but ducting the air as it comes out of the radiator onto the wheels is a great way of keeping the heat out of the under bonnet area and, as has been mentioned, I'm running a second radiator for the aircon so even more heat to shift. There should be plenty of room for the ducting so well worth a go. I certainly wouldn't have thought of the idea without having seen the video. There's a real temptation to forge ahead with installing the engine but I need to resist that and finish the roof and door apertures ready for fixing in place and welding. And that's what I've been doing. 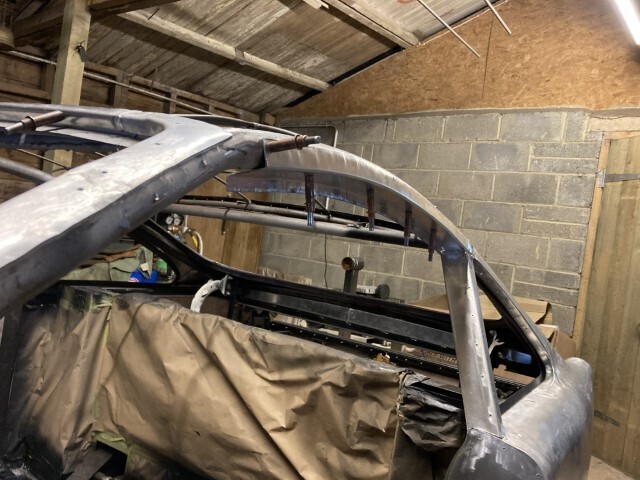 |
| |
|
|
|
|
|
Sept 5, 2022 16:46:46 GMT
|
|
Actually I linked the wrong one, but it was useful anyway. Have a look at this one too
|
| |
|
|
|
|
|
Sept 5, 2022 16:48:41 GMT
|
|
but then this one is good too. Sorry for the spam, but there's some great knowledge here that I didn't know
|
| |
|
|
maf260
Part of things
 
Posts: 533
|
|
Sept 5, 2022 17:41:13 GMT
|
Ogle GT very different again…. 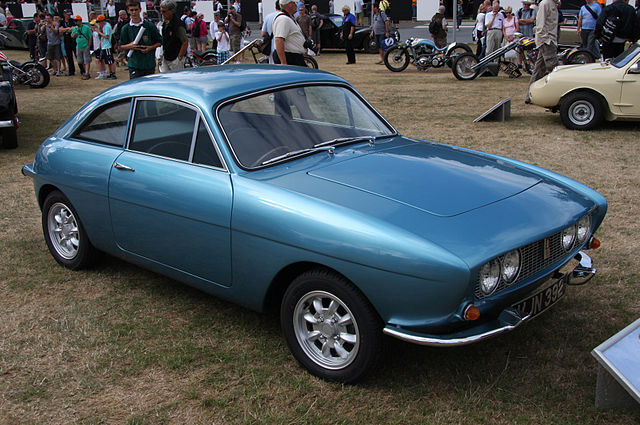 That looks to me like Zagato got hold of an Allegro! |
| |
|
|
|
|
|
Sept 5, 2022 18:59:45 GMT
|
|
This information has come just in time because I can revise the radiator mounting and move it forward sufficiently to duct the exiting air in front of the wheels. The original mounting brought the radiator just in front of the axle line and impossible to arrange the ducting in this way.
|
| |
|
|
|
|
|
Sept 5, 2022 19:19:02 GMT
|
Ogle GT very different again….  That looks to me like Zagato got hold of an Allegro! Looks a bit Rover 2000 front lights & grill. |
| |
|
|
|
|
|
|
|
Looks a bit Rover 2000 front lights & grill. Which was a break away from "Hey chaps, I've got a great idea. Let's use Vauxhall Victor FD front grilles for these cars!" |
| |
Last Edit: Sept 6, 2022 1:14:12 GMT by PhilA
|
|
byakk0
Part of things
 
Posts: 14
|
|
Sept 6, 2022 15:19:16 GMT
|
Looking great John. A slight deviation from the topic, but thought you may find this interesting. Someone posted a photo on FB of the lightweight GT at a carshow the other day.  |
| |
|
|
|
|
|
Sept 6, 2022 19:07:19 GMT
|
|
Hazen, well spotted and thank you for sharing the picture. I believe the Lightweight may have changed hands again, last year but how nice to see it out. I'd really like to make contact with the new owner but having closed my account, I have no access to Facebook. Was it the TSSC page? Could you make contact on my behalf? That would be marvellous. Mind you, not being a lover of car shows I would have preferred to have seen pictures of it competing at Prescott or Shelsley Walsh which was what I built it for.
PS I realise of course that the author was not the owner so making contact with him wouldn't help. Sorry
|
| |
|
|
byakk0
Part of things
 
Posts: 14
|
|
Sept 7, 2022 20:37:59 GMT
|
|
I can certainly give it a shot.
|
| |
|
|
|
|
|
|
|
I can certainly give it a shot. Thank you Hazen. I have contacted the Rotary Club but the owner didn't register on line so unfortunately there's no digital record. Not worth a great deal of trouble but it would be nice to stay in contact with the car. Kind regards |
| |
|
|
|
|
|
Sept 10, 2022 8:13:03 GMT
|
The section I'm working on at the moment which is the passenger side door aperture is slow work with a lot of careful shaping, trimming, fitting and then repeat. The roof will be butted up to the aperture sections, riveted in place and then welded. The steel side rails are painted with zinc self etching primer and that's the best I can do to avoid corrosion. I'm not sure what effect the zinc will have on the welding but if it proves impossible, filler prior to painting will do the job. You could say why not omit the weld, give both a good thickness of paint and fill later and I could do that but I would prefer to see it welded. Whatever I do or don't do, it will see me out that's for sure  A lot of time has been spent on planishing the roof and I'm pretty happy with it now. 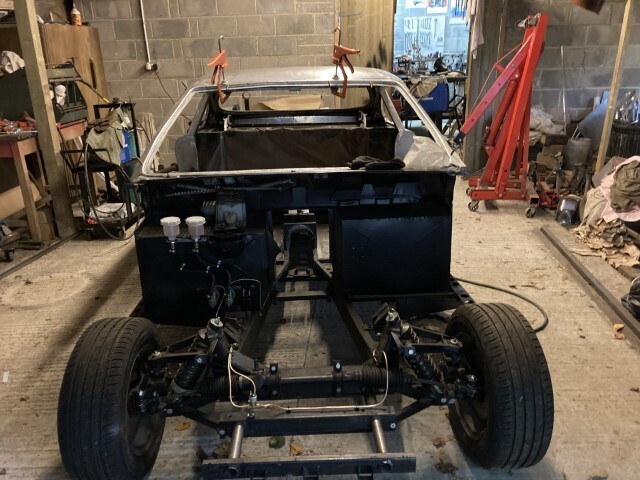  |
| |
|
|
|
|
|
Sept 10, 2022 17:07:30 GMT
|
And one more photo with sill trial fitted.  |
| |
|
|
|
|
|
Sept 10, 2022 17:10:38 GMT
|
EXsillent .  |
| |
Last Edit: Sept 10, 2022 17:11:10 GMT by ivanhoew
|
|
|
|
|
Sept 18, 2022 12:04:22 GMT
|
The engine and gearbox are going back into the frame very soon and once installed I know that I shall not rest until the engine has been started. So, to this end I dragged some of the wiring loom out of the Fiesta and put some volts on it. The Fiesta has two or three fuse boxes but one of them was attached to the loom that I have removed and I was very heartened to find that not only does the windscreen wiper motor work in all modes, normal, high speed and intermittent but the hazards work as well. This is going to give a huge time and money saving over building a loom from scratch. 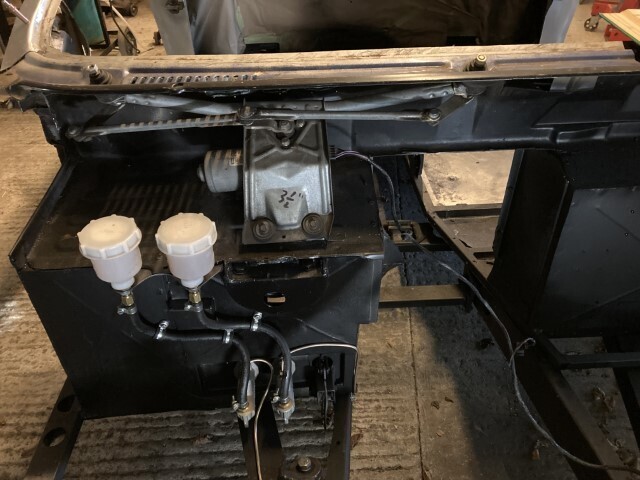 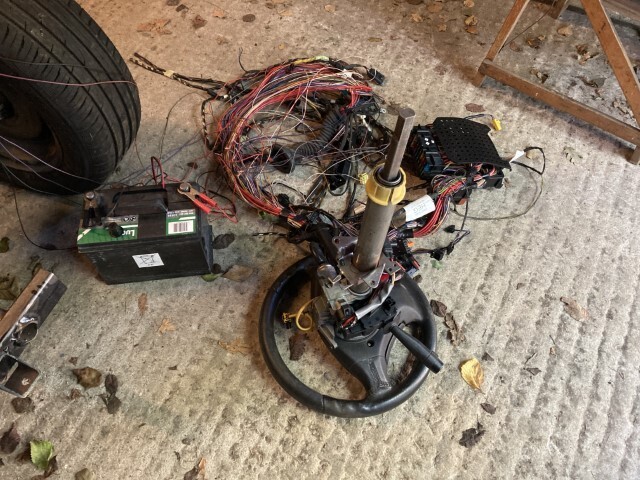 |
| |
|
|
|
|
|
Sept 30, 2022 15:51:05 GMT
|
|
No pics today I'm afraid.
I've spent days and days tracing the wiring through on the Fiesta loom using a battery and a multimeter.The Haynes manual hasn't been a huge help because in many cases, the cable colours on the loom don't tally with the manual. Some of the circuits are enabled or disabled by the immobiliser which also adds to the difficulty. Unfortunately, I delegated the job of removing the loom from the Fiesta and it was done with gay abandon with nothing labelled and swathes of cable cut with a hacksaw. Not terribly helpful and there's a lesson to be learned there.
There are two fuse/relay boxes, one in the car and the other in the engine bay. I have now connected them electrically and apart from the radiator fans circuits I'm pretty much there having all the outputs I need. Although laborious, being able to use the Fiesta loom has saved months of work and not a little cost.
I should be able to reduce the sheer bulk of the loom by removing the wires that won't be needed but I haven't sufficient confidence yet to start on that.
I made a big mistake in having the dashboard covered so early on because I'm afraid I shall have to butcher it by cutting an access hole to be able to change the fuses which will be adjacent to the steering column. Of course, the downside of using an existing loom is that, without a lot of work, cable lengths may be incorrect for my application. There are a lorra lot of wires from the column switches to the fuse box which of course could be lengthened to reposition the box but even if I did I'm still not sure where I'd put it.
This the first time I have been free of the Lucas W14 wiper system which pleases me no end. Gone are the always inaccessible wheel boxes and the choice of normal speed or slower. The Ford system is so direct and simple and it comes with the luxury of all the functions on the one switch.
My obsession to understand the Fiesta circuitry has left the metalwork largely neglected but I'm anxious to get one remaining piece formed so that the roof can be welded in and that will be a whole section of the body put to bed.
|
| |
|
|
|
|
|
|
|
|
It's all progress John.
Having just wired my dash I can sympathize, it's a long slog.
|
| |
Proton Jumbuck-deceased :-(
2005 Kia Sorento the parts hauling heap
V8 Humber Hawk
1948 Standard12 pickup SOLD
1953 Pop build (wifey's BIVA build).
|
|
|
|
|
|
|
|
Wiring is 60% theory and 40% actual work. Both unfortunately are extremely time consuming.
|
| |
|
|
|
|
|
|
|
|
I've just ordered some more fuses
|
| |
|
|


