|
|
|
Jun 14, 2021 18:57:17 GMT
|
John re bumpers.... Are you aware of a company called Harrington in Vietnam? groupharrington.comThey produce stainless steel bumper sets for most classics at a reasonable cost. I don't doubt that you can make your own but sometimes it's nice to just buy and bolt on, done. A pair for a TR6 is about £700 or so. Maybe you can find a style that suits your incredible one off? Regards Nick That would certainly make things very easy Nick if I could source bumpers off the shelf but the chances of finding a pair that would fit the shape of my car perfectly are pretty slim particularly given the width which is the same as a Fiesta, narrow for a modern car but fairly wide for a classic. However, I have just checked the width of a DB 5 and see it is just 7mm narrower than a Fiesta. And Harringtons do a pair of bumpers for a DB5 with a price reduction! Would they fit though? I've never made bumpers before and I'd like to have a go so that's probably what I'll do. Thank you very much for your suggestion. |
| |
|
|
|
|
Zagato
Part of things
 
Posts: 80
|
|
Jun 14, 2021 21:43:34 GMT
|
Well if you build them yourself they will fit your car perfectly. Also if you make them in aluminum all you need to do is polish them, having steel parts chromed costs an arm and a leg in my experience. I would really enjoy seeing a step by step of you making the bumpers so please proceed  Nick |
| |
Last Edit: Jun 14, 2021 21:45:08 GMT by Zagato
1959 Abarth Double Bubble resto project
1989 Lotus Esprit LHD
1997 Lotus Eprtit GT3
1996 Jaguar XJ6 Sovereign manual gearbox from factory
Porsche 356A Coupe replica
Formula 27 Super Seven replica Alfa Nord powered
|
|
|
|
|
Jun 14, 2021 22:19:04 GMT
|
Ask your painter to make a front wing and offer to paint a panel in return - see who makes the least worst job  He might keep quiet then  Like the car in your video - you don't necessarily need a full bumper, quarter bumpers or even just overriders may well look as good/better. |
| |
|
|
|
|
|
Jun 14, 2021 22:46:43 GMT
|
|
In regards to the numberplate recess, rounded corners or even perhaps just a shallower recess would make a big difference.
I sort of picture it in my head at the moment with thin chrome full width bumpers a la MGB, probably sans over riders.
It will be interesting to see what route you go.
Do bumpers need to have a certain amount of strength to pass. Or just radius?
ETA; the Retropower car I think that recess will work because the lights are recessed a little and the whole back end looks like it has been mildly cleaned up.
|
| |
Last Edit: Jun 14, 2021 22:49:58 GMT by varelse
|
|
|
|
|
Jun 15, 2021 13:28:43 GMT
|
Some good input there thank you everyone. In the case of my car the bumpers will be cosmetic so there is no reason why they should not be in aluminium which will be easier to work and won't need chroming. The one big advantage in building from scratch over kits is that everything should fit together perfectly and that is not always the case with a kit. I like your suggestions that the recess for the number plate should have rounded corners which was actually my initial plan having done something similar on the lightweight. So that's what I'll do in preference to the very deep recess on the RetroPower car. 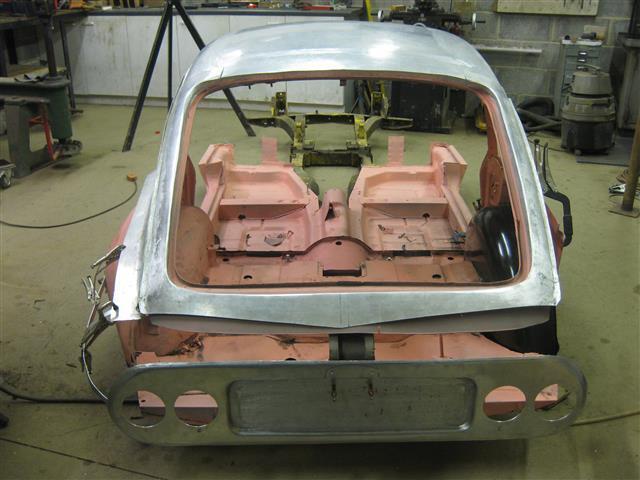 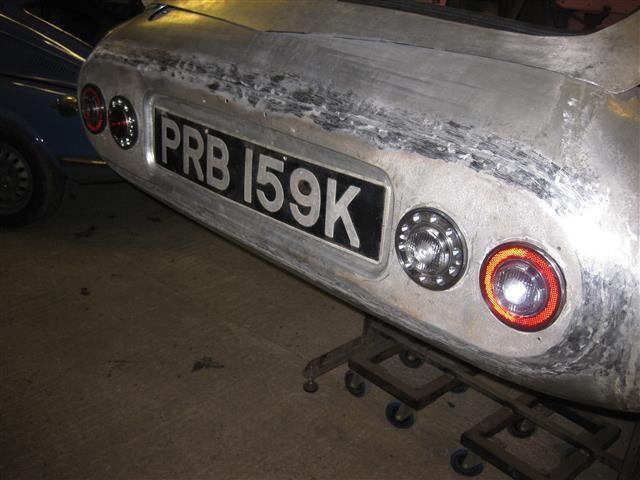 With a conventional number plate lamp at the top in the middle. 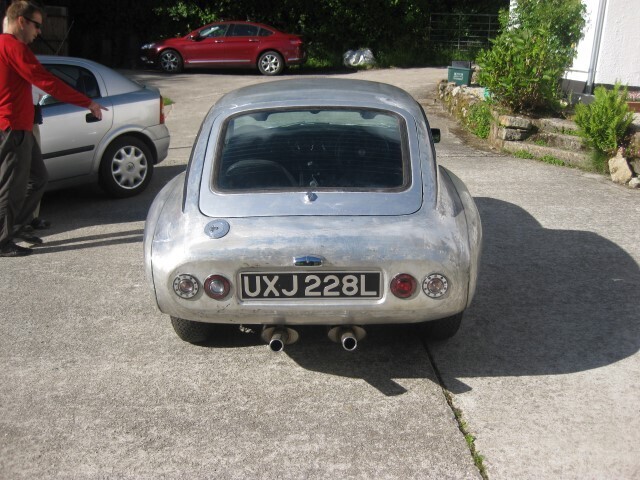 It's good to have suggestions like these which do help in clarifying thoughts and coming to a decision. |
| |
|
|
|
|
|
Jun 15, 2021 16:56:45 GMT
|
I've always said that it's the low CROWN panels that give (me) the most trouble and I should have listened to myself rather than naively expecting to have it finished by lunchtime. The problem I had is that the panel tapers from the front to the back so the front edge needs raising the most with the shape disappearing at the rear edge. I was expecting that when I wheeled the panel horizontally over the front edge that it would raise it but it didn't or if it did not very much. The shape in the form of a CROWN came a couple of inches further in which wasn't what was wanted. I then tried a big hammer followed by more wheeling and by then, every single thing I tried made things worse, There was a time when I thought I had a good grasp of the basics of wheeling but episodes like today's are a bit of a confidence shaker because I don't know what I was doing wrong. 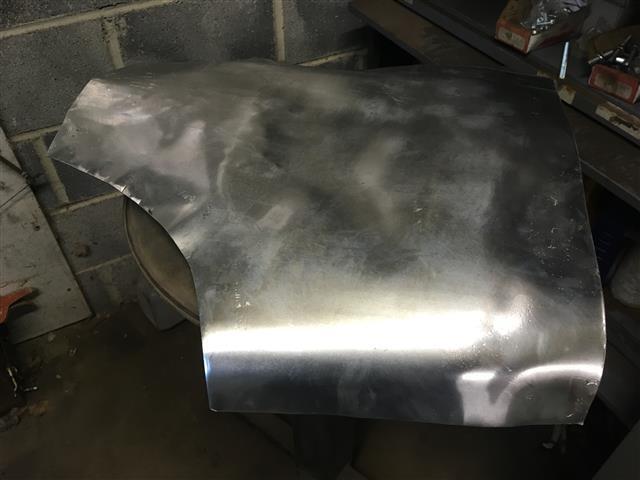 I probably should have consigned the piece to the scrap bin and started again but it is a fairly large piece of aluminium and I didn't want to waste it so I had one last try. I clamped it firmly to the buck and using the blow torch to stress relieve it and I am hoping that when I remove the clamps tomorrow it will stay reasonably to the shape I want and just need a bit of tweeking and smoothing. We'll see but I'm not holding my breath! 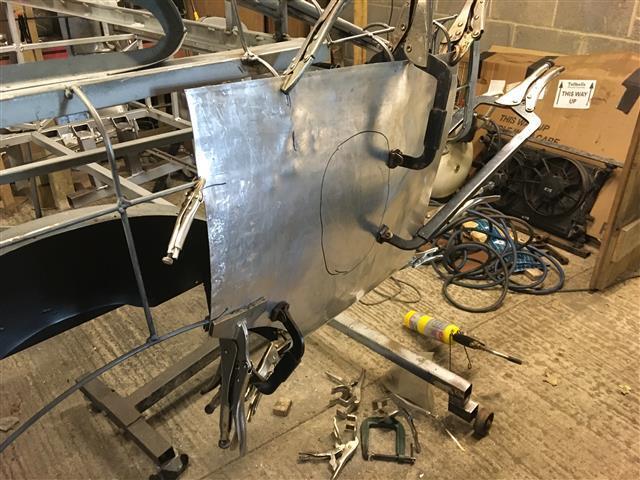 |
| |
|
|
|
|
|
Jun 15, 2021 17:34:21 GMT
|
|
Well, as all of us reading would make the panel worse every time we tried to fix it you are in good company, lol.
I'm sure tomorrow will be another day and just maybe everything you do will work (hopefully).
|
| |
|
|
|
|
|
Jun 15, 2021 20:22:06 GMT
|
I've always said that it's the low CROWN panels that give (me) the most trouble and I should have listened to myself rather than naively expecting to have it finished by lunchtime. The problem I had is that the panel tapers from the front to the back so the front edge needs raising the most with the shape disappearing at the rear edge. I was expecting that when I wheeled the panel horizontally over the front edge that it would raise it but it didn't or if it did not very much. The shape in the form of a CROWN came a couple of inches further in which wasn't what was wanted. I then tried a big hammer followed by more wheeling and by then, every single thing I tried made things worse, There was a time when I thought I had a good grasp of the basics of wheeling but episodes like today's are a bit of a confidence shaker because I don't know what I was doing wrong.  I probably should have consigned the piece to the scrap bin and started again but it is a fairly large piece of aluminium and I didn't want to waste it so I had one last try. I clamped it firmly to the buck and using the blow torch to stress relieve it and I am hoping that when I remove the clamps tomorrow it will stay reasonably to the shape I want and just need a bit of tweeking and smoothing. We'll see but I'm not holding my breath!  Well, having given it a bit of thought one solution would be to add another couple of inches of material which would put the CROWN just where it's wanted. And then cut off the unwanted two inches. I think this should work. |
| |
|
|
|
|
|
Jun 15, 2021 22:25:43 GMT
|
|
Sounds like a plan.
|
| |
|
|
|
|
|
|
|
I shall have to find a solution because every panel has the same curve tapering towards the rear up to the front edge of the door. |
| |
|
|
|
|
|
Jun 16, 2021 11:35:57 GMT
|
It has been an unorthodox method of achieving the end but the panel was saved and it all looks quite promising and as blackpopracing confidently predicted, "Tomorrow is another day" and how pleased I am that you were right. A couple of hours in and the panels are ready for trimming and welding.. 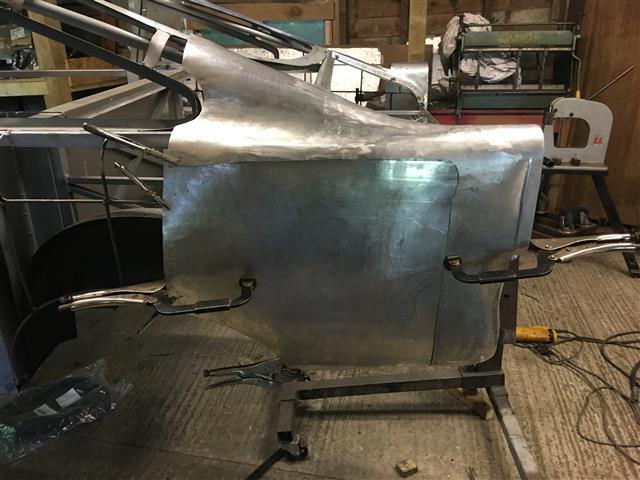 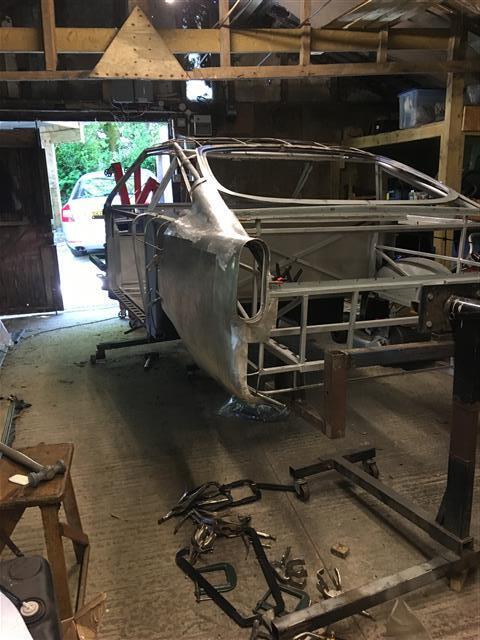 |
| |
|
|
|
|
|
Jun 16, 2021 15:49:59 GMT
|
Certainly coming along well John! You'll have built an entire body by scratch before I've finished putting mine together from existing pieces  |
| |
|
|
|
|
|
Jun 16, 2021 17:30:34 GMT
|
Kind of you to say, but I doubt it. It really is a huge project and I dare not look at the big picture. But considering that this time last evening there was doubt in my mind as to whether the panel would be consigned to the bin it played ball and things have moved along nicely today. Once marked and trimmed the two sections were tacked together which all went very well. The secret it no gap which isn't always easy to achieve but something I try my best to do. It's worth taking a bit of trouble at this stage to trim and file accurately because it saves a bucket load of grief further down the line. Cleanliness is paramount when welding aluminium. I have a dedicated stainless steel brush to remove the oxide and a coarse file to draw down the edges to ensure clean and fresh material. Finally I give the job a wipe down with acetone that removes any oxide powder and grease. It really does pay off. So by close of play, we have the makings of a rear three quarter panel. The new piece has gained a bit of unwanted shape but with a bit of heat it should shrink back with some encouragement from the slapper and dolly. 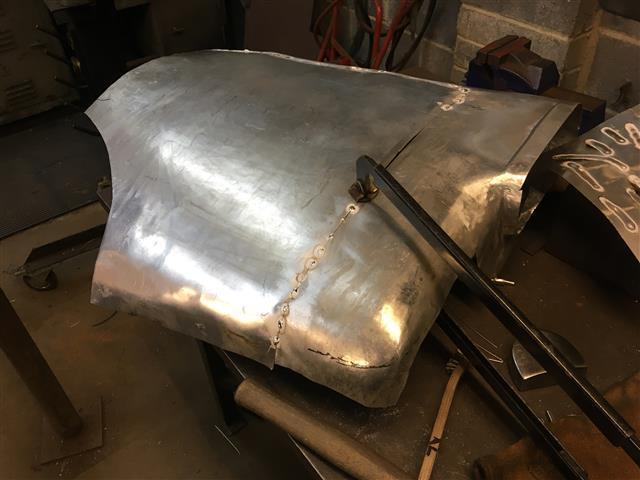 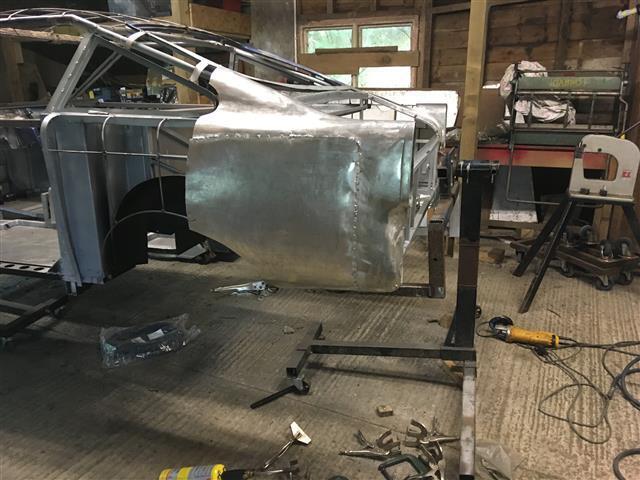 A fair bit of welding lies ahead. |
| |
|
|
|
|
|
Jun 16, 2021 19:15:14 GMT
|
|
A fair bit of welding indeed, but one step at a time. I am amazed at your skill level and the determination you have John. I really enjoy watching your progress and wish I had you skills. Please keep posting as each one is an education.
|
| |
|
|
|
|
|
Jun 16, 2021 21:21:42 GMT
|
A fair bit of welding indeed, but one step at a time. I am amazed at your skill level and the determination you have John. I really enjoy watching your progress and wish I had you skills. Please keep posting as each one is an education. High on determination but I'm not sure about the skill. It's plain for everyone to see that TIG welding aluminium isn't my forté having gas welded aluminium n the past but this project is a good opportunity to learn and practice. I struggle with wheeling as well which I still regard as a black art and very difficult to master. But these are challenges which keep the old brain and body active and every morning when I unlock the workshop I get this frisson of excitement, a real buzz of the prospect of another day doing something that I love. Thank you and everyone else who contribute regularly to my thread with encouragement, ideas and suggestions. |
| |
|
|
alx
Club Retro Rides Member
Posts: 367
Club RR Member Number: 21
|
|
|
|
|
This thread is currently the first one of my Bookmarked threads I look up every day. Some really nice work going on, thanks for sharing it with us.
AL.
|
| |
|
|
|
|
|
Jun 17, 2021 17:29:29 GMT
|
I remember my friend Darkspeed in one of his posts saying that me (he that is) and the tig welder got on well today and for me that is just how it is, some good and some not so good and today was one of the good days. I have plenty of days when the same cannot be said so when a good one comes along it is all the more appreciated. Welding is all about technique and practice so I'm hoping that as the panelling progresses and the more welding I do I'll become more consistent with decent results being the norm. In under an hour I had fully welded the panel with no touch downs and excellent penetration. As before using no filler I did a fusion weld on the underside which should ensure there is no cracking once I start using a hammer on it. I've made a good start planishing the weld and decided to quit while I'm ahead! 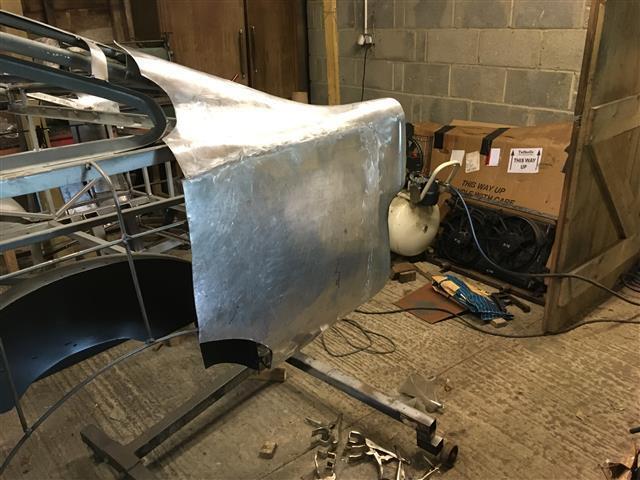 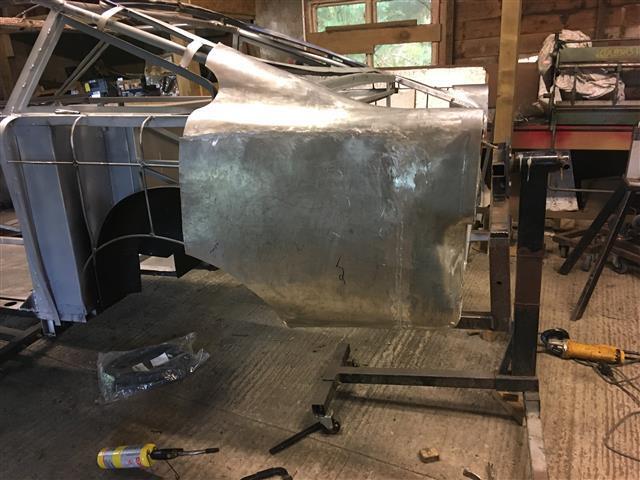 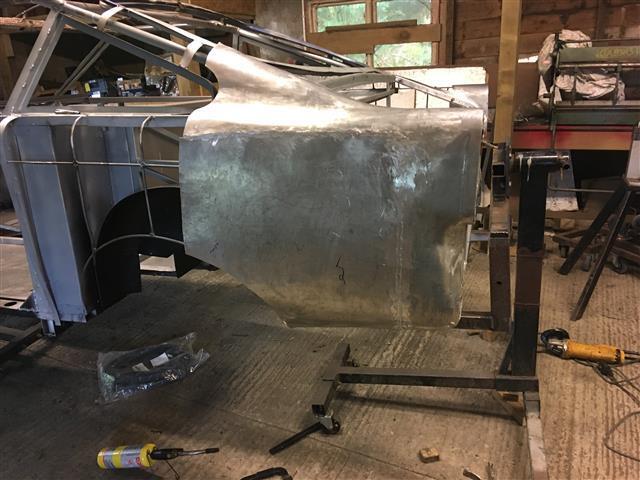 |
| |
|
|
|
|
|
Jun 17, 2021 19:16:15 GMT
|
|
Stupid question time.
Why didn't you make the wing in one whole panel? - ie from your join on the rear lamp housing and one long seam where you are welding at the top?
It would seem (to me - never having done it) that it would be easier to it that way?
|
| |
|
|
|
|
|
Jun 17, 2021 19:36:00 GMT
|
Stupid question time. Why didn't you make the wing in one whole panel? - ie from your join on the rear lamp housing and one long seam where you are welding at the top? It would seem (to me - never having done it) that it would be easier to it that way? I'm probably incorrect but in my experience as a novice "wheeler" (very novice) is that you have more control and achieve good results with smaller pieces one your own. |
| |
|
|
|
|
|
Jun 17, 2021 21:37:55 GMT
|
Stupid question time. Why didn't you make the wing in one whole panel? - ie from your join on the rear lamp housing and one long seam where you are welding at the top? It would seem (to me - never having done it) that it would be easier to it that way? No not a stupid question. You are quite right and someone with more skill would have done it that way. But as truckdoctor rightly points out smaller pieces are easier to handle without the risk of losing control of the shape. I'll definitely try it as one panel on the other side. |
| |
|
|


