|
|
|
|
|
Blue. 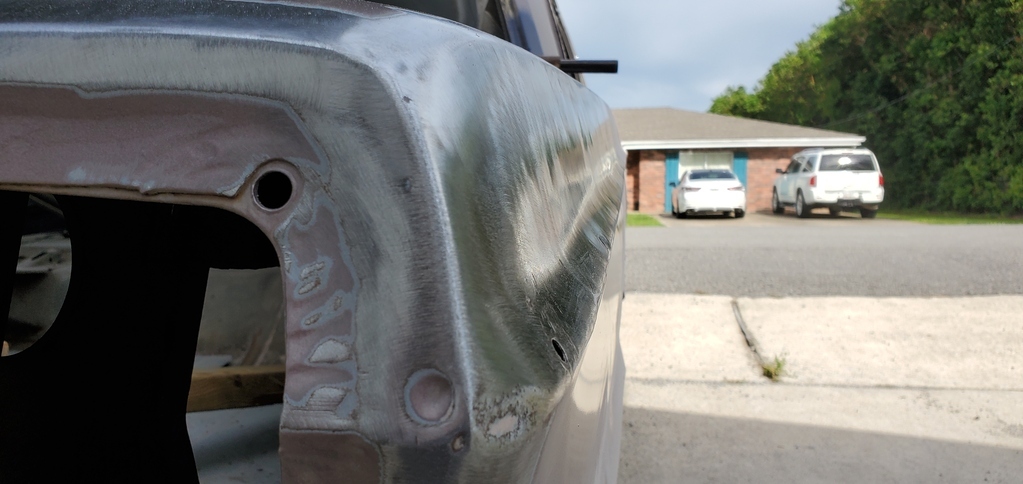 Before I started. Garage wall interface, by looks of it.  As far as I am concerned, that corner is now about good enough (needs a little more work) for filler to profile out where the metal is stretched beyond my skills to beat it true. Couple more ripples to get a bit better further up the quarter yet, but my garage time was hijacked tonight. Phil |
| |
Last Edit: May 27, 2021 1:33:14 GMT by PhilA
|
|
|
|
|
|
|
May 27, 2021 14:30:15 GMT
|
Bash bash bash. Pulled the dent out of the corner. Settled a couple more creases. Cleaning up, I looked at this. Looks a bit suspect. 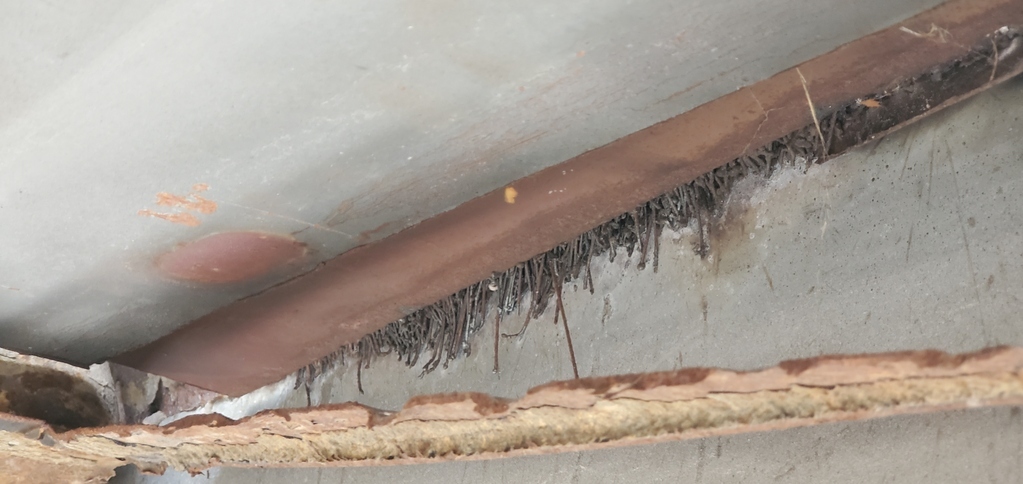 It isn't.... No, it is, all freaking MIG wire. What in the name of all things...?! This has to be posted onto Migweb. And FB it has to be the pinnacle of this sort of high end work. |
| |
|
|
|
|
|
May 27, 2021 15:51:39 GMT
|
This has to be posted onto Migweb. And FB it has to be the pinnacle of this sort of high end work. Feel free to steal the photos! |
| |
Last Edit: May 27, 2021 15:52:45 GMT by PhilA
|
|
|
|
|
May 27, 2021 18:57:36 GMT
|
Jesus christ - that's one of the worst bit of welding?  ? I have ever seen - period! |
| |
|
|
|
|
|
May 27, 2021 19:48:34 GMT
|
 Quality........ Looooow quality......  Nick
|
| |
1967 Triumph Vitesse convertible (old friend)
1996 Audi A6 2.5 TDI Avant (still durability testing)
1972 GT6 Mk3 (Restored after loong rest & getting the hang of being a car again)
|
|
|
|
|
May 27, 2021 21:07:55 GMT
|
|
I need to pull that trunk floor panel out. I need to see what's under it (nothing, I know that much) but I do need to see what's left of the old floor.
|
| |
|
|
|
|
|
May 27, 2021 21:47:43 GMT
|
|
When you see wire like that it usually means that someone was trying to weld to rust and mostly failing.....
You PO was more stubborn about it than most though!
|
| |
1967 Triumph Vitesse convertible (old friend)
1996 Audi A6 2.5 TDI Avant (still durability testing)
1972 GT6 Mk3 (Restored after loong rest & getting the hang of being a car again)
|
|
|
|
|
May 27, 2021 22:24:39 GMT
|
Angry grinder time.  The trunk has a repair panel in. Not hugely great quality but it's sort of bead rolled into the rough pattern that originally was in the trunk. 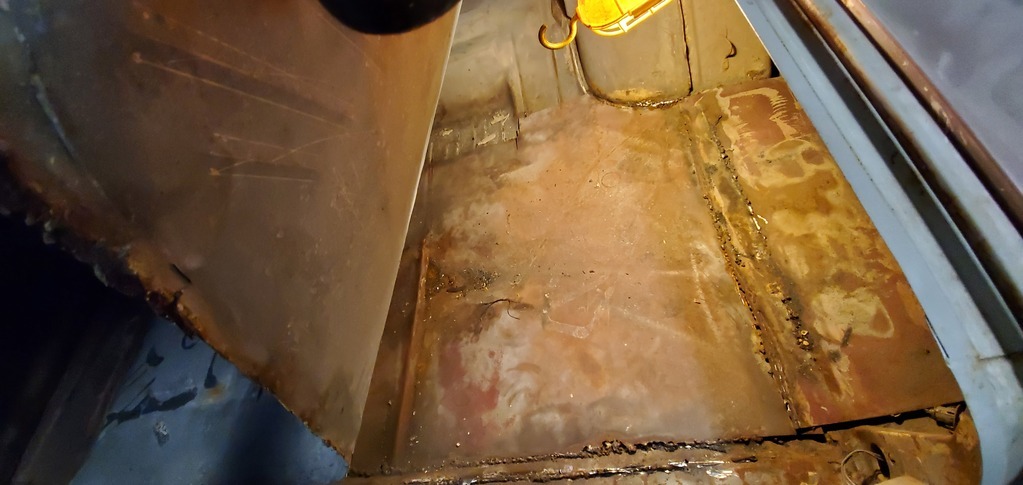 I got half way round so lifted it up Wait, what? Now I'm confused. There's a plain piece of steel in there already, this has been slapped on top of? This makes no sense. I need to get more cutoff wheels. Phil |
| |
|
|
|
|
|
May 27, 2021 22:46:33 GMT
|
|
Ah, the joys of fixing others bodges. So much nicer to have a rusty original panel to work with.
|
| |
|
|
|
|
|
May 27, 2021 23:05:51 GMT
|
Ah, the joys of fixing others bodges. So much nicer to have a rusty original panel to work with. Agreed, it would've been easier to repair, for sure. I'm sure the floor was beyond redemption but still... |
| |
|
|
|
|
|
|
|
|
its going to be a lot lighter thats fer shure .
|
| |
|
|
|
|
|
May 28, 2021 12:19:13 GMT
|
its going to be a lot lighter thats fer shure . Despite the size of it, it's a remarkably light car, 3300 lbs fully built up. All torn down like it is, very easy to roll about. However, I'm told the back end is too softly sprung and lightly damped, coupled with being a fair bit lighter than the front- something about rear passenger comfort- that when made to press on a bit the back end is quite fond of swapping with the front. Phil |
| |
Last Edit: May 28, 2021 12:35:59 GMT by PhilA
|
|
|
|
|
|
|
Cutting disc: purchased. 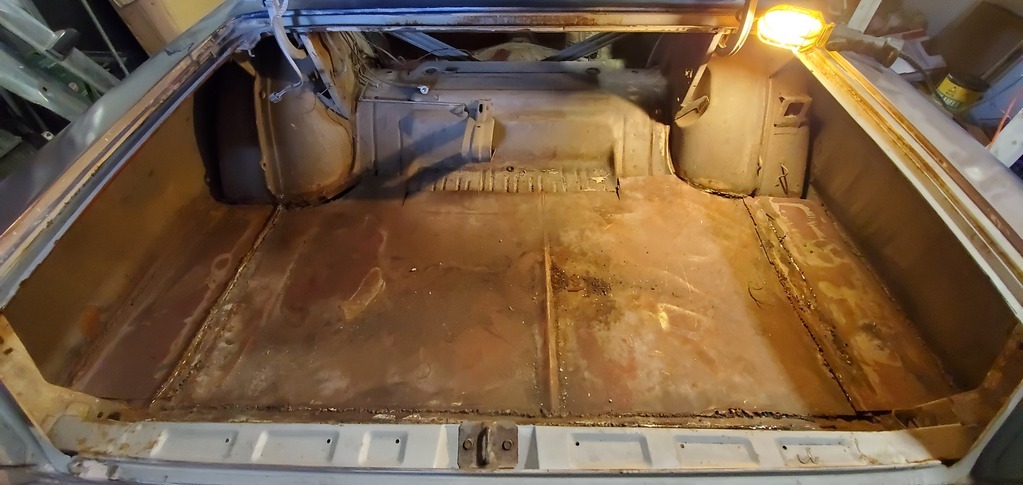 Well, there's the repair panel removed. Now it's more like a Beetle because there's the hood, in the trunk. 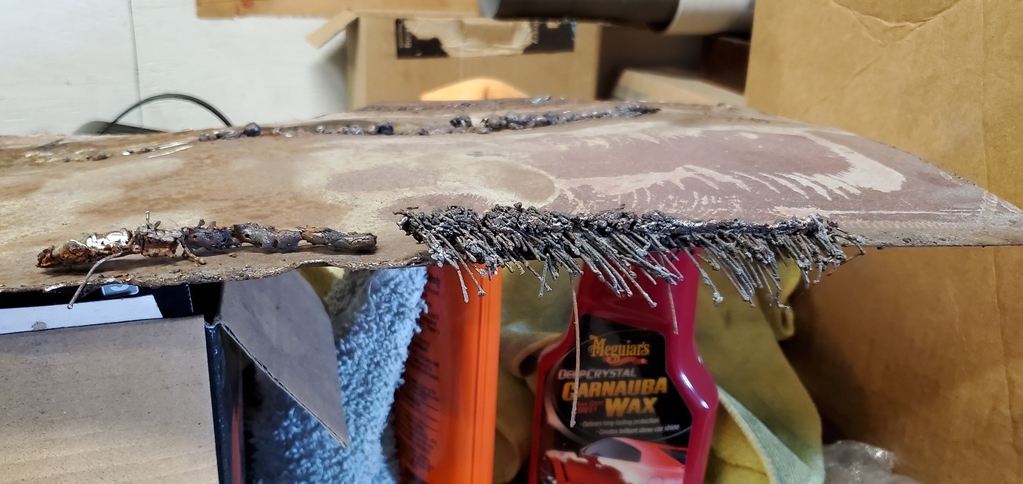 There's our artwork installation. It broke off, most of it not actually being attached to the car. 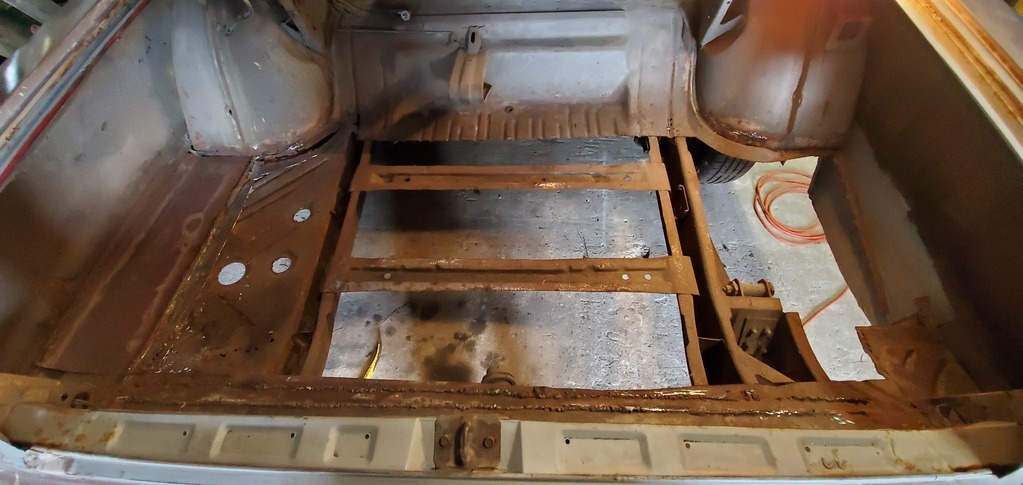 That had to come out, too. Well, that's better. Very dirty, but better. 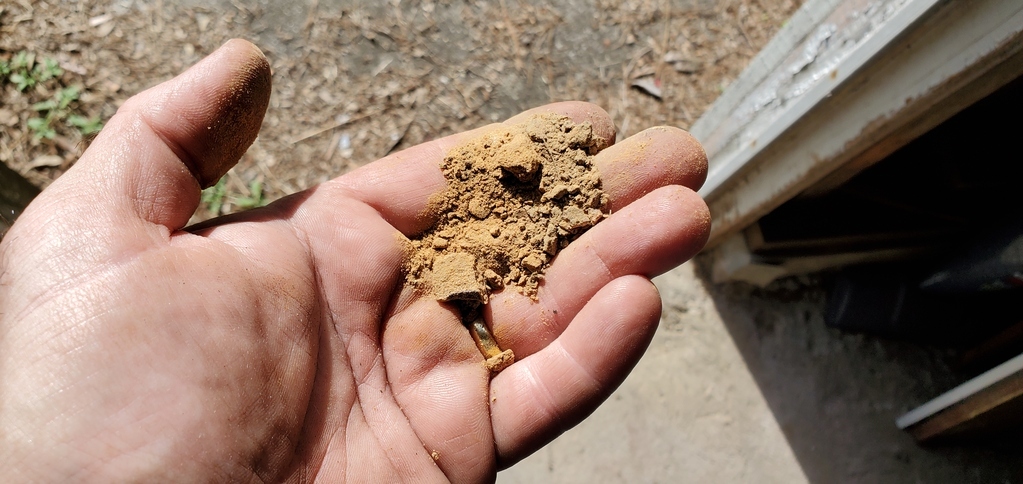 Pulled out maybe three, four pounds of dirt from the frame rails. That wasn't even cleaned out! 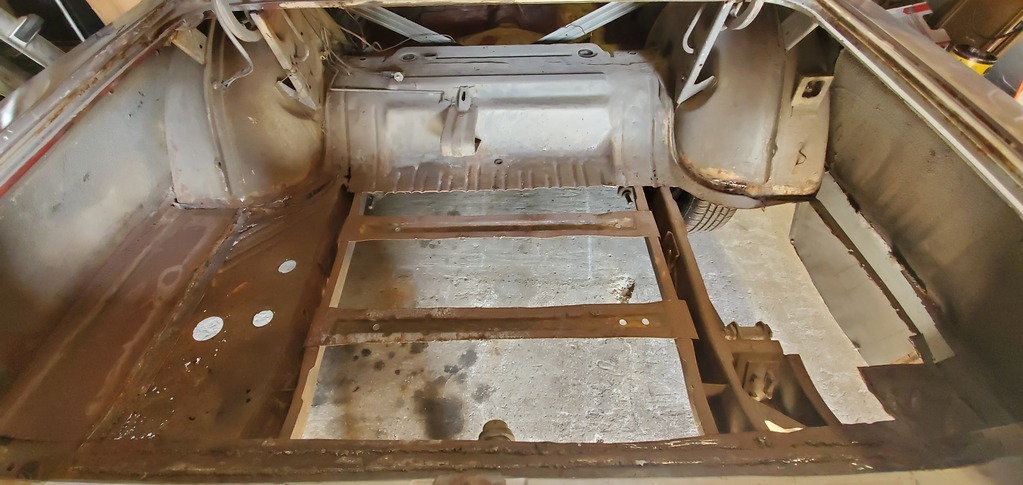 Well, vacuumed all that out. Still needs the piece on the left removing but underneath there's enough left I can copy into new metal. Phil |
| |
|
|
Clement
Europe
ambitious but rubbish
Posts: 2,095
|
|
|
|
|
I keep watching your work religiously, it's a true delight every time.
That MAG wire all over the place is hilarious, like that person had been given a welder with no instructions!
You mentioned buying an HF-less TIG, I had one a few years agi and found it quite frustrating to use as it would contaminate the tungsten all the time, and the weld would be compromised as you have to lift the torch away from it to stop the welding, killing the gas protection. To be fair, I was just out of training and hadnt really used welders that much, perhaps I'd find it easier now. I suspect the best way would be with HF, short full-power bursts and the filler rod already on the joint, basically like a MAG spot weld (in French it's called a "flash spot" as it very much looks like a camera flash from afar).
Anyway please do keep going, I love what you do!
|
| |
|
|
|
|
|
|
|
|
that looks so much better than it could be , excellent progress phil .
|
| |
|
|
|
|
|
May 29, 2021 11:19:17 GMT
|
I keep watching your work religiously, it's a true delight every time. That MAG wire all over the place is hilarious, like that person had been given a welder with no instructions! You mentioned buying an HF-less TIG, I had one a few years agi and found it quite frustrating to use as it would contaminate the tungsten all the time, and the weld would be compromised as you have to lift the torch away from it to stop the welding, killing the gas protection. To be fair, I was just out of training and hadnt really used welders that much, perhaps I'd find it easier now. I suspect the best way would be with HF, short full-power bursts and the filler rod already on the joint, basically like a MAG spot weld (in French it's called a "flash spot" as it very much looks like a camera flash from afar). Anyway please do keep going, I love what you do! That was based around what I thought I had for power supply in the garage. Turns out I have a moderately decent setup so I should be able to run a halfway decent mig. Nice thing too it's inside, I had issues with my old mig because I was only ever able to work outside and the gas would blow away leaving a crappy weld. Hopefully that'll change, but I'm very badly out of practice. Phil |
| |
|
|
|
|
|
May 29, 2021 11:42:47 GMT
|
I was looking at yesterday's photos again. 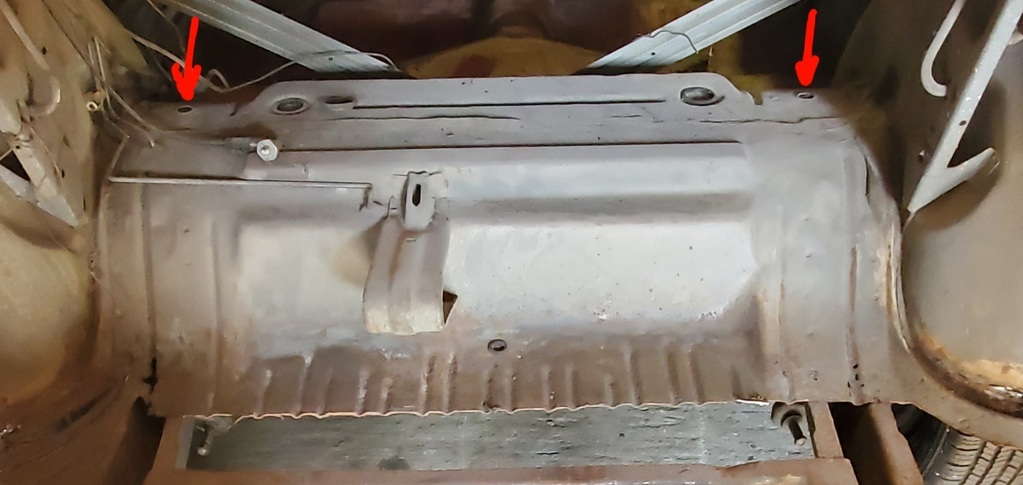 I need to go crawl up inside there and see if the two points (red arrows) are just dimples or if they've got rubber bungees in. If they're bungs then that gives decent access to put some rust protection up inside after cleaning. I really need to protect those frame rails, they collect a lot of dirt. It'll also be useful for the future, that's a Waxoyl (or similar product) injection point. Phil |
| |
|
|
|
|
|
May 29, 2021 19:05:52 GMT
|
Nice thing too it's inside, I had issues with my old mig because I was only ever able to work outside and the gas would blow away leaving a crappy weld. Hopefully that'll change, but I'm very badly out of practice. Phil I can't imagine that you are as badly out of practice as the last fella that worked on the car... 
I know that this won't be to everyone's taste but, I have found that the Eastwood MIG/TIG set up works quite well for my needs - I bought the cheaper set up and now regret not spending the extra but hey ho for what I do it's more than enough. I have even seen some "professional yootubers" that do well with the Eastwood set up.
Anyhoo, good luck with redoing the other fella's "work".
|
| |
|
|
|
|
|
May 30, 2021 23:23:10 GMT
|
|
I wouldn't mind a more expensive machine, but for now I'm just going to have to end up with a cheap Chinese mig.
I was eyeing up available body panels and take what I need to do is scrub the whole side of the car back to the door and check see how good, bad or indifferent the panels are there, because there's definitely a dent and a few big globs of wob. Next fun challenge will be to remove the rear door cards and pull the glass out of both so I can get access to behind the panel to try knock the dent out.
Phil
|
| |
|
|
|
|
|
|
|
I'm out of cutting discs again. 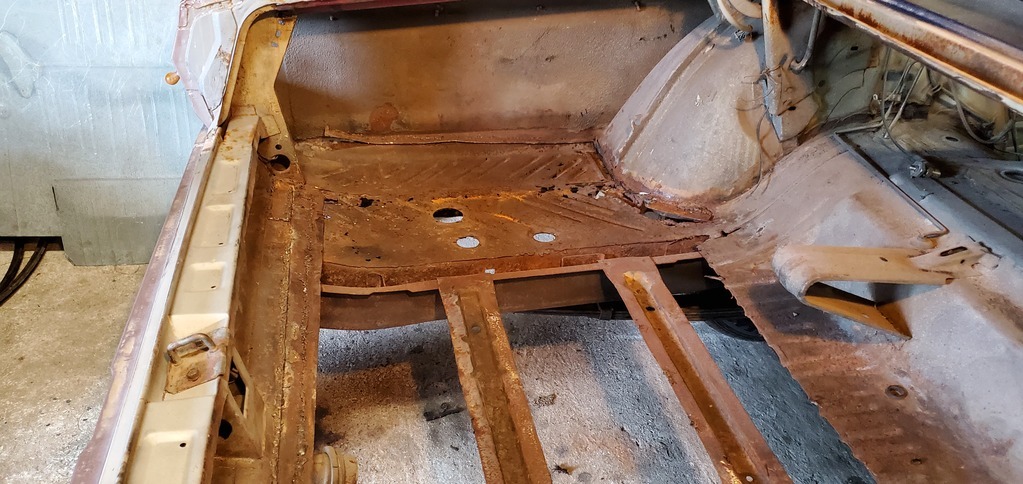 I removed the last of the big nonsense panels to reveal some significantly rusty but mostly intact trunk and drop panels. 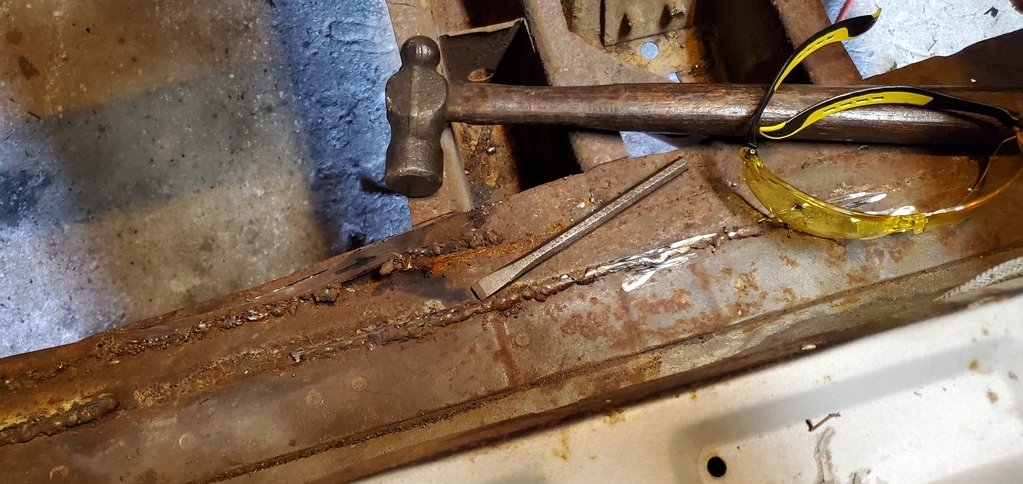 I set about cleaning up the welds so I could see what's left of the original rear seam of trunk. 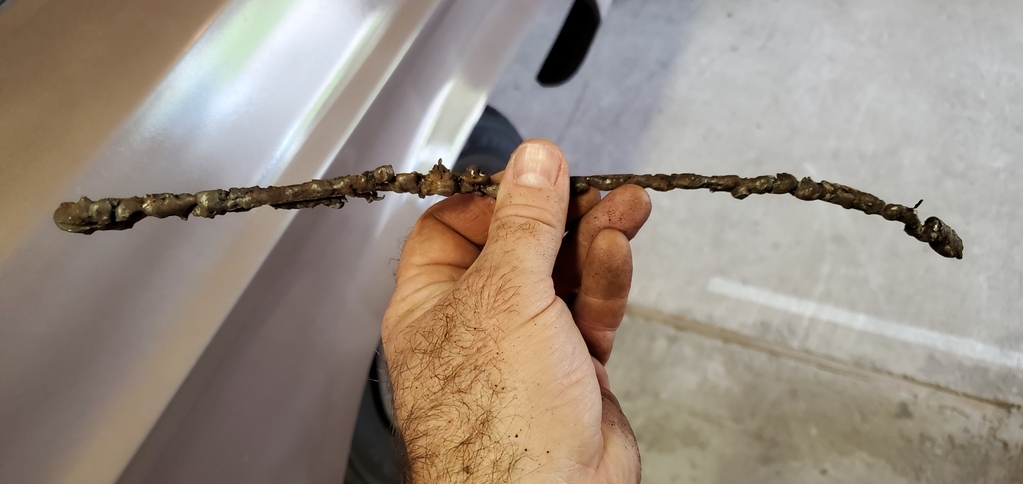 A good amount of it came away like this. 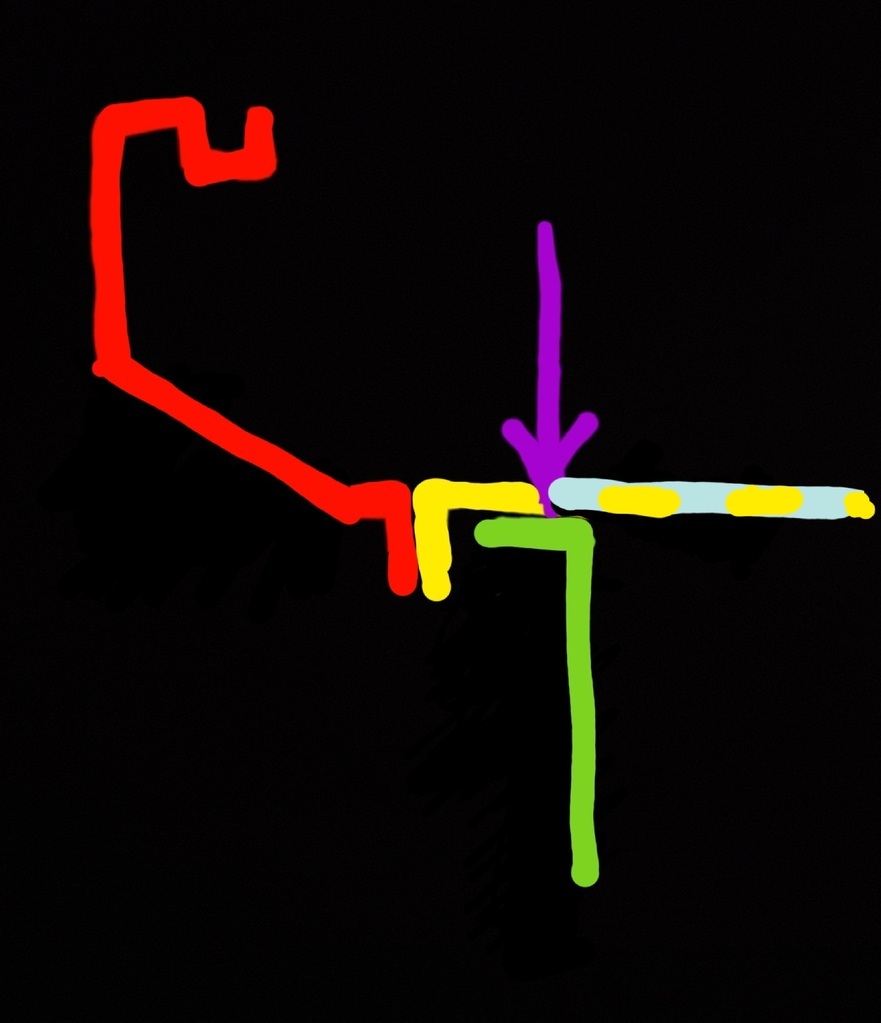 The rust went further up than I was happy with so I took a look to see how the back end of the car was assembled. The trunk floor was welded to the rear valence, then the rear upright panel was welded to the L of the back of the trunk floor. I figured the best and strongest join point was in the middle of the top of the rear valence. 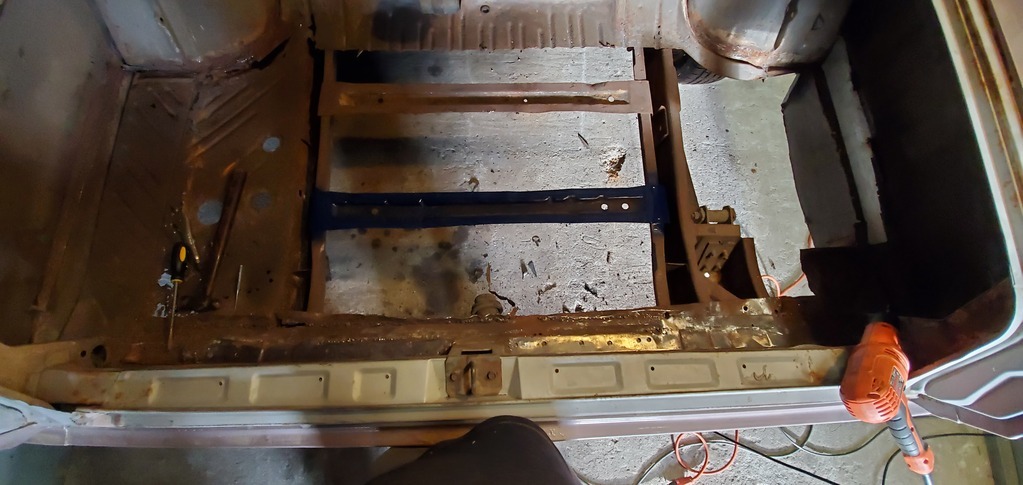 I started removing the spot welds, and ran out of time. But, it's looking better than it did. Progress. Phil |
| |
|
|


 ? I have ever seen - period!
 Quality........ Looooow quality......


