|
|
|
|
|
|
I've been doing some more reading over the weekend and what was once making sense isn't any longer.
The plan was to strip the underside and apply Bilt Hamber Electrox which is a zinc-rich primer. The description claims it makes a good base for epoxy 2k coatings and has excellent corrosion resistance properties.
The Raptor spec sheets say it should be applied to clean metal surfaces for best results.
Not sure if I'm going to compromise the Raptor if I use primer but Italian cars of a certain age need as much rust resistance as possible. Also, it's going to take time to strip the underside and I want to protect it rather than let it sit form weeks/months uncoated.
|
| |
|
|
|
|
|
|
|
|
|
|
Yeah should be fine over a primer. Might need to scuff it to get good adhesion, but probably worth the zinc rich primer.
If you want to make sure, you could do a test plate. Try putting the primer one, leaving it to flash off and then putting some raptor over the top. If it doesn't react and everything goes off ok then no need to wait til the primer's cured and scuff it, just spray, flash off and spray again.
|
| |
|
|
jmsheahan
Club Retro Rides Member
Posts: 689
Club RR Member Number: 121
|
HF integrale rebuildjmsheahan
@jmsheahan
Club Retro Rides Member 121
|
|
|
I can only speak from my own experience, but Raptor is fine over a primer, in fact I'm pretty sure Upol recommend laying it over their own epoxy primer? The underside of my Golf was bare-metalled, Electrox'd, epoxy primed (Upol's raptor branded stuff), then Raptor'd over that (can be done wet-on wet). It went on well, has stayed on well and left a nice uniform finish. ( HERE if it's any help) |
| |
Last Edit: Jul 5, 2021 14:21:50 GMT by jmsheahan
|
|
|
|
|
|
|
Nice one, thanks biturbo228 and jmsheahan. Think I was getting to the point of not being able to see the wood from the trees. |
| |
|
|
|
|
|
|
|
You're right to question stuff though. I had terrible trouble getting POR-15 to stick to the same-brand primer (forget the name), even after scuffing it heavily. Put it directly onto the metal and it sticks fine  |
| |
|
|
bricol
Part of things
 
Posts: 290 
|
|
|
|
|
I gave mine a good coat of looking at when it was upside down - I left good underseal alone - figured it had been on there close to 30yrs, it wasn't going to fall off anytime soon.
Anywhere dodgy was removed, any rust blasted and then epoxy primer applied, over coated with anything a different colour, then undersealed with 3M stuff all over.
Pretty much as I had done it a decade and 100,000 before.
|
| |
|
|
|
|
|
Jul 19, 2021 11:59:15 GMT
|
So I welded up the A pillar/ front wing strengthening plates that I had made up to reduce the flex induced in this area. They were costed with weld through primer before being attached. 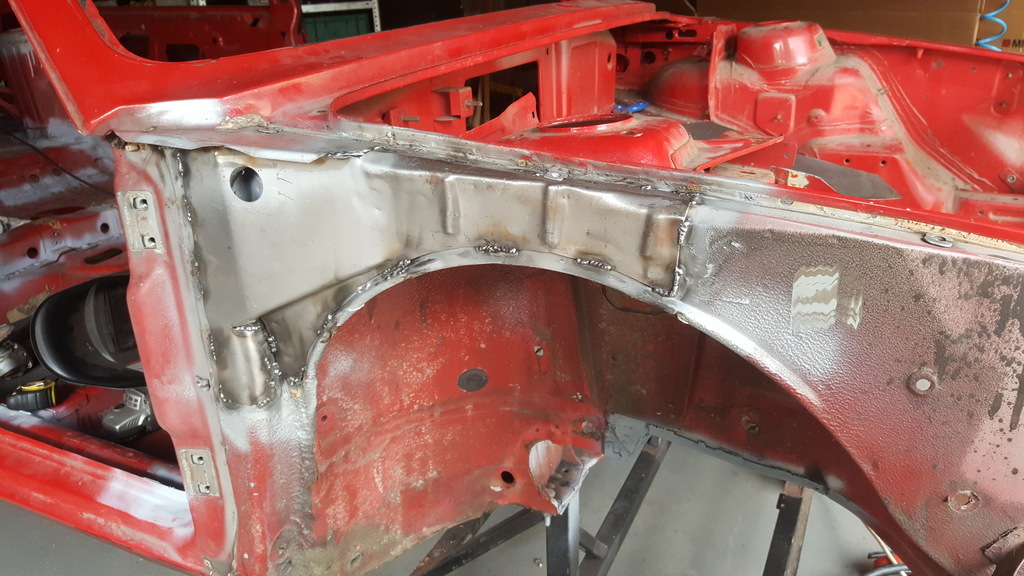 The panels were coated with weld through primer on the outside as well as they then needed a further plate on the outside to close them off. I have to admit here that I don't know much about the design of these plates as I'm simply taking advice of someone who knows a lot more than me in this respect and I'm just grateful he's willing to share his knowledge. 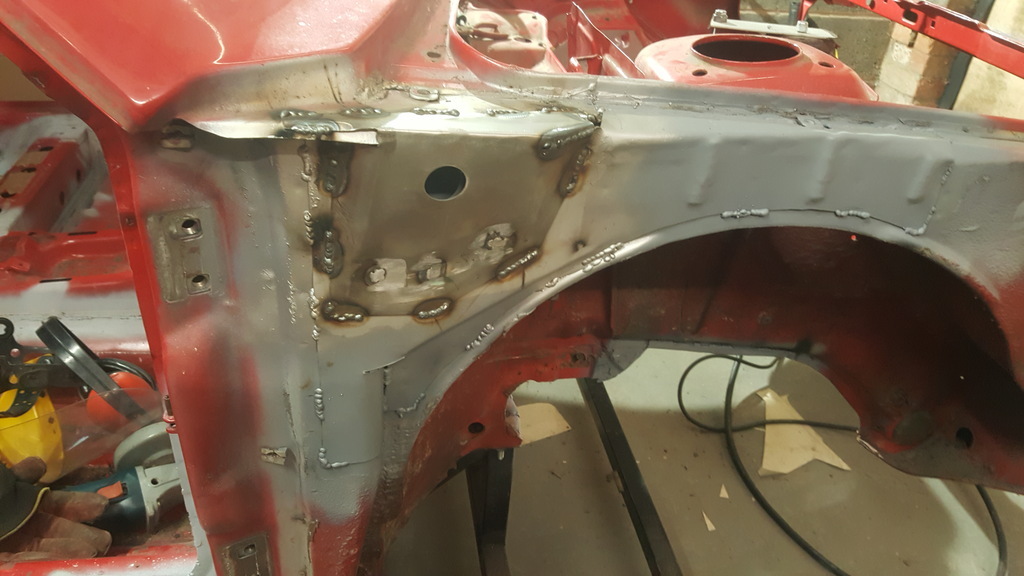 After final welding they were given a liberal coat of Zinc 182. I'm staring to find some surface corrosion that I'm tackling with a mixture of Clean & Strip wheels and Kurust. I'm pleasantly surprised at how little rust I've found so far but I've yet to tackle the underside properly. 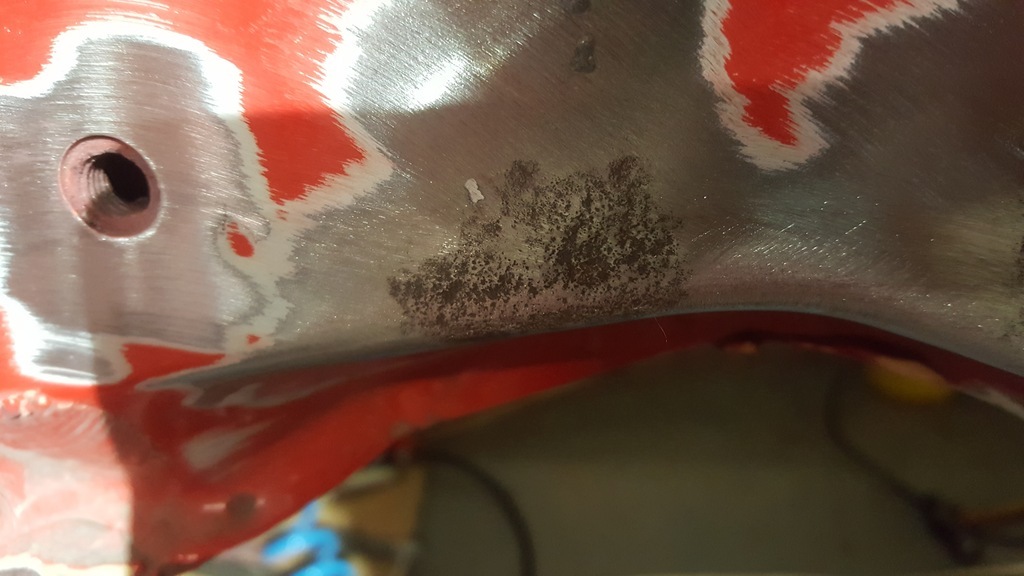 The next task was to make up a plate for the nearside chassis leg. This side is less effected by stress cracks but as the engine's out why wouldn't you? 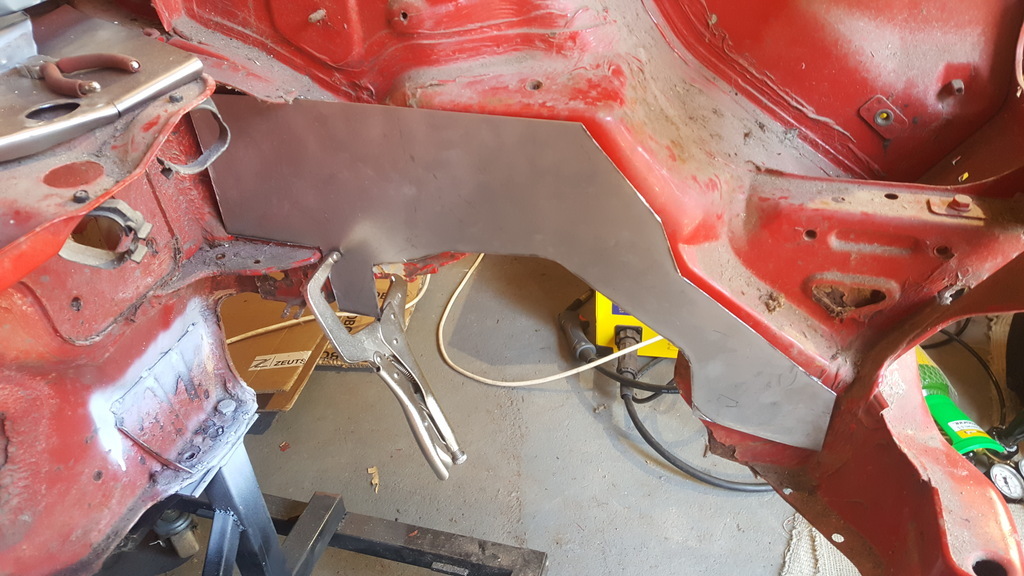 Much cutting, shaping drilling and welding later, I'm quite pleased with the fit. I've left the bottom edge free at the moment as it will be easier to weld when the shell is on the spit. 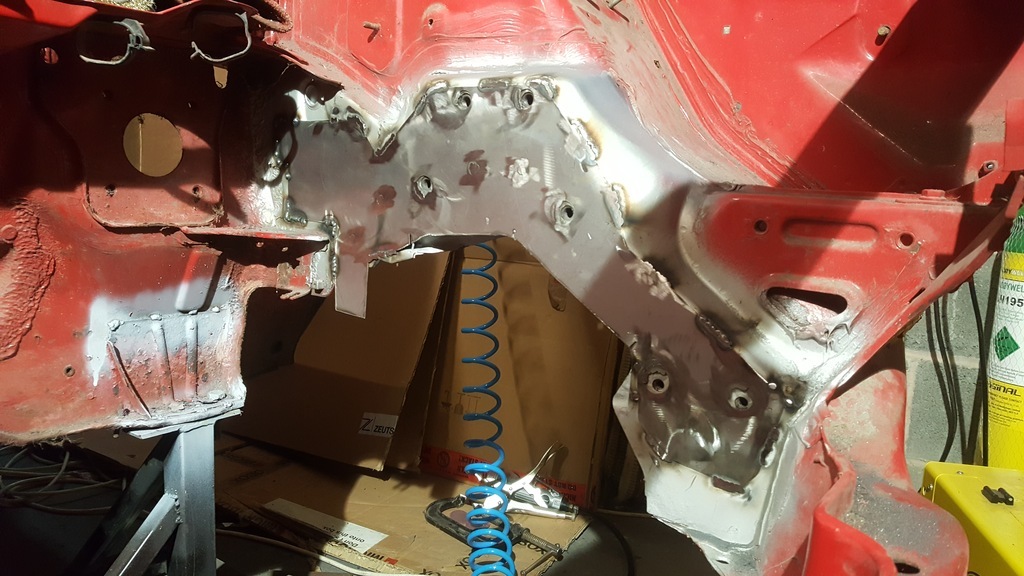 |
| |
|
|
|
|
|
Sept 9, 2021 13:01:33 GMT
|
IT was always my intention to build a spit/rotisserie/tilt frame etc. I only want it for this one build so don't need a fully adustable fancy one, just something that allows me to get to the underside of the shell easily. I benchmarked a few online ones and while well priced I was sure I could build one for less. I priced up steel online but was pleasantly surprised to find my local steel stockist was much cheaper. The materials came in at about £80 all in. 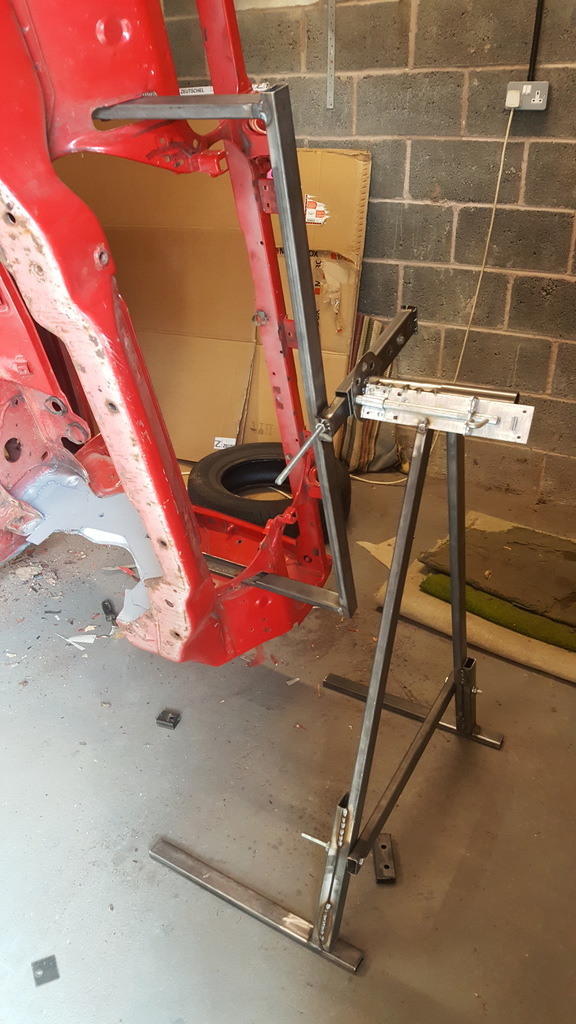 There's an oversized sleeve attached to the pivot shaft through which the bumper frame slides. With an M10 bar and captive nut, I can adjust the height so can put the shell on and off on my own. Then there's enough adjustment to balance the shell so I can rotate it with one finger. 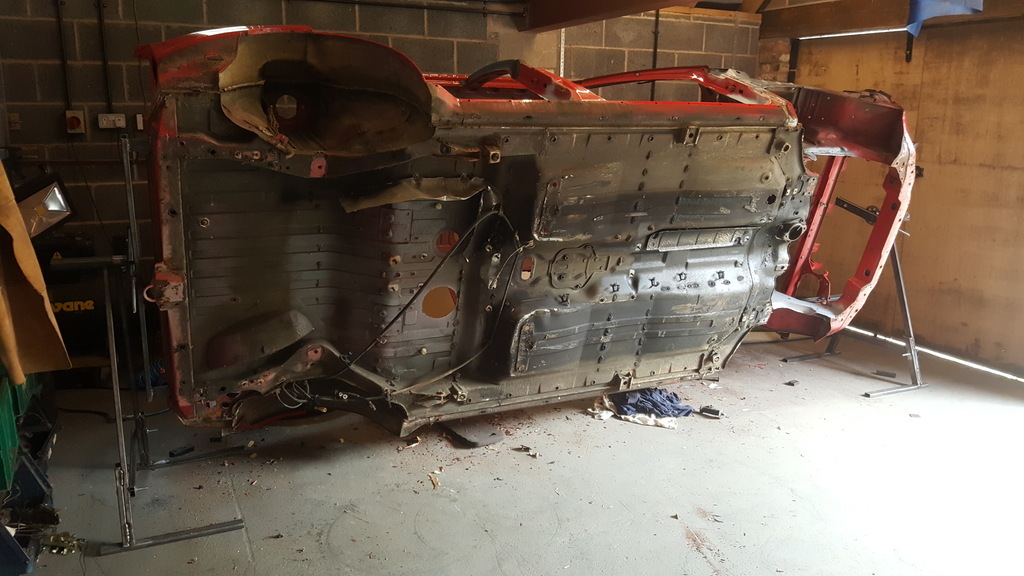 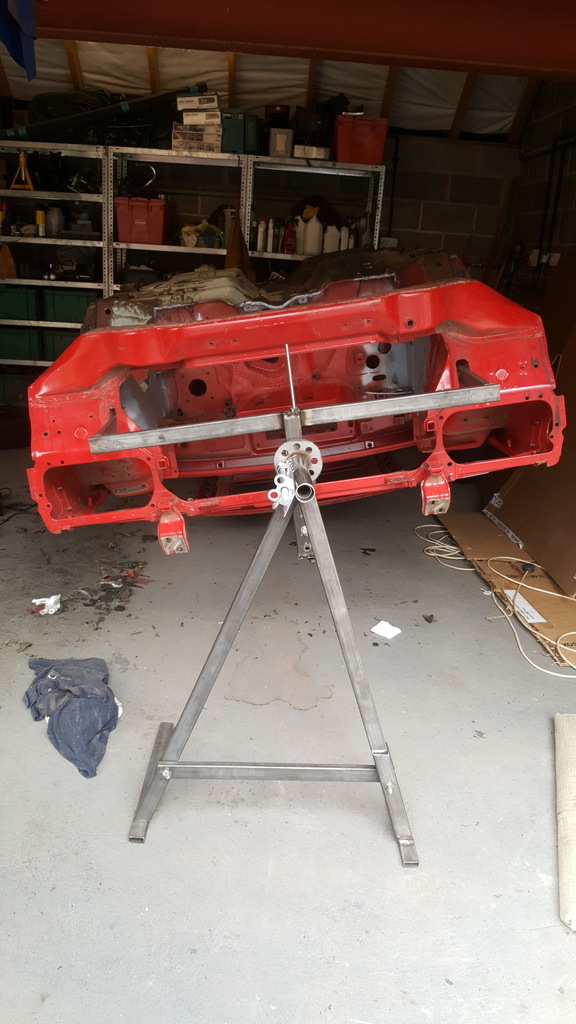 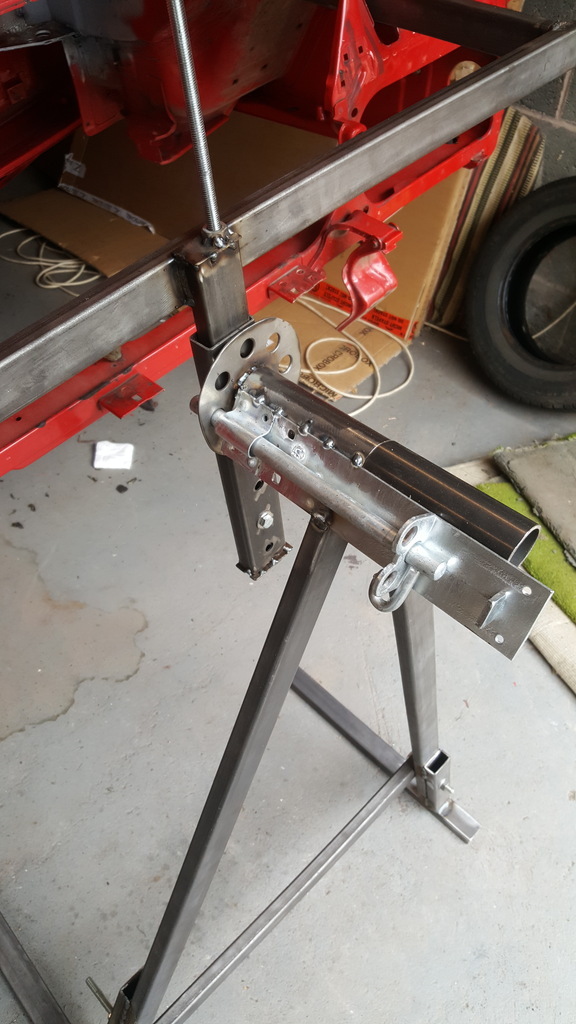 A simple gate bolt locks the rotation in place. I decided to use 40 x 20 x 2mm rectangular section. If I did it again I'd go a bit bigger as it does rock a bit. Also, I'd put in more holes in the circular lock plate to give me more options on positioning but get's the job done and means I can now start to strip the underseal off. |
| |
|
|
|
|
|
Mar 20, 2024 13:18:07 GMT
|
I can't belive it's been 2.5 years since the ![]() last update.......don't hold your breath for loads of progress. 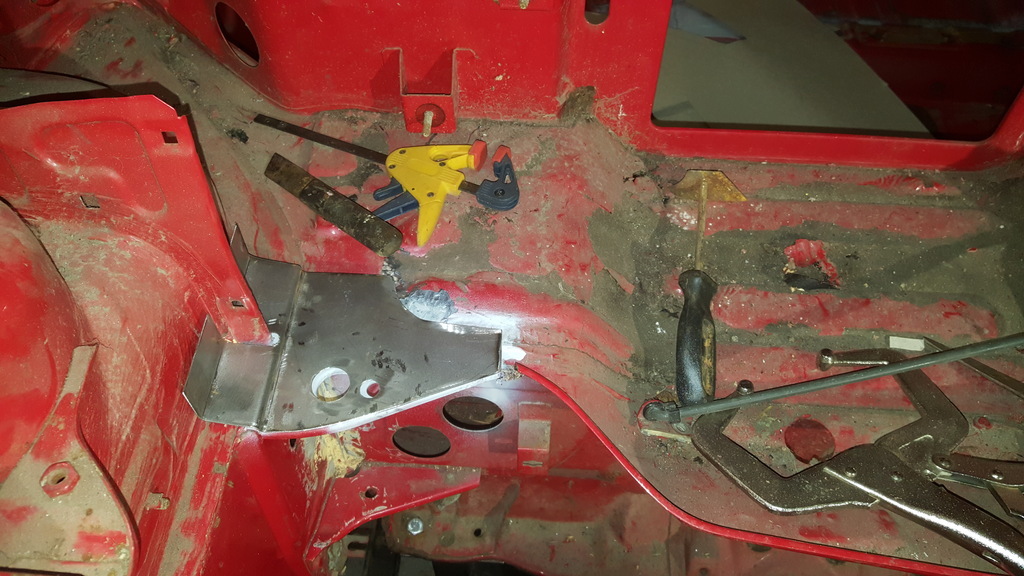 Still been plating up around the A post which is a major weak spot with these cars. 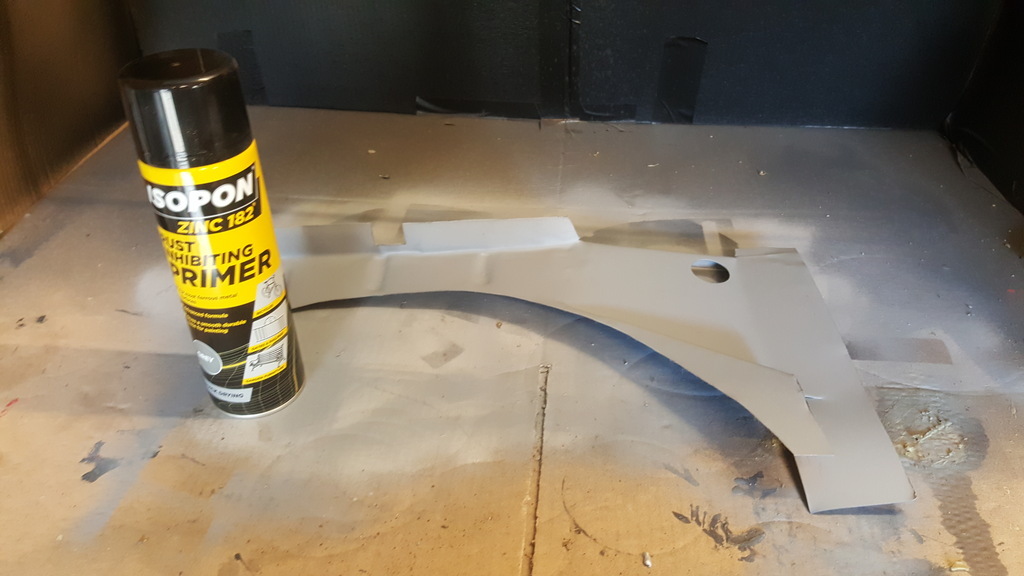 I've tried various zinc-rich primers but am finding the Isopon Zinc 182 gives the best adhesion 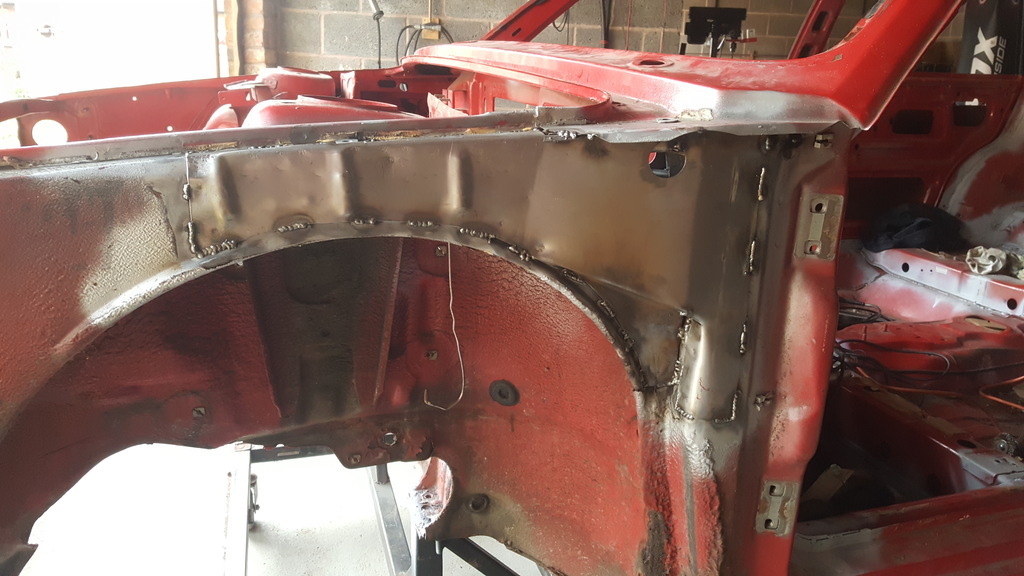 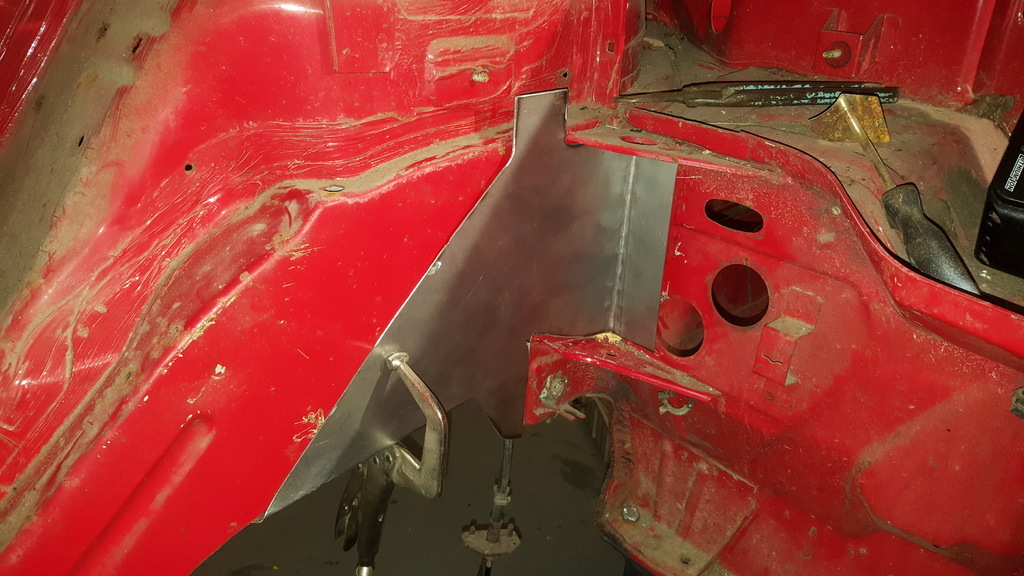 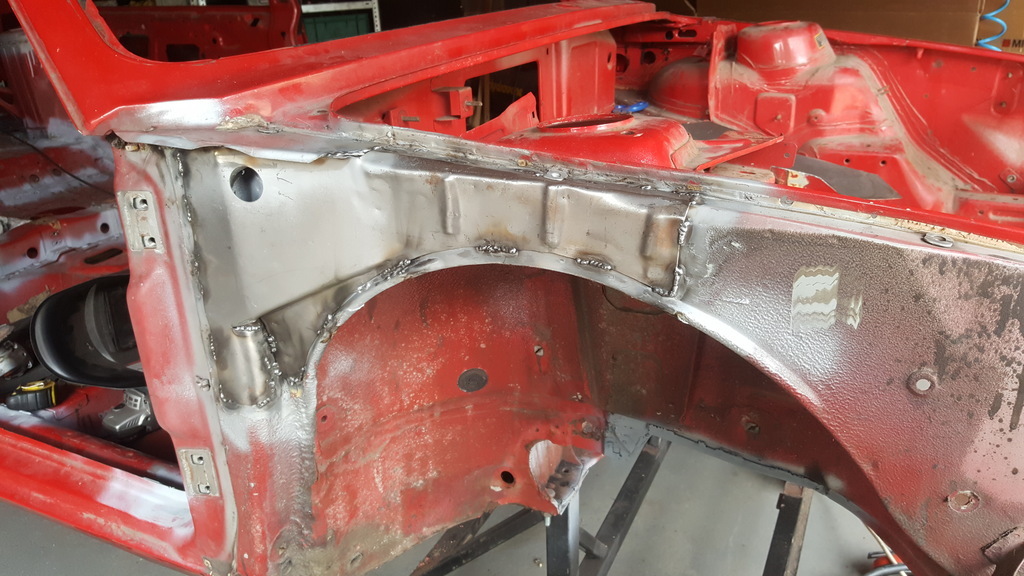 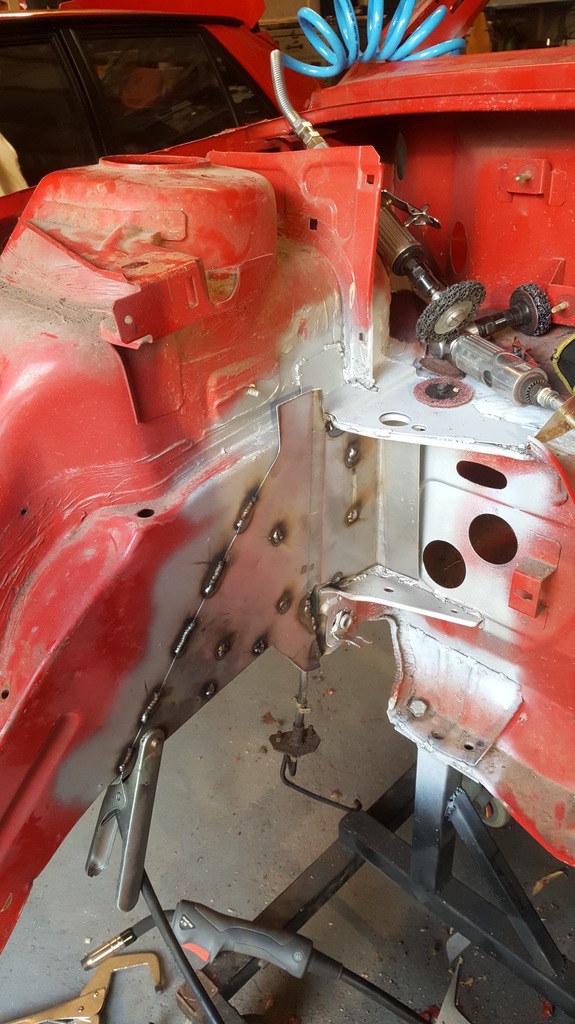 Inner and out chassis legs have been plated and everything that's been welded up gets a good couple of coats of 182 to give it some protection. |
| |
Last Edit: Mar 20, 2024 13:19:44 GMT by micromoose
|
|
|
|
|
Mar 20, 2024 13:33:48 GMT
|
Blimey! Have you been hibernating?  |
| |
|
|
|
|
|
|
|
Mar 20, 2024 16:43:08 GMT
|
|
So good to see this pop up again!
Still my all time favourite car - in the best colour too...
|
| |
|
|
|
|
|
|
|
Blimey! Have you been hibernating?  Hahaha! Life got in the way for a while and I've got the other one to use, so there's a reduced incentive to get this one finished. The plan is to get the underside painted this summer then send it off to have the roof skin replaced by someone much better at welding than me. |
| |
|
|
|
|
|
Mar 27, 2024 14:07:33 GMT
|
Woohoo! Glad to see this car again  I've experimented with blowing 2-pack primer through a waxoyl gun into cavities like that. Seems to work pretty well provided it's thinned down enough. Chews through paint, but you can feed the little tube right into boxed sections like that and actually paint the inside. |
| |
|
|
|
|
|
|
|
Once on the spit, I could set to stripping the underside. The original factory rubberised coating was in really good condition so I started with a multi tool fitted with a non-serrated blade. 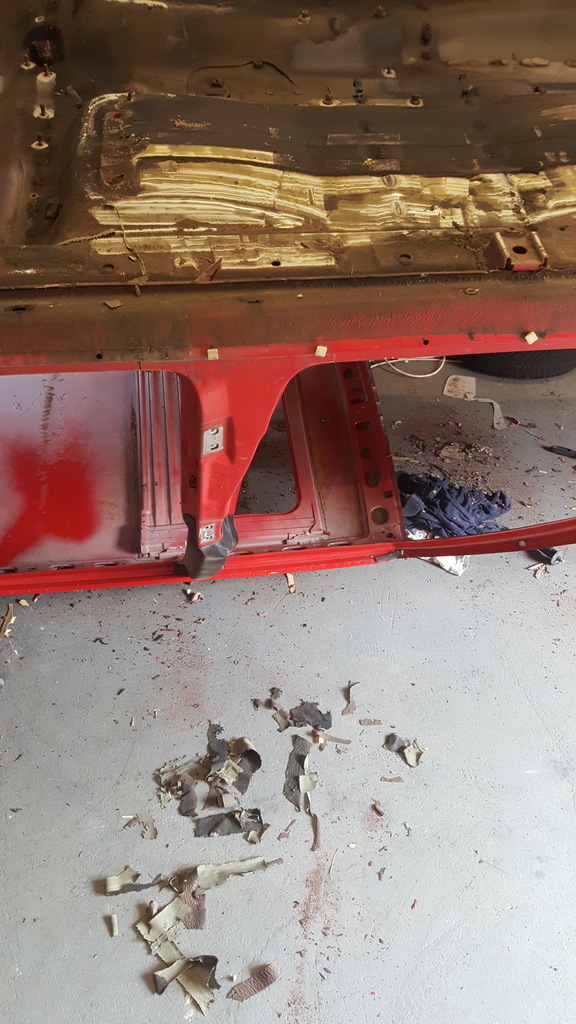 Moving onto wire wheels then clean & strip disks when appropriate. 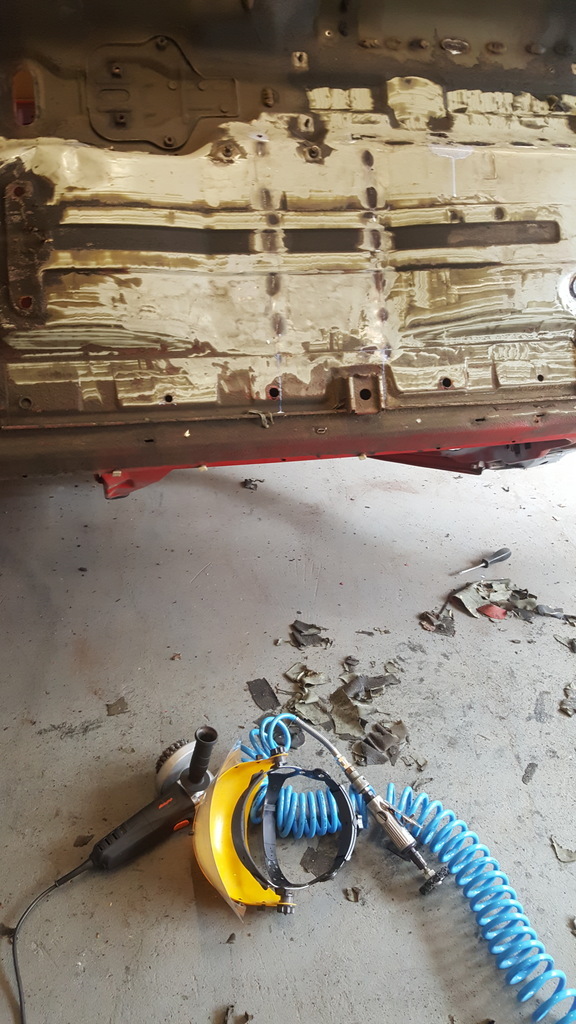 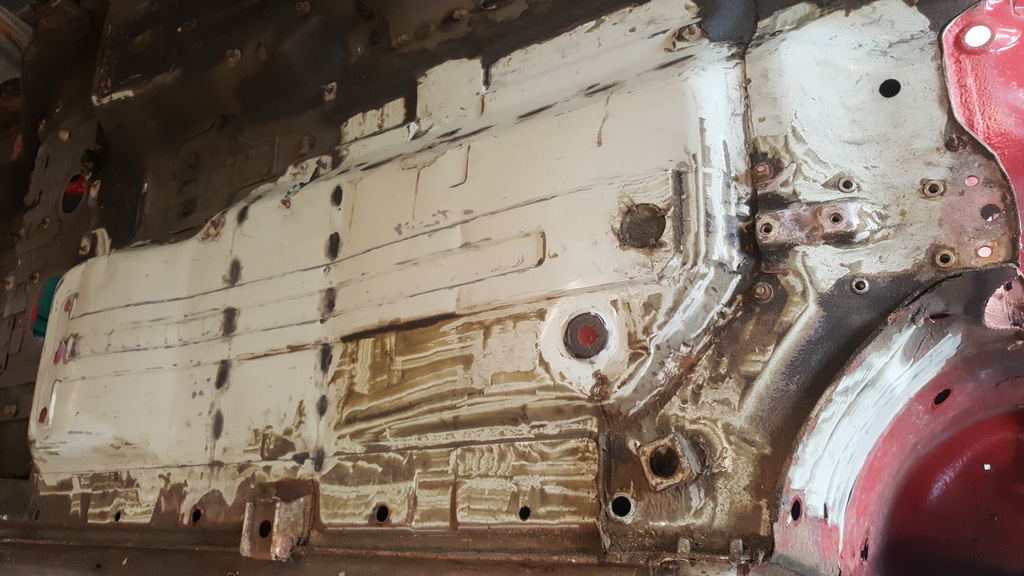 Finishing off with some panel wipe left me with the original paint which again, looks in really good nick. 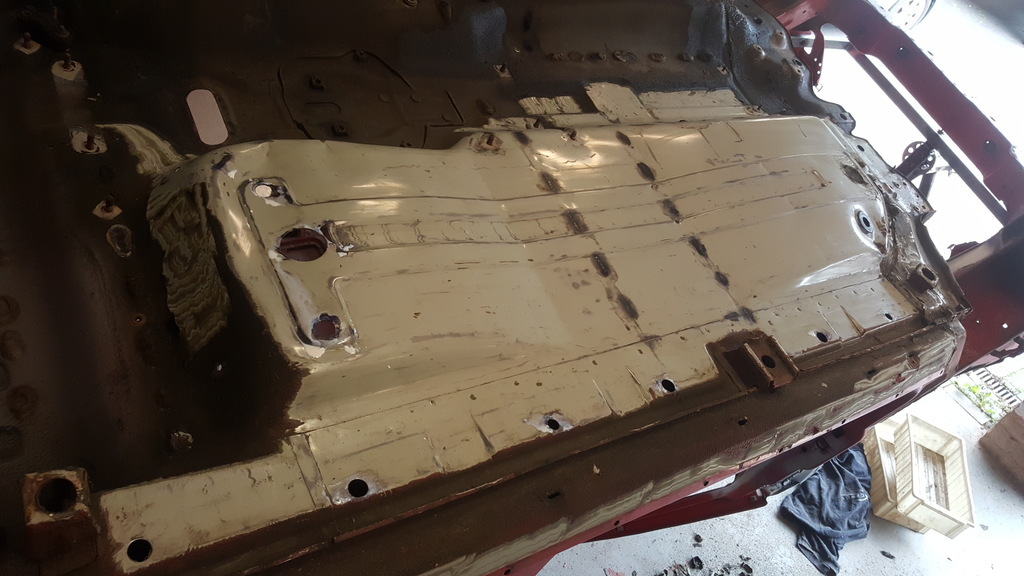 Now I could get some zinc primer over the penetration marks left from when I'd stitched the seams inside. 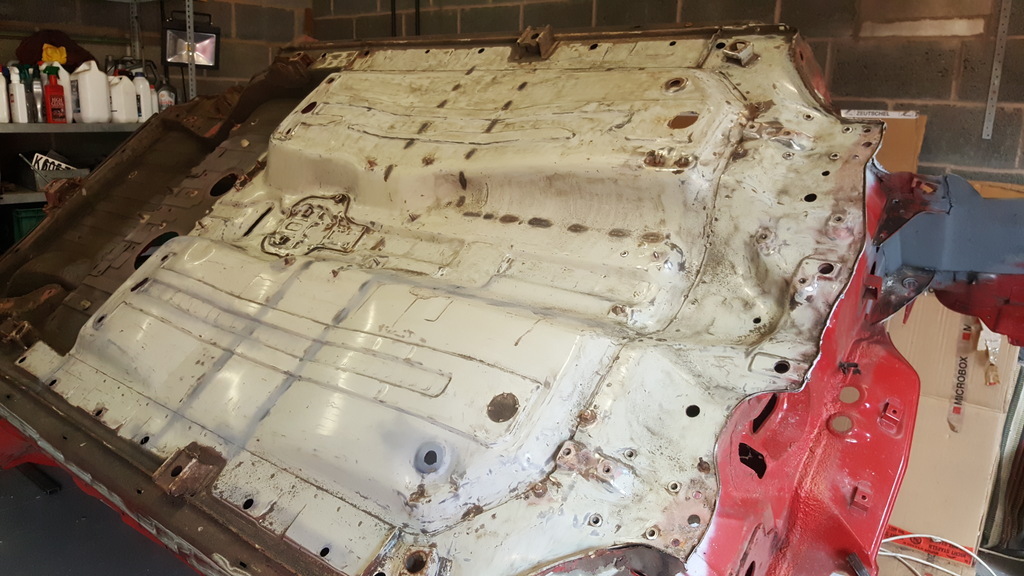 Lastly, I covered the stripped areas with more zinc primer just to afford some protection until I come back to the area. 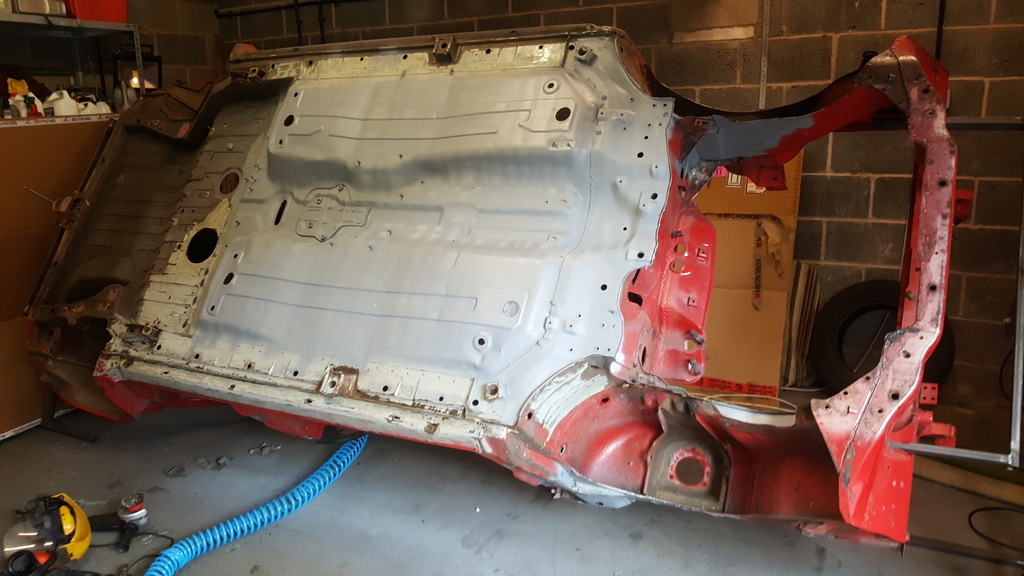 |
| |
|
|
|
|
|
Oct 25, 2024 12:25:54 GMT
|
Time for another sporadic update...... I finished stripping the factory rubberised coating from the underside.. 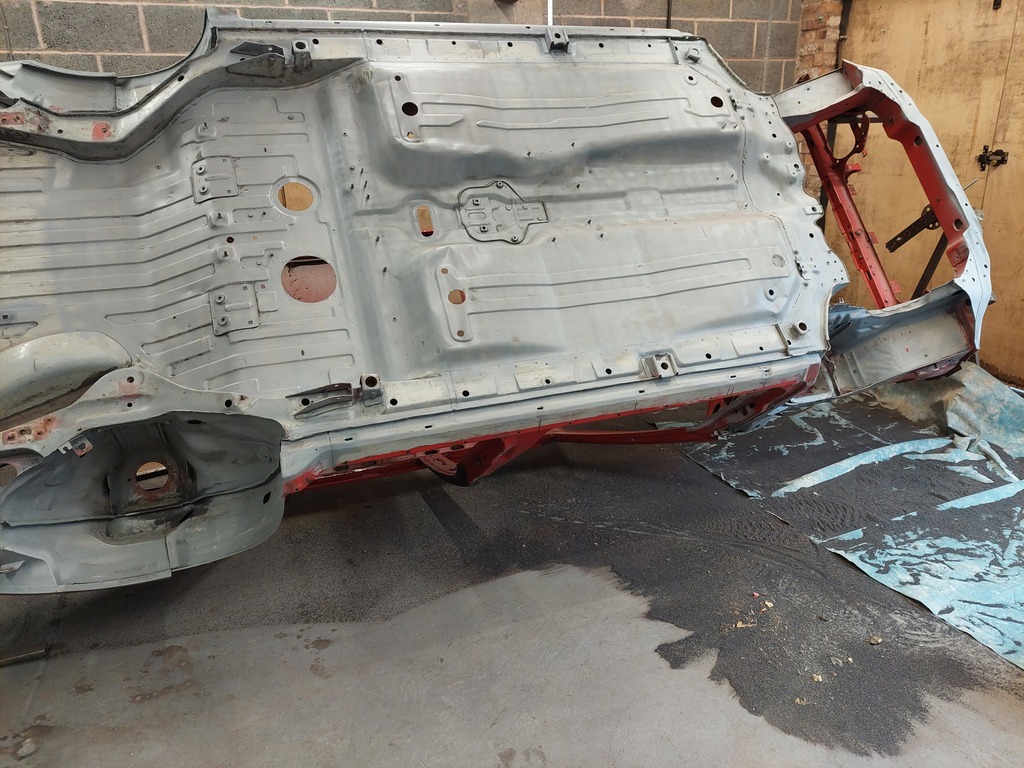 The underside looks really good with no repairs necessary except for a small patch on the rear crossmember which is a know spot for them to fail. I then turned to stripping off the sound deadening in the cabin 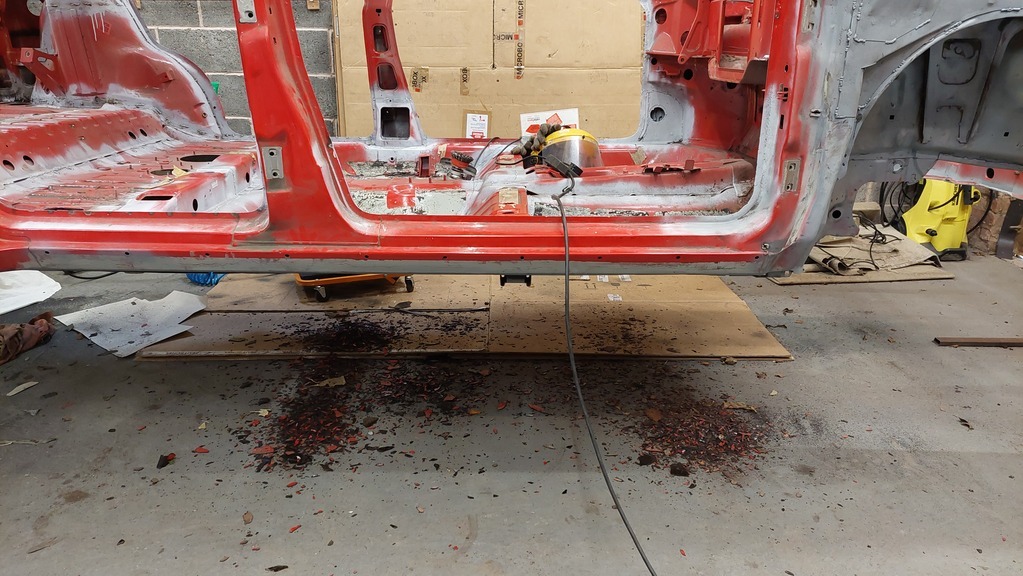 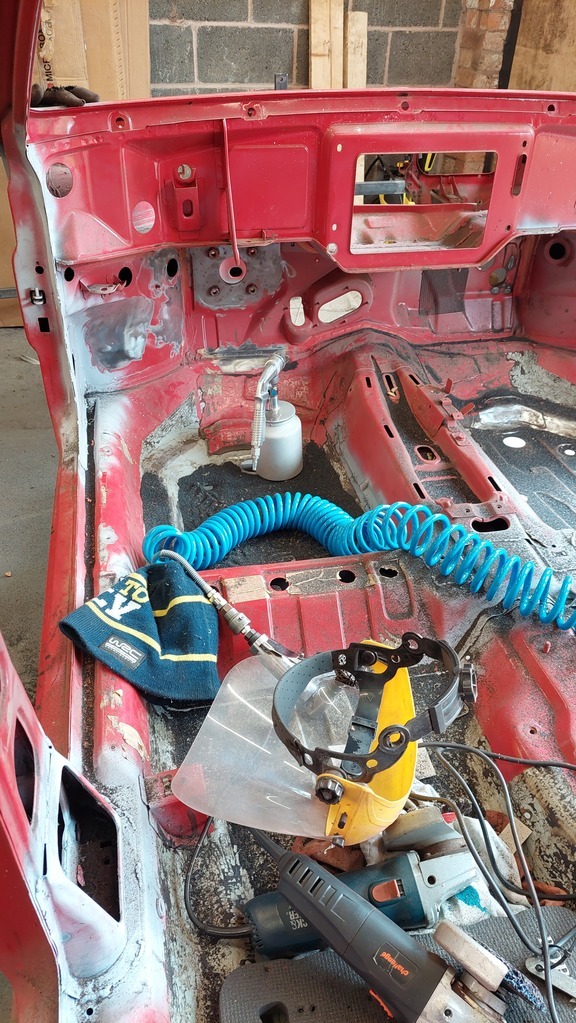 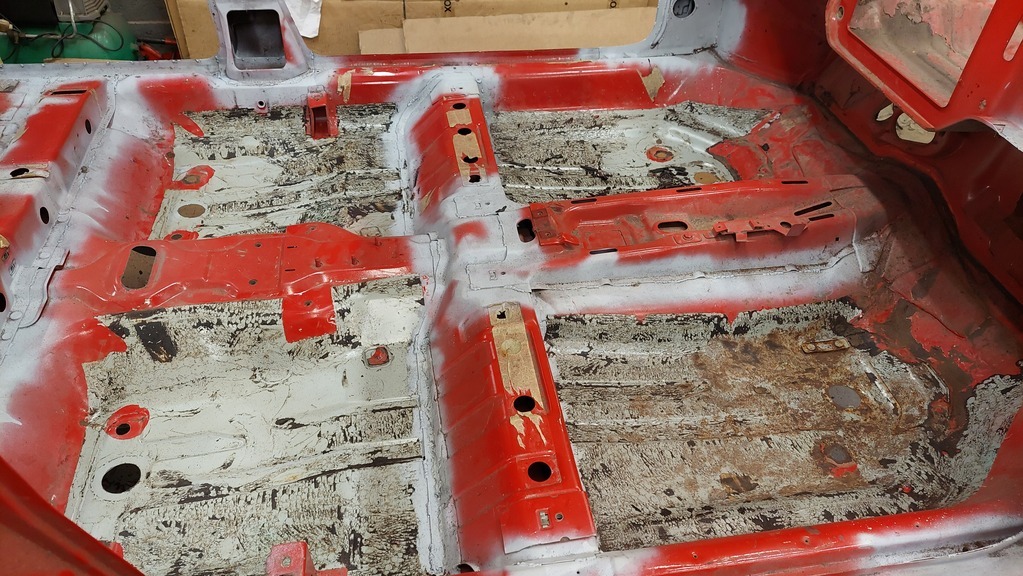 It didn't need to come off but I wanted to see underneath it to make sure it wasn't hiding anything but again, it all looked good. |
| |
|
|
|
|
|
Oct 25, 2024 16:57:28 GMT
|
|
Progress is progress.
I like these cars but they are amazingly not well known now.
"Everyone" want a Scoobie or and Evo lol.
Personally Id love an Alfa 155 Q4
Bookmarked this now.
|
| |
|
|
|
|
|
Oct 25, 2024 21:37:15 GMT
|
|
Great to see progress on this thing!
I've saved a decent chunk of weight out of my X1/9 so far replacing old style sound deadening with dynomat. 1.2kg per footwell, and it'll function better than the half cracked, half loose stuff that was there before.
Also, just had another look at your rotisserie design. Love the gate latch holding it in position. I had a little 6mm pin on mine and it wasn't really up to the job. The fine height adjustment with a threaded bar is clever too.
|
| |
|
|
|
|
|
|
|
Progress is progress. I like these cars but they are amazingly not well known now. "Everyone" want a Scoobie or and Evo lol. Personally Id love an Alfa 155 Q4 Bookmarked this now. I had a widebody 155 2.0TS and it was a stunning car. In a world of Moneos and Vectras is was like being dressed in a sharp suit everywhere I went. The 2.0 Twinspark was a peach of an engine too |
| |
|
|
|
|
|
|
|
Great to see progress on this thing! I've saved a decent chunk of weight out of my X1/9 so far replacing old style sound deadening with dynomat. 1.2kg per footwell, and it'll function better than the half cracked, half loose stuff that was there before. Also, just had another look at your rotisserie design. Love the gate latch holding it in position. I had a little 6mm pin on mine and it wasn't really up to the job. The fine height adjustment with a threaded bar is clever too. Yes, the plan is to use dynomat after I've sprayed inside. Thanks for the comments re the rotisserie - it came from hours of looking at other peoples design and amalgamating them - there's nothing original there! I tried M10 bar initially but it wasn't up to the job. I've damaged 2 M12 bars so they're only just good enough. What it does mean is I can get it off the dollies and onto the spit on my own in less than 30mins. Once it's adjusted to the right height, I can rotate it with 1 finger which is handy. |
| |
|
|
|
|
|
|
|
|
Yeah I remember fitting my a-frame being lightly sketchy involving winching it up to the ceiling and shimmying the frames on each end. I also balanced it pretty well with just the bodyshell, but that got out of whack when I fitted the chassis at the same time. The fine height adjustment would have been welcome then!
|
| |
|
|
|
|


