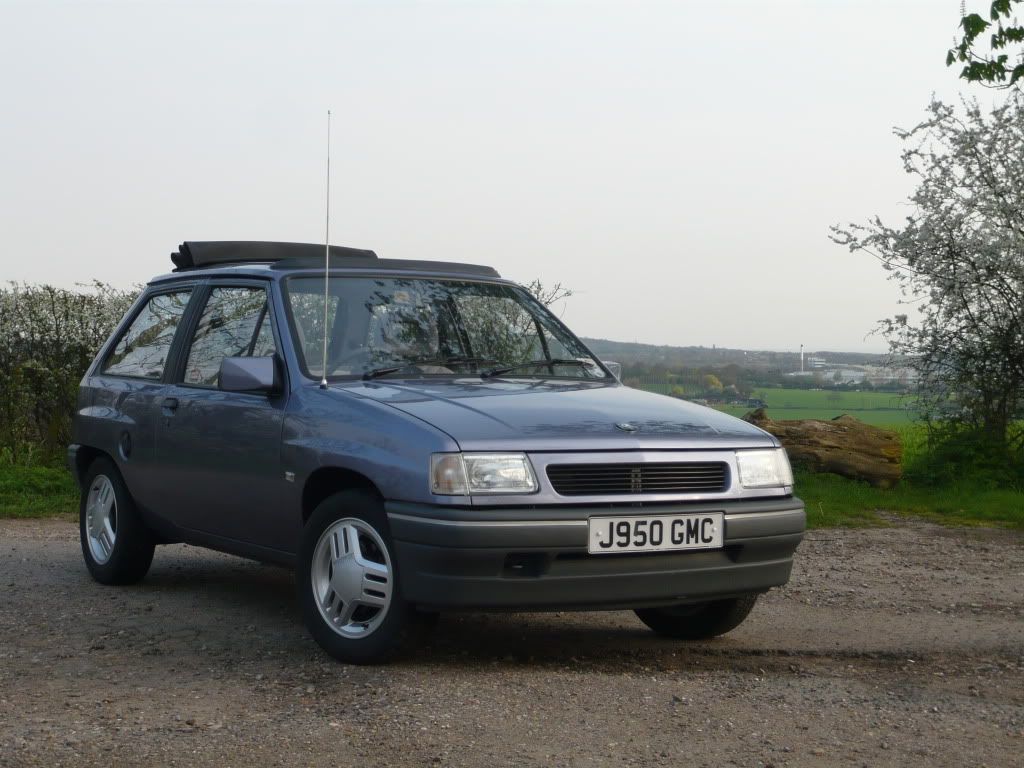
Hi everyone, so what happened to project silver? Life took a few twists and turns and I had to mothball it. However it's back on track and time for a long overdue update.
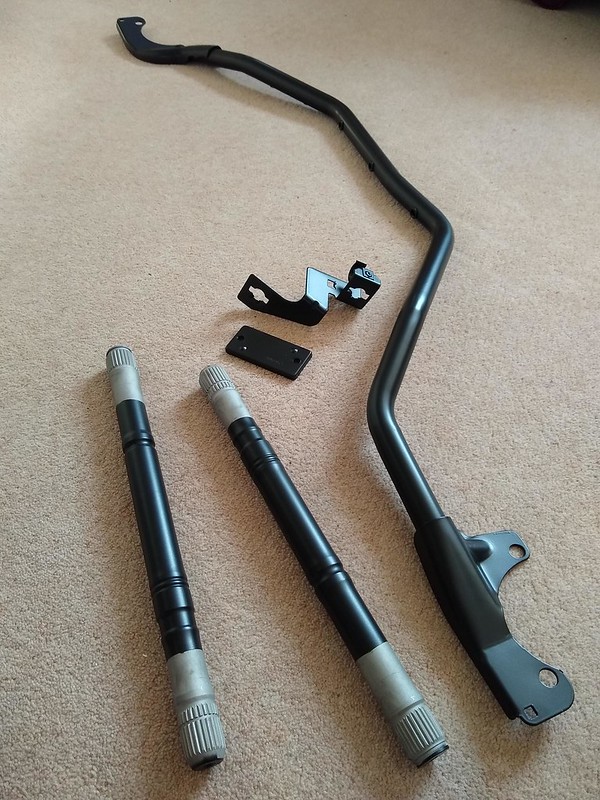
Rebuilding the driveshafts was next on the list. They came back from powder coating looking great, along with the strut brace and battery cable bracket.
Driveshaft parts were a little tricky to obtain but managed to source GKN tripod joints, left hand inner boot and outer cv boots. Went for outer CV's made by SKF due to availability and had no choice other than autofren aftermarket for the RH inner boot. The tripod joints have small needle bearings and it's a bit of a minefield which grease to use. I've played it safe and gone for the GKN grease on these inner joints just to avoid any mistakes.

SKF outer boot and clips on the left vs GKN on the right supplied with oetiker stepless clips. The GKN are a tougher more plastic construction and the stepless clips provide a nice seal all around the boot.

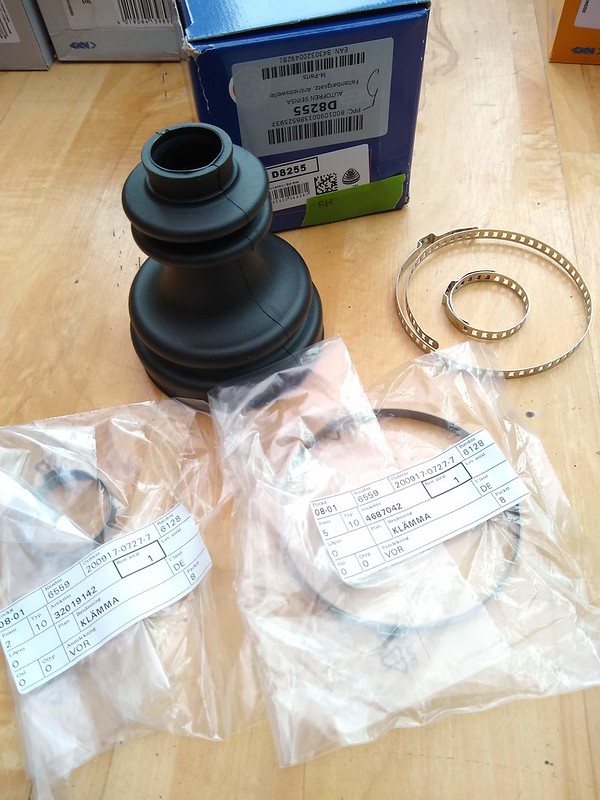
The aftermarket boot came with some cheap universal boot clips seen top right in this picture. Using the Saab part numbers and Saabits I managed to get some oetiker clips which seem hard to source but miles better quality.
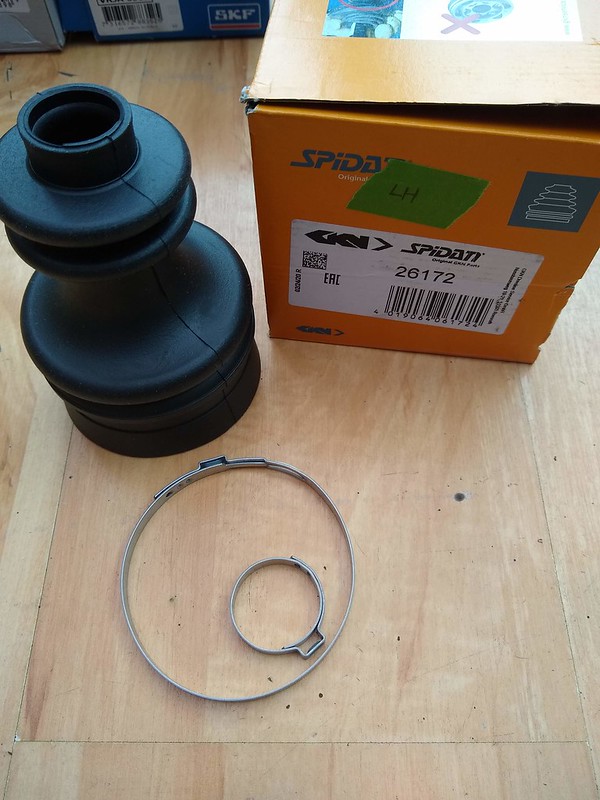
GKN LH boot comes with oetiker clips.
The tripod joints didn't come with a circlip but one came in the GKN kit. This left me one short and found that this part is no longer supplied by orio. Out came the measuring callipers and ordered some D1400/0240 24mm External Circlip. In this picture the original is on the left, GKN middle and these newly purchased on right. The ears are slightly bigger, but the size is spot on and solved that little issue.

Rebuilt a few driveshafts over the years, but these were an unusually tight fit. Took a few taps to get the outer cv all the way on and clip in the groove.

Grease well worked into the new joint...

CV clip time. The pliers I've had a while and made by Lazer allowing a socket wrench to be used for more leverage.

Can't buy the inner joints anymore but there wasn't any noticeable wear and it got a clean up and paint earlier.
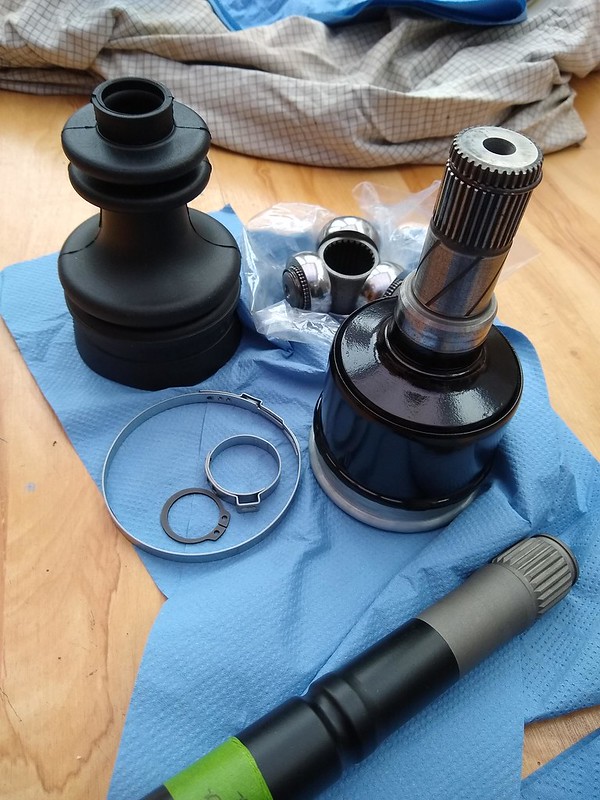
Worked the grease into the new GKN tripod bearings...
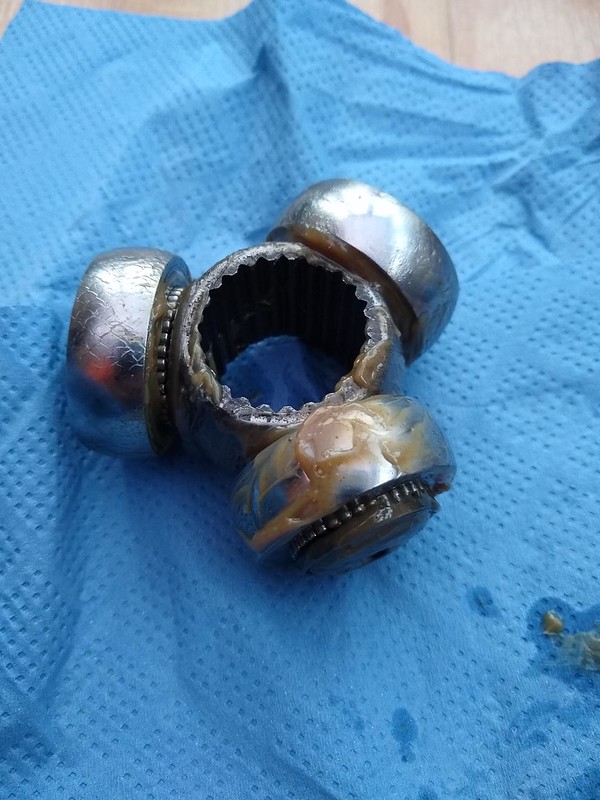
Little persuasion required...

Finished of nicely with the clip...

Required amount of grease measured out...

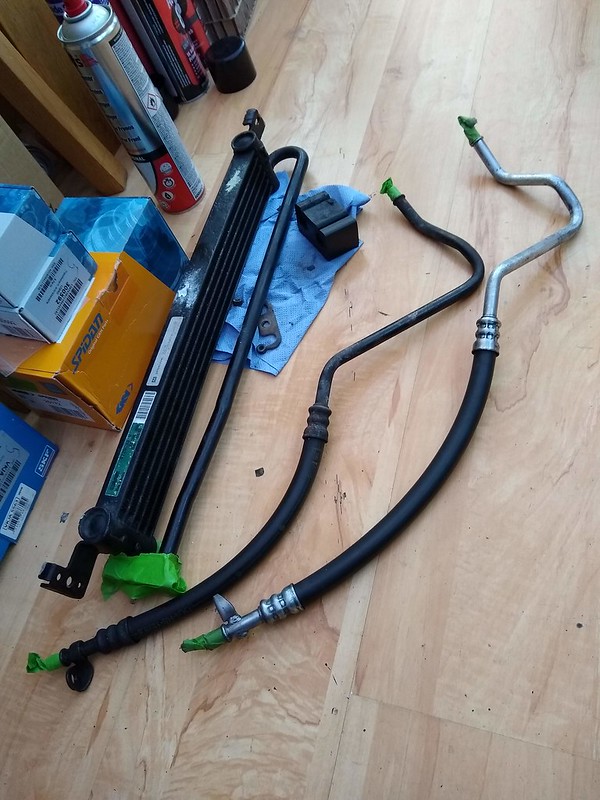
Now at this point you would expect the finished driveshaft pictures, but I wanted to stop the outer cv joints going rusty and give them some paint. Good excuse to paint a few bits at the same time like the oil cooler. The oil cooler had it's own mini project where I mocked up aftermarket ones, even bought one from a 9-5. However for simplicity and to get the car running I'm going with standard for now. Because these are crazy money to buy new I've flushed this and cleaned it up.
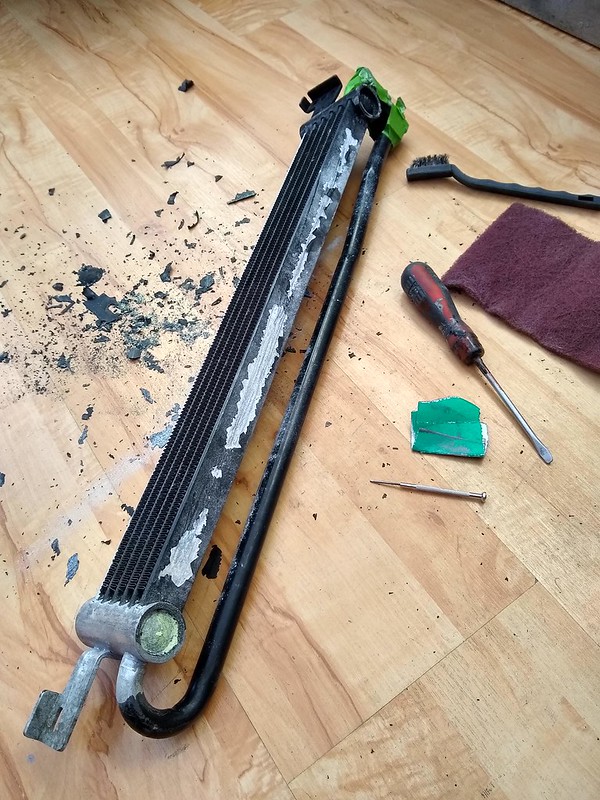
Mixture of heat and aluminium oxidation means the paint just lifts on these.
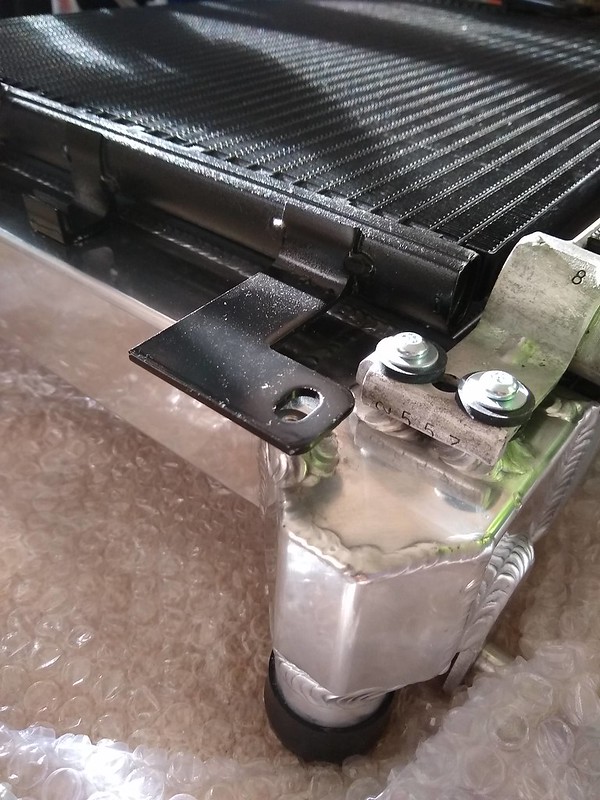
Quick mock up on the do88 radiator showed the oil cooler left hand bracket needed a slight trim.
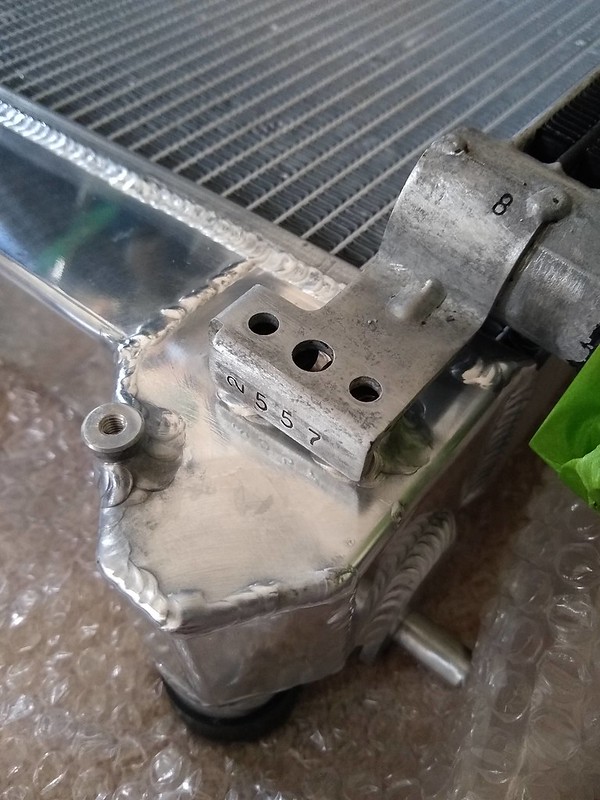
Removed the condenser bracket the do88 instructions tell you about and the oil cooler fitted and was ready for paint.
Spot the driveshafts also ready for paint.

Bit of etch primer and some black brake caliper paint.

Bit over the top painting the outer CV joints but I couldn't resist.

Fitted the innner driveshaft with the engine so the alternator could be fitted and whole lot dropped in. However with the subframe on this left no room for cv clip pliers which was a mistake.
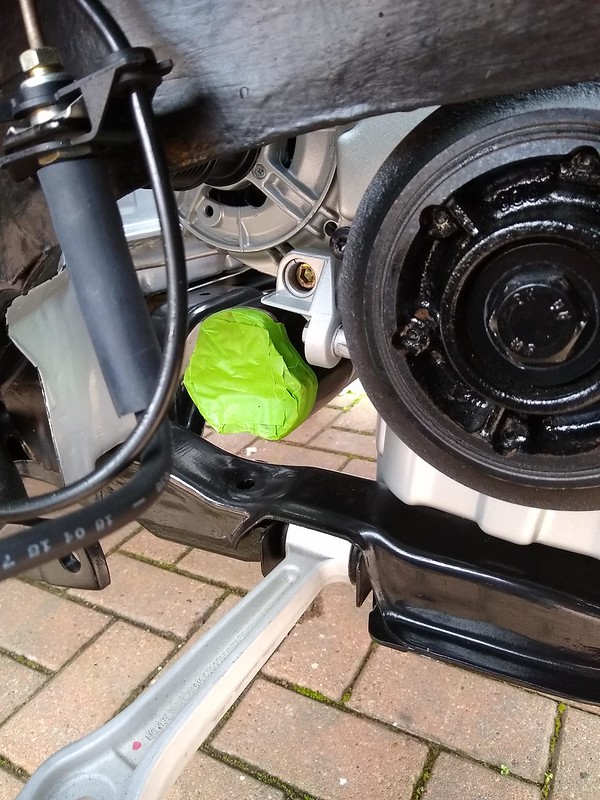
Alternator off again I had enough access from the top with the cv clip pliers. The workshop manual makes sure you get the clip in the right place due to the shape of the joint. I'd already clamped one end of that inner joint and luckily it was in correct position. If anyone does similar I would clamp up that shaft off the car and fit it as one complete unit.
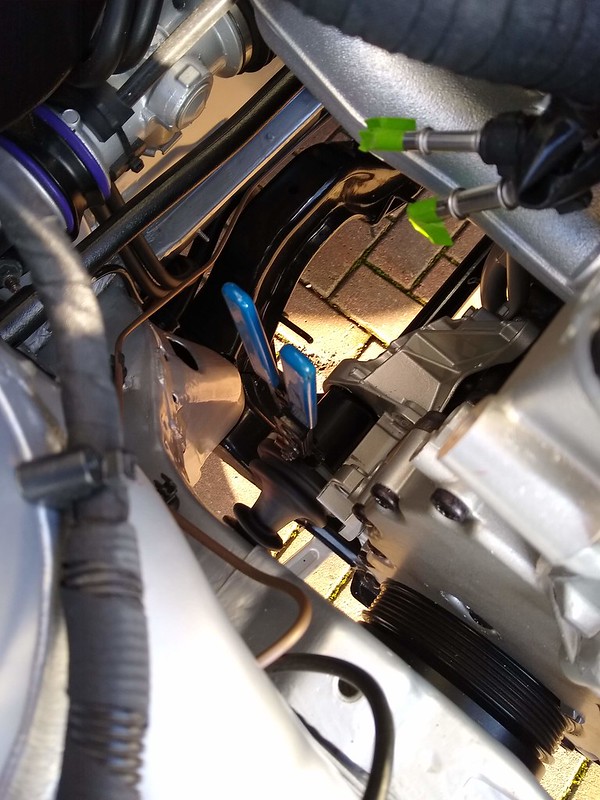
Drop links were next on the list.
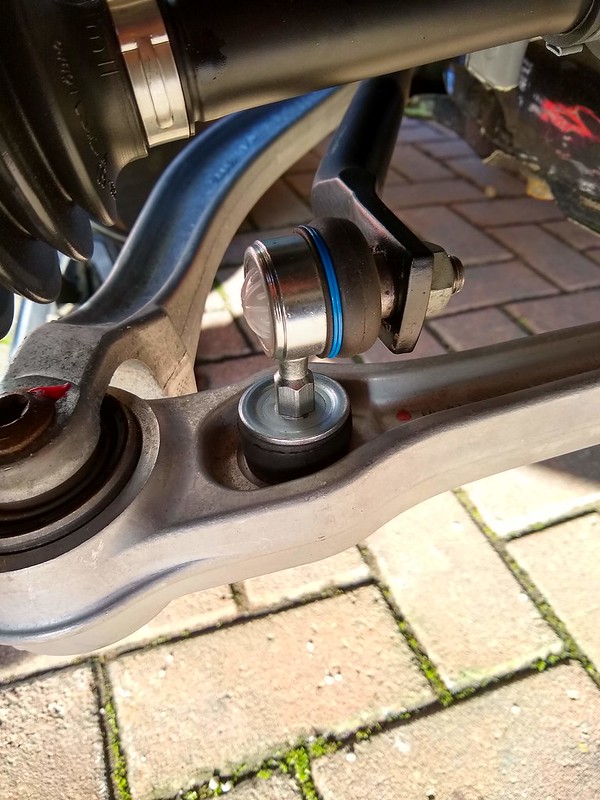
Wanted to get the clutch bled to confirm slave cylinder was good and engine was staying in the car. I have a gunson eezibleed but just use it for pushing air and keep a closer eye on the fluid level in the cars brake reservoir. Kept the fluid level topped up and then when all was going well got loads of air again. Quick look across and fluid level looked good. Scratched my head for ages before realising the reservoir has a separate chamber for the clutch and I just needed to top up the fluid again. Photo of the schoolboy error.
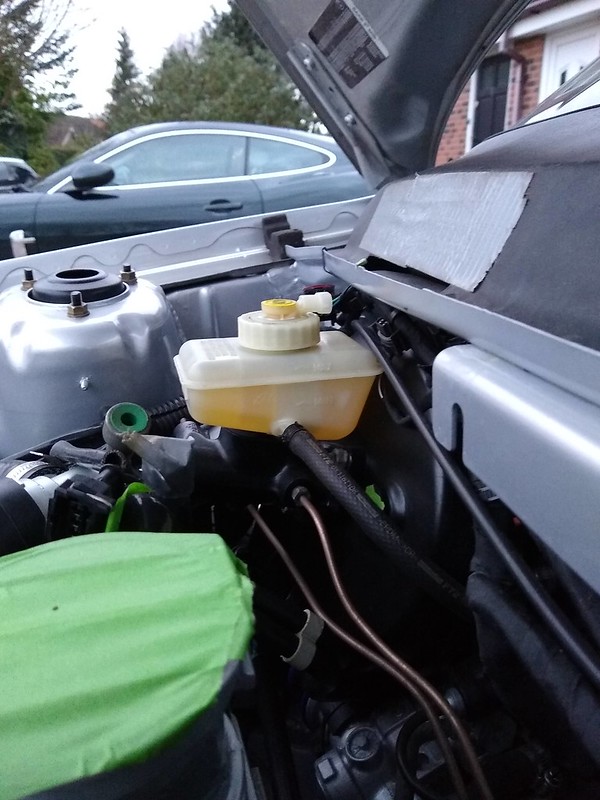
After getting a good clutch pedal I checked it next day and it was spongy which had me thinking the worst. Closer inspection showed the issue was the bleed nipple wasn't sealing despite swinging off this thing in terms of tightening. This was a genuine new pipe and end connection but the machining looked a bit rougher on the new replacement. I swapped the ends over with the old one which finally sealed and passed the pressure test.

Old end you can't see the machining marks and bleed nipple sealed better.
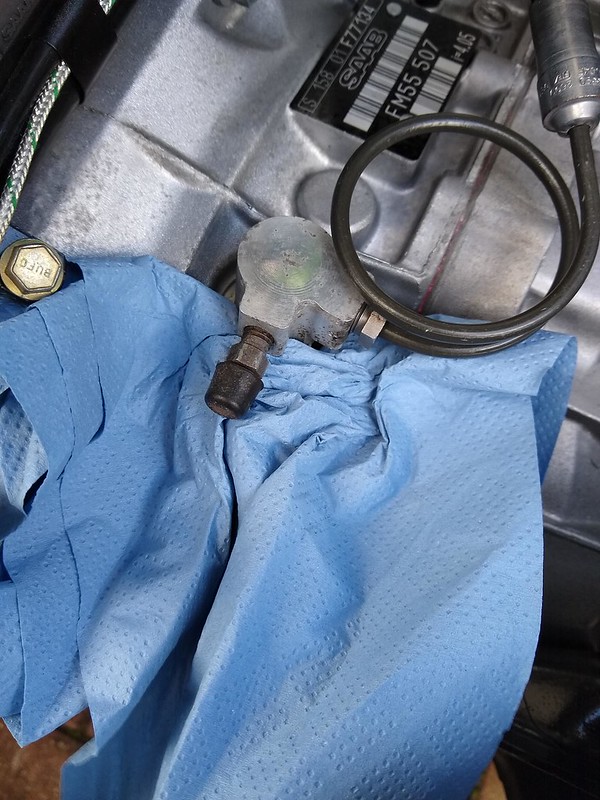
The pressure test was just leaving the clutch depressed for a few hours and checking the bleed nipple with blue roll for wetness. Left the clutch depressed over night to encourage any tiny bits of air back into the reservoir. Very good pedal after that and clutch was working great testing it and turning the wheels over.

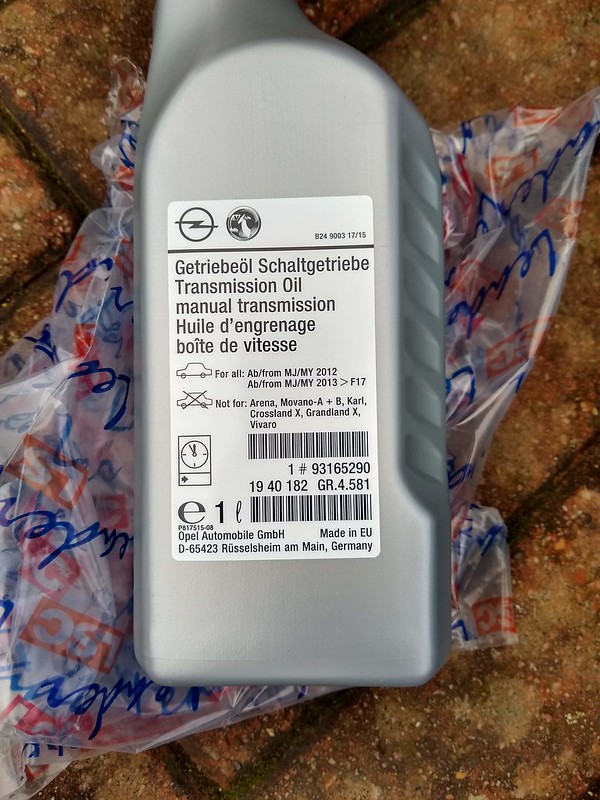
Fluids time and think it was 1.8 litres until it reached the level plug. Was concerned the car would be sitting over winter and wanted some fluid in the new box just to keep it good inside.

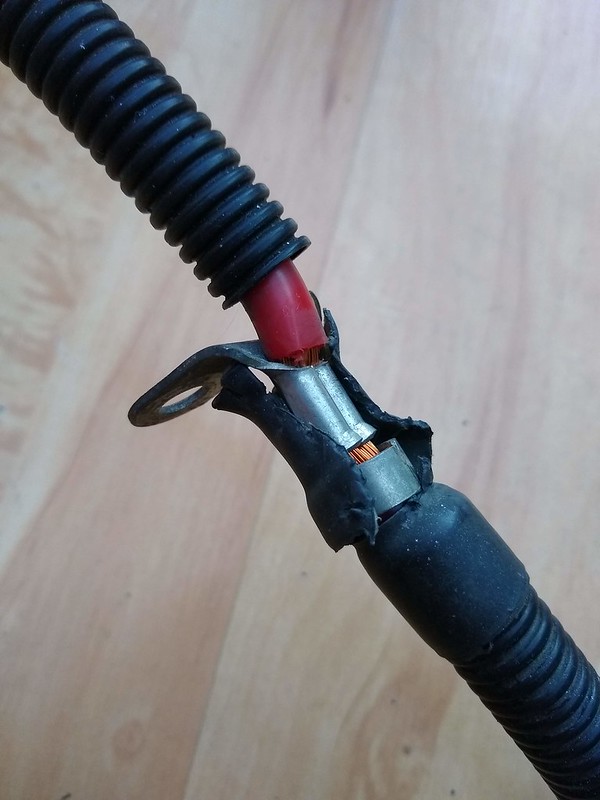
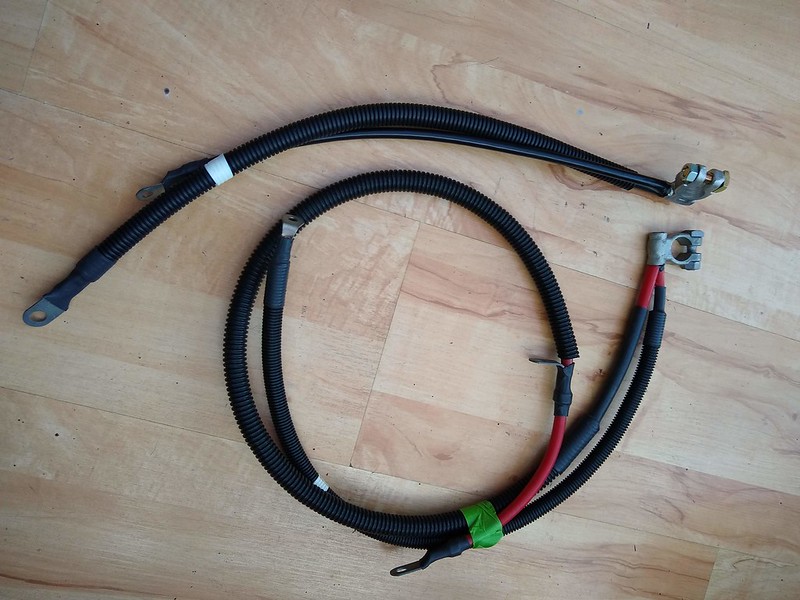
My battery cables were past their best, especially around the two into one crimp joint where some cable is exposed.

Looked at building up cables in a similar style but the inline eyelet was proving tricky to source.
The positive cable is silly money in the UK new but managed to find one in the Netherlands for a good price. The new ones also solved the mystery AK stamp on the clamps which stands for AutoKabel. Worth a mention in case someone wants to try sourcing these directly from the manufacturer in future. Gave the small exposed sections and clamp ends a coating of liquid insulation tape to prevent future corrosion.

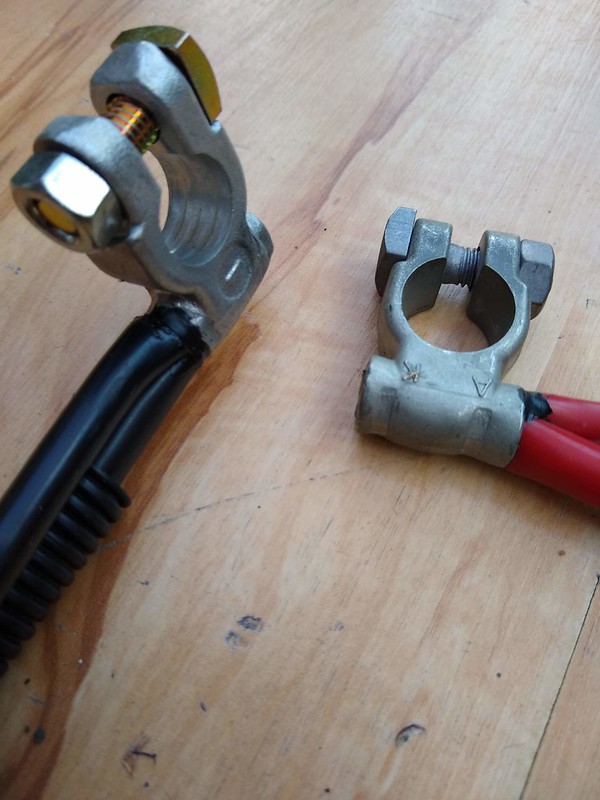
Looking good, ready to fit
Realised Saab changed the battery cable clamp between the 1999 donor and my 2000 build. This meant I had got the wrong one powder coated!
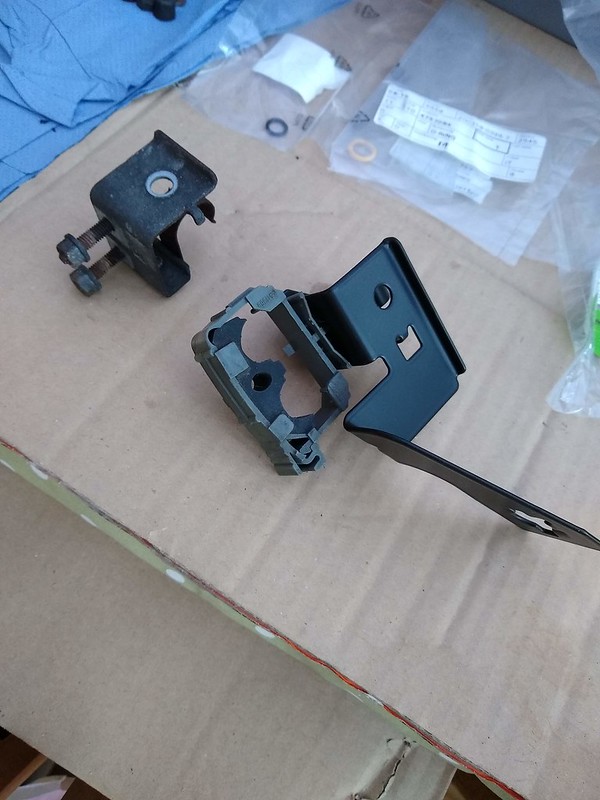
Soon fixed that with a clean up and paint. Treated the radiator retaining clamps to the same treatment.

The front aircon pipes needed cleaning up and orings replacing. Saab changed these pipes on the later cars to include this bit that sticks up which acts as a deadleg with a diaphragm in it.

After some research the diaphragm is for noise reduction with the aircon system and people have known these to leak. It also means things get a bit crowded in the engine bay and I decided instead to use the older 1999 version from the donor car. This finishes flush at the aircon pump but meant another clean up and purchase of orings.
Old version not cleaned up yet in this photo but shows the difference between the two.

Aircon pump and pipes installed, I then hit a snag trying to fit the king cobra pipe. It wouldn't fit leaving a gap at the bottom and fouling on the engine mount where the aircon pump mounts.
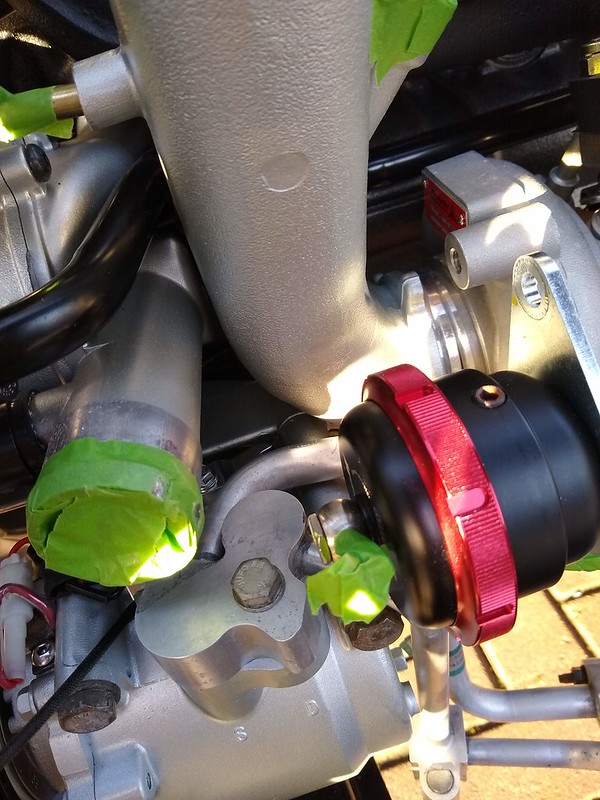
Bit of an oversight with my mockup stages this.

Time for a trim.
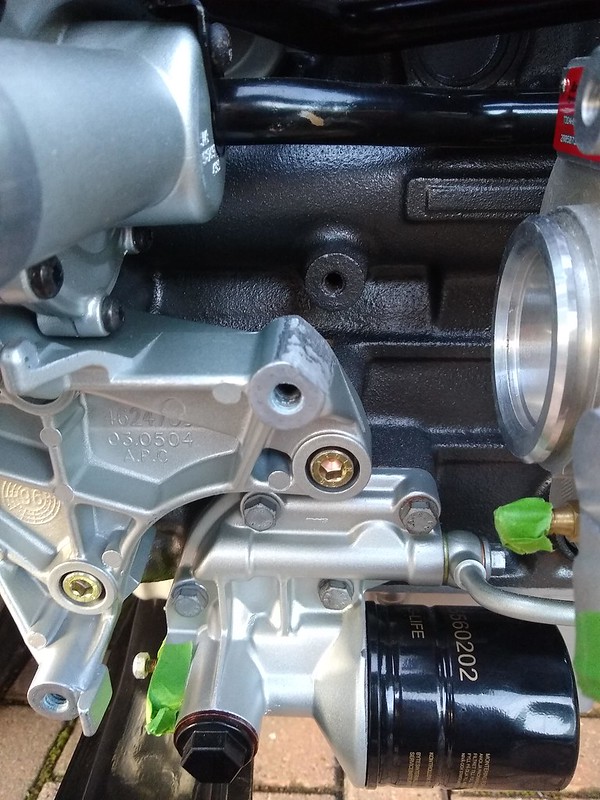
All the clearance.
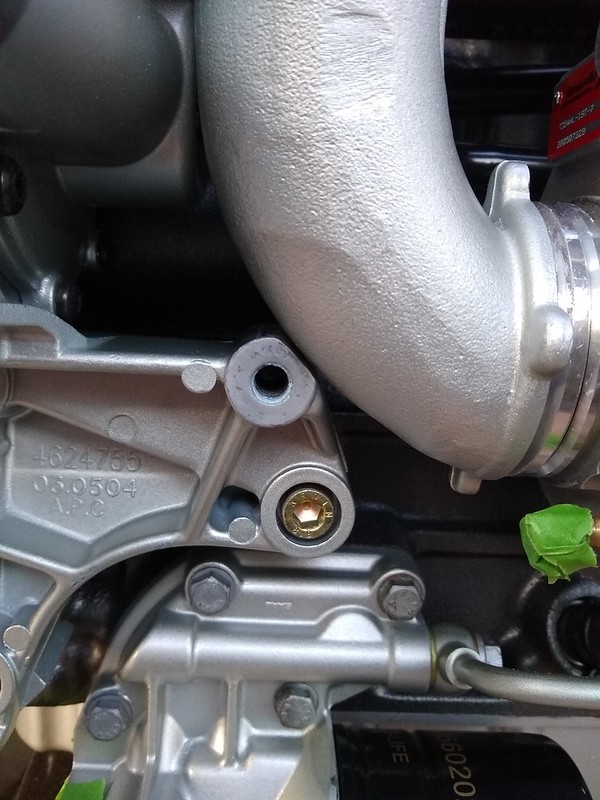
Fitted the APC valve and really like how you can run some silcone lines nice and short with this setup.

Found some Vac line clips of which I could only use the bigger ones. Maybe a bit overkill on the APC but fitted them for peace of mind.

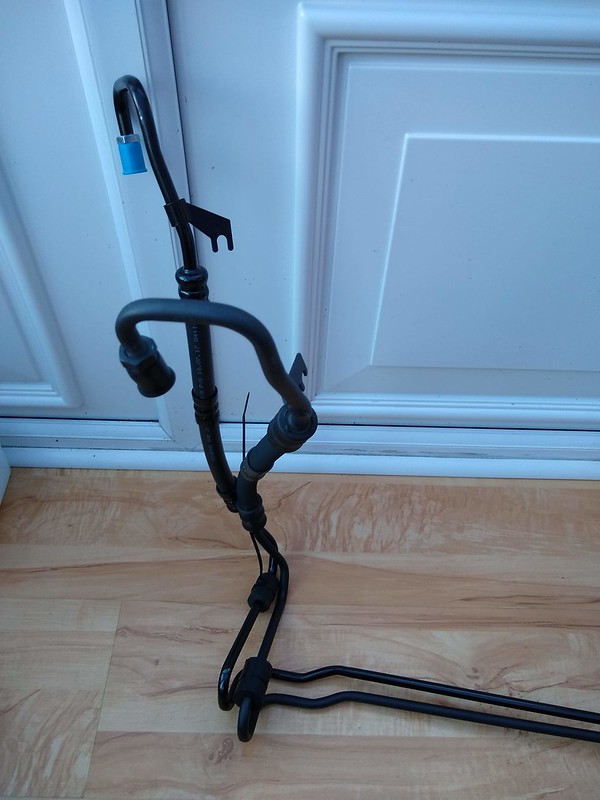
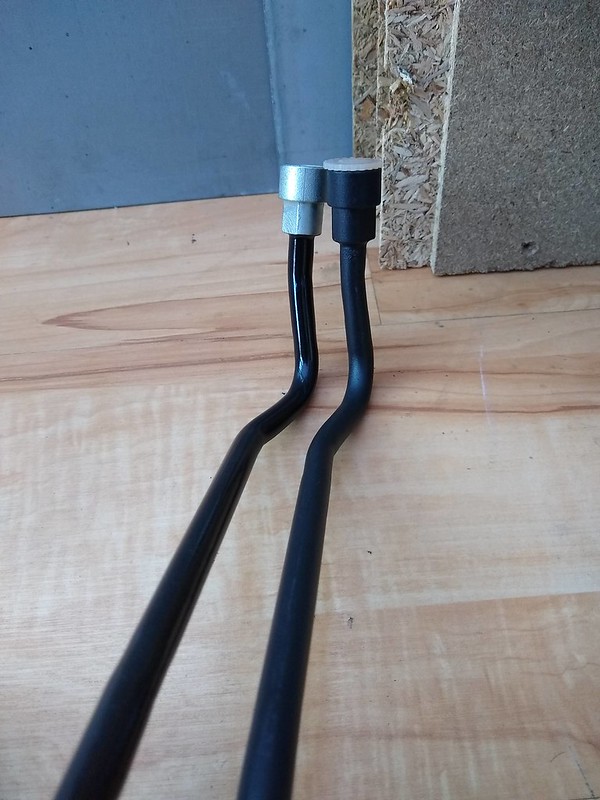
Had some drama with aftermarket power steering pipes part number 5061833. First one was unbranded and I stupidly painted it black before test fitting. The hose fitting required twisting to get even slightly in the right position. The threaded fitting near the wing is a mile off and put two much pressure on the joint to engage threads nicely. I then bought a TVT item which looked better and you can see the difference between the two.
Still wasn't happy though, the TVT item came with a rusty end which cleaned up okay but sent alarm bells ringing.
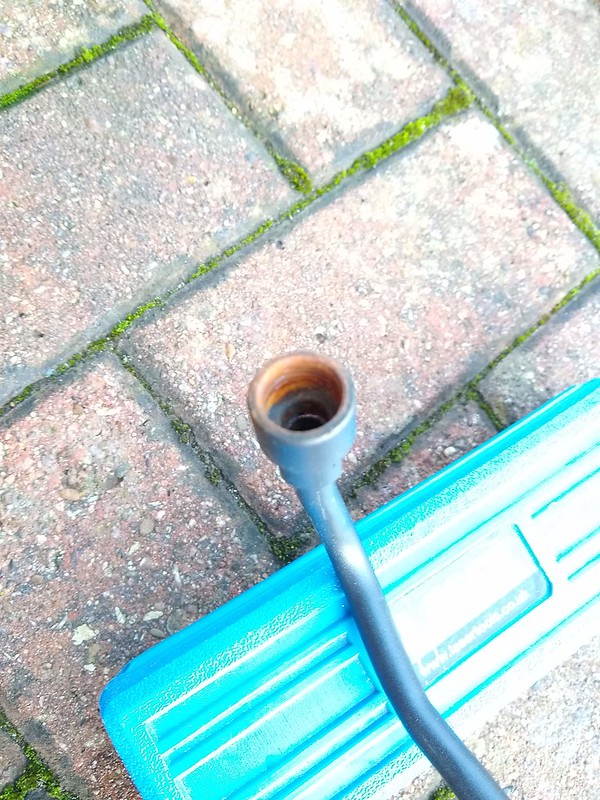
Managed to clean this up but it still wasn’t engaging and if you look closely it's missing a nice chamfered edge to guide the oring.
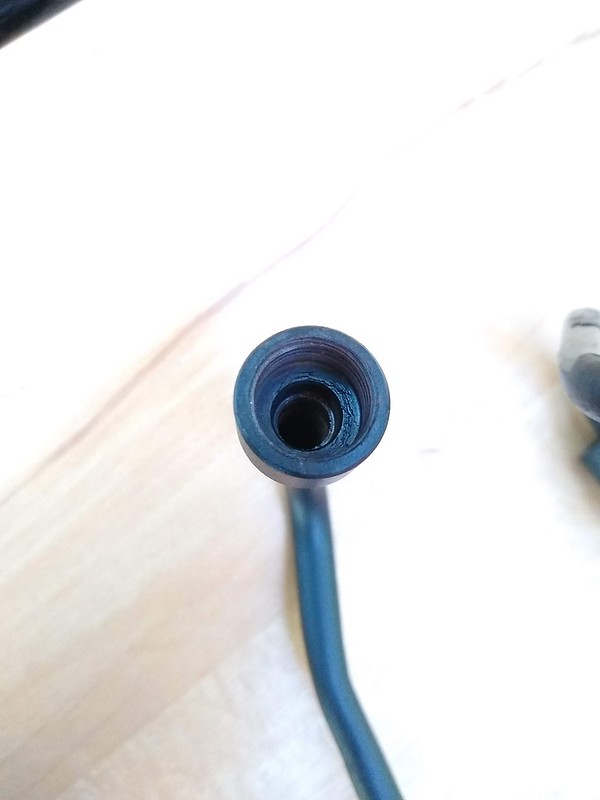
Sent that pipe back and bit the bullet purchasing a genuine pipe. £55 aftermarket vs £215 genuine but wow big difference in quality!

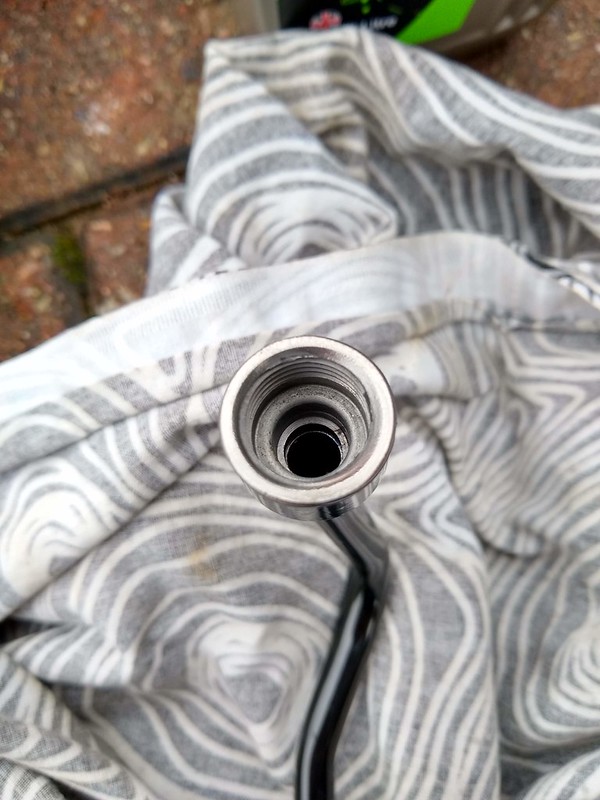
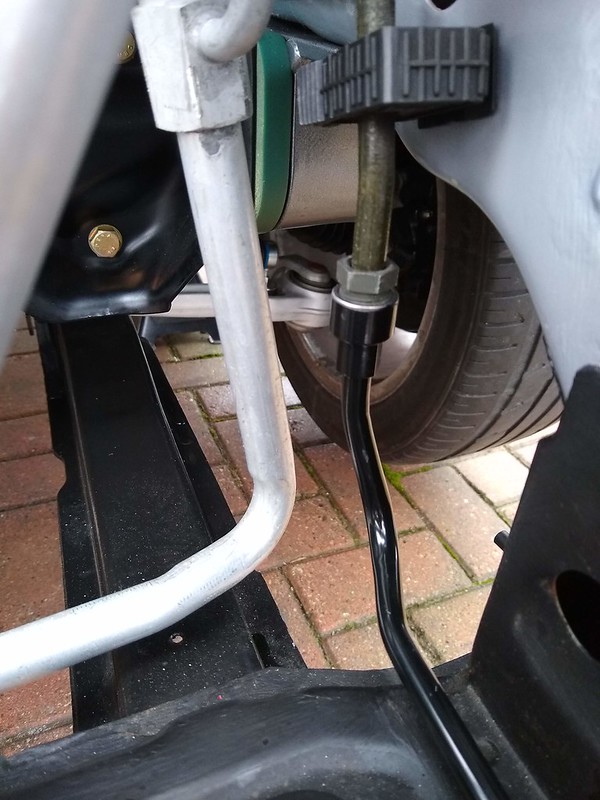
Perfect fit, no hassle and already nicely painted from factory to keep that rust off for a few years.
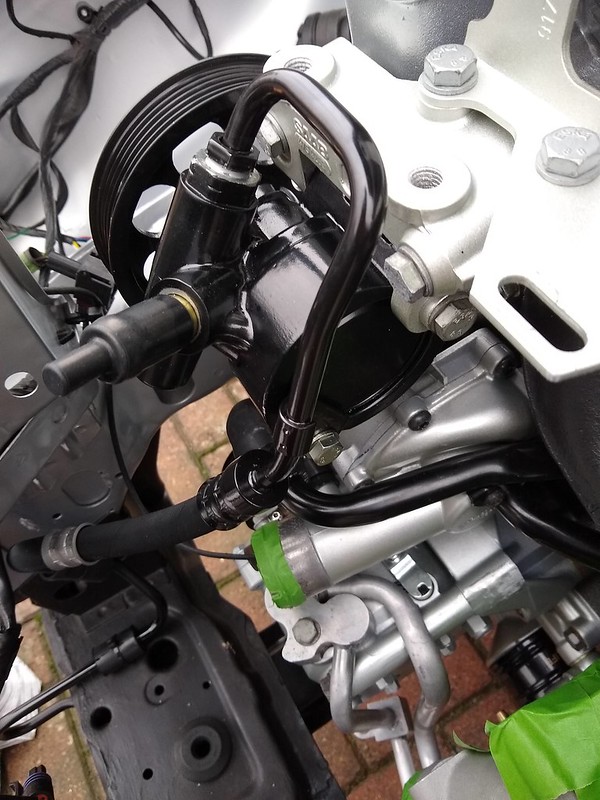
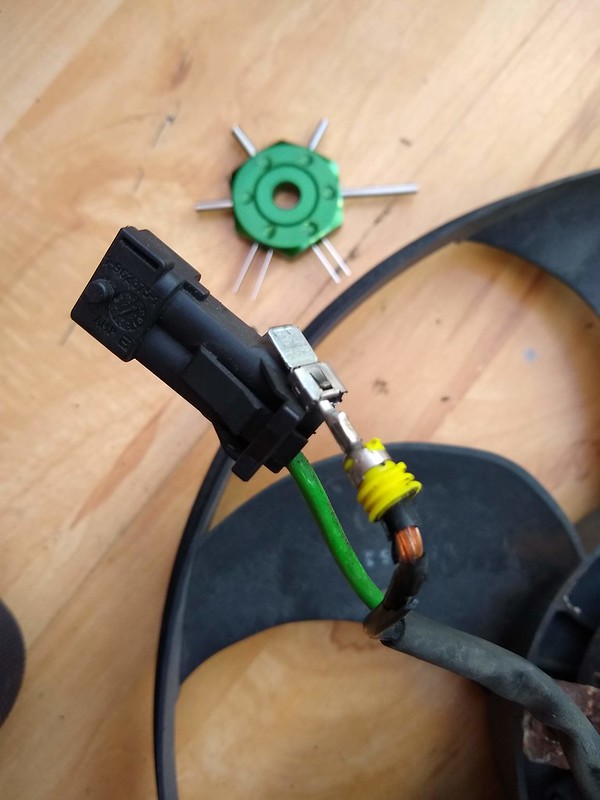
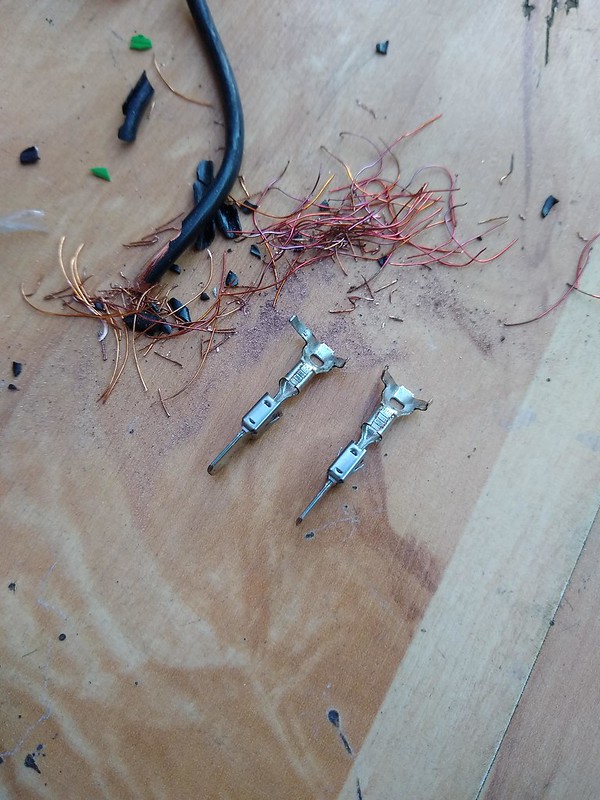
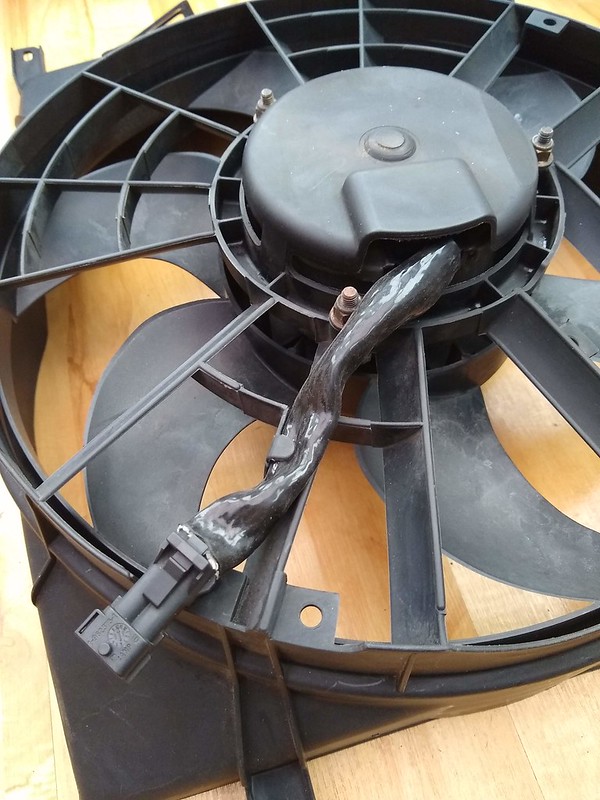
Needed to clean up the engine fan but noticed the insulation had perished on the one from project silver and the donor car. It's quite close to the exhaust so the heat and age means it just crumbles off when touching it.

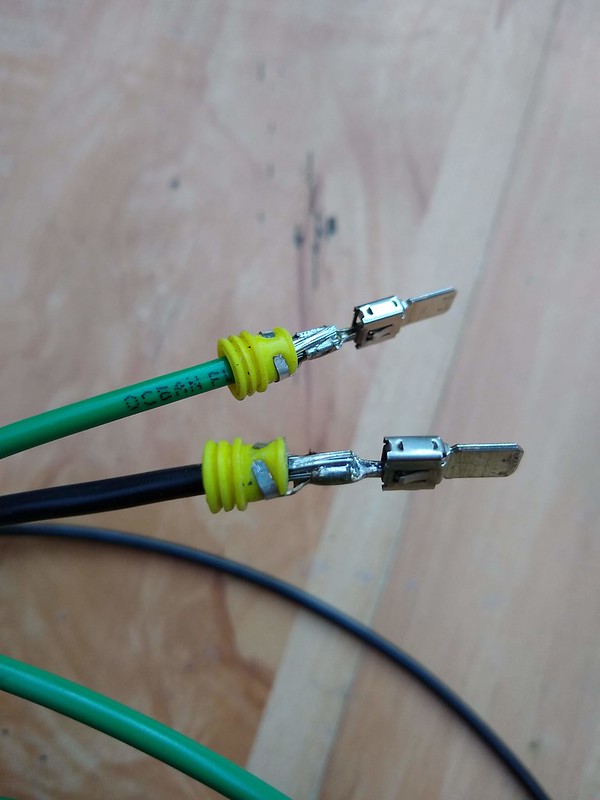
Couldn't find the terminals to buy so I used the originals with some new 4.0mm2 wire. The motor end would not unsolder even with a 100w iron. Oddly I could cut them off and solder the new wire to the metal bars though.

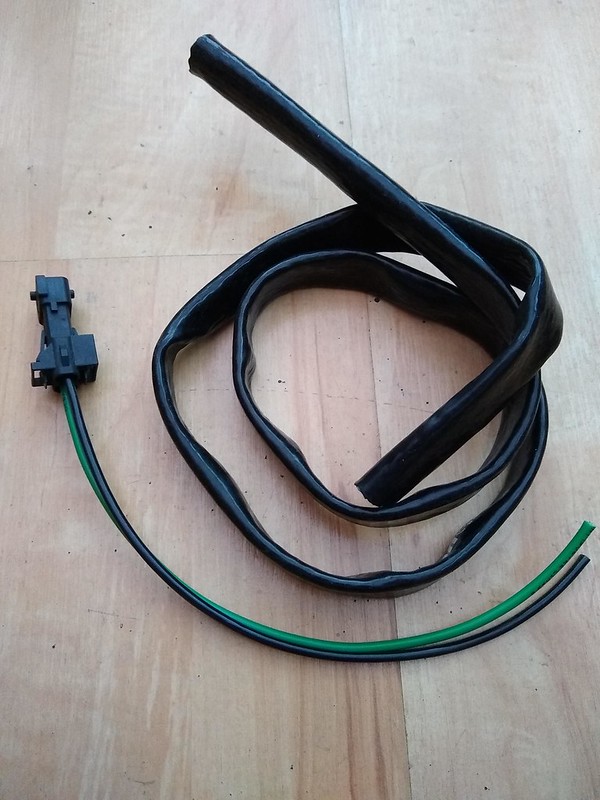
Protecting the new wire with some silicone coated fibreglass heat sleeving 10mm ID.
DO88 radiator fitted nicely and should keep things nice and cool even with the power increase.

The repaired fan was a struggle to get in place but I got there eventually.
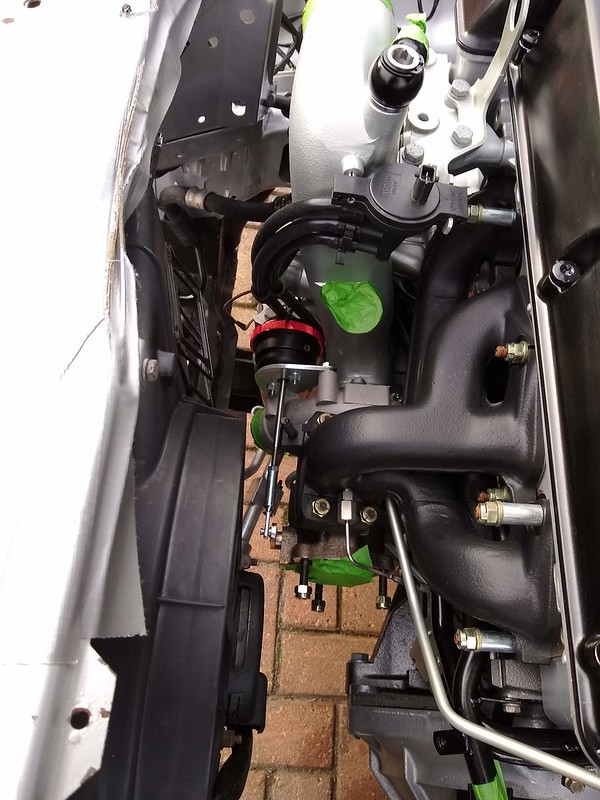
Nissens condenser and the cleaned up oil cooler installed with all new orings.


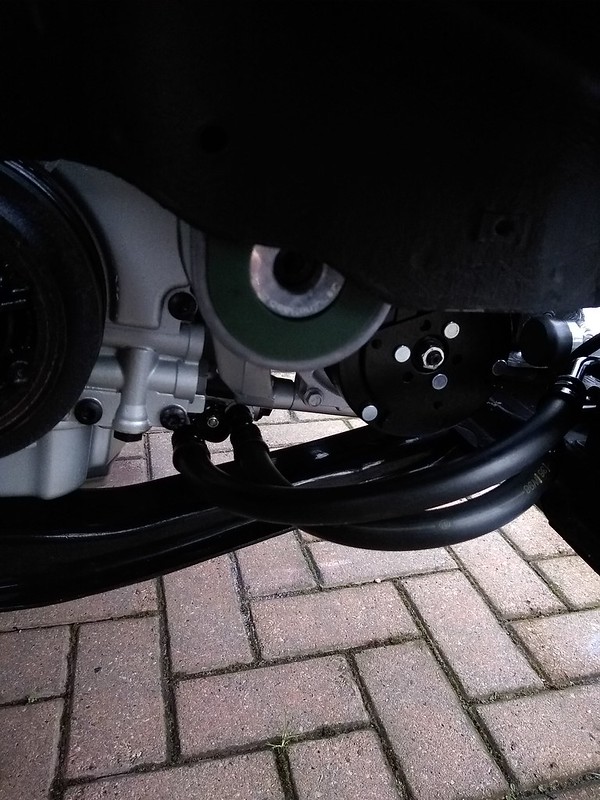
Next up was the DO88 intercooler. Seemed rude not to treat it to their silicone hoses too.

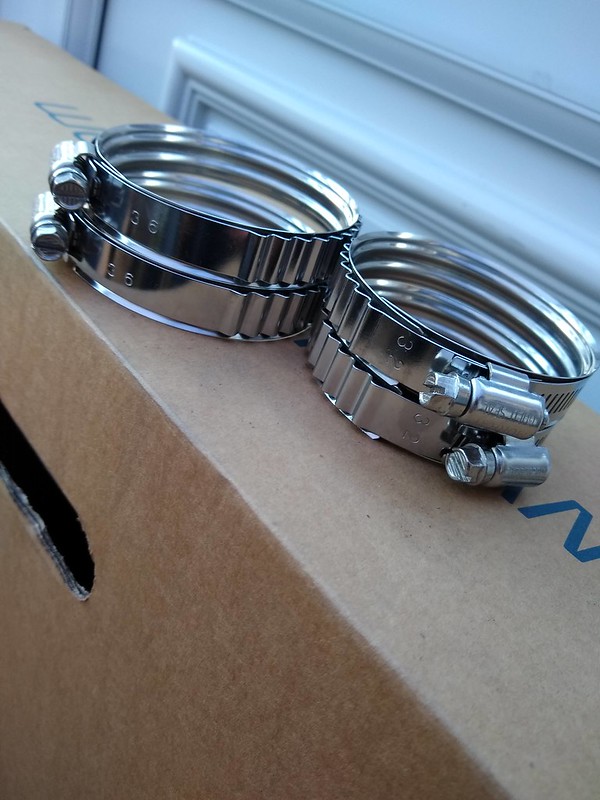
Used these murray stainless steel clamps on my other cars and been impressed with them.
All was going smoothly so I was due a snag which presented itself when fitting the intercooler. One of the condenser pipes was right where the intercooler needed to be and prevented it from bolting up.

DO88 make their intercooler to be bolt up and although it's super tight it should've fit out the box. Attention turned to the aftermarket condenser comparing it to the original Saab item. Sure enough the pipe is in a slightly different position.
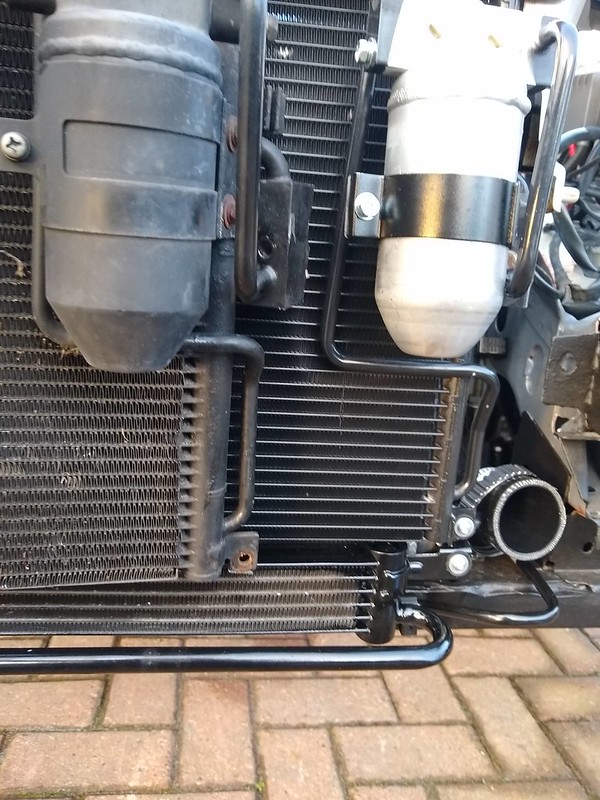
This presented a problem because the original condenser made by SHOWA is no longer manufactured and the majority of aftermarket appear to use this slightly modified design. On a standard car this wouldn't be a problem but the DO88 intercooler has been designed to use that space and so the hunt was on for a replacement. Counting the condenser rows and looking at pictures I found a replacement from Scandix that looked like it would work. However in the UK Brexit & Covid had happened and shipping from Germany was a nightmare at the time with no available courier. Asked for advice on the facebook groups and someone else had experience this and recommended heating up the pipe and bending it. Seemed like a lot of bending would be required but with nothing to loose it turned out they were spot on.
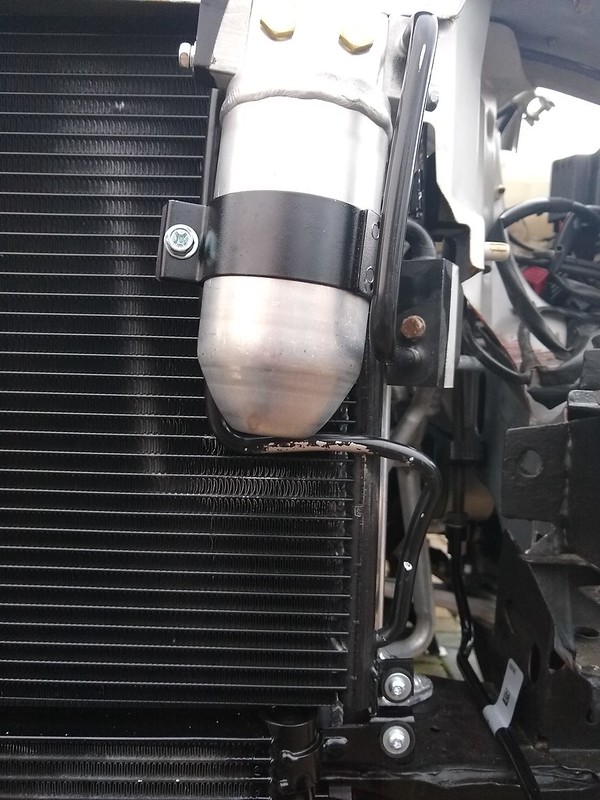
Bolted up and it clears, just!

Test fitted the grill to make sure the condenser pipe still cleared.

The larger aero front bumper definitely required for this monster.
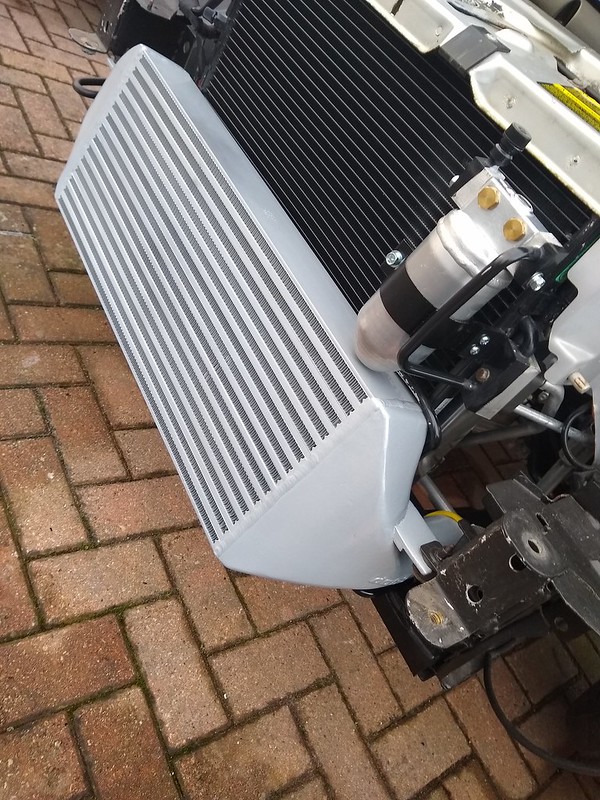
Thought the oil cooler corner had potential for damaging the intercooler which does flex a bit.

Rounded the edge so even if the bumper scrapes a speedbump and causes intercooler movement it shouldn't damage it.
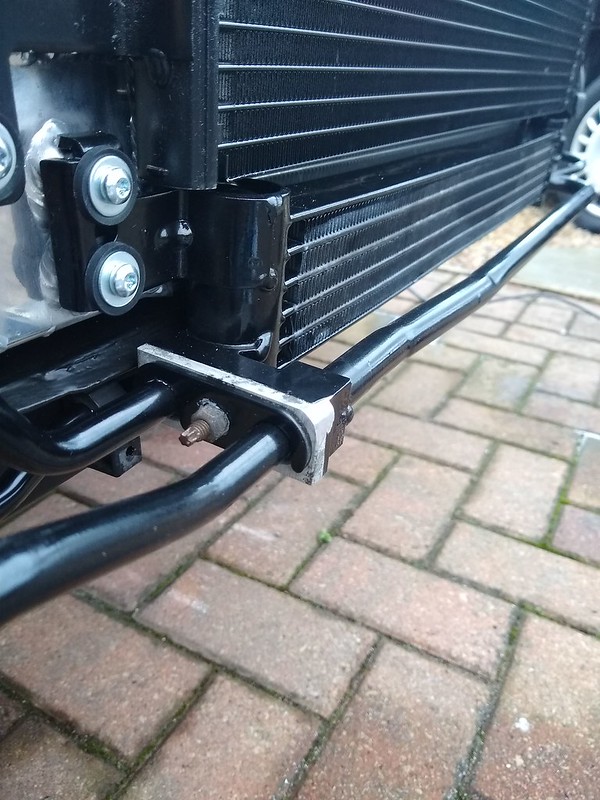
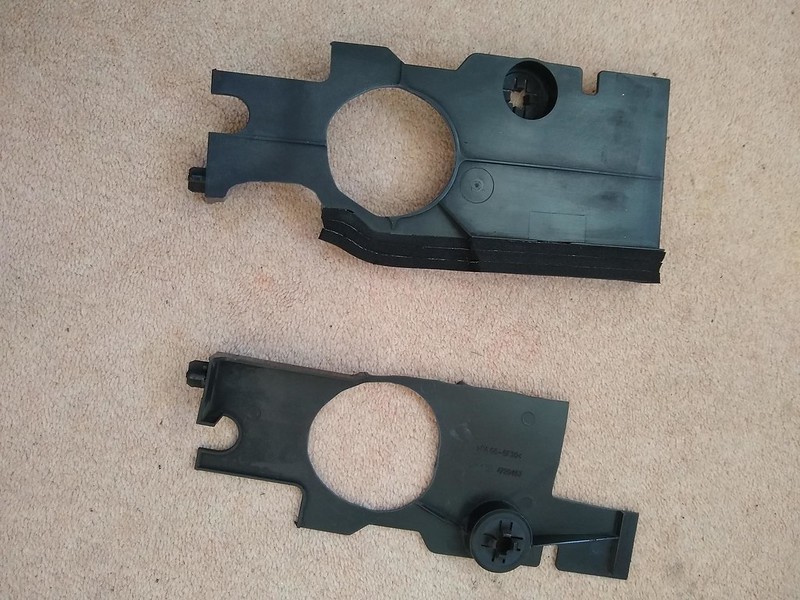
The DO88 radiator and intercooler mean the air shields don't fit. I trimmed two drivers side ones and added some heat resistant foam to make some that will fit. The passenger side one got cut in half from this picture but that side has more pipework blocking airflow anyway. The idea is to encourage the air through the rad and cooler instead of the easy route around.
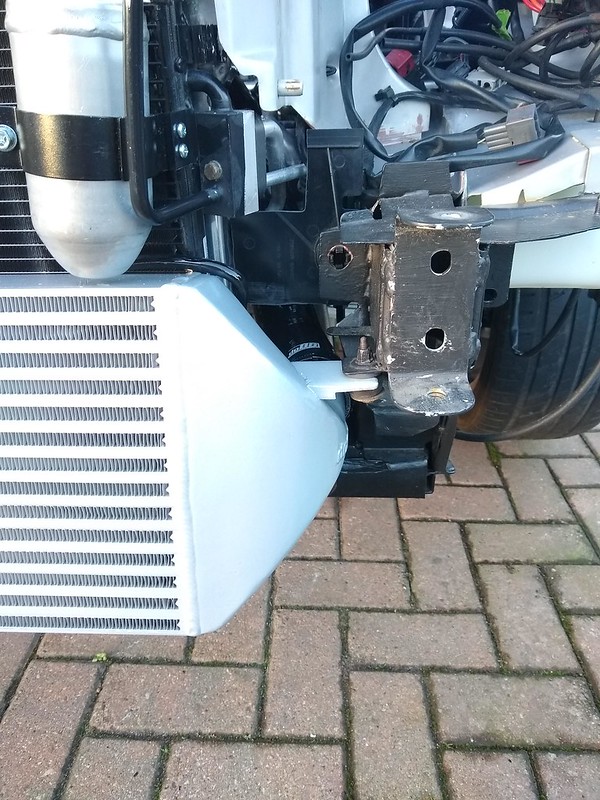
Drivers side finished will all pipework bolted up and intercooler in place.

Passenger side, even painted the condenser pipe I scratched up bending earlier.
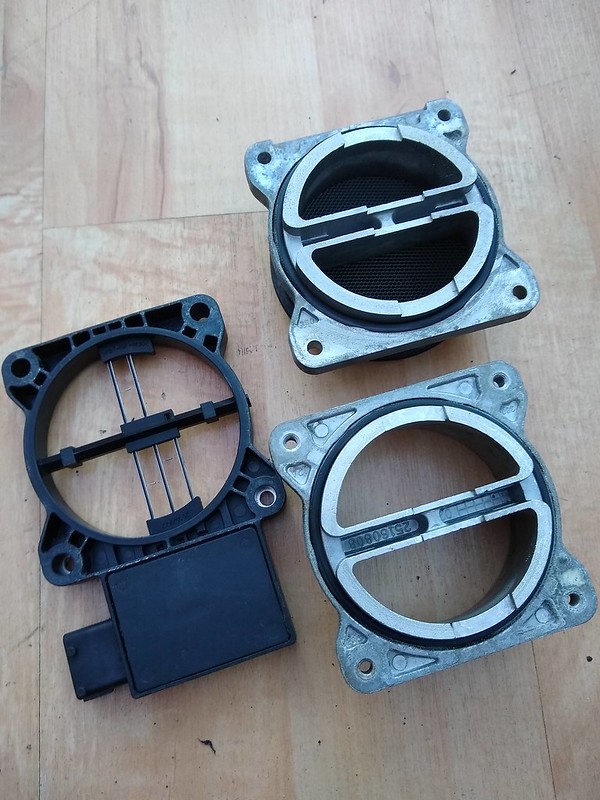
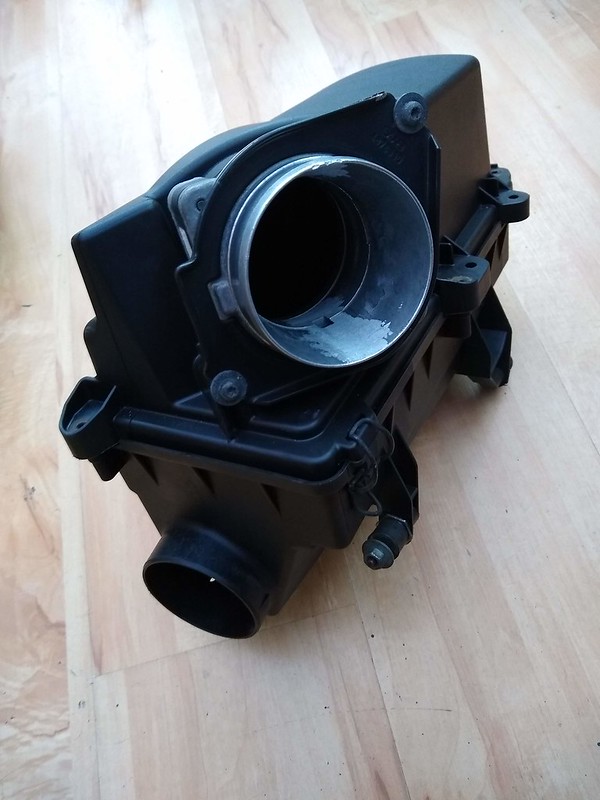
The later T7 airbox has a factory fit pipe for the king cobra pipe and keeps the OEM look I'm after. The only snag is the T7 uses a MAF sensor which this T5 car doesn't need. Peter at Rawsaab gave me this idea which he's done on his track car, where you smooth off the sensor so it just serves as a connecting piece.
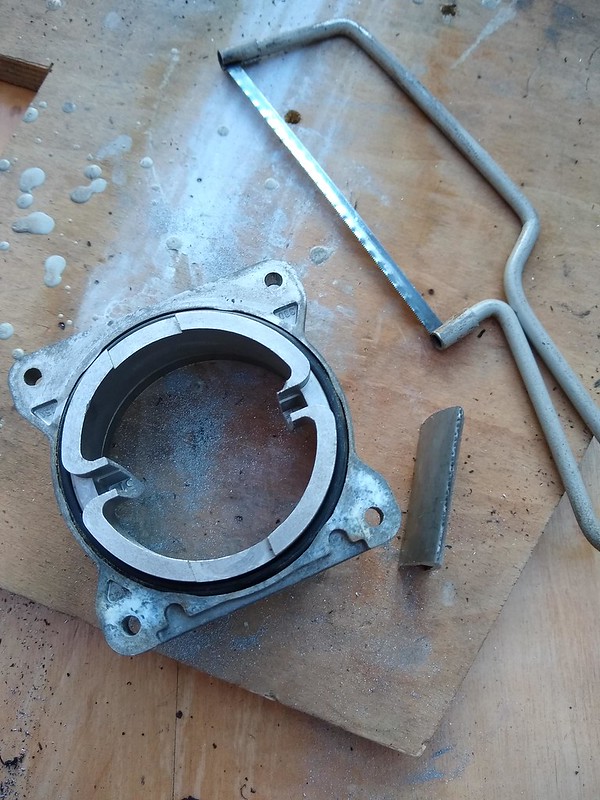

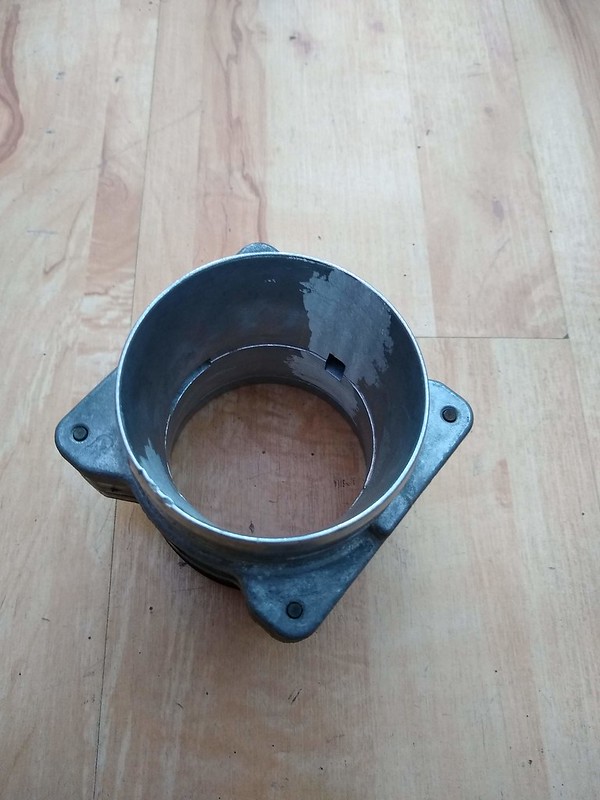
The metal retaining plate could do with a powdercoat at some point but really happy with how that turned out. People far more knowledgeable than me in the Saab scene think these standard airboxes are good for high power levels than I'm looking at.
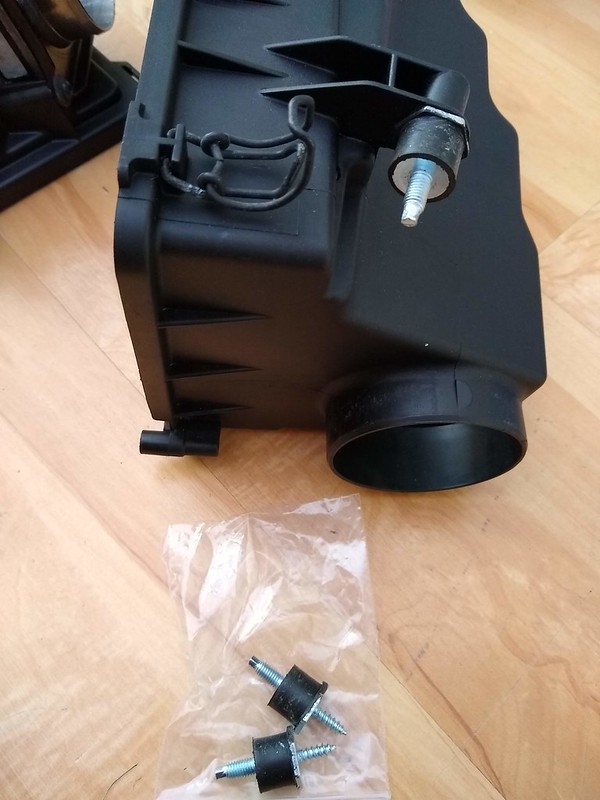
The vibration connectors on the airbox had perished. I initially only replaced one but then another broke when mocking up so ended up replacing all three.
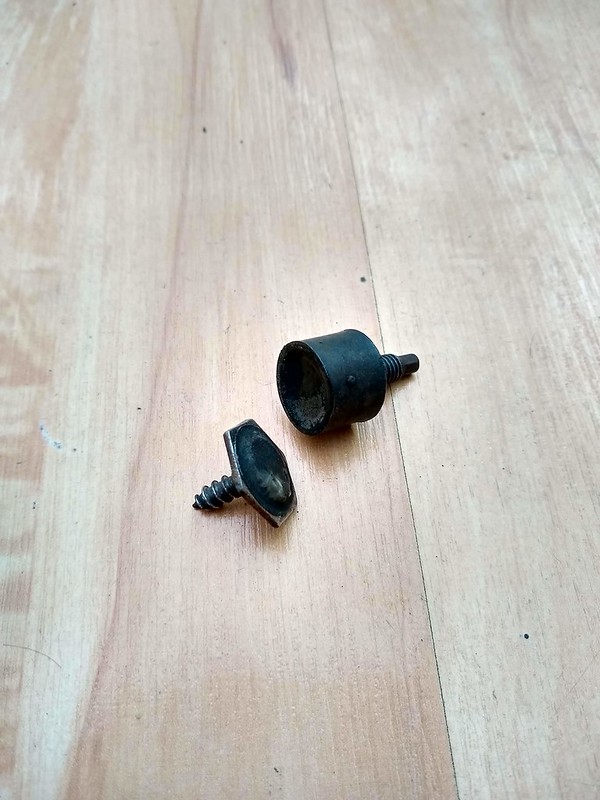
The airbox lid torx screws had rusted making removal quite difficult. You can't buy the exact replacements and I wanted to find some stainless ones with a hex head. Couldn’t find anything so made by own from some full thread stainless self tappers.
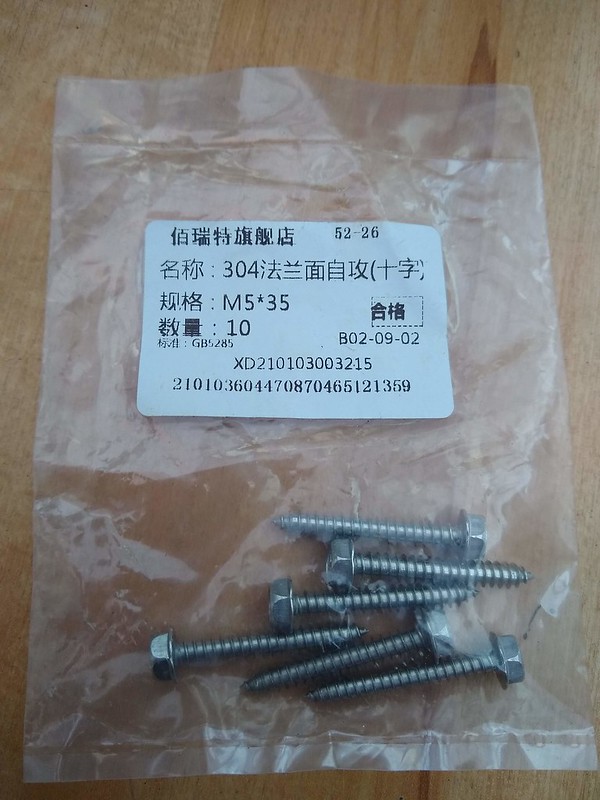
Mine vs original vs one from a Saab 9-5 which are still available to buy.
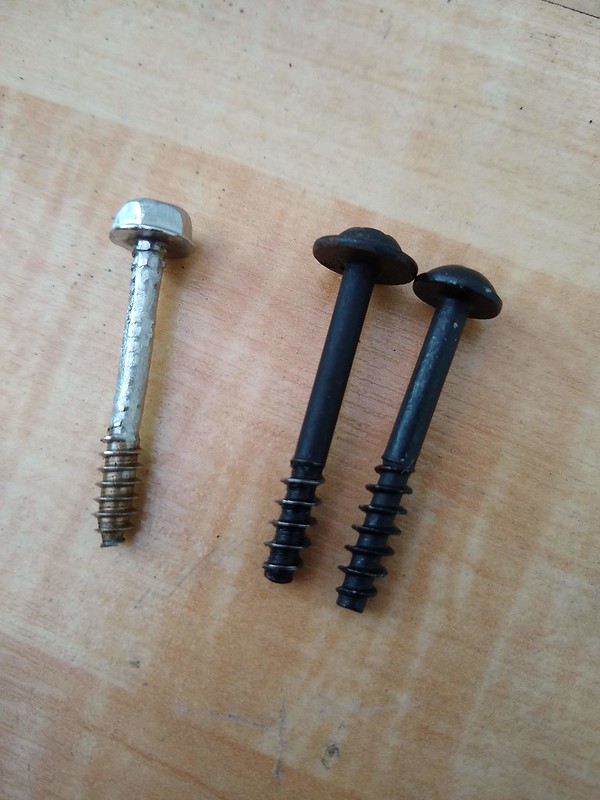
Worked great and that was the airbox complete.

Loads of little jobs in the engine bay were next. All the sensors are 21 years old and done there time so I'm replacing them all just for reliability. IAT sensor was next on this list and fitting the top hat.
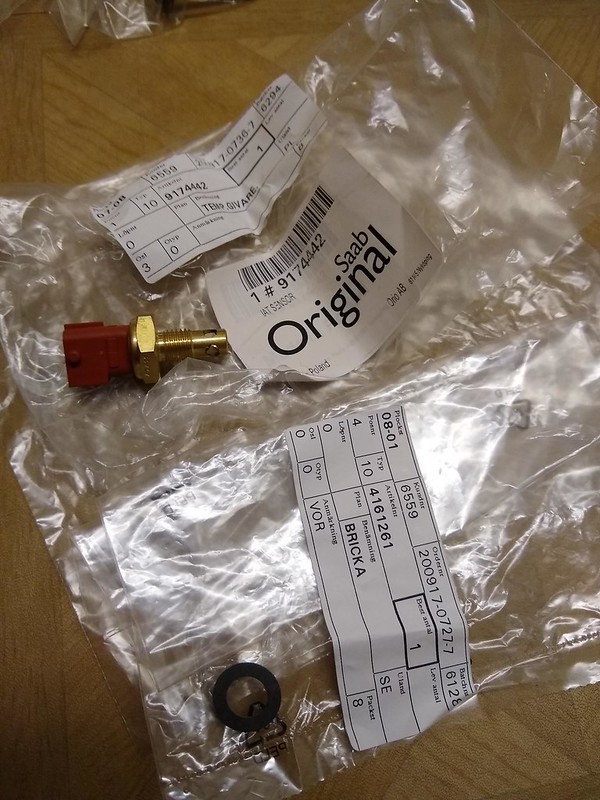
I managed to find a new old stock connector really cheap on eBay keeping that standard look.

The original worm drive clips were an odd size so the closest stainless steel versions were a bit long. Trimmed the ends to give a nice clean look again.
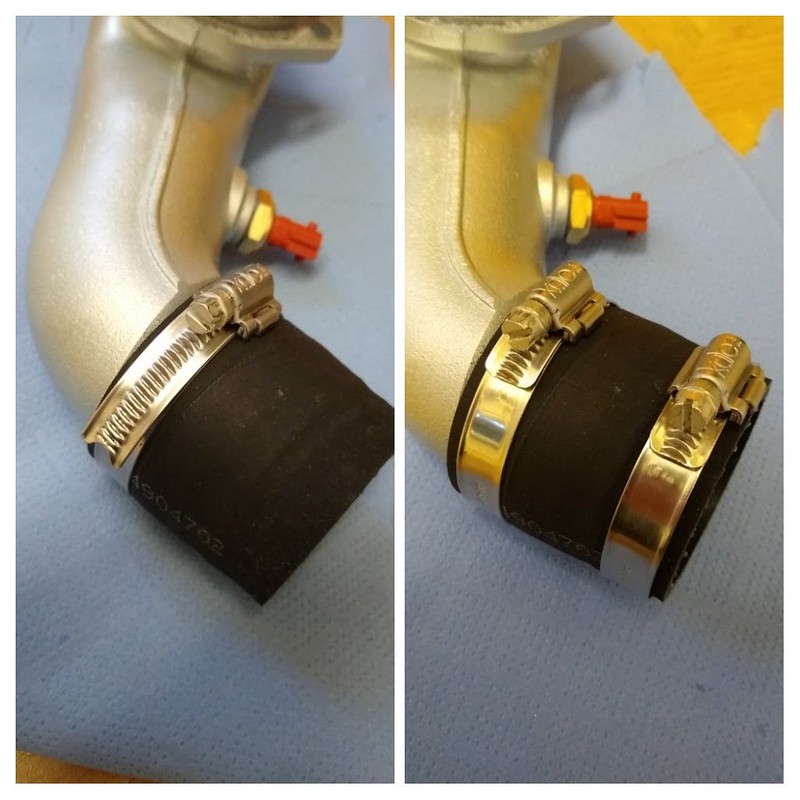
Aftermarket head bung with retaining clamp fouled the standard intercooler pipe bracket. Had to notch that so it bolted up nicely.

Gearbox ground strap was next on the list.
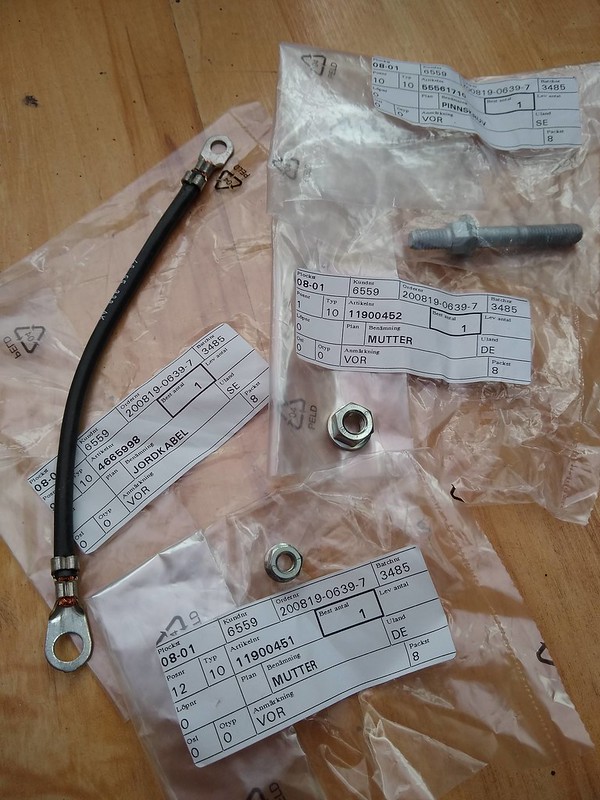
These get so corroded I've covered the ends in liquid insulation tape to prevent that from happening again.

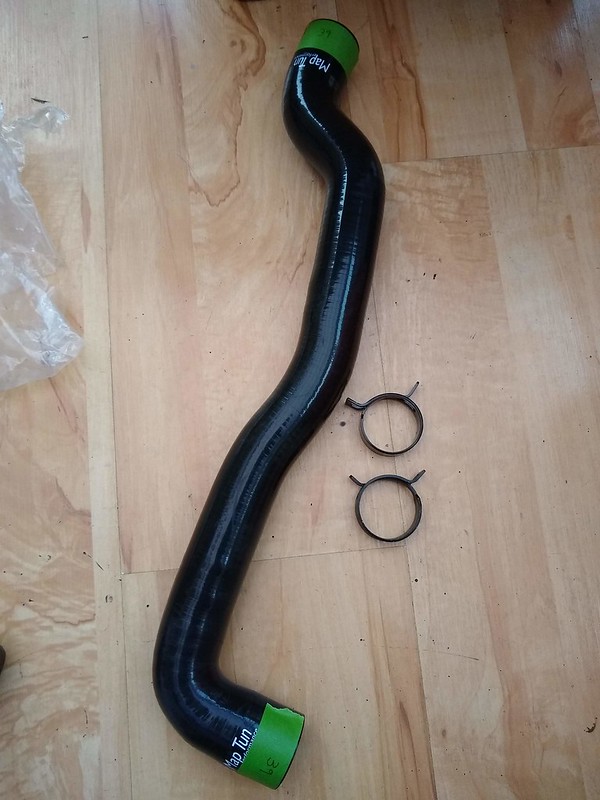
Silicone hoses throughout using a mixture of the maptun coolant kit with DO88 heater matrix pipes. I prefer spring clips so measuring the hose size then buying stoney racing hose clips from eBay using their size chart.
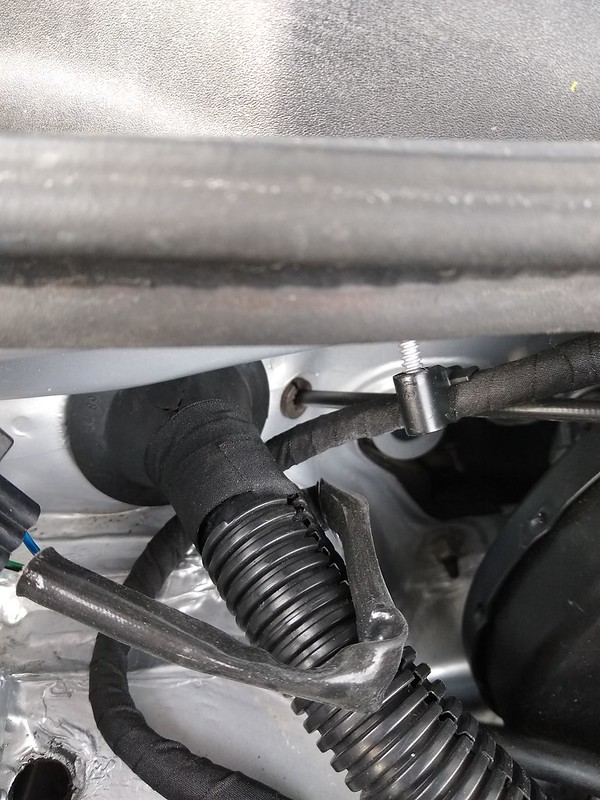
I had re-used the old grommets in the bulkhead for the bonnet release cable. This was old and the split seen here bothered me enough to find you can still buy them and fitted a new one.

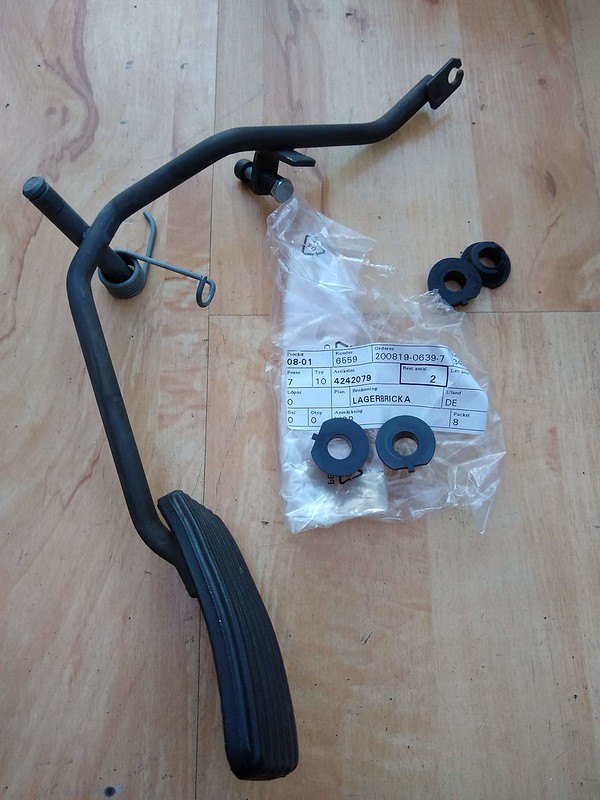
Re-fitted throttle pedal and cable and noticed play in the plastic bushes. You can still buy them which should make the pedal feel better.
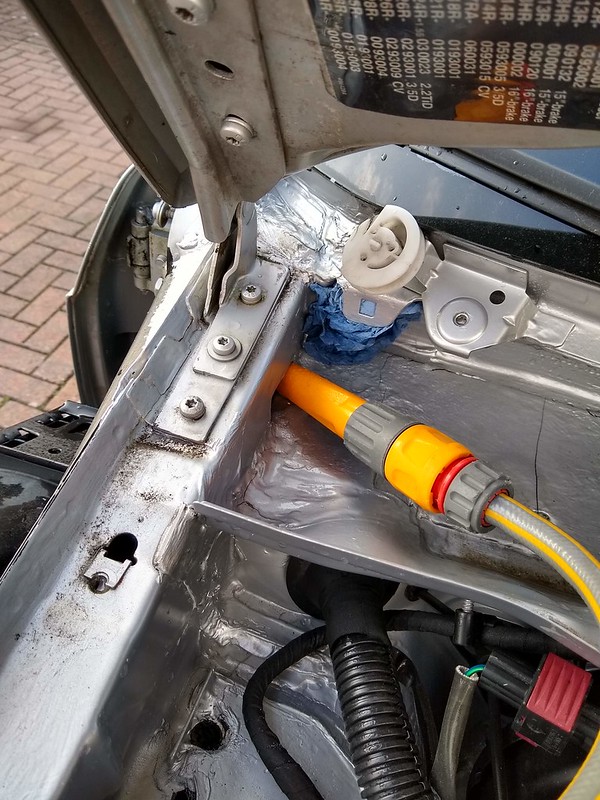
Fitting the throttle pedal I had a set back noticing some water rust stain around the bulkhead repair. This was after some storms with very heavy rain but super annoying that it wasn't 100% water tight.
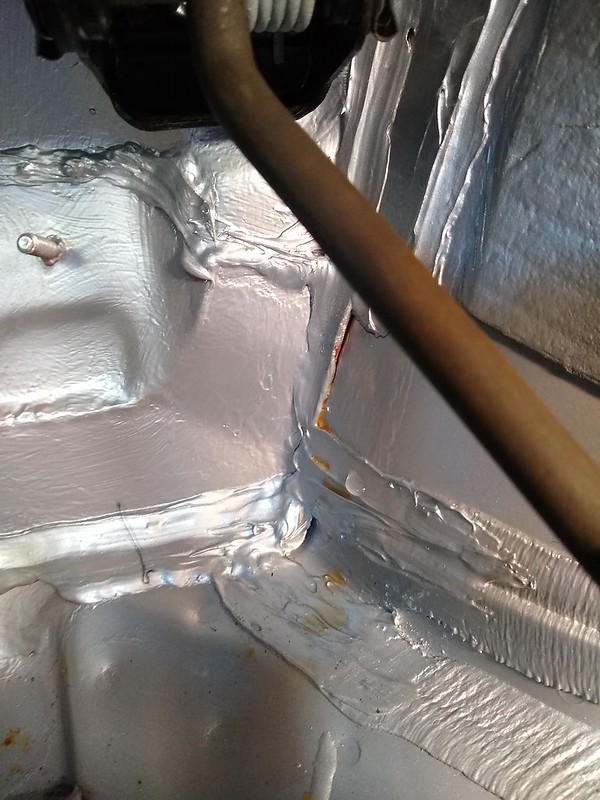
Bit more investigation showed the seam sealant was also lifting due to the red anti rust primer I used here. Luckily I only did this area with this primer and it looks like I didn't leave long enough between coats. It hadn't fully hardened and the bond with seam sealant a result.

I've re-fitted the door seal and found this tiny spot in the scuttle area I've not covered with seam sealer.
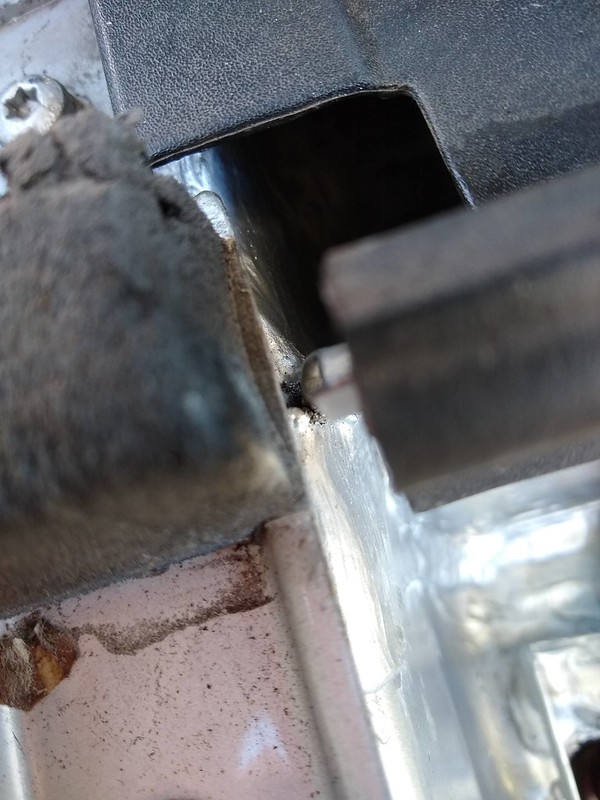
Cleaned up the area again.
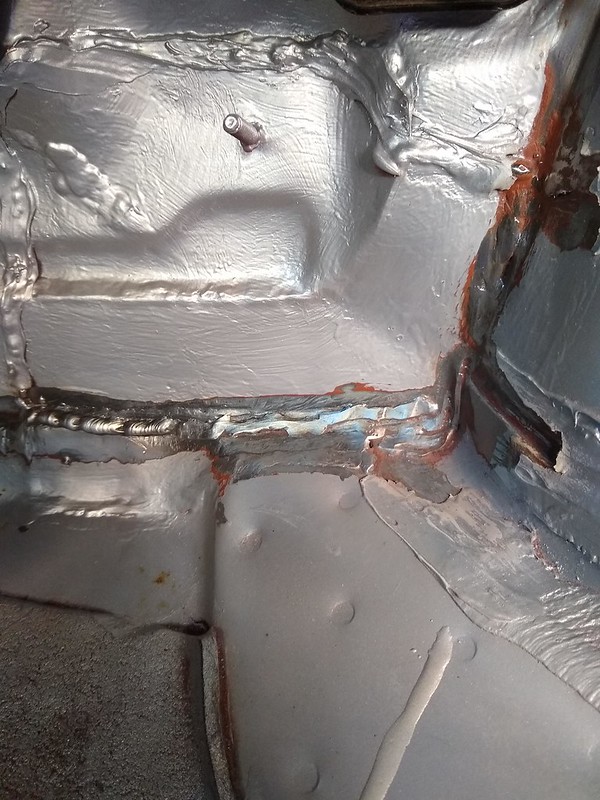
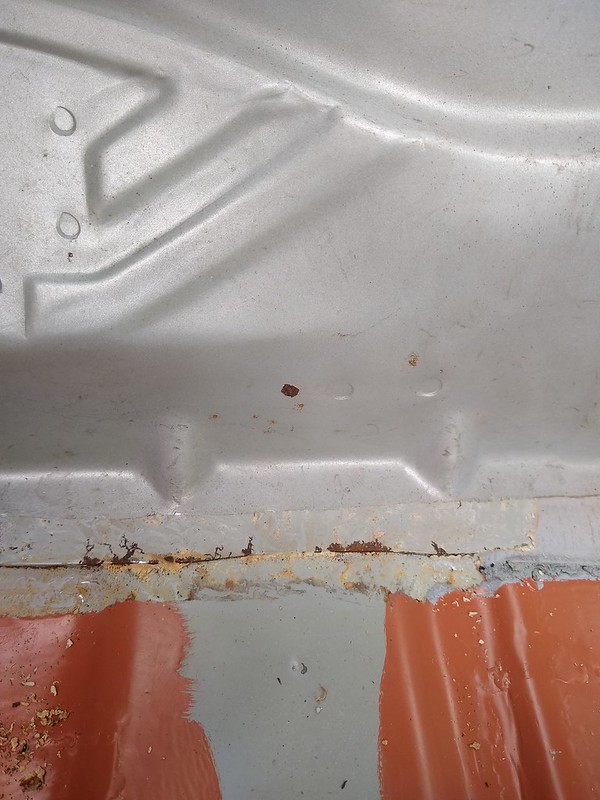
Coated in primer for now and will monitor and paint when I tackle the floorpan.

Crank case breather pipe using hose that will handle the oil vapour better.

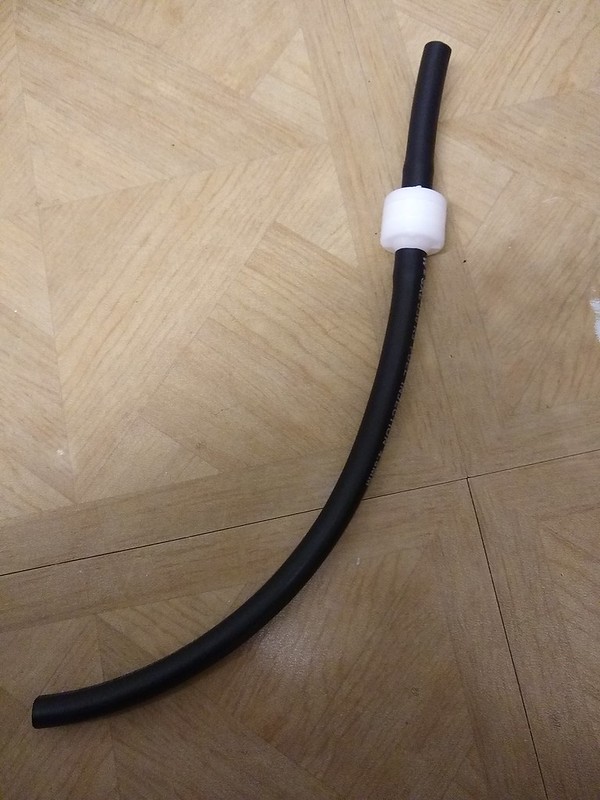
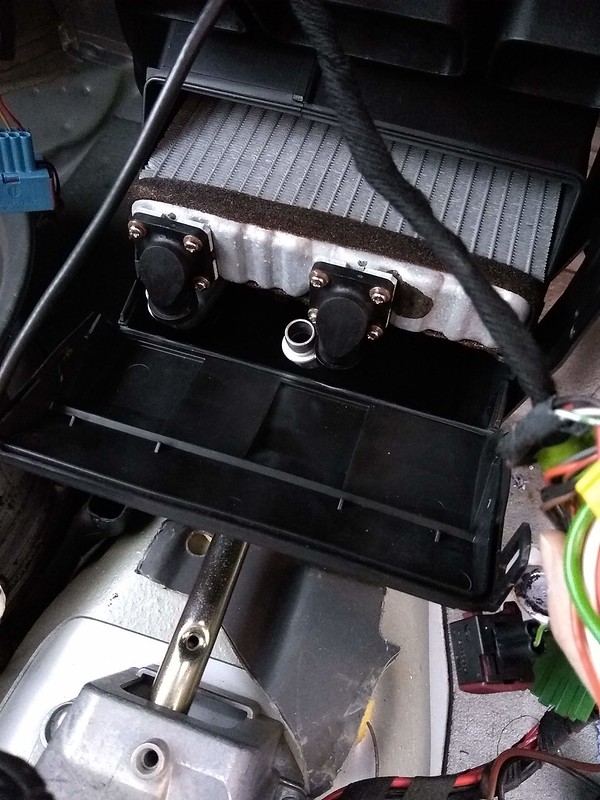
Heater matrix got the new orings and clamps I've been meaning to fit for ages.

New pipe for brake servo vacuum line fitted.

Changed my mind again on the king cobra connection and dropped down to An8 instead of An10. Decided not to run a catch can and lines and modified the standard pipe instead.

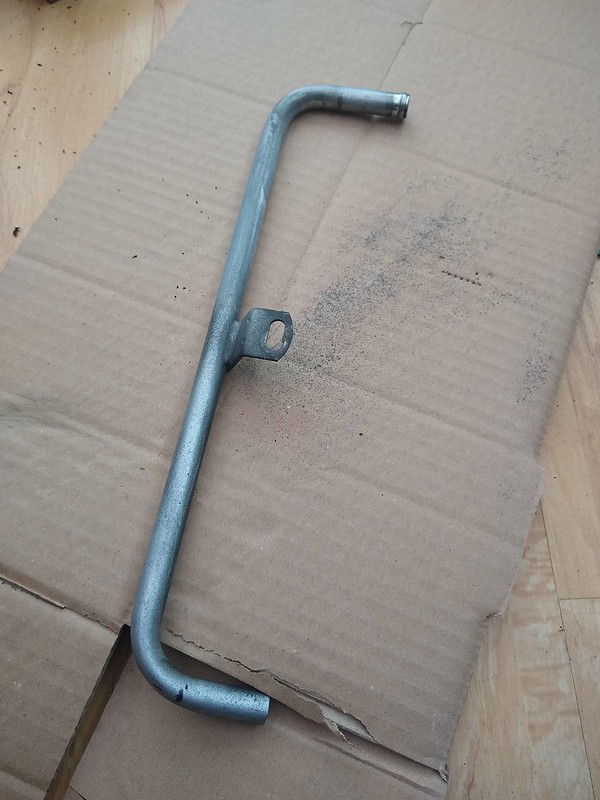

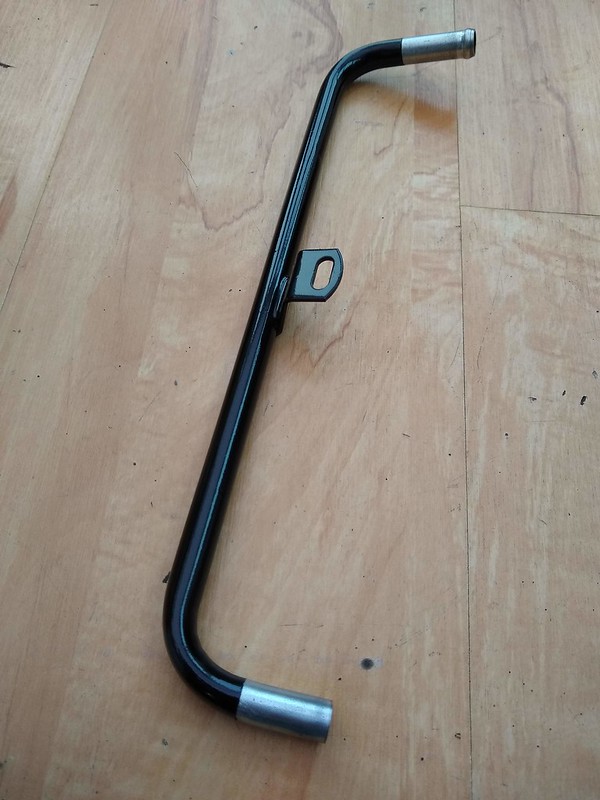
The smaller AN8 fitting has the same ID as the standard tube but meant more barb fittings were available that fit the fuel hose size I needed.

Using the T7 aluminium recirculation pipe meant the silicone pipe in the T5 kit was useless. It did however come in handy for making silicone connector joints.

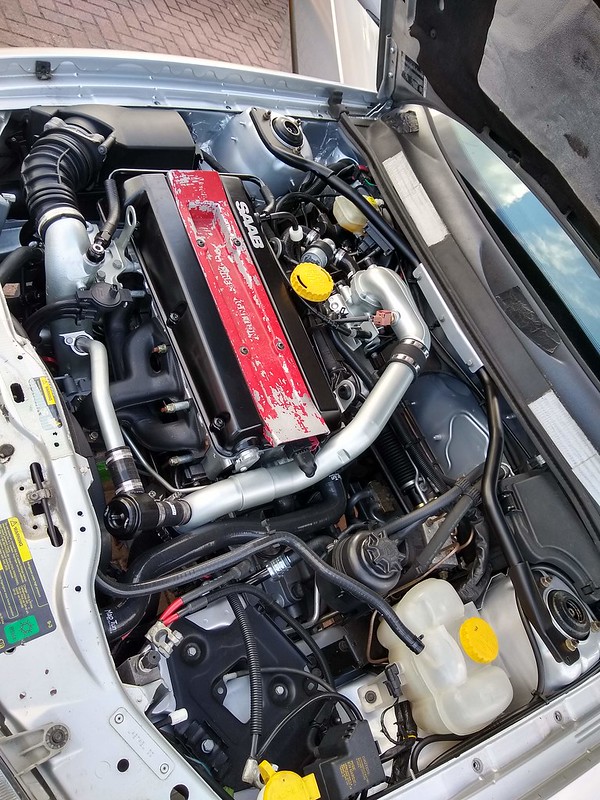
Teased you long enough, here’s the very nearly finished engine bay after all that work. It will get a shiny new red DI pack but coming together nicely and before I can fire it up need to address the rest of the car.
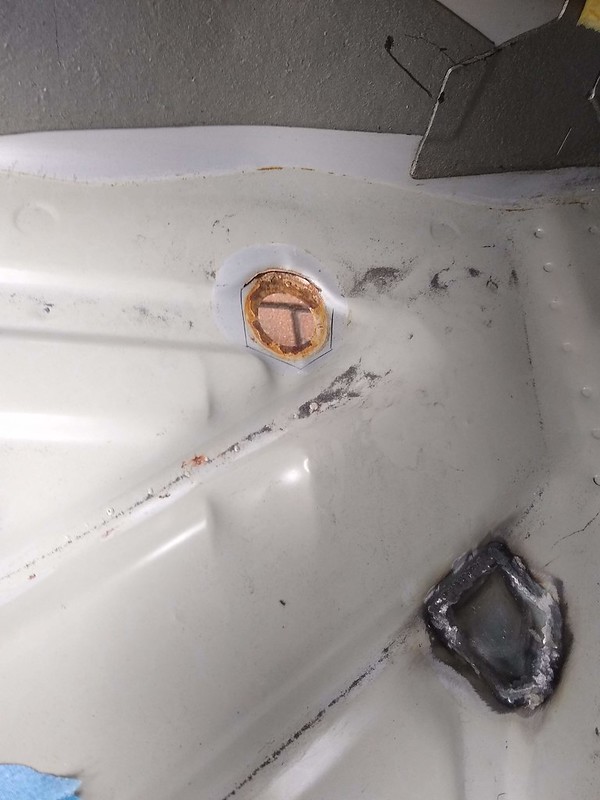
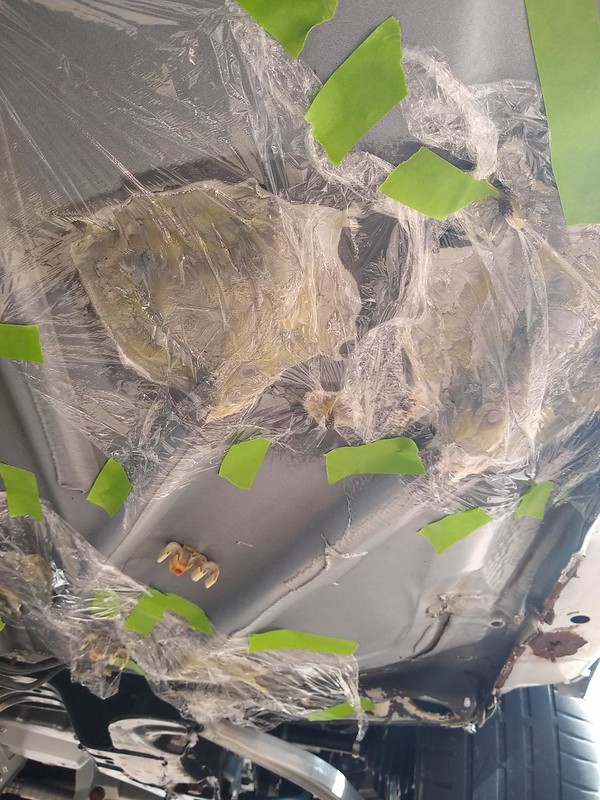
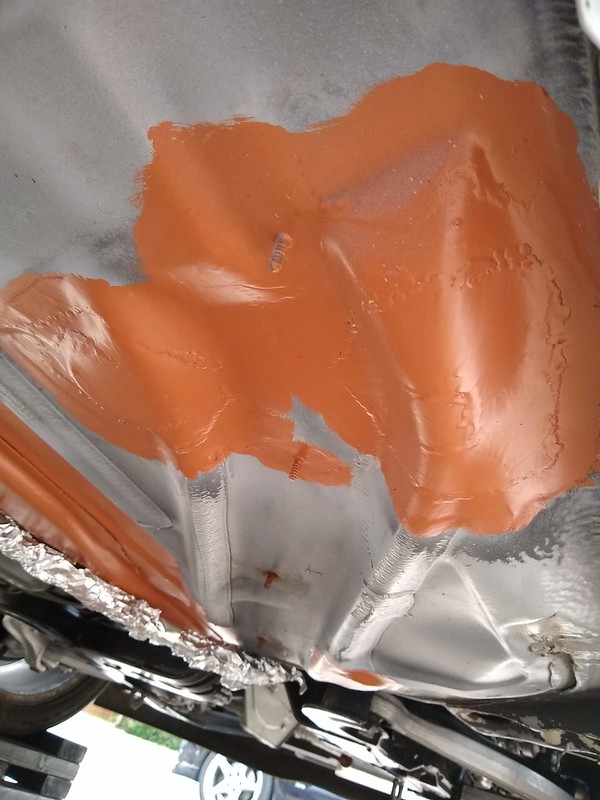
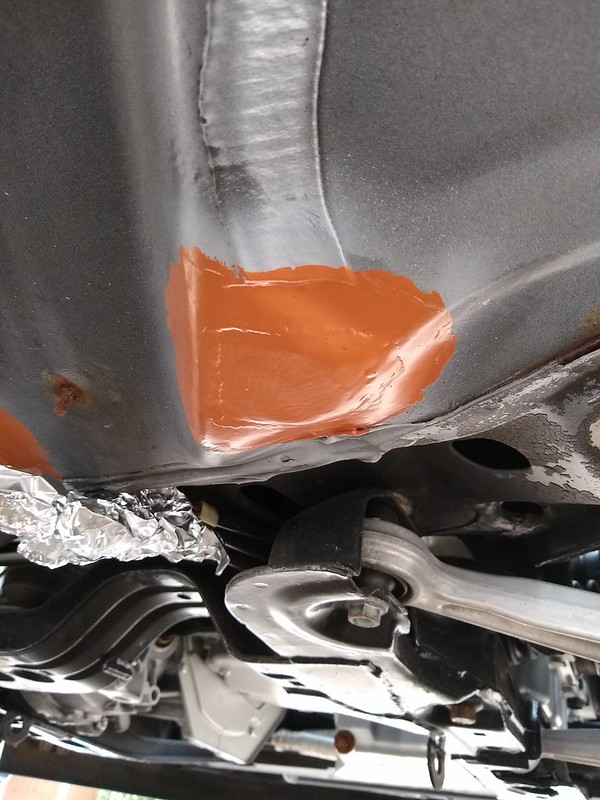
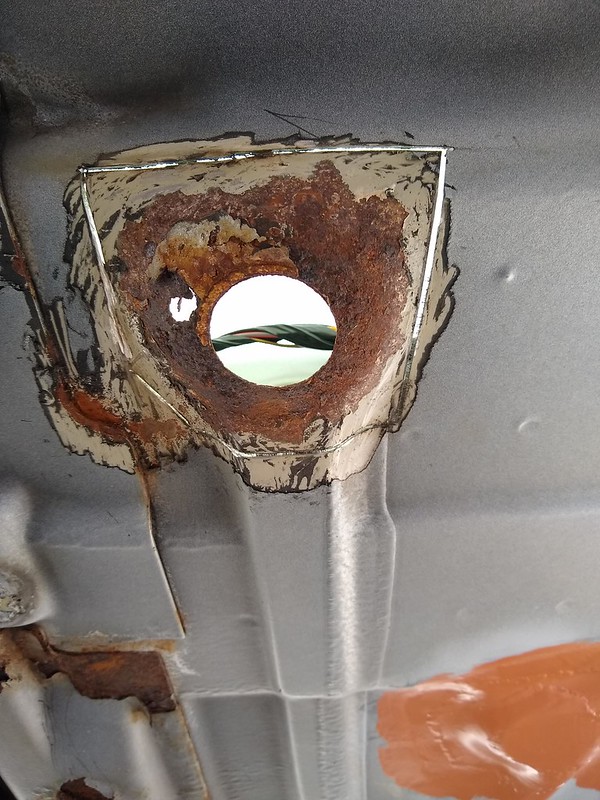
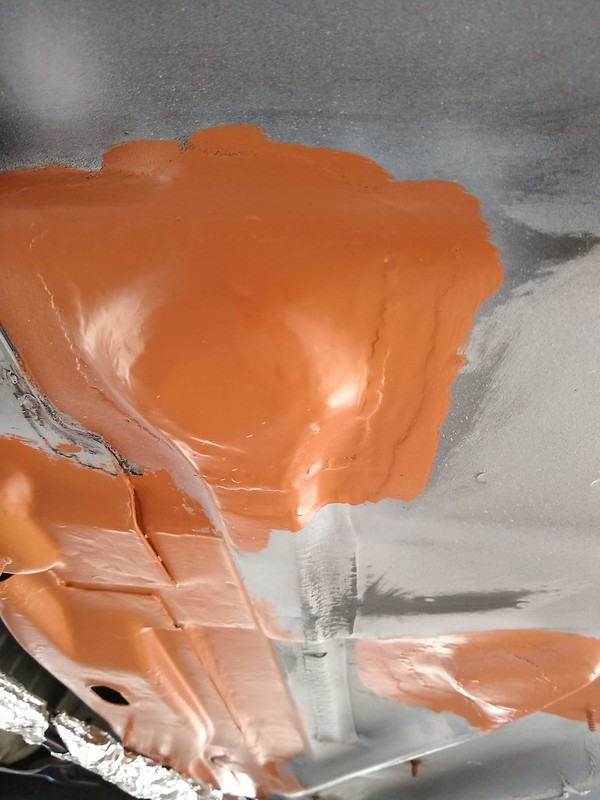
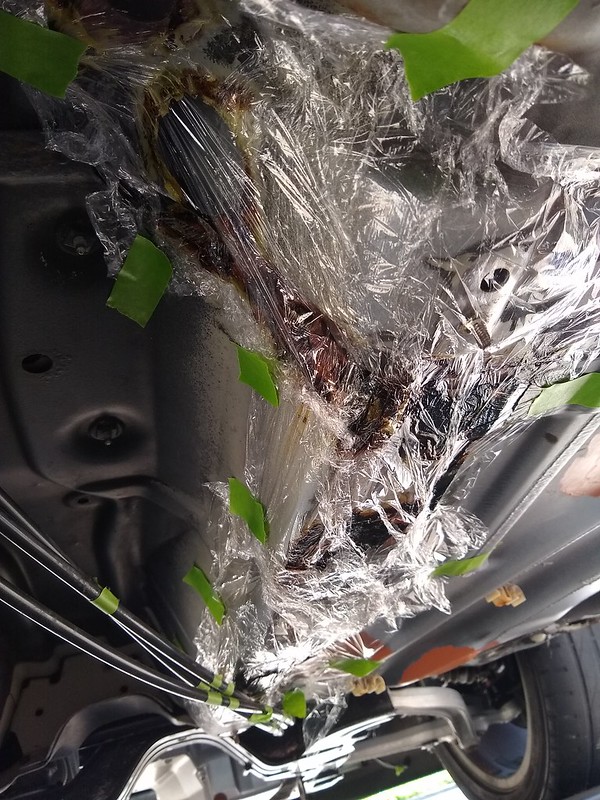
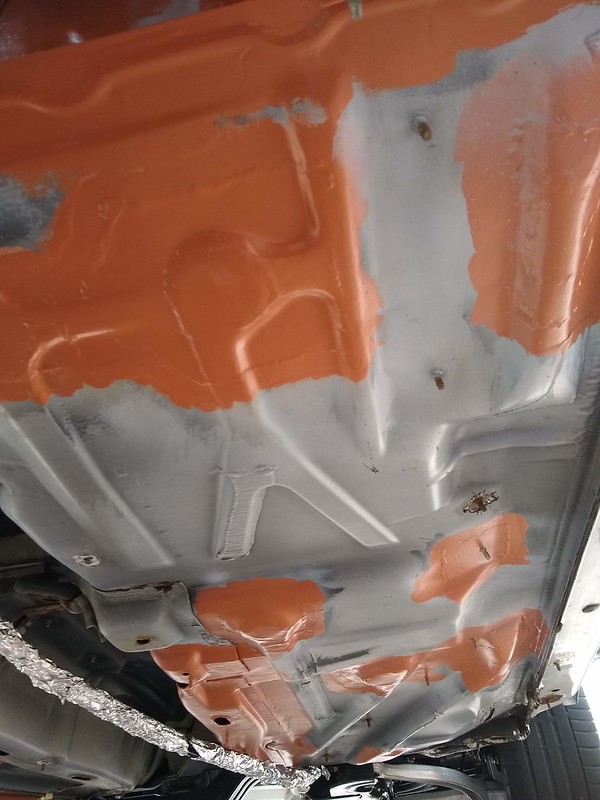
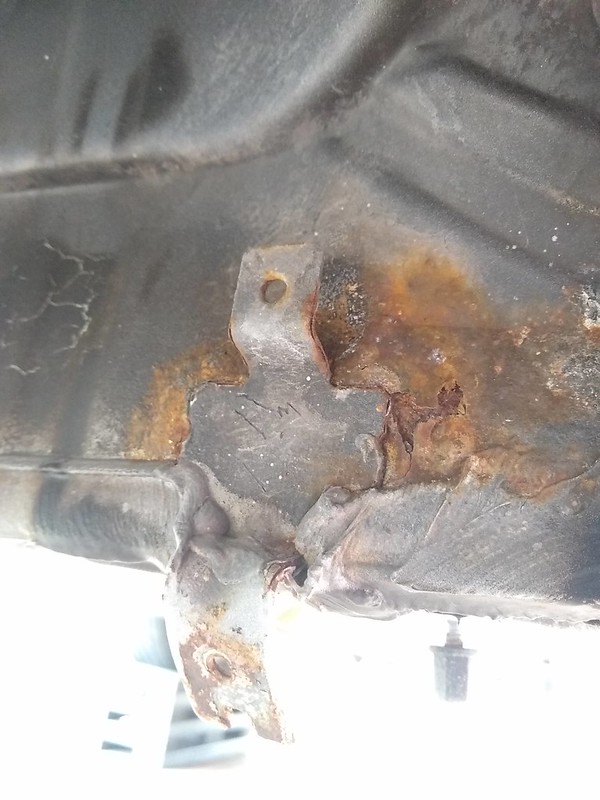
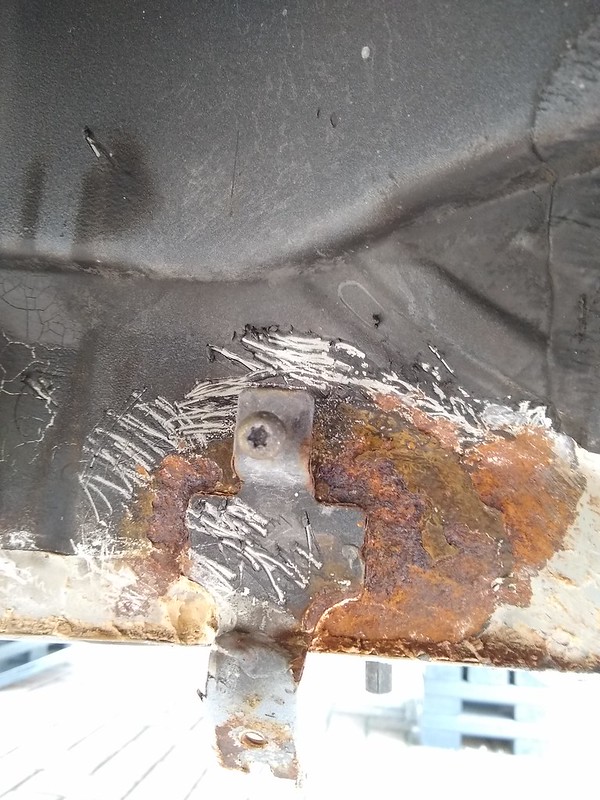
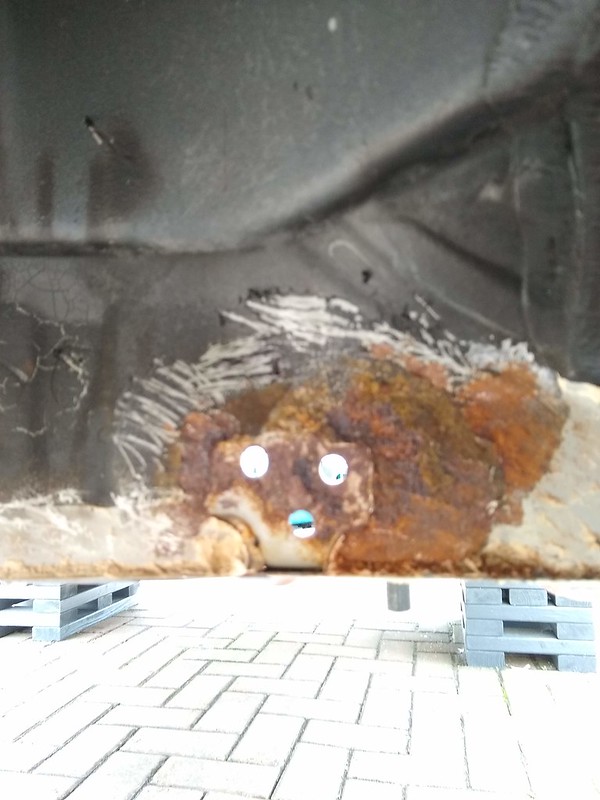
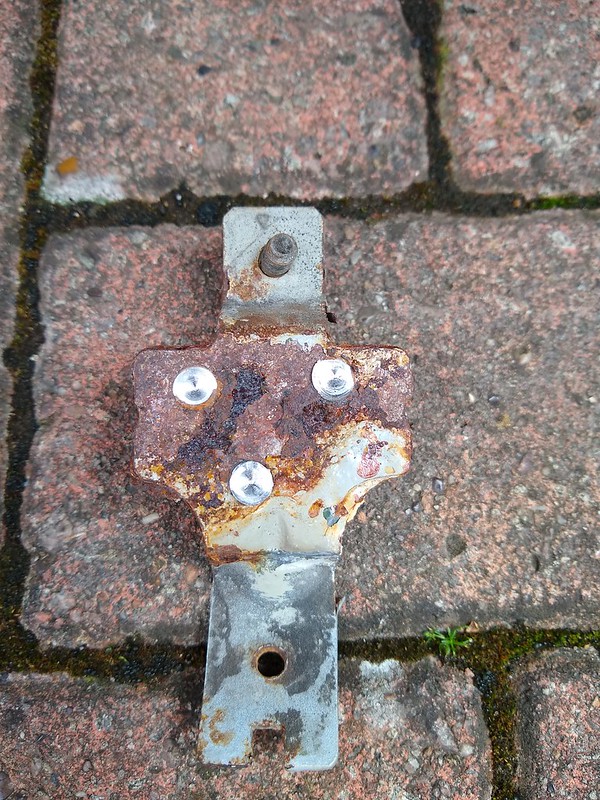
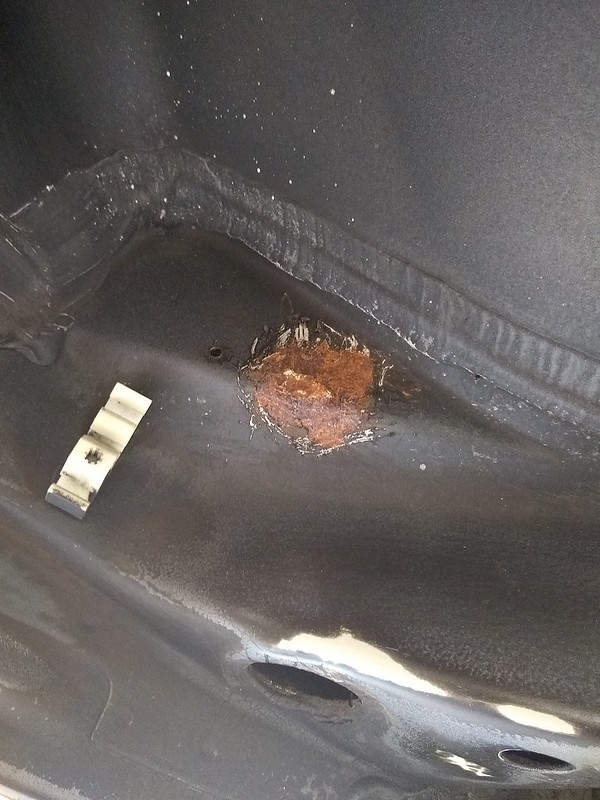
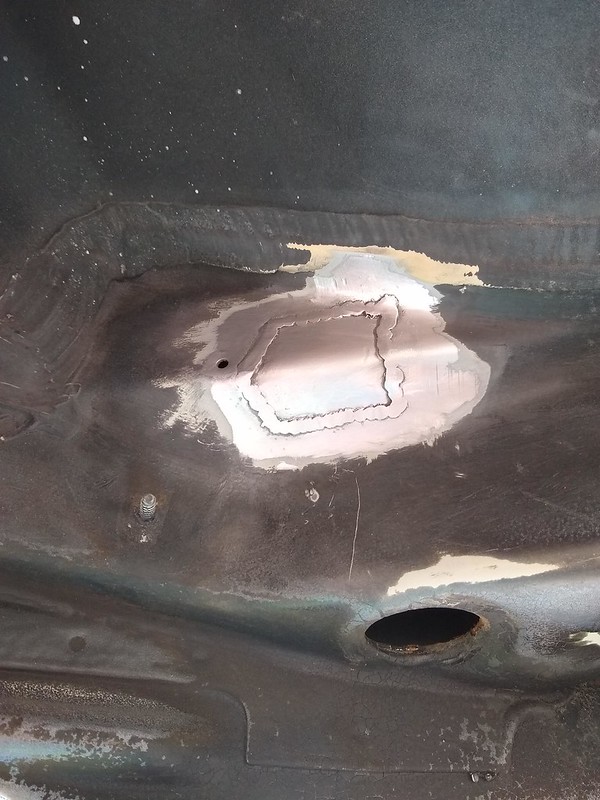
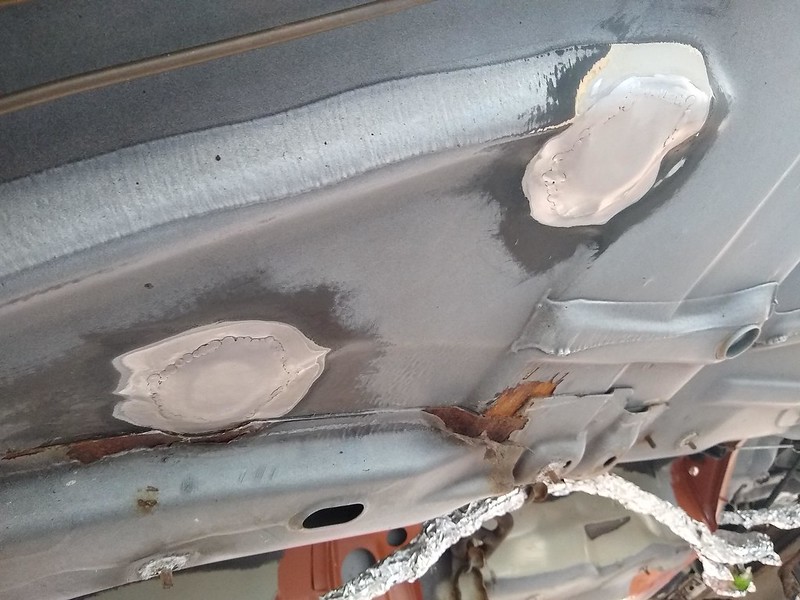
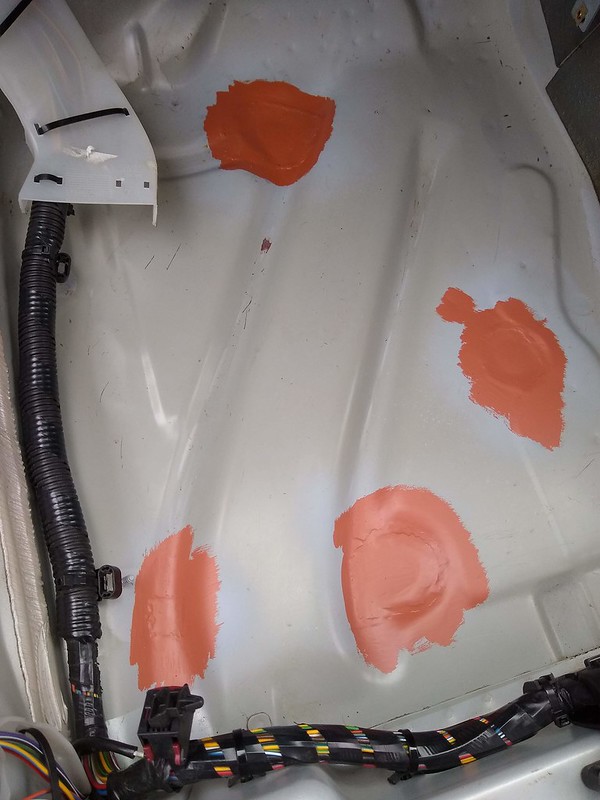
Before I can fire up the rebuilt engine the fuel tank needs dropping and new pump installing. There's also rust around the floor depressions and plastic bungs that needs fixing. I scraped away the underseal to get an idea of how far the rot spread.
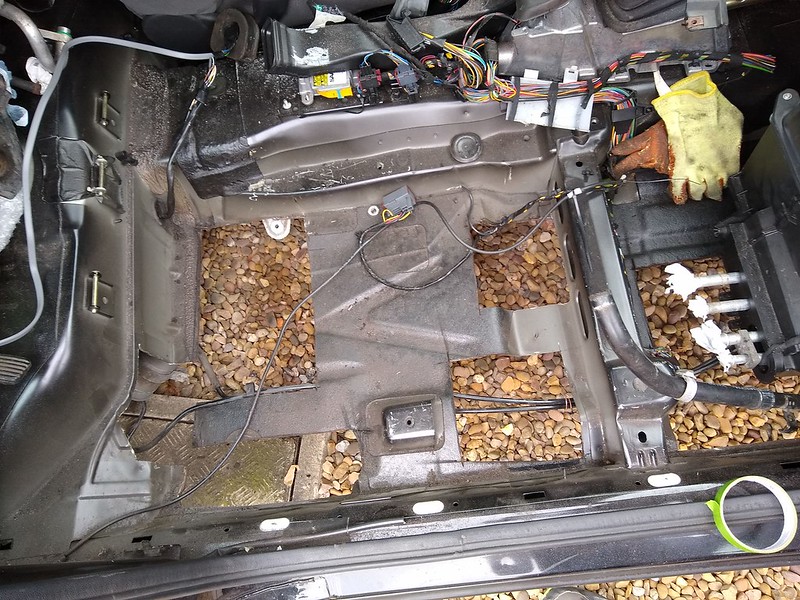
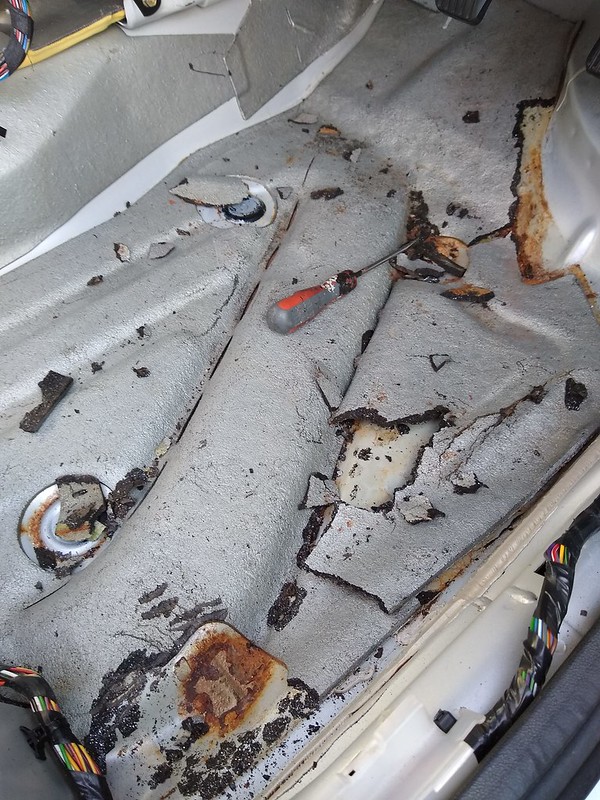
Decided to remove the floor sound deadening to make life easier for the floor pan repairs and allow me to check all areas. Drivers side came up in large sections and then the remains could be scraped away.
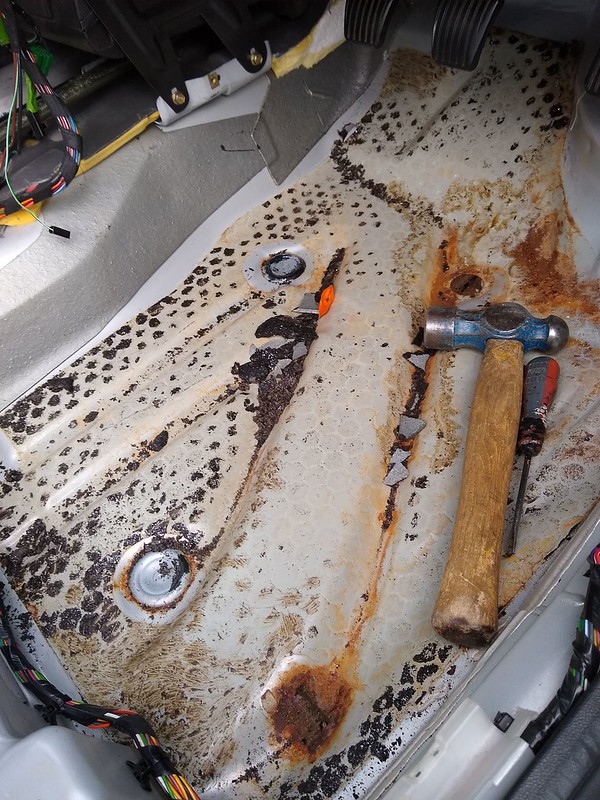
Autogylm intensive tar remover for final clean up.

The rear stuff is thinner and proved tricky to remove. Tried freeze spray which kind of worked and was debating the dry ice method before I gave it a try with the heat gun and scraper. This worked a treat and the residue could then be removed with intensive tar remover and a bit of effort.


Thinking I had this method worked out I tackled the passenger side which turned out to be a complete nightmare.
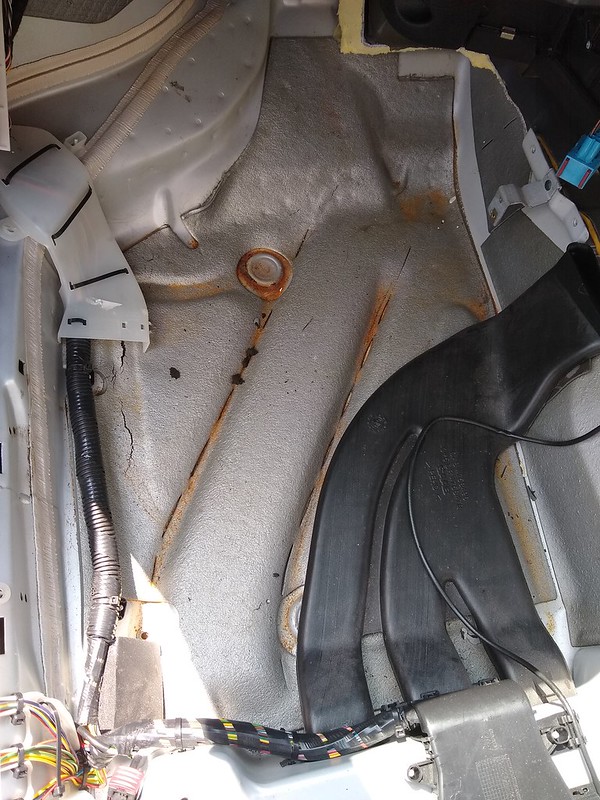
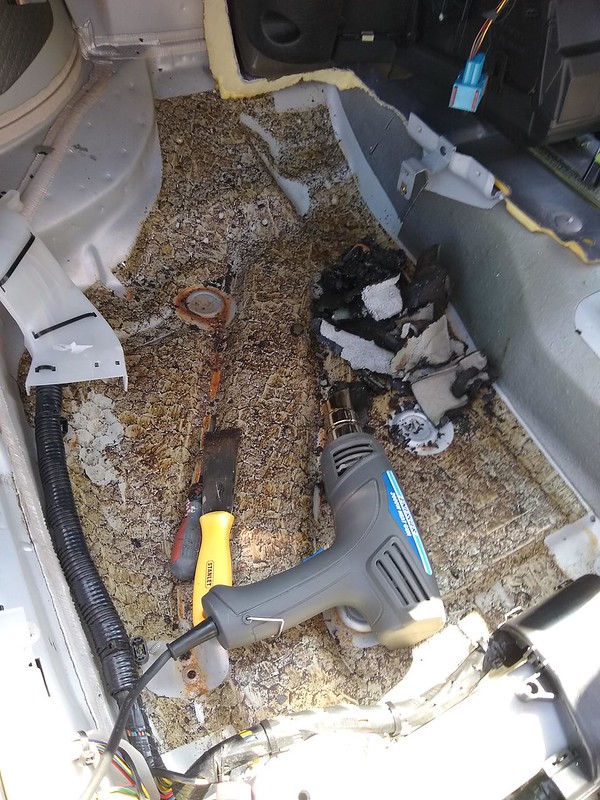
Few hours later I had it matching the others and looking clean.
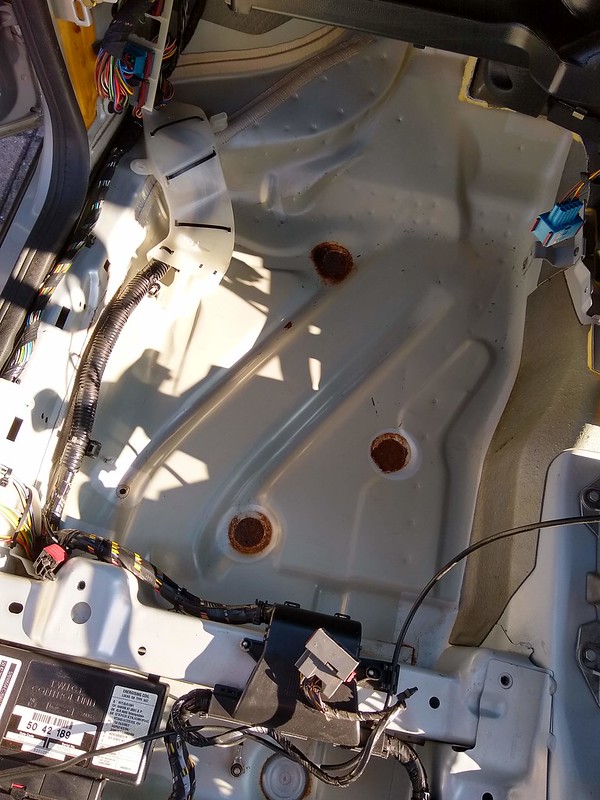
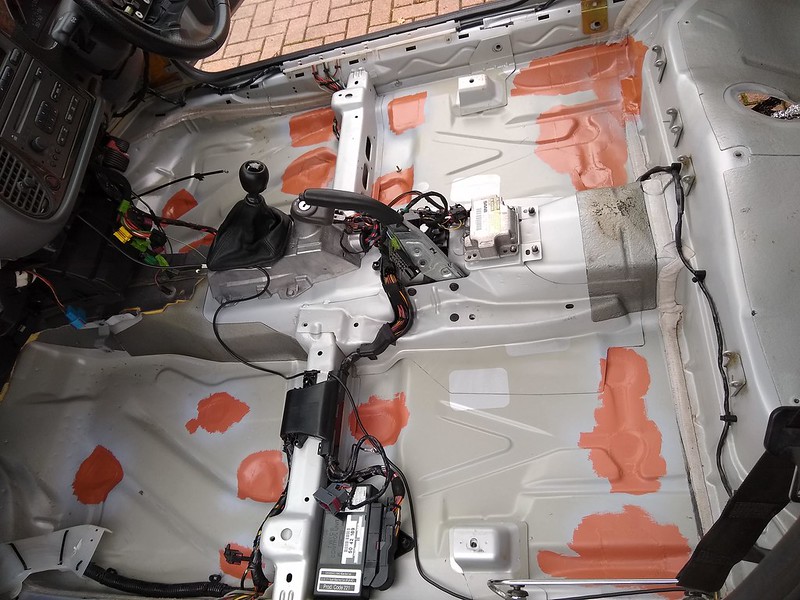
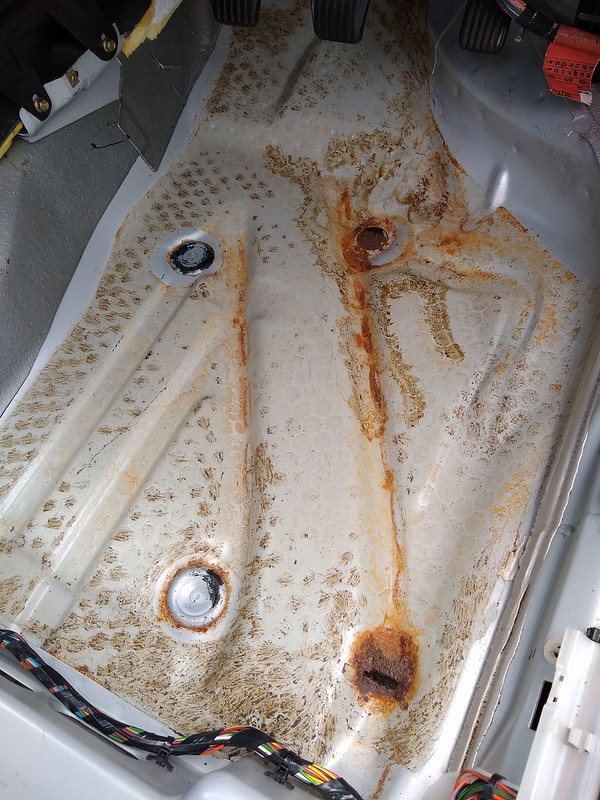
All out, cleaned up and ready for welding floor pan repairs. Planning on eventually replacing the sound insulation with dynamat after floor pan is painted.

I need to repair the sills right where the axle stands are located and wanted some more height for the floorpan repairs. Looked at wheel cribs and decided they were too expensive and I would make my own. Inspired by various designs on YouTube I've made these long enough so the tyre sits on the wood not just the end stops and a stackable top section for slightly adjustable height.
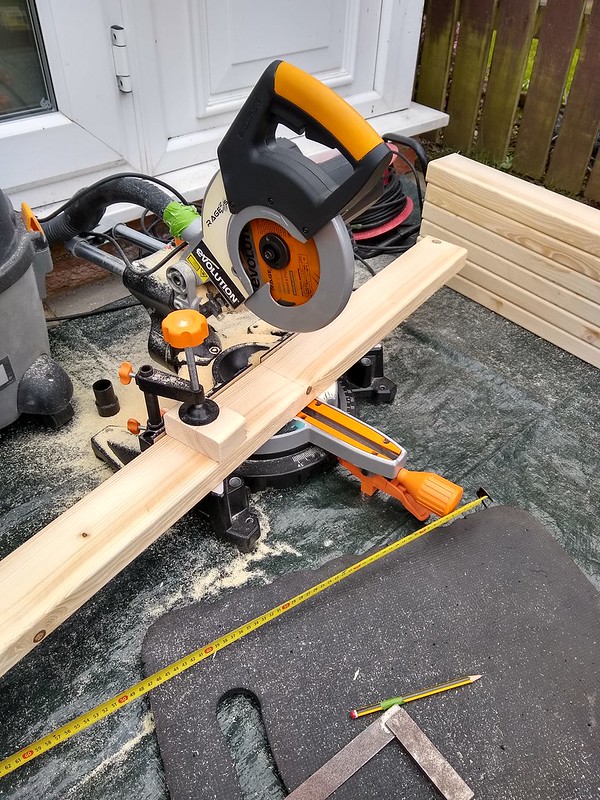
Quick mock up to check height.

Because this is a driveway project and open to the elements I decided to paint every bit of wood before assembly. Each block got 2 coats and it became a nightly routine after work one week to get them all ready.

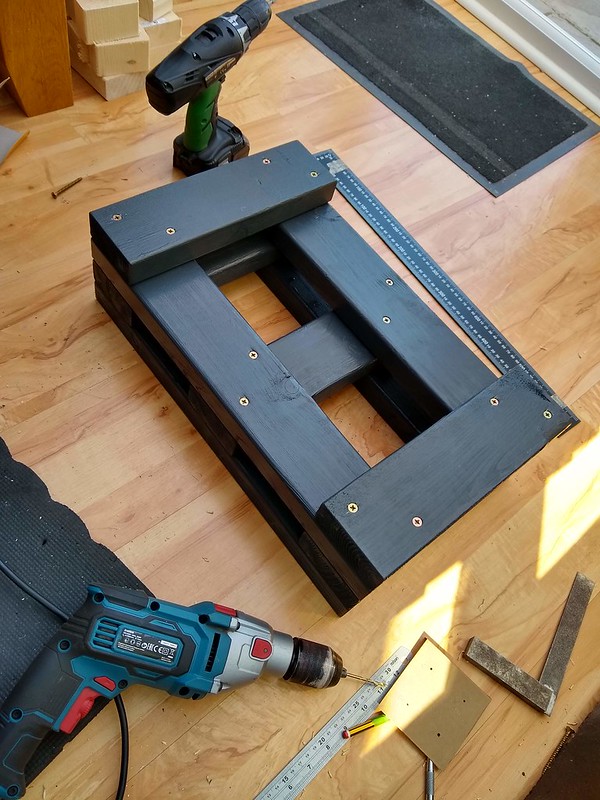
I was concerned the paint might allow the top section to slide so built in dowel locators. Massive Jenga set complete!
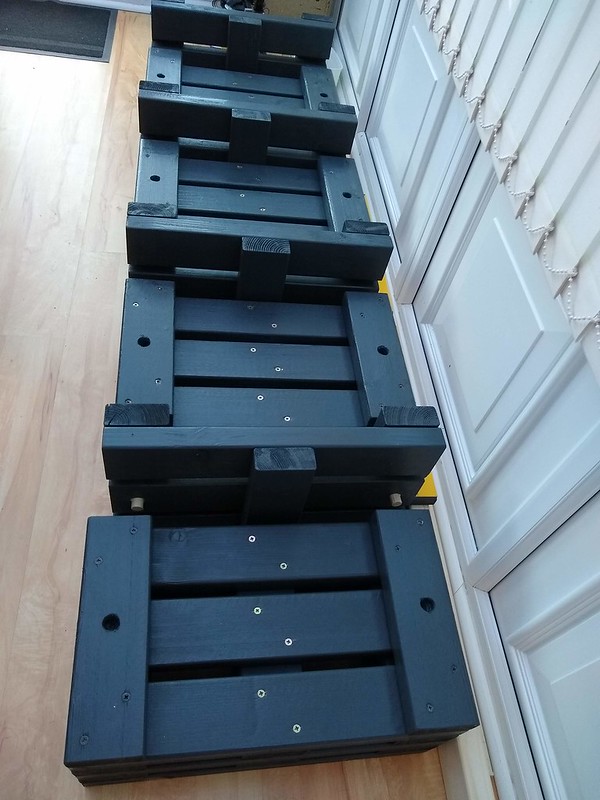
Before I got the car raised up I cut off the old exhaust and dropped the fuel tank. There was half a tank of old fuel in there which took some draining and was dispensed into my daily driver. Thought the fuel would be very stale but surprisingly looked okay and the daily driver hasn't run any different so all good there.

Got the rear raised first using the front cribs to support two scissor jacks.
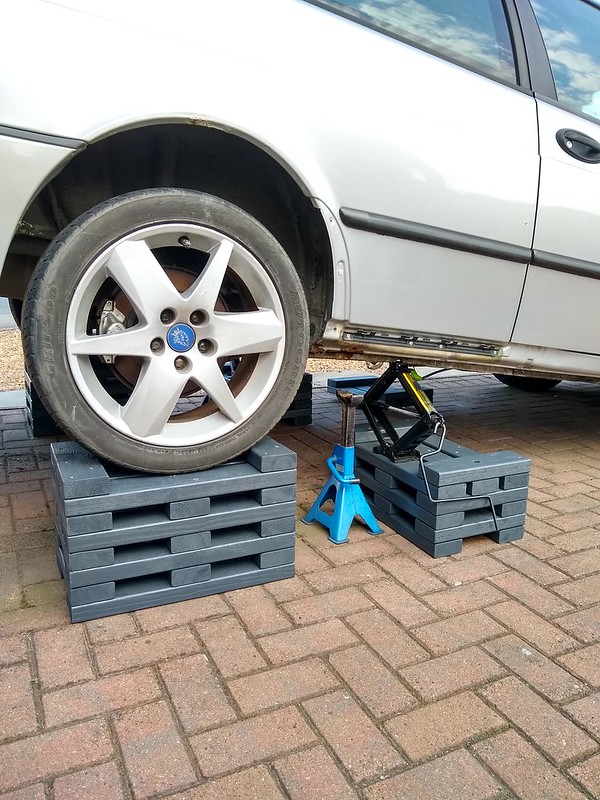
The front was a bit sketchy, jacking the wheels onto scraps of wood and cribbing the jack to gain the final height. Really could do with a low profile high lift jack but that's out of budget. Couldn't get it high enough for the top layer of the cribs but plenty of room for working on still.

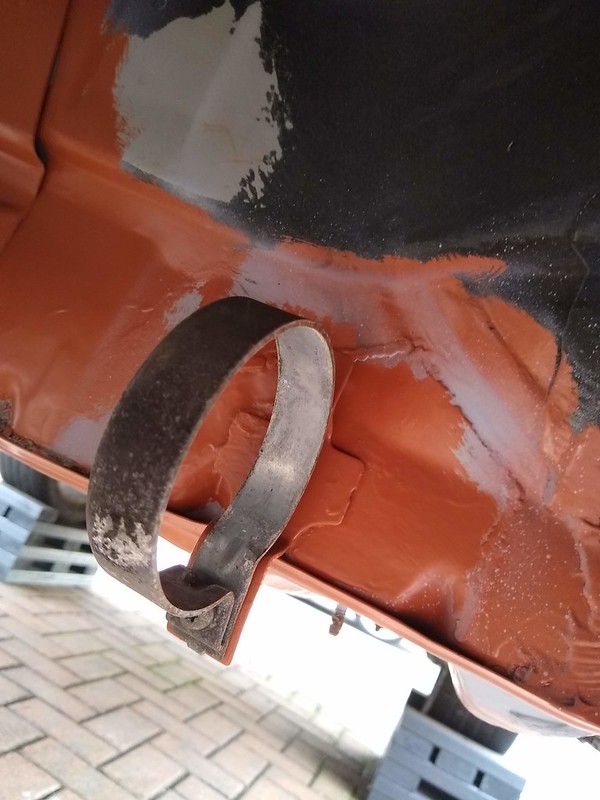
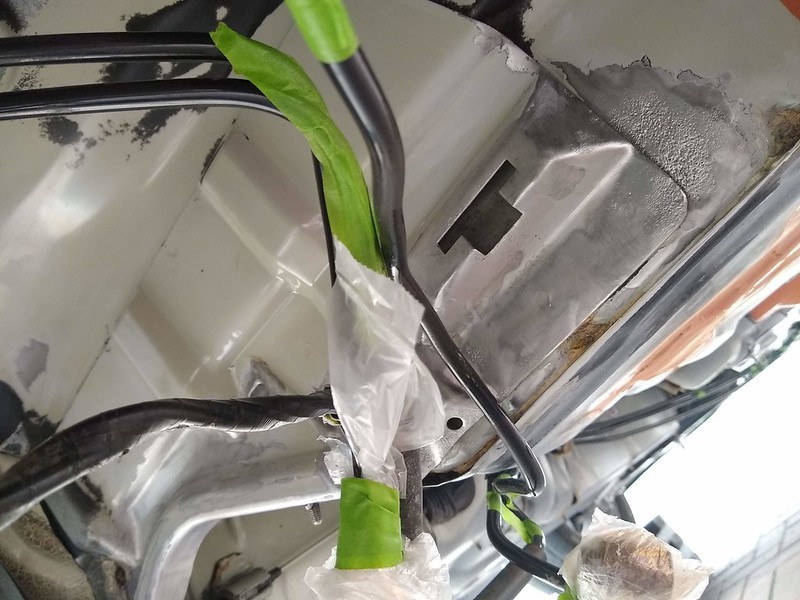
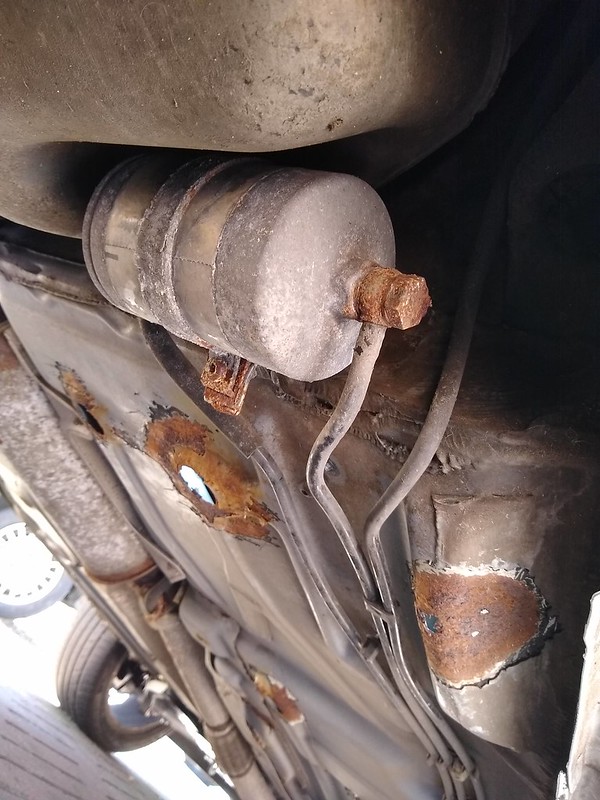
With the car raised up high I could give the rear section a good inspection. With the exception of the floor it's in great shape considering the age of the car. Few surprises like this bit of rot behind the filter.
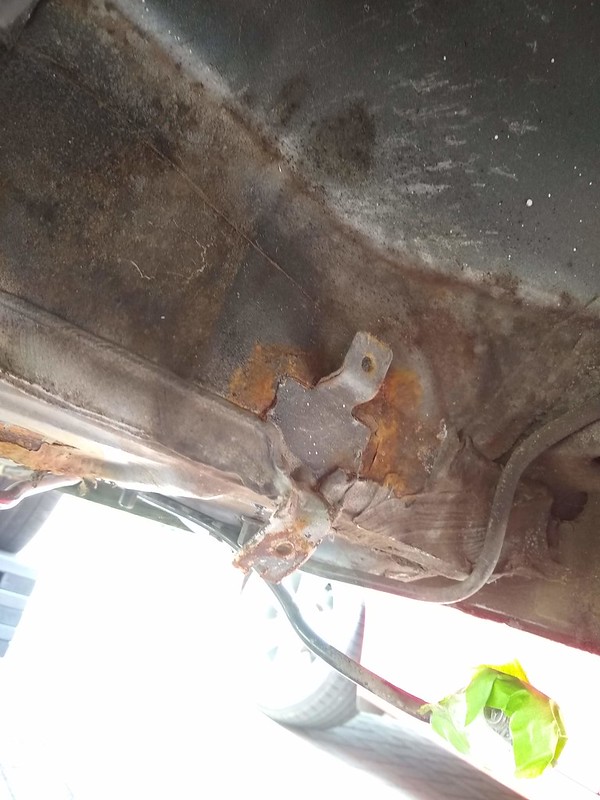
The rear looks good, even looking past all the muck you could tell it's in good shape in places. Decided to clean the whole underside to get a true picture.
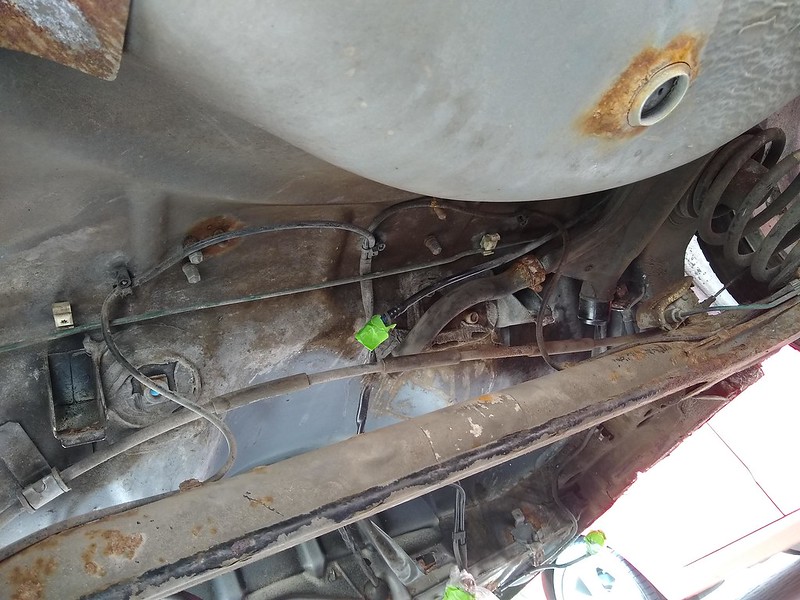
I thought this would be a quick job of spray some TFR and wash it off. It required more scrubbing, degreaser and another round of TFR but cleaned up nicely for full inspection.
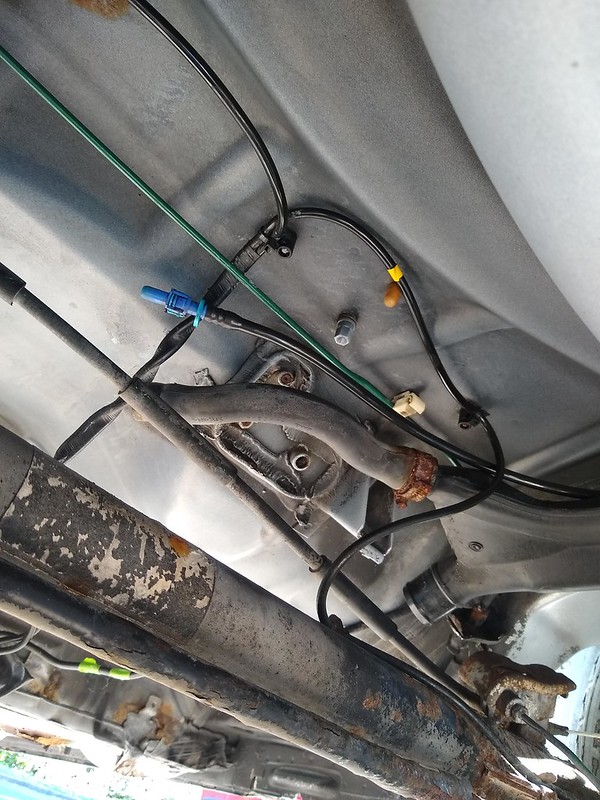
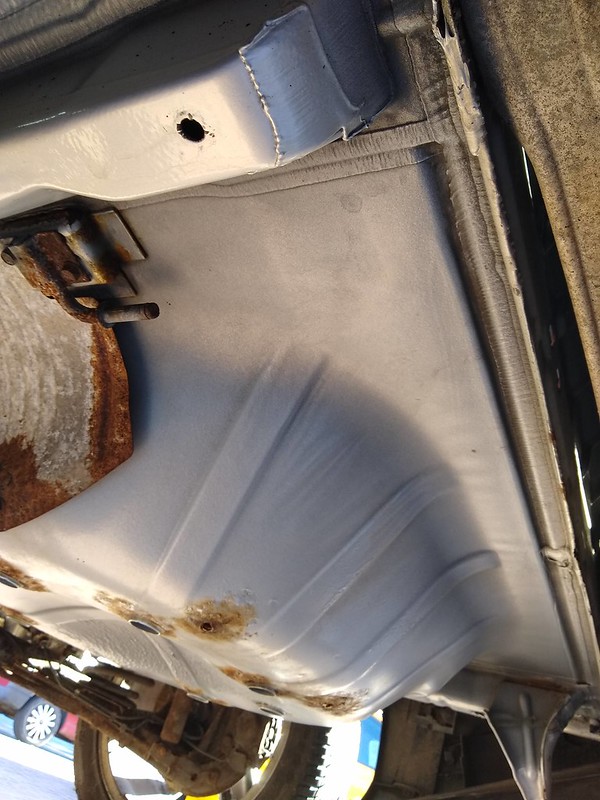
Passenger side isn't too bad.

Drivers side wants some work and I scraped of some underseal to see how far back the rot goes.

Drivers footwell floor is quite bad.
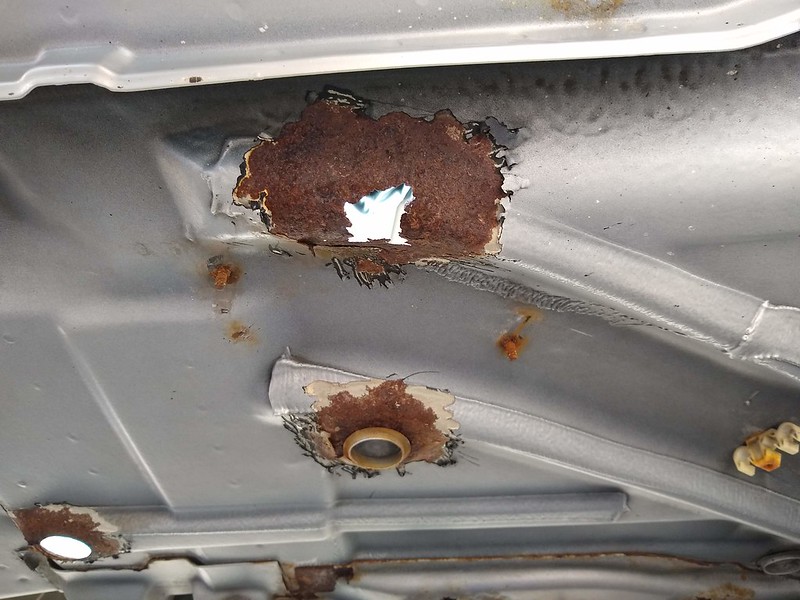
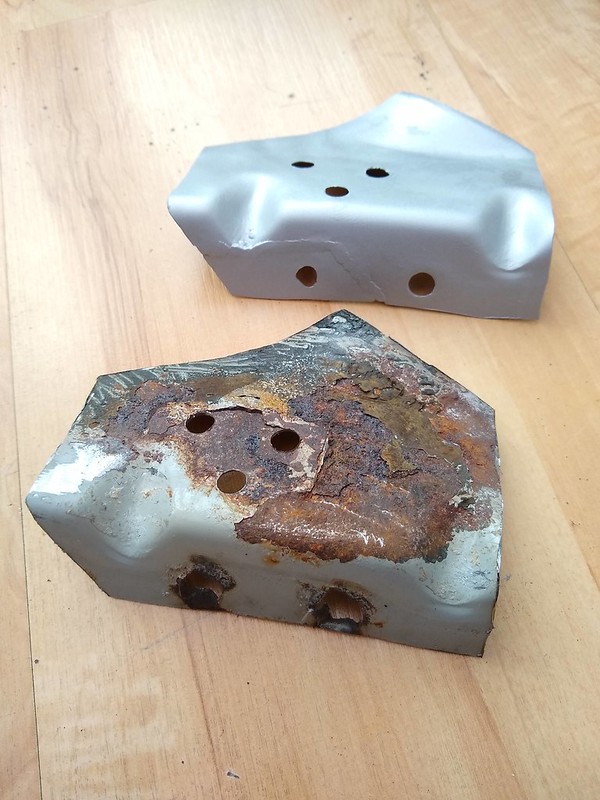
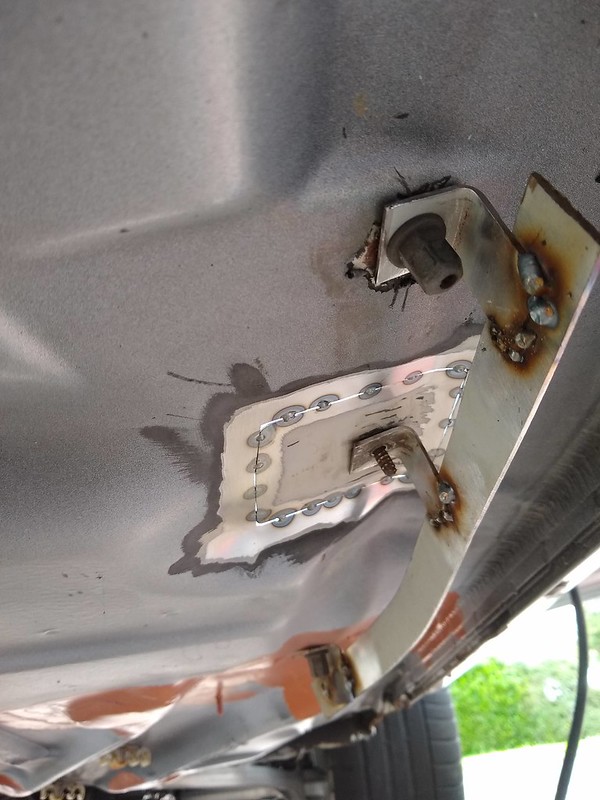
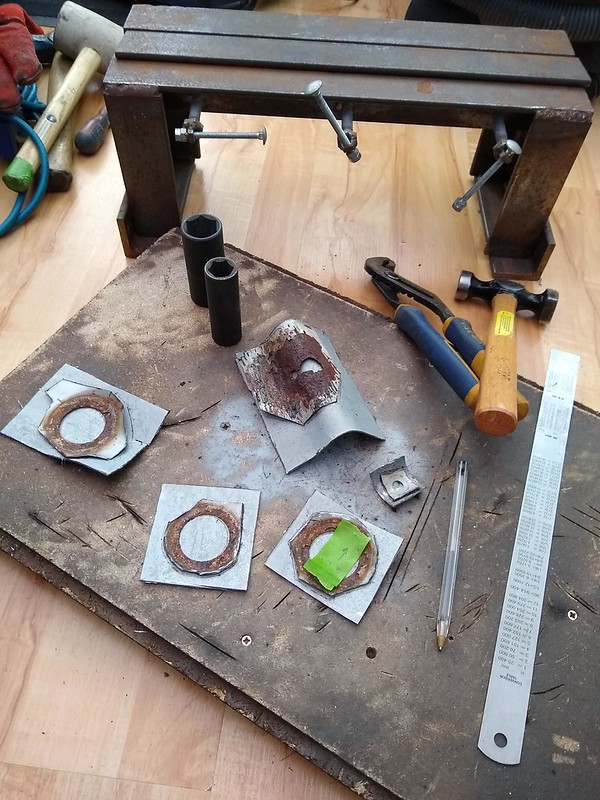
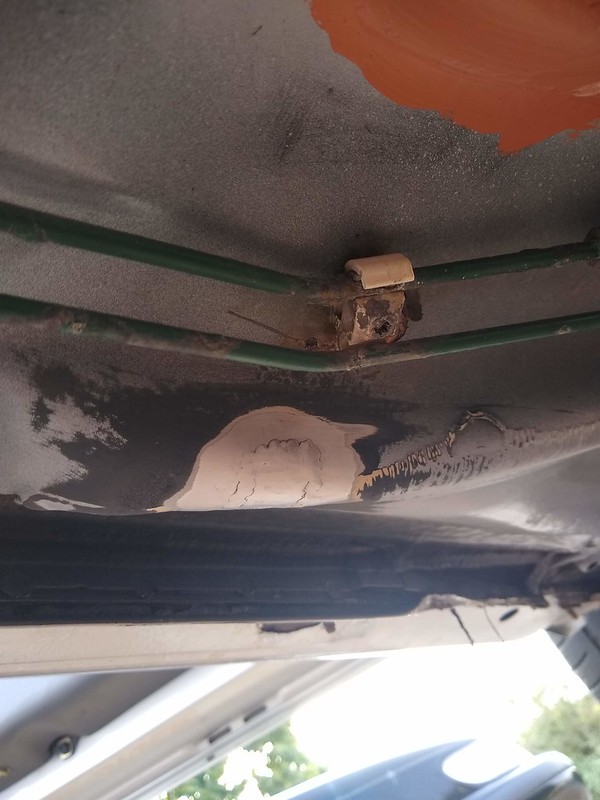
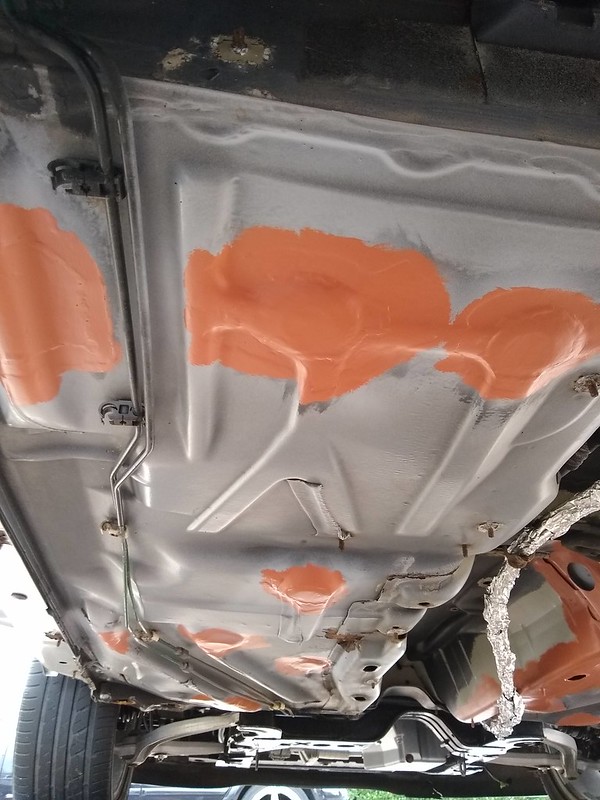
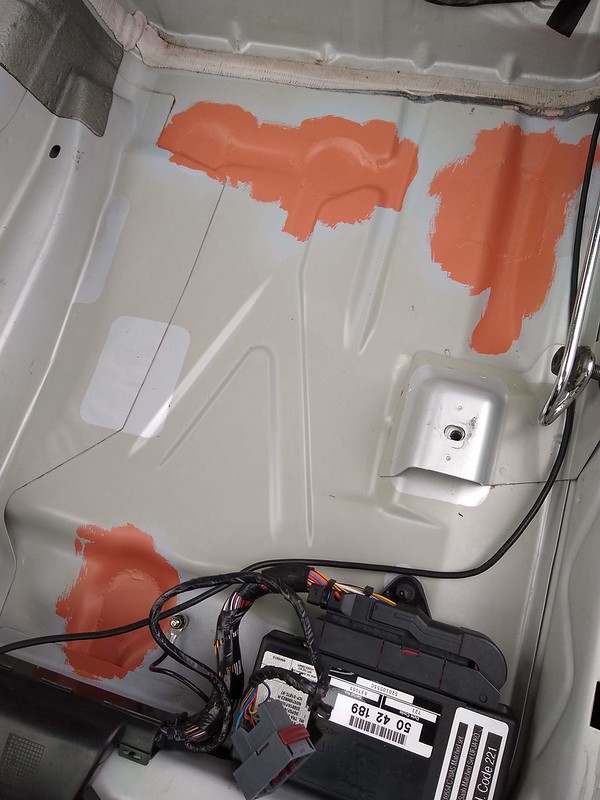
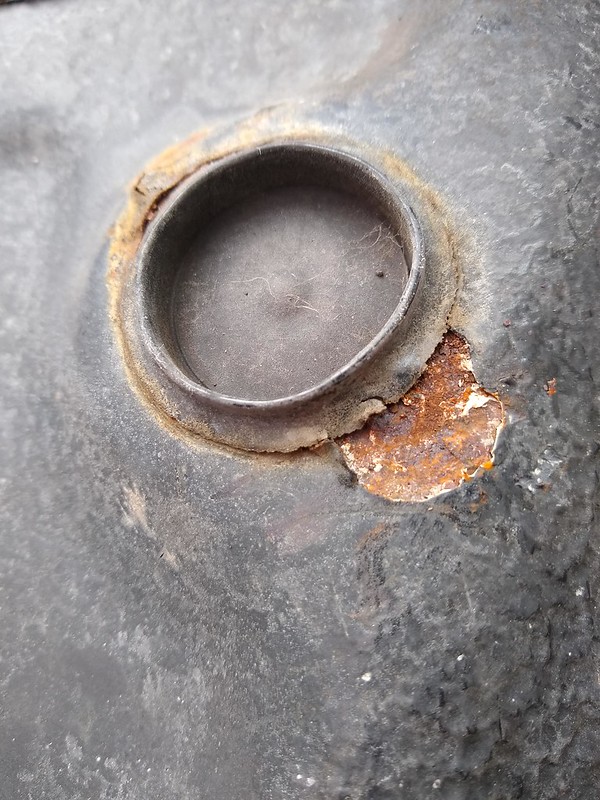
The scrap donor car I have has only done 70k and the floorpan bungs are not as rusty as project silver. Plan is to use sections of that to replace the areas where the shapes are quite complex.

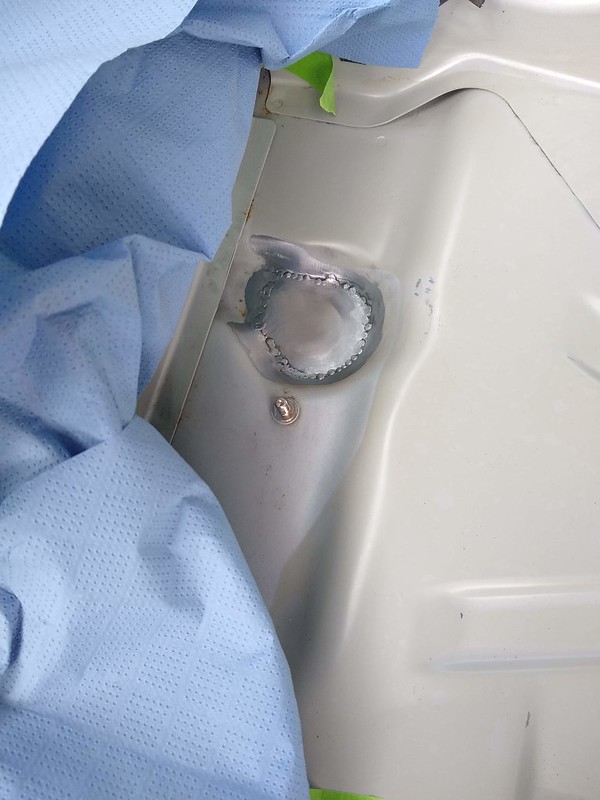
This is the donor car and shows how this little plastic lip on the bung traps moisture and causes these rust issues.
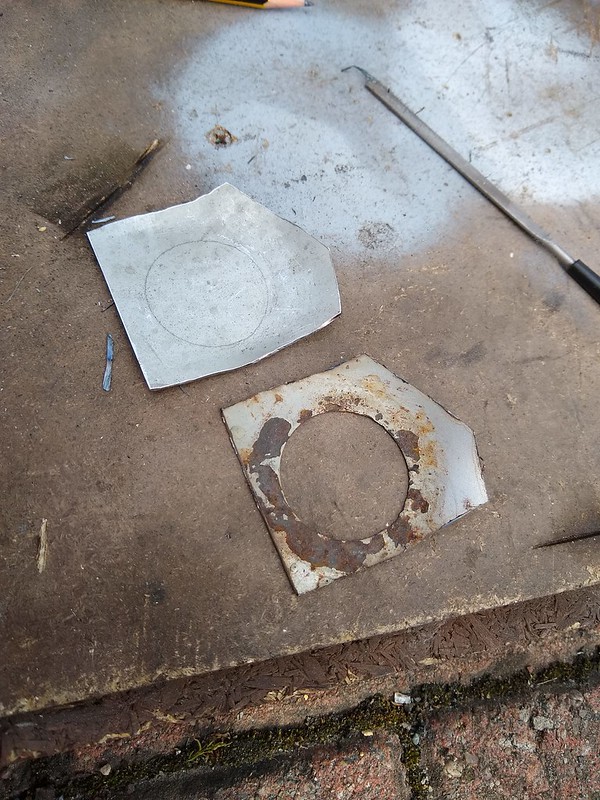
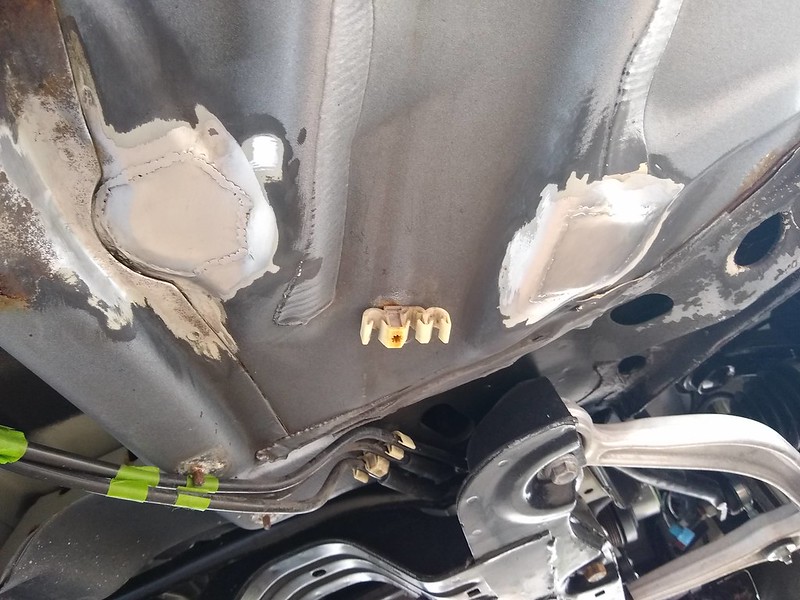
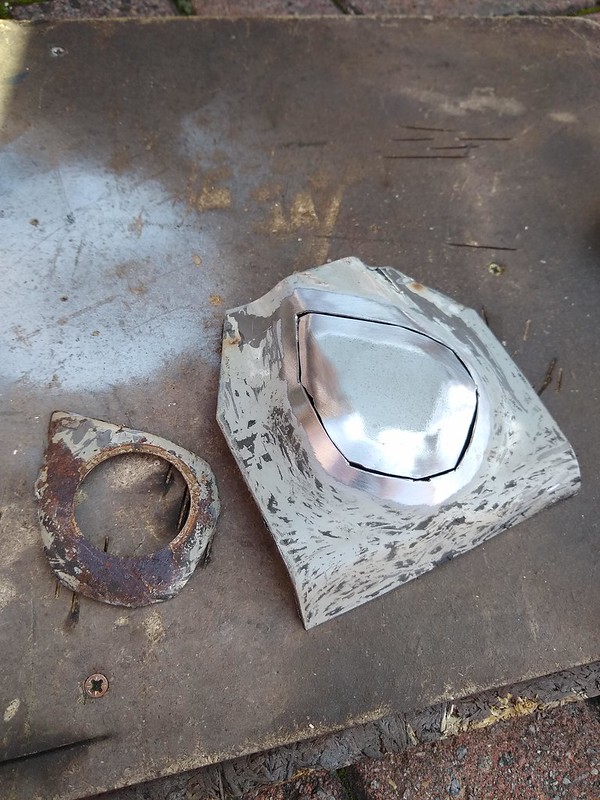
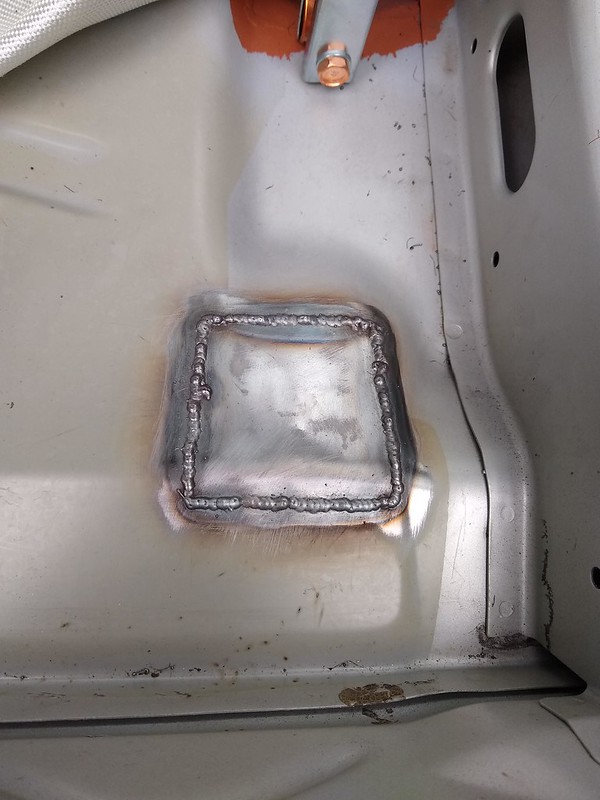
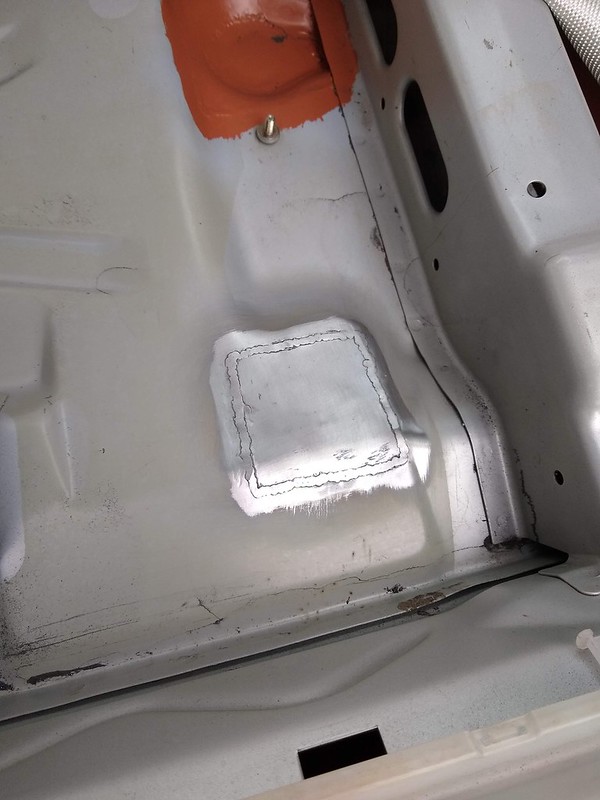
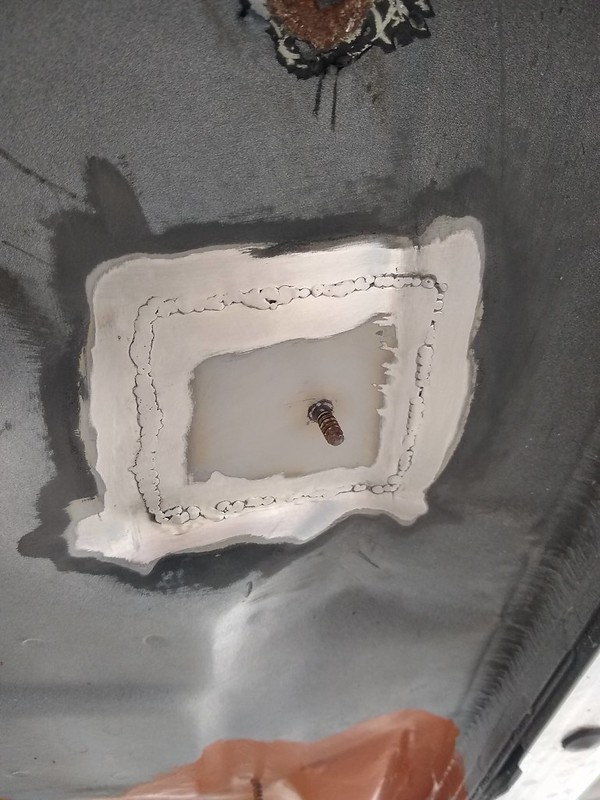
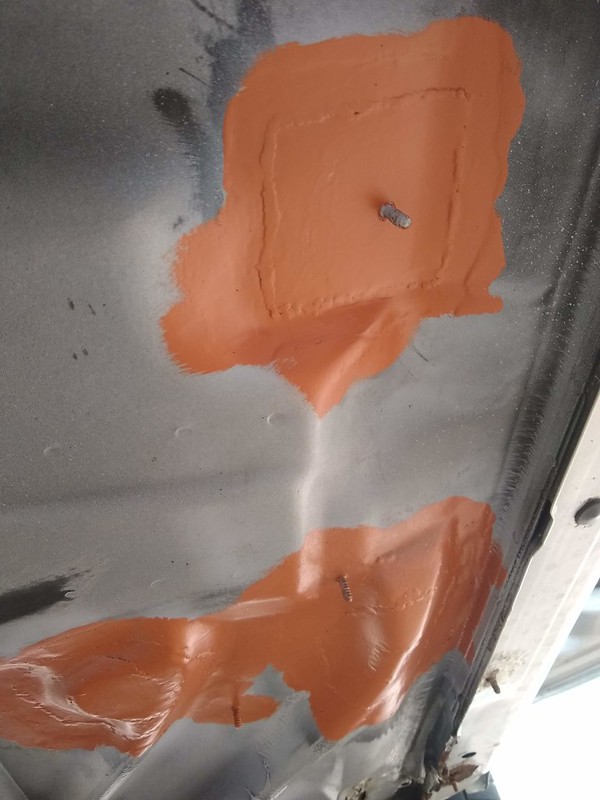
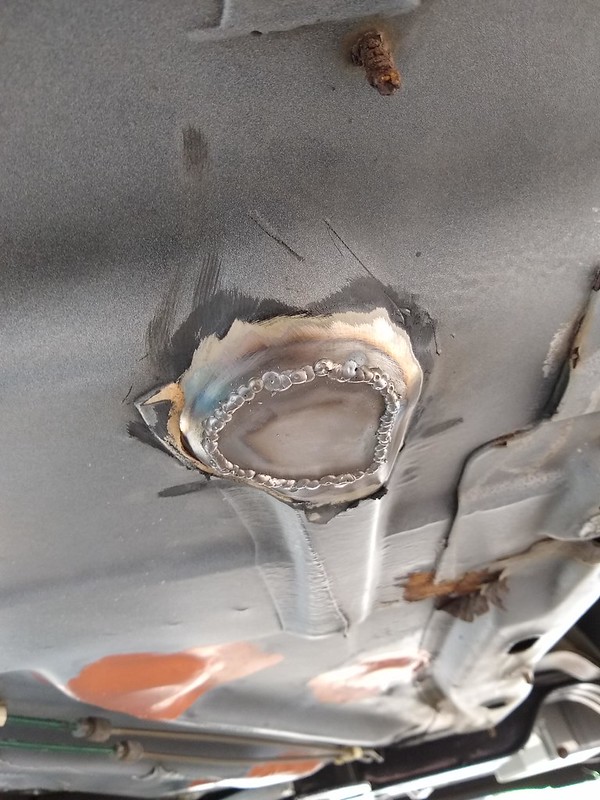
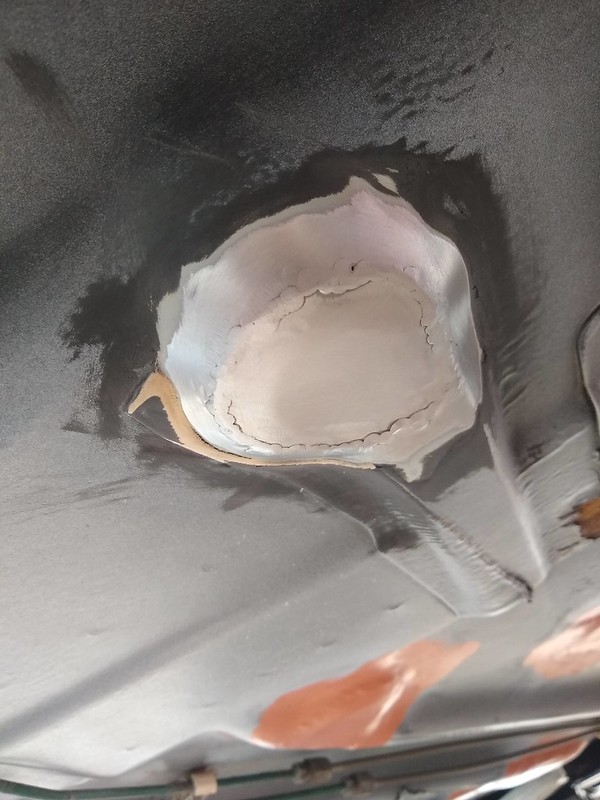
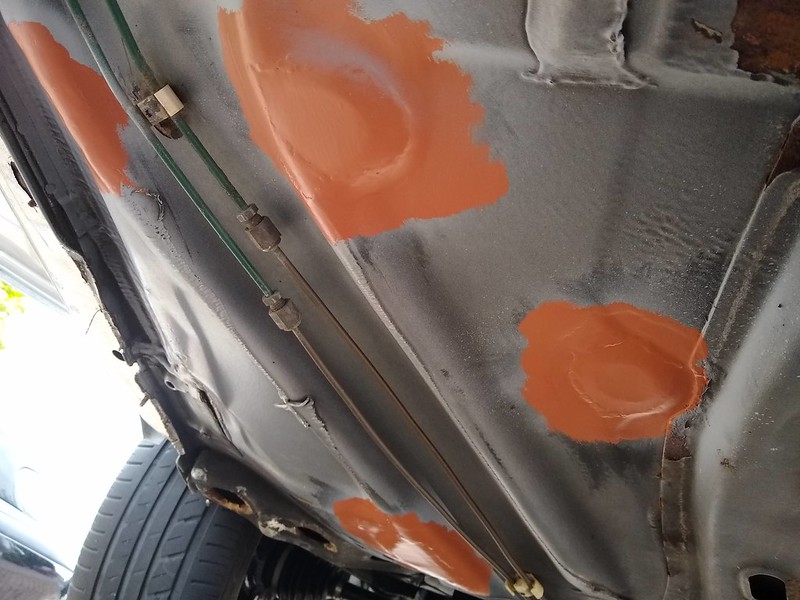
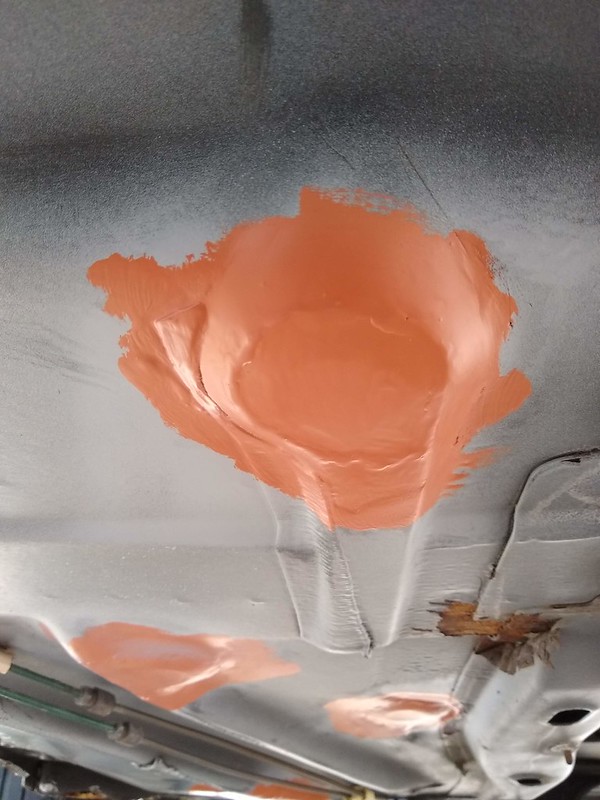
Plan is to weld up these donor section bung holes removing the small amount of rot. That then gives me a nicely formed replacement section to cut in.


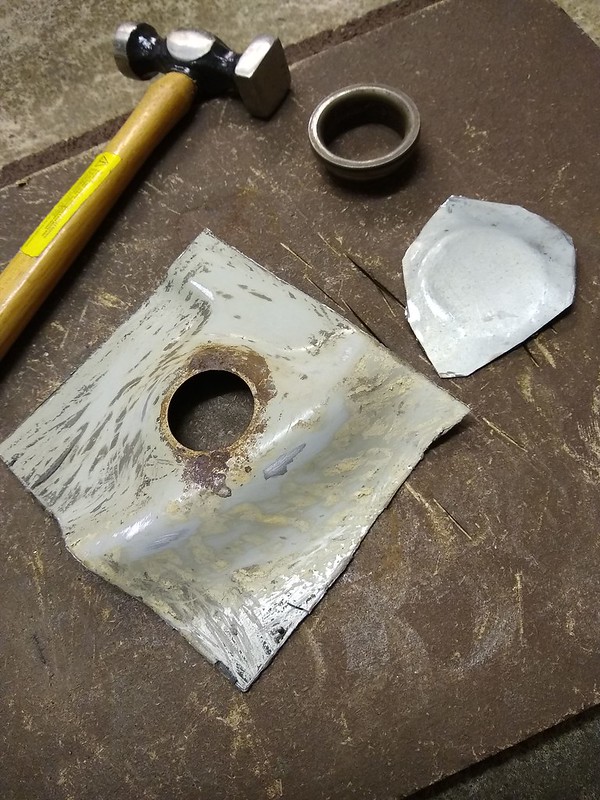

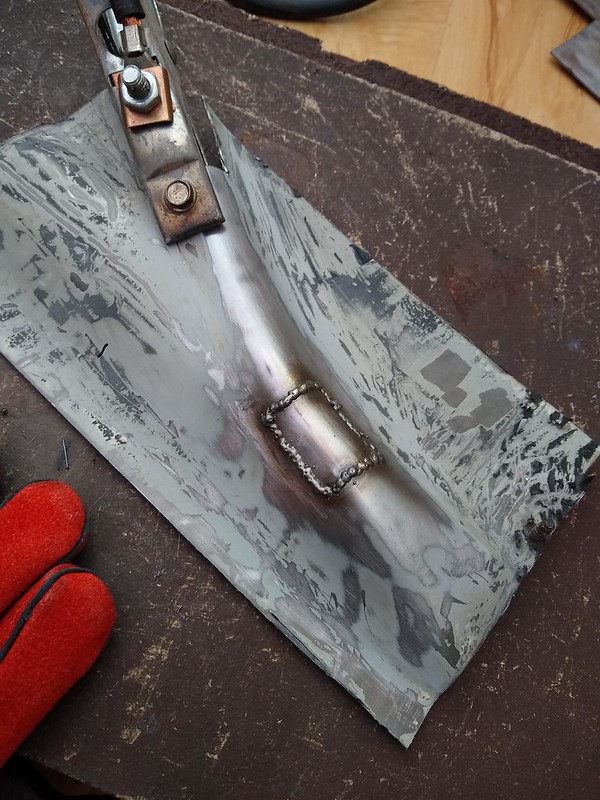
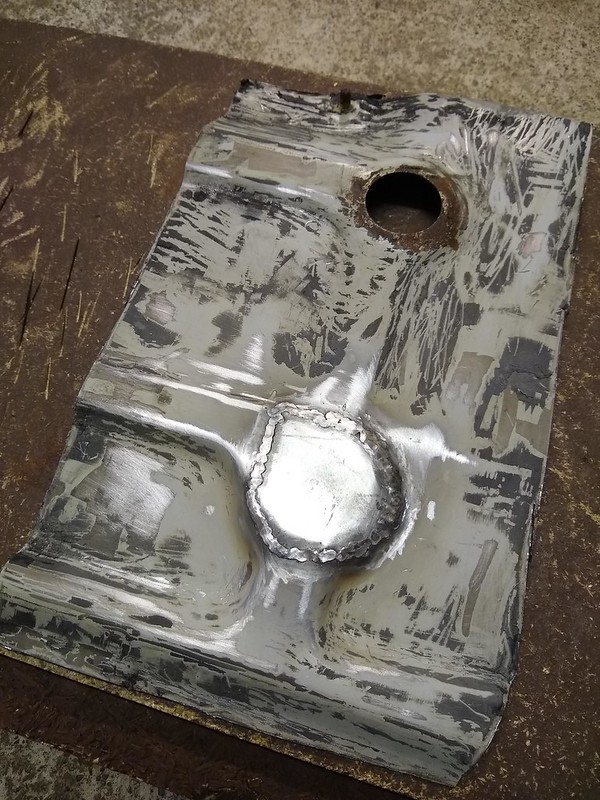
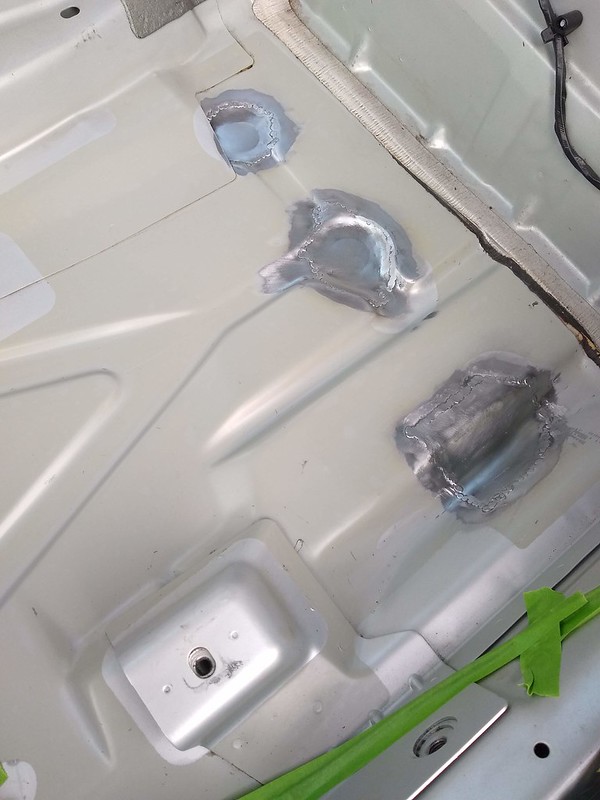
Repair panels need some welds grinding more but was time to make a start on the car.


Started to make progress then ran out of gas.
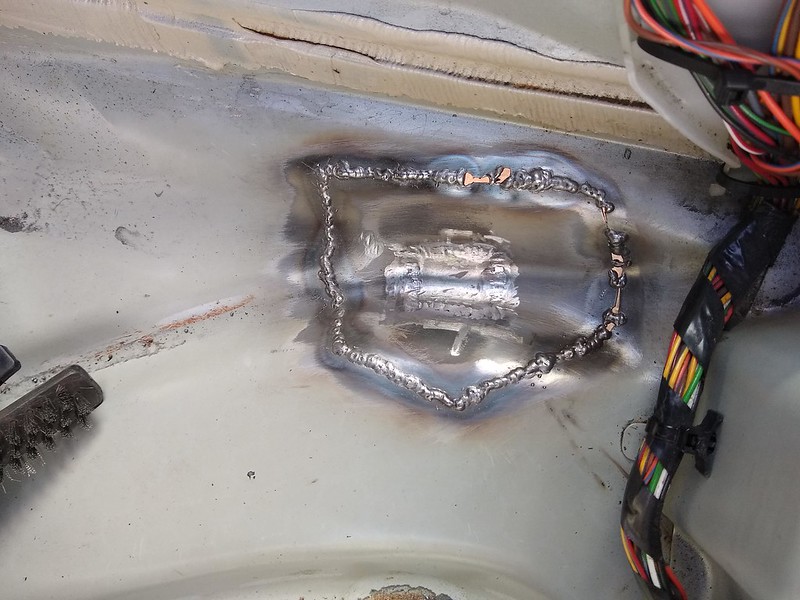
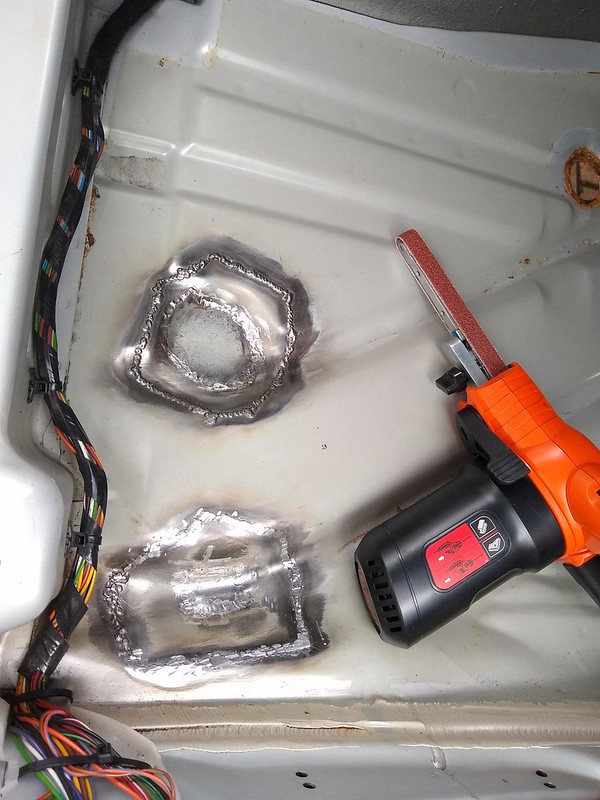
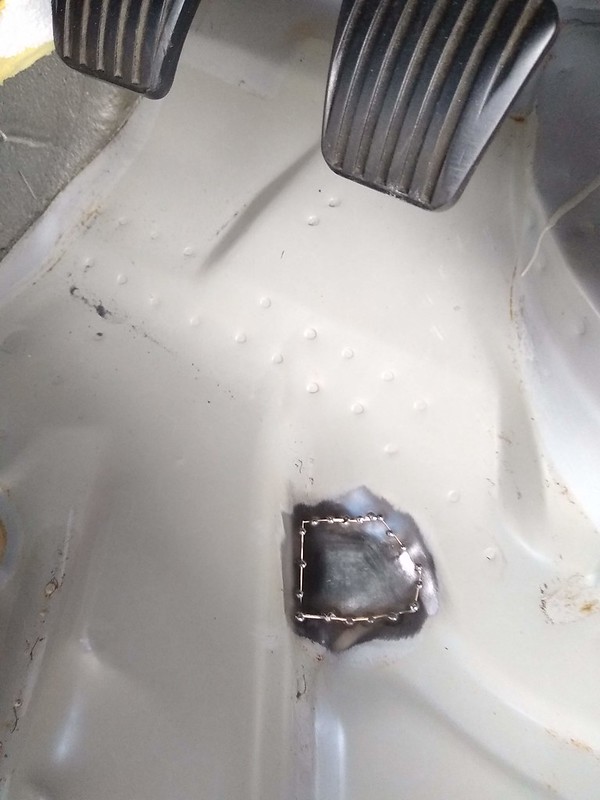
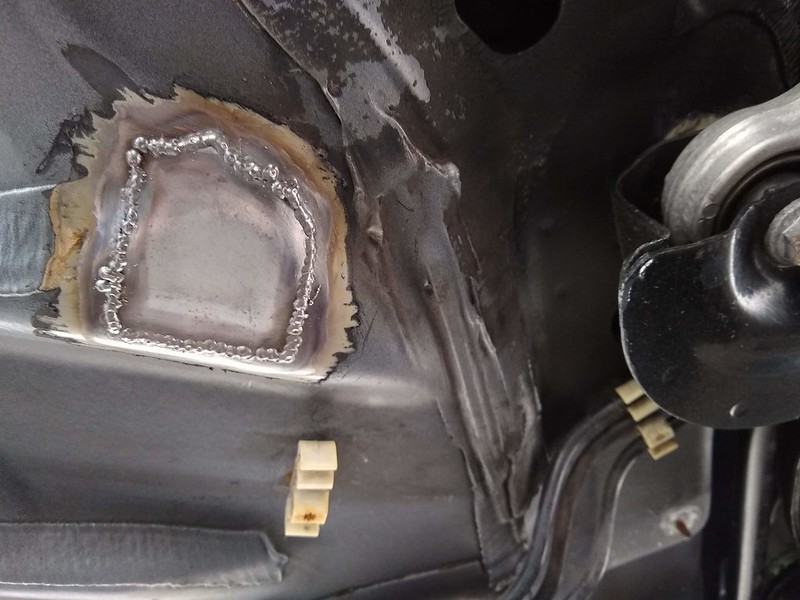
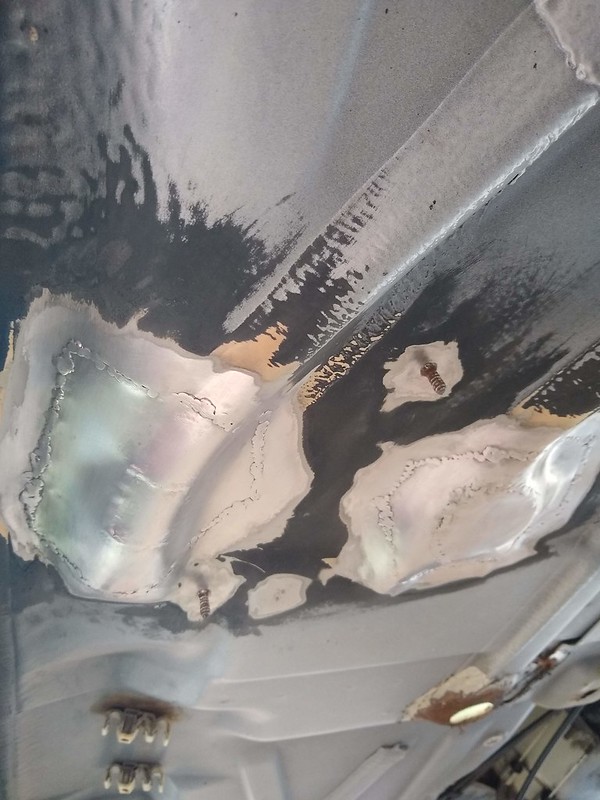
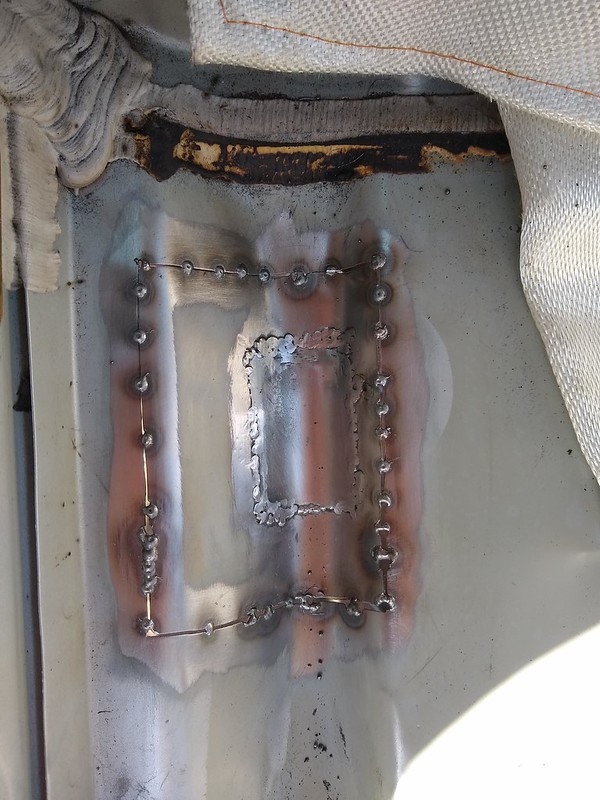
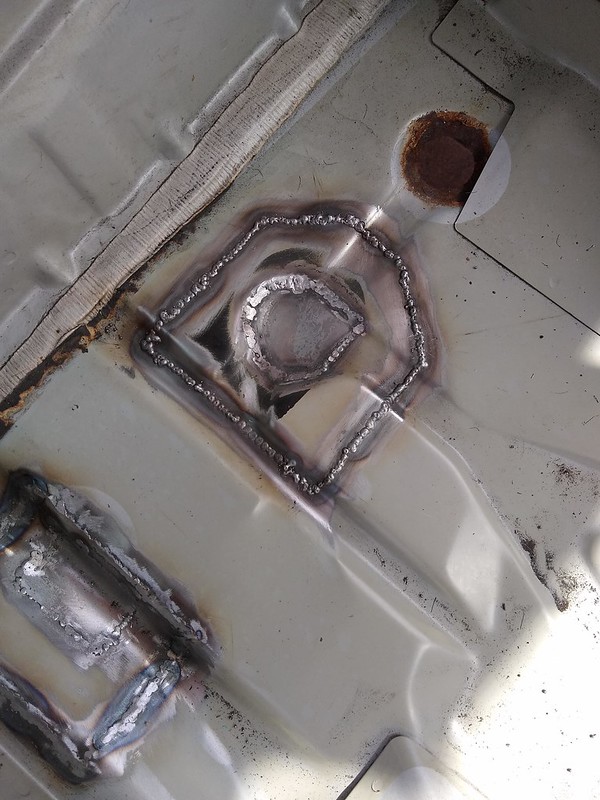
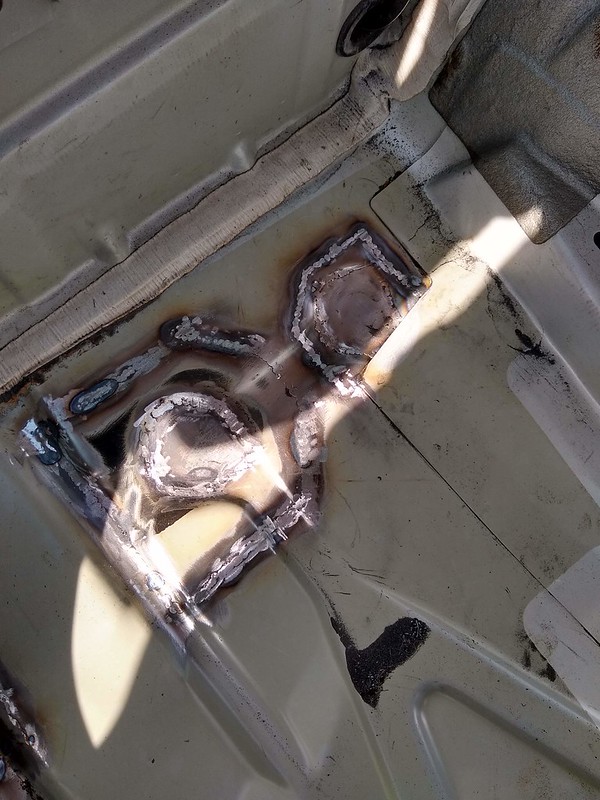
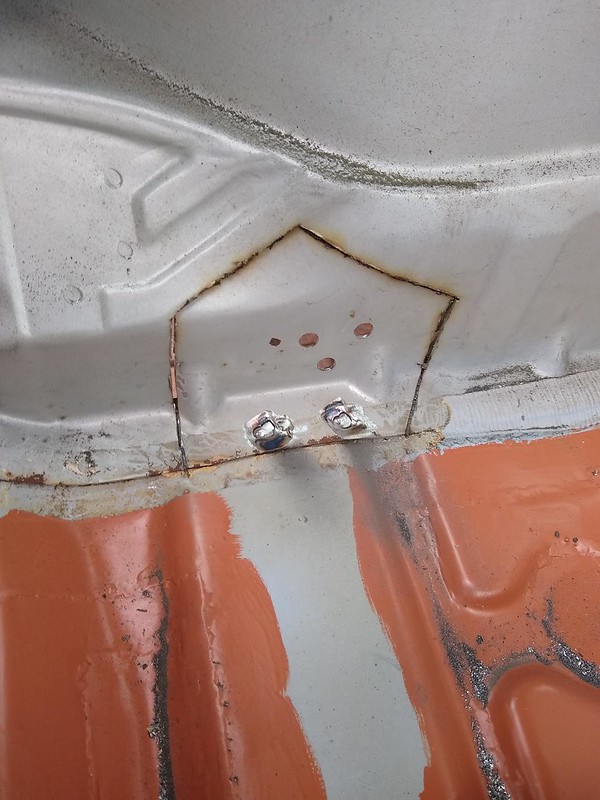
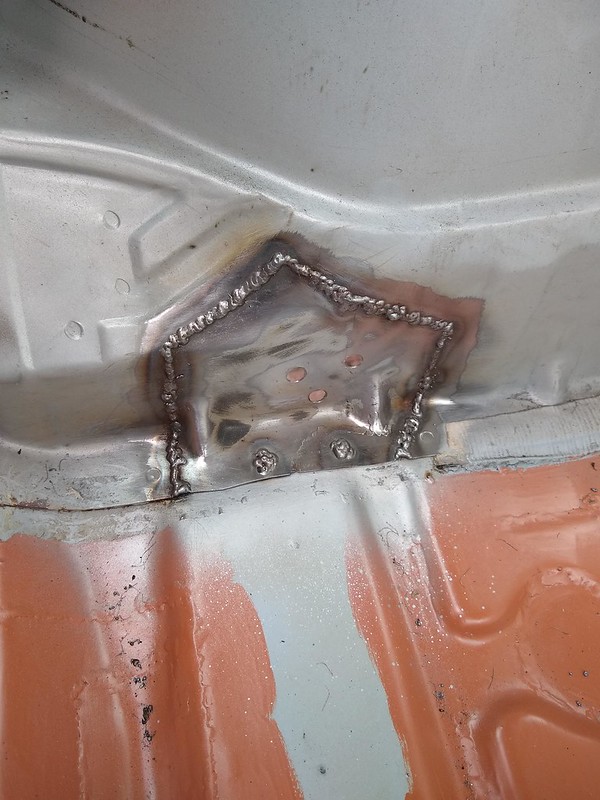
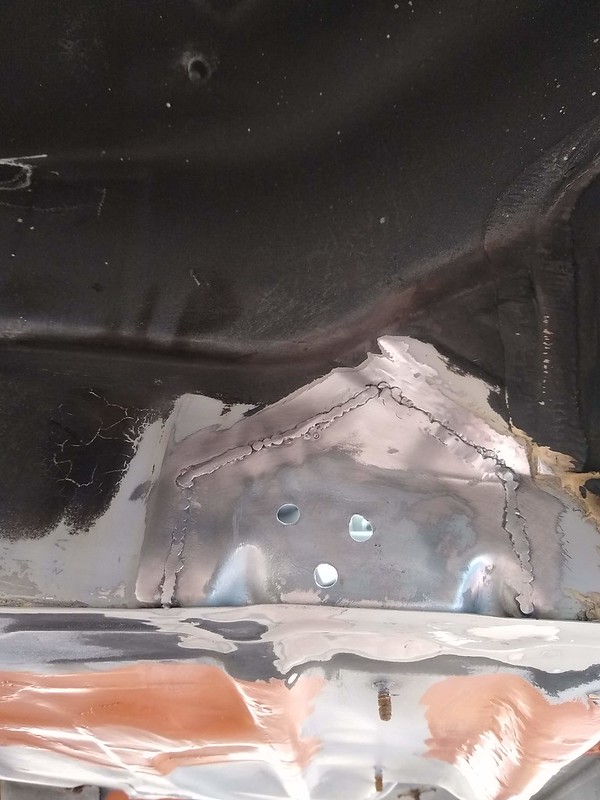
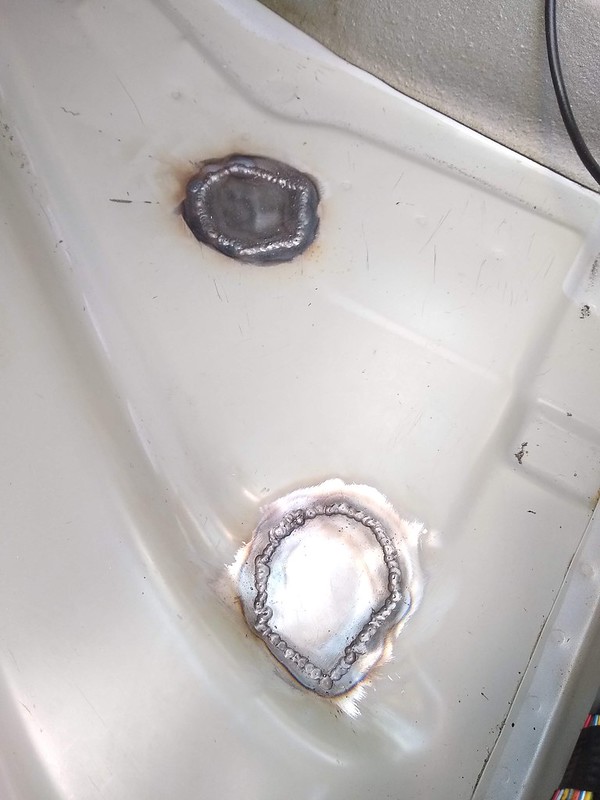
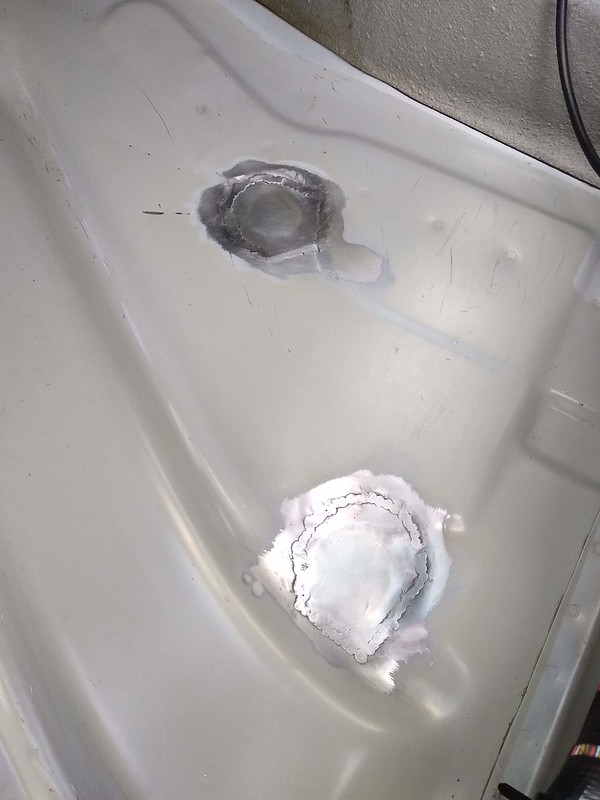
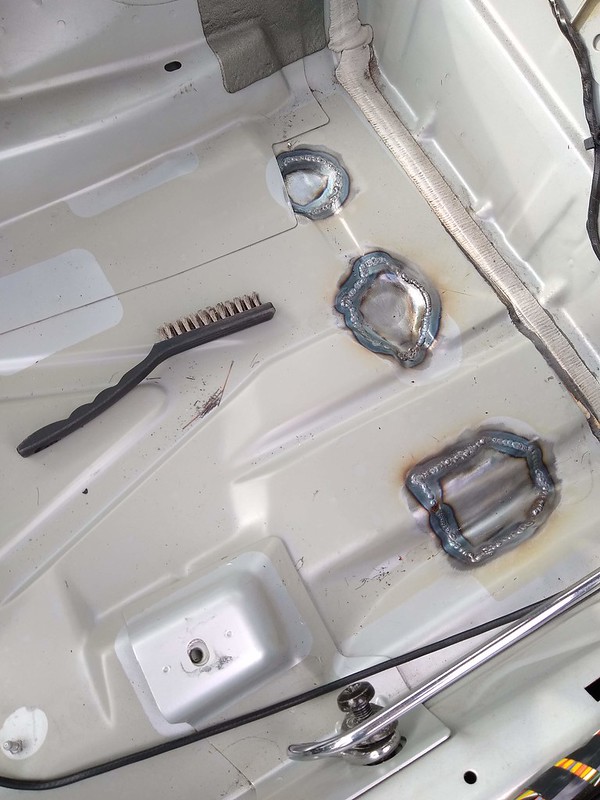
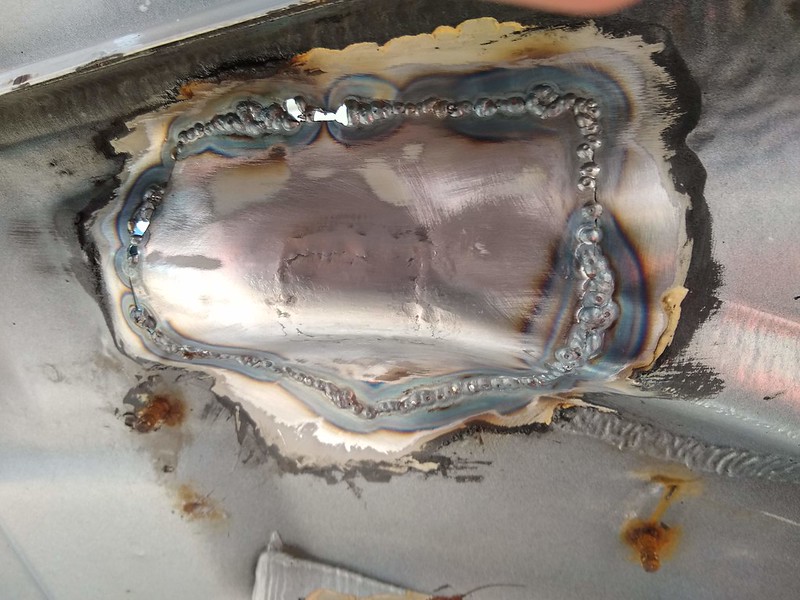
Welding from inside the car the penetration is good underneath but was blowing a few holes in places as you can see. Tricky to get the gaps cut exactly right but hopefully I will get the welder dialled in again and this finished off nicely.
That brings project silver uptodate. Not close to finishing yet but glad it's back on track.
Rebuilding the driveshafts was next on the list. They came back from powder coating looking great, along with the strut brace and battery cable bracket.

Driveshaft parts were a little tricky to obtain but managed to source GKN tripod joints, left hand inner boot and outer cv boots. Went for outer CV's made by SKF due to availability and had no choice other than autofren aftermarket for the RH inner boot. The tripod joints have small needle bearings and it's a bit of a minefield which grease to use. I've played it safe and gone for the GKN grease on these inner joints just to avoid any mistakes.

SKF outer boot and clips on the left vs GKN on the right supplied with oetiker stepless clips. The GKN are a tougher more plastic construction and the stepless clips provide a nice seal all around the boot.

The aftermarket boot came with some cheap universal boot clips seen top right in this picture. Using the Saab part numbers and Saabits I managed to get some oetiker clips which seem hard to source but miles better quality.

GKN LH boot comes with oetiker clips.

The tripod joints didn't come with a circlip but one came in the GKN kit. This left me one short and found that this part is no longer supplied by orio. Out came the measuring callipers and ordered some D1400/0240 24mm External Circlip. In this picture the original is on the left, GKN middle and these newly purchased on right. The ears are slightly bigger, but the size is spot on and solved that little issue.

Rebuilt a few driveshafts over the years, but these were an unusually tight fit. Took a few taps to get the outer cv all the way on and clip in the groove.

Grease well worked into the new joint...

CV clip time. The pliers I've had a while and made by Lazer allowing a socket wrench to be used for more leverage.

Can't buy the inner joints anymore but there wasn't any noticeable wear and it got a clean up and paint earlier.

Worked the grease into the new GKN tripod bearings...

Little persuasion required...

Finished of nicely with the clip...

Required amount of grease measured out...

Now at this point you would expect the finished driveshaft pictures, but I wanted to stop the outer cv joints going rusty and give them some paint. Good excuse to paint a few bits at the same time like the oil cooler. The oil cooler had it's own mini project where I mocked up aftermarket ones, even bought one from a 9-5. However for simplicity and to get the car running I'm going with standard for now. Because these are crazy money to buy new I've flushed this and cleaned it up.

Mixture of heat and aluminium oxidation means the paint just lifts on these.

Quick mock up on the do88 radiator showed the oil cooler left hand bracket needed a slight trim.

Removed the condenser bracket the do88 instructions tell you about and the oil cooler fitted and was ready for paint.

Spot the driveshafts also ready for paint.

Bit of etch primer and some black brake caliper paint.

Bit over the top painting the outer CV joints but I couldn't resist.

Fitted the innner driveshaft with the engine so the alternator could be fitted and whole lot dropped in. However with the subframe on this left no room for cv clip pliers which was a mistake.

Alternator off again I had enough access from the top with the cv clip pliers. The workshop manual makes sure you get the clip in the right place due to the shape of the joint. I'd already clamped one end of that inner joint and luckily it was in correct position. If anyone does similar I would clamp up that shaft off the car and fit it as one complete unit.

Drop links were next on the list.

Wanted to get the clutch bled to confirm slave cylinder was good and engine was staying in the car. I have a gunson eezibleed but just use it for pushing air and keep a closer eye on the fluid level in the cars brake reservoir. Kept the fluid level topped up and then when all was going well got loads of air again. Quick look across and fluid level looked good. Scratched my head for ages before realising the reservoir has a separate chamber for the clutch and I just needed to top up the fluid again. Photo of the schoolboy error.

After getting a good clutch pedal I checked it next day and it was spongy which had me thinking the worst. Closer inspection showed the issue was the bleed nipple wasn't sealing despite swinging off this thing in terms of tightening. This was a genuine new pipe and end connection but the machining looked a bit rougher on the new replacement. I swapped the ends over with the old one which finally sealed and passed the pressure test.

Old end you can't see the machining marks and bleed nipple sealed better.

The pressure test was just leaving the clutch depressed for a few hours and checking the bleed nipple with blue roll for wetness. Left the clutch depressed over night to encourage any tiny bits of air back into the reservoir. Very good pedal after that and clutch was working great testing it and turning the wheels over.

Fluids time and think it was 1.8 litres until it reached the level plug. Was concerned the car would be sitting over winter and wanted some fluid in the new box just to keep it good inside.


My battery cables were past their best, especially around the two into one crimp joint where some cable is exposed.

Looked at building up cables in a similar style but the inline eyelet was proving tricky to source.

The positive cable is silly money in the UK new but managed to find one in the Netherlands for a good price. The new ones also solved the mystery AK stamp on the clamps which stands for AutoKabel. Worth a mention in case someone wants to try sourcing these directly from the manufacturer in future. Gave the small exposed sections and clamp ends a coating of liquid insulation tape to prevent future corrosion.


Looking good, ready to fit

Realised Saab changed the battery cable clamp between the 1999 donor and my 2000 build. This meant I had got the wrong one powder coated!

Soon fixed that with a clean up and paint. Treated the radiator retaining clamps to the same treatment.

The front aircon pipes needed cleaning up and orings replacing. Saab changed these pipes on the later cars to include this bit that sticks up which acts as a deadleg with a diaphragm in it.

After some research the diaphragm is for noise reduction with the aircon system and people have known these to leak. It also means things get a bit crowded in the engine bay and I decided instead to use the older 1999 version from the donor car. This finishes flush at the aircon pump but meant another clean up and purchase of orings.
Old version not cleaned up yet in this photo but shows the difference between the two.

Aircon pump and pipes installed, I then hit a snag trying to fit the king cobra pipe. It wouldn't fit leaving a gap at the bottom and fouling on the engine mount where the aircon pump mounts.

Bit of an oversight with my mockup stages this.

Time for a trim.

All the clearance.

Fitted the APC valve and really like how you can run some silcone lines nice and short with this setup.

Found some Vac line clips of which I could only use the bigger ones. Maybe a bit overkill on the APC but fitted them for peace of mind.

Had some drama with aftermarket power steering pipes part number 5061833. First one was unbranded and I stupidly painted it black before test fitting. The hose fitting required twisting to get even slightly in the right position. The threaded fitting near the wing is a mile off and put two much pressure on the joint to engage threads nicely. I then bought a TVT item which looked better and you can see the difference between the two.


Still wasn't happy though, the TVT item came with a rusty end which cleaned up okay but sent alarm bells ringing.

Managed to clean this up but it still wasn’t engaging and if you look closely it's missing a nice chamfered edge to guide the oring.

Sent that pipe back and bit the bullet purchasing a genuine pipe. £55 aftermarket vs £215 genuine but wow big difference in quality!


Perfect fit, no hassle and already nicely painted from factory to keep that rust off for a few years.

Needed to clean up the engine fan but noticed the insulation had perished on the one from project silver and the donor car. It's quite close to the exhaust so the heat and age means it just crumbles off when touching it.

Couldn't find the terminals to buy so I used the originals with some new 4.0mm2 wire. The motor end would not unsolder even with a 100w iron. Oddly I could cut them off and solder the new wire to the metal bars though.


Protecting the new wire with some silicone coated fibreglass heat sleeving 10mm ID.

DO88 radiator fitted nicely and should keep things nice and cool even with the power increase.

The repaired fan was a struggle to get in place but I got there eventually.

Nissens condenser and the cleaned up oil cooler installed with all new orings.


Next up was the DO88 intercooler. Seemed rude not to treat it to their silicone hoses too.

Used these murray stainless steel clamps on my other cars and been impressed with them.

All was going smoothly so I was due a snag which presented itself when fitting the intercooler. One of the condenser pipes was right where the intercooler needed to be and prevented it from bolting up.

DO88 make their intercooler to be bolt up and although it's super tight it should've fit out the box. Attention turned to the aftermarket condenser comparing it to the original Saab item. Sure enough the pipe is in a slightly different position.

This presented a problem because the original condenser made by SHOWA is no longer manufactured and the majority of aftermarket appear to use this slightly modified design. On a standard car this wouldn't be a problem but the DO88 intercooler has been designed to use that space and so the hunt was on for a replacement. Counting the condenser rows and looking at pictures I found a replacement from Scandix that looked like it would work. However in the UK Brexit & Covid had happened and shipping from Germany was a nightmare at the time with no available courier. Asked for advice on the facebook groups and someone else had experience this and recommended heating up the pipe and bending it. Seemed like a lot of bending would be required but with nothing to loose it turned out they were spot on.

Bolted up and it clears, just!

Test fitted the grill to make sure the condenser pipe still cleared.

The larger aero front bumper definitely required for this monster.

Thought the oil cooler corner had potential for damaging the intercooler which does flex a bit.

Rounded the edge so even if the bumper scrapes a speedbump and causes intercooler movement it shouldn't damage it.

The DO88 radiator and intercooler mean the air shields don't fit. I trimmed two drivers side ones and added some heat resistant foam to make some that will fit. The passenger side one got cut in half from this picture but that side has more pipework blocking airflow anyway. The idea is to encourage the air through the rad and cooler instead of the easy route around.

Drivers side finished will all pipework bolted up and intercooler in place.

Passenger side, even painted the condenser pipe I scratched up bending earlier.

The later T7 airbox has a factory fit pipe for the king cobra pipe and keeps the OEM look I'm after. The only snag is the T7 uses a MAF sensor which this T5 car doesn't need. Peter at Rawsaab gave me this idea which he's done on his track car, where you smooth off the sensor so it just serves as a connecting piece.


The metal retaining plate could do with a powdercoat at some point but really happy with how that turned out. People far more knowledgeable than me in the Saab scene think these standard airboxes are good for high power levels than I'm looking at.

The vibration connectors on the airbox had perished. I initially only replaced one but then another broke when mocking up so ended up replacing all three.


The airbox lid torx screws had rusted making removal quite difficult. You can't buy the exact replacements and I wanted to find some stainless ones with a hex head. Couldn’t find anything so made by own from some full thread stainless self tappers.

Mine vs original vs one from a Saab 9-5 which are still available to buy.

Worked great and that was the airbox complete.

Loads of little jobs in the engine bay were next. All the sensors are 21 years old and done there time so I'm replacing them all just for reliability. IAT sensor was next on this list and fitting the top hat.

I managed to find a new old stock connector really cheap on eBay keeping that standard look.

The original worm drive clips were an odd size so the closest stainless steel versions were a bit long. Trimmed the ends to give a nice clean look again.

Aftermarket head bung with retaining clamp fouled the standard intercooler pipe bracket. Had to notch that so it bolted up nicely.

Gearbox ground strap was next on the list.

These get so corroded I've covered the ends in liquid insulation tape to prevent that from happening again.

Silicone hoses throughout using a mixture of the maptun coolant kit with DO88 heater matrix pipes. I prefer spring clips so measuring the hose size then buying stoney racing hose clips from eBay using their size chart.

I had re-used the old grommets in the bulkhead for the bonnet release cable. This was old and the split seen here bothered me enough to find you can still buy them and fitted a new one.


Re-fitted throttle pedal and cable and noticed play in the plastic bushes. You can still buy them which should make the pedal feel better.

Fitting the throttle pedal I had a set back noticing some water rust stain around the bulkhead repair. This was after some storms with very heavy rain but super annoying that it wasn't 100% water tight.

Bit more investigation showed the seam sealant was also lifting due to the red anti rust primer I used here. Luckily I only did this area with this primer and it looks like I didn't leave long enough between coats. It hadn't fully hardened and the bond with seam sealant a result.

I've re-fitted the door seal and found this tiny spot in the scuttle area I've not covered with seam sealer.

Cleaned up the area again.

Coated in primer for now and will monitor and paint when I tackle the floorpan.

Crank case breather pipe using hose that will handle the oil vapour better.


Heater matrix got the new orings and clamps I've been meaning to fit for ages.


New pipe for brake servo vacuum line fitted.

Changed my mind again on the king cobra connection and dropped down to An8 instead of An10. Decided not to run a catch can and lines and modified the standard pipe instead.


The smaller AN8 fitting has the same ID as the standard tube but meant more barb fittings were available that fit the fuel hose size I needed.

Using the T7 aluminium recirculation pipe meant the silicone pipe in the T5 kit was useless. It did however come in handy for making silicone connector joints.

Teased you long enough, here’s the very nearly finished engine bay after all that work. It will get a shiny new red DI pack but coming together nicely and before I can fire it up need to address the rest of the car.

Before I can fire up the rebuilt engine the fuel tank needs dropping and new pump installing. There's also rust around the floor depressions and plastic bungs that needs fixing. I scraped away the underseal to get an idea of how far the rot spread.

Decided to remove the floor sound deadening to make life easier for the floor pan repairs and allow me to check all areas. Drivers side came up in large sections and then the remains could be scraped away.


Autogylm intensive tar remover for final clean up.

The rear stuff is thinner and proved tricky to remove. Tried freeze spray which kind of worked and was debating the dry ice method before I gave it a try with the heat gun and scraper. This worked a treat and the residue could then be removed with intensive tar remover and a bit of effort.


Thinking I had this method worked out I tackled the passenger side which turned out to be a complete nightmare.


Few hours later I had it matching the others and looking clean.

All out, cleaned up and ready for welding floor pan repairs. Planning on eventually replacing the sound insulation with dynamat after floor pan is painted.

I need to repair the sills right where the axle stands are located and wanted some more height for the floorpan repairs. Looked at wheel cribs and decided they were too expensive and I would make my own. Inspired by various designs on YouTube I've made these long enough so the tyre sits on the wood not just the end stops and a stackable top section for slightly adjustable height.

Quick mock up to check height.

Because this is a driveway project and open to the elements I decided to paint every bit of wood before assembly. Each block got 2 coats and it became a nightly routine after work one week to get them all ready.


I was concerned the paint might allow the top section to slide so built in dowel locators. Massive Jenga set complete!

Before I got the car raised up I cut off the old exhaust and dropped the fuel tank. There was half a tank of old fuel in there which took some draining and was dispensed into my daily driver. Thought the fuel would be very stale but surprisingly looked okay and the daily driver hasn't run any different so all good there.

Got the rear raised first using the front cribs to support two scissor jacks.

The front was a bit sketchy, jacking the wheels onto scraps of wood and cribbing the jack to gain the final height. Really could do with a low profile high lift jack but that's out of budget. Couldn't get it high enough for the top layer of the cribs but plenty of room for working on still.

With the car raised up high I could give the rear section a good inspection. With the exception of the floor it's in great shape considering the age of the car. Few surprises like this bit of rot behind the filter.

The rear looks good, even looking past all the muck you could tell it's in good shape in places. Decided to clean the whole underside to get a true picture.

I thought this would be a quick job of spray some TFR and wash it off. It required more scrubbing, degreaser and another round of TFR but cleaned up nicely for full inspection.


Passenger side isn't too bad.

Drivers side wants some work and I scraped of some underseal to see how far back the rot goes.

Drivers footwell floor is quite bad.

The scrap donor car I have has only done 70k and the floorpan bungs are not as rusty as project silver. Plan is to use sections of that to replace the areas where the shapes are quite complex.

This is the donor car and shows how this little plastic lip on the bung traps moisture and causes these rust issues.

Plan is to weld up these donor section bung holes removing the small amount of rot. That then gives me a nicely formed replacement section to cut in.


Repair panels need some welds grinding more but was time to make a start on the car.


Started to make progress then ran out of gas.

Welding from inside the car the penetration is good underneath but was blowing a few holes in places as you can see. Tricky to get the gaps cut exactly right but hopefully I will get the welder dialled in again and this finished off nicely.

That brings project silver uptodate. Not close to finishing yet but glad it's back on track.


