bstardchild
Club Retro Rides Member
Posts: 14,971
Club RR Member Number: 71
|
|
|
|
What thickness cutting discs do you use? the 1mm discs for stainless are the best. What you could do is fit the (oversize) panel 2mm lower than you need with tape or drill extra holes & use Cleco pins) or something and then cut through both panels at once, this will give an even gap regardless of how wonky your line is. You would need to position it carefully before cutting though. Clever but my mind can't get itself round the 2mm lower - it keeps telling me the cut thickness is 1mm why would the panel need to be 2mm higher - sorry for the threadjack |
| |
|
|
|
|
Norman
Part of things
 
Posts: 449 
|
|
|
|
|
Hi, I am using 1mm stainless discs. I had thought about overlapping and cutting through both layers but didn’t feel confident enough to try it. I have been reading through your thread on the pop, that is quality work. I still have a LOT to read. It looks like a big budget build, i am trying to do mine on a shoe string. I am quite looking forward to applying primer and doing the bodywork. I would feel i am getting near the end. I don’t however have the patience for that level of perfection on the roof, doors etc. All the best, Norman
|
| |
|
|
|
|
|
|
|
bstardchild, actually we are both wrong, thinking about it you would put the panel in the correct place with an overlap, then just cut through. The 1mm disc cut would give the 1mm gap for welding. Norman, My Pop Build was budget-ish. I did almost everything myself but it was spread over 20 years, so £1,000+ a year was still low budget - except the amount of years made it a bit bigger, lol.
|
| |
|
|
Norman
Part of things
 
Posts: 449 
|
|
|
|
Today i made the next repair panel and tacked it in. I think when i did the wheel arch i put too much curve in it. This has led to me hammering and pulling it about, i have put a bit of distortion in it which may have been caused by welding. I think i can correct it by cutting a couple of slits in the flange, we shall see. Here are a couple of pics. 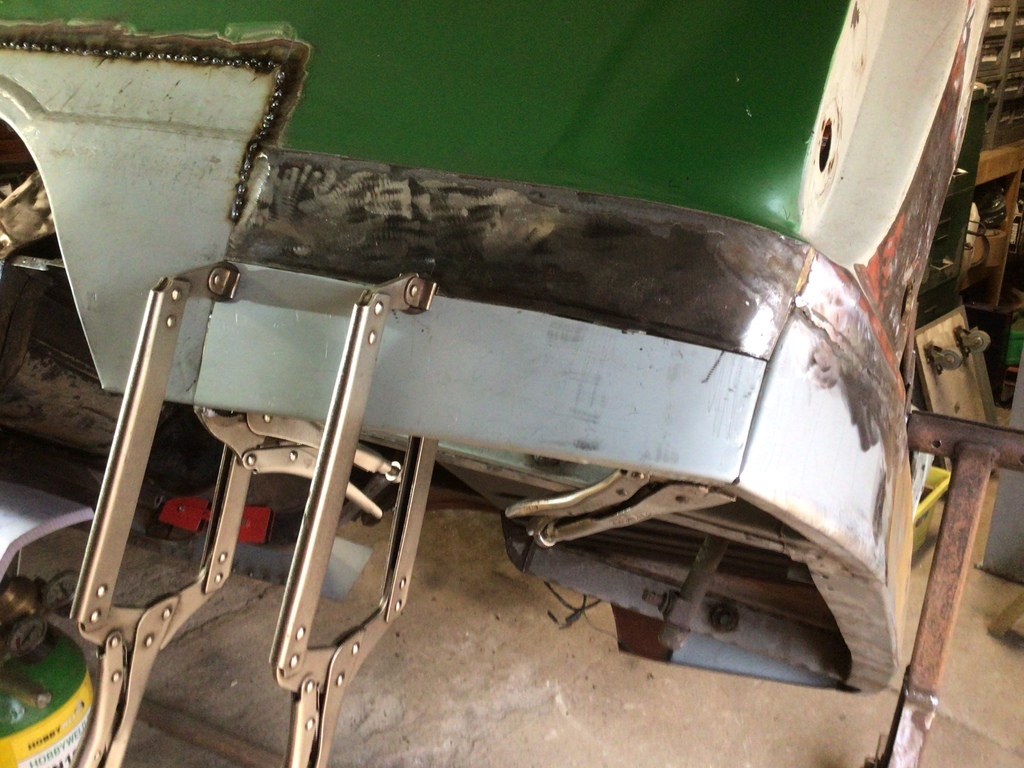 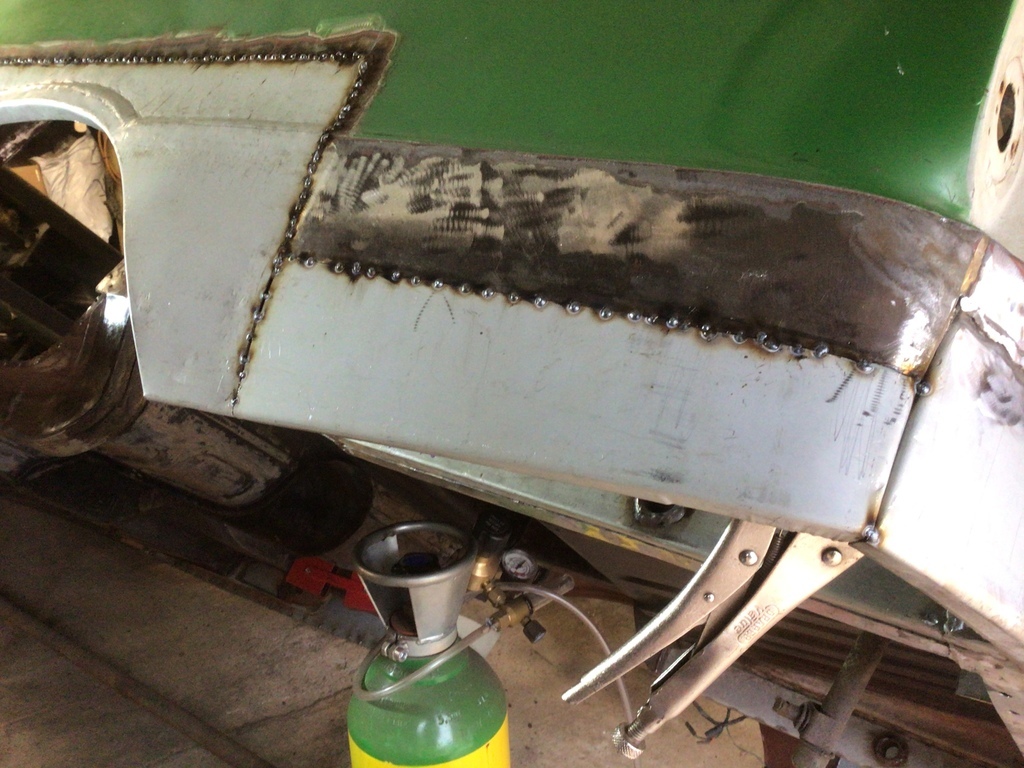 Now as you all will know who follow this i jump around from one thing to another. I am looking at the boot floor which i need to clean up prior to priming. Some clown, I assume the previous owner has painted the car with what i can only describe as household gloss paint. It catches fire easily if you are welding near it, goes really black and stinks. I started to strip it today with a hot air gun and paint sploper (don’t ask me what a sploper is but my auto spell likes it) most of it was coming off easily as i suspect no prep was done. The rust hadn’t been removed and had been painted over . It took me a couple of hours to get to this stage. I am not sure how i am going to get to the seat bulkhead as i am stretching which isn’t helping my back much. Once i get the most of the white paint off i will attack it with a polystrip disc and clean/key it ready for primer. Once i have this cleaned up i will attempt to fit the wheel tubs. This will take some jiggery pokery to fit and i will need to make some infill panels. If my back is ok i will get to this in the next day or two. Here are a couple of pics of the progress. 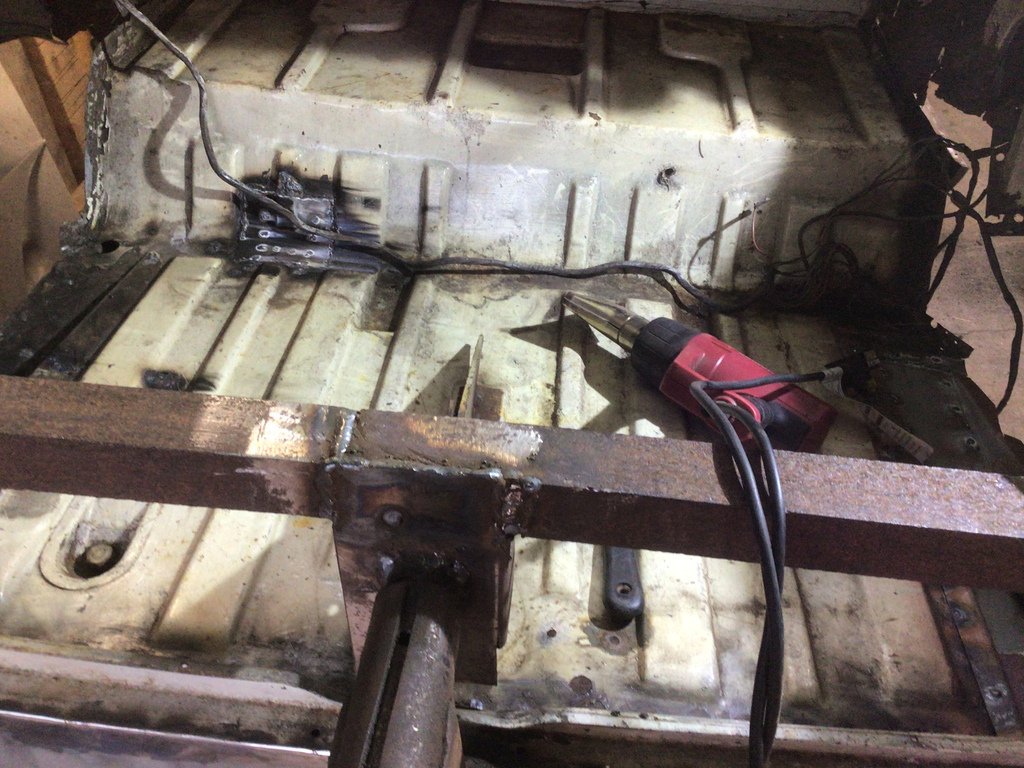 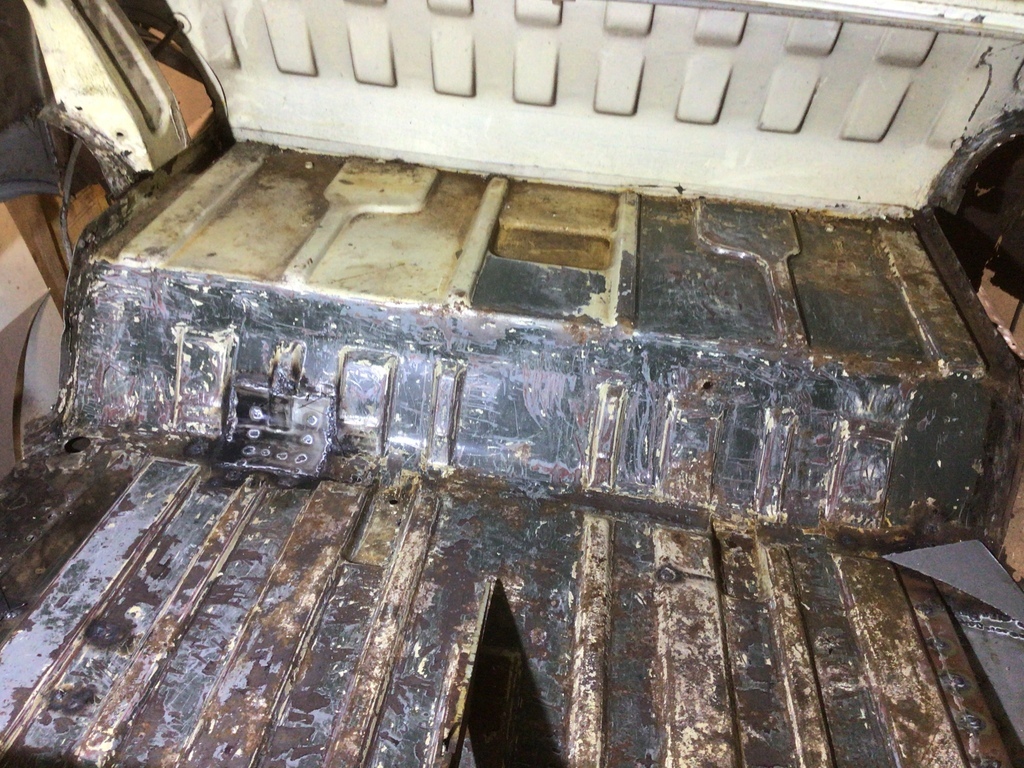 Yes i know, crusty or what! I have also found a few small holes that need filling and some welds that need tidying. I will attend to them in due course. So that’s it for now, please feel free to comment or offer advice god knows i need it. All the best, Norman |
| |
Last Edit: Mar 3, 2021 19:18:33 GMT by Norman
|
|
|
|
|
|
|
|
Hi Norman.....I certainly don't envy you after seeing what you've been up to today! One of the jobs I hate the most is stripping old paint off. I can't imagine there's many folk out there that enjoy such a tedious task to be honest. But, it's one of those necessary evils I suppose. It looks like you've done a thorough job of the boot floor👍. I'm exactly like yourself when comes to hopping from one area to the next....and then back to the other. Keep the good work.....really impressed your hand formed arch panel 👍
|
| |
Opel Commodore A Coupe
Opel Rekord C Coupe
Opel Rekord C Saloon
Vauxhall Magnum Coupe V8 (Magnumania)
Mk1 Scirocco GLS
Mk1 Scirocco GLS (early chrome bumper)
Corrado G60
Mk1 Cortina 2 door Pre Airflow
Mk2 Escort 1300 2 Door
VW LT35 Tipper Truck
BMW 320D E91 Tourer
|
|
Norman
Part of things
 
Posts: 449 
|
|
|
|
Today i was back at the boot floor, i cleaned up the metal as well as i could. It was a bit of a stretch getting all the way to the back. I had a few holes to fill, one was about a half inch in diameter and it filled no problem. The other was much smaller but i ended up chasing it all over the place. I had a piece of copper behind it to prevent this but i was wasting my time. I got the grinder out and cut a piece out of the floor. However when i started to weld it up the edges of the boot floor were just burning away again. So back out with the grinder and cut a bigger hole, I am getting fed up with this now, anyhow I managed to weld it this time. Here are some pics for your amusement. 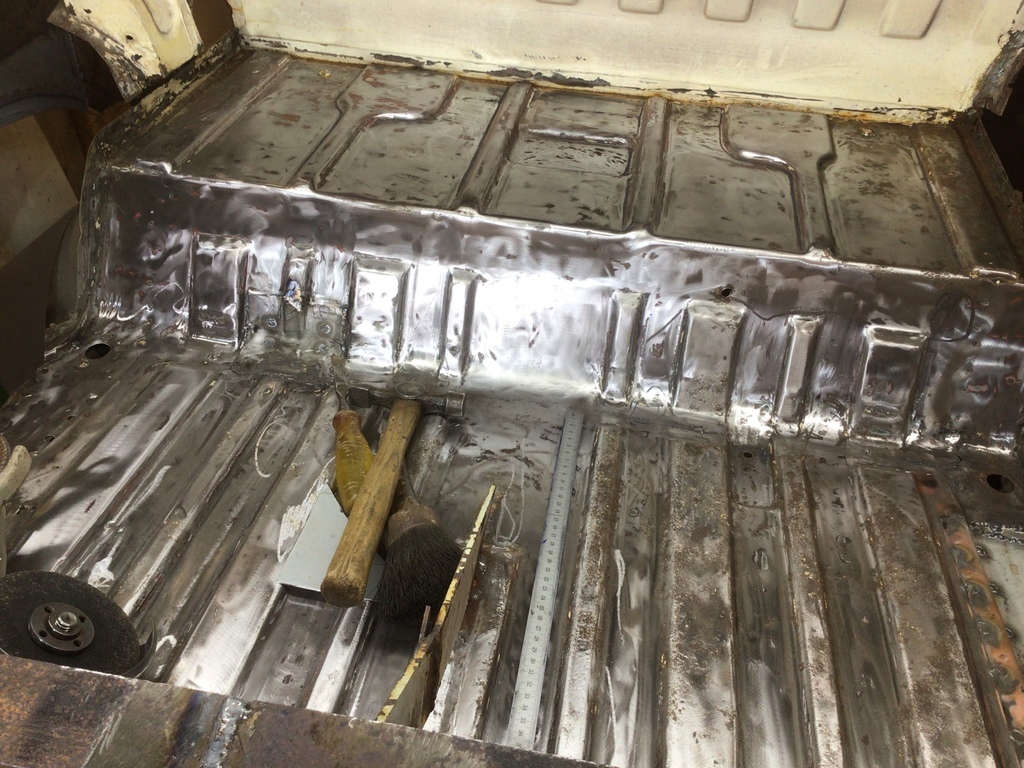 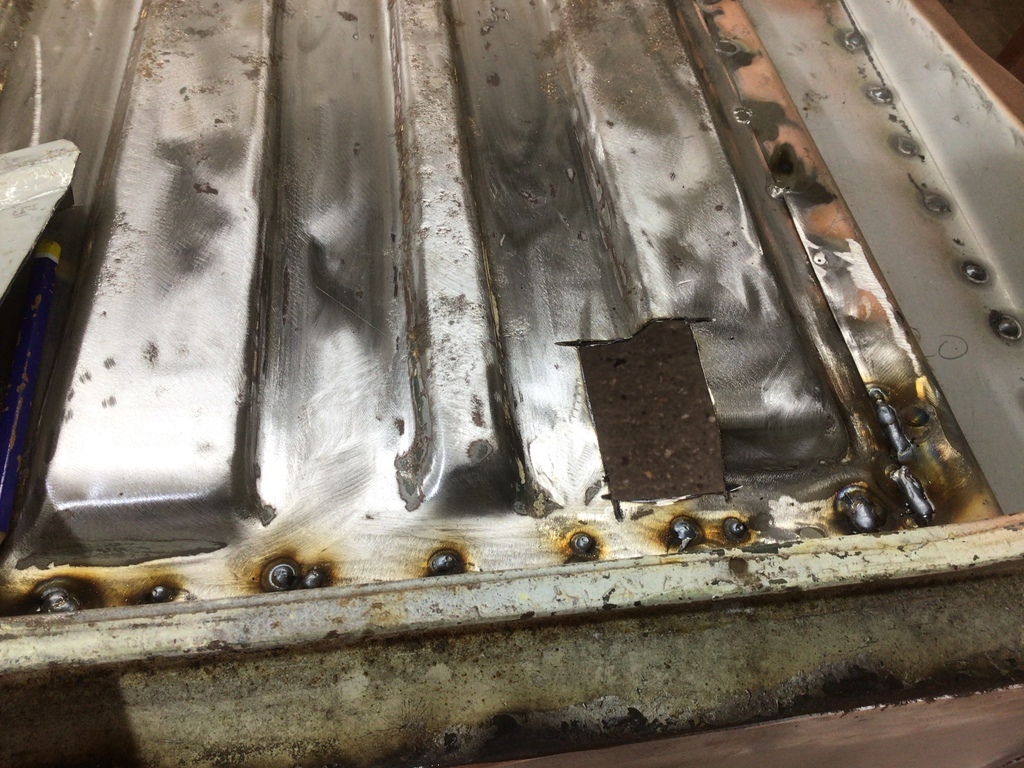 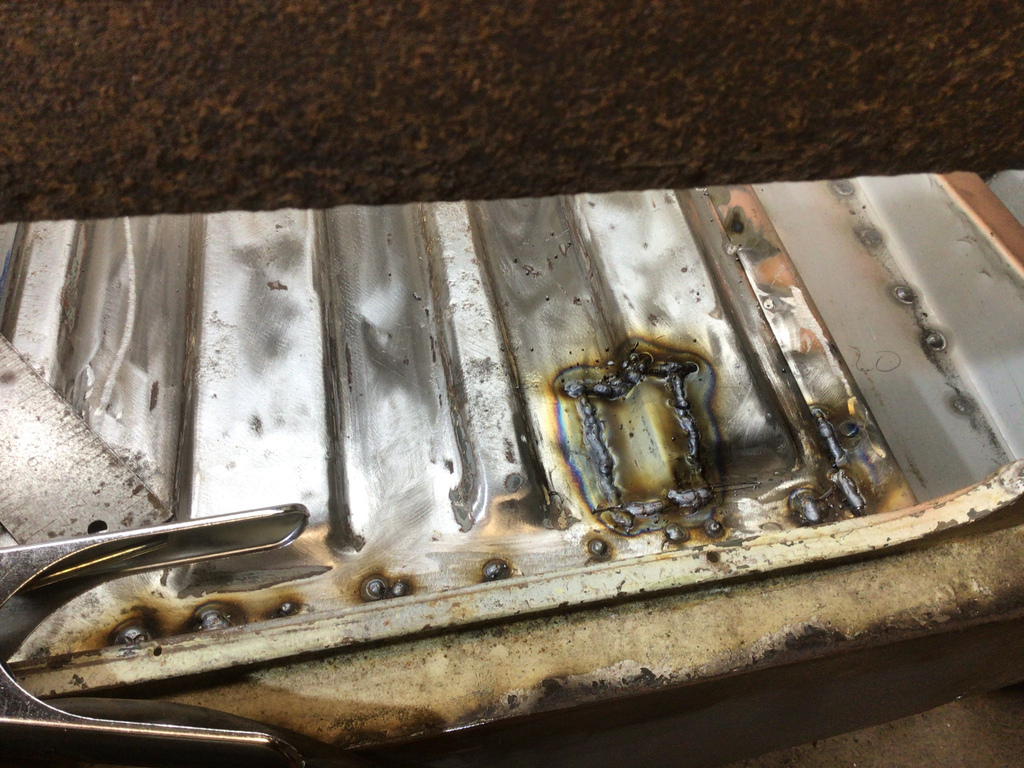 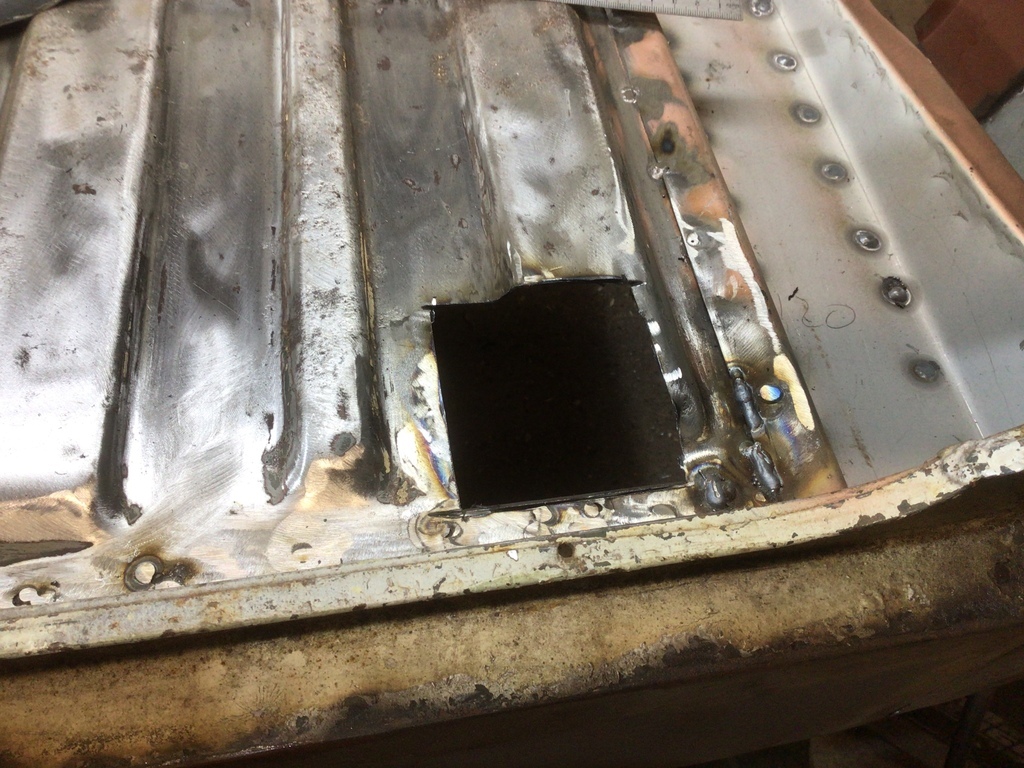 You get the picture, i think some of that floor is very thin. Here are a couple of pics with the hydrate 80 applied, you can see in the second picture that some of it is already turning black. 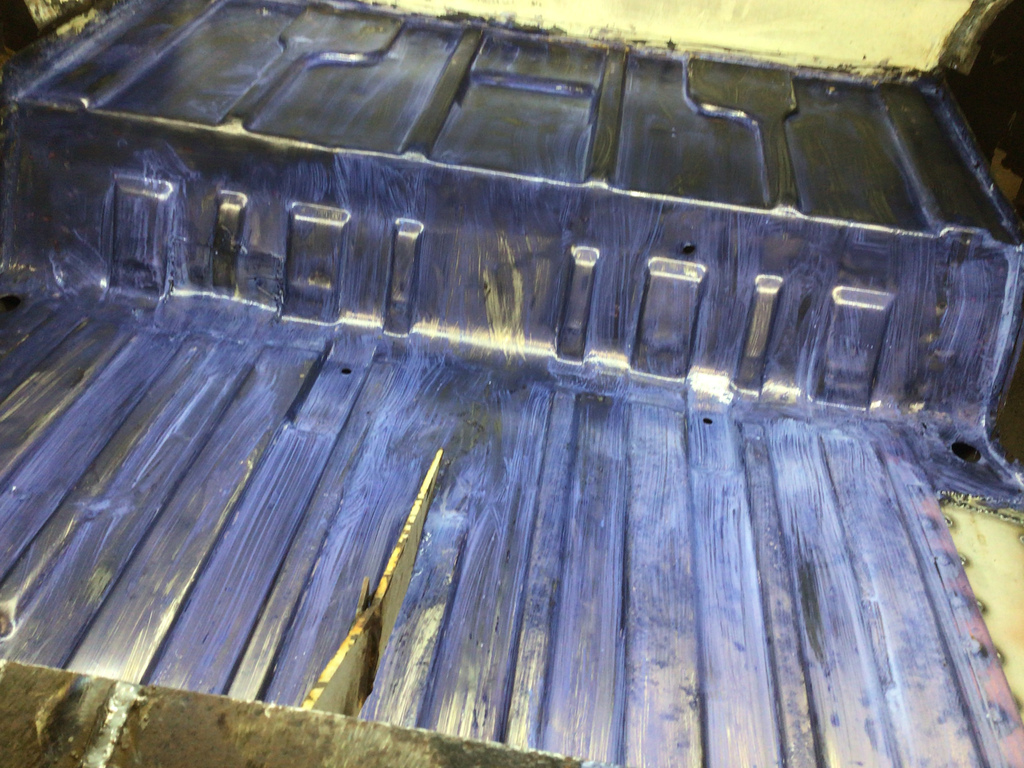 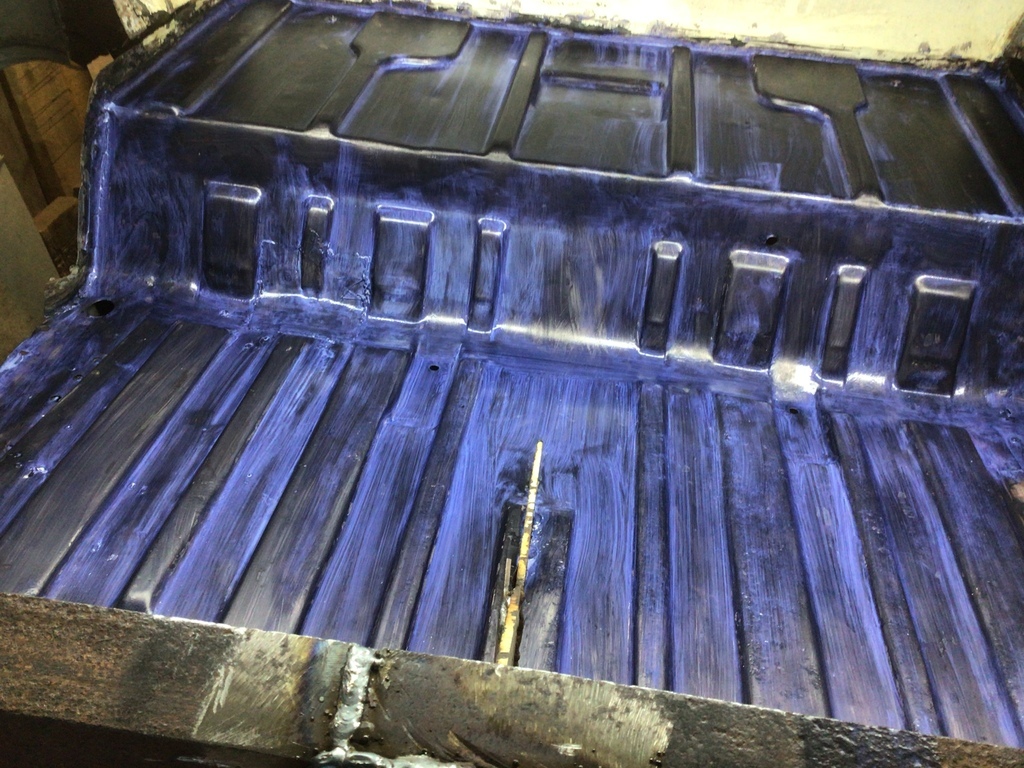 I still have some work to do in the boot corners but i wanted to apply some kind of protection meantime. I think i will try to fit the wheel tubs next, i will probably have to cut more metal out to get them in as they are bigger than the originals. When they are in i will see what’s needed in the boot corners. On another subject, it was flipping cold in the garage today, about 4 degrees. I certainly felt it and stuck the heater on for a while. The heater also helps with the cure time of the hydrate 80. That’s it for today, more exciting stuff tomorrow ha ha. As usual feel free to comment, all the best, Norman |
| |
Last Edit: Mar 4, 2021 19:21:28 GMT by Norman
|
|
eternaloptimist
Posted a lot
   Too many projects, not enough time or space...
Posts: 2,578
|
|
|
|
|
Cracking work Norman. I’ve been following a thread elsewhere where a 1950’s Standard Vanguard Estate is being ‘restored’ Huge sections of sheet with swaging reinforcements have been cut out and replaced with flat sheet steel and no attempt to repair what’s there. Hats off to you.
|
| |
XC70, VW split screen crew cab, Standard Ten
|
|
|
|
|
|
|
|
Wait till you get it in the first coats of primer, it will suddenly make it all worthwhile.
|
| |
|
|
Norman
Part of things
 
Posts: 449 
|
|
|
|
|
I am well and truly hacked off, today i was going to fit the wheel tubs i made a couple of weeks ago. I realised once they were in i wouldn’t be able to apply rust treatment or primer. I set about cleaning off the rust and treating the area with hydrate 80. I then fired on some etch primer, this is where the fun begins. I thought at the time i was being ambitious trying to fit the tubs in one piece and that was very true. I couldn’t get the tubs in. I ended up distorting the wheel arch flange, gouging the wheel arch repair section I made and generally making a hash of it. Next i started cutting the tubs as they were oversize and were designed to be trimmed to fit. The main problem is they are about 10mm too wide and I hadn’t taken into account the fact that the lower edge of the wing curves inward which made for no clearance and a lot of scratching. The original idea was to get them in and mark what needed trimming. I cut more floor area away, pushed pulled hammered and generally swore a lot before deciding this isn’t going to work. I am going to cut one side out of them and offer that up and see where it’s fouling and what needs trimmed. I am well hacked off as i have wasted most of the day. I am going to leave it for now as i will end up making a real mess of it. No pictures today as there was nothing worth photographing.
Please feel free to comment, chastise me for being a tit or anything else. Any advice most welcome, i must calm down a bit, did I mention i am hacked off!!!
All the best, Norman
|
| |
Last Edit: Mar 5, 2021 19:46:38 GMT by Norman
|
|
|
|
|
|
|
|
Hi Norman, I absolutely know how feel....and you've certainly done the right thing in walking away from it for today. A few years back while restoring a mk1 fiesta, I did something wrong while welding in a repair patch. Instead of walking away from it, I carried on with anger and made a total mess of it. It was 3 o'clock in the morning when I finally gave in and walked away.
Tomorrow's a new day and you'll be able to take a freash approach. Have you thought about mocking up the whole wheel tub in thick cardboard. That way you'll be able take the cardboard mock up apart, then use it as templates against what you've already fabricated and make the necessary adjustments??
|
| |
Opel Commodore A Coupe
Opel Rekord C Coupe
Opel Rekord C Saloon
Vauxhall Magnum Coupe V8 (Magnumania)
Mk1 Scirocco GLS
Mk1 Scirocco GLS (early chrome bumper)
Corrado G60
Mk1 Cortina 2 door Pre Airflow
Mk2 Escort 1300 2 Door
VW LT35 Tipper Truck
BMW 320D E91 Tourer
|
|
|
|
Norman
Part of things
 
Posts: 449 
|
|
|
|
|
Yes i had thought about doing it in cardboard. I had big sheets of it the other day and kept catching myself on it soooo i cut it up and put it in the recycling bin! I will see what i can dig up, many thanks for the suggestion, Norman
|
| |
Last Edit: Mar 5, 2021 20:25:59 GMT by Norman
|
|
|
|
|
|
|
|
Also a nice method for butt welding in panels.
|
| |
|
|
Norman
Part of things
 
Posts: 449 
|
|
|
|
|
Thanks for the link, i have seen that one before. I did try it but I don’t know what I did wrong, I don’t think I held the grinder at the correct angle. I think a lot of my bother is impatience. If the patch touches here and there i am welding it in. All the best, Norman
|
| |
|
|
|
|
|
|
|
|
Congratulate yourself sir for doing the right thing and walking away at the right time. Maybe take a break from it for a few days? When you go back to the car you will have fresh eyes and a clearer perspective.
You’ve been doing a great job of it so far so don’t be too hard on yourself! 👍🏻
|
| |
|
|
|
|
|
|
|
gathered up my mole grips and stuck them in a box as I can never find them. Now you can lose them all at once! Cracking work on the car, as ever. |
| |
|
|
|
|
|
|
|
|
I think I would cut off the outer part of the tub and get the tub fitted to the chassis rail or whatever it welds to. I would then sort the outer part of the tub as you’ll see exactly what you need. On my Escort I’ve cut out the outer part of the tub and continued the tub straight out to meat the outer 1/4 panel. This is how most rally cars are done to increase wheel clearance.
You may not want to go that far but with the cut tub in position you can see what you need to make to Get the tube to meet the outer arch lip.
|
| |
|
|
Norman
Part of things
 
Posts: 449 
|
|
|
|
|
Thanks to all for the suggestions, I am going to give it a miss for the weekend. I will get back to it on Monday and see where I go from here. I don’t know how folk can stick with restoration taking 10 plus years, i am loosing patience a bit and need to just get on. All the best and thanks for the encouragement, Norman
|
| |
Last Edit: Mar 6, 2021 14:14:39 GMT by Norman
|
|
|
|
|
|
|
You are doing a bang up job mate - you'll be so pleased with the results... once you get there that is. Restorations taking 10 plus years well, ahem, speaking on behalf of a friend like it's because we get so hacked off that we take some time off, then life happens, then other shtuff and before you know it a week, a month, a year has gone by... you get back out there aaand repeat - obviously none of this knowledge is based on personal experience you understand. I admire guys like you that keep plodding on and getting the job done - you are an inspiration to me to get out and work on my stuff....... I mean to my friend to pull his finger out.......  |
| |
|
|
|
|
|
|
|
|
Make it in cardboard first, then transfer it to your tubs.
You cant rush these jobs.
|
| |
|
|
|
|
|
Mar 24, 2021 13:15:27 GMT
|
Norman, did you set fire to it??  Any progress?? |
| |
|
|
|
|


