stealthstylz
Club Retro Rides Member
Posts: 14,960
Club RR Member Number: 174
|
|
Sept 21, 2019 19:51:12 GMT
|
For the same flow area as a single 4" pipe you'll need 2 pipes of 2 7/ 8"... Yeah my maths aren't great but I realised after I posted 2 2 inch pipes don't add up to 4 inch. So I'd end up running twin 3 inch pipes so not a great deal of help. I have seen in the states oval tube. But it's expensive.. however if I only need a little short section to go under subframe it might be an option. Especially considering I've come this far with it now (if I'd have been staying standard management and sticking a chongy chingy turbo on I'd have stuck it through bonnet and dealt with the consequences.. I just make my own oval tube when needed, split along its length then weld flat sheet in to whatever width is needed. Time wise it doesn't cost anywhere near as much as buying the proper stuff. |
| |
|
|
|
|
|
|
|
Sept 21, 2019 22:33:58 GMT
|
|
Make a simple former and squash a pipe in a vice ?
|
| |
|
|
mat88
Yorkshire and The Humber
Posts: 1,542
|
|
Sept 22, 2019 15:34:19 GMT
|
|
The slitting the standard round tube and welding in plate isn't a bad idea at all.. can in theory just buy any diameter pipe and extend to make same volume.
The former in the vice idea is another possibility, I've got access to a ten ton press at work so that's a possibility too.
As for the alternator it's a 50 or 60amp unit can't remember off top of my head. I'm hopeful that should be enough amperage to keep everything happy.. if it's not il have to rethink..
Cheers
|
| |
|
|
mat88
Yorkshire and The Humber
Posts: 1,542
|
|
Sept 22, 2019 16:39:52 GMT
|
Managed to get a few hours in today whilst the Mrs went shopping with the little un. Was odd getting time to work on it in daylight hours so didnt know what to do first haha. Decided to finalise the alternator bracket as it's one less thing on the list to do. Couldn't really be happier with how it's turned out. Almost looks factory and gives a good 10/15mm of adjustment on the belt which should hopefully be enough. Ended up using half the bracket I made and half the original one from the alternator.. Also managed to remake the bracket that supports the turbo and flange so that's rock solid and not moving anywhere. Still plenty to be getting on with tho Anyways here's a few pics. Doesn't look like much but it's all progress. 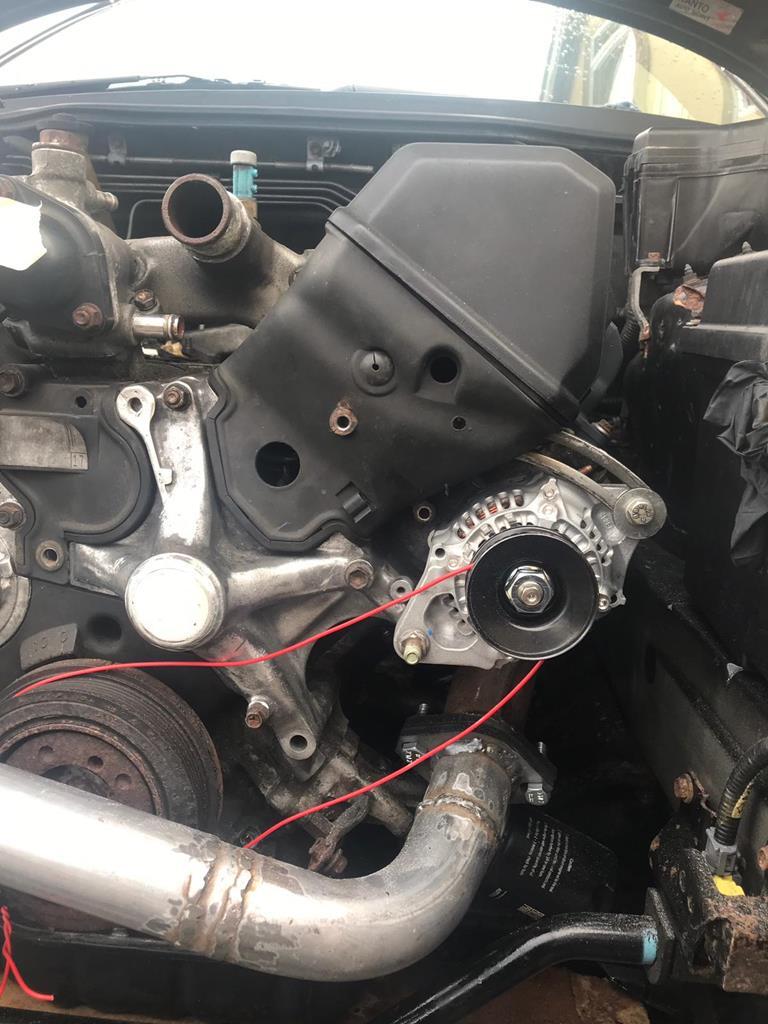 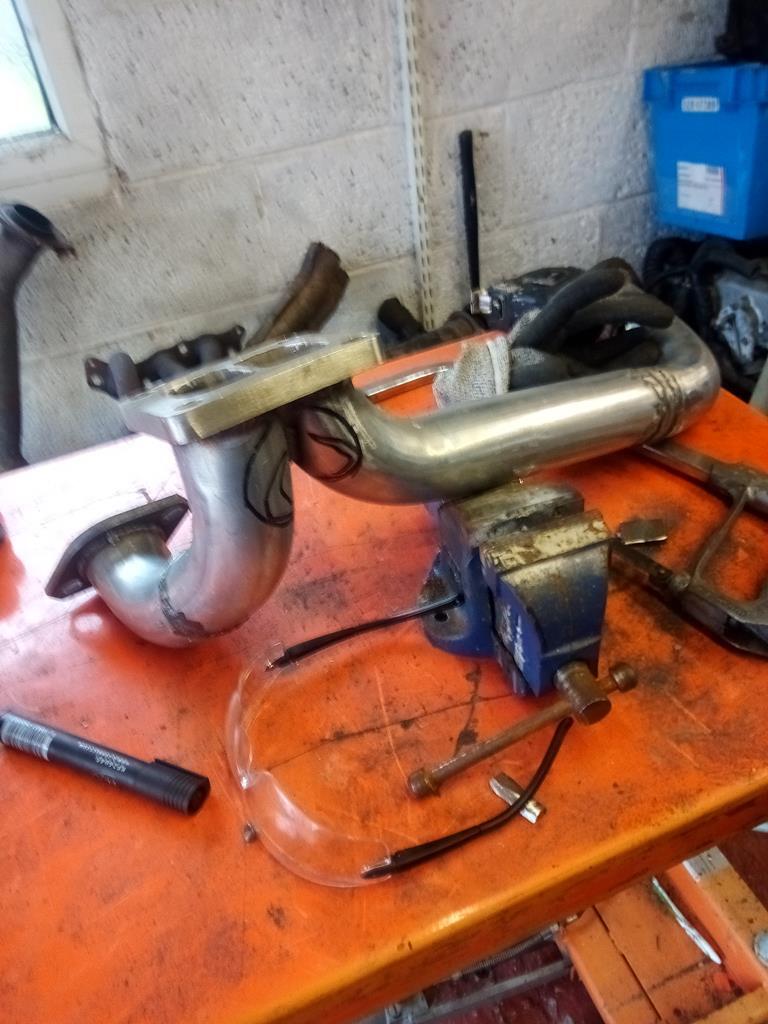 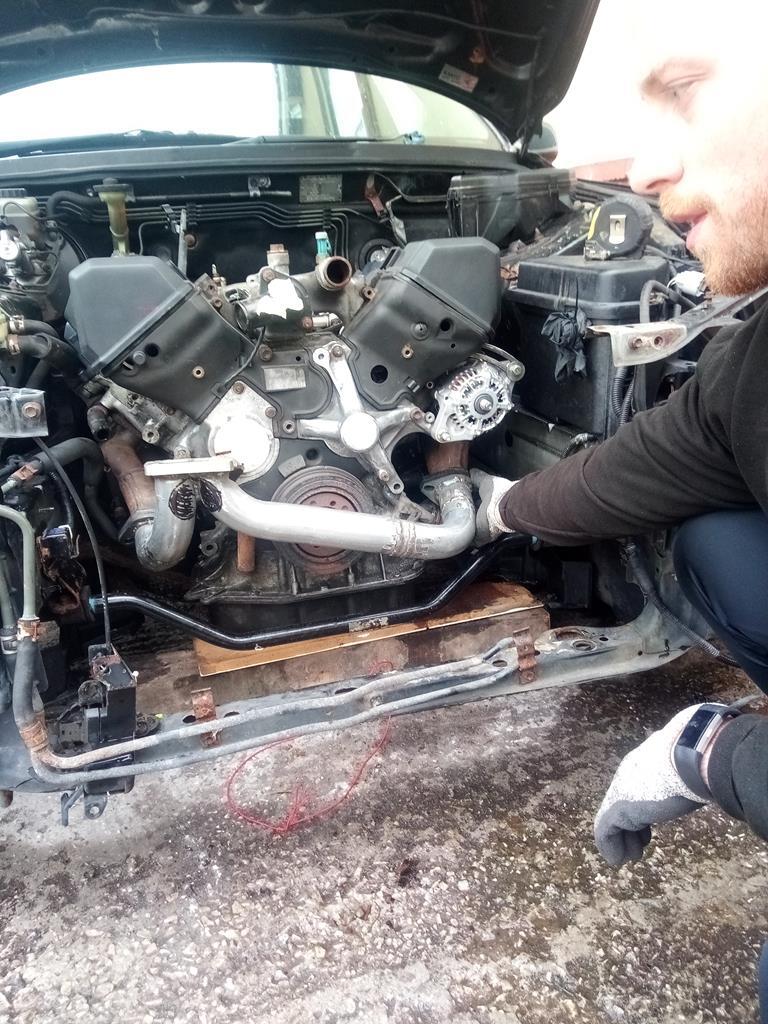 |
| |
|
|
|
|
|
Sept 22, 2019 18:21:06 GMT
|
|
Looking good mate, just out of interest what engine mounts did you use,
I'm keeping a close eye on this build as I'm planning to fit a lexus v8 into my crew cab pickup as and when funds allow
Keep up the good job
|
| |
|
|
mat88
Yorkshire and The Humber
Posts: 1,542
|
|
Sept 22, 2019 18:36:50 GMT
|
|
Cheers.
The engine mounts are lexibreak ones. There a firm over in Ireland who make the conversion bits so the engine drops straight in to an is200 and the adaptor plate makes the engine bolt up to a modified Bellhousing. Tbh there's not a lot to em, and you could make stock mounts work. But it isn't worth the faff considering I know these will line the engine up bang on exactly we're it should live.
|
| |
|
|
mat88
Yorkshire and The Humber
Posts: 1,542
|
|
Sept 23, 2019 16:22:11 GMT
|
Soooo the saga continues.... Box turned up today, but what's in the box... And more worryingly why has it got "repacked by DHL on"  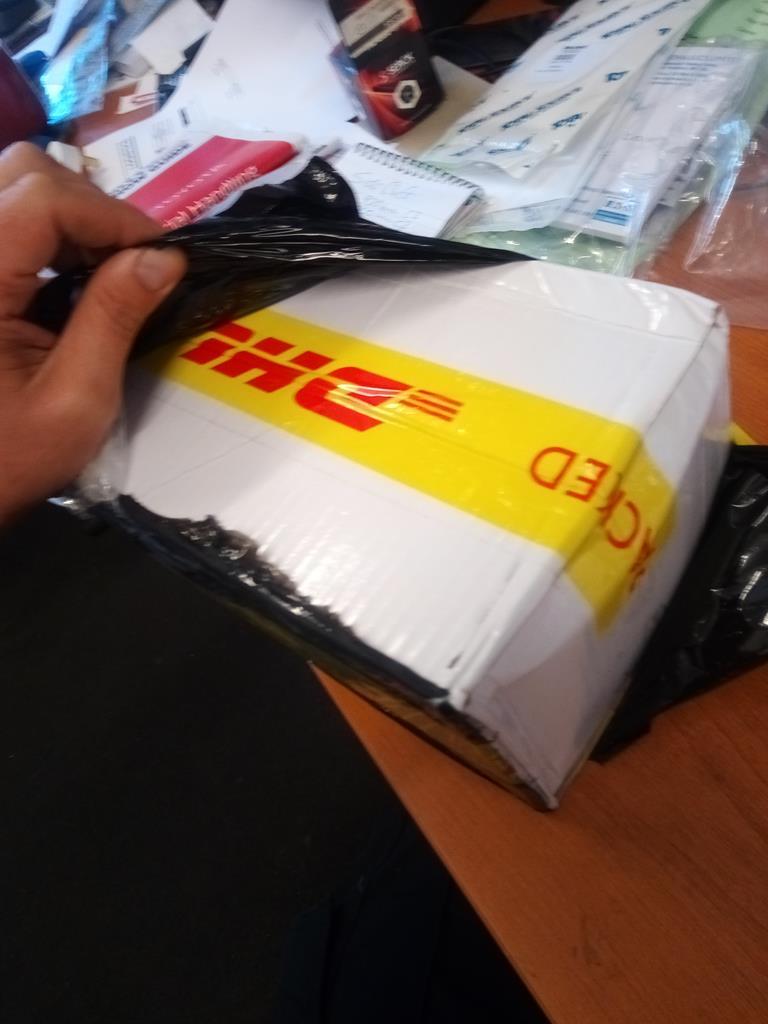 Ahhh a tial "esque" 60mm gate from the land of deep-fried cat and Calvin kine clothes.. and some sweets, should have seen these as a bribe really 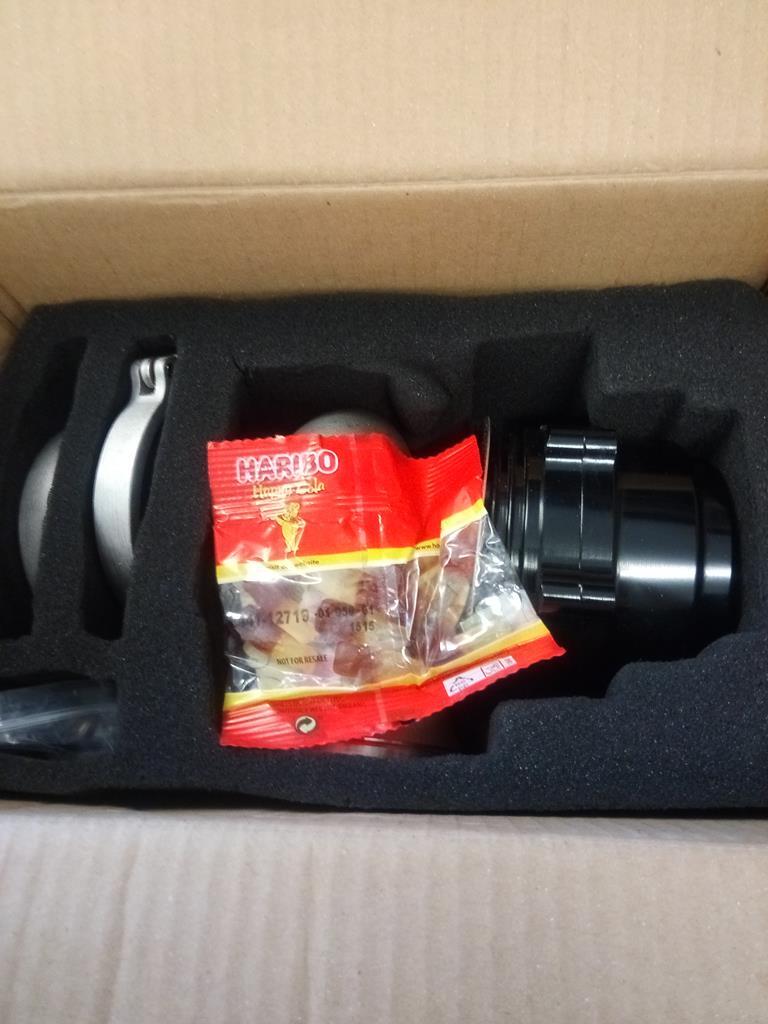 All looked ok. Quality doesn't look bad and the gate moves perfectly if I put a air line in the fittings.. but.... There's no way on gods green earth it's going to work without some kind of insert/valve seat in the body for the valve to seal against... Did a bit of googling apparently it's called a fire ring. Apparently.. wonder if it got lost when dhl repacked it.. who knows 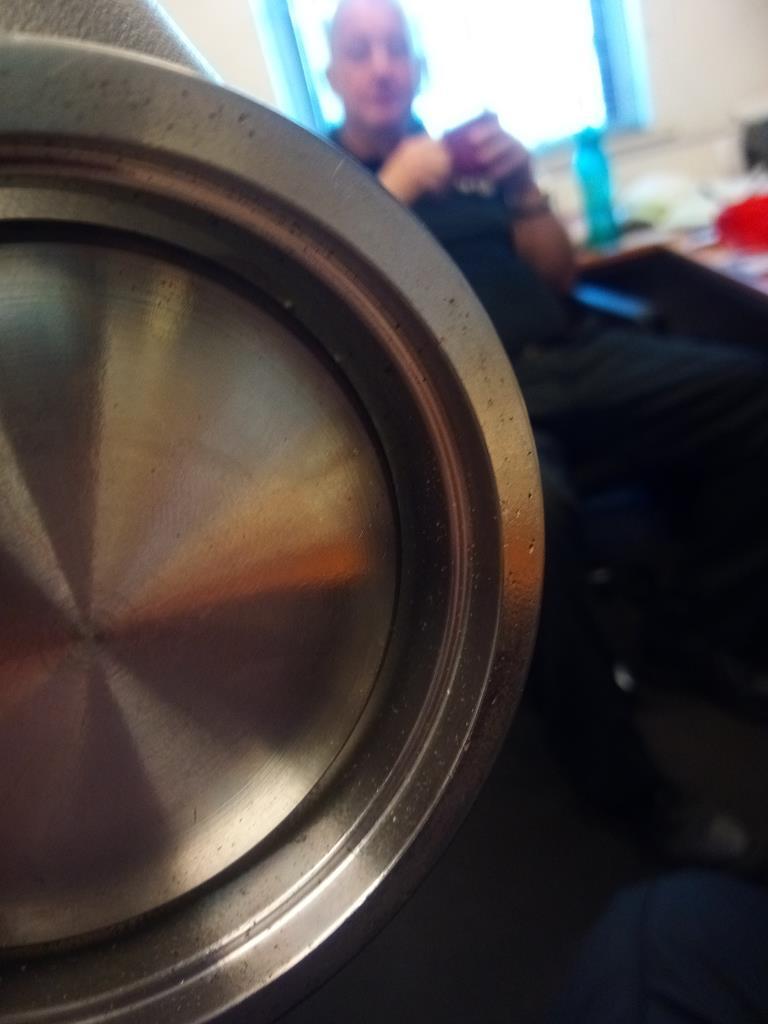 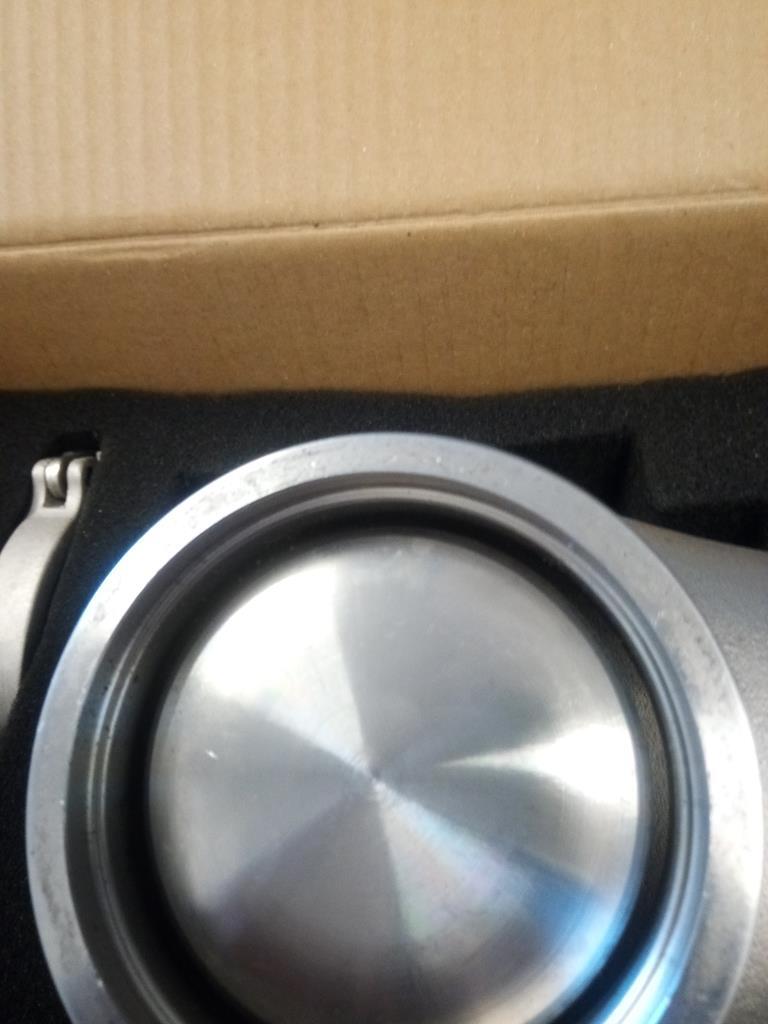 So now we wait for the supplier to get in touch and see what solution he can come up with.. failing that it's get an insert made, or eat the sweets and send it back.. still undecided.. Oh and it's huge. Stupid huge. Why is everything related to turboing a 4ltr V8 massive! So I can see me having space issues.. (haven't exactly got much room already) 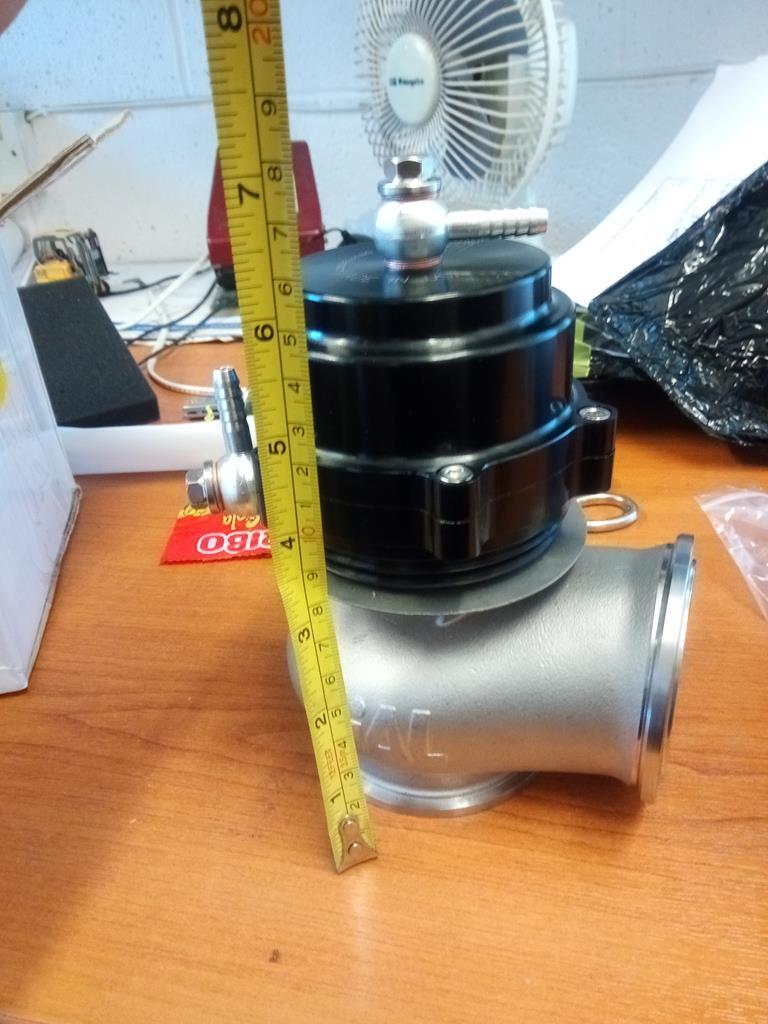 Anyways.. watch this space. Or don't  |
| |
|
|
austinpowers
South West
"Do I make you horny?"
Posts: 741
Member is Online
|
|
Sept 23, 2019 21:29:40 GMT
|
|
Maybe the packet of sweets is the fire ring, you just have to lick them and stick together. Chinese build quality, it’s like a fortune cookie you just never know what you are going to get until its broke.
|
| |
1955 Austin A30
1981 Jawa Mustang
1990 Trabant 601 (Tommy)
1989 Trabant 601
2009 Jaguar XF
2012 Toyota AYGO
2018 Scomadi TL
|
|
mat88
Yorkshire and The Humber
Posts: 1,542
|
|
Sept 24, 2019 10:34:41 GMT
|
Maybe the packet of sweets is the fire ring, you just have to lick them and stick together. Chinese build quality, it’s like a fortune cookie you just never know what you are going to get until its broke. I've tried licking and sticking the cola bottles that came with it... Sadly it hasnt worked. However the supplier has just got back saying the "fire ring" should be in the box. I've explained it's 10000 percent not in the box so he's sending another first class apperantly.. so wel see when it arrives. |
| |
|
|
|
|
|
Sept 24, 2019 14:58:33 GMT
|
following this to see where it gets that holset spinning up  |
| |
|
|
mat88
Yorkshire and The Humber
Posts: 1,542
|
|
Sept 24, 2019 15:51:24 GMT
|
Home from work early in pouring rain.. no Mrs home yet and little un still at nursery... Can only mean i pinched an hour on job..  (normal people go in and get cleaned and dry after working on trucks in rain all day) Offered up the wastegate to see where she will live. Some kind of collector under the flange is what I'm thinking. Maybe. Took a load of measurements for clearance. 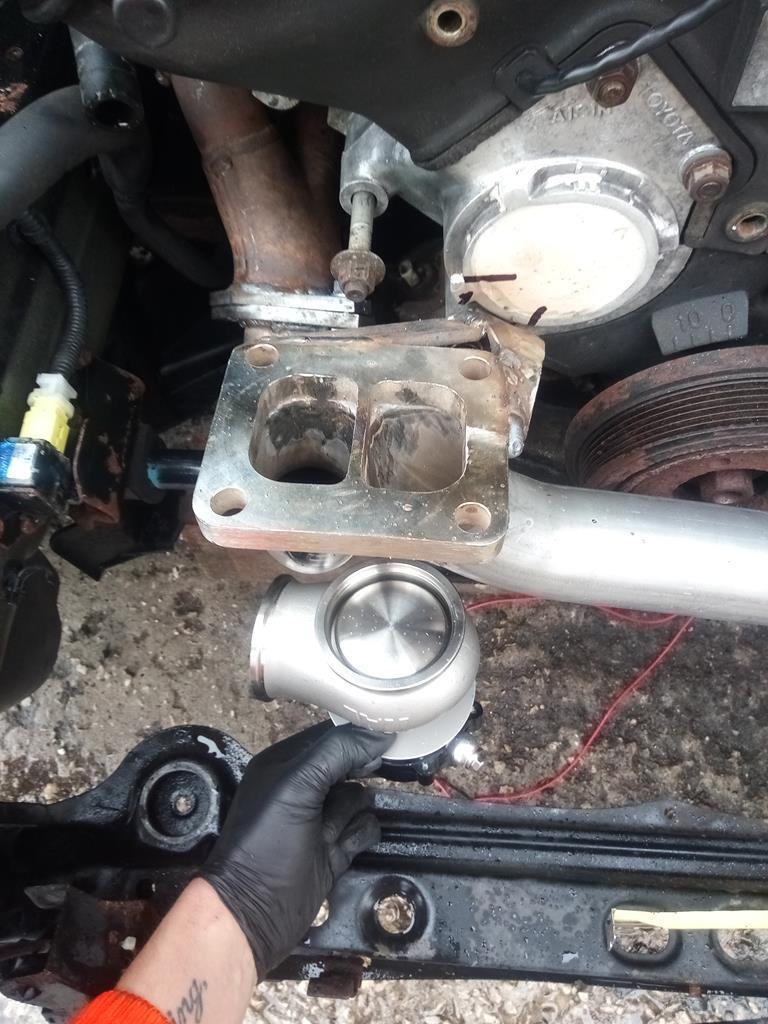 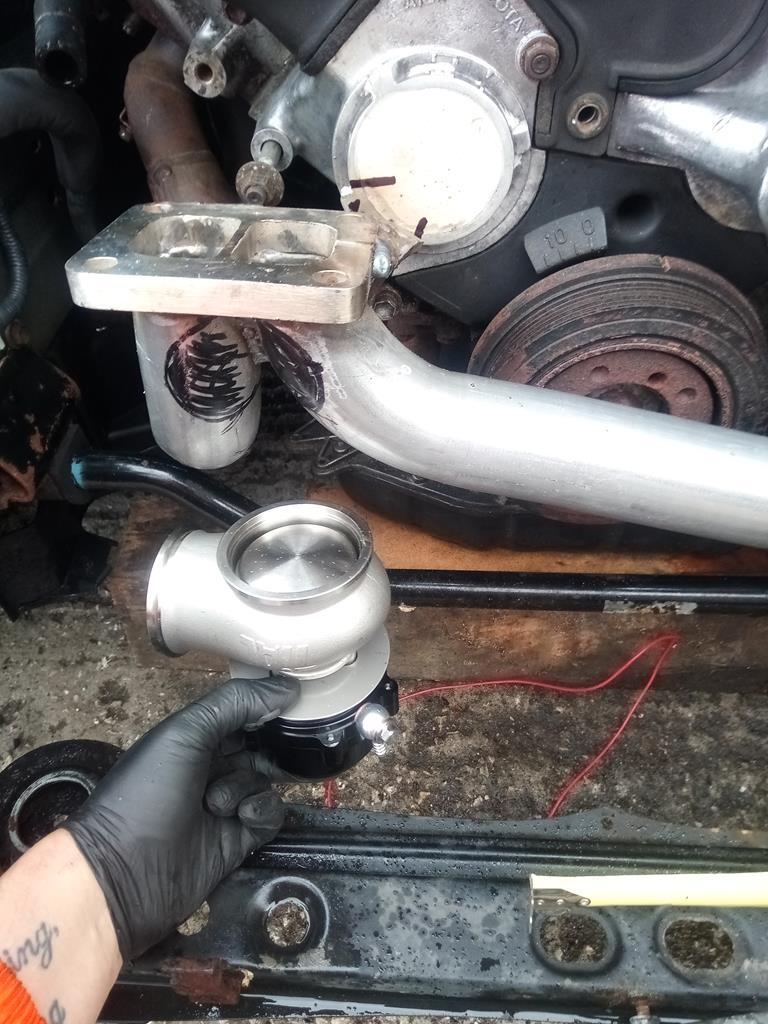 With that the engine can come out of the car for the final assembly!!! And since I'm fundamentally a child (and cannot wait). Half hour later we have this.. 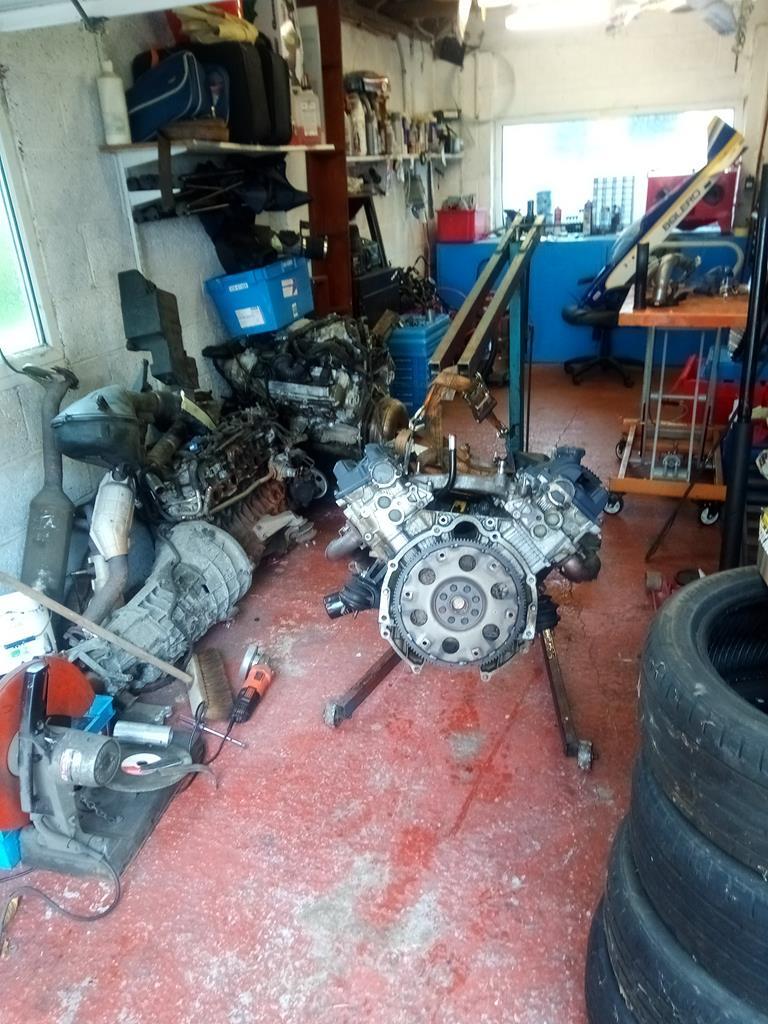 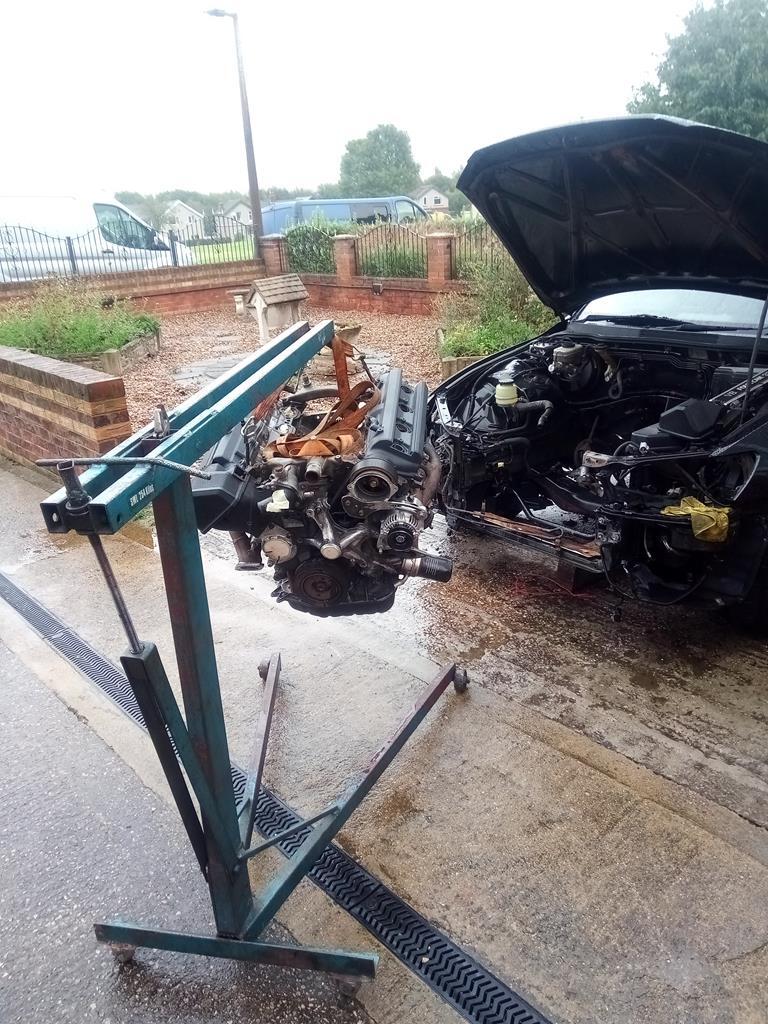 All being well that's it. Next time engine goes in its for boost!! Next plan is fab a collector for the wastegate. Then start final build up of everything.. hopefully might see a bit more progress then |
| |
|
|
mat88
Yorkshire and The Humber
Posts: 1,542
|
|
Sept 28, 2019 14:29:06 GMT
|
Firstly il appolagise.. not sure what is going on but I can't do a reply with more than a couple of pictures in so this will be a staggered sort of reply... Finally the fire ring/valve seat thingy whatsit turned up from the far side of the world.. not bad for a UK seller  doesn't look like much but atleast the wastegate will actually function now and will build boost without all the exhaust gas escaping first.... 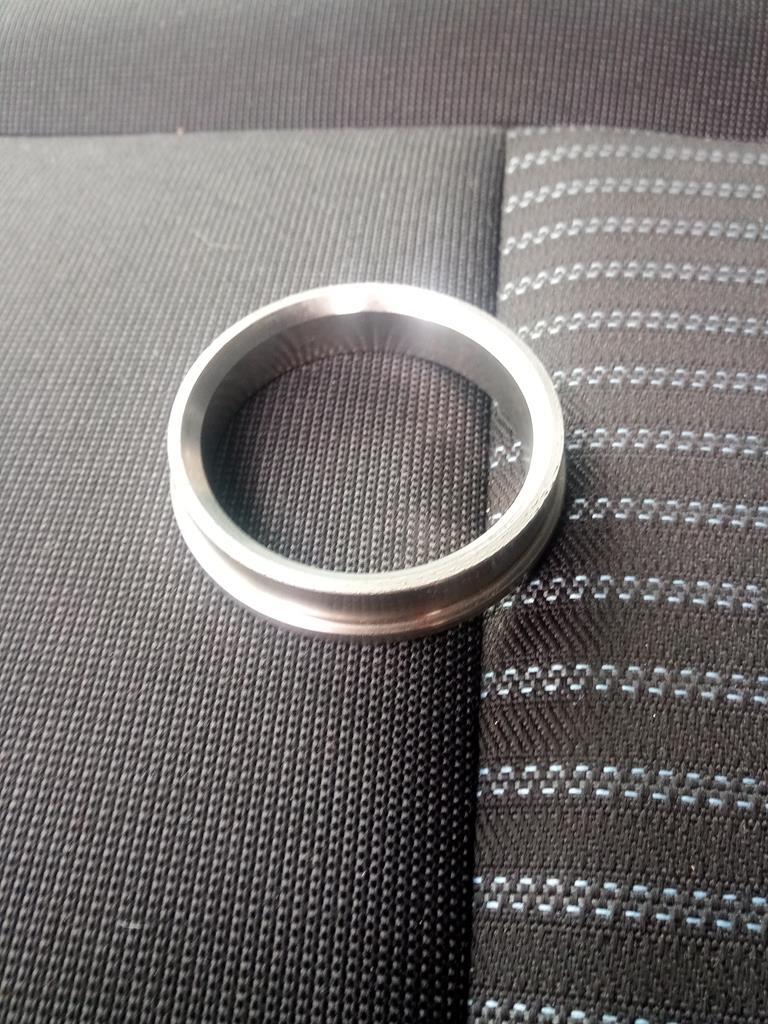 The fit isn't great. It's not terrible but will be better once I've lapped the valve in with a bit of grinding paste 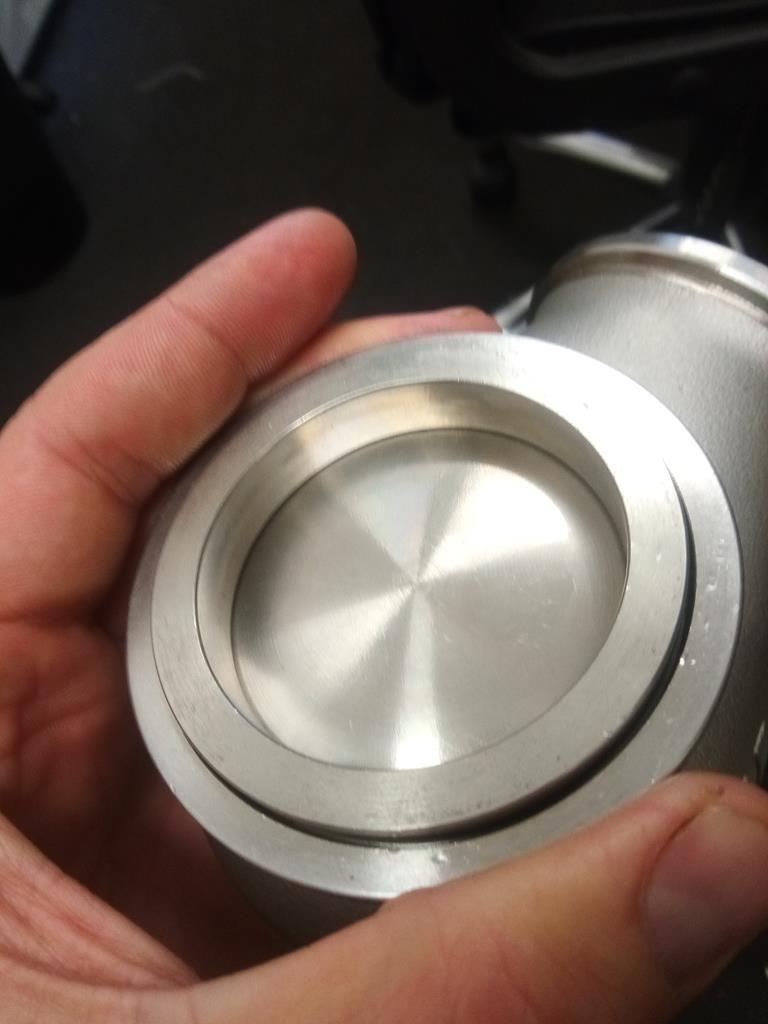 So now that's that problem solved I can now start on a collector of sorts |
| |
|
|
mat88
Yorkshire and The Humber
Posts: 1,542
|
|
Sept 28, 2019 14:37:23 GMT
|
So the collector.. wasn't 100% sure how I was going to do it. Isn't all that much info on the internet about fitting one and this is first time I've done summat like this so all a bit of an experiment. If it works it works if it doesn't it will make all the boost just before it puts a leg out of bed    Speaking of all the boost turns out the gate has come with an 11 and a 22psi spring pre fitted. Glad I realised before I got to the time to start it.. 33psi would have made it very quickly very briefly... Anyways. Broke out the trusty CAD department again. Came up with this idea.. 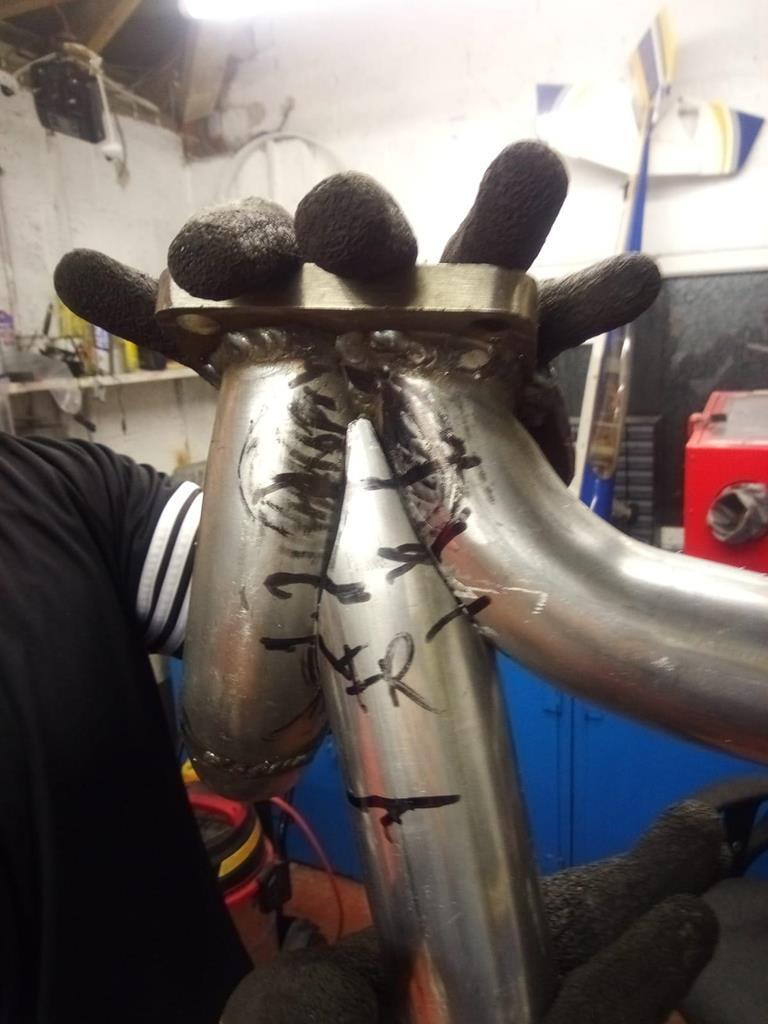 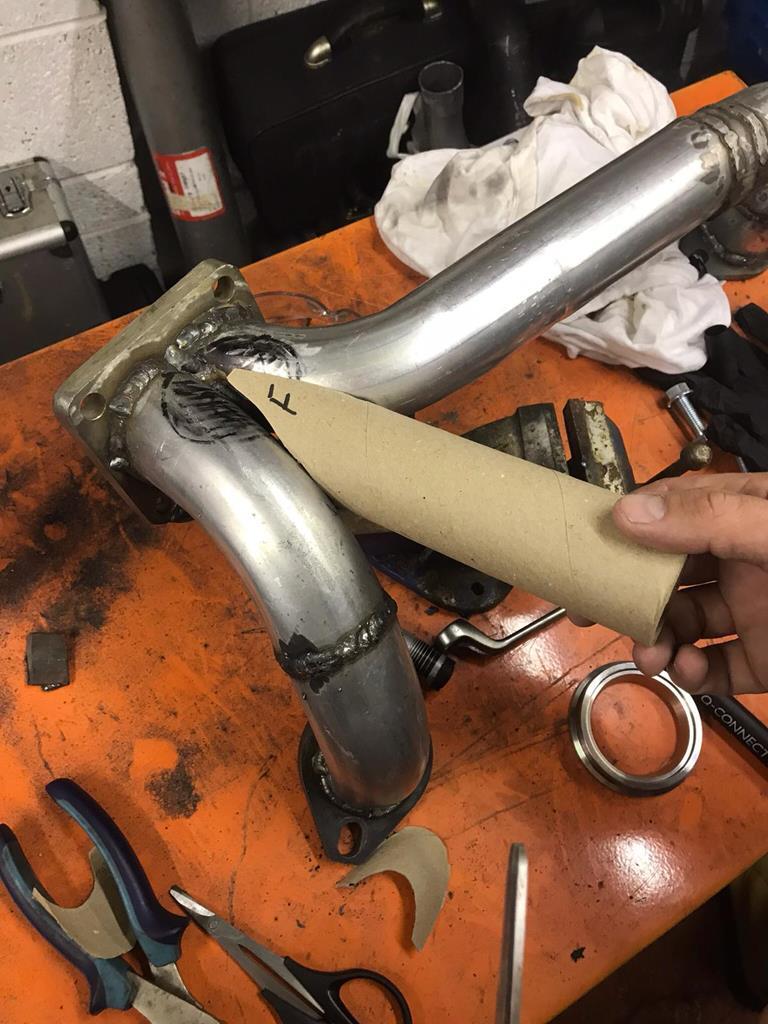 Not the easiest shape in world to figure out and the holes in the collectors were a ball ache to do.. but got there eventually 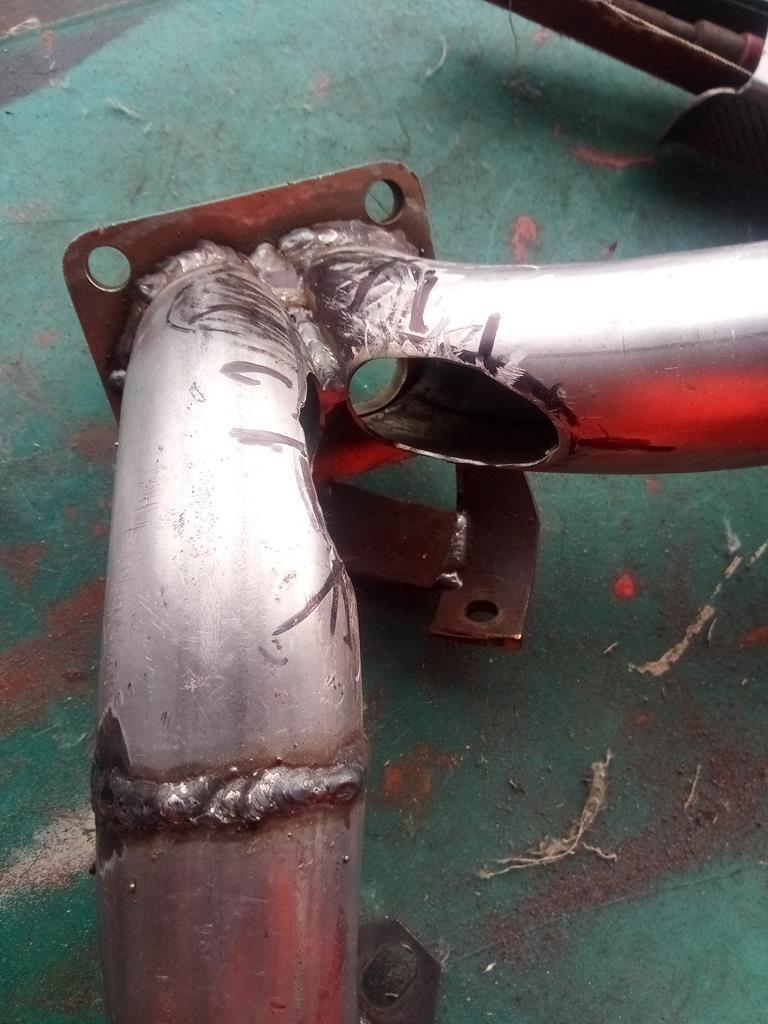 Time for a bit of welding... |
| |
|
|
mat88
Yorkshire and The Humber
Posts: 1,542
|
|
Sept 28, 2019 14:56:14 GMT
|
So after quite a bit of welding. And a nightmare with the gas (which I won't bore you with on here) I've ended up with this.. it's not the prettiest welding I've ever done. And I don't think the new gas helped.. but it's strong and it's airtight. And it should flow enough to stop it self destructing.. 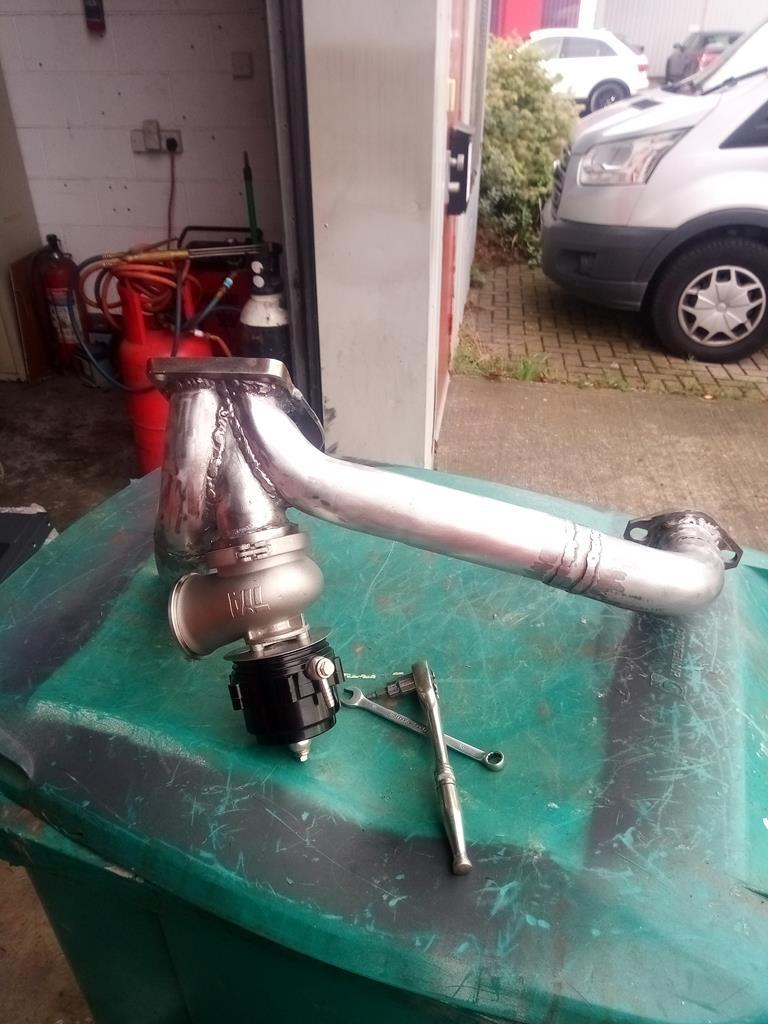 Once it was all together this is what I've ended up.. I'm no expert but it looks to me like it should work!! 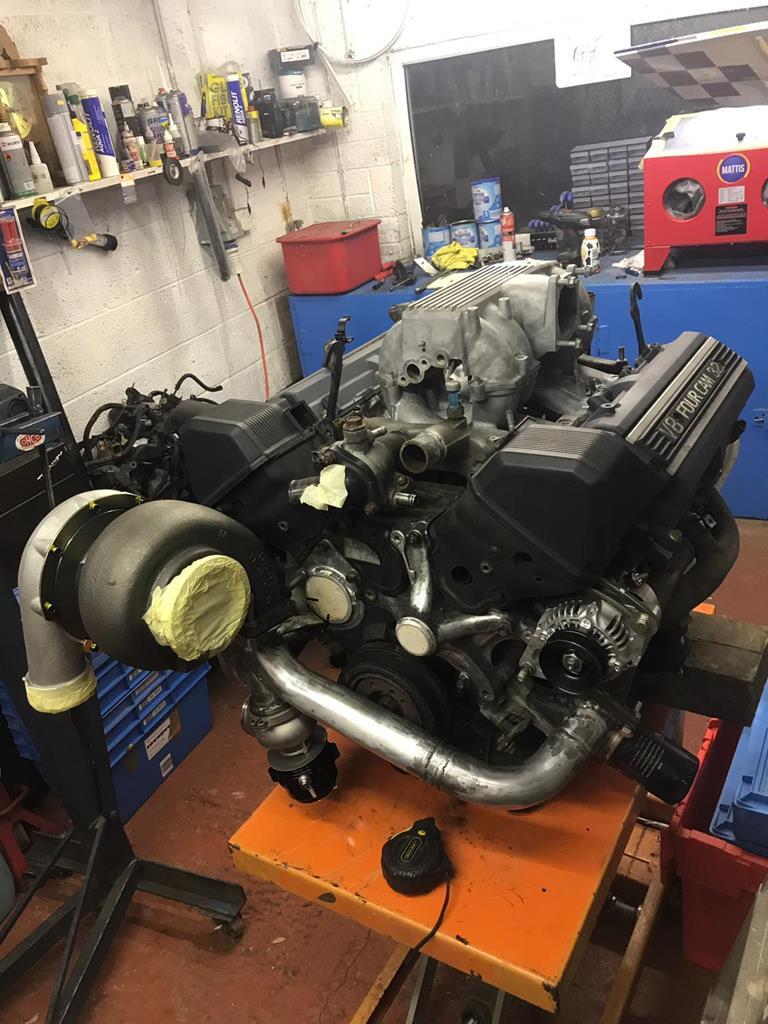 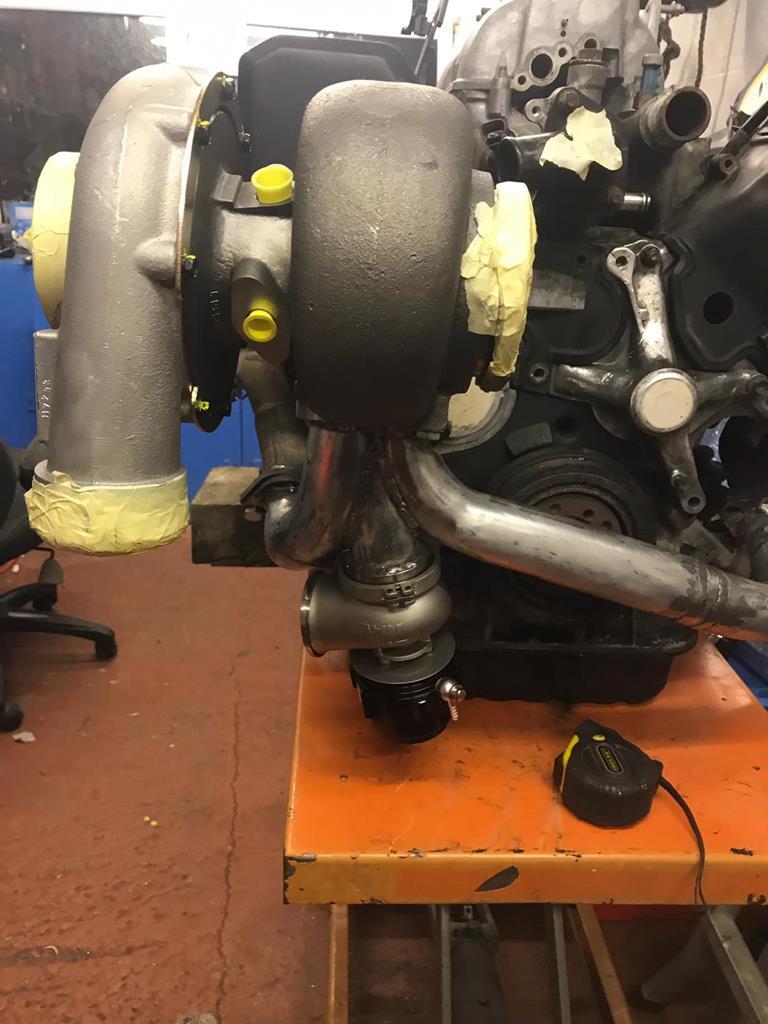 Anyways that's were I'm up to. Not sure how much more I'm likely to get done before the little un arrives.but il carry on doing bits at work were I can. |
| |
|
|
|
|
|
Sept 28, 2019 21:34:51 GMT
|
|
Looking good!
Small side note- your engine stand, does it have a screw thread rather than a hydraulic ram? Looks like hard work!
|
| |
|
|
|
|
|
Sept 28, 2019 21:49:40 GMT
|
|
A word of caution - your pipework layout into the wastegate is somewhat "sub-optimal" from a flow perspective so erring on the side of caution spring rate / boost -wise is probably wise. With your 11 psi spring in that, I'd expect somewhat more ... Looks good though :-)
|
| |
Last Edit: Sept 28, 2019 21:50:12 GMT by rallyboy
|
|
zeberdee
Club Retro Rides Member
Posts: 1,042  Club RR Member Number: 2
|
|
Sept 29, 2019 10:53:01 GMT
|
A word of caution - your pipework layout into the wastegate is somewhat "sub-optimal" from a flow perspective so erring on the side of caution spring rate / boost -wise is probably wise. With your 11 psi spring in that, I'd expect somewhat more ... Looks good though :-) What would you say is optimal in this situation ?? Asking as i’m about to turbo something with the same sort of manifold into turbo situation . mat88 , hopefully you don’t mind me asking questions on your thread ? Loving your work so far !! |
| |
|
|
stealthstylz
Club Retro Rides Member
Posts: 14,960
Club RR Member Number: 174
|
|
Sept 29, 2019 11:16:07 GMT
|
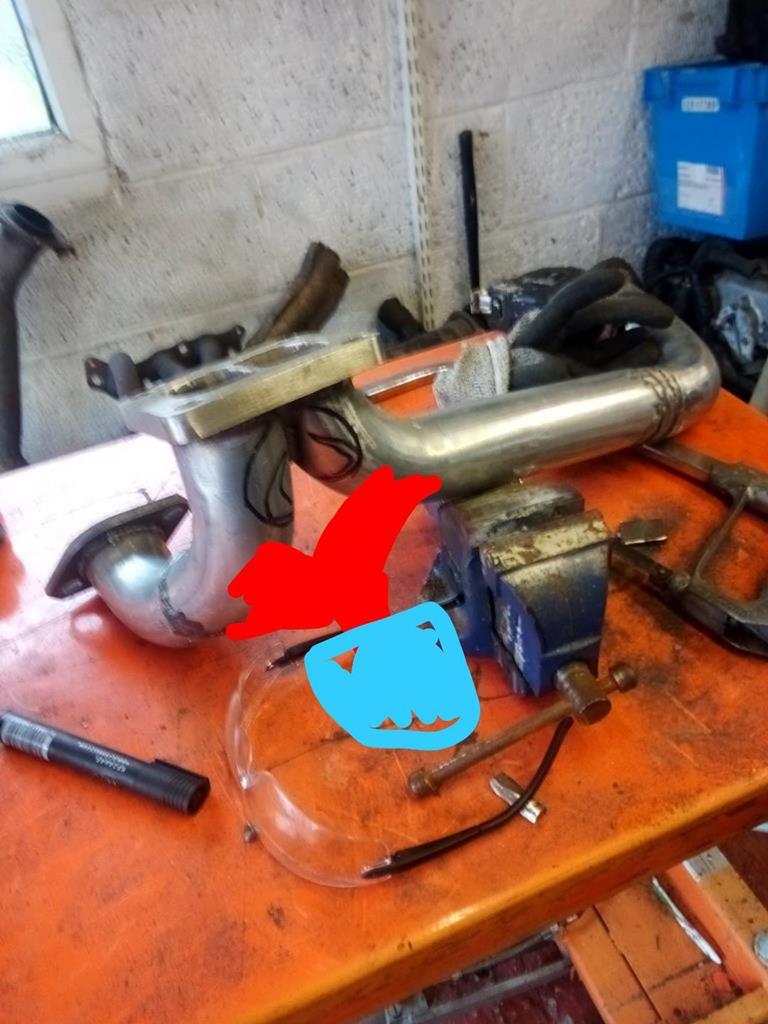 Personally I'd have done it more like this incredibly detailed sketch. Should have probably done this when I mentioned running it opposing the V but couldn't work out how to draw on a photo on my phone. |
| |
|
|
Dez
Club Retro Rides Member
And I won't sit down. And I won't shut up. And most of all I will not grow up.
Posts: 11,790
Club RR Member Number: 34
|
|
Sept 29, 2019 11:29:31 GMT
|
|
Interesting thread.
A few things-
I’ve done the 5” gas pipe through the crossmember with some bracing to run an exhaust through before. Works well, I’d definitely recommend it as a problem solver as it’s easy to brace up the subframe or whatever aftwards.
I’ll be utterly amazed if your exhaust doesn’t crack. I really think you should have put a flexi in where you originally planned to account for all the different material expansion rates you will have going on, especially with it being a v8.
I’ve also done the making oval tubing by cutting and welding. Pressing to shape really doesn’t work very well, cutting and letting in some flat is the way to go.
|
| |
|
|
zeberdee
Club Retro Rides Member
Posts: 1,042  Club RR Member Number: 2
|
|
Sept 29, 2019 12:45:14 GMT
|
|
|
| |
|
|


 (normal people go in and get cleaned and dry after working on trucks in rain all day)


