|
|
|
|
|
|
The front wings and front panel on my car in the pics are the club GRP bits. They are a very good fit, the wings especially need next to no fettling. The front panel is a little less simple but still no problem to anyone with some experience. I "screwed and glued" mine on with Tiger seal and those tapping bolts that drill their own holes. And there is NO filler whatsoever on my front end. The club also supply the "eyebrow" panel in GRP. This is the bit that sits above the headlight and curves round the outside to meet the valance. Rimmer Bros do a not very accurate steel replica at £117 a side! TBH I left them out on my car altogether as I fitted a new steel inner front panel complete. The car doesn't seem to have suffered from the lack! All this work was done in 2012 and the panels and fitting has stood up well to near constant use (and a small impact with a large dog, the dog refused treatment and left the scene) I got a couple of very small cracks and a bit of crazing in the gel coat at the front of the n/s wing from the collision! But it's a driving car, stuff like this happens!
Steve
|
| |
|
|
|
|
|
|
|
|
|
|
it does look good for grp!
|
| |
'80 s1 924 turbo..hibernating
'80 golf gli cabriolet...doing impression of a skip
'97 pug 106 commuter...continuing cheapness making me smile!
firm believer in the k.i.s.s and f.i.s.h principles.
|
|
PhoenixCapri
West Midlands
Posts: 2,685
Club RR Member Number: 91
|
|
Oct 24, 2019 12:59:26 GMT
|
Thanks to this thing taking over my life for the past few weeks, progress has been a little stunted. However, I have put the hours away from home to good use tracking down some cheap bits for the project.  First up is a pair of fibreglass front wings and a front panel. Not going to end up a show car with these bits, but for £150 all in it will tidy things up and save a bit of weight and a lot of time over repairing the rusty current bits. 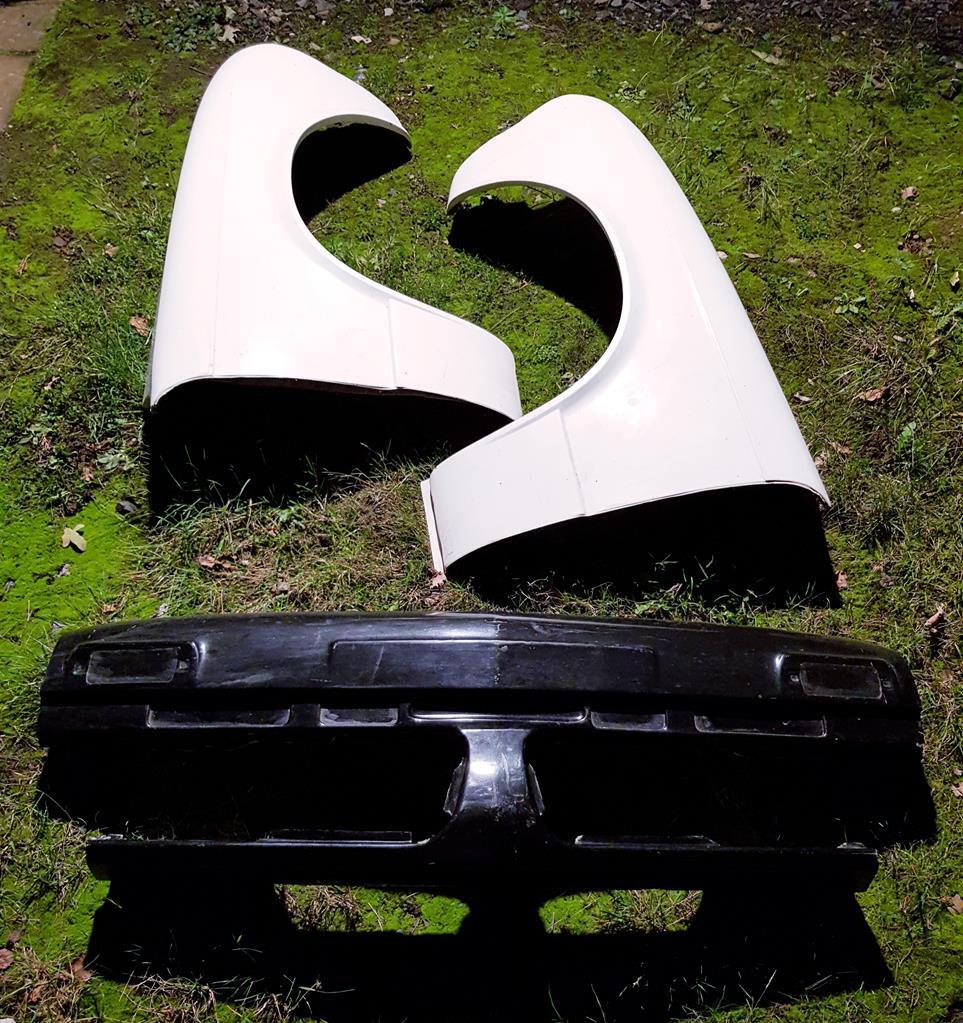 Next up is a set of coilovers. Think the rears are MX5 ones tweaked,and the front Dolly ones. Either way they came from a slammed dolly that was getting an upgrade, so are an easy way to some stance. £200 all in, isn't as cheap as i could have done it, but is more than worth it for the hours saved. They give this stance, that'll work! 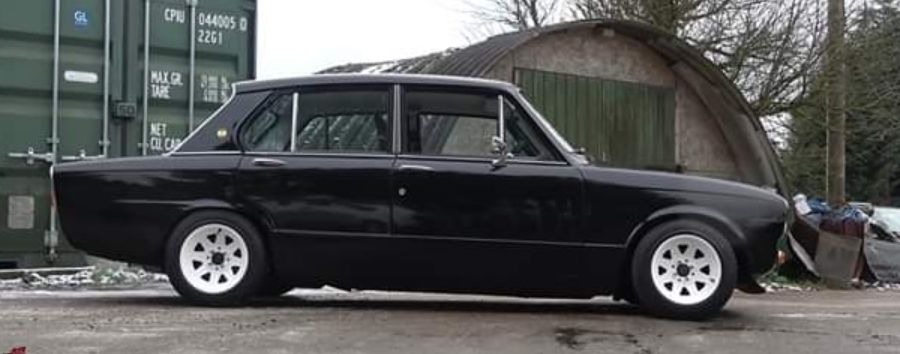 Thankfully work should calm down a but now, so should be getting back down the unit a couple of times a week so things will hopefully start to move forward again. Total so far = £1680 this sounds pricy to me! Better see what more I can sell... |
| |
|
|
|
|
|
Oct 24, 2019 21:36:42 GMT
|
That black un looks like Dan Browns car, now sporting an S13 turbo lump. I'm assuming the coilovers you got are adjustable for ride height? Fixed ones for a Sprint will sit too high on a 2 door, go on, ask me how I know! You have to be very careful lowering a Dolomite/Toledo, Dans car (or mine) are pretty much on the limit of what is practical. More drop than that and you'll be grounding the subframe and exhaust on every little bump and ripping the sump off. I get the odd unavoidable but painful graunch from time to time even so. As I said, on the limit! I actually replaced my hex nut sump plug with a recessed Torx one to save a few more mm and lessen the risk of a grounding ripping it out! A mate with a similar Carlton sump on his Redtop powered Sprint did actually succeed in ripping the plug out, which has made me rather paranoid about it! Steve
PS, those wings are by Honeybourne mouldings. They aren't as thick as club ones, or quite such a good fit! But you got all 3 bits for the price of a new club front panel and beggars can't be choosers!
|
| |
Last Edit: Oct 24, 2019 21:48:59 GMT by carledo
|
|
PhoenixCapri
West Midlands
Posts: 2,685
Club RR Member Number: 91
|
|
|
|
So although the thread has been quiet the work has gone on. Not very interesting weld after weld, so not worth updating on, plus i managed to crack my phone lense with weld splatter somehiw getting though my pocket... But it is now solid, to celebrate have a photo of the last bit, the front frame mount 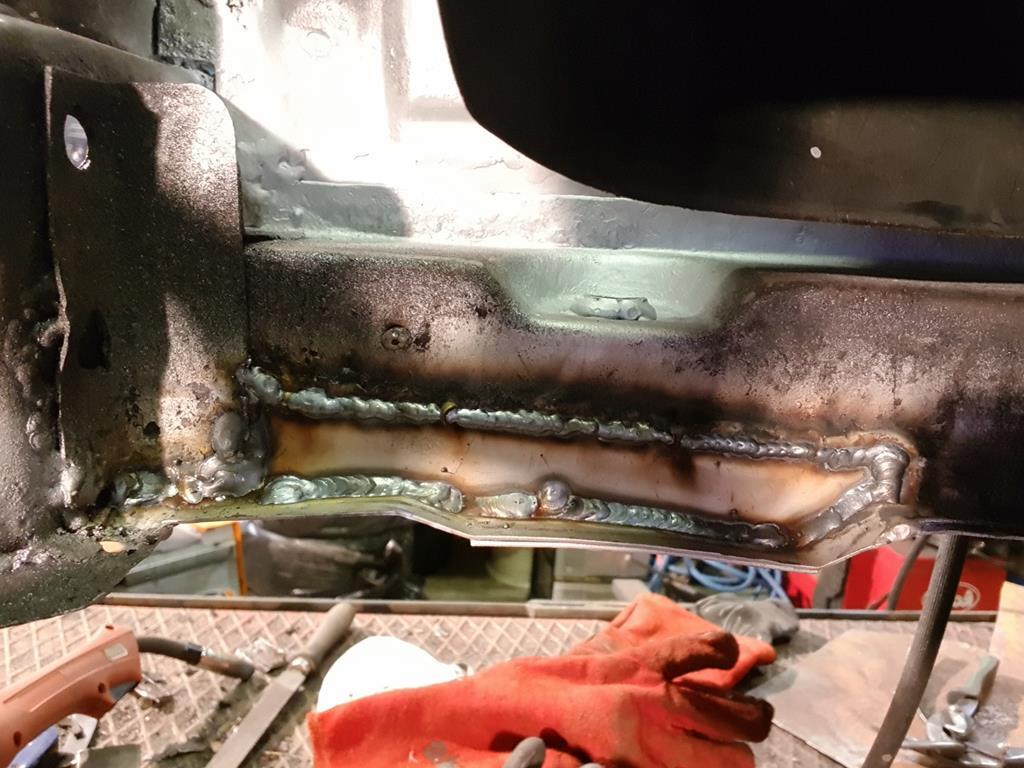 Little bit of dressing and we're done. Next up make the engine fit! |
| |
|
|
|
|
|
|
|
|
Ooooh exciting! That’s a big tick getting all the welding done.
|
| |
|
|
|
|
|
Jan 19, 2020 12:07:51 GMT
|
Nicely done squire !  |
| |
|
|
PhoenixCapri
West Midlands
Posts: 2,685
Club RR Member Number: 91
|
|
Jan 23, 2020 19:19:52 GMT
|
The engine is in! Well, its resting in the bay but at least I know what I need to change to get it where I want it. 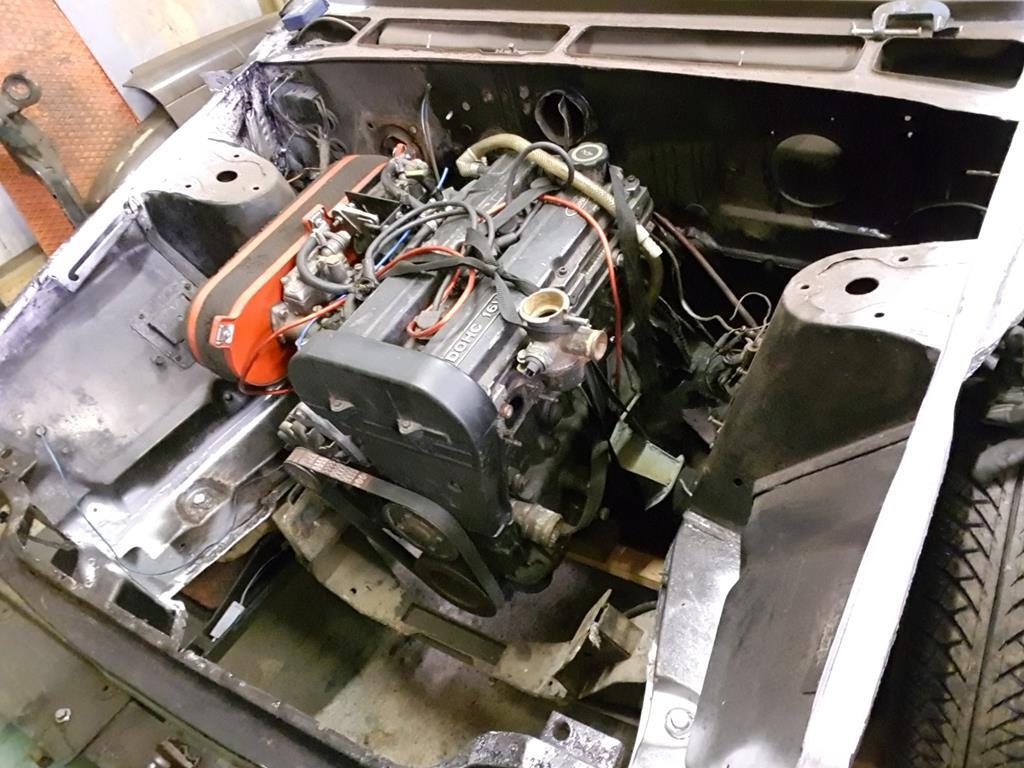 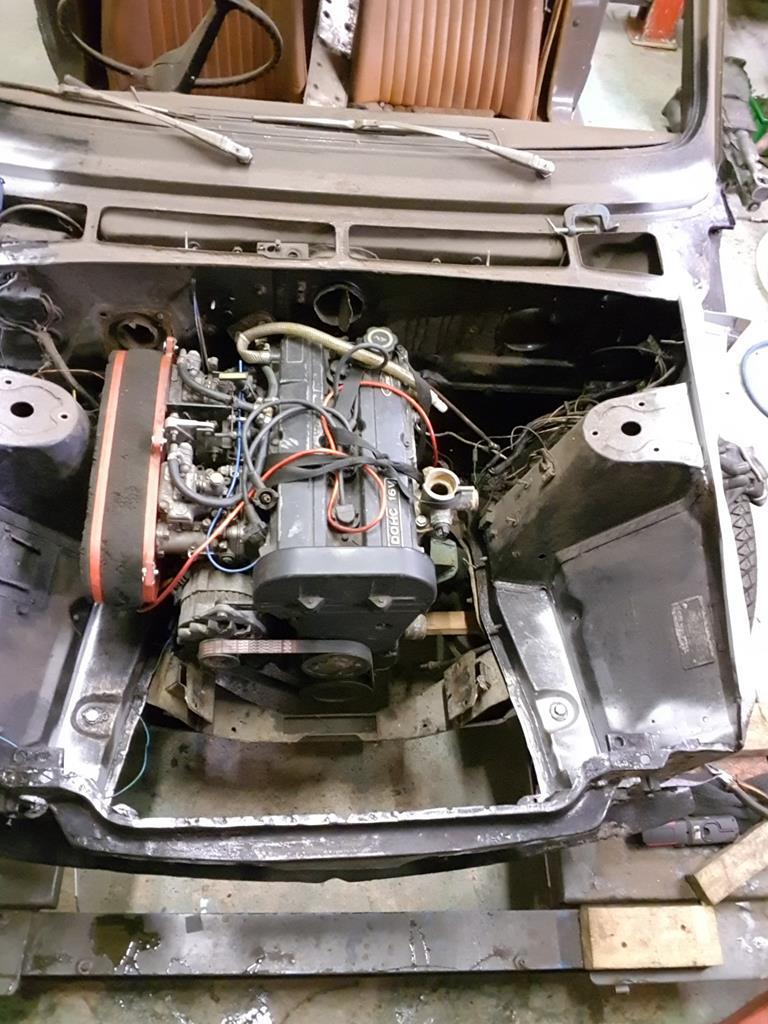 Now I just need; a front bowl sump (CVH or Escort/Fiesta 1.8 Zetec should do it) to knock up some mounts a different gearbox (don't want to modify the type 9) maybe a different exhaust manifold (or at least I need to modify the ine I have...) Simples... |
| |
|
|
PhoenixCapri
West Midlands
Posts: 2,685
Club RR Member Number: 91
|
|
|
|
Progress has seeming been slow, yet I have been putting an oddly large amount of time in, annoying when that happens! Anyway, the big bump in the rear right has been pulled out and the badly rippled rear left arch area so body is ready for prep. And after a lot of faffing I have managed to get the engine to sit an extra couple of inches rearward meaning I can use a rear bowl sump, eh voila! 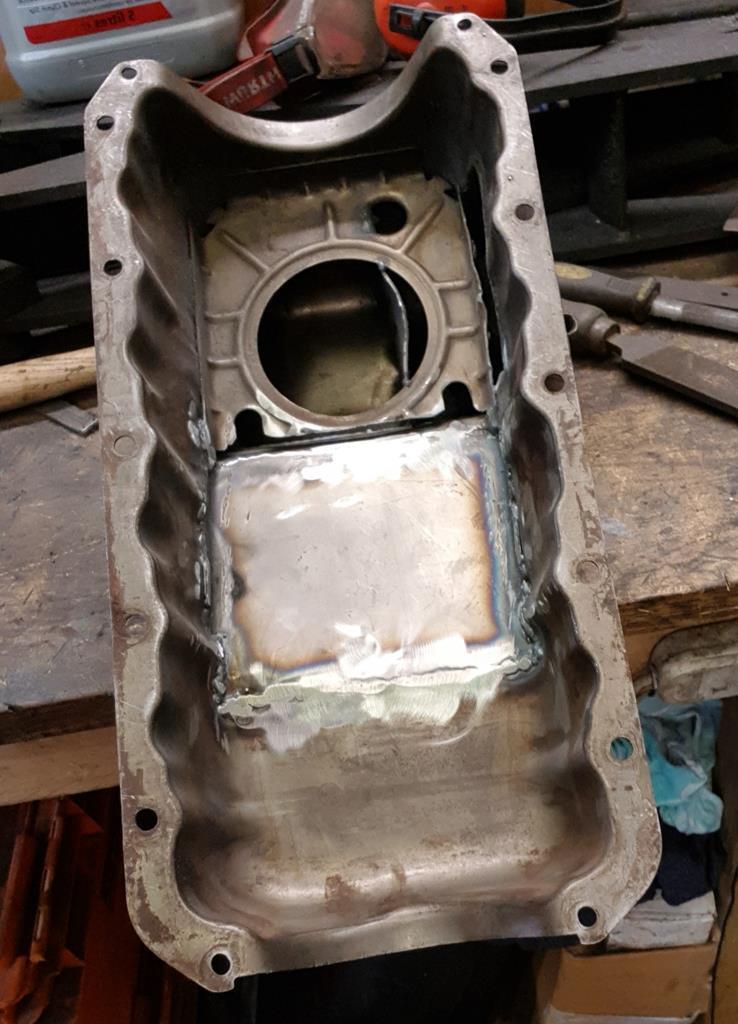 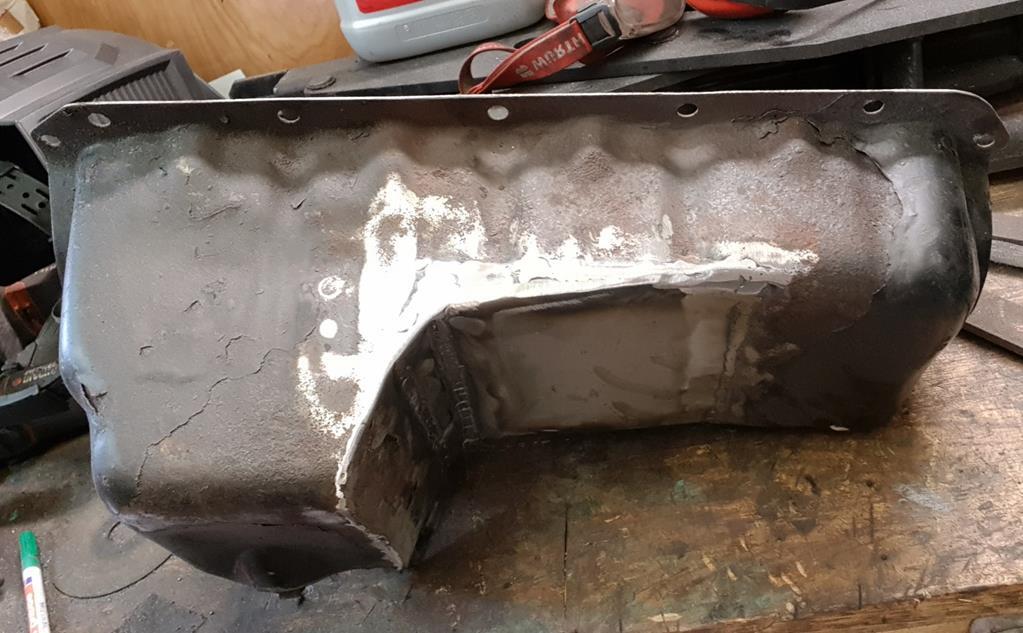 Needs a lot of clean up and a lick of paint but shouldn't take too long to get ready to go in. Also got lucky with an already shortened tail housing for the type 9, wasn't going to us this box as didn't want to modify it, but it so easy to change the rear housing seems a missed opportunity not to. 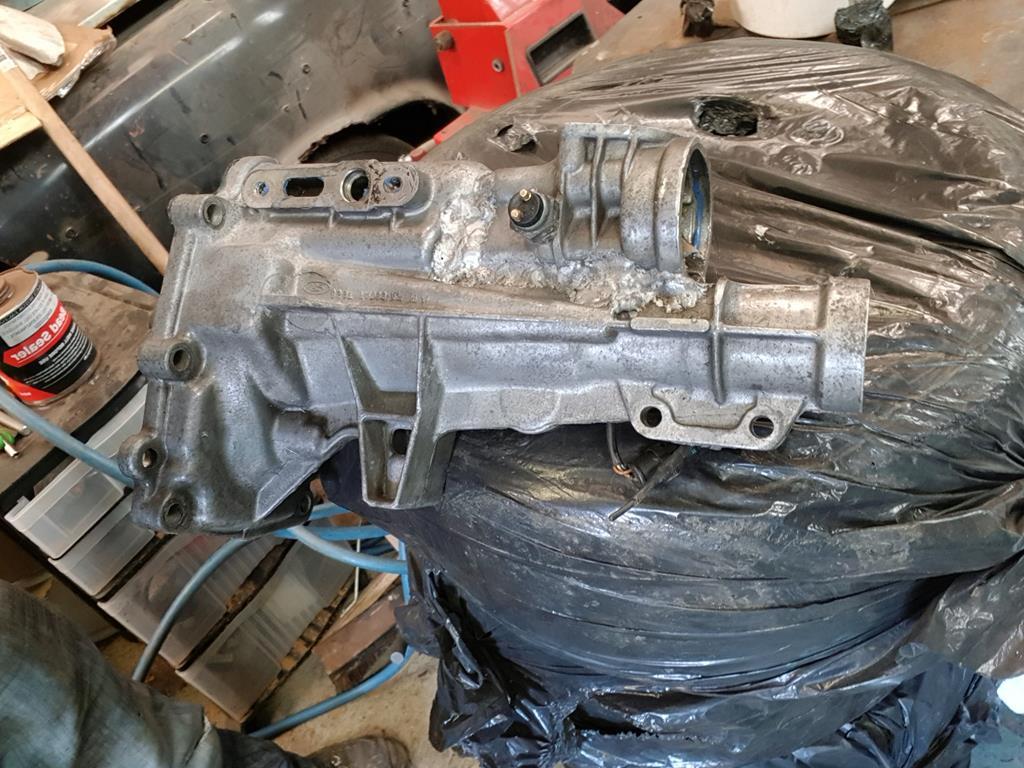 Next up, modifing the front frame to be solid mounted and making some engine mount up. |
| |
|
|
PhoenixCapri
West Midlands
Posts: 2,685
Club RR Member Number: 91
|
|
Apr 18, 2020 10:49:41 GMT
|
Slow but steady progress (if only I wasn't still working and wasn't a farther I'd probably be finished by now!) Engine and gearboxes bolted back together, just need to get a new release bearing as old one a bit tired then can bolt them together. 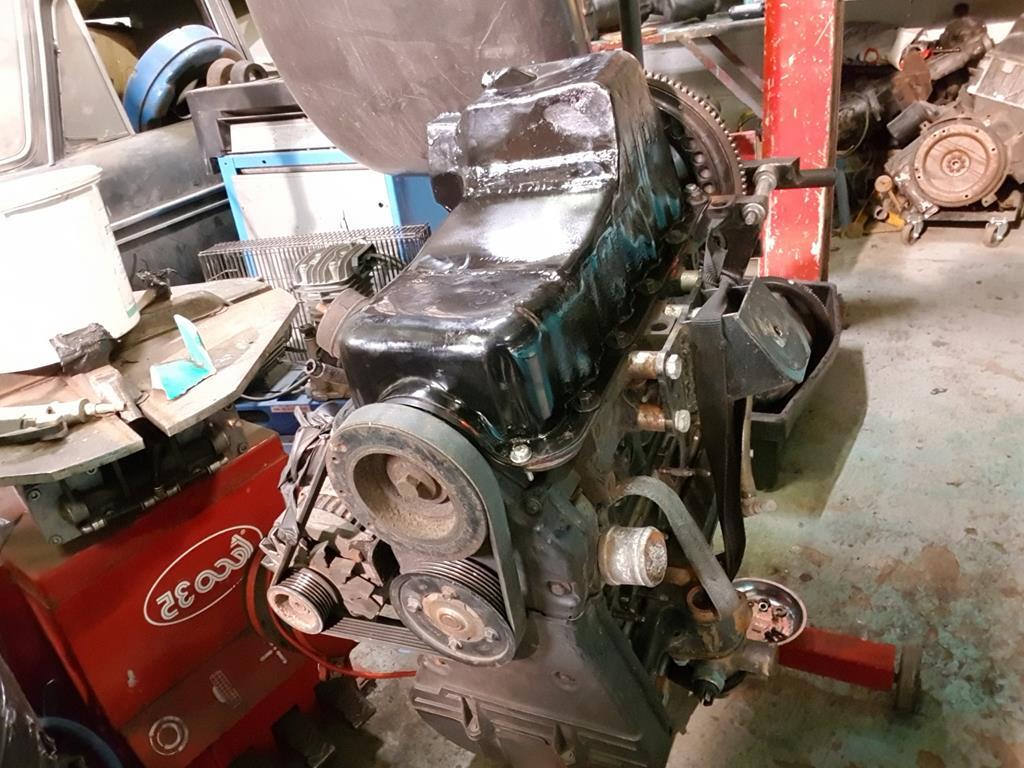 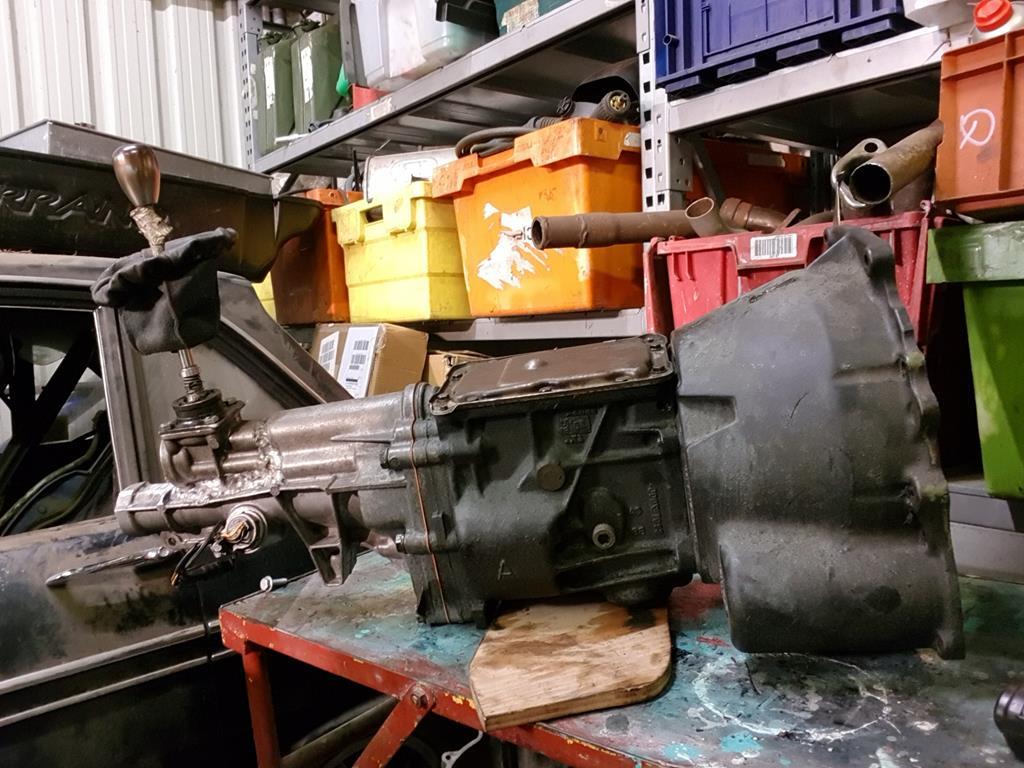 Also started tweaking the front frame. Original mounts removed and new plates welded on for the new mount location. Once I get the motor in can weld the brakets on. Need to turn up some mounts for the rear and feont adaptors as am changing to a solid mounting and raising frame up closer to body a bit (should help to keep rack angles closer to standard with the lowered suspension. 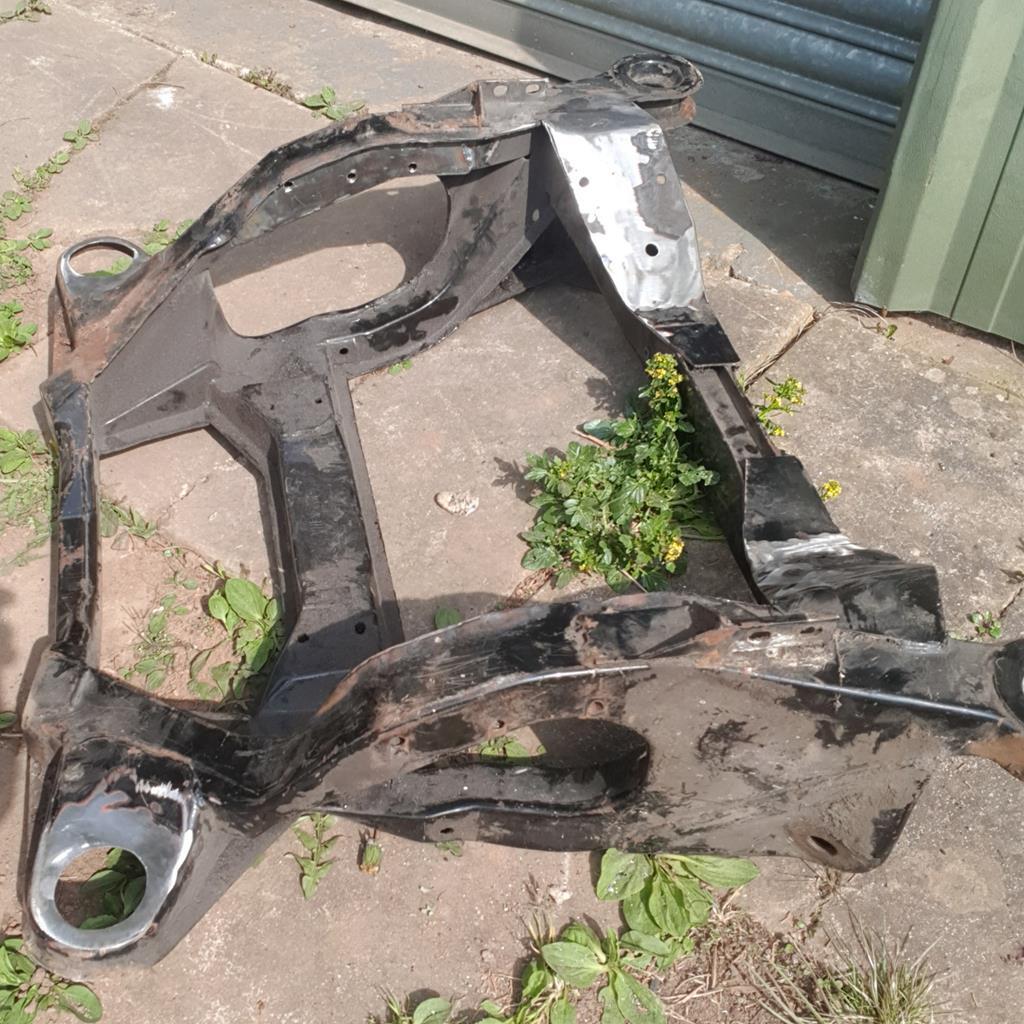 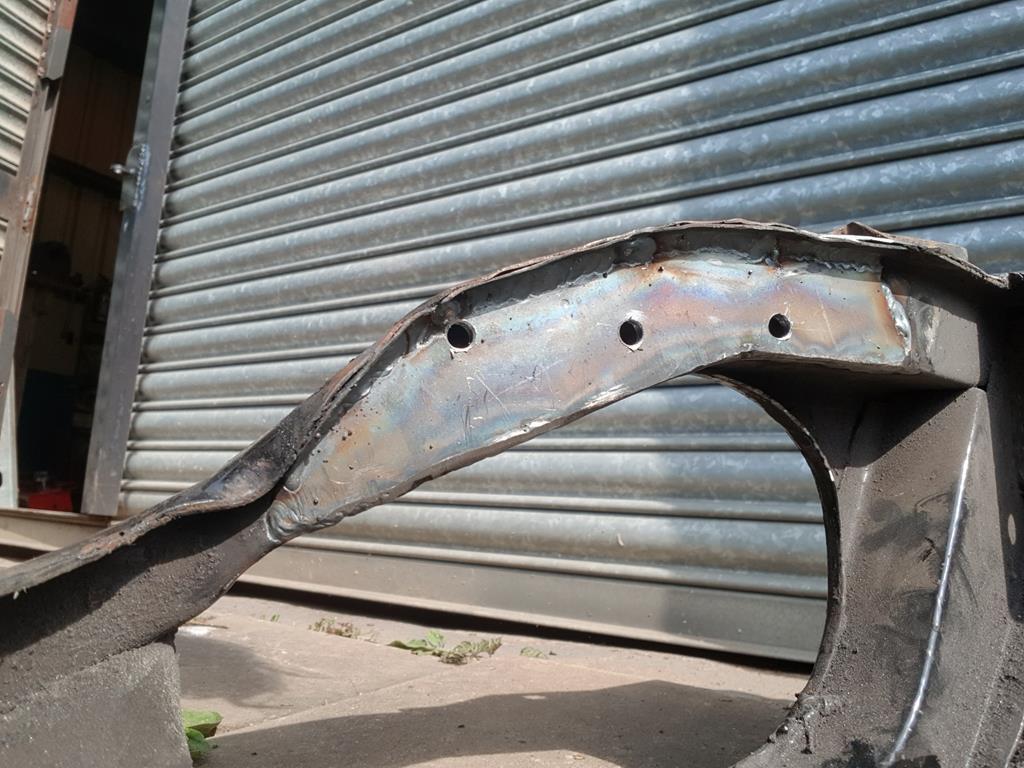 While I'm waiting on the release bearing am getting the other items that'll neew to go off for powder coating done. First making the suspension adjustable and removing some of the compliance. Just need to chop and weld this lot 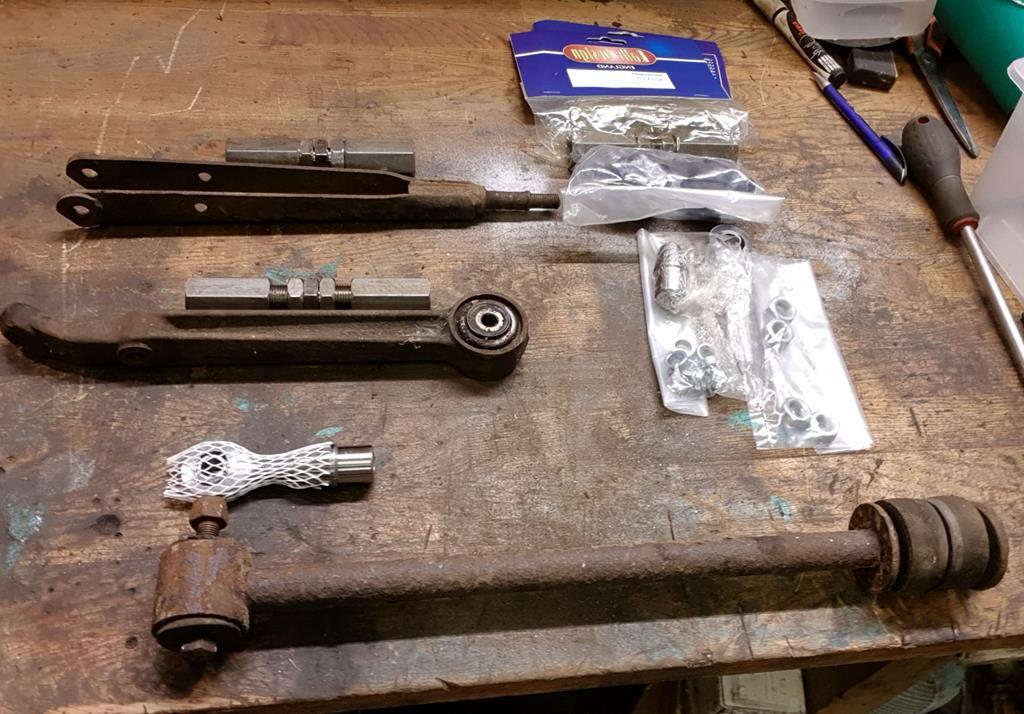 |
| |
|
|
|
|
PhoenixCapri
West Midlands
Posts: 2,685
Club RR Member Number: 91
|
|
Apr 19, 2020 16:26:47 GMT
|
Two sets of links done, one to go  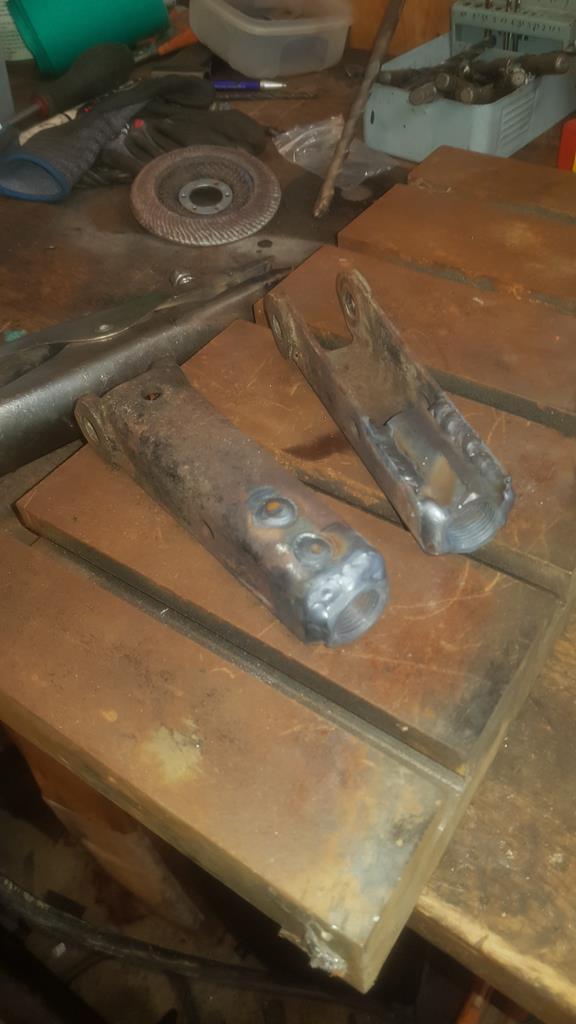 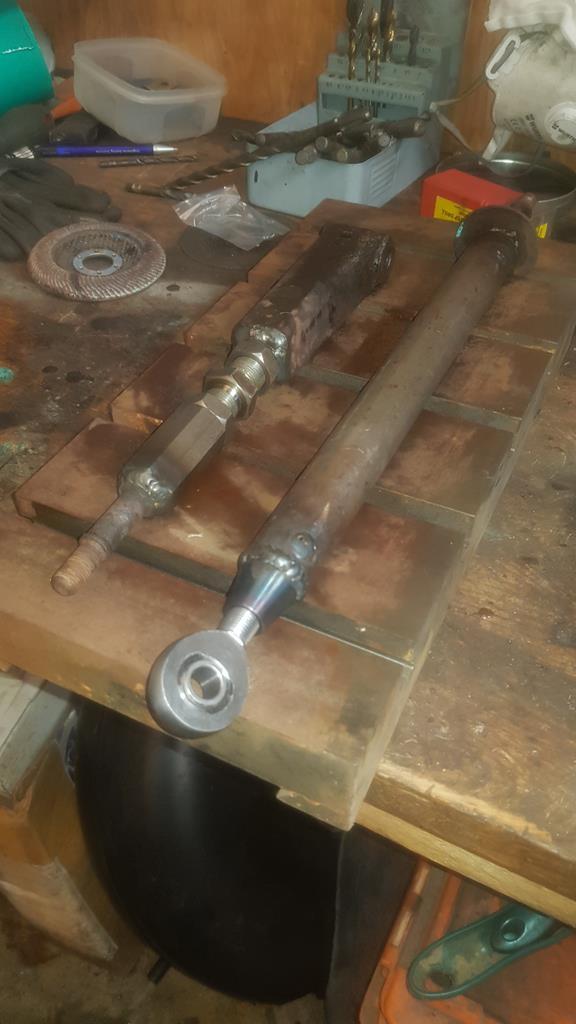 Last pair are the hardest though, never like welding to cast metal! |
| |
|
|
PhoenixCapri
West Midlands
Posts: 2,685
Club RR Member Number: 91
|
|
|
|
Little more progress, adjustable links done. Now to get the engine mounts done and then ship a load of stuff off for powder coating. 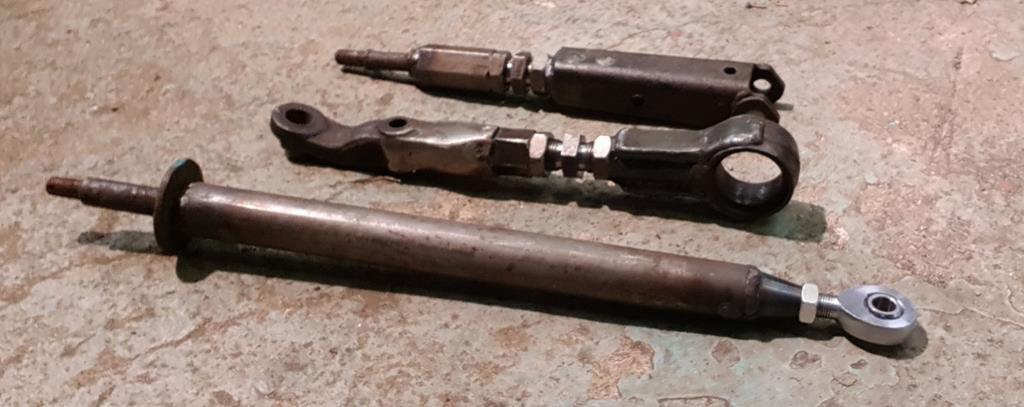 |
| |
|
|
|
|
|
|
|
If it's cast steel you should be fine (which these probably will be). People have at least semi-regularly welded the rear vertical links of GT6s/Spitfires with no issues. Decent amount of heat to make sure it's penetrated properly, and linger more on the cast side than the bit you're welding to and you should be fine  |
| |
|
|
|
|
|
|
|
|
I don't like to play the critic after all that hard work, but I really don't like that TCA! You DO know that the bracket that supports it (and the upper wishbone arms) is shim adjustable to achieve what you've done here?
And the front tie bar is still badly worn at the front end where the bushes go. Rob Macgregor at Sprintspeed actually MAKES adjustable versions of this tie bar for not stupid money. With the bush support bit completely renewed.
Sorry, I missed the last couple of posts or i'd have told you sooner!
On the upside, the rear tie bars are ok, though I can't see a lot of benefit to making them adjustable!
If you are going to polybush the rear trailing arms at both ends, i'd recommend you box in the trailing arm at the rear end where it kicks up to meet the axle, these have been known to crack and split here on hard used and hard bushed track cars. Alternatively, the track oriented guys at the TDC (me included) use a polybush at the rear end of the trailing arm and a new stock rubber one at the front end. This gives a necessary bit of twist compliance to the arm and doesn't really make it any sloppier than poly.
Steve
|
| |
|
|
PhoenixCapri
West Midlands
Posts: 2,685
Club RR Member Number: 91
|
|
Apr 23, 2020 11:54:12 GMT
|
I don't like to play the critic after all that hard work, but I really don't like that TCA! You DO know that the bracket that supports it (and the upper wishbone arms) is shim adjustable to achieve what you've done here? And the front tie bar is still badly worn at the front end where the bushes go. Rob Macgregor at Sprintspeed actually MAKES adjustable versions of this tie bar for not stupid money. With the bush support bit completely renewed. Sorry, I missed the last couple of posts or i'd have told you sooner! On the upside, the rear tie bars are ok, though I can't see a lot of benefit to making them adjustable! If you are going to polybush the rear trailing arms at both ends, i'd recommend you box in the trailing arm at the rear end where it kicks up to meet the axle, these have been known to crack and split here on hard used and hard bushed track cars. Alternatively, the track oriented guys at the TDC (me included) use a polybush at the rear end of the trailing arm and a new stock rubber one at the front end. This gives a necessary bit of twist compliance to the arm and doesn't really make it any sloppier than poly. Steve Thanks for info Steve. I had actually been through all the bits I coukd just buy in, but soon reached into hundreds of pounds. Plus I have this terrible afliction where I only feel I've fully achieved something if I've done everything I can on it and its a bit different rather than just bolted some bought in stuff together. Daft, but that's me!  Rear trailing arm isn't done to make adjustable really, it's to remove the inner bush compliance since these give the majority of lateral control of the rear end, does mean I can now set the axle nose angle correctly as well. TCA, yeah can shim from factory but I hate the faff of shims when trialing different setups so this is full insitu, plus not entirely sure I could get the range of adjustment I want on shims given the effect to geometry my solid mounting the frame closer to the body will have. If you've ever tried setting camber and caster on on a linked setup like this (where one changes with the other) you'll understand why an insitu setup like this is so much nicer to setup! As for the angled front links, the pins are worn (not that that'll have mich effect with much stiffer longditudinal bushes fitted) but this has cost me £30 vs £90odd. Yeh I know in the grand scheme not a lot, but on a cheap as possible project still a fair amount. Again though, maybe it all just comes under, "just because you can, doesn't mean you should". But that's never stopped me before, just look at my Capri! Cheers  |
| |
|
|
|
|
|
Apr 24, 2020 11:02:50 GMT
|
|
Being largely a cheapskate myself, I understand your philosphy! In a set of famous words, "i've been doing so much with so little for so long that i'm now fully qualified to do anything with nothing!"
And though i've been smitten lately with "Binky's disease" (anything worth doing is worth overdoing and then doing over because you aren't happy with the first try) I try not to lose sight of the KISS principal!
If the factory in their infinite wisdom (!) gave me shims, i'll use them and if I spend an extra £60 on a proven product that uprates something that would need to be repaired or replaced anyway, i'll take it! Time is still money, even if that translates as brownie points from SWMBO for doing the gardening!
I'm a bit of a lazy engineer, I don't really go for changing things unless I have to, I'd rather try as is and only alter it if it's proven unsatisfactory. So the Carledo is rocking absolutely stock shimming and non adjustable tie bars with it's near 2" drop! The lowering has definitely increased the front camber angle which is good, the castor seems unaffected, turn in and self centering is spot on. I guess this actually translates as "if it ain't broke, don't fix it!"
I can't see that dropping the body over the subframe will have a negative effect on rack angles, every part of the steering and suspension that matters, is attached to the subframe. In fact, doing it this way gives you an instant effective 3/4" drop so you only need 1" lowered springs to get a 1.75" lower body! Clever! One thing you MAY need to do though, is shorten the intermediate steering column to allow for the rack being closer to the body.
Steve
|
| |
|
|
PhoenixCapri
West Midlands
Posts: 2,685
Club RR Member Number: 91
|
|
|
|
Being largely a cheapskate myself, I understand your philosphy! In a set of famous words, "i've been doing so much with so little for so long that i'm now fully qualified to do anything with nothing!" And though i've been smitten lately with "Binky's disease" (anything worth doing is worth overdoing and then doing over because you aren't happy with the first try) I try not to lose sight of the KISS principal! If the factory in their infinite wisdom (!) gave me shims, i'll use them and if I spend an extra £60 on a proven product that uprates something that would need to be repaired or replaced anyway, i'll take it! Time is still money, even if that translates as brownie points from SWMBO for doing the gardening! I'm a bit of a lazy engineer, I don't really go for changing things unless I have to, I'd rather try as is and only alter it if it's proven unsatisfactory. So the Carledo is rocking absolutely stock shimming and non adjustable tie bars with it's near 2" drop! The lowering has definitely increased the front camber angle which is good, the castor seems unaffected, turn in and self centering is spot on. I guess this actually translates as "if it ain't broke, don't fix it!" I can't see that dropping the body over the subframe will have a negative effect on rack angles, every part of the steering and suspension that matters, is attached to the subframe. In fact, doing it this way gives you an instant effective 3/4" drop so you only need 1" lowered springs to get a 1.75" lower body! Clever! One thing you MAY need to do though, is shorten the intermediate steering column to allow for the rack being closer to the body. Steve Hadn't actually tried connect the rack up yet so hadn't though about that! Another thing to modify, woop! |
| |
|
|
|
|
|
Aug 12, 2020 12:26:26 GMT
|
|
Looking really good! I need to modify my Toledo drag links and rear axle control arms in the same way. Lolly gives too much compliance still and I need to dial in a bit more front caster. I look forward to seeing this finished
Chris
|
| |
1973 Triumph Toledo S2000
|
|
PhoenixCapri
West Midlands
Posts: 2,685
Club RR Member Number: 91
|
|
Mar 12, 2021 19:45:28 GMT
|
Would you believe it I've actually done something on the Toledo! Not a lot granted, but given the engine has sat in the bay for a year (blame a house extension!) I thought it about time I made some mount brackets to hold it. Nothing fancy, but bloody strong. And front frame mounted meaning you can drop the engine out the bottom of the shell 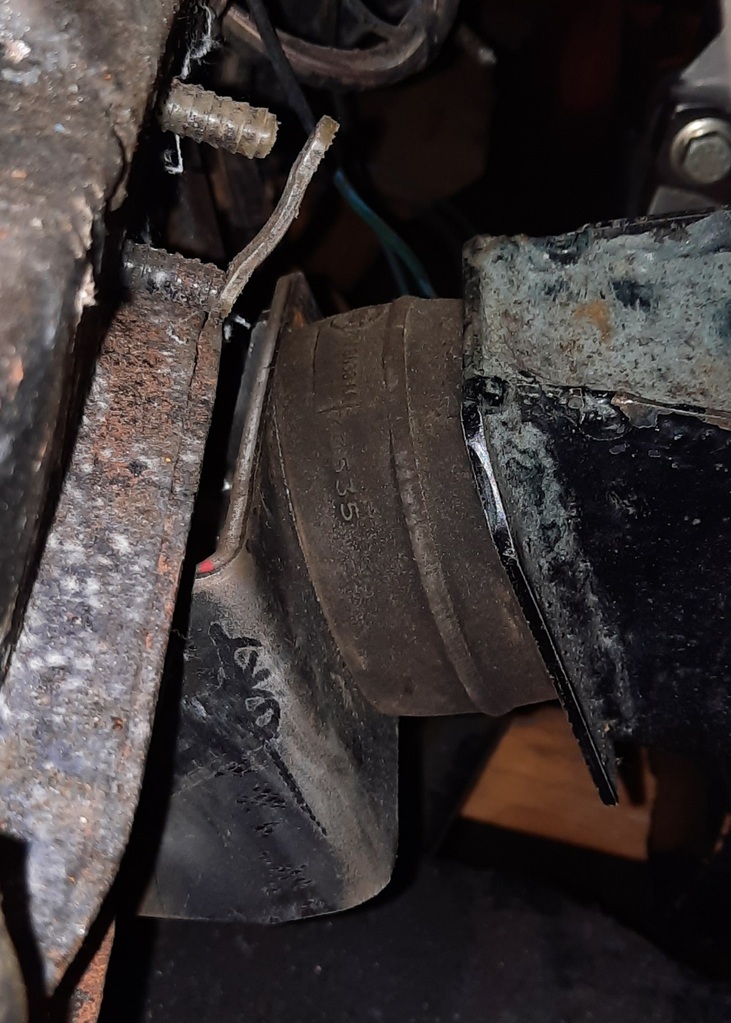 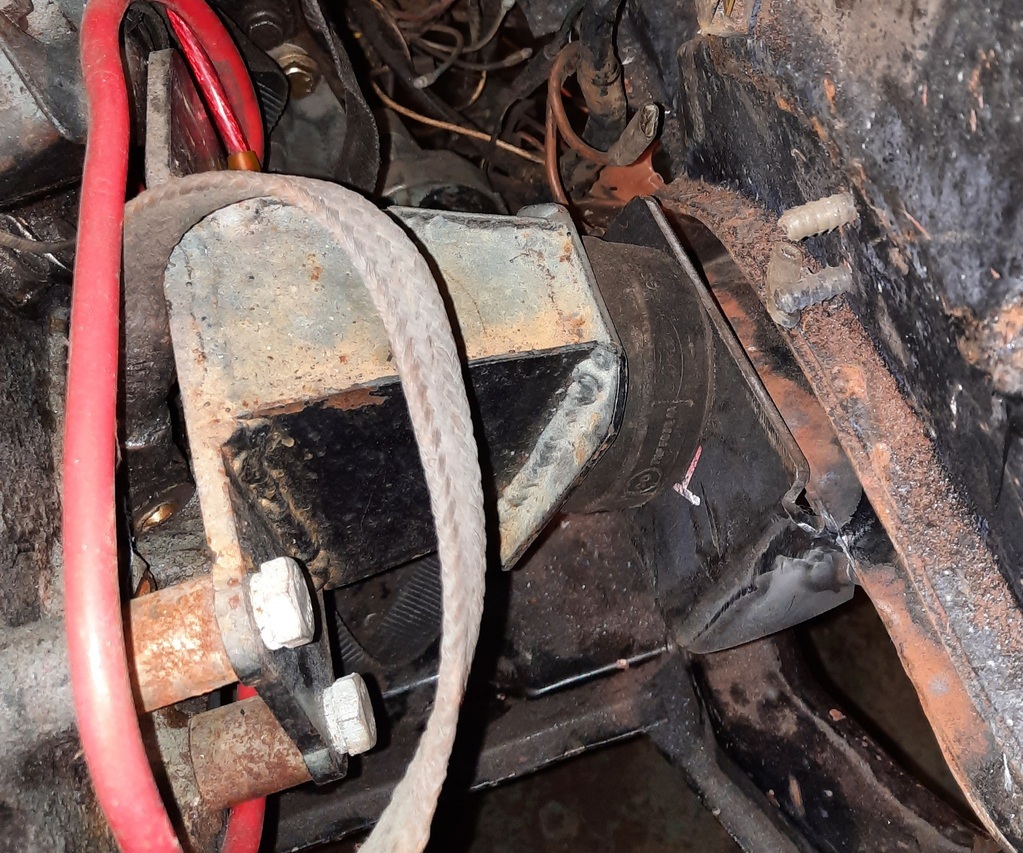 In bigger news, it got dropped back on it's wheels and loaded up to go see fellow RR'er @slackerthepinstriper to get the underside tarted up and protected. 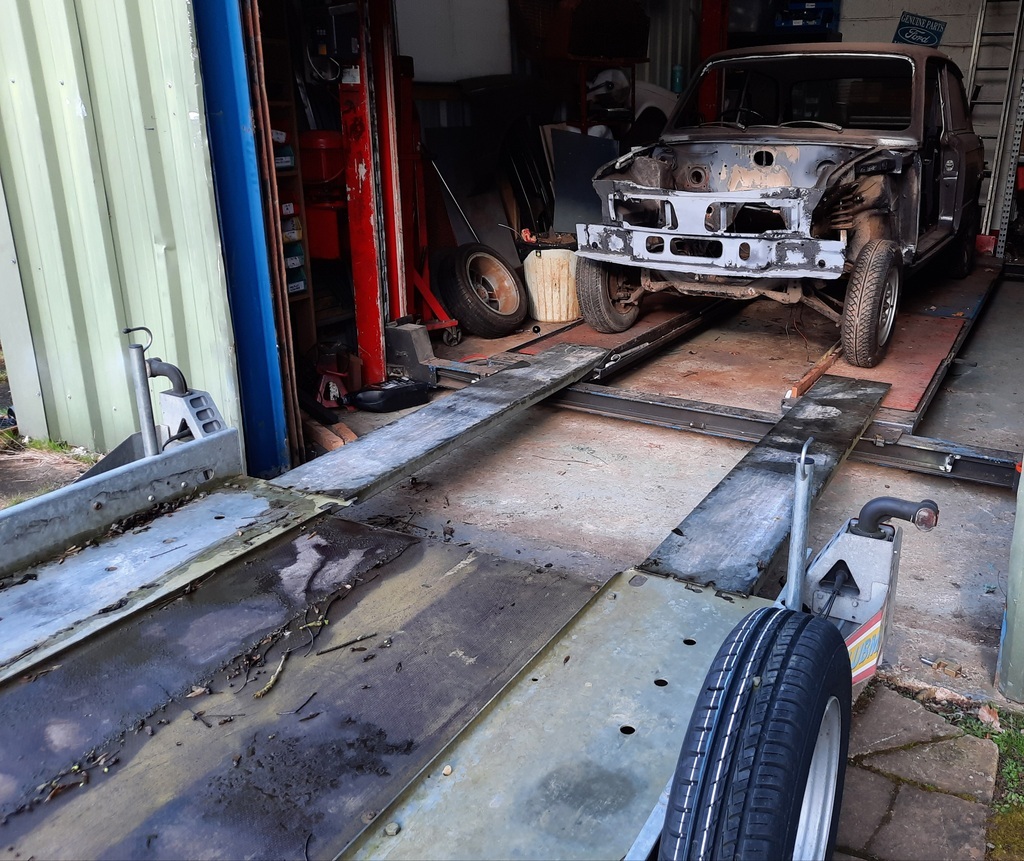 Can't wait to see the results |
| |
|
|
|
|
|
Mar 12, 2021 19:57:45 GMT
|
That looks like a fun place to work |
| |
|
|
|
|


