|
|
|
|
|
My buddies own a body shop and they have a welder that gets heavy too...its on a cart with an arm coming off it which, with a big bungy like spring thing, suspends the heavy cord and gun. maneuverability always an issue, I'm sure. JP JP - And there lies the problem 'Manoeuvrability' you would end up fighting against the tension and not being able to get the work piece or the welder to where you wanted to weld - On the old production lines when this car was built they would have had individual spot welders set up at different angles fitted with different custom arms for access to each area or section - all on counter balances - On todays vehicle production lines its all done by robotic arms - that is where any welding is undertaken - welding on production lines is gradually being phased out to composite construction / adhesive bonded panels & high tensile specialist rivet / fastener construction - I don't have to use the spot welder that often its a handy piece of kit and speeds up the welding process whilst replicating the original factory process - I just have to have my Weetabix on the day that I plan to use it Something like this would do the job far better migtigarc.co.uk/tecna-scorpion-spot-welder-801-p.aspAnd I don't mind investing the £3k + a few set of arms will take that to £4k - downside is it requires a 3 phase power supply which I don't have |
| |
Last Edit: Apr 12, 2020 22:23:15 GMT by Deleted
|
|
|
|
|
|
|
Apr 12, 2020 15:57:24 GMT
|
My buddies own a body shop and they have a welder that gets heavy too...its on a cart with an arm coming off it which, with a big bungy like spring thing, suspends the heavy cord and gun. maneuverability always an issue, I'm sure. JP JP - And there lies the problem 'Manoeuvrability' you would end up fighting against the tension and not being able to get the work piece or the welder to where you wanted to weld - On the old production lines when this car was built they would have had individual spot welders set up at different angles fitted with different custom arms for access to each area or section - all on counter balances - On todays vehicle production lines its all done by robotic arms - that is where any welding is undertaken - welding on production lines is gradually being phased out to composite construction / adhesive bonded panels & high tensile specialist rivet / fastener construction - I don't have to use the spot welder that often its a handy piece of kit and speeds up the welding process whilst replicating the original factory process - I just have to have my Weetabix on he day that I plan to use it Something like this would do the job far better migtigarc.co.uk/tecna-scorpion-spot-welder-801-p.aspAnd I don't mind investing the £3k + a few set of arms will take that to £4k - downside is it requires a 3 phase power supply which I don't have Hi Chris Coincidentally I have that same spot welder, which I bought about secondhand from a man near Eastleigh about 8 years ago, it was originally supplied by MigTigArc, and he suggested that I contact them for assistance, which I did. Turns out mine is the earlier version which can be used on single phase, and the man I spoke to at MTA advised how to do it and also said he has the same one at home, he also supplied me with a used slide hammer for the dent puller and some replacement tips. Might be worth a call to MTA as maybe they could fix you up with an older one set up for single phase, but it does need a good supply Best regards. (And love your posts) Frank |
| |
|
|
|
|
|
Apr 12, 2020 16:18:15 GMT
|
JP - And there lies the problem 'Manoeuvrability' you would end up fighting against the tension and not being able to get the work piece or the welder to where you wanted to weld - On the old production lines when this car was built they would have had individual spot welders set up at different angles fitted with different custom arms for access to each area or section - all on counter balances - On todays vehicle production lines its all done by robotic arms - that is where any welding is undertaken - welding on production lines is gradually being phased out to composite construction / adhesive bonded panels & high tensile specialist rivet / fastener construction - I don't have to use the spot welder that often its a handy piece of kit and speeds up the welding process whilst replicating the original factory process - I just have to have my Weetabix on he day that I plan to use it Something like this would do the job far better migtigarc.co.uk/tecna-scorpion-spot-welder-801-p.aspAnd I don't mind investing the £3k + a few set of arms will take that to £4k - downside is it requires a 3 phase power supply which I don't have Hi Chris Coincidentally I have that same spot welder, which I bought about secondhand from a man near Eastleigh about 8 years ago, it was originally supplied by MigTigArc, and he suggested that I contact them for assistance, which I did. Turns out mine is the earlier version which can be used on single phase, and the man I spoke to at MTA advised how to do it and also said he has the same one at home, he also supplied me with a used slide hammer for the dent puller and some replacement tips. Might be worth a call to MTA as maybe they could fix you up with an older one set up for single phase, but it does need a good supply Best regards. (And love your posts) Frank Frank - Many thanks for this info - I will make some enquiries - Thanks again - Chris |
| |
|
|
nze12
Part of things
 
Posts: 193
|
|
Apr 12, 2020 19:59:10 GMT
|
I just have to have my Weetabix on he day that I plan to use it Maybe this then...     |
| |
1986 BMW E30 refreshed to original spec
1973 BMW E12 520 converting to Motorsport 530
1982 XJS V12 converting to 5 speed manual
Many landscaping projects overriding above!
Cogito cogito ergo cogito sum!
|
|
|
|
|
Apr 12, 2020 20:23:21 GMT
|
|
A lot of the counter balances used in the factories are on overhead tracks (Think industrial curtain rails) and which themselves can be attached to a swinging arm, gives a fair bit of maneuverability. (If you have the headroom)
|
| |
|
|
|
|
|
Apr 14, 2020 19:32:03 GMT
|
 I could now remove the temporary fastenings & weld the apertures that I drilled for them up 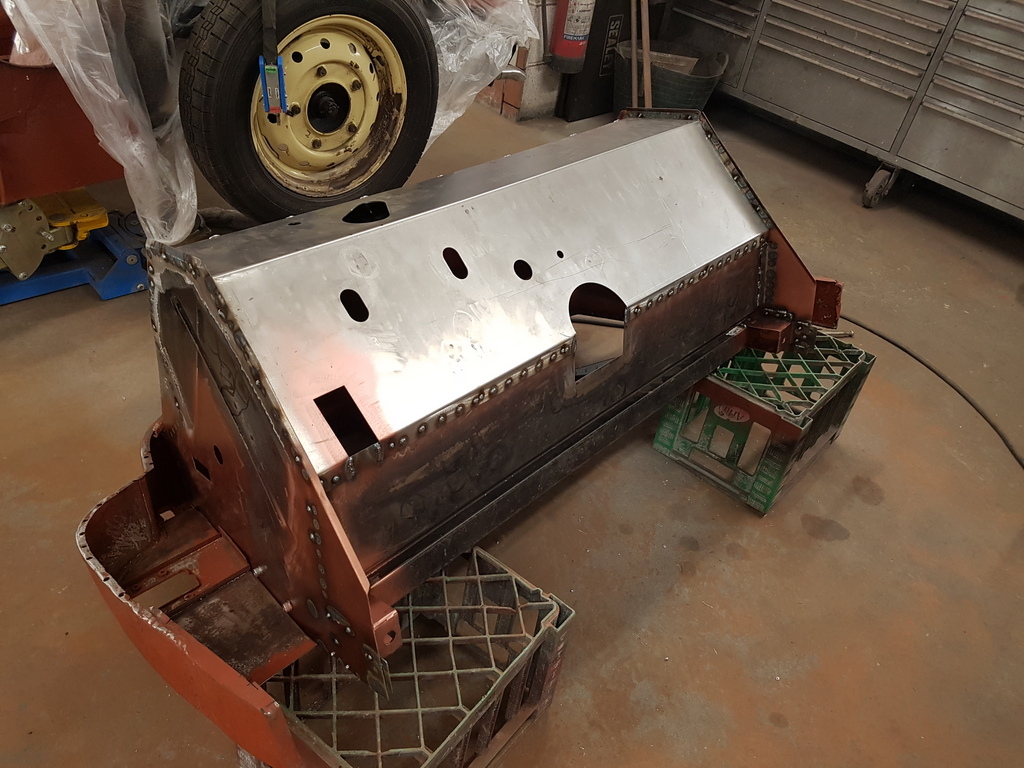 Below image shows the difference in the original damage impacted bulkhead - circles denote the apertures for the chassis to bulkhead mountings - the black dots are what the actual apertures need to be - in other words the old bulkhead was 10mm + out of tolerance due to impact damage  Just a matter of working around and dressing the welds / panels  I normally use a 60 grit flap disc to remove the high spots on the plug welds - then follow over with 80's then 100's to linish - not after perfection here - just a decent level of finish - much of the bulkhead goes unseen once the car is fitted back up 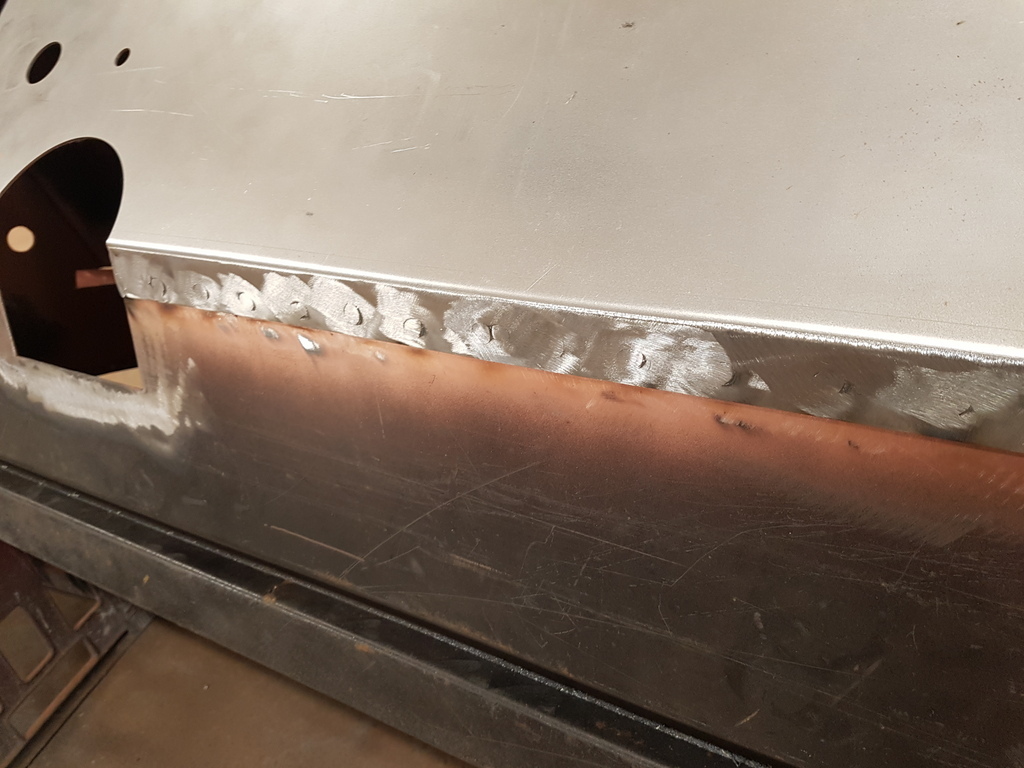 The chassis to bulkhead mounting plate was derusted and a coat of Hydrate 80 applied to it 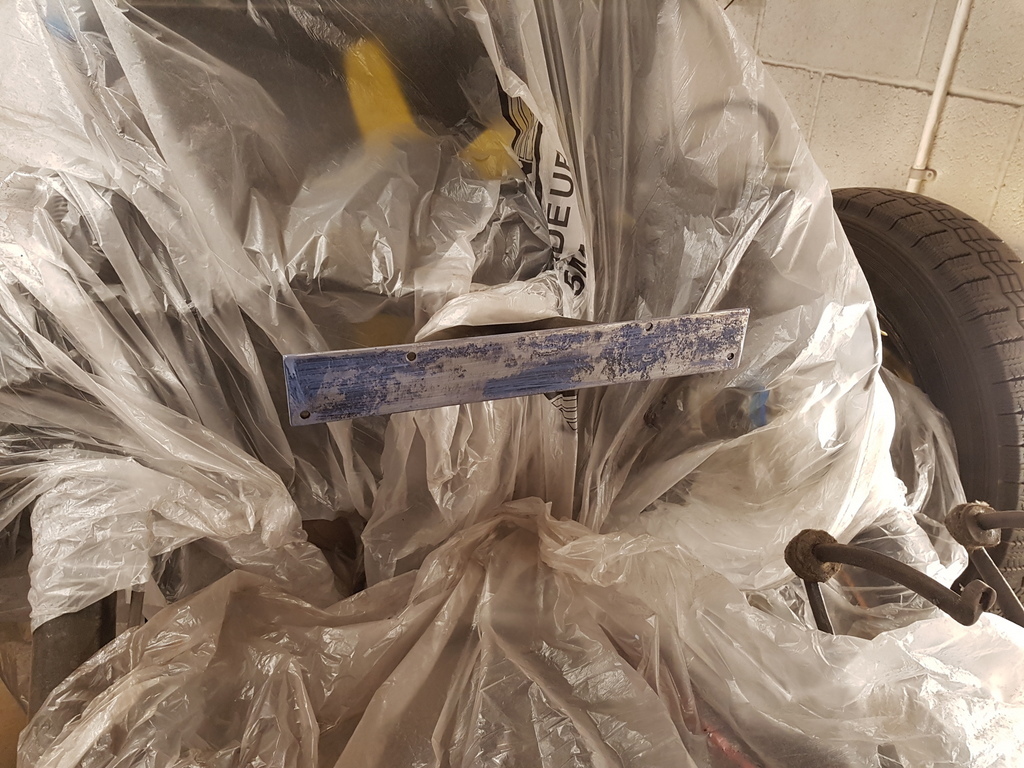 I could now turn the bulkhead over - add a few return plates then remove the temporary bracing 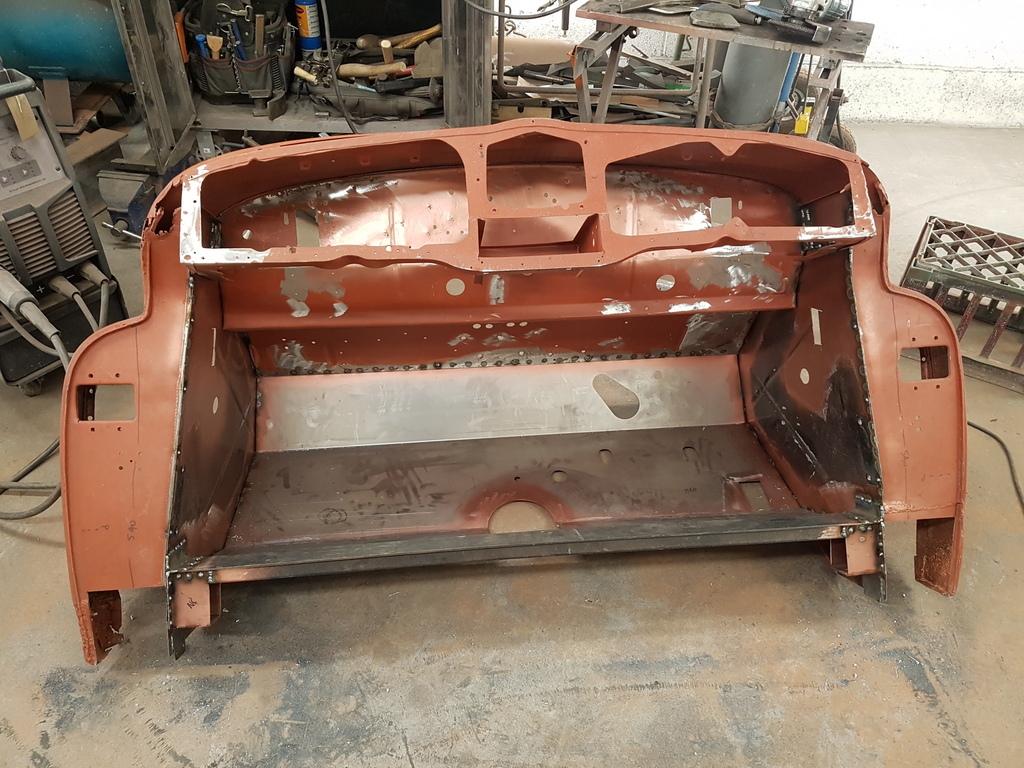 The side edge return flanges could now be initially dressed back to 90 degrees - there will require truing up to a even width down the length of them & the angle joints made good  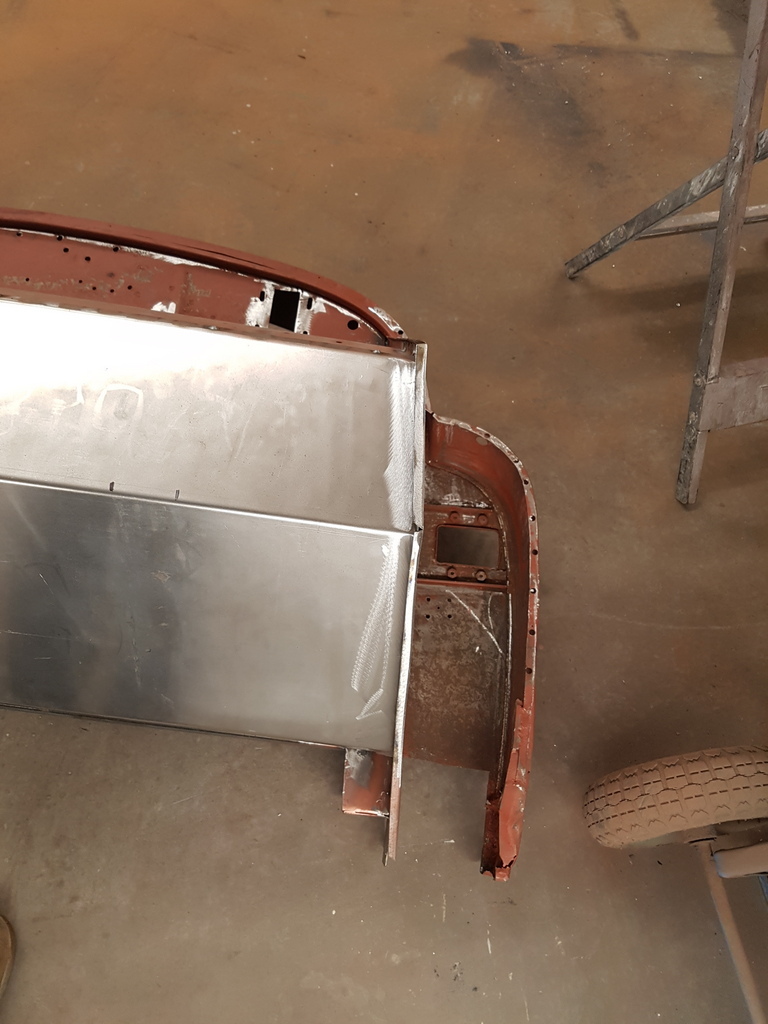 Job for the morning is to now dress the welds / panels on the inner faces of the bulkhead 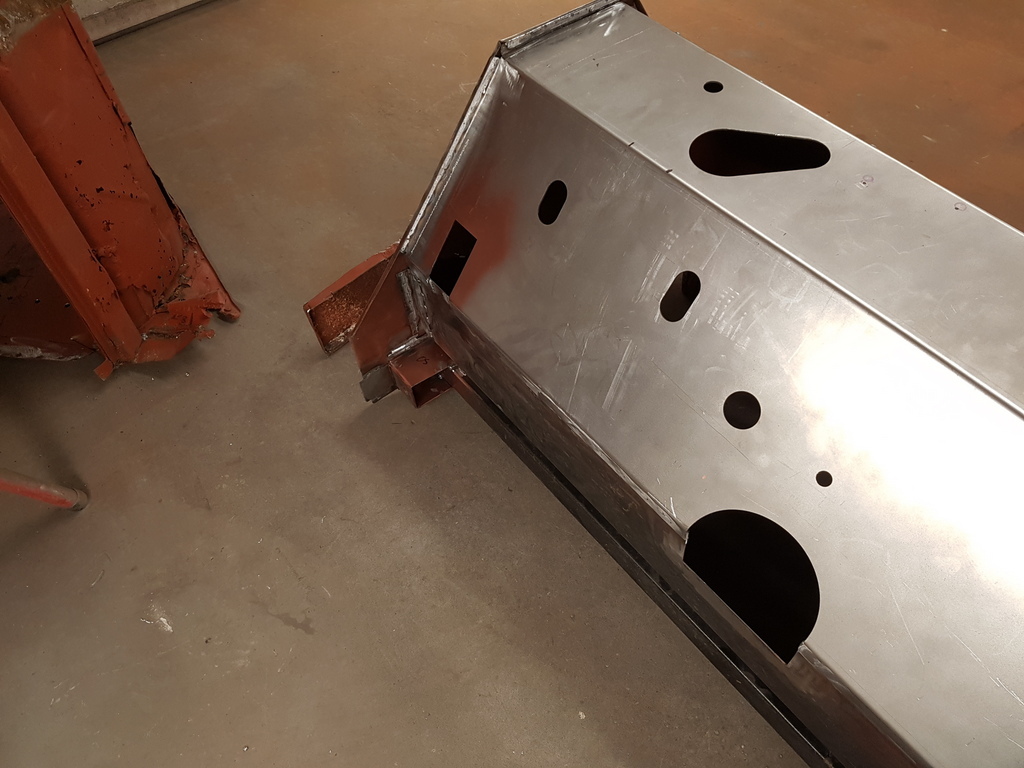 But only an hour or so from the bulkhead going back onto the car  Finally whilst the majority of us will wear gloves / eye & possibly ear protection whilst the grinder is singing away - I wonder how many bother with a dust mask - this one was clean on this morning - its amazing how much fine dust a grinder can put airborne - I have a sizable air extraction system running in the workshop too - and the mask still gets this filthy |
| |
Last Edit: Apr 14, 2020 19:35:26 GMT by Deleted
|
|
Frankenhealey
Club Retro Rides Member
And I looked, and behold, a pale horse! And its rider's name was Death
Posts: 3,888
Club RR Member Number: 15
|
|
Apr 14, 2020 19:48:28 GMT
|
|
Top work
|
| |
Tales of the Volcano Lair hereFrankenBug - Vulcan Power hereThe Frankenhealey here |
|
|
|
|
Apr 14, 2020 20:01:46 GMT
|
I normally use my expired paint masks for grinding - fortunately I don't need to grind rusty old metal anymore  One really annoying thing about this lockdown though is my paint respirator is almost out of spec & I just cannot get another anywhere  |
| |
|
|
jonomisfit
Club Retro Rides Member
Posts: 1,790
Club RR Member Number: 49
|
|
Apr 14, 2020 20:05:36 GMT
|
|
If there's any significant level of grinder action going on I use a dust mask now.
Its amazing how much better I feel from its use!
|
| |
|
|
|
|
|
|
|
|
really amazing work there Chris.
I am using a dust mask or respirator more and more as time goes on.
You do feel better the next morning for sure...its also pretty tough on the nasal passages after a while without one!
JP
|
| |
I know its spelled Norman Luxury Yacht, but its pronounced Throat Wobbler Mangrove!
|
|
|
|
|
|
|
|
|
I normally use my expired paint masks for grinding - fortunately I don't need to grind rusty old metal anymore  One really annoying thing about this lockdown though is my paint respirator is almost out of spec & I just cannot get another anywhere  Mark - What paint respirator spec do you use - is it one of the 3M spec disposable type ? if so post up the model number - I may well have supply access via a trade only supplier |
| |
|
|
|
|
|
|
|
|
Hi Chris, that would be cool if so.
I use the 3M 06941 disposables. If you have access I'd like 2 if poss as I like to have a spare at all times.
|
| |
|
|
|
|
|
Apr 15, 2020 19:40:05 GMT
|
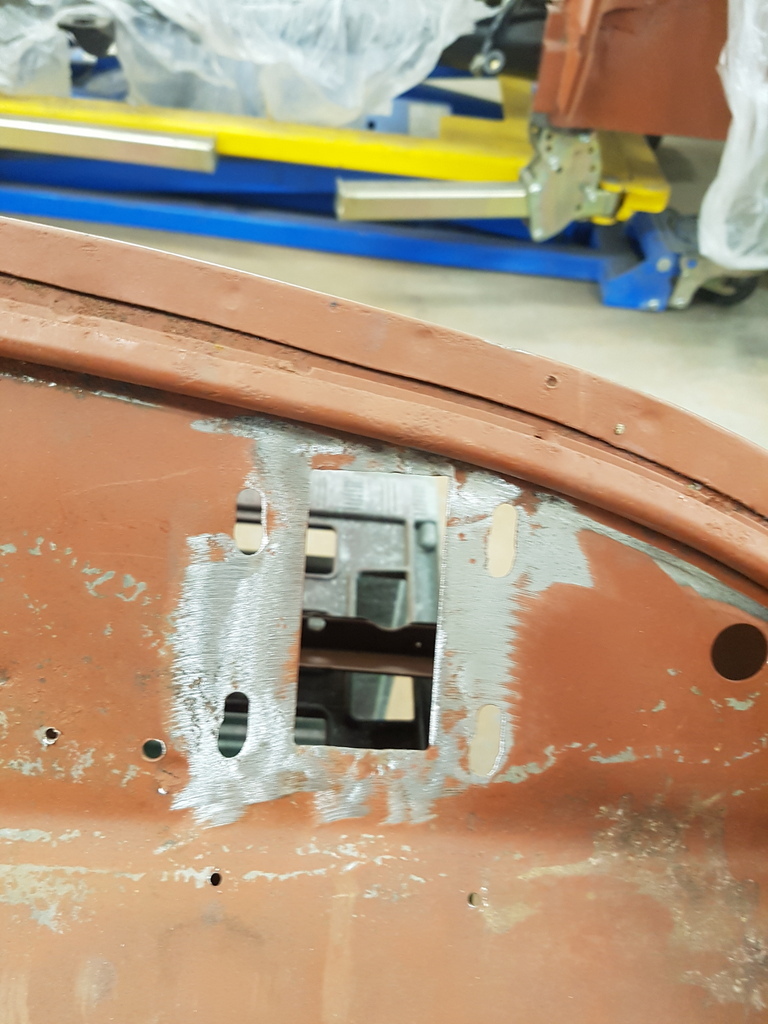 Apertures for the bonnet hinge boxes are a weak point on the bulkhead and the panel fractures from the bolt holes 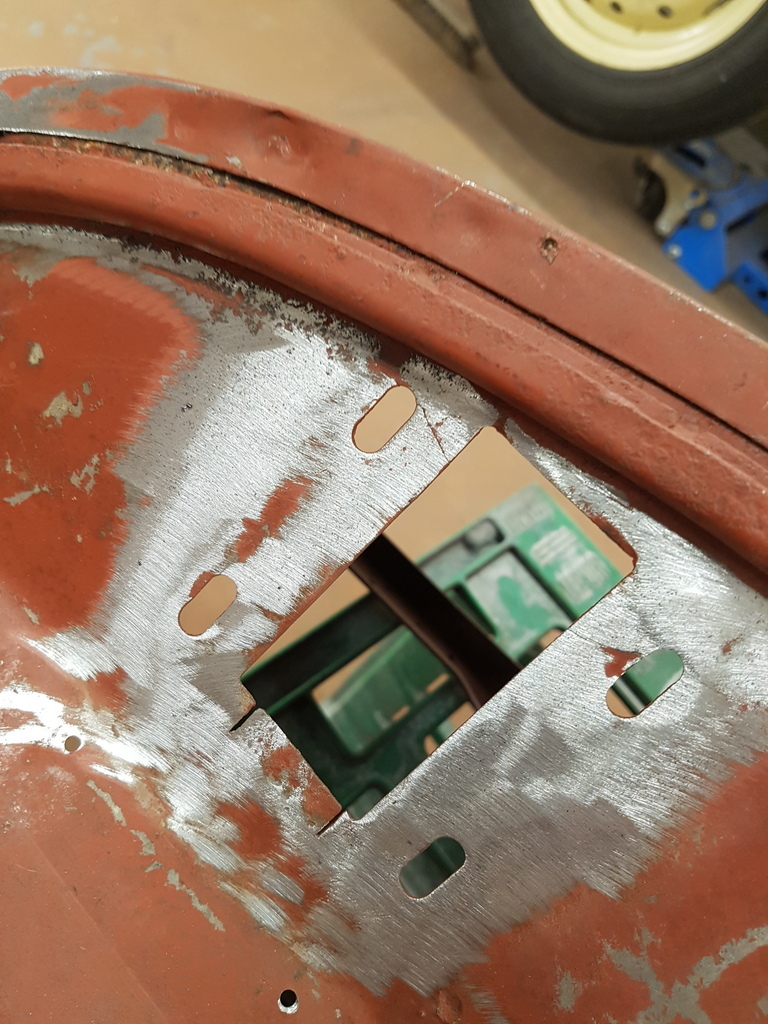 These get welded up but there is also reinforcing panel that gets added in order to spread the load from the hinge boxes  Pedal box for the accelerator is goosed  However the cars left the factory with 2 pedal boxes - one for left hand drive and the other for right hand drive 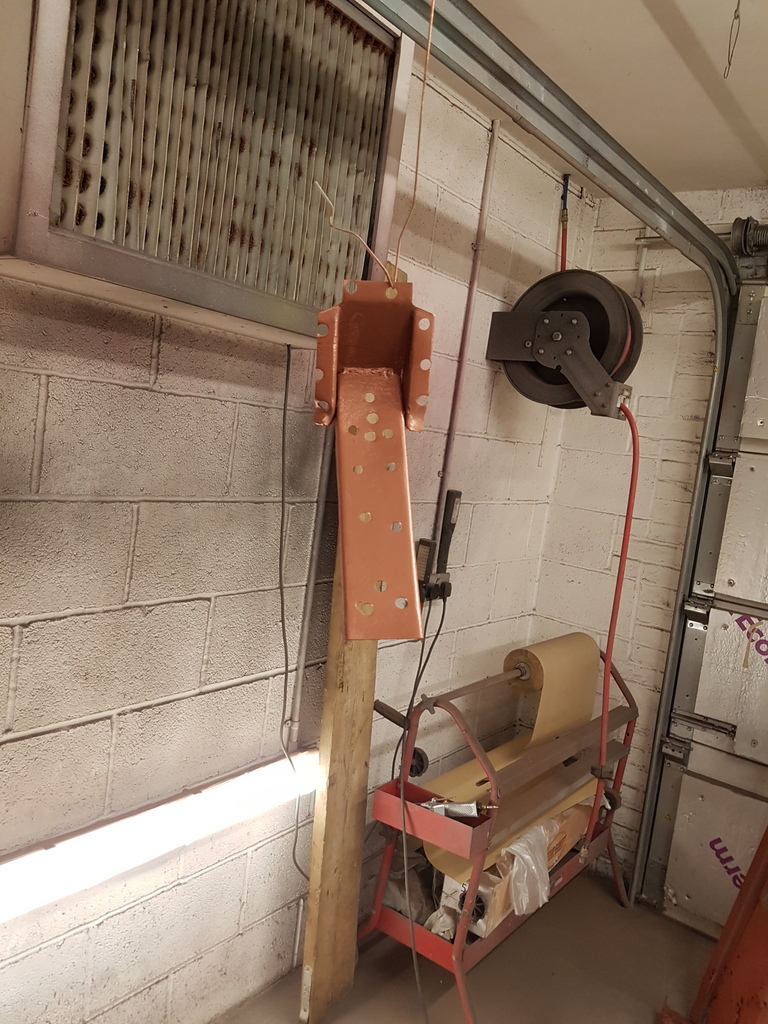 Left hand one was in good condition and its pointless it going back on in the left hand position - but it can be utilised for the right hand drive replacement  Welded in & dressed back 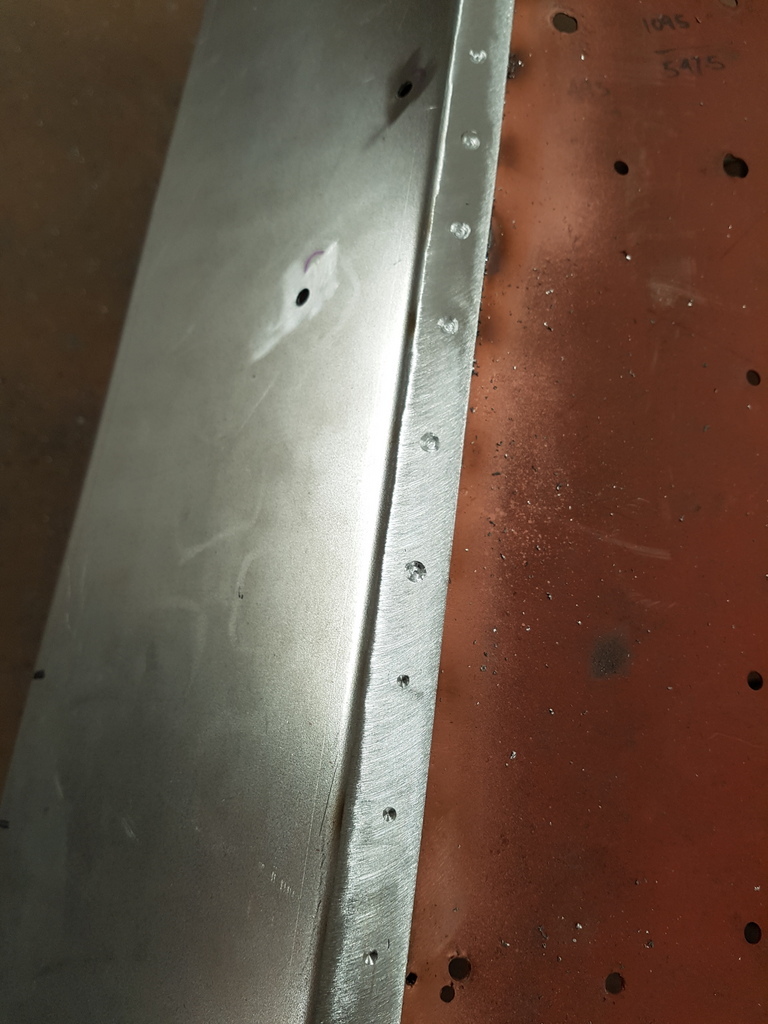 The upper bulkhead flange that I plug welded - this is sort of seen within the engine bay and I wanted to replicate the factory spot weld indents - so 5mm drill bit on a slow speed for a few mm depth  Then a 7.5mm drill bit with the tip ground off it - slow speed and move the drill about a bit to create a more random shape than a perfect circle indent  Once primed & painted it will give the factory spot weld appearance  I'm going to leave the propshaft cowl cover off the bulkhead for now to ensure I obtain full clearance on the prop flange once the bulkhead is mounted to the car 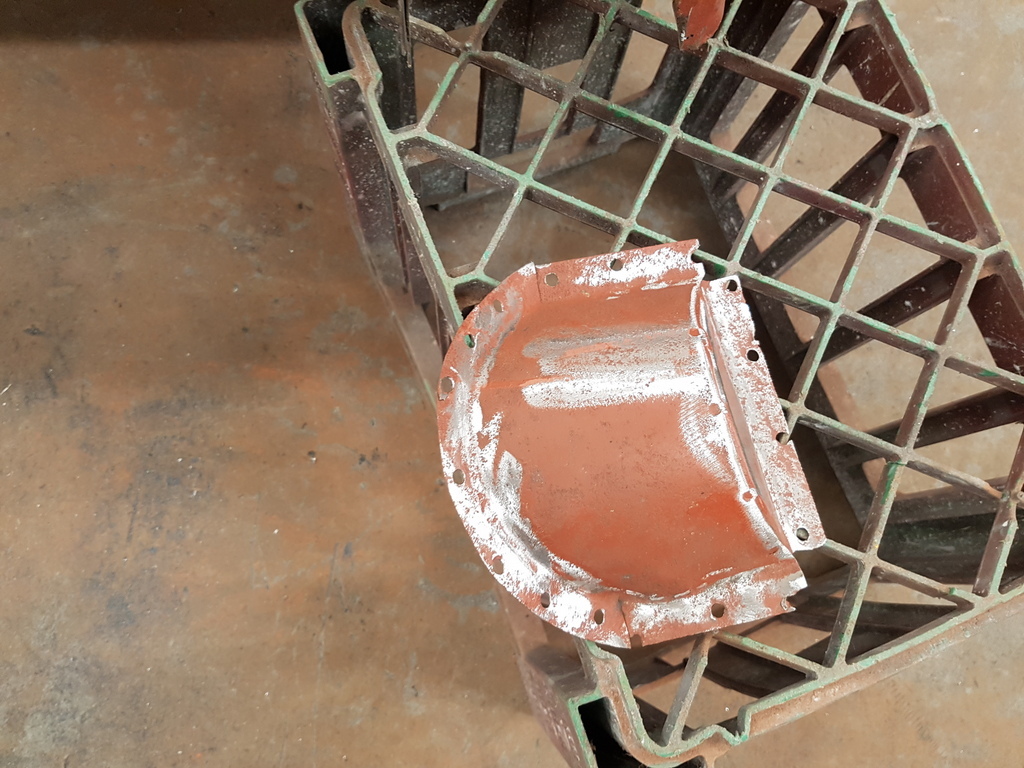 Its internally welded so its quite easy to fit / weld with bulkhead on the car 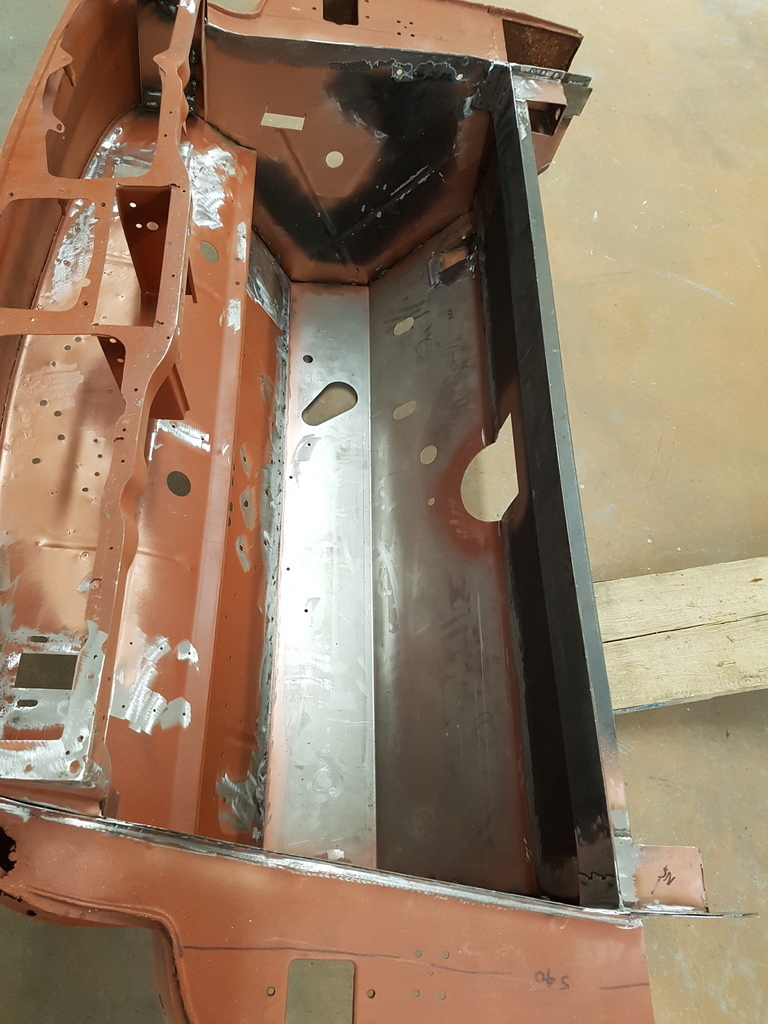 All the internal flanges / welds had been dressed back 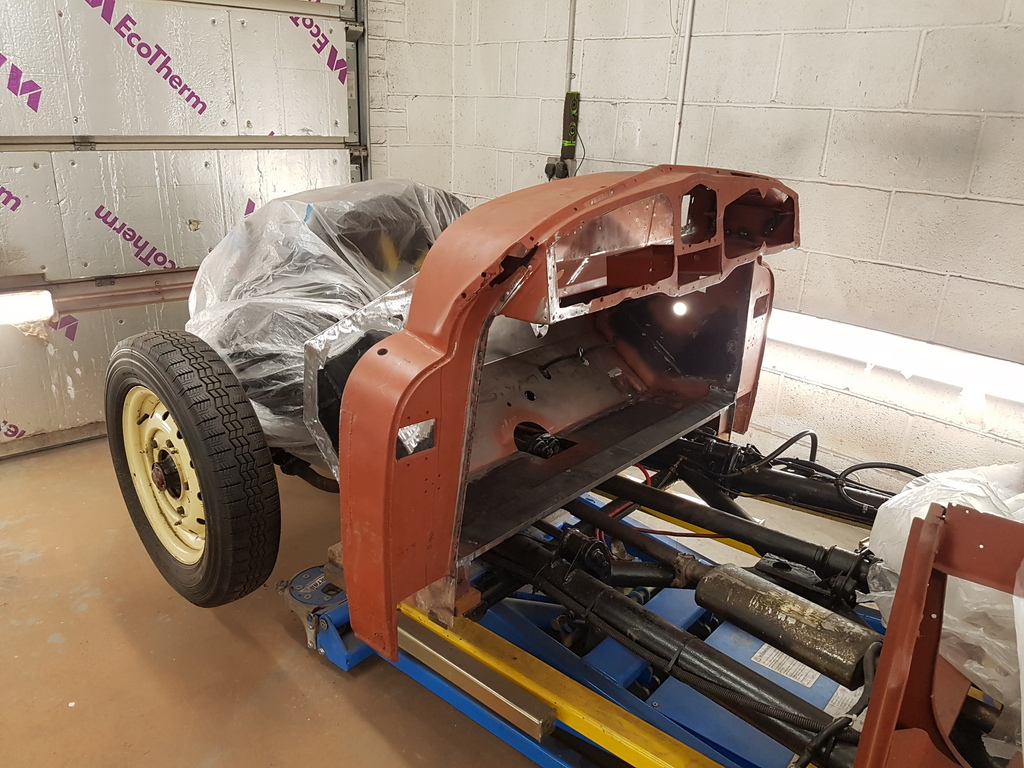 Back on with the bulkhead then  The bulkhead to chassis plate could be fastened up  Along with the lower body mountings to the chassis out riggers 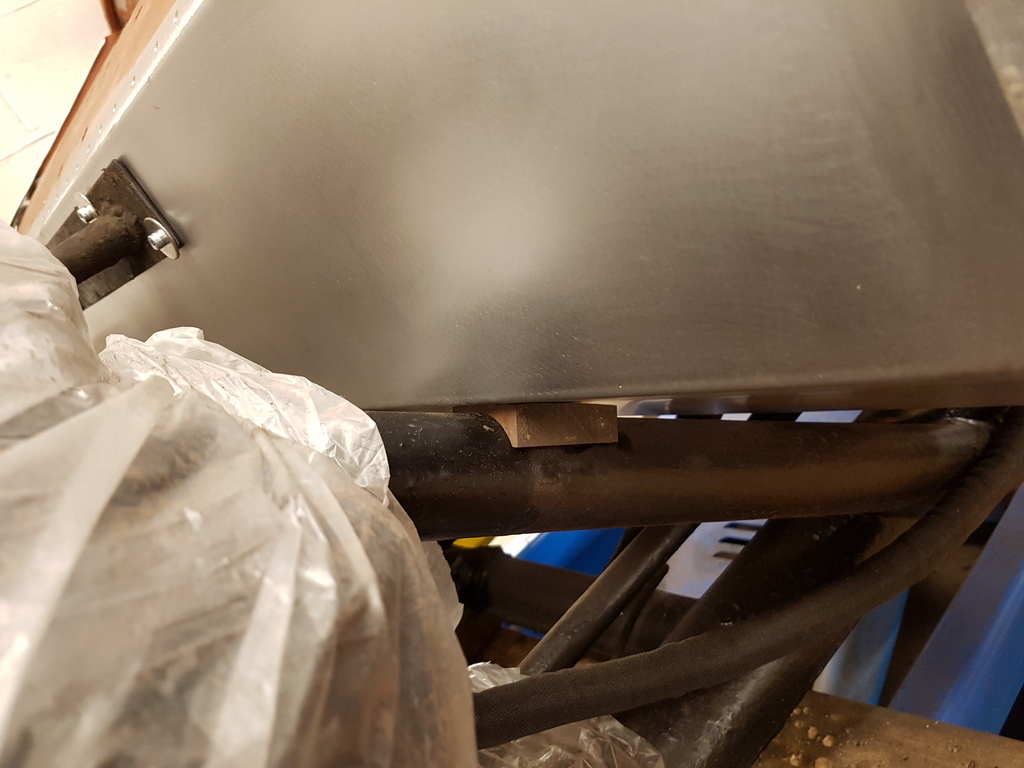 Bulkhead to chassis tube blocks fitted 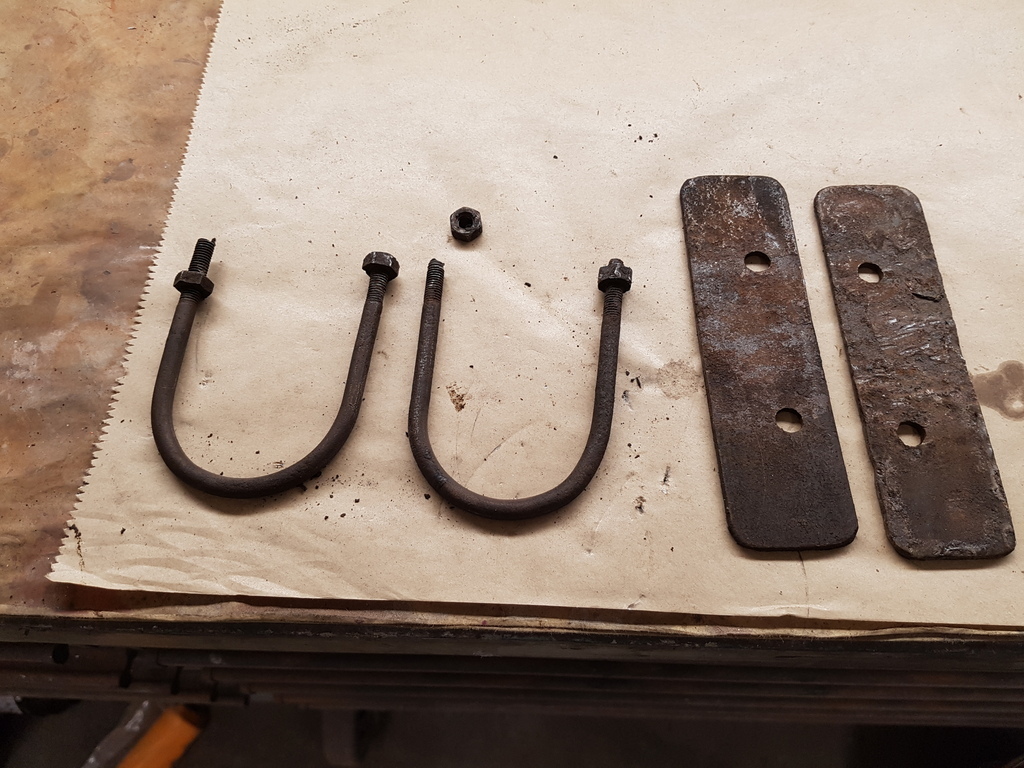 But the U bolts are shot hence I shall source some new replacements 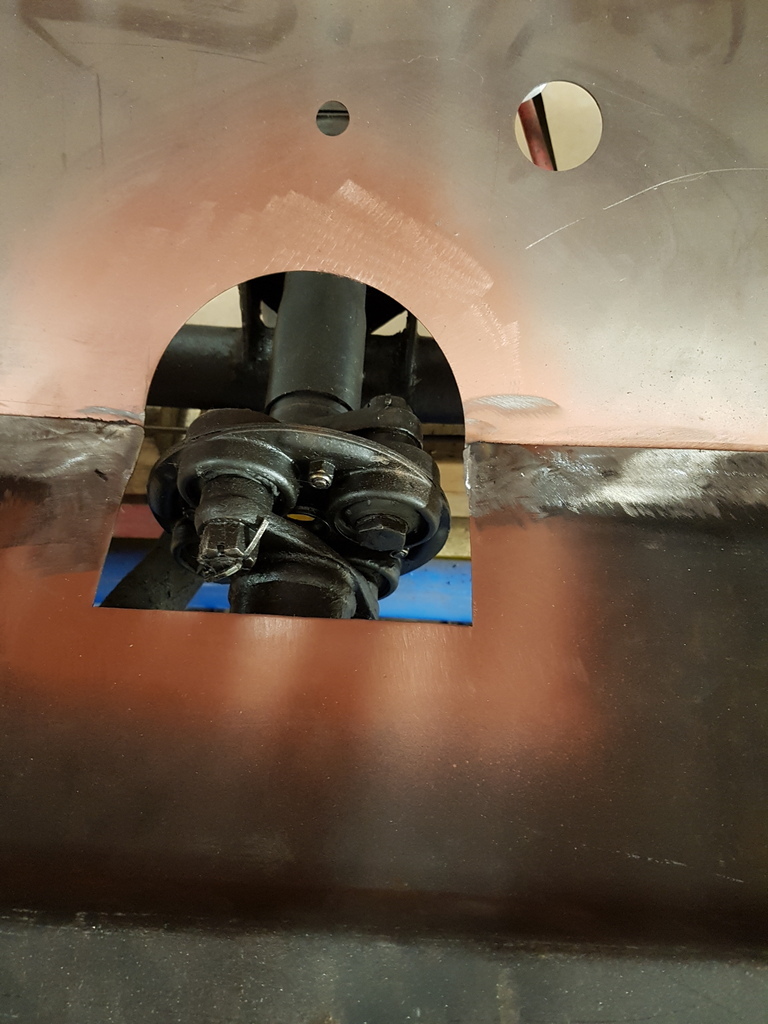 Propshaft flange clearance is good  And the floor brace clears the torsion bars & master cylinder ok  The return arm on the crank of the brake pedal leaver does not clear the floor - so this requires some minor fettling 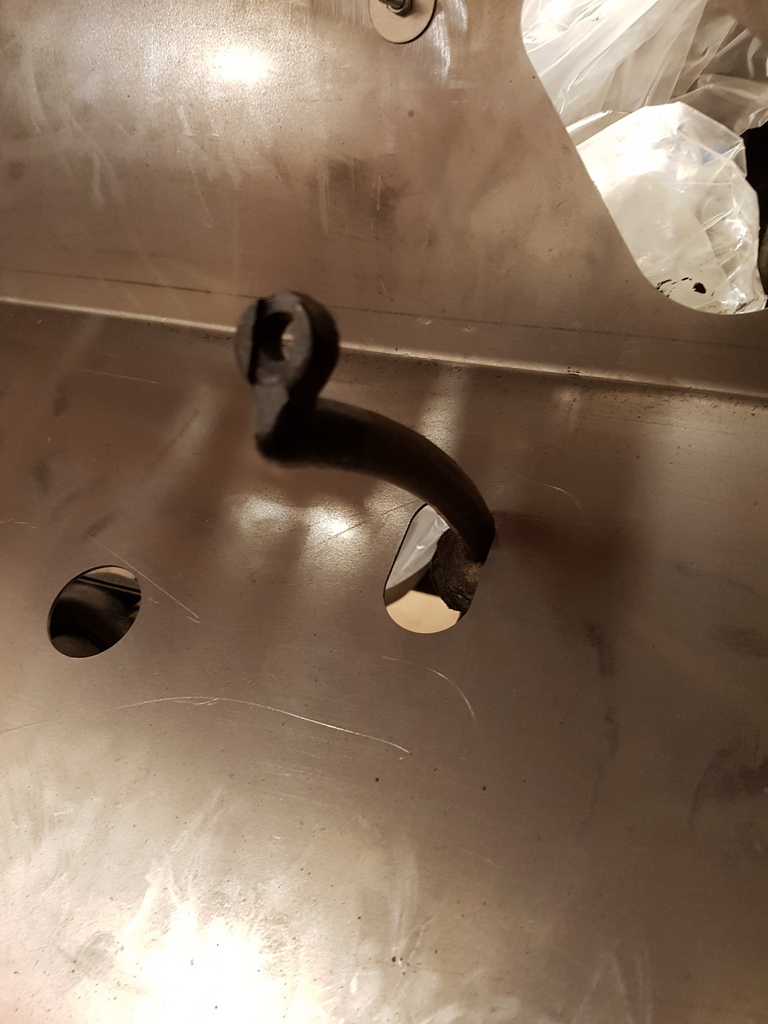 And a element of play on the clutch pedal mountings allows it to foul / contact the side of the bulkhead aperture 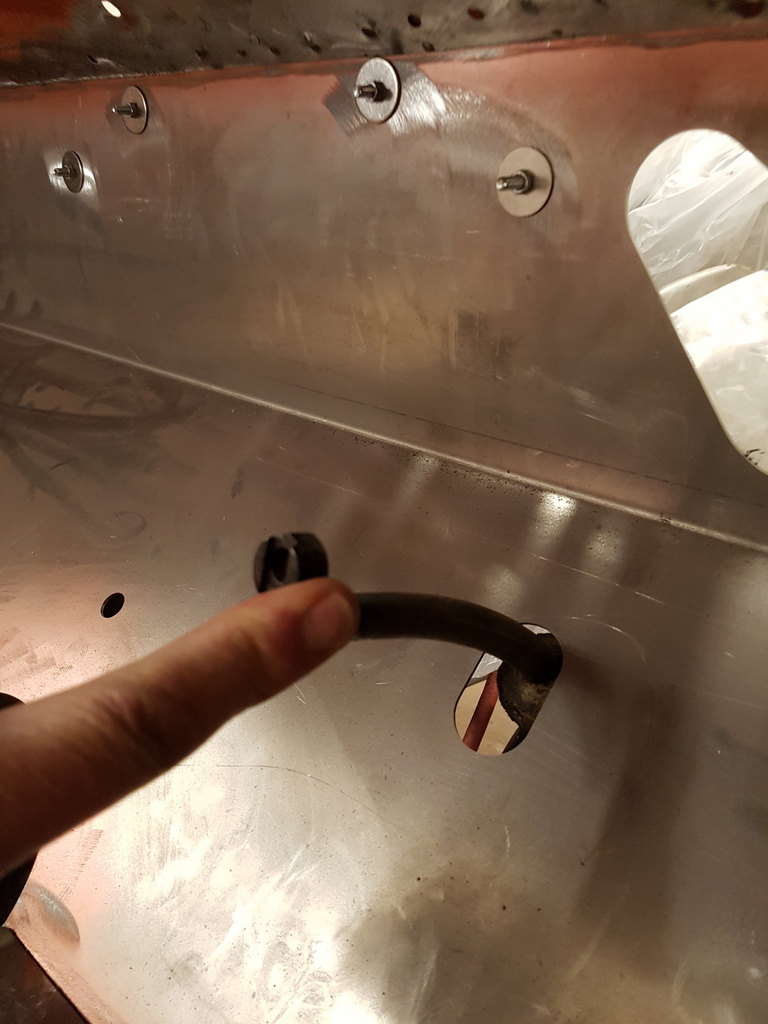 Some type of a shim in the pedal arm should resolve this More tomorrow |
| |
Last Edit: Apr 15, 2020 19:46:51 GMT by Deleted
|
|
|
|
|
Apr 15, 2020 21:22:40 GMT
|
|
Replicating the factory spot welds?! If this was the first thread of yours I'd read I wouldn't believe you.
Next time I get laughed at for my 'sock audit' I will direct people to those welds.
|
| |
|
|
|
|
|
Apr 15, 2020 23:45:56 GMT
|
They look too evenly spaced and lined up for any factory spot welds I've seen.  Granted I've only seen Morris and Toyota ones up close. |
| |
|
|
|
|
|
|
|
|
more inspiring work, Grumpy!...I like the idea of replicating factory appearances where you can...it just adds to the quality of the work..at the very least in appearance. but I think its more a value thing....
well done
Jp
|
| |
I know its spelled Norman Luxury Yacht, but its pronounced Throat Wobbler Mangrove!
|
|
|
|
|
Apr 16, 2020 10:34:35 GMT
|
They look too evenly spaced and lined up for any factory spot welds I've seen.  Granted I've only seen Morris and Toyota ones up close. And there is the difference Morris & Toyota's were built on vast production lines but the little Jowett was built was hand built with pride & care 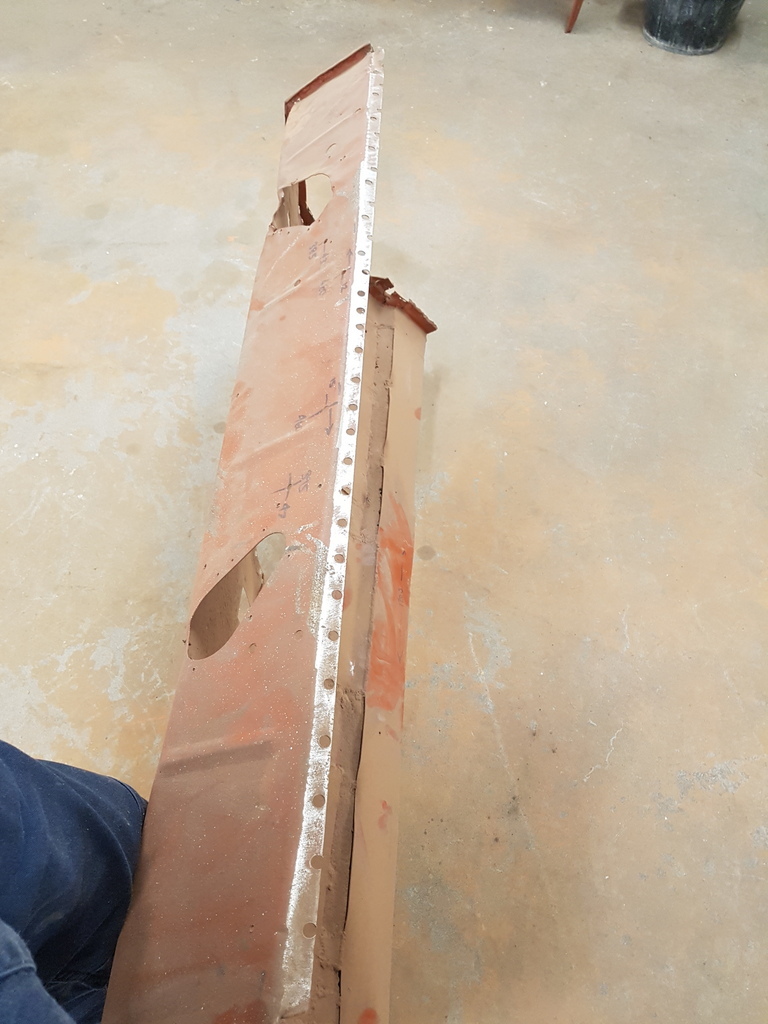 I also checked on the spacings of the original bulkhead panel that I had removed - not that it really matters at all because you cant really see that part of the bulkhead once the bonnet is fitted and the car is built back up - that is unless you want lay across the top of the engine - but if the spot weld thing helps me sleep on a night - so be it  Pic taken with the wings off - once they are on you can see / access very little - but next time you are rebuilding your £250k Ferrari you all know how to replicate the spot welds  |
| |
Last Edit: Apr 16, 2020 10:35:48 GMT by Deleted
|
|
|
|
|
Apr 16, 2020 18:06:24 GMT
|
|
I was wondering whether it would be possible to pre fabricate the bulkhead, floor side panels and brackets as a sub assembled unit, thereby making the welding easier and giving you the luxury of having one in stock so to speak, just a thought ,not a criticism, its a lifetime in fabrication that makes me think like this. Excellent work and attention to detail as usual.
|
| |
|
|
|
|
|
Apr 16, 2020 18:52:23 GMT
|
I was wondering whether it would be possible to pre fabricate the bulkhead, floor side panels and brackets as a sub assembled unit, thereby making the welding easier and giving you the luxury of having one in stock so to speak, just a thought ,not a criticism, its a lifetime in fabrication that makes me think like this. Excellent work and attention to detail as usual. You could - however unless you have a spare upper section of the bulkhead to work with - then no - the cars are quite rare - 900 built and around 450 survive - the upper panels section of the bulkhead is fairly complex - spare panels such as bulkheads just don't come onto the open market 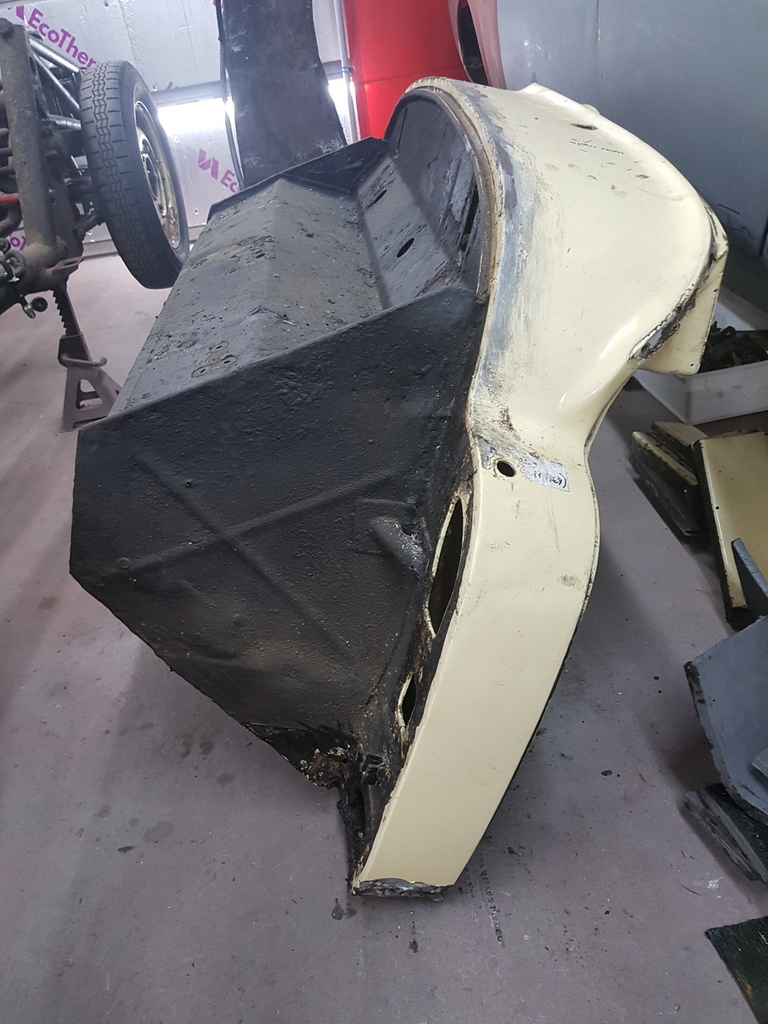 The bulkhead carries a raised swept profile that tapers to the centre of the panel that the windscreen frame seats upon - then there is all the dashboard support frame along with the upper sections of the A posts - whilst these panels could be fabricated / made - it would tie up a lump of expense in formers or for the panels to bespoke fabricated - personally I could do them myself if I had the time but I don't - I'm way too busy restoring clients cars - a project to make a spare bulkhead up would not really buy me any time - especially when you consider that the cars are hand built - not one of them carries the same measurements or profiles - they were all built, adjusted upon new assembly to fit the chassis - much better to stick to using the cars chassis that you working with has the jig for the body and work from there |
| |
Last Edit: Apr 16, 2020 18:53:34 GMT by Deleted
|
|
|
|
|
Apr 16, 2020 19:54:07 GMT
|
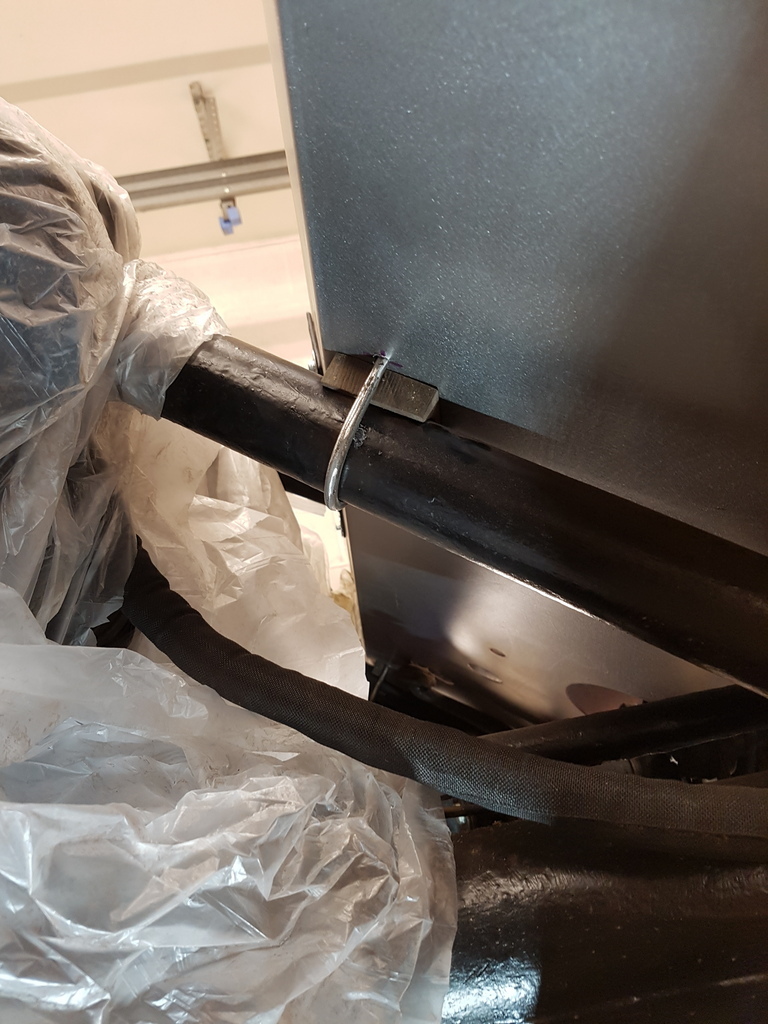 I could not source new U clamps of the correct profile & length - therefore the old ones were repurposed - the old thread ends cut off and the shanks tapered - new threads welded on and then dressed back  So that's the bulkhead now secure to the chassis - critical point as the bulkhead on any vehicle is the determining point that dictates the layout of the rest of the vehicle structure - In other words it sets the datum point for all panels forward & rearward of it 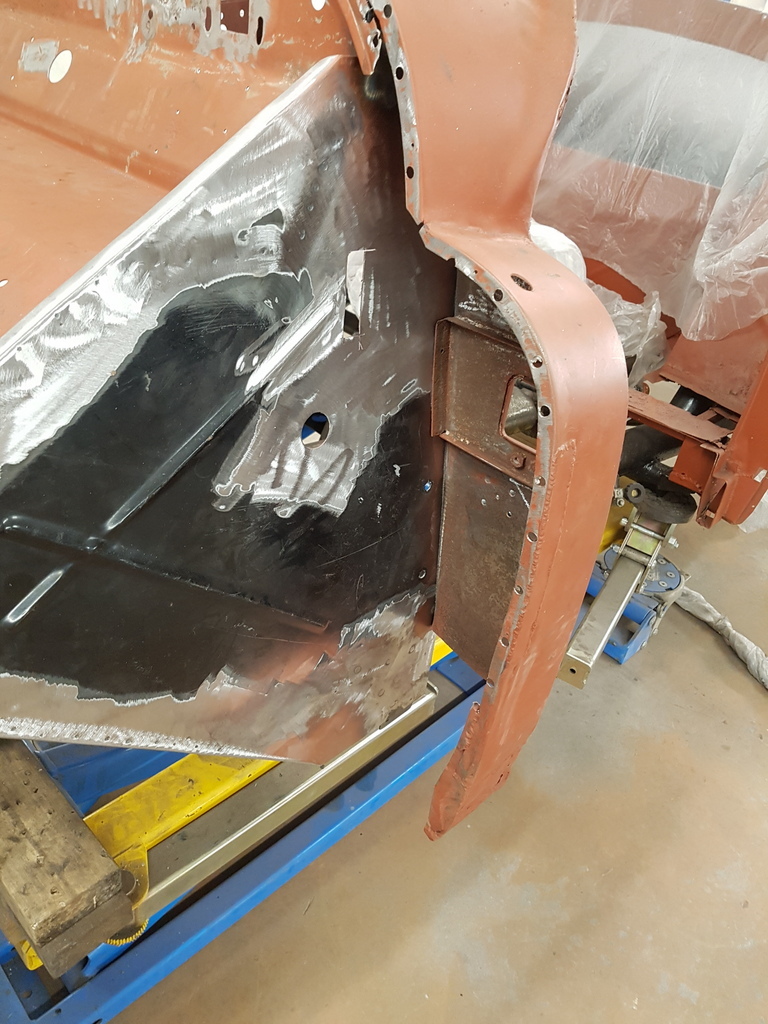 The A posts need to remain open / accessible - the box profile sill sits physically inside of the A post - with the sill being responsible for tying the bulkhead to the rear superstructure - until the sill is welded into position there is little point doing anything with the A posts 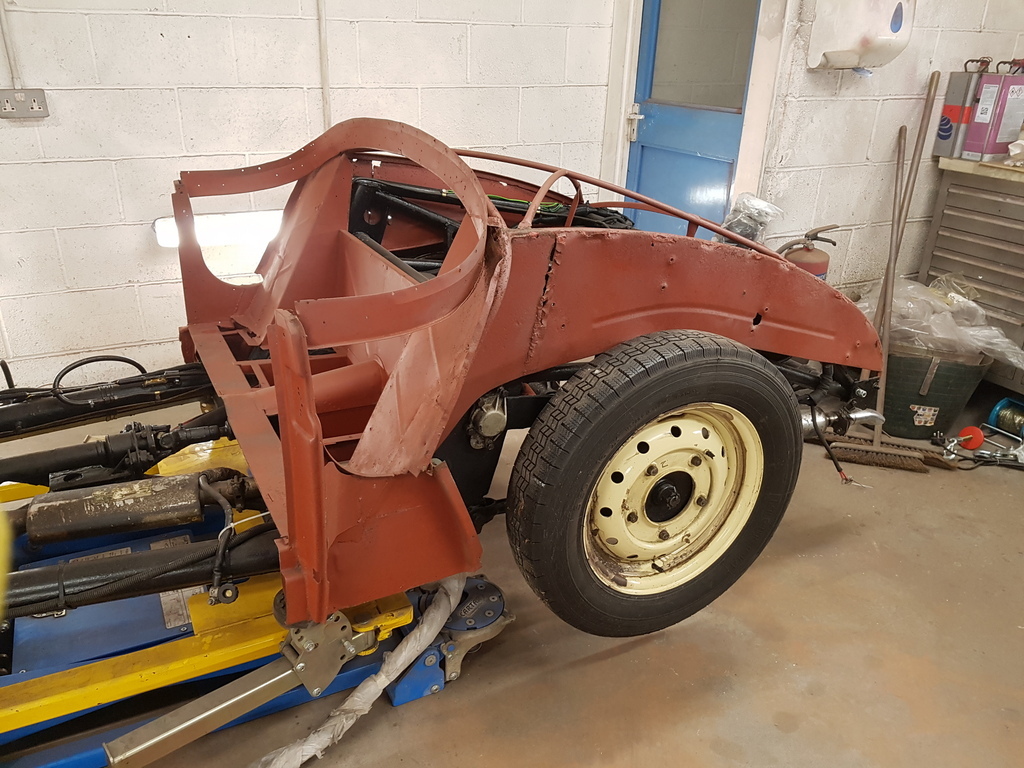 On to the rear superstructure which I placed onto the chassis mountings via a suitable timber block on each side  Then using the door width measurements plus door gapping allowance to give a door aperture width that I could place the superstructure to - the factory door gaps on the Jupiter were virtually non existent hence overly tight - vehicles that were relatively new suffered from mis-fitting doors - only now I have the opportunity to correct that problem 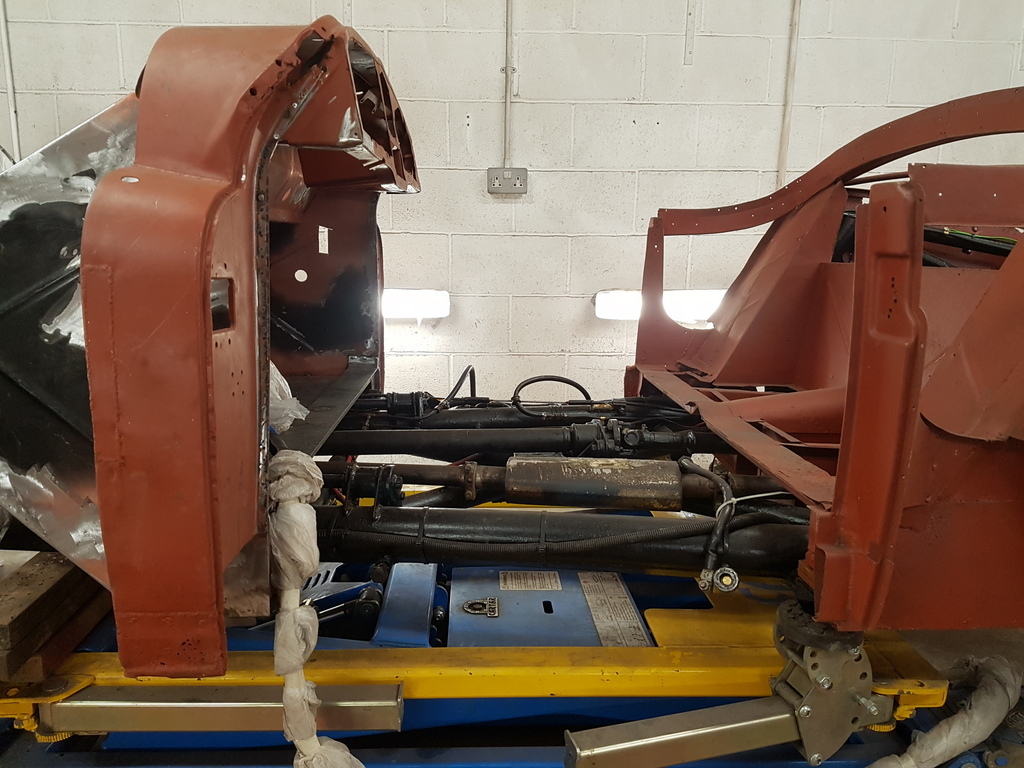 Next was to sort the rear body mounts for the superstructure which were all but non existent 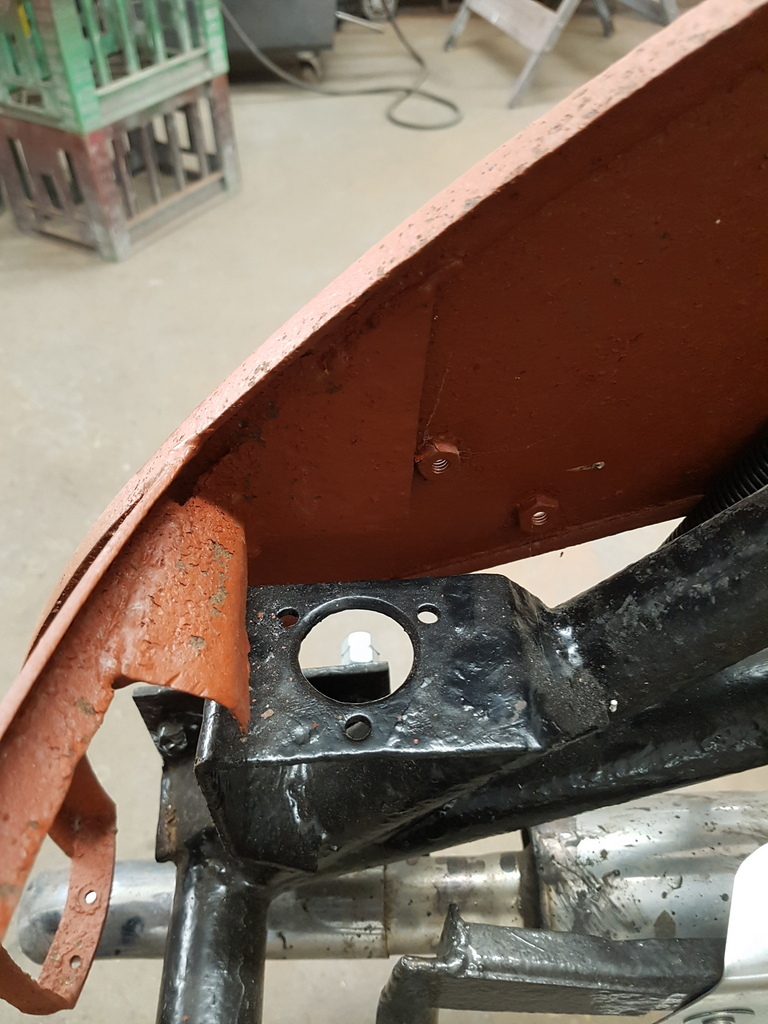 New mountings fabricated & welded insitu 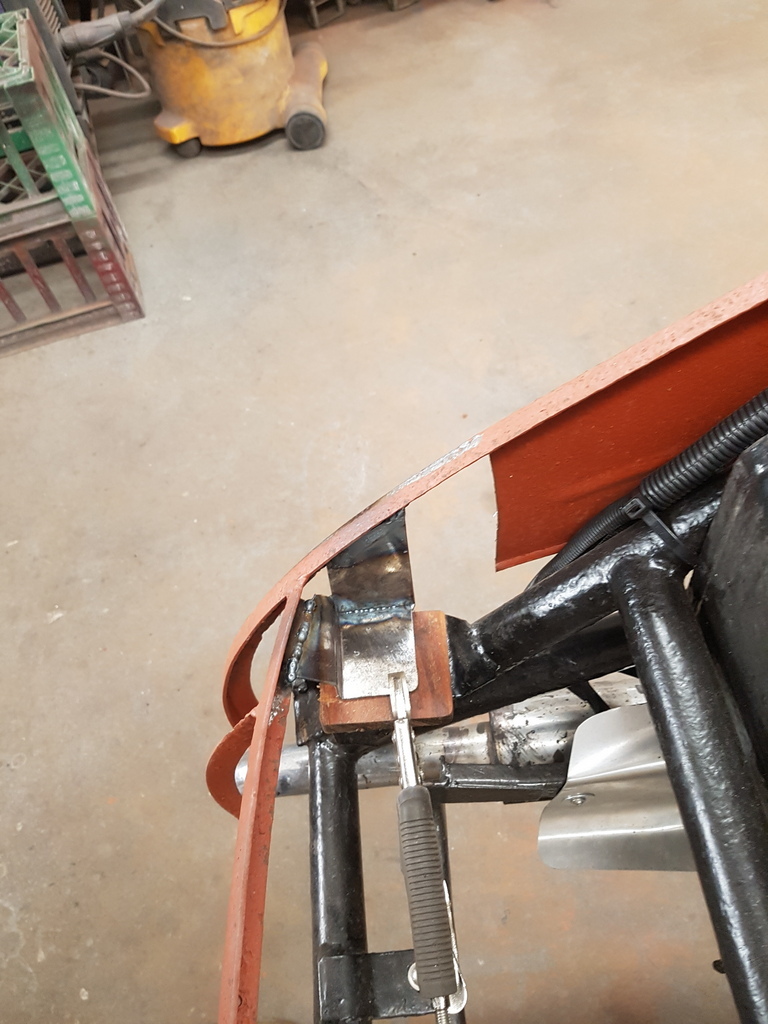 Complete with new hardwood packers 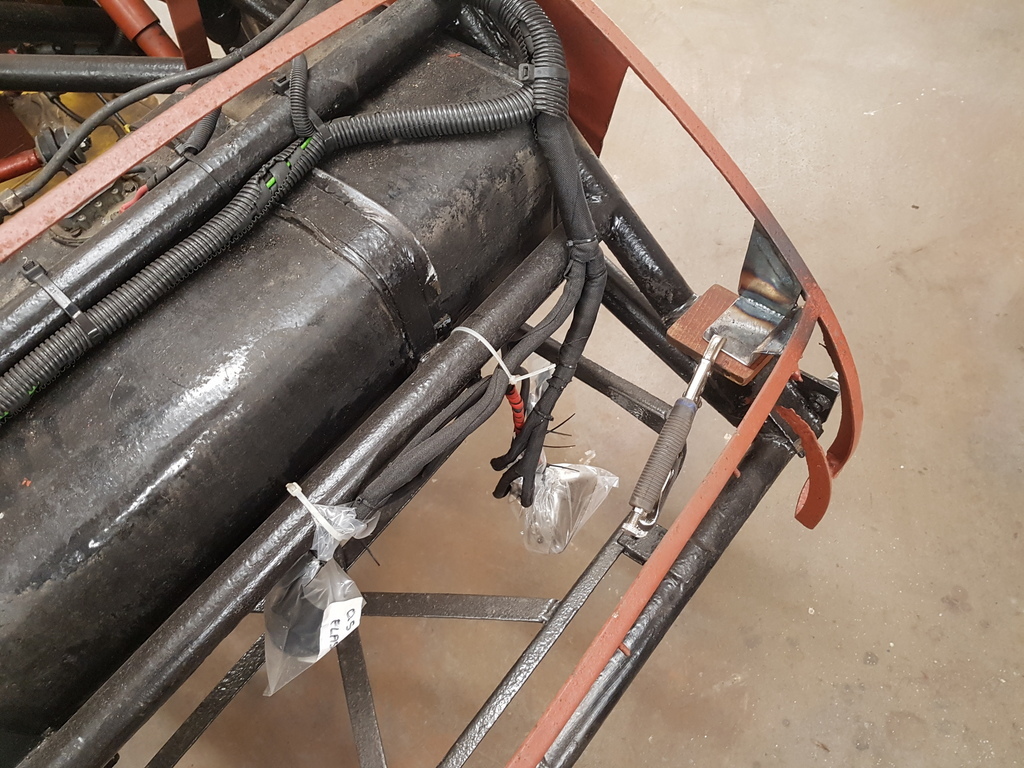 Fabricated mountings made up from 2mm sheet steel 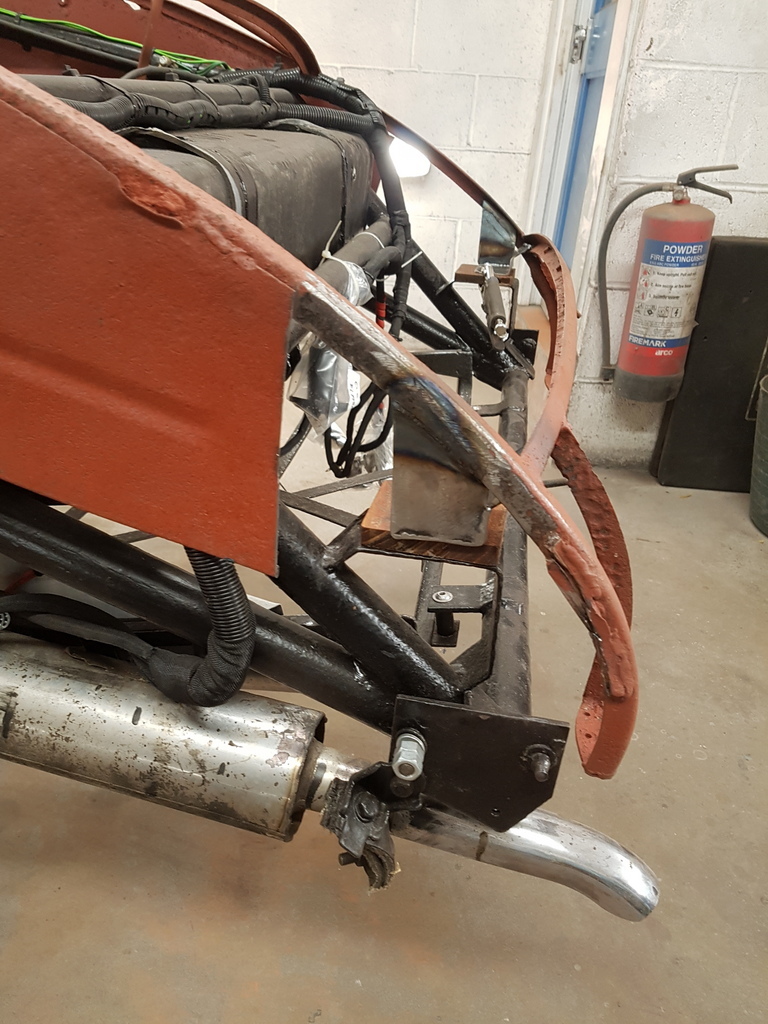 The rest of the structure is pretty good but its had various sub standard repairs throughout is life that will require sorting 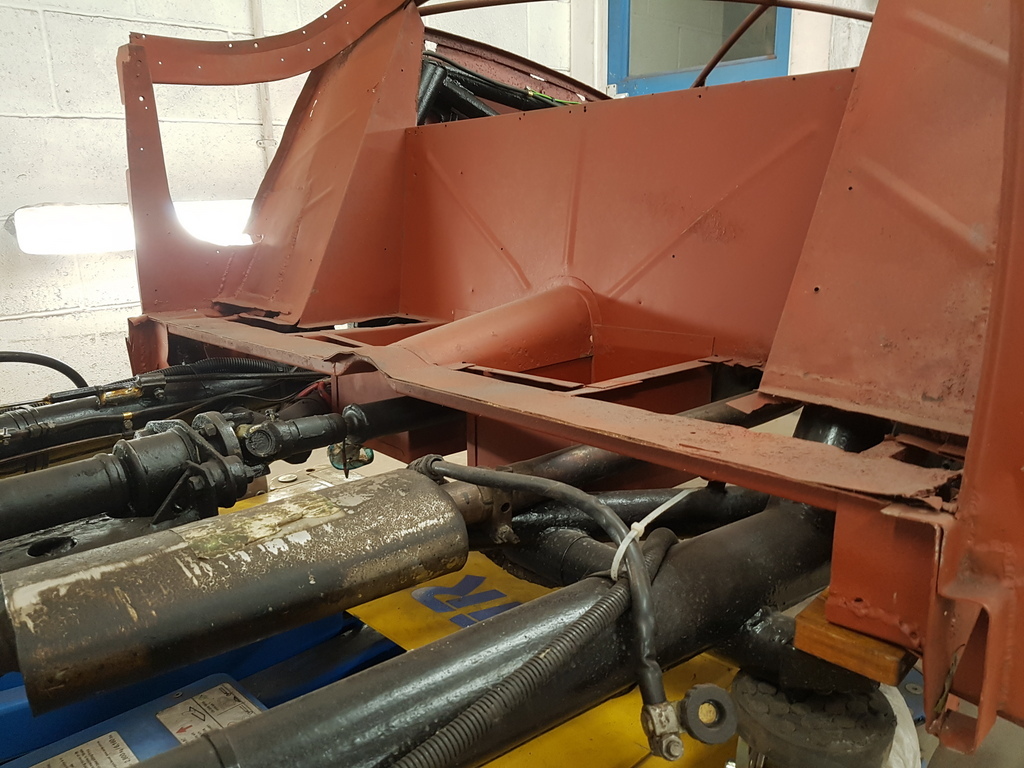 Battery boxes normally rot the bases out but these are very good 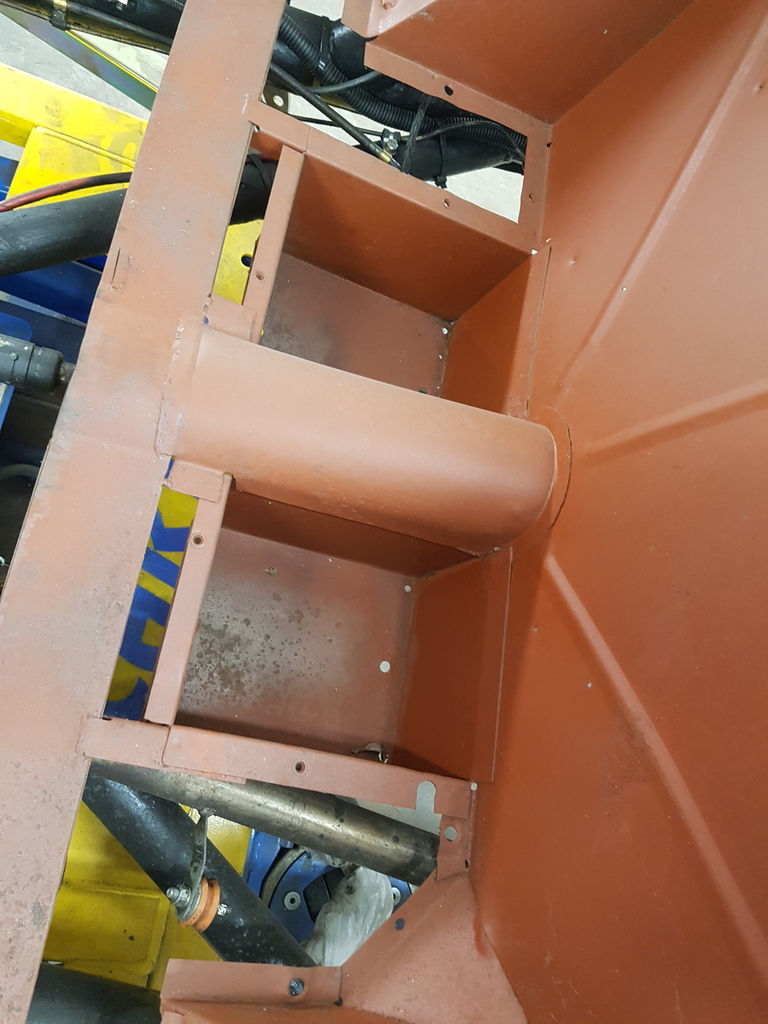 Some panel work is completely missing  Various sheet metal repairs have been undertaken with gas welding - most of it will require removing & replacing  The rear frame hoop that supports the alloy rear panel is in very good order - these normally suffer quite badly from dissimilar metals corrosion 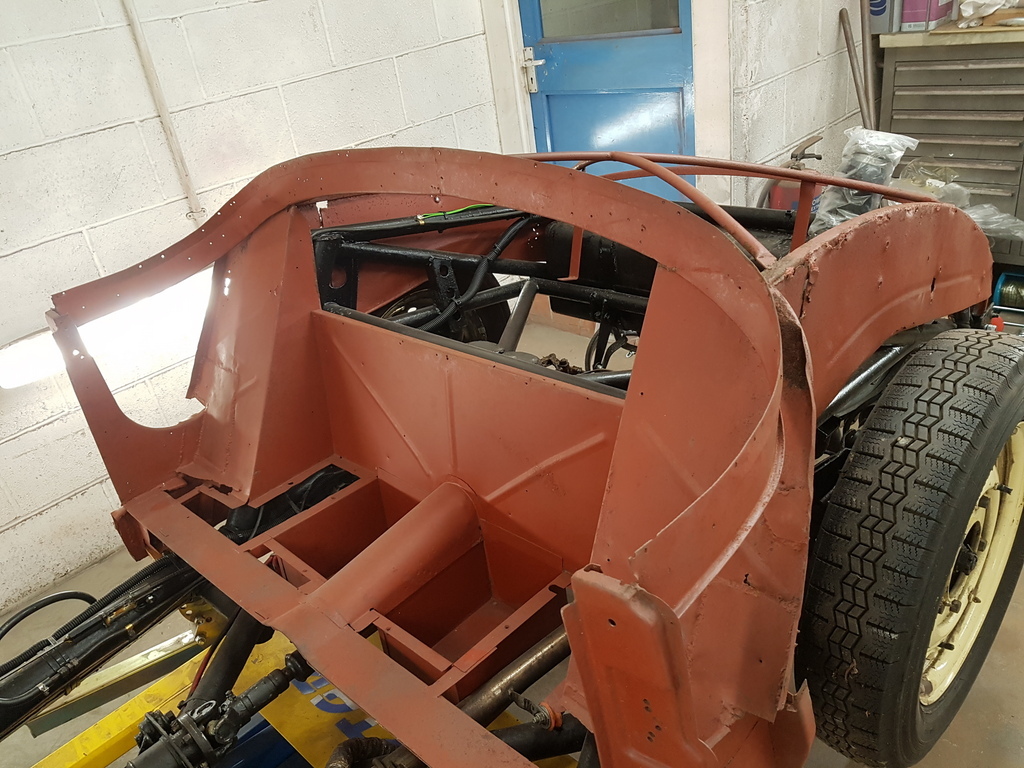 The rear inner wings / splash guards are very corrosion ridden and form a good lump of the work on the structure 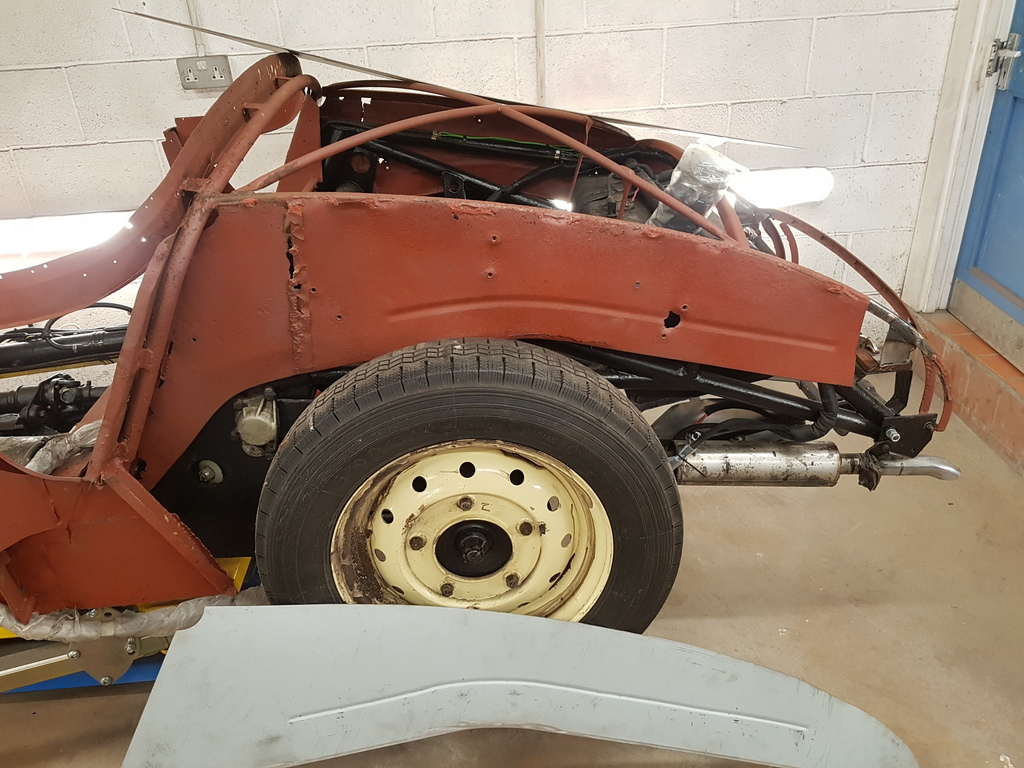 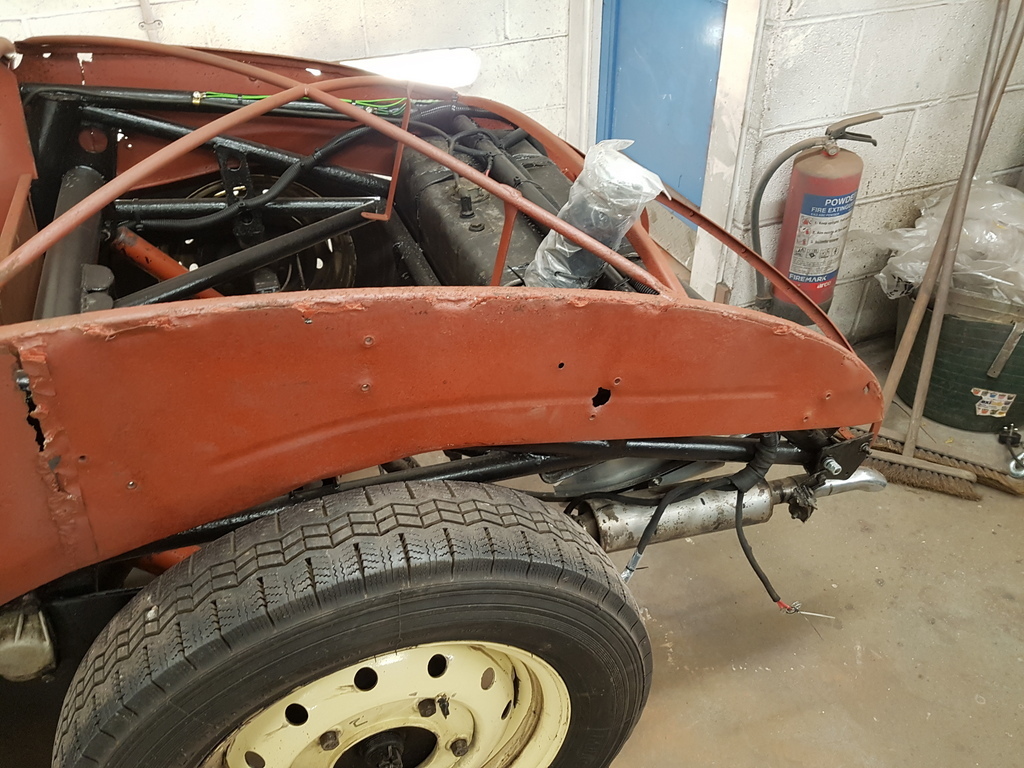  These were covered over in fibreglass when I first dissembled the car  Fortunately the clubs spares team have had several new sets fabricated (I require another set for the Jupiter that follows this one) 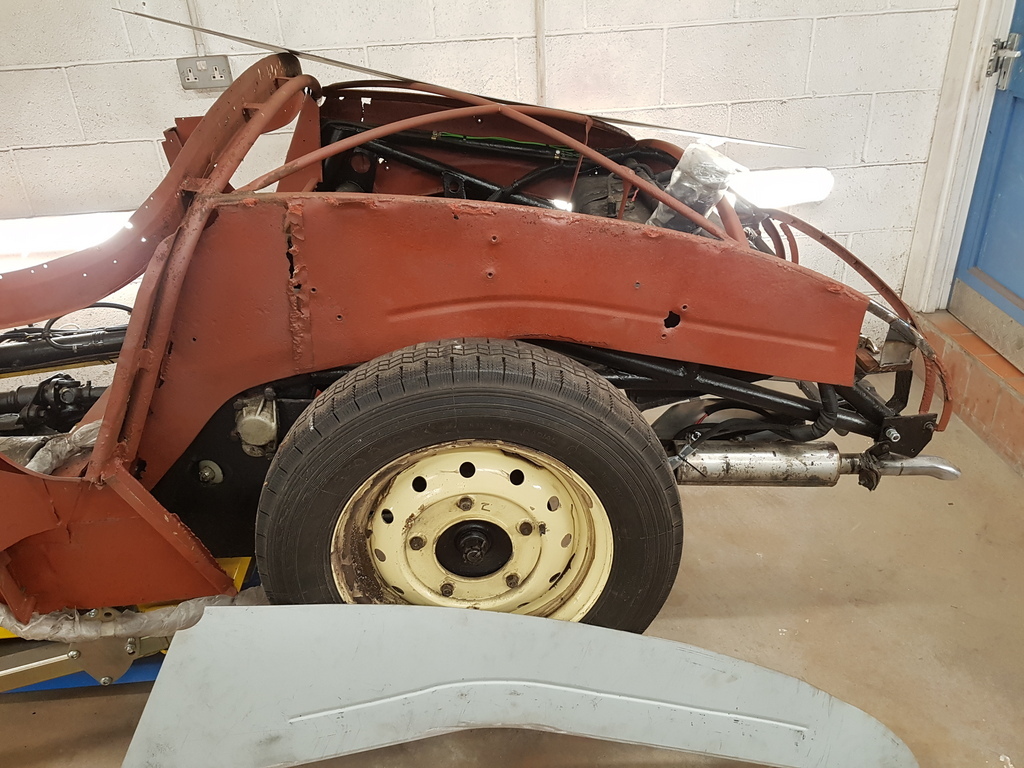 The superstructure can now be removed which will allow much better access to undertake the majority of the fabrication / welded repairs on it More tomorrow |
| |
Last Edit: Apr 16, 2020 20:01:19 GMT by Deleted
|
|
|
|


