|
|
|
|
|
Some great work done there again! Maybe a silly question but should the car be sstanding on its wheels when you do these structual repairs. Because it is a convertable, it will always sag a bit Thanks again for posting these projects as it is a fair bit of work and great fun for us! Peter Peter - The car is based upon a very strong tubular chassis (designed by the legendry team at ERA - English Racing Automobiles) - there is not that much flex in the chassis - but its a fair point that you make and should always be considered - I have seen this catch others out before today on convertibles fitted with weaker chassis structures |
| |
Last Edit: May 12, 2020 7:23:56 GMT by Deleted
|
|
|
|
|
|
|
|
|
GN, with this being such a low productions car, would the exterior panels have been made with English wheels and other traditional handcraft technicques (as opposed to being stamped)? Thanks, John John - Absolutely the panels were all formed by hand and tested / tried against a buck - the rear shroud section is made up several pieces and the bonnet in 11 pieces - it would have been pretty heavy going too its all 2mm + thick alloy sheet that its formed from |
| |
|
|
|
|
|
|
|
|
I hadn't realised before that the rear suspension seems similar to a Frogeye Sprite with the upper torque link and lower sort of quarter elliptic arrangement....I also didn't know about the ERA connection. However I did know that they were highly regarded and competed at Le Mans in the 50's....I think??
Great work - as ever GN!
|
| |
|
|
|
|
|
|
|
I hadn't realised before that the rear suspension seems similar to a Frogeye Sprite with the upper torque link and lower sort of quarter elliptic arrangement....I also didn't know about the ERA connection. However I did know that they were highly regarded and competed at Le Mans in the 50's....I think?? Great work - as ever GN! Phil - Its torsion bar suspension all round - and yes very much a Le Mans competitor - winners of the under 2 litre class in 1950, 1951 & 1952 - very much a underrated / under estimated car |
| |
|
|
|
|
|
|
|
Some great work done there again! Maybe a silly question but should the car be sstanding on its wheels when you do these structual repairs. Because it is a convertable, it will always sag a bit Thanks again for posting these projects as it is a fair bit of work and great fun for us! Peter Peter - The car is based upon a very strong tubular chassis (designed by the legendry team at ERA - English Racing Automobiles) - there is not that much flex in the chassis - but its a fair point that you make and should always be considered - I have seen this catch others out before today on convertibles fitted with weaker chassis structures Thanks Chris. I found out that when i put my P5B on 4 axle stands on the jacking points, the doors do not close as well as when the car is standing on its wheels.Luckely i did the sill and other structual repairs with the car on axle stands under the axle and front suspension so all was fine.
Peter
|
| |
|
|
|
|
|
|
|
|
What were/are the ugly welded strips in the front wings for? Semaphores?
|
| |
|
|
|
|
|
May 12, 2020 11:18:32 GMT
|
What were/are the ugly welded strips in the front wings for? Semaphores? Mark - Originally yes - obviously someone has plated over them with gas welding - just something else for me to sort |
| |
|
|
|
|
|
May 12, 2020 19:18:50 GMT
|
So I tackled the nearside structural welding today 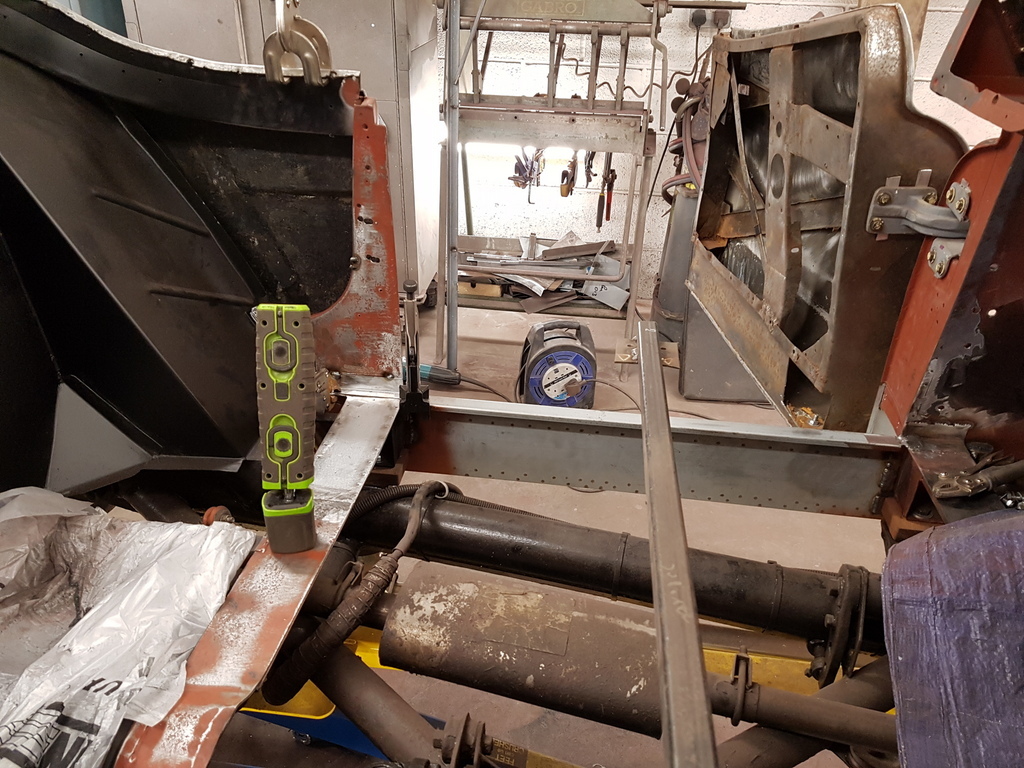 Really just a repeat of the work that I did on the offside yesterday 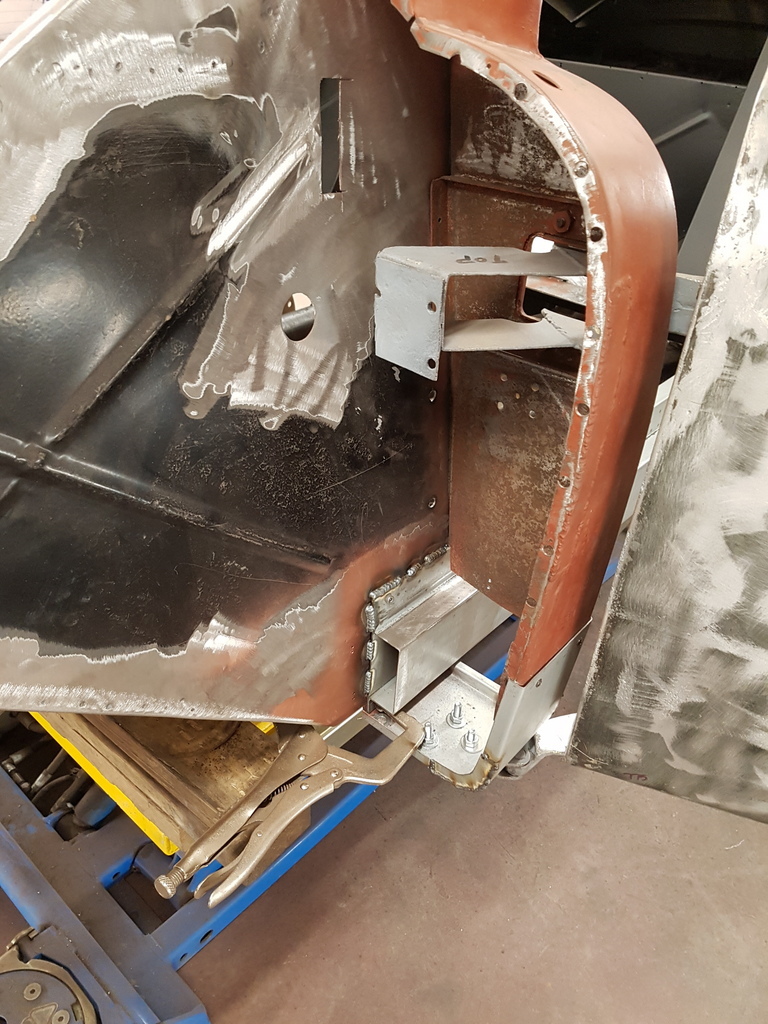 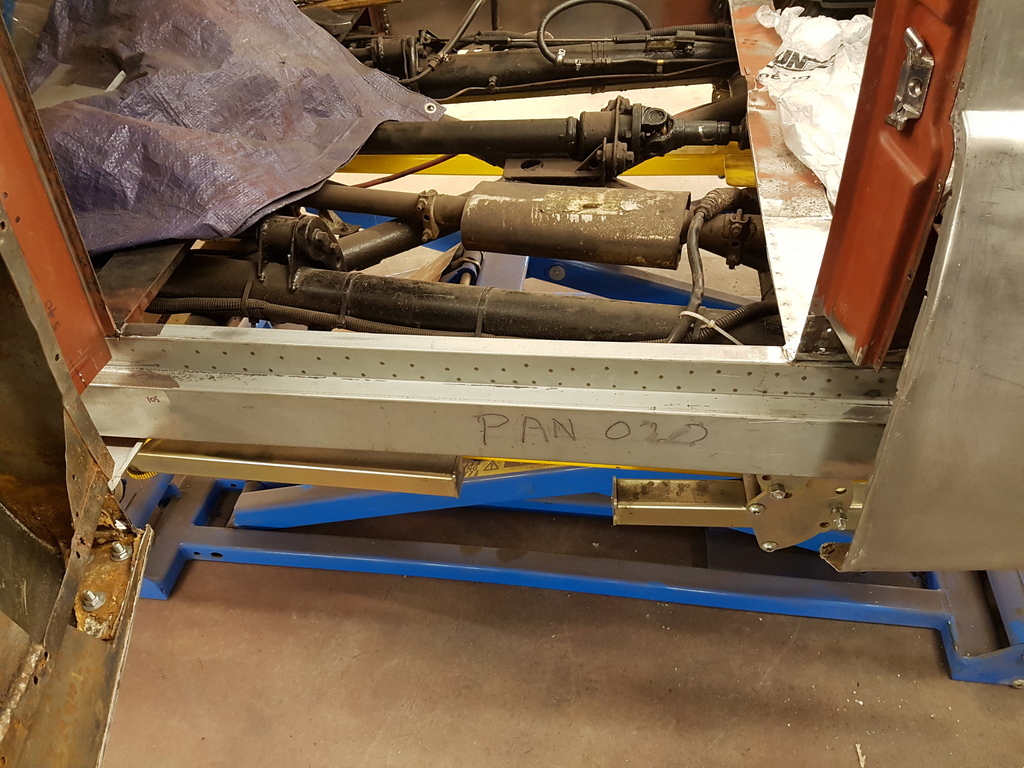 But now I could complete the B post base & extend the repair 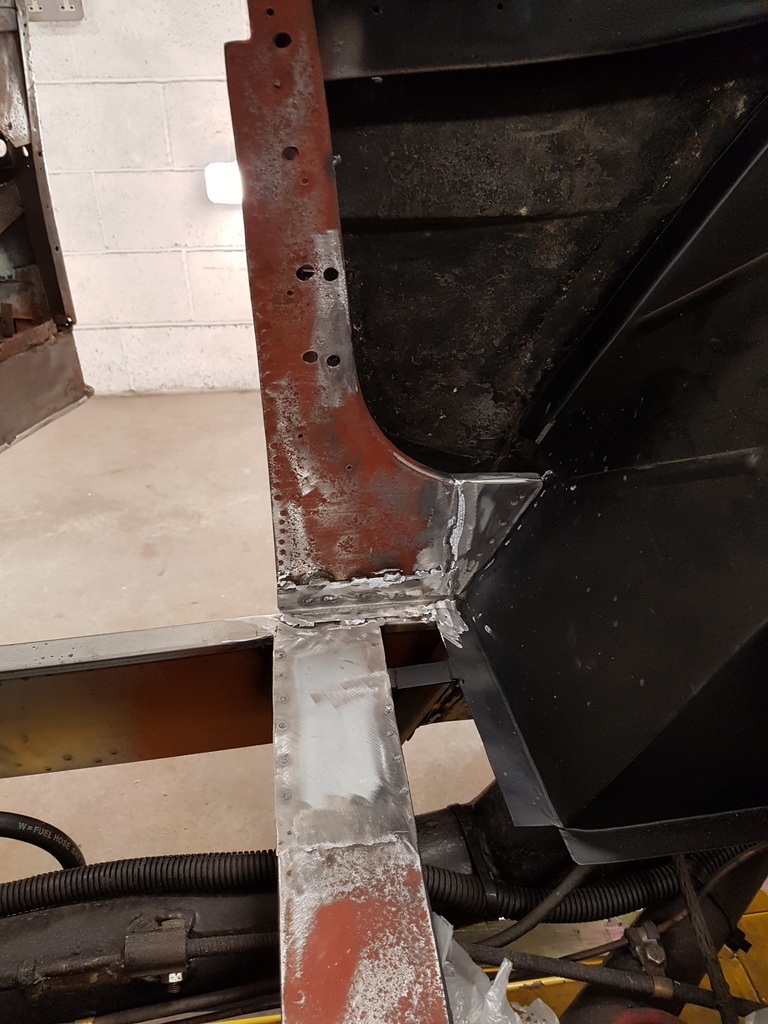 On both sides 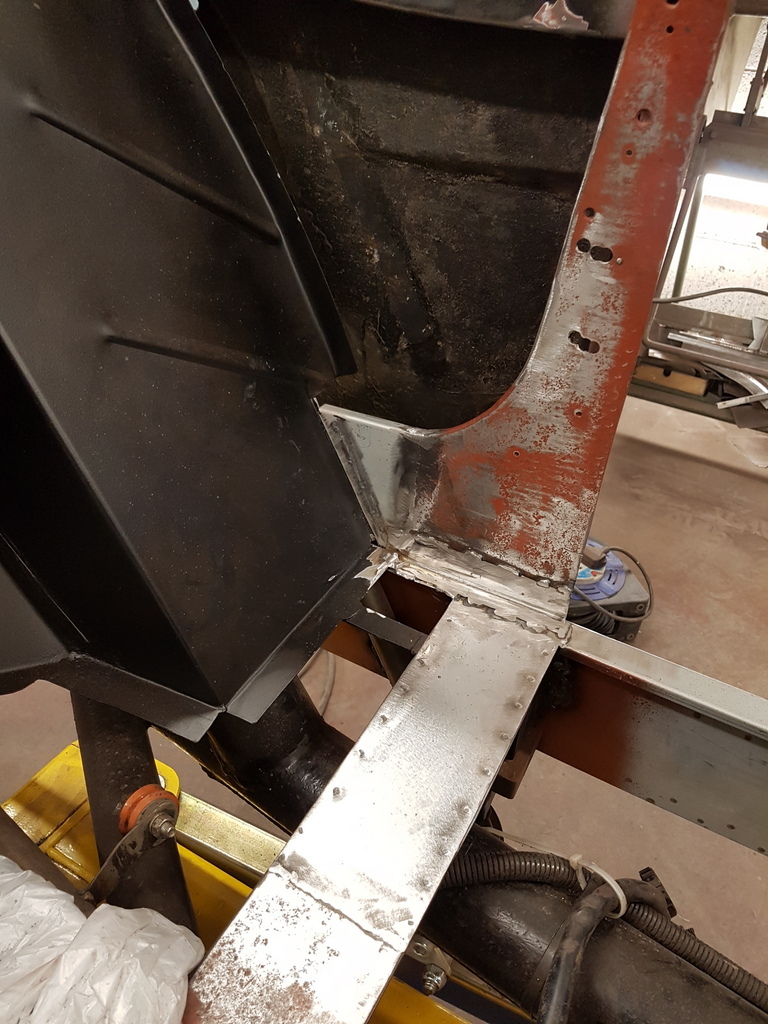 Then tied the support tube into the inner sill 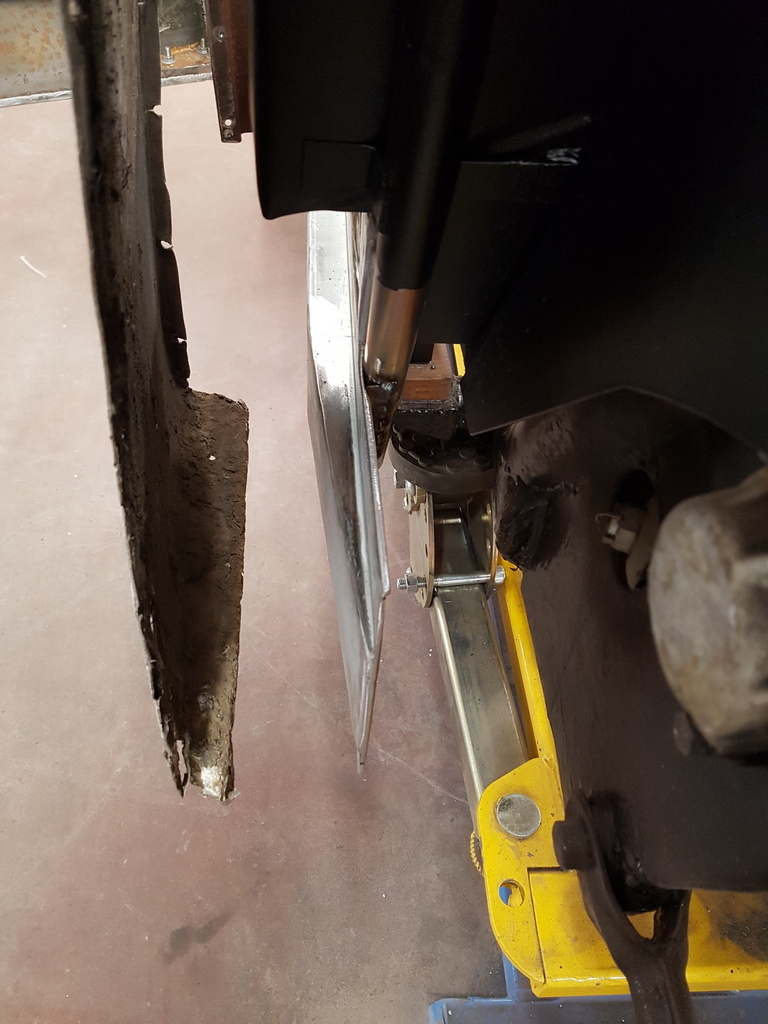 And that is the structural welding completed on the nearside 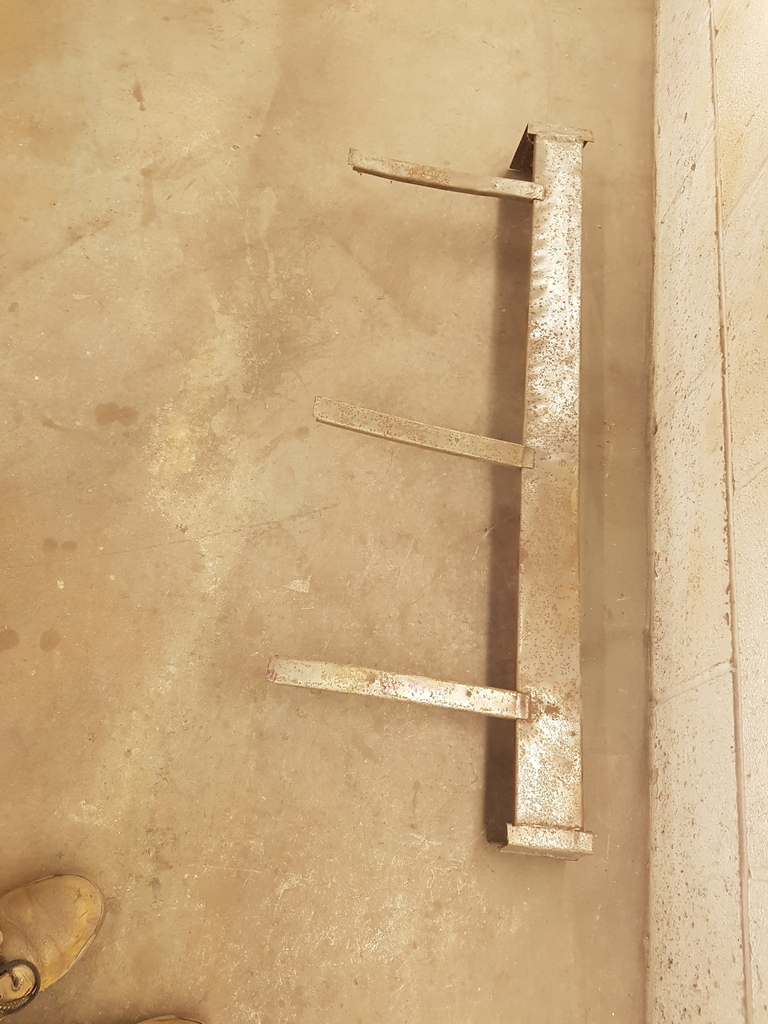 This is the original floor support brace but its been messed with before today so I am going to replace it with new 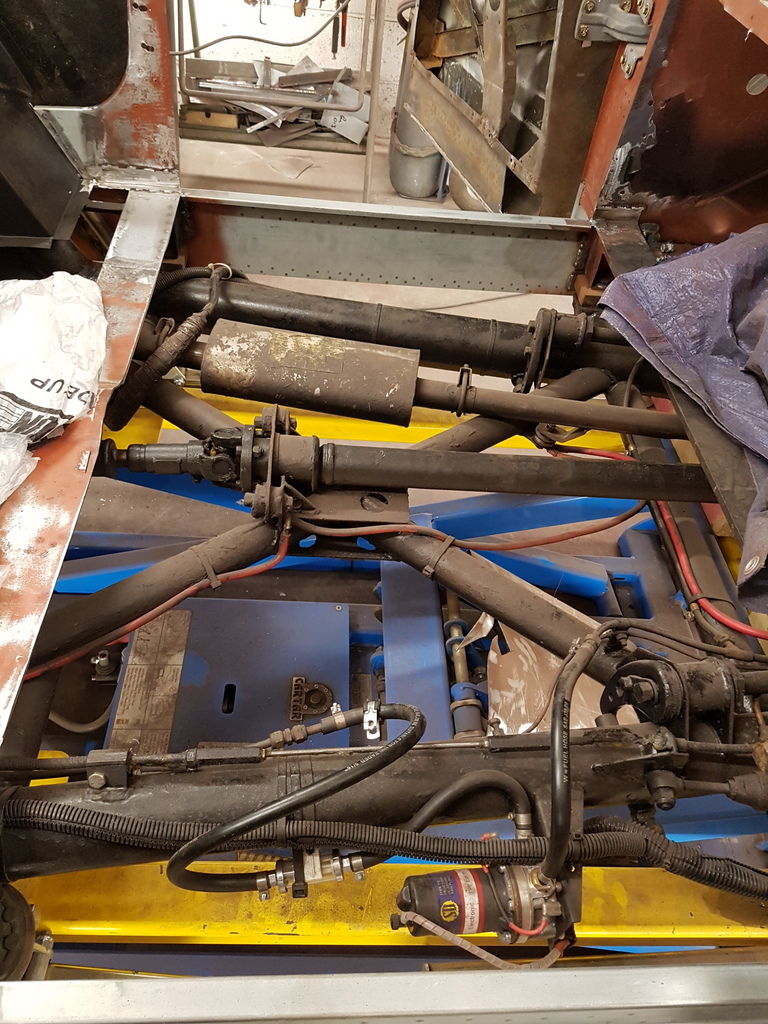 Spans between the inner sills 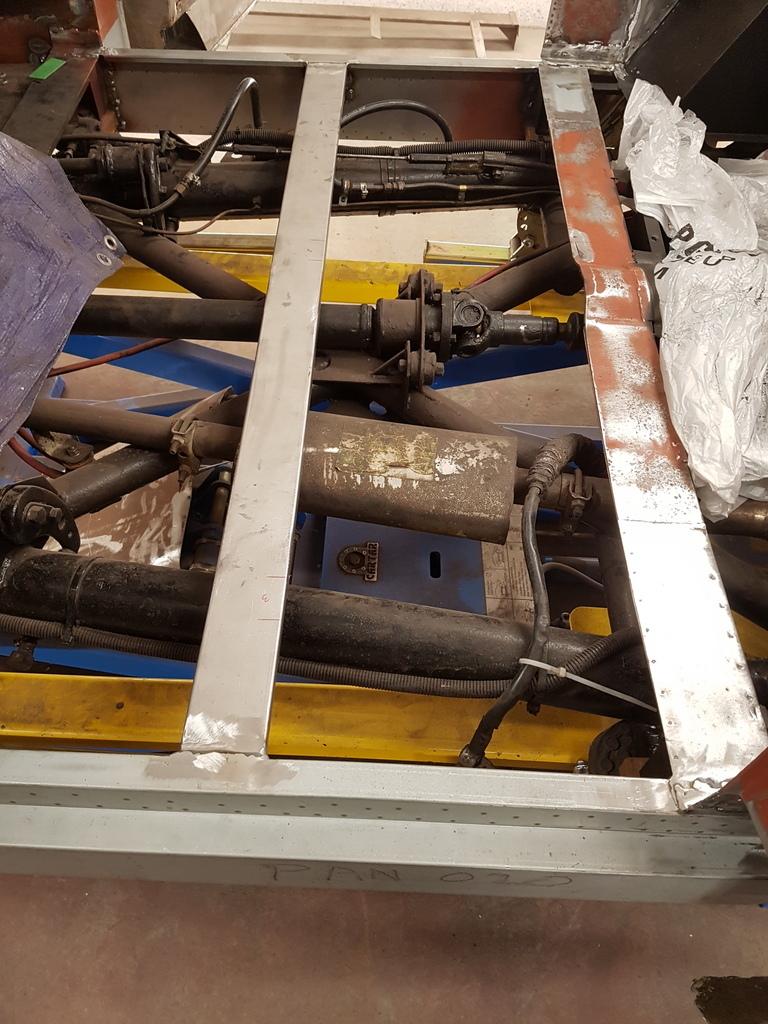 Like so 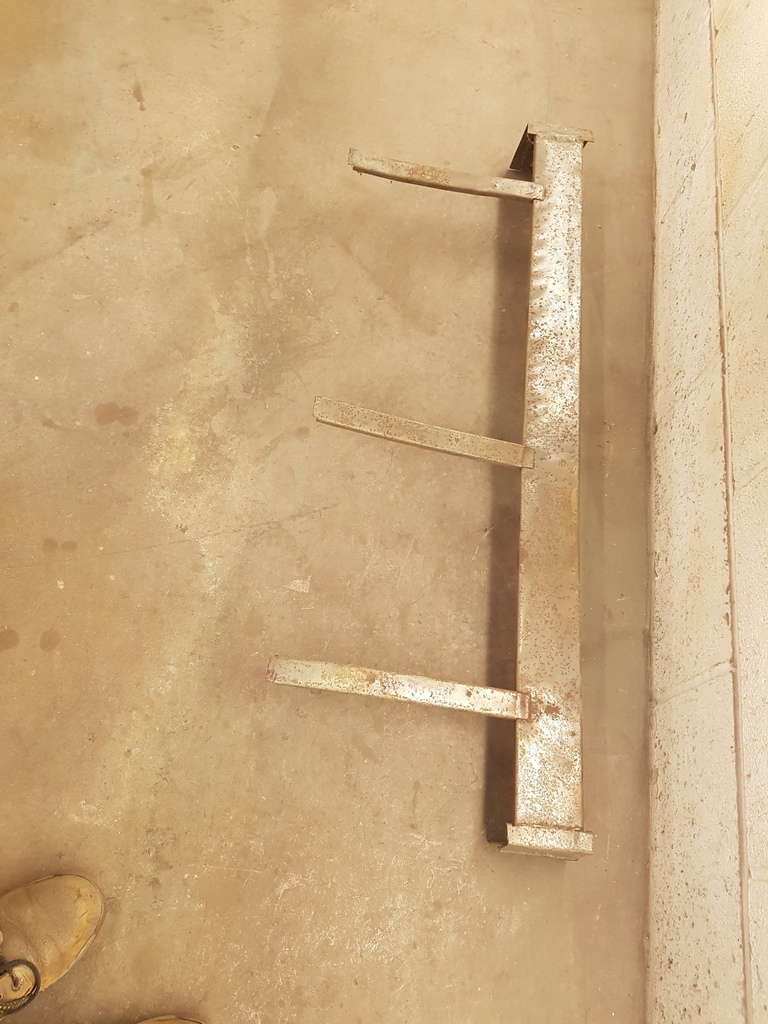 Just need to cut & weld in the new seat support braces in the morning 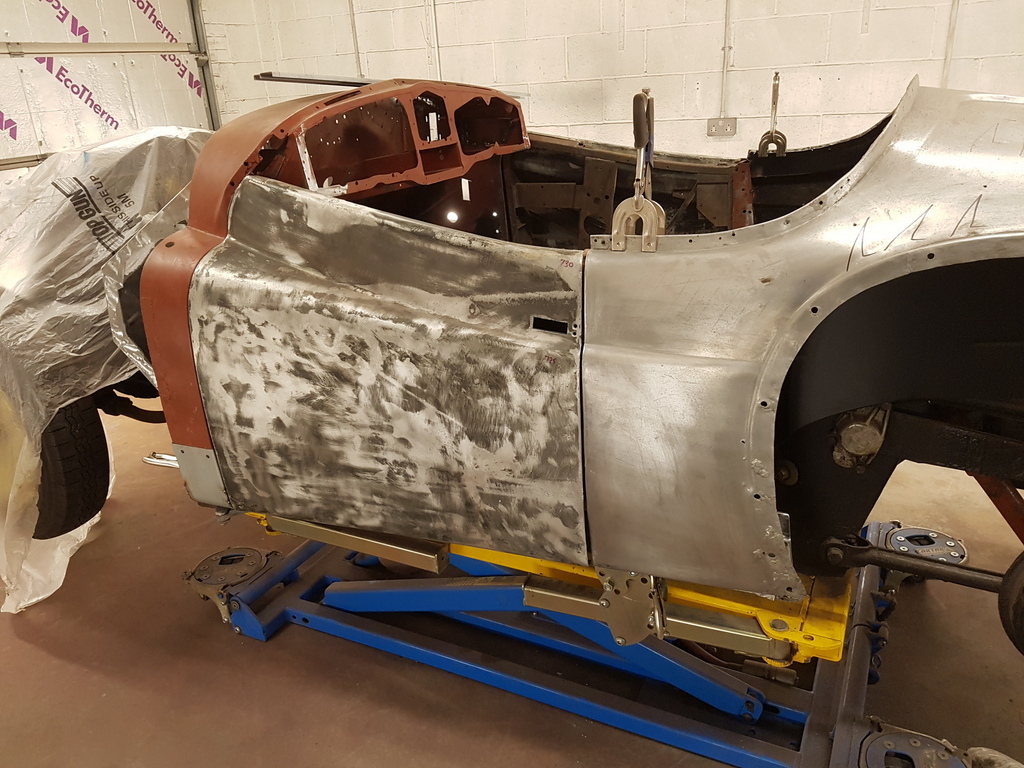 But another quite productive day - more tomorrow |
| |
Last Edit: May 12, 2020 19:23:17 GMT by Deleted
|
|
|
|
|
May 12, 2020 19:51:11 GMT
|
|
See what you mean about a rigid chassis. You’d never believe that was from the era it was, remarkable.
|
| |
|
|
|
|
|
|
|
|
I can feel how solid that is becoming again from here, Grumpy!
super nice!
JP
|
| |
I know its spelled Norman Luxury Yacht, but its pronounced Throat Wobbler Mangrove!
|
|
|
|
|
|
|
|
|
Seat support braces cut & tacked in 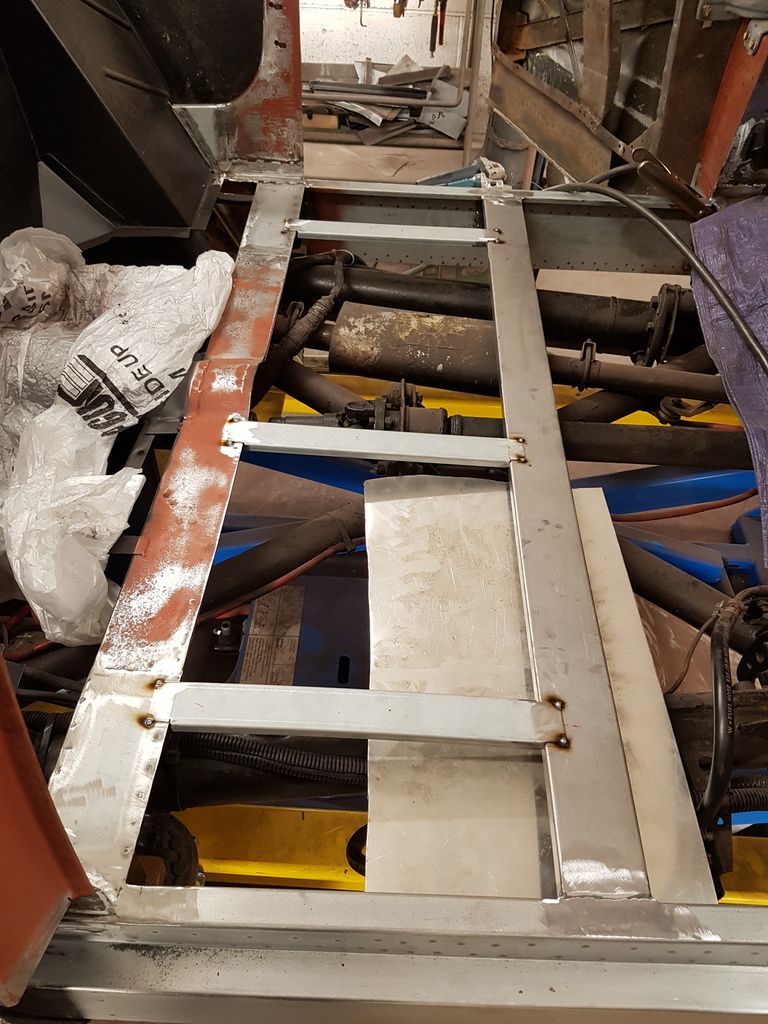 Fully welded & dressed back 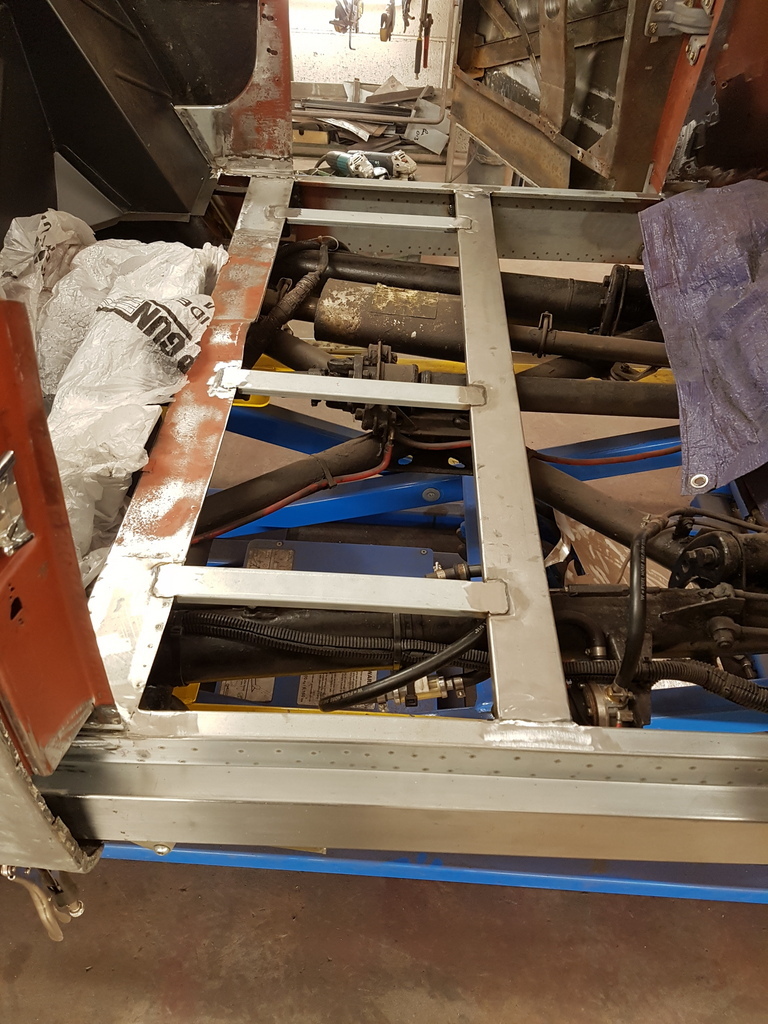 Now I need to make a start on getting the A post repairs more permanent 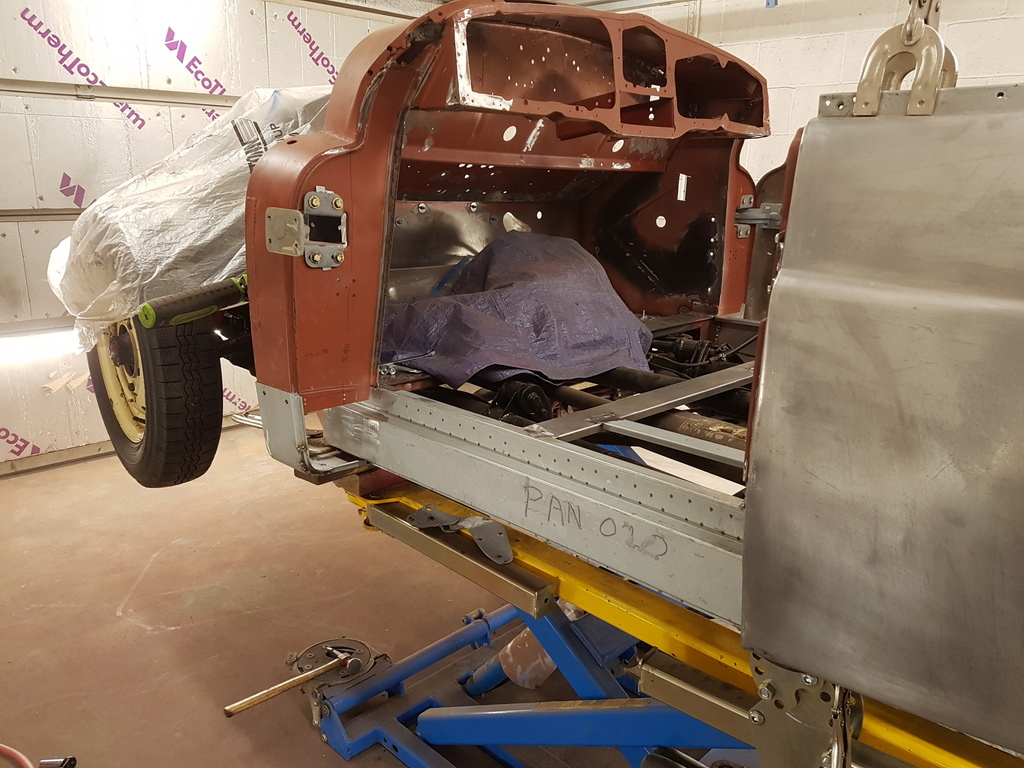 This is a fiddly time consuming job to get right 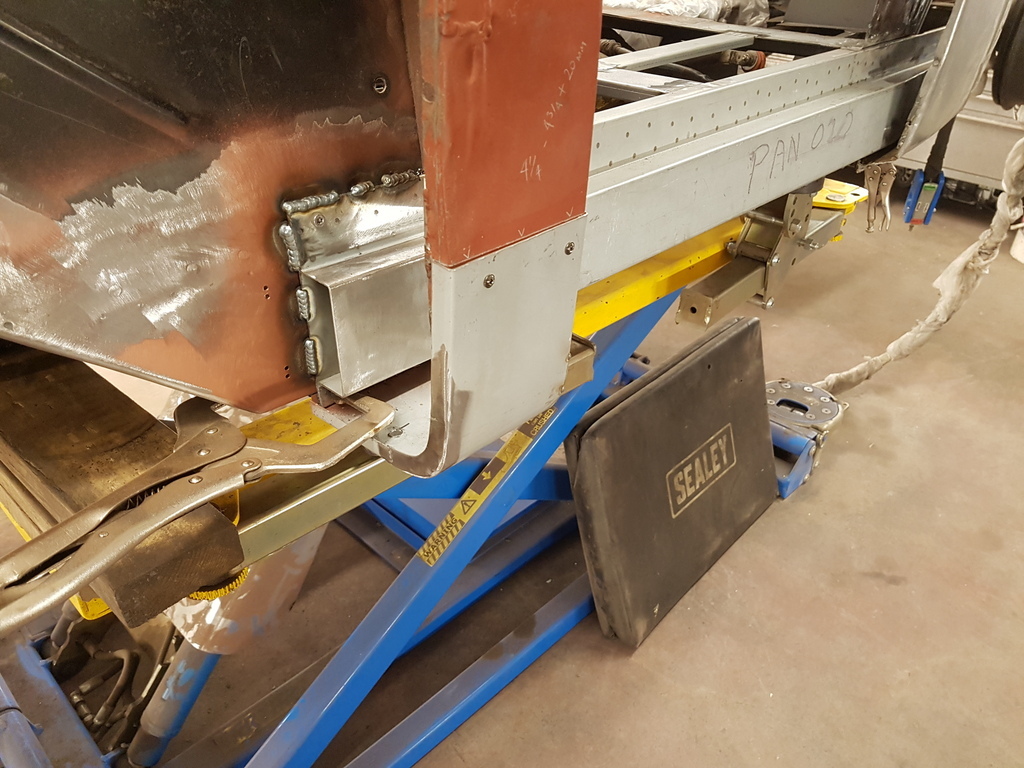 It involves the door being removed & refitted on several occasions in order to keep checking the clearances & hinge positions 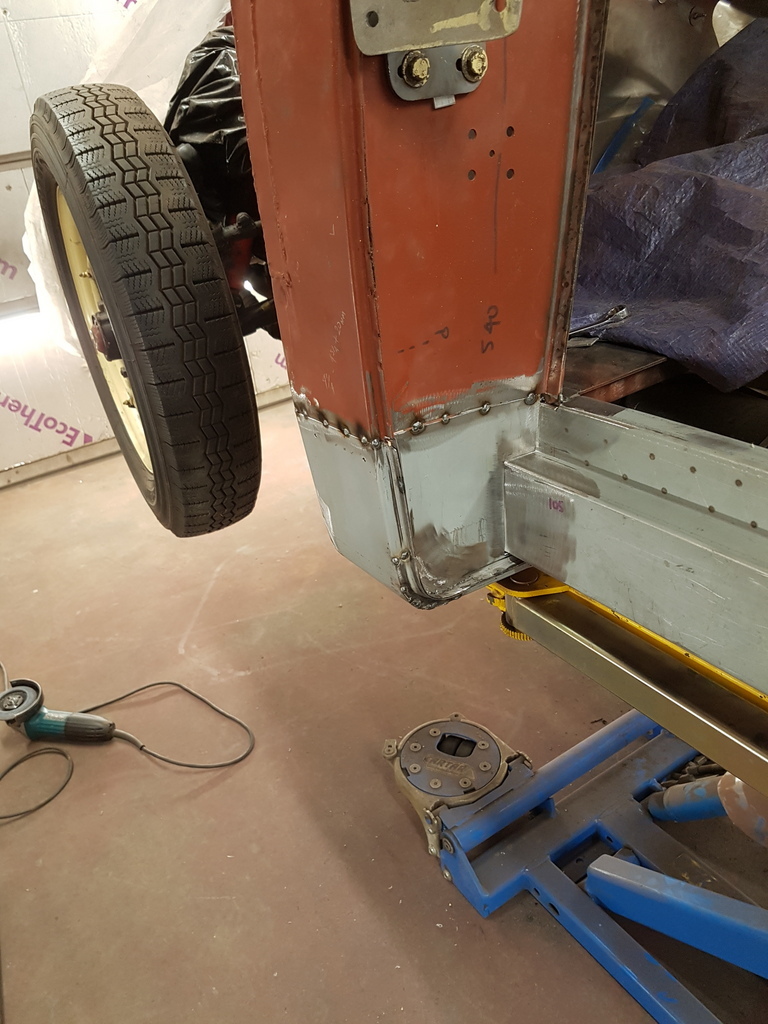 Trimmed back & tacked up 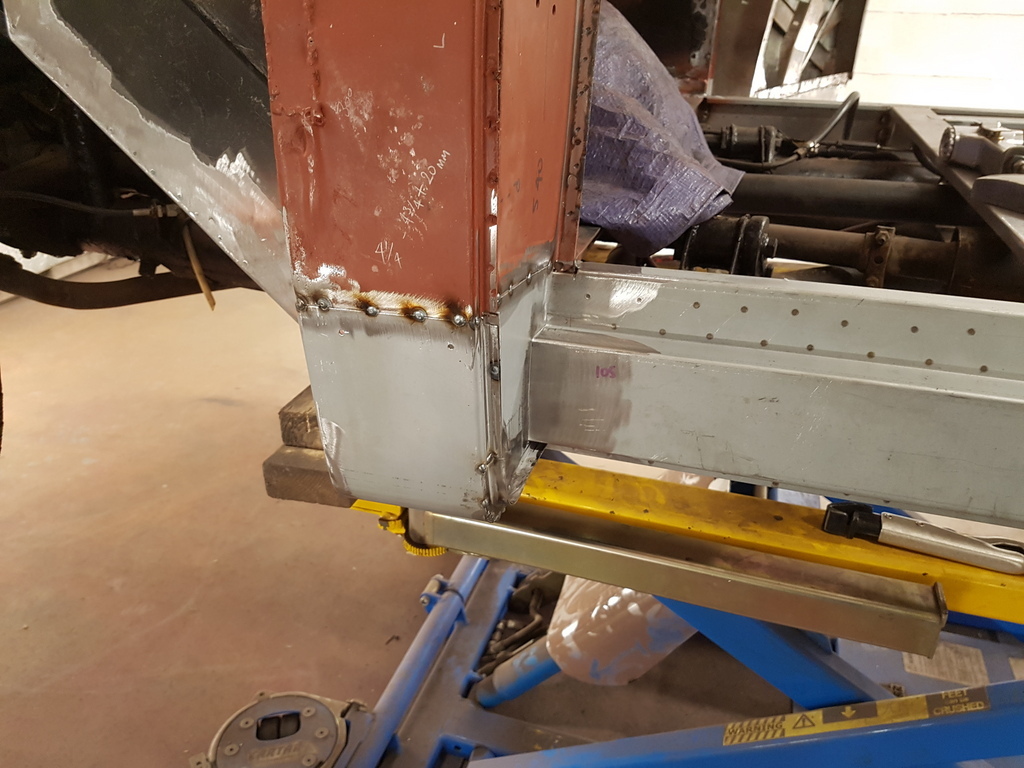 The door gets refitted at this stage and any minor adjustments made prior to fully welding the repair areas up 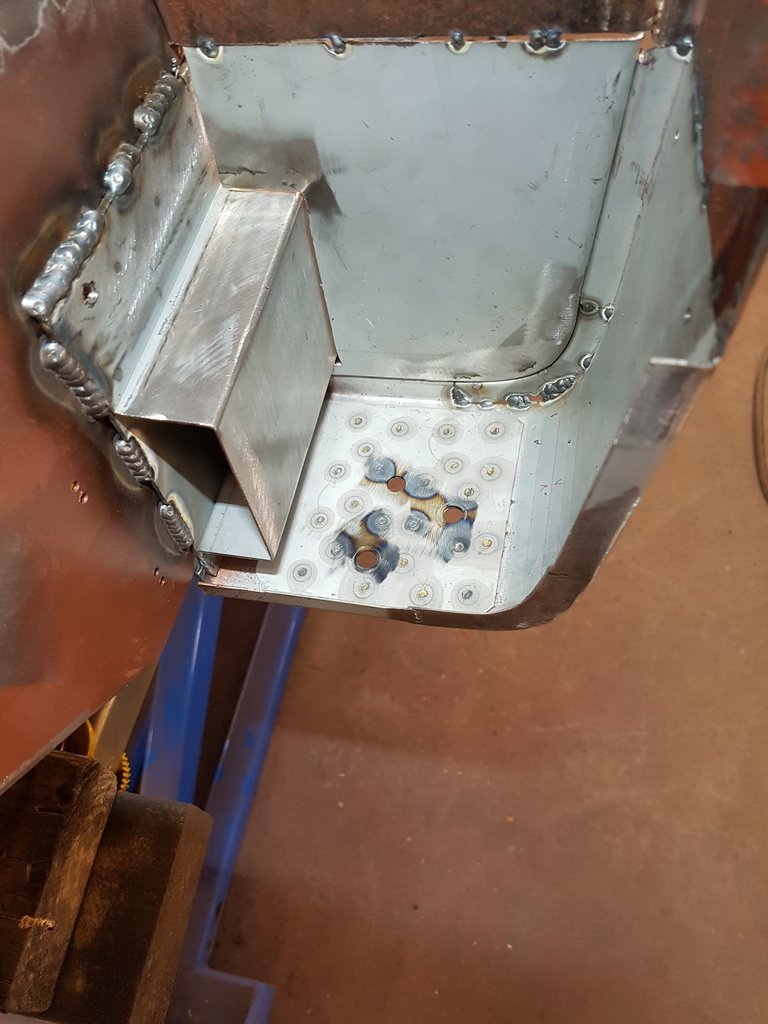 Strengthening plate added to the base of the A post to provide support for the lower hinge that is bolted beneath it 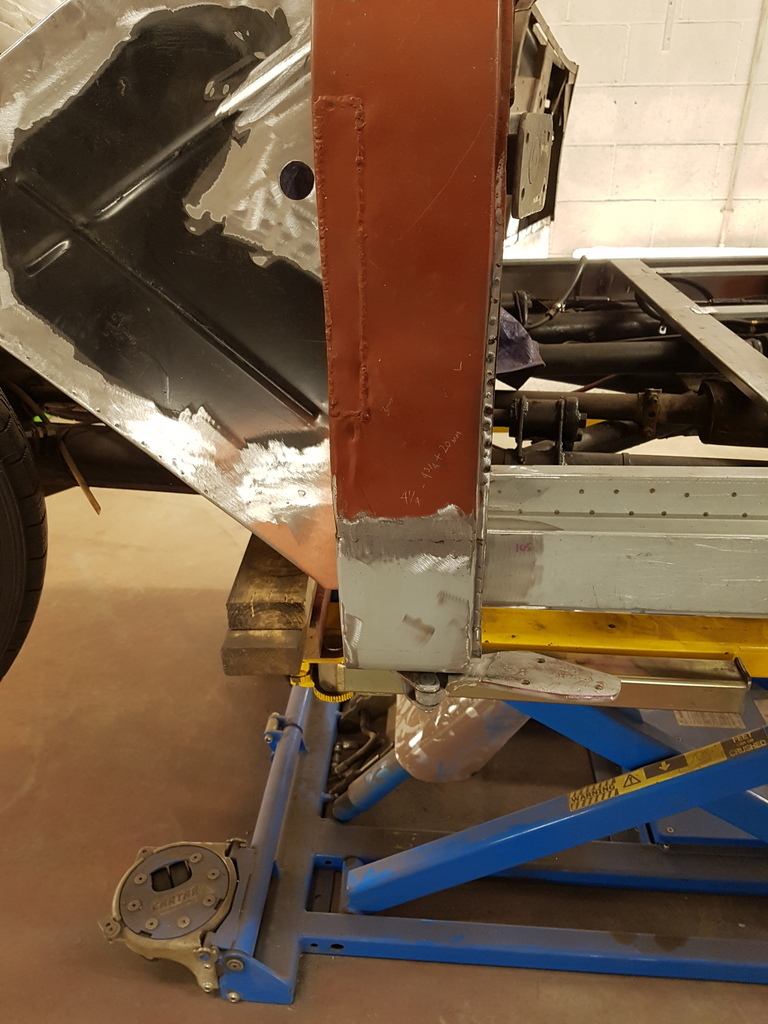 Fully welded on the two faces 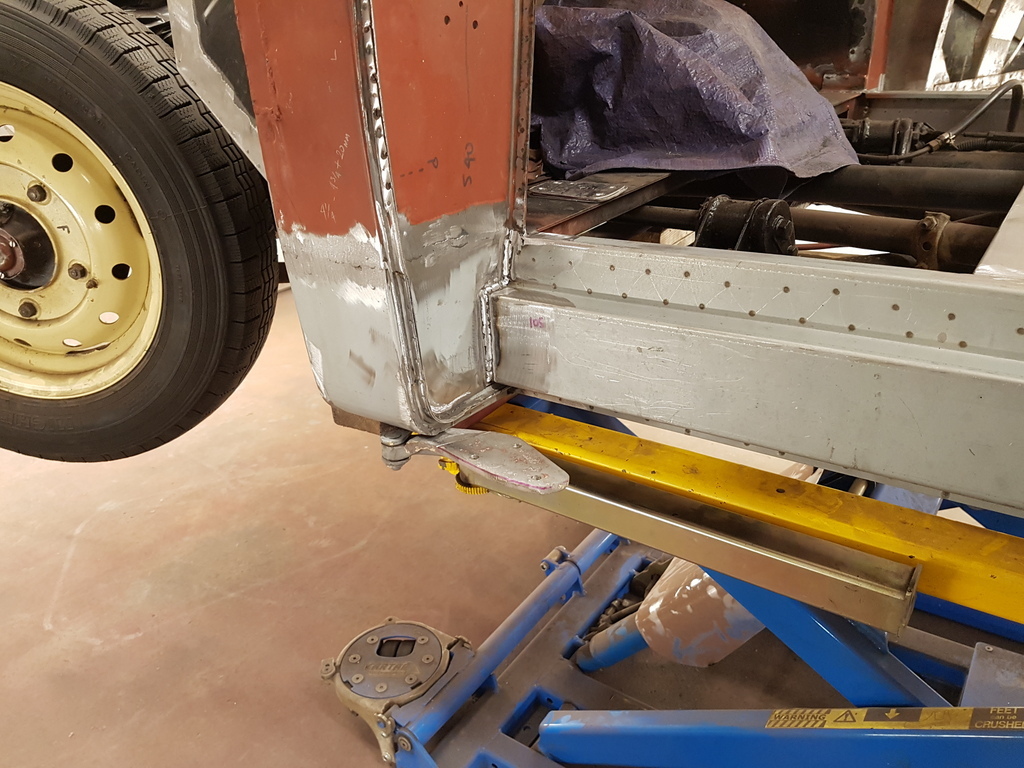 And dressed back 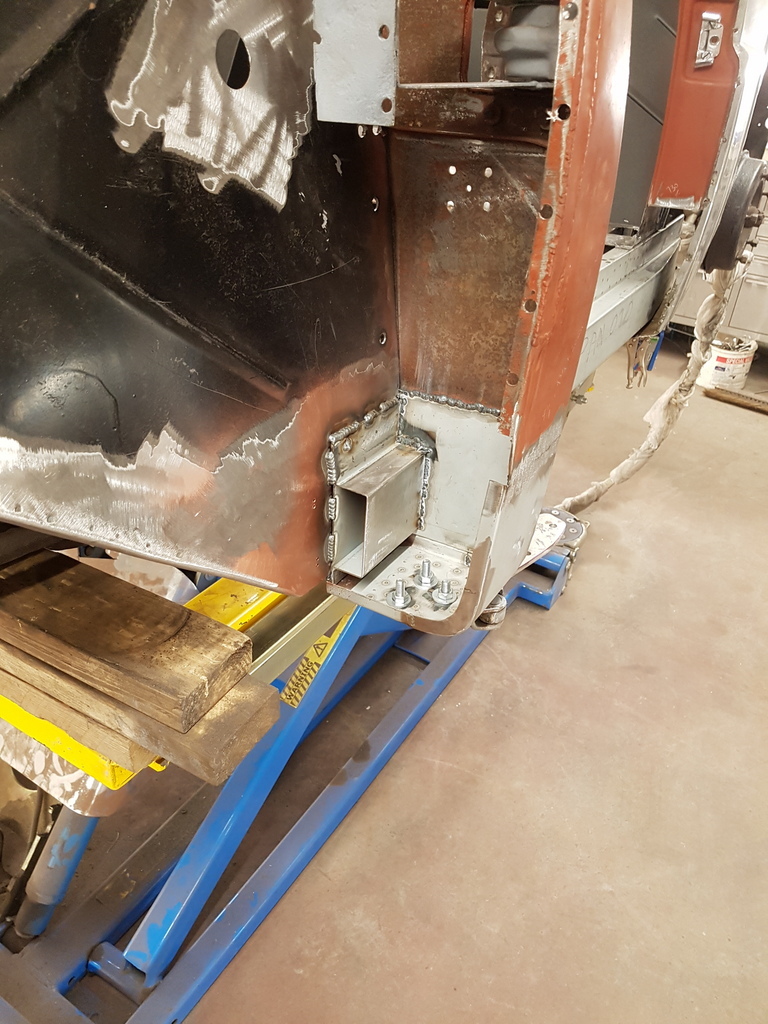 I have a repair section pre made to close the front face of the A post 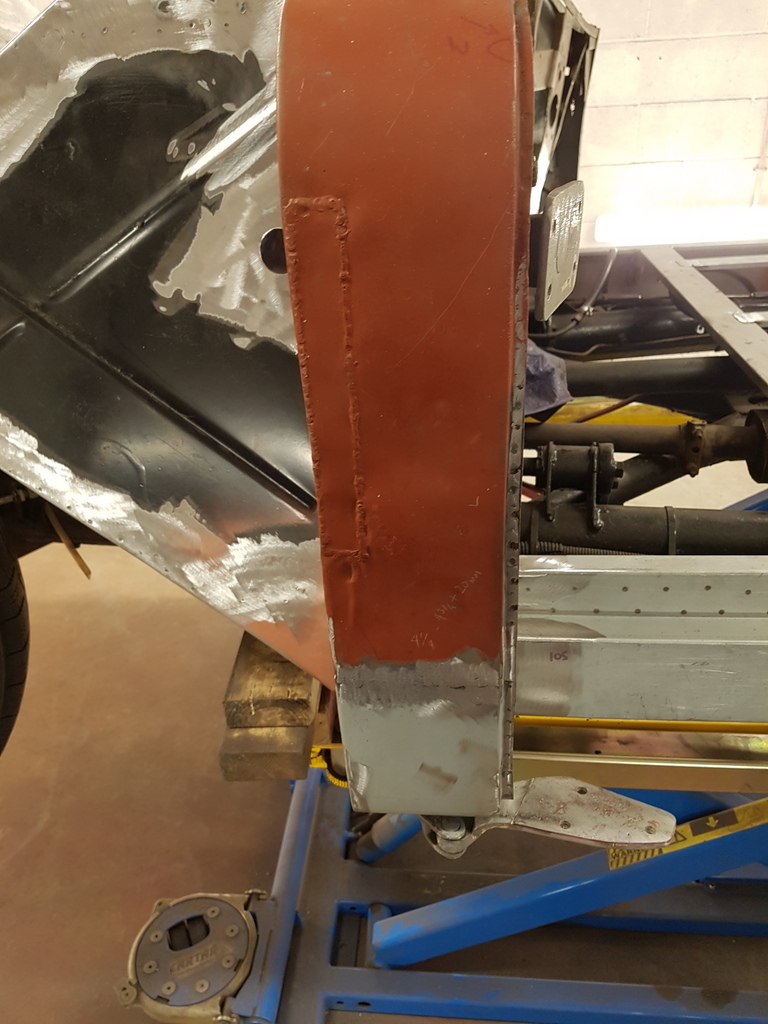 But there are several other jobs to undertake first before losing the access - one of them is sort the remaining areas on the outer face of the post out - its seen several er lets say fillered over repairs I(if you can call them repairs in the first place) - more later |
| |
|
|
|
|
|
May 14, 2020 11:29:33 GMT
|
|
looking great, those cars look like a perfect example of how not to design a car for corrosion protection!
|
| |
|
|
|
|
|
May 14, 2020 18:21:15 GMT
|
looking great, those cars look like a perfect example of how not to design a car for corrosion protection! Kevin - Its like all cars of that era - nothing was thought about when it came to preventing rust ingress |
| |
|
|
|
|
|
May 14, 2020 19:12:34 GMT
|
Another day sorting the A post out - Its a critical point - get it wrong and nothing else on the car will fit - so its steady progress - measure 3 times - cut & weld once etc 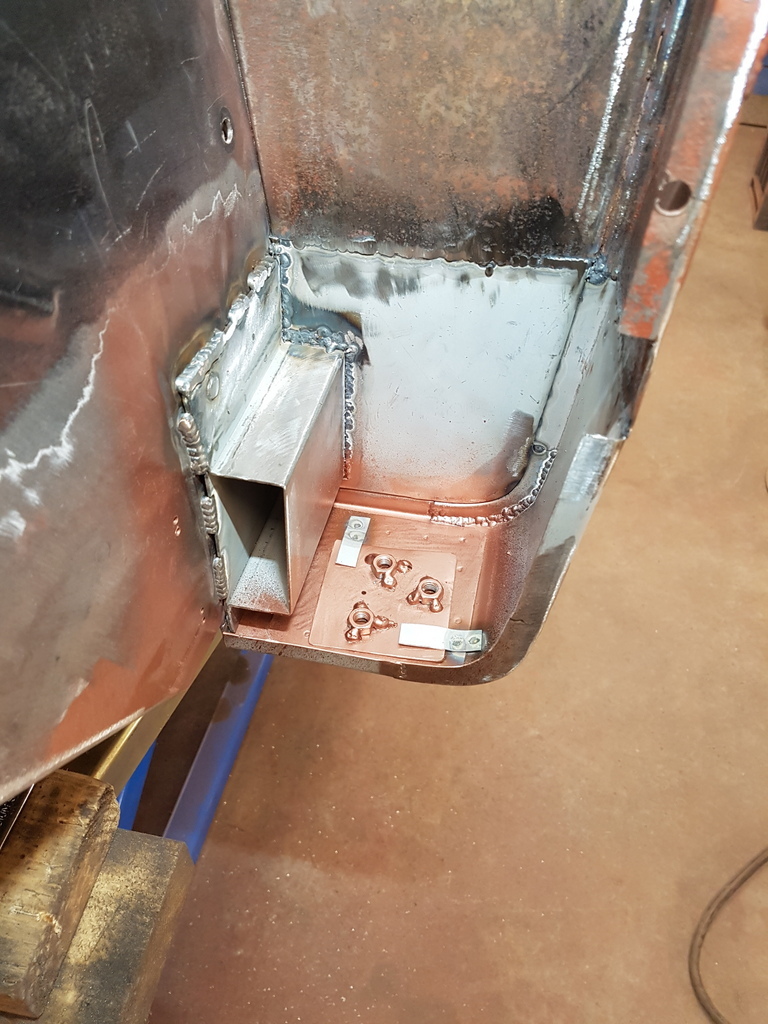 Floating plate made up in order make the bottom hinge nuts captive - just retained by a couple of spot welded tangs 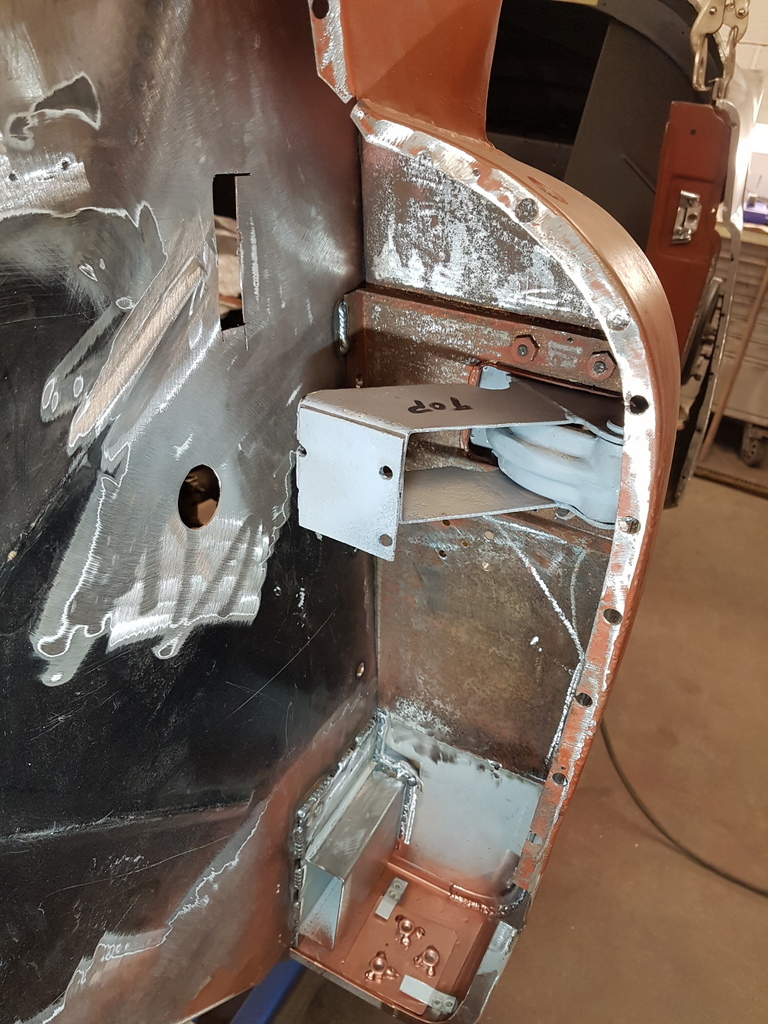 Cleaned the inside face of A post panels up 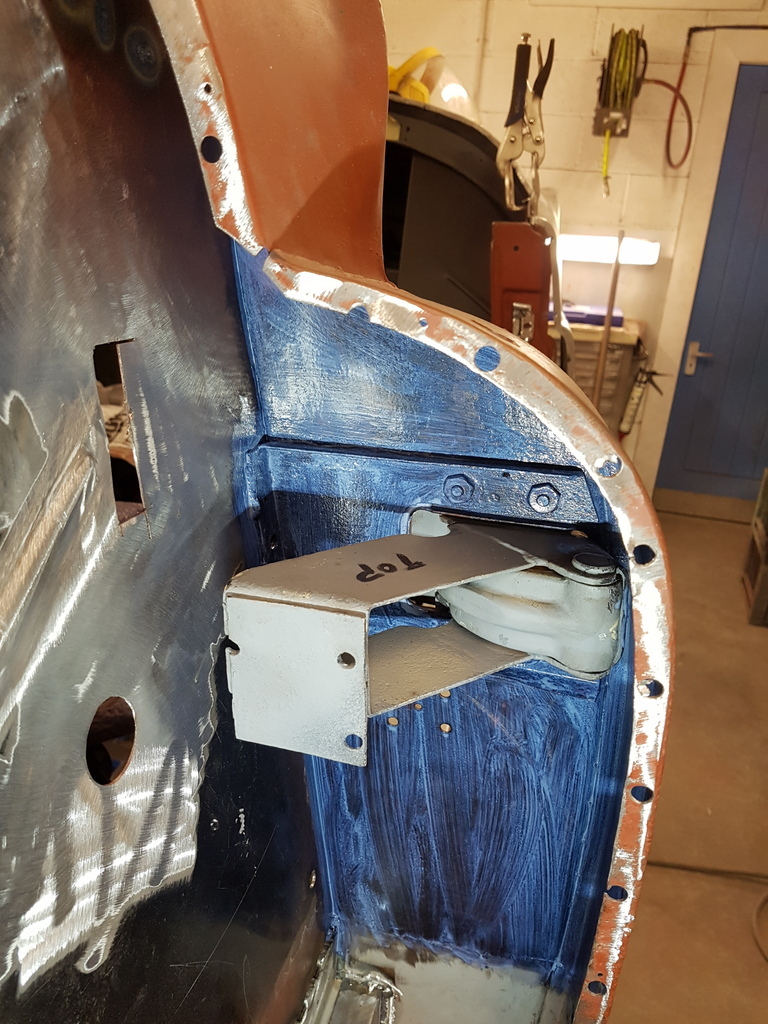 And then applied a 2 coats of Hydrate 80 to them 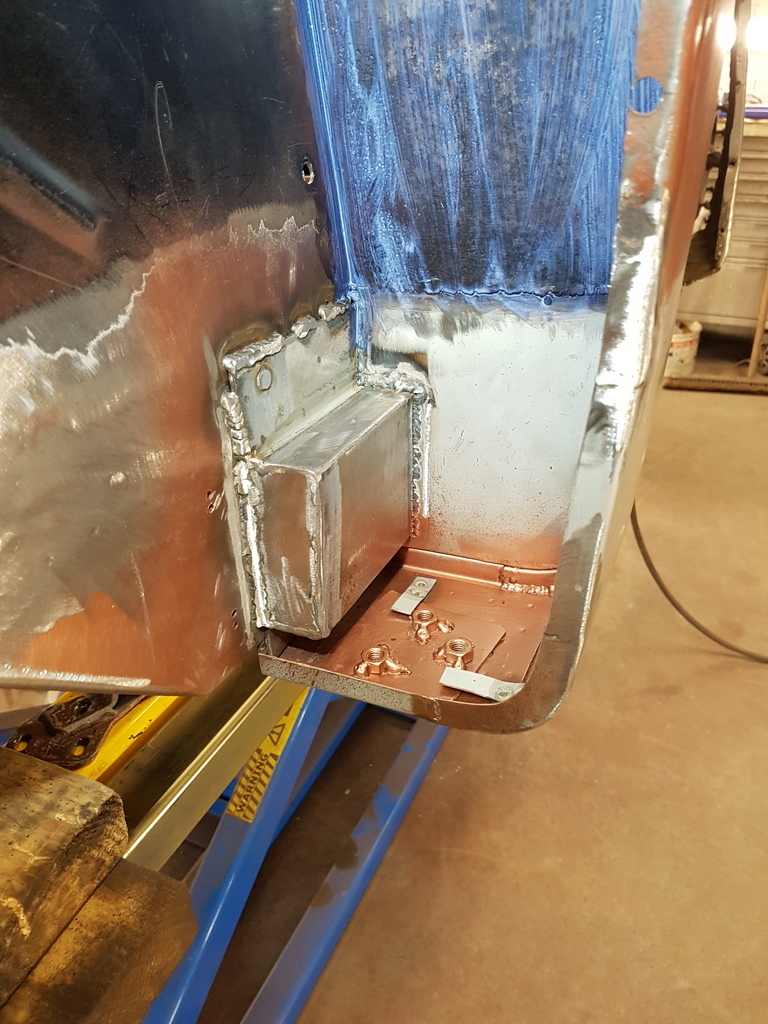 Welded a blanking piece to the end of the sill cavity 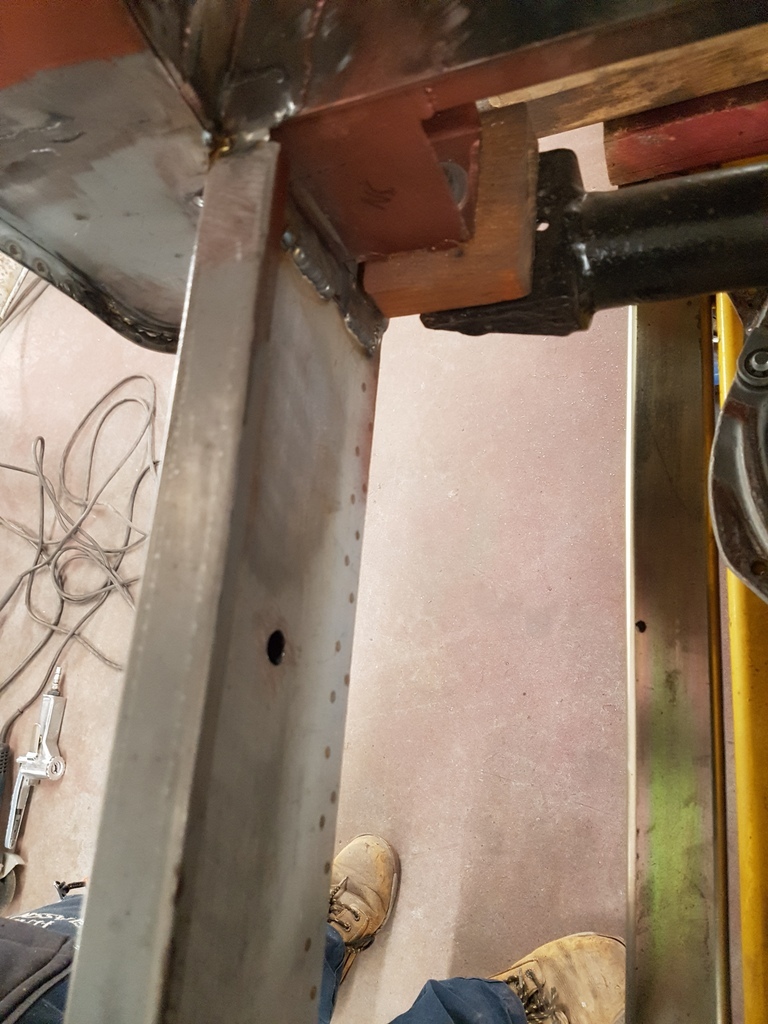 I like to flood the sill cavities with cavity wax 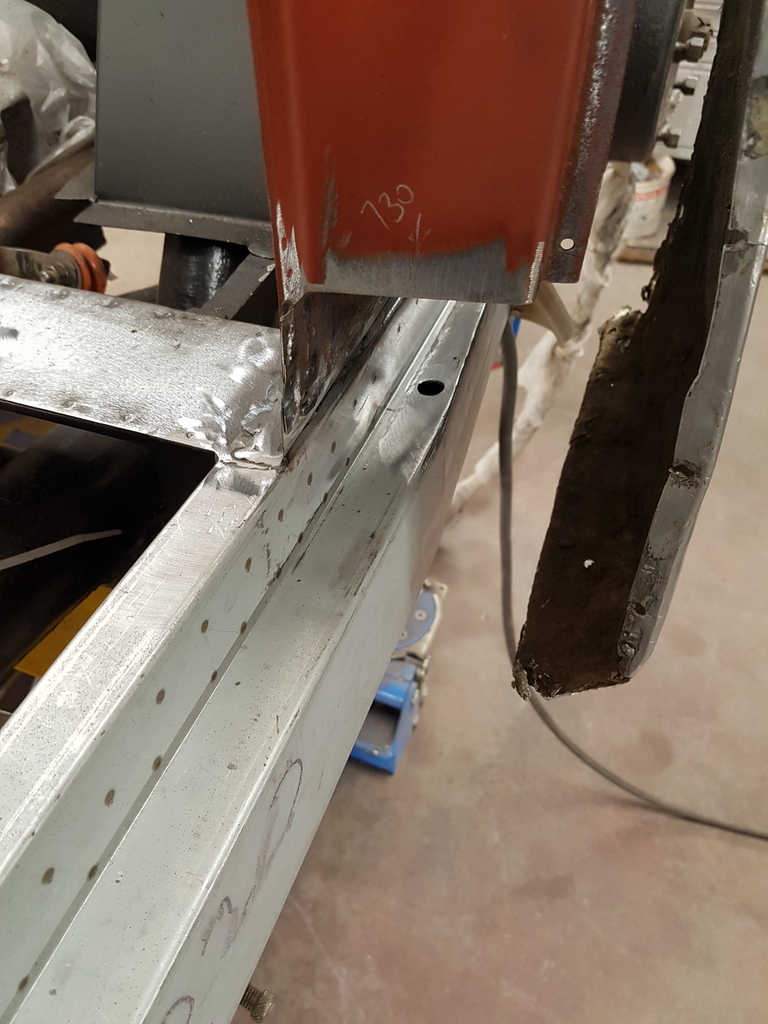 Via a couple of pre drilled holes - these will be sealed with grommets once the car is completed 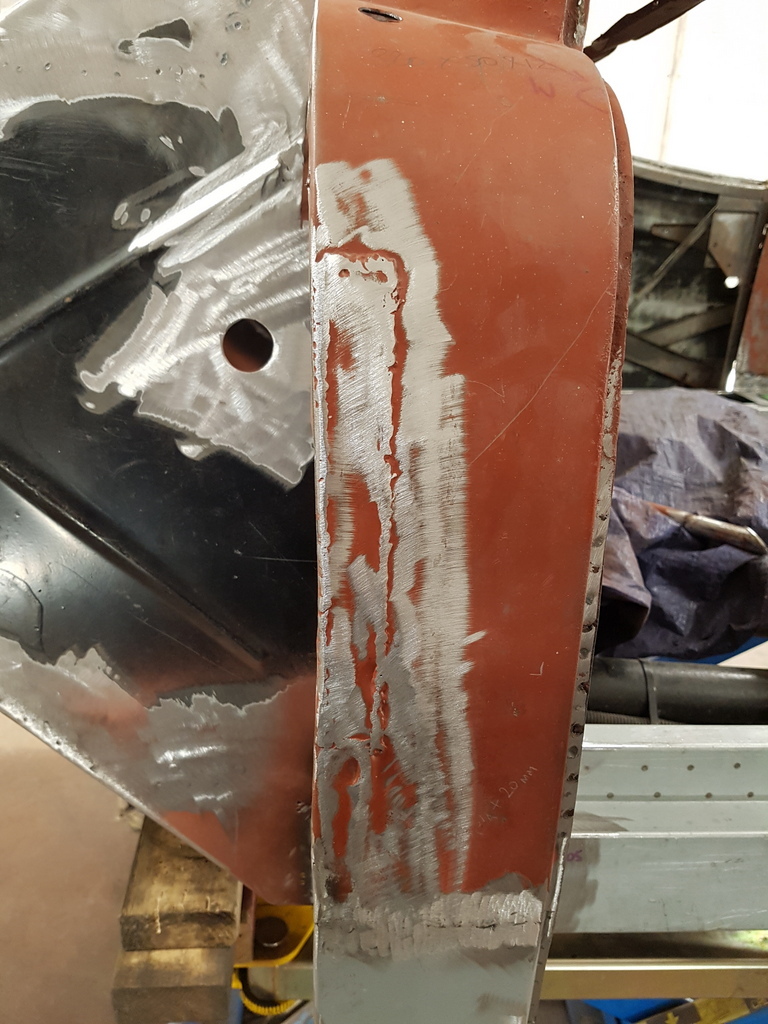 Next was to sort out the remaining areas on the A post face panel - the car originally had semaphore trafficators fitted to it when new 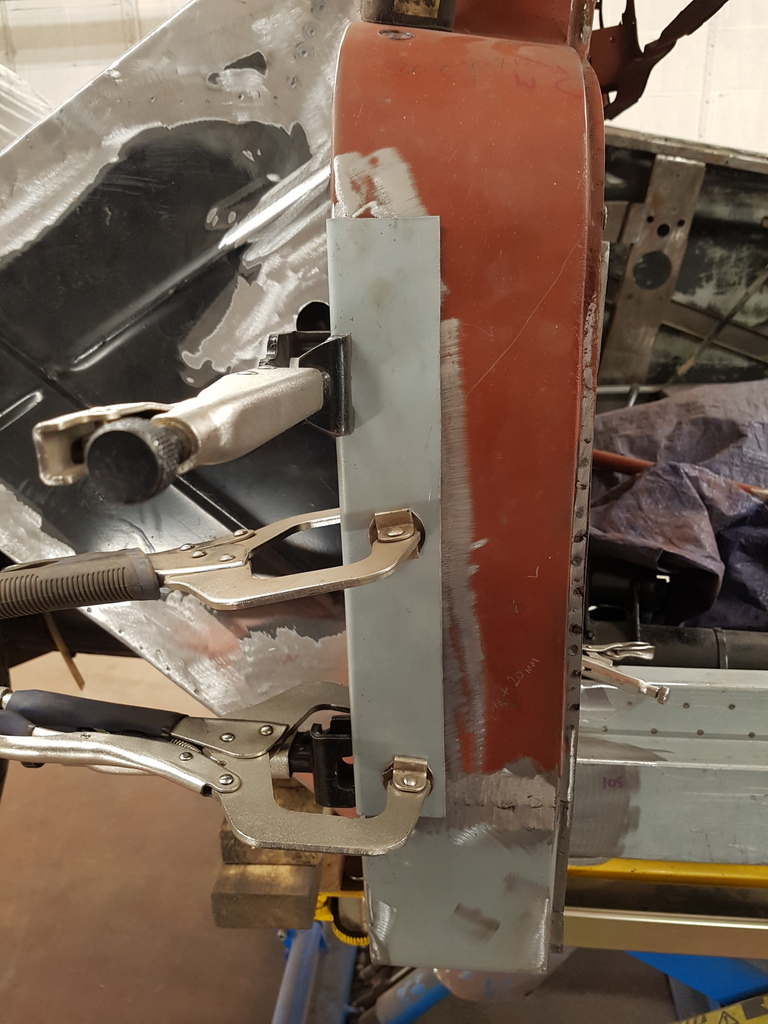 But these tend to get deleted and replaced with flashing front & rear indicators - owners then have the trafficator aperture welded up / plated over has this is just a point of water ingress - that's exactly what they had done here - only not very well - gas welded with heat distortion around the repair areas and although I could not see it when I placed my hand to the rear of this area I feel a open seam 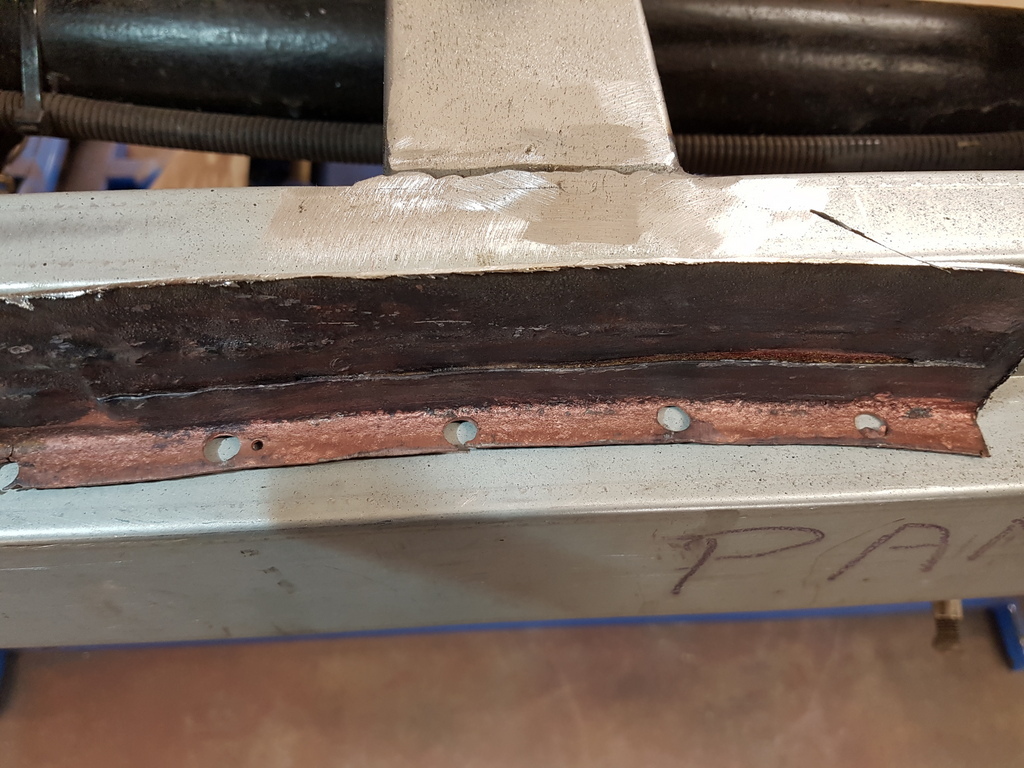 Old repair section of the A post face removed - if left the open seam would have created issues further on in the cars life 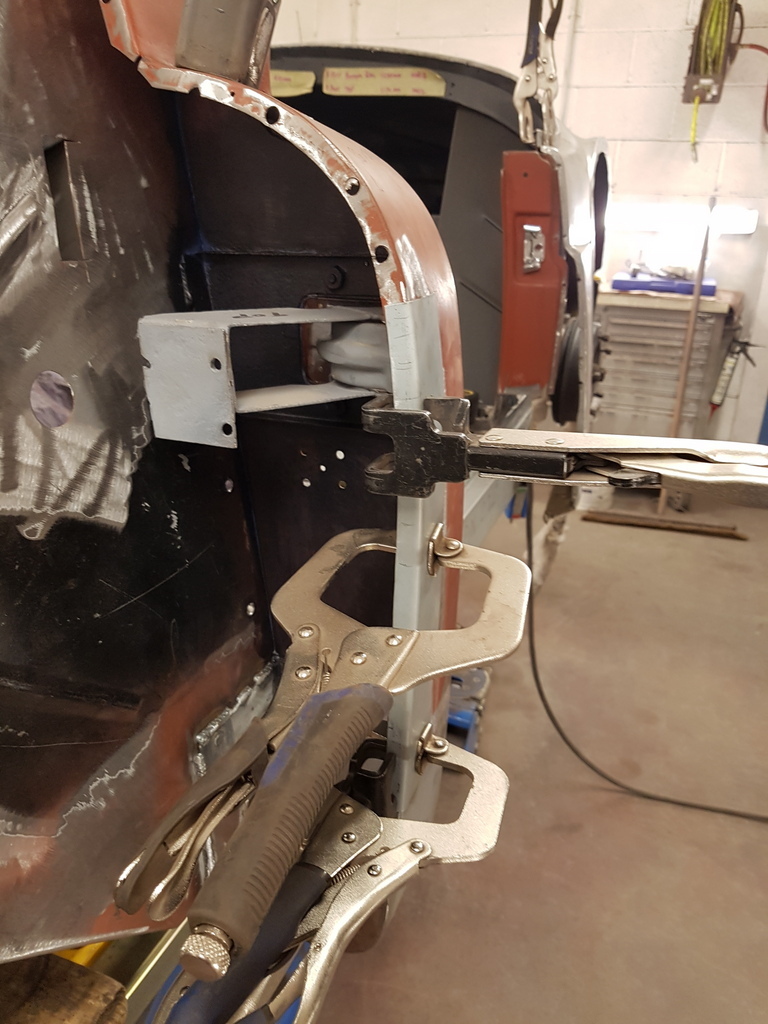 New repair section formed and shrunk on the flange edge to form the curvature 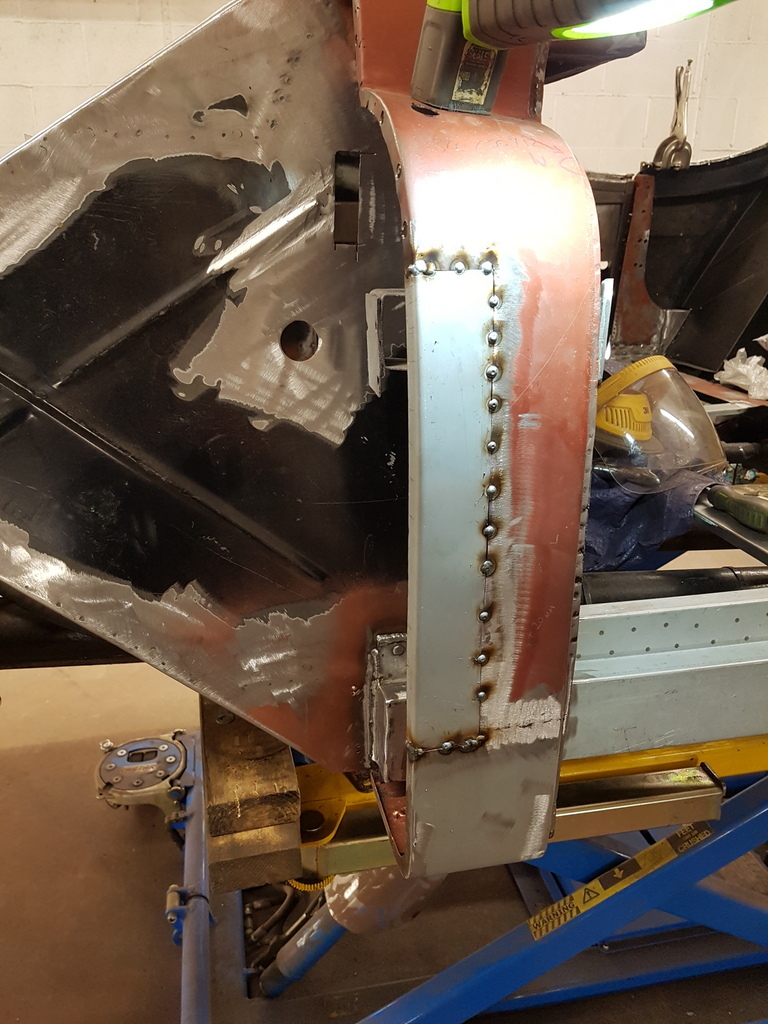 Tacked in 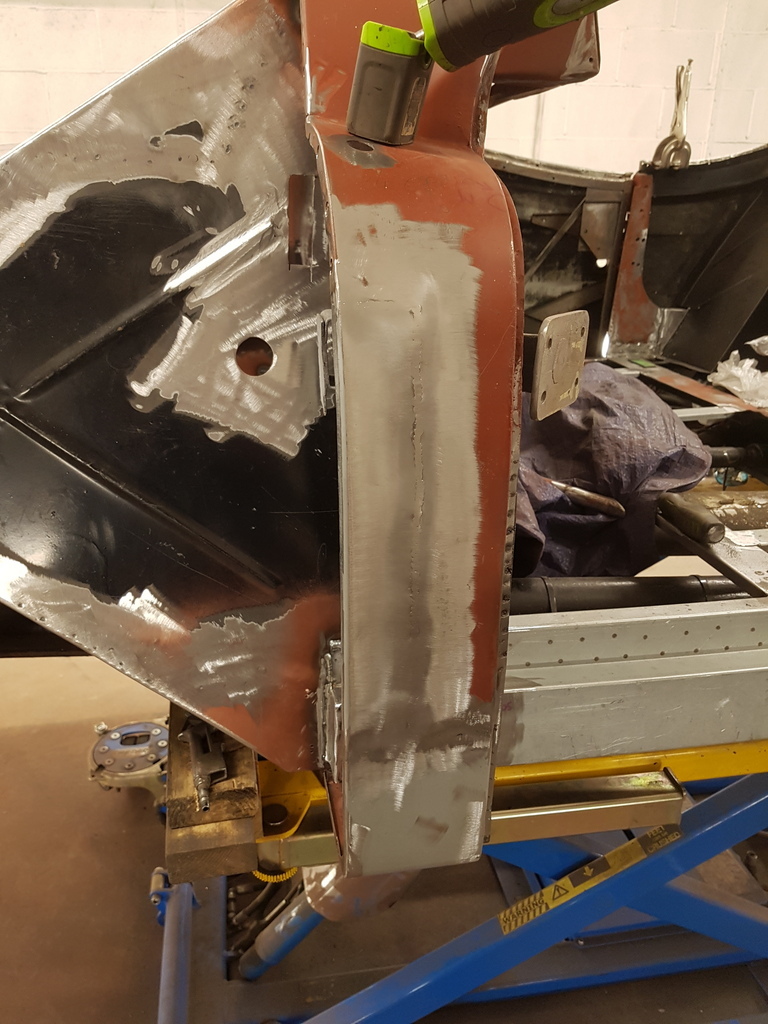 Fully welded & dressed back 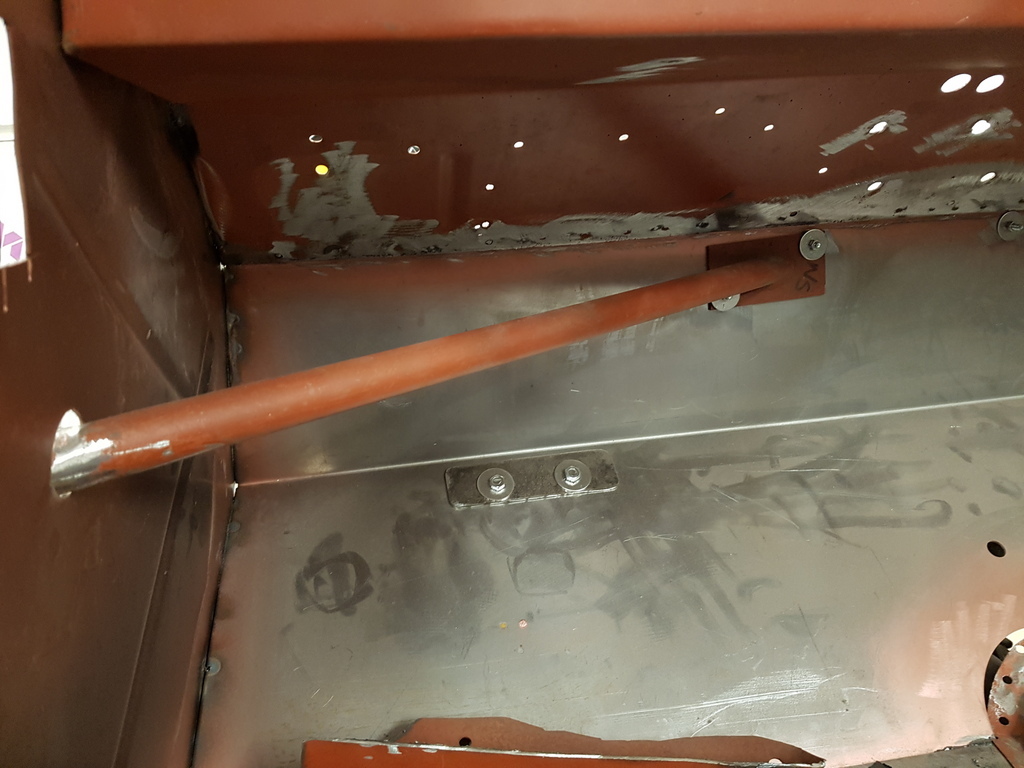 Top hinge support brace being trial fitted 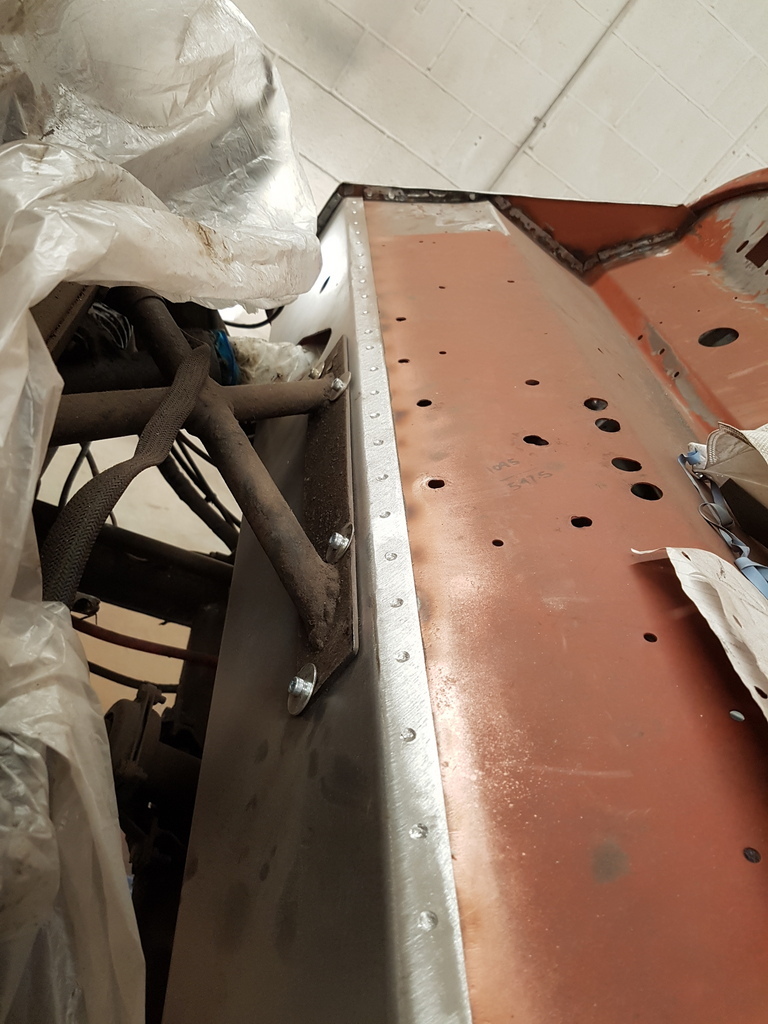 Bolts to the bulkhead chassis mounting 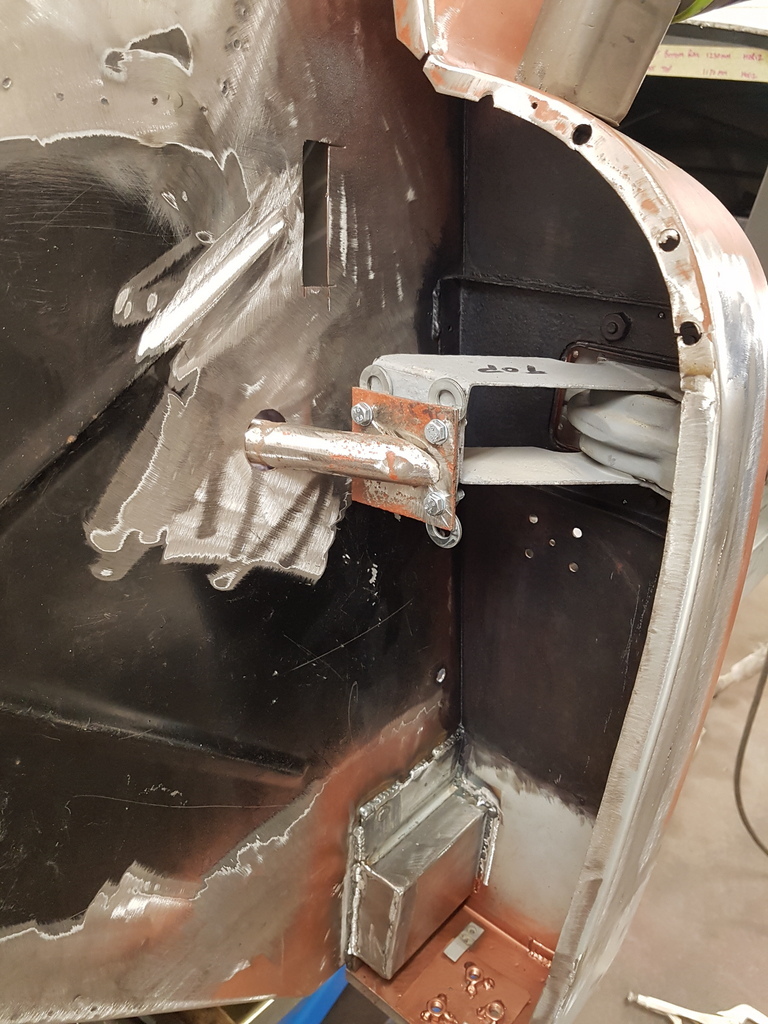 Then to the top hinge - Need to set all this up to determine the hinge plate location on the brace that has to be welded insitu 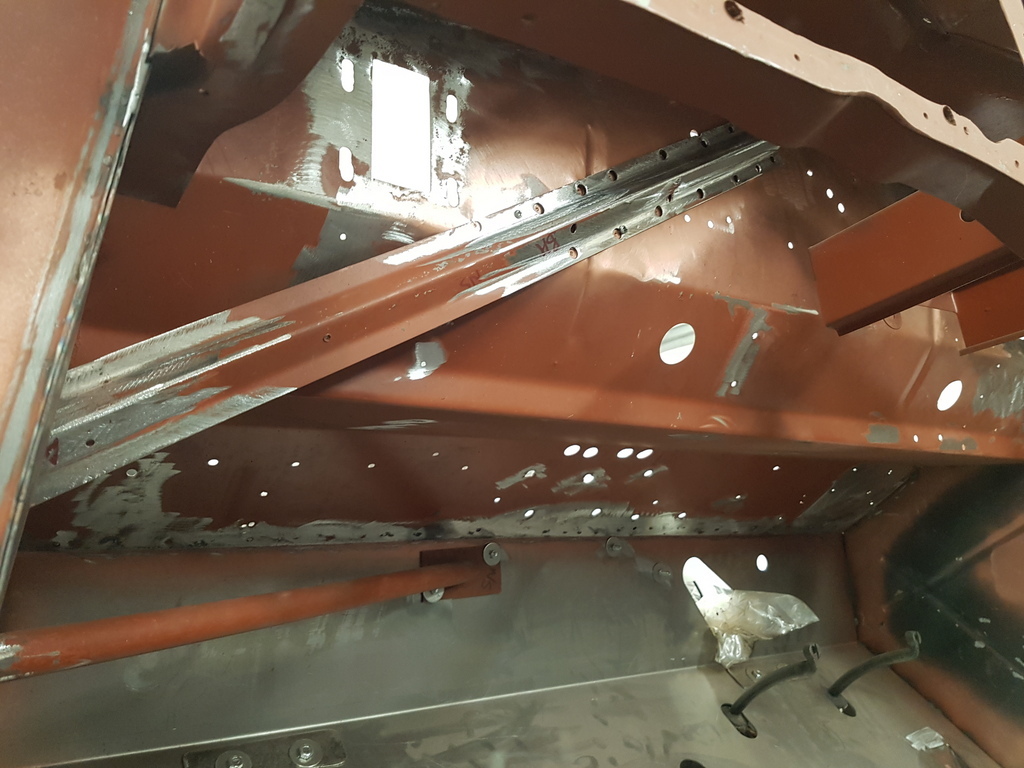 Then the A post support brace 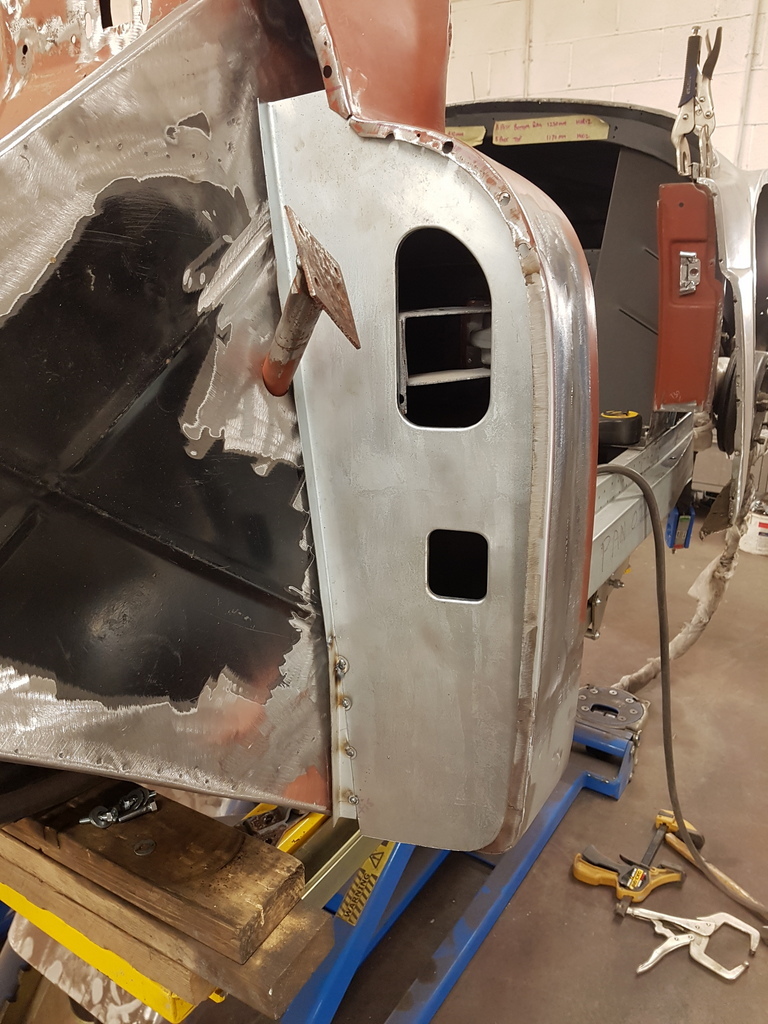 A post closing panel - still requires a few more adjustments prior to being fully fitted - the a post support brace gets plug welded to rear face of the panel and the hinge support brace bolts through the panel on the hinge back plate 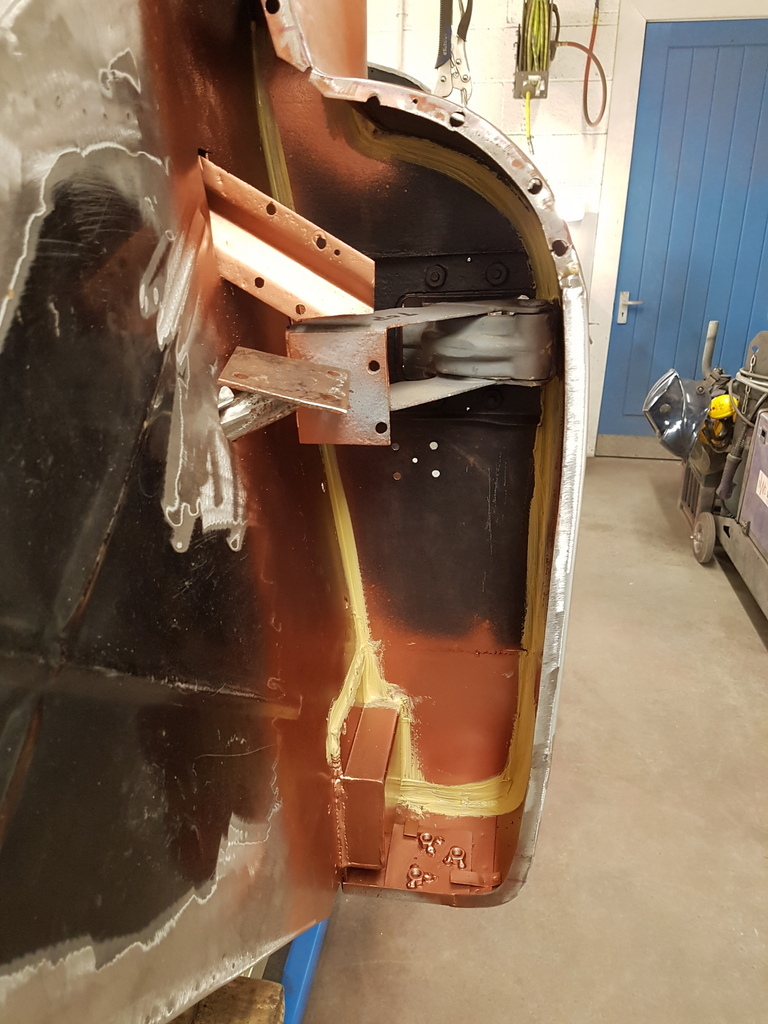 But whilst I have the access now is good time to seal the seams - More tomorrow |
| |
Last Edit: May 14, 2020 19:15:06 GMT by Deleted
|
|
|
|
|
May 14, 2020 22:30:11 GMT
|
|
That top hinge mount is crazy! John
|
| |
Last Edit: May 14, 2020 22:31:19 GMT by jjeffries
|
|
|
|
|
|
|
That top hinge mount is crazy! John John - The very early production cars did not have this fitted or the diagonal A post support brace back to the bulkhead - It was quickly found that the early cars suffered from the top door hinge sagging & scuttle / bulkhead shake - hence the early cars were recalled and the two braces added - later cars like this one were all factory fitted with the braces as standard to rectify the problem |
| |
Last Edit: May 15, 2020 6:27:17 GMT by Deleted
|
|
|
|
|
May 15, 2020 19:47:27 GMT
|
Front A post closing panel now trimmed to fit 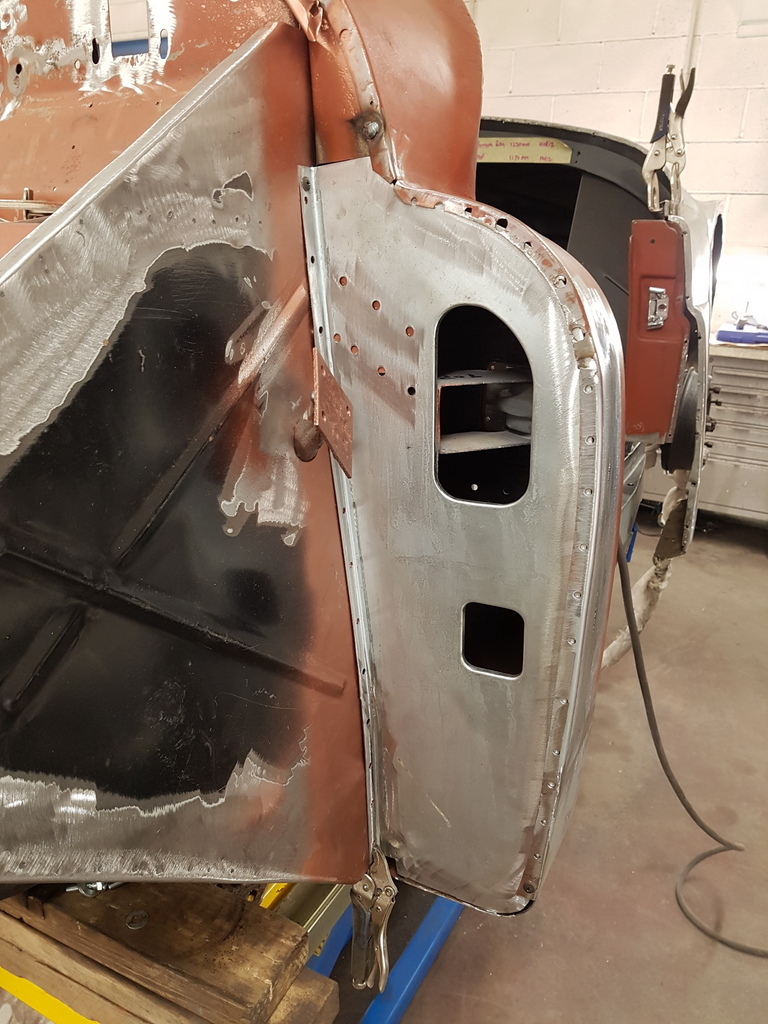 But I had to remove the bottom flange on the A post in order to slide it in 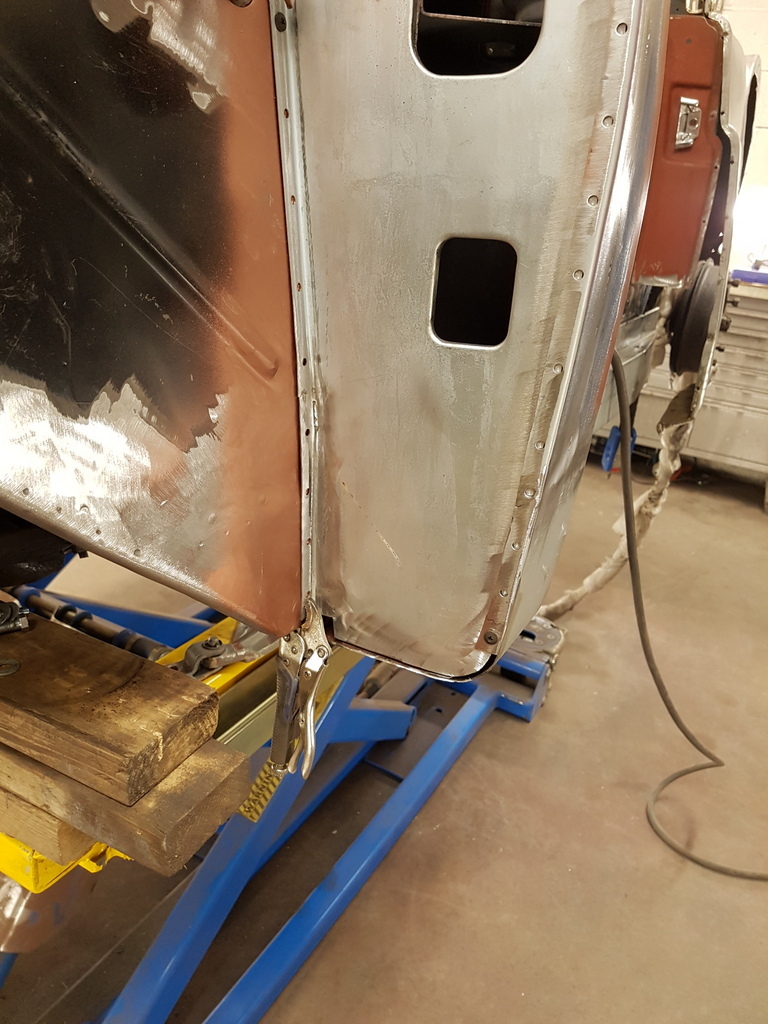 At the factory this panel would have been fitted from the rear to abut the flange and the door face of the A post fitted last - hence the flanged swage edge that they could access with spot welds 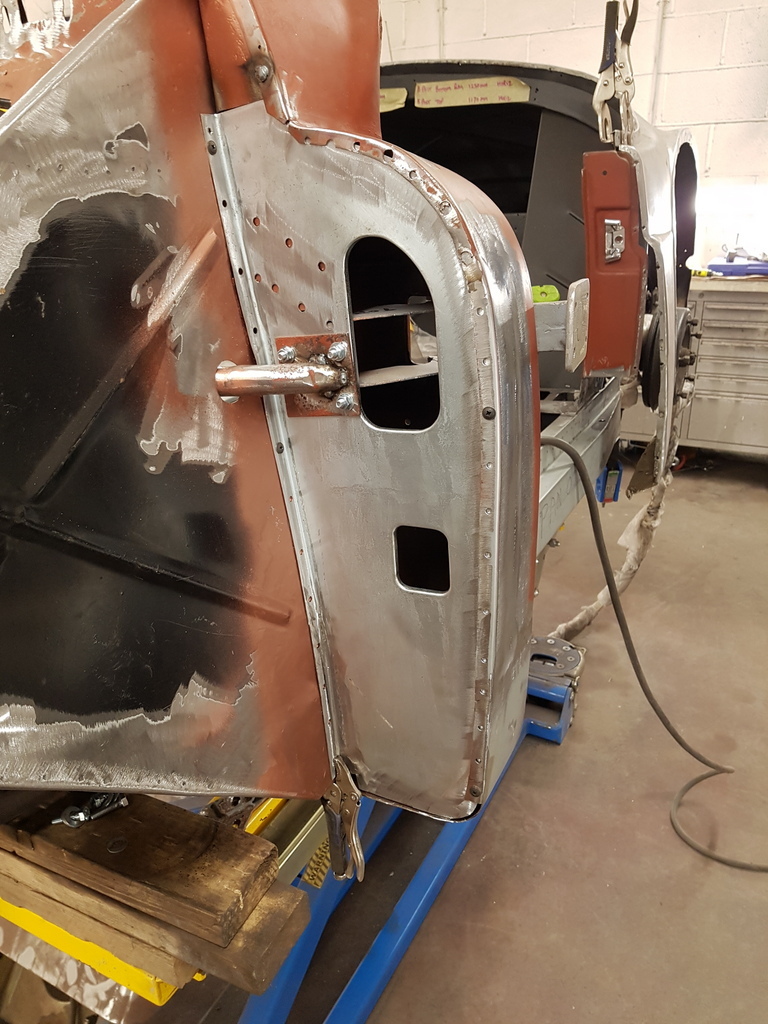 With door side face panel of the post remaining I don't have the luxury of being able to access it with the spot welder - hence it will be plug welded 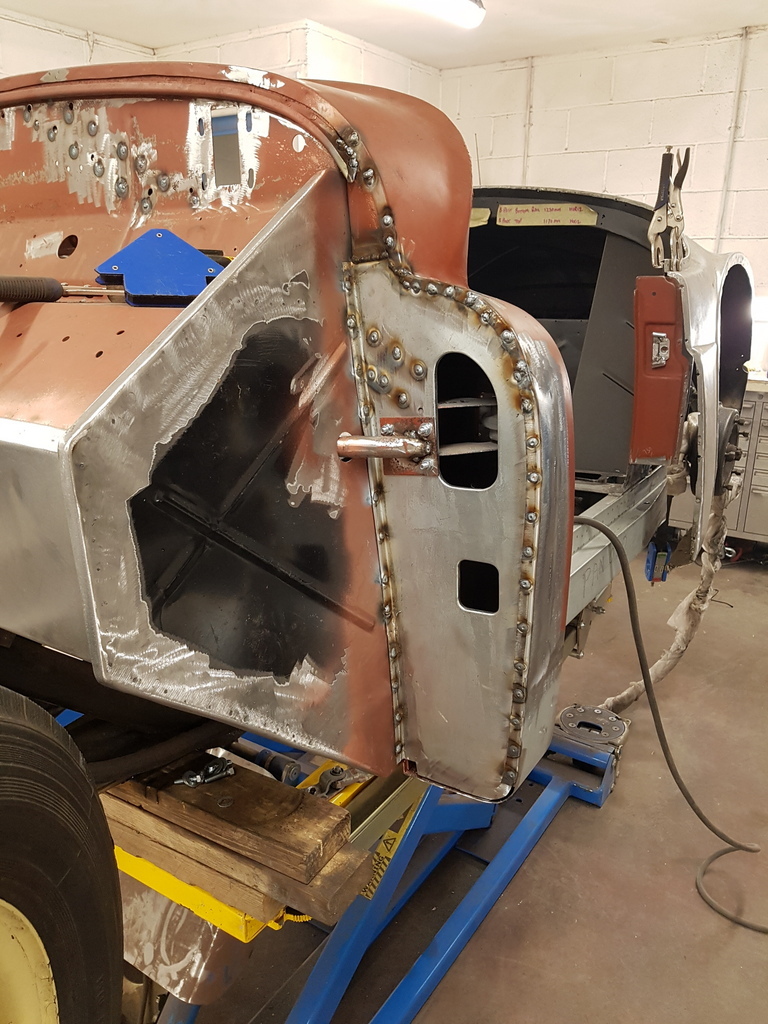 Welded 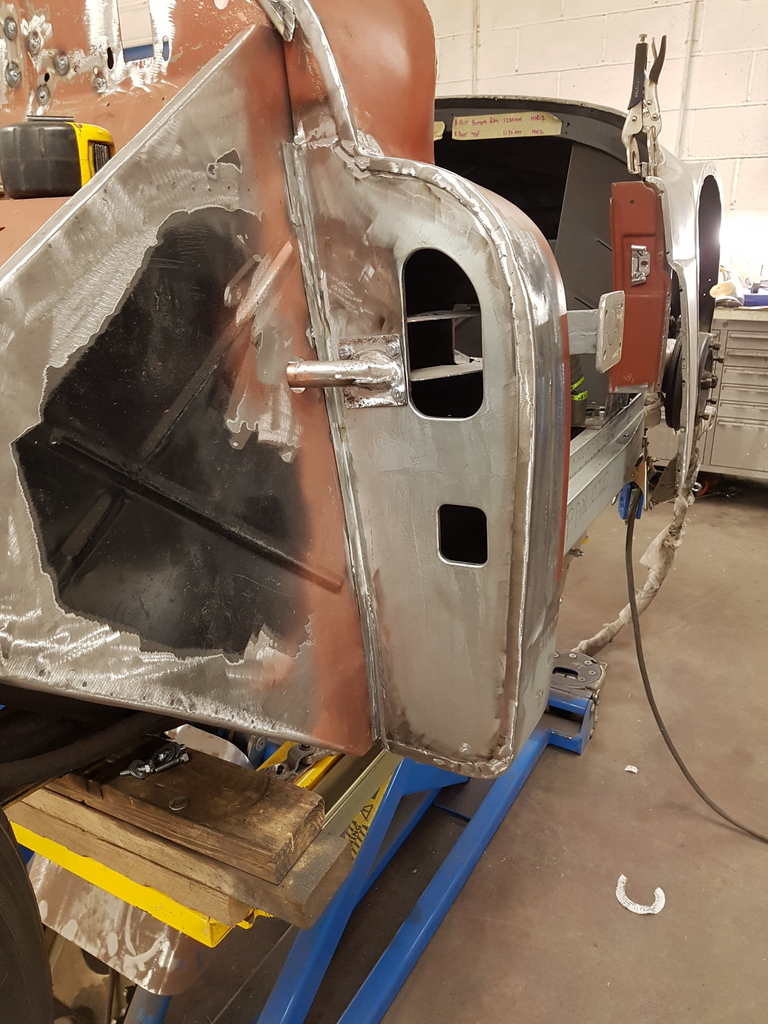 Dressed back 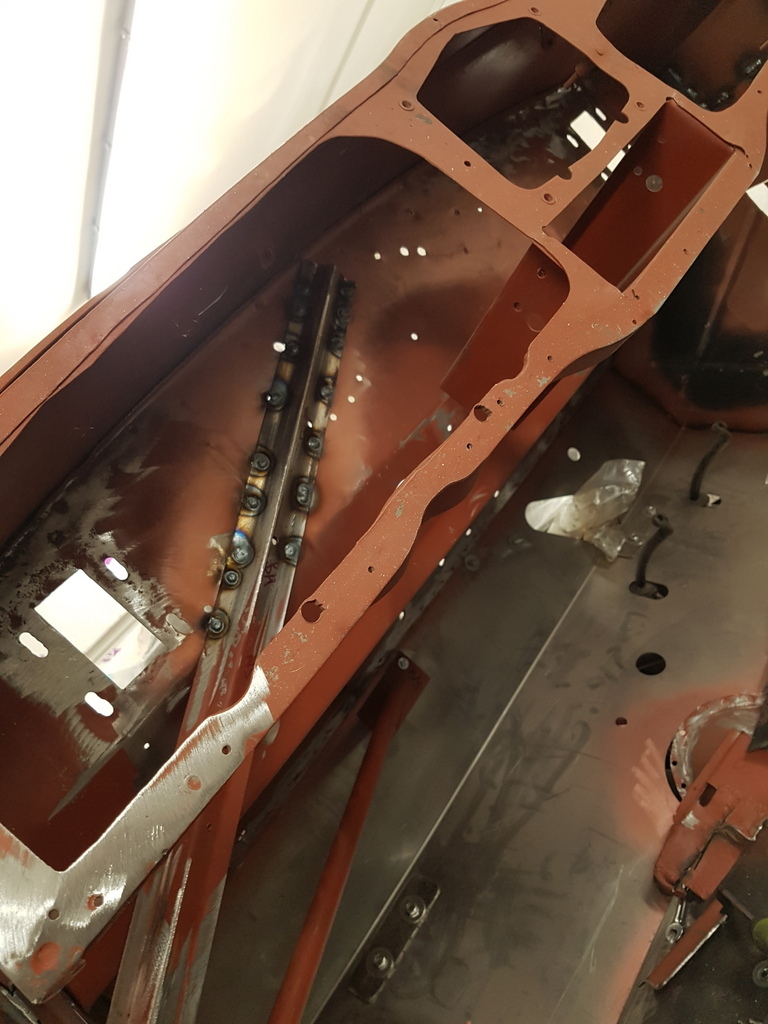 Brace welded to the bulkhead 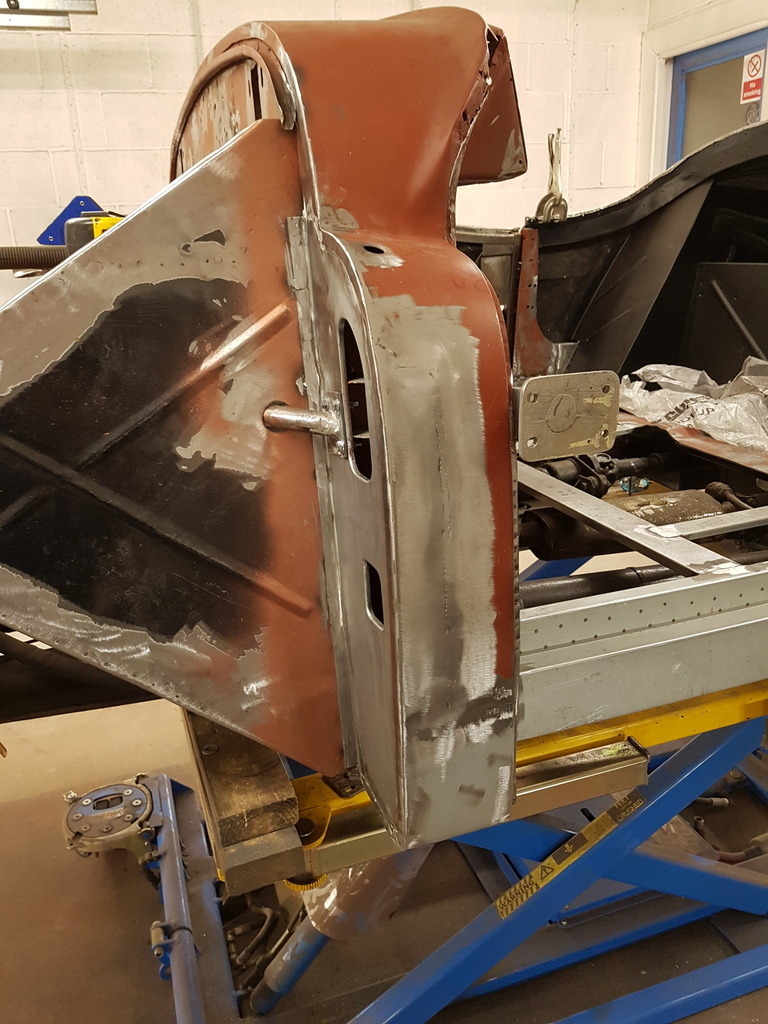 And the top hinge brace 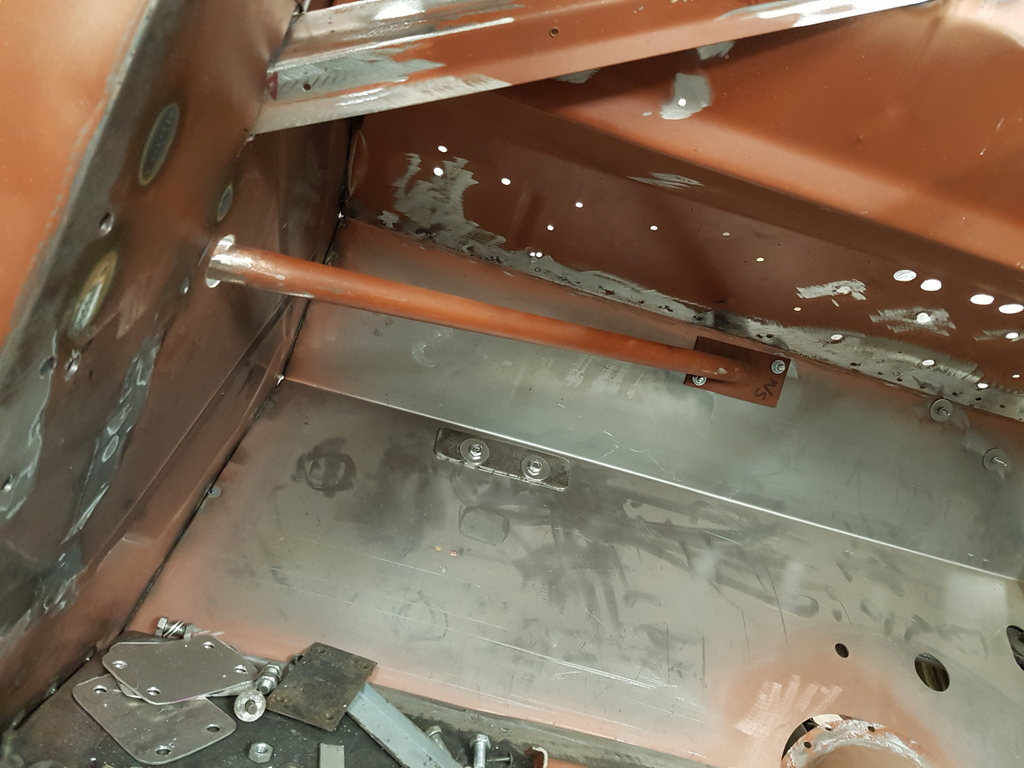 Now fully fitted 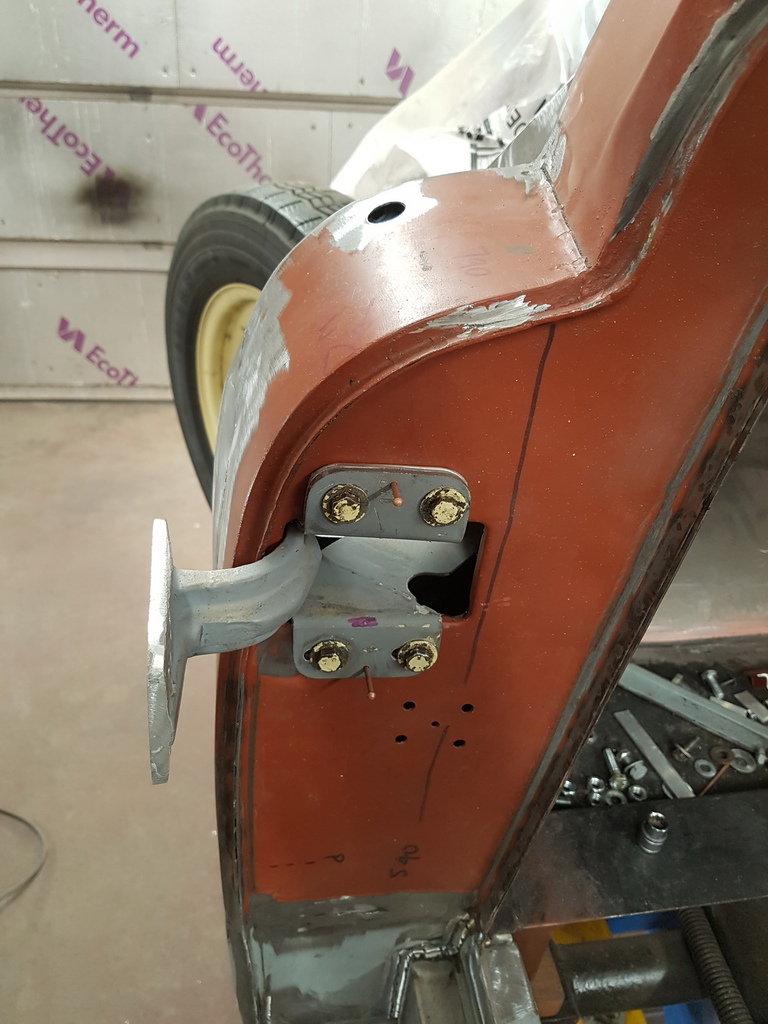 Shims made up for the top door hinge & fitted 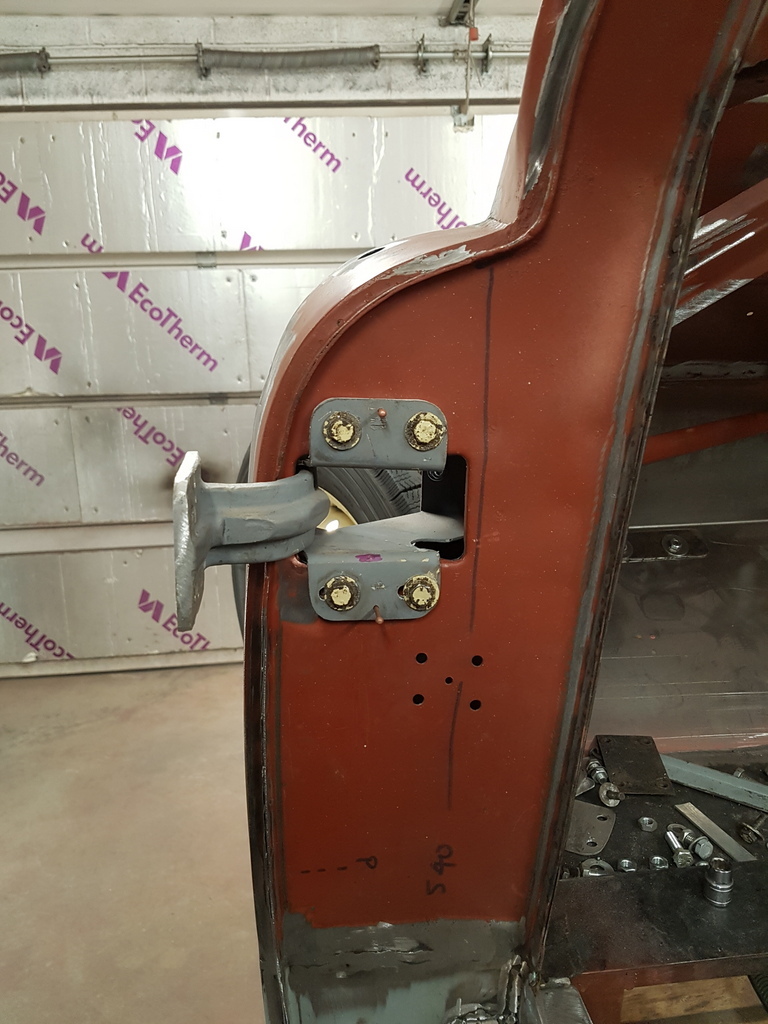 Note my use of hinge alignment location pins - these get removed once the hinge is bolted up in the correct location 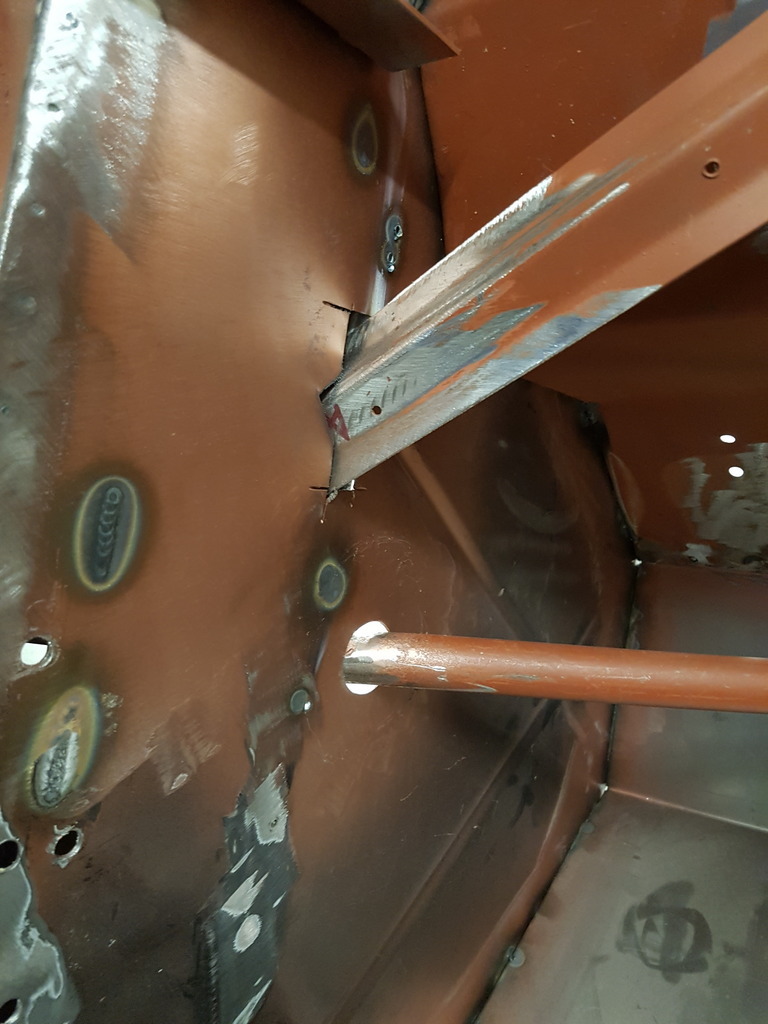 The 2 brace apertures to the bulkhead return panel will require closing plates fitted around them but I will deal with them once I have the offside A post completed then I can make a matched set up for both sides 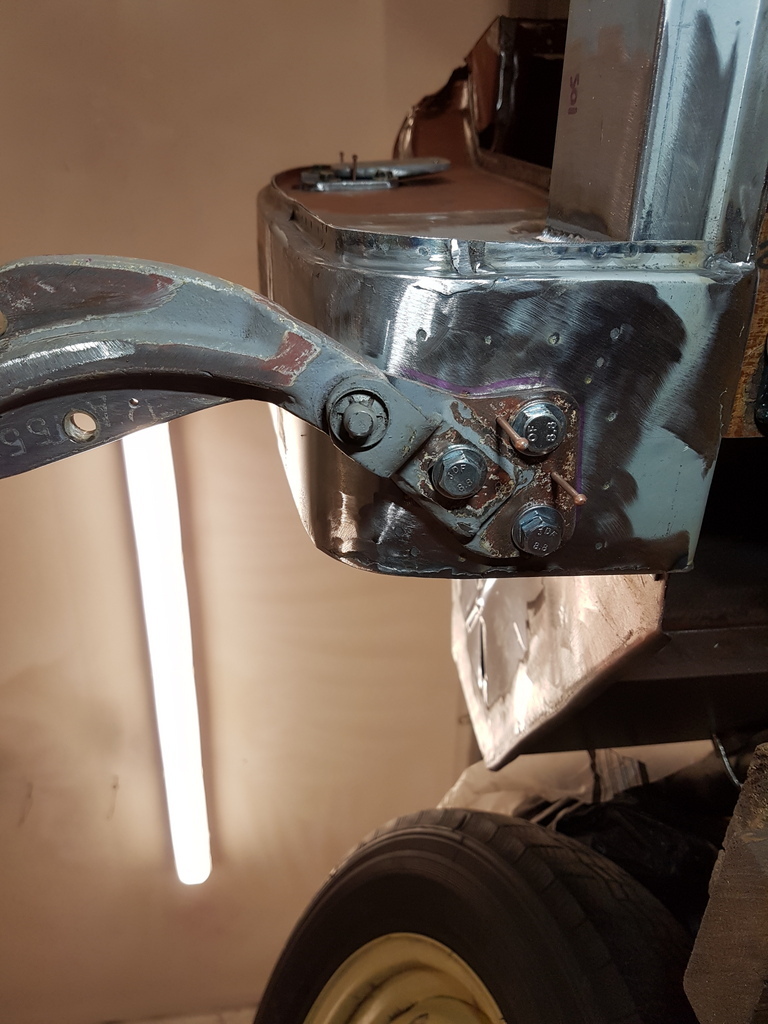 Bottom door hinge refitted 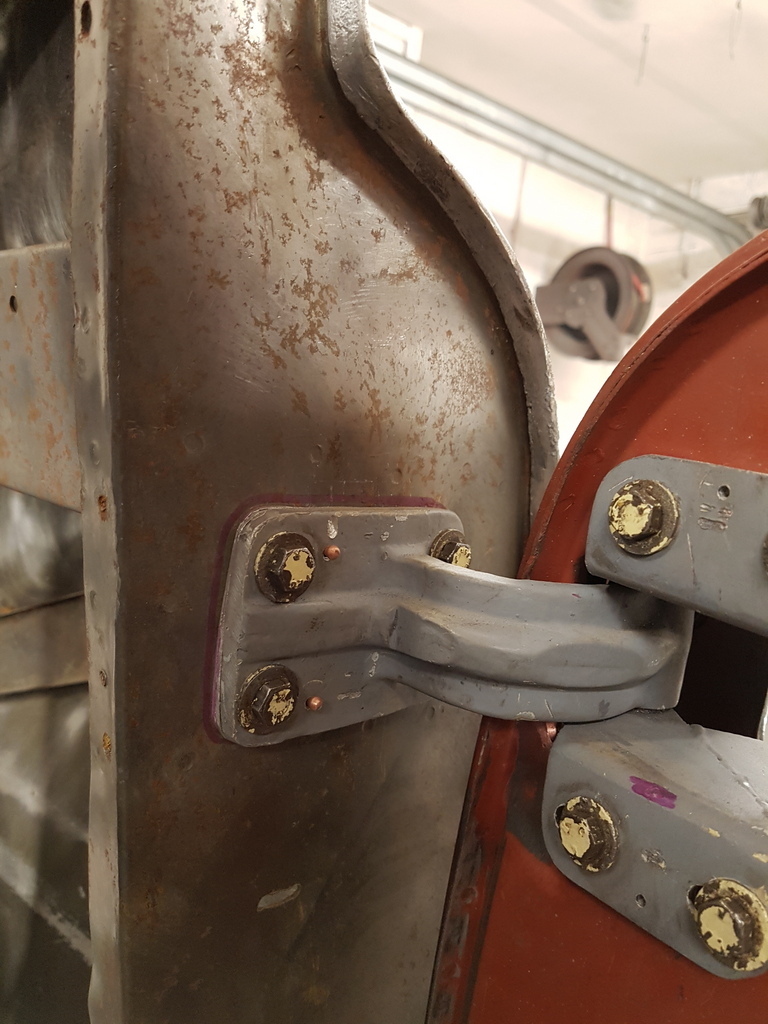 And the door rehung 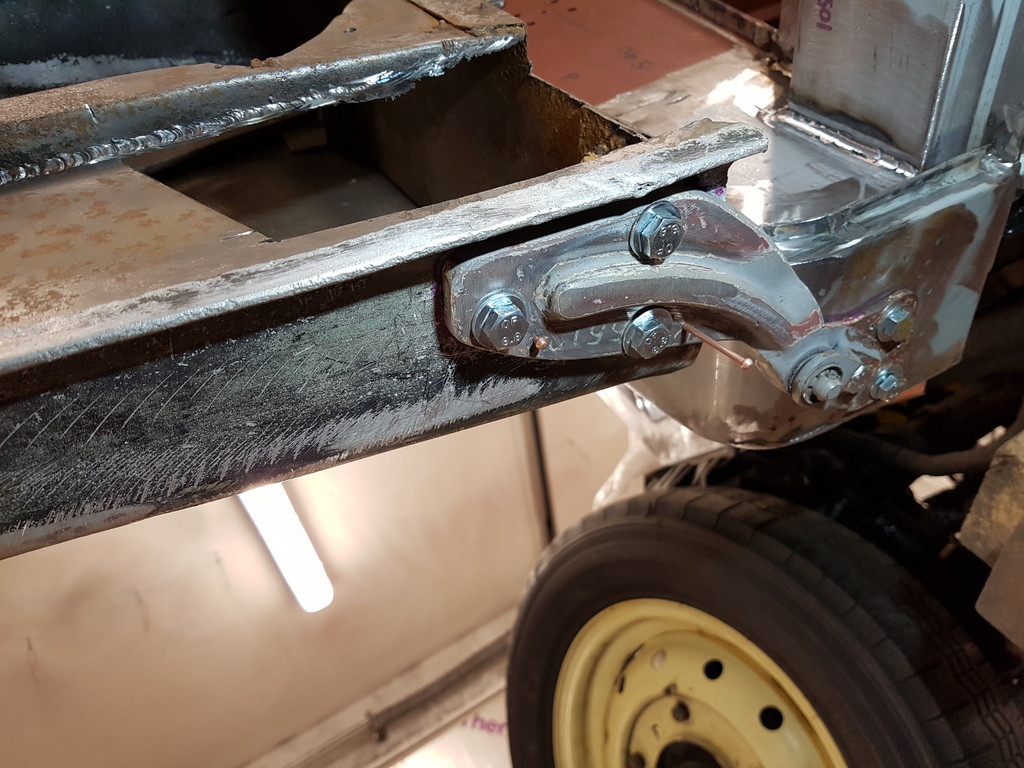 Hinge alignment pins used throughout 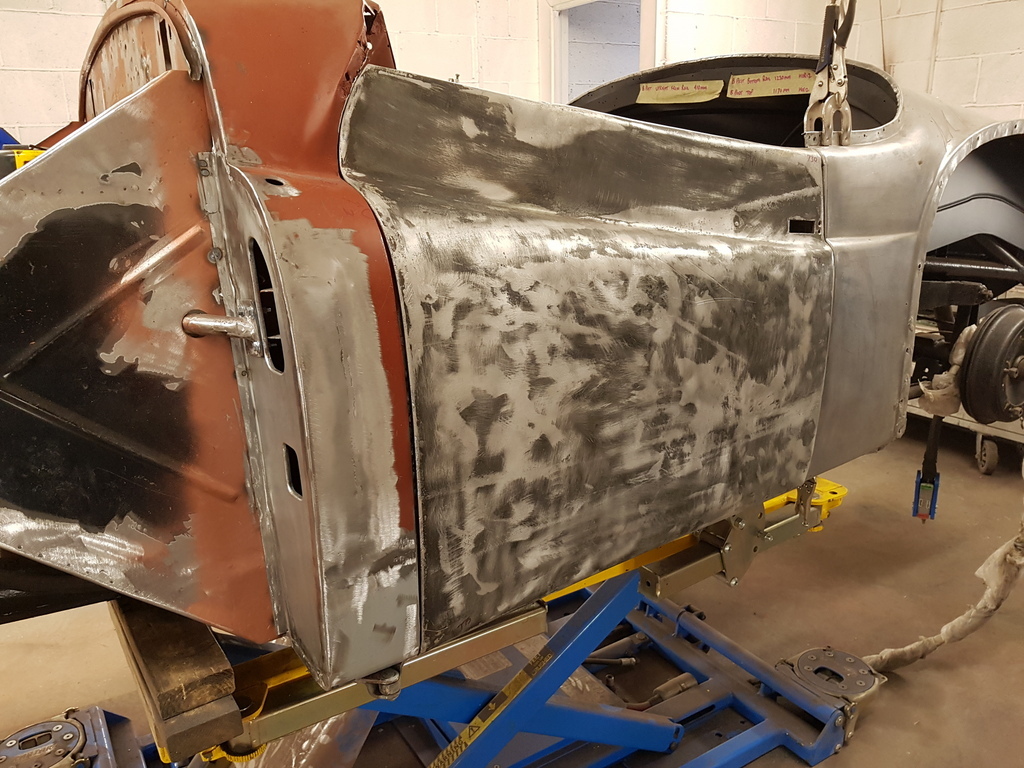 The door gapping still needs work but is basically where I need it in order to panel the rest of the car 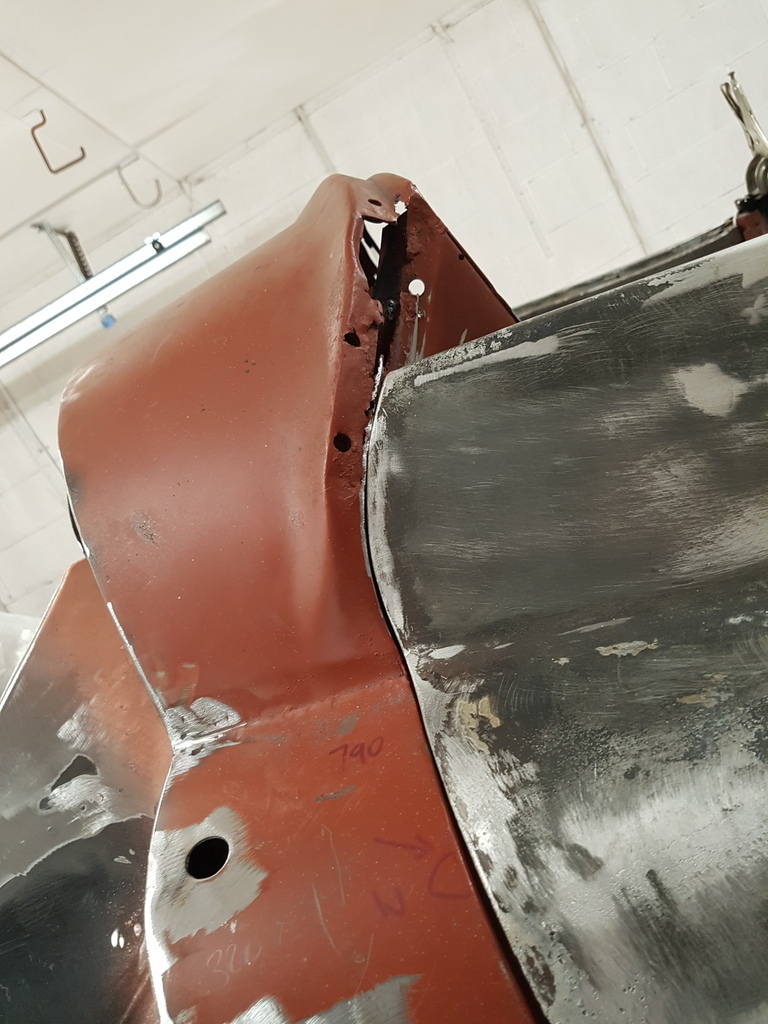 Its tight at the top front edge on both sides (normally is on all Jupiter's) - this I shall deal with in conjunction with the upper bulkhead repair around the windscreen frame mounting 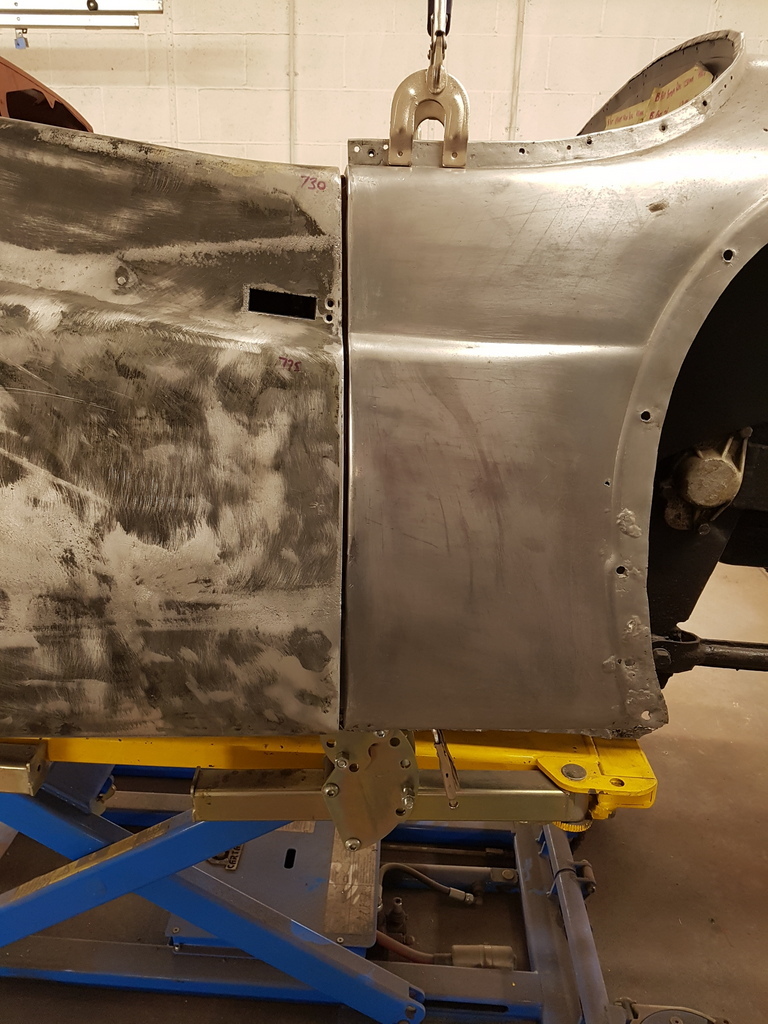 Rear edge is ok at the top 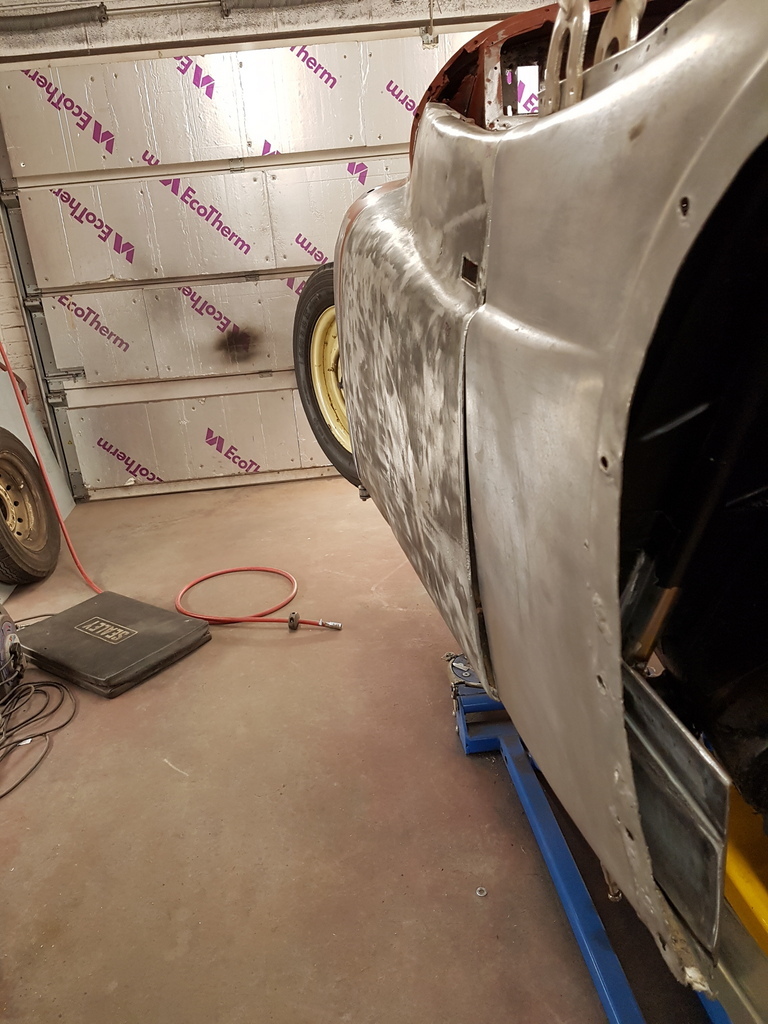 But very poor in the side profile at the bottom - I will deal with this has I rebuild the lower part of the B post - plus the entire section of the outer quarter panel is being replaced from the swage line down 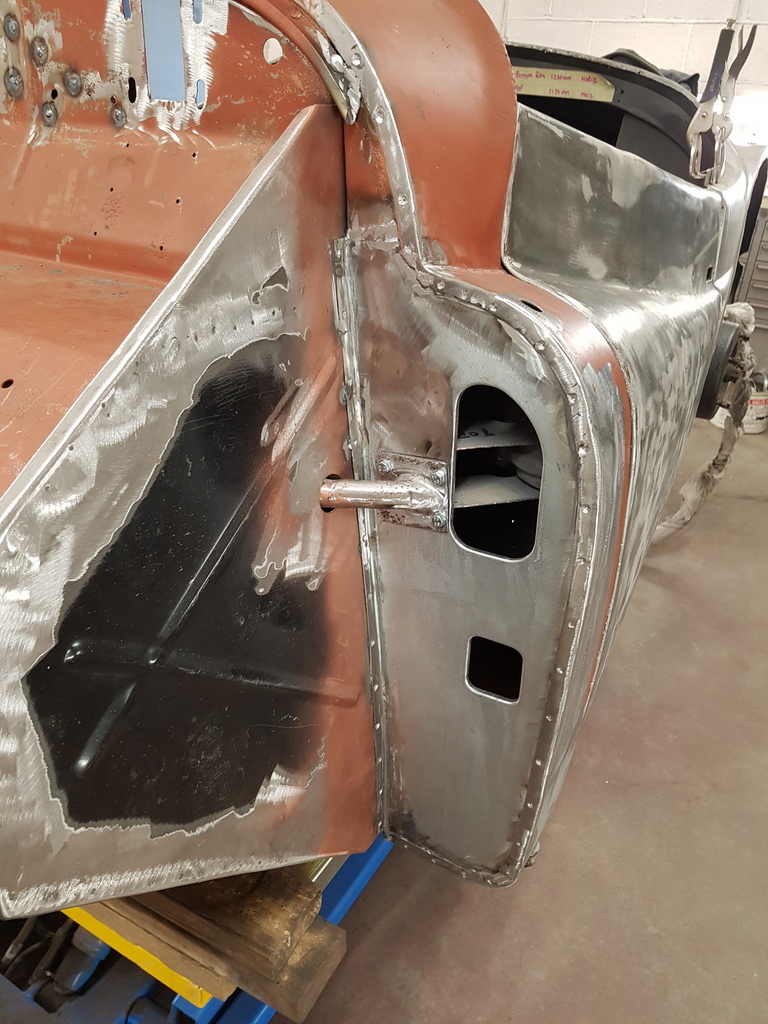 Just the spotweld indents drilled to complete the nearside A post 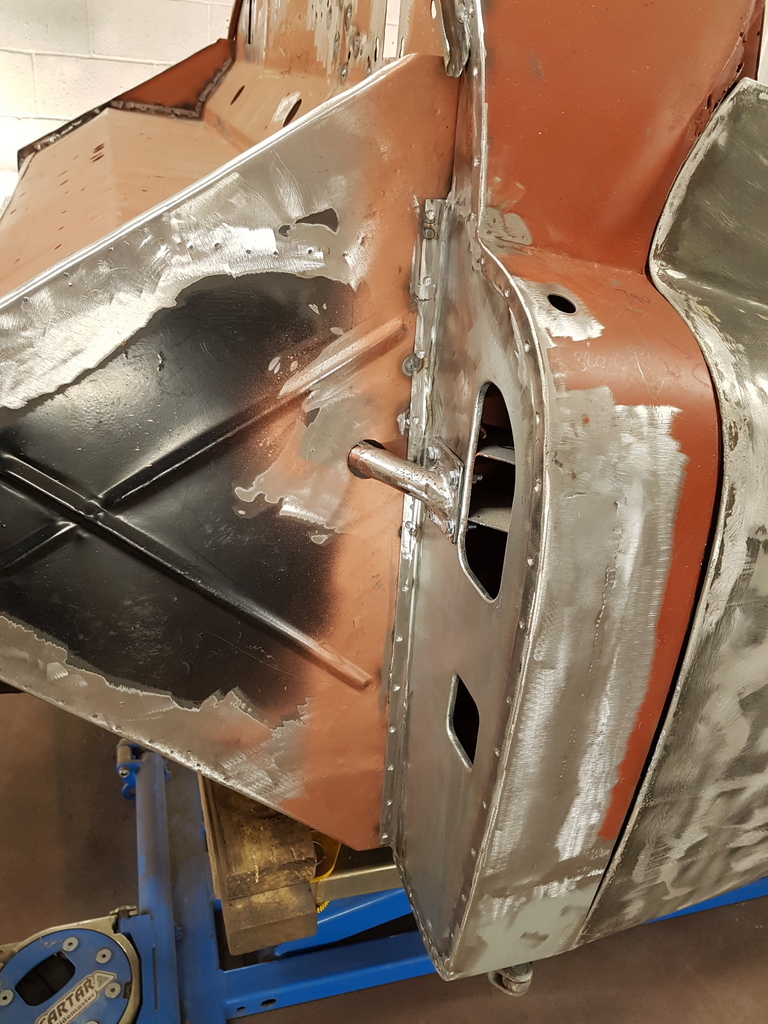 And found time to weld the propshaft cover into the front bulkhead - which just requires dressing back 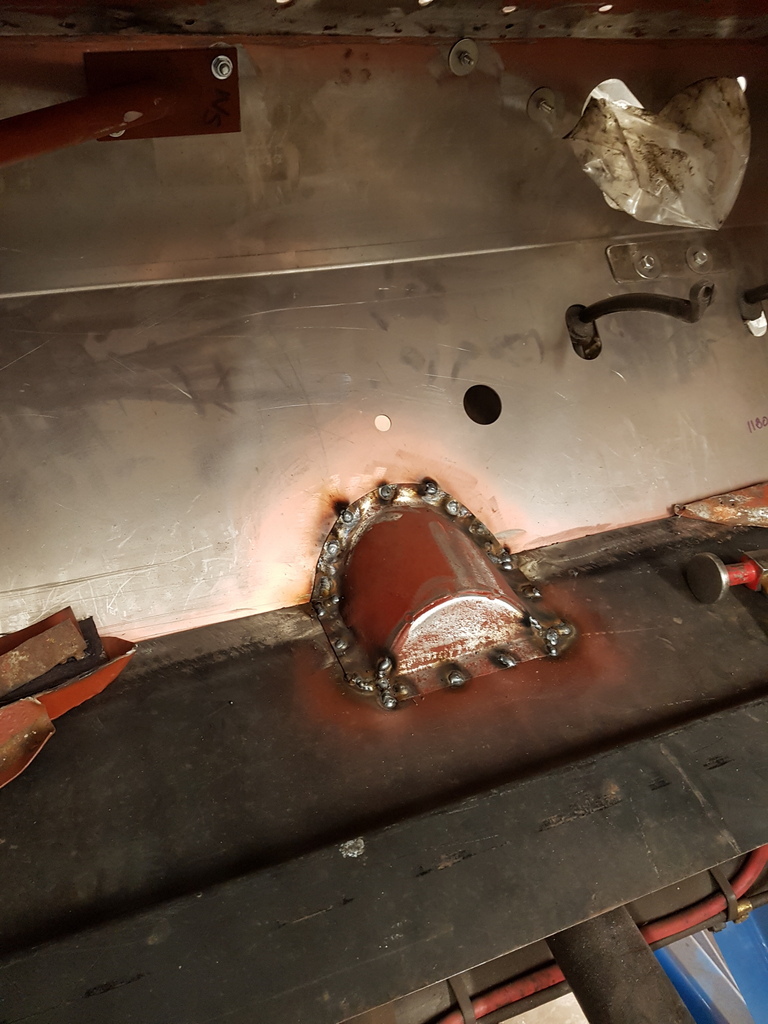 I will make a start on the offside A post in the morning |
| |
Last Edit: May 15, 2020 19:54:06 GMT by Deleted
|
|
|
|
|
May 16, 2020 10:48:41 GMT
|
|
Having done a couple before must really help sort out in your head the order each process has to be done in... it would certainly do my head in - I'm getting stressed just reading about it! Great posts as always, love the detail and how it all comes together and makes sense at the end of each sub-process! Thanks.
|
| |
1968 Mini MkII, 1968 VW T1, 1967 VW T1, 1974 VW T1, 1974 VW T1 1303, 1975 Mini 1000 auto, 1979 Chevette, 1981 Cortina, 1978 Mini 1000 1981 Mini City, 1981 Mini van, 1974 Mini Clubman, 1982 Metro City, 1987 Escort, 1989 Lancia Y10, 1989 Cavalier, 1990 Sierra, 1990 Renault 19, 1993 Nova, 1990 Citroen BX, 1994 Ford Scorpio, 1990 Renault Clio, 2004 Citroen C3, 2006 Citroen C2, 2004 Citroen C4, 2013 Citroen DS5. 2017 DS3 130 Plenty of other scrappers!
|
|
|
|
|
May 16, 2020 12:49:25 GMT
|
Having done a couple before must really help sort out in your head the order each process has to be done in... it would certainly do my head in - I'm getting stressed just reading about it! Great posts as always, love the detail and how it all comes together and makes sense at the end of each sub-process! Thanks. Yes it does help knowing what direction to head in - just has well I only have another 4 Jupiter's in the pipeline to restore over the next few years  (amongst other restoration projects) - but I like doing the write ups has much as the physical restoration side of things - plus it documents the restoration for the owners |
| |
Last Edit: May 16, 2020 19:57:28 GMT by Deleted
|
|
|
|
|
May 16, 2020 20:03:50 GMT
|
A few bits advanced this morning 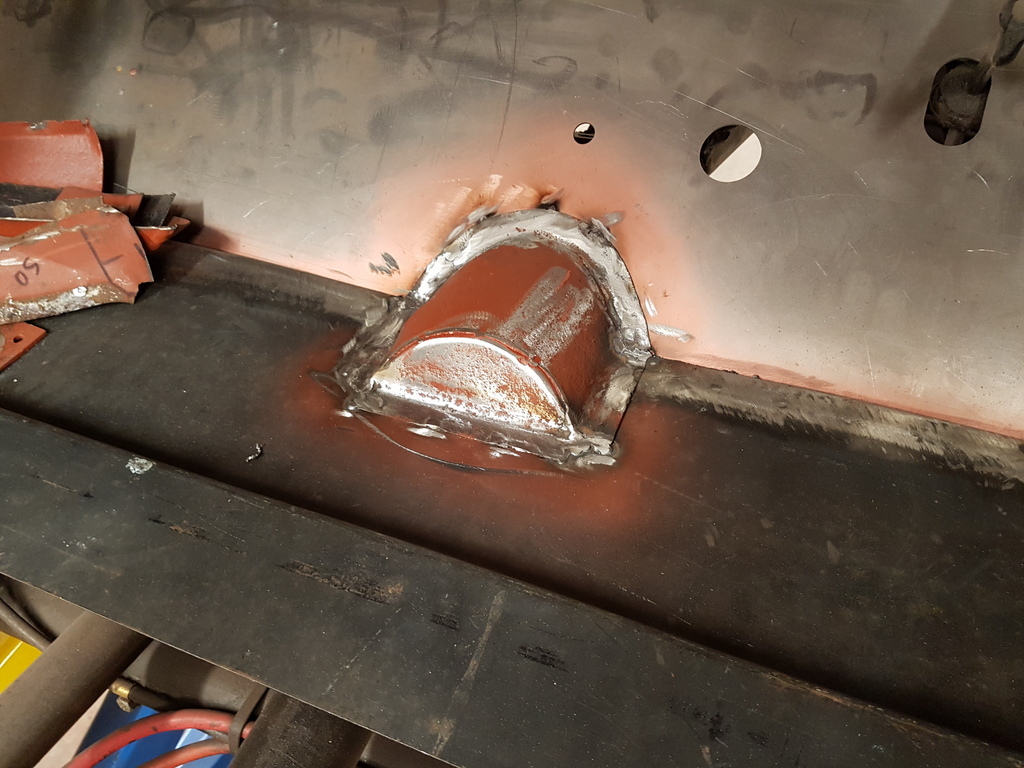 Propshaft cover dressed back after being welded in 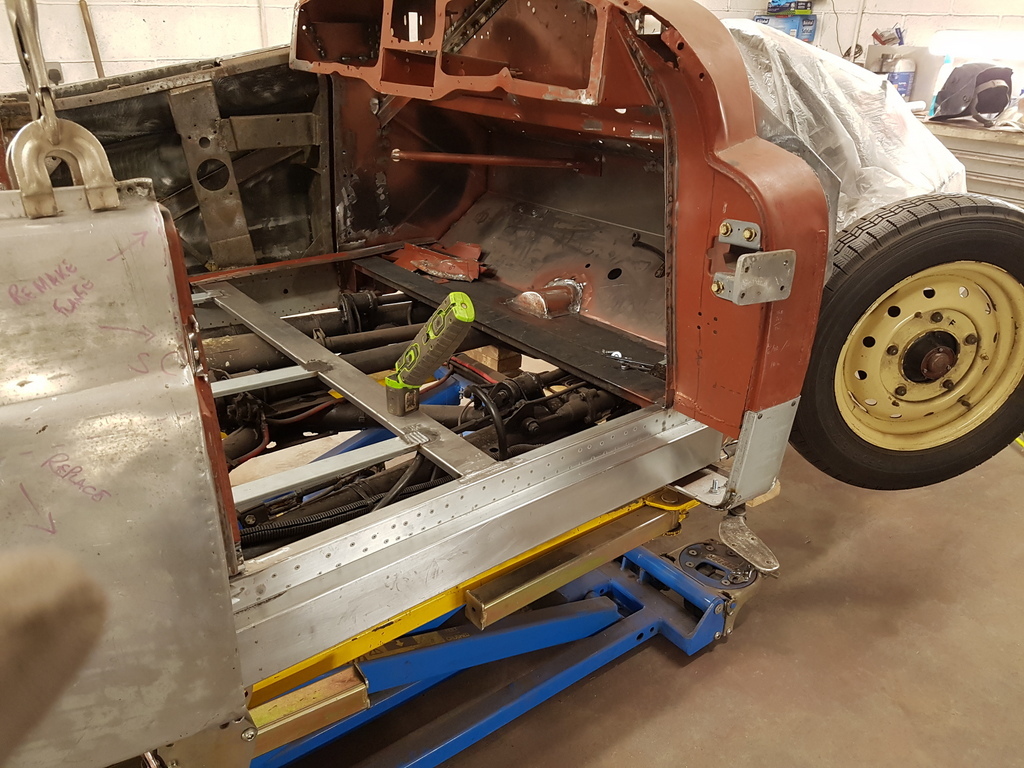 Made a start on the offside A post - door removed to allow access once I had drilled for hinge alignment pins 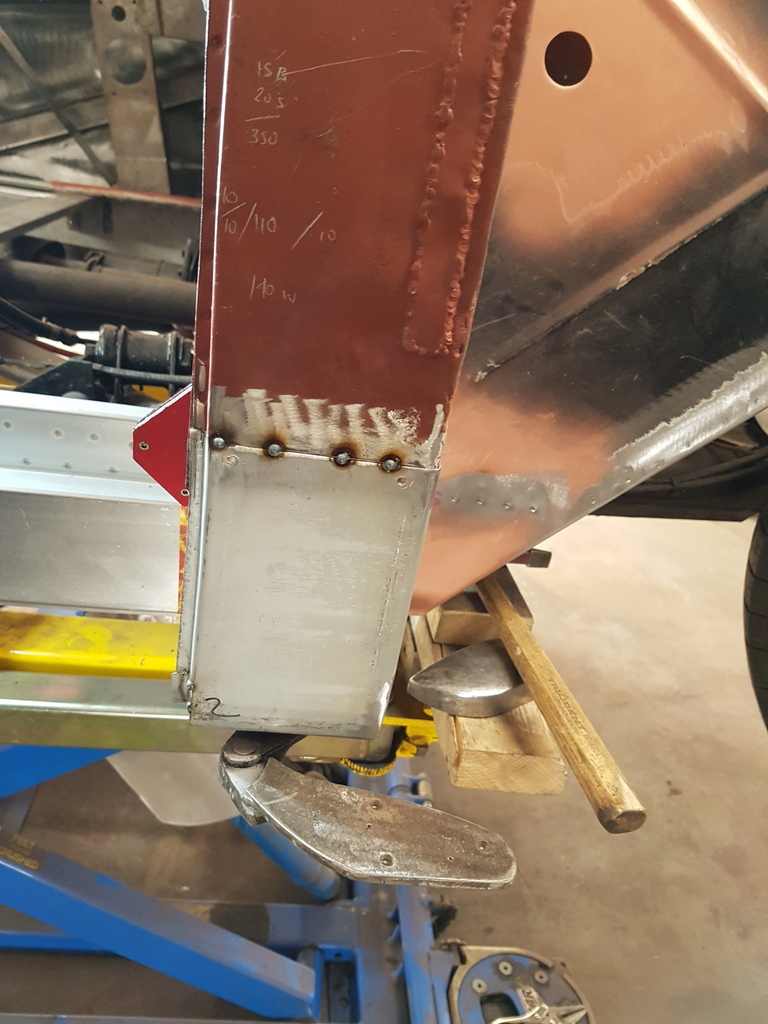 A post face & base repair panel that I had previously fabricated tacked in 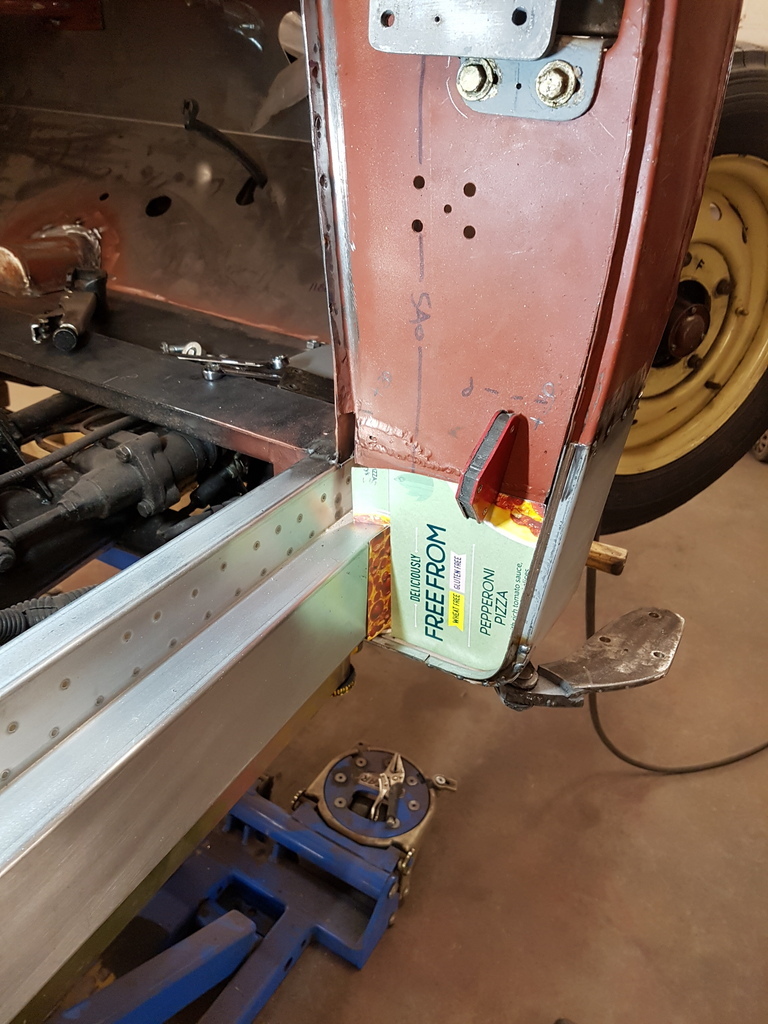 Inner door face to post patterned up 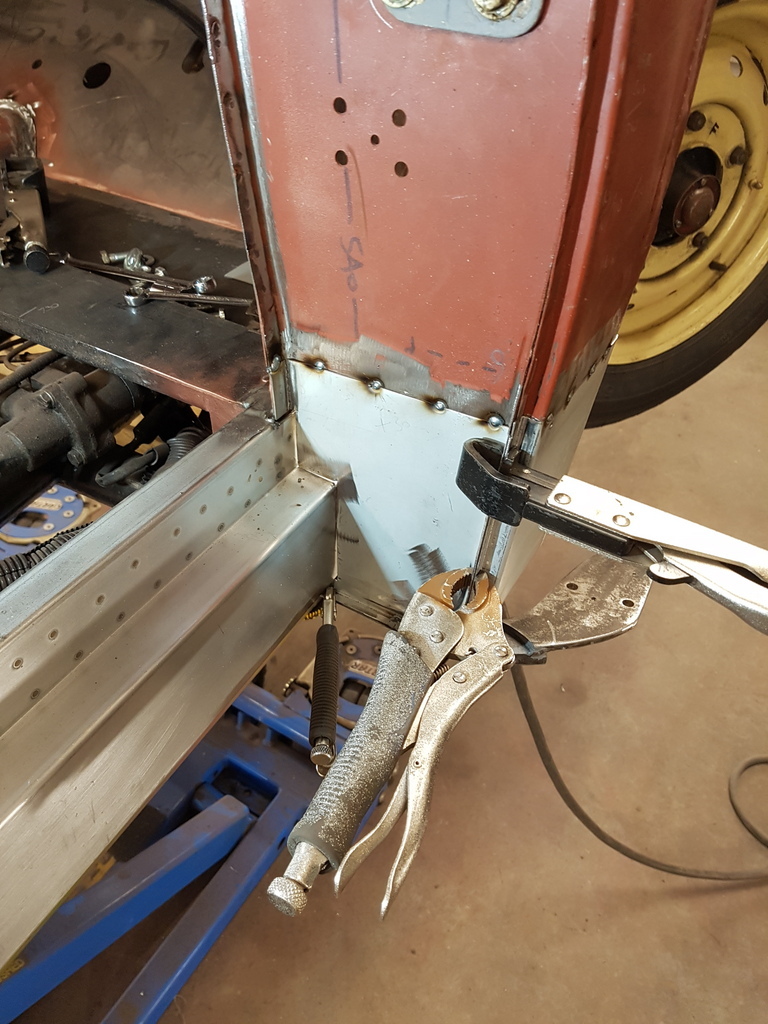 Fabricated & trail fitted 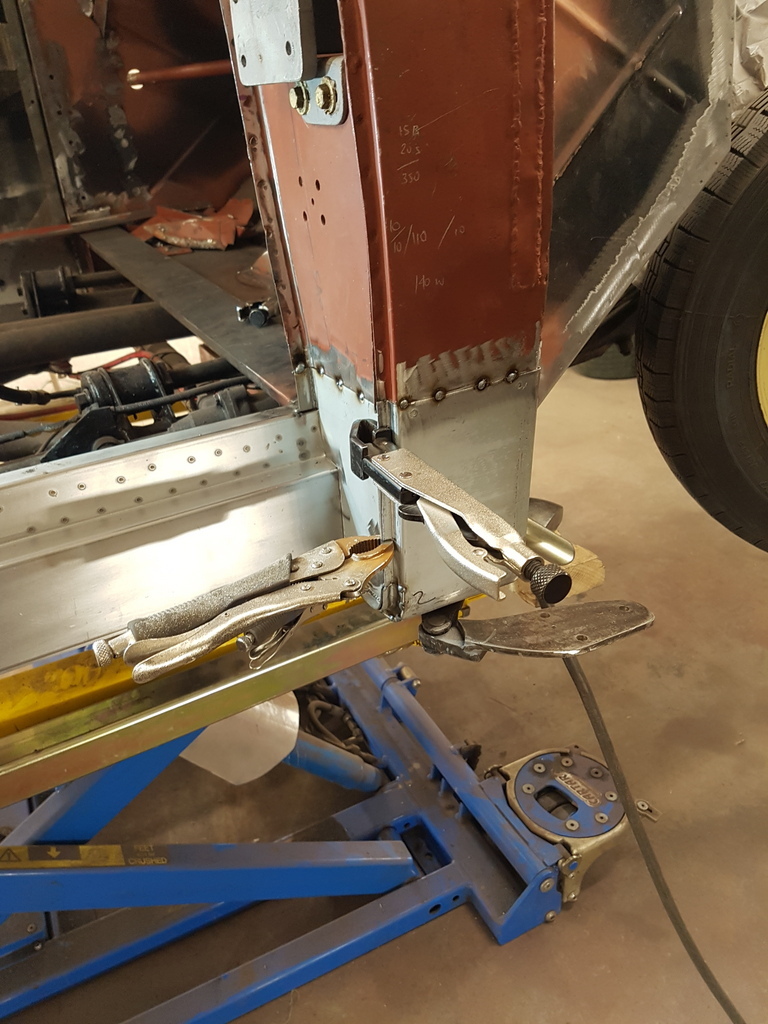 Ready for tacking up and then the door can be refitted to check for fitting & tolerances More on Monday |
| |
|
|
|
|


 (amongst other restoration projects) - but I like doing the write ups has much as the physical restoration side of things - plus it documents the restoration for the owners


