|
|
|
Jul 24, 2020 11:44:59 GMT
|
My one memory of my mate's shortlived MG Midget project was that the bonnet didn't open very far, meaning you were always hunched up trying to work on it. I was thinking a set of funky dual-action bonnet hinges from something like an E60 BMW would really help things out as they sort of lift up and out rather than just swing upwards. Could get the bonnet way out of your way with those  |
| |
|
|
|
|
pptom
Part of things
 
Posts: 475 
|
|
Jul 24, 2020 12:10:34 GMT
|
My one memory of my mate's shortlived MG Midget project was that the bonnet didn't open very far, meaning you were always hunched up trying to work on it. I was thinking a set of funky dual-action bonnet hinges from something like an E60 BMW would really help things out as they sort of lift up and out rather than just swing upwards. Could get the bonnet way out of your way with those  Good idea, although I'll never need to open the bonnet when it's finished  I'll have a look, the bonnet was the first thing to come off, so I should really trial fit it soon. The hinges are a bit queer on these that they go through the bulkhead and pivot around a single pin, just behind the dash, probably why they don't open much. Might involve a bit too much engineering at this stage but it's worth investigating. |
| |
|
|
|
|
|
Jul 24, 2020 12:15:16 GMT
|
That's the attitude  They weren't too tricky to fit to my Spitfire. Should be well within your capabilities  Thinking about it though, E60 hinges probably wouldn't be what you're after. The reason they work on the Spit is they open out and forwards, which isn't what you'd want. A lot of boot hinges do what you'd want though, so something like the Boxster boot hinges and the like, if you fancied giving it a go  |
| |
|
|
pptom
Part of things
 
Posts: 475 
|
|
Sept 13, 2020 7:54:10 GMT
|
I've been quietly beavering away at the bodywork and got the car painted, wet sanded and polished. Pretty happy with the result, better than painting the Lotus, I think I've learnt from some of my previous mistakes and was generally a bit calmer and slower this time around, no runs. Started adding a few trinkets to the rear end. 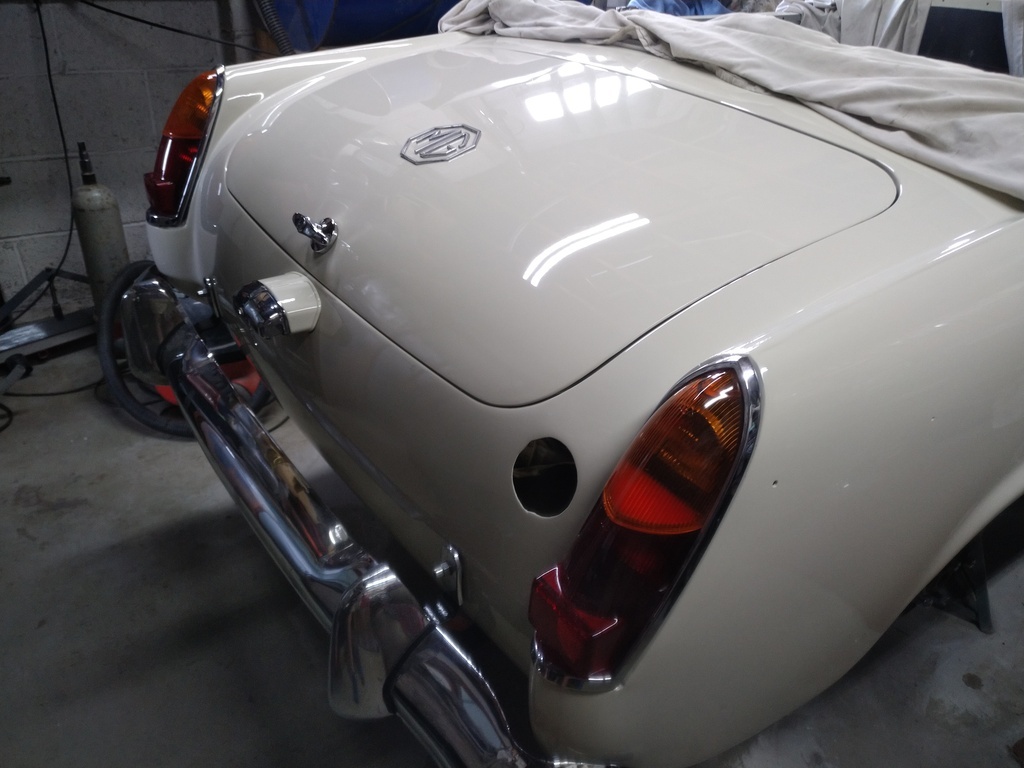 Finally shifted the last motorbike so had a bit of space to play. First job was some rough chops in the engine bay for clearance. Before 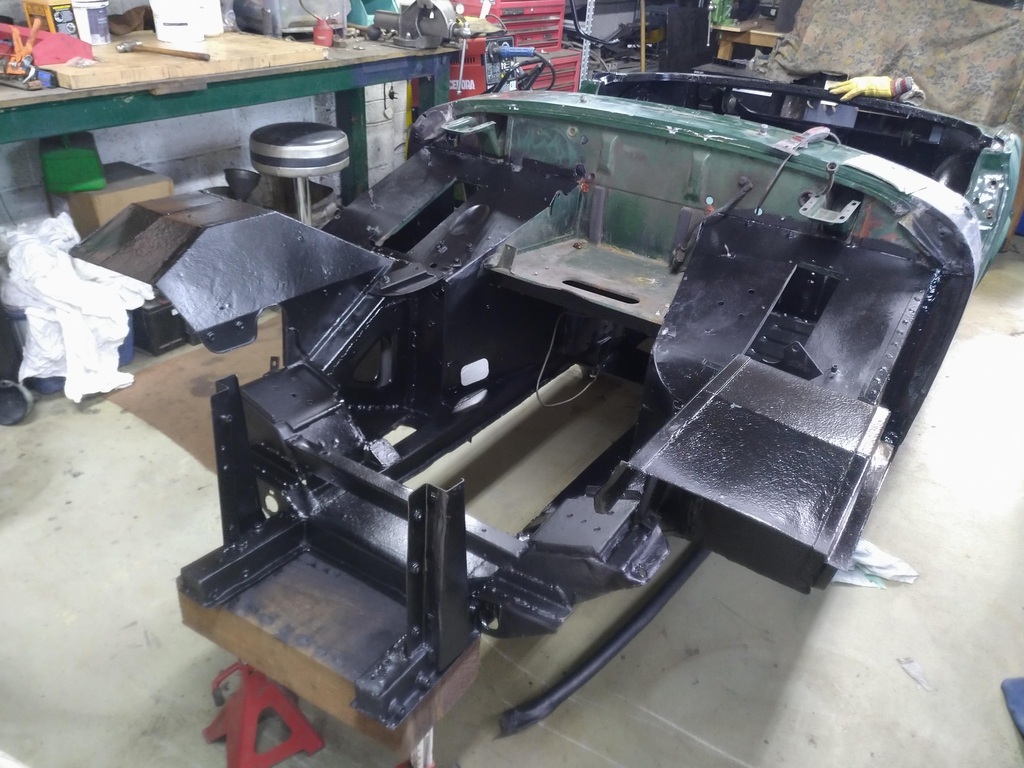 After 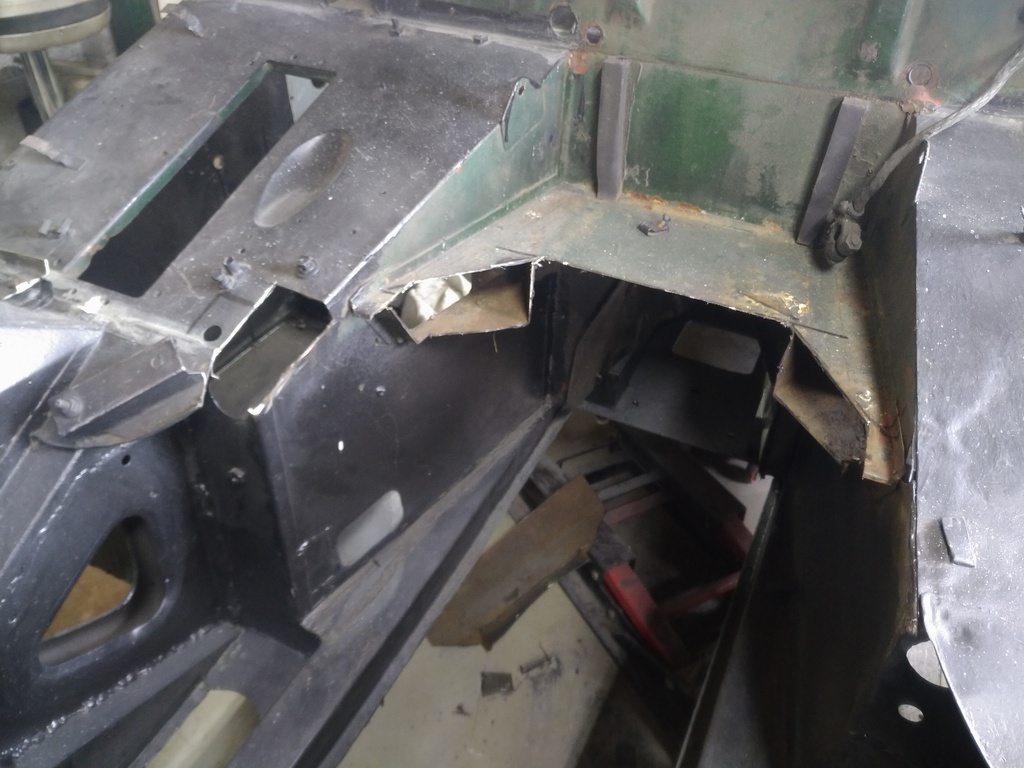 Had to relieve a bit next to where the steering column exits the bulkhead so the inlet manifold would clear. The other option would be to convert to maybe bike carbs, but that would involve changing the management etc and I wanted to keep the plug and play simplicity of it. Going to be close, bolting the column in today to check and make the closing piece. 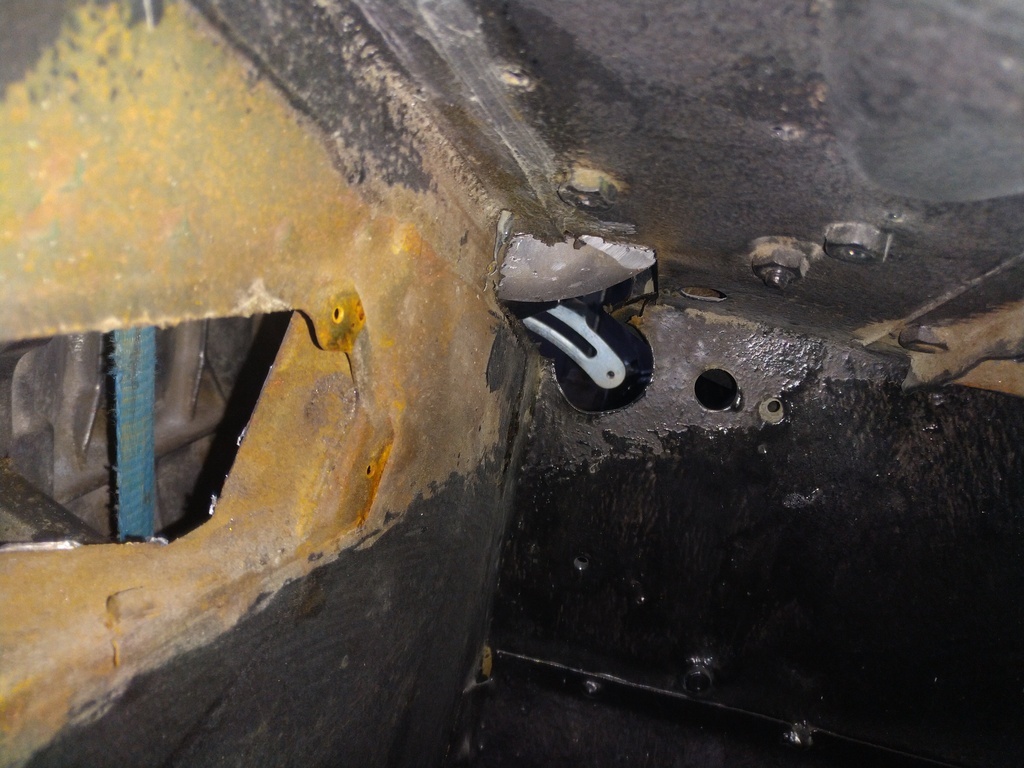 Finally, a shot of the gearstick location which should work nicely 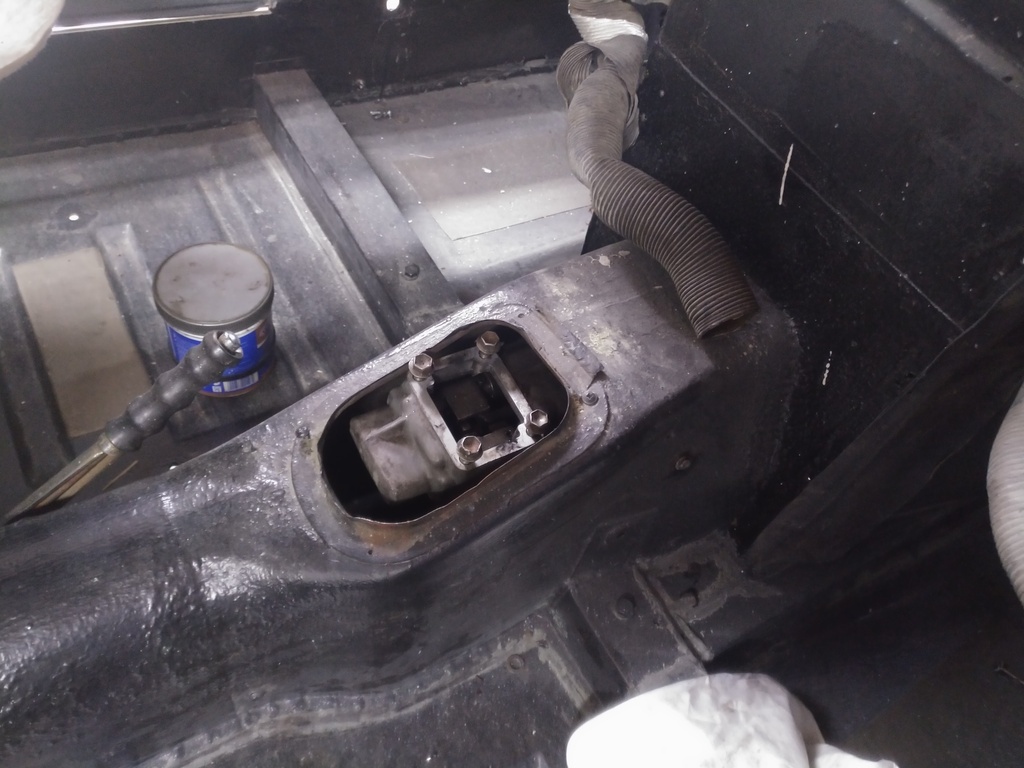 |
| |
|
|
|
|
|
Sept 13, 2020 8:13:06 GMT
|
|
Very smart
|
| |
|
|
pptom
Part of things
 
Posts: 475 
|
|
Sept 13, 2020 10:40:09 GMT
|
Just had another couple of hours on it, very frustrating. That inlet manifold / steering column is proving to be an obstacle. At the moment I'm pretty sure its preventing the engine from dropping low enough to clear the bonnet, everywhere else is fine. I've lowered the column about 10mm at the steering wheel end, any more and I won't be able to get in and out of the car. At the moment my options seem to be a bonnet bulge, bin the standard manifold and go down the carb manifold rabbit hole or possibly look at dropping the column more with a removable steering wheel. 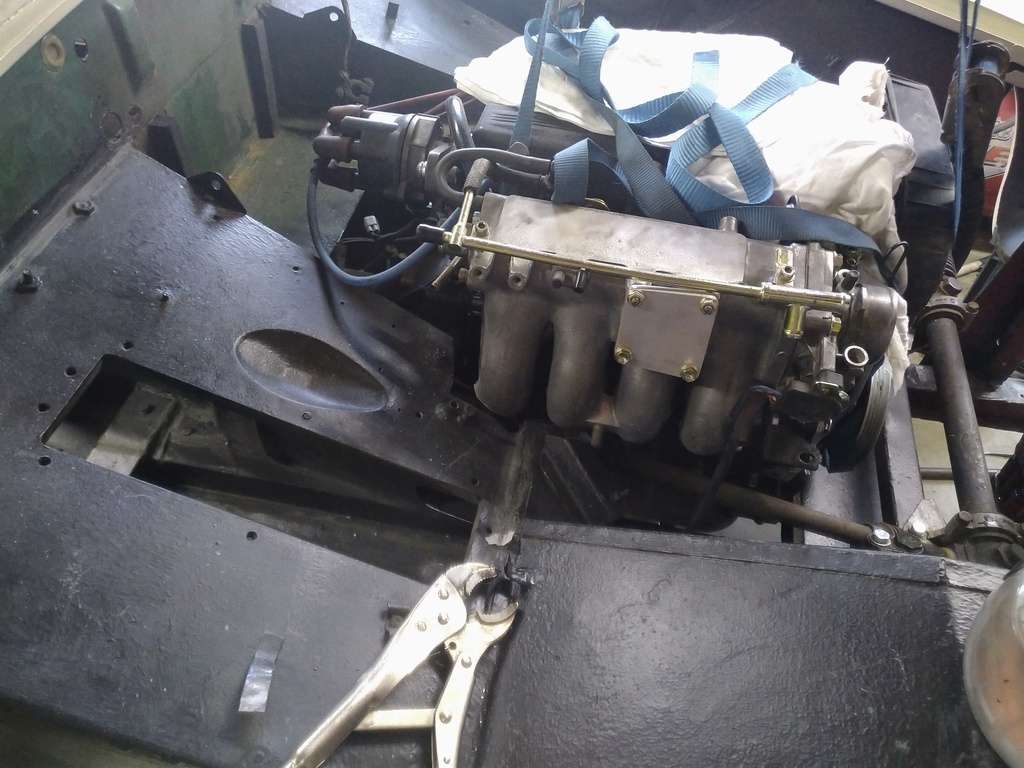 |
| |
|
|
79cord
Posted a lot
  
Posts: 2,617
|
|
Sept 13, 2020 11:29:36 GMT
|
|
Worth adding an extra joint in the column? Especially if it's one piece to the front for collapse ability.
|
| |
|
|
|
|
|
Sept 13, 2020 11:48:44 GMT
|
|
Just fully caught up on this,
I thought the work you'd done on the Lotus was great but the work and attention to detail of the Midget restoration is amazing,
Really looking forward to seeing the future updates,
Nigel
|
| |
BMW E39 525i Sport
BMW E46 320d Sport Touring (now sold on.)
BMW E30 325 Touring (now sold on.)
BMW E30 320 Cabriolet (Project car - currently for sale.)
|
|
pptom
Part of things
 
Posts: 475 
|
|
Sept 13, 2020 13:21:39 GMT
|
Worth adding an extra joint in the column? Especially if it's one piece to the front for collapse ability. Seems like a very likely possibility and it is a one piece, thanks for the suggest. I've been chasing mm here and there, but ultimately it needs to have enough clearance to account for engine movement, so that could be the way to go. Just about to pull it all out and rebuild the wings, slam panel and bonnet so I can crawl underneath and measure the bonnet top clearance. |
| |
|
|
pptom
Part of things
 
Posts: 475 
|
|
Sept 13, 2020 17:35:53 GMT
|
Bonnet clearance measured, should really have done that first. Also had another play, the glaringly obvious thing is to cannt the engine over slightly, I'm talking one side of the cam cover about 10mm lower than the other. Ideally I'd want the engine level, but this is easy and 'shouldn't' be an issue? The ruler is bonnet height. 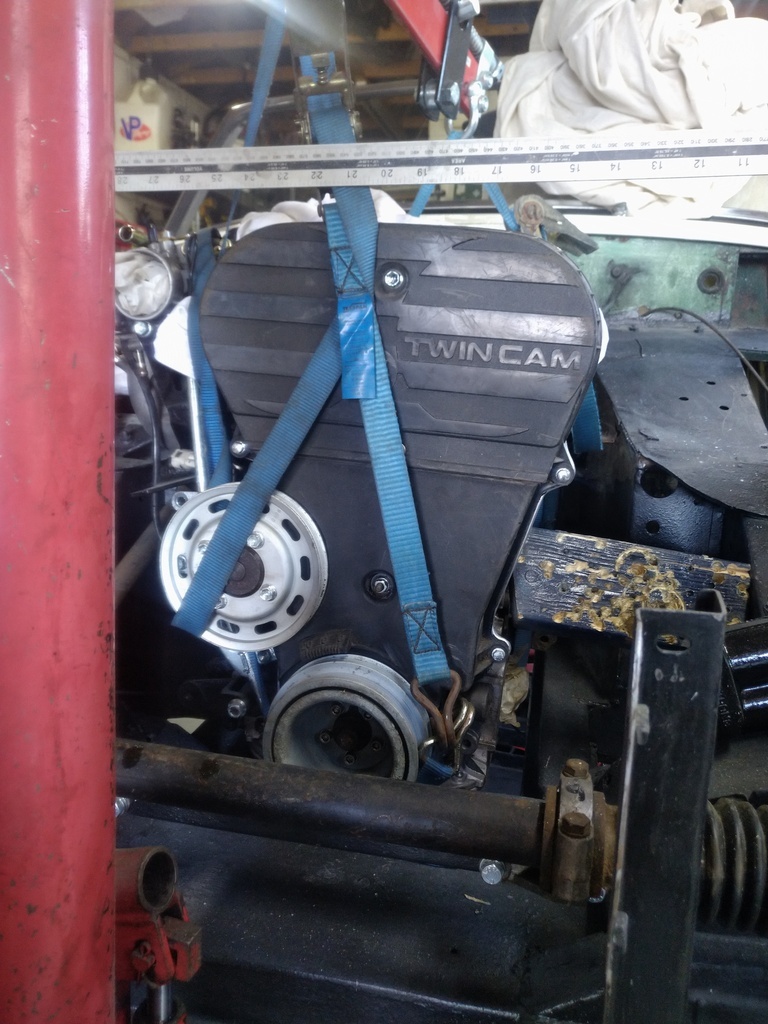 I am also intrigued by the double UJ option on the column, but can't find alot of info, assuming I'd just cut a section out of the column and weld a couple of UJ''s on with a short length of joiner between them? Does this need additional support in the form of a bearing etc? The standard setup is just a clamp at the steering wheel end and a spline pushed onto the rack. |
| |
Last Edit: Sept 13, 2020 17:40:20 GMT by pptom
|
|
|
|
|
|
|
Sept 13, 2020 18:24:28 GMT
|
Usually you would have a bearing at the bulkhead then a uj and shaft with another uj on the rack end. This a tr7. 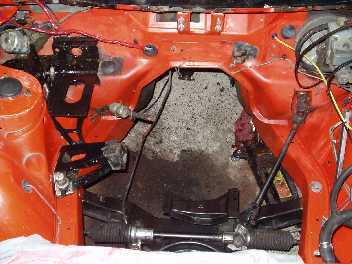 |
| |
Last Edit: Sept 13, 2020 18:25:31 GMT by kevins
|
|
pptom
Part of things
 
Posts: 475 
|
|
|
|
Finally I have an installed engine and box! 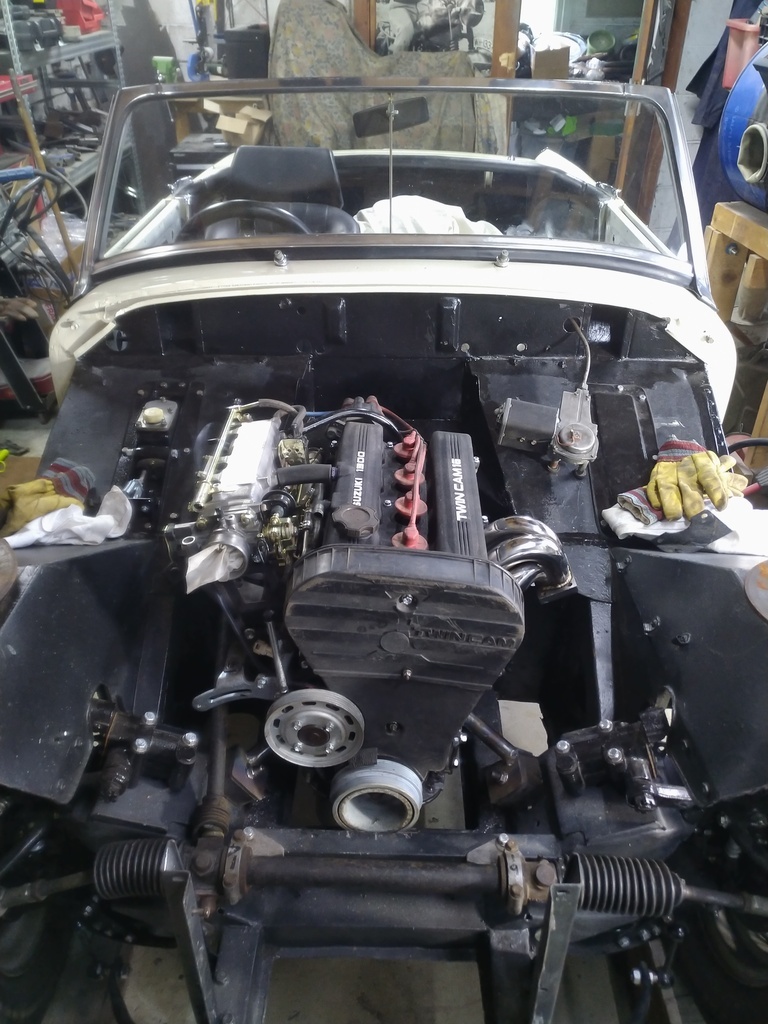 I was being a bit dense with the engine / column issue. In its original fitment the engine is canted forward which translates to leaning into the exhaust side, once that is done it clears the column no problem. Mounts fabricated using MK1 fiesta rubbers and some 5mm plate and CDS tube 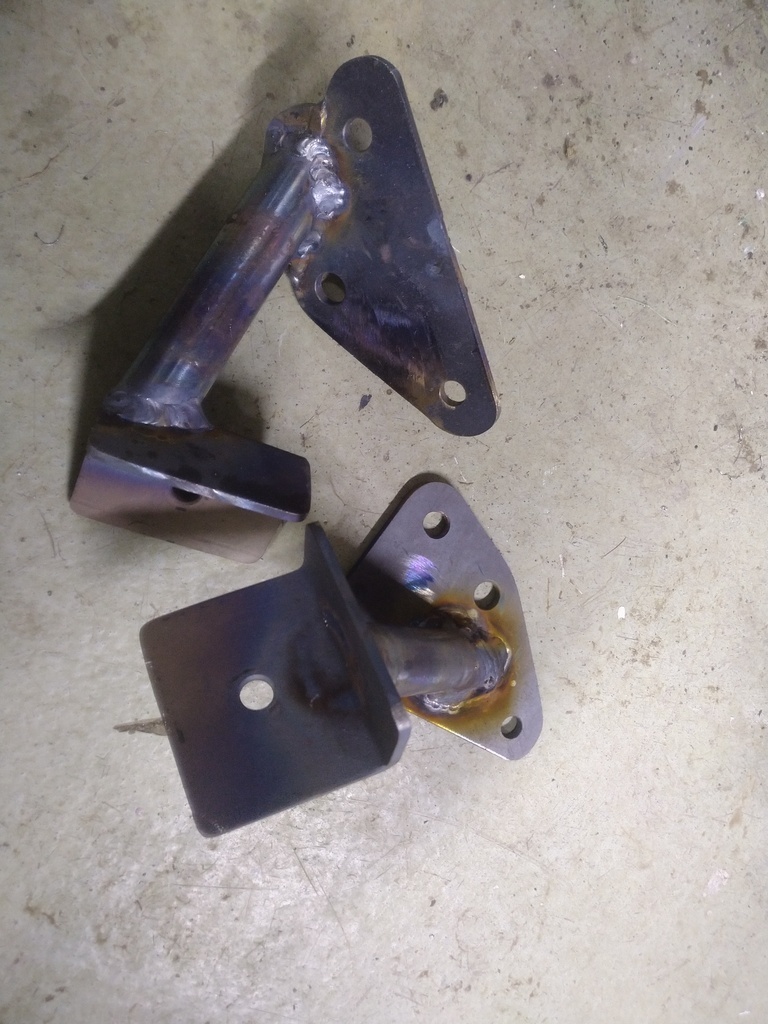 Even the gearstick fits through the hole nice 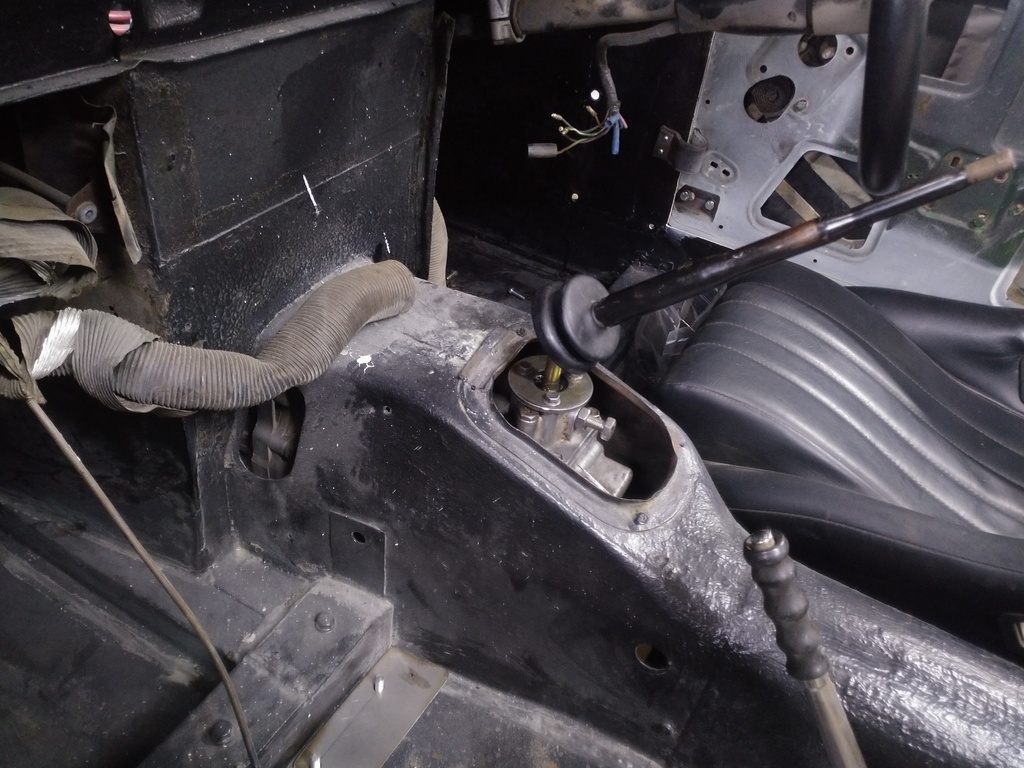 |
| |
|
|
pptom
Part of things
 
Posts: 475 
|
|
|
|
Shiny new manifold trial fitted 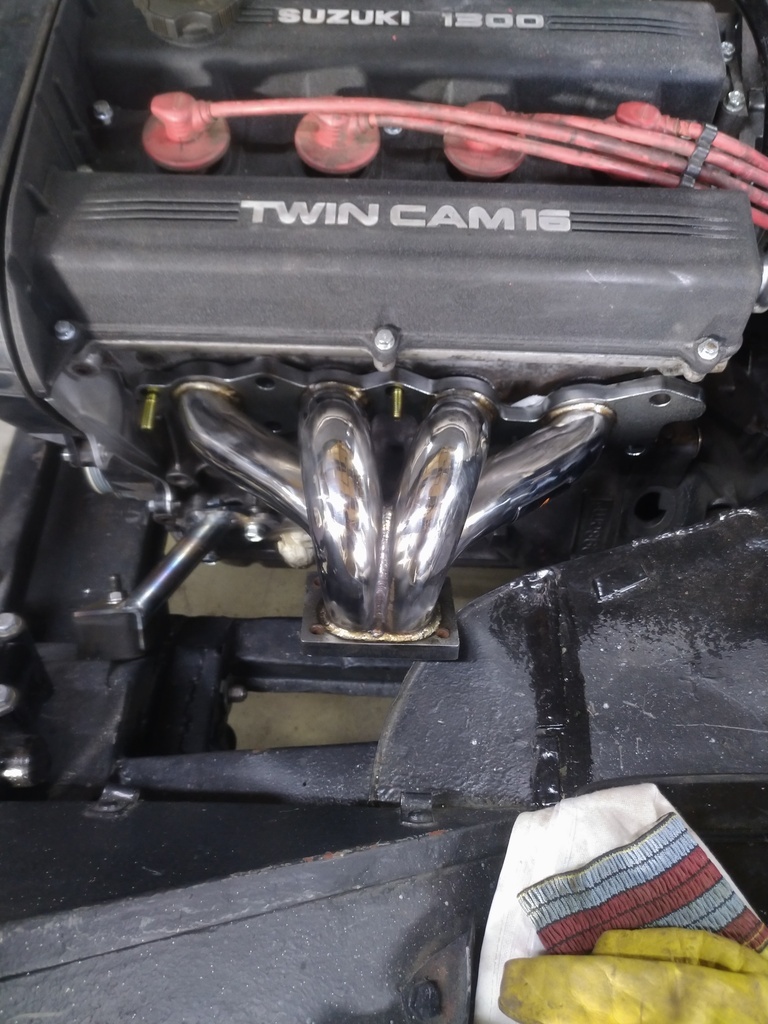 Yes, this is a turbo manifold... The rationale here is that the swift manifold I have doesn't come close to fitting, it's mild steel and don't think it will survive the mods required. I did find a cad drawing of the mounting flange with a view to building one, but the quote for laser cutting was £65, plus I would need various bends / collectors etc which wasn't going to be cheap. This Chinese manifold was £103 delivered, exits at a nice angle and only fouls on a thin strengthening gusset, it's not going to be optimum for gas flow but all I have to do is make one pipe to connect this to the rest of the exhaust (plus, if I get bored in the future these engines apparently take a low boost turbo pretty well, if I can find a chip for the ECU) In other news, as I've been looking more into the injection / fuel supply system for this the idea to inject the +2 has reared its head again. The DCEO's are far from optimal these days and, despite being set up properly they do like a drop of fuel. Managed to win a set of GSXR600 throttle bodies complete yesterday for £70, so that's a back burner project for the winter |
| |
|
|
pptom
Part of things
 
Posts: 475 
|
|
Oct 19, 2020 16:47:02 GMT
|
Just to add a couple of gearbox mount and clutch cable pictures really. As said before, the chassis crossmember needed to come out for clearance, but looking at it I think it would be just possible to mount without cutting the chassis, if I got the engine a bit further forward, then the gearstick would need modifying to get further back to the correct position. Not too much of an issue on mine as I'd planned on removing the crossmember when installing new floors etc, so had plenty of time for additional supports and just kind of followed the tried and tested method the type 9 conversion people use. The gearbox mount / Chassis brace is 8mm aluminium, still needs tidying, the original SJ gearbox mount bolts to this and I made a new link piece which ties the gearbox to the mount. 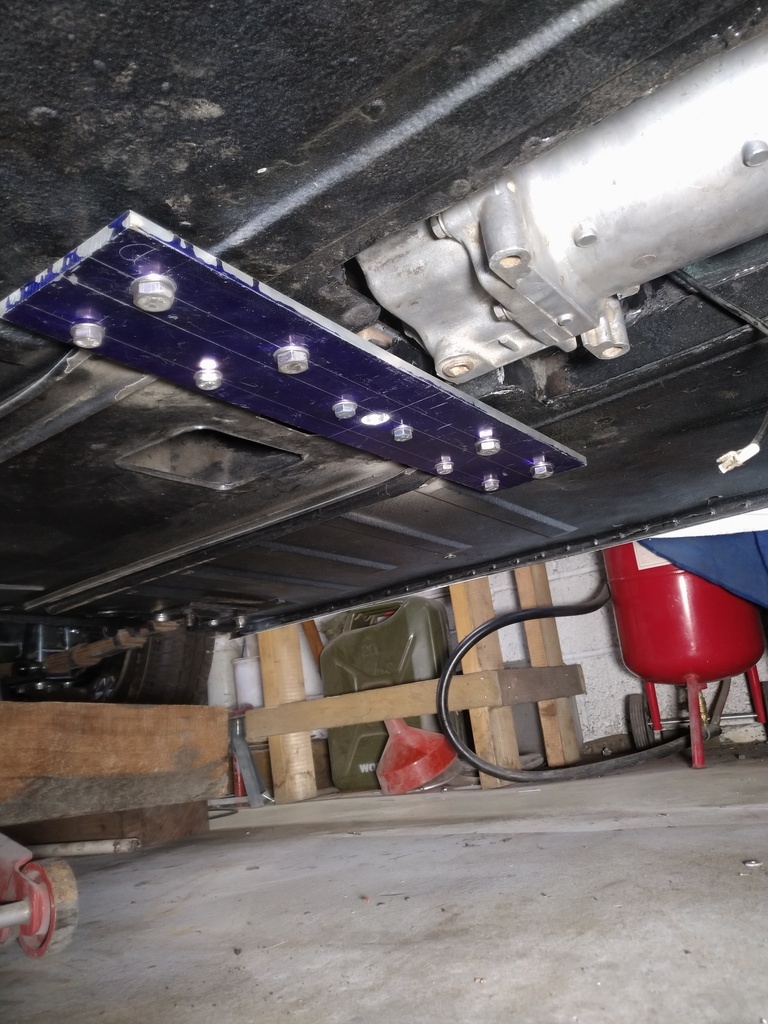 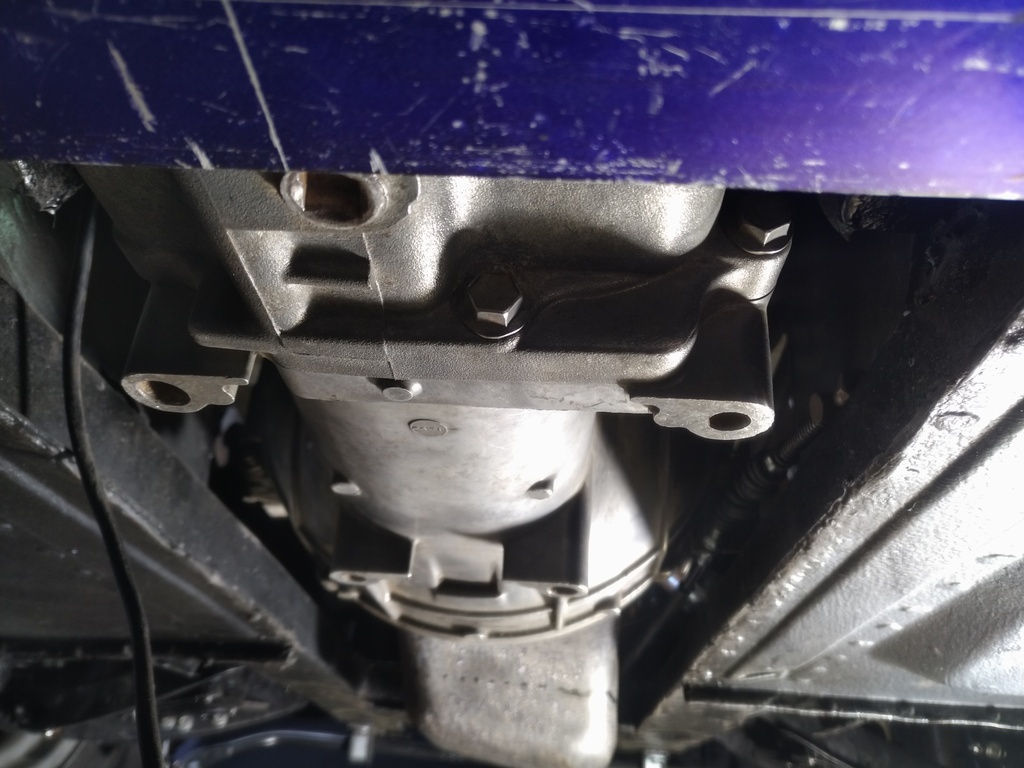 The clutch cable by coincidence has a collar which follows the same angle as the inner wing, I've routed the cable wheel side of the inner wing and it pops out inline with the clutch pedal. My car has a combined clutch / brake master, so I've removed the rod from the clutch slave and the cable handily has a clevis which will be secured through the pin hole in the top of the pedal. Also made a stainless brace to spread the load on the inside of the wing. 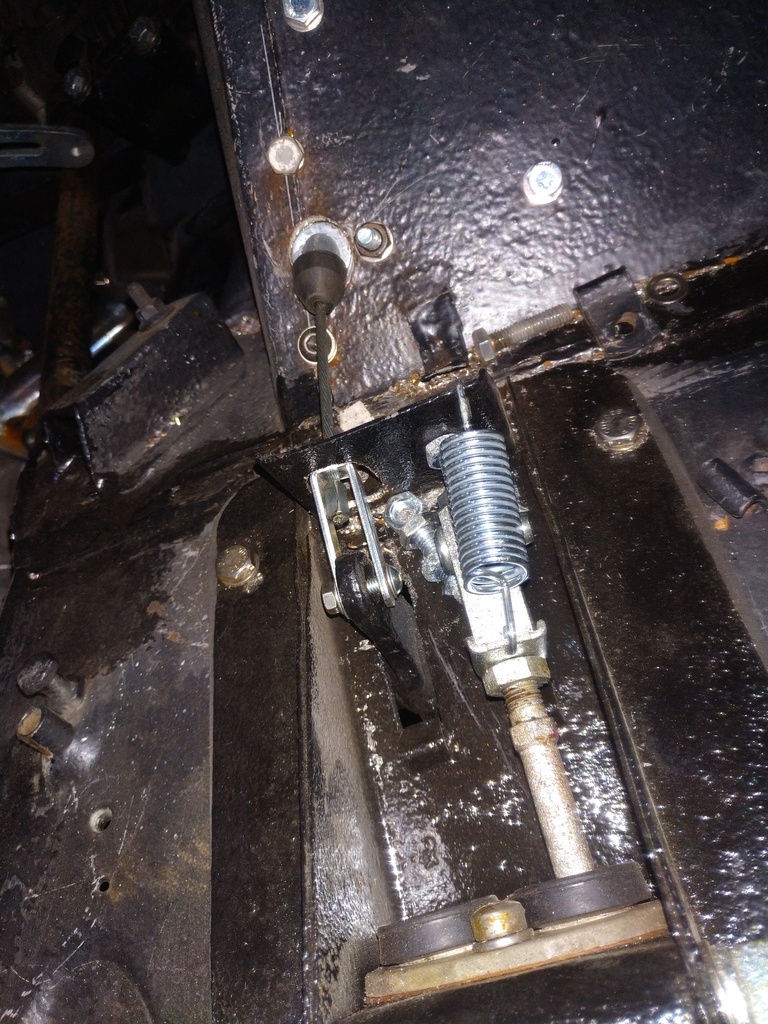 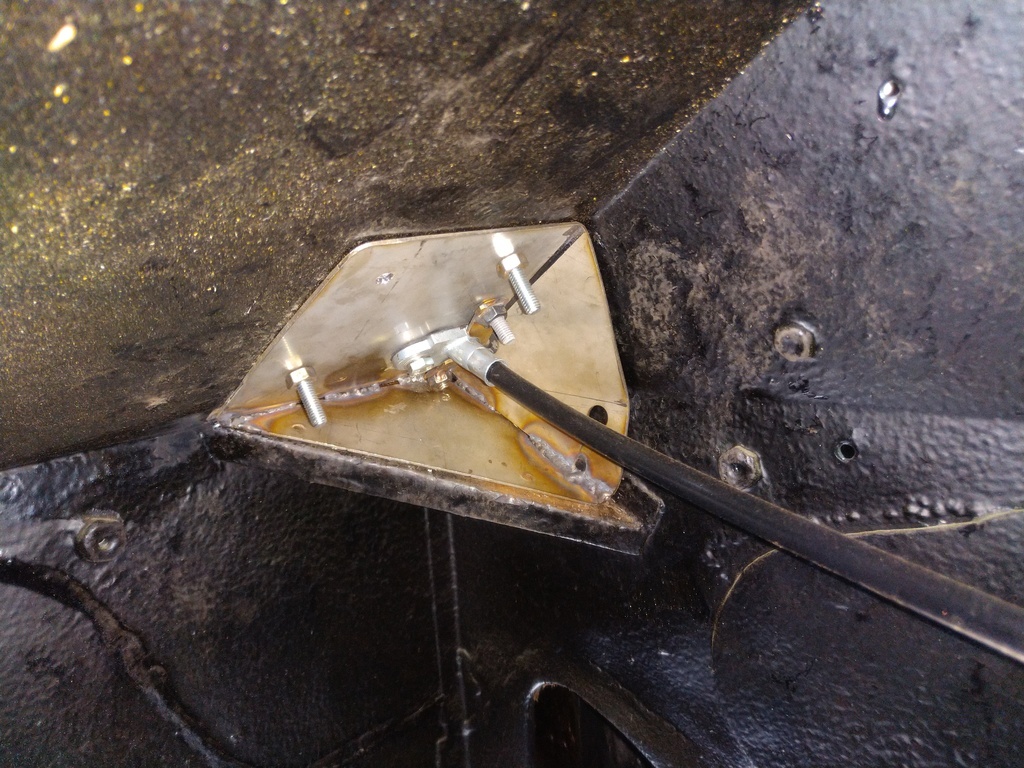 Hope this all makes sense, still got to do plenty of finishing and then remove everything to paint all of the holes I've drilled. I've got a couple of long weekends coming up so am hatching a plan to paint the wire wheels, I don't really want to go to the hassle of removing the tyres / tubes so it might be interesting. Slowly getting the interior back together, fuel system next then wiring!! |
| |
|
|
pptom
Part of things
 
Posts: 475 
|
|
|
|
A couple of weeks ago I decided to do something about the wheels. They were generally very dirty and shabby as they are supplied painted from new. 5 hours with the pressure washer, a stiff brush and various concoctions including fairy liquid, all purpose cleaner, dishwasher tablets (excellent) and wonder wheels and they were pretty dirt and grease free. Made a stand out of a scrap metal pallet dumped by the roadside at work and an old halfshaft and hub, plus a brake disc for weight. 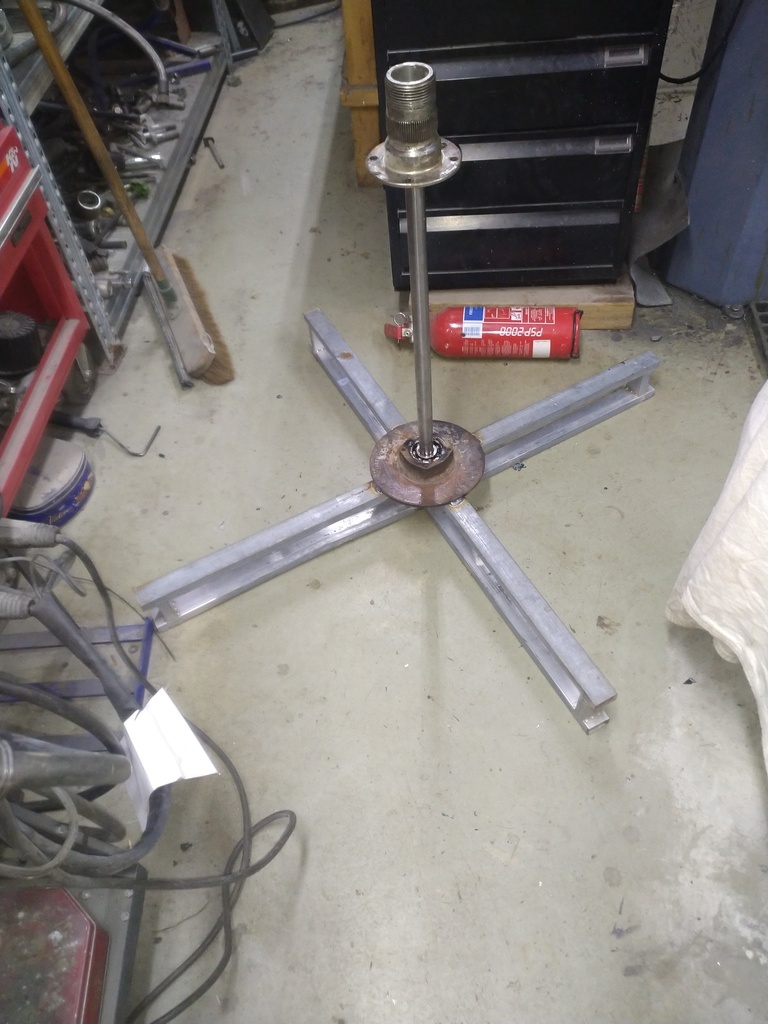 The wheel sits on the hub spline and the halfshaft spins on a bearing I welded to the brake disc. This enabled me to blast and paint them with the wheel freely spinnig, I left the tyres on for ease but pushed the beads off and masked them up. Didn't go mad with the blasting, just loose stuff and give a key really. 1 coat of Jotamastic and 2 coats of 2k Matt / satin black 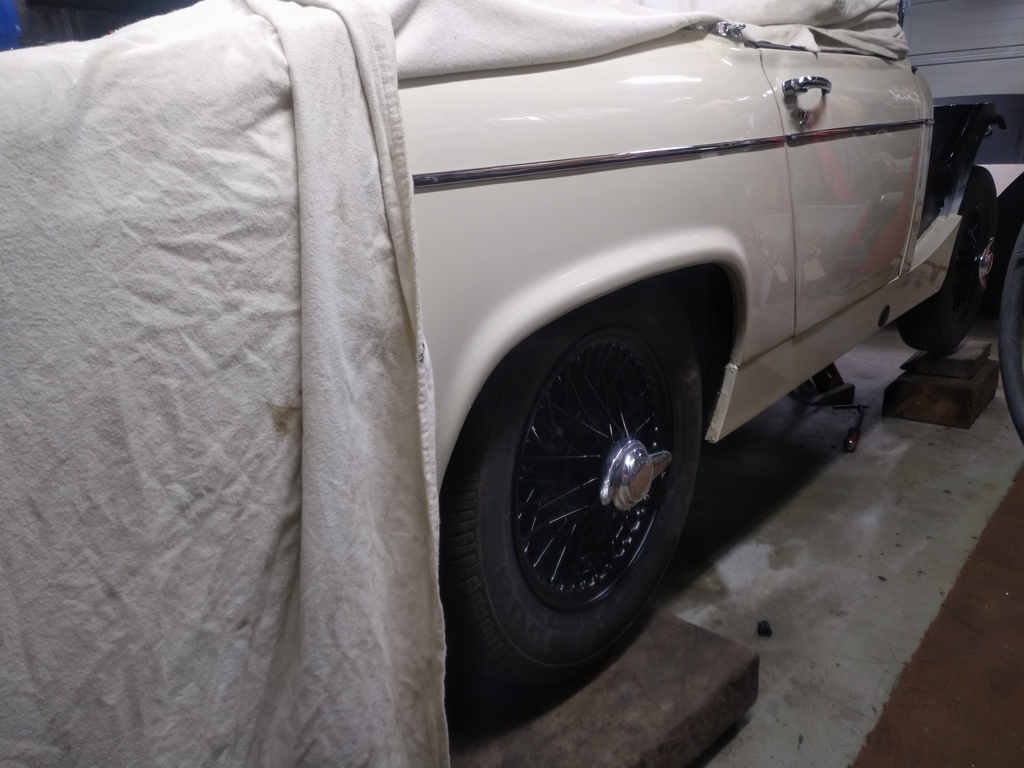 |
| |
|
|
pptom
Part of things
 
Posts: 475 
|
|
|
|
Been slowly chipping away at the fuel system and brake lines and also picked up my hybrid prop from Dave Mac Propshafts. One thing I hadn't done was to sort the flywheel. The GTi flywheel is slightly different to the SJ413 one. The SJ is thicker, so moves the clutch assy further into the gearbox, all the other dimensions are the same, but this of course makes the SJ fly heavier, which is ideal for off roading, not so good in a revvy midget. If I wanted to use the GTi flywheel I'd have to look at spacing the clutch out somehow but I decided to keep the SJ flywheel as I know that works. I try not to sub any work out, but for some things like the prop and this I'm happy to have an expert job done So, off to Midland Balancing near Lutterworth, this is a proper old school machine shop located in a farm building, 2 guys work in the space, one is a crank grinder and the other an engine balancer / flywheel lightener. 4 days later and for only £60, my SJ flywheel has lost about 3kg, is 150g lighter than the GTi one and has been balanced. 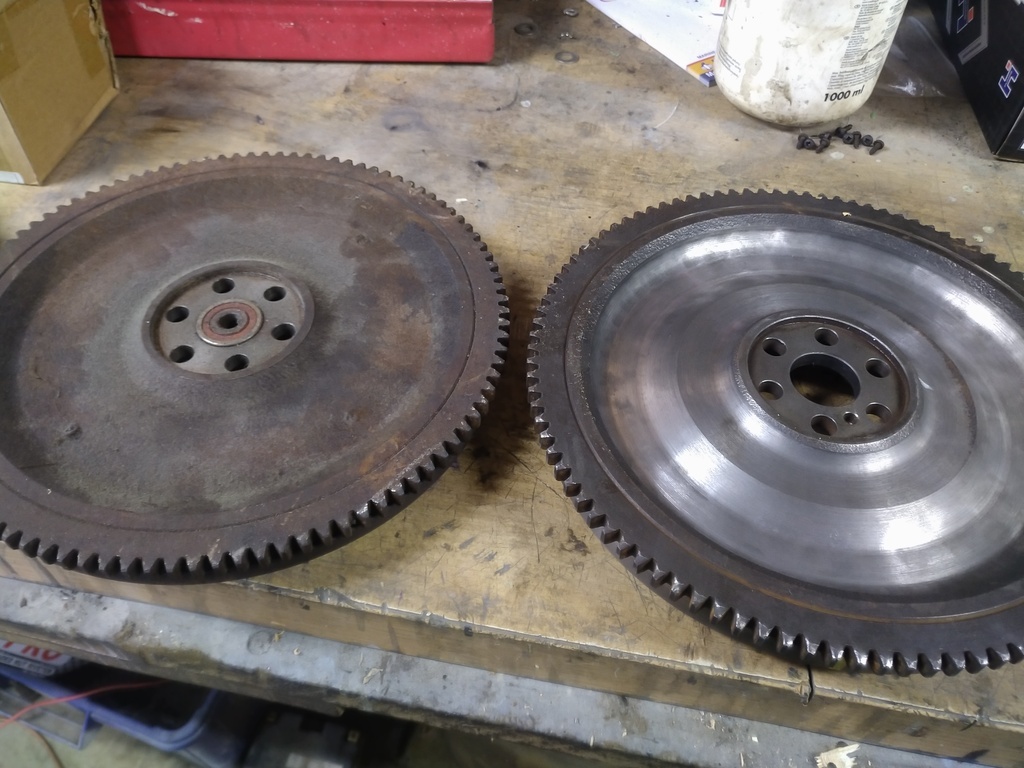 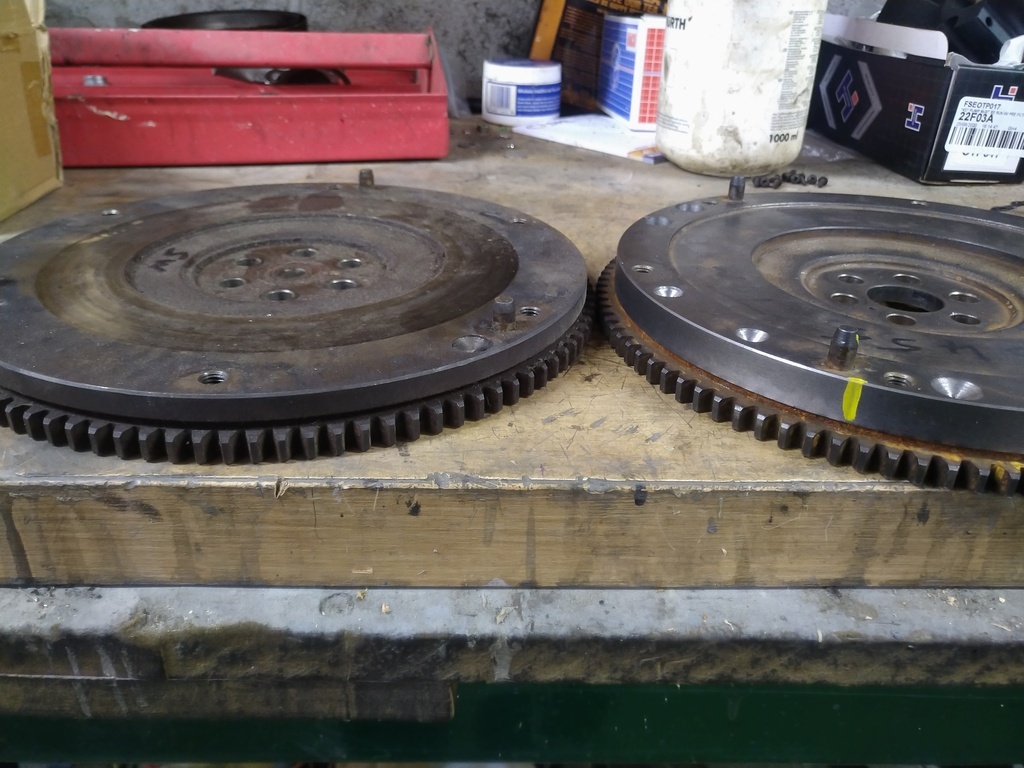 Engine and box out again this afternoon, mounts painted, I've got to fit the clutch and flywheel and do a bolt check then hopefully it can go back in to it's permanent home. |
| |
|
|
pptom
Part of things
 
Posts: 475 
|
|
|
|
Fly and clutch fitted 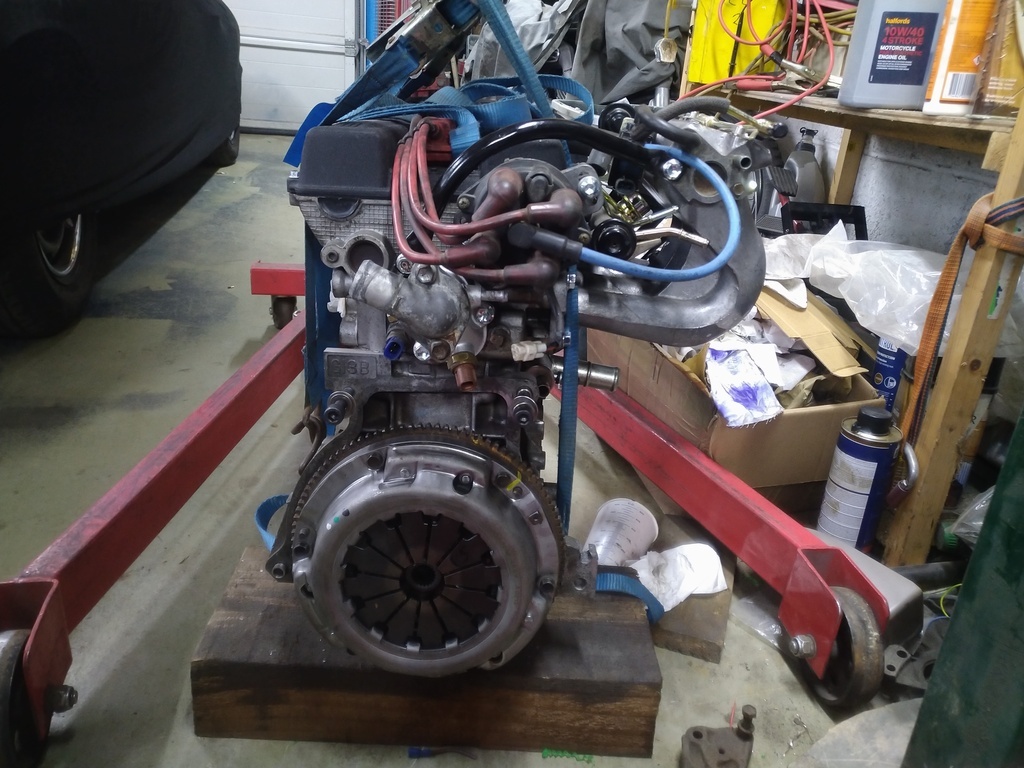 Then I got a bit carried away with wiring 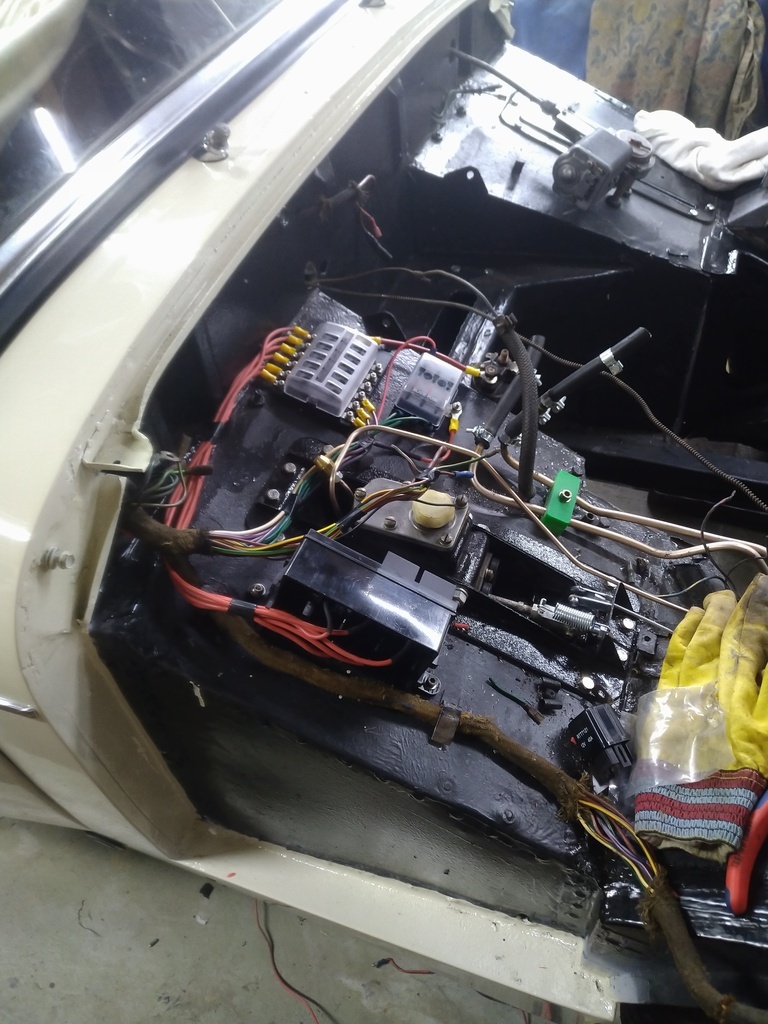 Standard loom has 2 fuses, one for the permanent live circuit like key switch and headlights, the other is for the switched circuits such as side lights starter solenoid etc. I got carried away on the Elan which was the same and ended up with 8 relays and a shed load of fuses, it's not in the best place for access and I spent a lot of this me upside down in the passenger footwell. Thought I would slim the system down for the midget, but it hasn't turned out this way. Access is much, much better and should be pretty neat when it's done. I've one fuse box for the live circuits, including feeds to 6 relays which will deal with the ECU, HP fuel pump + headlights. Then one smaller fuse box which deals with the switched circuits, including low pressure fuel pump. The Engine loom should just need a positive and ground to work, so i'm planning on fitting a separate switch for that, maybe a start button too. |
| |
|
|
|
|
|
|
|
|
Very nice to see the quality job that you are doing with the Midget. What has to be remembered is that back in the 80's the car was not worth much and so repairs were usually done as cheaply as possible - there were very few "hobby" MiG welders about.
Mind you, a £3.5K "pro" repair should have been much better than that which you have found!
|
| |
|
|
pptom
Part of things
 
Posts: 475 
|
|
Dec 30, 2020 16:26:12 GMT
|
Time marches on and I've been rubbish at updating. Been pottering away, progress has been slow but constant and I suddenly found myself where I can see the end of the journey. Having this week off work has fallen perfectly. Boxing day saw the battery connected and several systems checks, including both fuel pumps, fuel system, electrics, starter motor etc. The 27th was the big day, plugs out and span over to get oil pressure, then turn it over for real. It started up like a regular user, quicker than 1 sec of cranking. Couple of throttle blips and settled down to a decent tickover. Still got to finish the coolant system, so didn't run it for long, but to say I was buzzing was an understatement. It even sounds really nice. The last couple of days has been bolting the front end back on, which has been a bit of an alignment headache in itself and I got the front lights on and tested today. 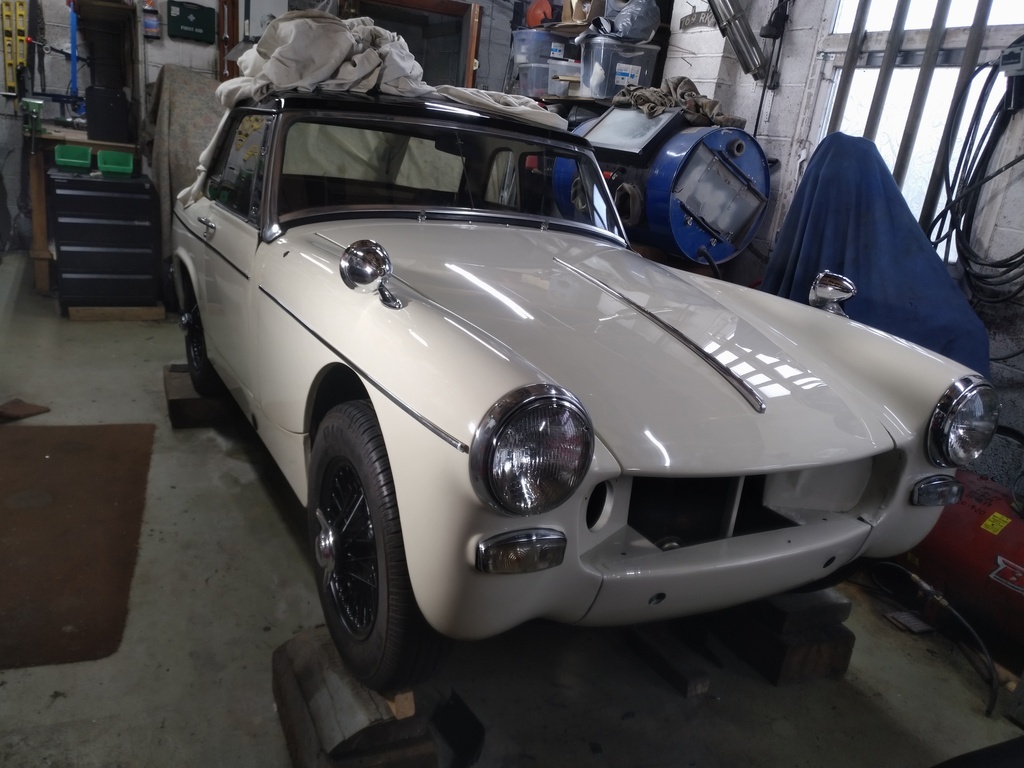 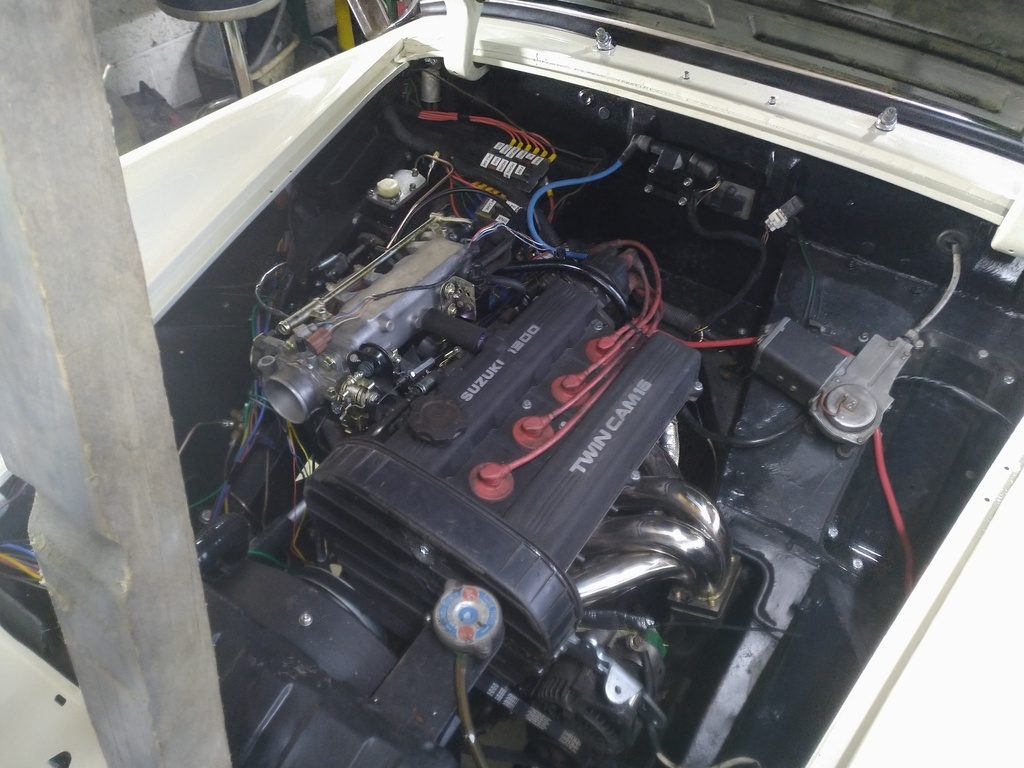 Planning on fitting the bonnet catch and cable, plus front bumper tomorrow, waiting for 2 X 90 degree silicone elbows to finish the cooling system and I've got a few little snagging jobs to do, but things are looking good for a test drive soon. Must remember the engine needs running in! |
| |
Last Edit: Dec 30, 2020 16:28:05 GMT by pptom
|
|
|
|
|
Dec 30, 2020 17:38:15 GMT
|
|
That is a really nice install,
The levels you work to are incredibly high,
The thread on both cars has been very enjoyable to follow,
Looking forward to seeing future updates,
Nigel
|
| |
BMW E39 525i Sport
BMW E46 320d Sport Touring (now sold on.)
BMW E30 325 Touring (now sold on.)
BMW E30 320 Cabriolet (Project car - currently for sale.)
|
|
|
|


