|
|
|
|
|
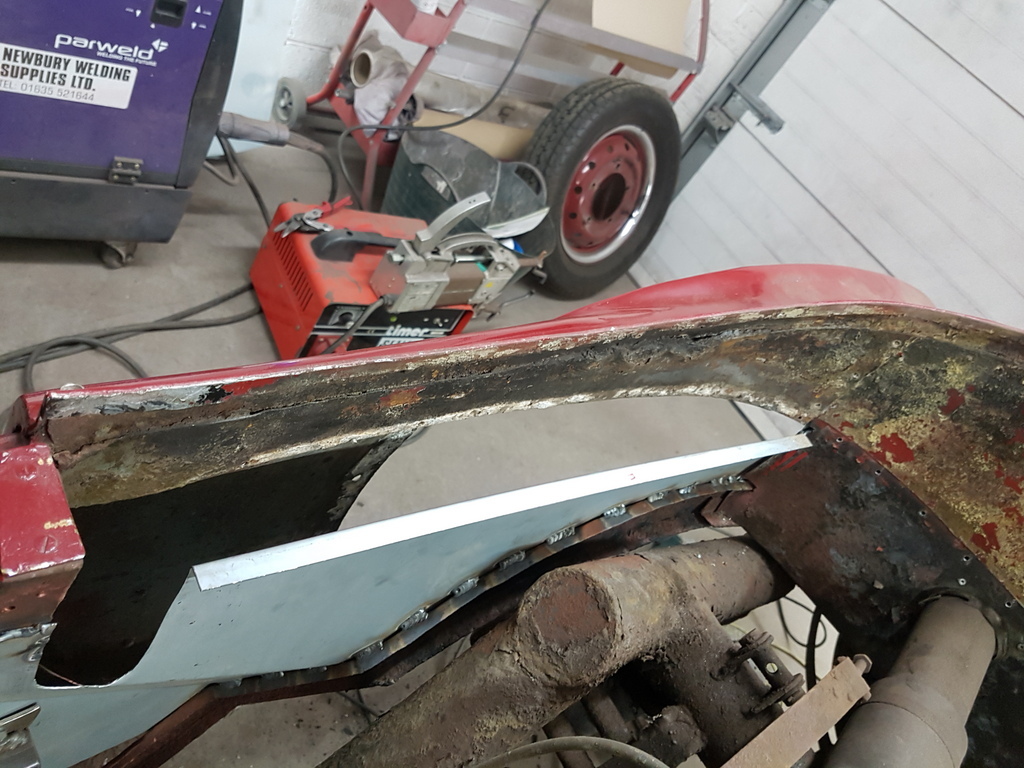
The previous restorer clearly didn't give a toss about the owners life if the Jupiter was to be involved in an accident. It's a good thing there is actual honest people out there like yourself who will do there up most to make good a bad repair, resulting in preserving the vehicle and most importantly someone's life if the worst were to happen. Thanks for the kind words - I think the main problem being is that this car was home restored 25 - 30 years ago in an era where home restored cars / equipment / expertise was in it's infancy, standards & quality were no where near where they are today along with the MOT test which is a lot more stringent in todays world. Bodges using unorthodox materials was to a certain extent an accepted practice and this one was carefully disguised. Its the second Jupiter in 18 months that I have repaired / restored that arrived at the workshop with bodged sills - to this end I shall be drafting a technical article for the clubs magazine and making all Jupiter owners aware of the problems and what to check / look for. |
| |
|
|
|
|
|
|
|
|
|
 Heh, watched a movie with the gf, mentioned that I'd seen that your wife had done a lot of work, so had a look on imdb, and sure enough. So had to go back and find her  |
| |
|
|
|
|
|
|
|
Heh, watched a movie with the gf, mentioned that I'd seen that your wife had done a lot of work, so had a look on imdb, and sure enough. So had to go back and find her Yep - unfortunately that film flopped at the box office - none the less she had 12 months production work out of it |
| |
|
|
|
|
|
|
|
|
Looking forward to how you press the wrinkles out of the wing. E-wheel or hammer and dolly? Going to be a bit of stretch to sort out I would expect.
Edit:
Never mind...got ahead of myself and did not realize that there were 5 more pages to read, before I posted the above. Now that I am caught up, I have to say that I am not all that surprised at what you found....What treasure chests of challenges these cars can be.
|
| |
Last Edit: Jul 5, 2018 16:08:09 GMT by bjornagn
|
|
|
|
|
|
|
 Next job on the inner wing was to sort the 2 sections out that form the rear shroud support - much like the other side they were weakened by the rust ingress 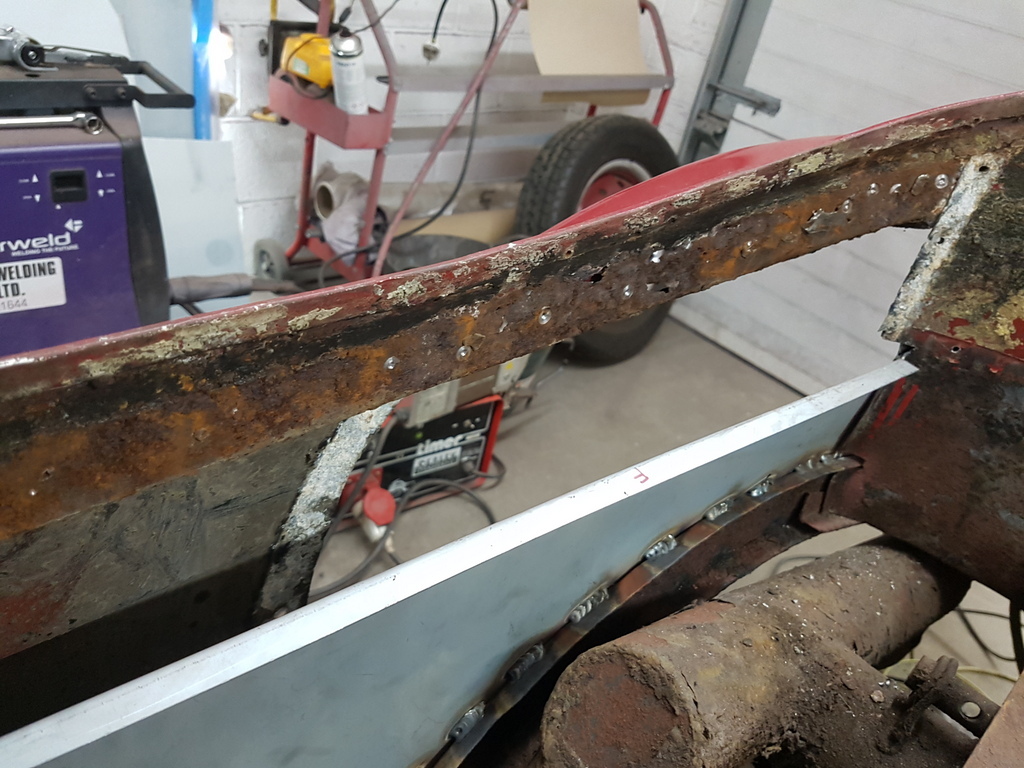 Lower section removed 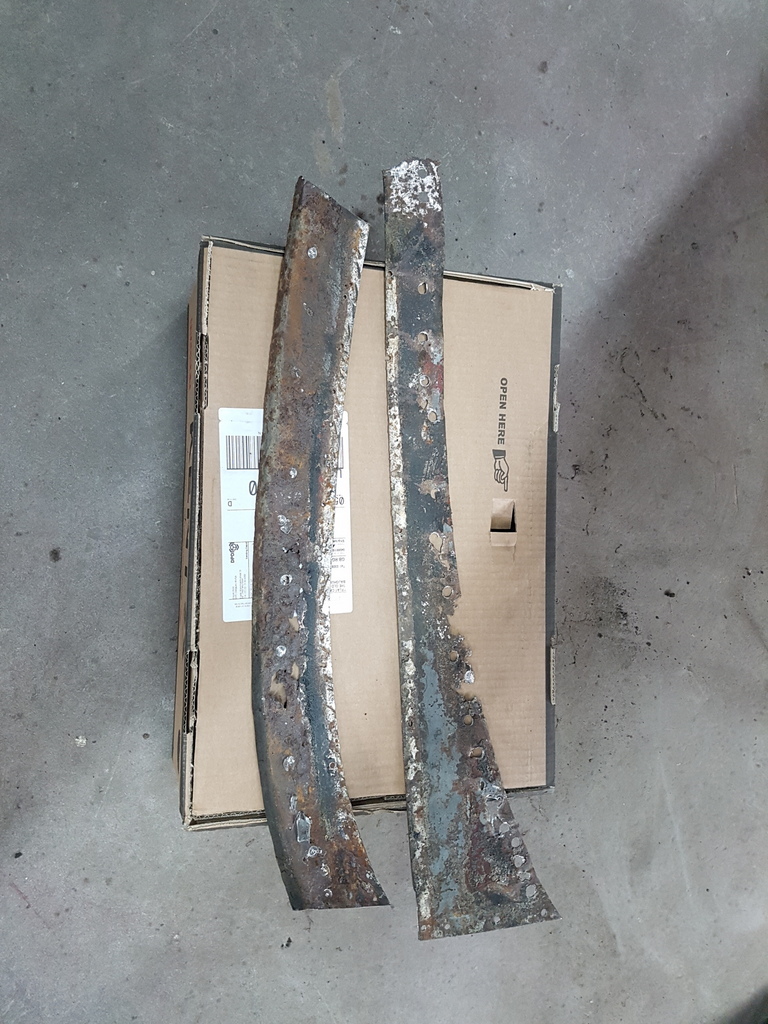 Then the upper one - both utilised for patterns to make up the new sections 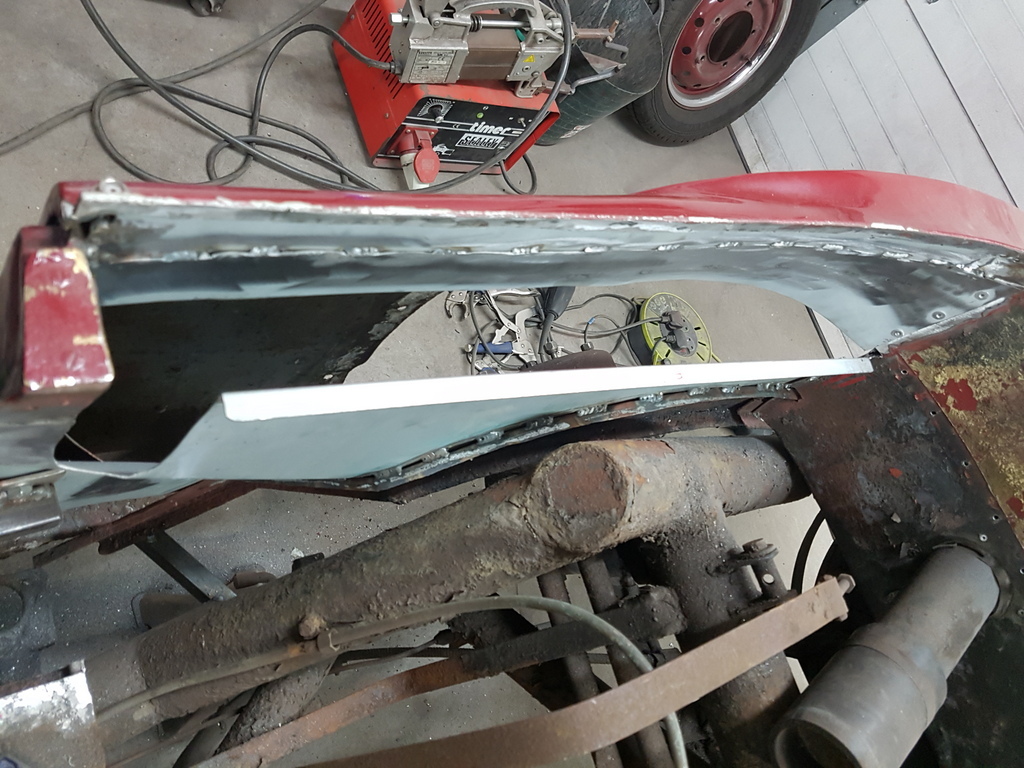 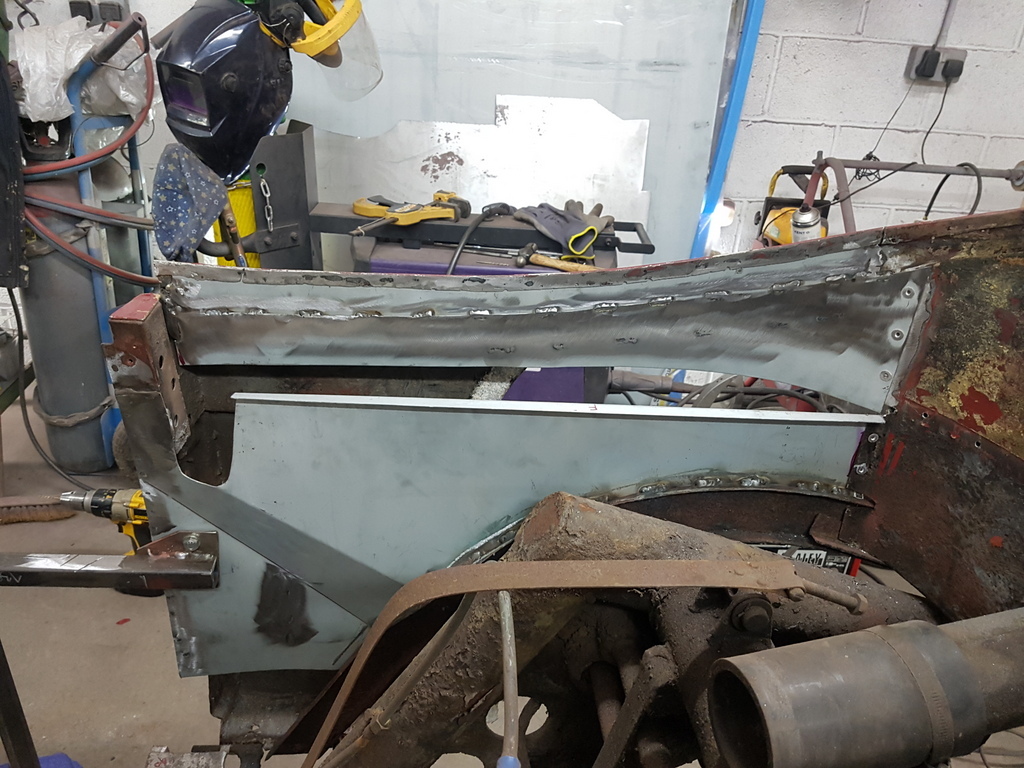 Then did the front lower bulkhead repair  So that's the last of the welding on both sides until sills turn up and with all the prep work now done they should not take too long to fit 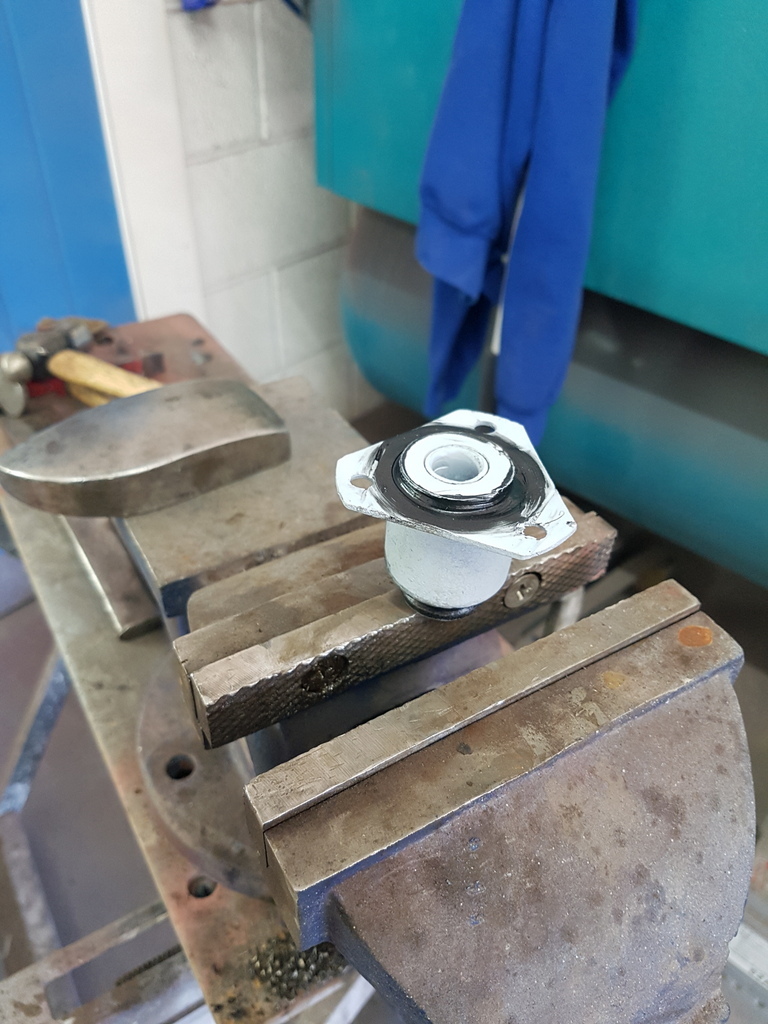 Cleaned the broken body mounting bush up and etch primed it - then used a urethane compound to form the new metalstic type bush - just a single pack cure applied from a cartridge skeleton gun 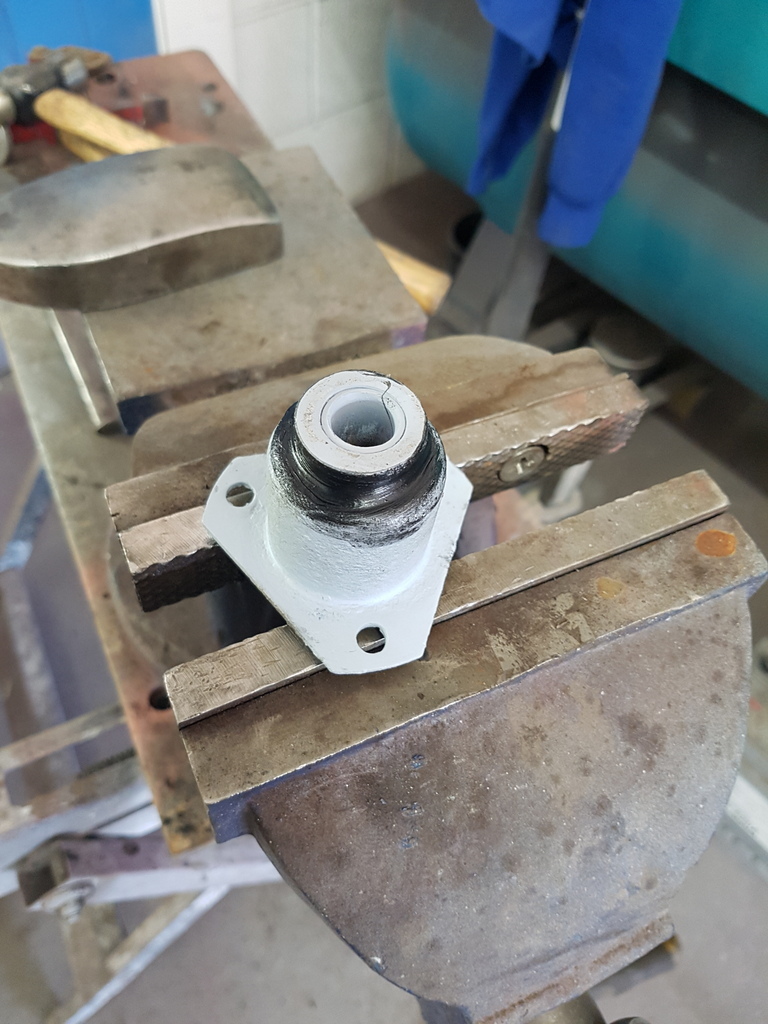 Painted up with satin black & refitted to the chassis 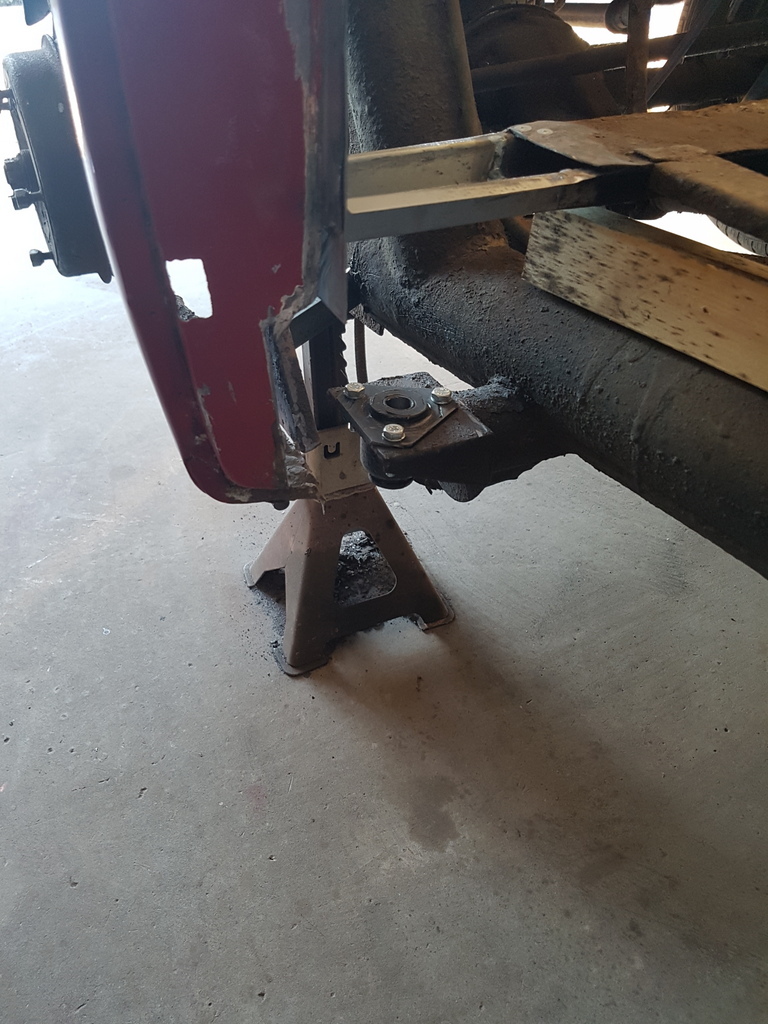 Made a new body mounting bracket up for this side too - although I won't weld it I into place until I have the sill fitted 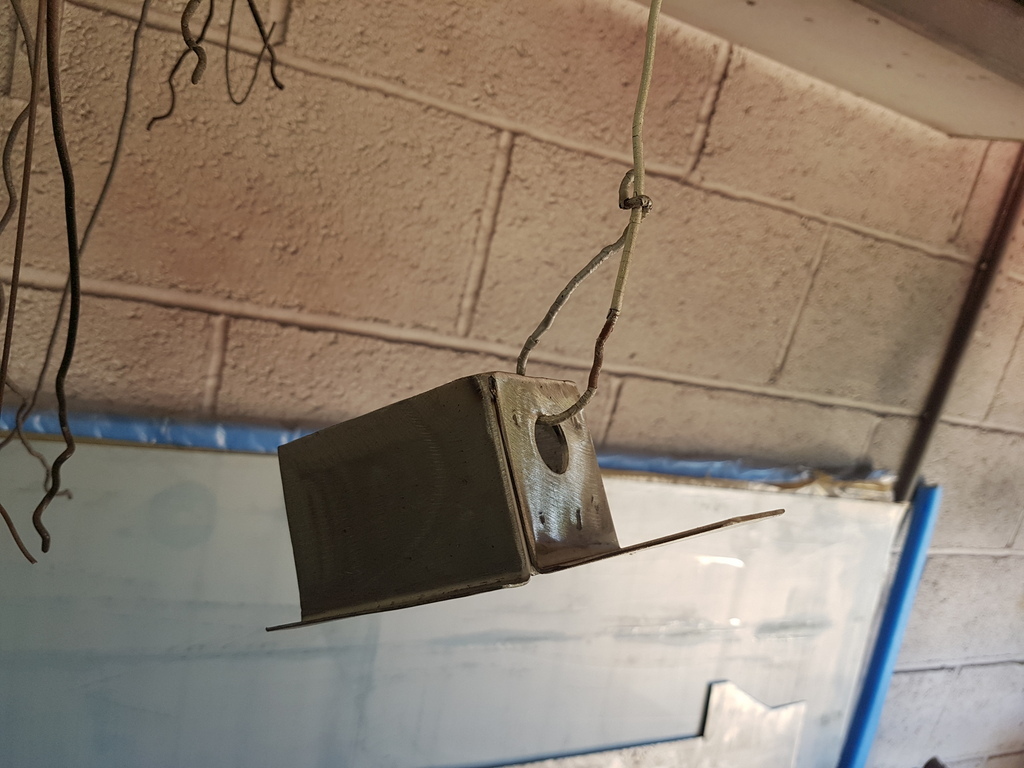 Dressed the inner wing repairs up & cleaned them off 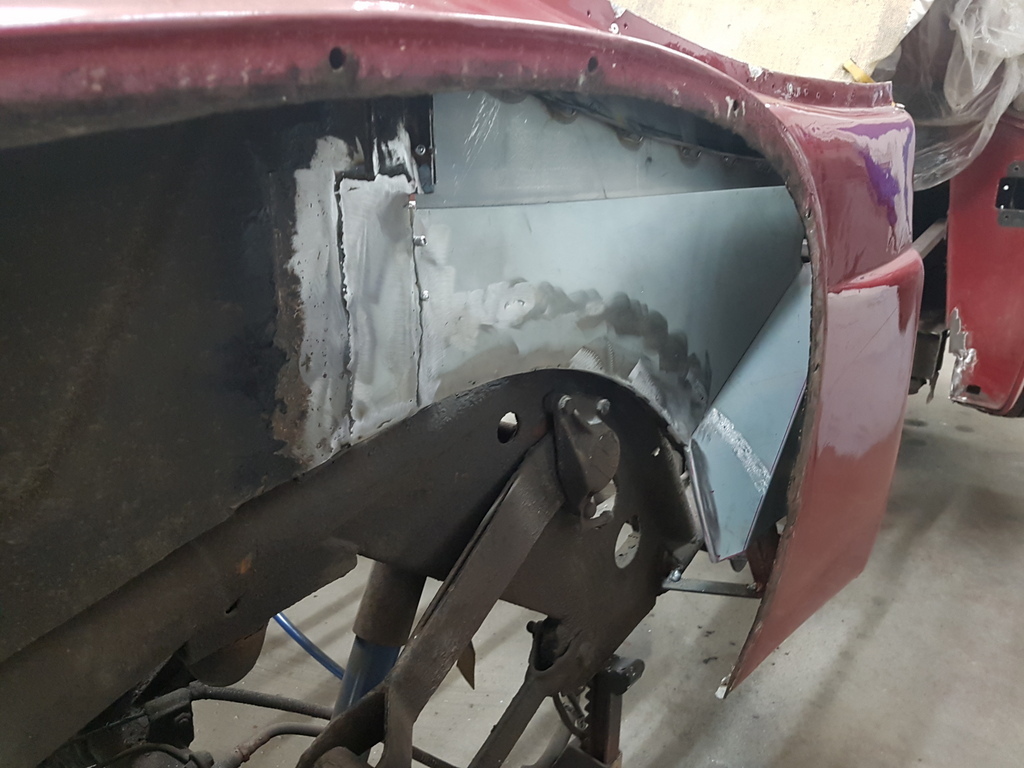 Then applied etching primer to the worked areas 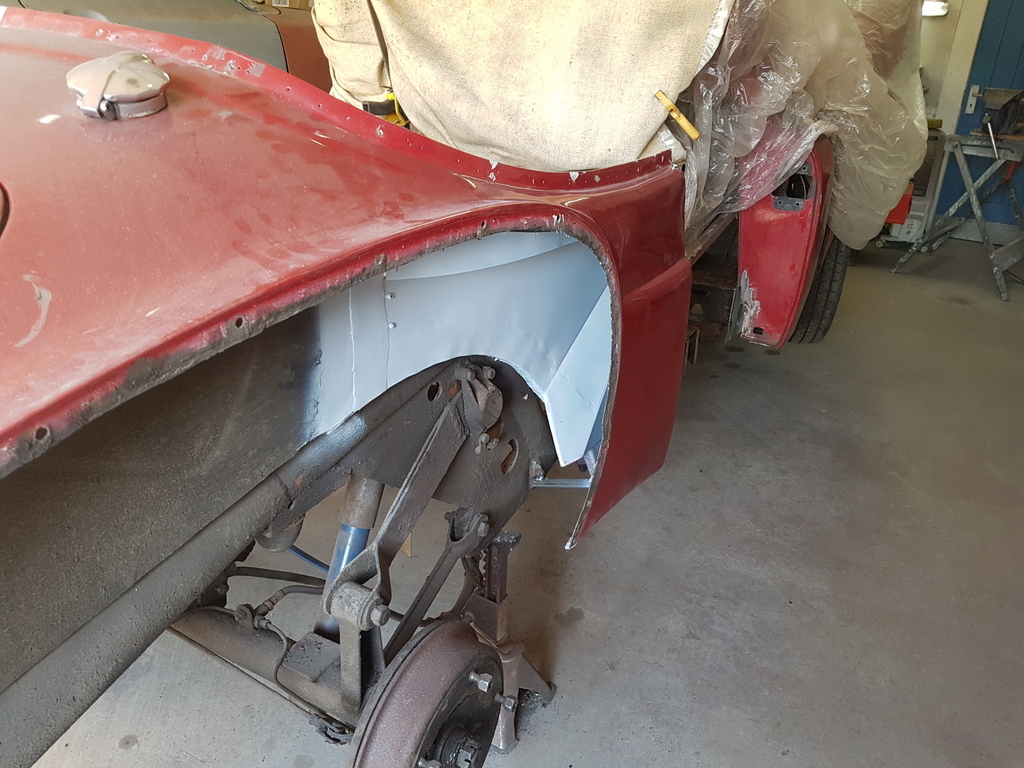 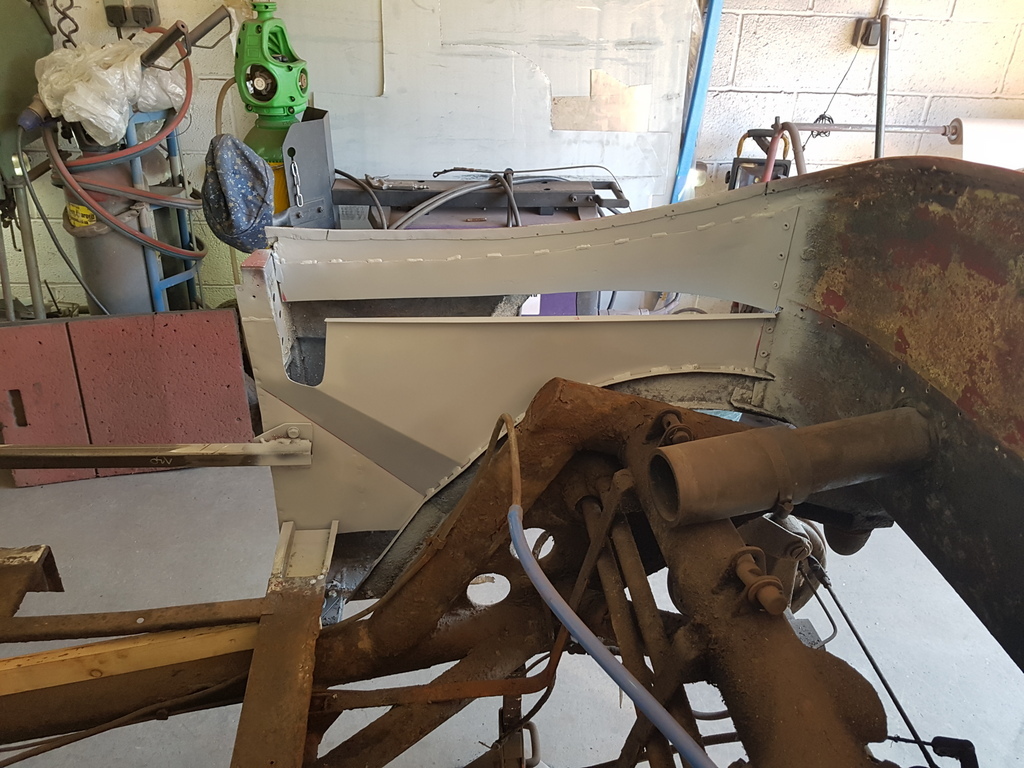 More tomorrow |
| |
|
|
|
|
|
|
|
|
what a difference a week make s EXCELLENT workmanship
|
| |
|
|
|
|
|
|
|
|
Mightly impressive.
By the time most people have decided what to do with rust, you've it cut out ,treated new metal welded in and are working on another car.
|
| |
|
|
|
|
|
|
|
Heh, watched a movie with the gf, mentioned that I'd seen that your wife had done a lot of work, so had a look on imdb, and sure enough. So had to go back and find her Yep - unfortunately that film flopped at the box office - none the less she had 12 months production work out of it Oh really? I suppose thinking back I don't think I even heard of it coming out... We enjoyed it, mainly because of the Guy Ritchie style applied to a medieval setting. It was fun to follow the disjointed narrative that I enjoyed so much in Lock, Stock & Two Smoking Barrels and Snatch.  So, I have a car related question. Is the battery REALLY right next to the fuel tank where you have to dismantle half the car to get at? |
| |
|
|
|
|
|
|
|
Yep - unfortunately that film flopped at the box office - none the less she had 12 months production work out of it Oh really? I suppose thinking back I don't think I even heard of it coming out... We enjoyed it, mainly because of the Guy Ritchie style applied to a medieval setting. It was fun to follow the disjointed narrative that I enjoyed so much in Lock, Stock & Two Smoking Barrels and Snatch. So, I have a car related question. Is the battery REALLY right next to the fuel tank where you have to dismantle half the car to get at? Yes - although the battery is accessed through a hatch / door on the hood stowage shelf - car design was just not has advanced in those days has it is in todays world |
| |
|
|
|
|
|
|
|
Lots of odds done 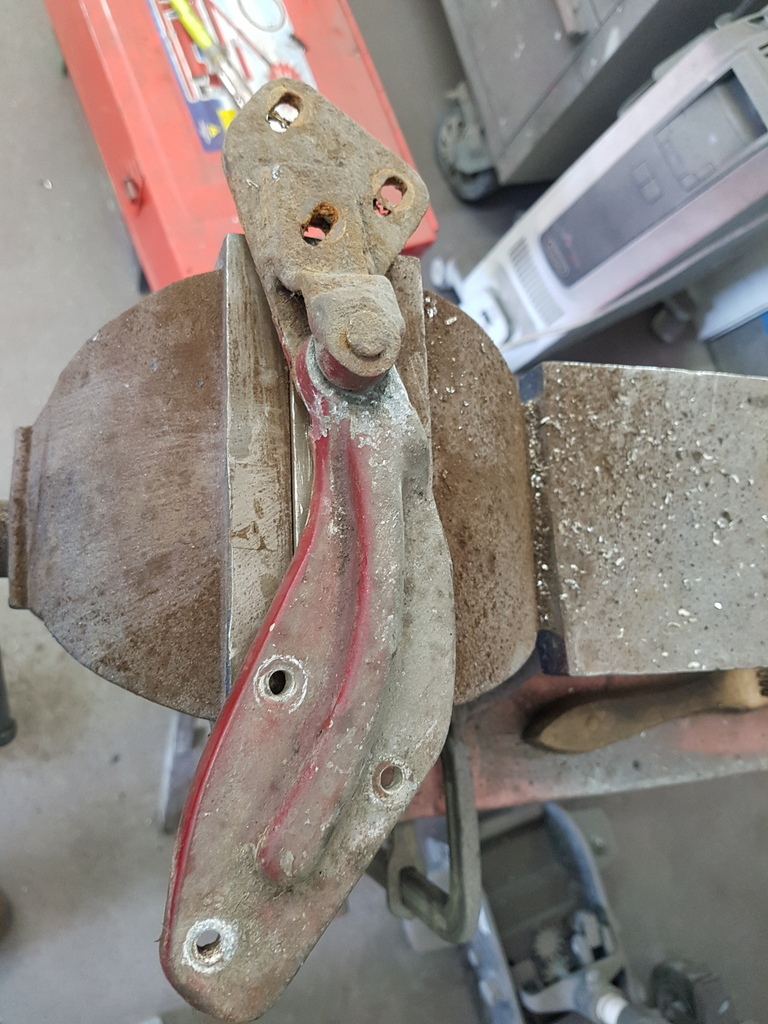 Large amount of play / wear in the offside bottom door hinge so I needed to sort that before rehanging the door  Someone had used a bolt in place of the original pin - not that this matters has the wear was in the alloy section 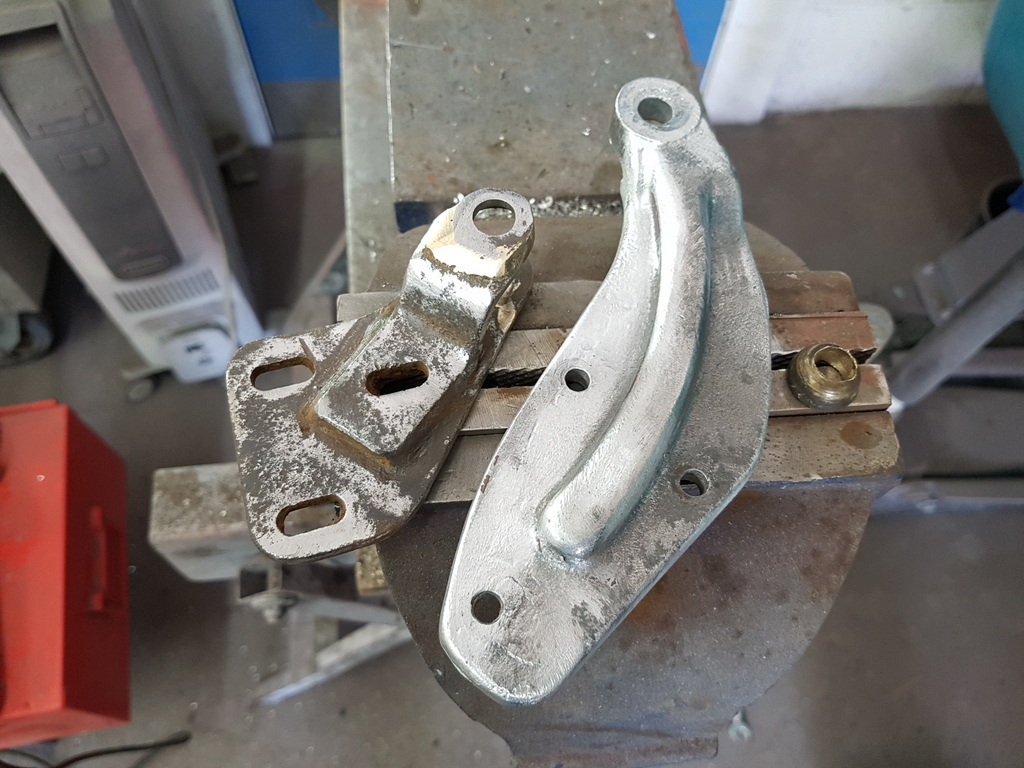 Bolt removed / parts cleaned up and the two hinge sections and bronze bush re-drilled to accept a larger pin / bolt 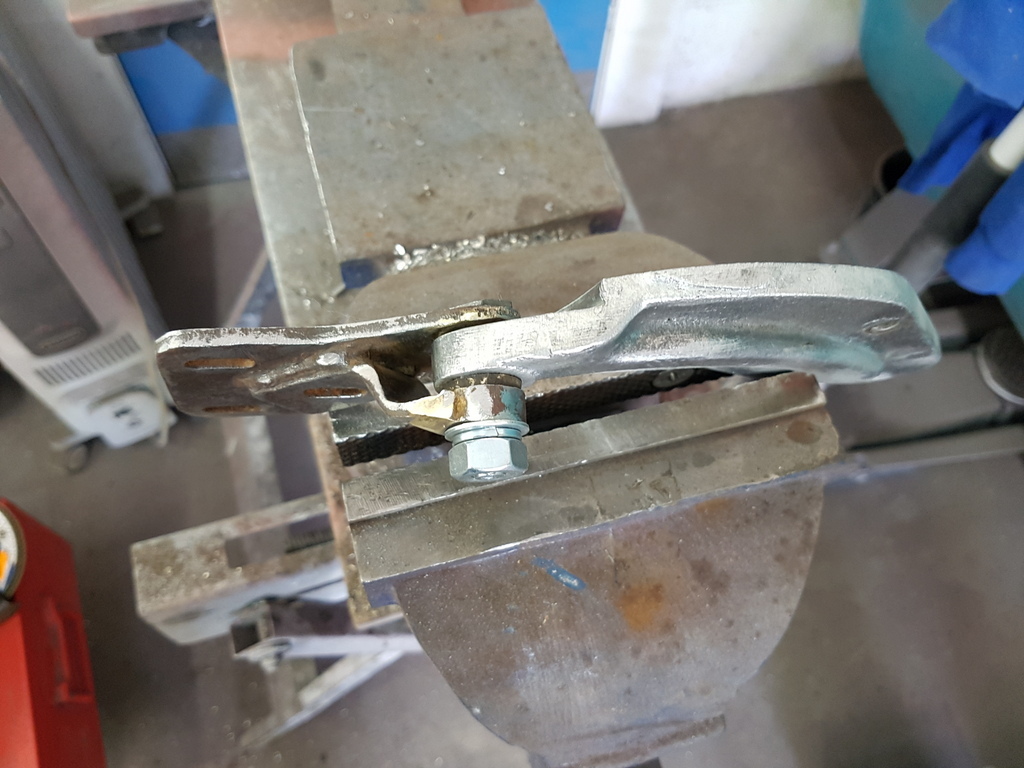 Reassembled and the bolt head reduced to ensure that it did not foul / contact the door skin - unlike the previous bolt  Etch primed along with the two retaining straps for the fuel tank which had been previously cleaned up  Then painted with a couple of coats of satin black 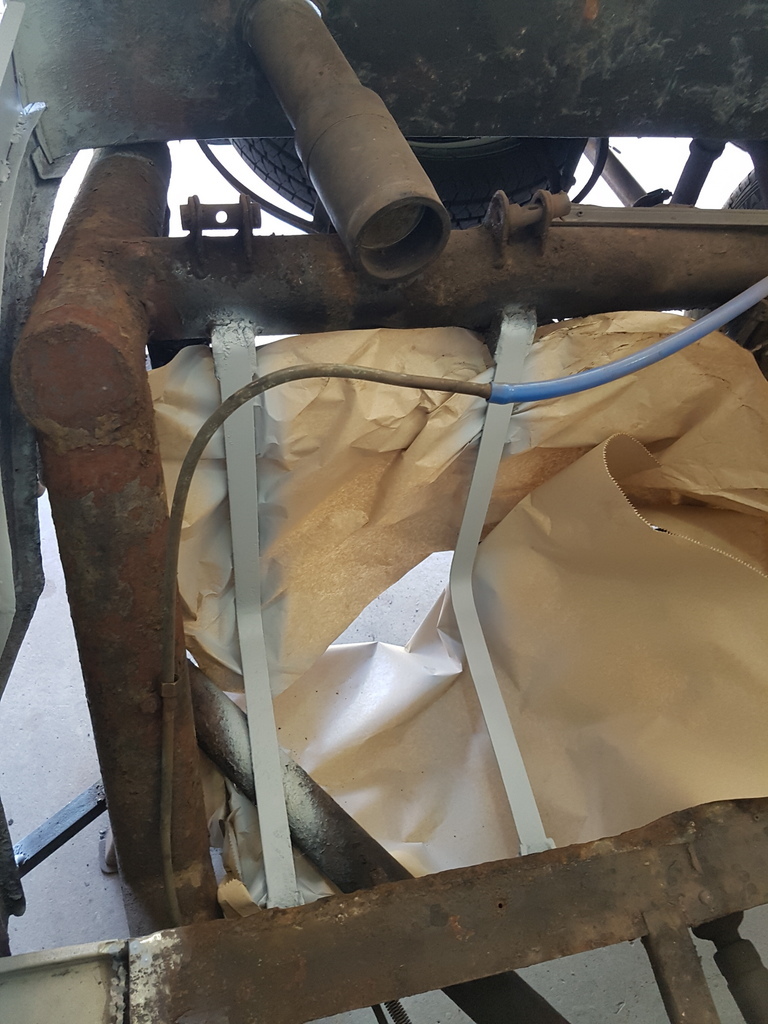 The fixed tank straps on the chassis which were damaged in the accident were straightened & cleaned up - then the same process of etch primed & satin black 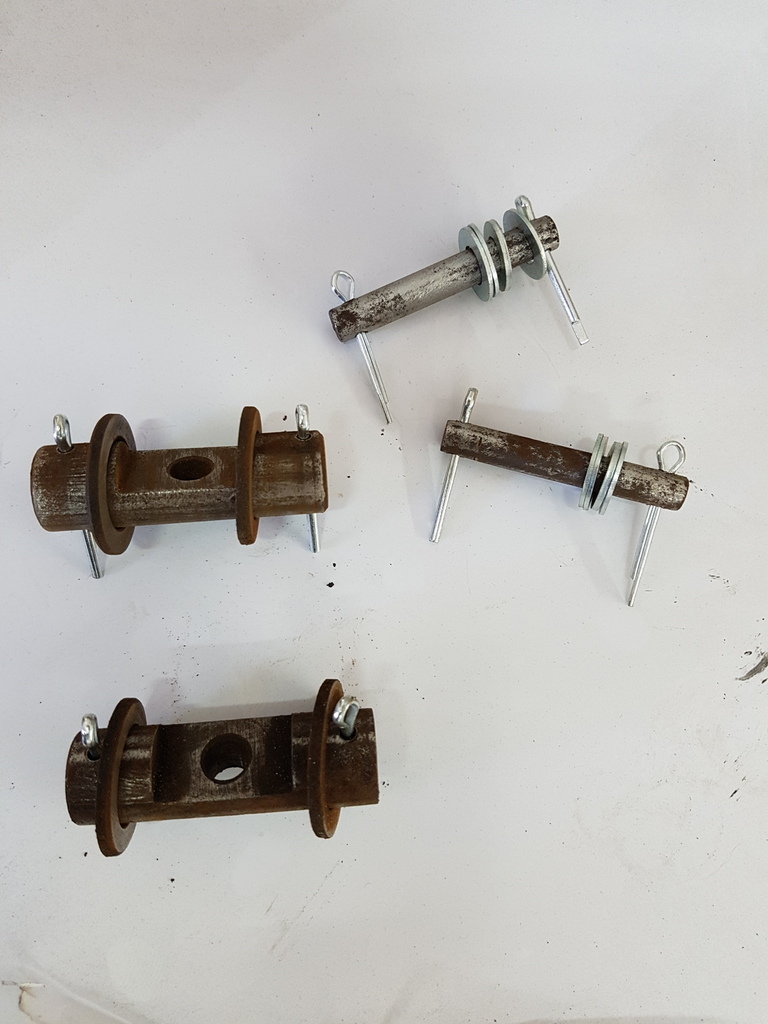 Cleaned the retaining pins up for the tank straps and had to drill the old rusted split pins out  Upper retaining pins fitted but will have to painted insitu otherwise it makes them too tight to fit if painted off the mounting 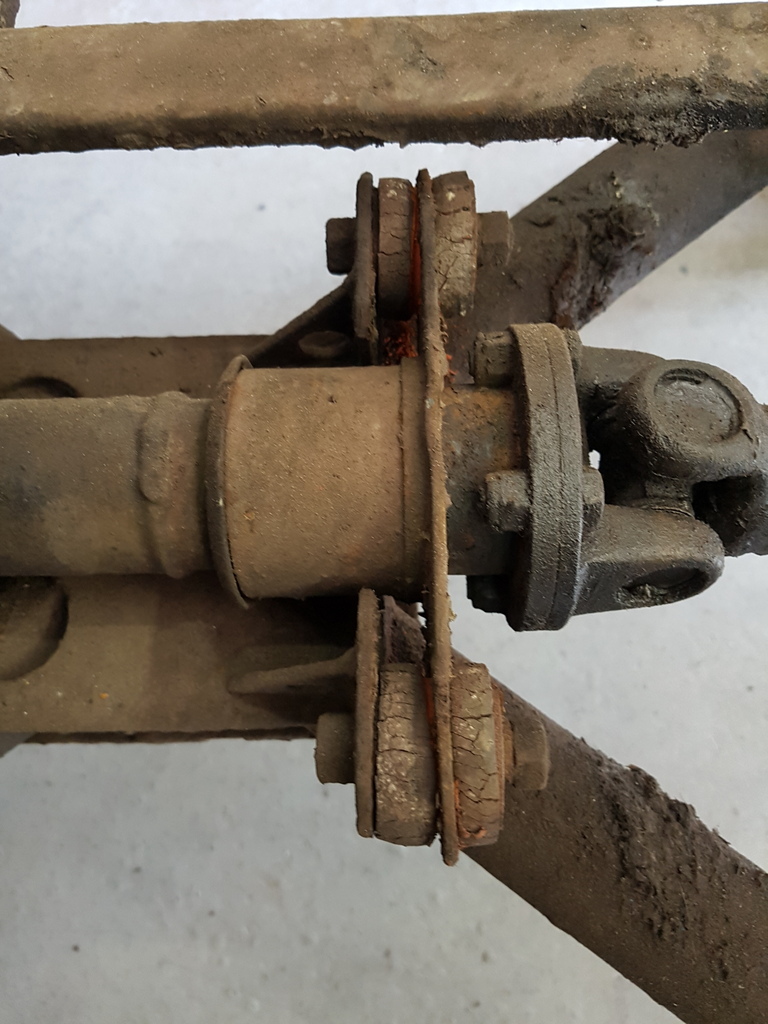 With the floor out and the car in the air a few minor mechanical maintenance issues could be readily accessed / addressed - the bushes on the propshaft mid mounting were worn & perished 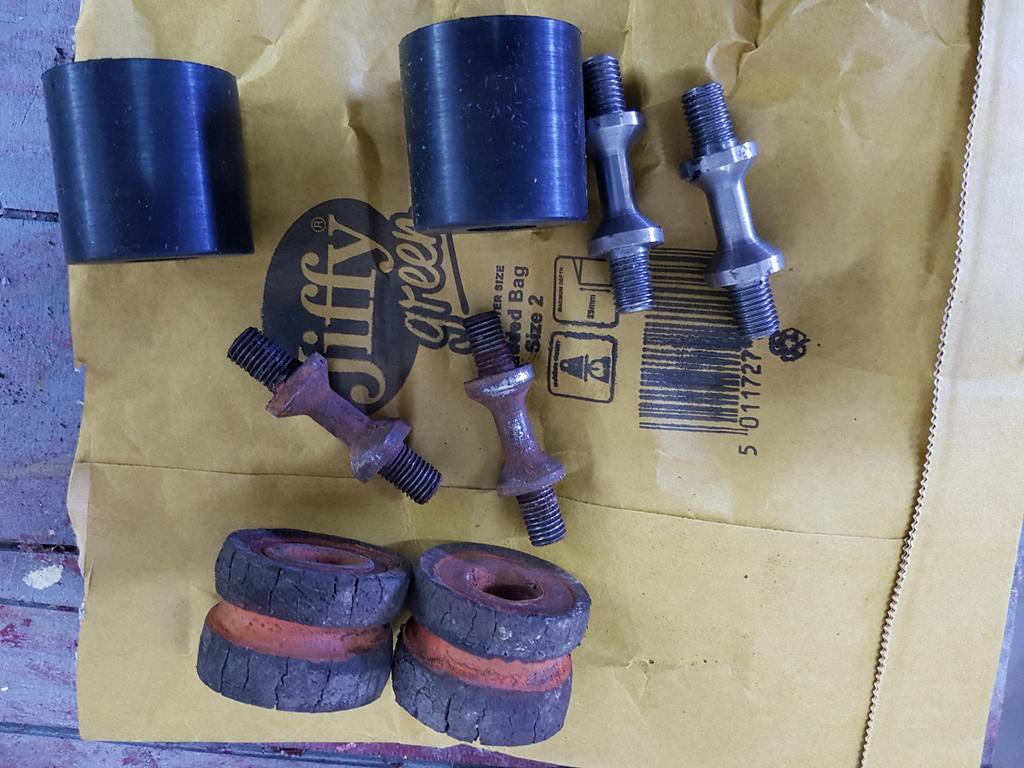 New ones complete with the waisted bolts were fitted 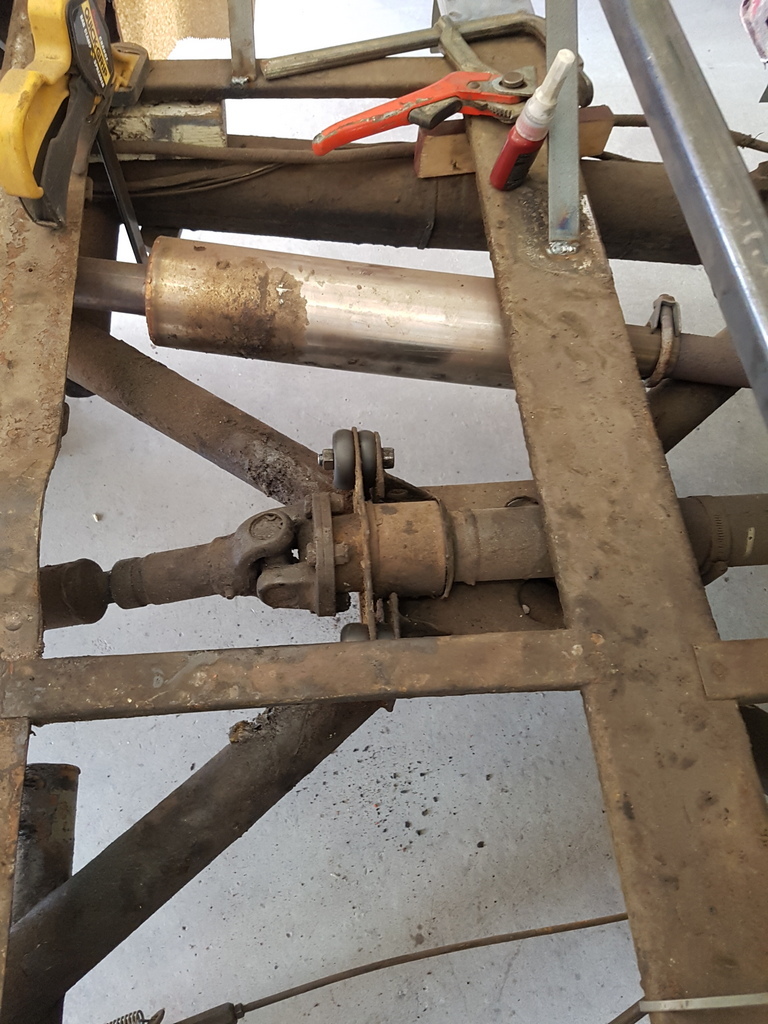 Both of the steering rack gaiter's are split - the rack is unique to the Jupiter hence rare, even of a rarer commodity are the parts to repair them with - so the last thing you need is to shorten the life of your rare steering rack by letting the debris thrown up off the close proximity road wheels then be retained by the grease in the rack and directly lead to the increased wear rate on the rack internals. 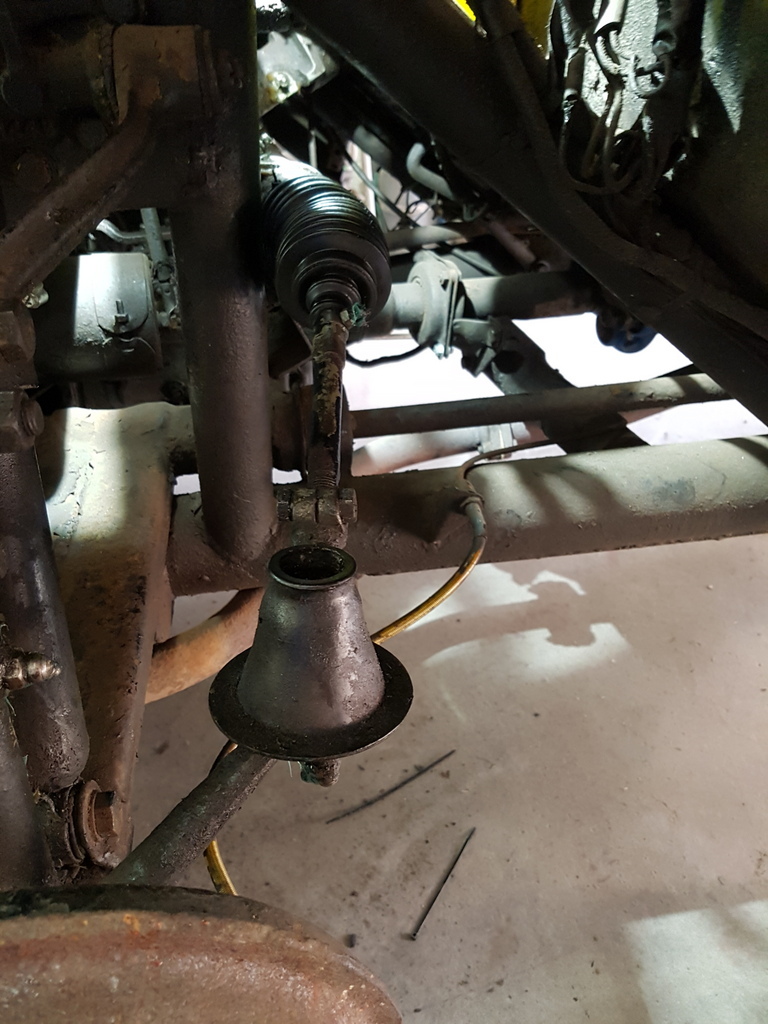 That's the nearside one done - greased all the points up at the same time - all parts supplied direct from the clubs own parts department 'Jowett Car Spares' 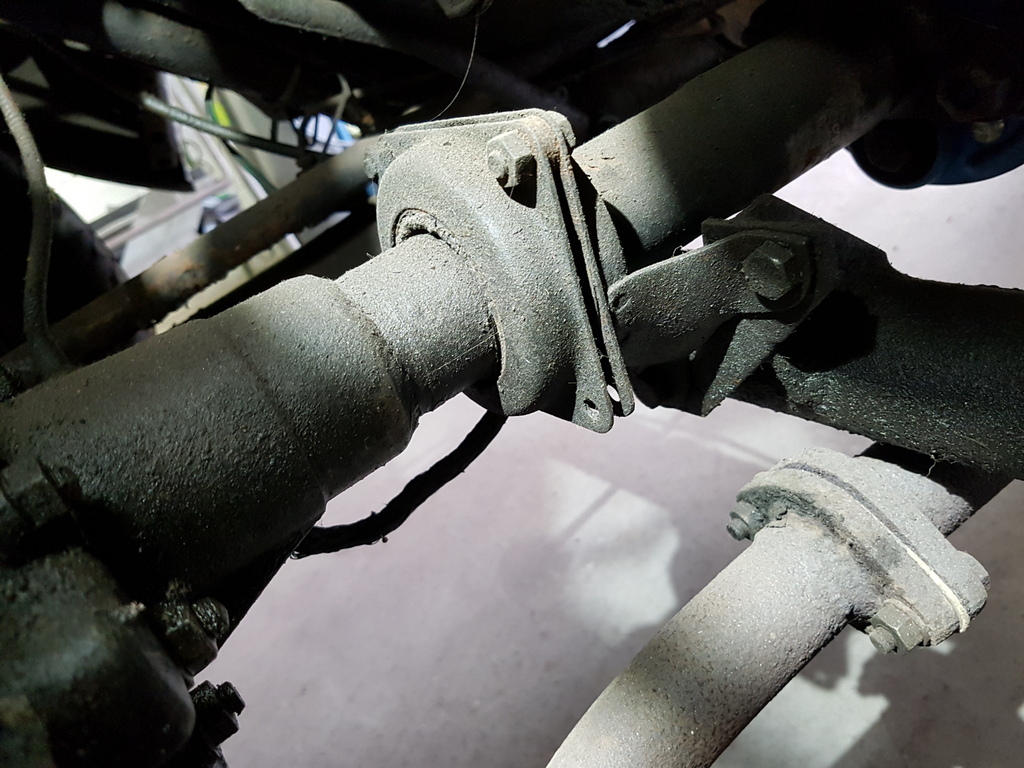 Noticed that a bolt was missing on the front propshaft support too - soon remedied 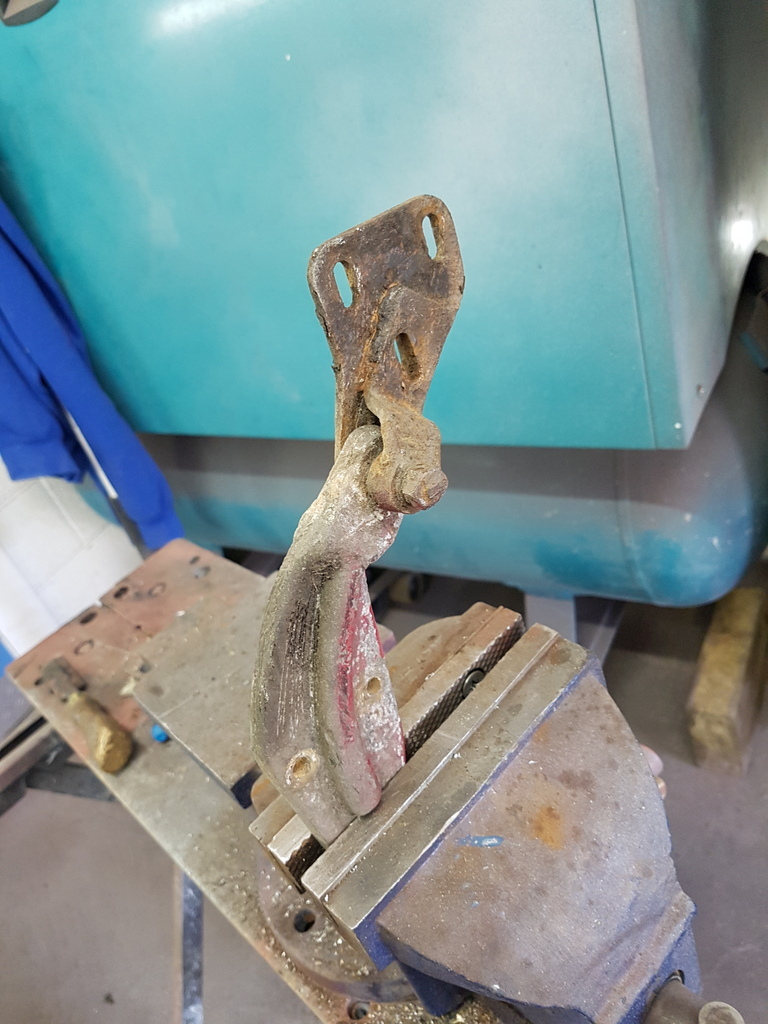 Scruffy looking nearside bottom door hinge was also checked for wear - but passed ok - then was cleaned up along with the rear bumper bar irons  Which in turn were all etch primed then painted with satin black  Reason for getting lots of the smaller jobs done yesterday was that they were all worked in between this - profiling the rear wing  It's all done by hand blocking and in these current temperatures is very hard work - so the best way to do it is a section at a time and work in other small jobs in-between the sections - go for it one hit and you will be very uncomfortable very quickly to the point that you will not want to work for the rest of the day - not very productive or effective.  Likewise for reapplying the skims - you will not get the wing done in one hit - this second application took me four - mixing it in small batches allowed me just enough time to apply it and neaten up close to the profiles required before it starts to cure in this type of temperature - add too little hardener and it will only part cure and clog your sanding paper no end along with effecting the final paint finish - the bigger the mess you make of applying filler - the more sanding & rubbing down you will be faced with - sounds like a nightmare - but just be methodical and pace yourself - a little forward planning goes a awful long way when it comes to panel profiling  Forget machine sanding on these type of profiles - there are too many compound curvatures - it's all by hand I'm afraid - so by writing this thread update I have had my break / timeout from the sanding the second skim - I'd better gat back to it ! |
| |
Last Edit: Jul 7, 2018 10:50:25 GMT by Deleted
|
|
|
|
|
|
|
|
|
|
What sort of difference does the extra heat make to the filler mix, Les hardener and long cure time or just a smaller mixes?
|
| |
|
|
|
|
|
|
|
What sort of difference does the extra heat make to the filler mix, Les hardener and long cure time or just a smaller mixes? Pete - Smaller batched mixes with a little less hardener - so in cooler temps i.e. below 10 degrees you are looking at a 20 - 30 min curing time - this can of course be accelerated by adding more hardener but this can cause problems with the hardener leaching through the cured filler and effecting the paint finish - has does too little hardener by allowing the softer filler to effect the final paint finish - trick here is to use the correct amount of hardener and accelerate the curing with a heat lamp / heat source - always cool the area to be sanded back down first (with a blow gun) otherwise your sanding paper will clog very quickly. In the current temperatures and you have 2 - 4 mins to get the filler applied before it starts to cure and will be fully cured in under 10 mins - so small batches and quick application is required. |
| |
Last Edit: Jul 7, 2018 12:03:33 GMT by Deleted
|
|
|
|
|
|
|
|
whats the function of the tube before the rear propshaft ? does it have a solid drive shaft running through the middle (under the cabin) ? or is the front half another bit of prop (just abnormally large) and the bit with rubber mountings just a bearing carrier ?
|
| |
|
|
|
|
|
|
|
|
Very quick precision work to apply then.
Thank you for the explanation.
|
| |
|
|
|
|
|
|
|
whats the function of the tube before the rear propshaft ? does it have a solid drive shaft running through the middle (under the cabin) ? or is the front half another bit of prop (just abnormally large) and the bit with rubber mountings just a bearing carrier ? Darren the prop is essentially a 3 piece - so there is a shaft from the gearbox that goes through the first carrier and to a lay-rub coupling (the blue circular disc that you see in the image) 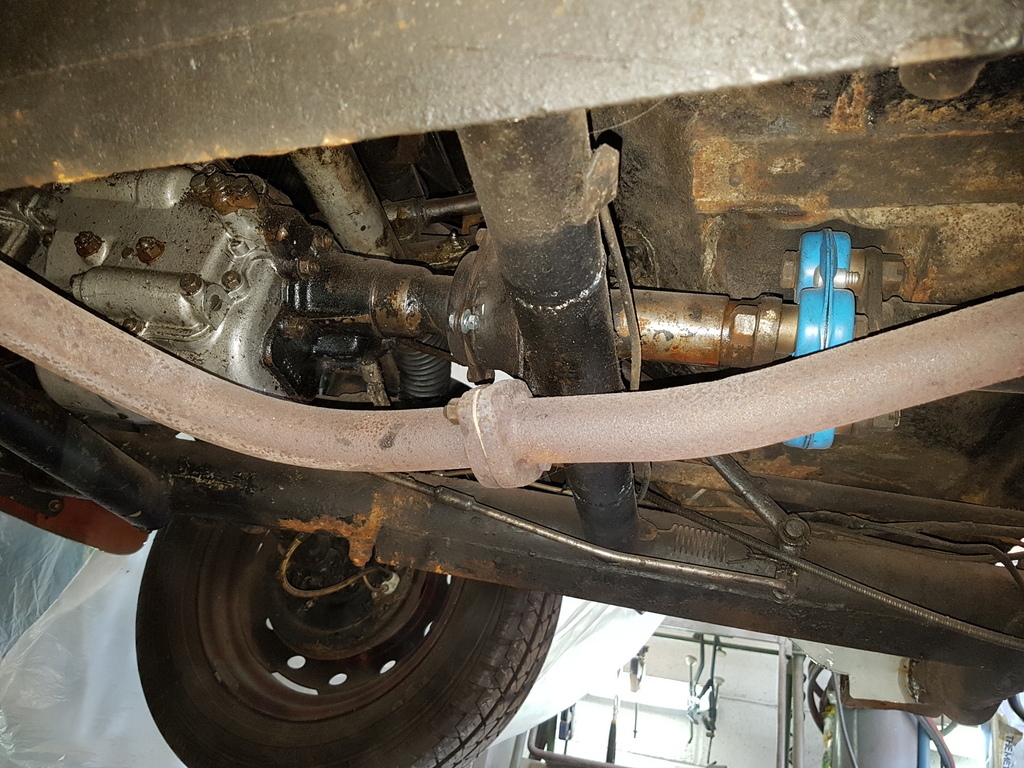 A second prop then travels to the centre carrier that I replaced the bushes on yesterday and then a third prop from the centre carrier down to the axle |
| |
|
|
|
|
|
|
|
Carried on with the profiling of the second skim 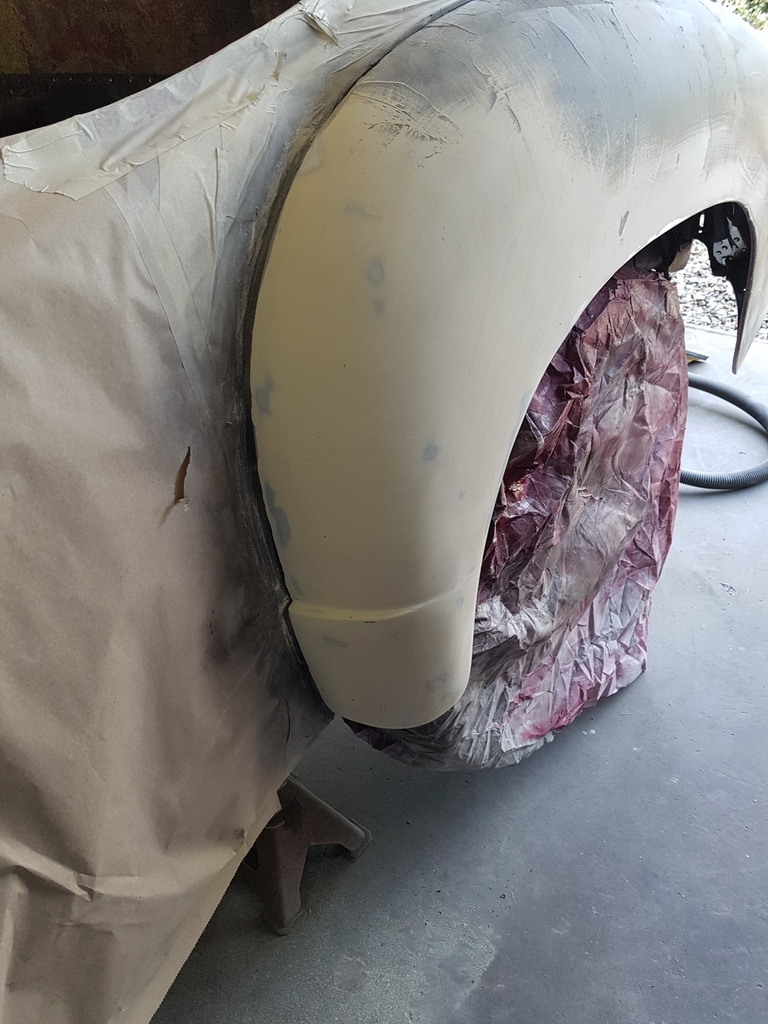 Section at a time has previously detailed 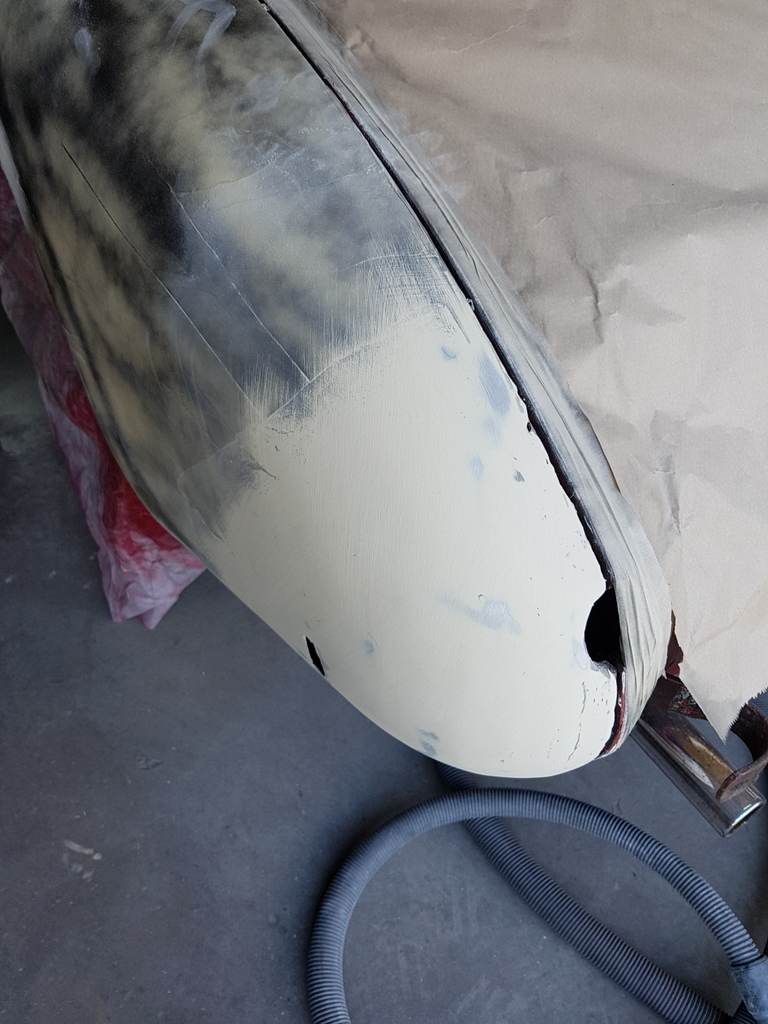 I utilise a Mirka dust free sanding system - the areas with the tighter radius / curvature were done with the small block - Velcro / hook & loop type abrasive but with the abrasive laid onto a net to allow the dust to be pulled through via the vacuum - it makes a huge difference 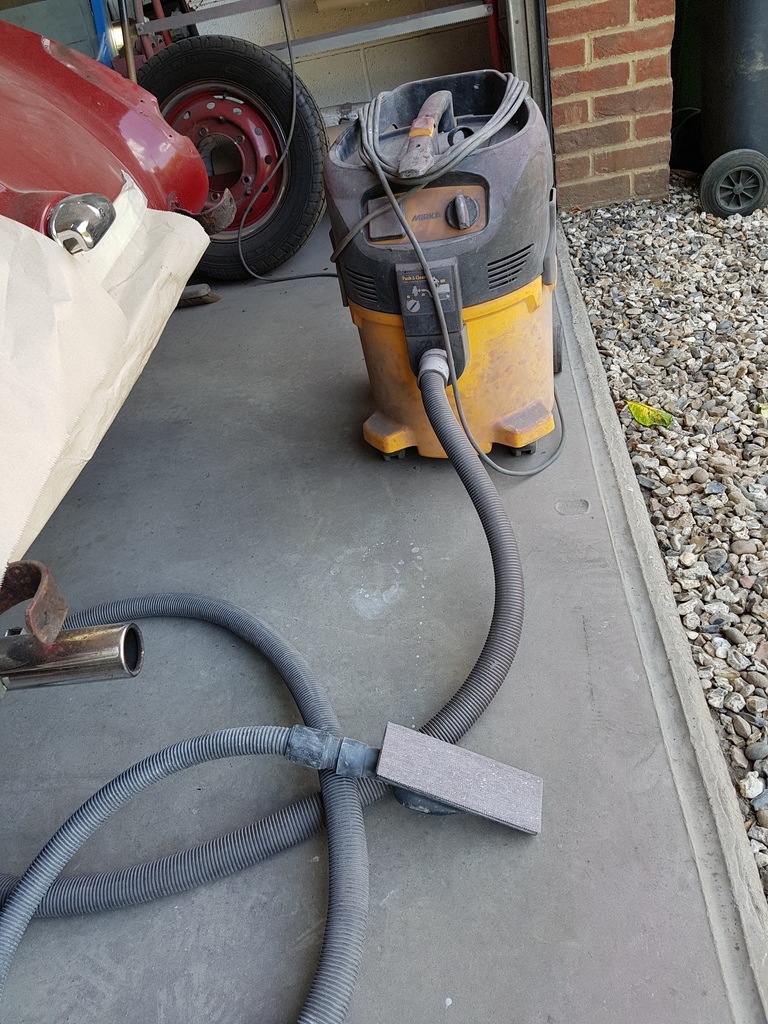 And for the larger areas I have this flexible block - ideal for this type of work 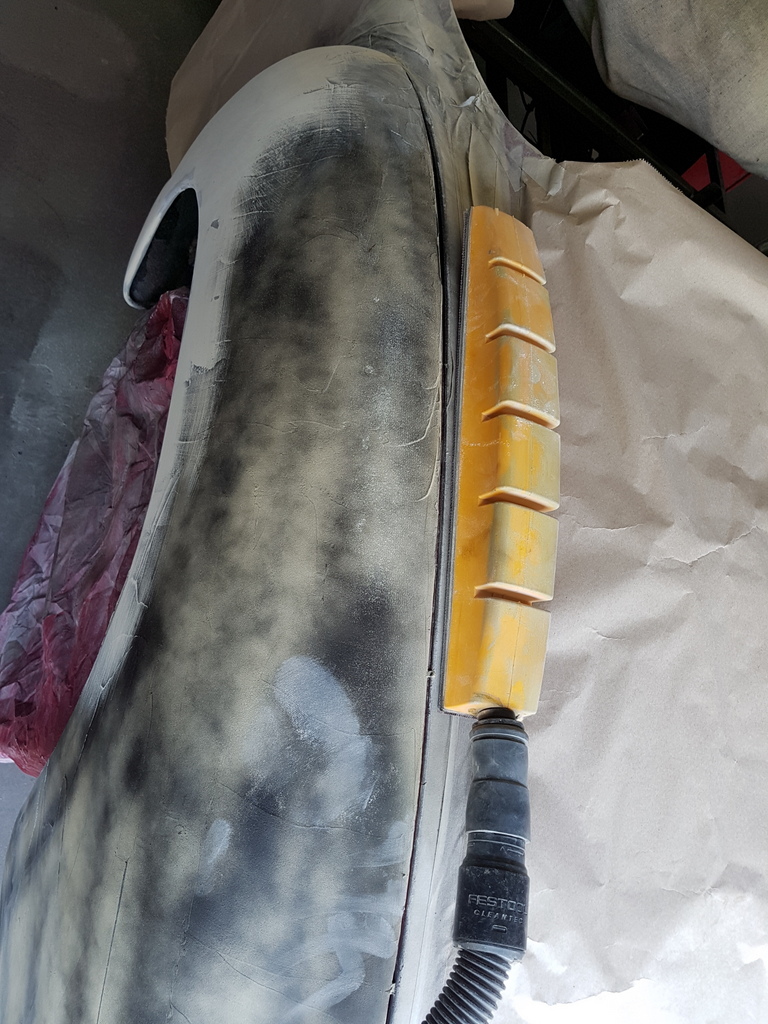 Second skim done and ready for the third skim 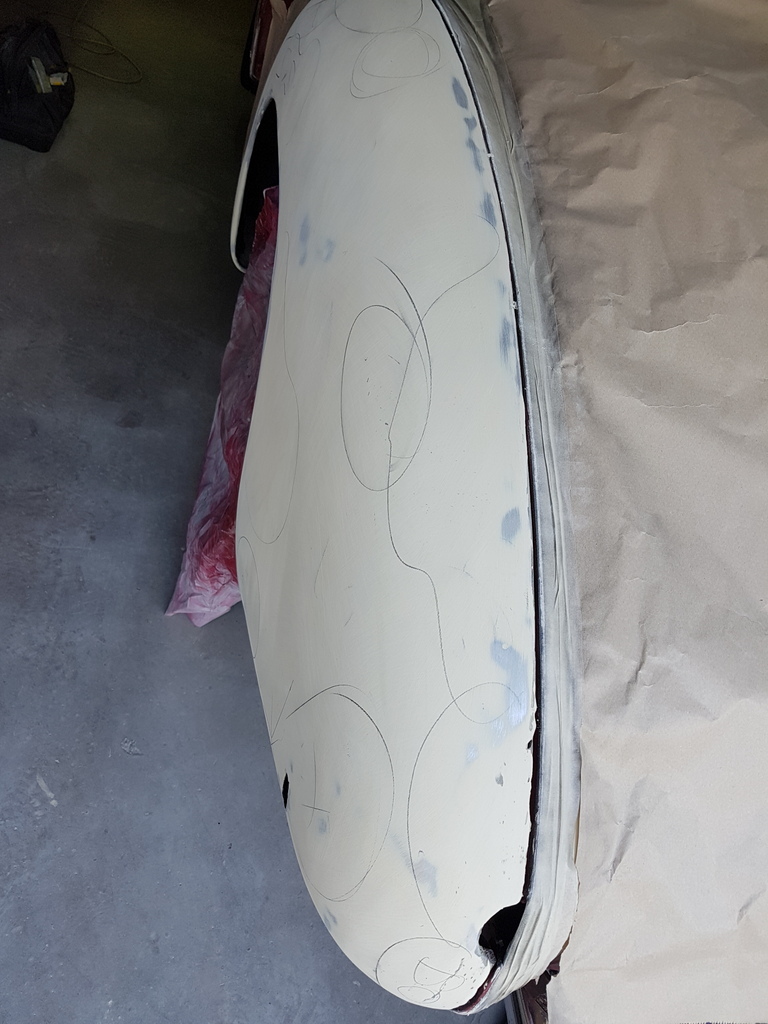 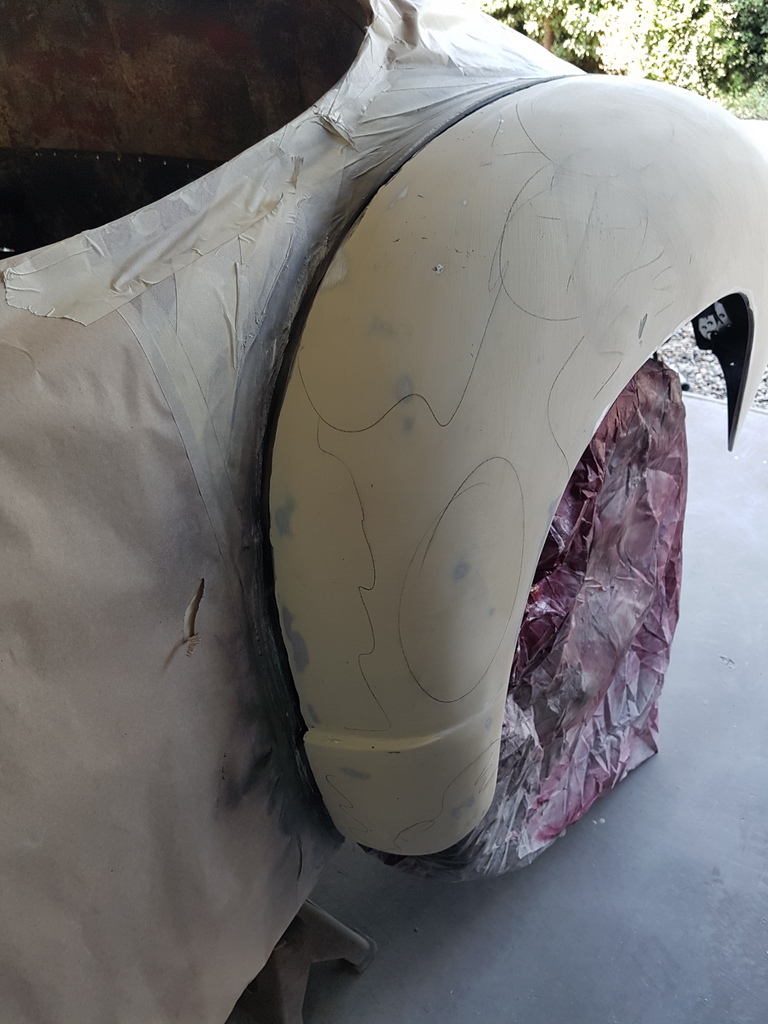 Third skim ready for blocking back 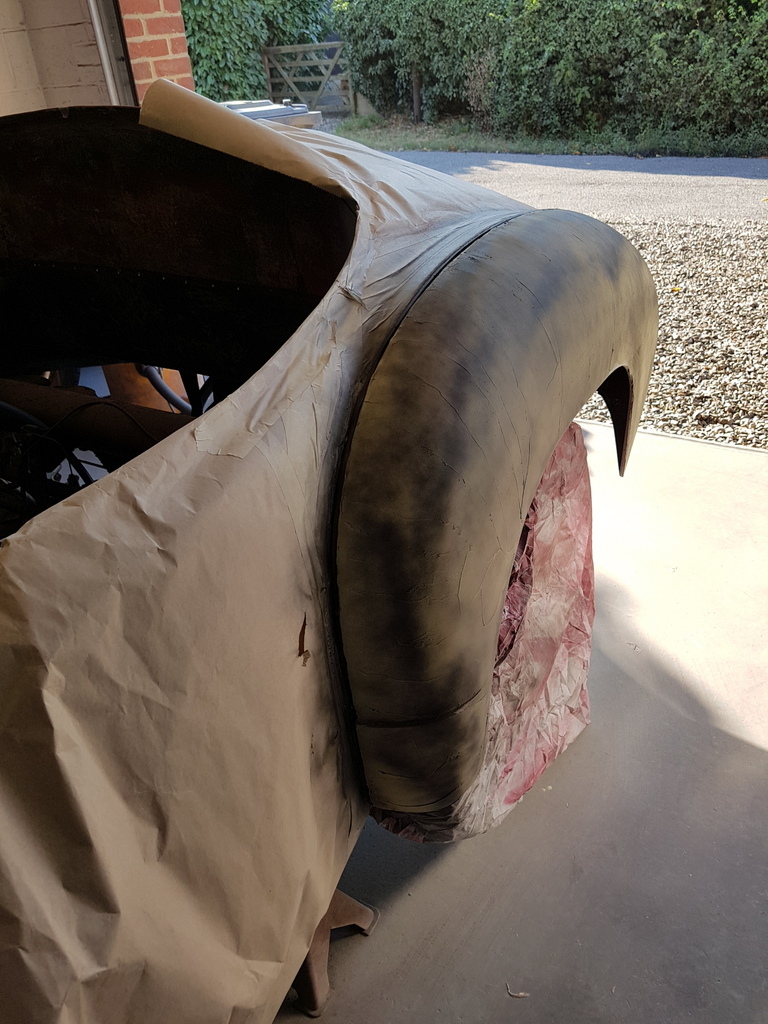 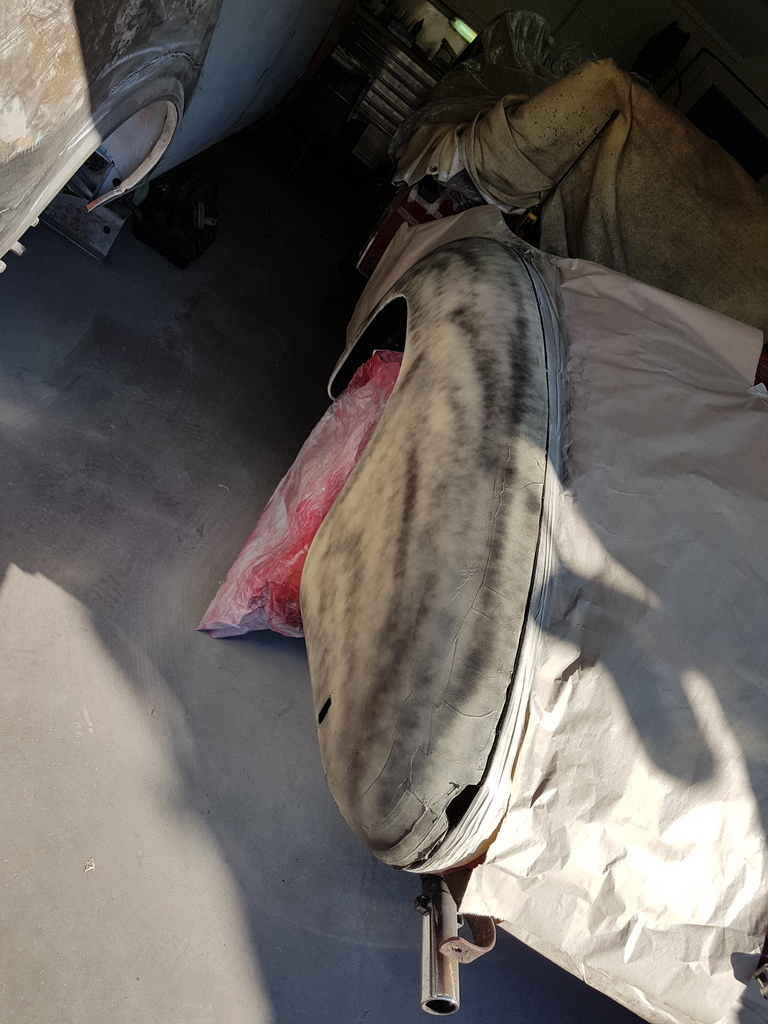 Done and the fourth skim applied but getting close so just applied to selected areas 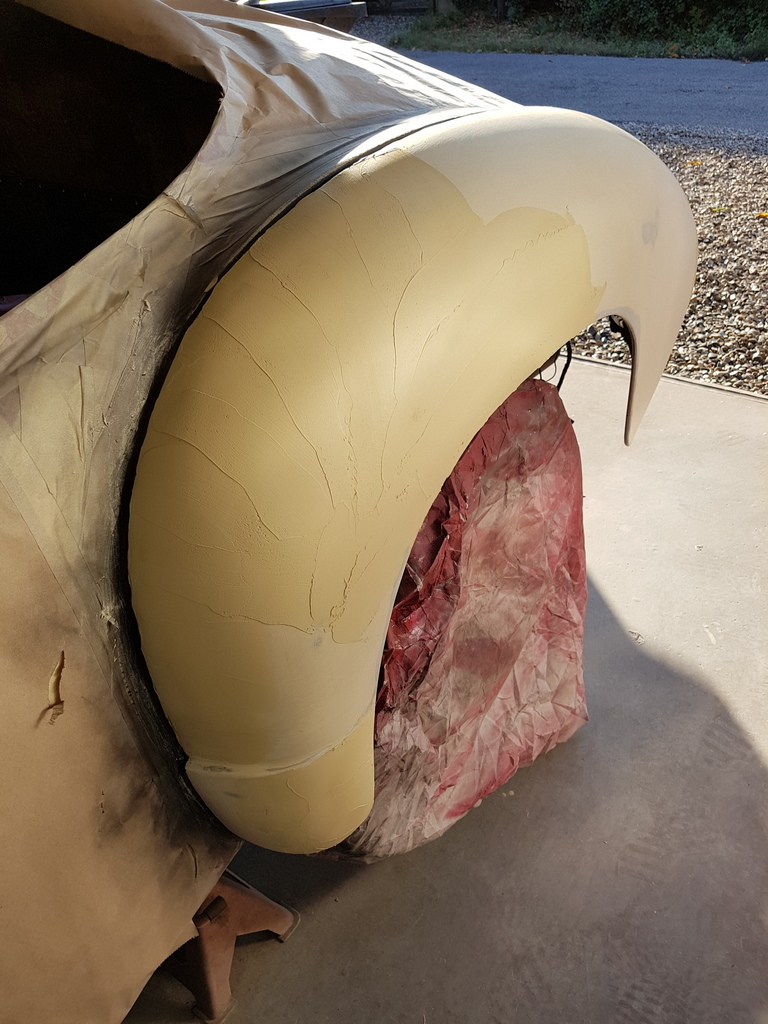 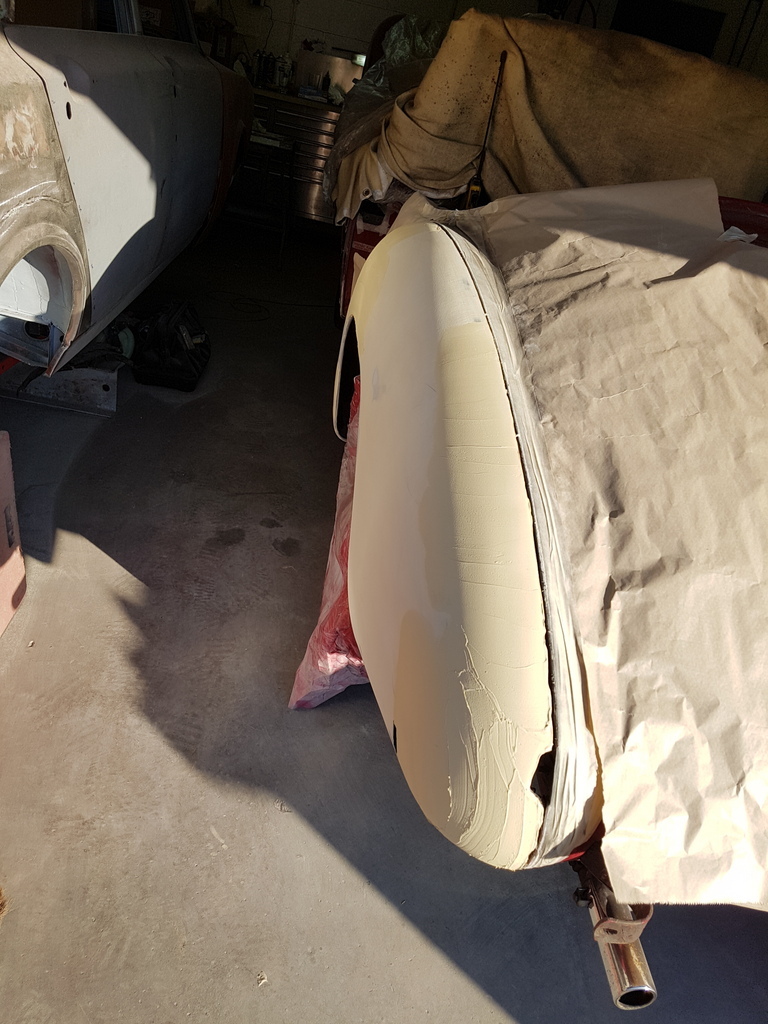 In between the sanding & filling this happened 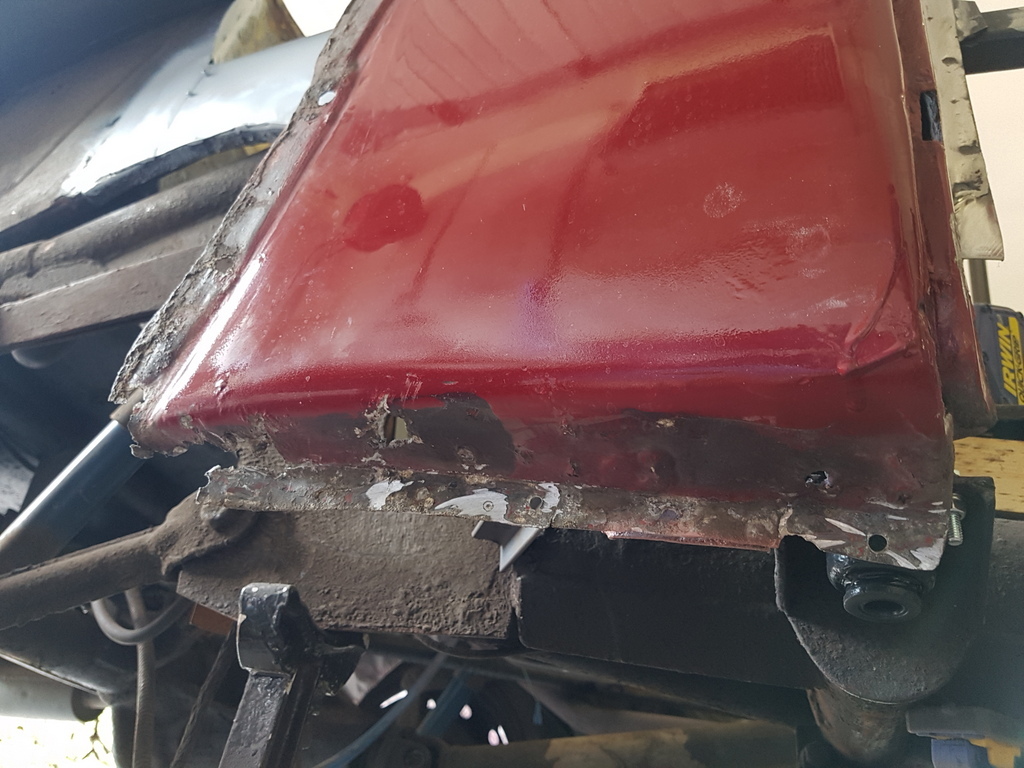 I assessed the offside rear quarter for its integrity 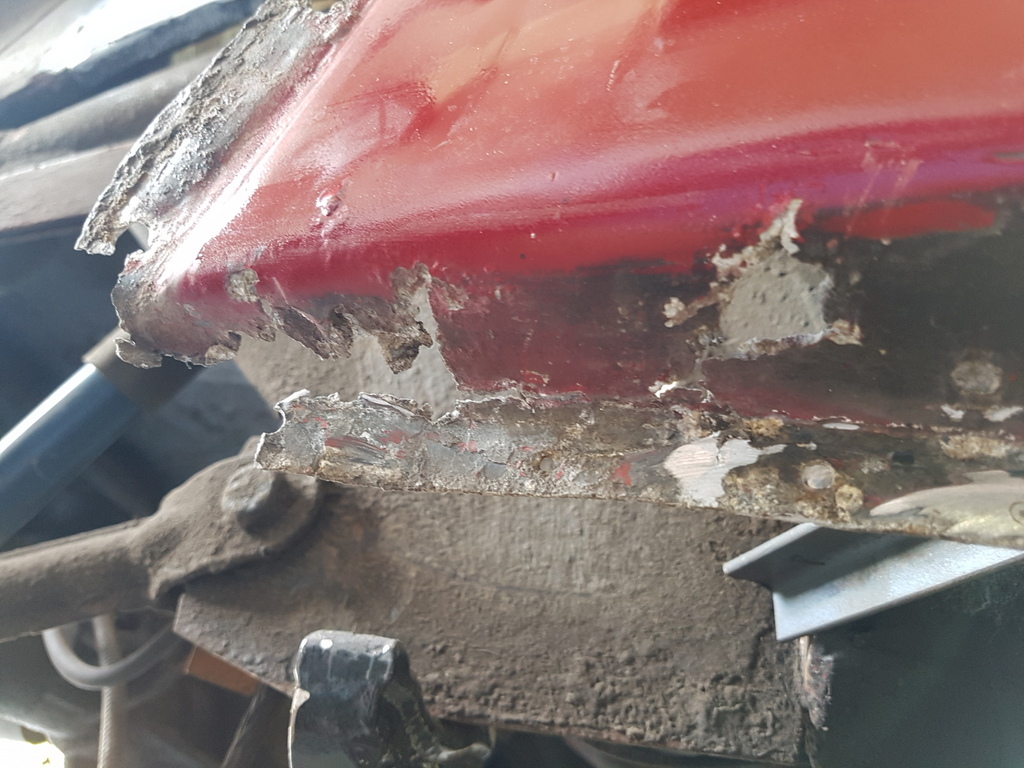 And it scored 3 out of 10 - basically it's very weak at the point that it fastens to the sill - just need to let a section in on the bottom radius to sort it - this panel is alloy and I have it paint it anyway due to other repairs that were required has part of the inner wing replacement - I know it looks like I'm finding yet more work but its a straight forward strengthening repair in my book and this panel in turn supports the rear wing 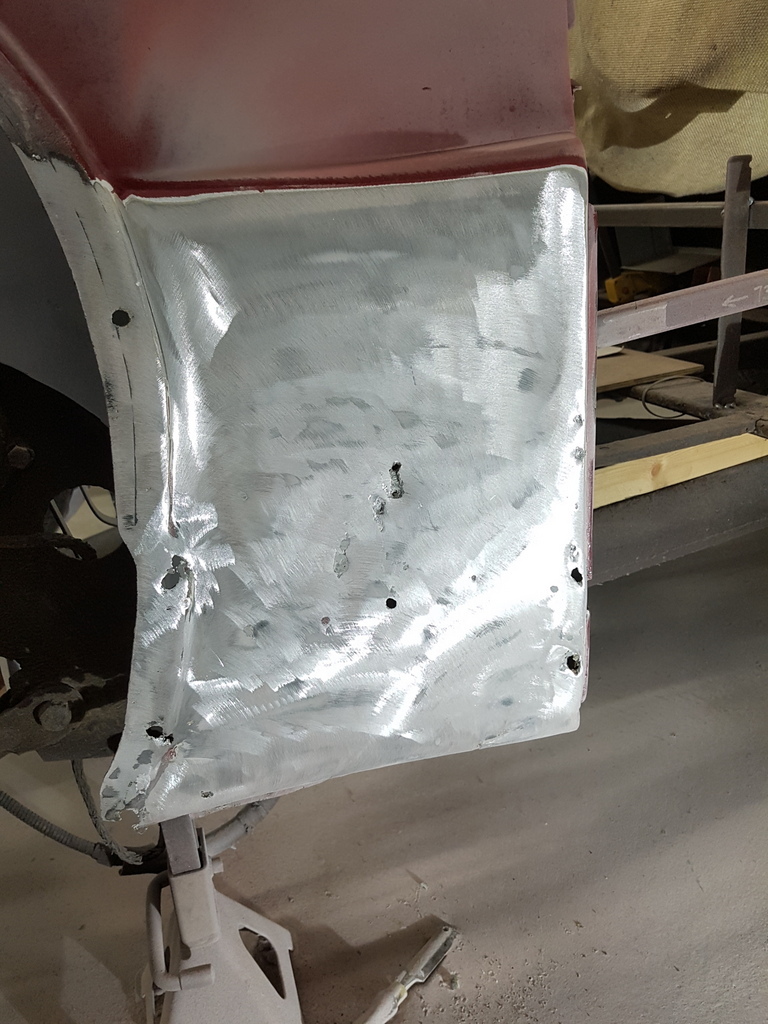 So I went to clean the panel back and found filler - loads of very deep filler - ho why do they do it ?  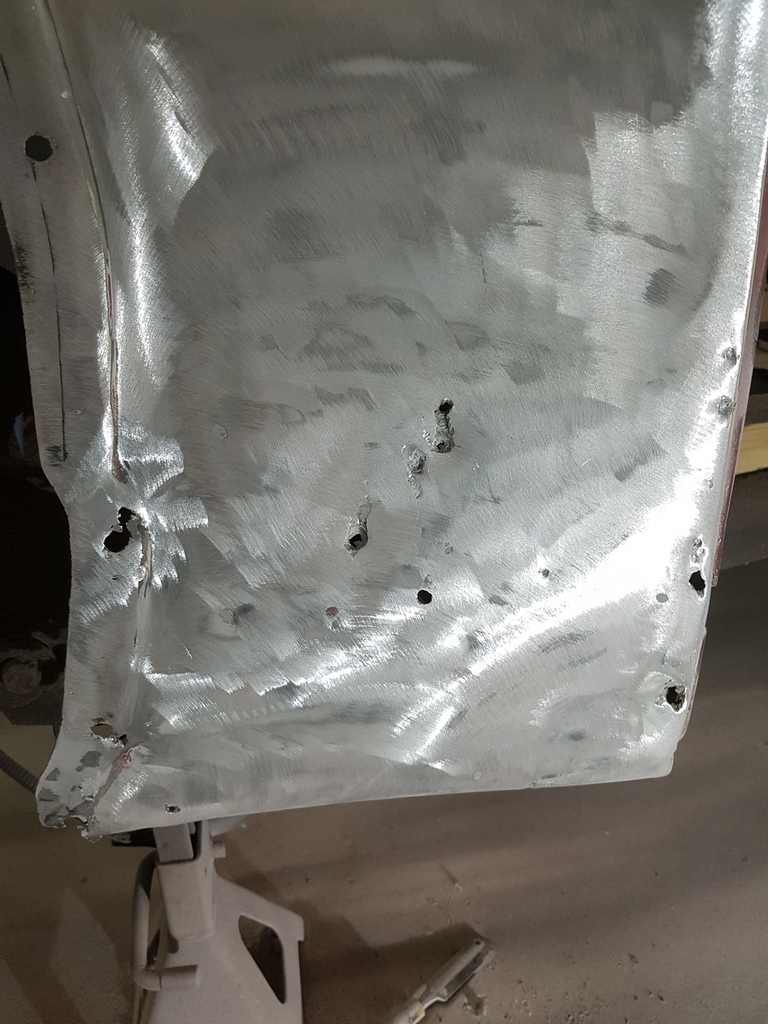  Easily sorted - used the original panel insitu to pattern a new section 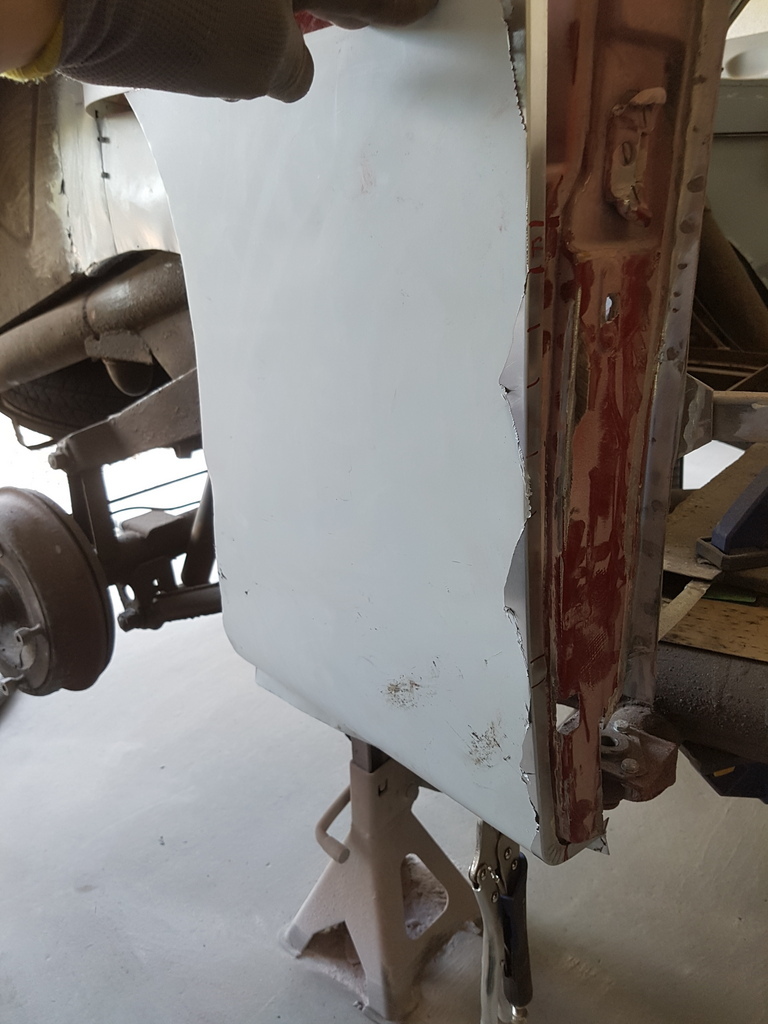 Utilised the shrinker to achieve the radius curves once I had formed the right angle return to the door aperture 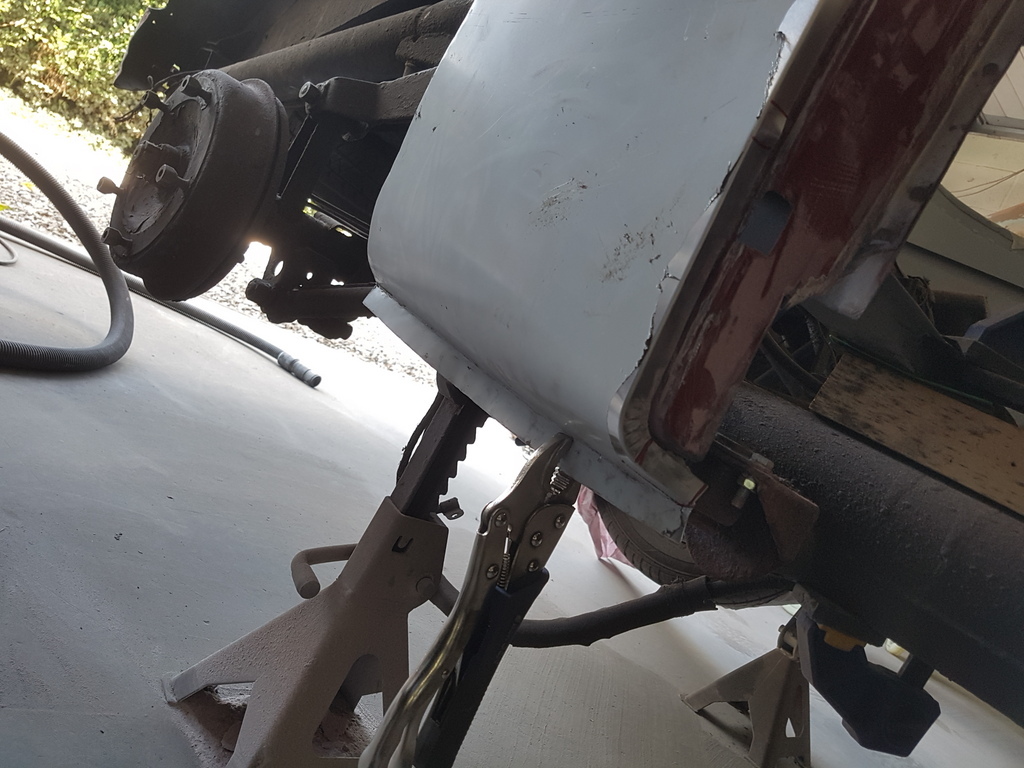 Original panel is simply pop riveted to the B post 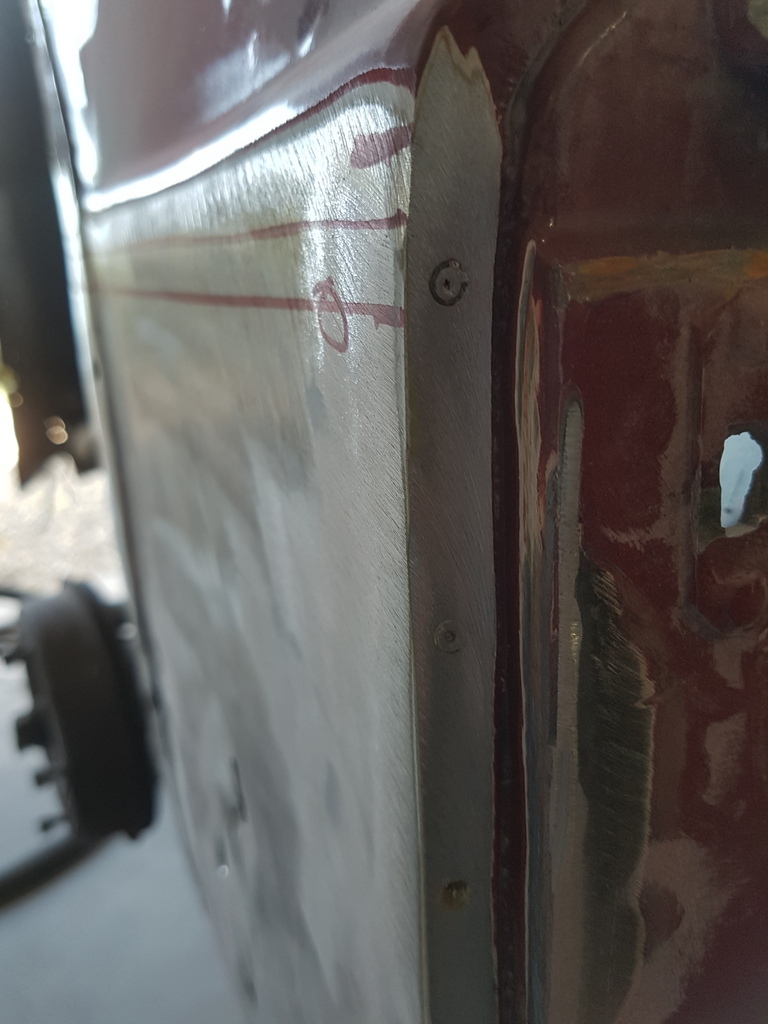 Old panel cut & removed - joggled rebate set in just under the swage radius 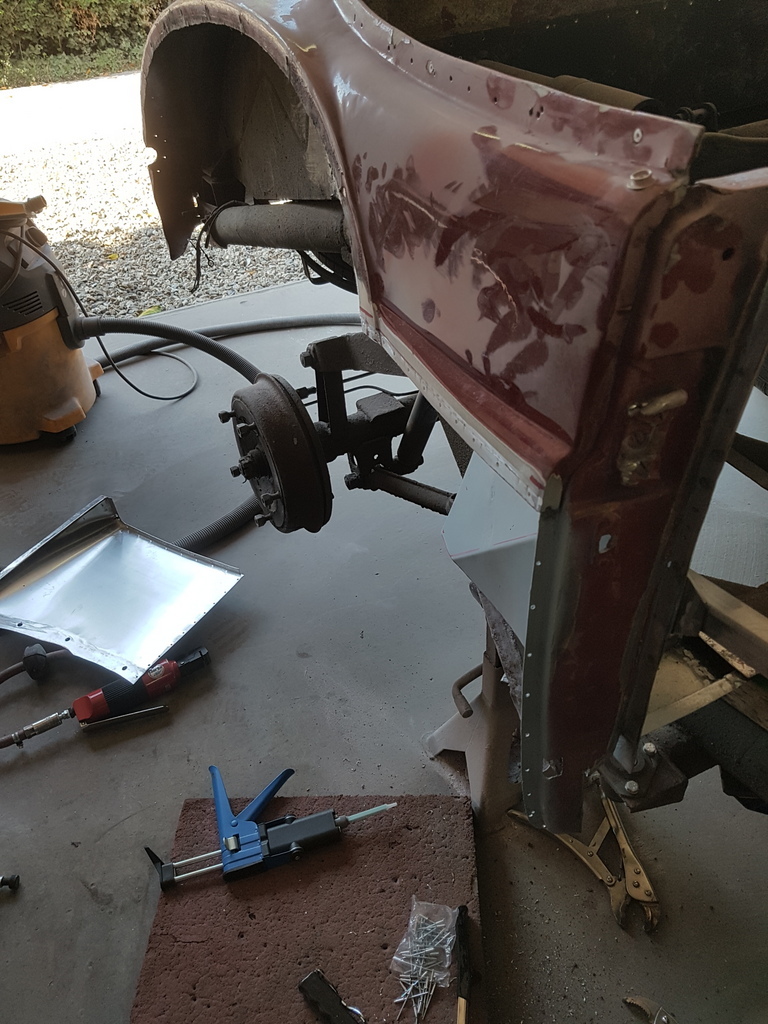 New panel trial fitted 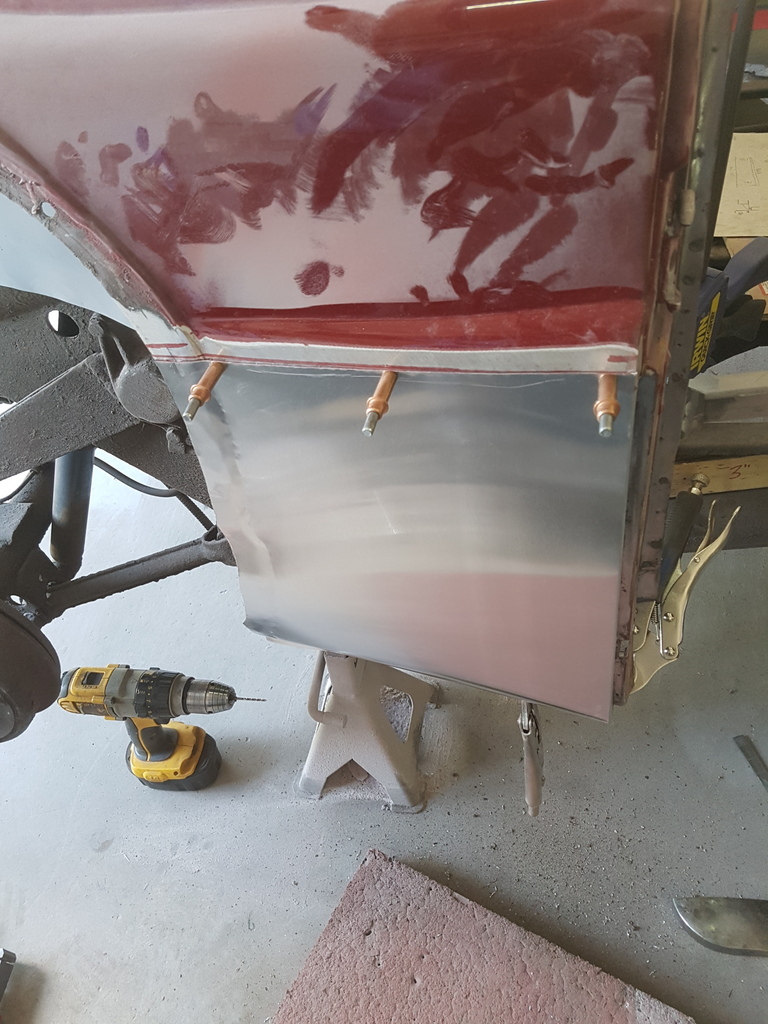 New panel bonded & countersunk pop riveted into place - initially dressed back 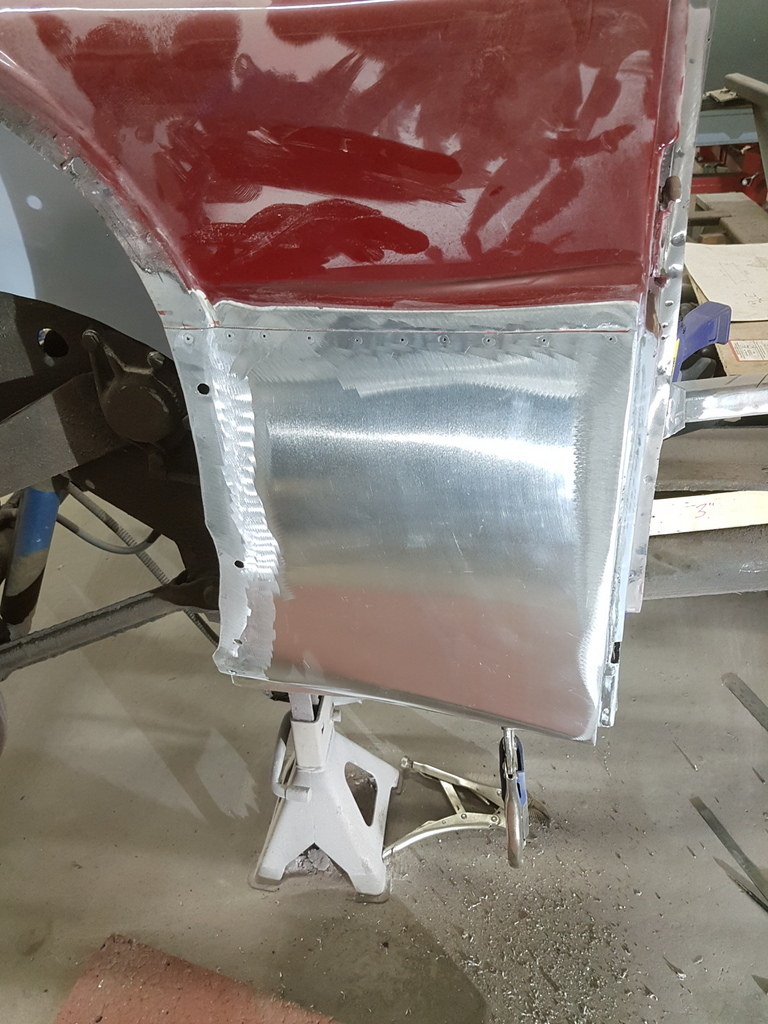 Further dressing back 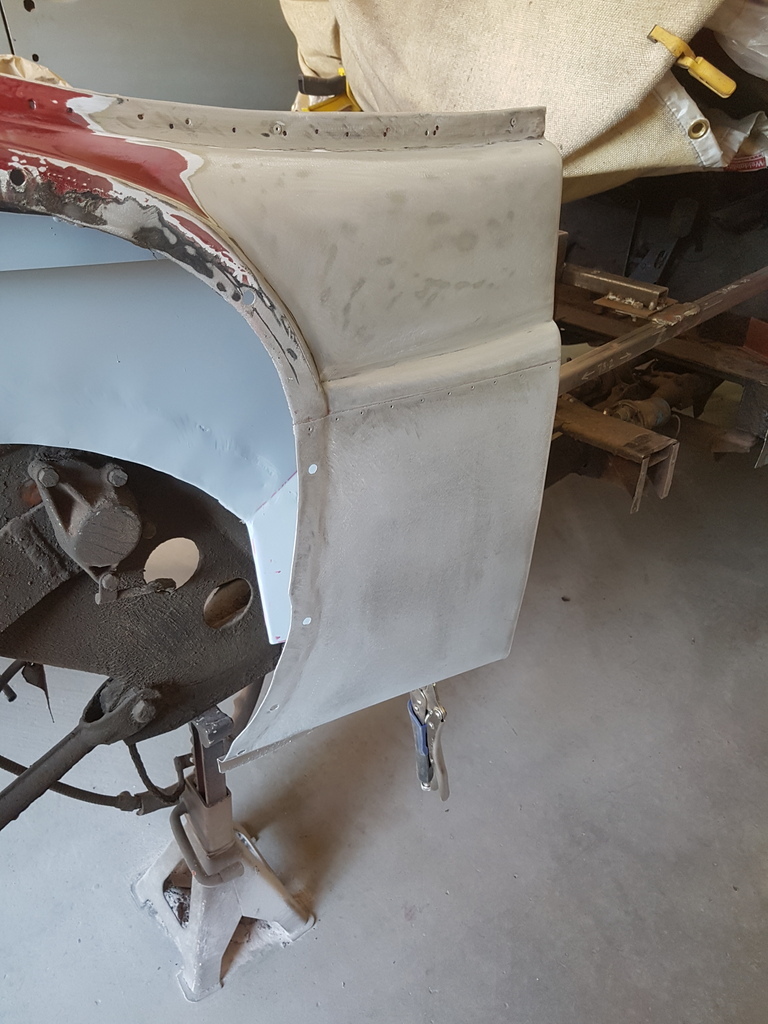 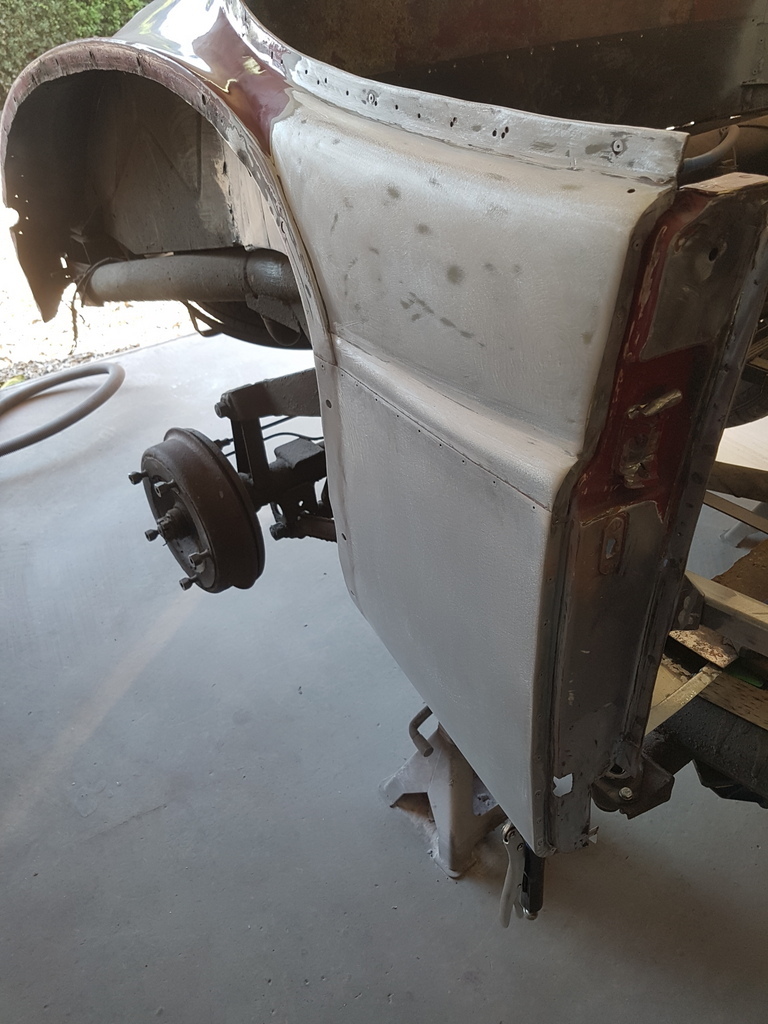 Nothing that a few skims will not now sort  I reckon that I sorted the new panel / fabricated & fitted it in the same time that it would have taken to bodge the original with filler which would have cracked / broken out within a few months of use |
| |
|
|
|
|
|
|
|
So I went to clean the panel back and found filler - loads of very deep filler - ho why do they do it ? I think that it's more of a case that they just are not bothered or in the case of my Corsair they just don't know any better. When blocking option do you prefer forward to back over the panel or X to find all the highs & lows?
|
| |
Last Edit: Jul 7, 2018 22:42:03 GMT by peteh1969
|
|
|
|
|
|
|
|
Chris,
I've been assembling more and more of the Mirka dustless hand sanding blocks over the past three years, including those you show, plus the Mirka Deros random orbital, all of which connect to my Makita VC4710 Xtract Vac with auto cleaning filters, and as a result, the shop is a far healthier place to work. I'm fairly certain the Makita and Mirka dust extractors are both made by Nilfsk/Alto/Wap, who also make vacs rebranded by several other companies. Great products..
Lance
|
| |
|
|
glenanderson
Club Retro Rides Member
Posts: 4,108
Club RR Member Number: 64
|
|
|
|
|
I’ve got a repair to do on some Land-Rover panels that I’ve been avoiding for ages because I’d convinced myself the only way to do it to my satisfaction would be to cut repair sections from the donor panels I have, and get them TIG welded into place. I think now though it’d be better to rethink how and where I section the donor panels, with a view to bonding and rivetting them instead.
Looks like I can stop putting it off. 😃
|
| |
My worst worry about dying is my wife selling my stuff for what I told her it cost...
|
|
tristanh
Part of things
 Routinely bewildered
Posts: 990 
|
|
|
|
|
I much prefer to bond non structure panels/repairs than to weld them, even steel ones.
Hope you're drinking bucket loads of water Chris!
|
| |
Whether you believe you can, or you cannot, you're probably right.
|
|
|
|


