Darkspeed
Club Retro Rides Member
Posts: 4,867
Club RR Member Number: 39
|
1970 Ginetta G15 Darkspeed
@darkspeed
Club Retro Rides Member 39
|
Mar 17, 2019 18:42:45 GMT
|
Looks to be coming along nicely - how are the window frames? Showers throughout the day create a few issues for me but I did manage to get a bit of work done on both of the G21's First up the white G21M the seat support steel went in both sides - some 50mm x 3mm which will also do duty supporting the the base to lay up the new glassfibre floors onto.  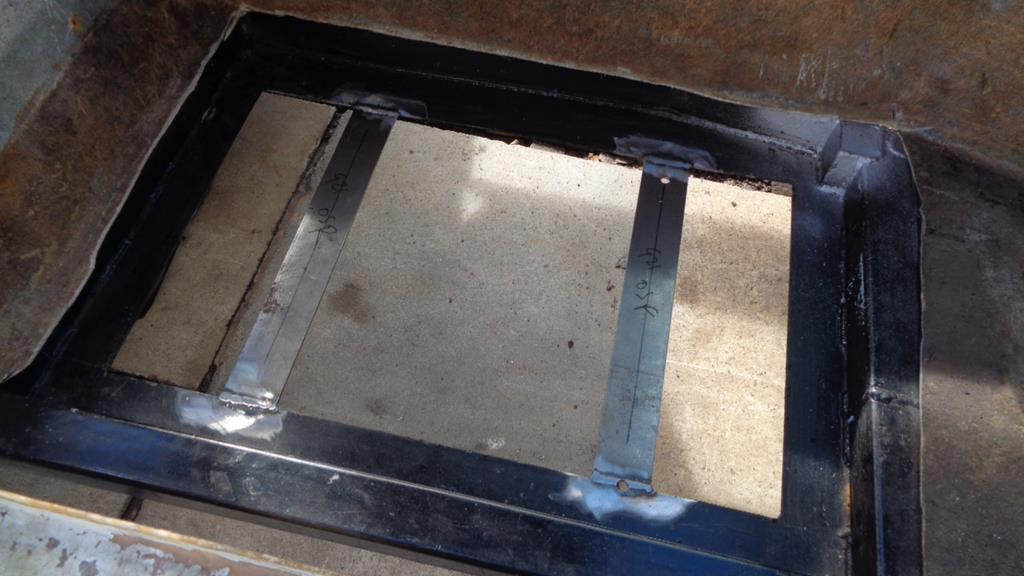 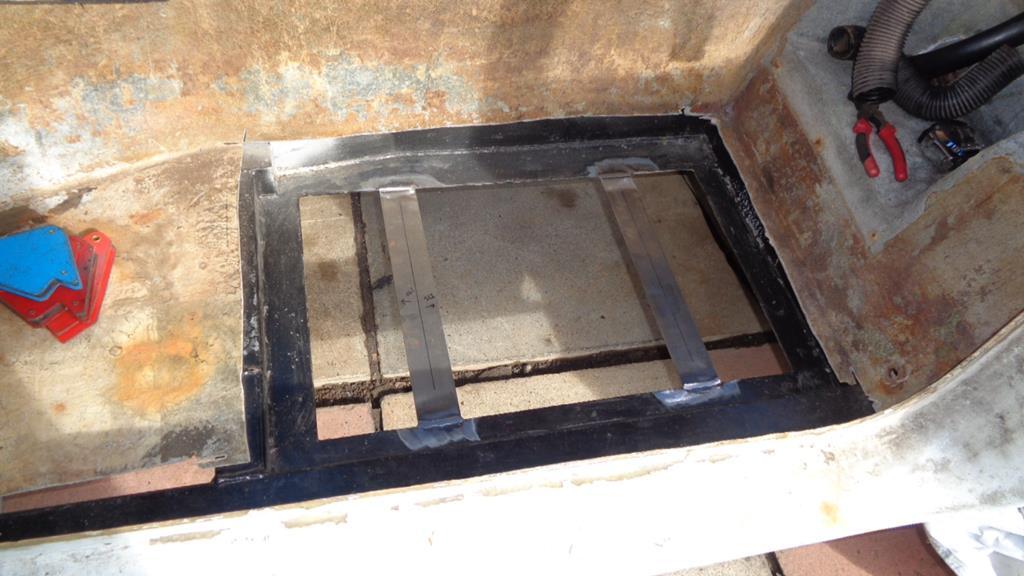 Then I fitted the door hinges - not the easiest of things to do on your own even with stripped out doors with no weight. 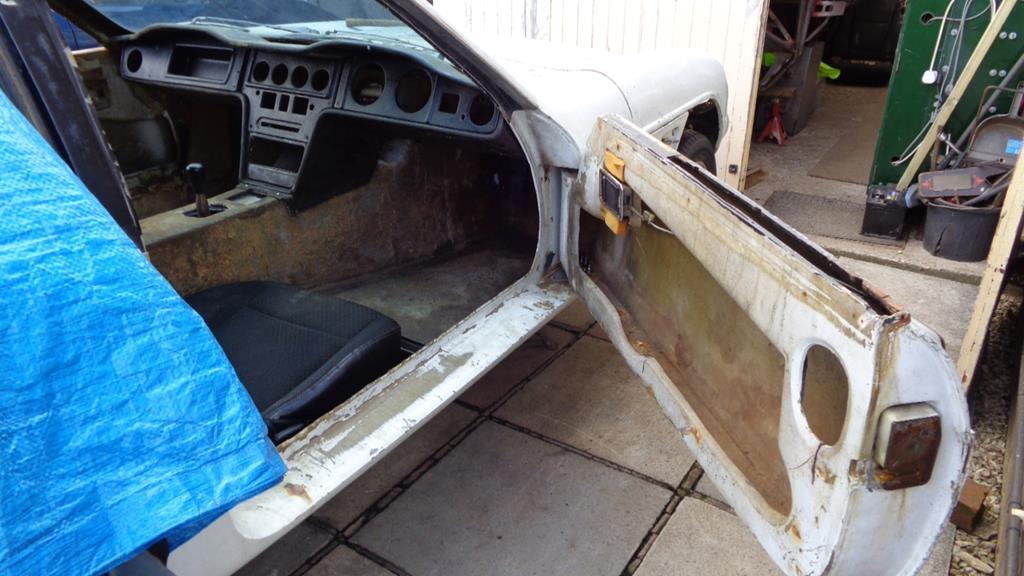 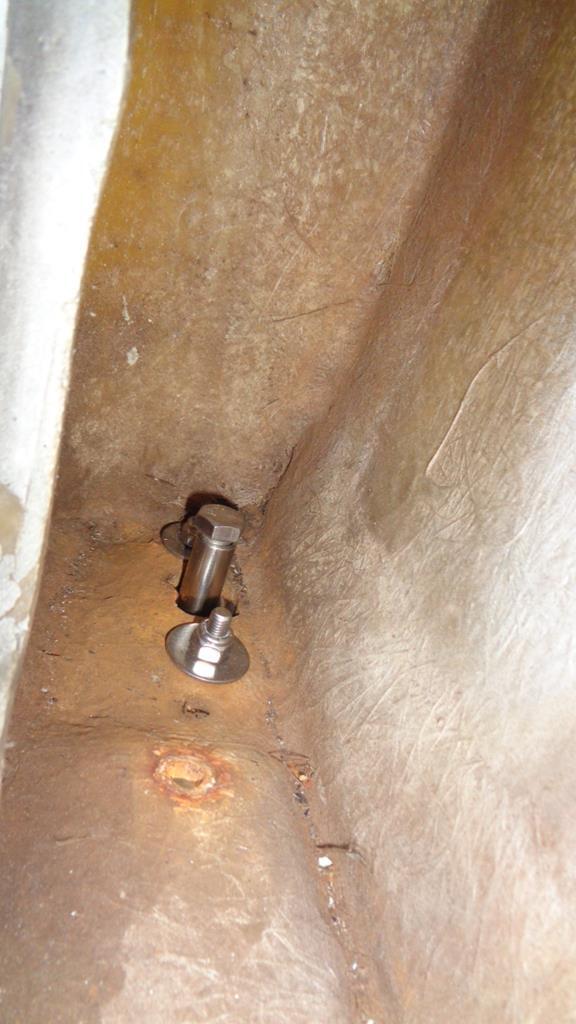  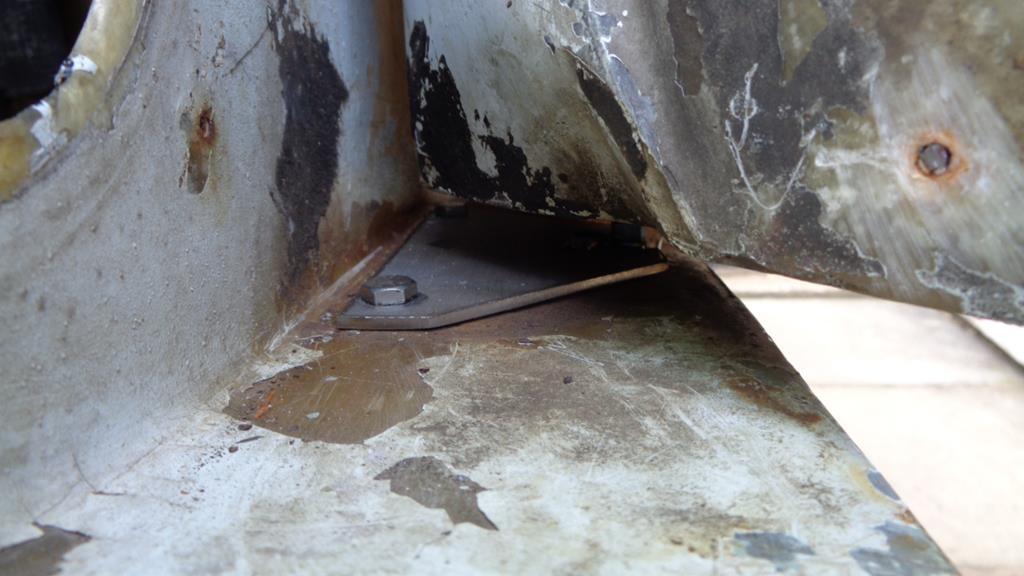 The seating position is really good now - loads of head room and plenty of adjustment for leg room Being able to sit in it and close the doors was a good feeling. Steering next time. Then for a bit of work on the G21S The rain covers had been catching on the very rusty rear bumpers so they needed to come off with the angle grinder being deployed to make short work of the obligatory Ginetta Roofing bolts !! - they used these bloody things on everything - just what you would want to find holding your car together.  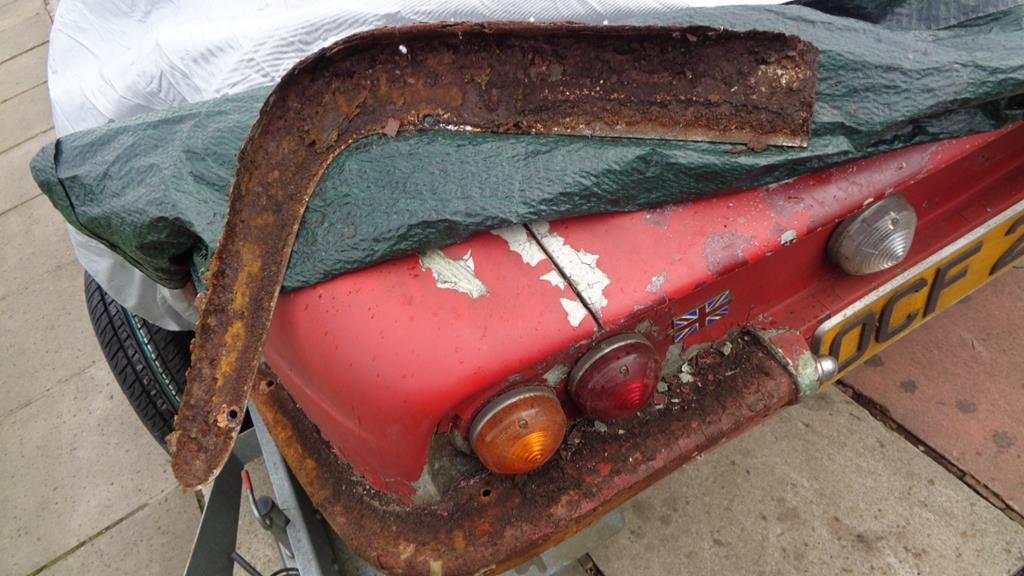 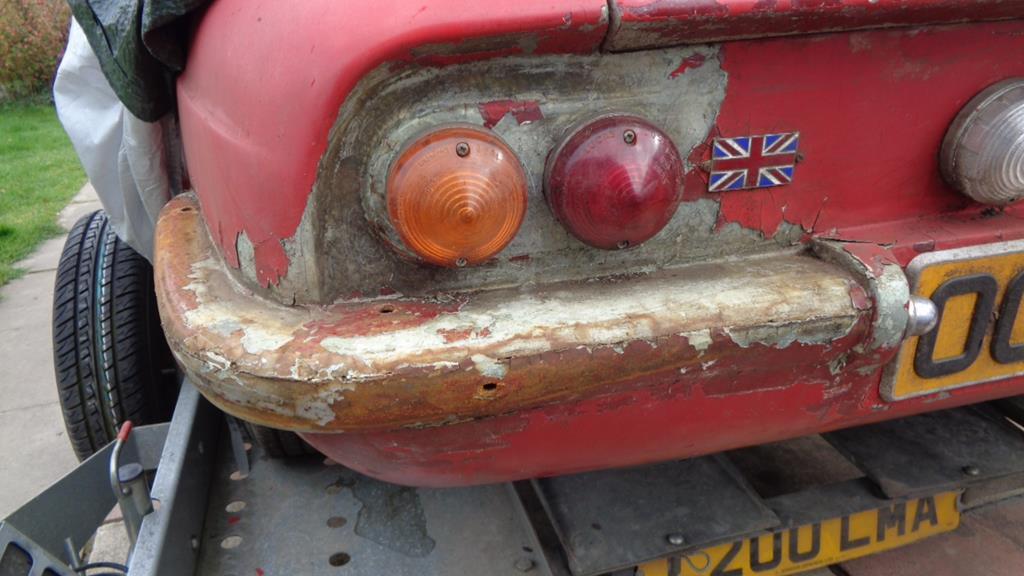 Even with the square nuts - they must have bought tens of thousands of these awful things as they used them on the G15's were still using them on the G32's - The fact that they were still doing the job until I cut them off 46 years later does not justify the act  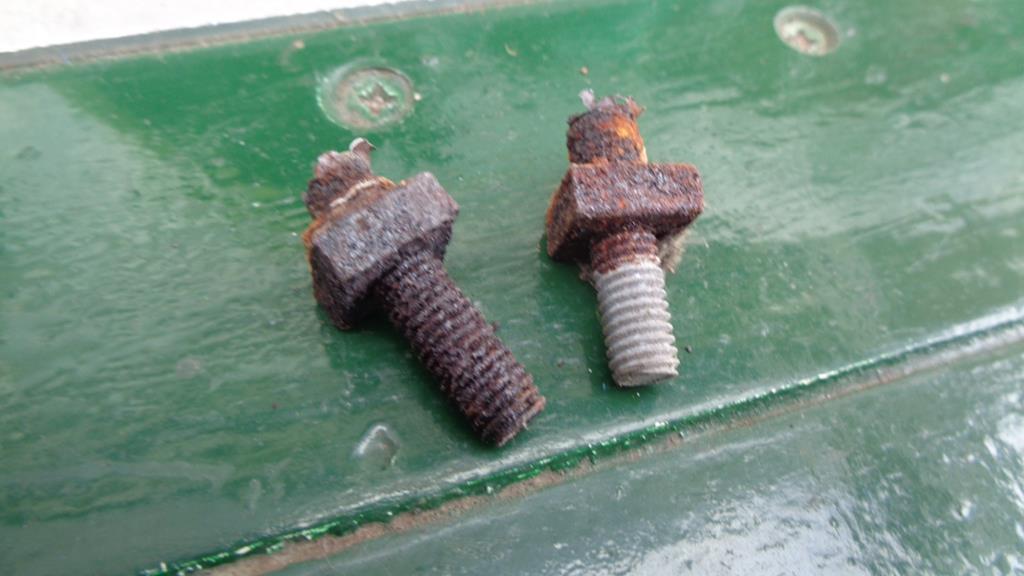 Nice bit of progress - would have been better for not dodging showers and I still did not manage to get into the car to get that door open. |
| |
|
|
|
|
Darkspeed
Club Retro Rides Member
Posts: 4,867
Club RR Member Number: 39
|
1970 Ginetta G15 Darkspeed
@darkspeed
Club Retro Rides Member 39
|
Mar 21, 2019 21:48:06 GMT
|
|
Making hinges .... with 5 sets of hinges there are 120 holes to drill in 3mm stainless steel all drilled with a 3mm to start then all out to 6.5mm - so that's 240 times - then a further 50 to 8mm then 30 to 11mm and then 20 to 12.5" 340 !
Drawing them and having them Lazy(er) cut from polished stainless would have been a far better and smarter option.....
Still just the final 20 12.5" holes to do now and I can start the welding
20 off 3/8" full nuts
20 off 1/2" tubes
30 off 1/4" UNF setscrews
There will be two sets that will be up for grabs but no more after that unless accompanied by a letter from the Queen.
Hmmm - polished stainless - I may just polish all the bottom plates on these sets as that's the only part you see and may look quite nice if I can get a near mirror finish on them.
|
| |
|
|
eurogranada
Europe
To tinker or not to tinker, that is the question...
Posts: 2,555
|
|
|
|
|
That is quite the effort!
|
| |
|
|
|
|
|
Mar 22, 2019 12:45:43 GMT
|
To me, a Holbay tuned Holbay would just about do it! Paint colour of your choice.   There are not many makes of car in existence that leave such indelible marks during ownership that after 1/2 hour sleuthing on the internet and an introductory email via LinkedIn would get an owner that bought the car 39 years previous call you up at home and fill in some blanks on a cars history. To add to the history file that the engine was not only rebuilt and modified but the work was done by Holbay no less is absolutely priceless. I had my cylinder head recalibrated for 4 Star by Holbay, and wasn't very impressed by the quality of their welding... Geoff |
| |
|
|
Darkspeed
Club Retro Rides Member
Posts: 4,867
Club RR Member Number: 39
|
1970 Ginetta G15 Darkspeed
@darkspeed
Club Retro Rides Member 39
|
Mar 22, 2019 15:47:00 GMT
|
 There are not many makes of car in existence that leave such indelible marks during ownership that after 1/2 hour sleuthing on the internet and an introductory email via LinkedIn would get an owner that bought the car 39 years previous call you up at home and fill in some blanks on a cars history. To add to the history file that the engine was not only rebuilt and modified but the work was done by Holbay no less is absolutely priceless. I had my cylinder head recalibrated for 4 Star by Holbay, and wasn't very impressed by the quality of their welding... Geoff Gone off these chips now - LOL |
| |
|
|
Darkspeed
Club Retro Rides Member
Posts: 4,867
Club RR Member Number: 39
|
1970 Ginetta G15 Darkspeed
@darkspeed
Club Retro Rides Member 39
|
Mar 22, 2019 19:49:48 GMT
|
Starting to become a bit un-hinged now..... They will take a polish - this was a quick run over with a 120 grit flap wheel and a stainless buffing pad, I could grab the metal polishing wheels and go at them but just smoothing them out a bit is more than enough - I may do all Ten in this way and then really polish my two sets. Stock finish on the right.  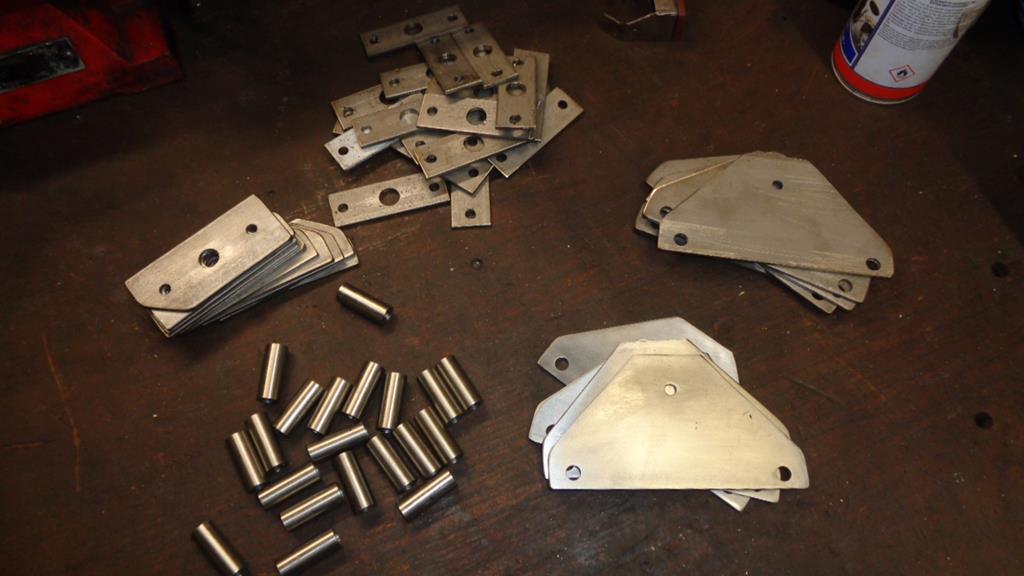 So all prep'd and ready for a final deburr and degreasing before a last wipe down with Acetone prior to firing up the TIG. must also remember to order up some polypropylene sheet for making some shuttering for the GF work on the white G21 and BOY as its time for a bit of progress to be made on my G15. |
| |
Last Edit: Mar 22, 2019 19:50:48 GMT by Darkspeed
|
|
Darkspeed
Club Retro Rides Member
Posts: 4,867
Club RR Member Number: 39
|
1970 Ginetta G15 Darkspeed
@darkspeed
Club Retro Rides Member 39
|
Mar 23, 2019 19:08:47 GMT
|
Dry warmish sunny day so a nice day to get outside. First job of the day was to get the drivers door off - The top hinge had already snapped so there was no good way of working on the car as you had to hold the door open to prevent it dropping and causing damage. No easy way to do it - Tape the door up, get a new hacksaw blade, curse not having one of those hacksaw blade holder handle things and just get cutting with the odd spray with cutting fluid. 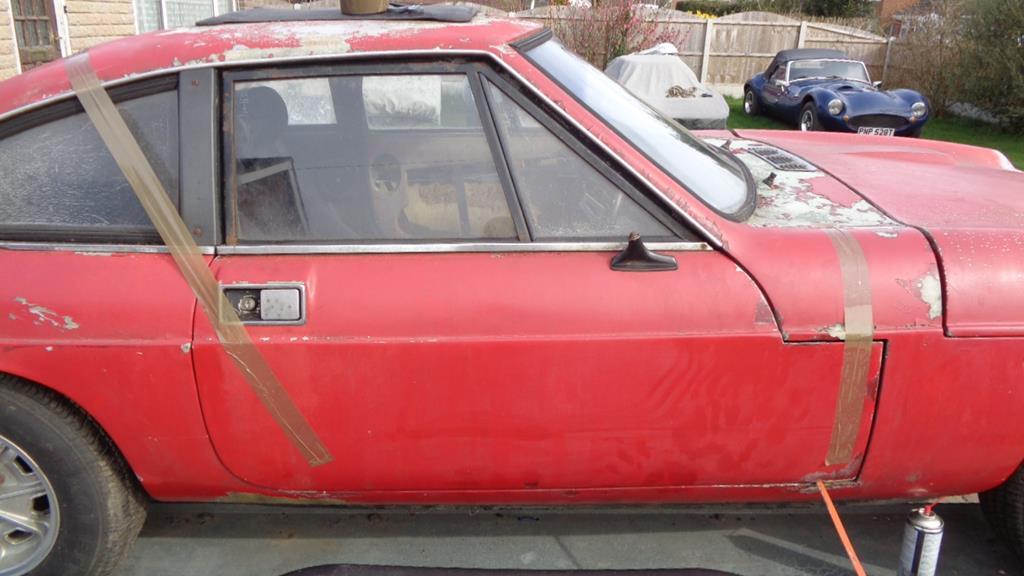 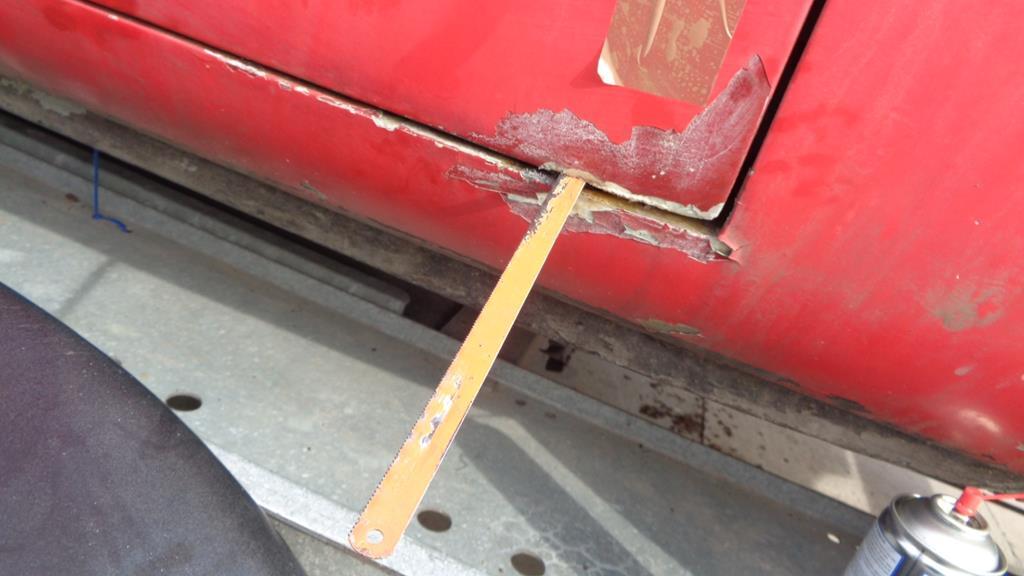 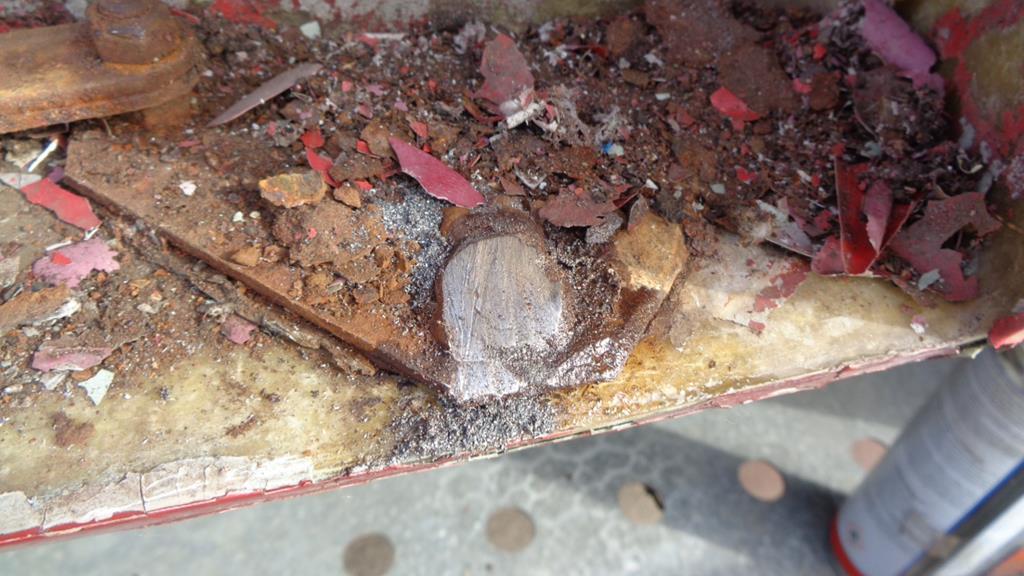 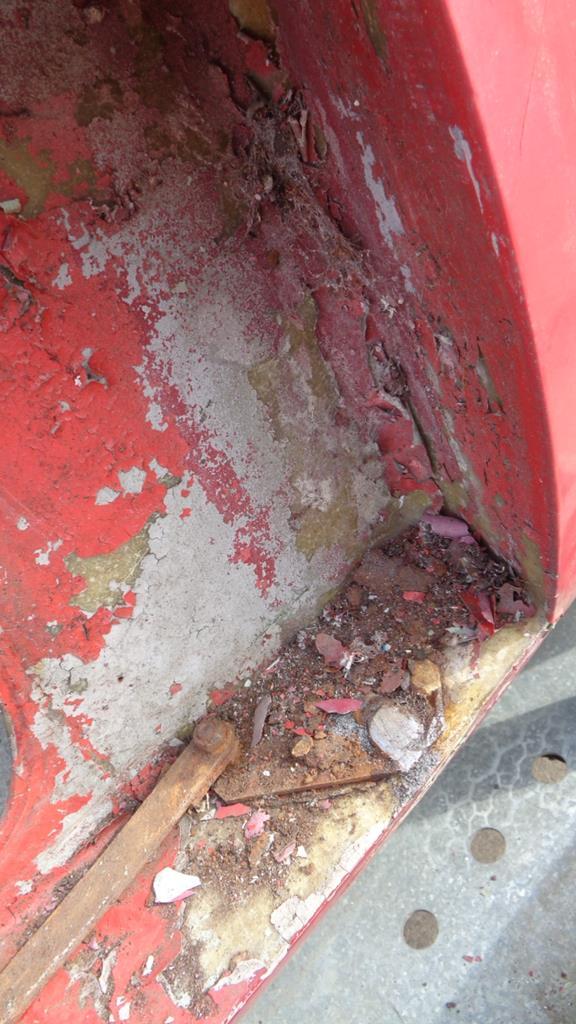 Door off. Take a few pictures New Hillman Hunter handbrake required 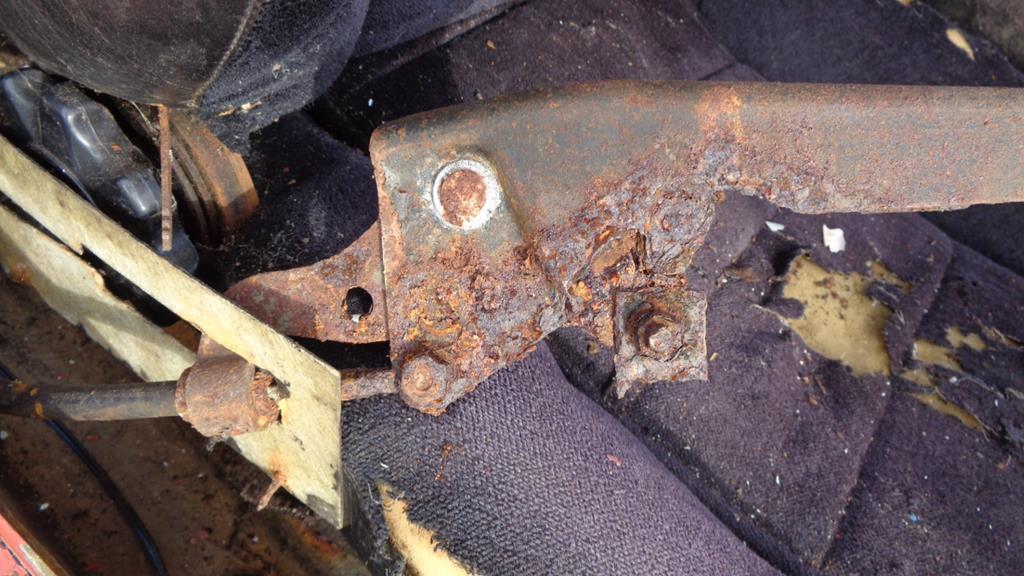 Radiomobile - wonder if it works 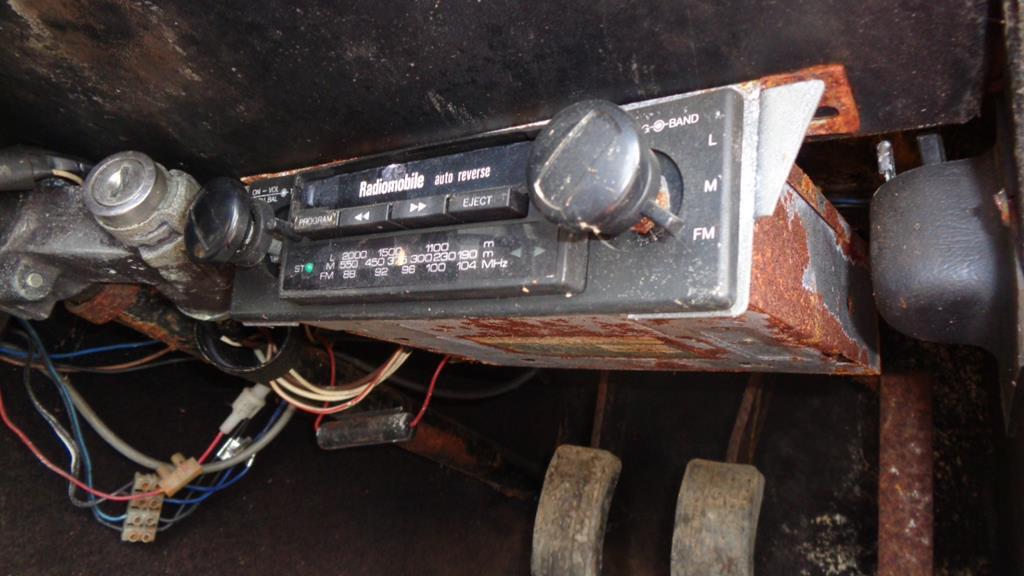 So with the drivers door off I could clamber in and give the passenger door a good kick - took a few thumps to get the lock to move but move it did. YAY 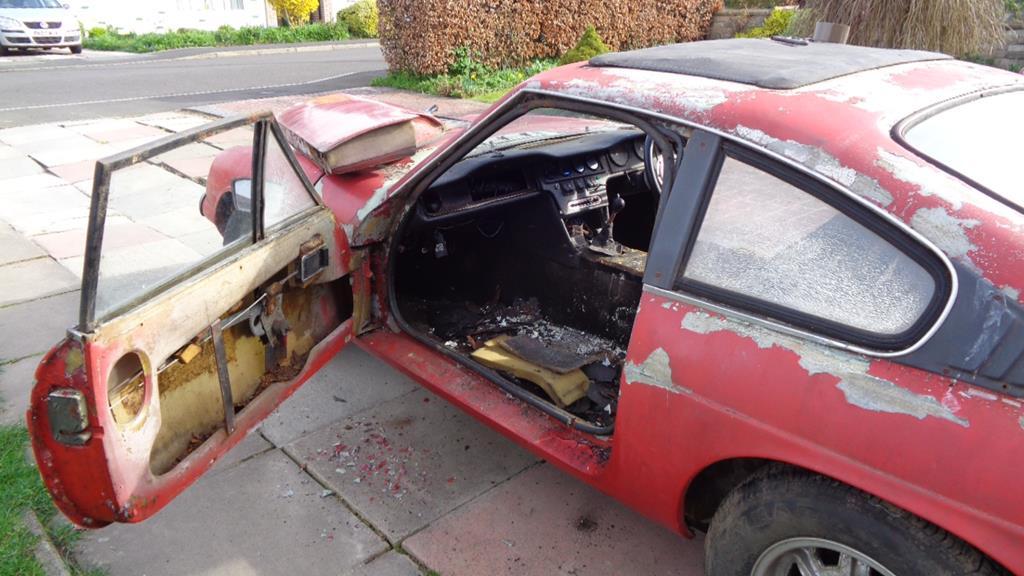 It's a bit grim in there - a few rust flakes in the bottom of the door - where have we seen that before 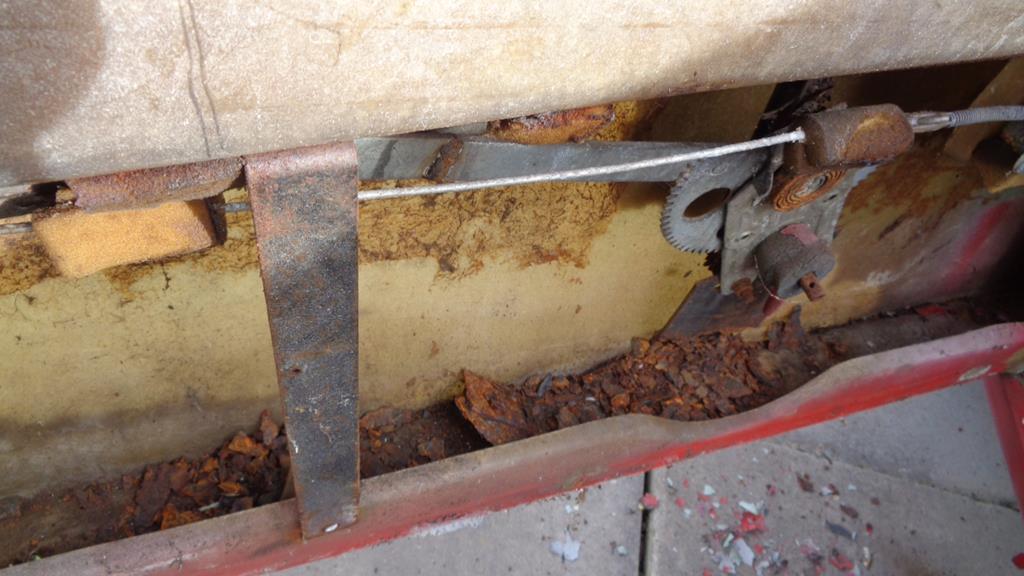  And it's fair minging in there - although it's dry now after being well covered for a couple of weeks 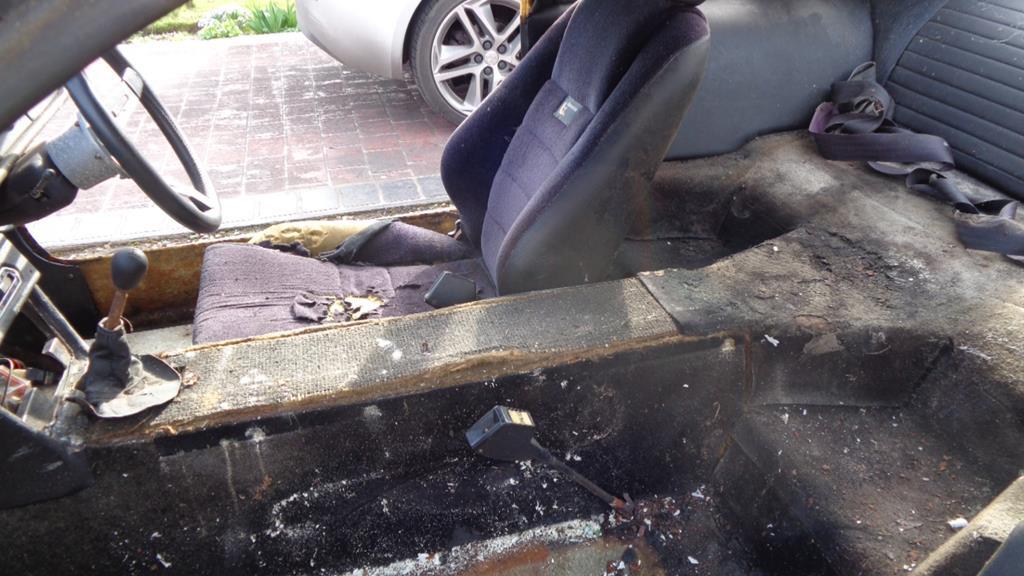  |
| |
Last Edit: Mar 24, 2019 18:55:45 GMT by Darkspeed
|
|
Darkspeed
Club Retro Rides Member
Posts: 4,867
Club RR Member Number: 39
|
1970 Ginetta G15 Darkspeed
@darkspeed
Club Retro Rides Member 39
|
Mar 23, 2019 19:19:23 GMT
|
Don't look up 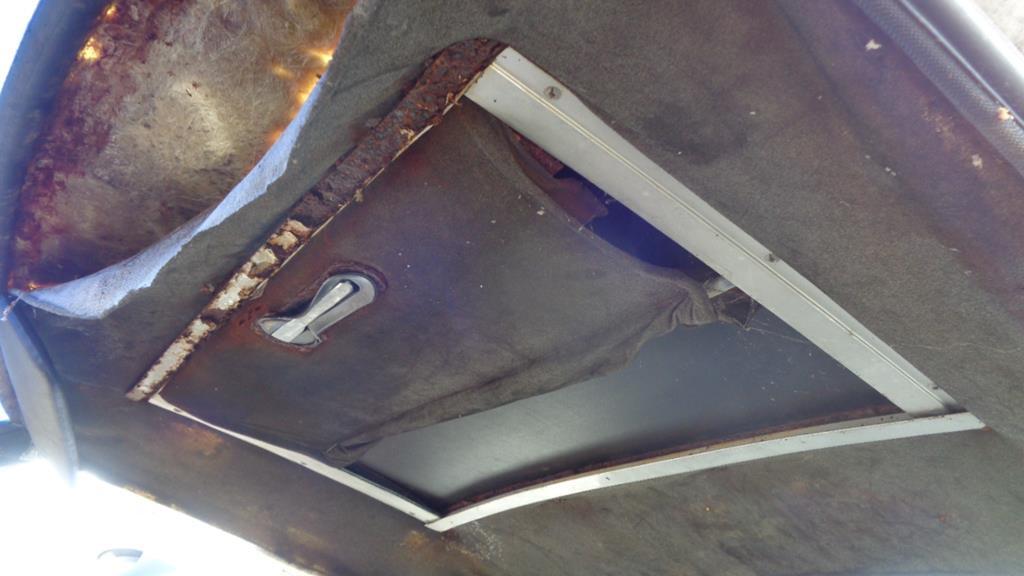 Then the cleaning and throwing out commenced 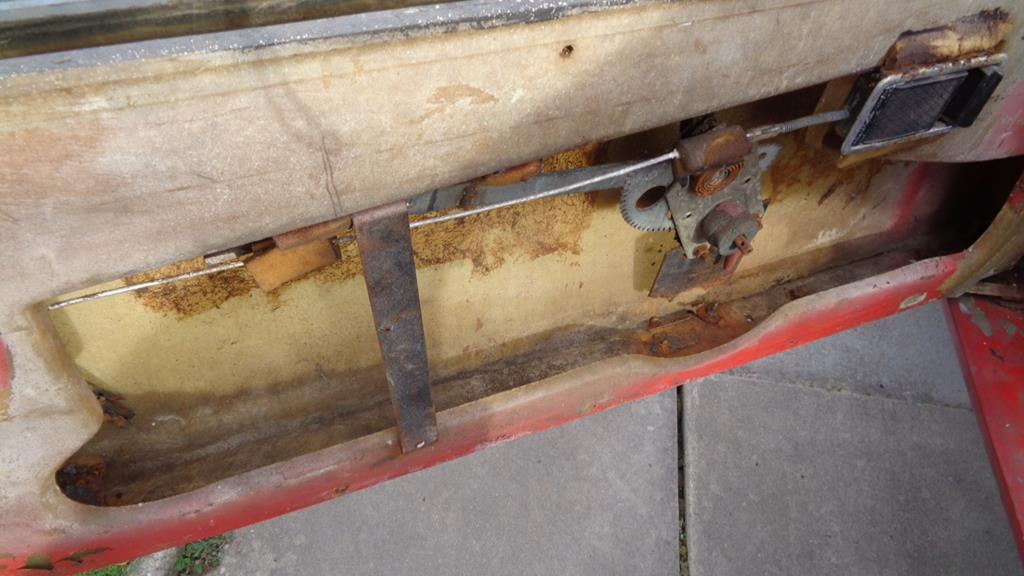 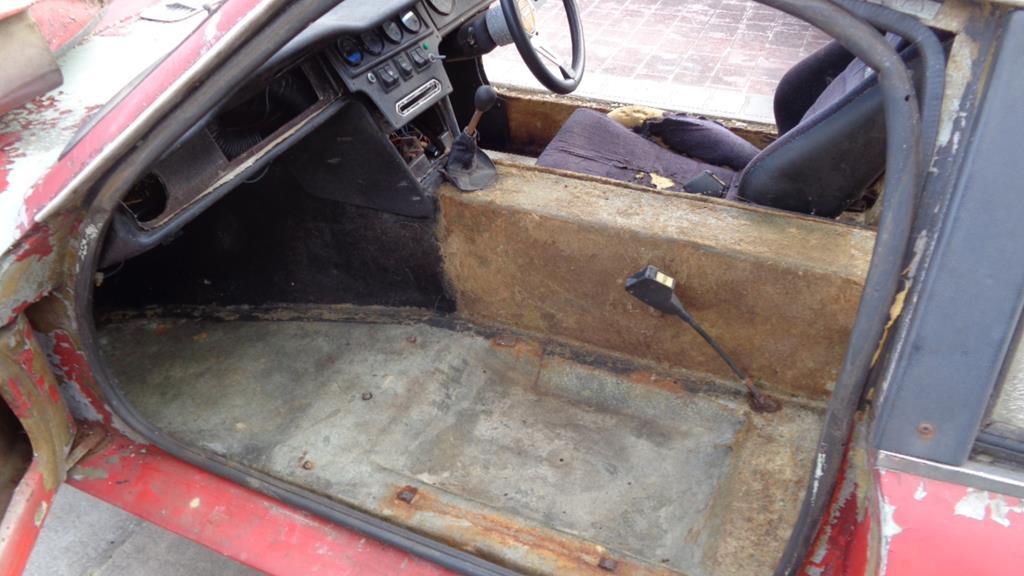  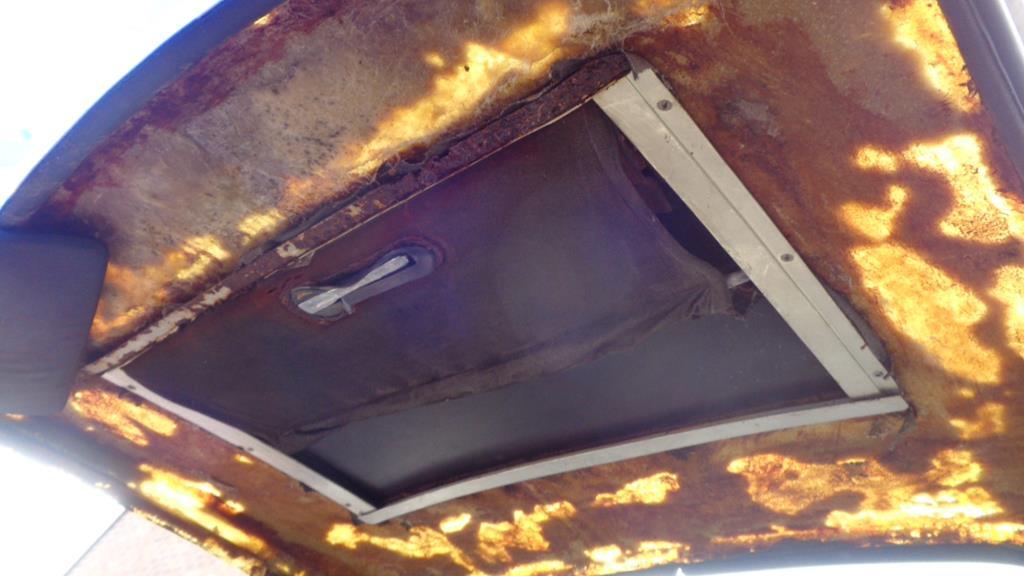 That's a bit better. Some of the wiring may need to be looked at. 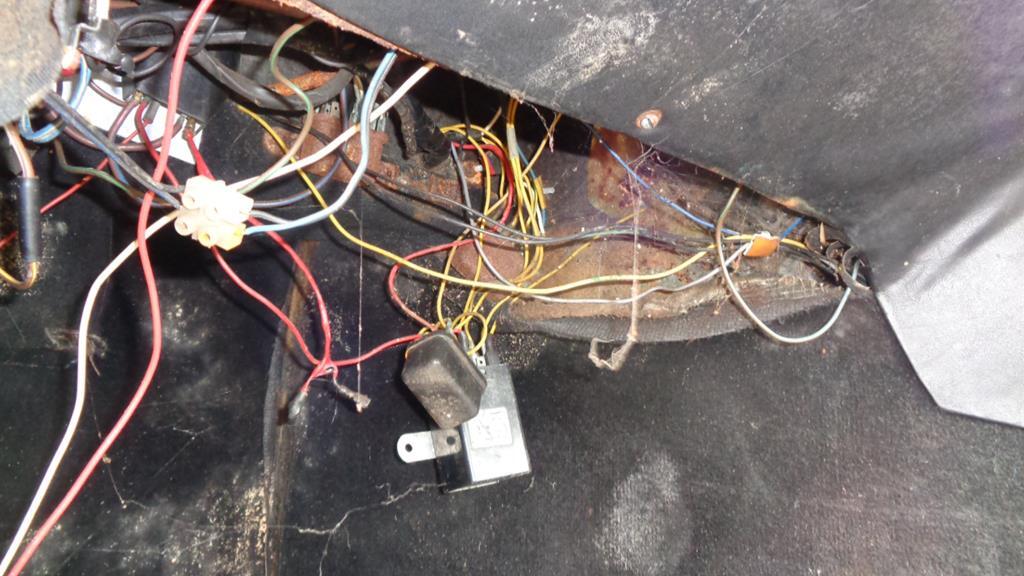 Going to get it up in the air tomorrow and have a better look at the chassis - there are some big holes that I know about - lets see just how many there are + need to chop off some bolts to free up that drivers seat and a few other rusty remnants. Its going to be Silver - found some more paint and will look at it a bit closer - it appears not to be a metallic its a flat for want of a better description Silver. On the up side the window frames look to be salvageable and I know a bloke that does a nice line in stainless steel door hinges. May have to bite the bullet and go on the lookout for a pair of original Webers and the full Holbay air box and filter arrangement. And I have to admit its growing on me now its a bit cleaner. |
| |
Last Edit: Mar 23, 2019 19:37:31 GMT by Darkspeed
|
|
|
|
|
Mar 24, 2019 10:56:25 GMT
|
And I have to admit its growing on me now its a bit cleaner. looking tons better just with that! |
| |
|
|
Darkspeed
Club Retro Rides Member
Posts: 4,867
Club RR Member Number: 39
|
1970 Ginetta G15 Darkspeed
@darkspeed
Club Retro Rides Member 39
|
Mar 24, 2019 17:51:10 GMT
|
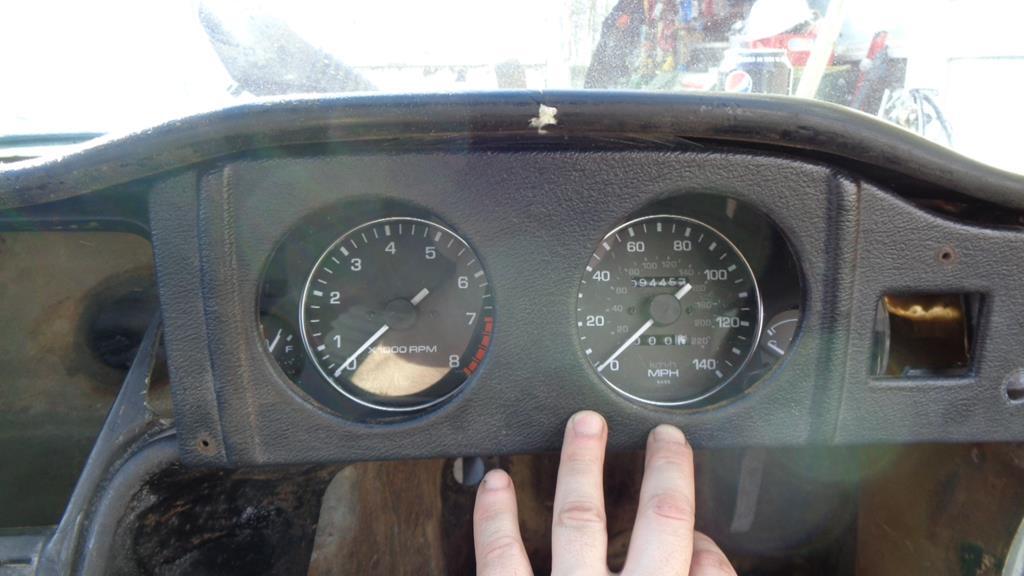
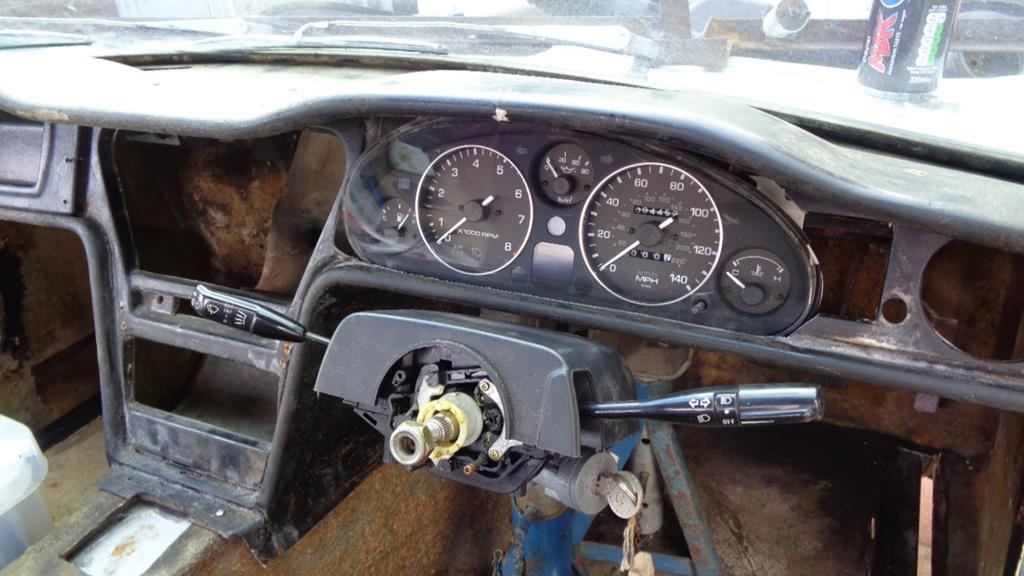
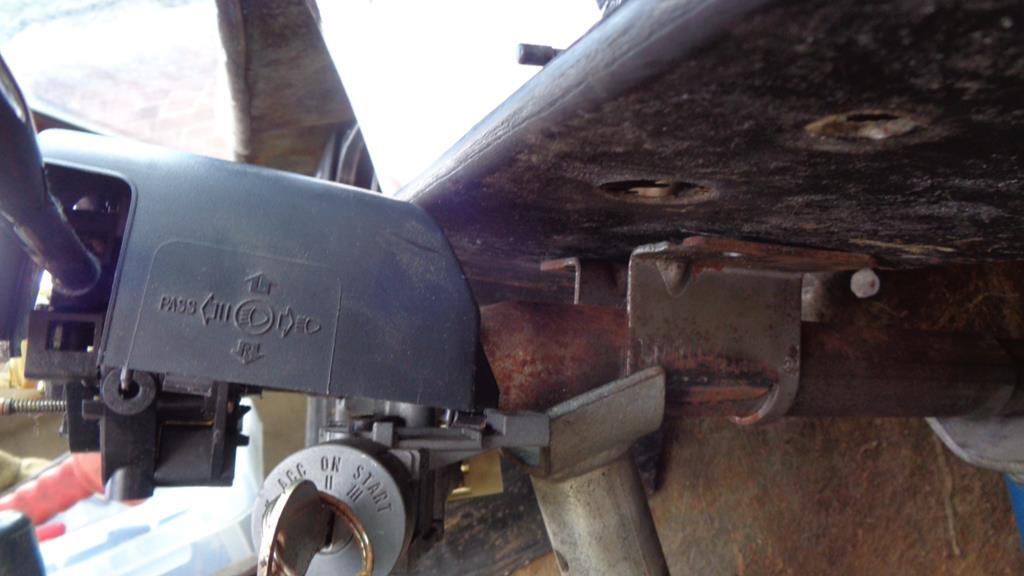
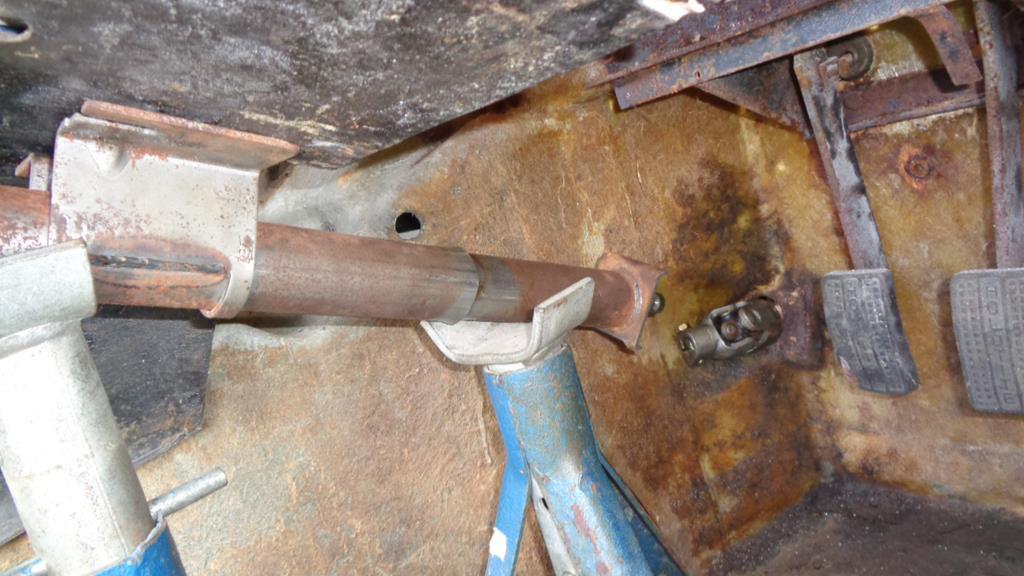
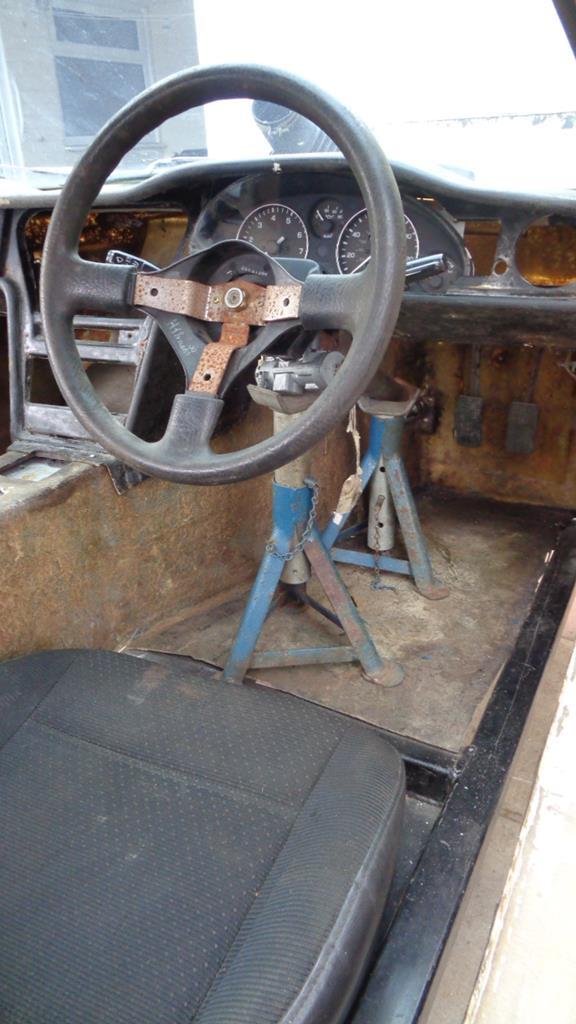
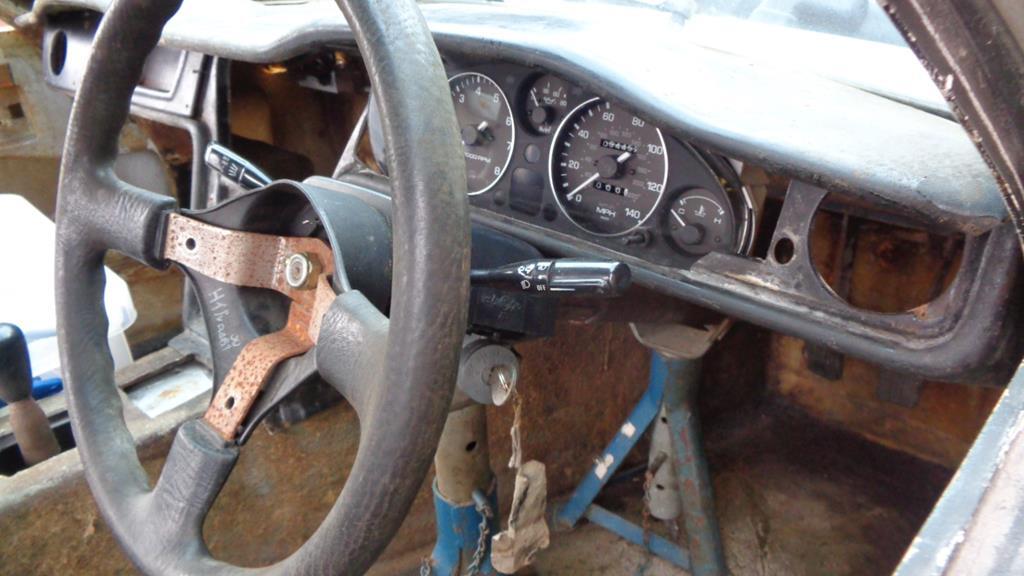
And I have to admit its growing on me now its a bit cleaner. looking tons better just with that! Cheers georgeb it also smells a bit better as well  - Really nice sunny day today so had the covers off and let the warm air get to it all a bit more. Got stuck into the G21M today as I wanted to get the steering progressed as it's the next big part of the modifications. So I offered up the rack took a few measurements cut some spacers/anti-crush tubes and got stuck in. The standard Mazda track rod converges to the track rod end and upright due to the rack being mounted quite high in the G21 in relation to the mount position in the MX5. 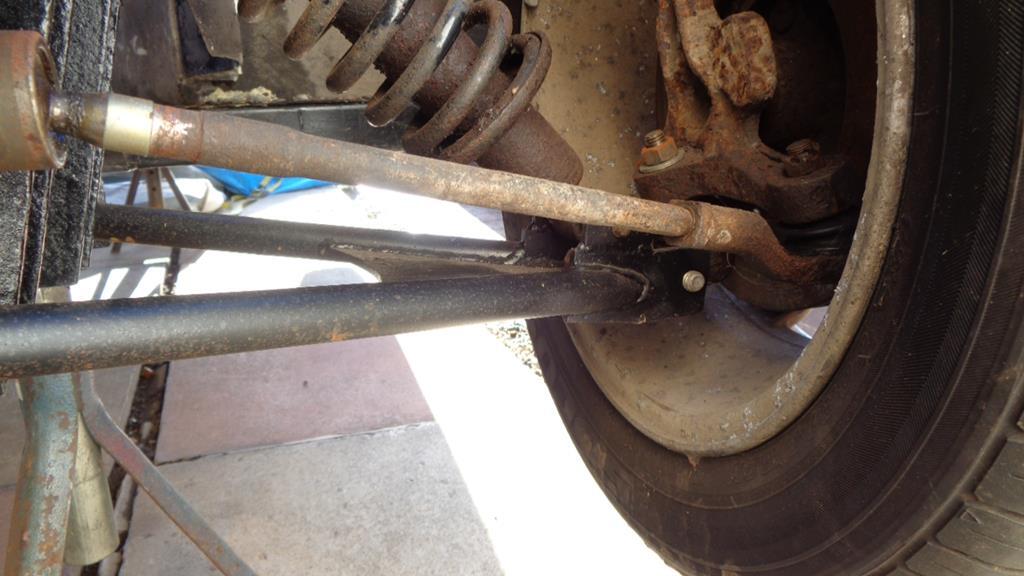 Using a rose joint and mounting above the arm gets the angles much closer but the "twist" in the steering arm on the Mazda upright creates some issues with alignment of the rose joint - I have some angle spacers but I may well need to use high angle rod ends. Once its there or there abouts we can start looking closer and measuring bump steer. 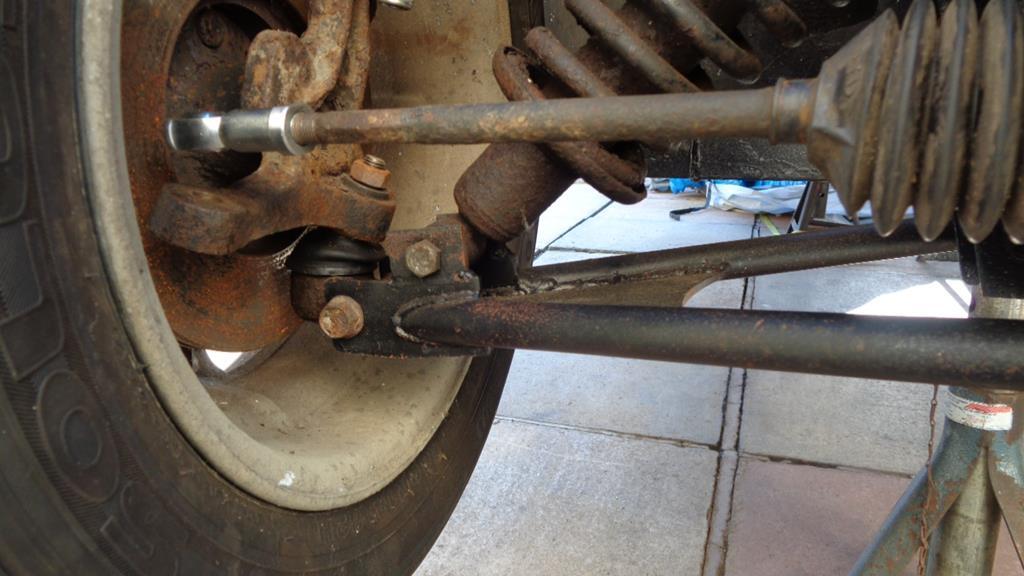 Drill tubes prep weld 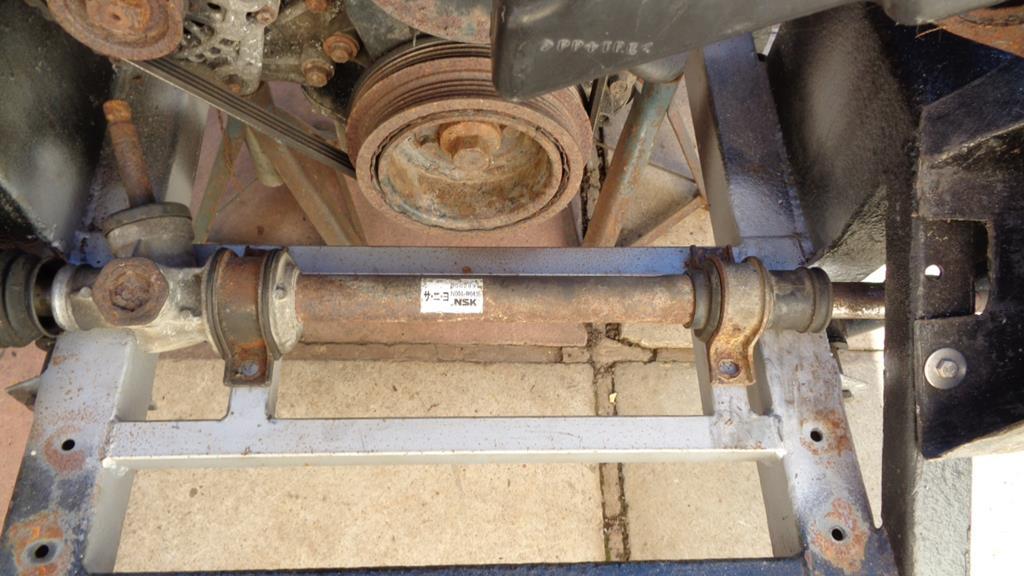  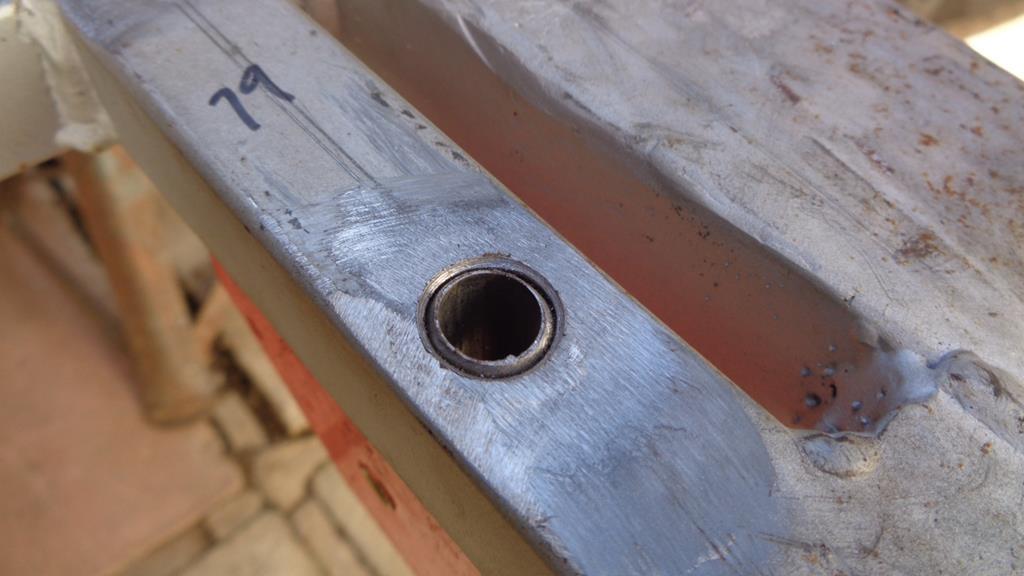  A bit of upside down welding 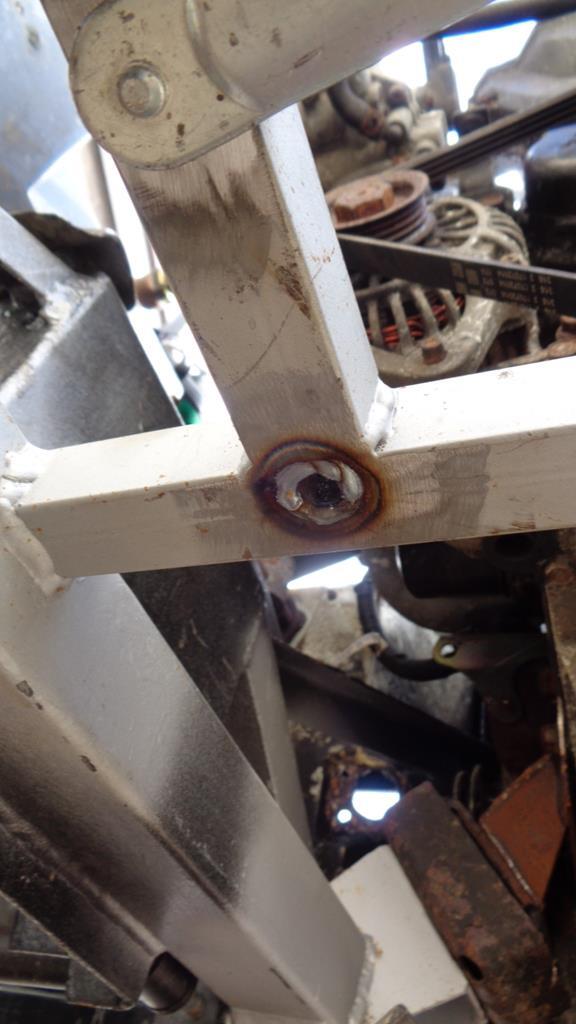 Flap wheel them flush 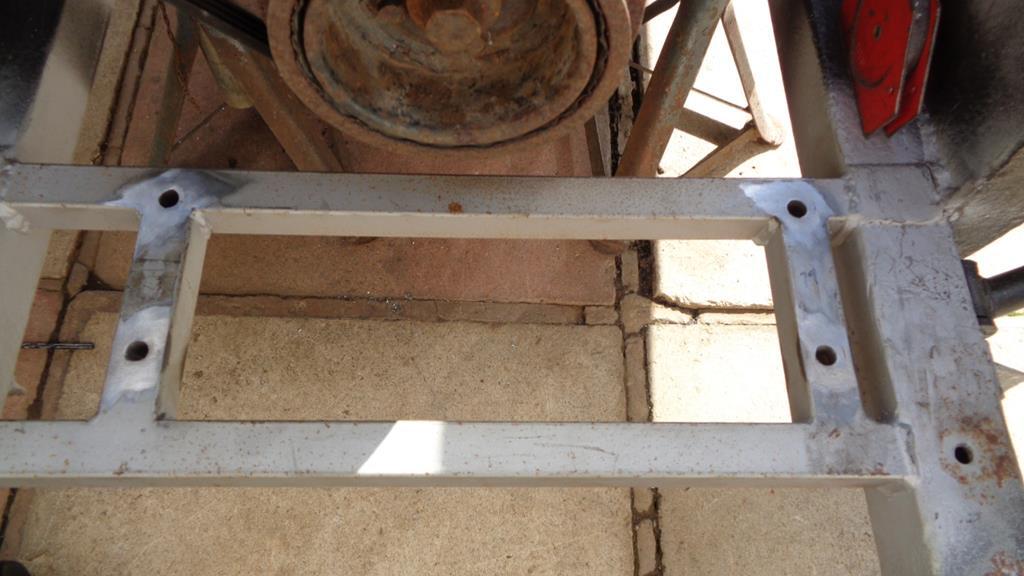 Find a few temporary bolts and nip them up and job done move onto the next stage of the job 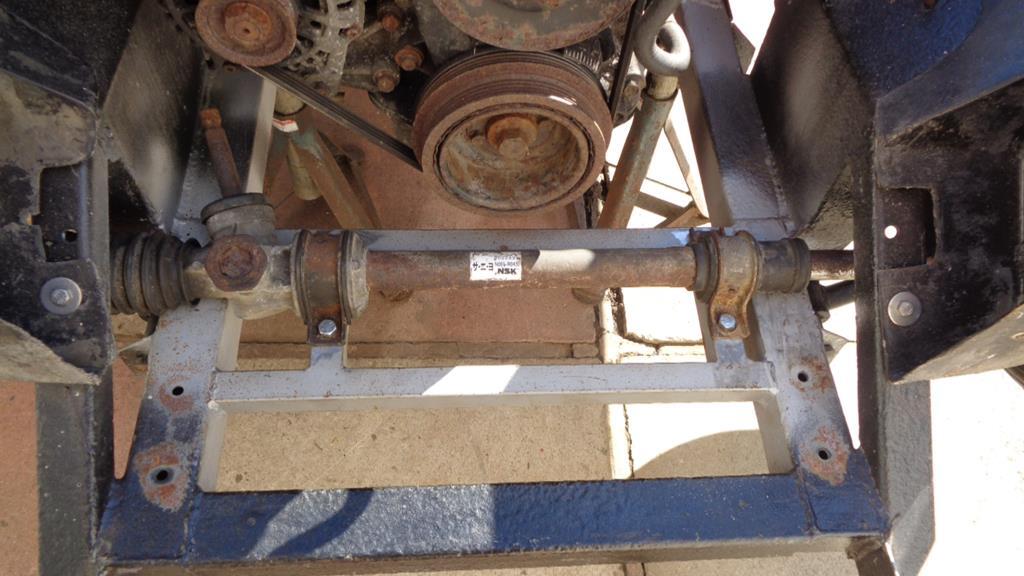 The next stage being fitting the clocks! - Well not strictly required but I want the clocks in to make sure nothing will clash ad to check all the alignments from the wheel down to the rack. But before that I dropped the lower UJ and Mazda lower column on - I new it would be tight due to the angle of the shaft from the MX rack and the UJ does hit the suspension so I will need to cut a clearance slot in the back of the tower. 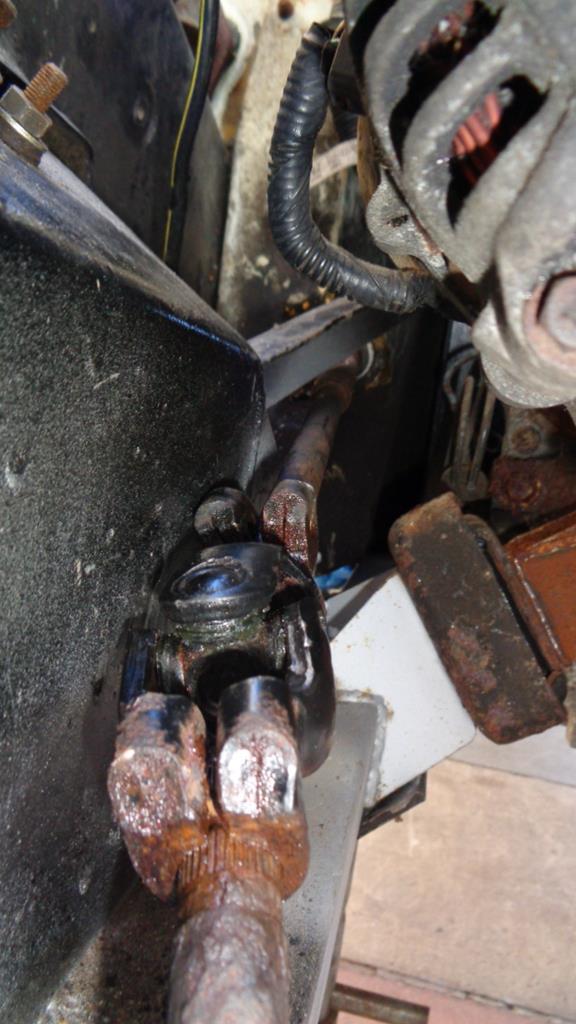 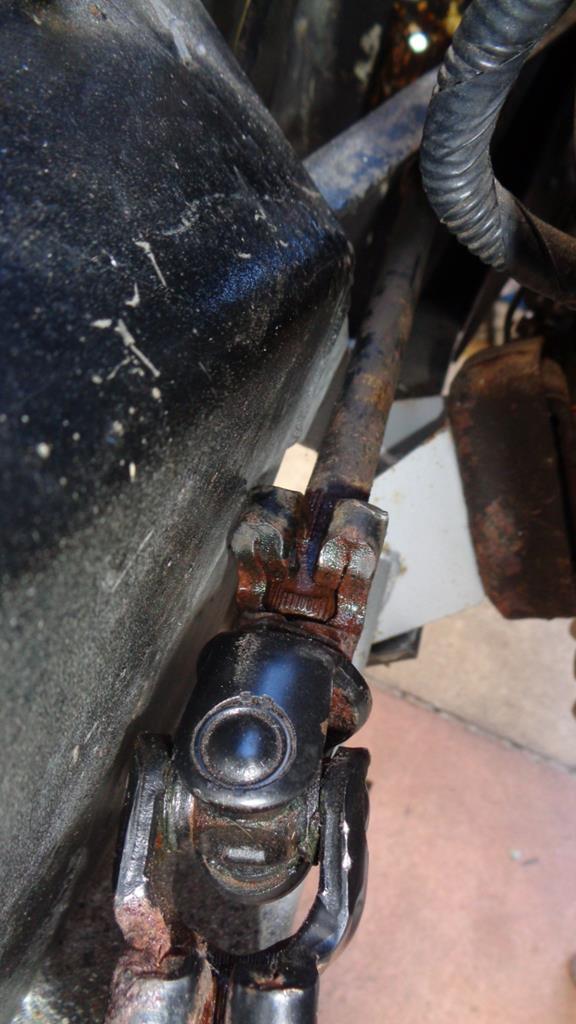 Upper UJ. 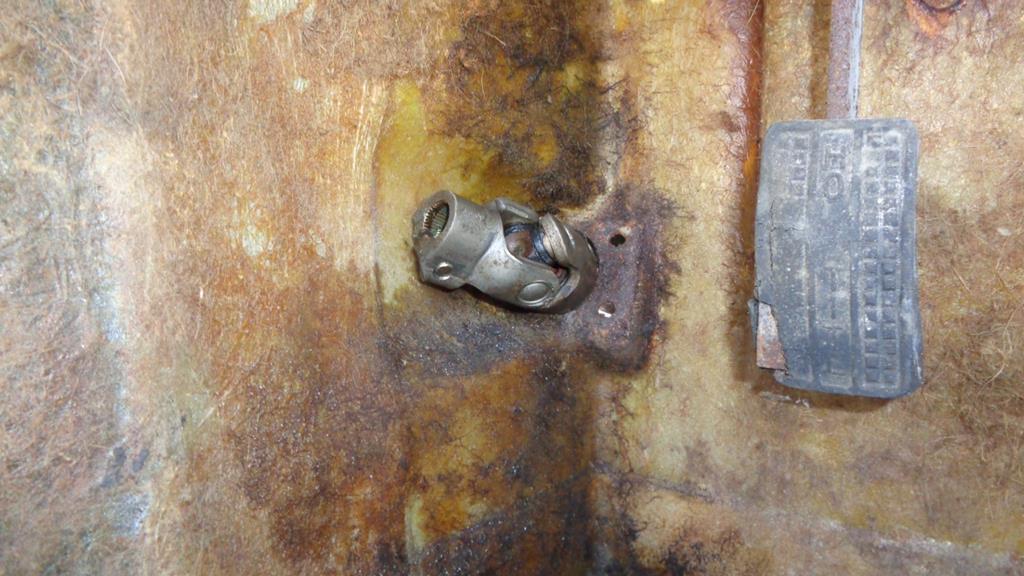 |
| |
Last Edit: Mar 24, 2019 18:57:55 GMT by Darkspeed
|
|
|
|
Darkspeed
Club Retro Rides Member
Posts: 4,867
Club RR Member Number: 39
|
1970 Ginetta G15 Darkspeed
@darkspeed
Club Retro Rides Member 39
|
Mar 28, 2019 20:09:45 GMT
|
Got stuck into some welding this evening - around 3 hours on the TIG Parts getting degreased stage 1 with some gun wash - after this all parts were given a quick wipe over with Acetone prior to welding. 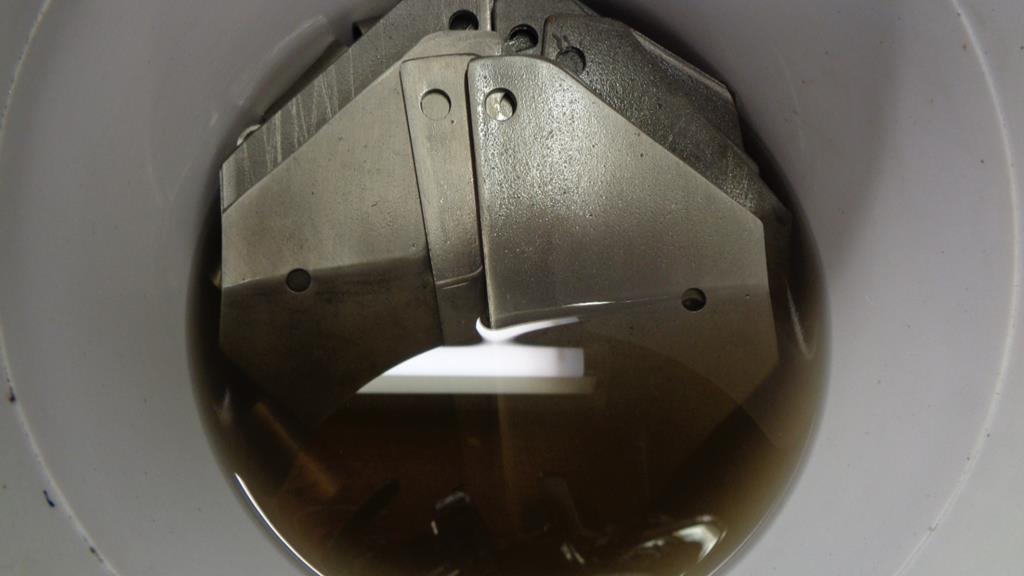 First off weld in the sleeves to the door mounting parts. Only to find that one of the sleeves was missing from the degreasing bucket 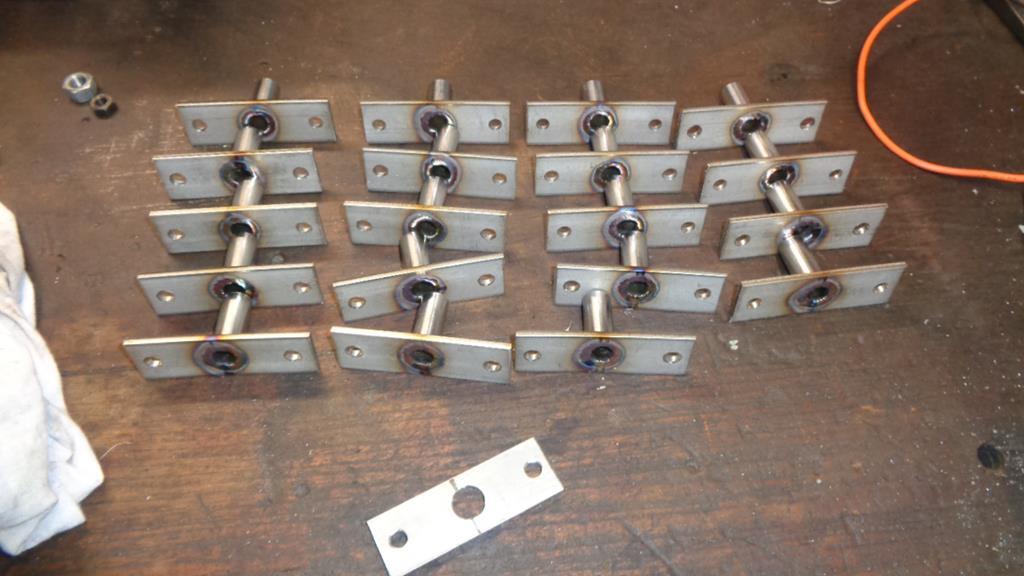 Found it in the drill bit container! 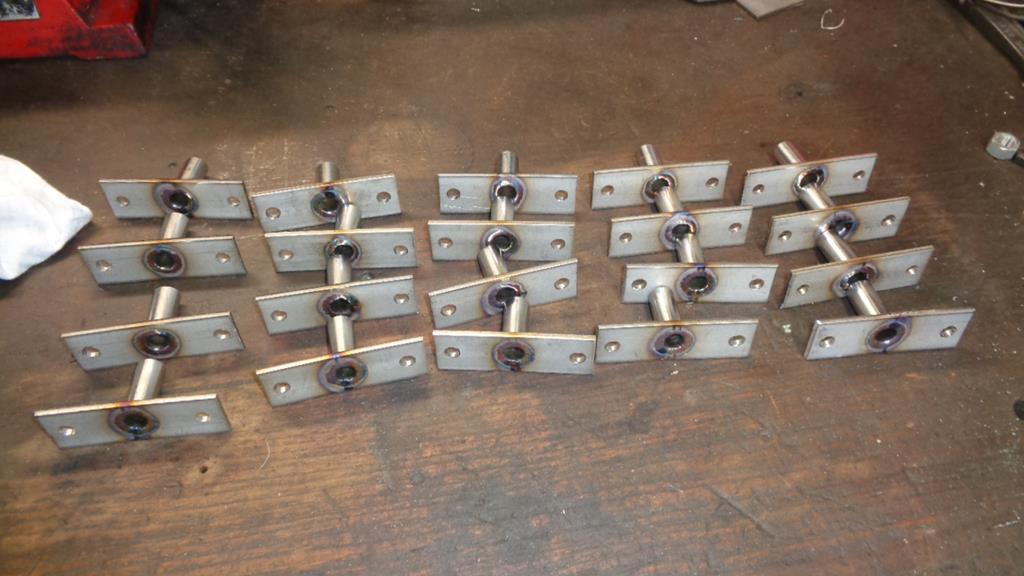 20 circular welds competed Next studs onto the upper mounting plates  6 short welds per plate - 10 plates  Weld 3/8 full nuts to upper plates 3 longer welds per plate - 10 plates  So 110 welding operations down - thankfully just another 60 to go. I may even fit a set to the G21S at the weekend - who knows. |
| |
|
|
Darkspeed
Club Retro Rides Member
Posts: 4,867
Club RR Member Number: 39
|
1970 Ginetta G15 Darkspeed
@darkspeed
Club Retro Rides Member 39
|
Mar 29, 2019 18:19:10 GMT
|
Thank  that's over and done with - 5 sets completed and a set that were done by someone else back for some additional welding. The lower plates do polish up and with a bit of work would polish up like Chrome but its a fair bit of work and a fine scuff pad provides a satin finish that is just as nice. 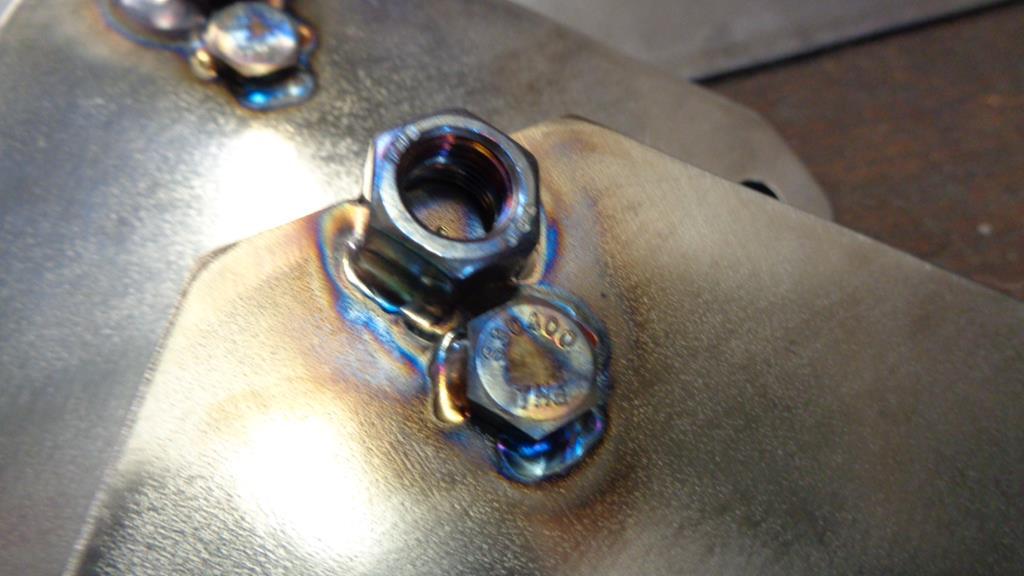 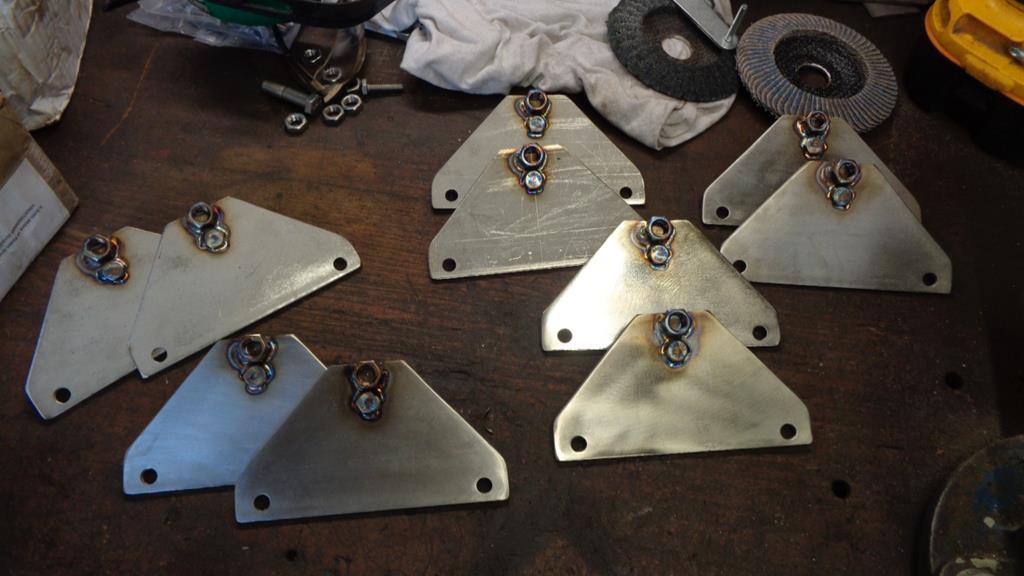 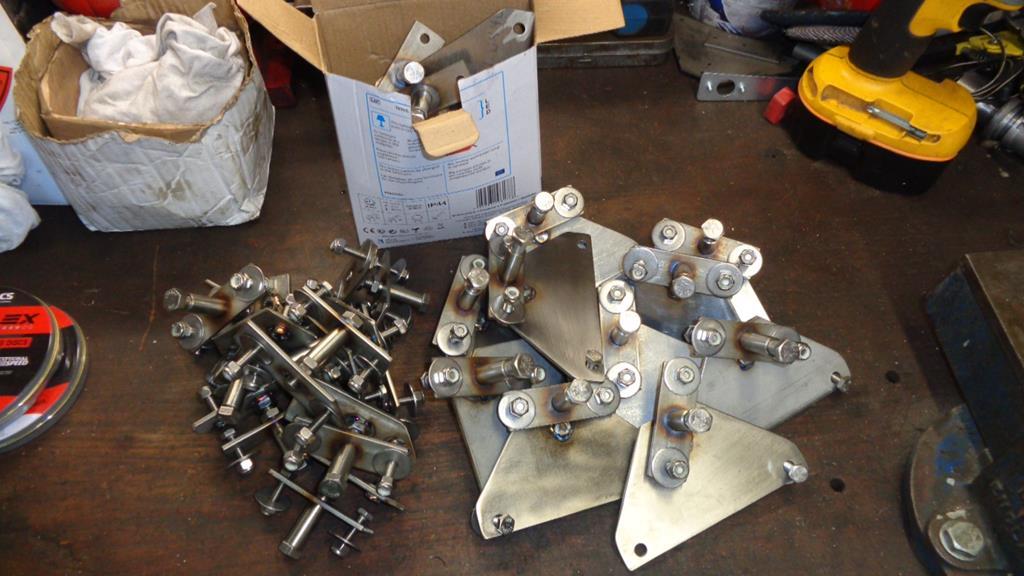 Question is do sell both spare sets of hinges or do I just sell the one set and keep a set back - I am thinking that they may well work as an insurance policy that will prevent me from ever being offered another G15 or G21 project......... For now both sets can sit on the shelf. Pretty sure in time a google search for G15 or G21 door hinges will find this thread. If its dry tomorrow I may well upgrade the G21S to opening doors. |
| |
Last Edit: Mar 29, 2019 19:10:18 GMT by Darkspeed
|
|
Darkspeed
Club Retro Rides Member
Posts: 4,867
Club RR Member Number: 39
|
1970 Ginetta G15 Darkspeed
@darkspeed
Club Retro Rides Member 39
|
Mar 30, 2019 18:22:31 GMT
|
A bit of work today that did not involve the works stainless steel or hinges. Steering on the G21M Started off by modifying the column to drop the brackets so that the column can sit closer to the dash. Mark cut prep weld 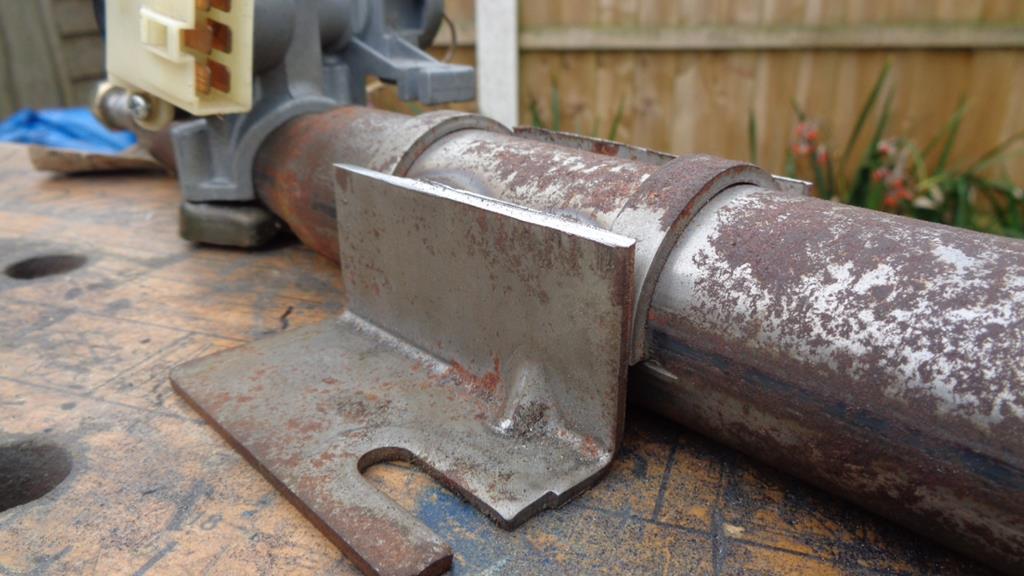  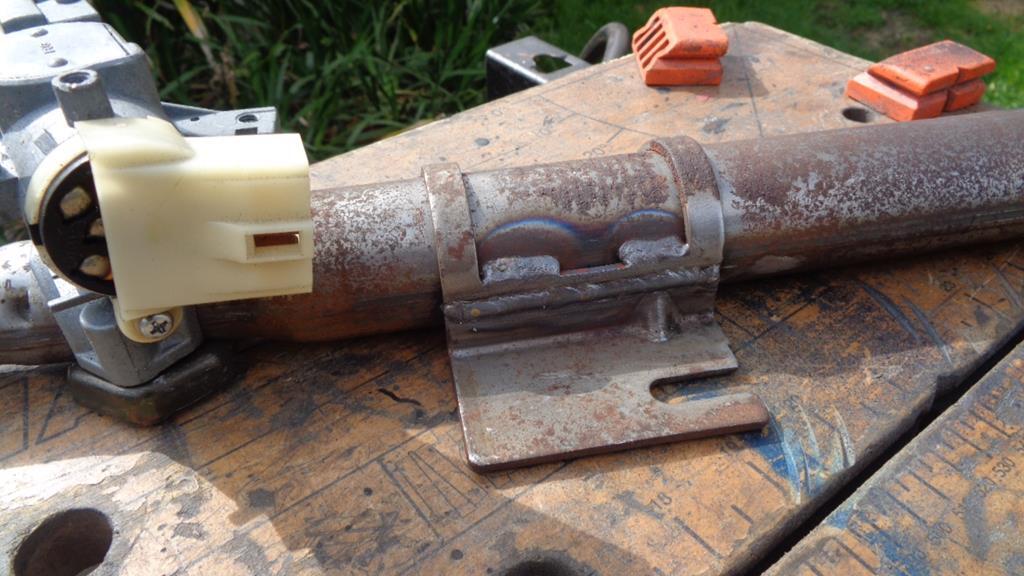  Then I thought I would have a look at the column as I am going to have to extend in a few inches - where's Frankie Howerd when you need him - Oooerrr misses.... So a bit of careful work with the hack saw made short of the weld and - well really!   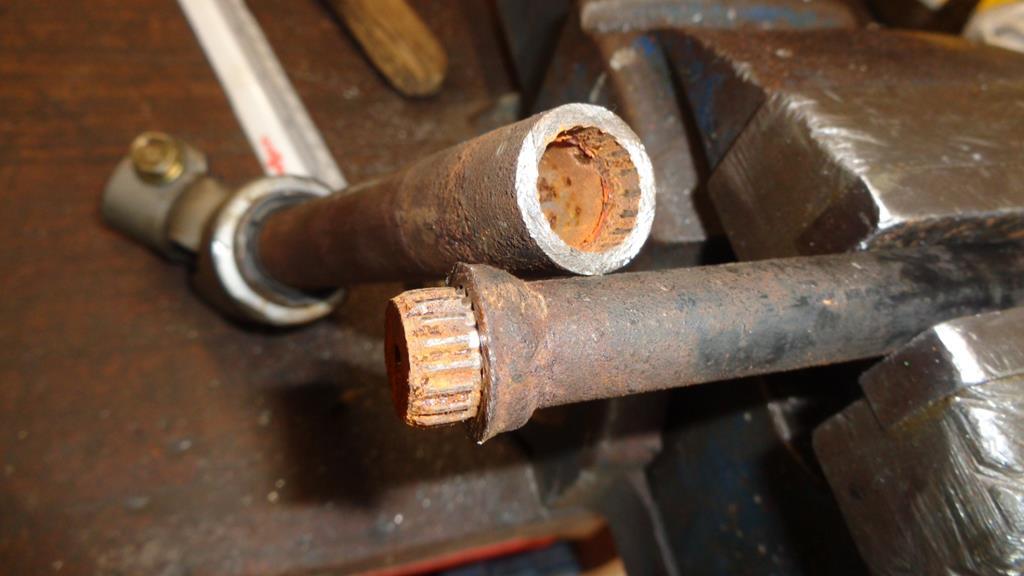 The fuss that I have seen made on forums when people cut and weld steering columns and that is what an MX5 has as stock. Then again I also see plenty of welds on structural and safety components that just make me wince. Here is the standard Ginetta dash rail - Angle iron failure in my book so its for the bin. 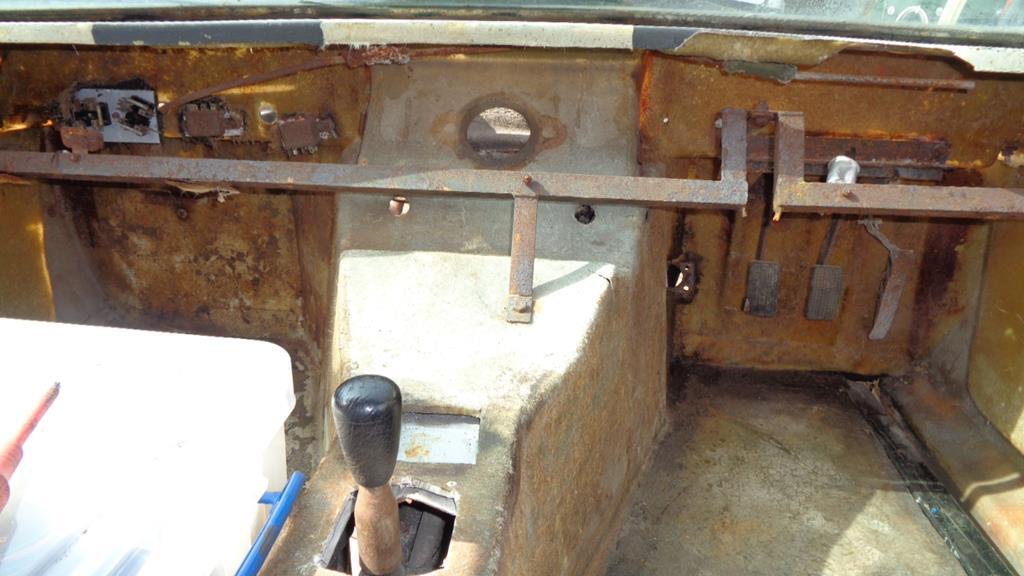 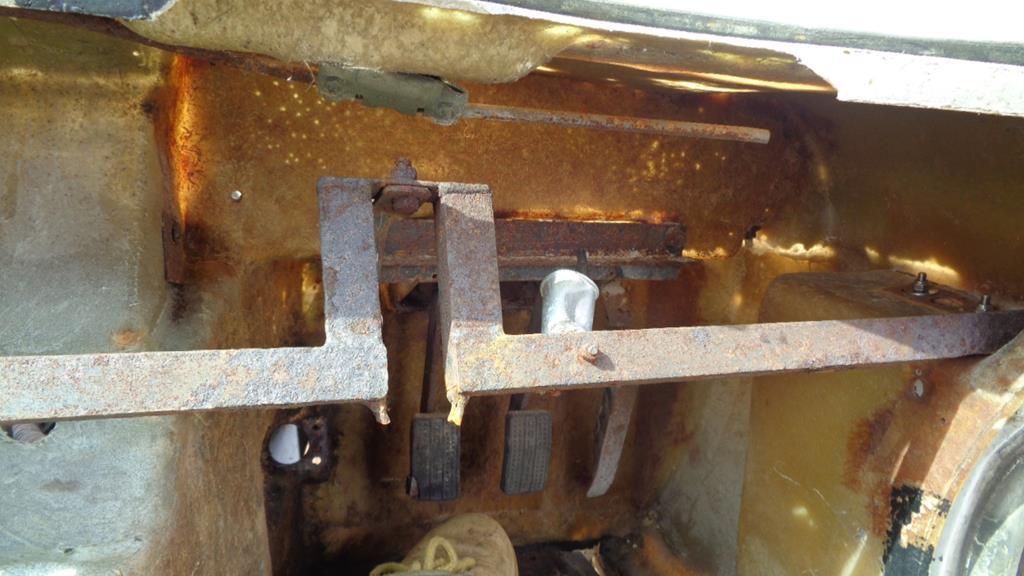 So we mark up a nice fresh bit of 25 x 1.5 Box. 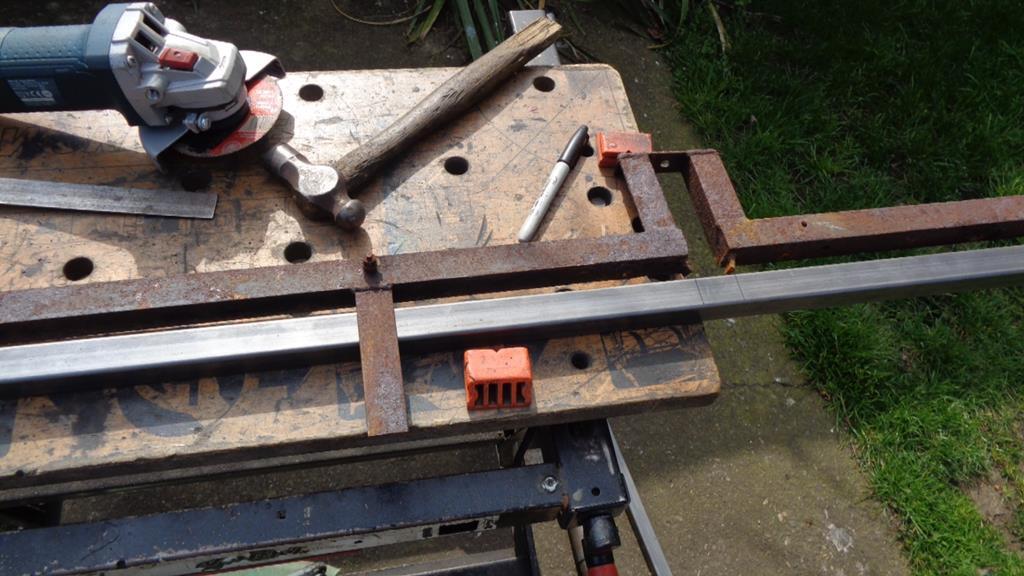 Now the dash is at a different angle to the point where the rail bolts just by the upper door hinge - ah  - used the word hinge and did it again... They make this angle by just putting a twist in the angle iron and the fact that you can do that is why angle iron is only fit for brackets. We will have to cut and weld the support rail at the ends to provide the change in angle which will be much stronger. Angle iron put to good use.    The next work will involve drilling and sleeving the outer supports which will be cut off of the dash rail - to alter the angle I will insert tube into the box at these junctions so that the centre part of the rail can rotate and then it will be welded up. I will then make a centre support - in angle to replace the original strip support and then to tie it all together bracket the column up to the pedal box assembly. Took a bit of thought and figuring out but got there. 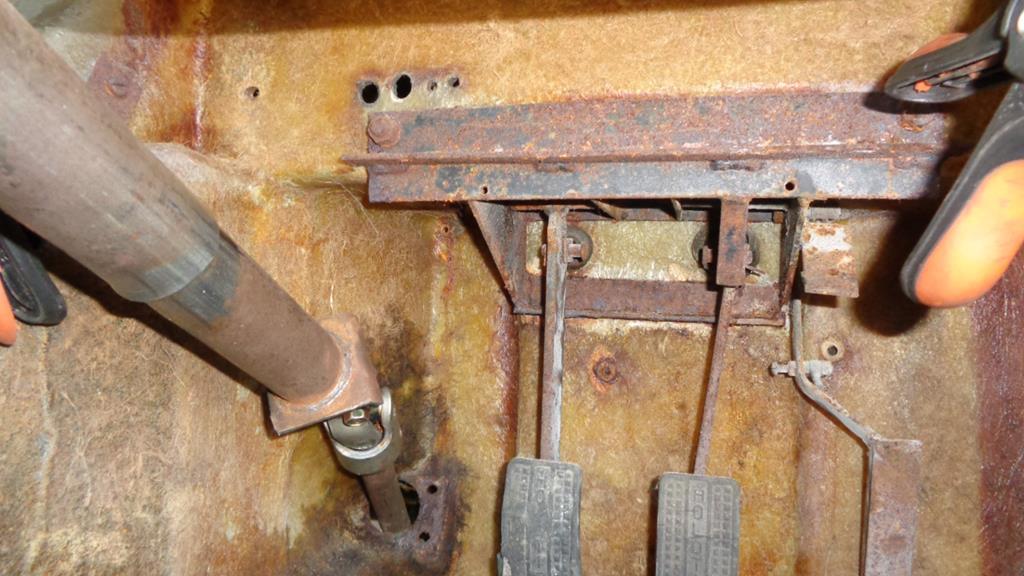 |
| |
Last Edit: Mar 30, 2019 18:26:14 GMT by Darkspeed
|
|
Darkspeed
Club Retro Rides Member
Posts: 4,867
Club RR Member Number: 39
|
1970 Ginetta G15 Darkspeed
@darkspeed
Club Retro Rides Member 39
|
Mar 31, 2019 18:42:28 GMT
|
I found some 7/8" tube to sleeve the 1" box measured and cut the ends. 1/4" difference between the mounting holes position side to side - good old Ginetta tolerances. Drilled and sleeved for the mounts - I do like the TIG for these jobs. 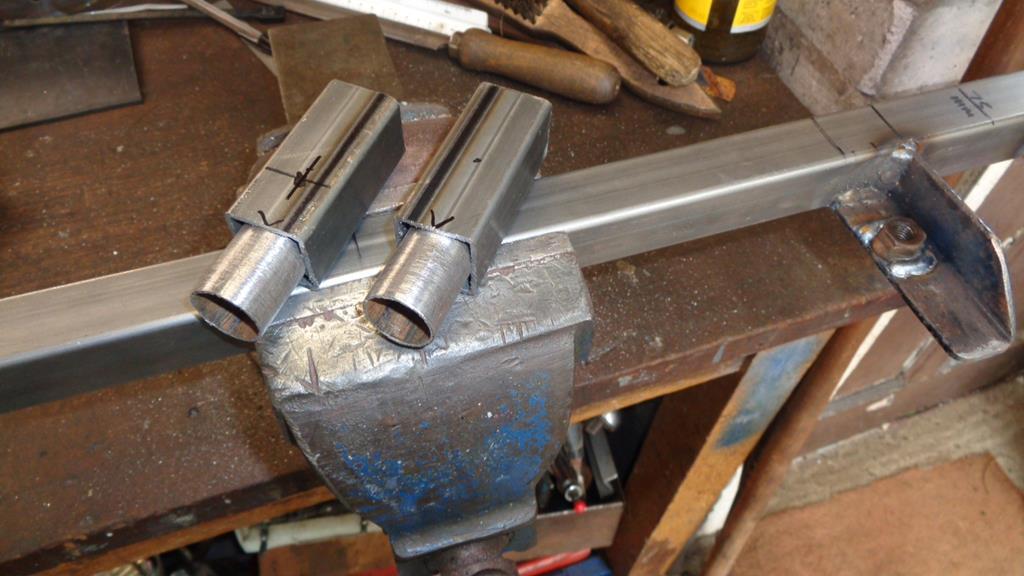 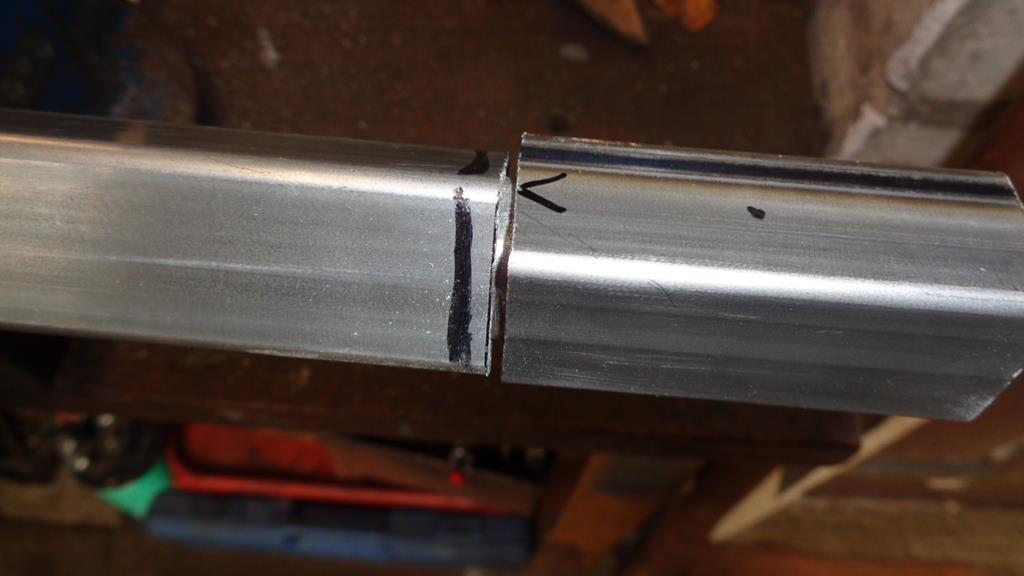 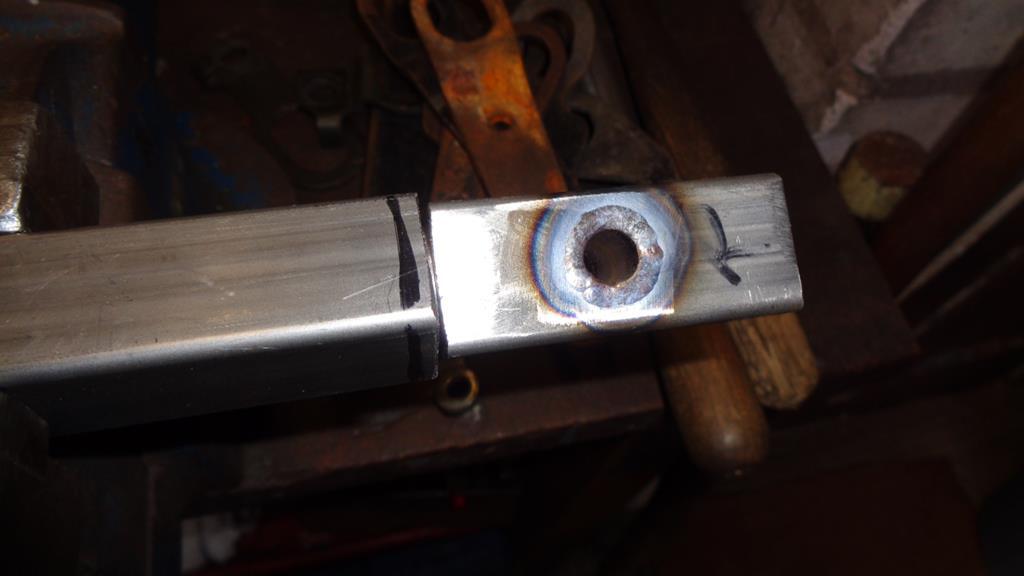 The box will get drilled and fitted with Rivnuts for mounting the dash rather than self tappers and a couple of stainless steel bolts will be welded at strategic locations for wiring earth points. Then a bit of a tidy up was due to try and clear the garage a little so that work on the Stratos can restart. |
| |
|
|
|
|
|
Mar 31, 2019 20:49:36 GMT
|
|
You are certainly improving your tig skills mate. Look how much you can get done without interruptions from motorcyclists. That's some impressive fabrication and welding. I think I will have to invest in a Rivnut as I feel I may have use. Dash on the Gemini for instance.
|
| |
|
|
Darkspeed
Club Retro Rides Member
Posts: 4,867
Club RR Member Number: 39
|
1970 Ginetta G15 Darkspeed
@darkspeed
Club Retro Rides Member 39
|
|
|
You are certainly improving your tig skills mate. Look how much you can get done without interruptions from motorcyclists. That's some impressive fabrication and welding. I think I will have to invest in a Rivnut as I feel I may have use. Dash on the Gemini for instance. Only just started my second bottle of gas with the TIG so and I estimated that it would take at least 3 bottles before I could be classified as amateur ranked so still a way to go. Another Glassfibre mould was completed this week - O/S head lamp pod - a couple more small ones to do before we move on to do the engine cover. 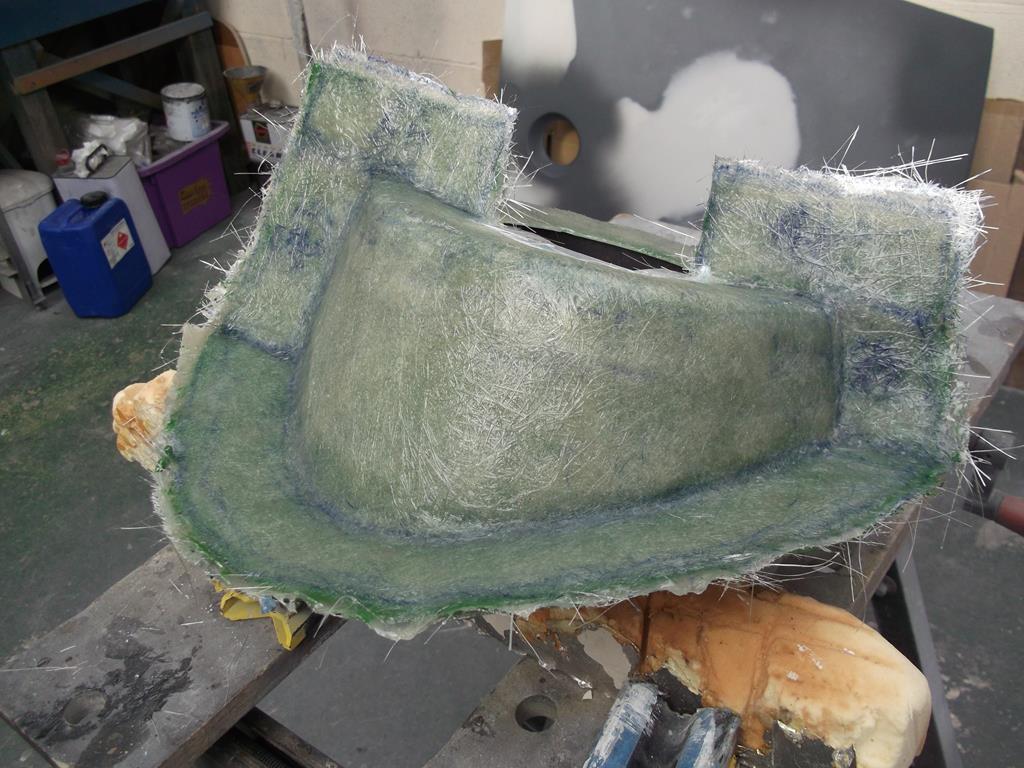  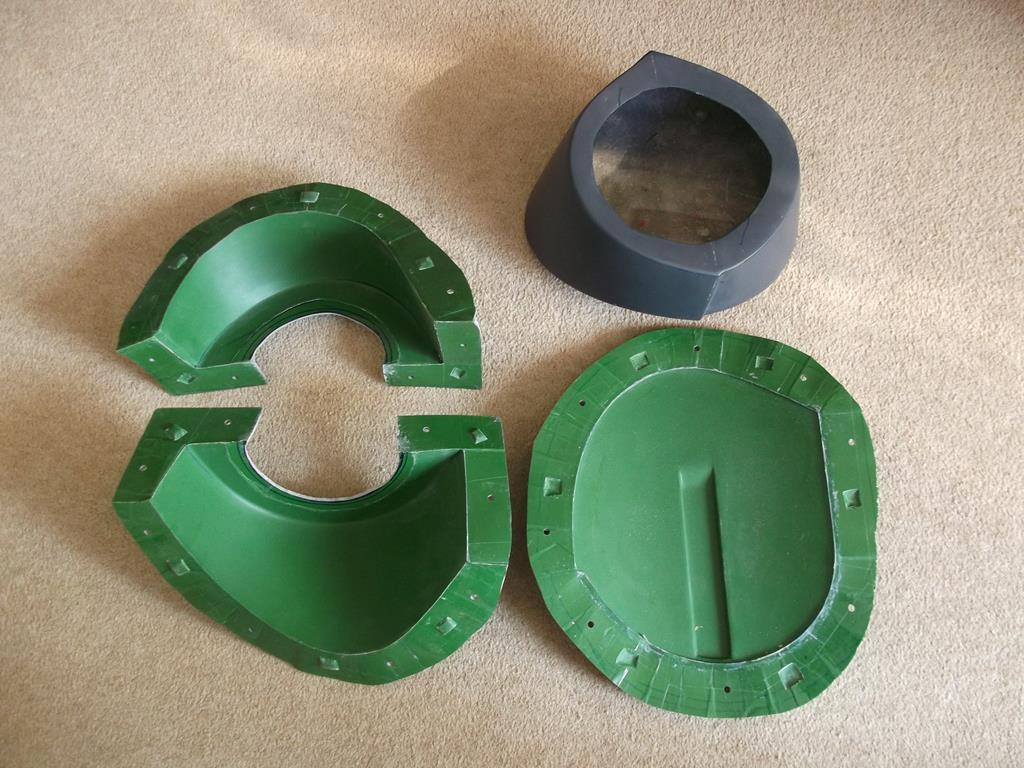 |
| |
Last Edit: Apr 1, 2019 20:23:03 GMT by Darkspeed
|
|
|
|
|
|
|
|
I know I should know where these fit, but I am struggling to visualise. Green (BR) and blue suggest the Geminis but they already have light pods, so the 21?
|
| |
|
|
Darkspeed
Club Retro Rides Member
Posts: 4,867
Club RR Member Number: 39
|
1970 Ginetta G15 Darkspeed
@darkspeed
Club Retro Rides Member 39
|
|
|
I know I should know where these fit, but I am struggling to visualise. Green (BR) and blue suggest the Geminis but they already have light pods, so the 21? Colour is a RED herring -  And no Gemini's in this thread and they do not have pods and nor do G21's - G15's have manually actuated pop up head lamps in pods! Visible in many shots of G15s in this thread but I don't think any show them in operation. 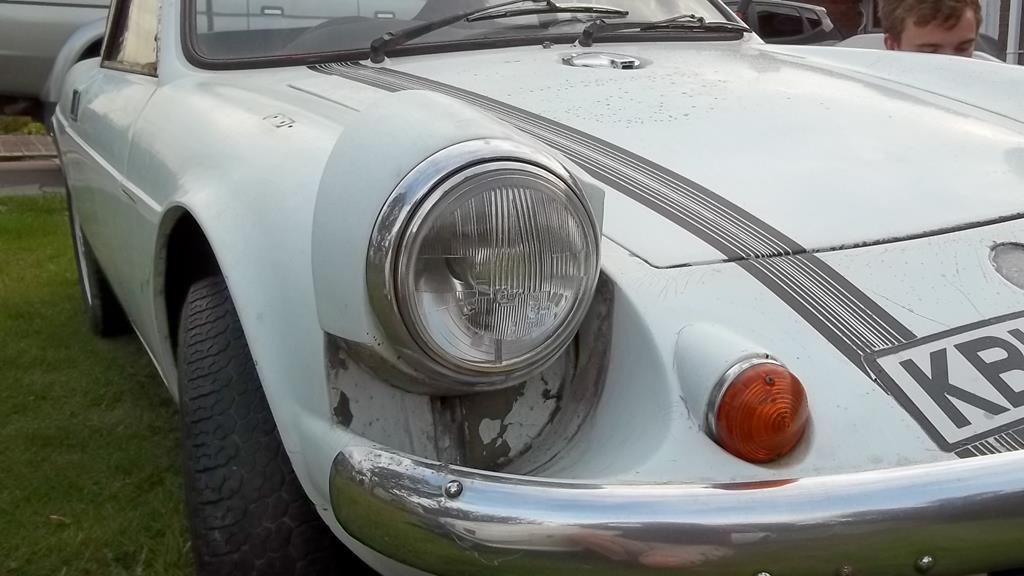 |
| |
|
|
jamesd1972
Club Retro Rides Member
Posts: 2,916  Club RR Member Number: 40
|
1970 Ginetta G15 jamesd1972
@jamesd1972
Club Retro Rides Member 40
|
|
|
|
Assume that is to get to minimum height for the C&U regs of the time but boy is that ugly !
Would it be an option now to leave at the lower height and fix in place with modern lights ?
James
|
| |
|
|


 There are not many makes of car in existence that leave such indelible marks during ownership that after 1/2 hour sleuthing on the internet and an introductory email via LinkedIn would get an owner that bought the car 39 years previous call you up at home and fill in some blanks on a cars history. To add to the history file that the engine was not only rebuilt and modified but the work was done by Holbay no less is absolutely priceless.





 that's over and done with - 5 sets completed and a set that were done by someone else back for some additional welding.


 And no Gemini's in this thread and they do not have pods and nor do G21's - G15's have manually actuated pop up head lamps in pods! Visible in many shots of G15s in this thread but I don't think any show them in operation.