|
|
|
Feb 15, 2018 19:25:16 GMT
|
As mentioned in my post to 320Tourings thread, I too have a 1959 Morris Oxford traveller. You wait for ages and then two come along.......
And I will post lots of photos here when I figure out why none of the methods apparently available to me ...do not work !
Insert image (I tried this from thumbsnap) results in a black box containing a small cross - perhaps there's something I'm not doing or a setting that needs changing?
|
| |
|
|
|
|
|
|
|
Feb 15, 2018 19:53:10 GMT
|
using basic mode....
Say hello to Hercules. So named as he appeared to have belonged to a rag and bone man (and is always nagging me to do stuff). You may be able to figure this out if you are over 50 or spend far too much time looking at very old BBC sitcoms.
2016 my birthday and on my drive is a saggy-bottomed 1959 Morris Oxford Series iv all-steel Traveller. Named so by Mr Morris to attract businesses employing travelling salesmen apparently.
What you can't see is lots of tin worm in all the usual places.
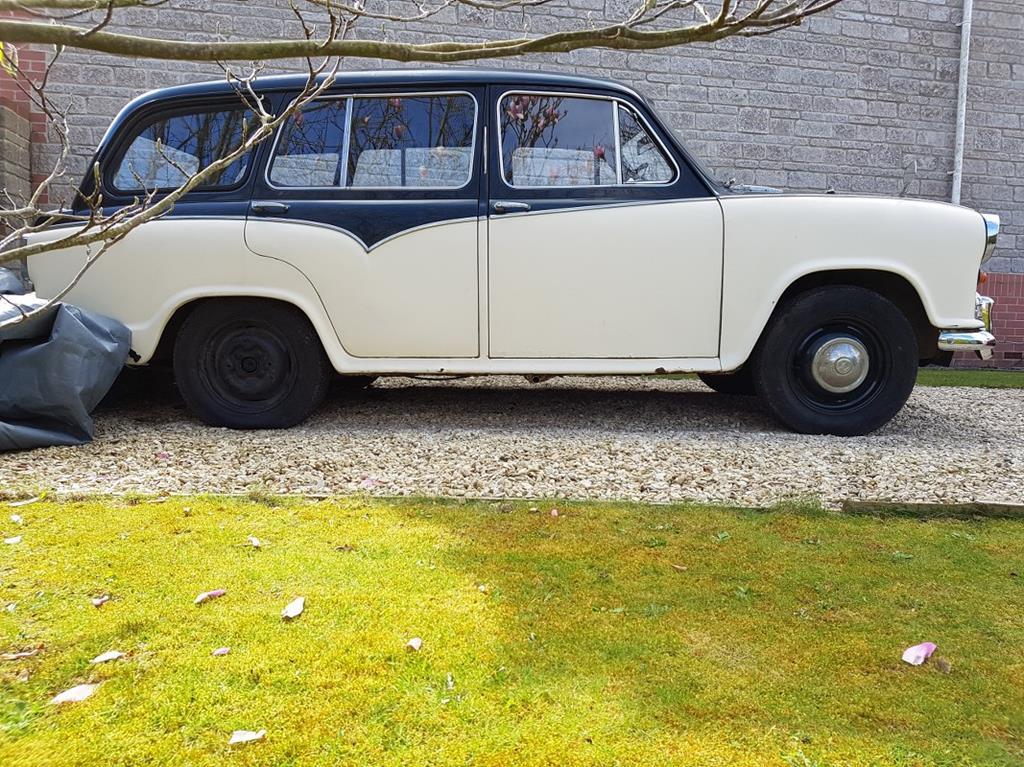
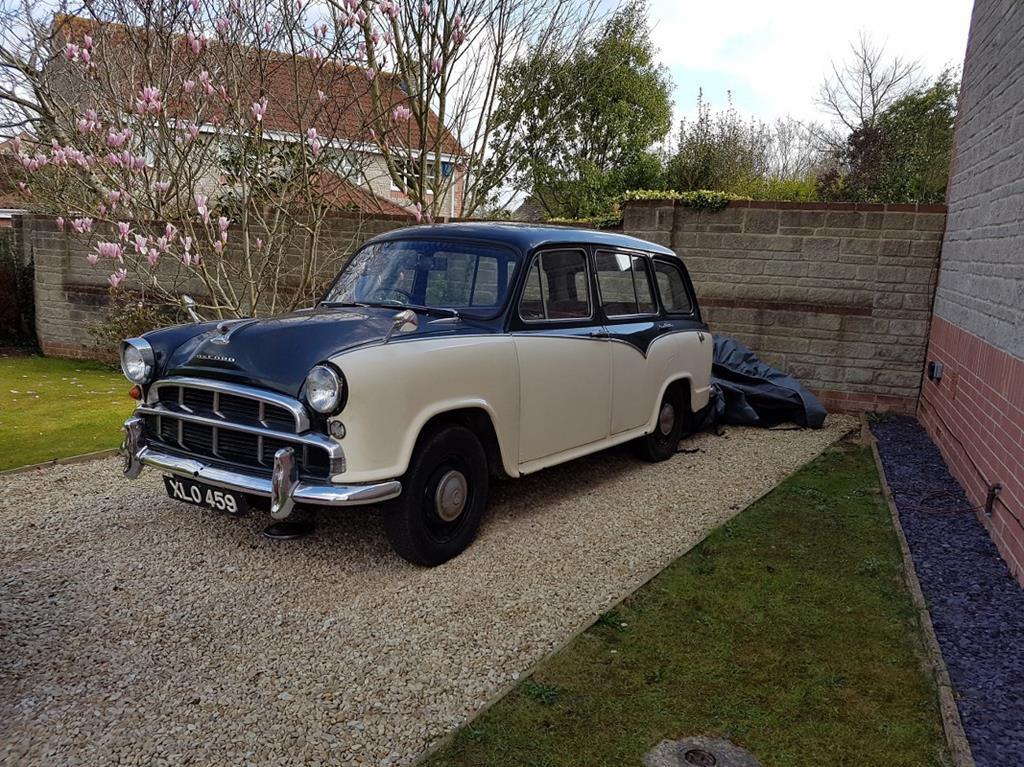
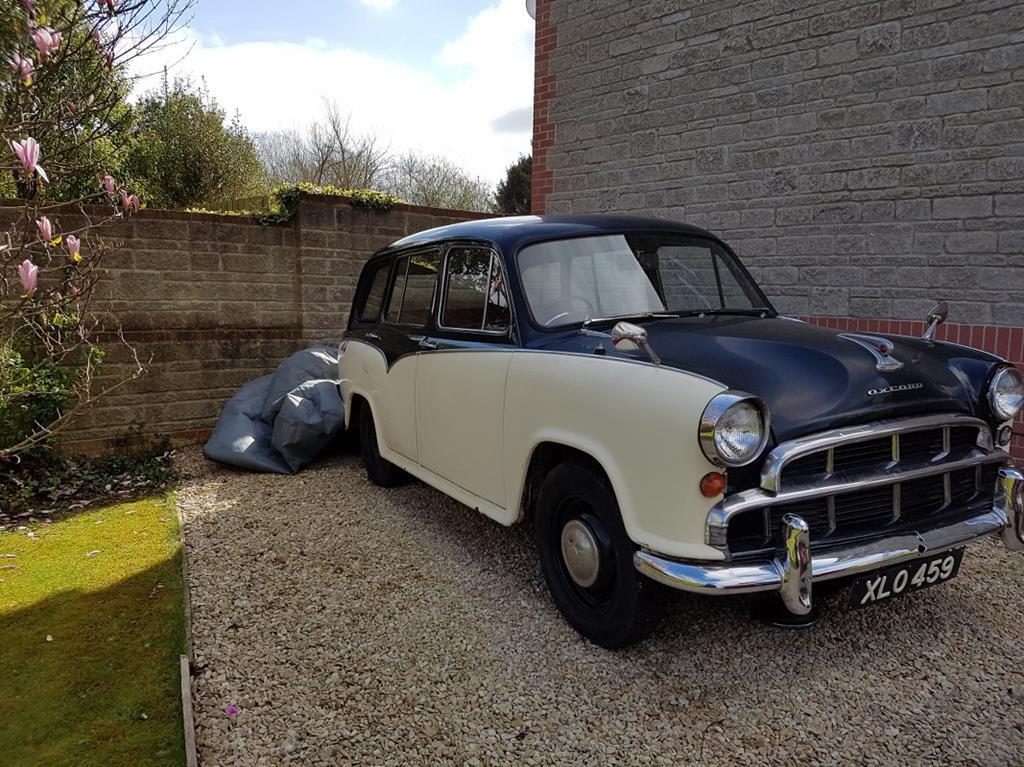
It can only get better! |
| |
|
|
|
|
|
Feb 15, 2018 20:04:39 GMT
|
I have to say the interface in this forum is driving me mad! Waiting for space in a number of local friends' workshops to start on the bodywork, I tackled the gearbox which was suffering some slight difficulty in engaging gears*. *This is a technical phrase meaning completely buggered with no spare parts available, but I didn't know that when I started. Meanwhile, Curly had some space in his farmyard behind the old cow shed and I had a flimsy tent. 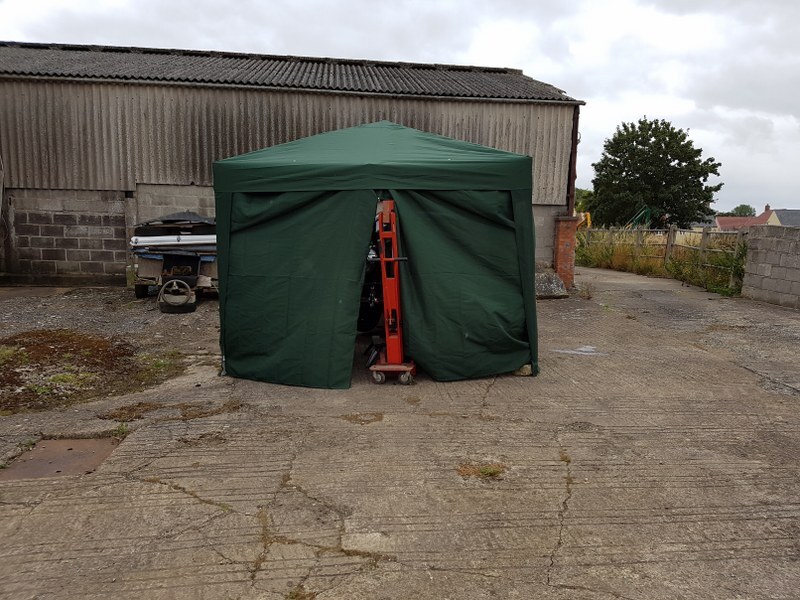 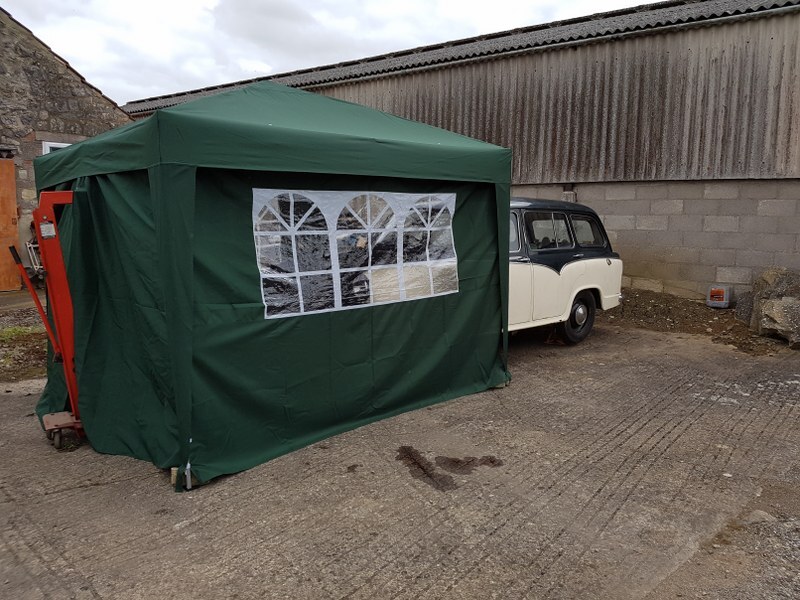 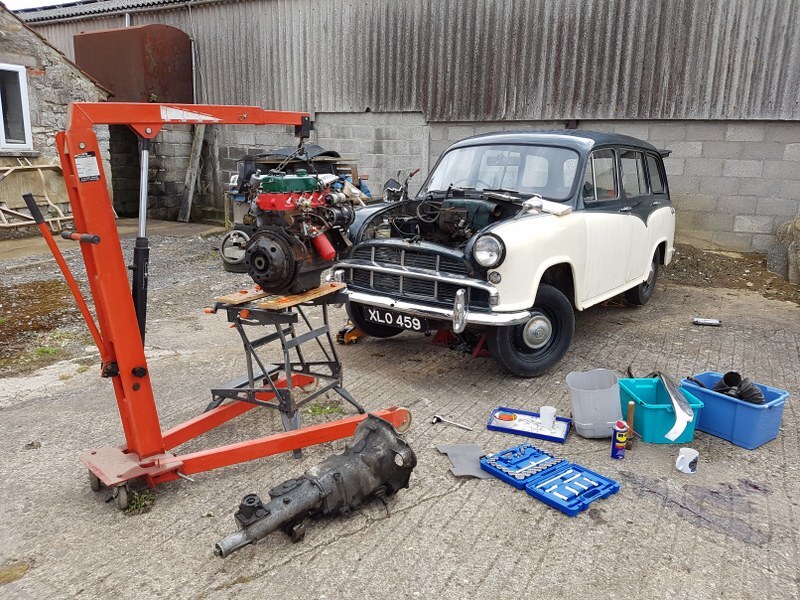 In the above pic, you may notice what looks like a small wing sticking out the back. Someone had fabricated a replacement door stay, but it was too short and mean the door sat at exactly forehead height.... ouch x 20. 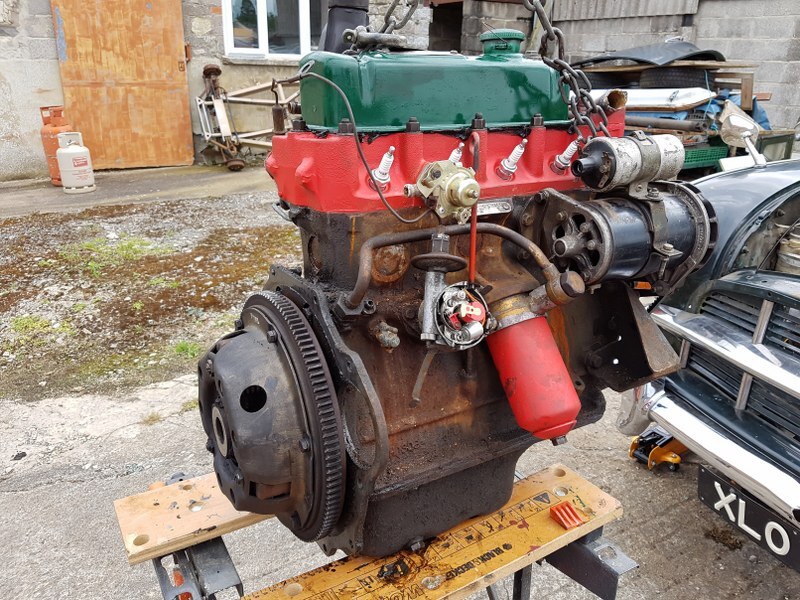 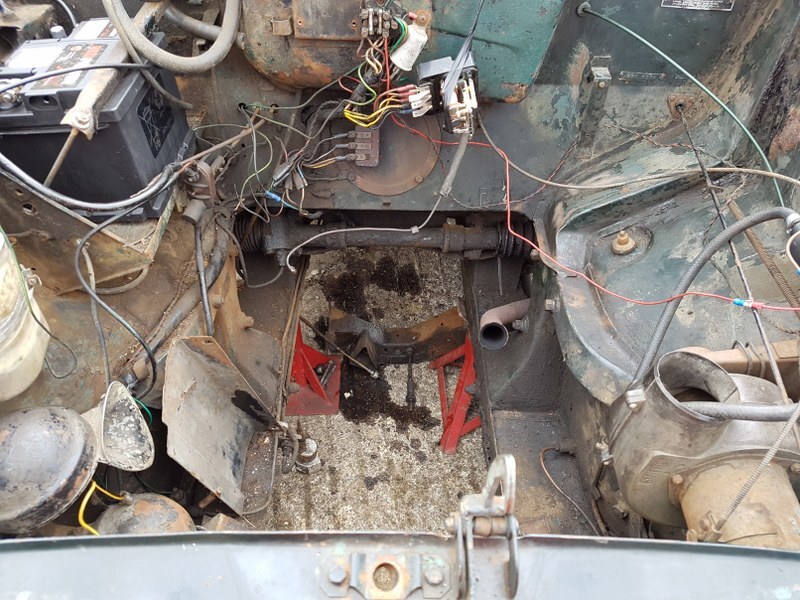 Engine compartment MUCH betterthan hoped and feared. Alas not the same for much of the rest of this car. |
| |
|
|
|
|
|
Feb 15, 2018 20:17:40 GMT
|
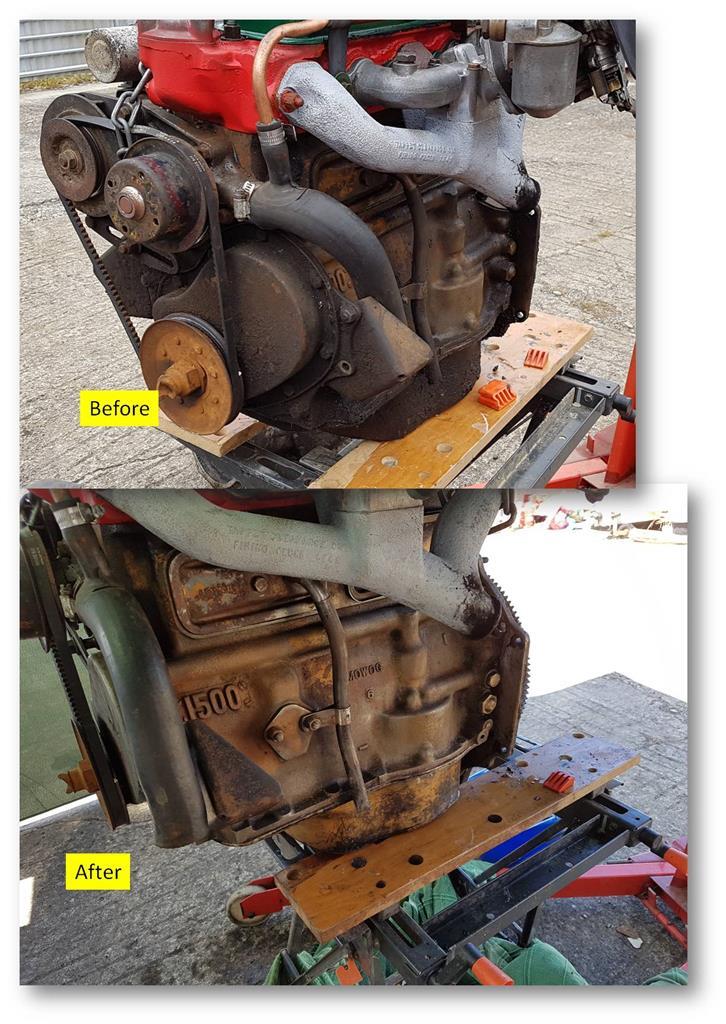
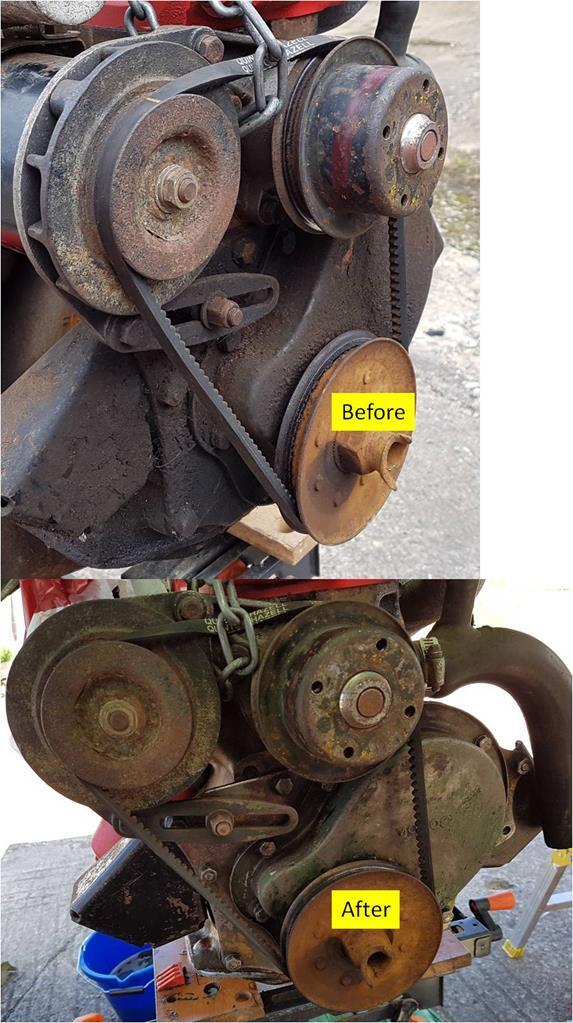
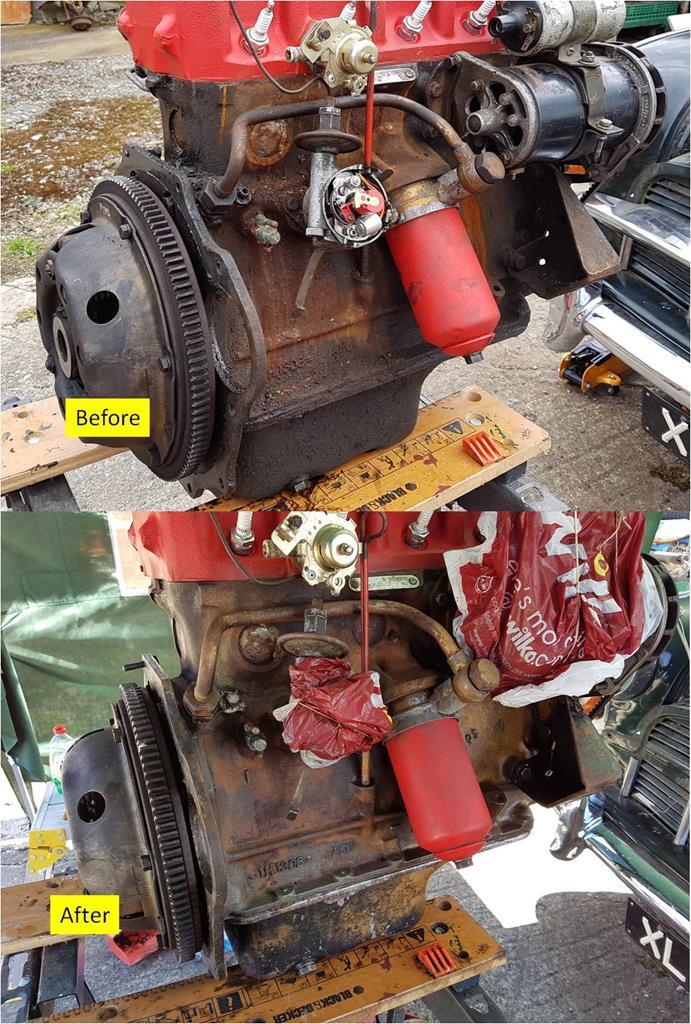
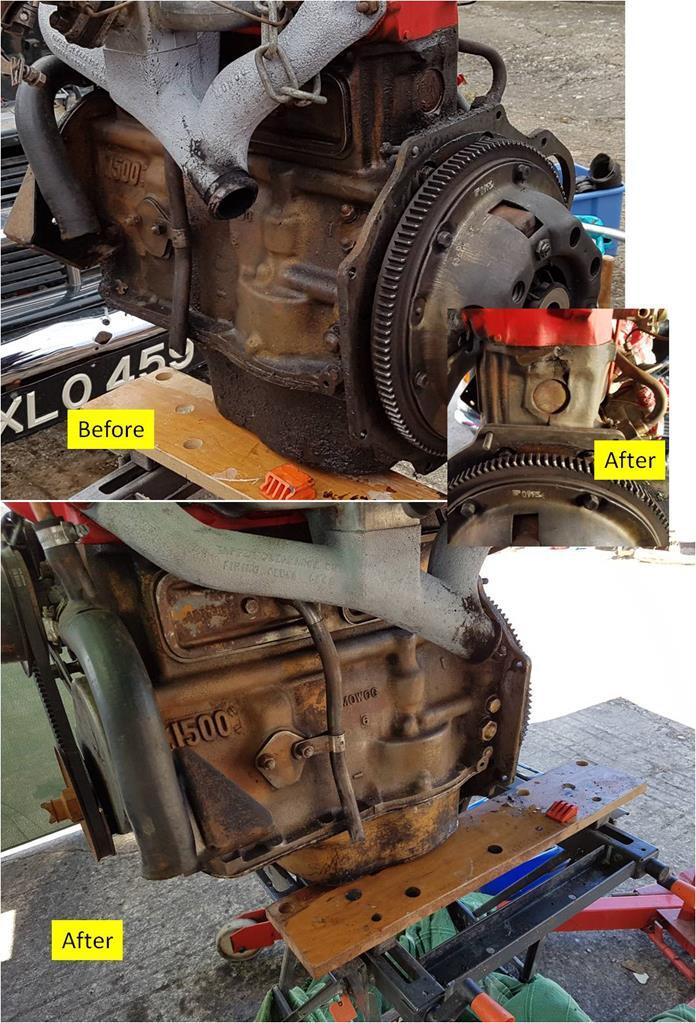
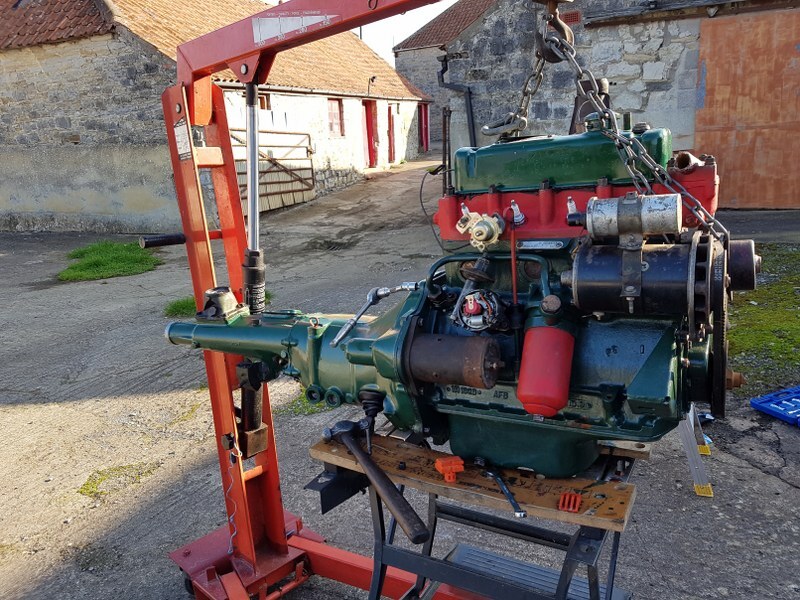
Stuart - of Southwest gearboxes - had confidently predicted he could recondition the box. Much to his embarrassment he couldn't source any replacement parts and the assorted non-meshing parts of the gear-changing device were geriatric, too far gone (and missing a few teeth and a snapped woodruff key). Luckily, being a member of the Morris Cowley Oxford club I was able to get an Austin A60 box for £30 from our parts guru, the best of the three he had in his Aladdin's cave.
Stuart refreshed the box, re-used the Oxford's bell-housing & gear-lever turret and fettled the mountings to match the originals so I was left with the onerous task of painting it a nice engine enamel green.
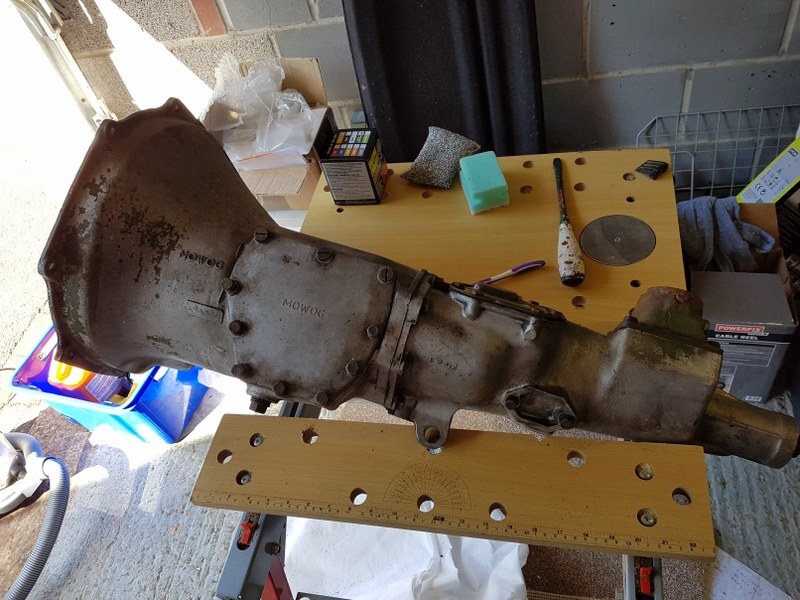
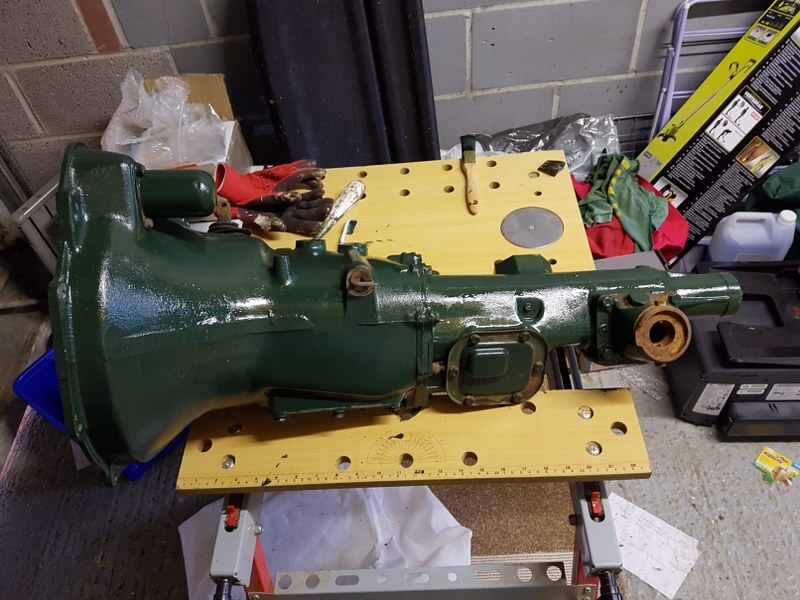
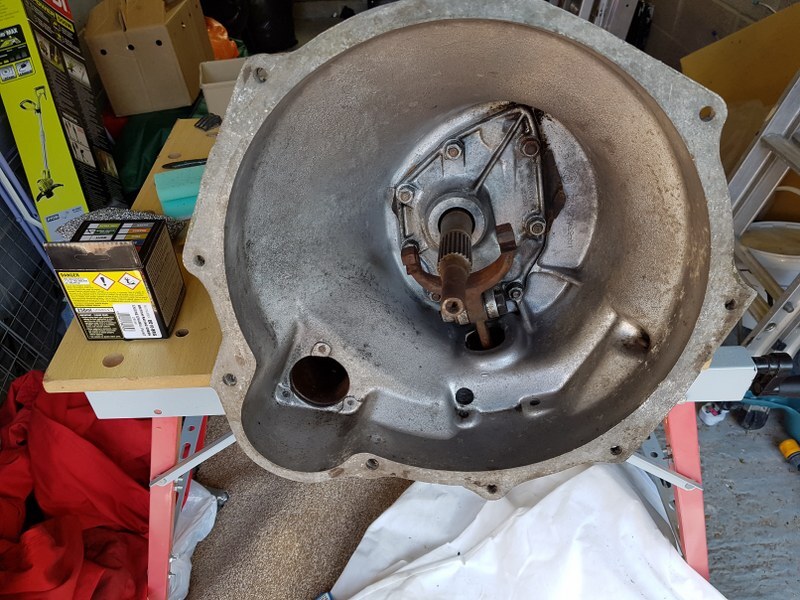
As an aside, the Oxford's output shaft is coarse splined. The A60 is fine and so my newly-purchased Oxford clutch was useless (!) The A60 clutch is also thinner and once back in the car with a new MGB slave cylinder (original was leaking) it still snagged the gears. Cue the clutch pedal free travel adjustment , which should have a gap of something like 1/32nd to 1/16th of an inch..... not 1/4 inch !
This is enough for the clutch to function but at some stage I may have to replace the slave cylinder shaft with a slightly longer one.
|
| |
|
|
|
|
|
Feb 15, 2018 20:20:26 GMT
|
|
That's an absolute peach!
|
| |
|
|
|
|
|
Feb 15, 2018 20:39:40 GMT
|
|
|
| |
|
|
|
|
|
Feb 15, 2018 20:44:31 GMT
|
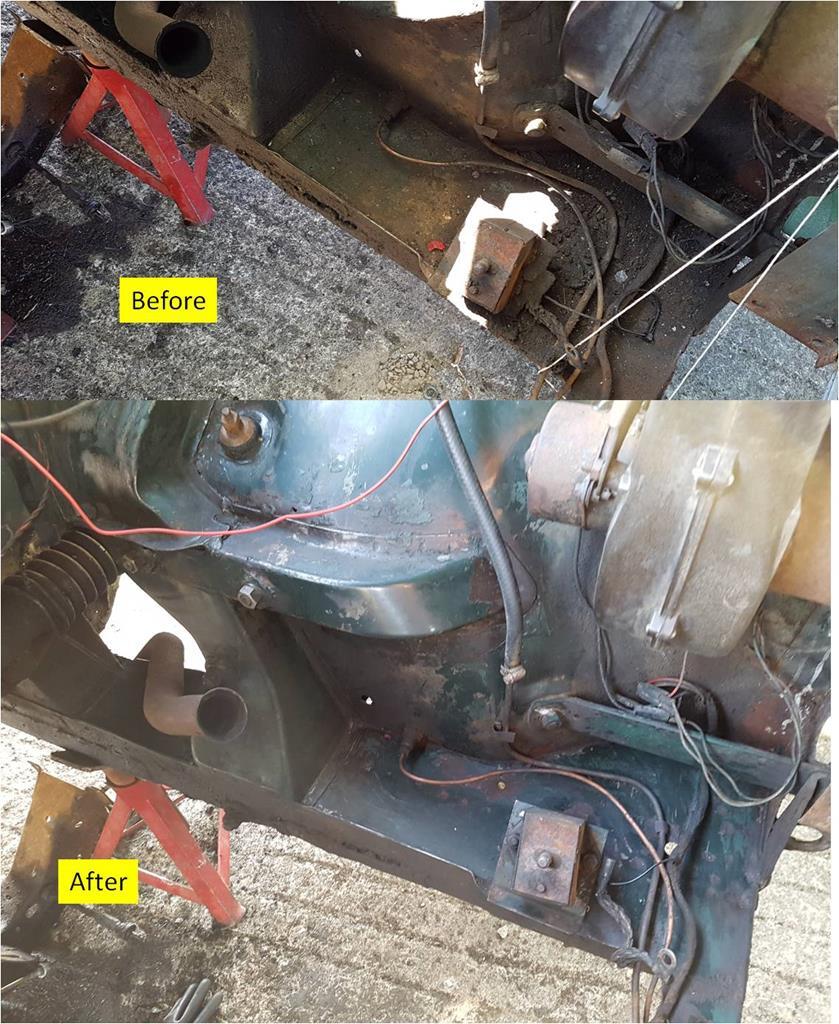
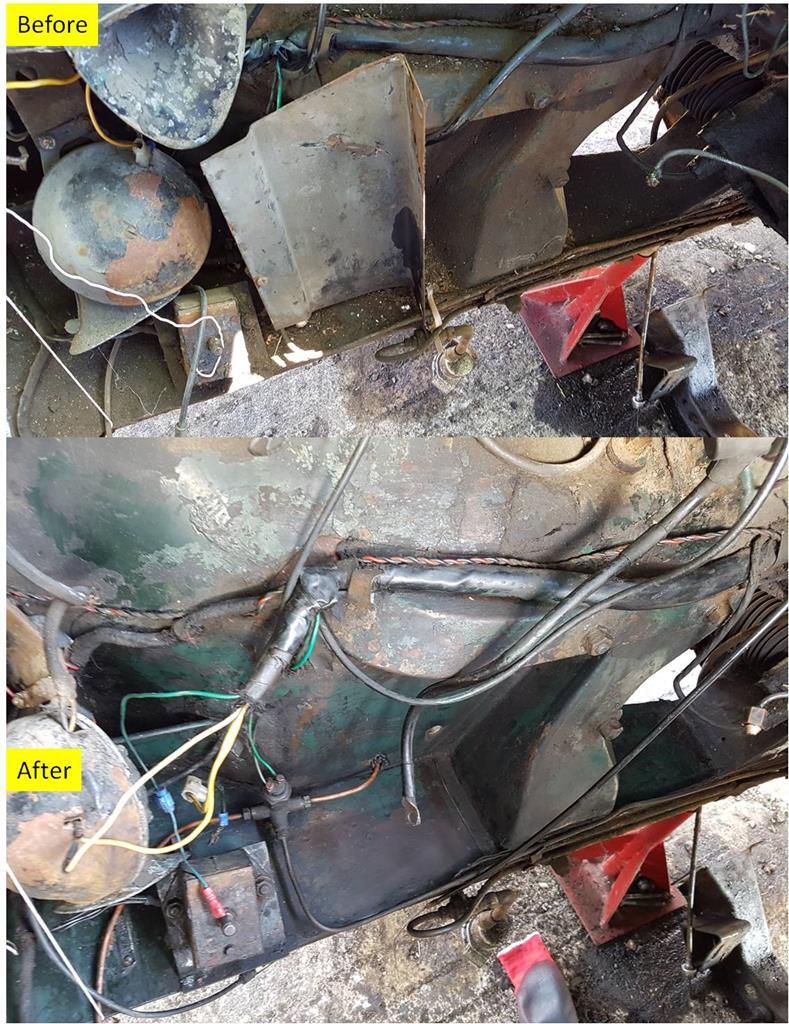
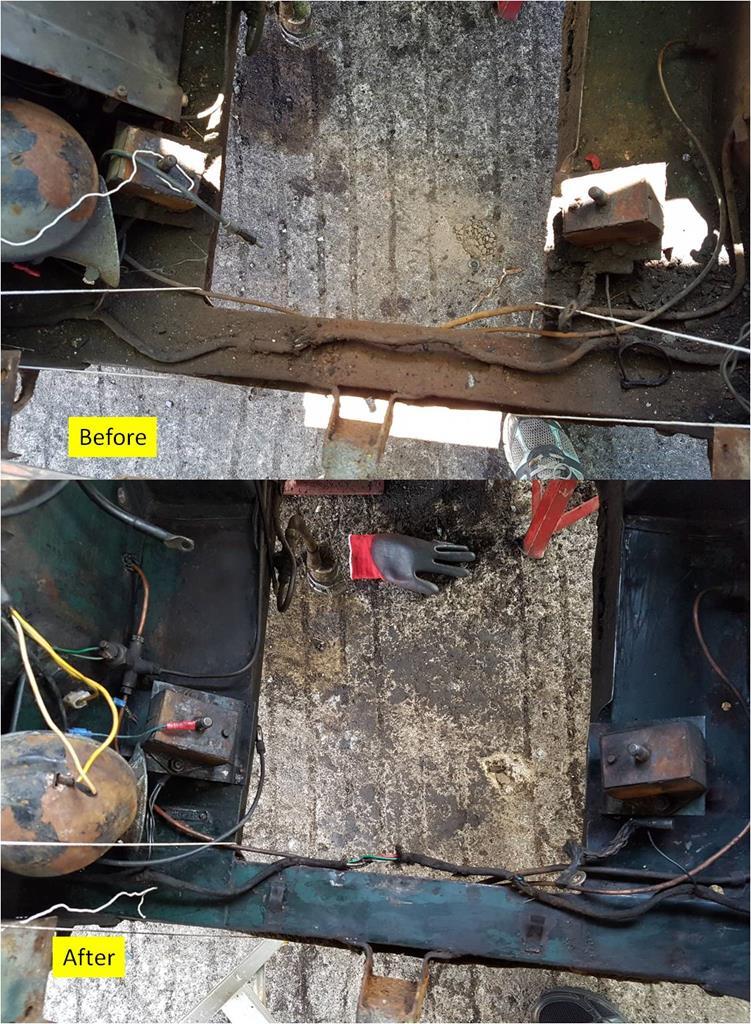
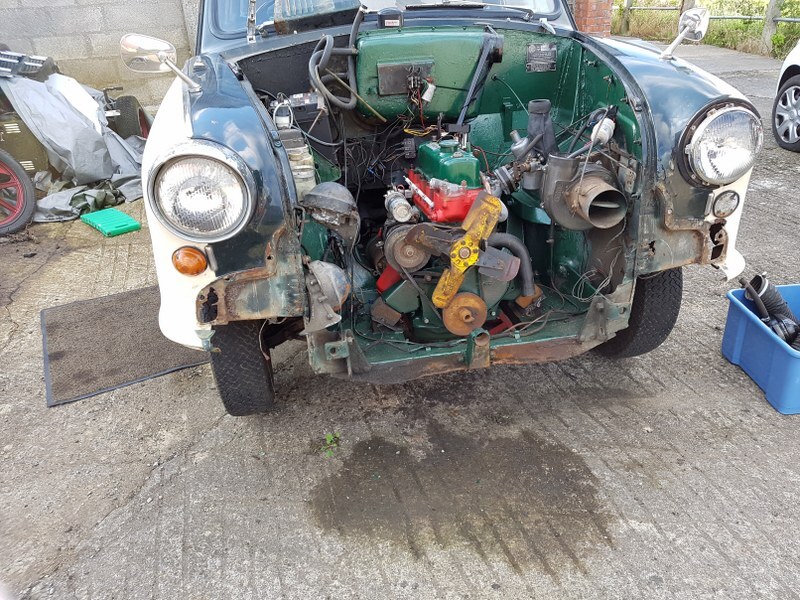
Results:
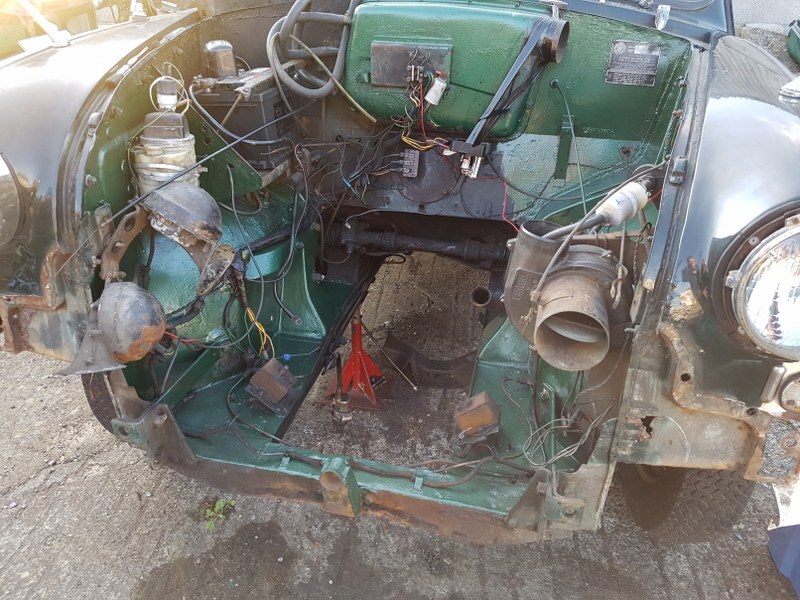 Still more to do - in fact I finished painting the bay a few weeks later but omitted to take photos (D'Oh)
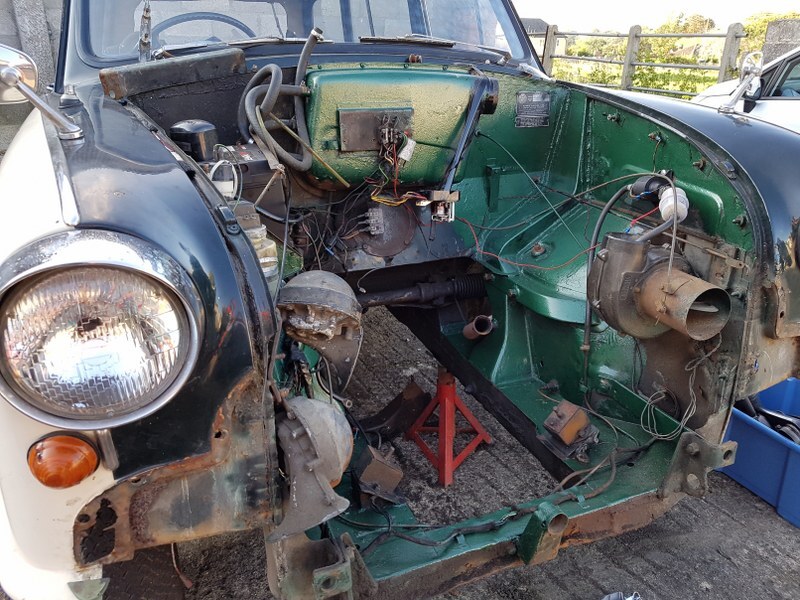 The rusty hole below the indicators is where the sidelight enclosure should mount. It was held on by some wire behind the panel and the grille chrome at the front....
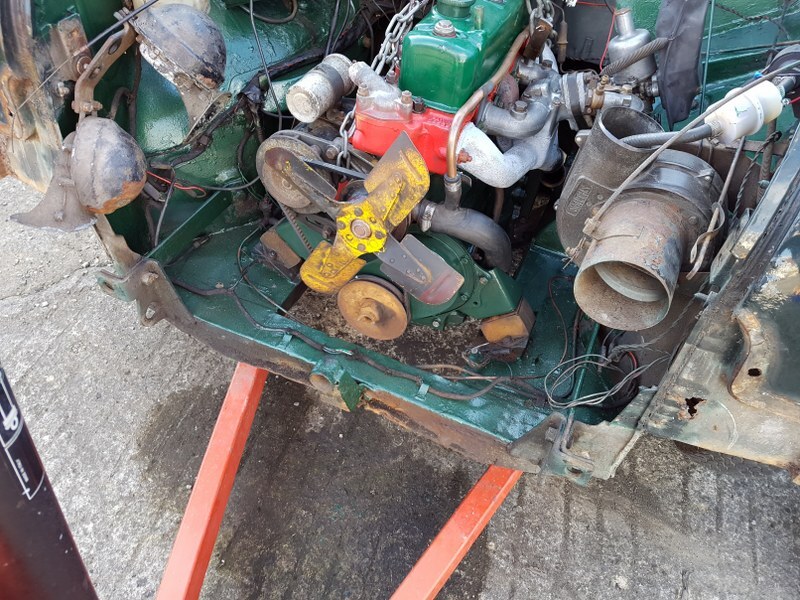
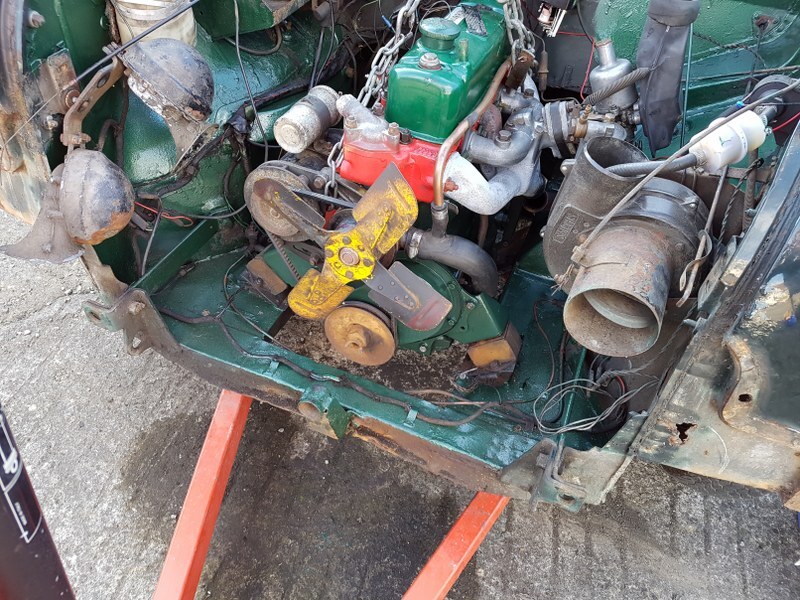 Note to self: should've painted the fan while the engine was out you dimwit.....
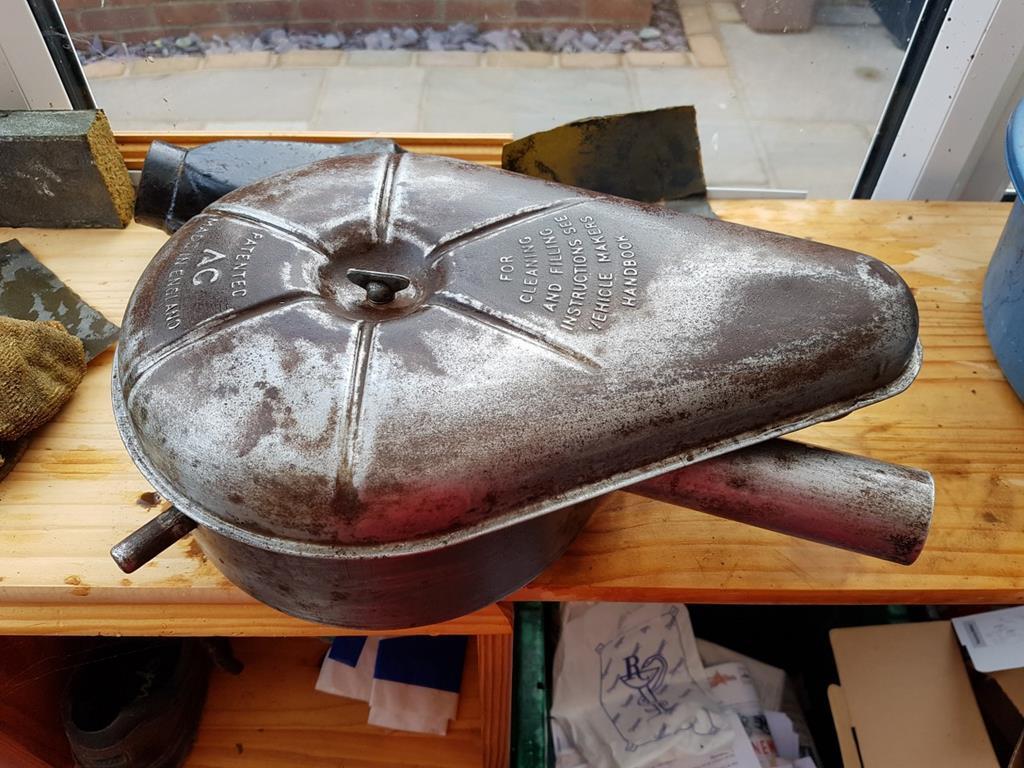
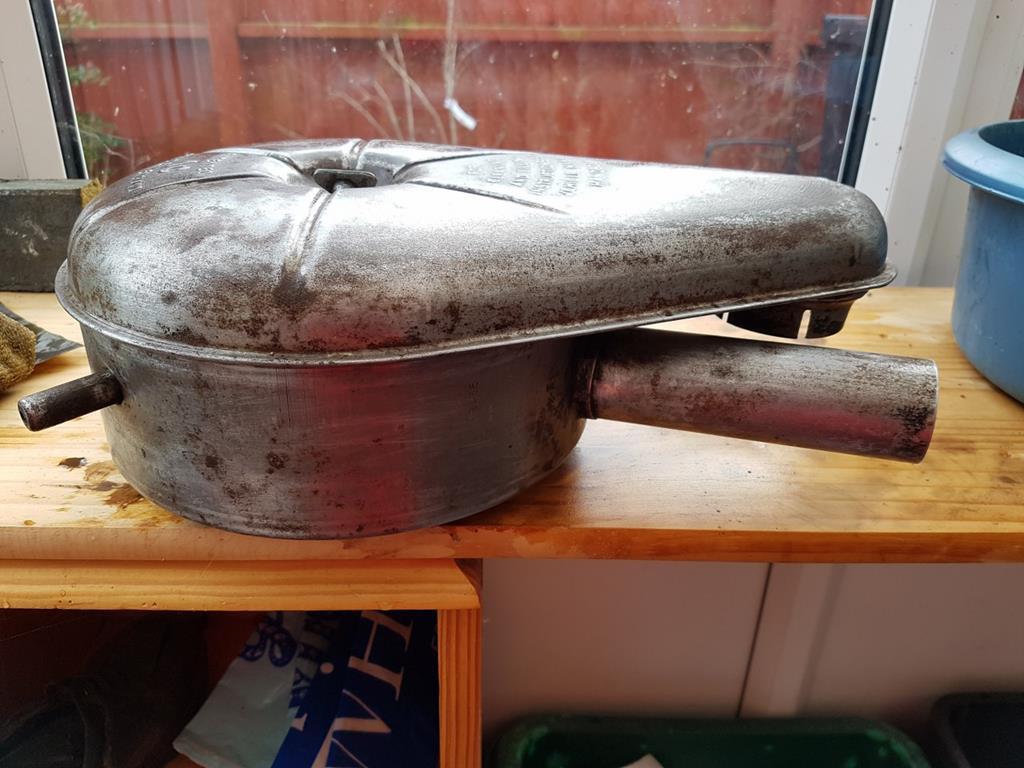
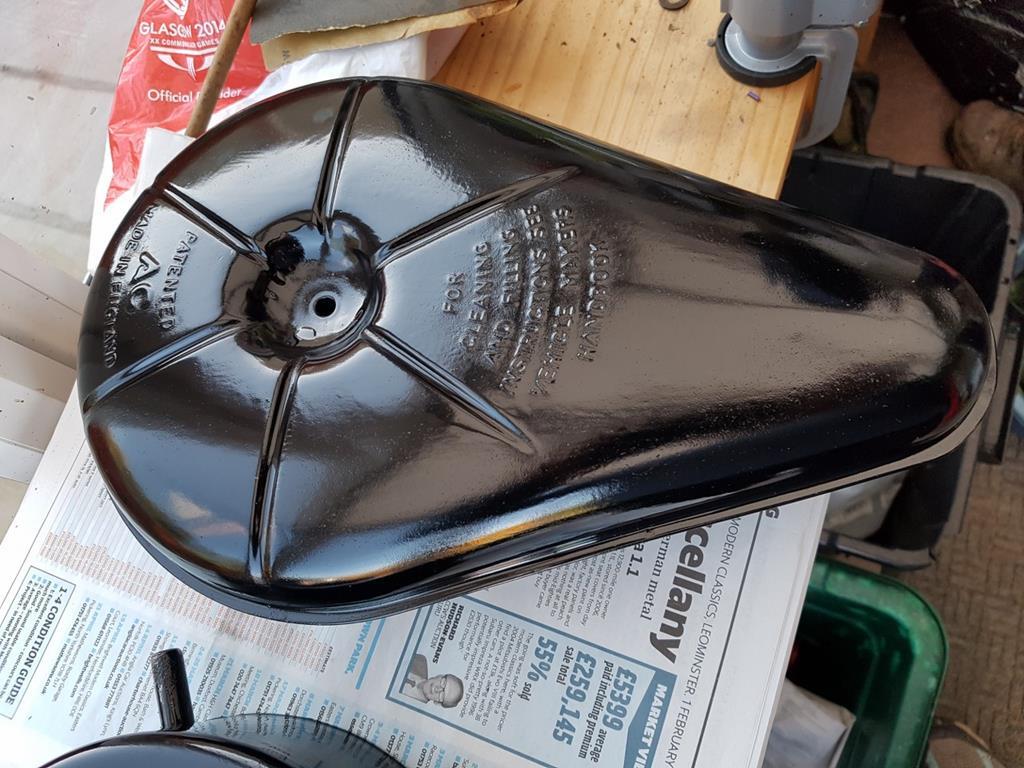
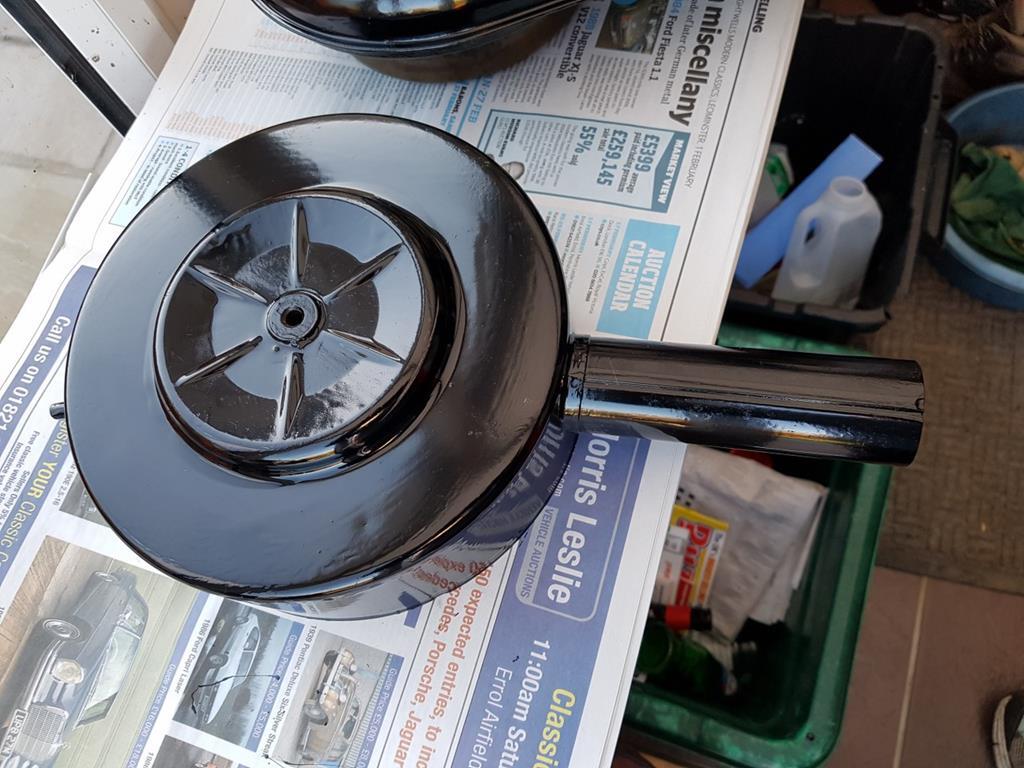
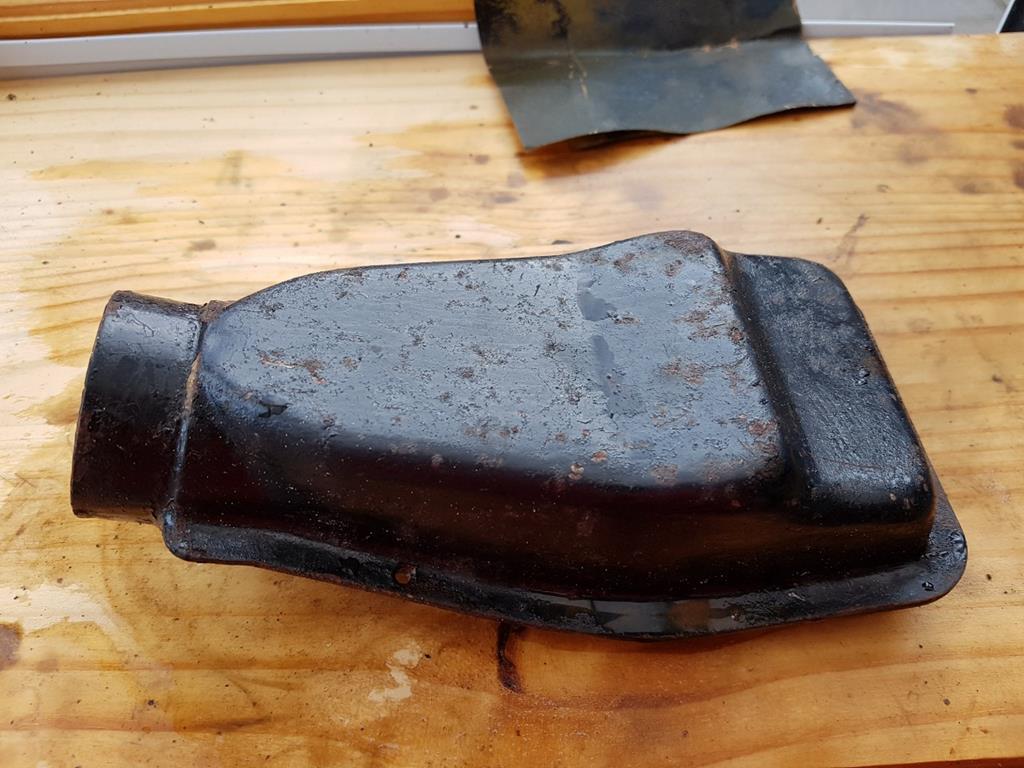
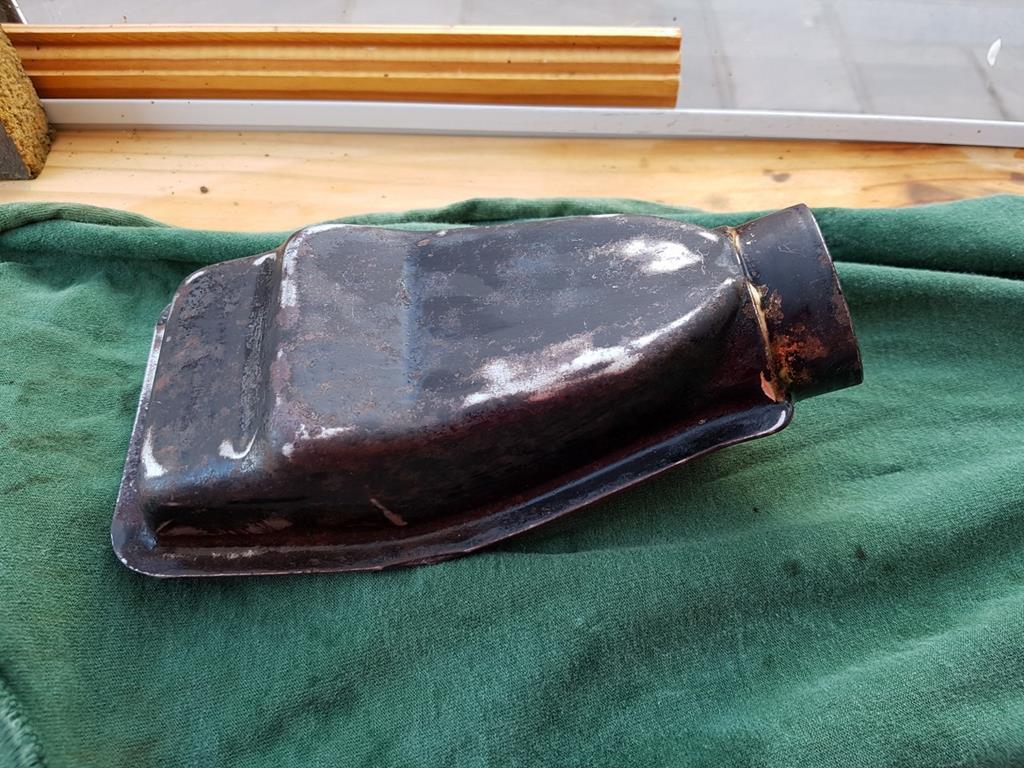
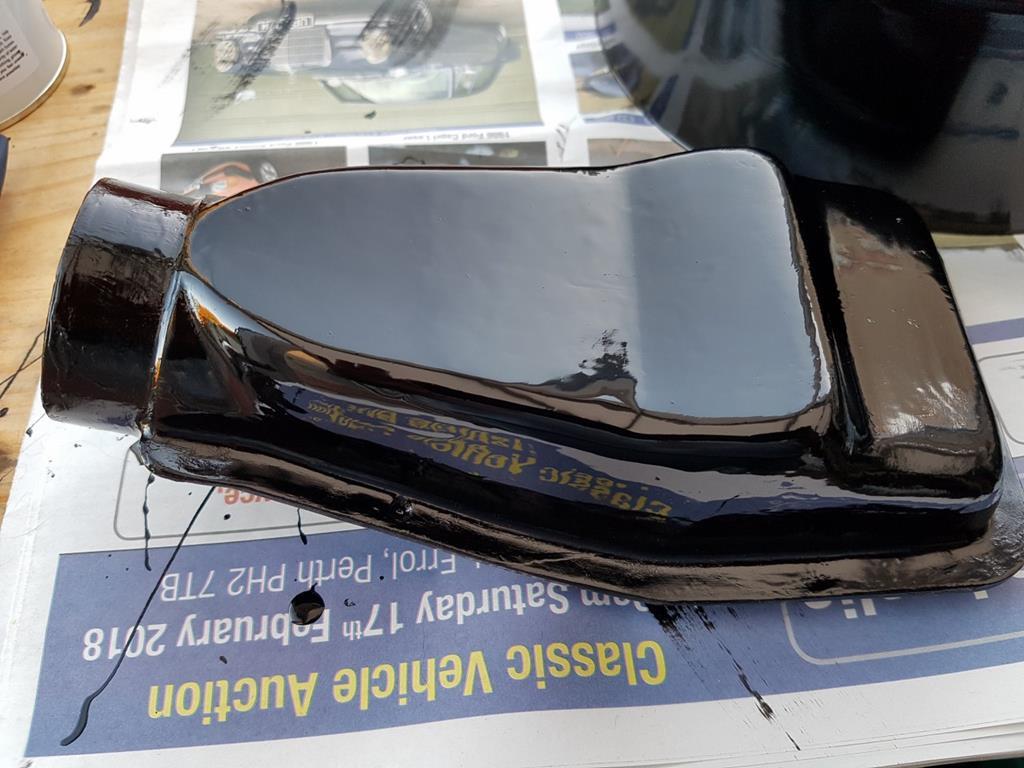
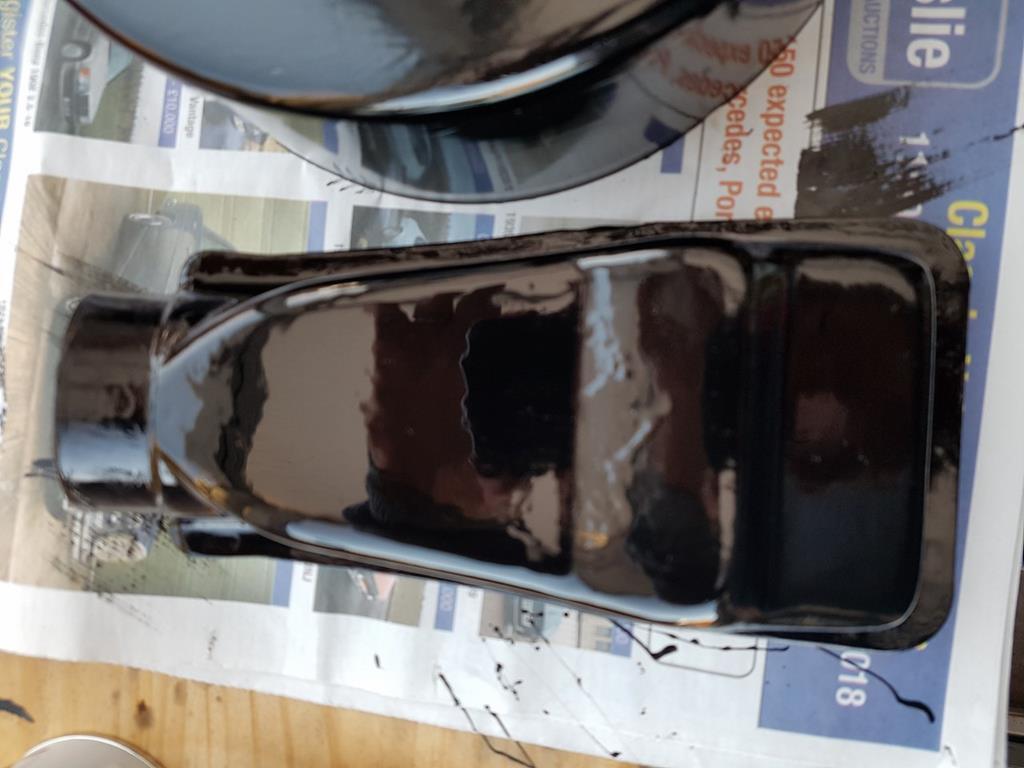
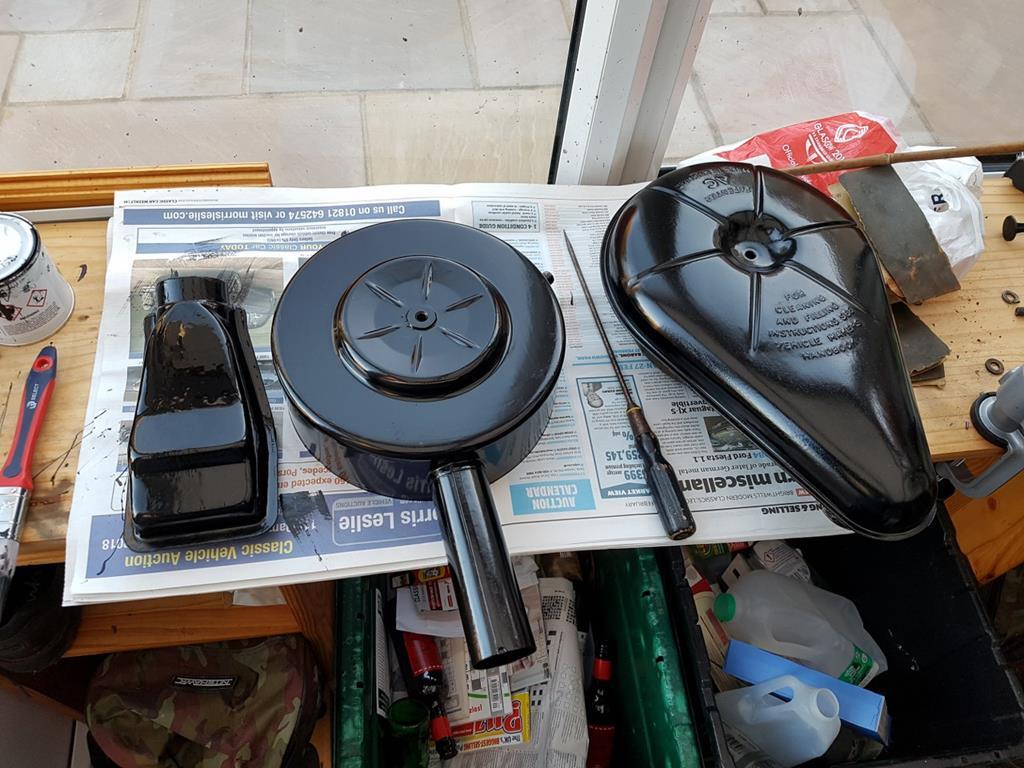
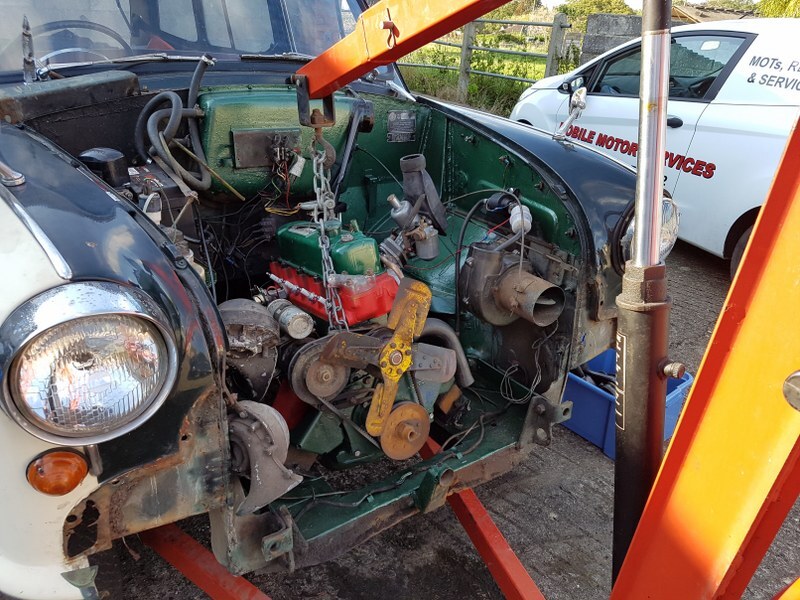 The Mobile Motor services van belongs to my mate Mark who was helping me by giving such useful advice as "pass the 7/16ths spanner" and "two sugars, please". He was an apprenticed BMC mechanic back in the day and as result was able to identify my dipstick and air cleaner as "definitely from a Cortina Mk1".... the dipstick was Cortina, but the air cleaner is original Morris Oxford (one pint to me, then). I now have 2 air cleaners, but at least I can restore one while the other remains on the car.
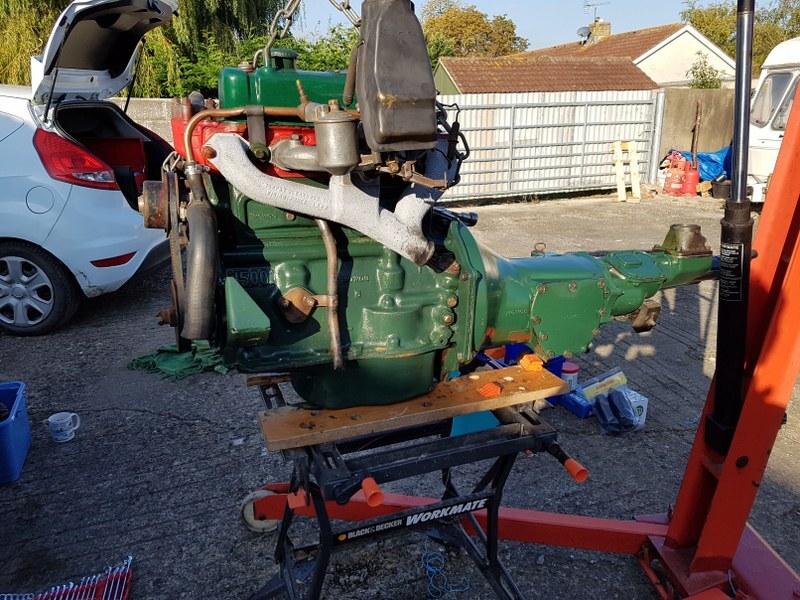
More anon. My wife and my beer glass are getting lonely!
|
| |
|
|
|
|
|
Feb 16, 2018 11:05:40 GMT
|
By early 2017 the car was a runner, although totally illegal. Only the engine electrics worked properly. Pending a space in another friend's workshop becoming vacant (at a price!) I stripped the chrome - badgework, grille, bumpers; the rear loadbay cards I removed the carpets, which were a nearly new set in green, but as I had inherited a red set of seats and door cards* it was going to be put on the "pass on to another Traveller owner in due course" pile. * the seller, whose personal life and car history is worthy of a book, had been selling TWO travellers, mine was the more complete but it had no seats, only wire frames. He kindly swapped the reasonably good red seats from the one my wife and father-in-law wouldn't let me buy (and keep in the front garden) as well. He also sourced a new unleaded recon head for me and installed it, plus an oil change, points and service. It was an OK deal, I could have had both travellers for "a bit more than I paid", but I would have had do do all the work and buy the new head - which by early 2017 would have been a major problem because I had developed arthritis in both hands and could no longer grip with my left. The other (all green) Traveller was sold to a film company to use as static scenery in a film shoot. In early June Hercules popped around the corner to Darren's "old fashioned petrol station and garage" - the establishment came with Darren, another modestly-priced BMC apprenticed assistant for whom I could hold spanners and natter with about classic cars, as by now my left hand was all but useless. Work to be done: cut out large chunks of and weld new metal in of front floorpan, most of the inner sills, 2 of the spring hangers, front inner wheel arches, jacking points Prior to this I had sourced a brand new new set of rear leaf springs which would be installed after the 1st phase of "industrial (i.e. "not pretty" and hidden) welding was completed. The only supplier capable of this had the designs only for the saloon, so the car will sit about 1 inch higher than it should. 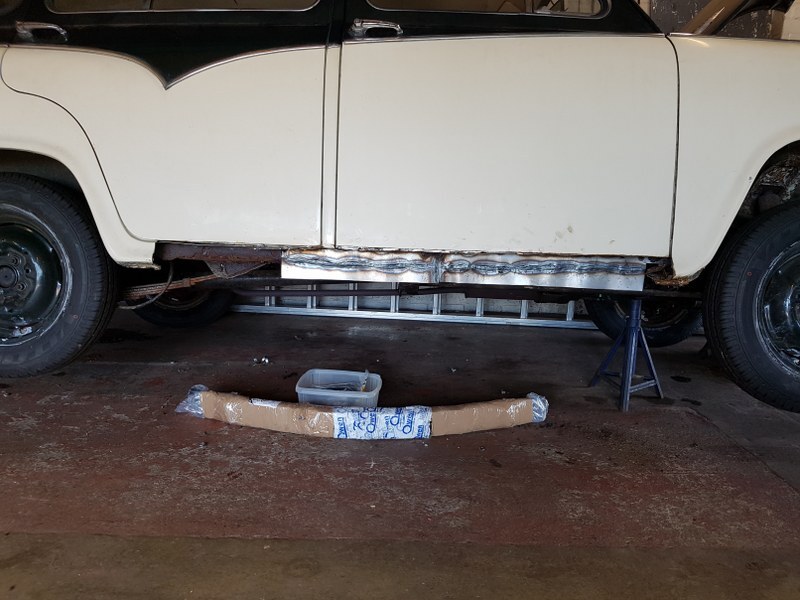 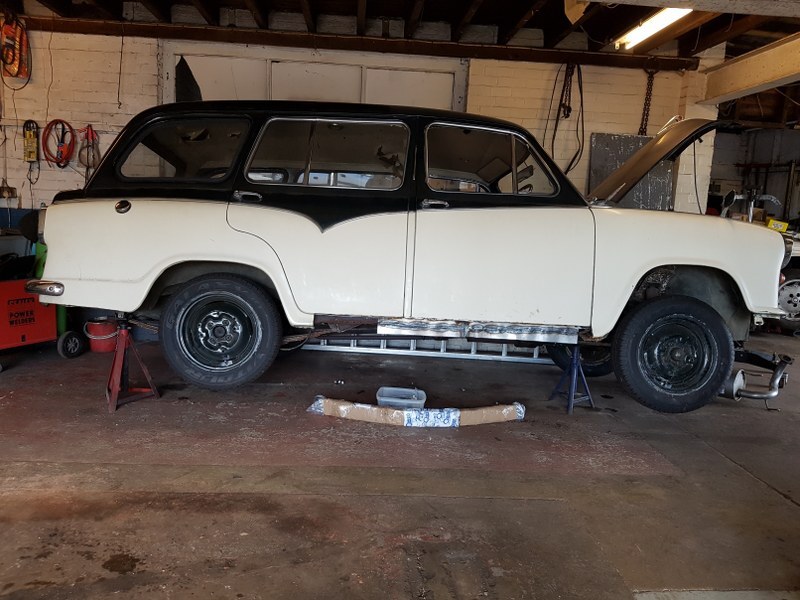 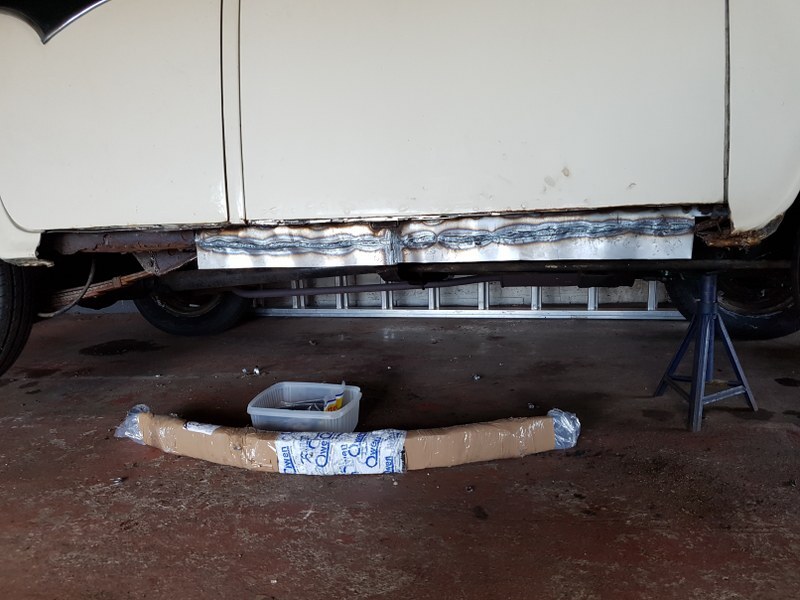 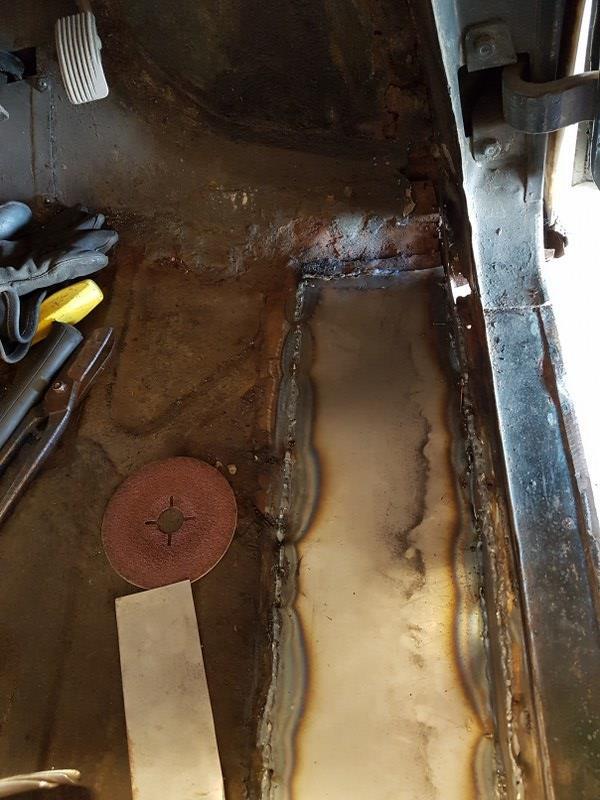 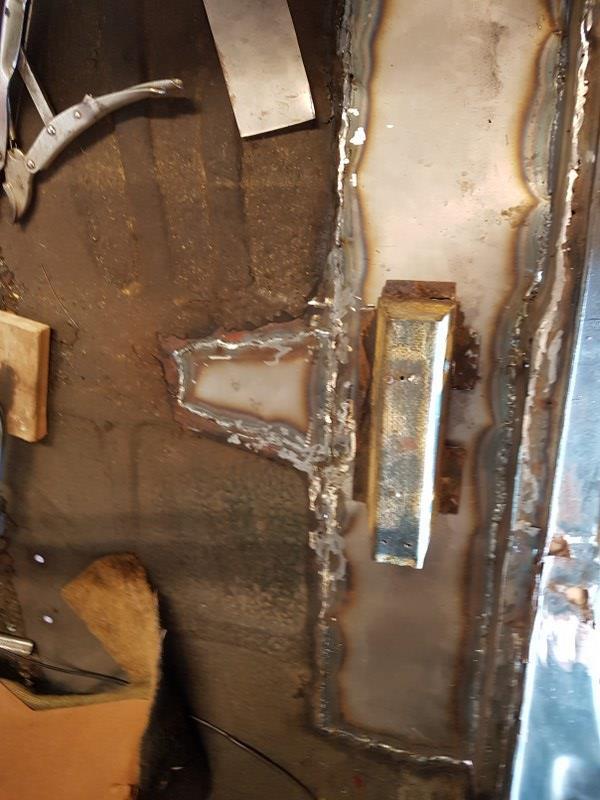 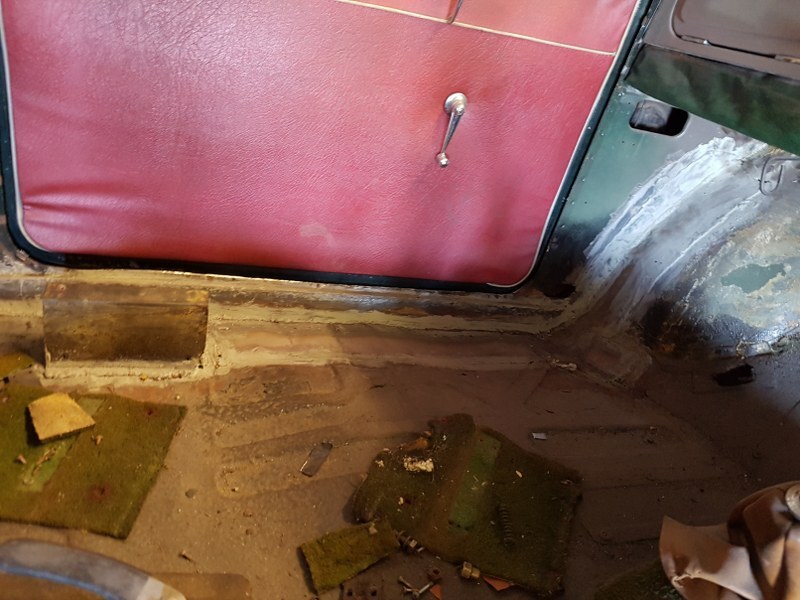 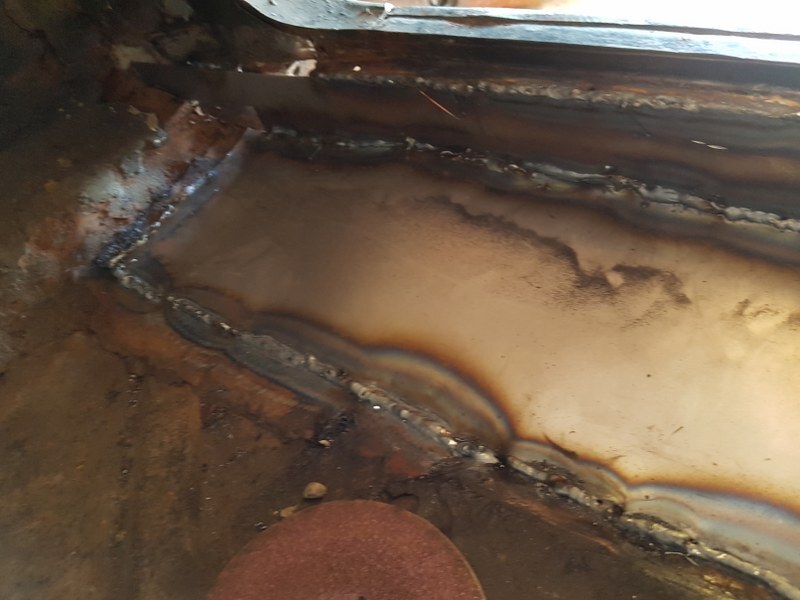 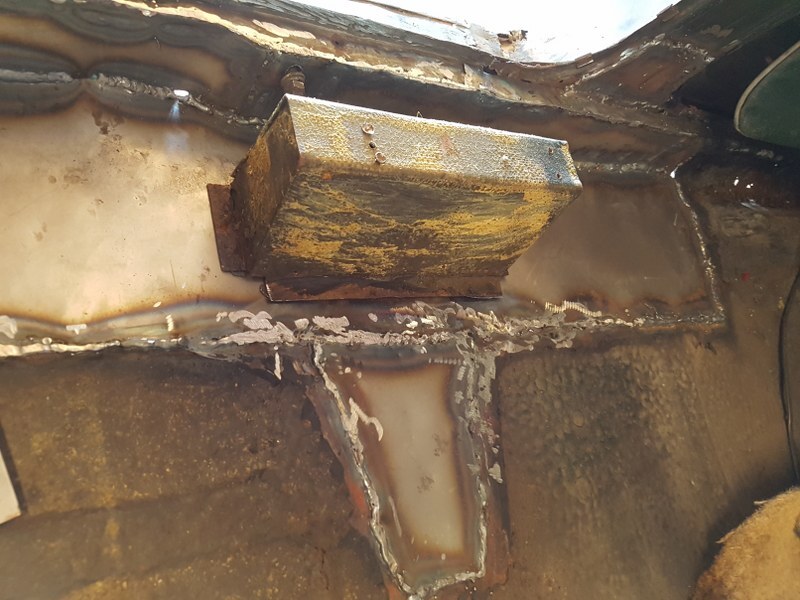 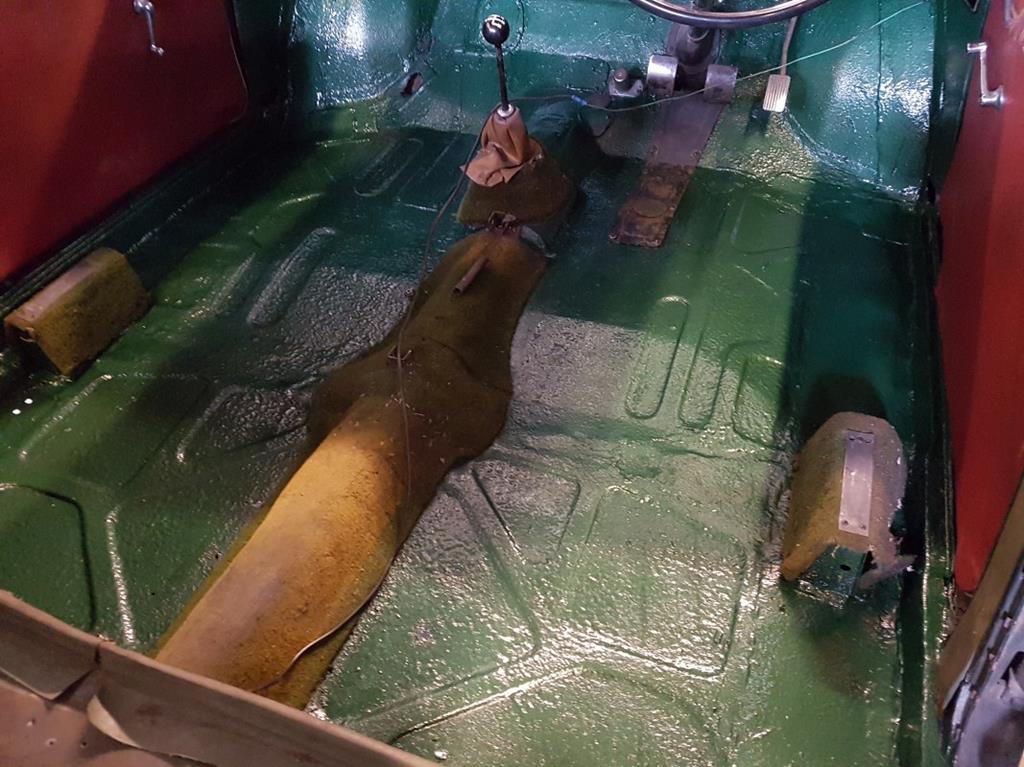 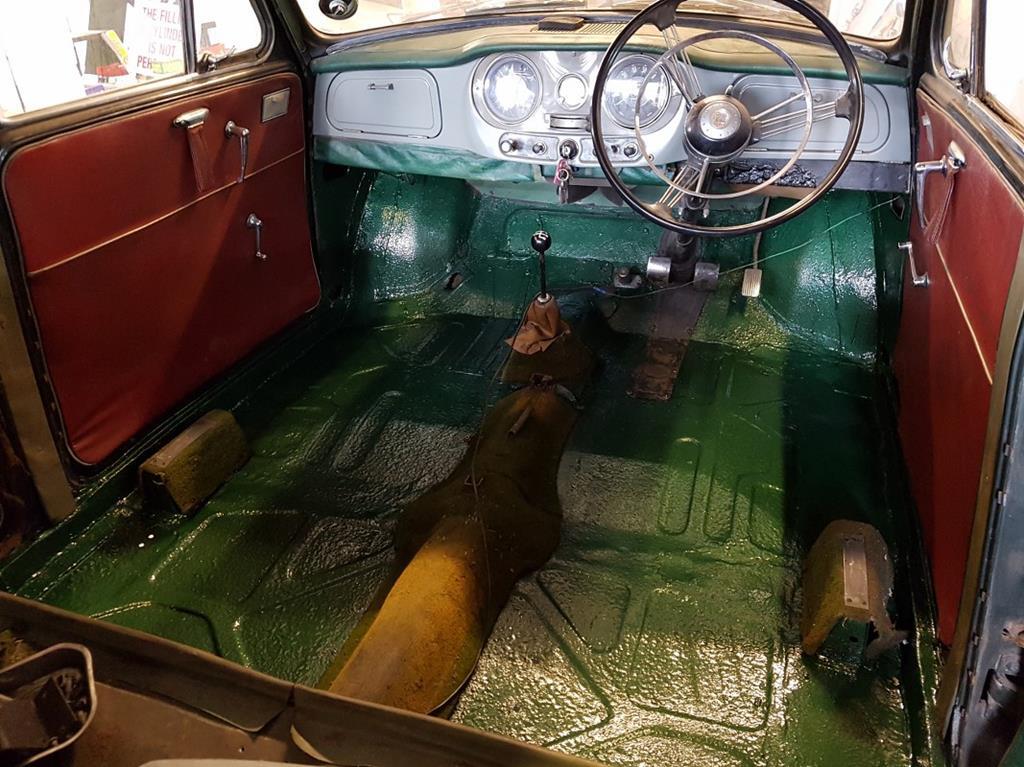 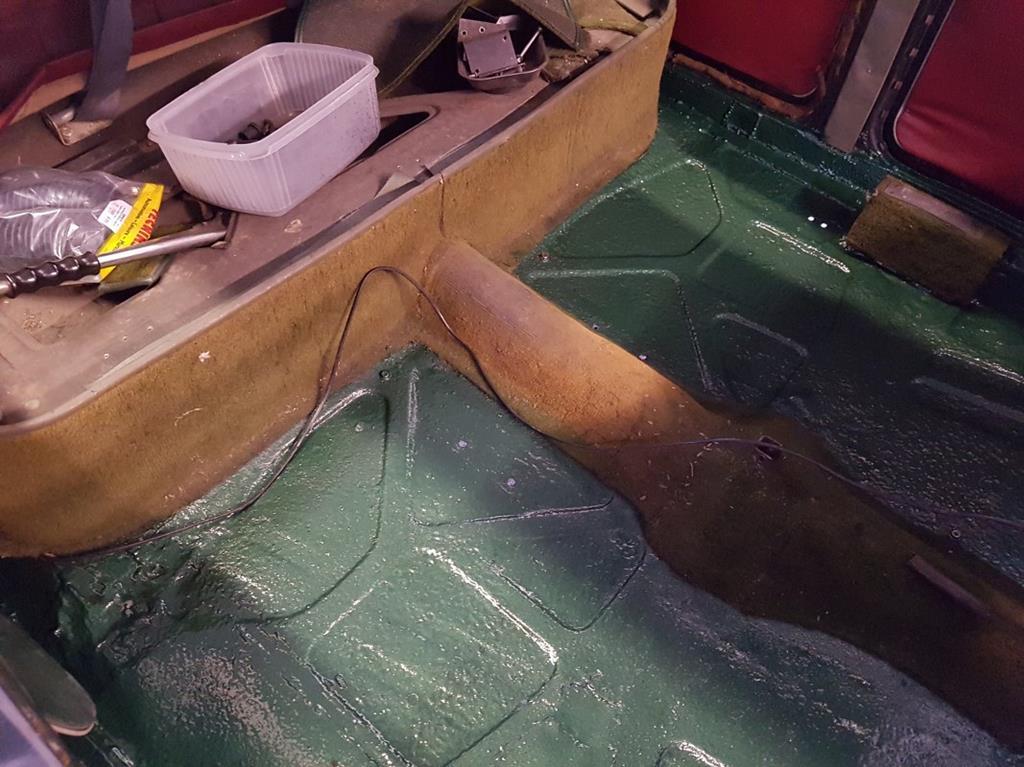 Still some bits of carpet to strip out. Fingers crossed (I haven't looked) that my new set will have the bits for the transmission tunners and rear seat kick / heel panel in the footwell |
| |
|
|
|
|
|
Feb 16, 2018 11:19:09 GMT
|
Once back home in Autumn 2017 with the majority of hidden welding complete and the new rear springs installed, the stance was much more purposeful. The rear shocks are original. I was told by the Morris Oxford Cowley Club's tecnical guru (who owns several Oxfords and Cowleys) that they were so massively over-engineered that they never failed and so very few replacements were manufactured. Mine seem fine - the roads here in Somerset are more third world than anywhere I've been and he's coped well on the few short trips I've made thus far. 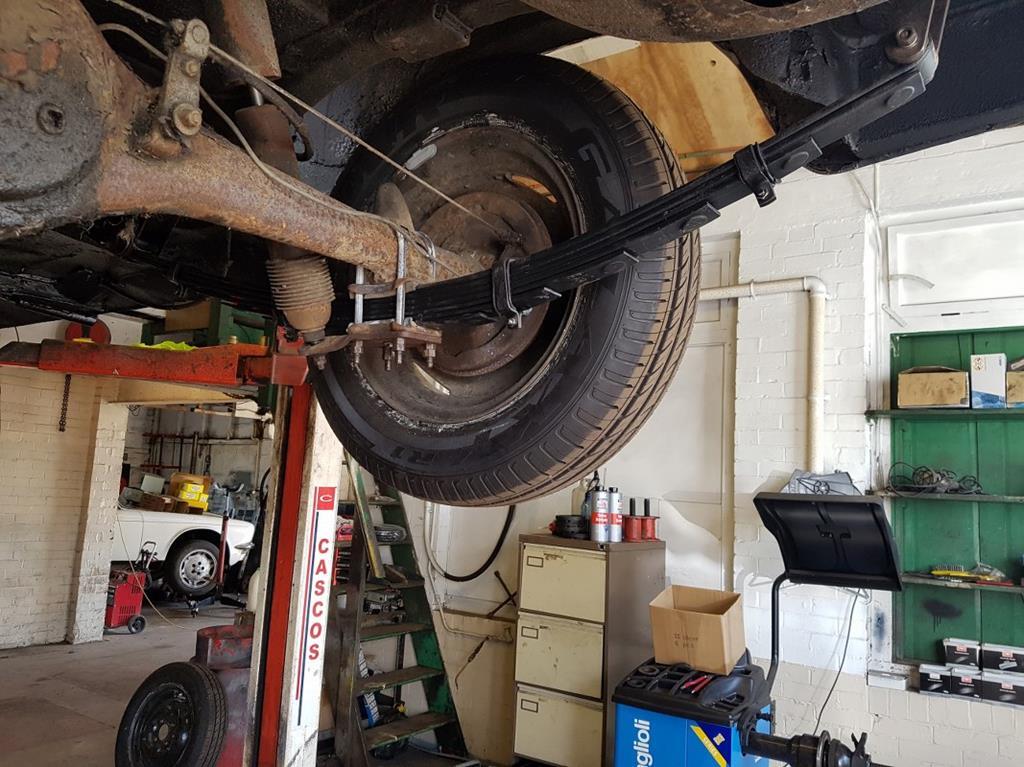 Yes, that's Darren's Jag in the background. Cobbler's shoes. He's made little progress in many years (but he's fiercly possessive, in case you're interested!) 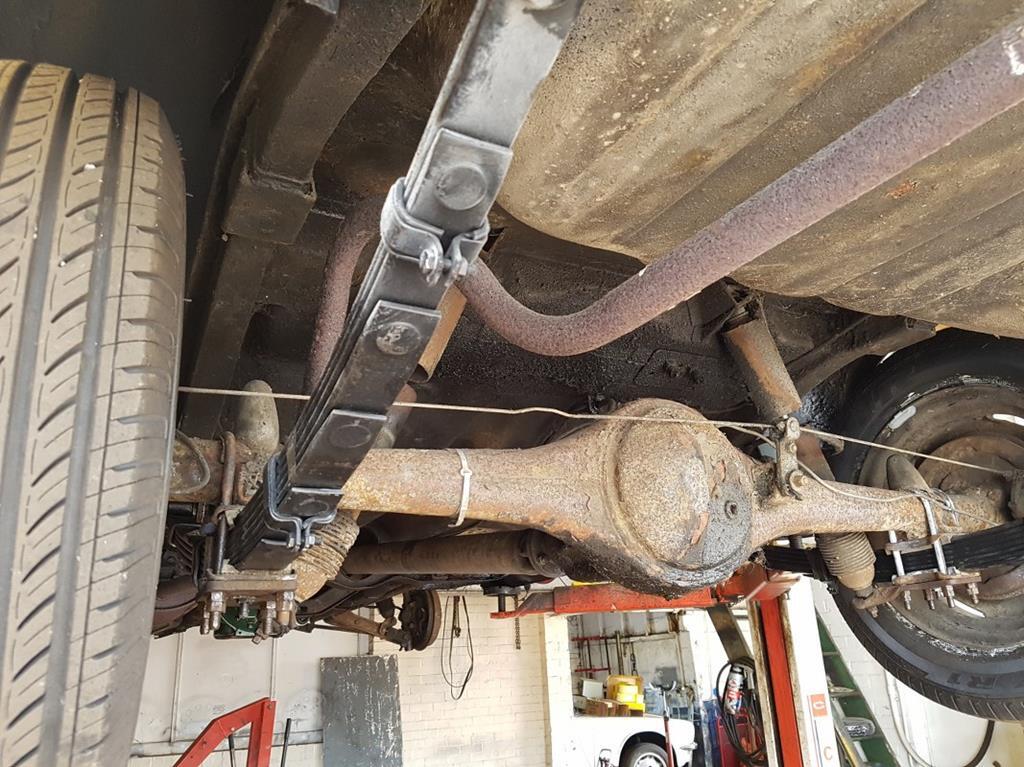 A new handbrake cable was shortly to be fitted - totally bespoke, but to the original design. There's nothing compatible available. 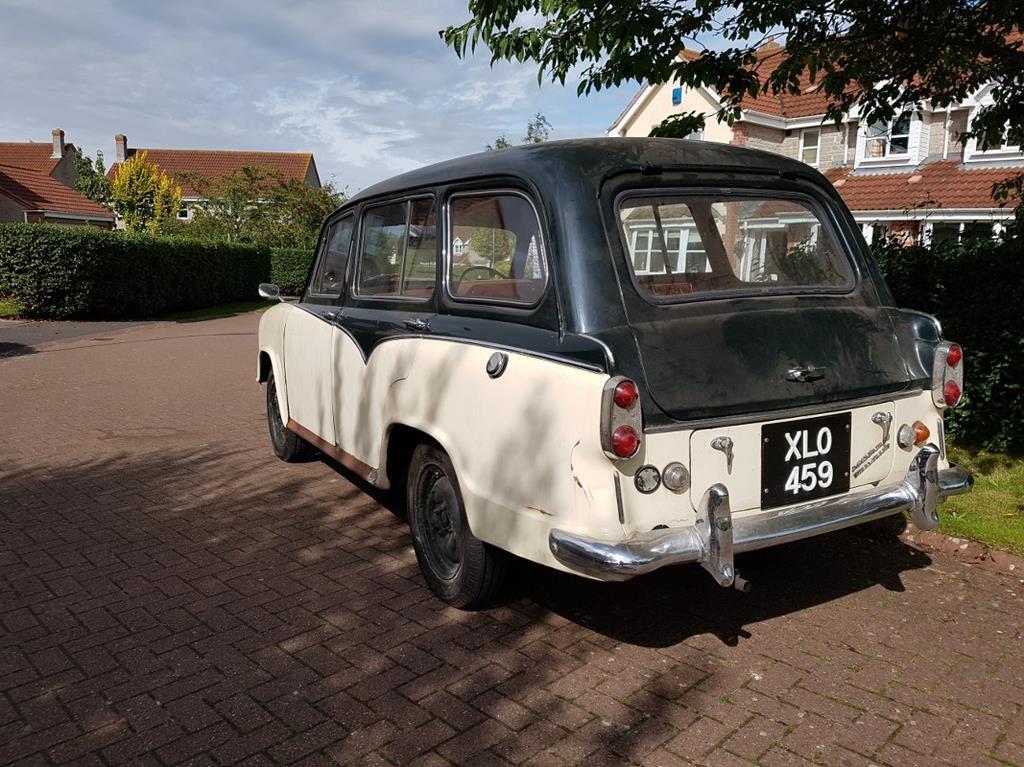 I'm sure you can see he's an inch higher than he should be. My dog noticed the difference as the rear is now about 6 inches higher than it was previously. When we started on the top half, we found that the crease below the nearside tail lights must have been a quite massive shunt as it pushed the whole rear quarted forwards several mm, such that one could barely get a cigarette paper between the rear door and the frame. 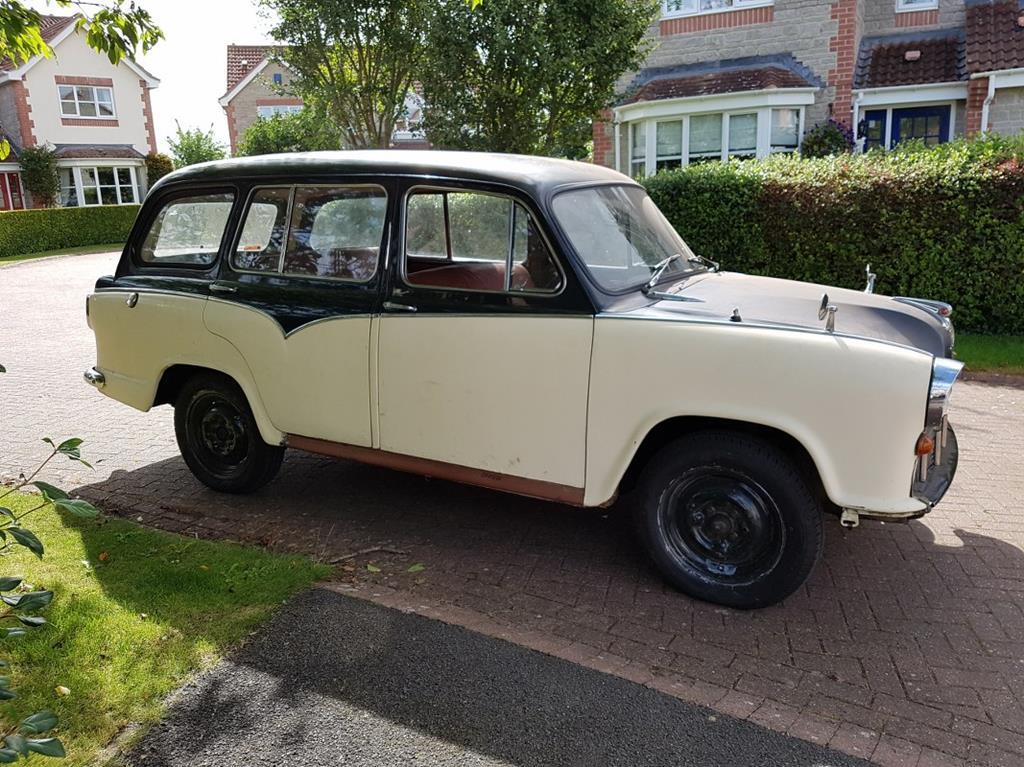 New sills, next step is to fabricate the end closures and to weld in new metal for the gap between the sill and the B pillar. 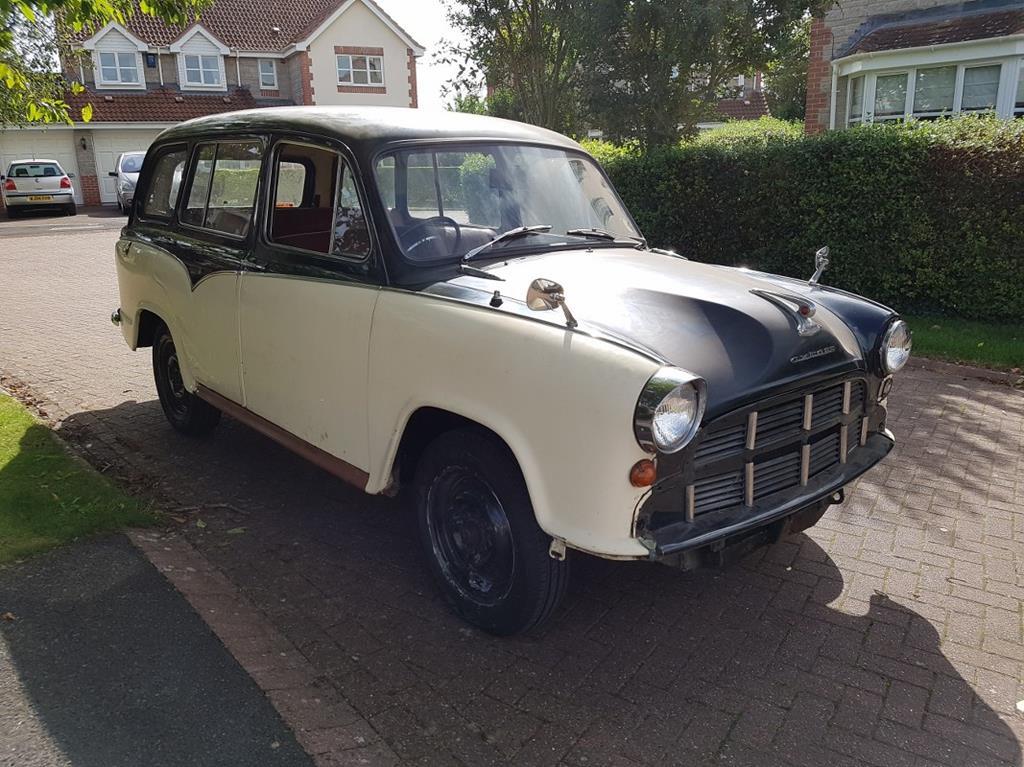 The metal just behind the end of this sill - the start of the wheel arch - was 95% filler - but replacement exceeded our skills. Never mind, another mate is a dab hand at fabricating (and welding) these sort of curved pieces. 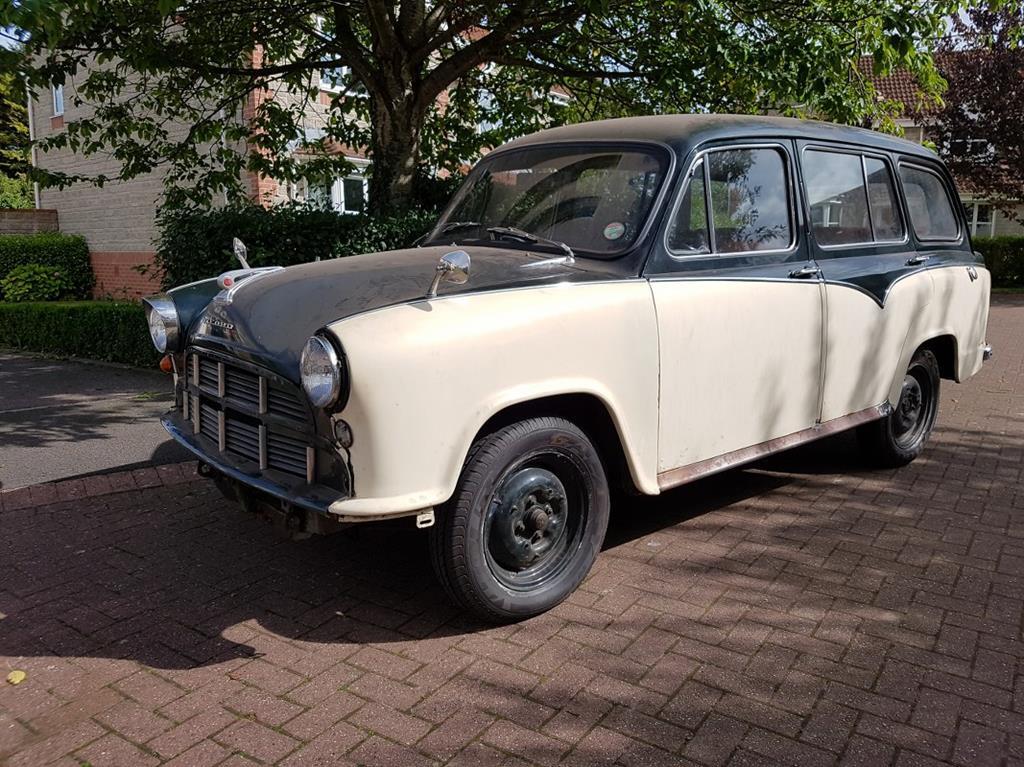 Cheers! Martin |
| |
|
|
|
|
|
Feb 16, 2018 14:05:25 GMT
|
By late summer 2017 the injections in my wrists made it possible for me to do "light duties" so I did. Bar one headlight, none of the lights worked so I set about designing a new system involving all things electrical. Alternator, electronic points and a new coil were fitted. I managed to source through the Morris Cowley Oxford Club lots of new chrome including New-Old-Stock front sidelight enclosures from a Morris Isis (I think) but I had to ream out the backplate and fit a larger bulb-holder capable of taking the bigger LED indicator/sidelamp "bulbs". I also got new rear light clusters (ditto) with New-Old-Stock chrome housing; and N-O-S bulbholders with lenses. The latter was important because the original (knackered) rear clusters had a brake light and a separate side light. The new clusters would take a combined brake/sidelight (LED) and an indicator light (LED) meaning I could dispense with the aftermarket fish-eye indicators. However, a new set of Land Rover fish-eyes will be added elsewhere on the back to make (LED) fog-lights and a set of ultra-small LED reversing lights (with 30 second cut-off) will go in the lower valance. Generally speaking it will be difficult to spot anything out of place on a 1959 car. 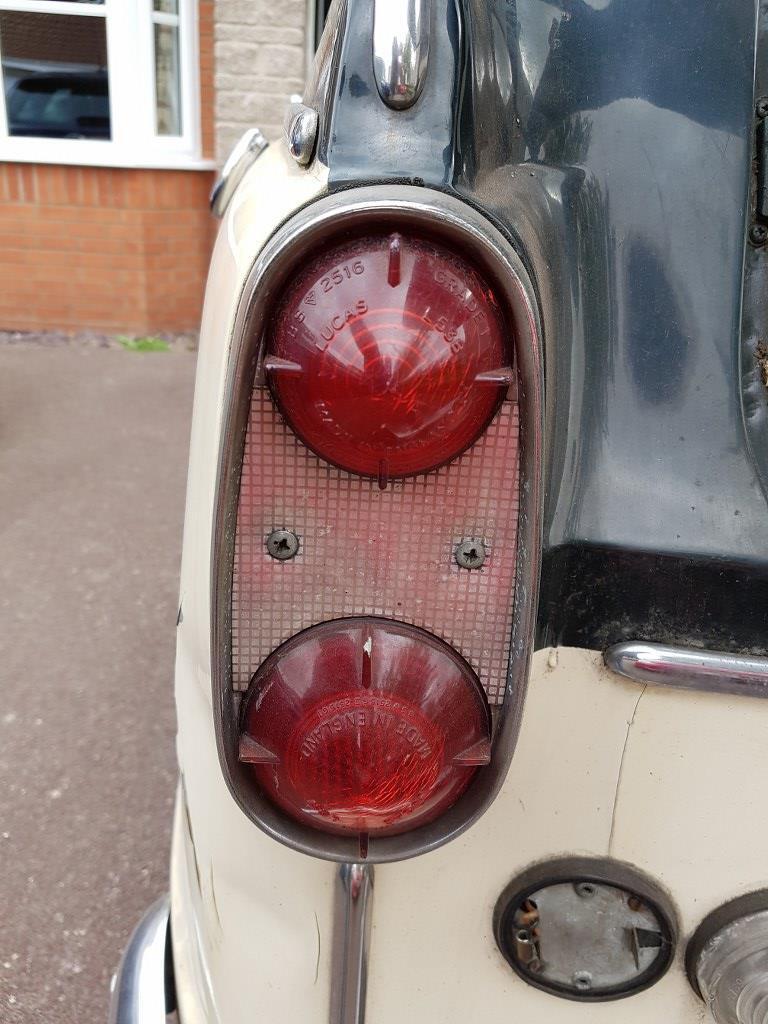 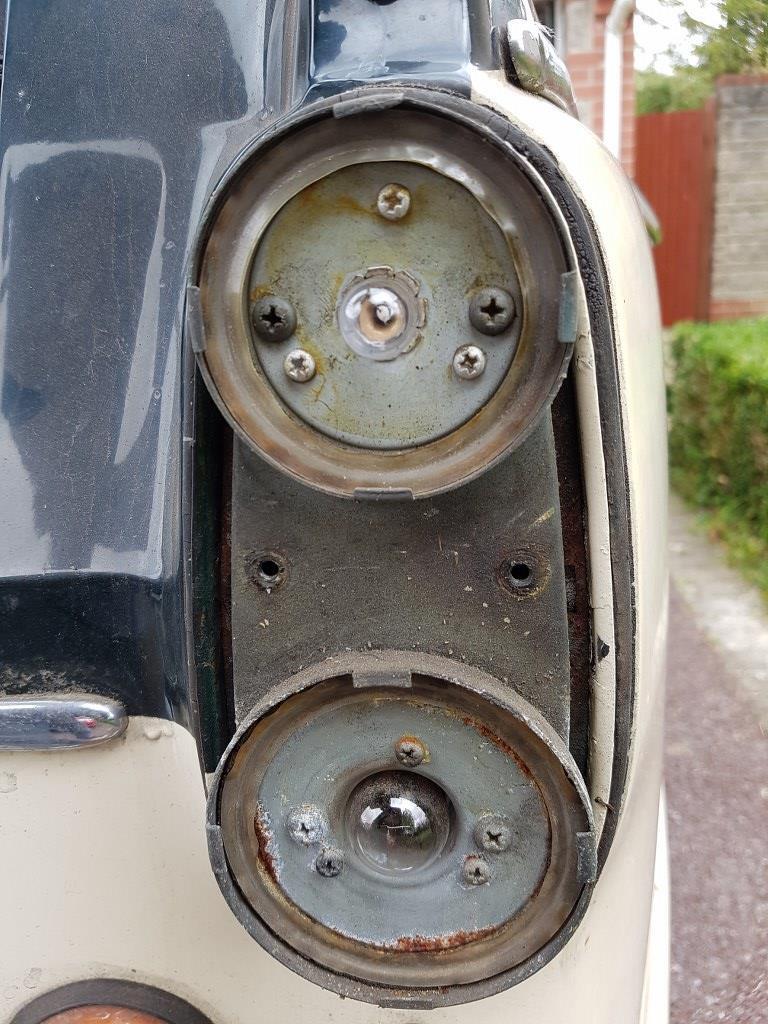 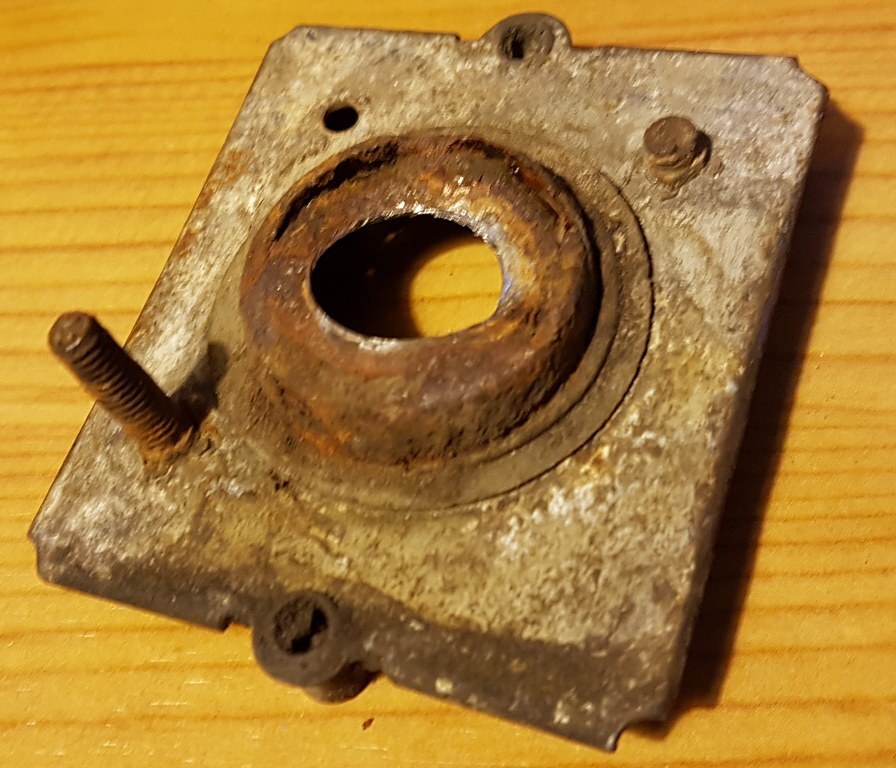 Original front sidelamp backplate sans bulb-holder. Alas it was too far gone and I managed to get some new-old-stock ones. 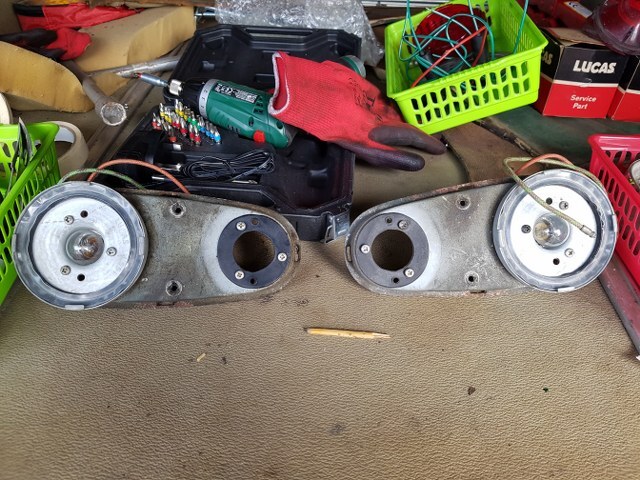 New bulb holders, original backplates 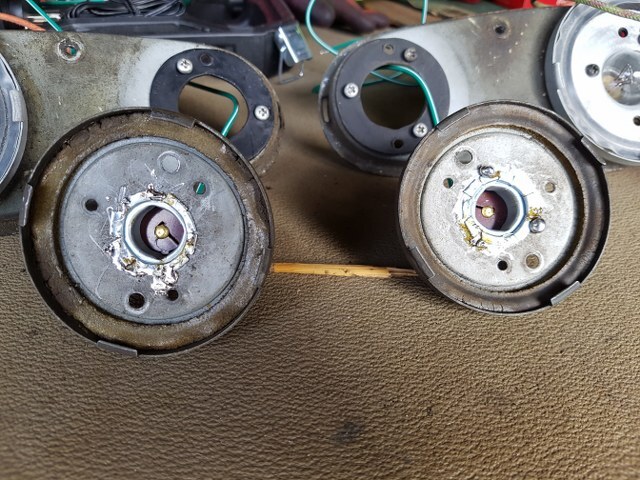 newly soldered bulb holders 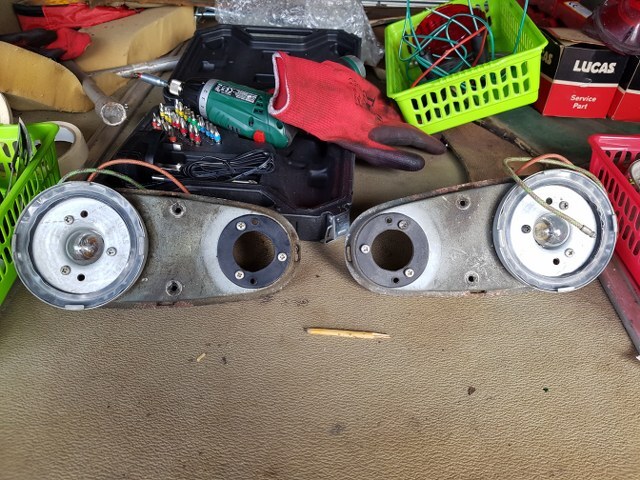 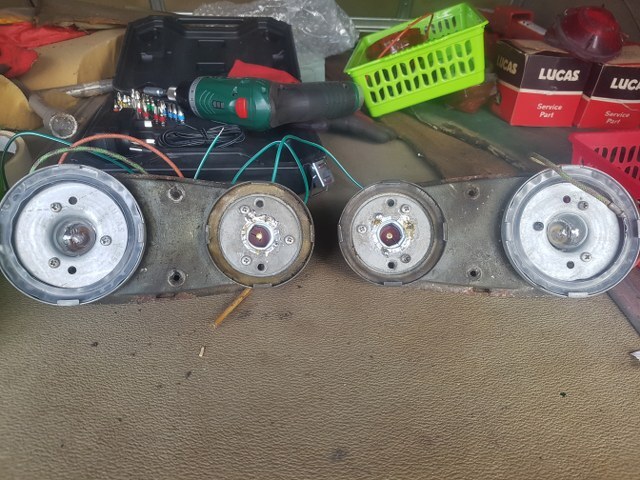 Nearly there 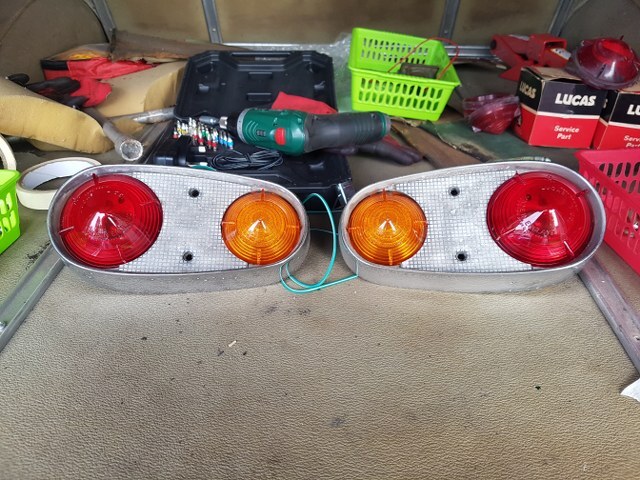 Ta-da.... (with original chrome) |
| |
|
|
|
|
|
|
|
Feb 16, 2018 14:39:04 GMT
|
Talking of lights, I have no further pictures as yet, but its worth mentioning that the new electrical system will include all-LED lights, including front spots, rear fogs & reversing lights; LED indicators and even the trafficators (the semaphore arms built into the B pillar) will have a flashing LED "festoon". The original SF80 Lucas trafficators were thoroughly knackered but I managed to buy a new set of Lucas SF120 trafficators. Many thanks to a kind soul on one of the BMC-related forums who gave me a copy of the original Lucas trafficator manual - this showed that the SF120 is in fact an "SF80 in a box" intended to be fitted on the cab side of an Austin J series van/truck - remove and throw away the box and you have SF80s. I'm also installing a couple of 12v sockets (for satnav & phone charger); a period-looking heated rear window (from Holdens); a hazard flasher system (not including the trafficators!); a new period-looking but DAB radio with bluetooth (they're £250 - £350 and very 1960s). With all this extra electrical load I think you can understand why I've gone for LED lighting (including headlights, although you can't tell!) It's posible that the original dynamo & control box might have coped, but to be sure I've installed a 45a alternator. This means that if I get stuck in a traffic jam when its at night, foggy, cold and raining heavily I can run: heater blower; wipers; headlights; foglights; HRW; radio etc., etc., and not kill the system. Oh, and 60 year old wiring is hard, brittle and probably dangerous, so yet another friend of a friend is making me a new loom (with correct colours) to re-plumb the existing kit and include all the new kit inside the tastefull original black tape having the yellow thread running through it. Finally I do have one picture (the rest will come in a load sometime in the summer when I'm recovered from the operation on my hand). The original 2-fuse fusebox is totally inadequate so I'm installing a period Lucas 6 or 8-fuse box. However the indicator system will require two flasher units (one for each side) and there'll be a plethora of other wires, so I've made a new fuseboard to take all this stuff. 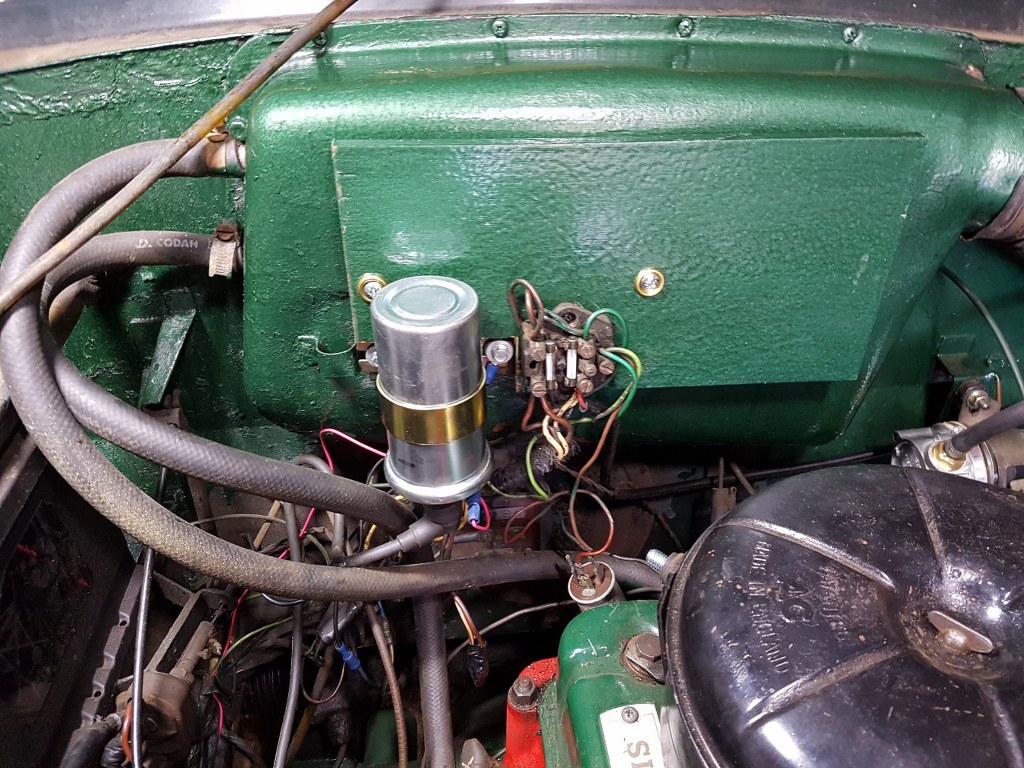 It looks better to the naked eye, the modern camera is a pretty harsh judge. and here are some of the LEDs with an incadescent for comparison: 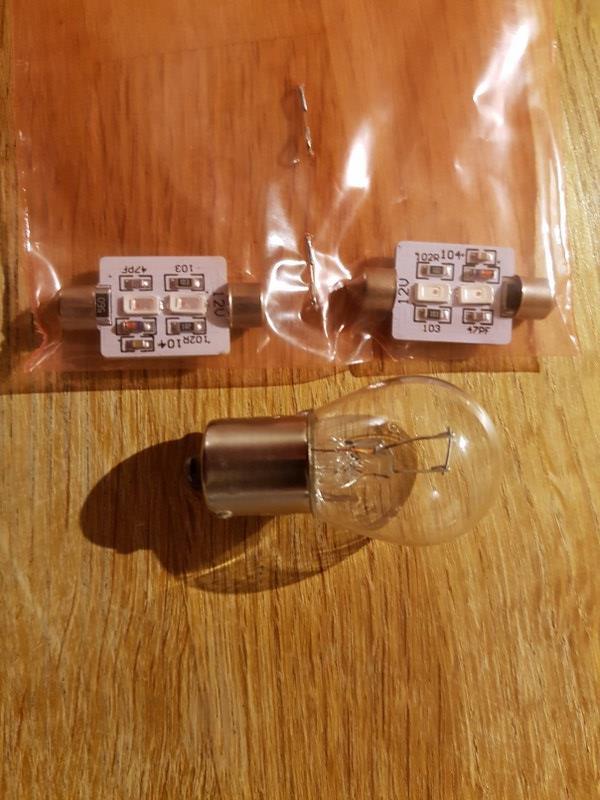 Festoon LEDs 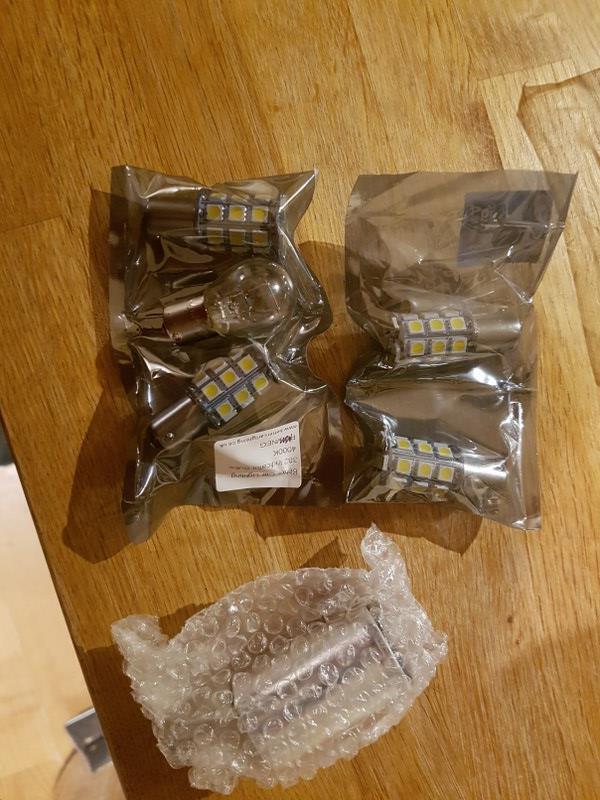 LED Indicators (hence the yellow panels). I have dual-use sidelight and indicator LEDs for the FRONT only - these have 50% yellow panels and 50% white.... clever, eh !? At night, when its all finished, you'll be able to see Hercules from Mars  |
| |
|
|
moglite
Part of things
 
Posts: 815  Club RR Member Number: 144
|
|
Feb 16, 2018 21:59:49 GMT
|
|
Marvellous vehicle - thanks for persevering with the photo uploads - well worth it.
Hope the recuperation goes well and you start wielding the spanners, and taking new pictures soon.
|
| |
1967 Morris Oxford Traveller
1979 Toyota LandCruiser BJ40
1993 Daimler Double Six
2007 Volvo XC70 2.4D
|
|
|
|
|
|
|
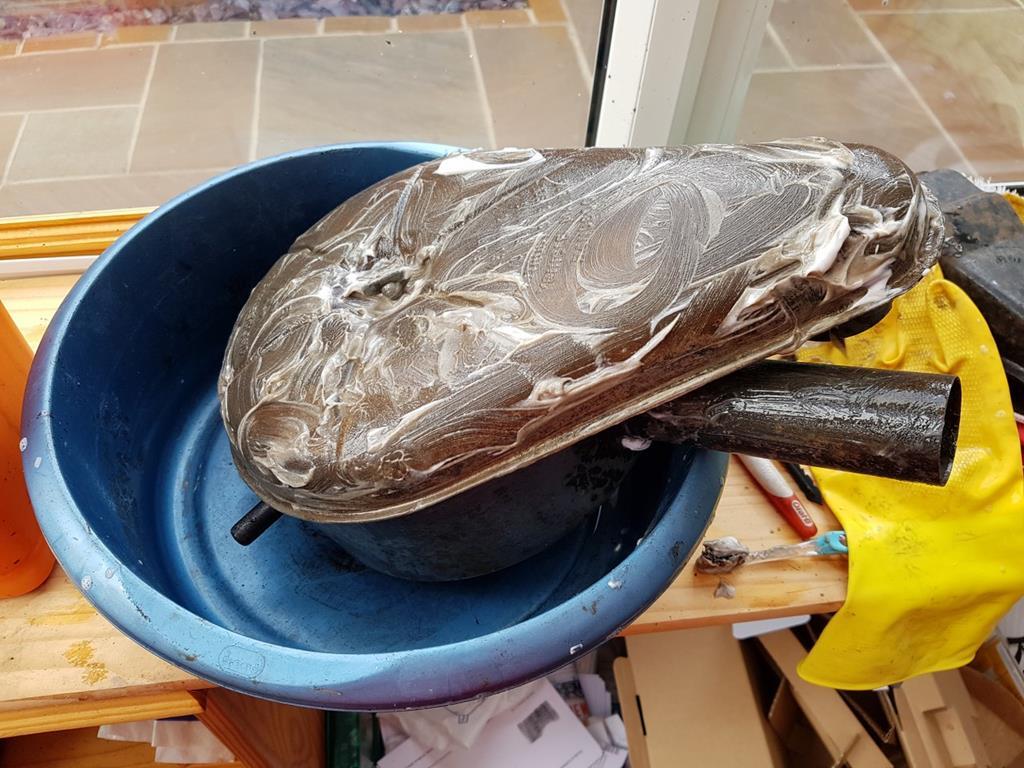
To get up to date, Hercules has been sat in a former chicken barn on the Somerset Moors for about a month now, being cut and welded in-between my friend's other ("real") jobs. Primarily he's a de-rust and re-spray man, but will do pretty much anything with the help of what turns out to be a "restoration hot spot" in this part of the county. The majority of activity in the barn revolves around Hot Rods. The "pretty" part of the body welding is way beyond my abilities but seems to be bread and butter stuff for him. 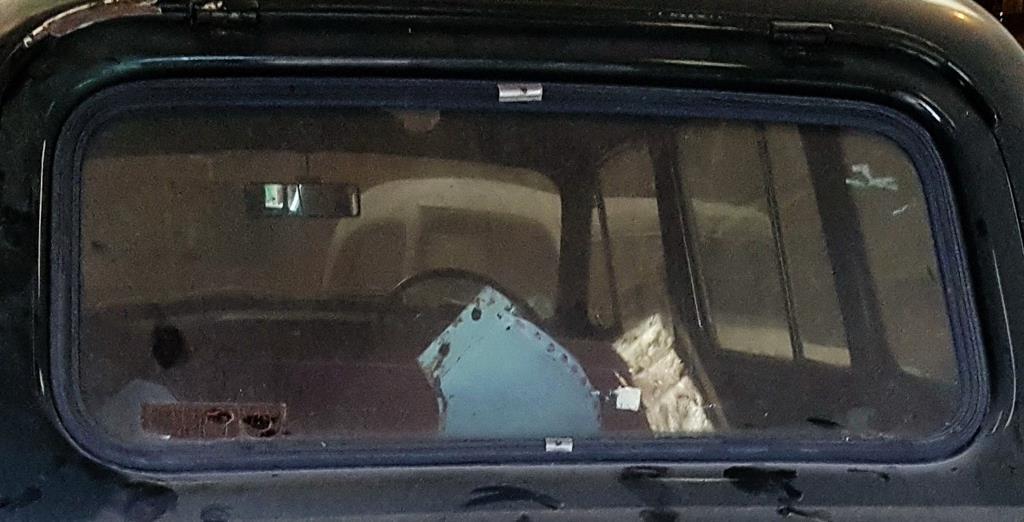 Sorry for the poor quality - this is a concrete rear window rubber, split and useless. A new rubber plus one each for the two rear side windows (different profile) were purchased from Phoenix trim - I was recommended to them and they are conveniently only 20 miles (near Tiverton in Devon) from me so I was able to take samples along. 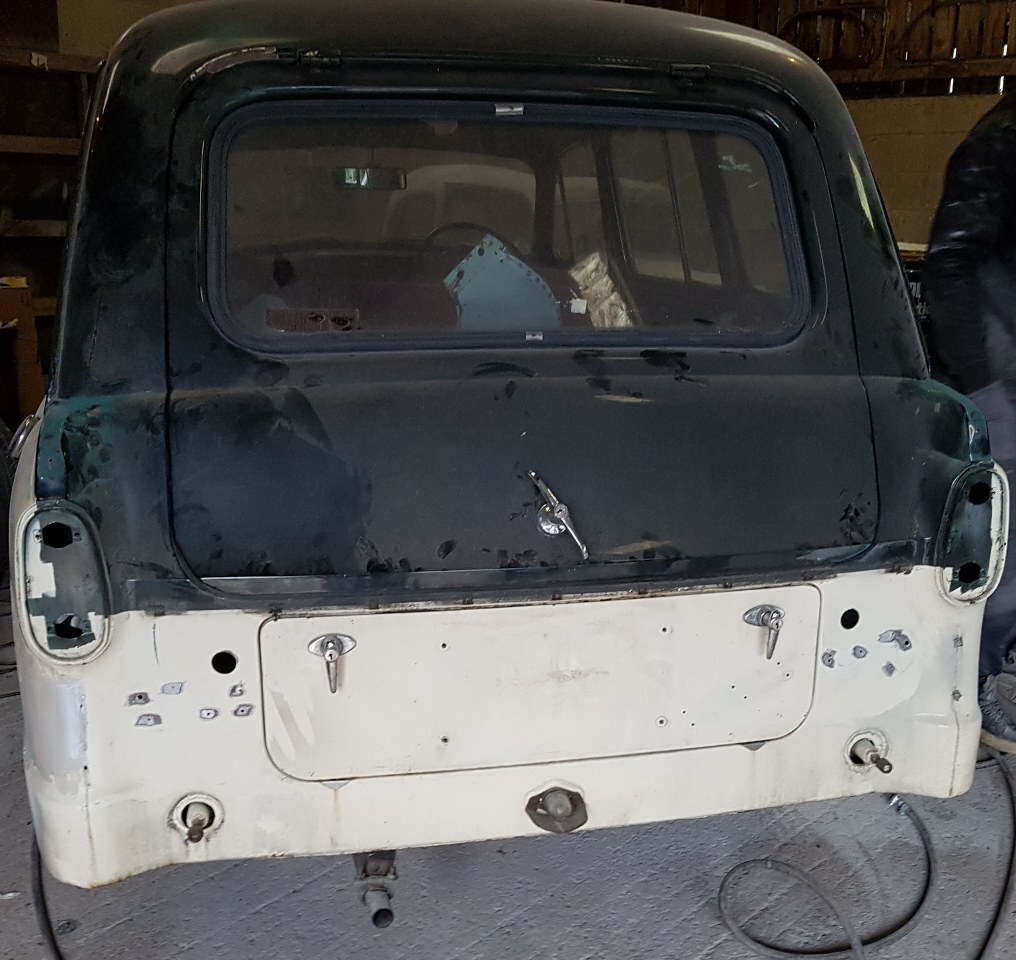 Apparently at some time in his life, Hercules was a mafia staff car.  I'm pleased to say that all four doors were this good. Normally the bottom has rotted out as well. 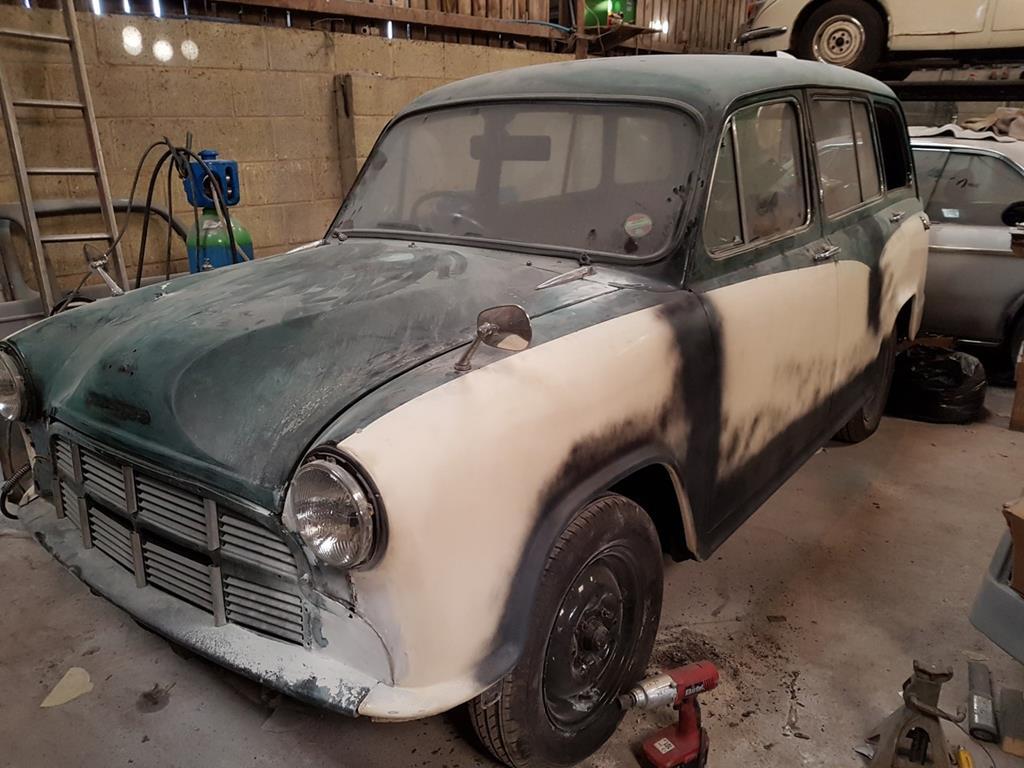 Black is good. Still need to cut out the sidelamp openings from the new metal. 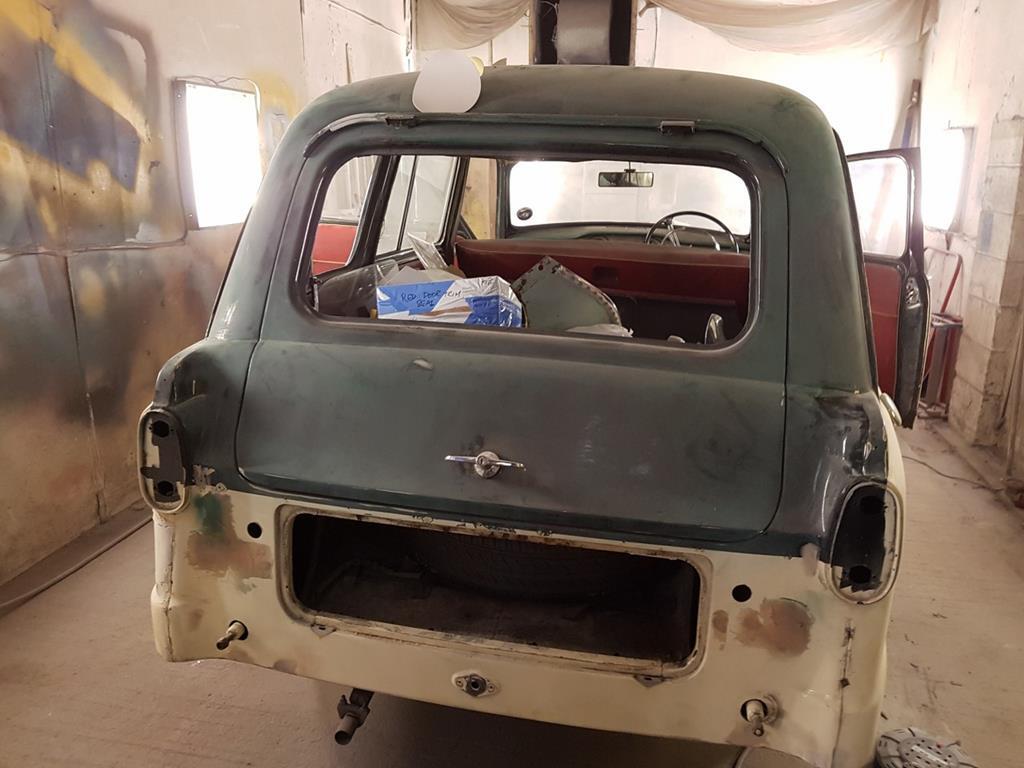 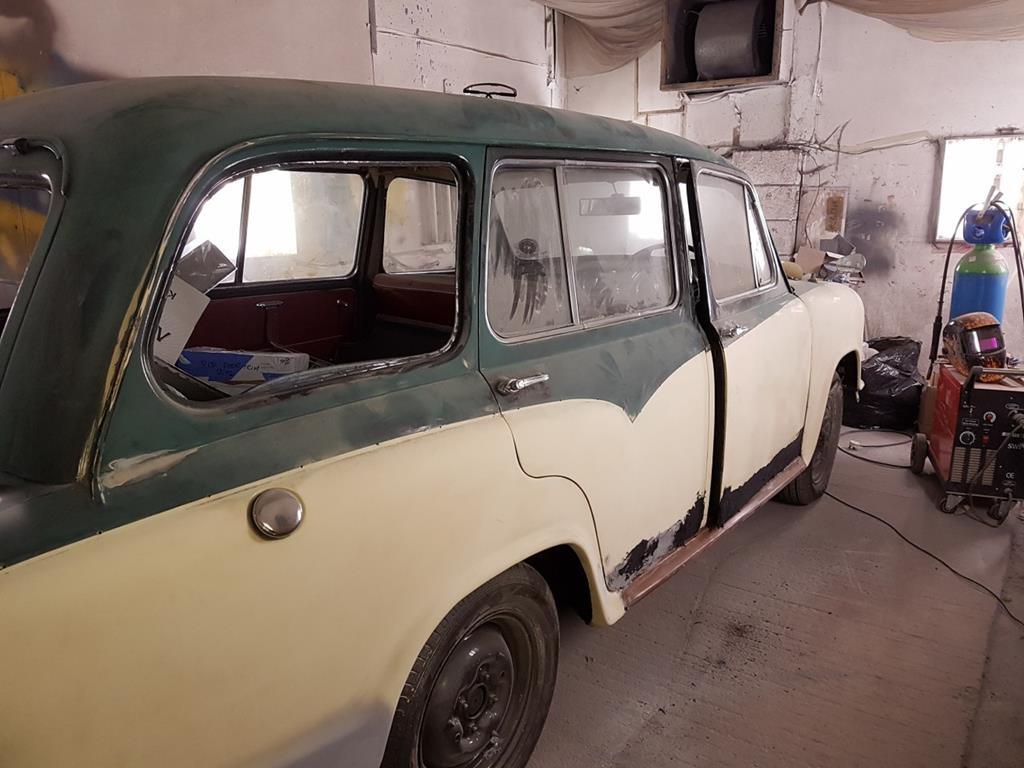 The rear side windows would have had chrome trim. Alas no more. 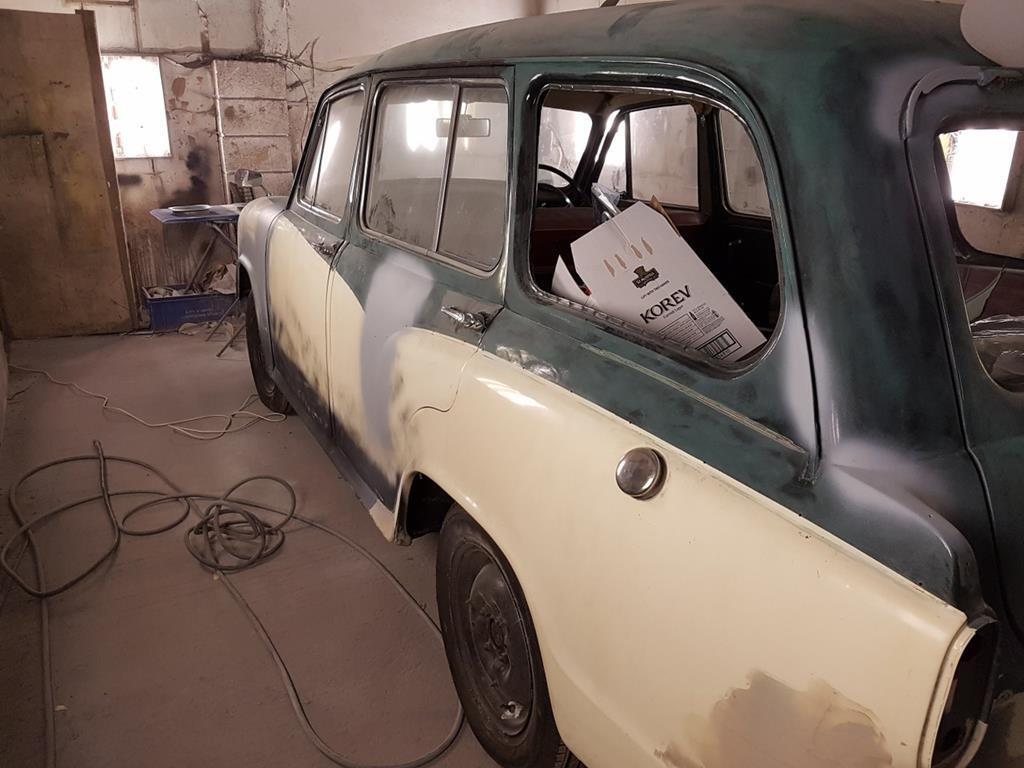 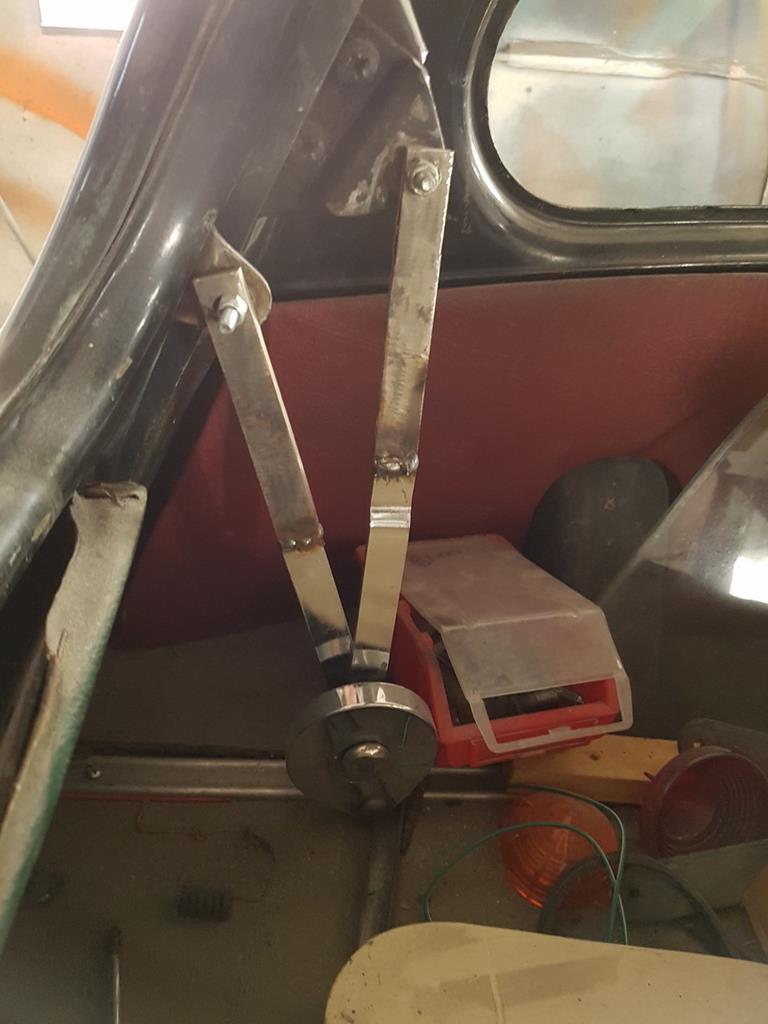 This is what the rear hatch support should look like - rather than the cobbled-together-from-a-washing-machine "prop" that had been on the car (and ony held the hatch at forehead height). The new one is from an MGB GT with extensions welded on to get the correct height. As an MGB GT hatch is somewhat lighter, one leg will open and hold the hatch steady unless there is any wind. A feather dropping on it will cause it to close. As I had the foresight to buy a pair, the other one is needed to give the correct amount of support. The hatch now opens as it should and no longer will I get an edge on the forehead, which is good! 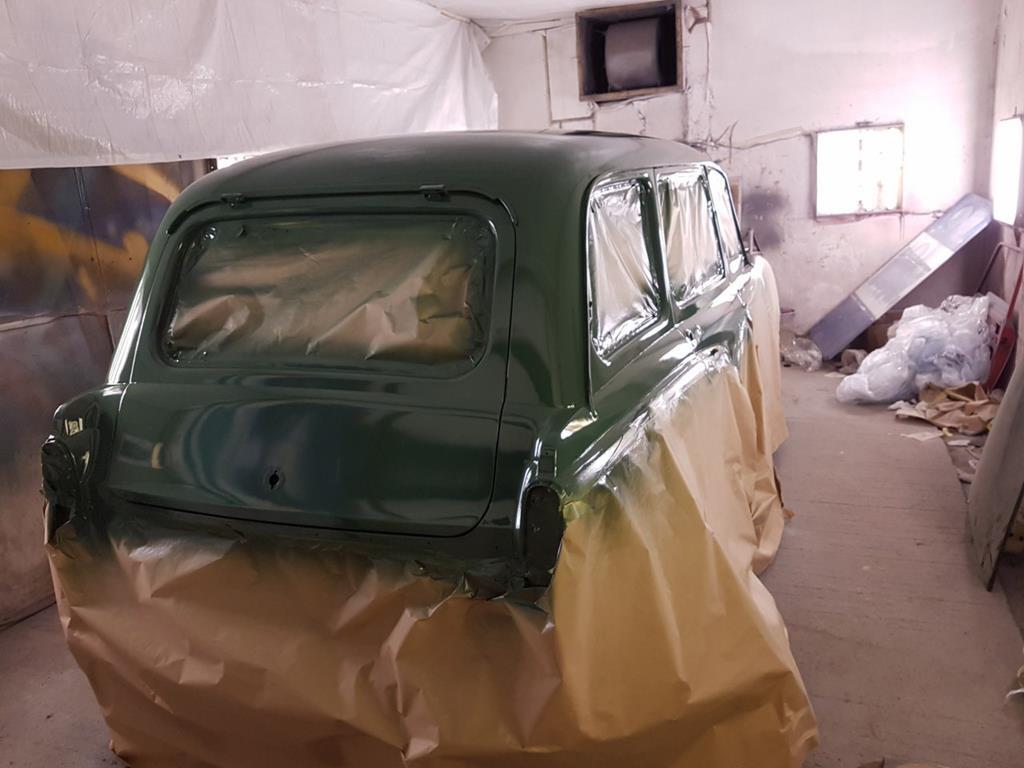 BMC Almond Green, flatting and hardening. Alas, my mate is unwell at present so all work has stopped. When I have more to post, I will. Cheers! |
| |
|
|
CaptainSlog
Part of things
 
Posts: 510
Club RR Member Number: 180
|
|
|
|
|
Looks good - bookmarked
|
| |
|
|
820
South East
Posts: 793
|
|
|
|
|
Proper handsome British car, its great to see it being brought back. Love the design and styling of this era.
Hope your mate is well again soon.
|
| |
|
|
|
|
|
Feb 20, 2018 18:42:47 GMT
|
|
|
| |
|
|
bgt
Part of things
 
Posts: 151
|
|
Feb 20, 2018 19:35:11 GMT
|
|
Very enjoyable thread so far! Can't wait to see it all assembled again!
Is the bottom tailgate for the spare wheel? I love that all three of the handles have locks on them.
|
| |
|
|
Davey
Posted a lot
   Resident Tyre Nerd.
Posts: 2,348
|
|
|
|
|
Don't know how I've missed this what a great first thread. Lovely car.
|
| |
K11 Micra x3 - Mk3 astra - Seat Marbella - Mk6 Escort estate - B5 Passat - Alfa 156 estate - E36 compact
Mk2 MR2 T-bar - E46 328i - Skoda Superb - Fiat seicento - 6n2 Polo - 6n polo 1.6 - Mk1 GS300
EU8 civic type S - MG ZT cdti - R56 MINI Cooper S - Audi A3 8p - Jaguar XF (X250) - FN2 Civic Type R - Mk2 2.0i Ford Focus - Mercedes W212 E250
|
|
|
|
|
Feb 21, 2018 11:00:55 GMT
|
Very enjoyable thread so far! Can't wait to see it all assembled again! Is the bottom tailgate for the spare wheel? I love that all three of the handles have locks on them. Thanks for that. Yes, but as a result its a real b*gger to get the spare out, especially if you're not young and fit. I think I'm still looking for better wheel compartment handles, the only similar ones are the boot handle from an Hindustan Landmaster, but they have a triangular base and mine is oval. (my wife ways I'm "fussy"). |
| |
|
|
|
|
|
Feb 21, 2018 12:37:01 GMT
|
|
Some great work going on here
|
| |
|
|
|
|


