mk2cossie
Club Retro Rides Member
Posts: 3,060  Club RR Member Number: 77
|
|
Dec 28, 2020 22:39:07 GMT
|
Any revving/idle videos of it with no exhaust parts?  As for the metal hard lines, any of the E36/E46 MOT failures I've rectified have been joined under the floor for ease and not too much faff. Usually just unbolt the tank and let it rest on the propshaft and shoved over to the opposing side to which pipe I'm replacing  |
| |
|
|
|
|
ChasR
RR Helper
motivation
Posts: 10,307
Club RR Member Number: 170
|
BMW E46 M3 : That's the ticketChasR
@chasr
Club Retro Rides Member 170
|
Dec 31, 2020 11:02:57 GMT
|
Any revving/idle videos of it with no exhaust parts?  As for the metal hard lines, any of the E36/E46 MOT failures I've rectified have been joined under the floor for ease and not too much faff. Usually just unbolt the tank and let it rest on the propshaft and shoved over to the opposing side to which pipe I'm replacing  Given the amount of stuff underneath it, not at the moment. I may do one with the mid-section on. So far, your way is the way I am doing it. It's fiddly, but doable. The other choice was to completely disconnect the tank, along with the filler neck and charcoal canister gubbins, and lower the tank down to the ground. More pics will arrive soon. I may well make a video on this, as the E36 is documented but not the E46. While it's similar, there are some differences. |
| |
|
|
|
|
|
Dec 31, 2020 16:35:50 GMT
|
As for the metal hard lines, any of the E36/E46 MOT failures I've rectified have been joined under the floor for ease and not too much faff. Usually just unbolt the tank and let it rest on the propshaft and shoved over to the opposing side to which pipe I'm replacing  This, however a two-post lift also makes the job a lot easier; I wouldn't fancy crawling around on the floor to do it! I've done a couple of E46 330i's and there was a joint in the pipes at the back of the engine bay just before the pipes bend to go under the car; I don't know if the M3 is the same but it's worth a look from underneath as they were partially obscured by a heatshield/splashguard. The E46 is easier to do than the E36 as pipe for the right hand side goes up and over the top of the diff rather than round the front of the tank; the last E46 I didn't even take the exhaust off (all of the flange bolts were so horrendously corroded I wasn't going to go anywhere near them unless there was no other choice), I managed to drop it down far enough to move the tank. |
| |
|
|
ChasR
RR Helper
motivation
Posts: 10,307
Club RR Member Number: 170
|
BMW E46 M3 : That's the ticketChasR
@chasr
Club Retro Rides Member 170
|
|
|
As for the metal hard lines, any of the E36/E46 MOT failures I've rectified have been joined under the floor for ease and not too much faff. Usually just unbolt the tank and let it rest on the propshaft and shoved over to the opposing side to which pipe I'm replacing  This, however a two-post lift also makes the job a lot easier; I wouldn't fancy crawling around on the floor to do it! I've done a couple of E46 330i's and there was a joint in the pipes at the back of the engine bay just before the pipes bend to go under the car; I don't know if the M3 is the same but it's worth a look from underneath as they were partially obscured by a heatshield/splashguard. The E46 is easier to do than the E36 as pipe for the right hand side goes up and over the top of the diff rather than round the front of the tank; the last E46 I didn't even take the exhaust off (all of the flange bolts were so horrendously corroded I wasn't going to go anywhere near them unless there was no other choice), I managed to drop it down far enough to move the tank. It does indeed have a joint by the bellhousing. There seems to be some questions about if all E46 M3s have them, and I'm guessing the non M3s as well. It seems possibly that the LCI cars didn't. That or no one removes the fuel filter shield, which conceals the joint very well as you say. I didn't think the joint was there until I removed it. It's not a job I'm enjoying on the floor. I did have the offer of doing the work on a 4 poster but I turned it down for a few reasons -The tank apparently is meant to be very fiddly to handle, even with no fuel. I've found it OK TBH! -The chap's shed is wetter and colder than mine -With no gearbox jack, I can imagine that supporting the tank would be tricky, and that a 4 poster would obscure things a little more in some cases -I have a couple of scabby parts under my car, which I want to personally see to. I was told I could borrow the ramp for a week, but I suspect the underbody treatment and a parts holdup won't help matters. I already have found that I need two new exhaust gaskets. As I thought, the pattern ones I fitted last year to the backbox are already blowing, so it will be genuine replacements for that area. I'll put up an update today  . |
| |
|
|
bstardchild
Club Retro Rides Member
Posts: 14,971
Club RR Member Number: 71
|
|
|
|
It's not a job I'm enjoying on the floor. Nothing is fun on the floor - ever!!! but at least the flooor is dry and out of the weather  I'll put up an update today  . Folowing as usual  |
| |
|
|
ChasR
RR Helper
motivation
Posts: 10,307
Club RR Member Number: 170
|
BMW E46 M3 : That's the ticketChasR
@chasr
Club Retro Rides Member 170
|
|
|
You do have a good point there Brian! I did used to be a driveway warrior for years! I've been lucky having the unit now I must admit  . With me cracking on, I finally managed to liberate the necessary undetrays from the car. At this point I found a couple of things I was not expecting. First was the fuel filter. Nothing surprising about that. That is, until you look more closely at the date. Late 2011. So the filter was fitted in 2012 going off the car's history. However, the history states that the last Inspection II this last had was in 2015. Obviously, someone was told a porky at some point. 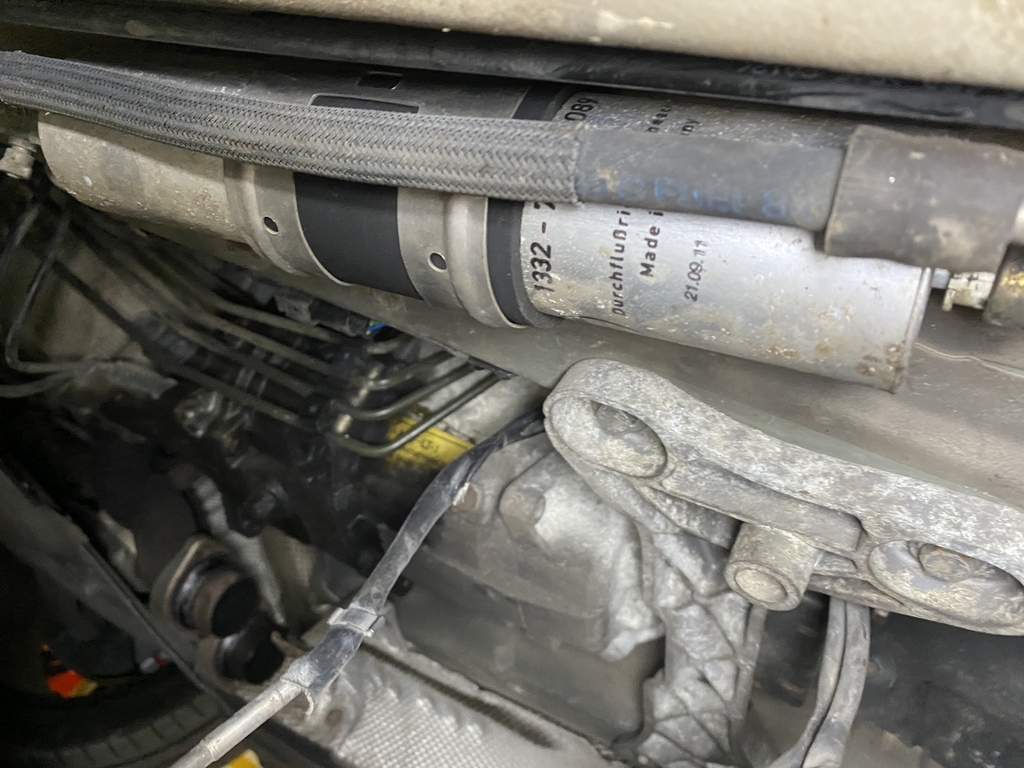 As you can see, the first Inspection II was done by the second owner. 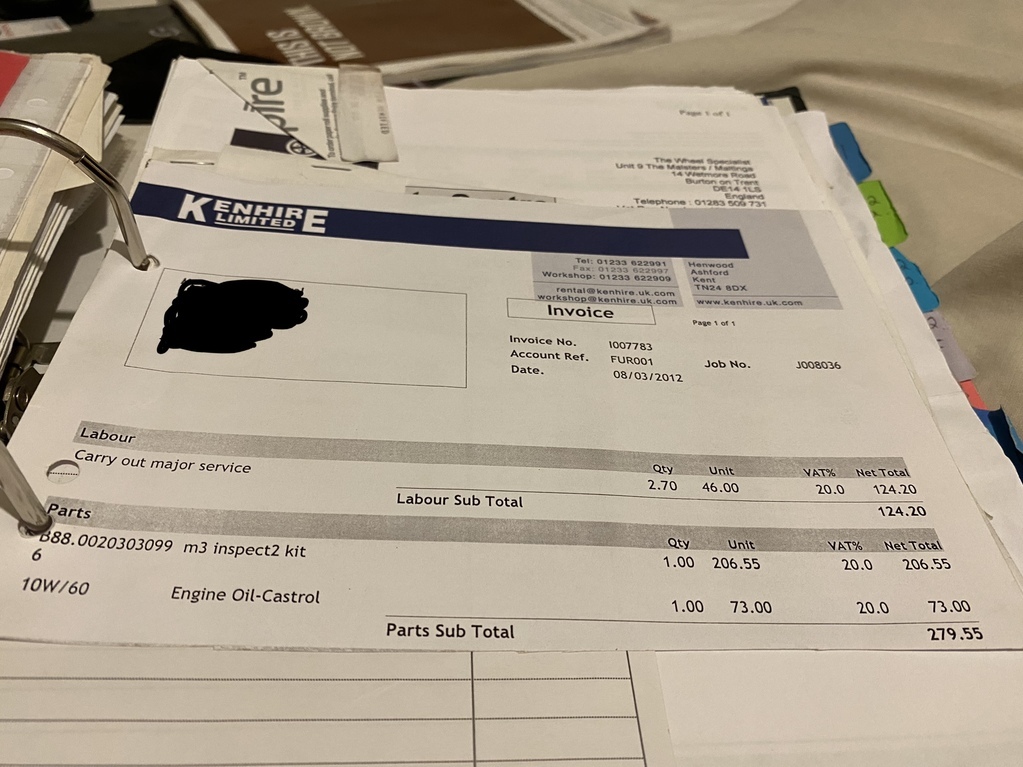 The second bill, as you see, clearly points to the fuel filter being changed with the then 3rd owner of the car. Not a massive biggie, but it's still annoying to see that someone was effectively was conned out of a full service. 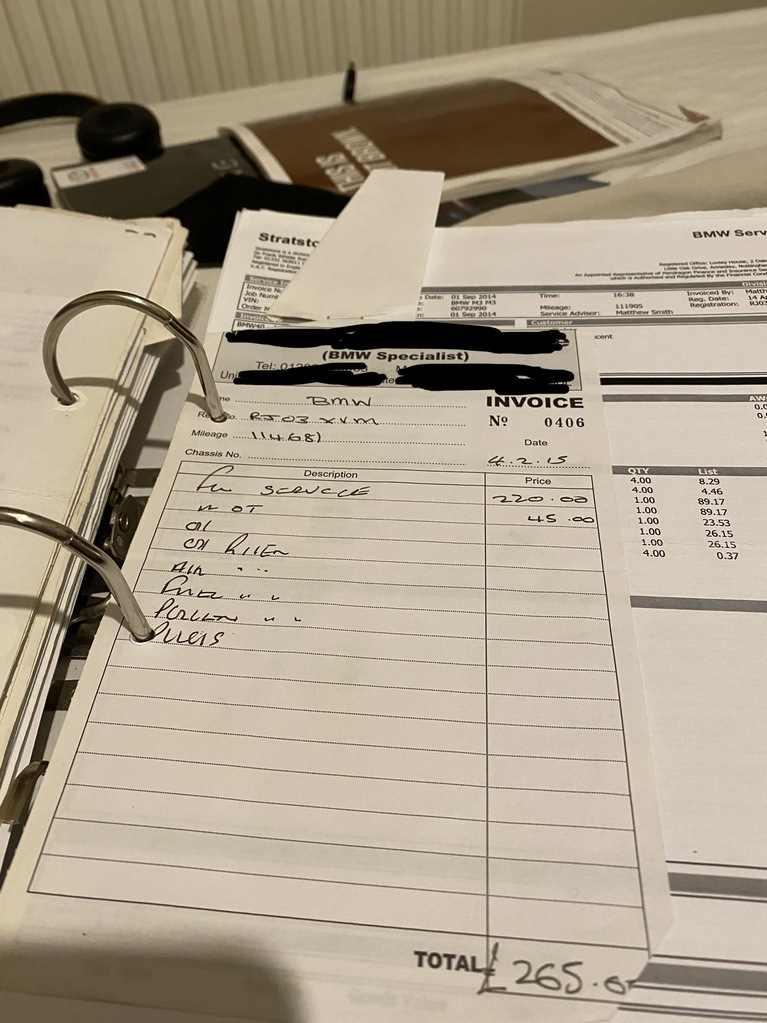 Ah well, that's one place I'll recommend folks to avoid! Obviously, I'll refrain from putting up the name of the outfit, who seem to have glowing reviews on Google, but it has been noted. Why do I work on my own cars again? The above is one reason. I guess at least the fuel filter is not as critical as some of the other filters on the car. The Mondeo for example, doesn't even have a fuel filter to be changed on it according to the service schedule. On a strainer which will stay in the car for its lifetime. That said, I do have a delivery from Rock Auto to perform the Inspection II: 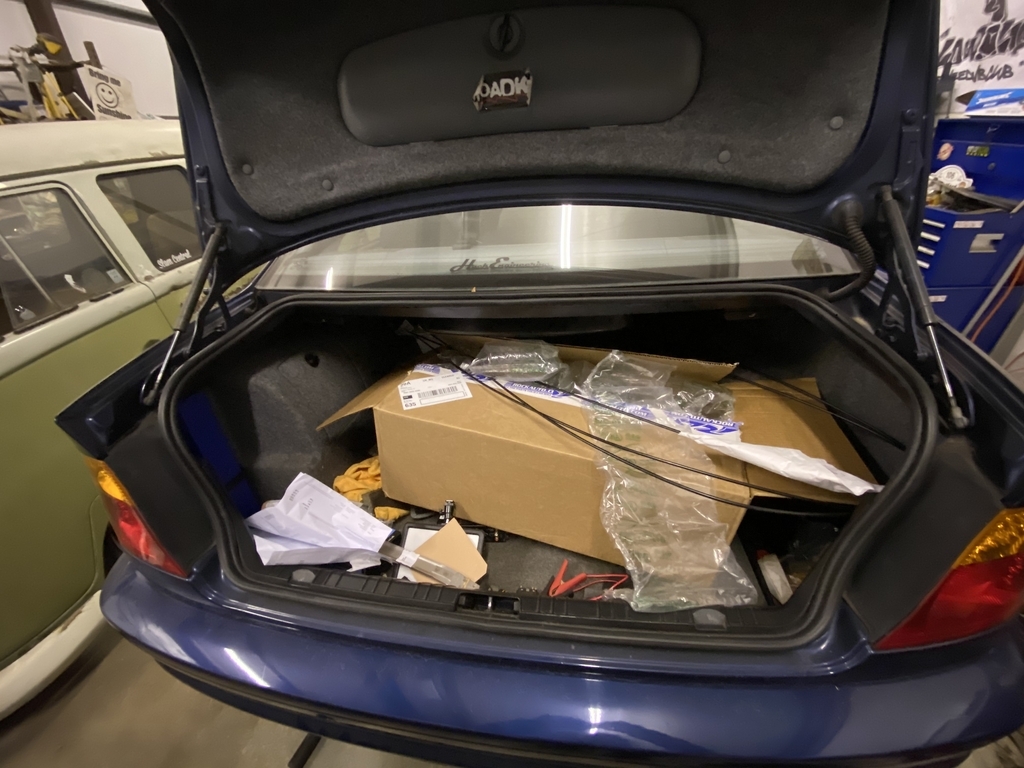 It's madness to think that I saved over £150 on Mahle items with the correct and updated part nos. as opposed to buying them locally! I'll not even mention how much cheaper the spark plugs were! Normally, I might have bought them from Opie Oils etc. but this time, cash unfortunately has to be king. Anyway, alot like this brake pipe job, I'm procrastinating on talking actually talking about it! While it was annoying to see that someone in the past had been conned out of a filter on the car, and possibly more, I did see some signs of good news. I was expecting to change the brake hose and do one of two things -Create a join underneath the car ; quite a few M3 owners have done this, even on the more valuable end-of-line CS models. -Change the entire pipe back to the DSC unit in the engine bay. Obviously, the latter is something I was keen to avoid. Upon seeing that there was a joint towards the front of the car, in a tight, but accessible area, I was a little more relieved about the job in hand! 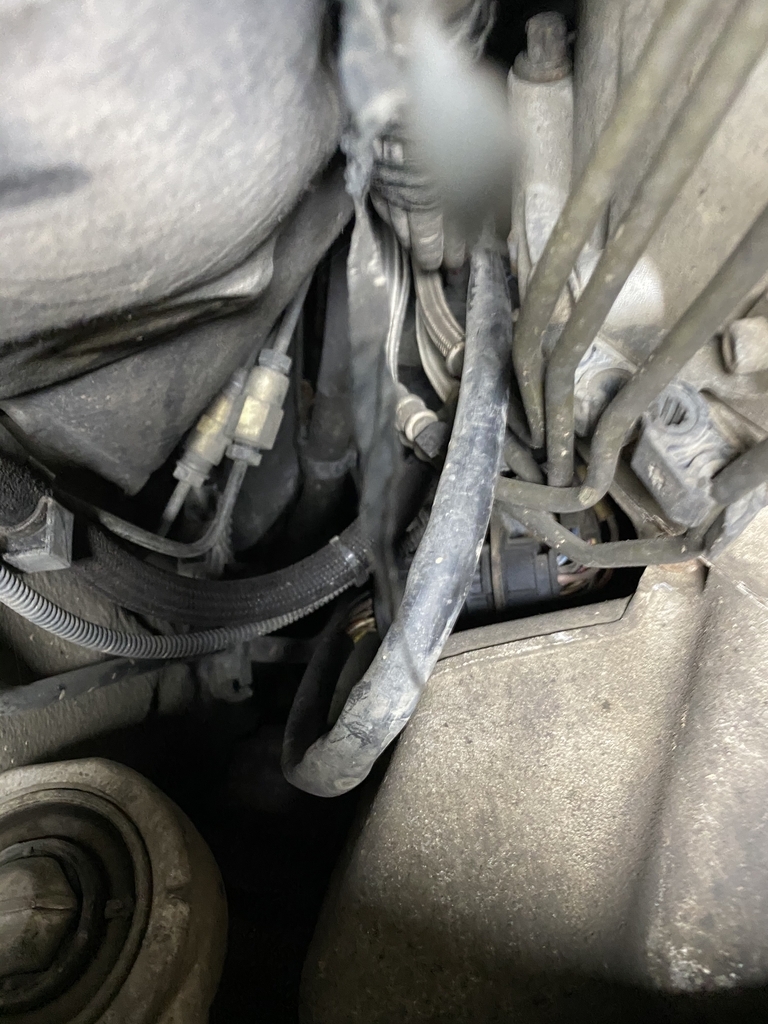 As mattn36 has stated, there is indeed a join upstream. Looking at that shot, you'd be wondering why I am changing the brake lines. 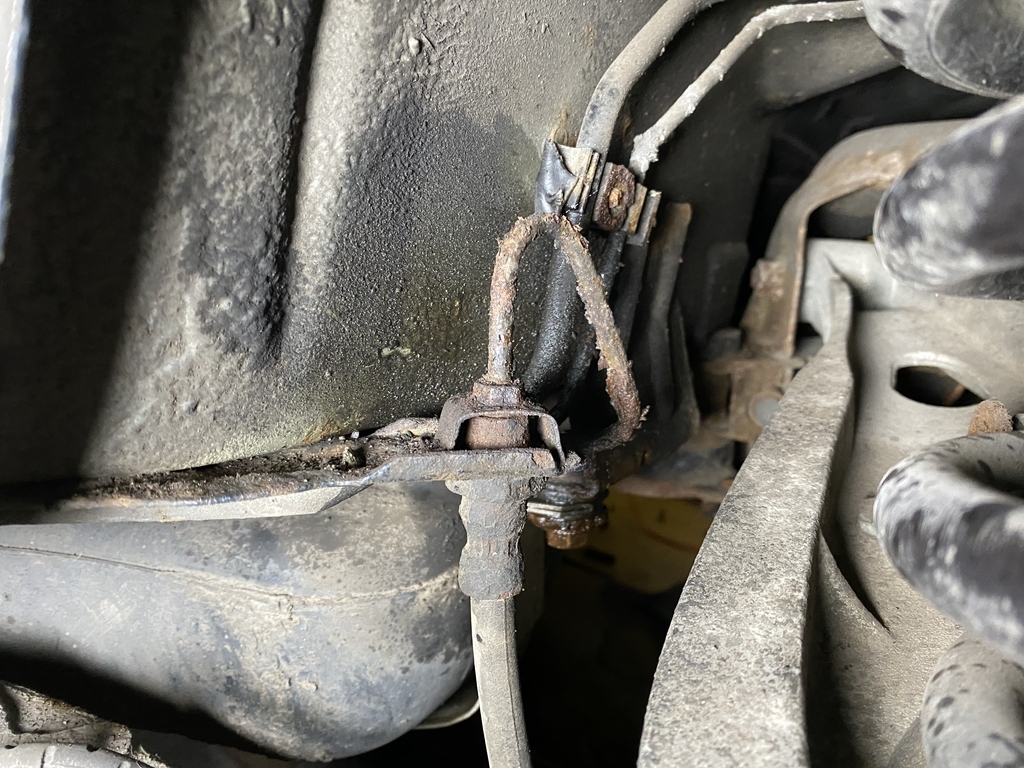 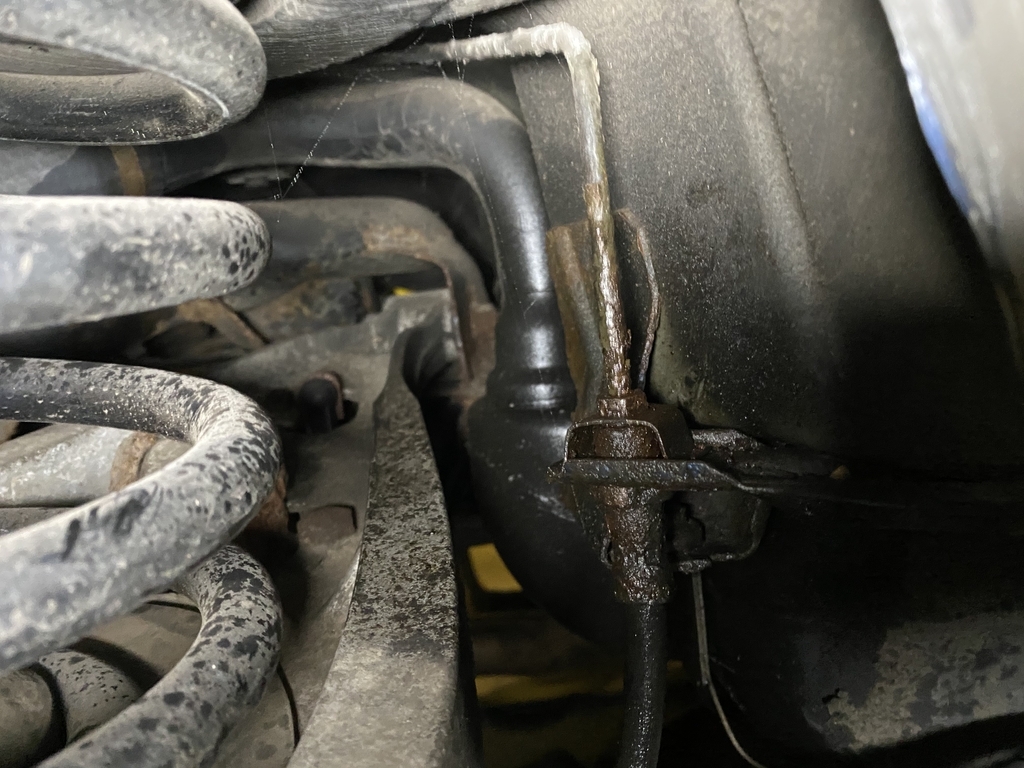 Erm, that is why. They don't look too bad in those shots, but they do look worse in reality, especially when you bear in mind that I have sanded them down and greased them in the past! A sin I know, but I guess old habits die hard! I'll go to run and hide now! It was then time to drop the tank now I had stripped out what was preventing the tank from being dropped. Upon removing the rear seat, and the access panels removed, I was greeted with a surprise upon seeing the fuel tank. 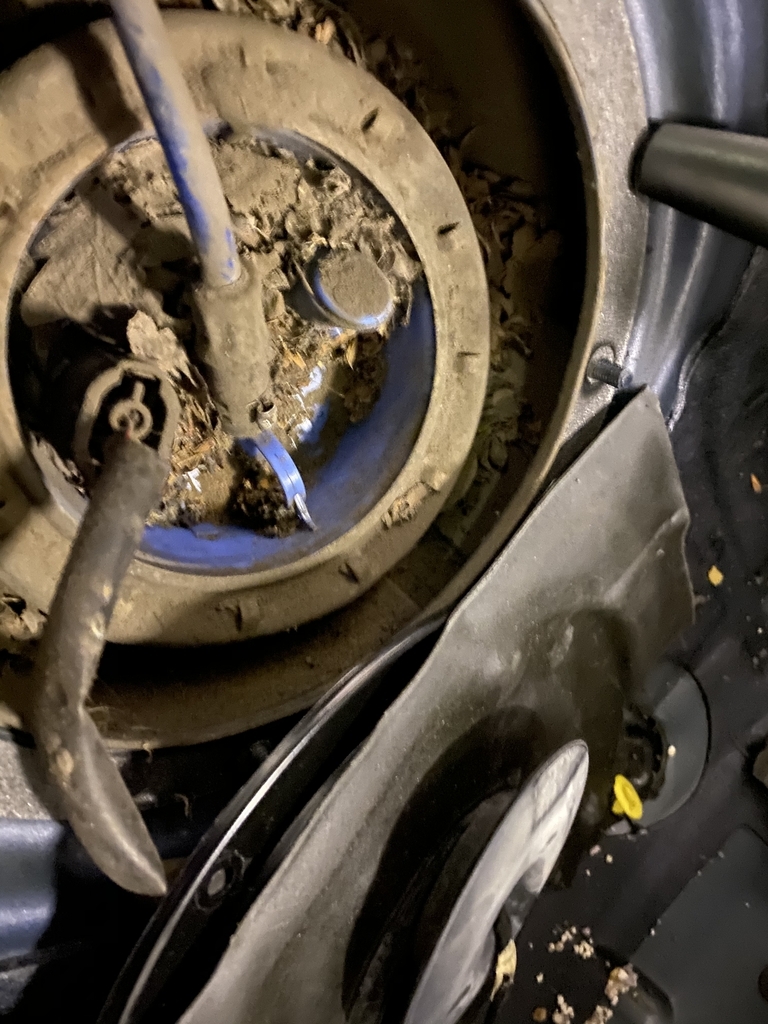 Besides struggling to remove the rear seat due to the sound deadening attaching itself to the seat, and making that more of a struggle to remove, I did not expect the fuel tank and sender unit covers to have so much stuff around the top of them! I realised that the earthy smell the car had was most likely down to this! Another job no doubt to add to the list. Clean what I can from the top of the fuel tank. With the tank vacuumed at the top, the accessible connections removed & the propshaft centre bearing lowered slightly, it was time to drop the tank, which wasn't too difficult. All of this to do the job I need to do ; the brake lines replacement. One-by-one that is, so as the keep the routing and the connections the same as they were before. I was able to access some of the lines from within the car, with the tank dropped, which was quite handy! With a combination of wobble extensions and sockets, I had loosened the brake pipe mounts. Thankfully! That is where I got to! Stupidly, I have lost my flare nut spanners! With that downer, I went and bought a set, awaiting for the now loose driver's side brake line to be changed. 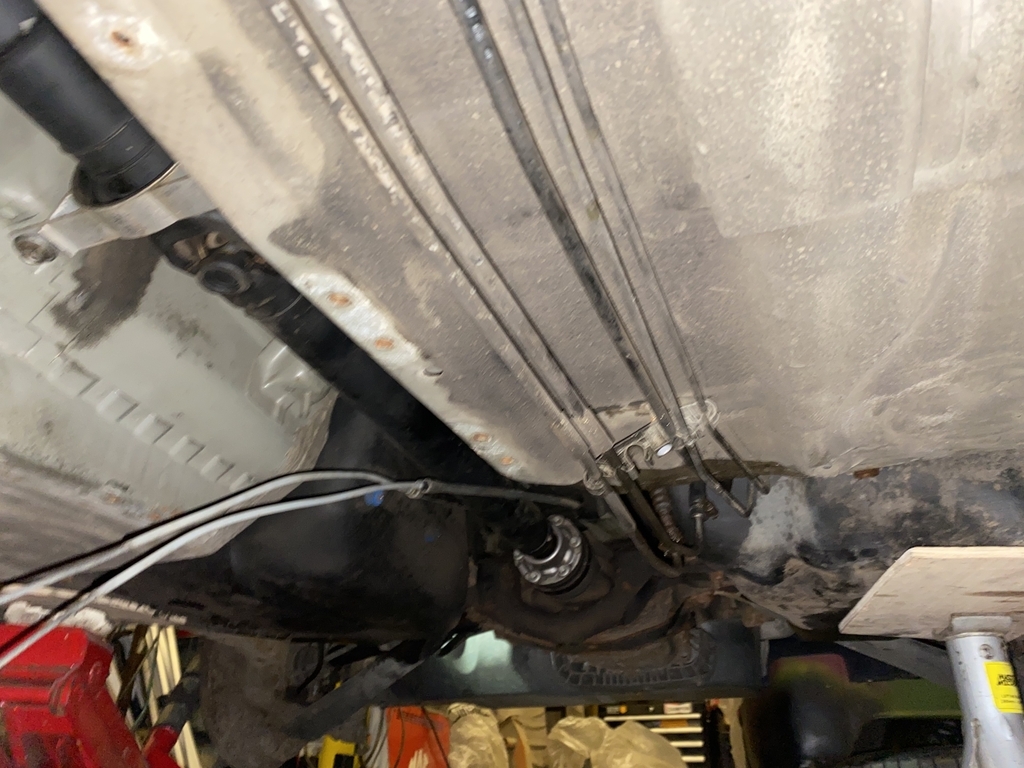 That is where I am for now. We'll await to tackle the brake lines next time I am down. |
| |
Last Edit: Jan 1, 2021 16:12:56 GMT by ChasR
|
|
ZXRob
Europe
Posts: 1,200 
|
|
|
|
|
Just got myself up to date with this thread after not seeing it for a while.
One of the best upgrades you can do on a car is brakes. Every time I put good brakes on a car the grin on my face increases by 10!
It's nice to see someone getting stuck in and having a go. Keep up the good work and keep up the write updates! I have really enjoyed reading them!
|
| |
|
|
bstardchild
Club Retro Rides Member
Posts: 14,971
Club RR Member Number: 71
|
|
|
|
Upon removing the rear seat, and the access panels removed, I was greeted with a surprise upon seeing the fuel tank.  Besides struggling to remove the rear seat due to the sound deadening attaching itself to the seat, and making that more of a struggle to remove, I did not expect the fuel tank and sender unit covers to have so much stuff around the top of them! I realised that the earthy smell the car had was most likely down to this! Another job no doubt to add to the list. Clean what I can from the top of the fuel tank. eeeewwwwwwwww - how in the heck did that all get there??? |
| |
|
|
ChasR
RR Helper
motivation
Posts: 10,307
Club RR Member Number: 170
|
BMW E46 M3 : That's the ticketChasR
@chasr
Club Retro Rides Member 170
|
|
|
Upon removing the rear seat, and the access panels removed, I was greeted with a surprise upon seeing the fuel tank.  Besides struggling to remove the rear seat due to the sound deadening attaching itself to the seat, and making that more of a struggle to remove, I did not expect the fuel tank and sender unit covers to have so much stuff around the top of them! I realised that the earthy smell the car had was most likely down to this! Another job no doubt to add to the list. Clean what I can from the top of the fuel tank. eeeewwwwwwwww - how in the heck did that all get there??? I have no idea! It can't get to the tank from the front, as all of the undertrays/heatshields shield off that area. The only thing I can think of is that it got there from behind the tank, blown around and up onto the top of the tank as it was once dormant for 7 months on a friend's driveway. It's an area I'll keep an eye on going forwards, as it's only a matter of taking out the rear seat and removing the rear covers to access that part. But yes, I was as aghast as you are when I saw the curse word on top of the tank! Yesterday was a bit of a turning point on the car. Yes, I did remove some stuff, but I also added stuff back onto the car. Finally, the car had something new, in the form of the brake hose go back onto it! However, given that the brake hoses I have are straight, albeit pre-made, I'd have to bend this one to shape. In the past, I've bent these by hand, as I've done on the 205 GTi that I once had. I decided to try and go a little more professional however, with one of these:  An Irwin Record Pipe bender, aka Chinese Record. A friend of mine lent this to me, as the packaging on his stated that his was for imperial pipes. However, it seems the bender is intended for metric pipes, like what I'm dealing with. Given that he makes pipes for a living, and that most of his stuff is imperial, his bender would actually come in useful! But would this Cheap bender actually do the job? Firstly, I'd need to get the old pipe out. This would be one of the three pipes that wouldn't need the tank to be dropped, but it would also be one of the trickiest to access, due to having a subframe and a 'big case' diff in the way of seeing it! With some patience, logic, and removing the driver's side spring, the offside rear pipe was finally liberated for the last time from the car, where it had been for 18 years. 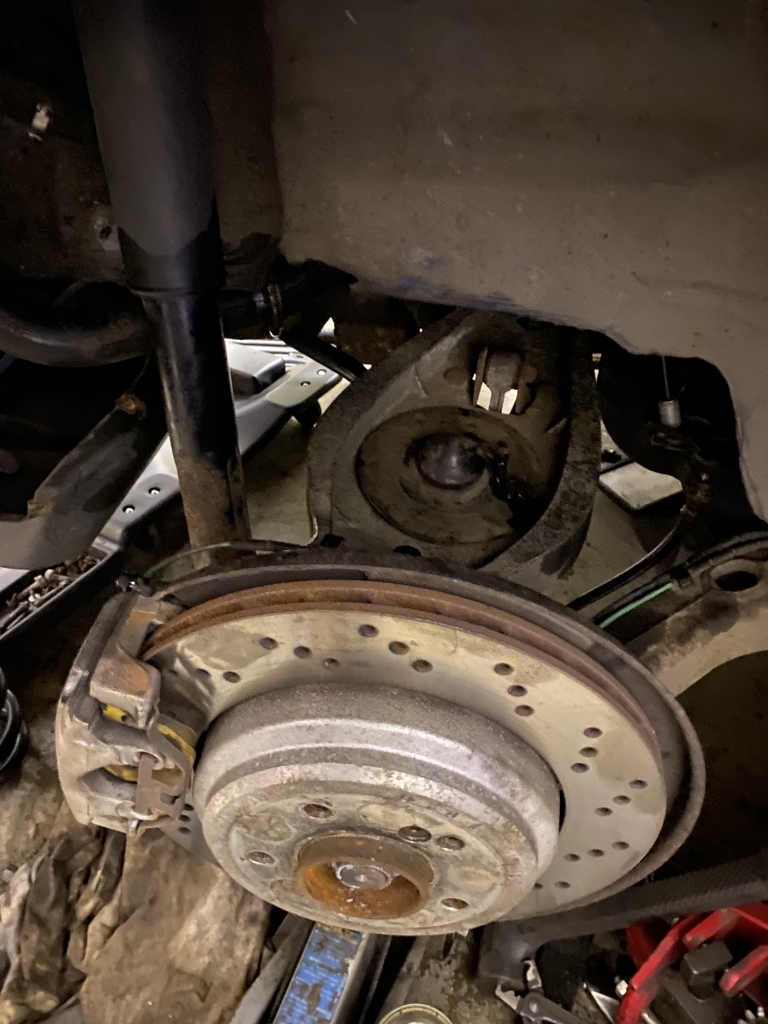 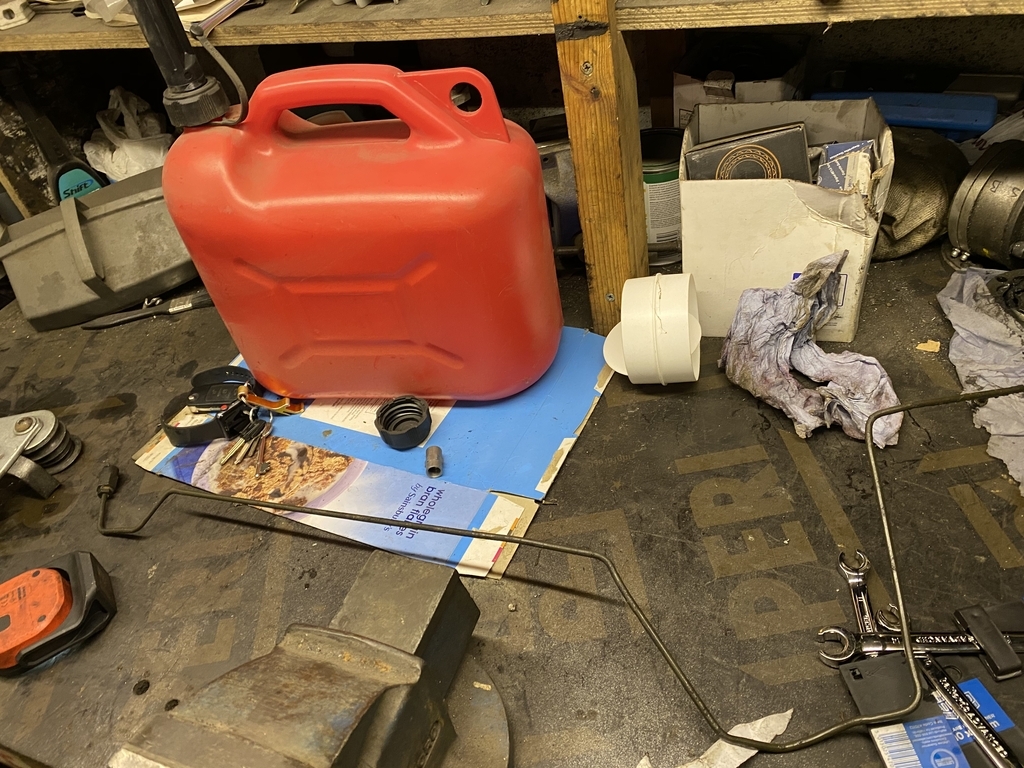 The union which I had been struggling with on the car with a flare nut spanner would finally come undone when I introduced it to yet another dose of WD40, in addition to mole grips. I was relieved to say the least! It's funny. On the bench, the pipe doesn't look as bad as I recall it being in the car! Note the mullered union! 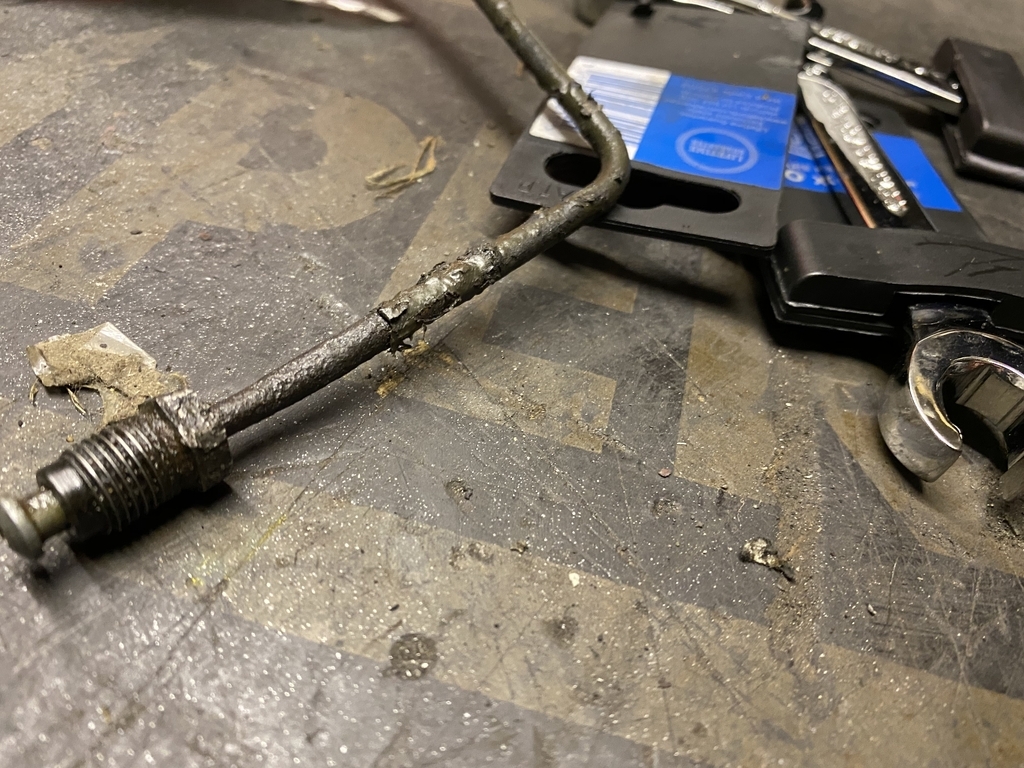 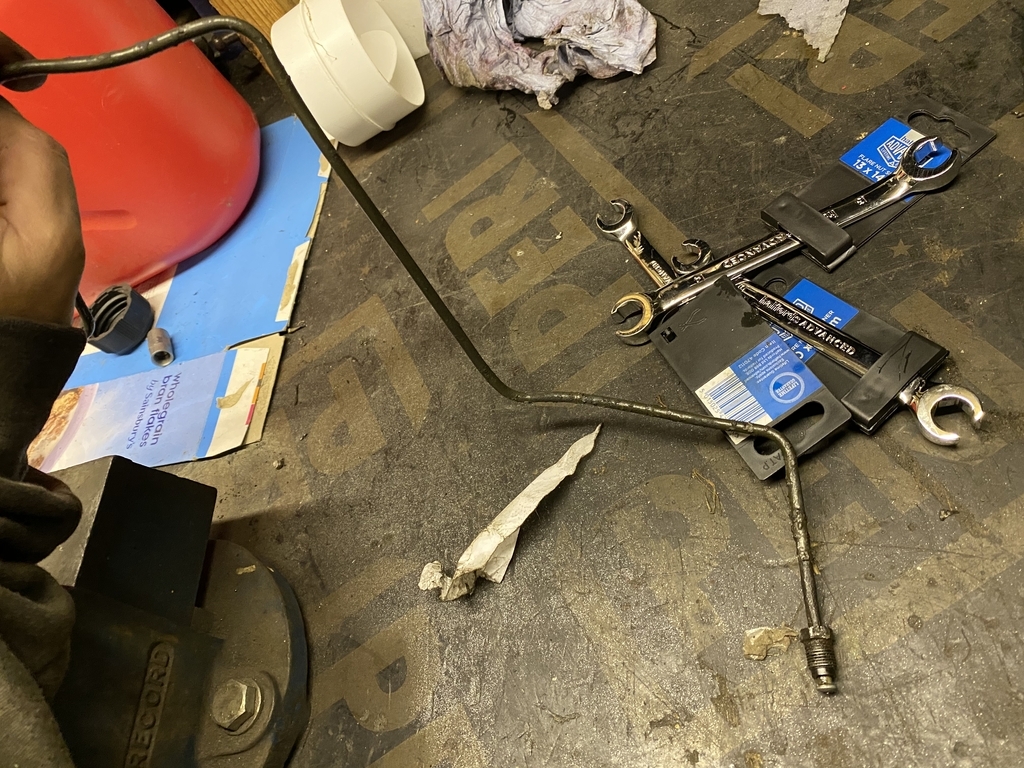 |
| |
Last Edit: Jan 3, 2021 9:39:00 GMT by ChasR
|
|
ChasR
RR Helper
motivation
Posts: 10,307
Club RR Member Number: 170
|
BMW E46 M3 : That's the ticketChasR
@chasr
Club Retro Rides Member 170
|
|
|
With the old hose removed, would the Cheap bender be able to almost replicate the bends in the new pipe? I'll let the pictures do the talking here. 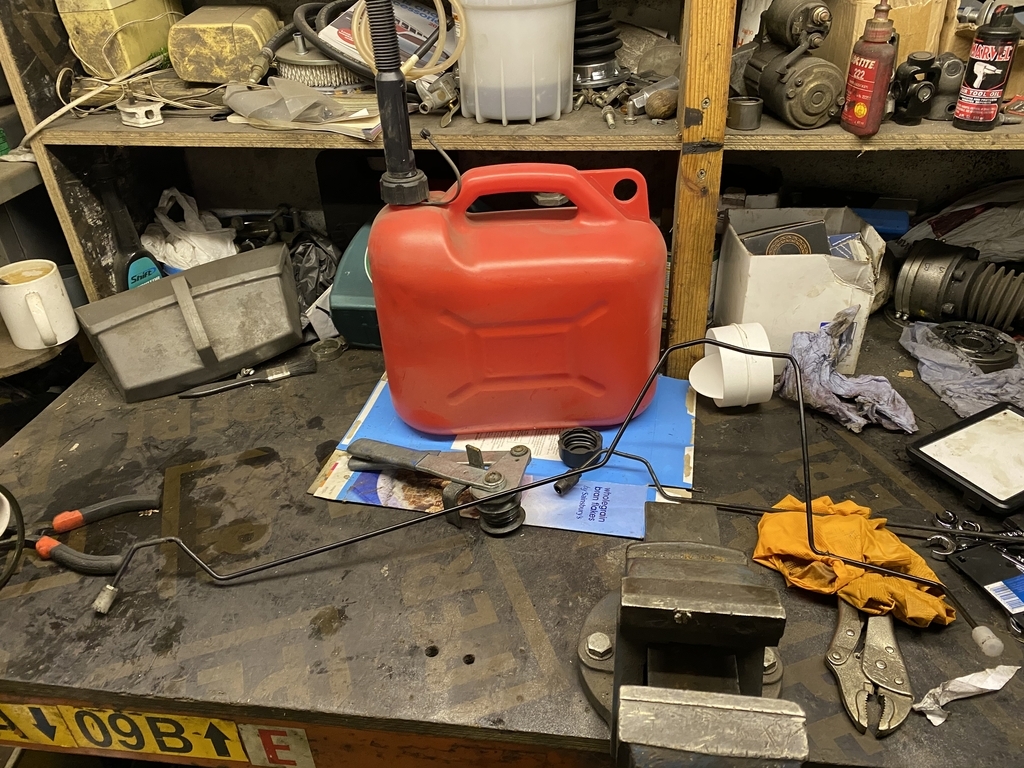 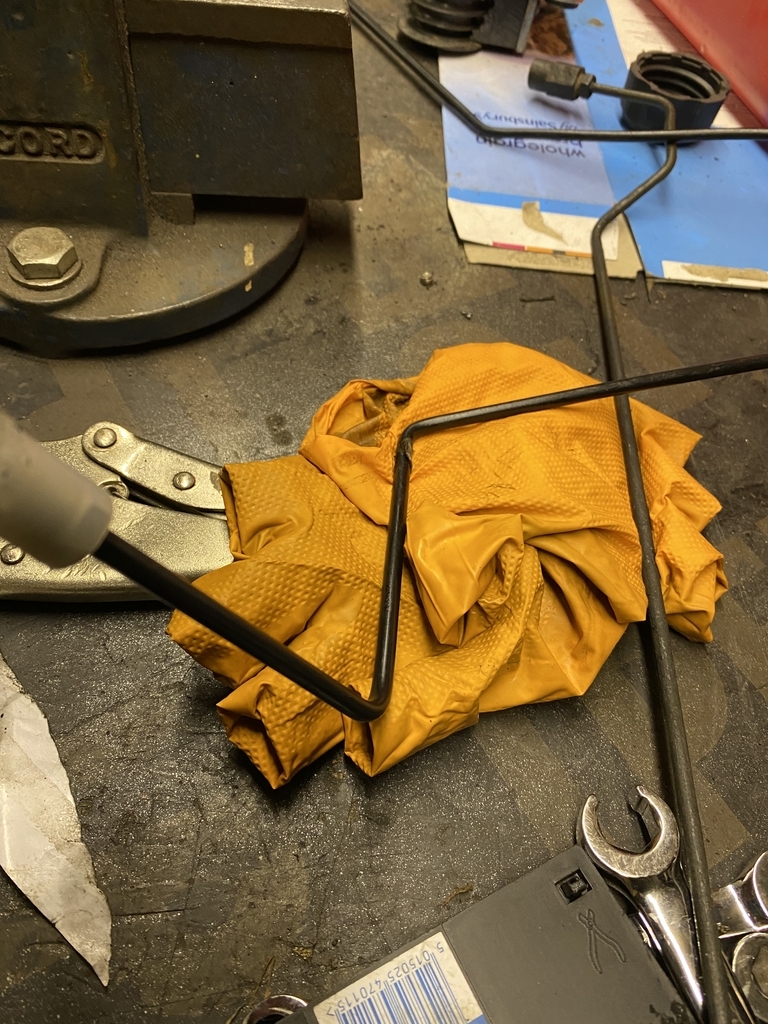 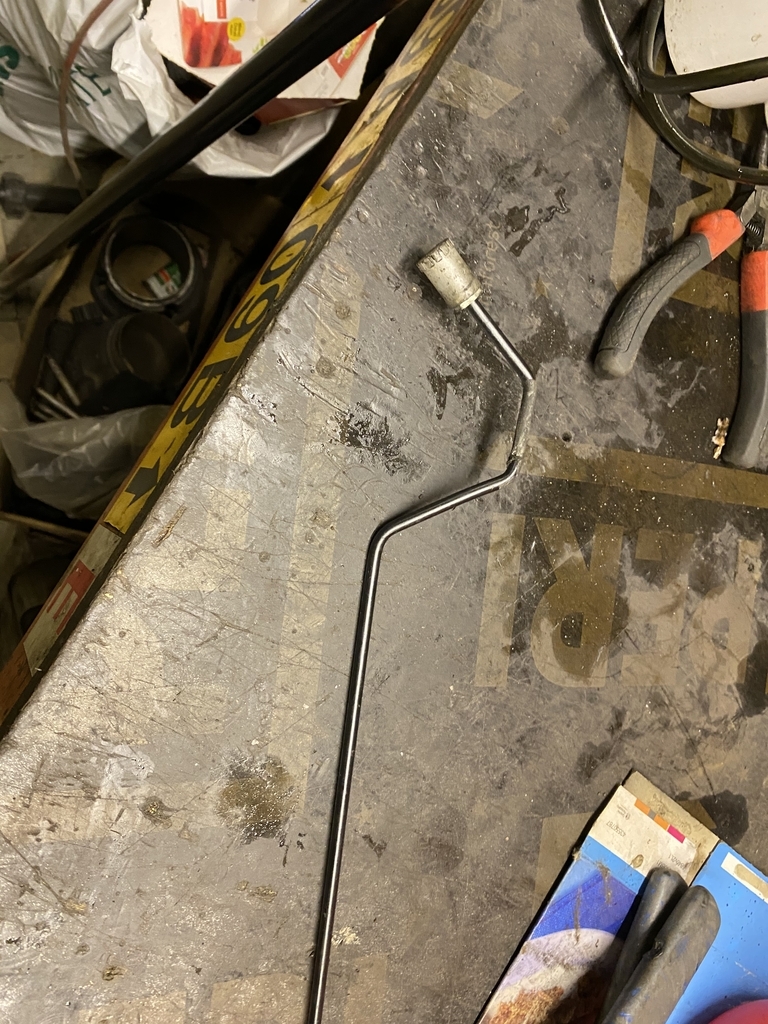 Obviously, I would play a part in where the bends went. I don't think the hose turned out that badly. I was quite impressed with myself for having the patience to do the bends! I could not stand around admiring my handiwork however, as if I were a Uni student who managed to make a great dish, which wasn't beans on toast! And so, the car received the new pipe! It did require a small amount of tweaking to get into place so it didn't hit certain part of the car, but my bends were in the right place, which was a result! 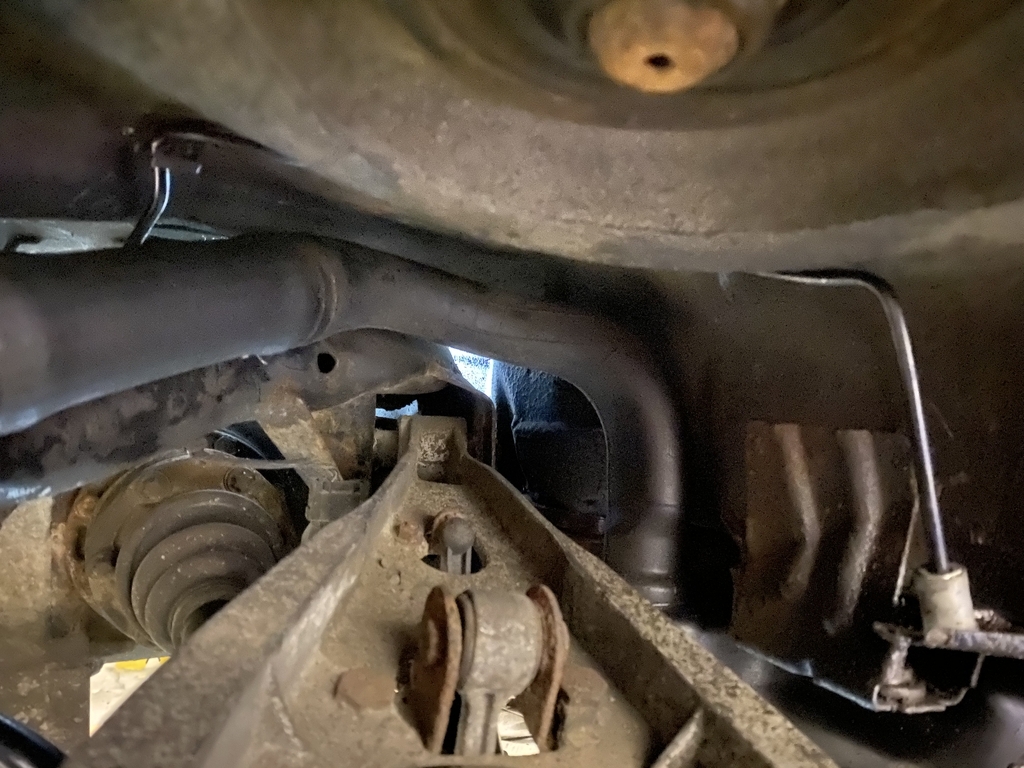 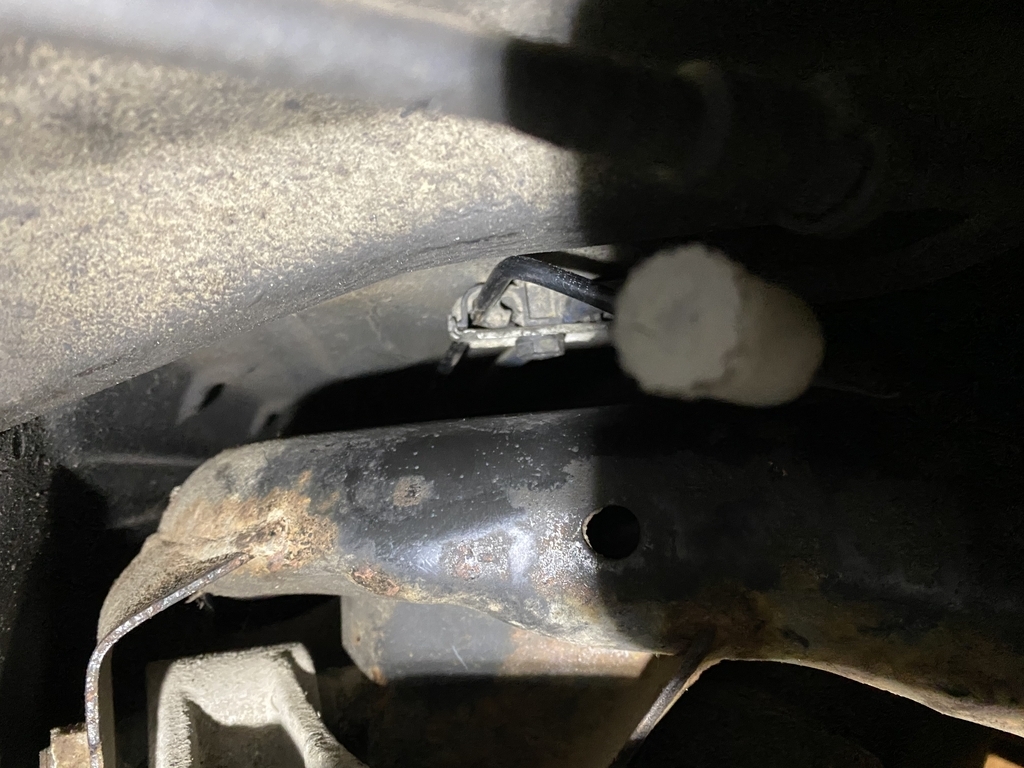 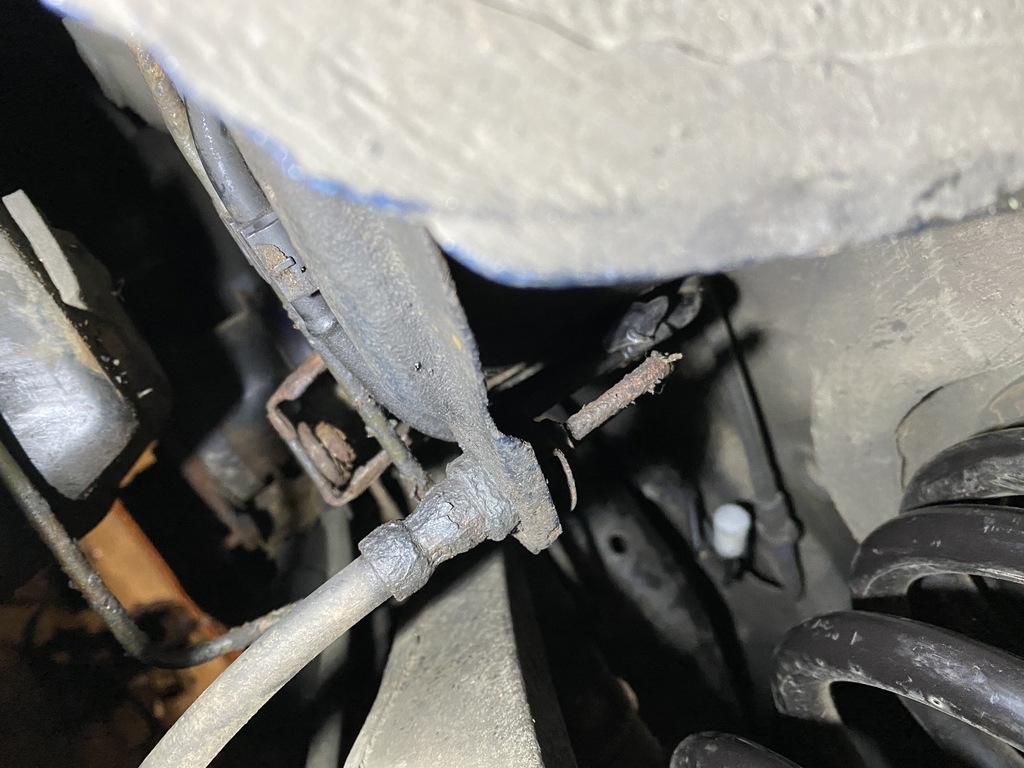 So there we have it. One down. two more to go. The two being the reason for why I dropped the fuel tank in the first place. |
| |
|
|
|
|
ChasR
RR Helper
motivation
Posts: 10,307
Club RR Member Number: 170
|
BMW E46 M3 : That's the ticketChasR
@chasr
Club Retro Rides Member 170
|
|
|
I managed to make a little more progress with the car. With one line done (no, not that kind of a line!), I was full of enthusiasm, With that in mind, I finally got to the pipes for which I dropped the tank for in the first place. 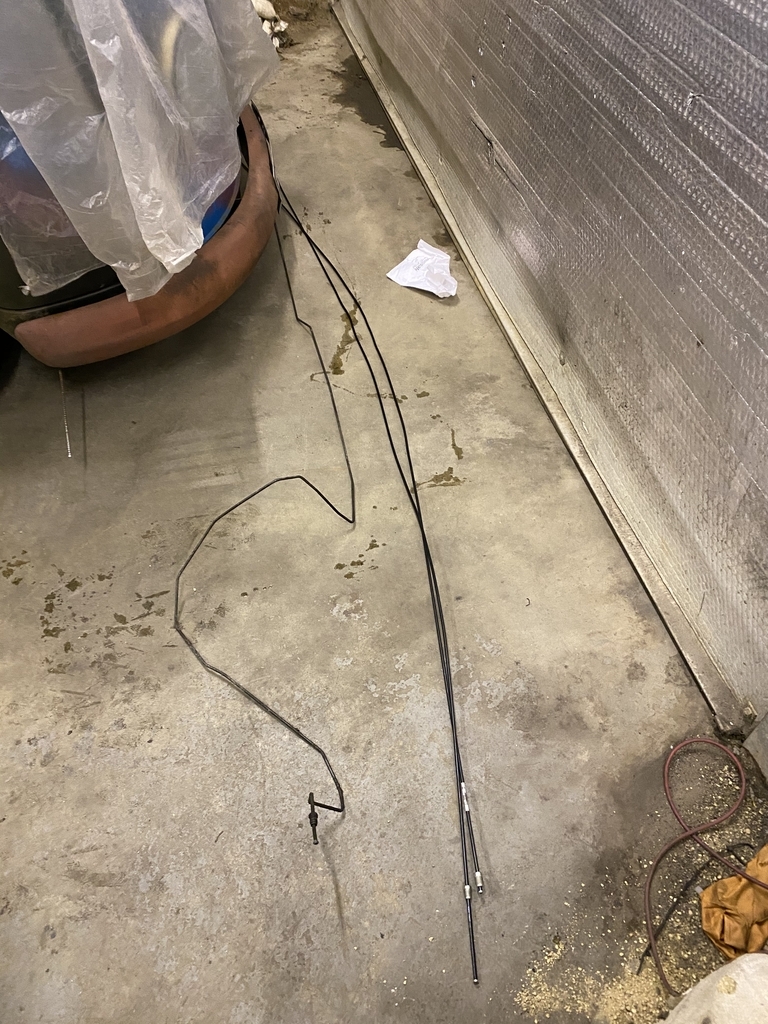 Part of me was tempted to leave this in place, but in all honesty, seeing as the one piece line to the nearside was done, I figured I may as well replace it. 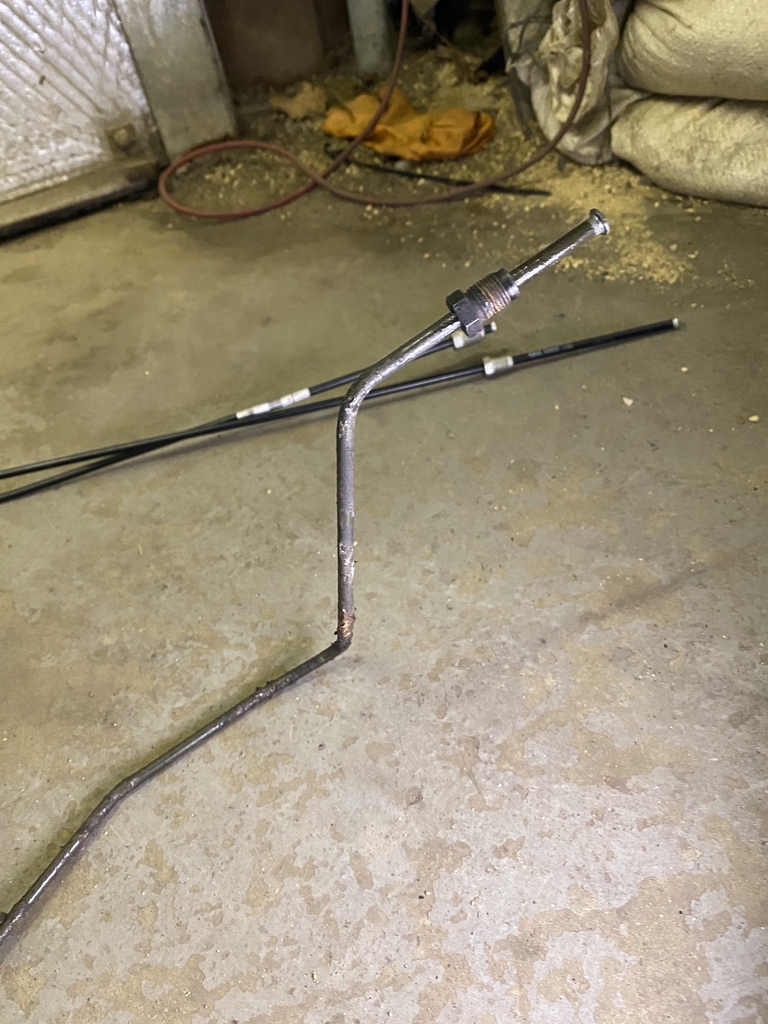 It was then time to bend the new line. I agonised over bending it in the car or attempting to replicate it outside. I chose the the latter. Brave and stupid some might say, but it looked so pretty! OK, maybe to a pipe bender! 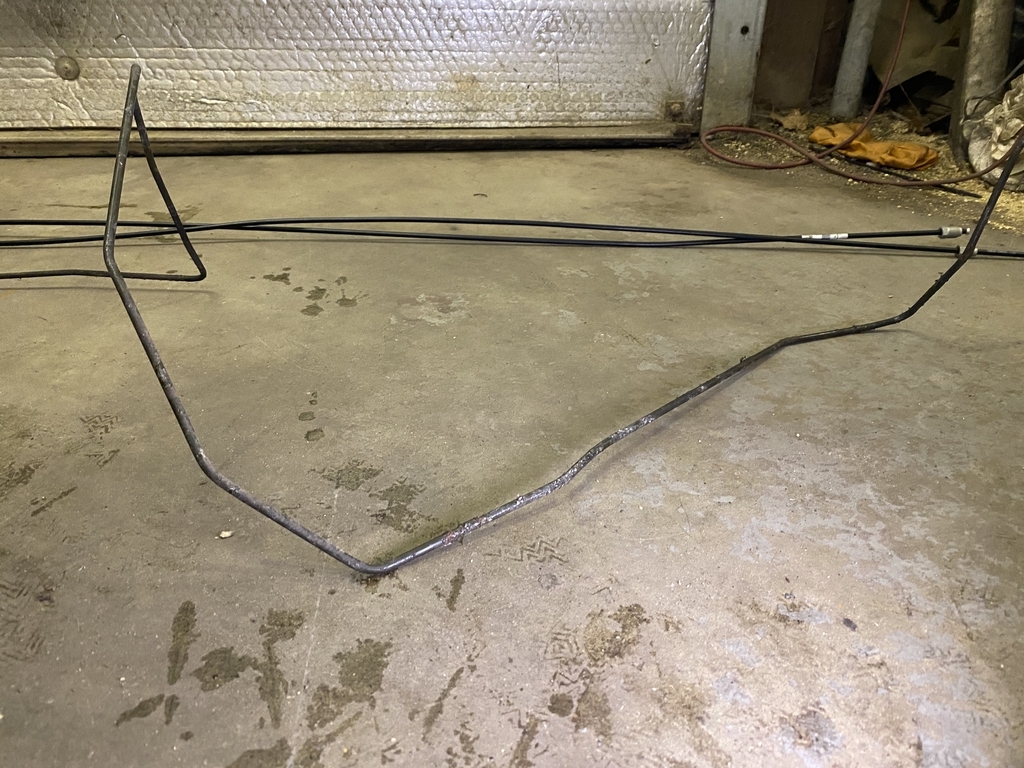 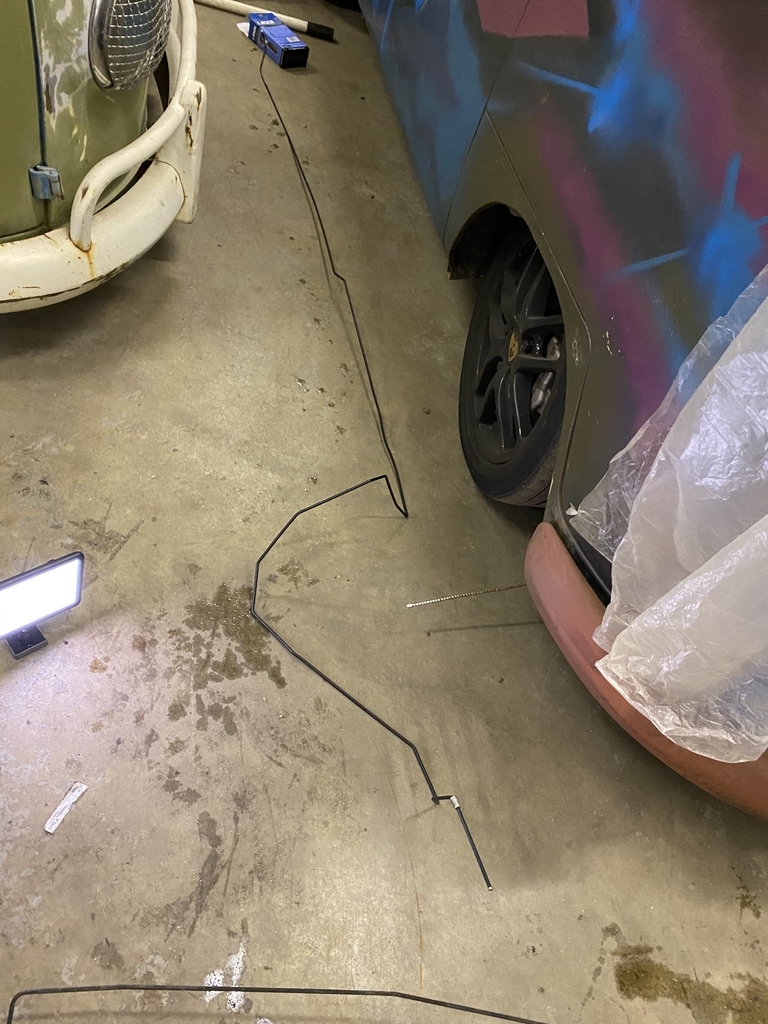 At least the end wasn't crust anymore! Some may already have sensed that there was trouble ahead. 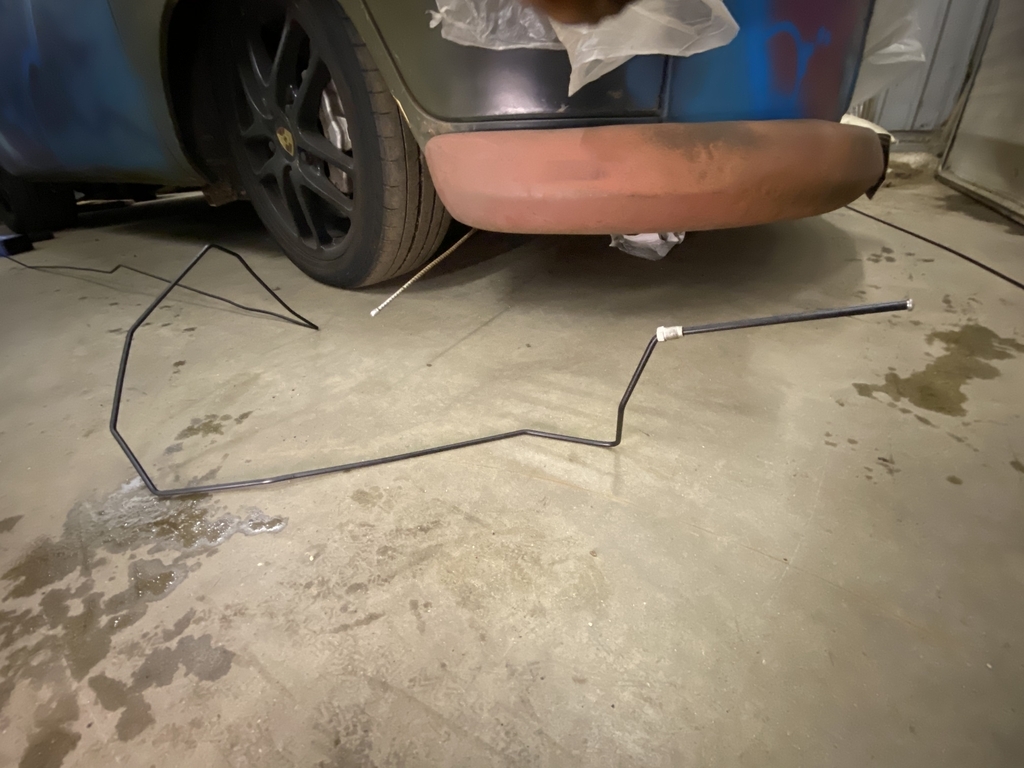 In short, the last part was 4mm too short on the bend where it goes from the tank to the join at the subframe. Balls! But I guess it's all a learning game eh? Since I was in a rush I didn't manage to get the shots to show the issue. But that can wait until next time  . |
| |
|
|
ChasR
RR Helper
motivation
Posts: 10,307
Club RR Member Number: 170
|
BMW E46 M3 : That's the ticketChasR
@chasr
Club Retro Rides Member 170
|
Jan 28, 2021 23:10:54 GMT
|
It was all going so well! I even was bending pipes away! However, a few things happened -Lockdowns ; Given the unit is 10 miles away, it's not somewhere I can exactly hop down to now -Coldness ; It's been freezing! This never really used to be a problem in the unit ; it was always around 10 degrees inside as long all doors were shut on both my unit and the adjacent one. However, with a bunch of new folks next door, who are busy, it's now semi-freezing inside. It's fine for them with a Space heater in their relevant work area, but poor for me. Poor for me being a wimp, but also increasing the likelihood of breaking or fatiguing 18 year old plastics that weren't designed to last this long -Mojo ; I bent that top pipe so well! Unfortunately, it catches the rear axle carrier panel as it's bent a little too short in one area! Not an issue, but I will have to lower the line slightly to correct this. Naturally, some would say there's a solution for this. Stick at it a bit more, invest in a space heater. With me, I figured there was another solution. Sell off some stock I already have. In other words, procrastination It's funny, when you have gone through a number of cars, you always end up with a selection of spares. You keep them at the time, thinking that you'll re-use them later. However, when the spares are required, they generally cannot be found! Some however, have a shelf life. In this case, it was the track tyres on the 18s. Remember these on the left? 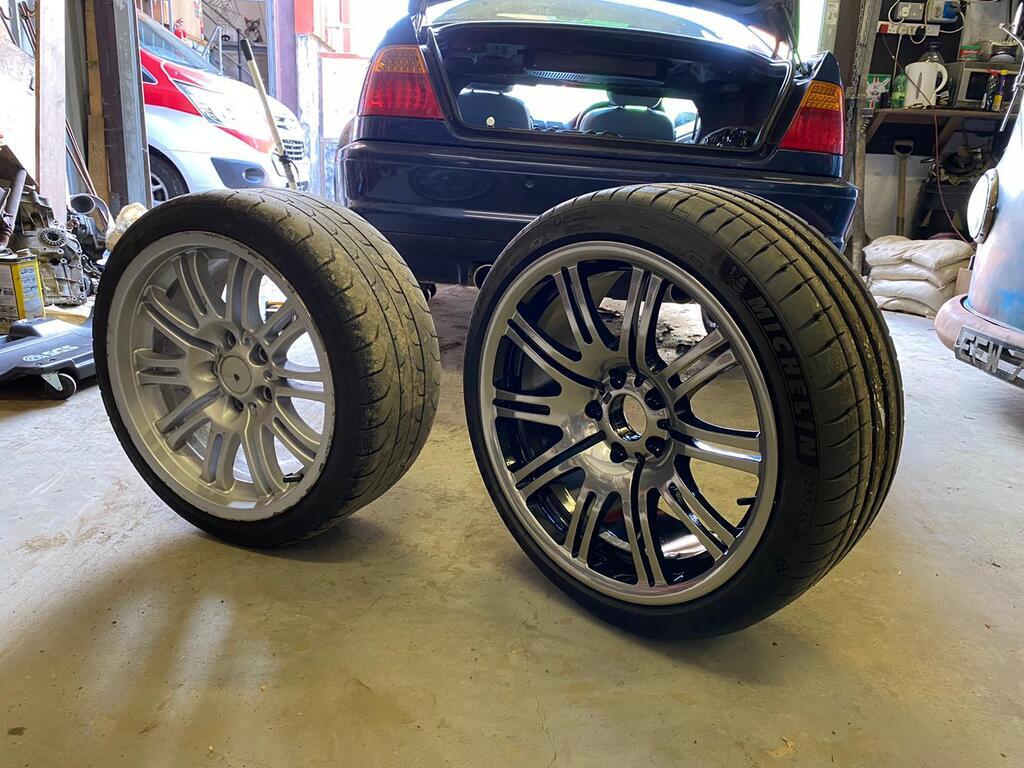 Those Kumhos V70As in the medium compound were a riot! Sure, they didn't work from immediately driving the car after you left it parked up for a week, but they were great fun! They gripped like something smelly on a blanket, made the car 'edgier' and a little more darty, but still more than playful. This culminated in me having a great time with these tyres in 2018 around the Spa track. But, like all good things, they must come to an end. In this case, I felt the tyres time was due. Their time was almost up. They were dated 2013 when I bought them in 2018, which was kind of on the limit then! I proceeded to drive them around the track, and even kept them on the car when it was partially a daily back then too! But, 2021 arrived, and I knew that with this year's plans, it's unlikely that I'd ever use the tyres again, and that they would perish further. Instead of me hanging onto them, I put them up for sale. Given that I paid £350 delivered for them 3 years ago, I think I got my money's worth out of the tyres, even if I didn't use them alot! The fact that the tyres were the wrong size for the M3 didn't help either! It's better to have someone else enjoy them with planned trackdays over someone who won't use them. Make no mistake, I didn't want to sell them. I fancied trying them out once more, as a comparison to the Michelin Pilot Sport 4Ss tyres on the 19s, at least on a trackday, where variable can be put more into the data (lap times, feel etc.). However, when the chap turned up in his M135i, and he handed over the cash, I knew it was the right decision to let them go. He plans to use them for trackdays this year, once they open up again, which will be the perfect send off for them  . Fear not though, I have kept the rims. It seems they are harder to pickup, and given that the rims are now quite cheap for me. They obviously will need a refurb at some point. This can wait for the timebeing, as I do have the wheels. 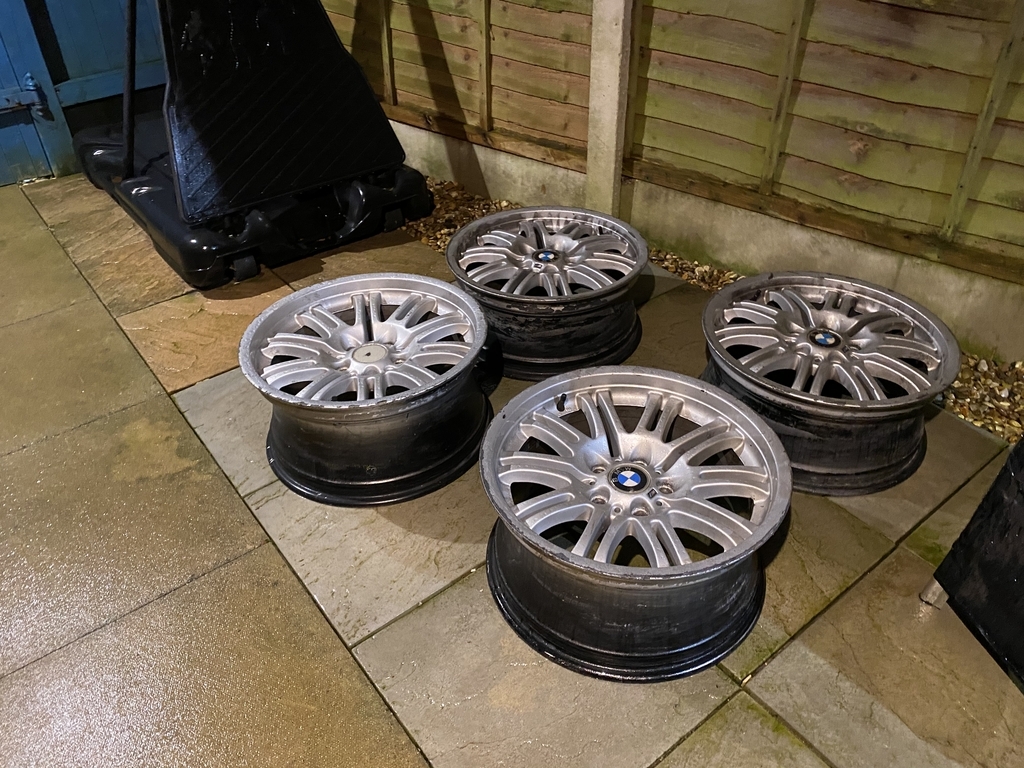 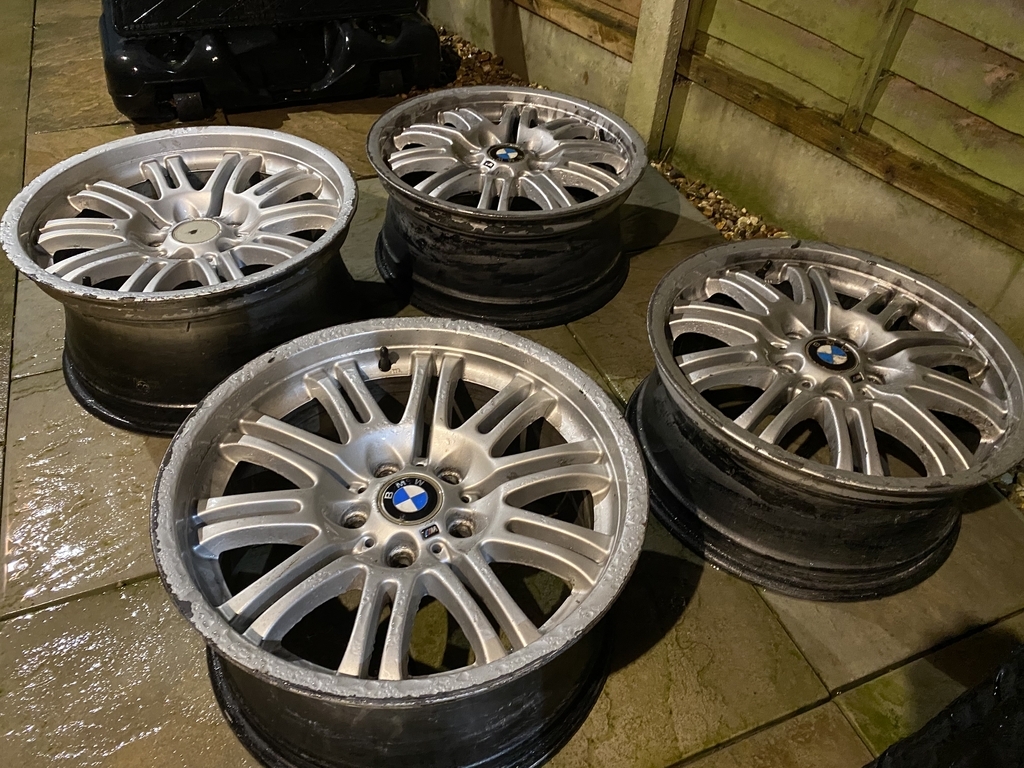 So, with this extra cash, what did I do? Buy another project! It's the RR way right? 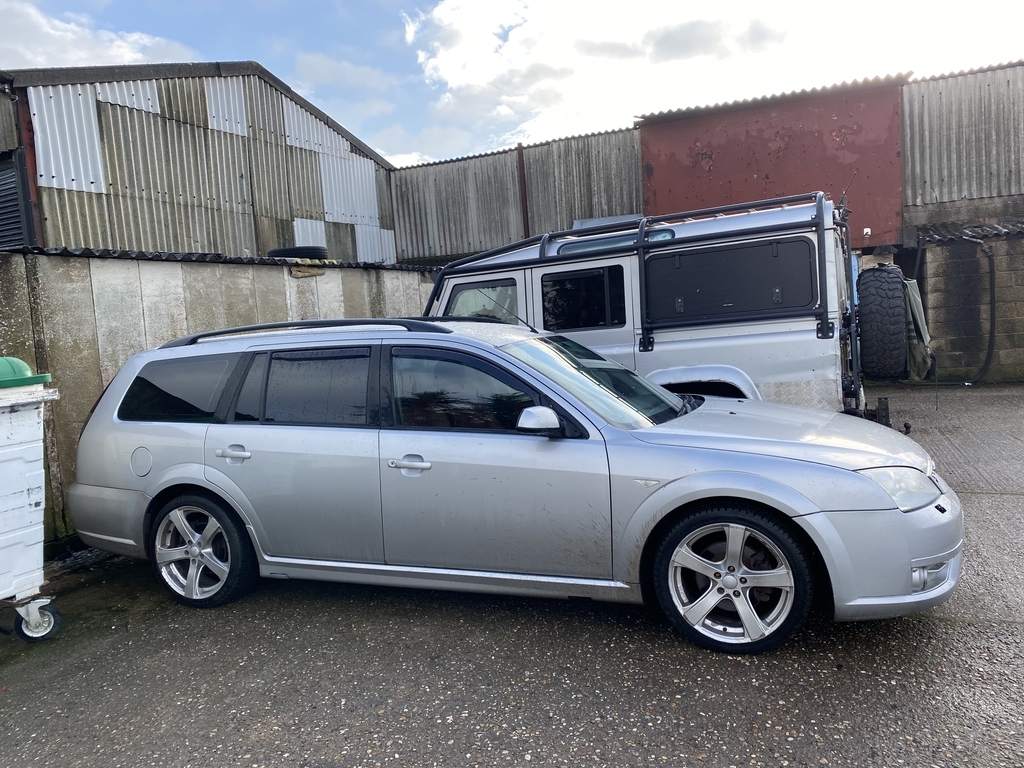 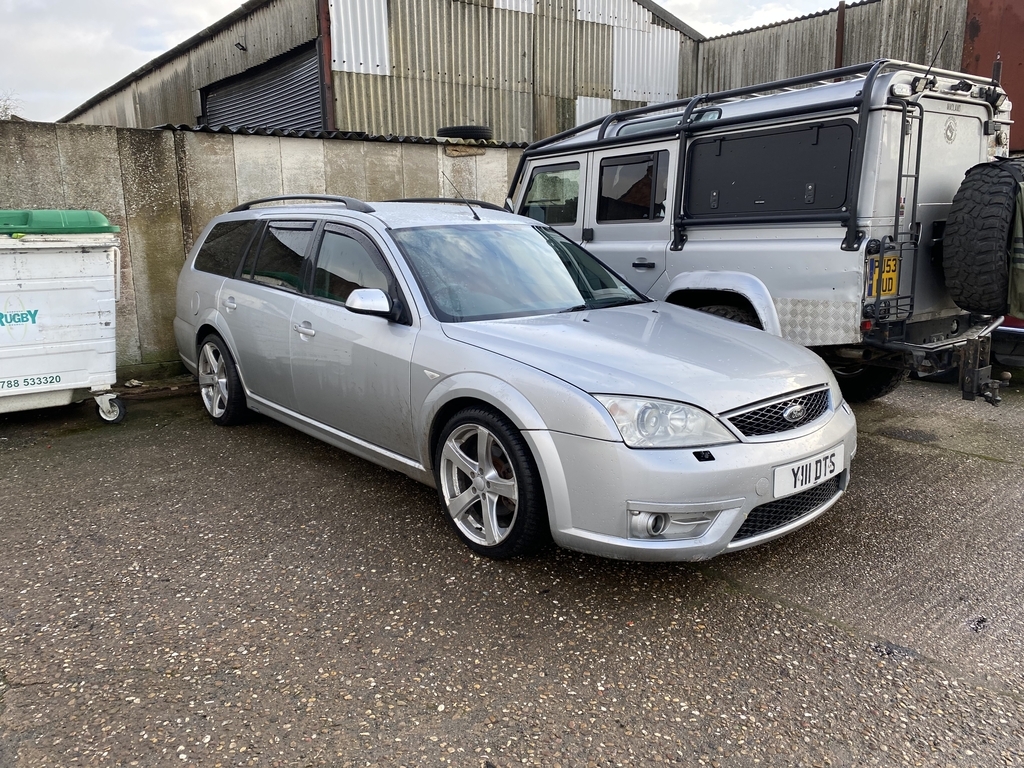 Yup, it's another Ford. This time, a Mondeo ST220 in Stardust Silver with a red Recaro Leather interior. To some here, it's probably seems mad buying a dull Ford, but I had my reasons, even if they were flawed Firstly, the spec was very good. Then I get to the underside. It's actually surprisingly solid underneath, probably moreso than my Mk4 structurally! With 97k on the clock, it's not too leggy for its age (2003 for those wondering), it was a known car for me. Finally, it was cheap. There's nothing like a bit of nostalgia either. I loved the 3.0 V6 Estate I had years ago, and I semi-regretted not buying it back once it was written off. But what's done is done, and you should never go back. Which is why I went for a different variation. So what's the plan for this automotive chickenshed? Not alot. It will be scrubbed up a bit inside and out, have the bumper repaired, and generally returned closer to a factory specification everywhere, including those wheels. It's not going to be a fast project. Far from it. It will be done bit-by-bit, as the parts come along locally and hopefully, relatively cheaply. I probably won't do a thread here, as despite it being old, and now with tricky to find parts as some will know from another thread here, it's probably not quite in the same league as a well respected M car. Anyway, slight distraction off the M3 thread. While I have the Mondeo to tinker with, the plan is to sort out the M3 once the lockdown softens a touch. It seems a shame to have it looking like a forlorn barnfind a way away from me. |
| |
|
|
ChasR
RR Helper
motivation
Posts: 10,307
Club RR Member Number: 170
|
BMW E46 M3 : That's the ticketChasR
@chasr
Club Retro Rides Member 170
|
Feb 14, 2021 11:37:27 GMT
|
It seems one person wants to see a thread on the ST220. However, I shall refrain for unless there is more interest for it. The idea behind that car is basically how we used to buy retros. That is: -Cheaply (i.e Sub £1k) -Fix it right but to a budget, but using decent parts where possible and at times taking a risk on it. On a £600 car, it's easier to do than on a retro costing £4k+ for most I'd imagine for most folks. -Where to choose your battles. So, where spares are either unavailable or pricey, see what options are out there. Be it you adapt something, buy the right part, or even try something yourself. Given that even a half decent Allegro or Marina is now £2.5k+, it does change the scope a little! It could just be that I'm stuck in the past with prices and ideologies! It's not to say I don't want an Allegro. But merely that for a second play car, something has to give (y). Speaking of which, it doesn't help when you occasionally loosen the wallet on your ride, especially when you shouldn't be! So, back to the M3... Some here will know that I have always fancied a set of particular seats for this M3. When I looked into the expense of what I wanted a while back, I gave up on the idea. I know, losers talk, but sometimes you have to choose your battles. Sometimes, the battles come to you! With said seats last Monday, I had a good friend call me up. He mentioned to me that he was going to buy these seats of seats cheaply with the required frames to get the seat vaguely into an installable manner into my M3. So, what are these seats? Well, they're not the prettiest of things at the moment. 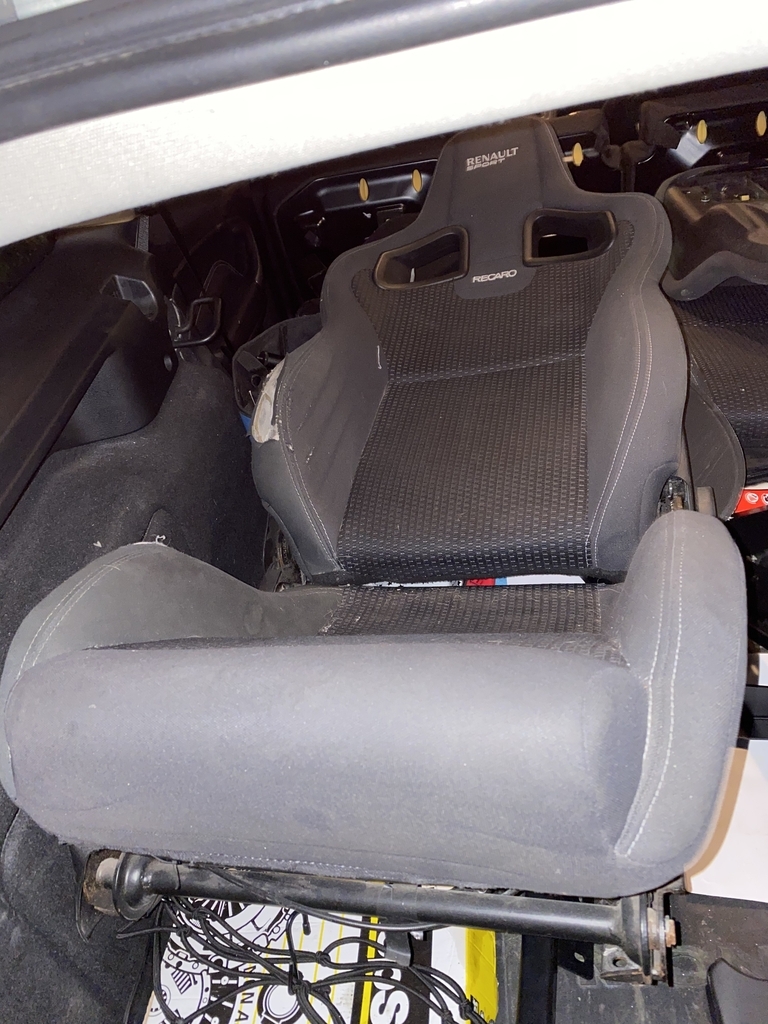 Guessed it yet? 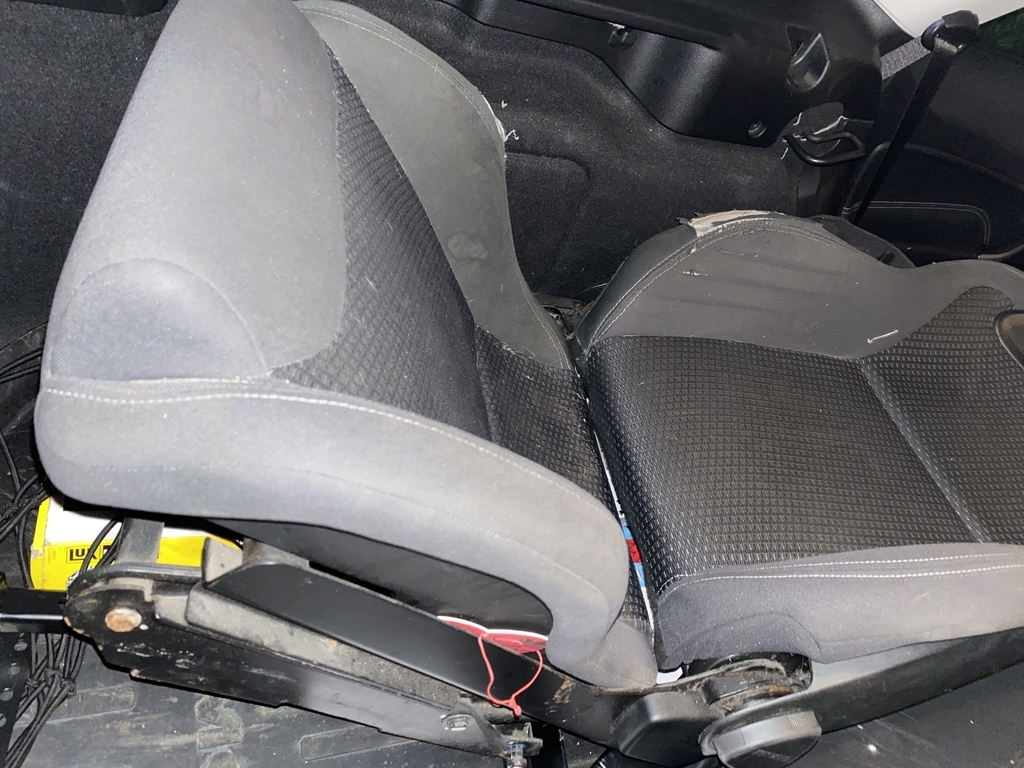 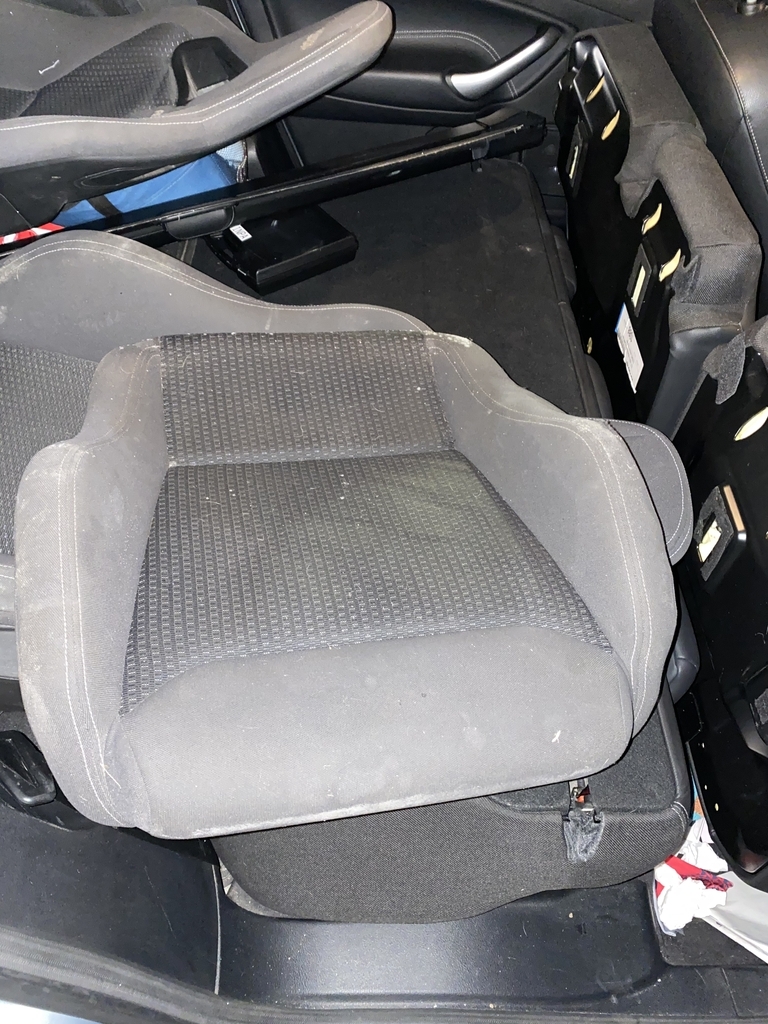 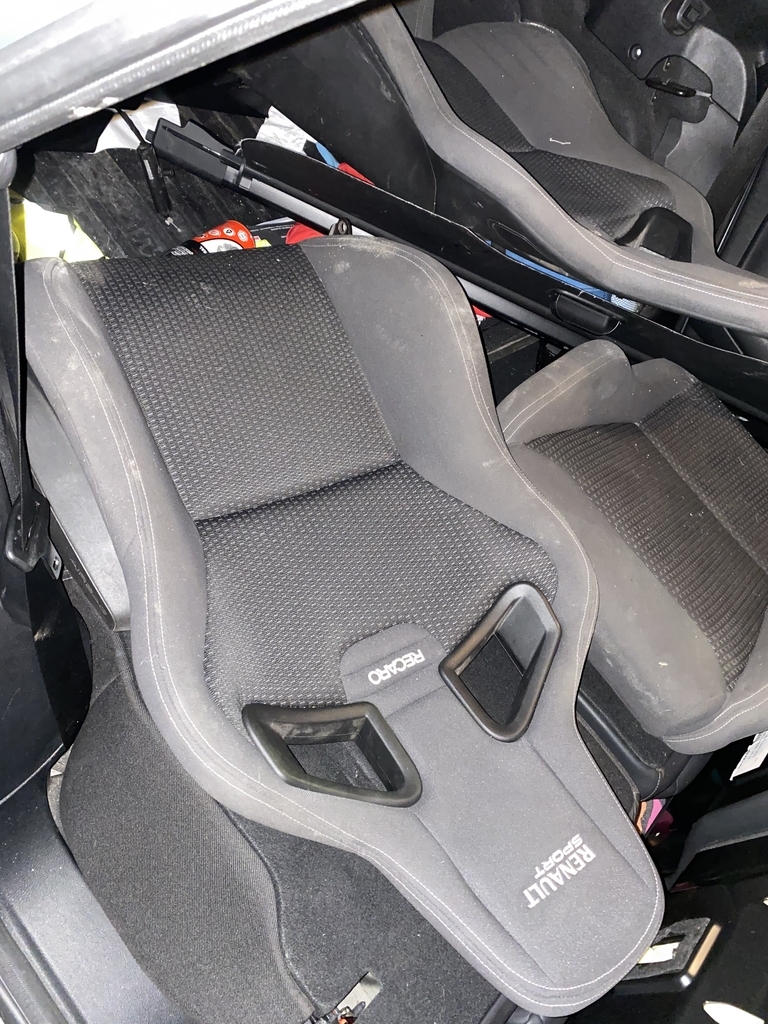 For those wondering, these are not some random seats out of a Renault, fresh from Halfords. Oh no! These are a set of Recaro Sportster CS seats out of a RenaultSport Clio 200 (I think....). However, there are a few problems with these seats! -Driver's seat has bolster wear -They're the wrong colour for my M3 -The frames won't fit in the M3 I think monty400k has done something similar in his. Being out of Renault, it seems Recaro made frames to mount the Sportster CSs directly into the Clio. The CSs from Recaro came with generic bases to tie the seats together, hence why once of the seats is split in two. Why is it split in two? That's because it needs these frames from VBD to make the seats become a 'generic' Recaro. Below we have the Renault frame. 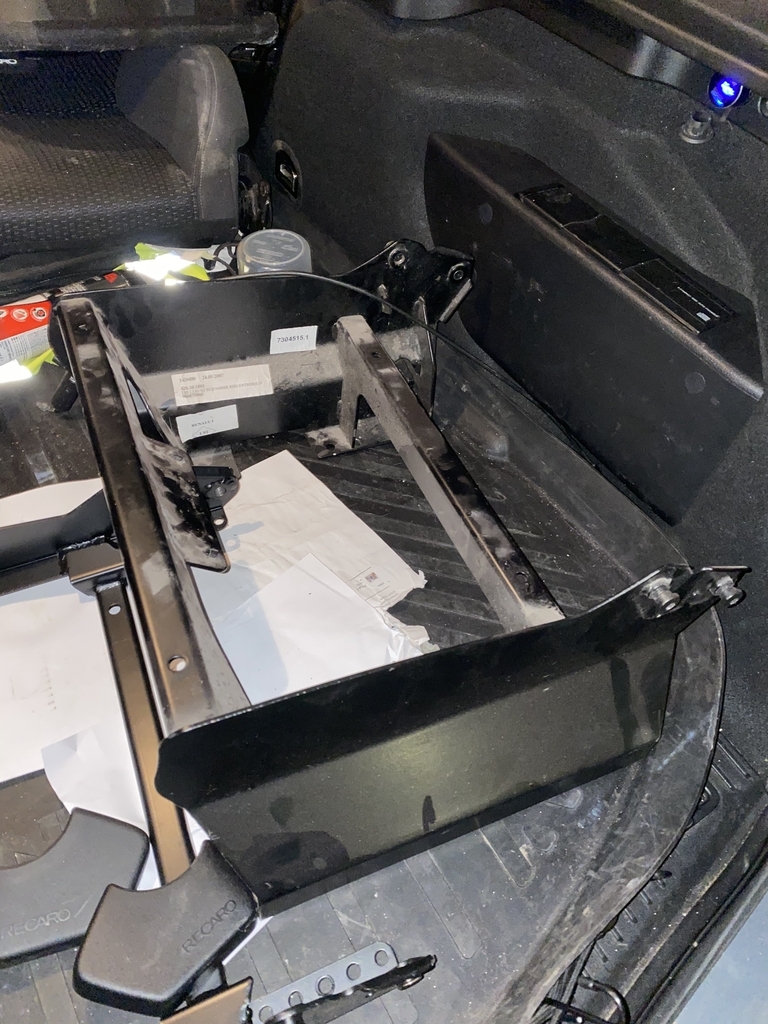 And here we have the generic "Recaro" frame. 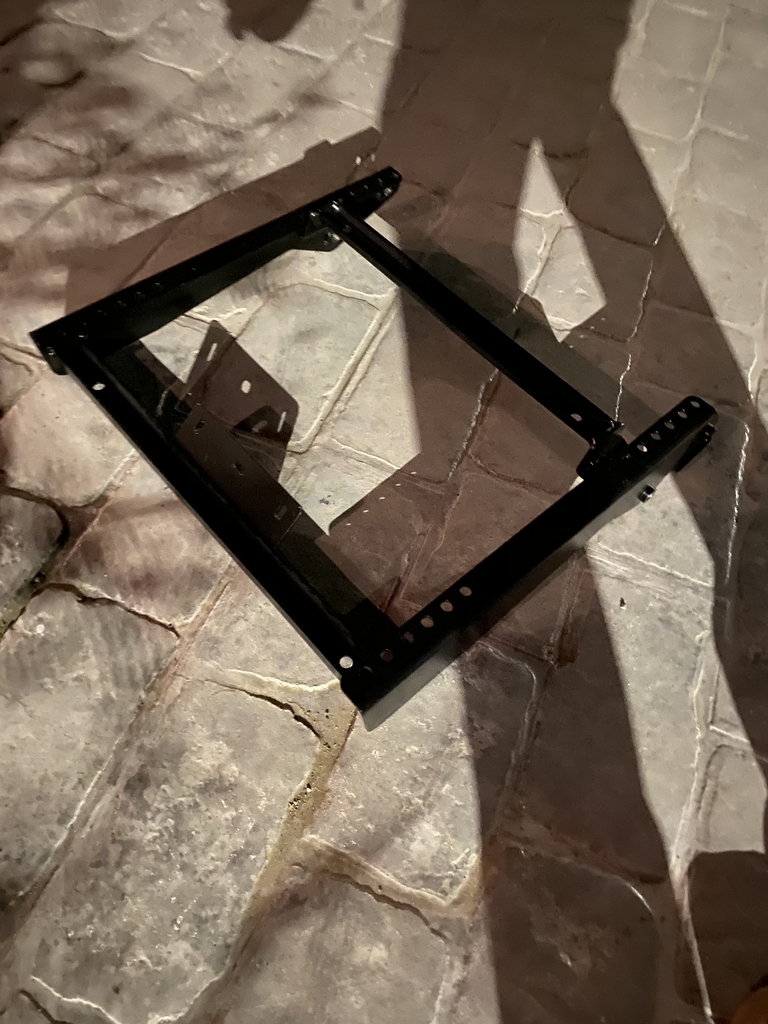 So that's some good news. I'll have to decide on which slider sets/conversion frames I decide to go with. Planted do a generic frame to M3 slider set out of the box, which I believe may be Recaro's own frame. They are not especially cheap however, and are said to sit too high. But I'll come back to why I haven't rule them out. The other way is to use generic Recaro sliders, and a conversion slider-frame set (i,e mounts the sliders on the floor in the correct location, and then the sliders to the generic Recaro frames) from a couple of companies. These sit lower, but folks can run into seat position issues regarding the seats being offset etc. So, it seems I have more bad news there! More time, more expense, and more hassle. But what is good about these -They don't look too bad! OK, maybe that's just me -These seats do seem to hold their value, so despite them being wallet crippling to buy, I can sell them on. -Being Renault items, these do have airbags in the side, just like my factory M3 seats. I hope to utilise these -Since they will need re-trimming, I can add things to these. Maybe the occupancy sensor for the passenger seat to turn on and off the passenger airbag, in addition to possibly adding some seat heaters, an option I really wished my M3 came with! Obviously, I will not be trimming them for a while. I suspect my wallet will be empty for a short while to say the least, barely justifying the expense of these seats, despite them looking quite cheap! But, it will put my M3 one step closer to my CS Lite vision. Plus, did I forget to mention that these seats are almost half of the weight assembled compared to the ones in there? Yes, I know weight doesn't matter too much here, but every little helps eh? Plus, they have some very cool design touches on them. From the polycarbonate backs to the subtle seat folding mechanism latches, you can't moan at these seats. 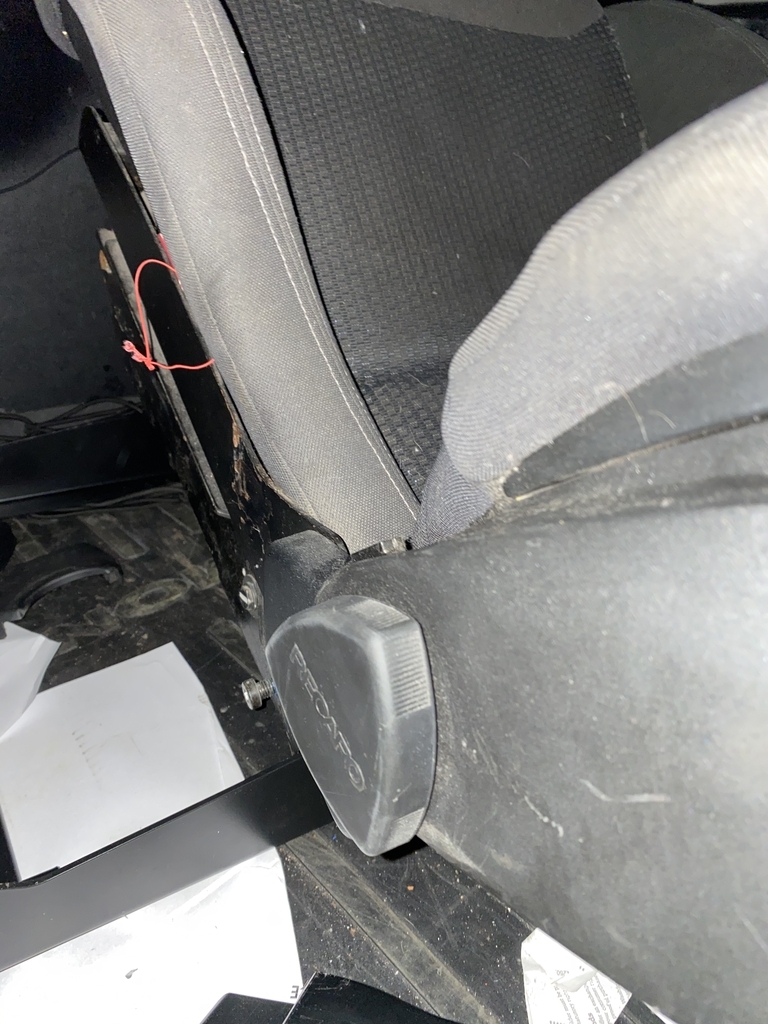 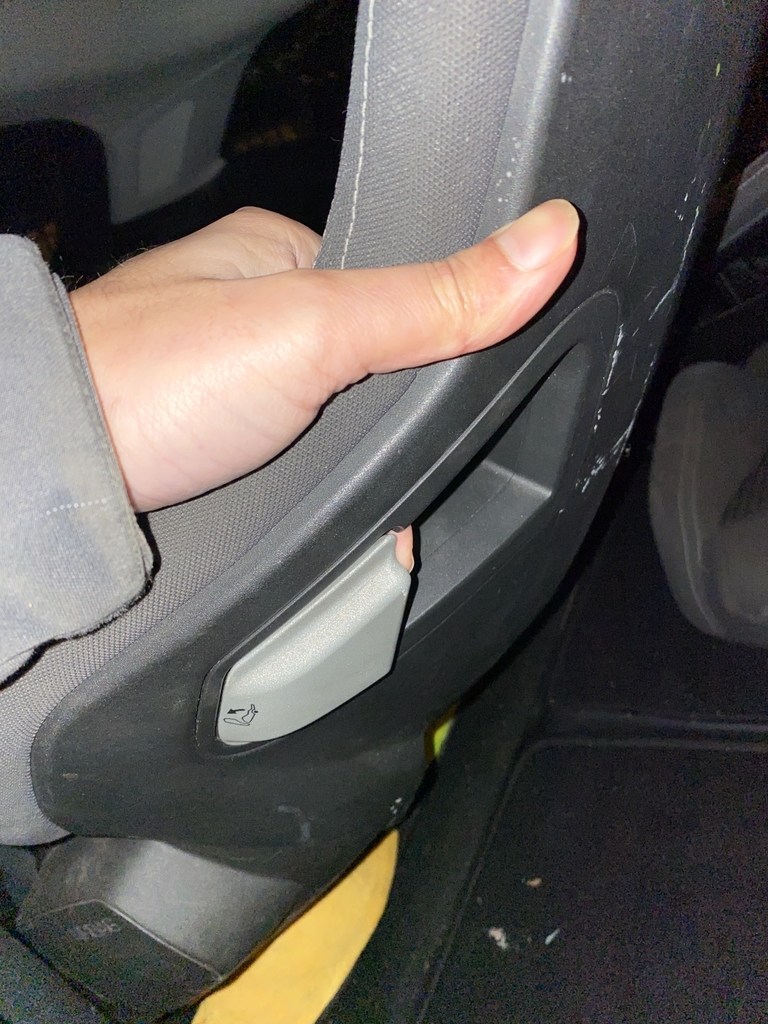 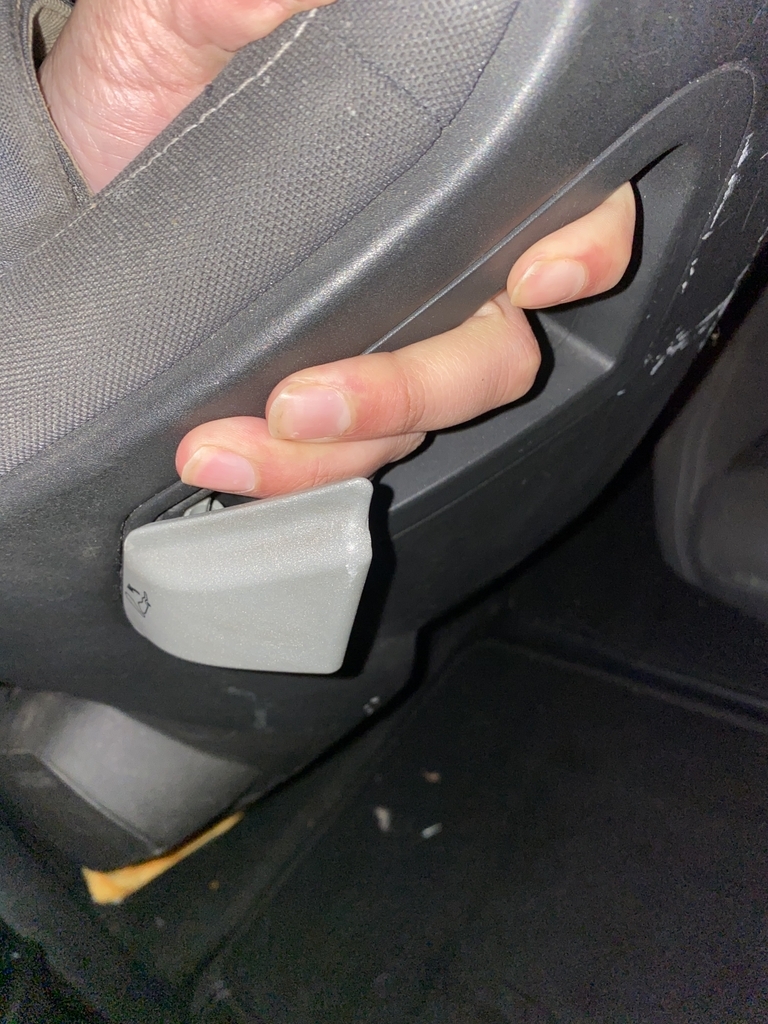 Yup, I've lost it and done what many here have! While you have an unusable car, get more cool bits for it! Now, where is the facepalm? |
| |
Last Edit: Feb 14, 2021 11:39:02 GMT by ChasR
|
|
|
|
|
Feb 14, 2021 13:17:01 GMT
|
|
Looking forward to seeing how the seats turn out, having an E46 Touring an M3 is a dream car so always enjoy your updates,
Have to also give a second vote for either a separate Mondeo thread or occasional updates included in this thread,
Nigel
|
| |
BMW E39 525i Sport
BMW E46 320d Sport Touring (now sold on.)
BMW E30 325 Touring (now sold on.)
BMW E30 320 Cabriolet (Project car - currently for sale.)
|
|
|
|
|
Feb 14, 2021 14:00:26 GMT
|
|
Statement of the Obvious, but submitted with your best interests in mind: find a way you’re sure about to verify that the BMW and Renault SRS components all talk to one another properly as a system: the air bags and seatbelt pretensioners, sensors and control unit. Maybe they’re all from the same vendor and that makes such substitutions plug & play? I’m sure you’re on top of it.
This is always a great project to follow.
John
|
| |
|
|
ChasR
RR Helper
motivation
Posts: 10,307
Club RR Member Number: 170
|
BMW E46 M3 : That's the ticketChasR
@chasr
Club Retro Rides Member 170
|
Feb 14, 2021 15:02:24 GMT
|
Looking forward to seeing how the seats turn out, having an E46 Touring an M3 is a dream car so always enjoy your updates, Have to also give a second vote for either a separate Mondeo thread or occasional updates included in this thread, Nigel Cheers! You might be waiting a while! It seems there is no cheap way to put these seats into a car that didn't have them, but that doesn't mean savings can't me made. Having these seats come with the frames however has saved a small fortune. Recaro charge £260 a frame to convert the seats to a Generic Recaro base. That's not to say, I don't have a plan. My plan is as follows with these - List item 1
Decide on which slider-frame assemblies I want. I know AMX sell a bunch of parts to make these fit for around £300(ish) and they mount the lowest of them all. Sounds great! Except, I'm not the tallest person in the world, so as long as they are at least as low as the factory seats I will be OK. Furthermore, peeps can run into issues with how they sit in the car (i.e they can be offset). AMX do modify these, but with Brexit and delays (of which my Mondeo isnow affected by a parts holdup), this route could potentially now get expenisve and time consuming, not to mention have hassle.
Some are happy to ditch the pretensioners. For some reason, despite them being old, I fancy keeping the safety features  . .
This brings me onto the second option. Recaro sell slider-frame assemblies that bolt the seats with the VDB I have directly into the car, and allow the pretensioners to fit. Some moan that they sit too high, but it seems alot of that is down to folks fitting the spacers Recaro provide for them. Remove the spacers and they then sit lower, like duh! I guess it's not obvious until it's explained to be fair. This does mean rear passengers can go in the back fine and have some space for their feet however, similar to the OEM seats. I don't always have rear passengers to be fair, but I've done a few long trips in this car with other folks inside. Being Recaro, they kind of are in the same family with the seats too I guess  . A pair of frames however are £500. I think these have a bit of a kick to them in the squab section too. Hard to deliberate without seeming them however. . A pair of frames however are £500. I think these have a bit of a kick to them in the squab section too. Hard to deliberate without seeming them however.

The other choice? Corbeau do a similar slider-frame assembly to Recaro. I'd need to see if my Recaros could bolt onto these. If they can, these work out to £300, a little more pallatable. I guess I could machine spaces to get the kick on the squab or to my tastes if the Recaro seats have that. I'd want machined spacers over just washers on this application, but it's something to think about. These look similar to the slider-frame assemblies OMP used to sell 5 years ago, which are now discountinued from them.

Finally, VAC Motorsports/Macht Schnell do floor adaptors to make the Recaro sliders (not the frames) bolt onto the seat and then onto the adaptors, which are on the floor. At £200 each without sliders, the Recaro slider-frame assemblies look cheap however. The VAC items do however mount the lowest out of the lot and are arguably the lightest
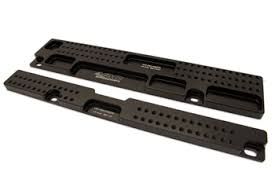
Some will say to go with the Polish AMX mounts, but I'm sure others will say on such a key part of the car, it's not worth cheaping out and instead going with the Recaro floor assemblies. I will wait and see the comms!
I might see if I can make my electric-slider assembies mate to these. Obviously, only the sliding function would most likely work, but it's potentially an option
- With the floor mounts decided I can then fit these into the car. Granted, the colours will be wrong, but the purpose of this will be to see if the seats work in the car. I suspect they will, but it's good to check before committing to other things that will make the seat solution semi-permanent, like trimming etc. If I do like them and don't want them out of the car, I'll for the timebeing put some £50 cover protectors onto them. A shame to hide the seats, but at least I'll have made a decision. Hopefully, unlike RoadKill, the covers won't become a permanent addition!
- Once I decide on the floor mounts, I'll need to get these retrimmed. This will be the most expensive part. My mate who got me the seats suggested I take out the grey interior and go with black, and sell the grey on, since mine is in great condition, albeit with wear on the driver's seat. That said, I like the contrast with the outside and it does brighten up the interior nicely IMHO. Odd, I know to many. It's also original to the car and in superb condition generally, even compared to low mileage cars out there. So I'm tempted to retrim these grey.
Since this is the most expensive part, I'll probably leave the trimming until last, either the end of this year or maybe even next year. If I don't like them, I'll buy some black leather seat covers, which are cheap for these, and sell them on. Being black, they will sell well
Did I say alot? Yes I did! Hopefully, that long-winded logic makes sense, or others may talk sense into me! We'll see how the ST220 gathers momentum from others prior to spilling more here. That as you can tell, will be a slow project  . I do know of a couple of E46 Tourings made over the years. I first saw one being done back in 2013 in Rugby via a then-known specialist. BMW even made one! 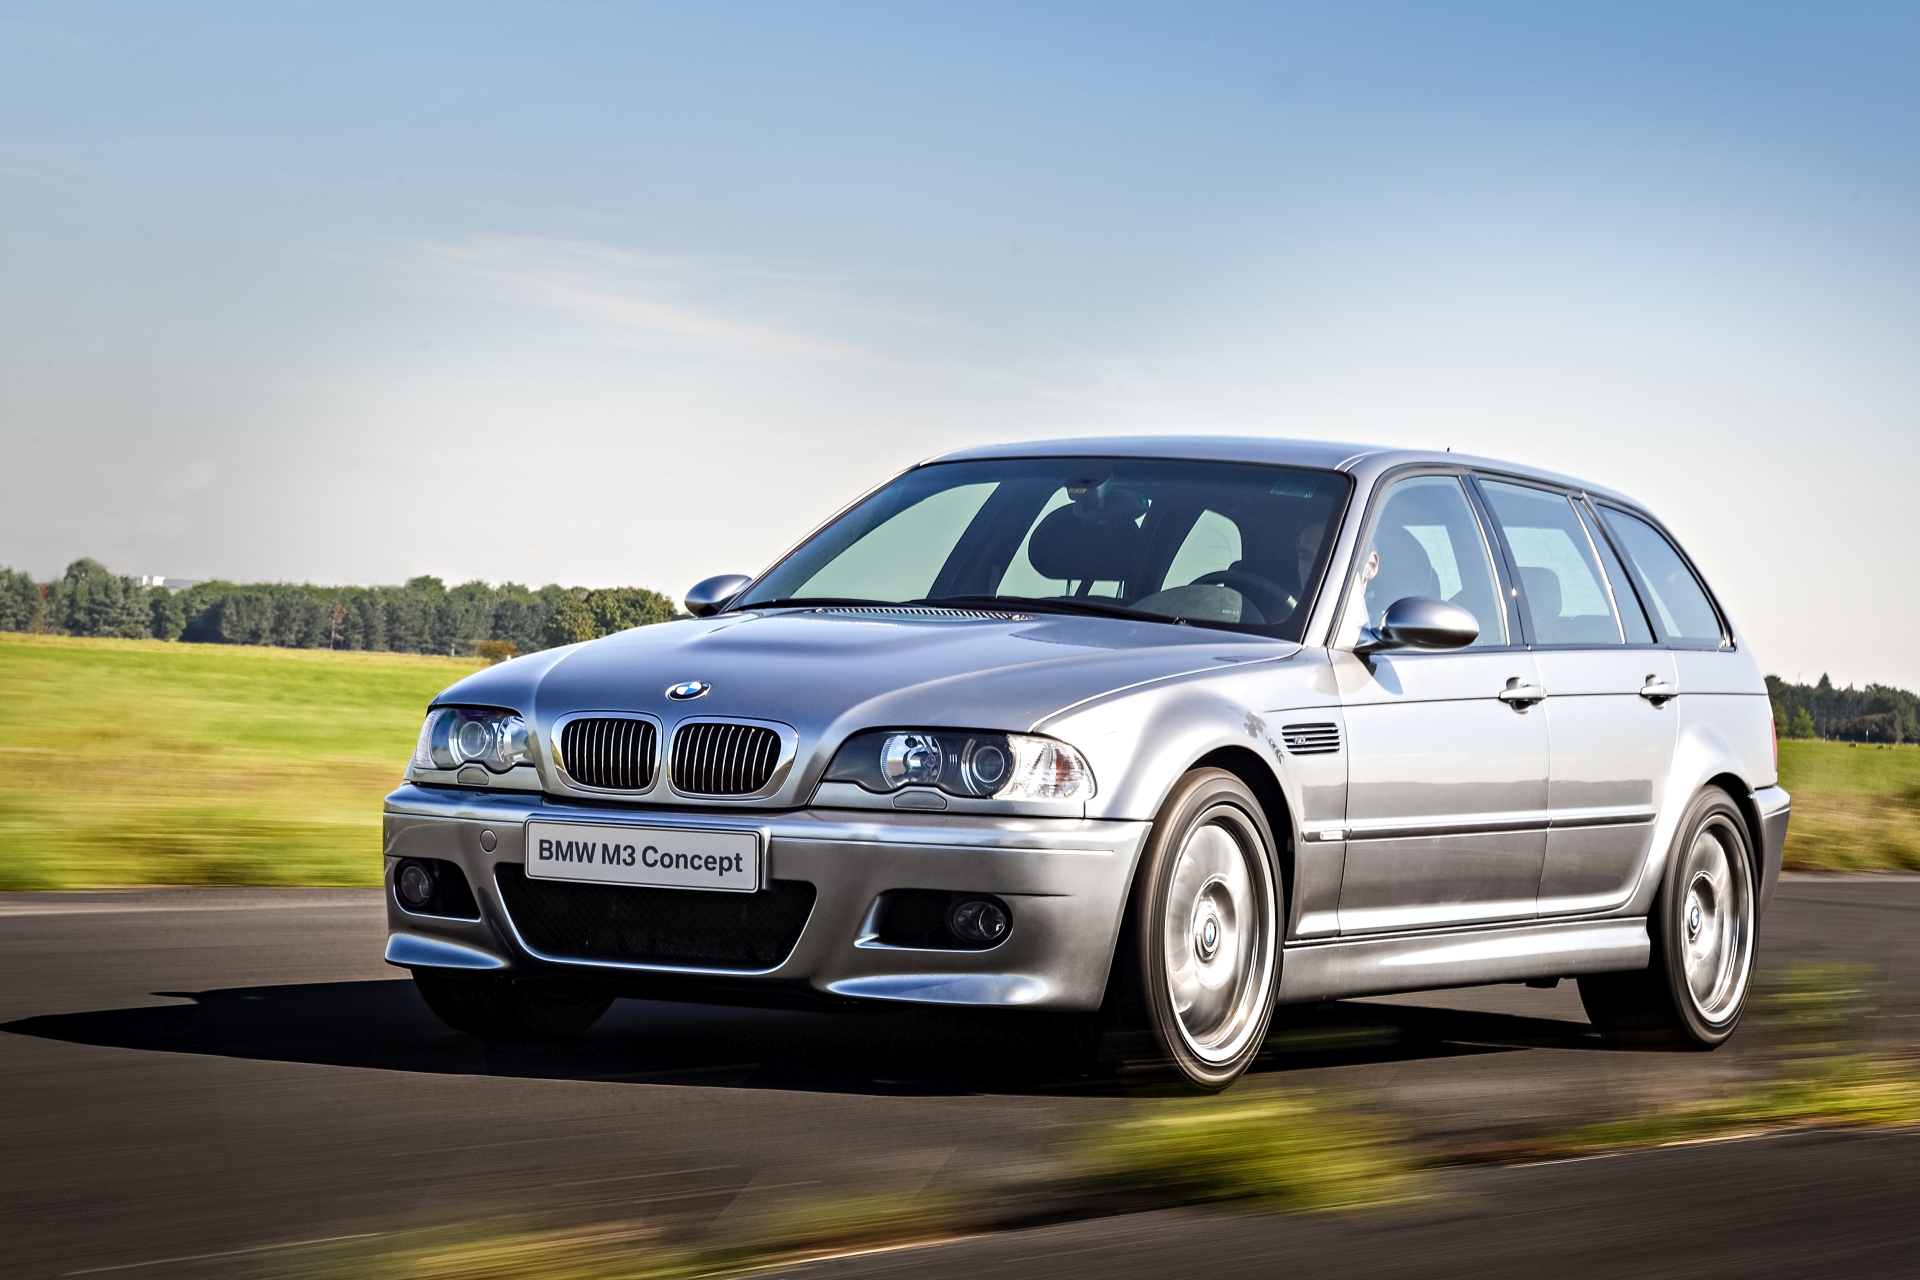 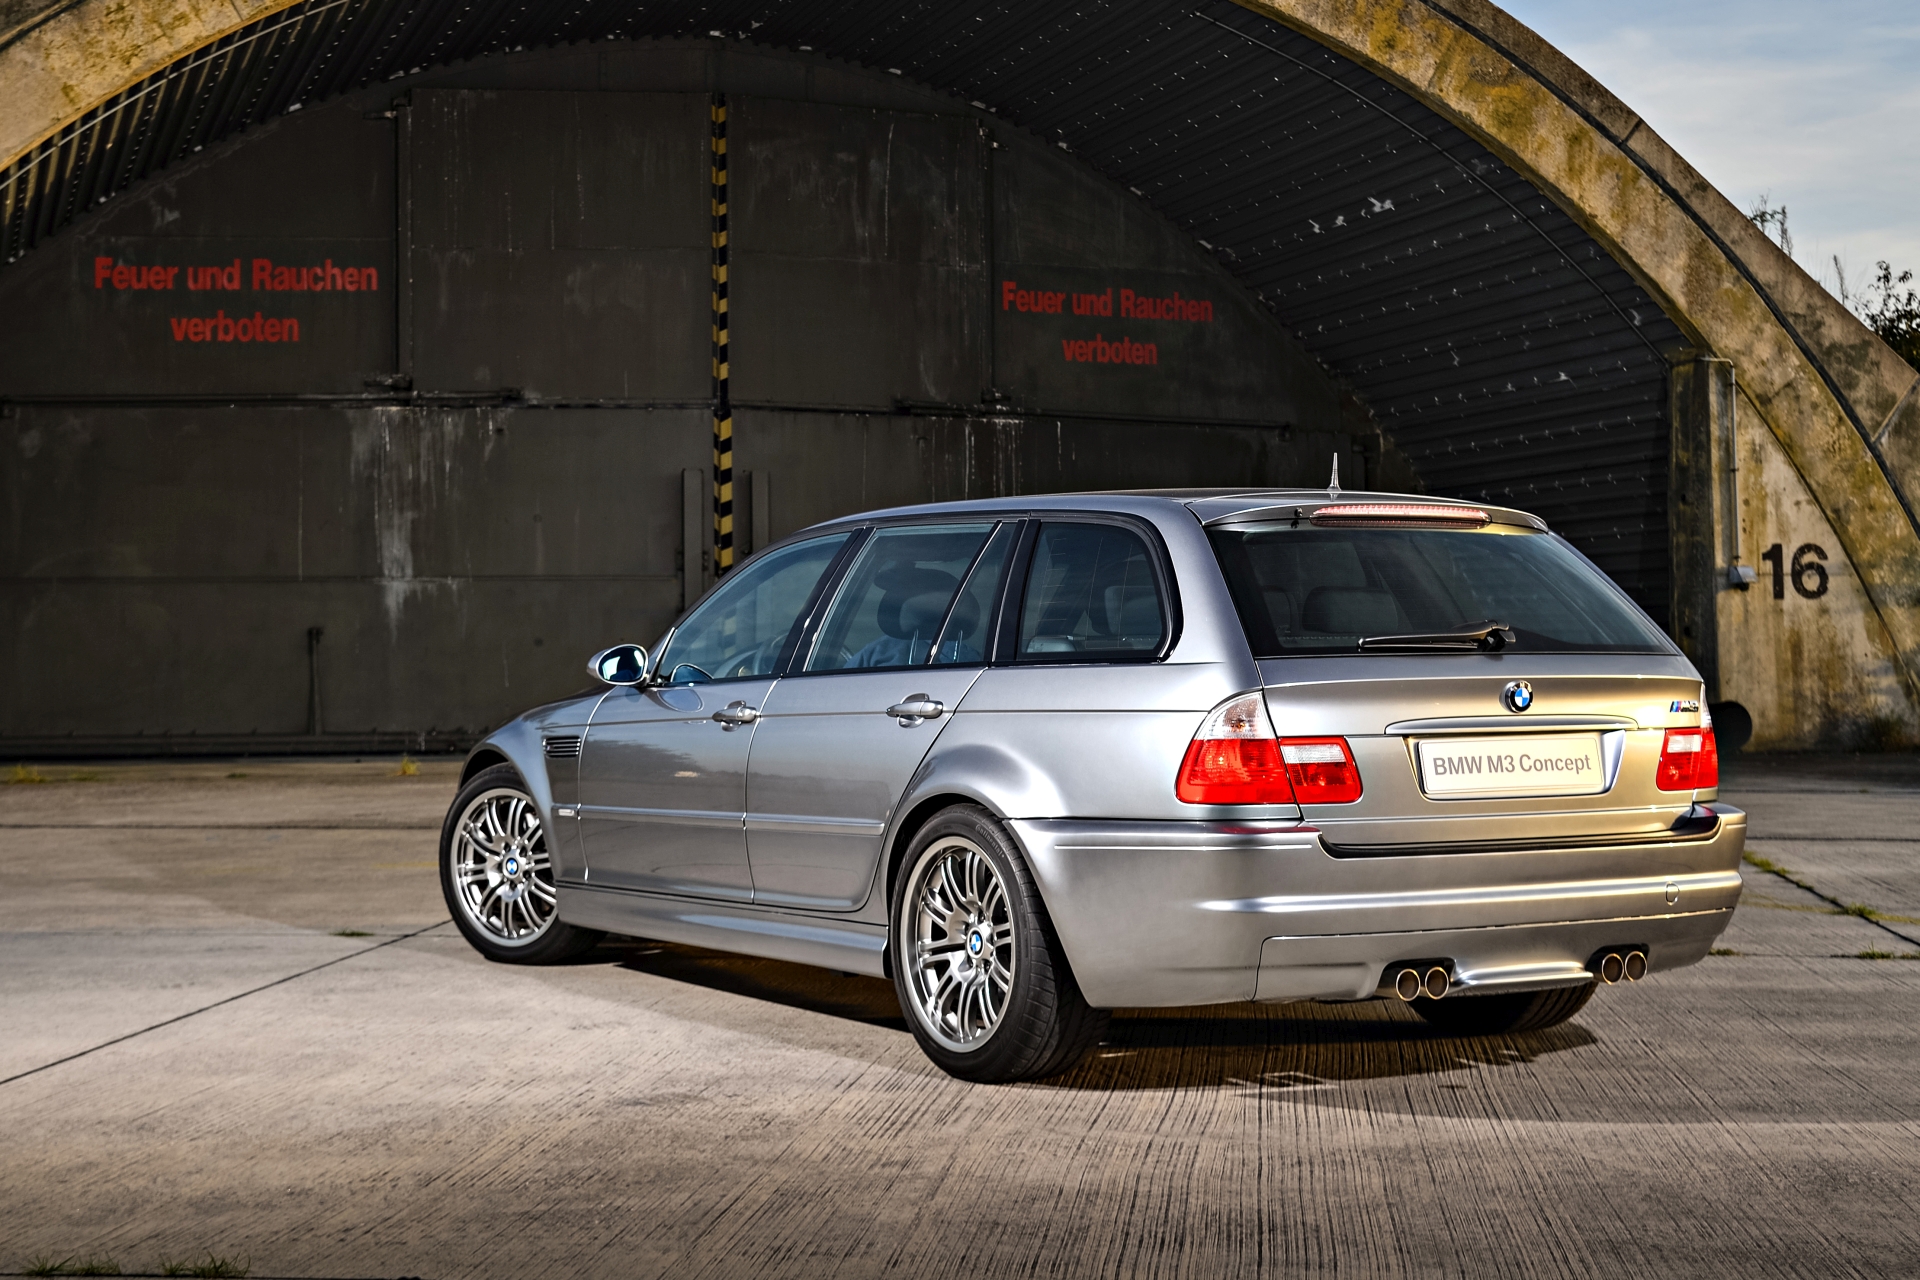  I used to dream of owning an E34 M5 Touring. With prices the way they are now for them however (£40k+!), I'm not so sure. I do still hanker after an E61 M5 Touring, but I don't want a car where the bills and fragility dominate the car experience  . Maybe one day mind you... I did almost buy an E36 M3 Touring off this very forum around 7 years ago. However, two things happened -At £2.7k, it wasn't cheap for an E36 back then, but cheap enough. So it went quickly -The insurance companies wanted £2.5k off me a year at the time. I could not justify buying it as a result. But then again, what could have been eh? Since I've helped with creating this one, at least I know what to do to make a Touring mind you.  |
| |
|
|
ChasR
RR Helper
motivation
Posts: 10,307
Club RR Member Number: 170
|
BMW E46 M3 : That's the ticketChasR
@chasr
Club Retro Rides Member 170
|
Feb 14, 2021 15:08:03 GMT
|
Statement of the Obvious, but submitted with your best interests in mind: find a way you’re sure about to verify that the BMW and Renault SRS components all talk to one another properly as a system: the air bags and seatbelt pretensioners, sensors and control unit. Maybe they’re all from the same vendor and that makes such substitutions plug & play? I’m sure you’re on top of it. This is always a great project to follow. John Very good point! There is nothing wrong with raising the concerns. It has to be welcomed when dealing with airbags. Pre-tensioner won't be a problem. They'll be the BMW ones on the car. The only 'foreign' SRS bit will be those airbags, which Recaro supplied to the seats for everyone, both what they sold to Renault and also to Recaro I believe. I am however, speaking to enquire about this to make sure that is the case. Recaro do sell a variety of things for the seats however, including -airbag emulation devices (i.e a resistor to go in place of the factory airbag plug, so no airbag would be used -airbag connection harnesses ; You can buy these seats new from Recaro with the airbag mine comes with  . It seems the OEMs didn't mess too much with them, which is refreshing. -Seat occupancy device (passenger side) ; most folks have recycled this from their old seats or used the emulation device (i.e the car thinks there is always a passenger on board). |
| |
Last Edit: Feb 14, 2021 15:10:46 GMT by ChasR
|
|
|
|
|
Feb 14, 2021 16:00:14 GMT
|
|
Those pictures of the M3 Touring, now that's just teasing !!😁😁😁
|
| |
Last Edit: Feb 14, 2021 16:00:48 GMT by Alpina99: Missing word
BMW E39 525i Sport
BMW E46 320d Sport Touring (now sold on.)
BMW E30 325 Touring (now sold on.)
BMW E30 320 Cabriolet (Project car - currently for sale.)
|
|
|
|
|
Feb 14, 2021 19:33:49 GMT
|
I have fitted Recaro Pole Positions in mine but rather than use Recaro or other generic mounts i went with Brey krause sliders, basically you retain the standard BMW electric slider (manual sliders are an option) so you have fixed back buckets but can move them forwards or back for different drivers or to let skinny friends in the back. Aftermarket slider kits are available although using the OE kit allows a lot more travel apparently. Can't comment if these will work with CSs though www.bkauto.com/R_9222_Seat_Mounts_for_OEM_Sliders_p/r-9222.htm |
| |
72 MGB GT
88 Daimler Double Six
89 Rover Mini
91 Nissan Figaro
95 Lotus Esprit S4S
18 Discovery
|
|
ChasR
RR Helper
motivation
Posts: 10,307
Club RR Member Number: 170
|
BMW E46 M3 : That's the ticketChasR
@chasr
Club Retro Rides Member 170
|
Feb 21, 2021 20:38:44 GMT
|
I have fitted Recaro Pole Positions in mine but rather than use Recaro or other generic mounts i went with Brey krause sliders, basically you retain the standard BMW electric slider (manual sliders are an option) so you have fixed back buckets but can move them forwards or back for different drivers or to let skinny friends in the back. Aftermarket slider kits are available although using the OE kit allows a lot more travel apparently. Can't comment if these will work with CSs though www.bkauto.com/R_9222_Seat_Mounts_for_OEM_Sliders_p/r-9222.htmThe more I think about, the more I am debating fitting the Recaro bases  . That reminds me, I need to get a quote for grey covers  . That would not be for this weekend however. Oh no. This weekend would be for Mondeo tinkering, but moreso to hopefully make this M3 drivable again. Yup, not even roadworthy, since its MOT has now ran out. No, I hadn't forgot about this car. If anything, I wanted it back out on the road! So, what would I do? I'd do what I thought I knew how to do. Bend pipes! Actually, that is true, I like to think that I can do that. Other parts? Well, I'll let you decide at the end. Firstly, I got the remains of the old brake pipe off. It must have taken me almost an hour to get the old pipe off! The union at the front was terrible inaccessible, and to top things off, despite it not being rusty, it was amazingly tight! It really was a struggle to undo the pipe a 1/4 of a turn at a time with a flare nut spanner in a tight transmission tunnel. Eventually, I could liberate the pipe from the car! Now, the fun could begin! It started off so well. I got the final brake pipe out and put it next to the other pipe in order to start bending it. Lovely stuff! 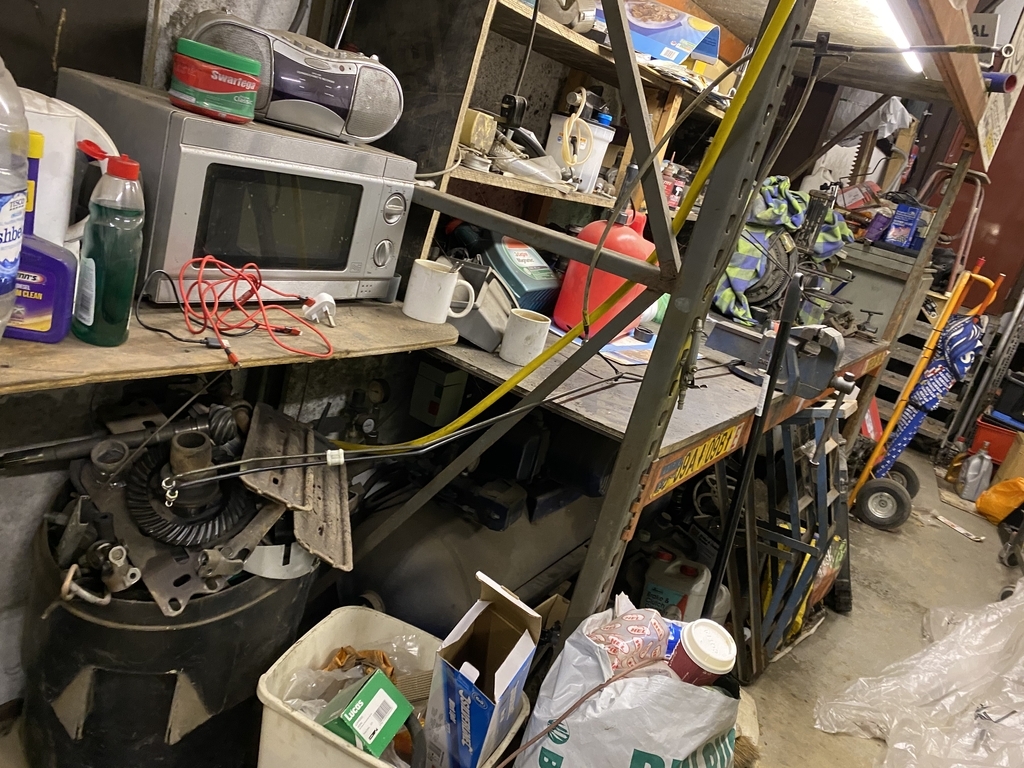 Yup, it was looking very good 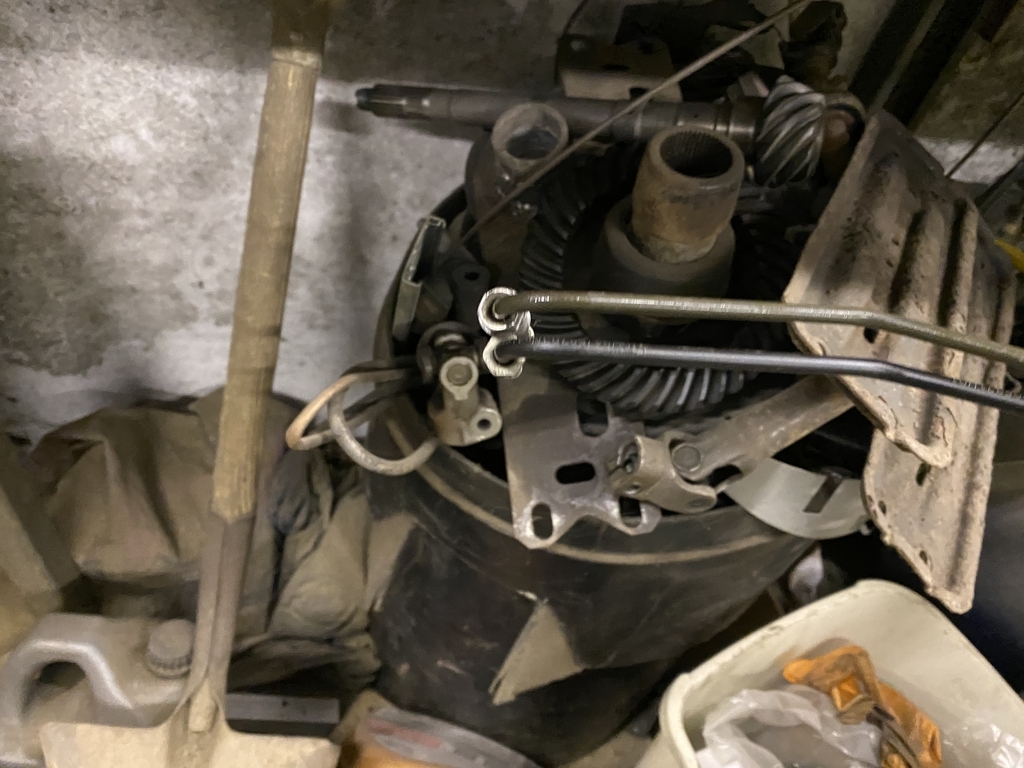 I even figured out an ingenious way to clamp the pipes! One of these methods will be very familiar to the RoadKill fans here  . 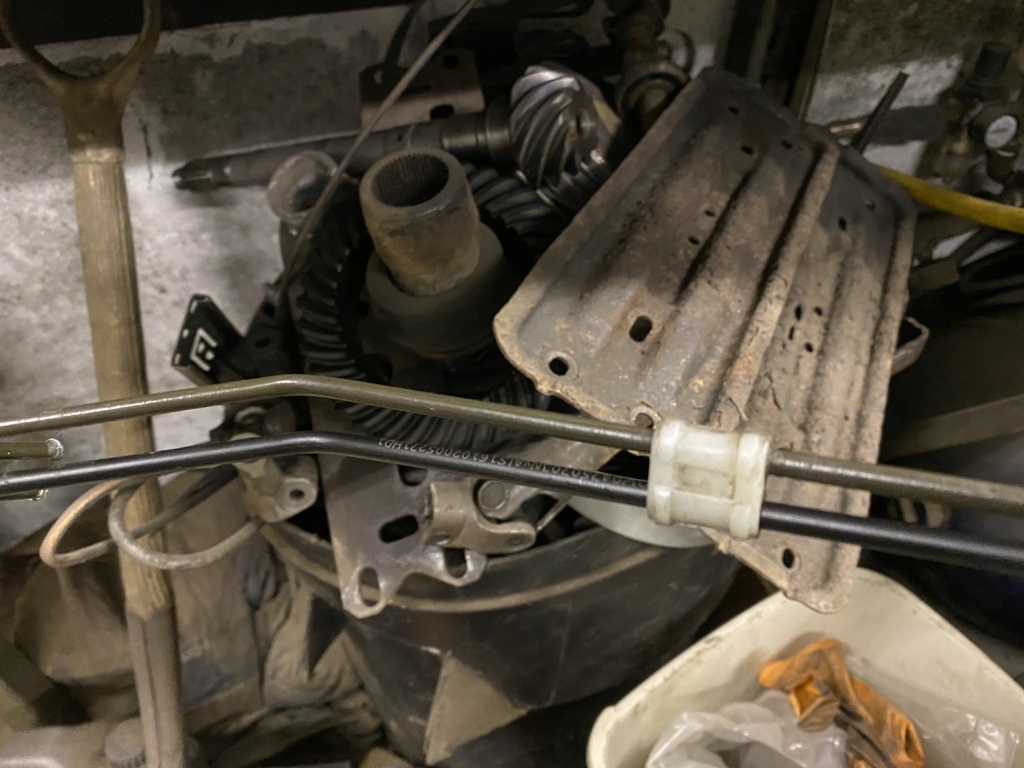 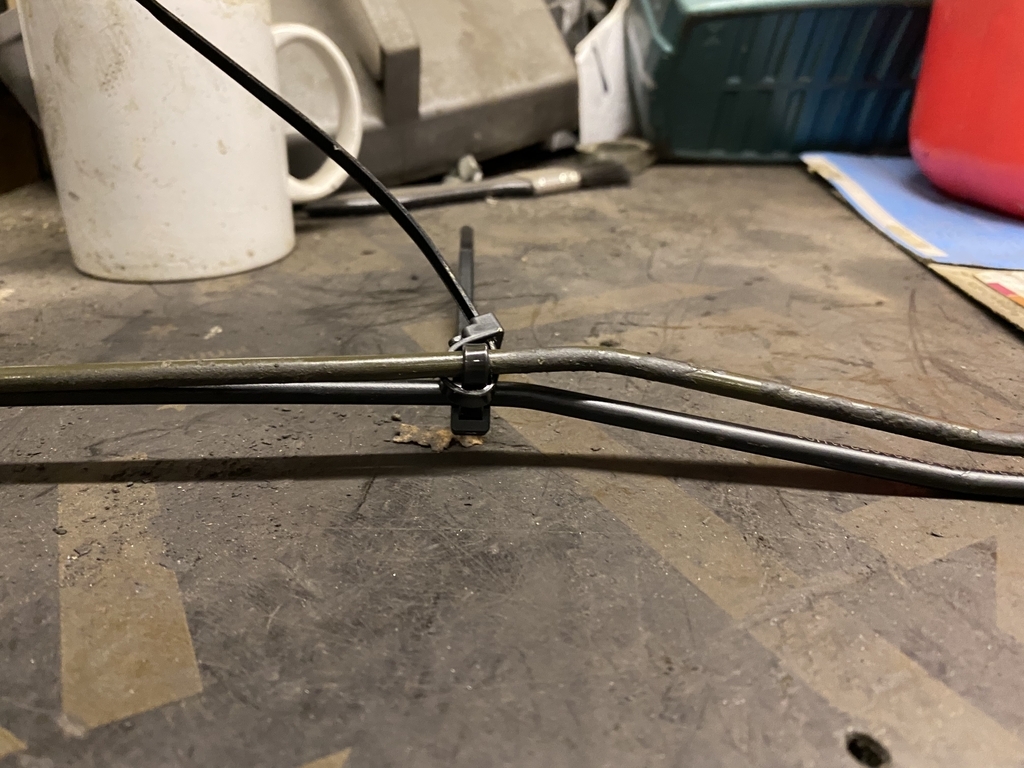 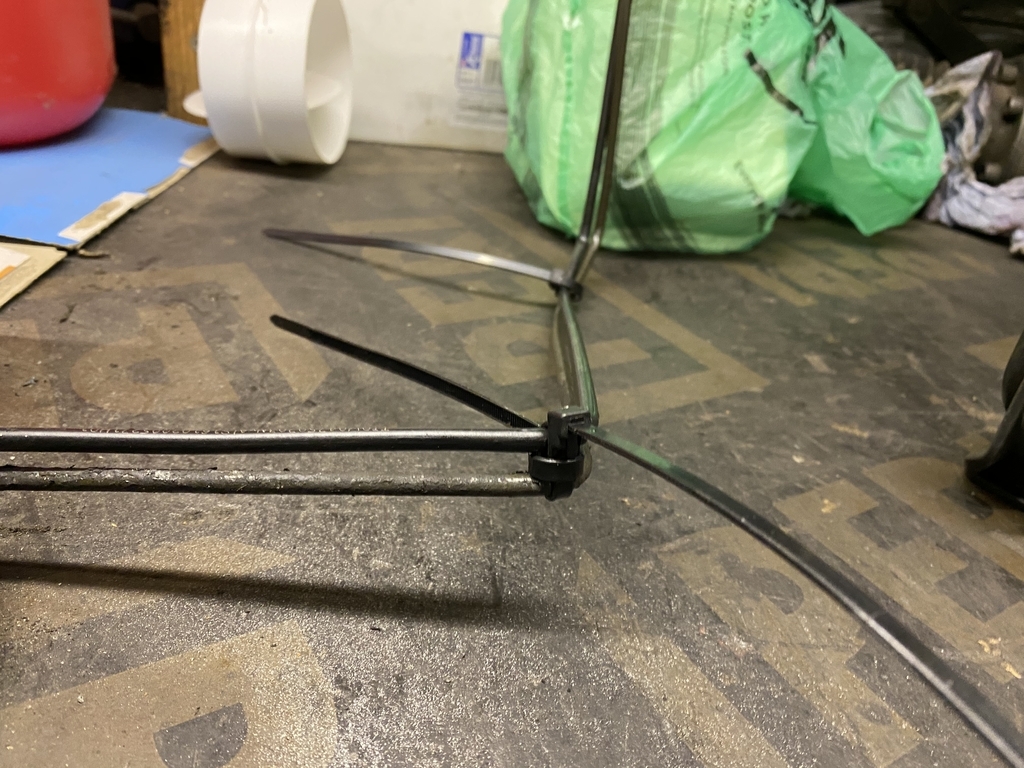 One way was to use the factory clip to keep the two hoses together, Quite effective but they did occasionally pop out. Yup, the infamous zip ties came in handy! These were re-usable ones, which I deliberately bought. Instead of using it to hold spark plug wires in place, I was using them to hold the pipes in place! With enough tension, it worked well! I'm sure there is a better way to bend the pipes in place, so as to replicate the original pipe, so I'm all ears for alternatives! Eventually, I had something which looked similar to a factory pipe. Just less rusty! 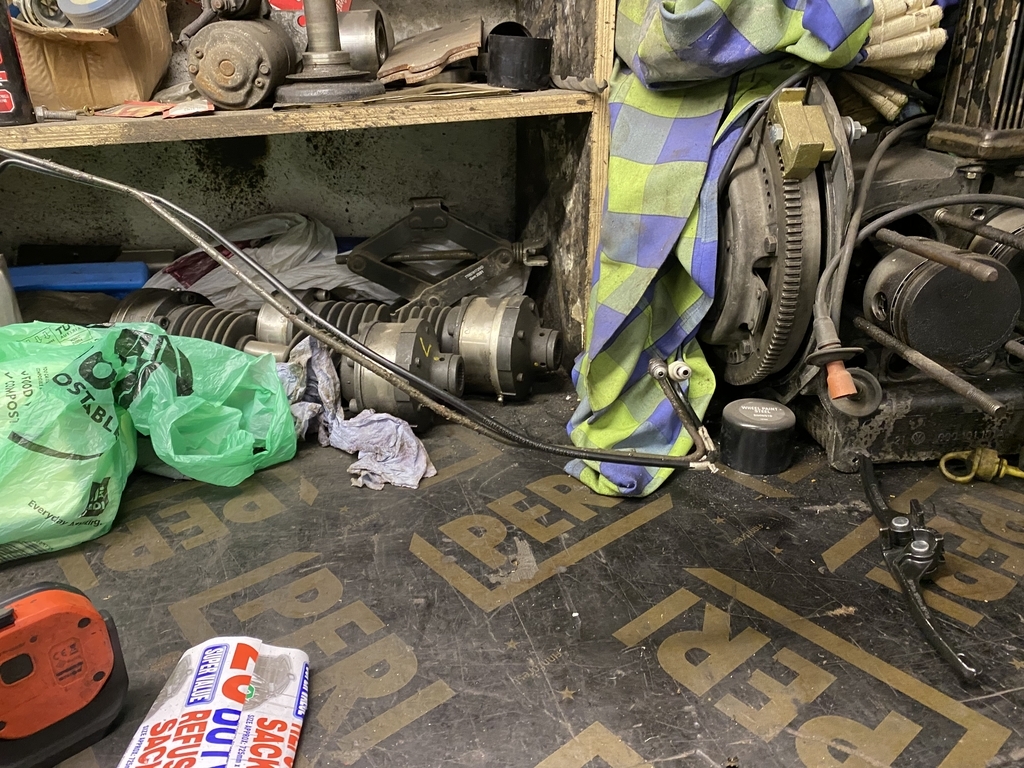 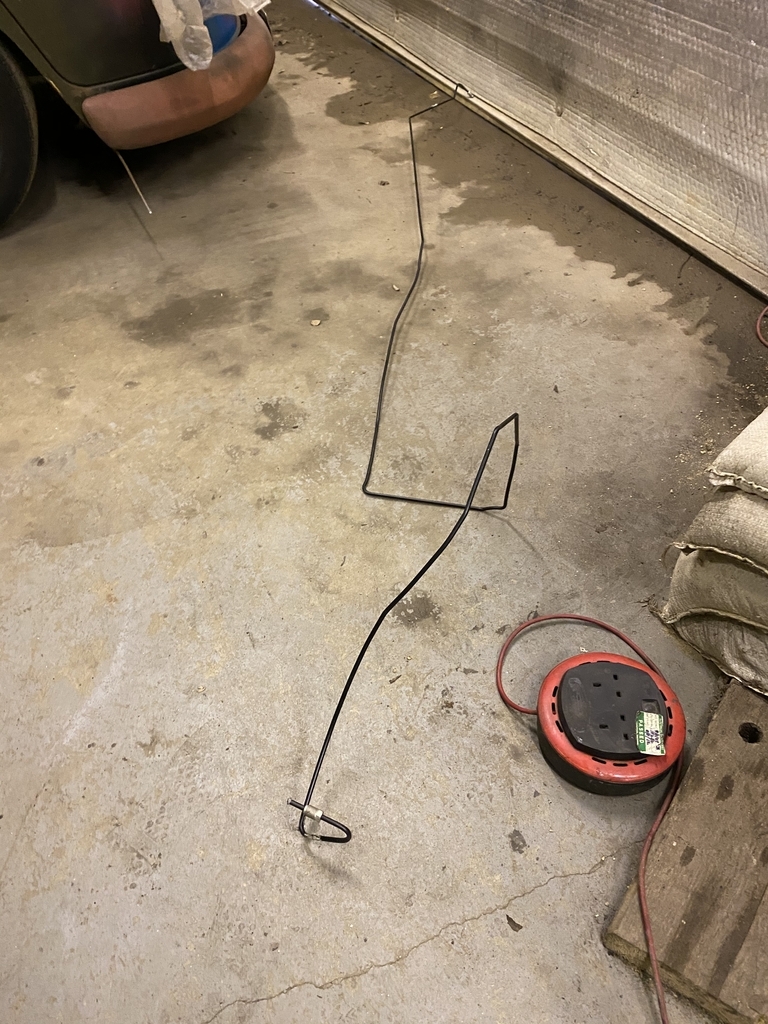 Just look at the final bend! So right in how I managed to bend it spot on so as to replicate the factory pipe! It was very wrong, and some will see how it was so! 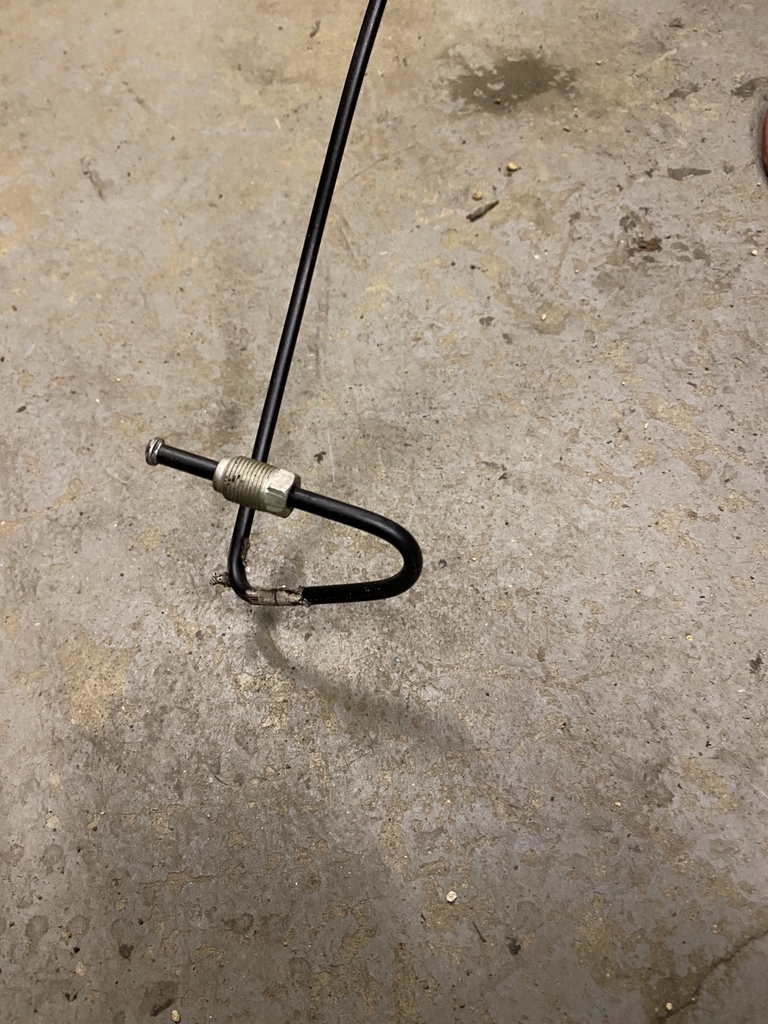 At this point, I was feeling pretty chuffed with the result! So much so, that I decided to tackle the final lot of the braking system. The rear brake lines. They can be fiddly to remove on the car. However, it seems BMW thought of this problem, long where BL insisted that people would just struggle with shoddy design. There was no hint of "If my bucket had a hole in it, I'd patch it up with chewing gum" mentality here! It's what I love about some of these BMWs. There is real thought into how things are put together. That collaboration is apparent in the design. 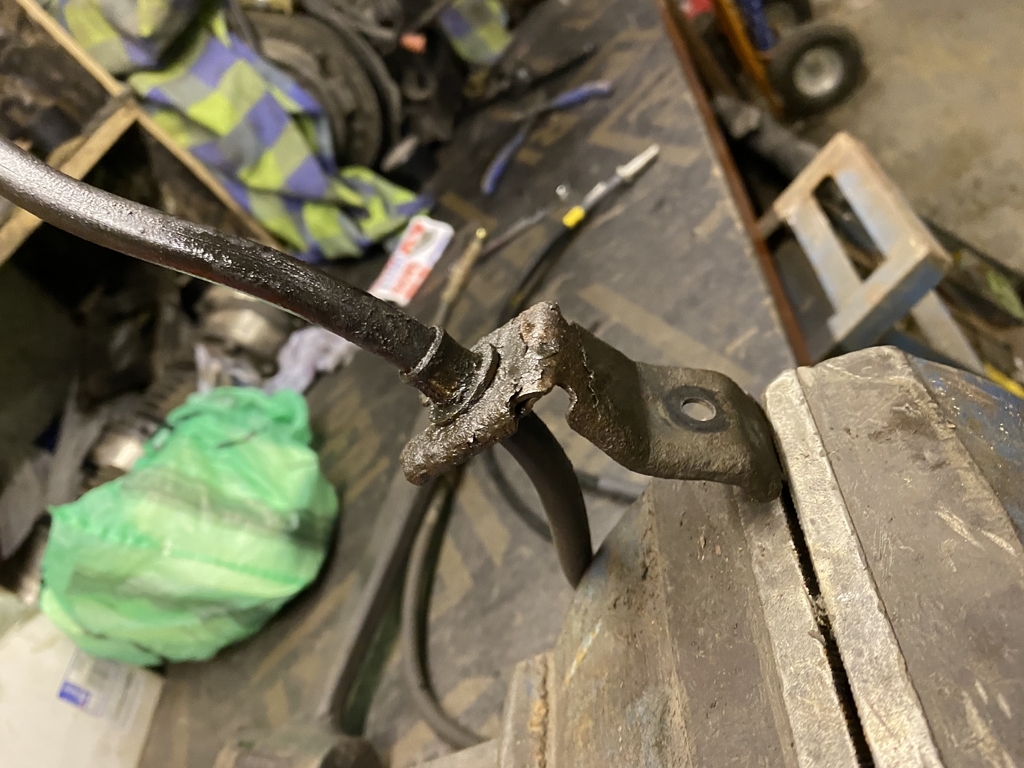 It's a bit of an excessive bracket isn't it? Howevr, the retaining clip would be much easier to remove in the vice as opposed to on the car. You can guess how I've previously removed these! Oh, what are those shiny things? 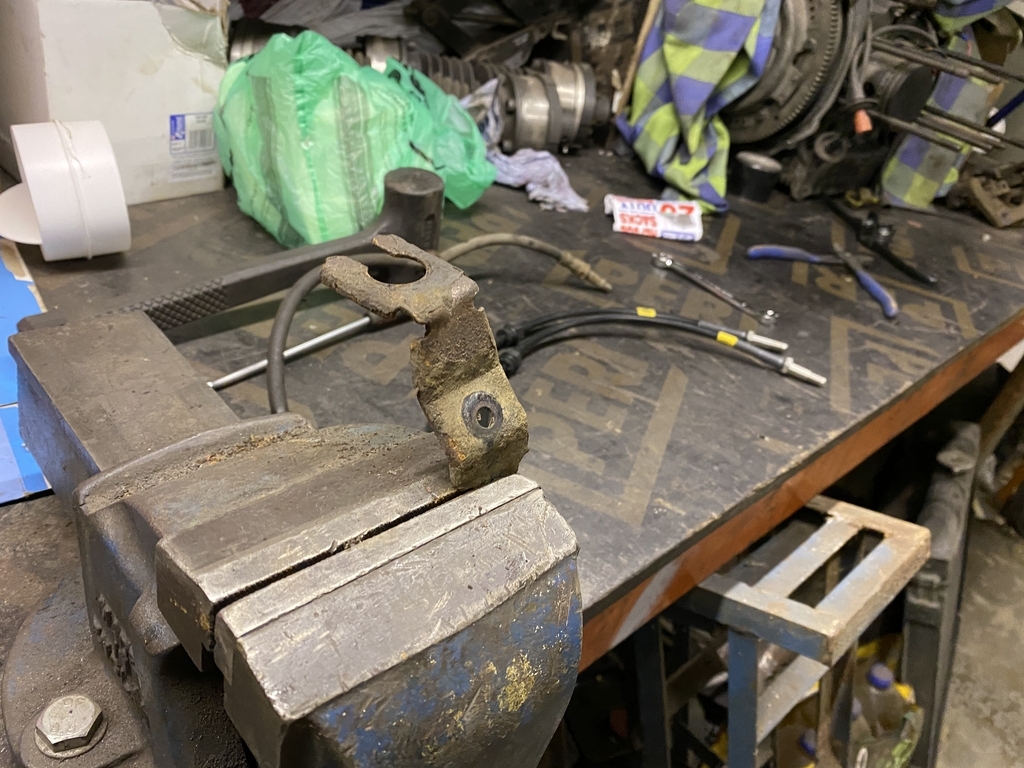 Yup, I'm fitting on the final parts of the braided brake lines. I plan to assemble the lines on the bench. with the clips and bracket in place. 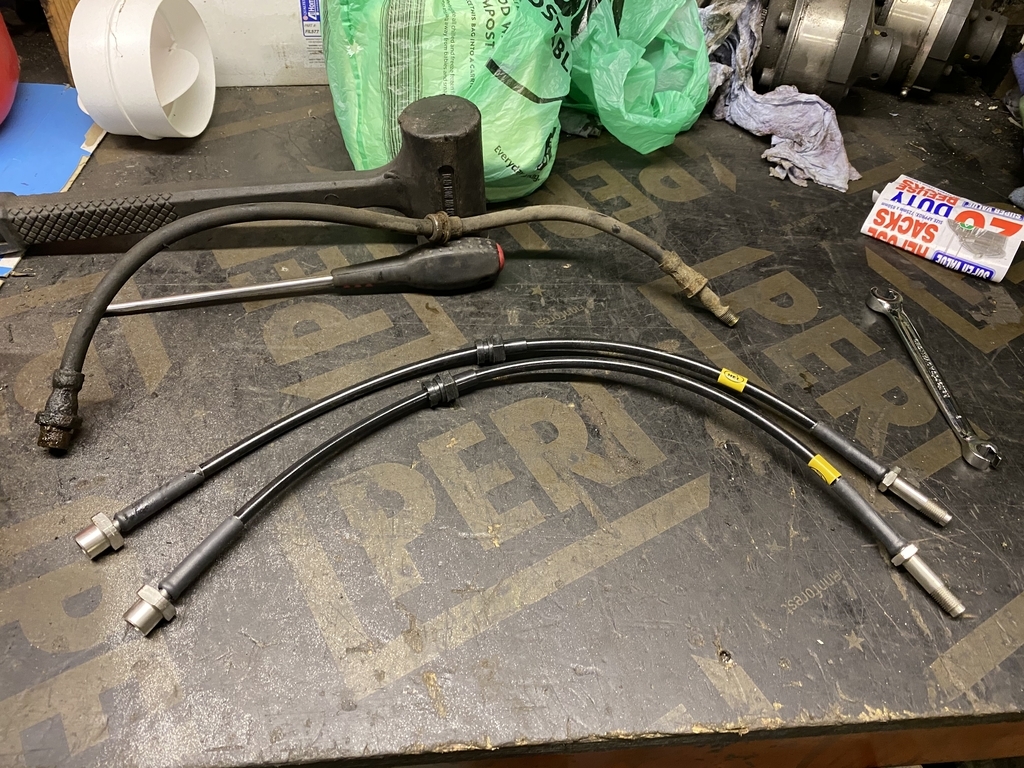 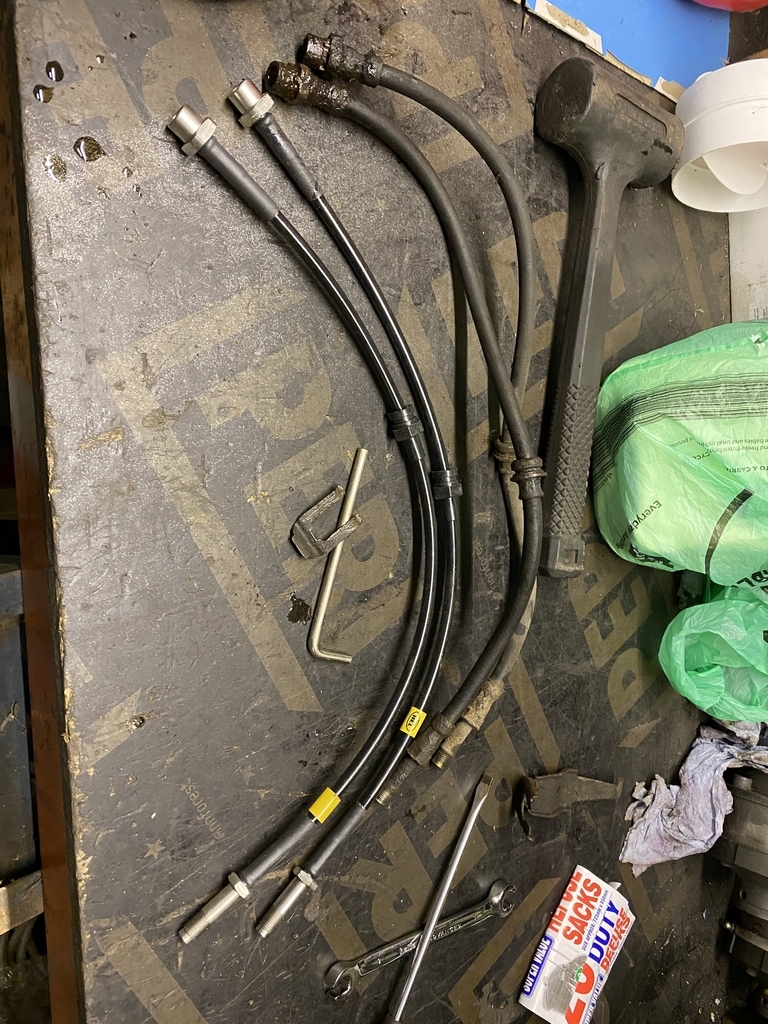 Yup, those old brake pipes might pass a UK MOT, but they'd be a TuV inspector's nightmare! However, to make that nightmare a reality, I'd need to be able to drive the car to a TuV centre! That would not happen today. There I was, in the groove and getting things back together but the brake pipe was not screwing into the brake pipe up front. It was odd! After a few minutes, I felt something wasn't right. Why? Remember that shot where I said that bend looked so right. Well, that picture is telling! I went to try a spare pipe union on the pipe. The front union to the DSC unit is larger than the one at the back, which goes into the flexi. Yup, I put the larger union at the back, so not even my new Flexis could go on! WHAT A TOOL! No, not the brake pipe tool! Me! Yes, I know it's an easy mistake to make, but it really annoyed me! But there was no point in getting wound up. What's done is done. I'm debating straightening the old pipe out, but for how little they cost, I'm probably going to bite the bullet and order a new one. A shame but it's the way things happen I guess. Still, at least I have a lovely looking, but useless brake pipe eh? 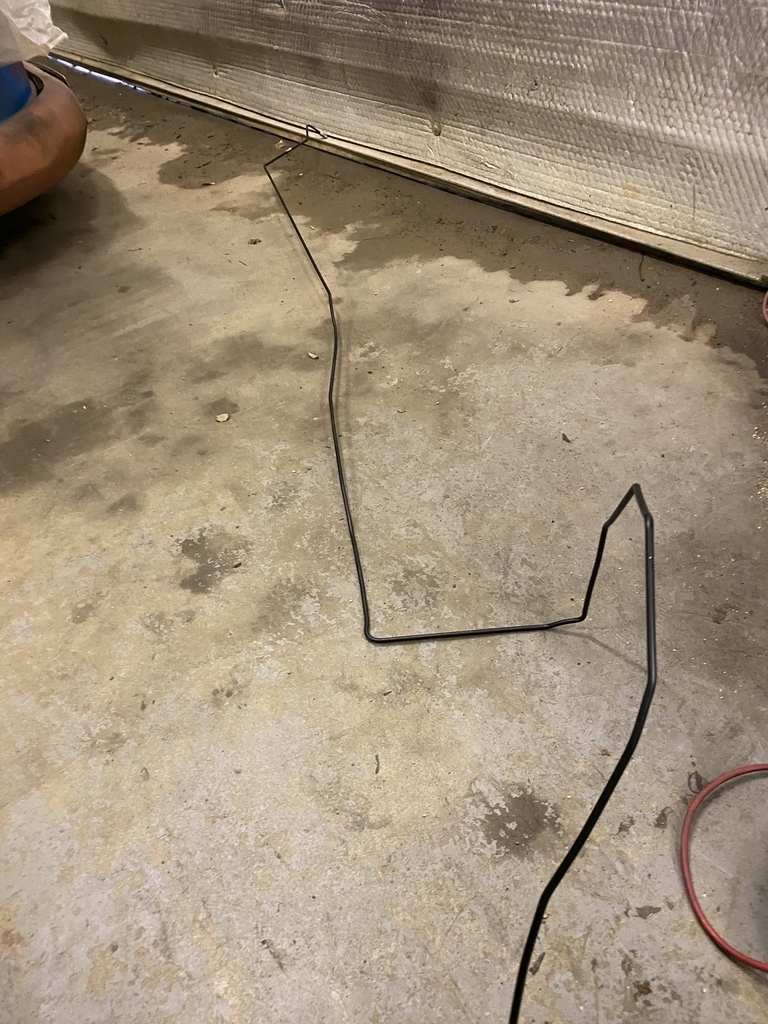 |
| |
|
|
|
|


 .
.


