Carlosfandango.
Part of things
  Now with added Suffix B Range Rover classic - another bucket list car acquired.
Posts: 145 
|
|
|
|
|
That's some crack in fairness..
Makes me somewhat uncomfortable looking at it but irresistible all the same.
Great progress otherwise man. Keep up the good work.
CFD
|
| |
1966 Fiat 1500 fast road/race conversion
1967 Porsche 912
1968 Fiat 124 Spider
1973 Range Rover Suffix B
1993 Series one Discovery 200TDI
1997 Jaguar XJ6 3.2 sport
2001 P38 Range Rover 2.5 TD
Brace of Triumph bikes
|
|
|
|
ivangt6
Part of things
 
Posts: 776
Club RR Member Number: 132
|
Range Rover Classicivangt6
@ivangt6
Club Retro Rides Member 132
|
Jan 11, 2018 20:19:16 GMT
|
|
Can anyone recommend a good seam sealer? The stuff I've used before cracks as it dries
|
| |
1979 Mini 1000
1972 Triumph GT6
2007 VW Golf GTi
1979 VW T25 Leisuredrive
1988 Range Rover Vogue SE
|
|
ivangt6
Part of things
 
Posts: 776
Club RR Member Number: 132
|
Range Rover Classicivangt6
@ivangt6
Club Retro Rides Member 132
|
Jan 11, 2018 20:41:54 GMT
|
|
I'm looking at options for painting and coating the work I've done so far. I have some 3M shutz to go over the top. I need some seam sealer and I'm toying with either etch primer and red oxide or a buzzweld all in one paint. Not sure wether to stonechip under the arches or wether the Shutz will be up to the job too. Hmmm
|
| |
Last Edit: Jan 11, 2018 20:42:28 GMT by ivangt6
1979 Mini 1000
1972 Triumph GT6
2007 VW Golf GTi
1979 VW T25 Leisuredrive
1988 Range Rover Vogue SE
|
|
|
|
|
Jan 11, 2018 20:47:19 GMT
|
|
Have a look through the @grumpynorthener threads. He mentions all sorts of stuff.
|
| |
|
|
pegwie
Part of things
 
Posts: 95 
|
|
|
|
|
Epoxy mastic instead of etch primer? Great stuff, just make sure the metal is roughed up and not 'polished' or else it doesn't like to stick. The farmer down the road from me when I was growing up used to have one of these, apparently it stayed fairly solid purely because there was so much dried on crud stuck to the bottom of it, protecting it from the elements. That might be an option? Haha
|
| |
|
|
|
|
|
|
|
|
I've had good experience with the Buzzweld stuff.
Customer support is pretty solid too.
|
| |
|
|
|
|
|
|
|
I'm looking at options for painting and coating the work I've done so far. I have some 3M shutz to go over the top. I need some seam sealer and I'm toying with either etch primer and red oxide or a buzzweld all in one paint. Not sure wether to stonechip under the arches or wether the Shutz will be up to the job too. Hmmm Seam sealer - whatever you use it needs to be intended for automotive use - it's pointless using off the shelf stuff that's a one stop everything from the local DIY store, secondly and from many years of experience I would avoid any epoxy mastics - these are primarily manufactured for industrial & marine use with most of them setting to form a very hard compound - sounds good but is useless where a vehicles component parts expand / contract through weather conditions & heat generated by engines / mechanical parts / exhausts / brakes etc where the metal around them is constantly effected by hot / cold conditions - net result is that epoxy cracks with the cracks forming a capillary action which allows water to seep behind it - we are only talking very small amounts but then again you only need small amounts to form / harbour rust. Personally whilst 3M do some good products - Shultz for corrosion protection is not one of them (nor is Waxoil come to that although not a 3M product) - I can highly recommend the Dinitrol range which I have been using for decades and has been used on all of my restorations without issue. Their 401 Plastkitt seam sealer is brushable and will sort your sealing problems out - I would recommend applying it over the top of a good quality etching primer (aerosol variety is fine) for the arches just clean them up and ensure that they are dry prior to applying Dinitrol's 4941 underbody wax - this is a high quality underseal type product, self healing and has excellent proven anti corrosion properties - it can be applied with a Shultz type gun and gives an excellent OE factory finish (It's used has OE by many vehicle manufactures worldwide) - For any cavities / box sections I would recommend Dinitrol ML cavity wax - again can be applied with a Shultz gun with a lance attached - it can be a messy process but so much worth doing - Dinitrol also do a 'Penetrant' which is a clear cavity way - ideal for door shuts / apertures around hinge boxes & visual areas of the engine bay - I use the aerosol version of this - link to the Dinitrol website: www.dinitroldirect.com/They do online ordering etc - £75 - £150 spent at this stage along with a bit of time on rustproofing is very well spent in preserving the life of a vehicle and it adds value too should you ever move it on. If you need any further advice on anti corrosion / paint / body related subjects just post up here or pm me - Chris |
| |
Last Edit: Jan 12, 2018 8:21:46 GMT by Deleted
|
|
|
|
|
Jan 12, 2018 10:41:54 GMT
|
|
I have used epoxy primer followed by a good quality automotive seam sealer then a black enamel topcoat (Teamac) and finally stone chip in the vulnerable areas.
I have always used Waxoyl thinned with clean 20/50 engine oil applied every 2 or 3 years and although I am sure the more modern alternatives work very well I have never had any problems, The TR7 was done this way 23 years ago and only now only after 100,000 miles of all year round use have a few small areas of rust appeared (and these are the few original seams I did not replace/ repair back then).
|
| |
|
|
düdo
Part of things
  wide as house
Posts: 770
|
|
Jan 12, 2018 17:25:05 GMT
|
Can anyone recommend a good seam sealer? The stuff I've used before cracks as it dries . Made in Switzerland. The best. End of story. |
| |
|
|
ivangt6
Part of things
 
Posts: 776
Club RR Member Number: 132
|
Range Rover Classicivangt6
@ivangt6
Club Retro Rides Member 132
|
Jan 12, 2018 17:36:02 GMT
|
I'm looking at options for painting and coating the work I've done so far. I have some 3M shutz to go over the top. I need some seam sealer and I'm toying with either etch primer and red oxide or a buzzweld all in one paint. Not sure wether to stonechip under the arches or wether the Shutz will be up to the job too. Hmmm Seam sealer - whatever you use it needs to be intended for automotive use - it's pointless using off the shelf stuff that's a one stop everything from the local DIY store, secondly and from many years of experience I would avoid any epoxy mastics - these are primarily manufactured for industrial & marine use with most of them setting to form a very hard compound - sounds good but is useless where a vehicles component parts expand / contract through weather conditions & heat generated by engines / mechanical parts / exhausts / brakes etc where the metal around them is constantly effected by hot / cold conditions - net result is that epoxy cracks with the cracks forming a capillary action which allows water to seep behind it - we are only talking very small amounts but then again you only need small amounts to form / harbour rust. Personally whilst 3M do some good products - Shultz for corrosion protection is not one of them (nor is Waxoil come to that although not a 3M product) - I can highly recommend the Dinitrol range which I have been using for decades and has been used on all of my restorations without issue. Their 401 Plastkitt seam sealer is brushable and will sort your sealing problems out - I would recommend applying it over the top of a good quality etching primer (aerosol variety is fine) for the arches just clean them up and ensure that they are dry prior to applying Dinitrol's 4941 underbody wax - this is a high quality underseal type product, self healing and has excellent proven anti corrosion properties - it can be applied with a Shultz type gun and gives an excellent OE factory finish (It's used has OE by many vehicle manufactures worldwide) - For any cavities / box sections I would recommend Dinitrol ML cavity wax - again can be applied with a Shultz gun with a lance attached - it can be a messy process but so much worth doing - Dinitrol also do a 'Penetrant' which is a clear cavity way - ideal for door shuts / apertures around hinge boxes & visual areas of the engine bay - I use the aerosol version of this - link to the Dinitrol website: www.dinitroldirect.com/They do online ordering etc - £75 - £150 spent at this stage along with a bit of time on rustproofing is very well spent in preserving the life of a vehicle and it adds value too should you ever move it on. If you need any further advice on anti corrosion / paint / body related subjects just post up here or pm me - Chris Thanks for all the advice, tips and wisdom everyone. I've had a good look over the Dinitrol website now and I think I have some sort of plan. @grumpynorthener I bought the 3M Shutz partly for the sound deadening characteristics as I've binned all the undercarpet foam that was harbouring so much moisture. I think I'll still use it under the floorpan where rust isn't so much of an issue on this car, although I'll make sure I give it a good going over with some Dinitrol 3125. So the plan is to use Dinitrol 401 Plastkitt seam sealer on the seams, Then I'll coat all the bare metal with some etch primer followed by some red oxide. Areas subject to tyre spray I'll put on a layer of stonechip, Gravitex for the moment until it runs out, and then the whole lot will get Dinitrol 4941(A thick OEM looking undercoating) followed by 3125(a thin brown wax). 3125 will also be sprayed into cavities. If anyone sees any holes in the plan, feel free to chip in. I want to get this right, I don't want to be revisiting any corrosion problems on this down the line. It needs to be daily driver used in all conditions. Bonus pic of the Disco from today 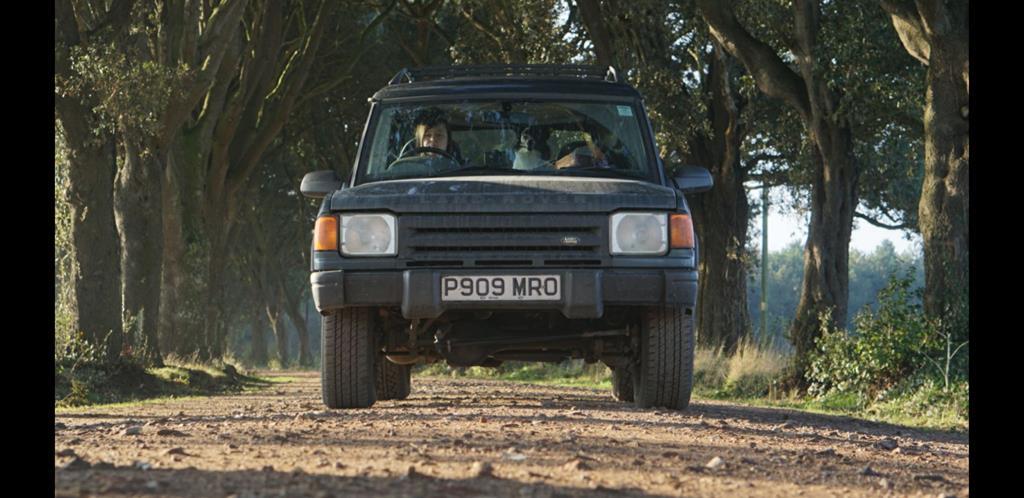 I don't really want to get rid of this bus, but needs must. Am currently tarting it up a bit for some pictures and then its going up for sale  |
| |
Last Edit: Jan 12, 2018 17:37:50 GMT by ivangt6
1979 Mini 1000
1972 Triumph GT6
2007 VW Golf GTi
1979 VW T25 Leisuredrive
1988 Range Rover Vogue SE
|
|
|
|
|
|
|
|
|
|
The 4941 will be really all you need on the arches providing you have prepared them correctly - no need to put the stone chip on first - generally factory applications equate to etch prime, seams sealed & then 4941 - two coats of that and you will be fine - its kept everything from getting to the steelwork on my Rover for the last 20 years and it still looks good when any road spray or debris is washed off it
|
| |
|
|
ivangt6
Part of things
 
Posts: 776
Club RR Member Number: 132
|
Range Rover Classicivangt6
@ivangt6
Club Retro Rides Member 132
|
Jan 19, 2018 19:17:53 GMT
|
Disco up for sale  Will miss this one once its gone. www.ebay.co.uk/itm/LAND-ROVER-DISCOVERY-1-300-3-9i-V8-XS-MANUAL-4x4/273032605768?hash=item3f9202f048:g:4UUAAOSw-RFaYizZAlso in the for sale section Last nights efforts 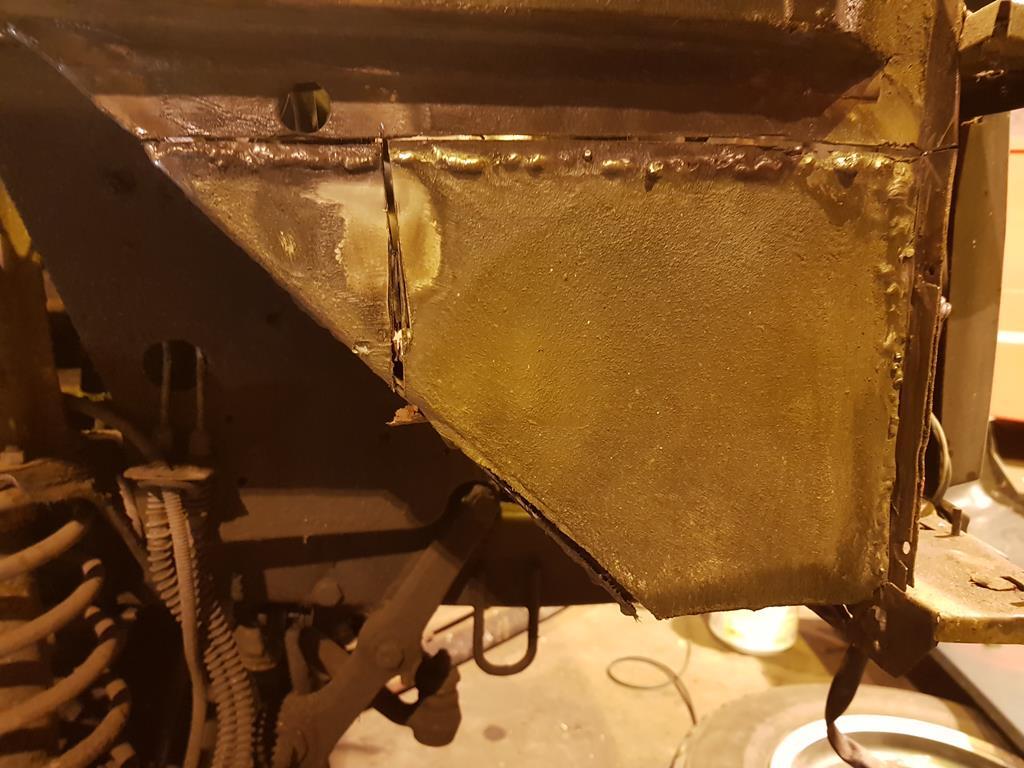 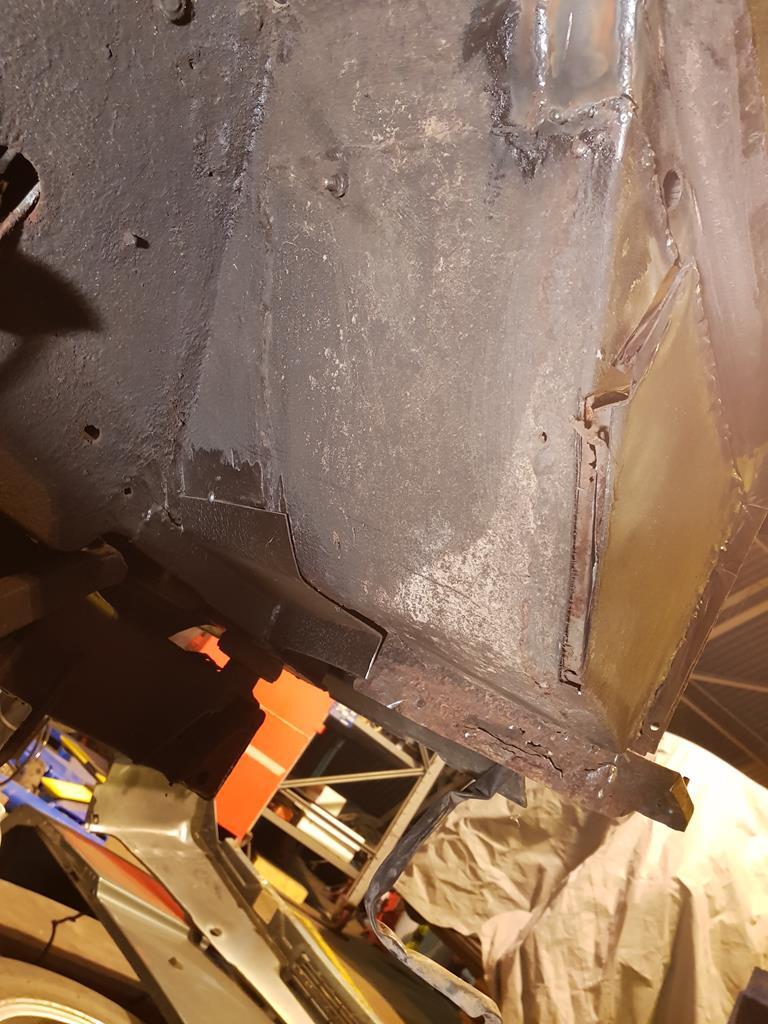 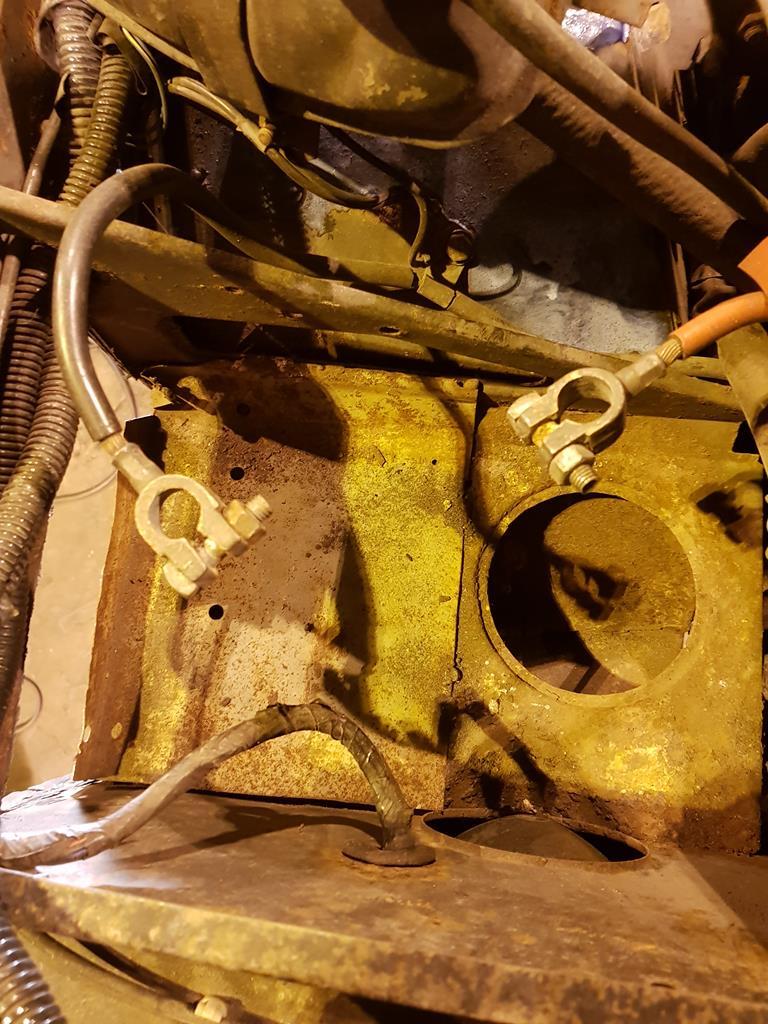 Very suspicious looking isn't it. It was solid enough but I couldn't bring myself to leave it there So out with the grinder 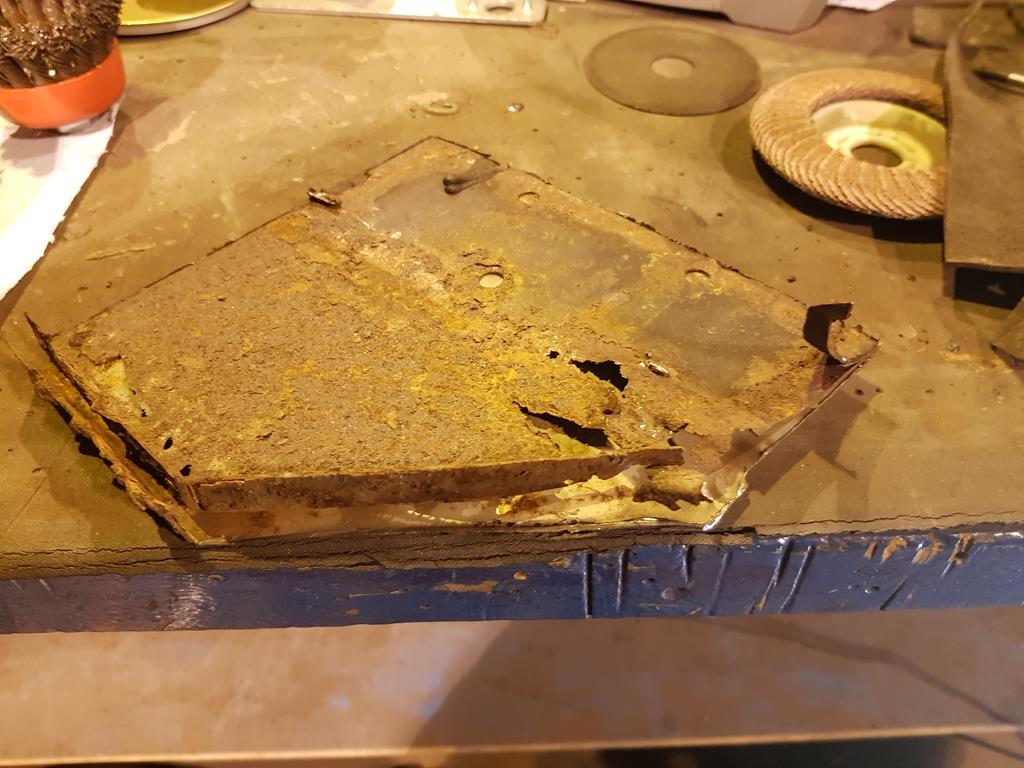 New unpainted metal welded over rust and scabby battery tray 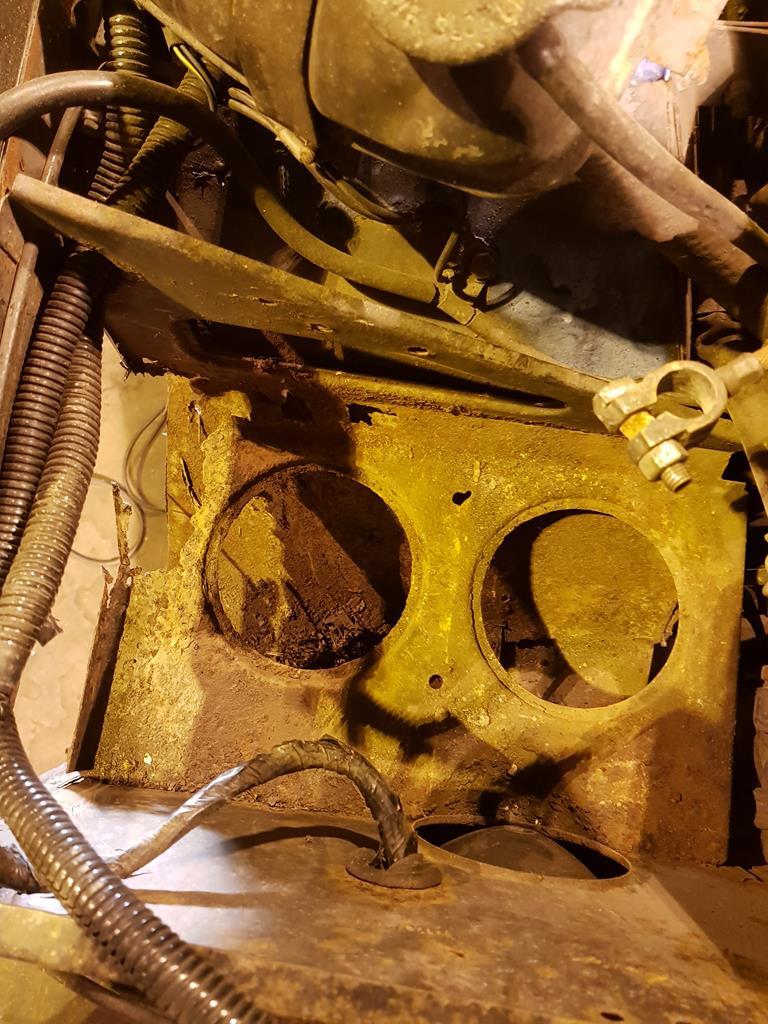 Only one thing for it 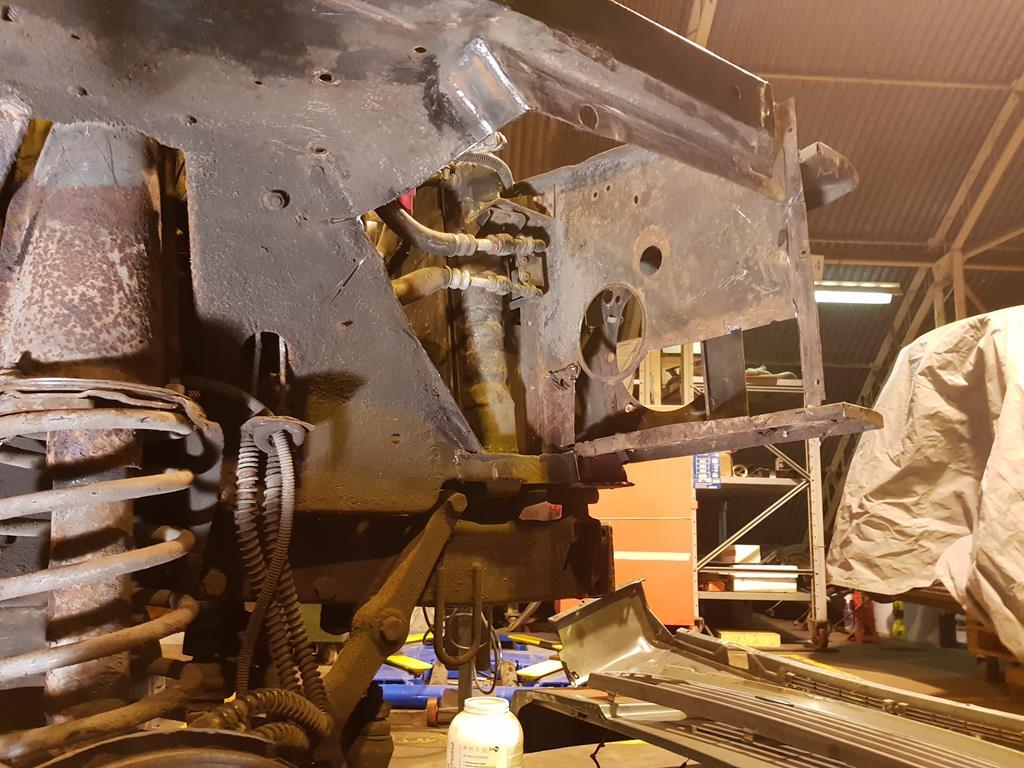 Which leaves me sweeping up half my Range Rover again. Back to solid metal though. I thought about making a new battery tray, swage lines and all but they're only £26 to buy so I'll order one in due course. In the mean time I need to weld in new metal under the headlight and make up a repair panel for the front section of wheel tub to go in after the battery tray. More progress soon, SWMBO is off to work so To the Batcave!!  |
| |
Last Edit: Jan 19, 2018 19:21:40 GMT by ivangt6
1979 Mini 1000
1972 Triumph GT6
2007 VW Golf GTi
1979 VW T25 Leisuredrive
1988 Range Rover Vogue SE
|
|
ivangt6
Part of things
 
Posts: 776
Club RR Member Number: 132
|
Range Rover Classicivangt6
@ivangt6
Club Retro Rides Member 132
|
Jan 25, 2018 23:42:08 GMT
|
More metal cutting and sticking has been happening Since the last update I have made the front of the RH wing ready to accept a new battery tray and also made the panel to go in after that, tailgate removed, windscreen removed and rot found in the windscreen surround repaired, LH front wing repair done, LH footwell cut out, front of LH sill repairs completed and new LH footwell made. Also lots and lots of stripping to bare metal and rust treatment. Anyway  Carrying on from last time, repairs to RH wing in preparation for new battery tray 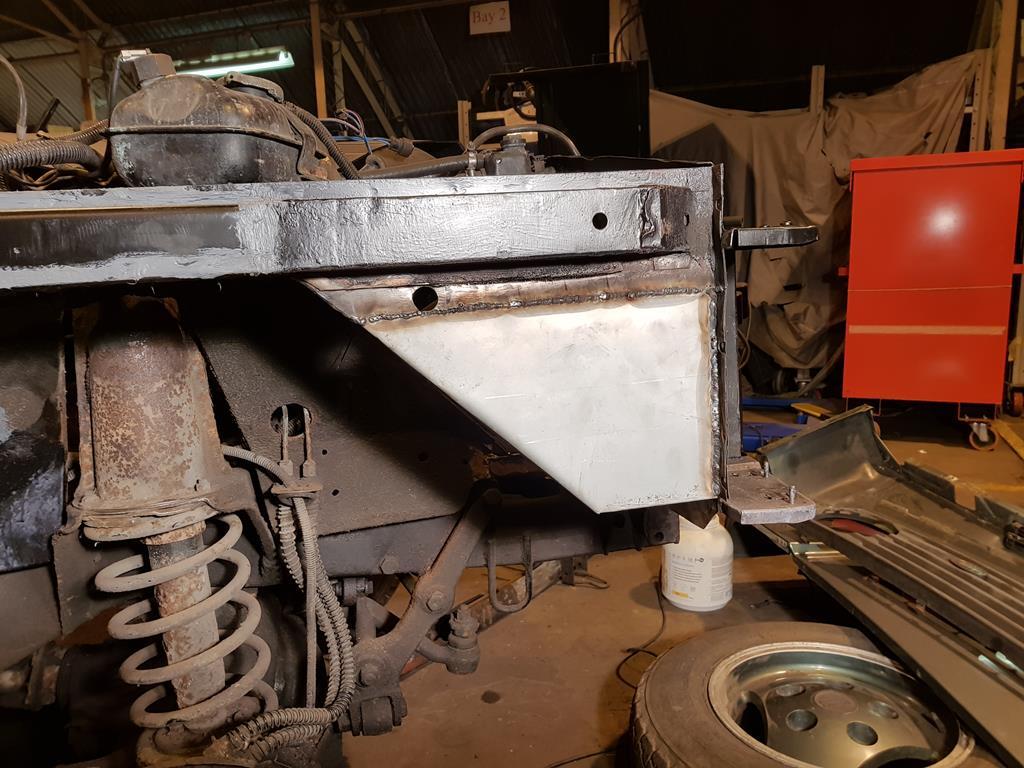 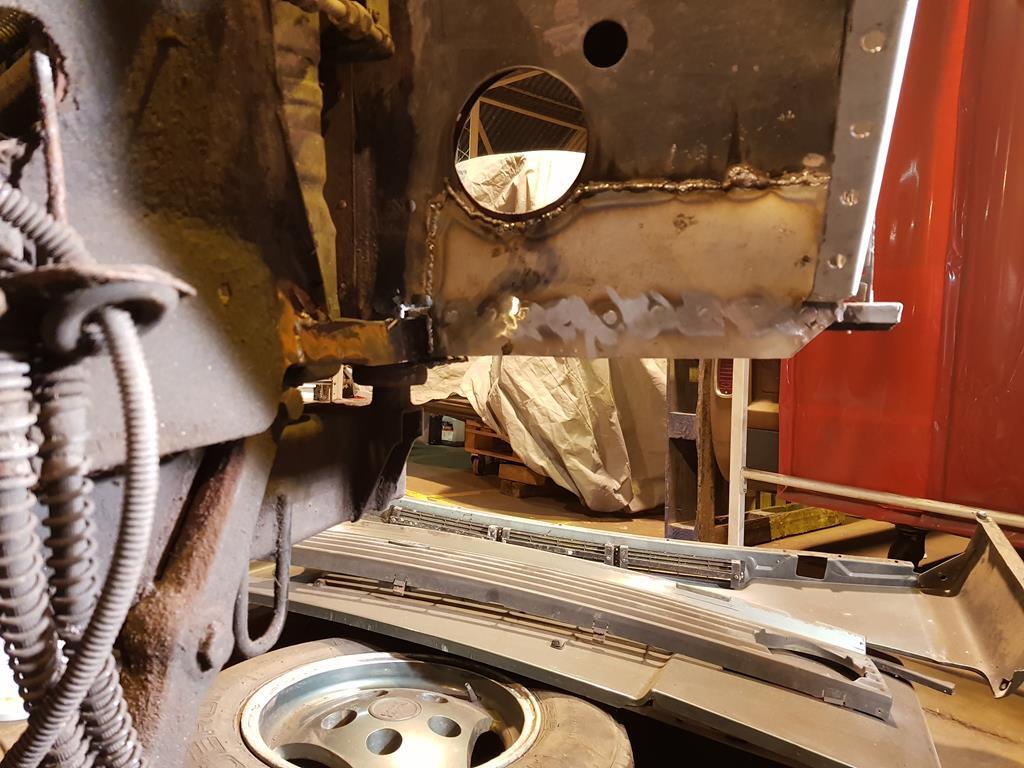 Windscreen out and rot cut out 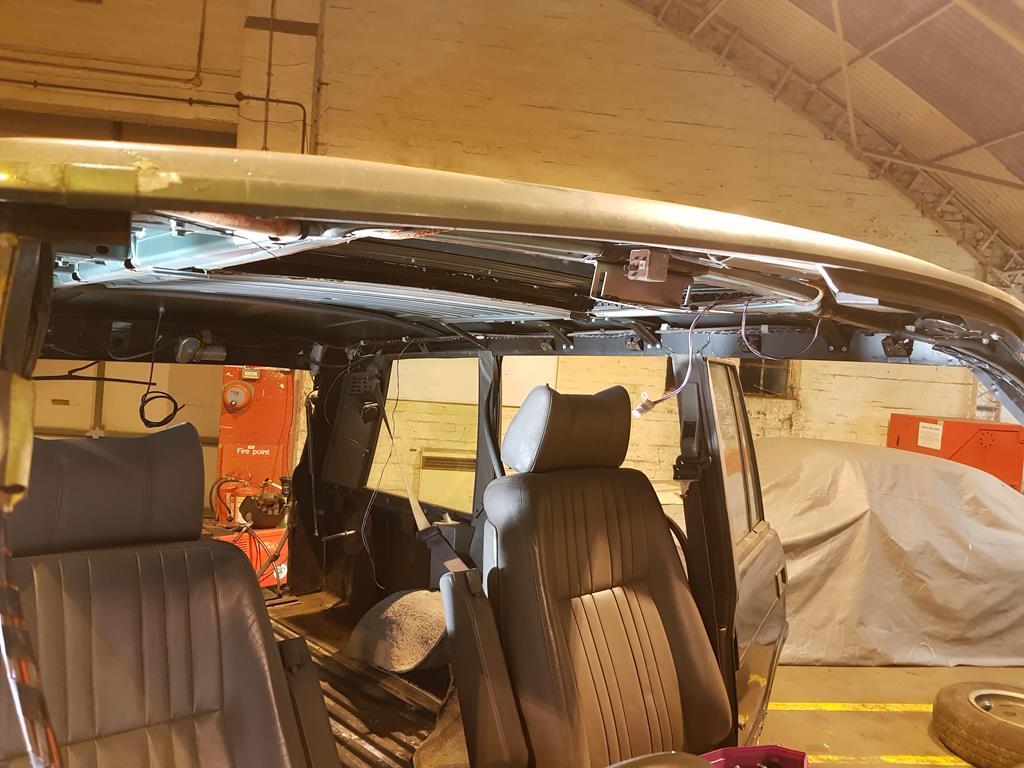 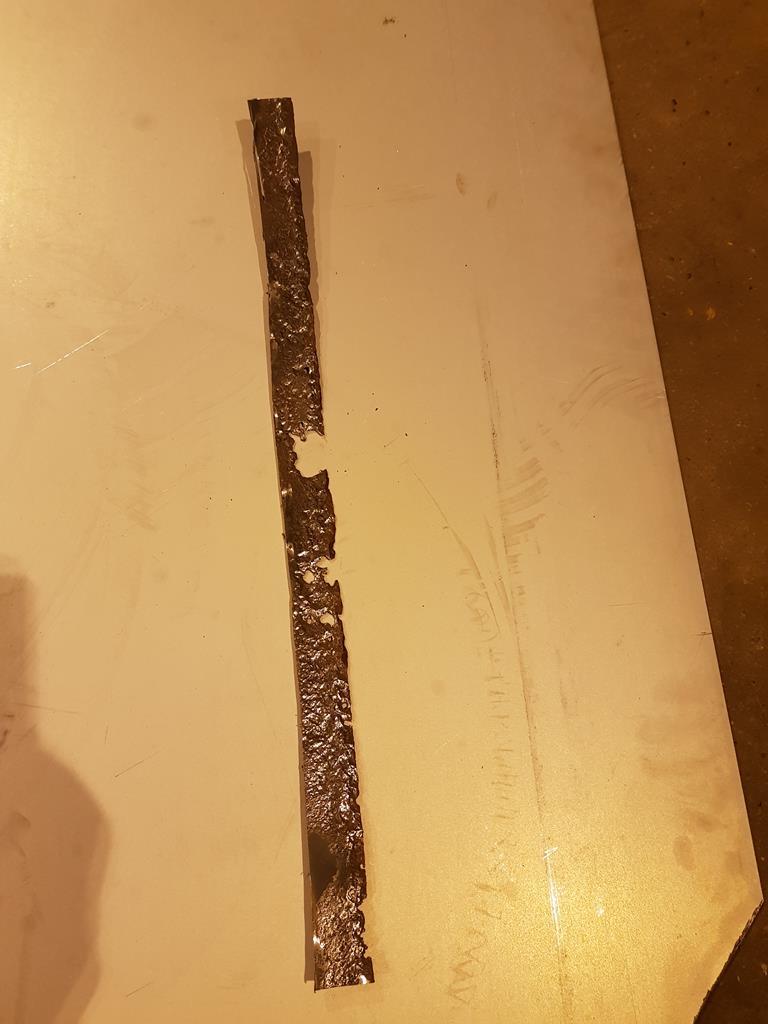 Windscreen frame repaired and painted 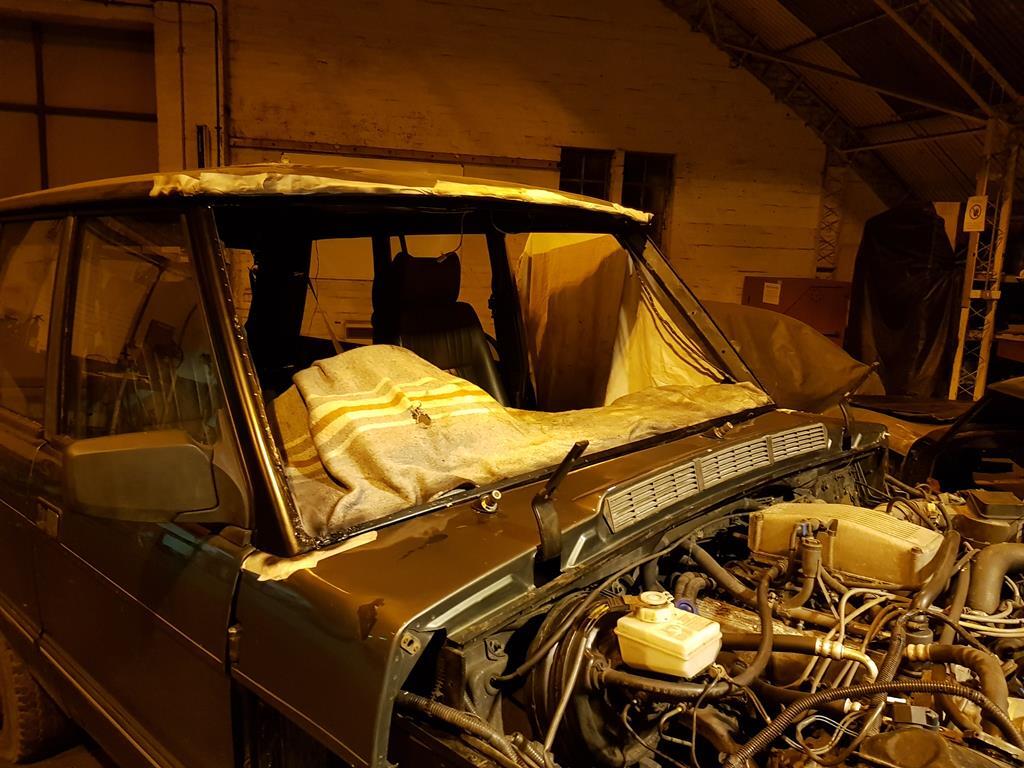 New attachment point for lower half of front wing and all seam sealed and painted ready for underseal 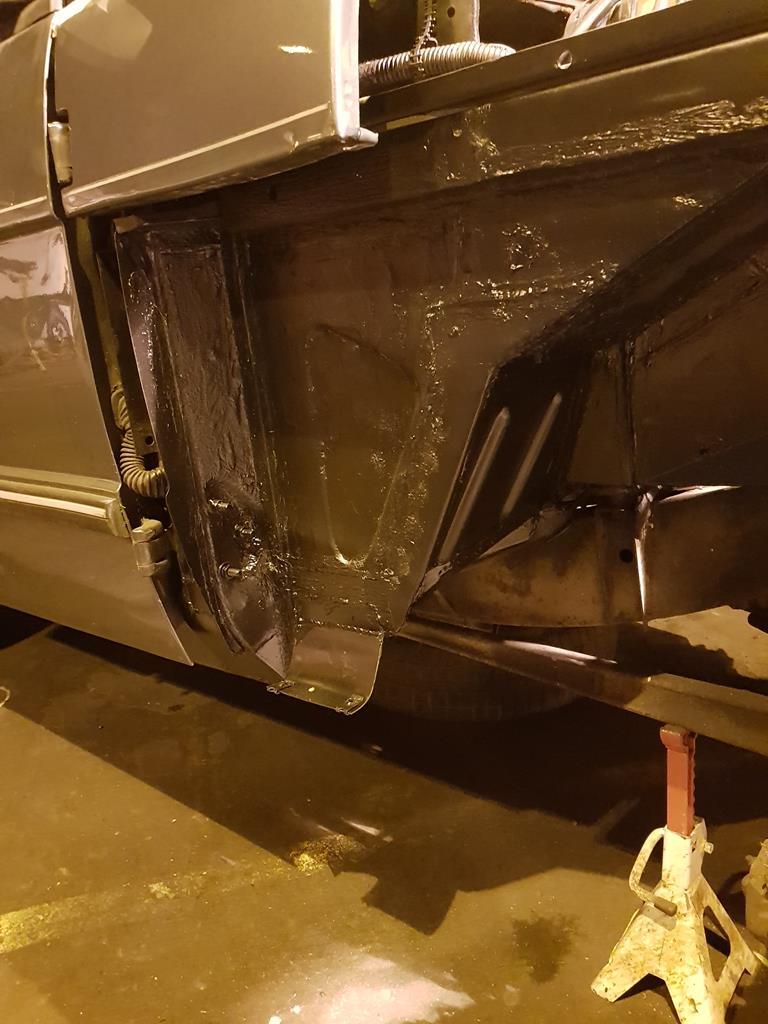 Cavity wax coated under scuttle and scuttle refitted after knocking all its dents out 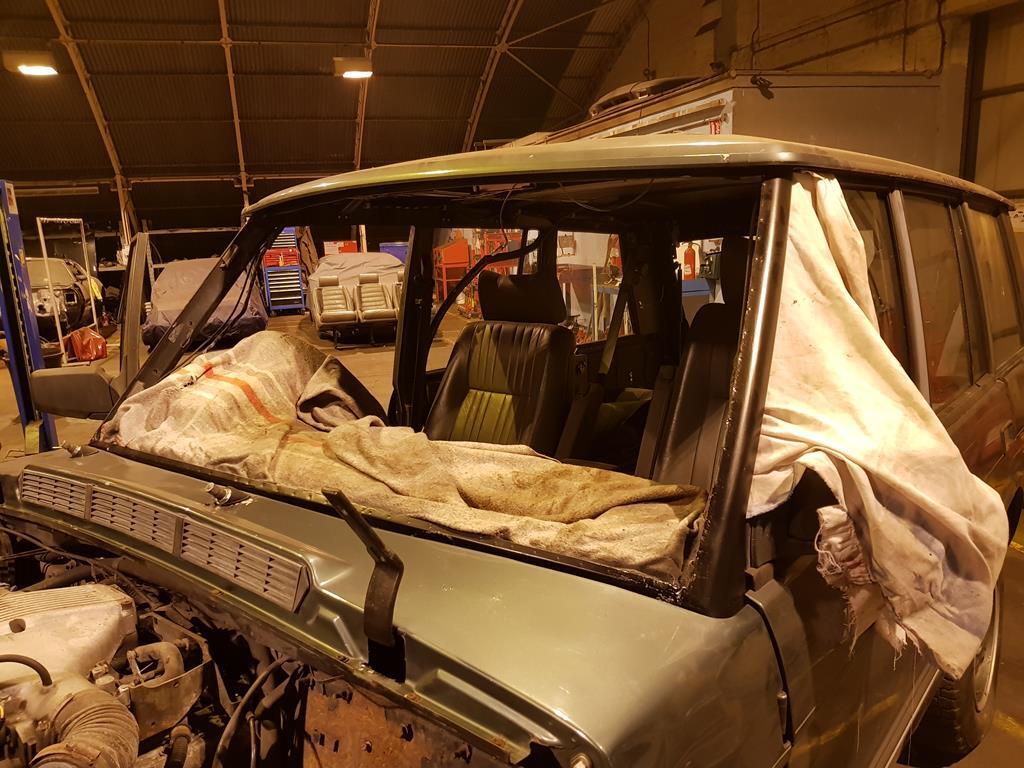 And moving onto the LH side, a dodgy repair to the front of the LH inner wing cut out and replaced 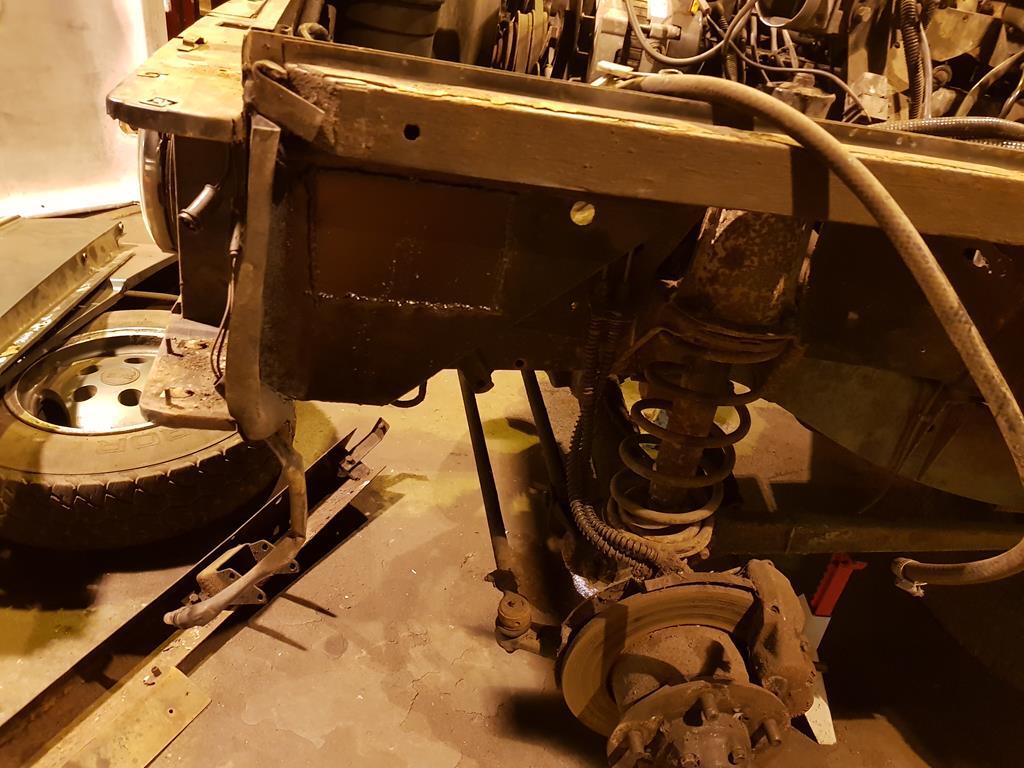 LH footwell cut out and dodgy repair to bodymount cut out 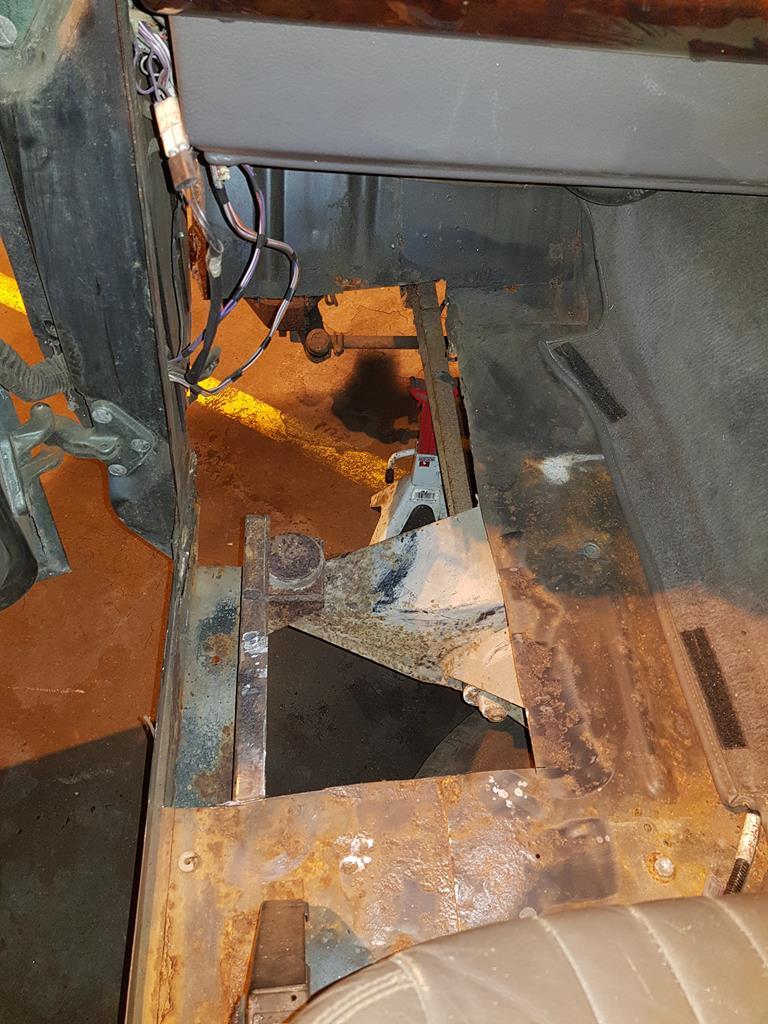 Bodymount partly replaced and inside sill rust treated 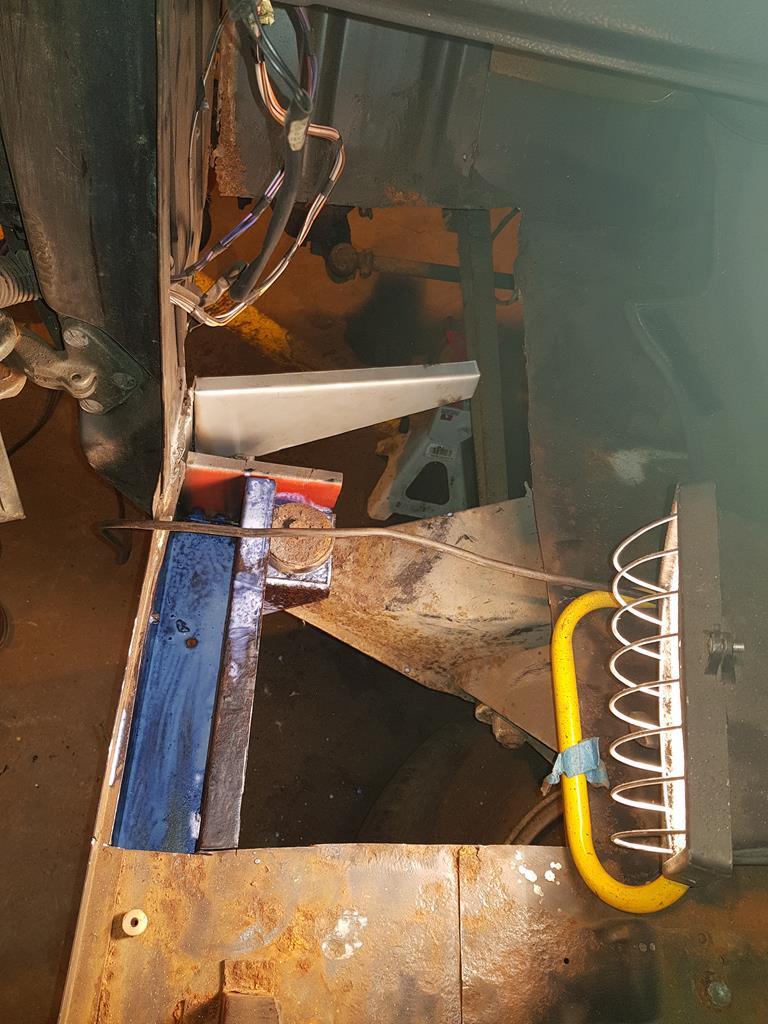 LH footwell cut ready for welding in 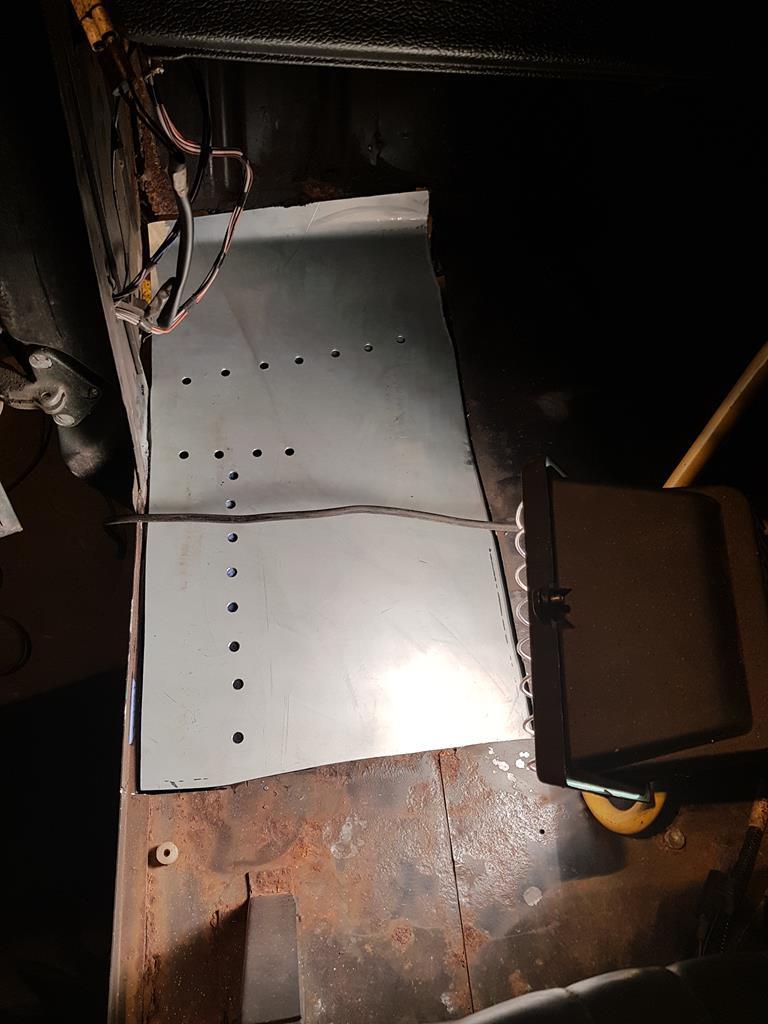 Which brings me up to date Remaining areas of concern are This little bit in the LH inner wing 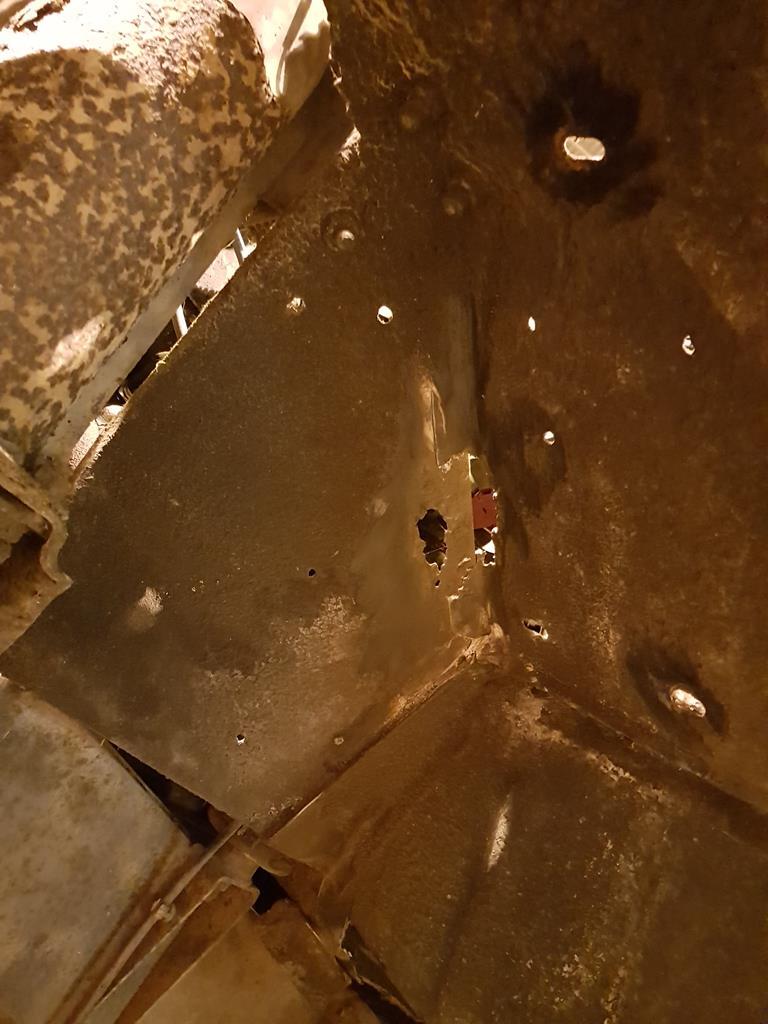 LH rear end off sill 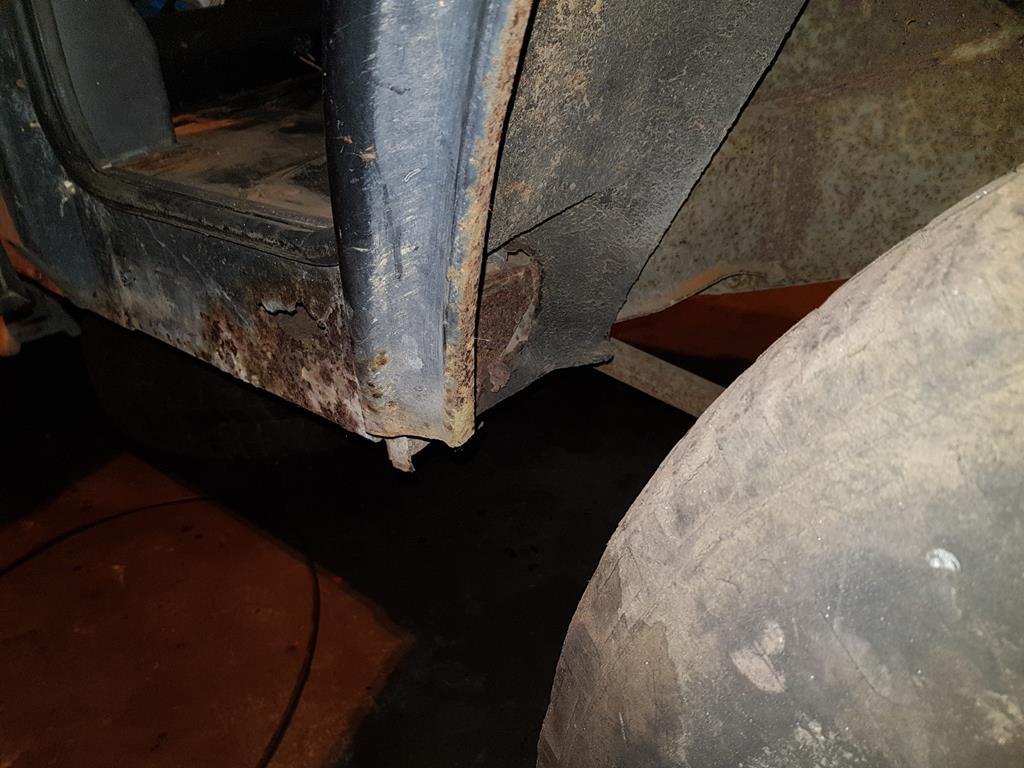 And Rh boot floor 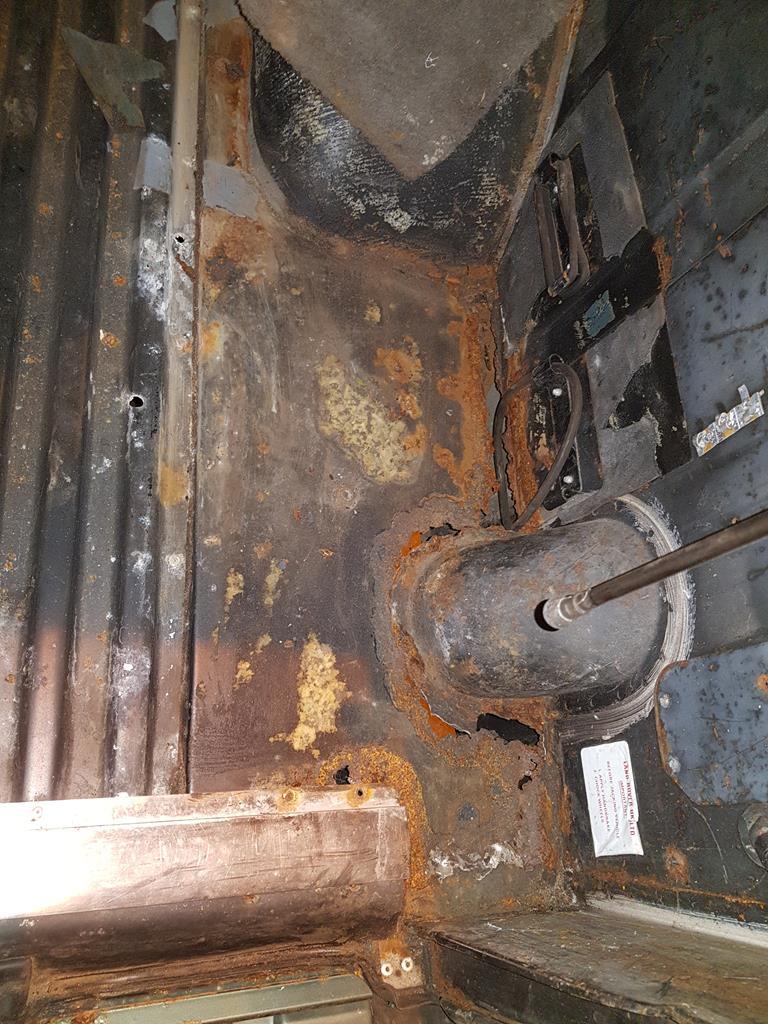 I found this on the LH side of the boot in the spare wheel well. It looks like it may be somebody's signature from the production line 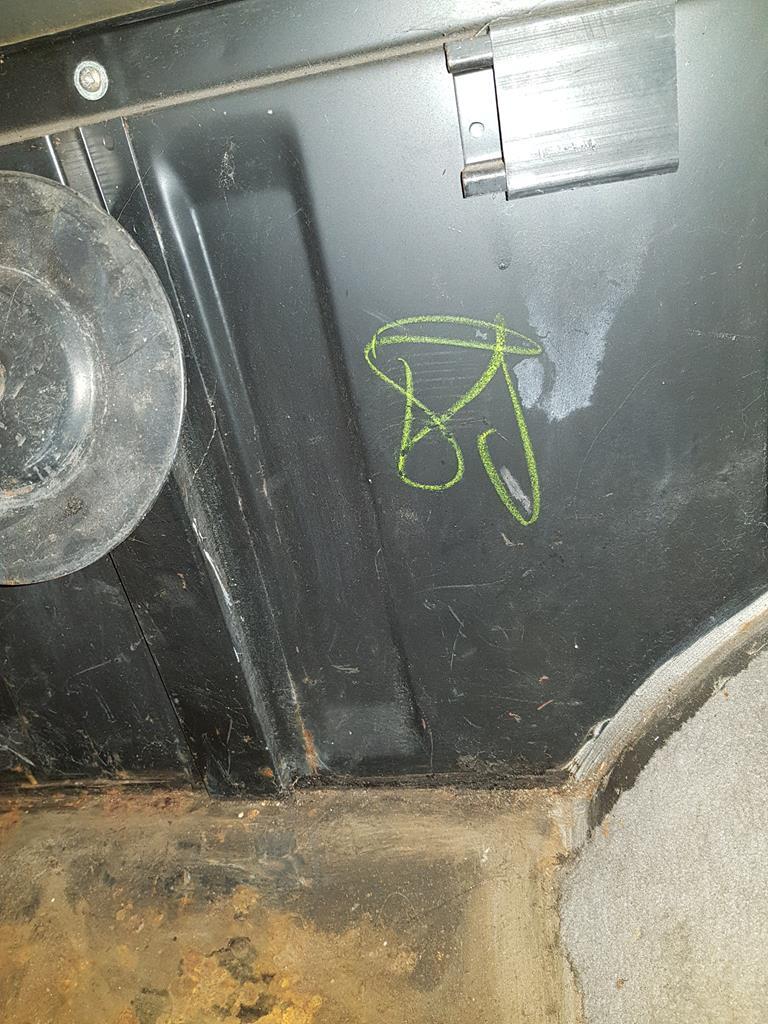 A few more late nights and I think I might have the rust beaten Cheers |
| |
1979 Mini 1000
1972 Triumph GT6
2007 VW Golf GTi
1979 VW T25 Leisuredrive
1988 Range Rover Vogue SE
|
|
ivangt6
Part of things
 
Posts: 776
Club RR Member Number: 132
|
Range Rover Classicivangt6
@ivangt6
Club Retro Rides Member 132
|
Jan 25, 2018 23:47:08 GMT
|
Almost forgot about this. Its a cover panel that all the relays are mounted on. Its screwed in from the inside and looks a pain to take out. Its also unavailable so I'm looking at either a good 2nd hand replacement or making a new one 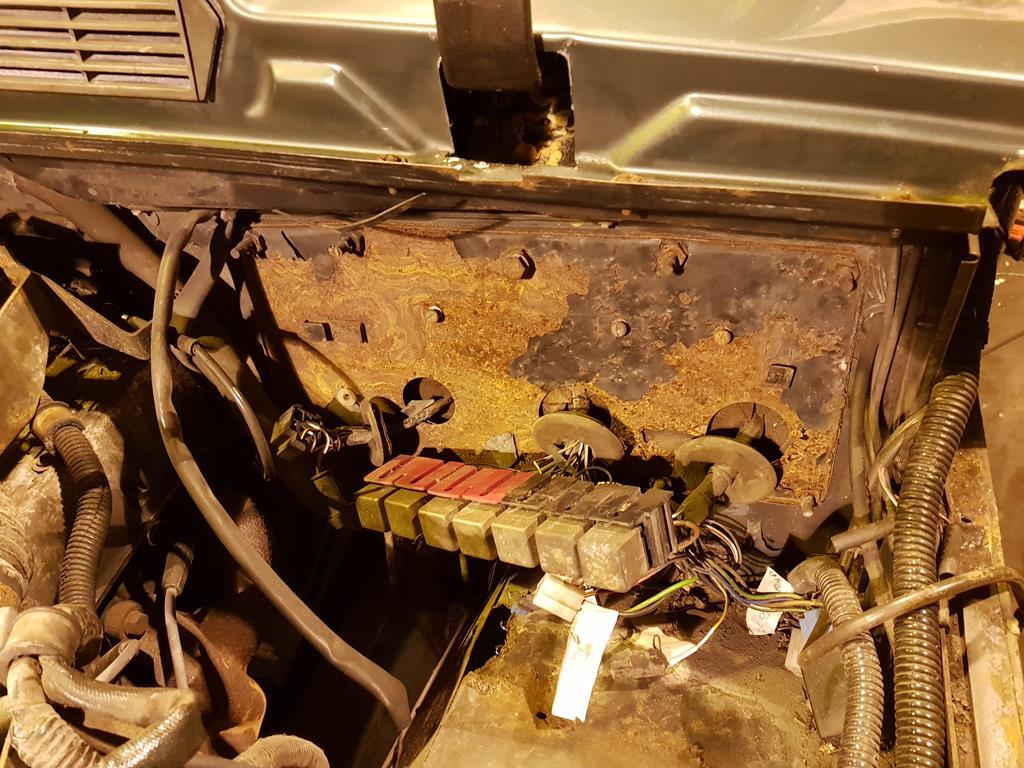 |
| |
1979 Mini 1000
1972 Triumph GT6
2007 VW Golf GTi
1979 VW T25 Leisuredrive
1988 Range Rover Vogue SE
|
|
|
|
|
|
|
|
From what I remember, the dash isn't THAT bad to take out.
It's a later model with a 2 spoke steering wheel, and they always seem to come off a lot easier than the 4 spoke on earlier ones which almost always need a puller.
Let's you get right in to the bulkhead area anyways.
|
| |
|
|
ivangt6
Part of things
 
Posts: 776
Club RR Member Number: 132
|
Range Rover Classicivangt6
@ivangt6
Club Retro Rides Member 132
|
Jan 26, 2018 14:34:36 GMT
|
From what I remember, the dash isn't THAT bad to take out. It's a later model with a 2 spoke steering wheel, and they always seem to come off a lot easier than the 4 spoke on earlier ones which almost always need a puller. Let's you get right in to the bulkhead area anyways. I might be able to get to the screws by taking the two heater fans that are on that side. I don't really fancy taking the dash out if I can help it. We shall see |
| |
1979 Mini 1000
1972 Triumph GT6
2007 VW Golf GTi
1979 VW T25 Leisuredrive
1988 Range Rover Vogue SE
|
|
ivangt6
Part of things
 
Posts: 776
Club RR Member Number: 132
|
Range Rover Classicivangt6
@ivangt6
Club Retro Rides Member 132
|
Jan 30, 2018 23:49:32 GMT
|
*MID WEEK UPDATE* I've managed to spend a couple of evenings in the bat cave this weekend I got half way through welding in the LH footwell before running out of gas. Will get more on Salturday. still need to make some small repair panels for the LH filch panel to weld to this panel and another small repair to the inner wing. I also need to have a closer look at a bodymount right at the front of the LH footwell as it looks slightly suspicious. 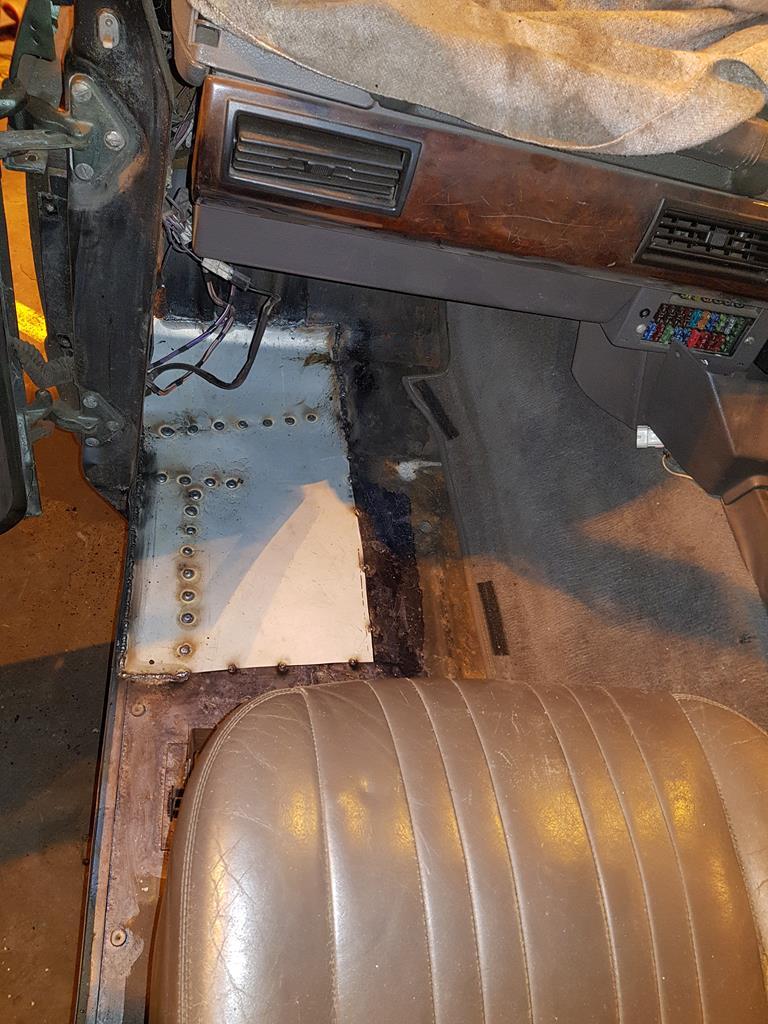 With no gas I thought I'd see what else I could crack on with. The boot floor needed to come out to repair the RH side of the boot floor. 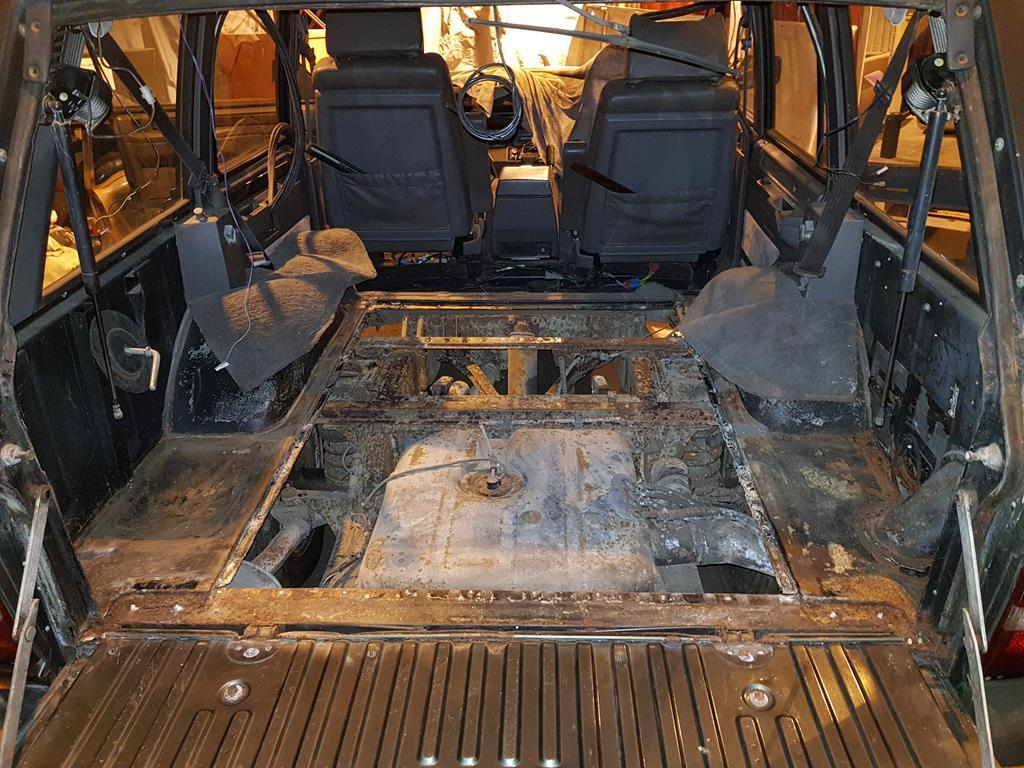 Which leaves a chassis that despite its paint flaking off is very solid. This will need no more than a good going over with a wire brush, some rust treatment and a lick of paint. The fuel lines though I have to admit are looking quite pitted. They run between the RH chassis rail and the body. I need to look more into it but I'm not quite sure how they come off. They look like they're fitted before the body. What I may do is cut them further forward and connect them via some rubber hose to a run of copper line, maybe some microbore stuff. More research needed! SO RH boot floor Cut 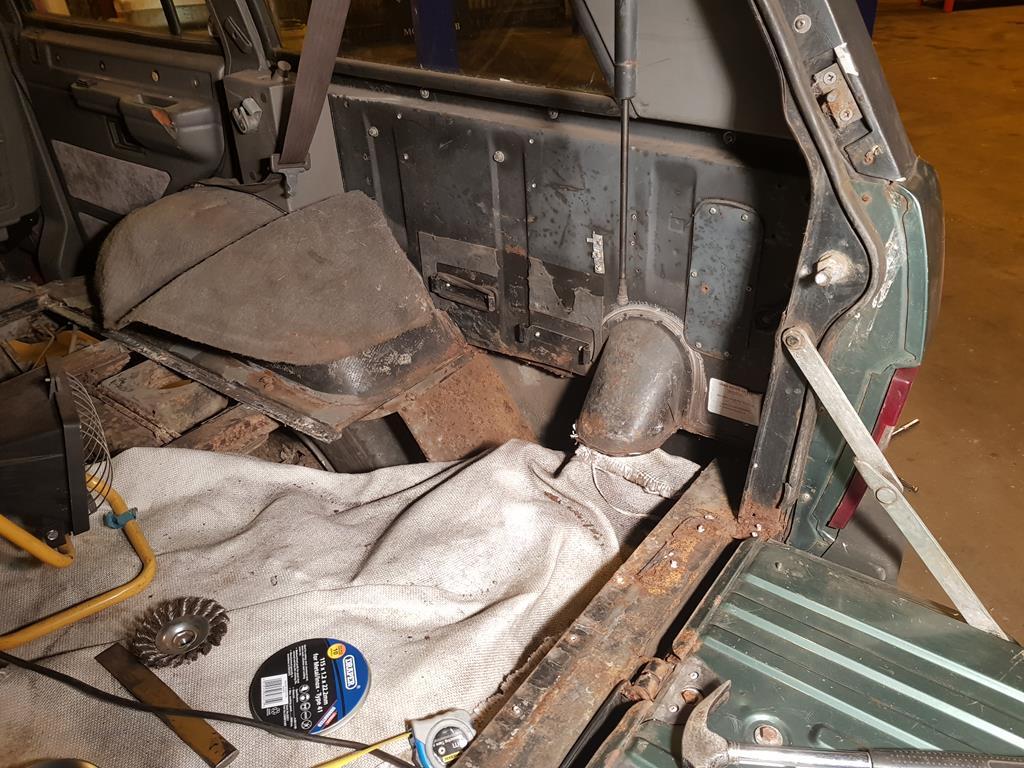 Copy 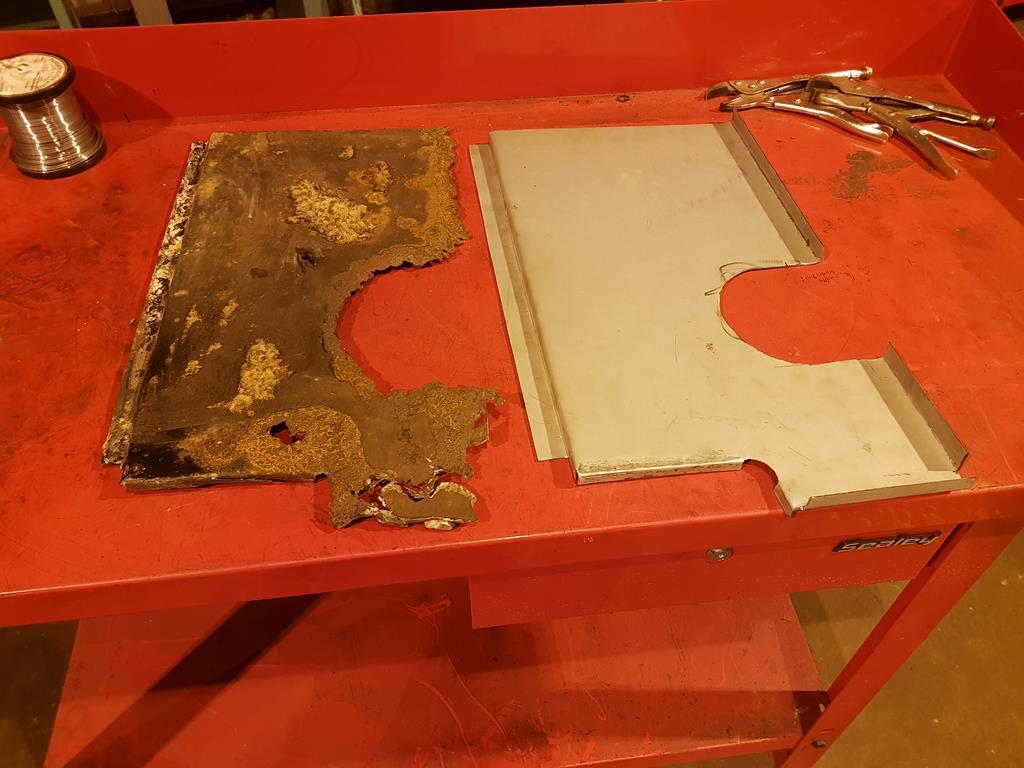 Paste 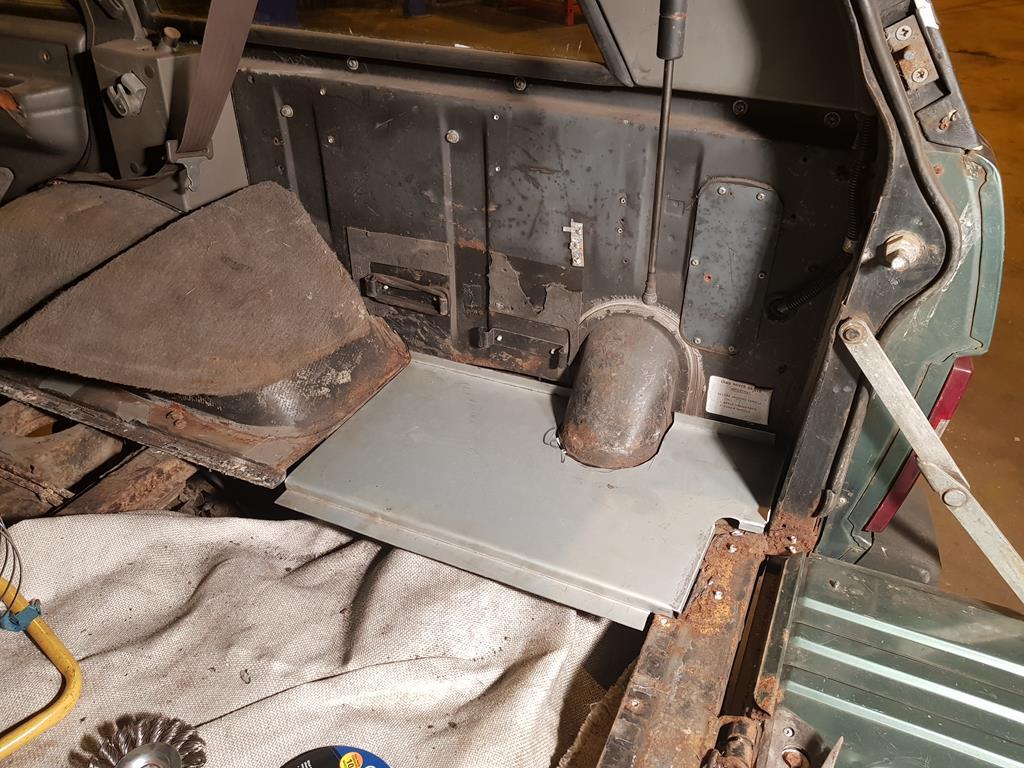 It needs some more fettling and some holes drilling but the bones are there. Thats a good chunk of the rust dealt with now with the only major bit left being the rear end of the LH sill Its looking a little sorry for itself at the moment and a far cry from the advertisement photos but were getting there slowly 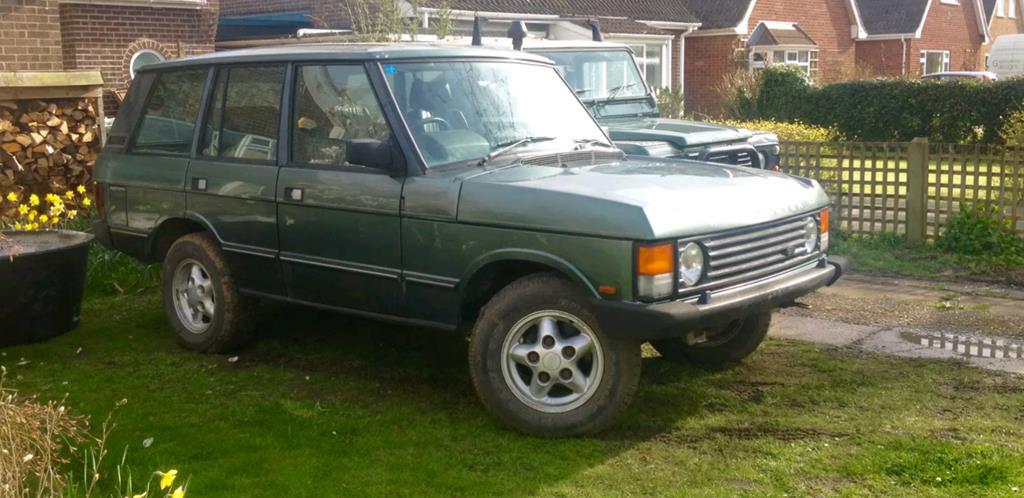 |
| |
1979 Mini 1000
1972 Triumph GT6
2007 VW Golf GTi
1979 VW T25 Leisuredrive
1988 Range Rover Vogue SE
|
|
|
|
|
|
|
|
Looking pretty decent for all the work that's gone into it though.
I've previously found that the 'bulkhead' mount on the front of the football is best dealt with by sawing it off, and adding slicing through the footwell from the inside in line with where the mount should be.
Make your new mount so that it sticks through the slots you've cut, bolt it up, then fold over what's sticking through and weld in.
Much easier than trying to do it upside down in the engine bay when it's got an engine in the way.
|
| |
|
|
ivangt6
Part of things
 
Posts: 776
Club RR Member Number: 132
|
Range Rover Classicivangt6
@ivangt6
Club Retro Rides Member 132
|
Jan 31, 2018 23:48:38 GMT
|
Looking pretty decent for all the work that's gone into it though. I've previously found that the 'bulkhead' mount on the front of the football is best dealt with by sawing it off, and adding slicing through the footwell from the inside in line with where the mount should be. Make your new mount so that it sticks through the slots you've cut, bolt it up, then fold over what's sticking through and weld in. Much easier than trying to do it upside down in the engine bay when it's got an engine in the way. I think I'll see if I can see the spot welds from the inside. If I can then it should make things a lot easier. |
| |
1979 Mini 1000
1972 Triumph GT6
2007 VW Golf GTi
1979 VW T25 Leisuredrive
1988 Range Rover Vogue SE
|
|
task
Part of things
 
Posts: 374
|
|
|
|
|
Looks like good progress, nice to see another classic being saved!
|
| |
|
|
|
|


