goldnrust
West Midlands
Minimalist
Posts: 1,886
|
|
|
|
Well it may be a month later (couldn't quite believe it till I looked at the dates on the pictures) but I am victorious, in that I finally have all of the rear hub parts separated. 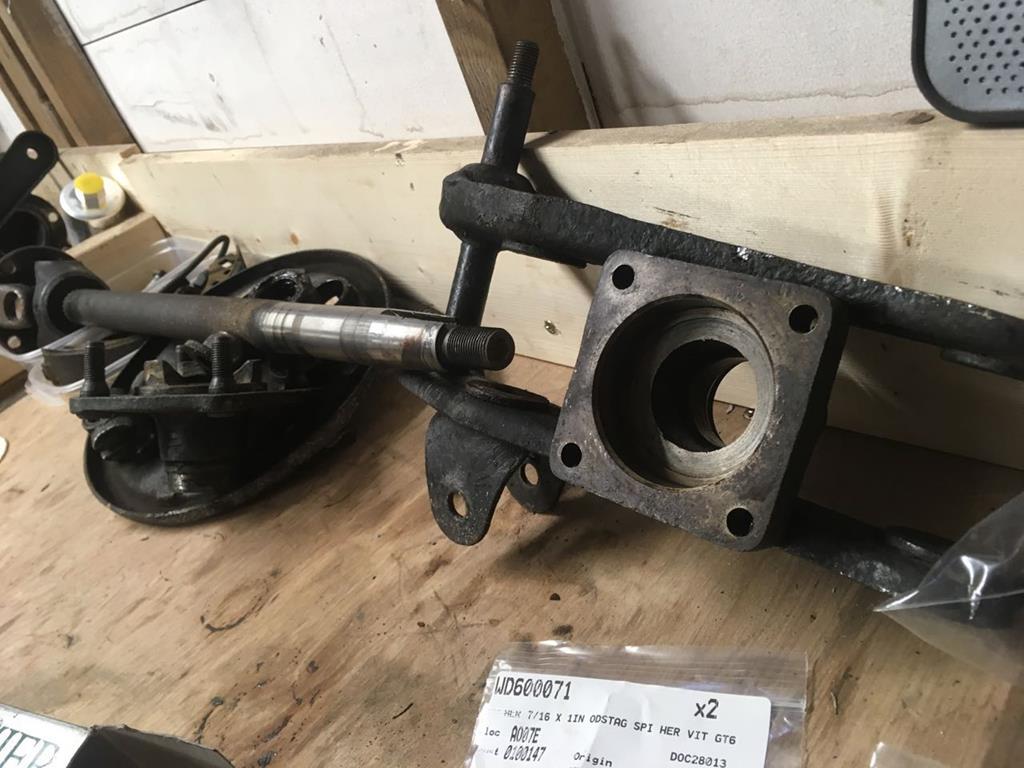 Removing the hub wasn't too bad in the end, once I'd decided it was scrap I went at it with undefeated champion of garage tools, the air hammer/chisel. It will either do the job or destroy the parts, so with nothing to loose I tightened up my homemade hub puller as much as I could, then went at the back of the hub with the air hammer and it popped off in a matter of seconds. The axel came out of the hub with relative ease, it had got some minor pitting where the inner wheel bearing rubs, but looks perfectly usable to me. The next challenge came when I realised that the trunions were basically seized solid.  I managed to remove the nut, but there was no way the bolt was moving at all. At this point the garage suffered a casualty.... 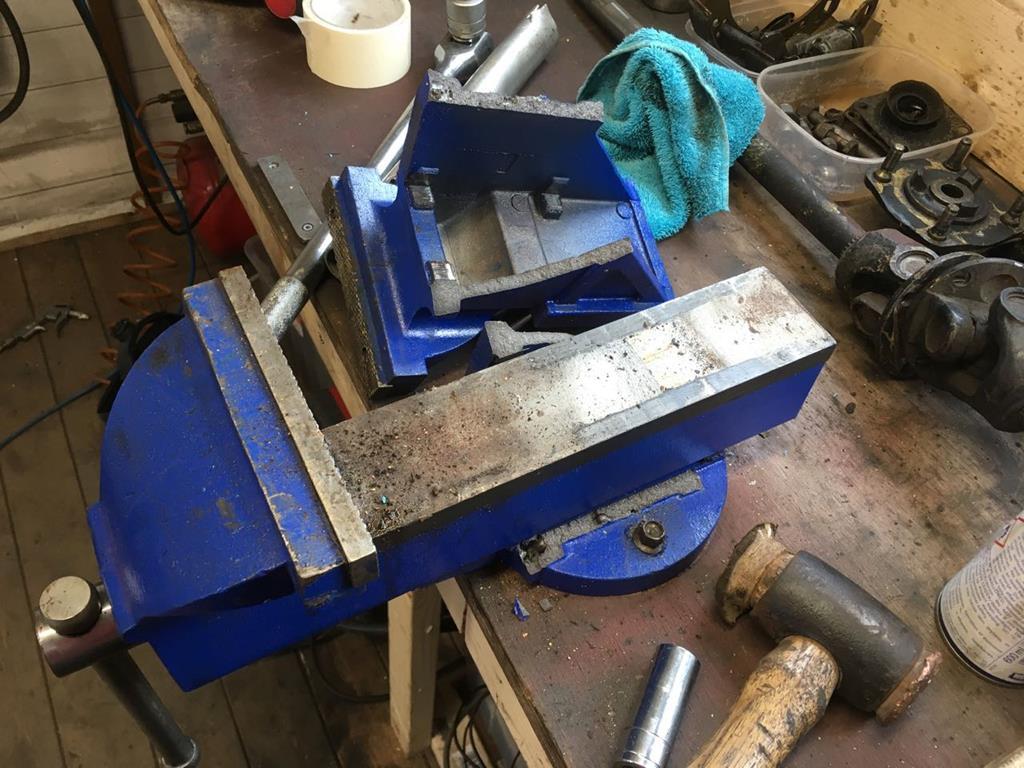 I may have over tightened it slightly while trying to holt the damn triumph hud still to attack said seized trunion bolt. Even the air hammer couldn't help this time, in the end with use of a drill, grind and careful hacksawing, I was able to cut through the bolt and separate the hub from the vertical links and then it was fairly straight forward to remove the remains of the bolt and knackered trunion. While I wait for funds to become available to buy the relatively expensive hub flange, I thought I should see how bad the other side was... Answer is broadly similar. The hub flange wasn't as bent as the passengers side was, but ti was still bent, and the bearing didn't have as much play in it, but it was still good and notchy. This hub came off with relative ease just using my homemade puller, I think it must have seen the destruction that air hammer can cause and decided it was safer to just come apart of its own accord. Again the driveshaft looks ok, and again the trunion was seized solid. I should think the car's going to drive quite differently when I get it back on the road! As I mentioned in the last post I need to do the diff output shaft seals/bearings so I removed the diff a couple of nights ago. Which just left the rear spring in place, in for a penny in for a pound, I've pulled that out too, and will fit new spring bushes and give the spring pack a once over. I went shopping yesterday, and came back with this nice little haul of goodies, which should keep me busy with the diff, spring and trunions till I can afford the hubs. 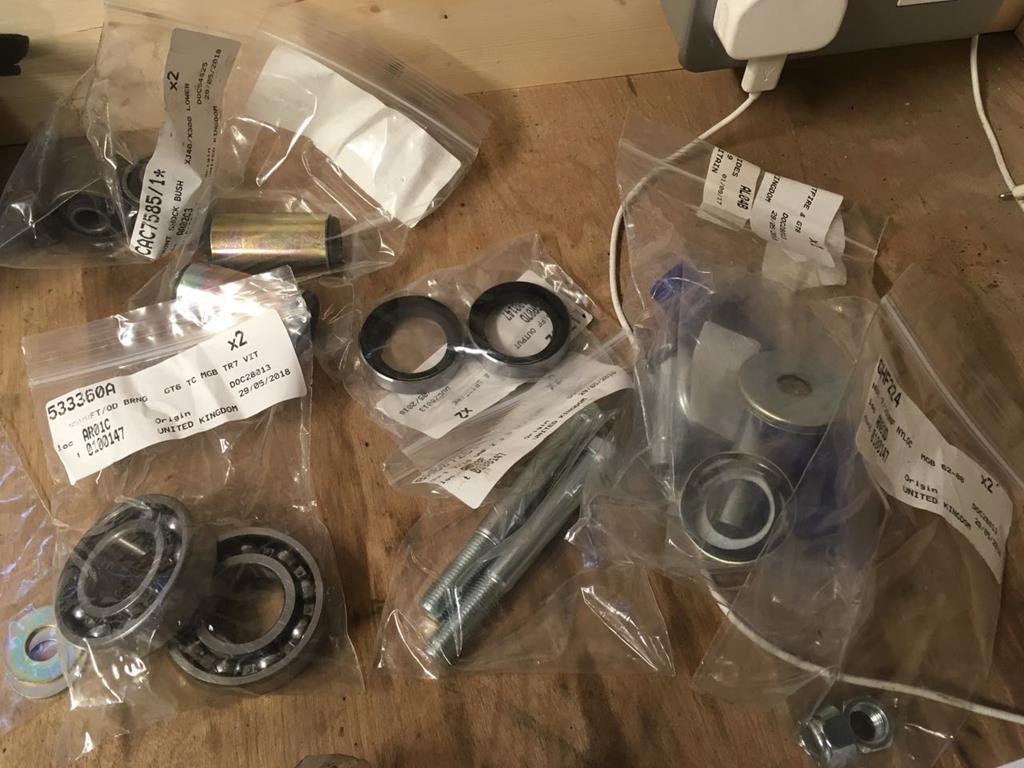 Also keeping me busy is the Jag, she must have been jealous of the attention the Triumph was getting, so decided she'd like to have ruined rear wheel bearings also. So I've got a matching pair of cars currently. lets hope the Jag doesn't escalate into full rebuild like the Triumph, I need it for work Monday! 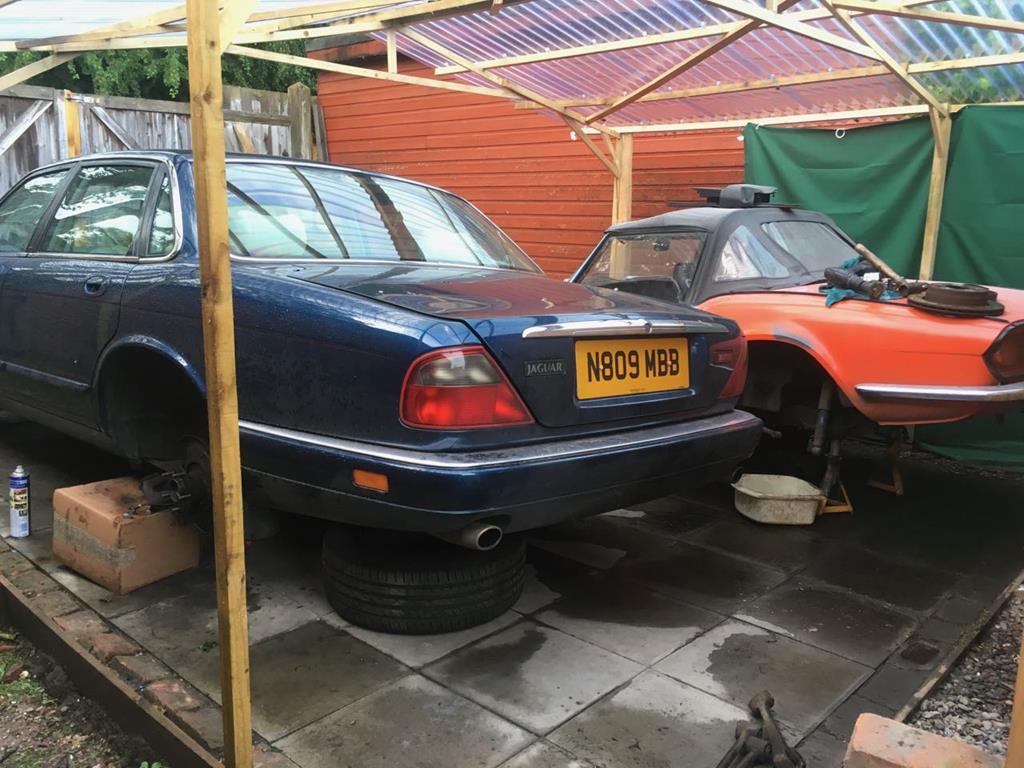 |
| |
|
|
|
|
goldnrust
West Midlands
Minimalist
Posts: 1,886
|
|
|
|
Going back to the wheels thoughts from Ian65 and bellybug on the last page, Ive got to say I've never really been a fan of slot mags. I'm not sure what wheels I'll go for, I've not seen many alloys on spitfires that work for me, though I did save this picture a couple of weeks ago, apparently these are some Tr7 wheels, and I think work kinda nicely (with a bit more lows in the front) 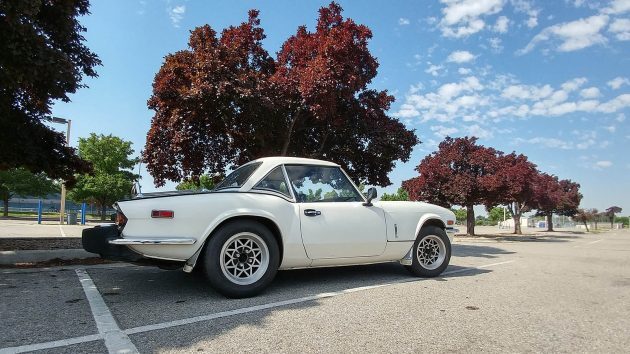 Otherwise I've considered getting the stock steels banded, or even some earlier steels so could have black/cream painted steels with a chrome hubcap? I've even toyed with the idea fo black wire wheels, thinking with some meaty tyres and lows it could have a classic motorsport feel? I think the spitfires lines might just be a bit to 70s and not 60s enough to pull off the look though. For the mean time I think I'll just get some new tyres for my stock steels, maybe go upto a 165 width though? and paint the centres black for the Spitfire MkIV look, I think I'm going to get an early MkIV front valance too, so I can loose the slightly 70s splitter. I think a few touches like this will help give it that kinda older look I like, hopefully without looking to over done like when people dress their Mx5s up like they're actually an MGB! 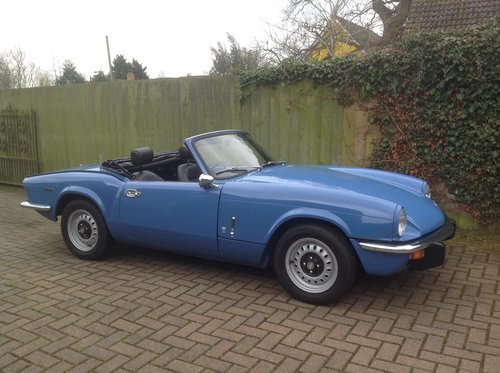 |
| |
|
|
|
|
|
|
|
|
Enjoyed reading that, looks like this spitfire is lucky you bought it with all that work it needed.
|
| |
1994 BMW 525i touring
2004 BMW Z4 sorn and broken
1977 Ford Escort
1982 Ford Capri getting restored
1999 Mazda B2500 daily driver.
|
|
MiataMark
Club Retro Rides Member
Posts: 2,971
Club RR Member Number: 29
|
|
|
|
Great to see progress, pity about the Jag. For wheels I'd stick with the steels, maybe banded, or be boring and go down the Minilite route. I did find this image 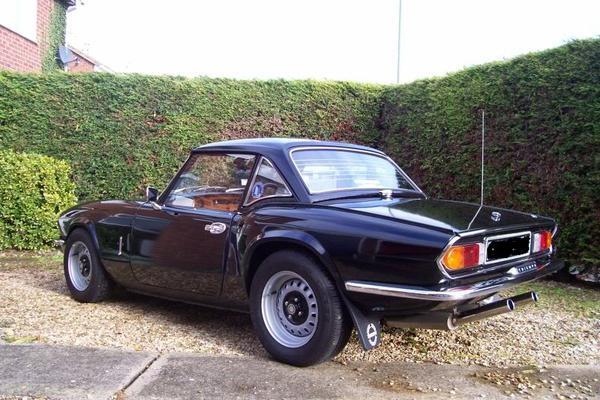 |
| |
1990 Mazda MX-52012 BMW 118i (170bhp) - white appliance 2011 Land Rover Freelander 2 TD4 2003 Land Rover Discovery II TD52007 Alfa Romeo 159 Sportwagon JTDm
|
|
Darkspeed
Club Retro Rides Member
Posts: 4,867
Club RR Member Number: 39
|
|
|
|
|
I have always liked Dolly Sprint Wheels for that Spitfire "Sprint" theme they, fit perfectly and are really light and strong. The ARE Libre is another favorite of mine - I think I ran 175's on my Spitfire and I do remember uprating the studs from 3/8 to M12 at some point.
|
| |
|
|
|
|
|
|
|
|
Banded steels. Always.
|
| |
1987 Supercharged BMW R1150 Citroen 2cv Hillclimb Monster
1995 Renault Master Mk1 Race Transporter
1994 Mazda MX5 Mk1 / NA Road Going Class Hillclimber
1991 UMM Alter II Crew Cab OM606 SuperTurbo Diesel MegaUMM Overlander
1992 UMM Alter II Station Wagon
1980 UMM Cournil - survivor - resto project
1979 Lomax 224
2014 VW T5.1 Transporter Kombi Highline
|
|
|
|
|
Jun 11, 2018 22:41:18 GMT
|
|
Yes to banded steels and shiny hubcaps. Then some decent tyres.
But I would say that.
|
| |
|
|
goldnrust
West Midlands
Minimalist
Posts: 1,886
|
|
Jul 19, 2018 21:08:29 GMT
|
Doesn't time fly... I'm not so good at keeping these things up to date as I used to be! Before I get stuck into the Triumph update, there is sad news. My lovely lovely Jag has had to move on to a new life, I have hope someone will fix it, but I think it more likely it will be broken. The 'wheel bearing' I was trying to fix I the last update, turned out to be a diff bearing, not necessarily a big deal, I bought the parts and got stuck in, only to find that the heads of the bolts holding the diff bearing carrier had rusted away to nothing. I tried every trick I knew to get them out but to no avail. To fix it would be a subframe out job for sure, and that would open a whole other can of worms looking at the rest of the corrosion under the car. Combined with the other issues I knew were waiting in the wings it was time to cut my losses and move on. The jag will be sorely missed, it definitely felt special to drive. A new daily has been acquired, far to modern to mention on here, so lets move on... On to happier news, despite radio silence here I have been making steady progress with the triumph. Picking up where we left off, I'd bought a whole bunch of bearings and seals for the rear end of the car. The first of which to be fitted were the new diff output bearings and seals. 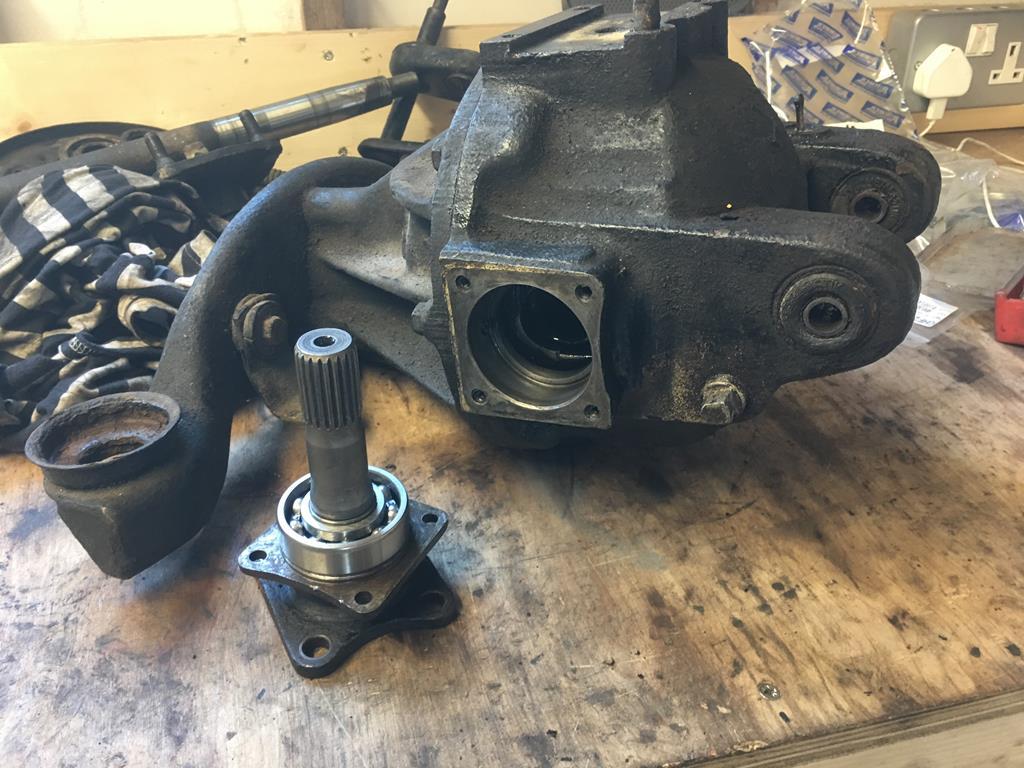 Next up, with more parts arriving the in the post I could start to assemble my rear hubs. Its nice when all the dirty work of disassembly and cleaning has been done and you get a nice pile of shiny bits ready to put back together like this! 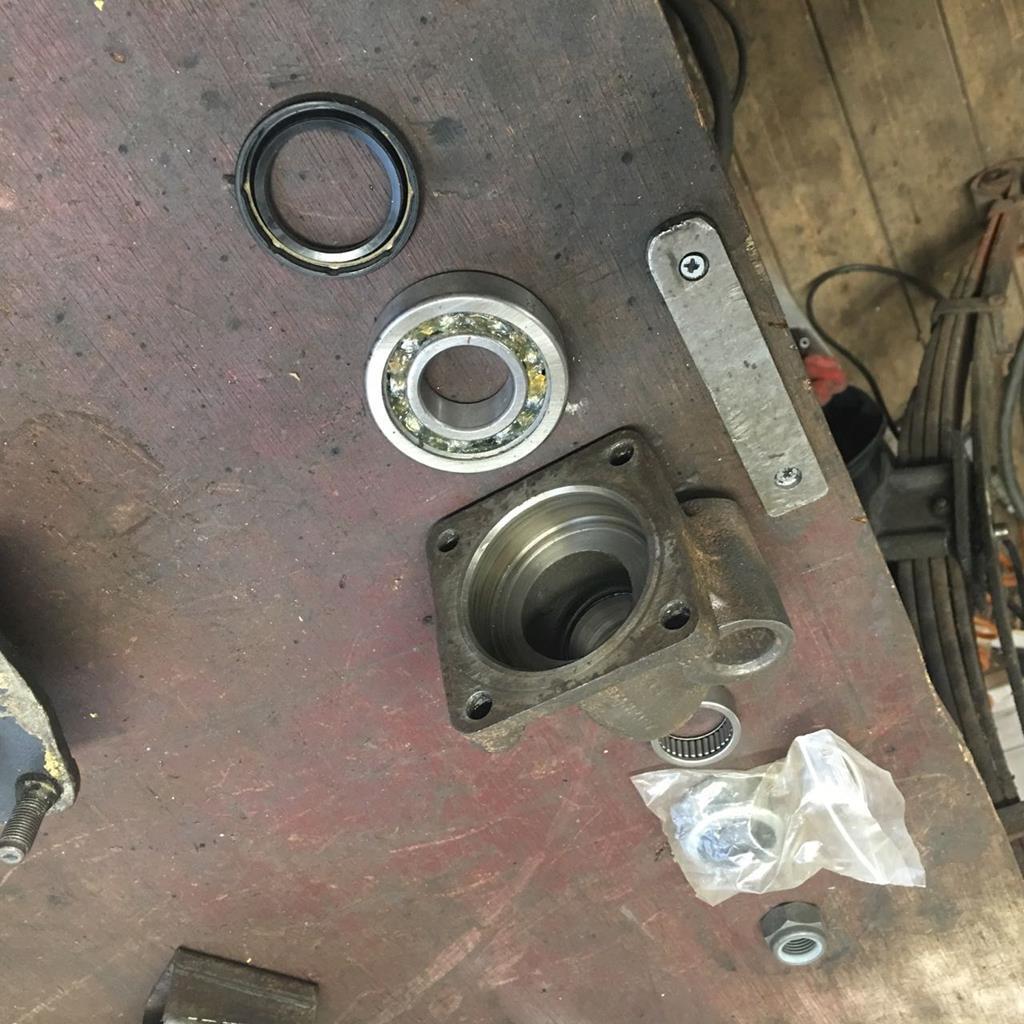 And here it is put back together with axle installed along with the brake shoes and hub flange. 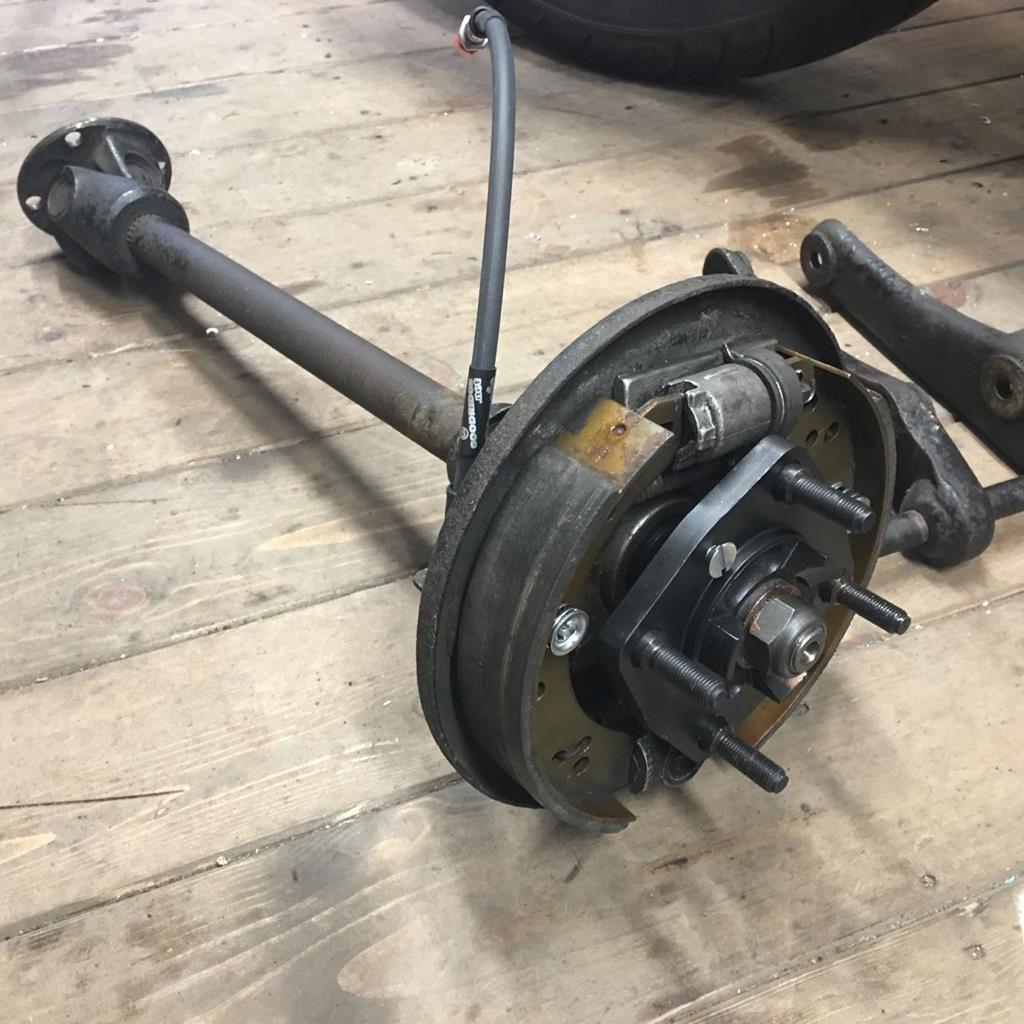 Some of the brake hardware (the shoe fixings, wheel cylinder retaining clips, etc)was looking a bit past it's best, so that all got replaced at the same time. With the axle/hub assembly complete, I fitted new trunions/bushes into the hub and mounted it in the upright, but forgot to take any pictures! As I mentioned in the last post, I'd also pulled the rear spring out. In my ownership it has always squeaked. Stripping it apart it was clearly in need of some TLC. 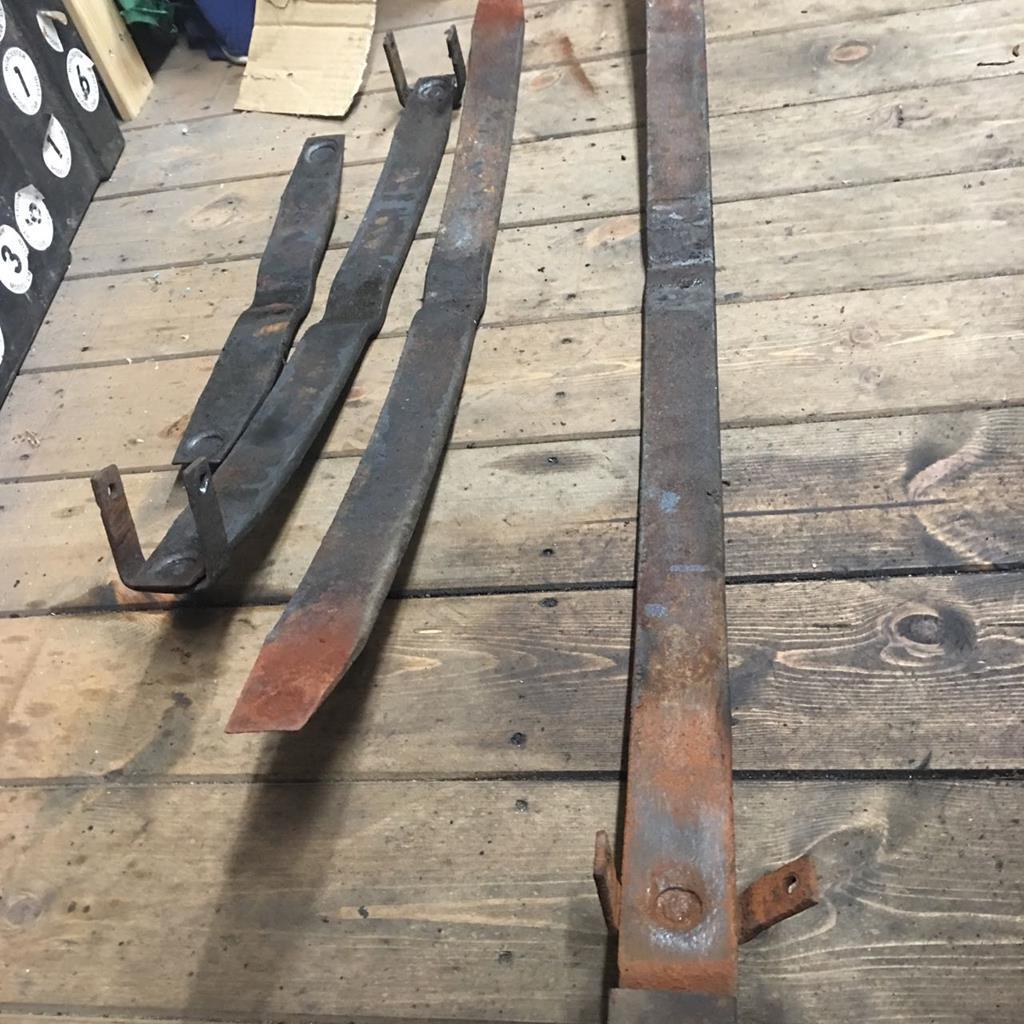 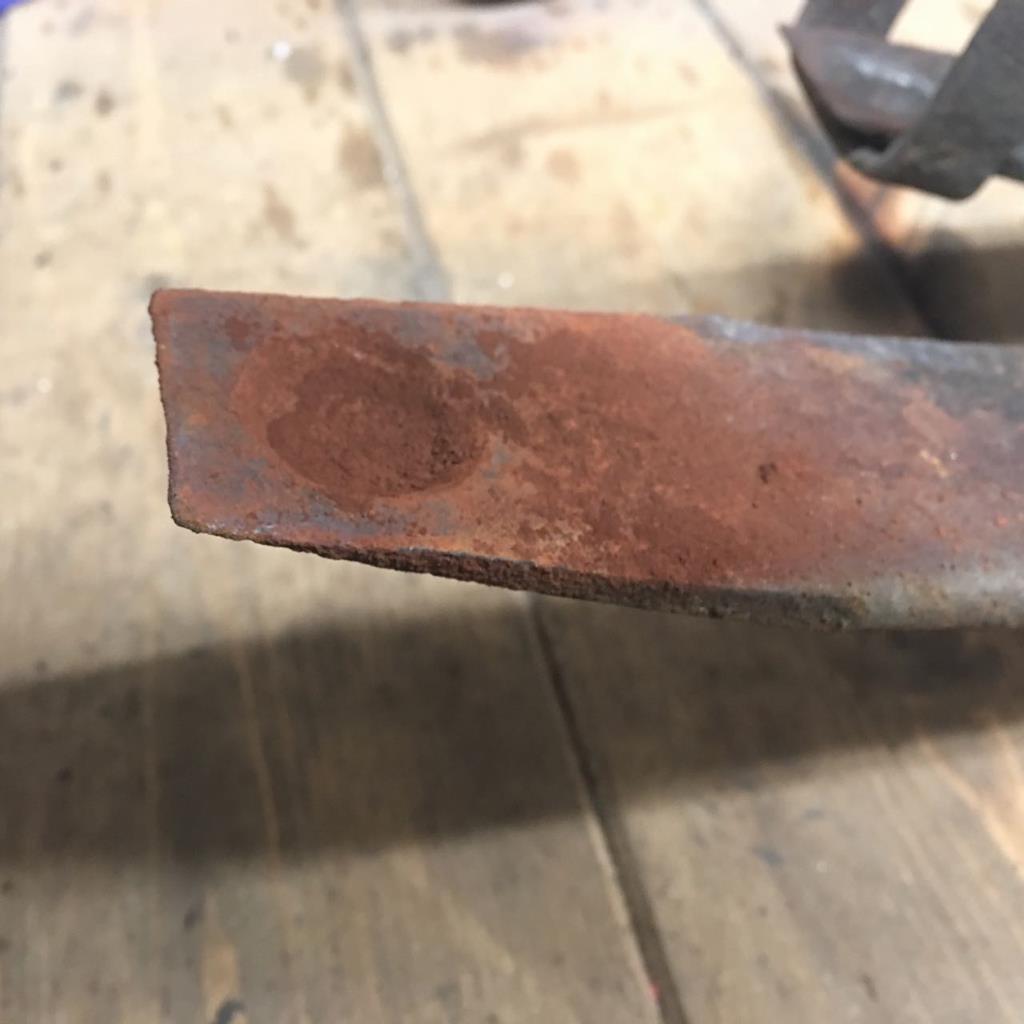 After a quick wire brush down it was looking ok, and the problem was clear. The spring isolation pads were all either missing or just utterly worn out. Here's an new Vs old, I shan't bother saying which is which.... 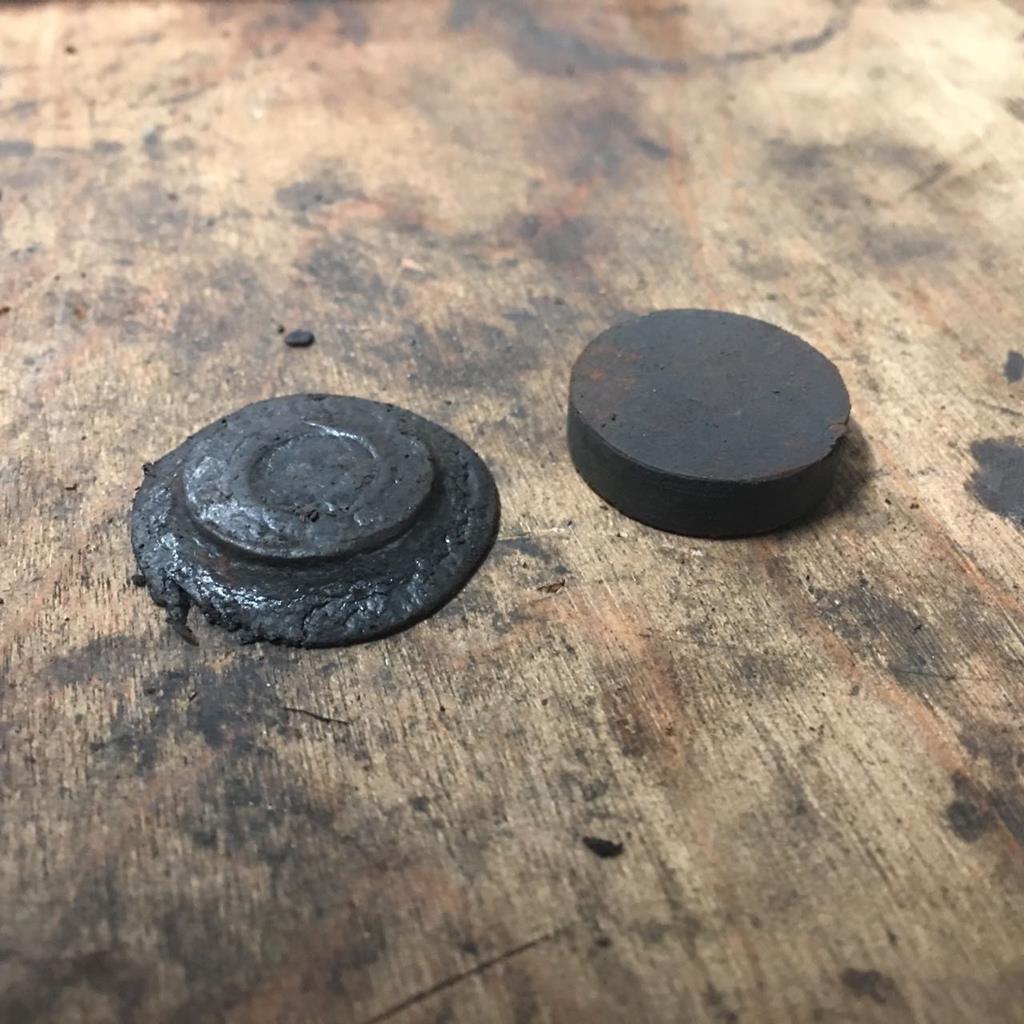 I put the spring back together with new isolators and a new pair for bushes for the spring eyes too while I was at it. With the spring eye bushes replaced, this means that every single bush, seal and bearing in the rear suspension has been replaced. Always a nice feeling.  With that all complete I bolted it all back together. It went suspiciously smoothly, so we'll see what falls off when I take it to the MOT! haha. Moving on to the front of the car, and that damned rust was once again rearing its head. Thankfully, it was only a fairly straight forward little repair for the front of the chassis. 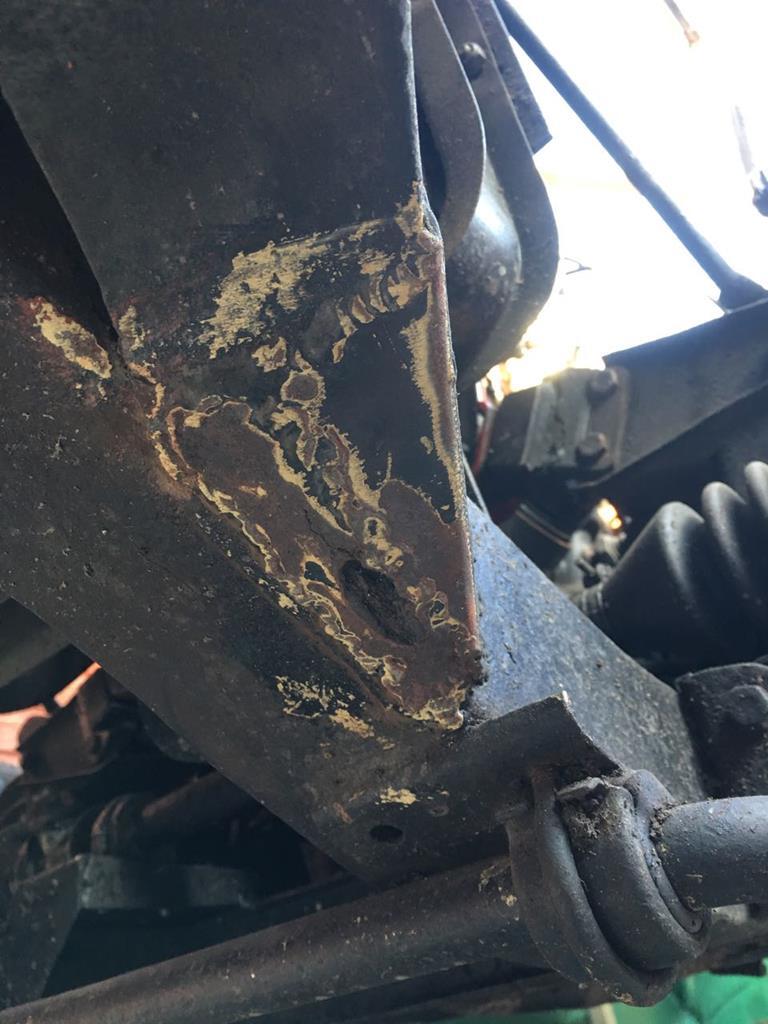 With a little bit of cutting, then some CAD... 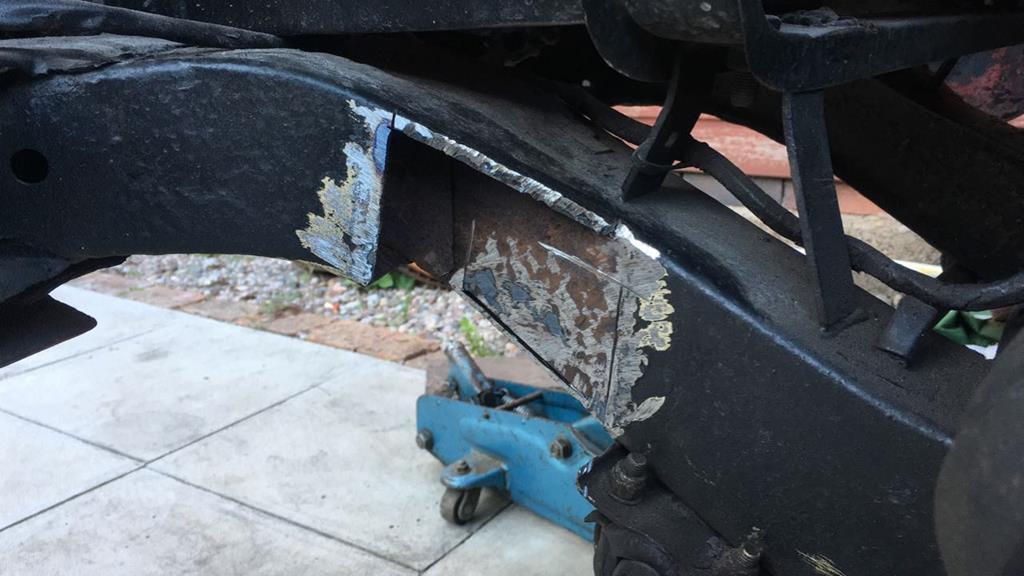 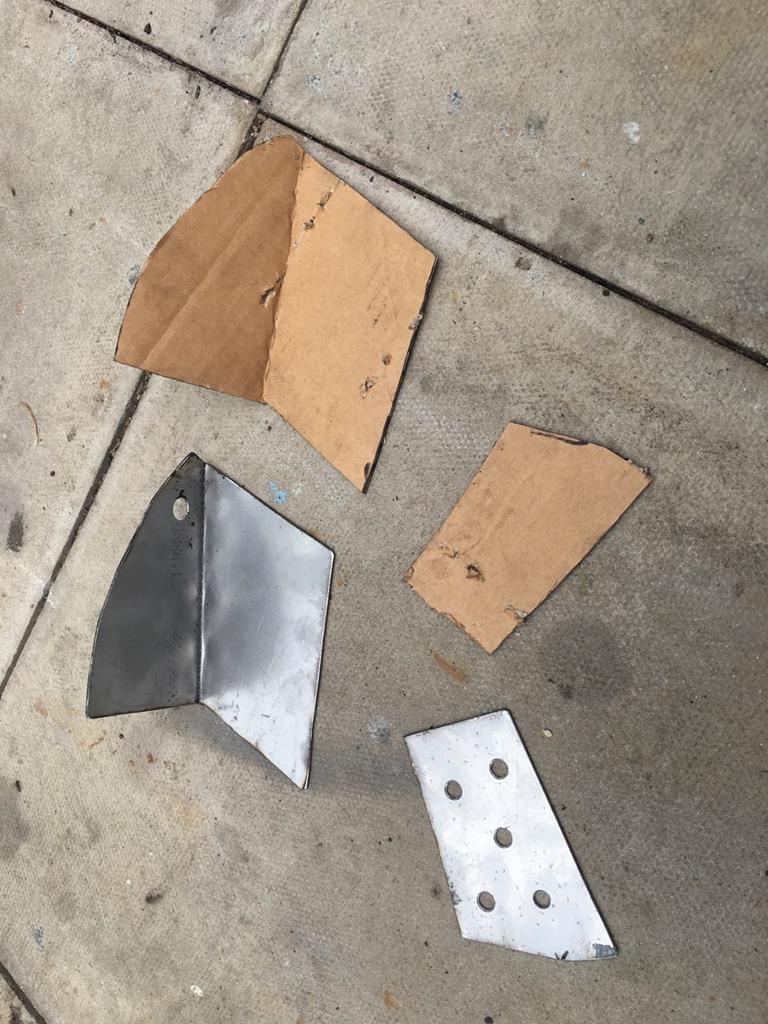 And then a quick splash of MIG and paint, that was sorted in no time. 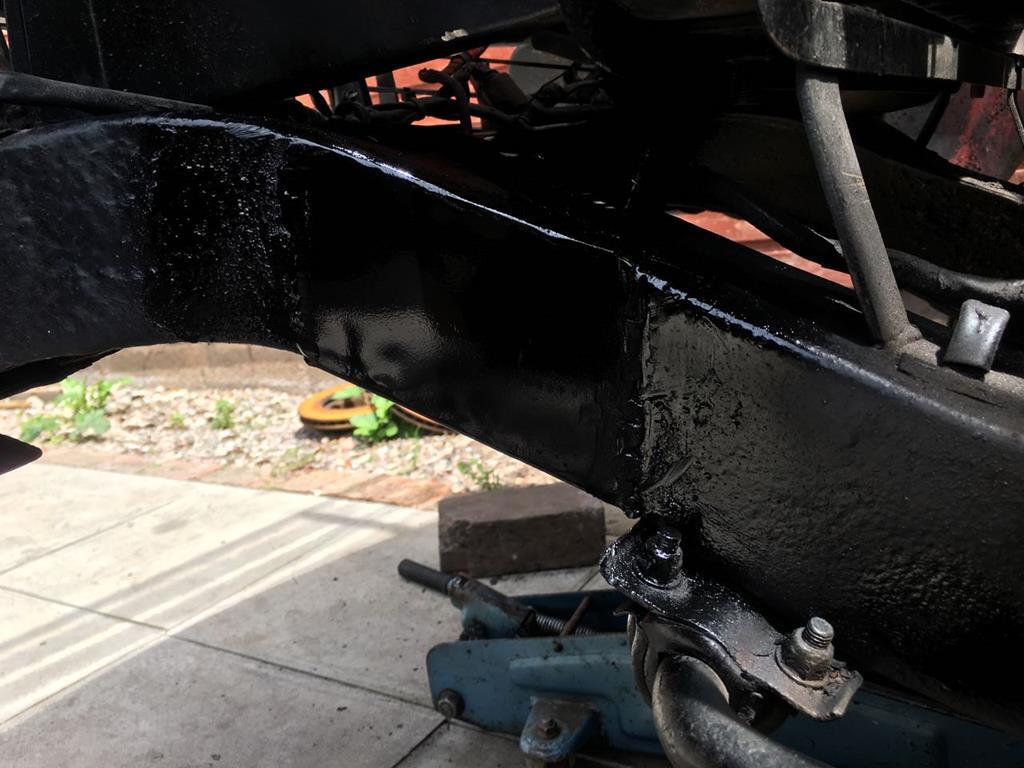 Getting close to no rust left on this car now! The front of the chassis under the bumper isn't great, but will do for now, and is easily accessibly at a later date as and when it needs sorting. Next up on my MOT prep list was the leaking front crank seal. 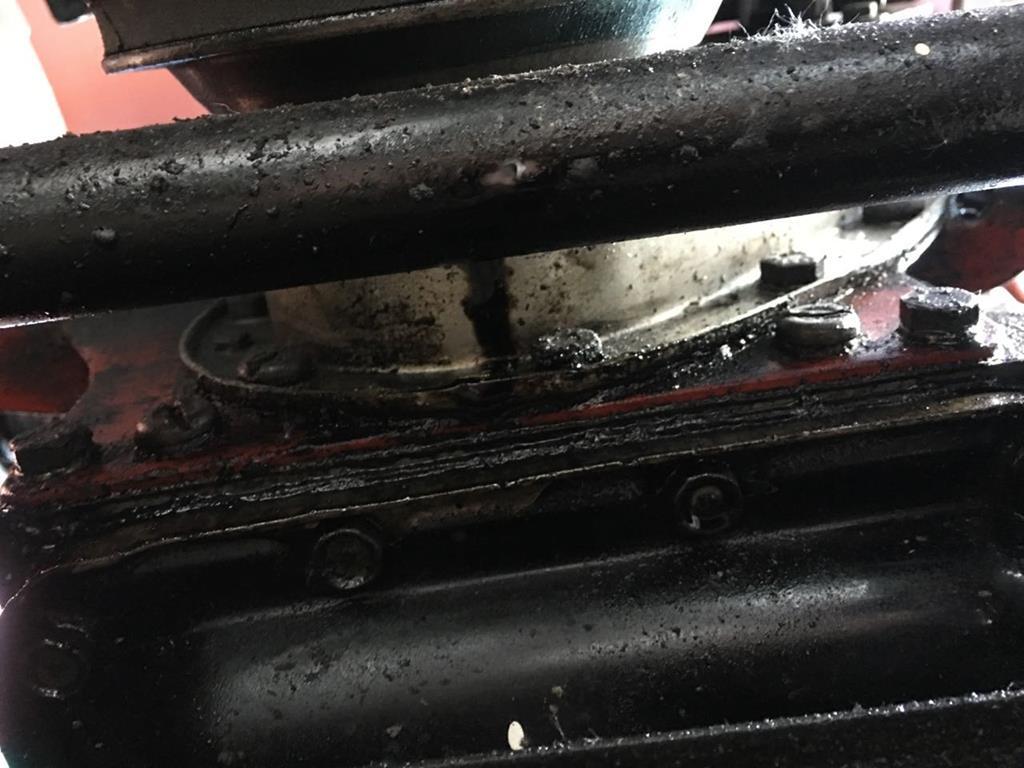 As you can see, it drips a fair amount and was making a mess of the whole underside of the engine and gearbox. I've no idea why Triumph decided to use such a massive nut to hold the front pulley on! Unsurprisingly I didn't have a 1 3/4" spanner to hand, os I had to make one up. It's a proper mans spanner this one! 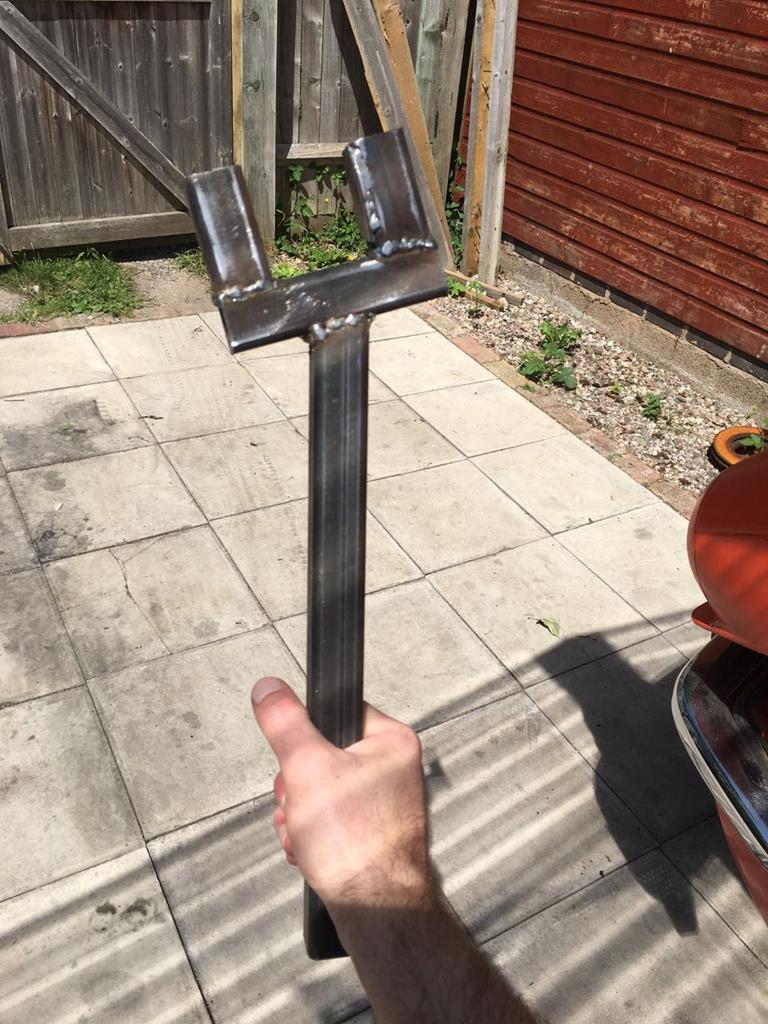 Anyway, I got the front cover removed without drama, all looking fairly clean under there. 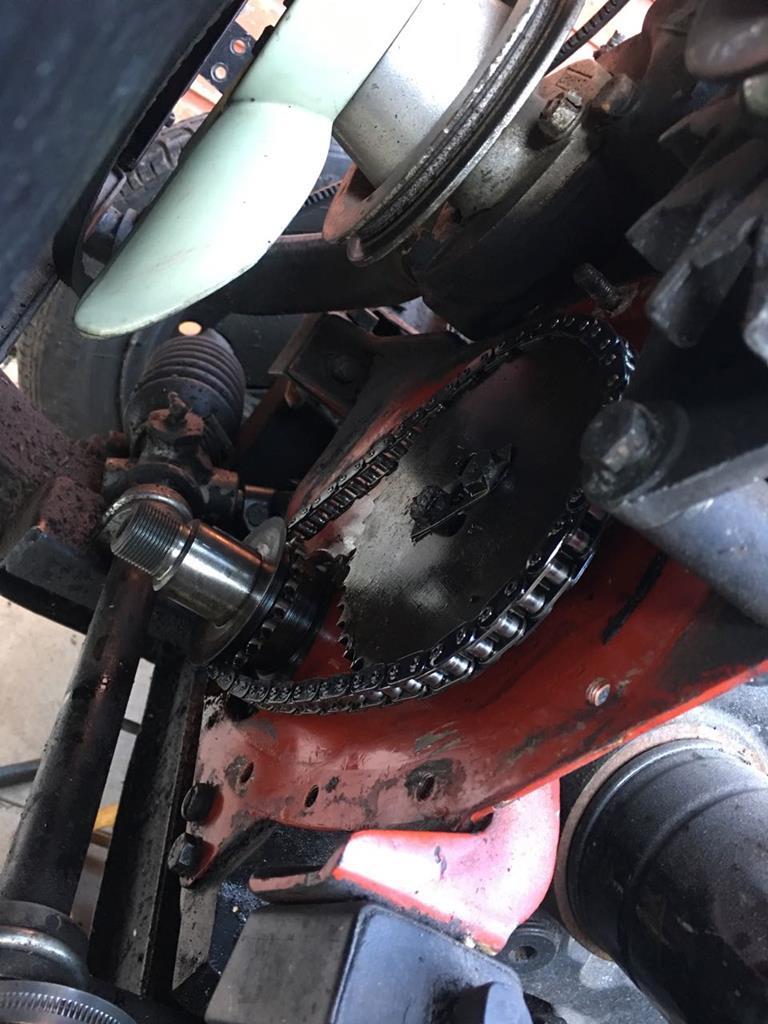 And the front cover ready to go back on with new crank seal, new cam chain tensioner and new gasket.  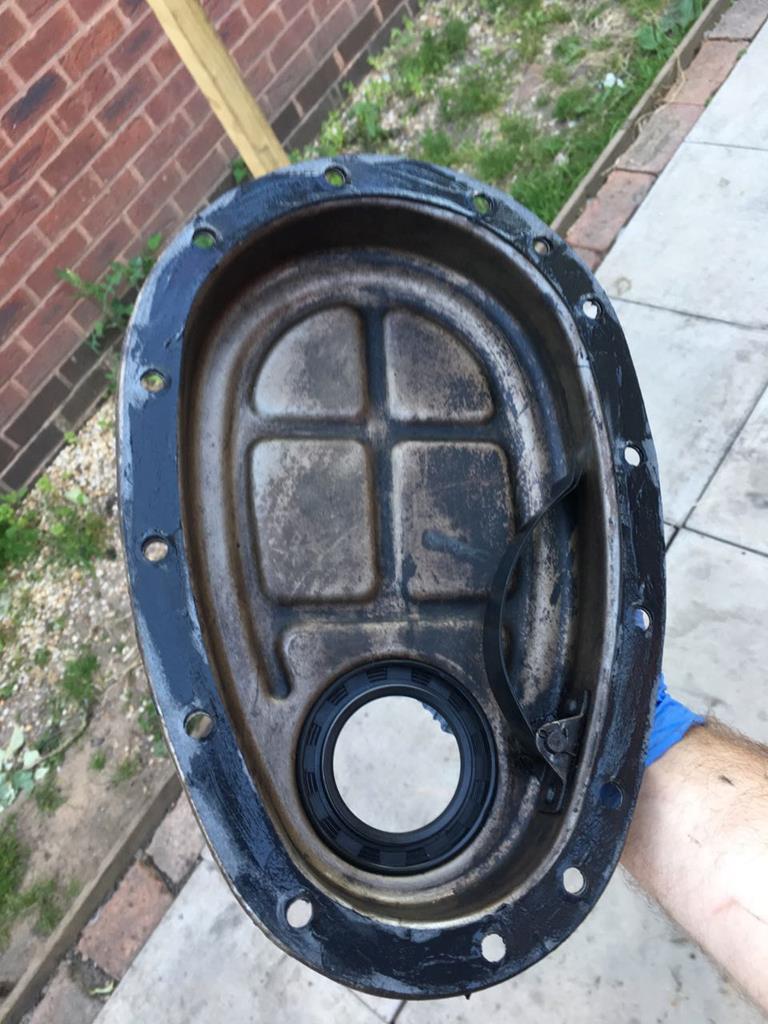 Seeing as I had to drop the engine oil to remove the cover I treated it to fresh oil and a filter. I can't believe how much smoother the engine sounds! Either what was in there was the wrong grade or was very very very old! I also popped a fresh pair of engine mounts on, as the current ones were heavily perished and looked like they were starting to tear. On to the brakes, I knew I needed new lines for the rear, so I splashed out on some fancy braided lines. 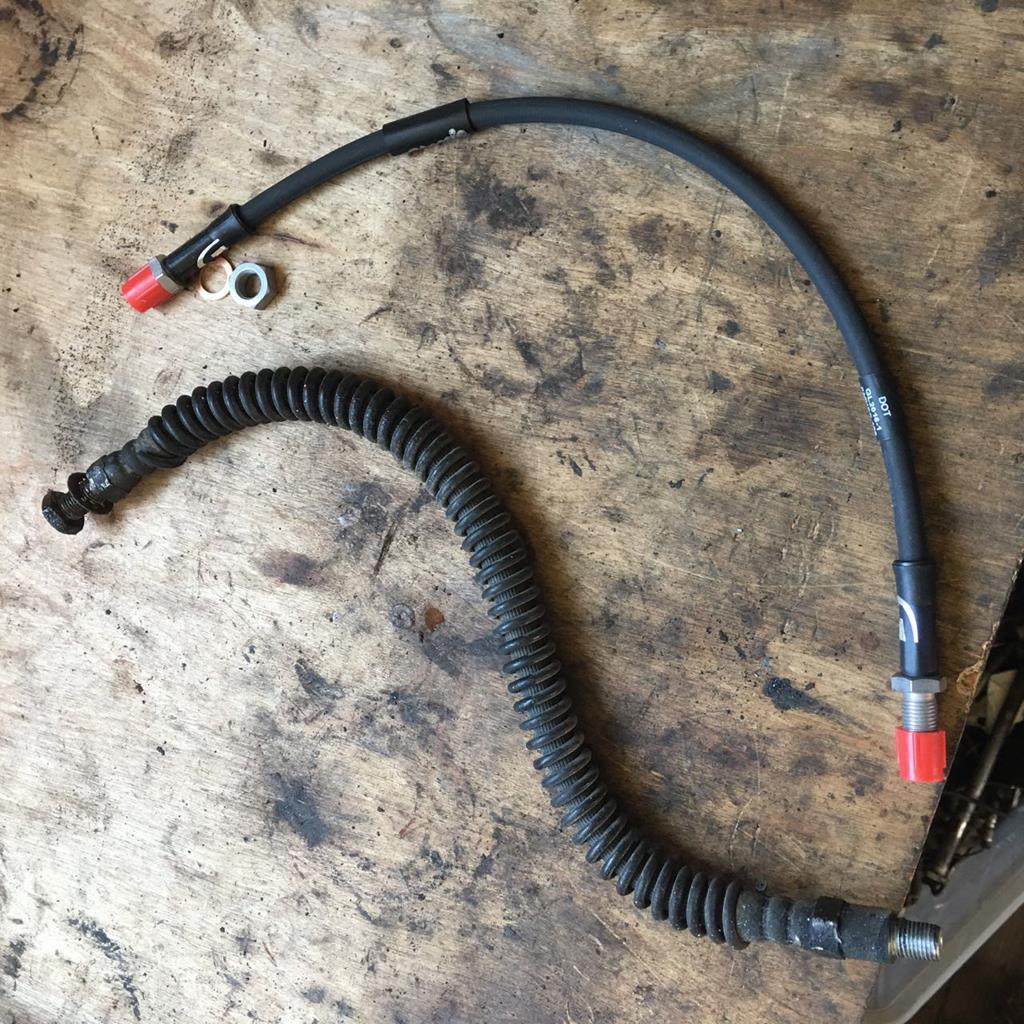 Brake pedal feels great now, really reminds me of a motorbike brake feel, without the servo you can really feel as the pads hit the disc/drum. They're still gonna require a fair amount of leg pressure to slow down mind... After getting used to driving my modern I forgot you have to actually apply pressure to the pedal to slow down and while manoeuvring the car the other week I lightly pushed the brake pedal in the Spitfire. Obviously it didn't slow down at all and I carried on into the side of the shed! Thankfully it was very slow and no damage done! hahaha. The last thing on my MOT list was some tyres. After going round in circles with my wheels thoughts for a while I decided the easiest thing to do to start with was just put some fairly cheap and cheerful 155/80/13s on my stock rims for now. They will make a good spare set, or winter set, as and when I sort some others out and for now it gets me rolling. 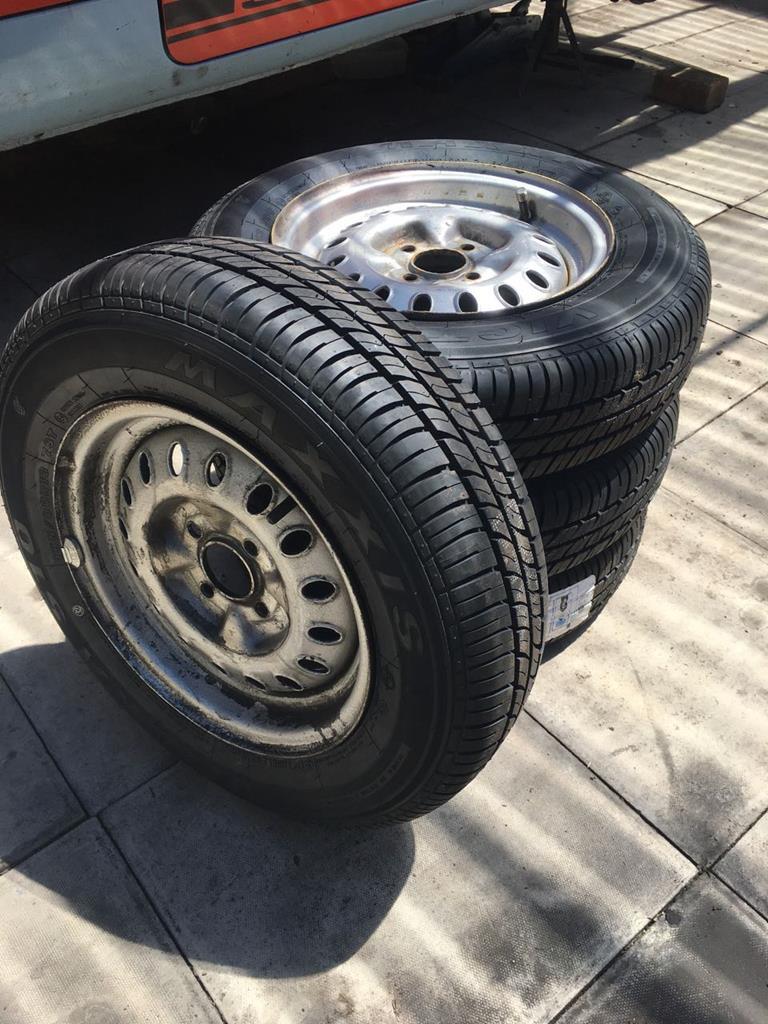 |
| |
Last Edit: Jul 19, 2018 21:35:53 GMT by goldnrust
|
|
goldnrust
West Midlands
Minimalist
Posts: 1,886
|
|
Jul 19, 2018 22:04:42 GMT
|
So we're getting close to a car I can drive again, but before I go any further it's time to sort that paint. I've done several DIY paint jobs now, and I'm beyond deluding myself that it will look as good as If I paid someone to do it for me. But equally I think going at it with a paint brush and some emulsion would probably look better than the paint job it's got currently, so nothing to lose. There's 3 main paint issues to deal with in prep before I get ready to get the spray gun out. 1, I've got to put a skim of filler over the join between the old metal and my new sills/lower rear arches. 2, the horrific orange peel will need flatting back. Finally 3, the bonnet needs a more serious investigation. Starting with number 1, I got some filler on the joins between the new metal and old. In a perfect world, it wouldn't need any filler here, but it's not a perfect world. My welding isn't perfect, and I need something to hide the gap between the various thicknesses of paint already on the old panels and the clean new panels! I started with the passengers side. 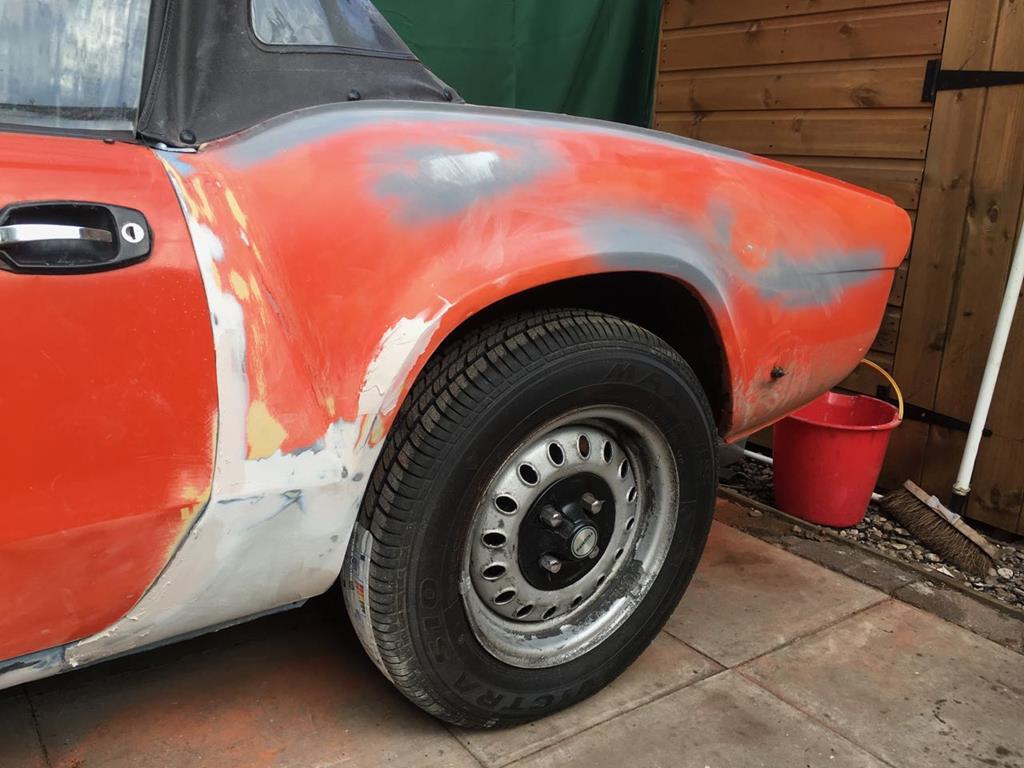 It didn't require much though, and when all sanded back and shaped it will only be 1-2mm thick, not the 1/2" I dug out in places before I started on the repairs! It still takes a fair amount of time though, I can never get it right in one pass, it always takes 2-3 thin applications and sanding back till I'm happy. As I was working my way round the rear quarter I started with problem 2, the orange peel. When I bought the car the previous owner suggested it just needed a machine polish and it would shine.... yeah right! I started by wet sanding the orange peel with a 1500, like I would with 'normal' orange peel, but quickly gave up, was hardly touching it. Much sanding later, having worked my way all the way up to 240 grit to actually make progress at a decent rate, and it was clear that by the time I got to the bottom of the pits in the orange peel I was well through the top coat and into the primer. Excellent paint prep by the last person to paint this car then! 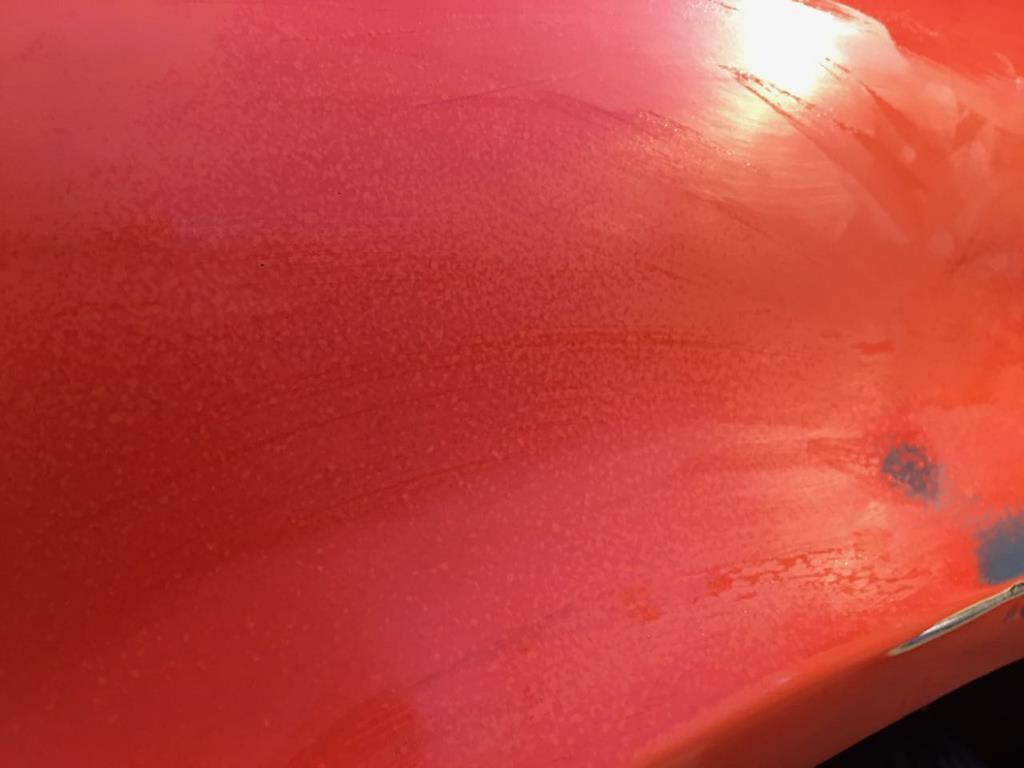 Anyway, I kept on working my way methodically through it. The best thing about sanding like this by hand is it's quiet. Almost makes it pleasant to just switch off my brain, listen to the radio and just keep sanding, just keep sanding, just keep sanding.... Passengers side rear and door is done. 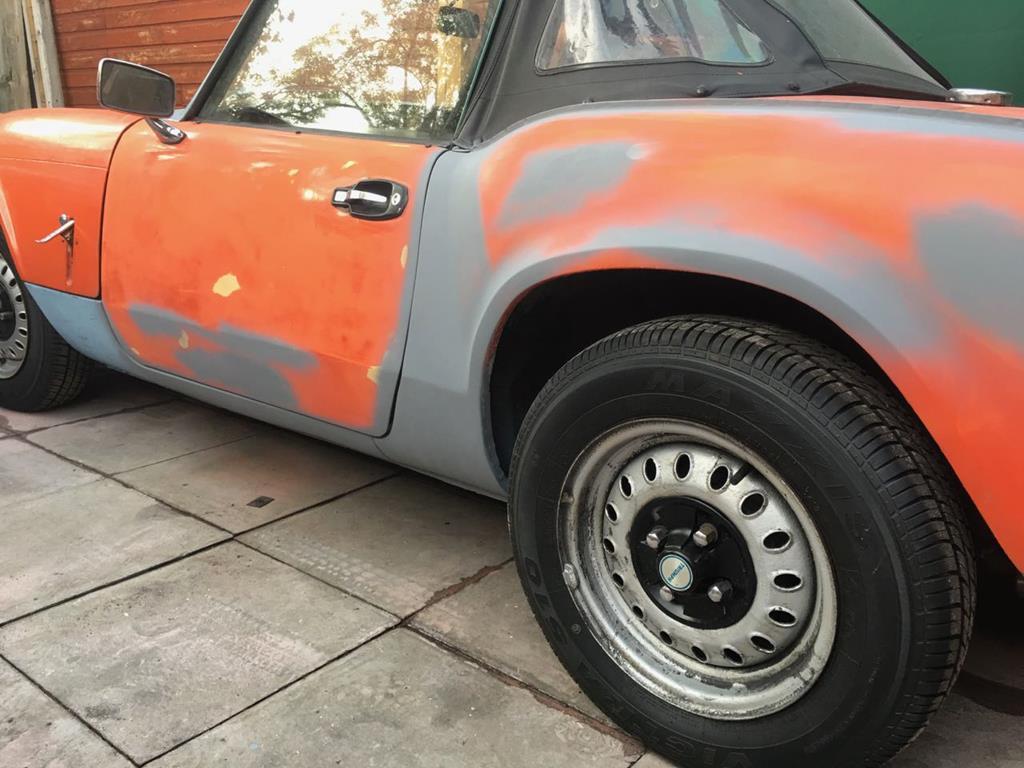 And as if by magic, the drivers side is done too! The driver side door bottom is still a bit crappy, but it will do for now. 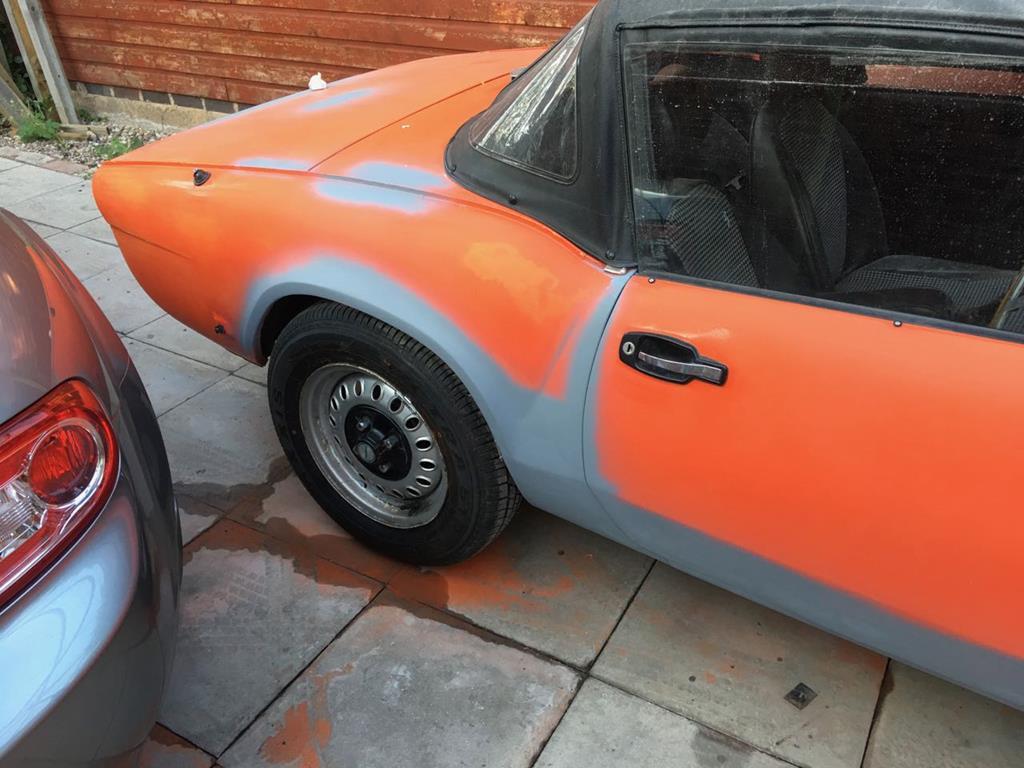 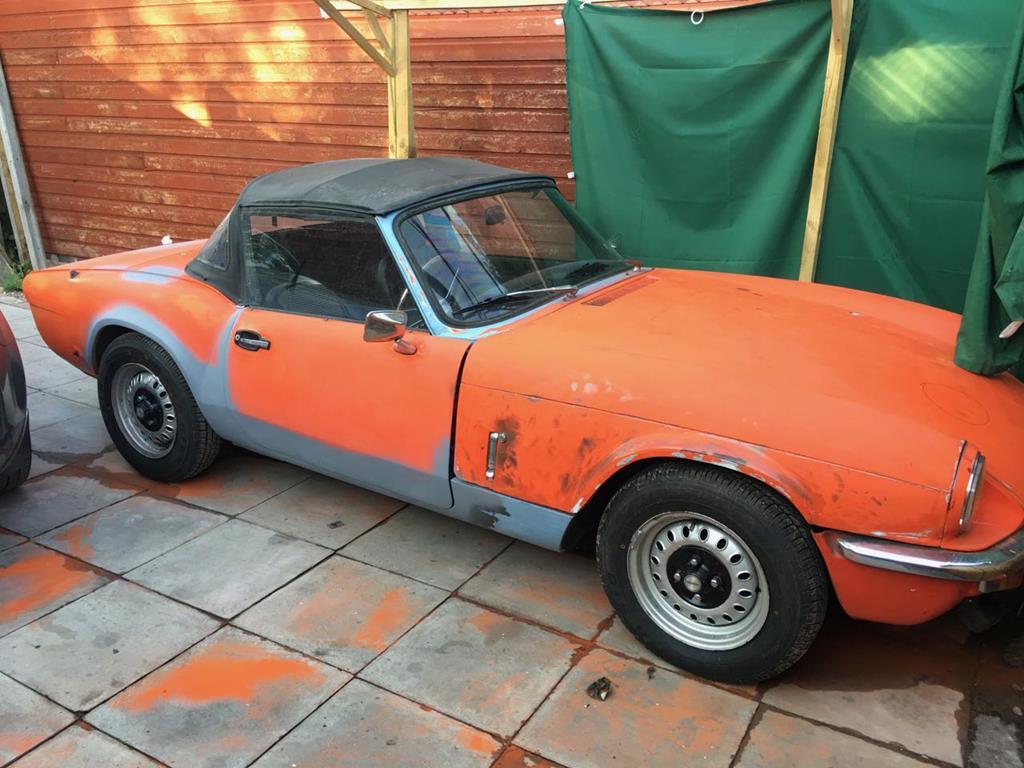 Moving on to the bonnet, uuurghh. So it looks like whoever last painted the bonnet didn't know what they were doing. They were either very heavy handed with a power sander, or sanded it by hand without a block, because there's some serious ripples and high/low spots, and its mostly in the paint/filler not in the metal work when you look from below. If this was a money no object job, then getting the bonnet blasted or dipped would probably be for the best, but it's not. So instead I gave it a quick guide coat with some silver I had lying about in the shed, so I could see what I was doing, then got some 60 grit and a sanding block and got to work. After what seemed like days it was still really bad. 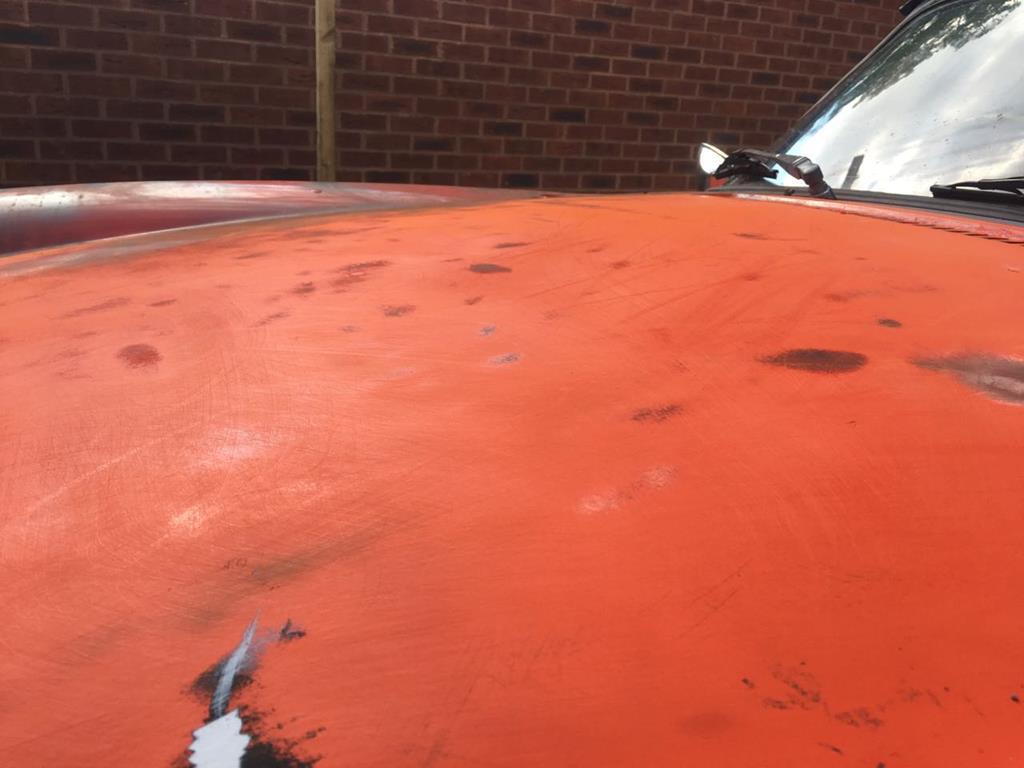 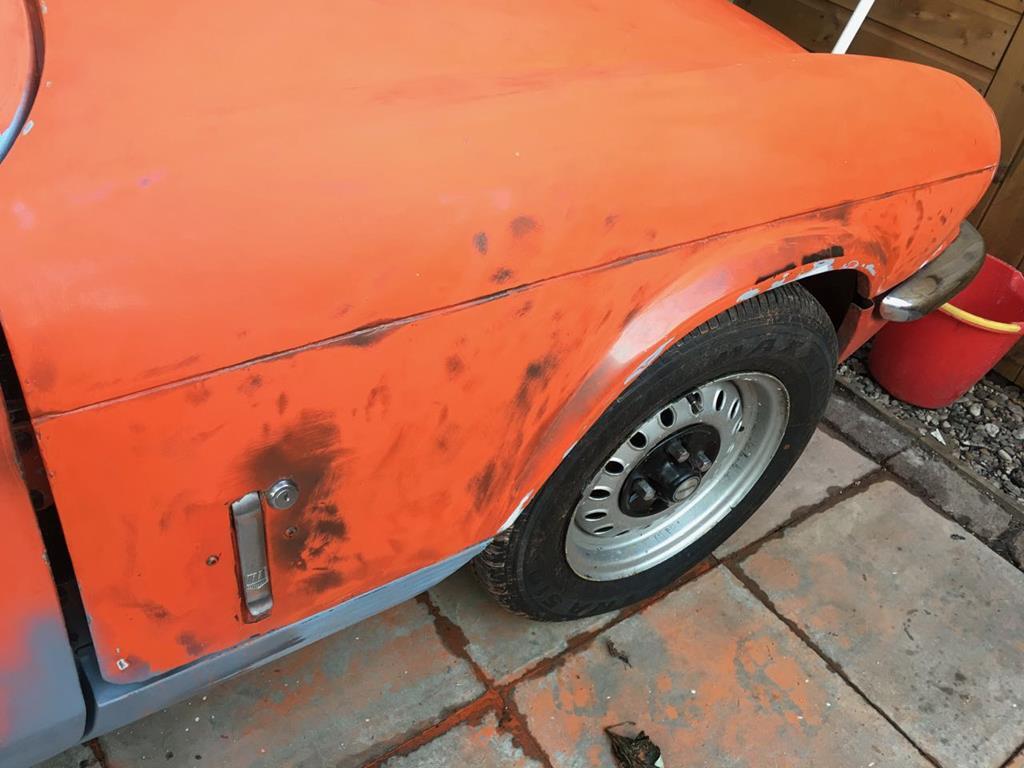 Everything darker/shiny is a low spot. But I've stuck with it and I've been slowly working my way through it, sanding back very thick layers of paint till it soothes out, putting a very thin skim of filler into some of the deepest low spots and gentle tapping down the highest spots. I can see light at the end of the tunnel! 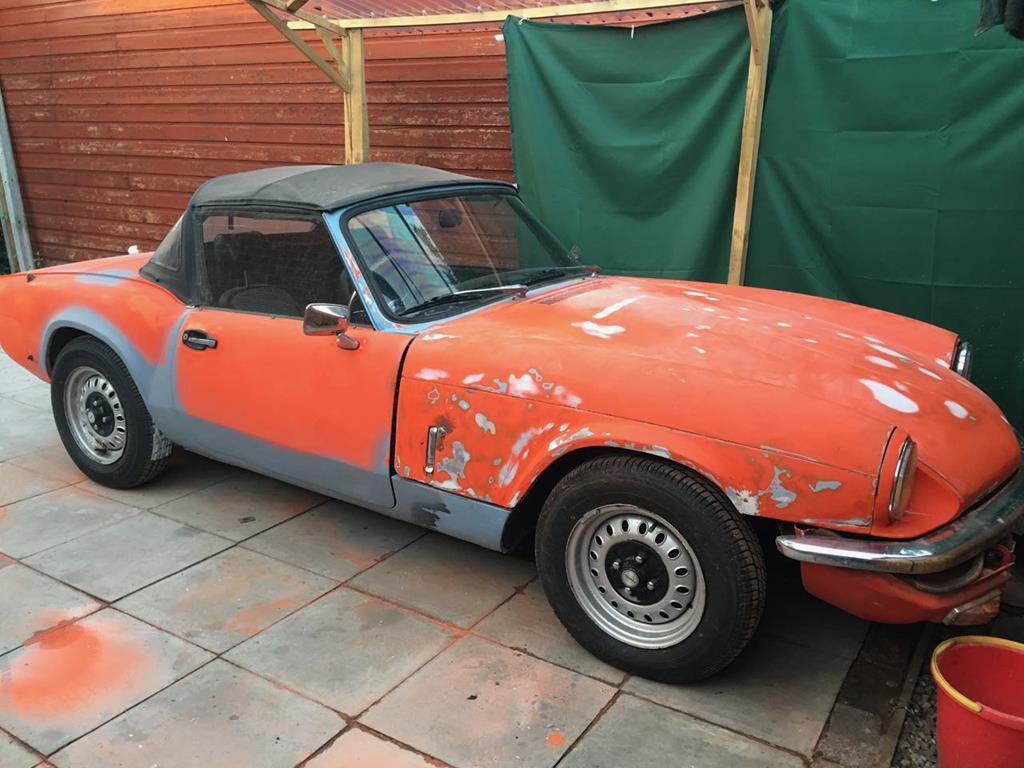 I should think there's still a good few hours of work left before I'll call it done, not least in sanding away the 60 grit scratches with something a fair bit finer, and its still not going to be perfect, especially around the latches, but it will be so much better than before. The big question is, will I get it on the road in time to drive it to the gathering.... hmmm. |
| |
Last Edit: Jul 19, 2018 22:09:02 GMT by goldnrust
|
|
|
|
|
|
goldnrust
West Midlands
Minimalist
Posts: 1,886
|
|
Jul 23, 2018 21:50:23 GMT
|
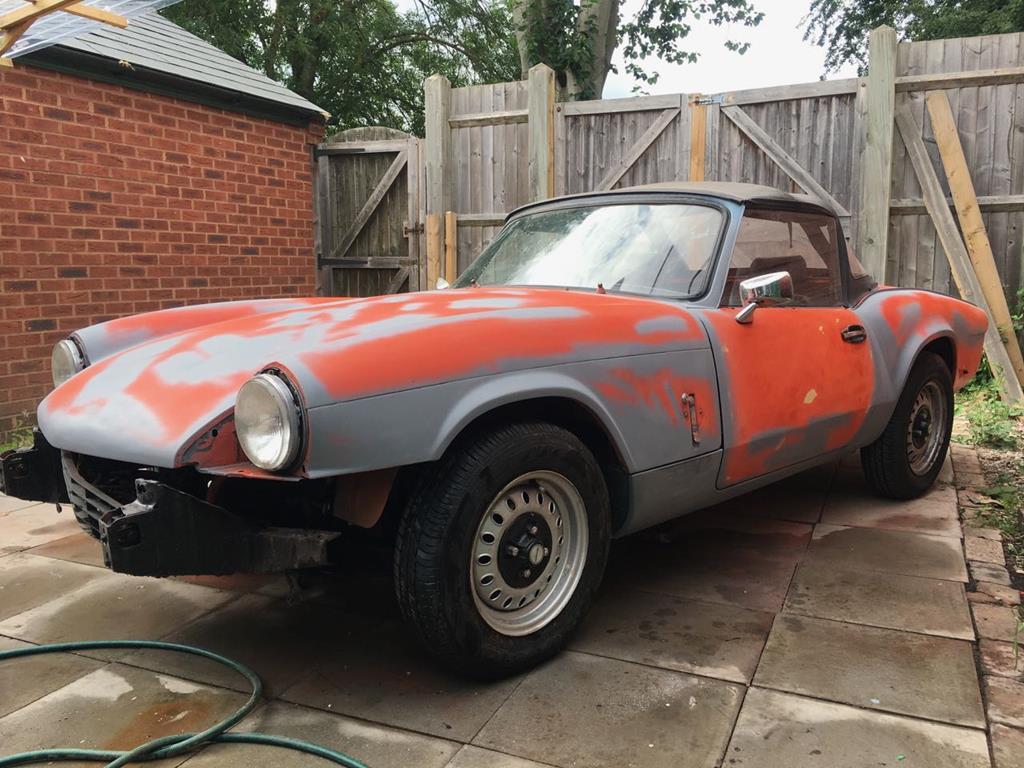 So much sanding... But there is light at the end of the tunnel. I've got the bonnet pretty flat, it's not perfect, but it's a lot better than it was. So I've spot primed the bare metal spots and the areas that have been filled and there was nothing for it but to bite the bullet and get ready to paint. 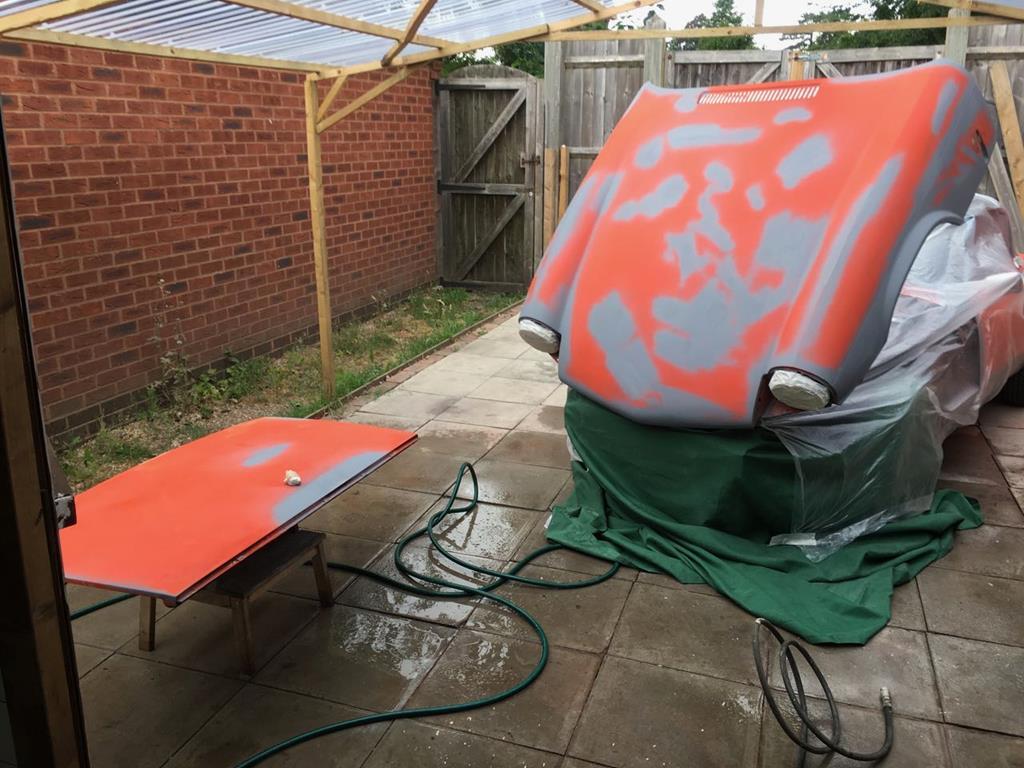 As I'm going for a colour change, it wasn't going to be a doors shut job. The main shell was going to be the most challenging thing to paint, so I thought I'd start with the boot lid and bonnet which would be a little easier. Thankfully the colour I've chosen, Triumph Wedgewood Blue, is quite forgiving and being an old fashioned flat colour it s easy to paint with too! 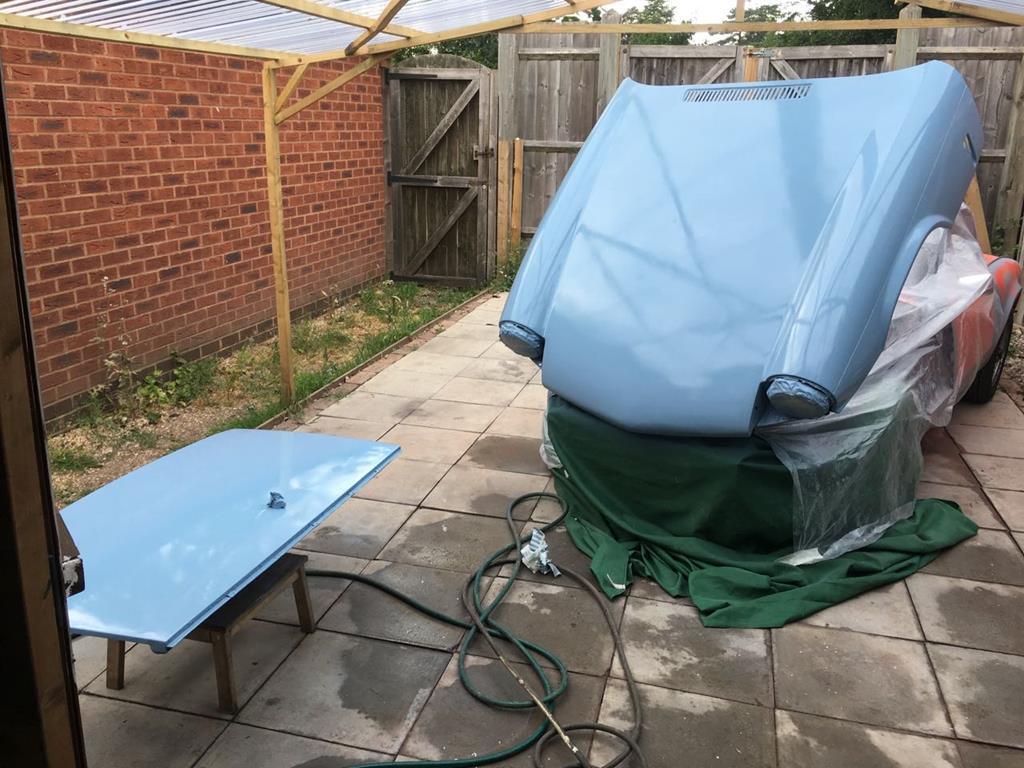 The colours gone on really well and I'm really happy with the shade. I also managed to get a better finish out of my cheap spray gun than I did on the last full respray I did (which was my Lancia). The practice of a few more smaller spray jobs I've dome since has helped. On the downside, I just wanted this done now and to get driving, so I rushes through some of the final surface prep, and this is showing up with some deeper scratches from the harsher sand paper grades still remaining along with some of there surface imperfections. It's not the end of the world though. Being a driveway paint job it's got its fair share of dust and insects anyway, so I'd always planned to give the paint a final wet sand and then compound it, and this should remove 99% of my poor prep issues. So on to the next section of car to paint, and this time it made sense to do the main body. Here she is all masked up and ready to go. 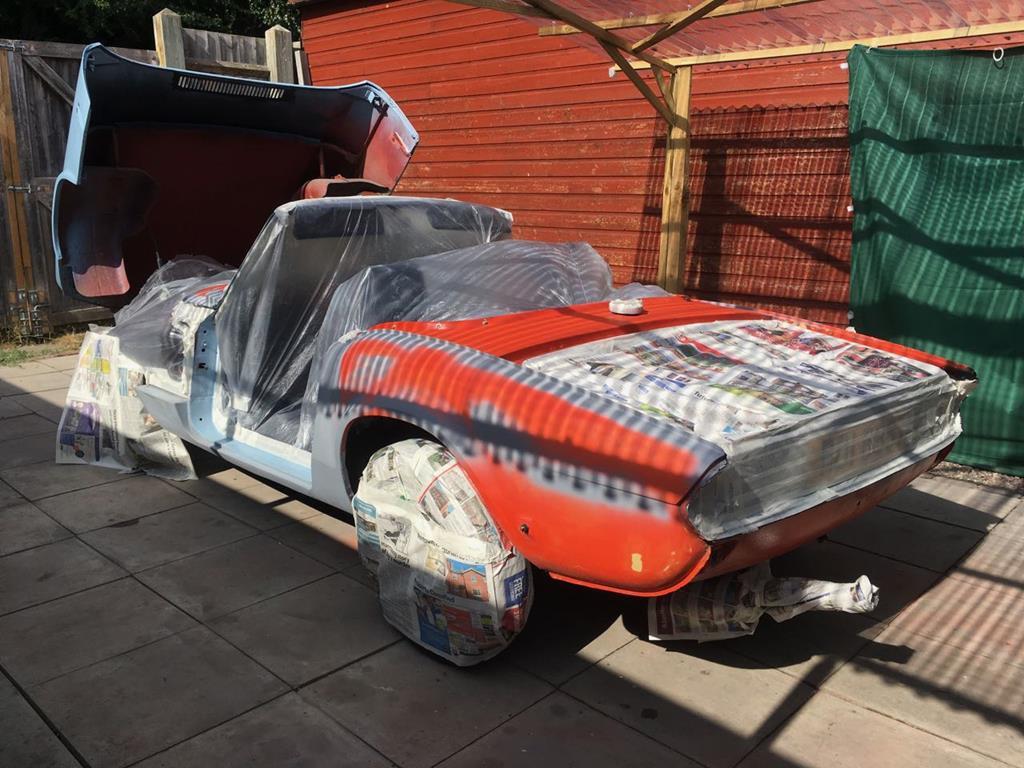 And a few minutes later it was also all blue. 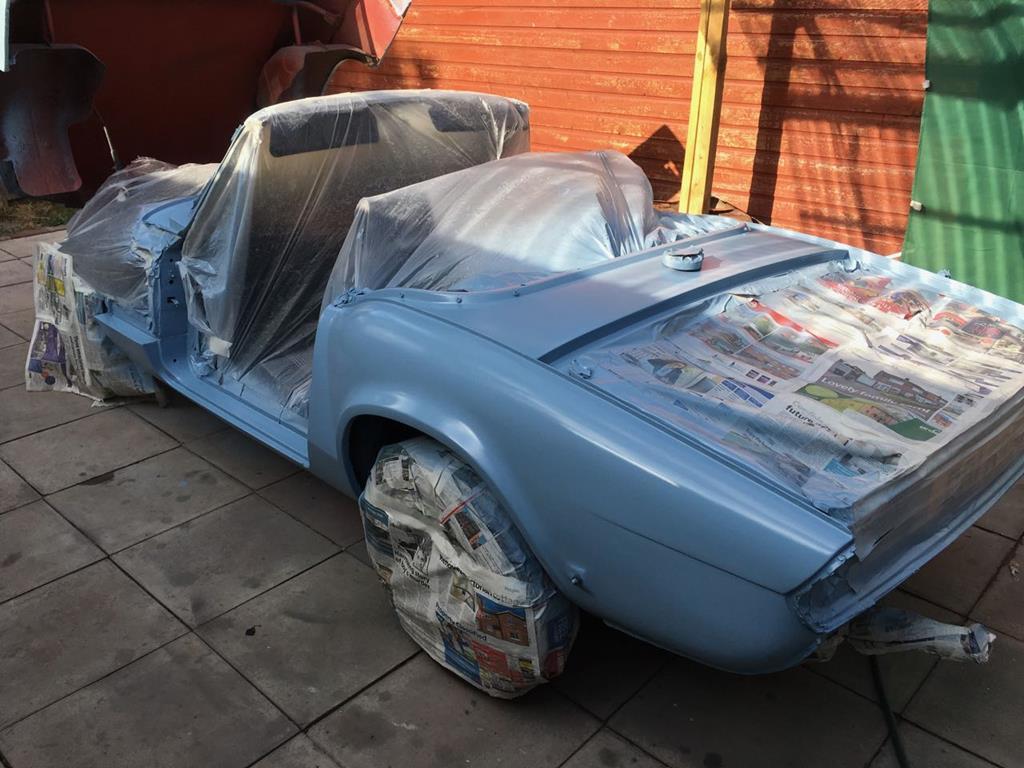 Same sort of issues as the first two panels, but not as bad. Once I'd removed the masking I popped the boot lid back on just to see how it looked. 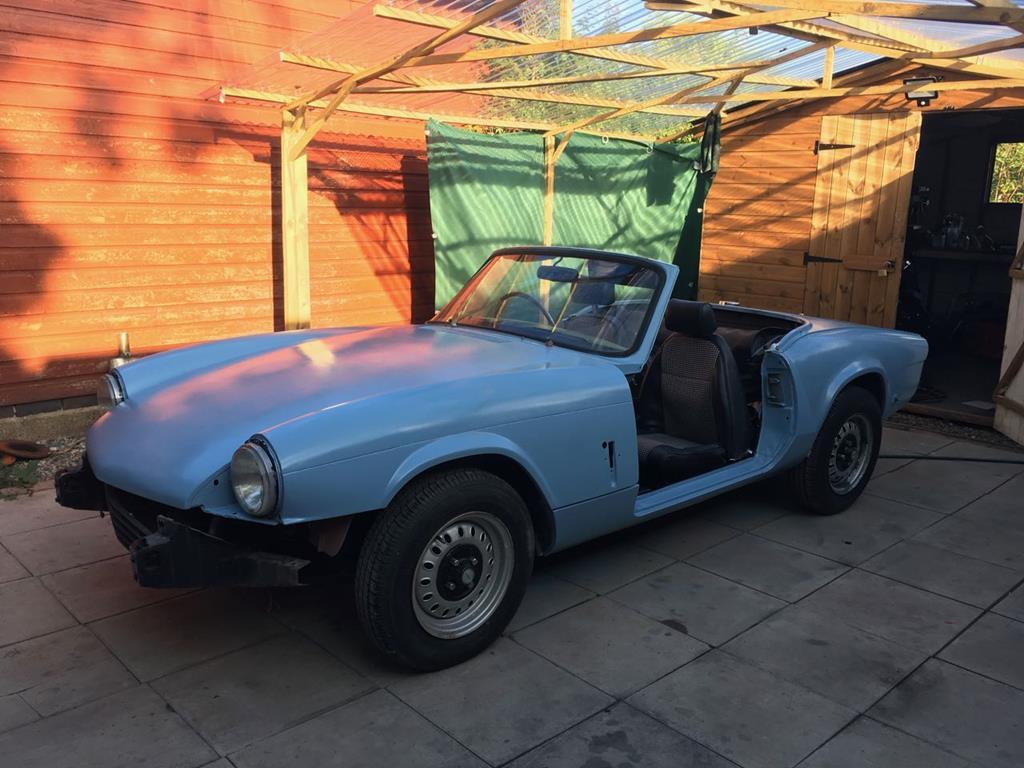 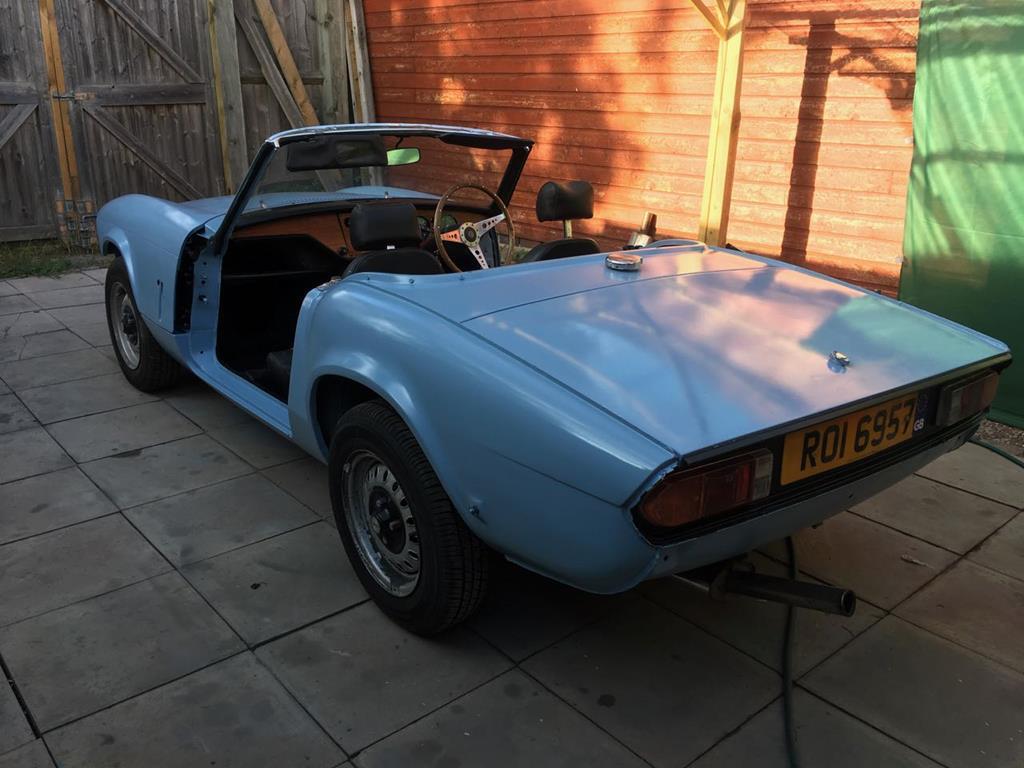 I'm even more pleased with the colour now I can see it without any Orange remaining. I think it's working really well. Eagle eyes viewers may also notice that for the moment I've done the rear panel in satin black. I'm cautiously optimistic that it's gonna look good when its all complete, but if it doesn't then its a nice easy section to repaint. I think either way it might look a bit out of place till we're a bit lower and with a few more modified touches. Anyway, next up, I've got to prep the front valance and head light surrounds, and strip down the doors. Then I should be ready for the next round of painting! |
| |
|
|
|
|
|
Jul 23, 2018 23:09:43 GMT
|
|
I have always enjoyed your threads and this one is another fine example of your talents.
I love the new colour that you have chosen.
Warren
|
| |
|
|
MiataMark
Club Retro Rides Member
Posts: 2,971
Club RR Member Number: 29
|
|
|
|
|
I'm a bit sad to see the orange go as I had a pimento red 1500 but the blue does look good. Also seeing this gives me some hope that I can do the paint on my MX5, although mine will be a rattle can job and I've got to do the welding first.
|
| |
1990 Mazda MX-52012 BMW 118i (170bhp) - white appliance 2011 Land Rover Freelander 2 TD4 2003 Land Rover Discovery II TD52007 Alfa Romeo 159 Sportwagon JTDm
|
|
|
|
|
|
|
|
Ooh that is a nice shade of blue!
|
| |
|
|
|
|
|
Jul 24, 2018 14:32:03 GMT
|
|
What a brilliant thread. Just had a good read throughout the day.
A good friend of mine has a Spitfire, cracking little bit of kit. His motor absolutely screams, he built it years ago with a custom cam and all sorts of bits and bobs. It chucks fantastic skids in the wet and hammers it quite nicely in the dry too.
I can also relate heavily to the undefeated air hammer, you know when that comes out it's a do or die moment for any part that is involved, in fact it was my mate with the Spitfire that introduced me to the ways of the air hammer, coincidence? haha
So, yup confirmed, cracking thread. Keep at it and I hope you get back to driving it soon!
|
| |
|
|
goldnrust
West Midlands
Minimalist
Posts: 1,886
|
|
Jul 24, 2018 21:21:24 GMT
|
Cheers guys  I'm glad the blue is generally going down well! I never really got on with the orange, I tried to like it but it just wasn't me. I know how you feel though Mark, sometimes a car gets attached to a colour in your mind. Like my old gold Rx7, I can't quite imagine having another one that wasn't gold! From my experience rattle canning a whole car is possible, and possibly even easier than using a proper gun for the smaller sections but getting a good finish on large sections like the bonnet and roof can be tricky. I definitely found using the paint shop rattle cans that come with a cap that gives more of a vertical stripe of paint rather than the normal circle make it easier to cover large areas though. Haha, Maybe it's something about old Triumphs that requires the air hammer Octane Riot! My first air hammer experience was when I was defeated in removing the lock ring from the front wheel bearing on my Lancia. After even going to a truck workshop and borrowing their 3/4" drive air impact gun to use in the special tool and still failing, I thought I'd check in with a classic place (which happened to specialise in Triumph Stags come to think of it...). The guy there suggested an air hammer and had the lock ring off in a couple of minutes! I like the sound of an engine that screams, so far I'd not really describe my Spitfire engine as having that kinda experience. It's going to feel especially flat when I get back into driving it, as my new daily is now also a small 2 seater but with about 100 more HP! Will probably have to do something about that... |
| |
|
|
|
|
|
|
|
|
Great read as usual and I'm loving the new colour!!!
I'm over here in blighty for a month and wow its hot. You've had perfect weather for painting.
It's also great weather for driving about in a silver n/c mx5 I imagine..... :-)
(I think that's the bum I have spotted in one of your pics)
|
| |
Last Edit: Jul 25, 2018 5:30:58 GMT by yoeddynz
|
|
MiataMark
Club Retro Rides Member
Posts: 2,971
Club RR Member Number: 29
|
|
Jul 25, 2018 16:32:23 GMT
|
It's also great weather for driving about in a silver n/c mx5 I imagine..... :-) (I think that's the bum I have spotted in one of your pics) Mk3? and I'd call it grey not silver :-) |
| |
1990 Mazda MX-52012 BMW 118i (170bhp) - white appliance 2011 Land Rover Freelander 2 TD4 2003 Land Rover Discovery II TD52007 Alfa Romeo 159 Sportwagon JTDm
|
|
|
|
|
Jul 25, 2018 18:45:32 GMT
|
|
I really like the blue. It's good your painting and preparing it yourself. My van needs preparing and painting but for some reason a lack any interest in learning it. It just seems like hard work. Well done
|
| |
|
|
goldnrust
West Midlands
Minimalist
Posts: 1,886
|
|
Jul 25, 2018 21:19:05 GMT
|
Alex, your bum spotting skills are correct, the new daily is a silver (or shiny grey if you prefer!  ) nc2/m3.5 Mx5 2.0 Sport with the electric foldy roof. I figured trying to get a daily to live up to the luxury of the Jag, whilst fulfilling the sensible daily needs of reliable/sensible economy/etc (none of which the Jag was doing haha) was going to be a tall order, so went in a different route and went back to my roots with an Mx5. It feels good to be home.  And yes, the weathers been rather un-British for a while! As you say this long dry spell has made getting the prep done much easier especially as I'm only working under a car port. I've been waiting till later afternoon/evening to paint mostly though, as I didn't want the panels to be too hot from the direct sun. Jonesy, yeah paint is a a lot of hard work, especially if you're doing the rubbing down by hand! Taking on something like a van would be a big task! Like most of these things, I worked my way up from small things like painting a cam cover, though to mid sized jobs like repainting a door bottom or sill after welding all with rattle cans before moving on to a proper compressor and spray gun when I first painted whole panels, like the door and front wings on my Rx7. This is my second attempt at painting a whole car. I'm still learning lots! It's very satisfying though, just takes a lot of time.  |
| |
|
|
|
|

 I managed to remove the nut, but there was no way the bolt was moving at all. At this point the garage suffered a casualty....


 I managed to remove the nut, but there was no way the bolt was moving at all. At this point the garage suffered a casualty....


 ) nc2/m3.5 Mx5 2.0 Sport with the electric foldy roof. I figured trying to get a daily to live up to the luxury of the Jag, whilst fulfilling the sensible daily needs of reliable/sensible economy/etc (none of which the Jag was doing haha) was going to be a tall order, so went in a different route and went back to my roots with an Mx5. It feels good to be home.