glenanderson
Club Retro Rides Member
Posts: 4,262
Club RR Member Number: 64
|
|
|
|
Yep. Geared down accordingly and wired through the neutral switch and clutch switch so you cant choose a combination of any gear plus reverse 😂😂😂 So it’s inhibited electrically so you’ve got to have it in 1st, with the clutch out, engine not running etc? Be interesting to see how it’s physically mounted. I’m assuming it must have to be sat the other side of the flywheel too. |
| |
My worst worry about dying is my wife selling my stuff for what I told her it cost...
|
|
|
|
glenanderson
Club Retro Rides Member
Posts: 4,262
Club RR Member Number: 64
|
|
|
|
|
Or does it drive downstream of the gearbox? So the engine can be running, it just has to be in neutral or with the clutch in?
Good stuff, whatever. I agree that reversing gearboxes are a bit pants. I used to work on Wickham rail trolleys, which had Ford 1172 sidevalve engines, three speed and reverse gearboxes (out of 100E Pops), and a reverse gearbox. The driveline shunt with them used to cause dreadful clutch judder.
|
| |
My worst worry about dying is my wife selling my stuff for what I told her it cost...
|
|
|
|
|
|
|
|
Drives onto the output shaft of the gearbox
|
| |
|
|
jamesd1972
Club Retro Rides Member
Posts: 2,907  Club RR Member Number: 40
|
|
|
|
|
Onto a modified flywheel / gear ring or just using a suitable cog ?
Small back wheels starter speed etc. must make the gearing question interesting.
How big a battery do you need to do j-turns ?
|
| |
|
|
glenanderson
Club Retro Rides Member
Posts: 4,262
Club RR Member Number: 64
|
|
|
|
Drives onto the output shaft of the gearbox Ah. That makes sense. 👍 |
| |
My worst worry about dying is my wife selling my stuff for what I told her it cost...
|
|
|
|
|
|
|
Onto a modified flywheel / gear ring or just using a suitable cog ? Small back wheels starter speed etc. must make the gearing question interesting. How big a battery do you need to do j-turns ? Due to the size of the wheels,a flywheel will be too big,so have to find something smaller and find a way of dropping the gear ratio down somewhere else. Will need to run something a bit bigger than a standard bike battery as otherwise if you don't rev the engine when you reverse it dies due to the load being put on the generator. |
| |
|
|
|
|
|
|
|
Knocked up a couple of mandrels yesterday to reinstall the various sight glasses,bearings and waterpump seals 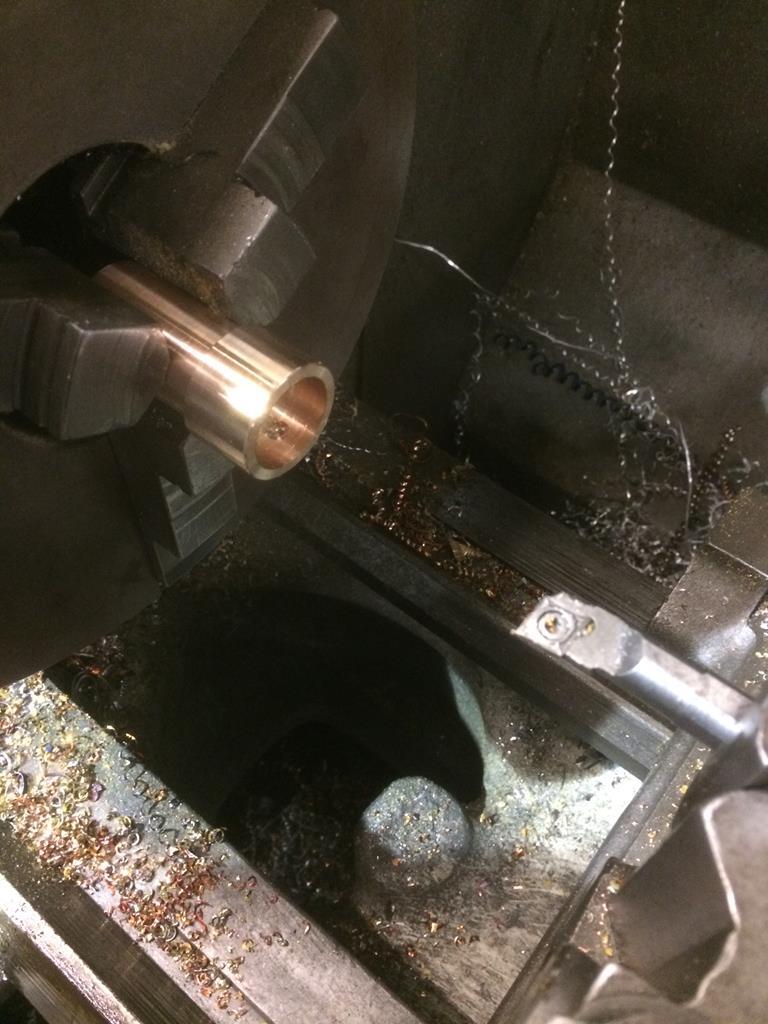 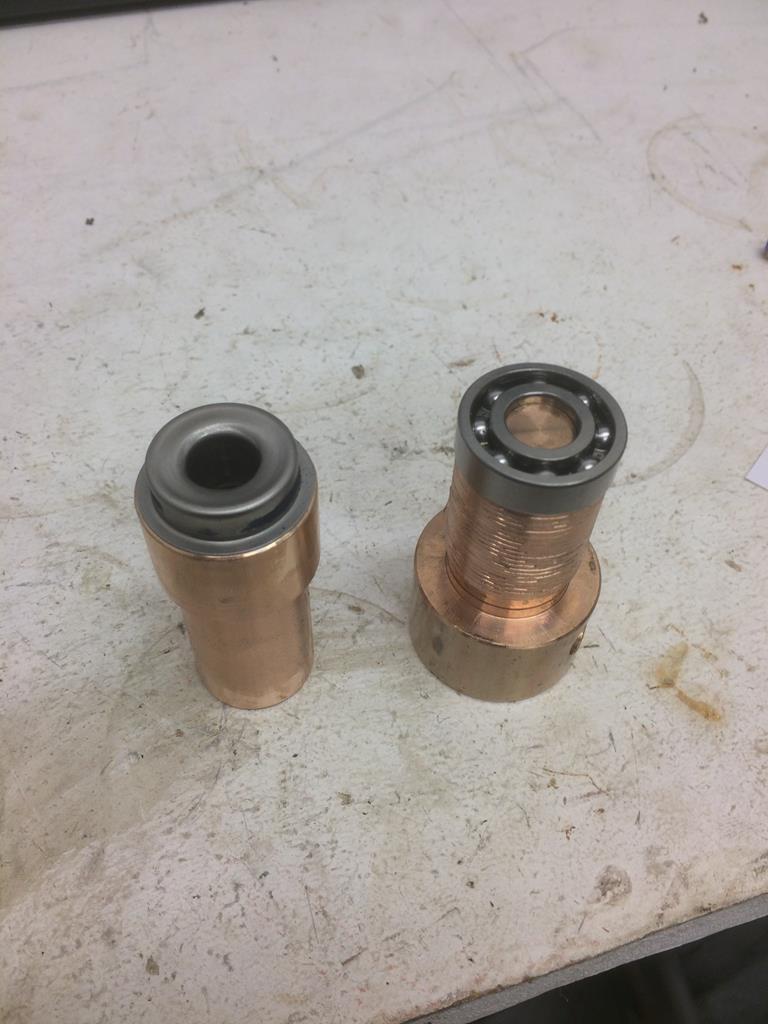 Bit of sealant on the sight glass and pressed home  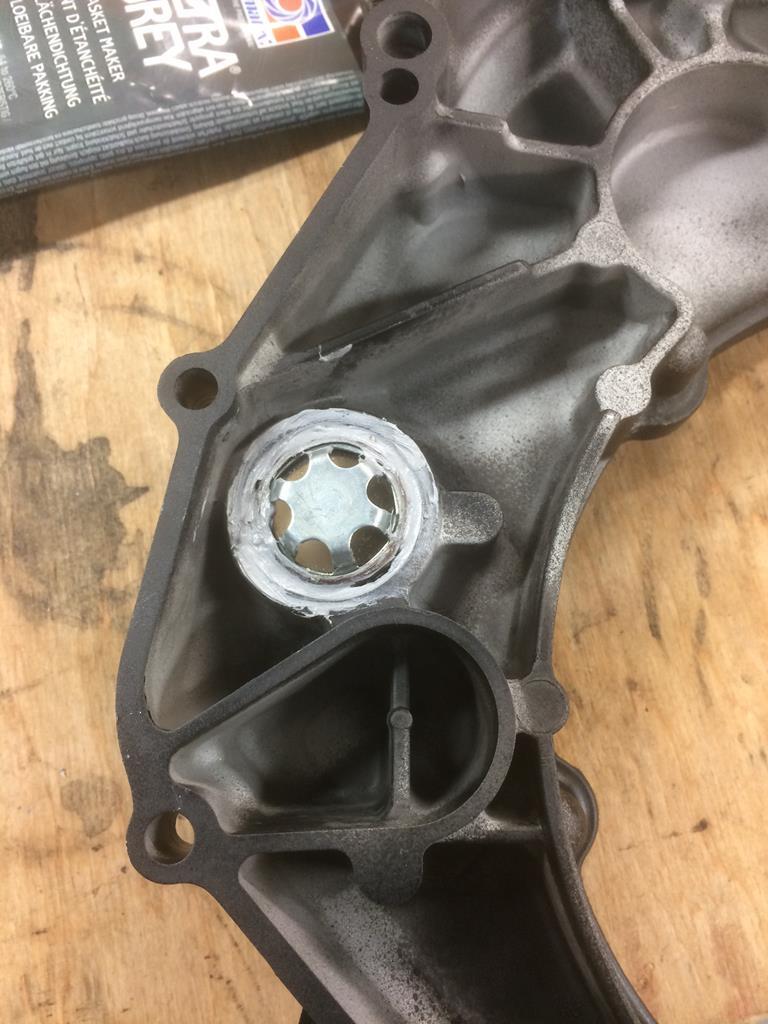 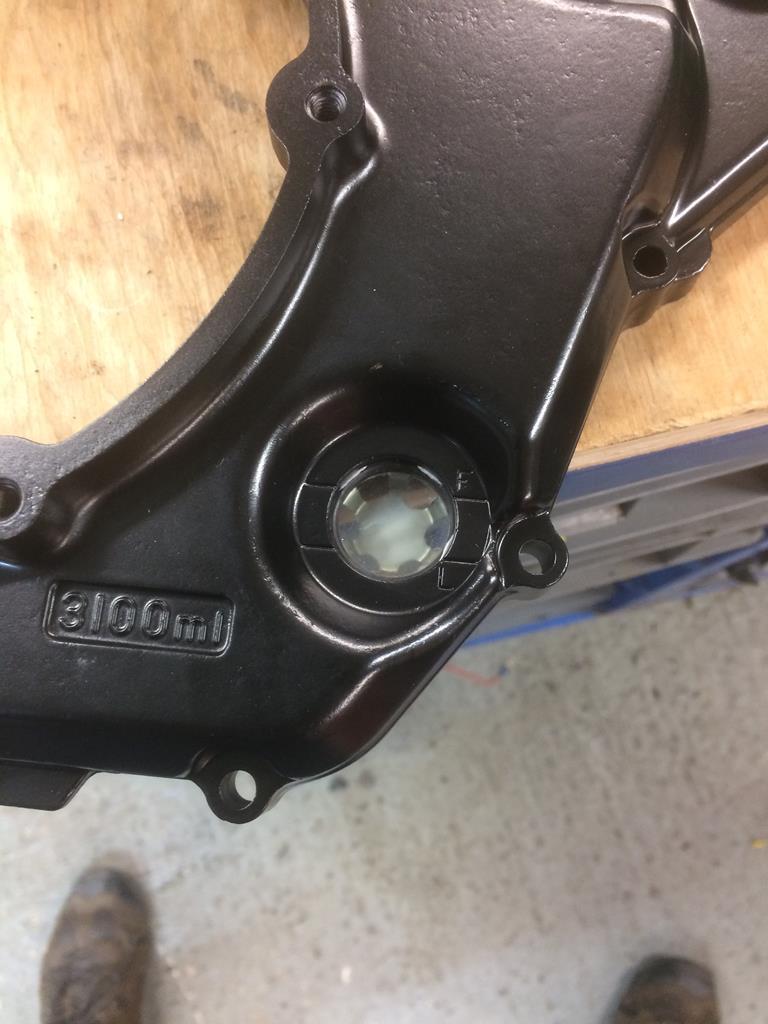 Also started on the starter modification for reverse. Pressed out the shaft from the one armature 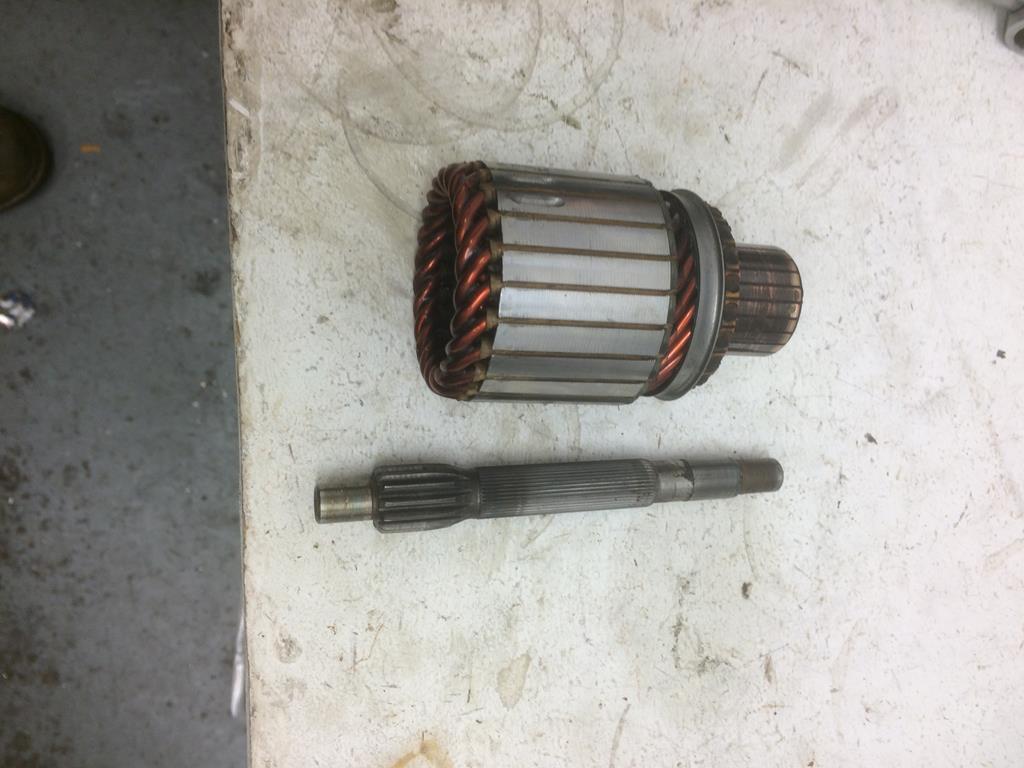 Keep the shaft,bin the armature.... |
| |
|
|
fer4l
Posted a lot
 Testing
Posts: 1,497
Club RR Member Number: 73
|
|
Apr 10, 2018 13:03:10 GMT
|
I've just come across this thread - brilliant is the only word for it! Thanks for sharing  Matt |
| |
|
|
|
|
|
|
|
Swapped the springs out on the clutch basket 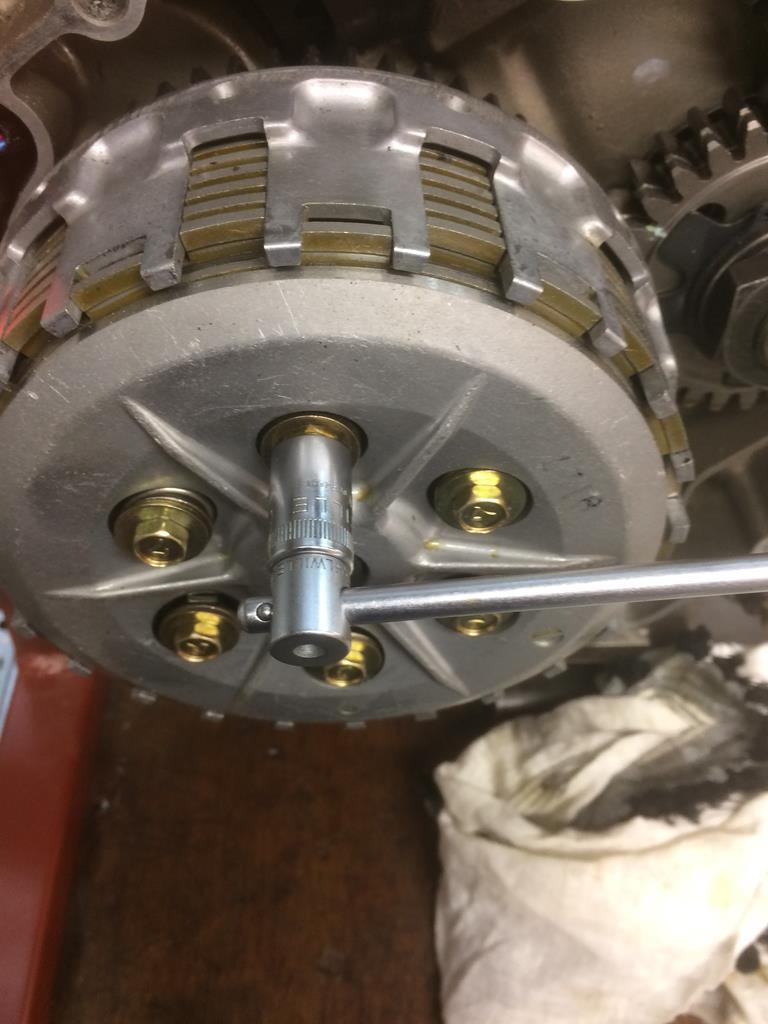 New springs slightly thicker and should have about 15% more clamping force 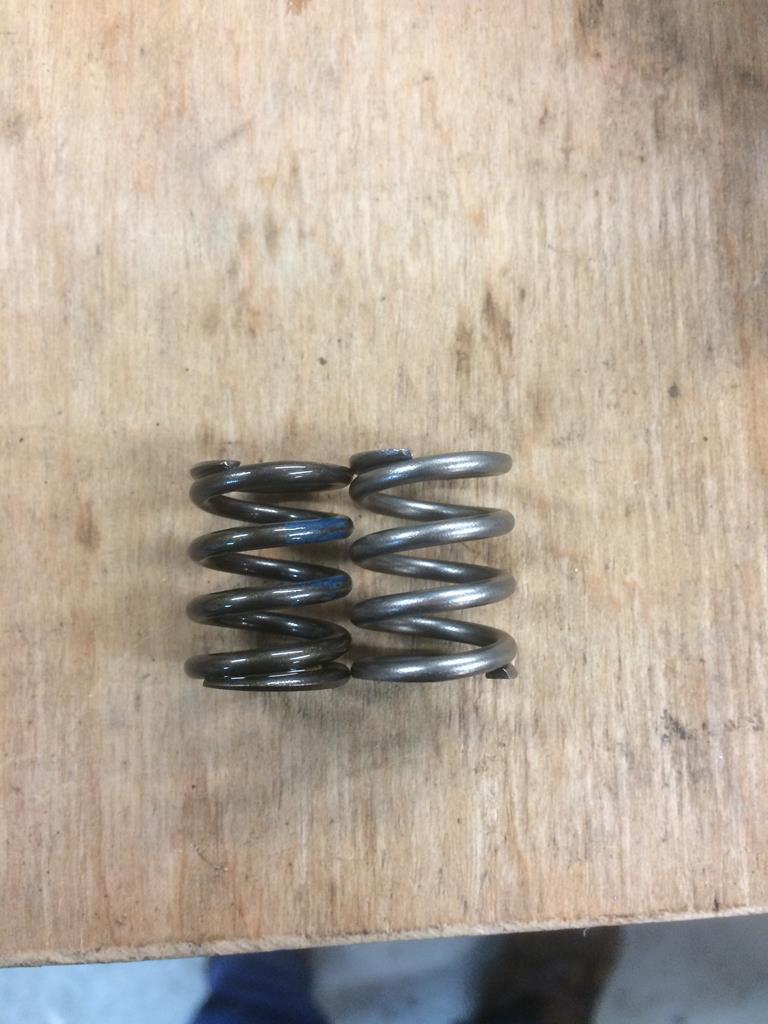 Closing up that side of the engine 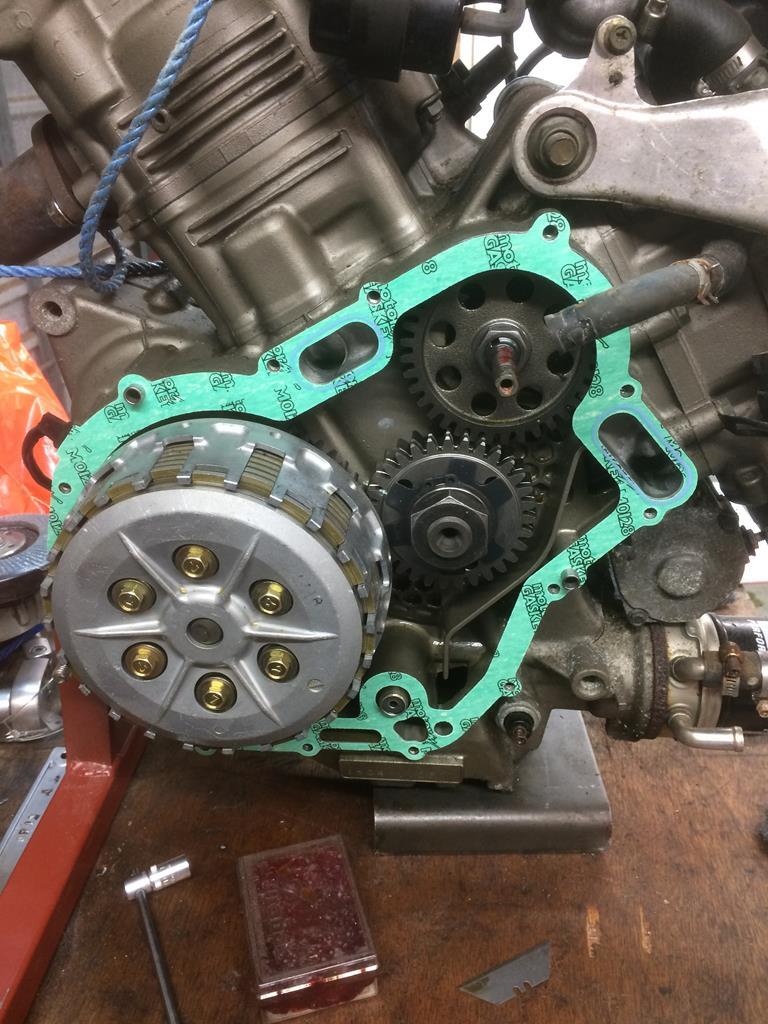 Waterpump being reassembled  Generator back in and that side of the engine closed up  Generator casing as it is now,with more space to move the clutch slave further in 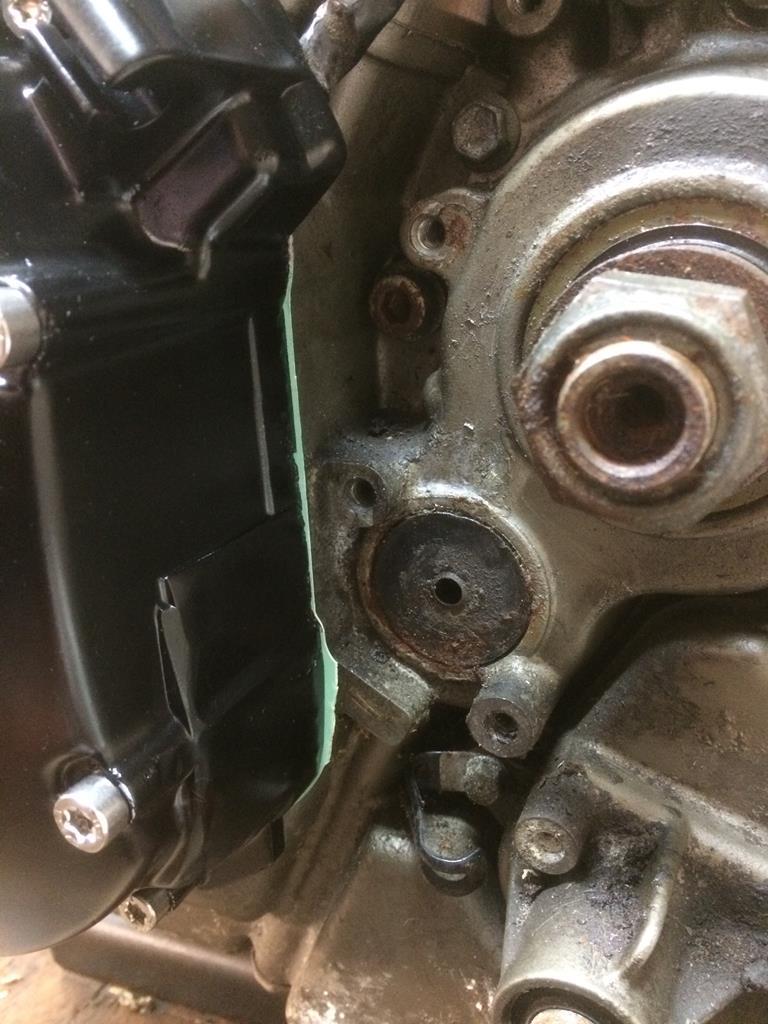 Time to draw up and make the new clutch slave cylinder |
| |
|
|
|
|
|
|
|
|
Not the greatest video, but the only one I did before stripping all the wiring off again. Bit hard to hold a phone,pull the clutch lever,press the starter button and blip the throttle by yourself 😂😂
You can hear the flame at about the 30 second mark
|
| |
Last Edit: Apr 13, 2018 4:49:49 GMT by Deleted
|
|
|
|
|
|
|
Had a bit of a rethink regarding the clutch actuating mechanism. The original set up from Suzuki doesn't look like it was made by design,but rather by default,and raiding the obsolete parts bin.Not their finest design,but rather more in keeping with things like Rotary dampers.. A couple of things I don't like  This big ,floaty oilseal that doesn't stand a chance of keeping the oil in the gearbox. Wasn't uncommon for it to become an automatic chain oiler within 2000 miles. Judging by the oily crudliness around it,it looks like it's died already.It's not rigid enough,and coupled to the pushrods guide bush that's too far away,and a pushrod that is way too long,isn't something I want to persevere with. The other bit that bothers me is this,or should I say the lack of this? 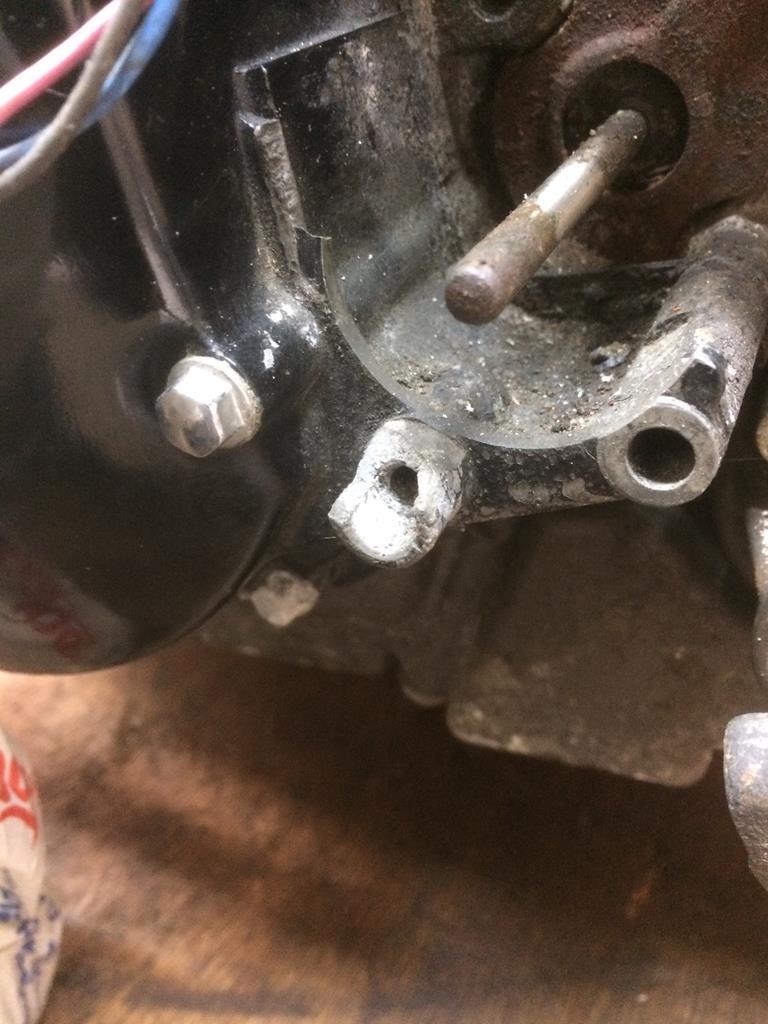 The broken out bit was for a locating dowel to align the clutch slave cylinder with the pushrod. Seeing it's broken,means it's got very little chance of doing what it's supposed to do.The fact that I chopped it off ,means it's got no chance ...😂 So, bearing all this in mind,a slight change of plan regarding the clutch. Need a clutch cylinder that doesn't foul the propshaft,doesn't push the pushrod all over the place making the oilseal cry,and needs to be free. |
| |
Last Edit: Apr 14, 2018 1:17:25 GMT by Deleted
|
|
|
|
|
|
|
The new clutch cylinder arrived today 😃 Very well wrapped in allynyumnyum...Time to unwrap it.. Free material comes in all shapes and sizes.Usually totally the wrong shape and totally the wrong size.But who is complaining when it's cheaper than stealing ?😂 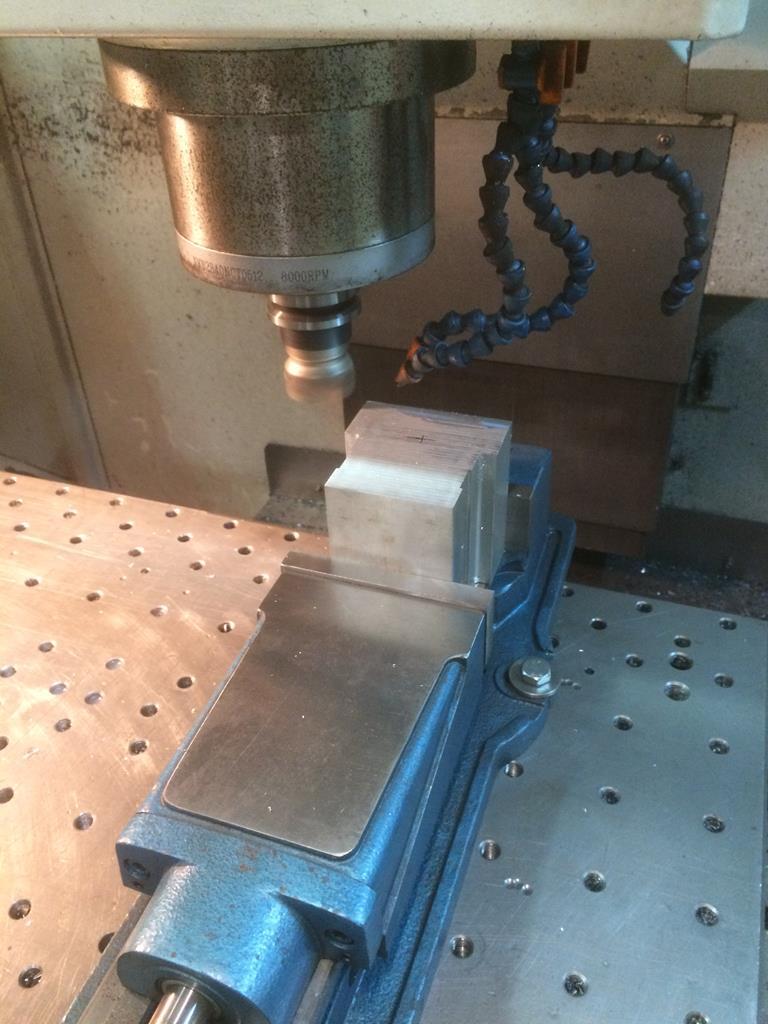 Unearthed a bit of round hiding in there. Looks like it is suffering from Tapworm,a couple of tapped holes from a previous life,but I think I can machine around them 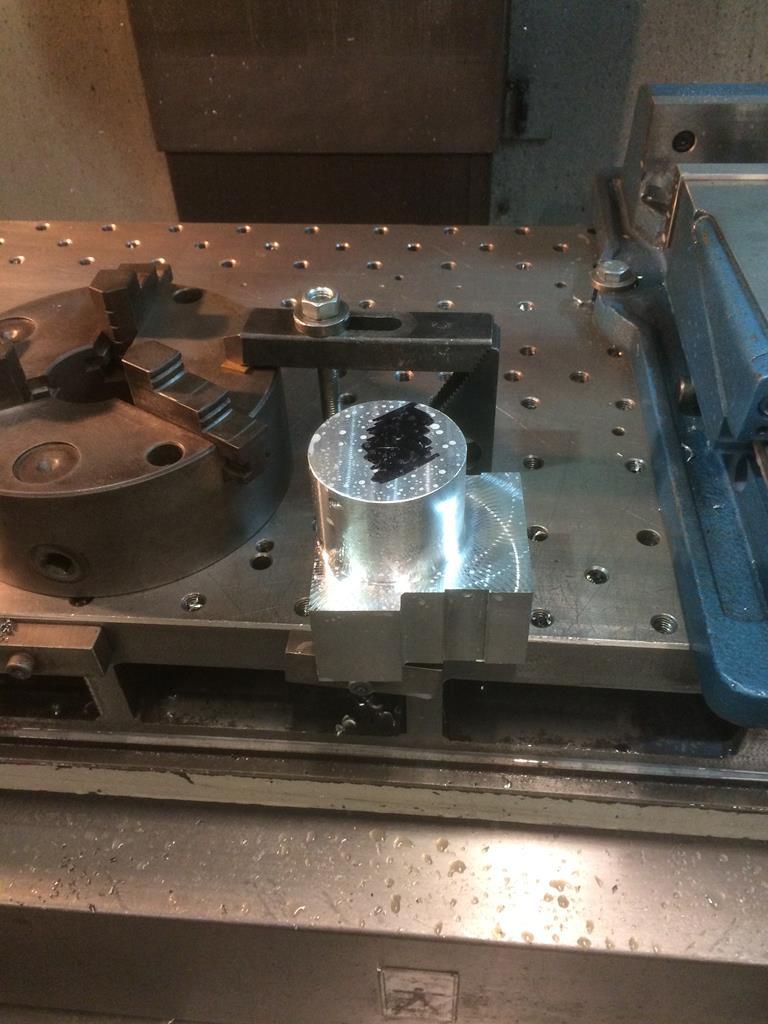 Halftime. Change sides. 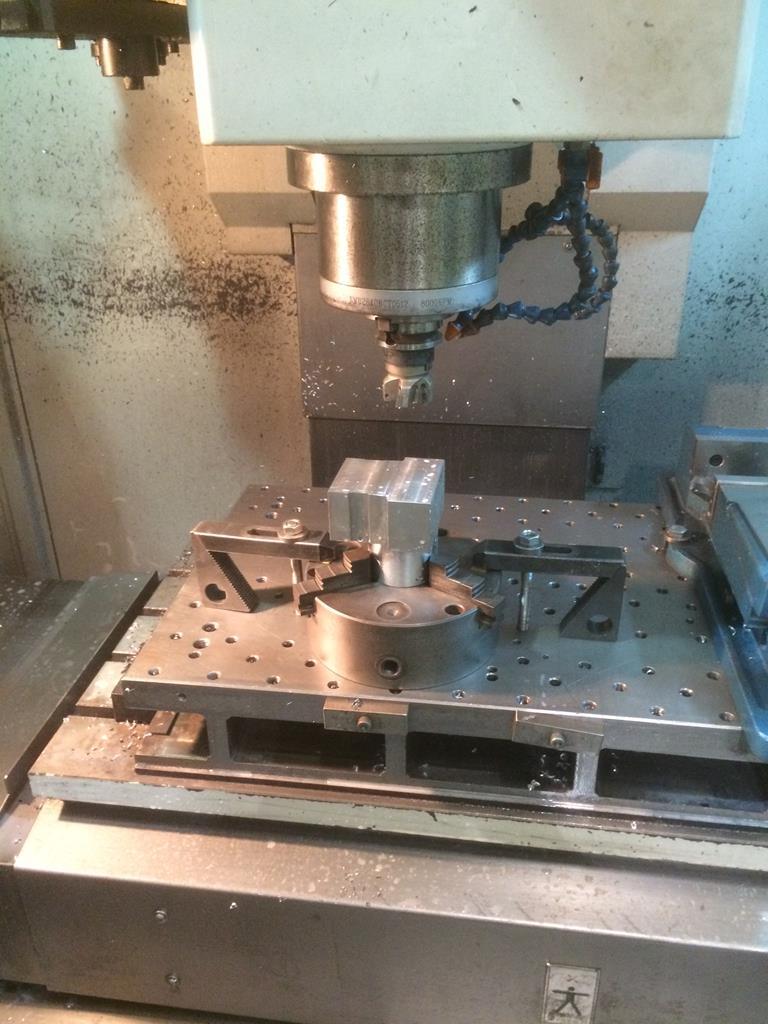 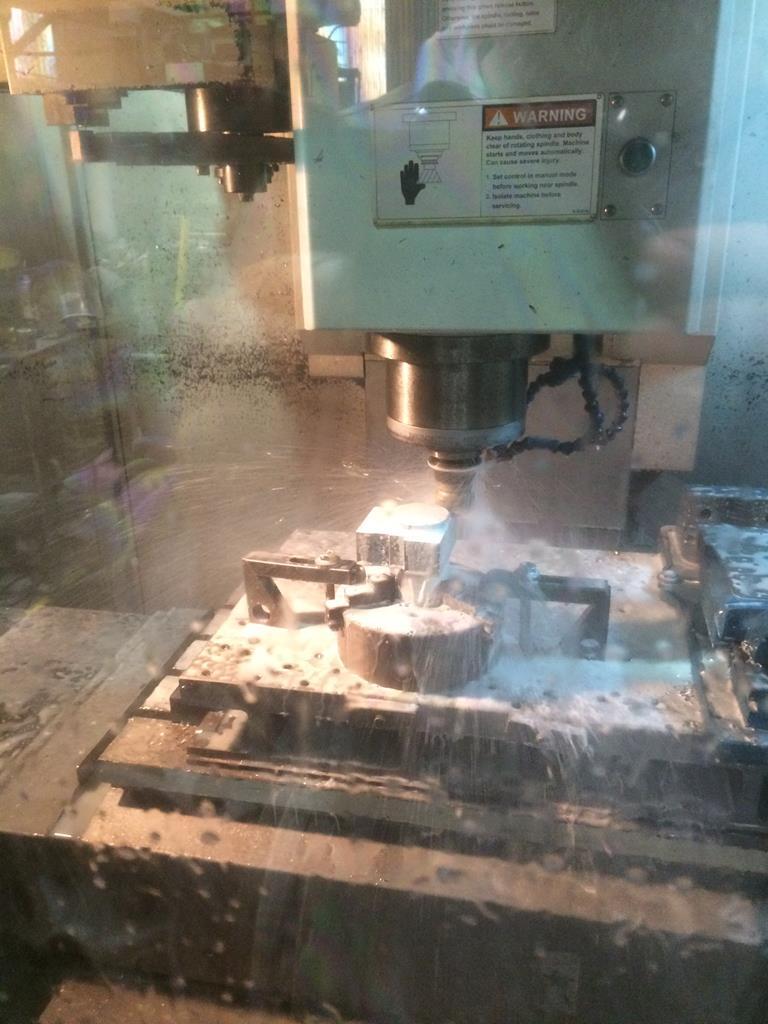 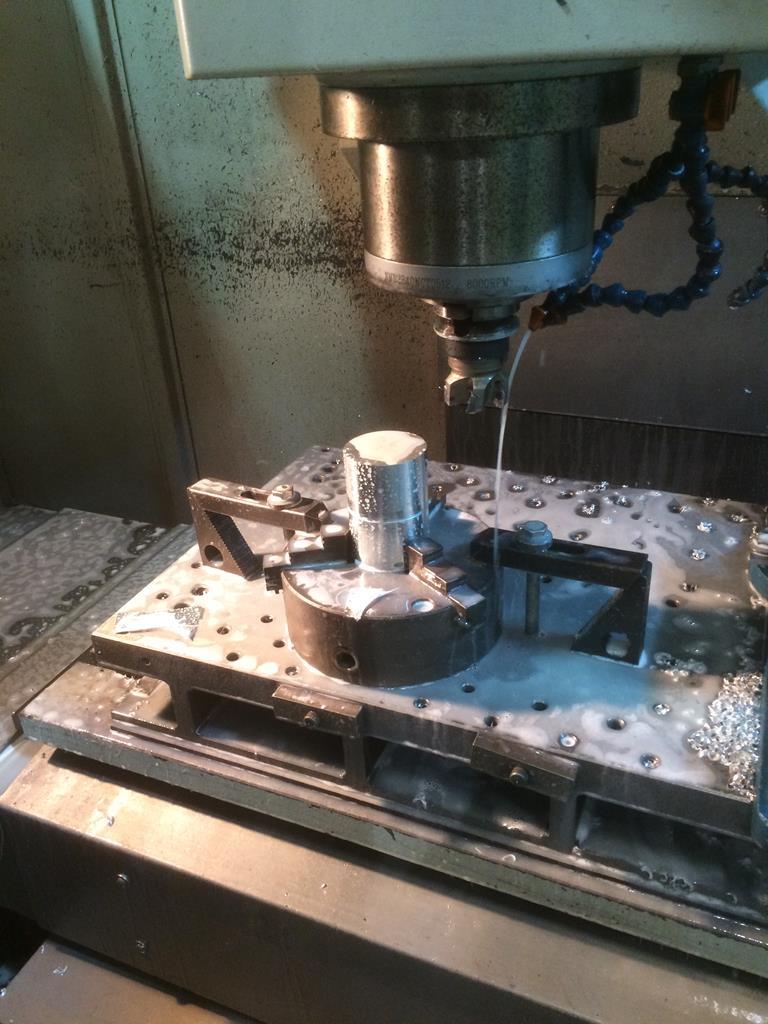 Ok. So now have a round bit of material to work with, so off to the lathe. 😊 |
| |
Last Edit: Apr 14, 2018 1:49:19 GMT by Deleted
|
|
|
|
|
|
|
Pulled the oilseal out the casing 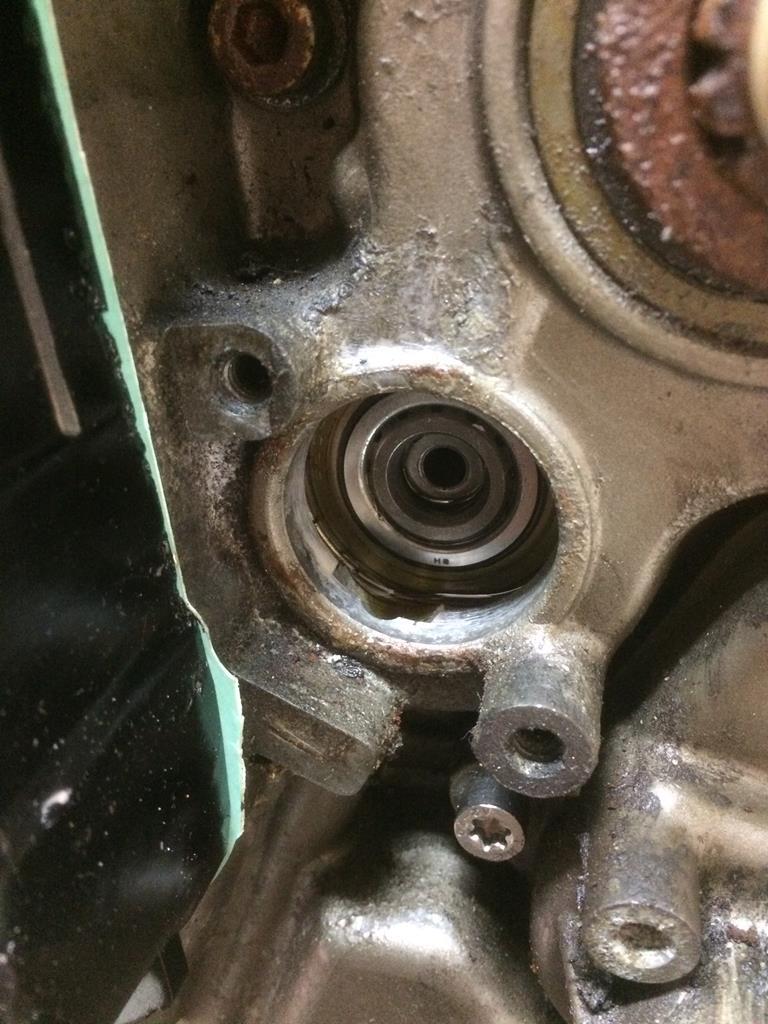 Knocked this bit up on the lathe 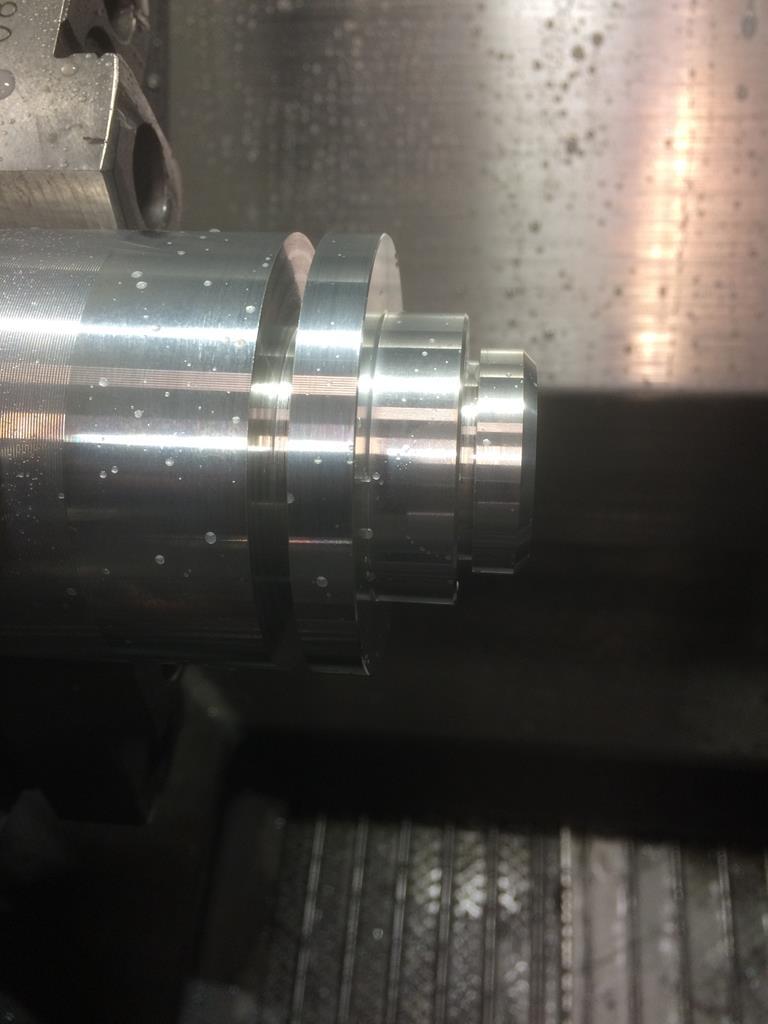 Whilst still in the lathe,I drilled a hole down the centre,eight millimetre diameter,then took a little 6mm boring bar and bored it out for a new guide bush and a new oilseal. Groove on the outside is for an o ring to seal it into the casing. 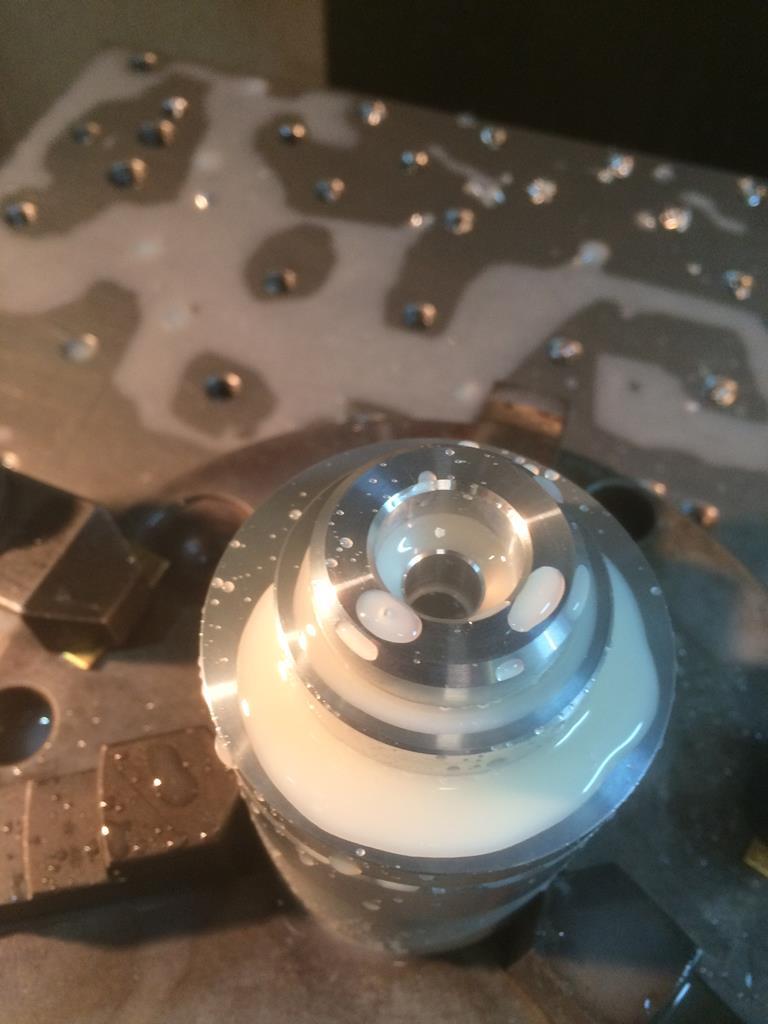 Milled it some ears,so hopefully it will start to listen... 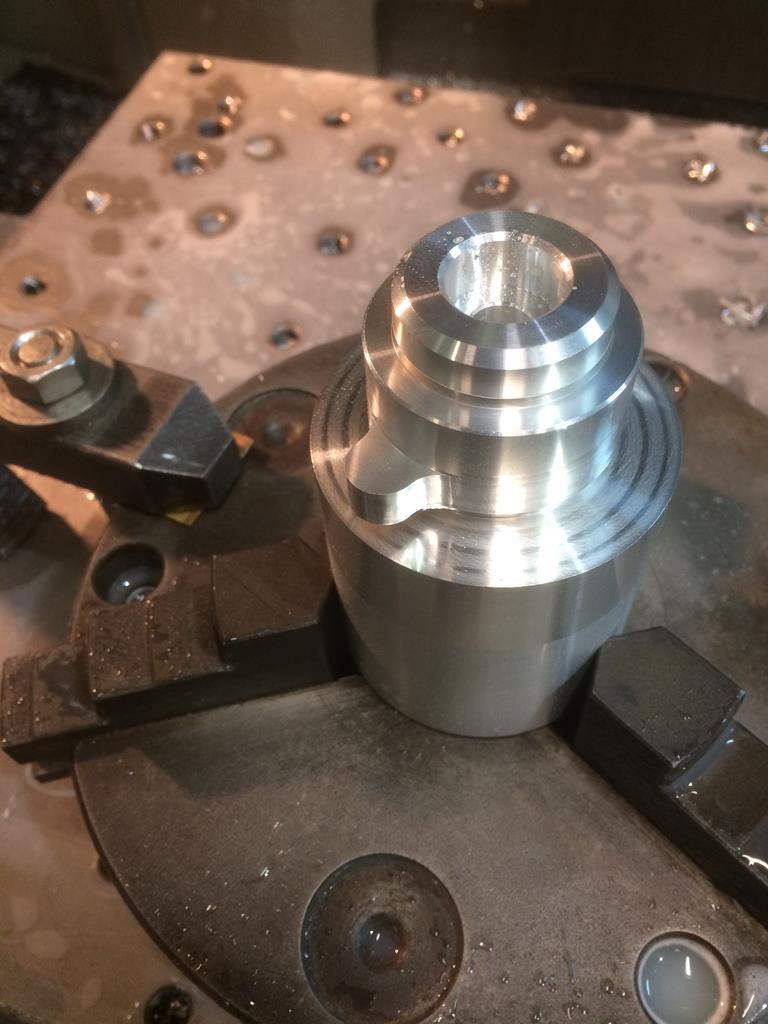 Drilled the holes,and then, seeing it's Friday the thirteenth,I parred it off. Not what I should have done as I haven't finished machining the first side 🙄 Oh well,they say $hit happens. No it doesn't, A-holes cause it.... Not the end of the world. Just need to make a jig to hold it,to finish matching the first side,something that wouldn't have been necessary had I engaged brain... 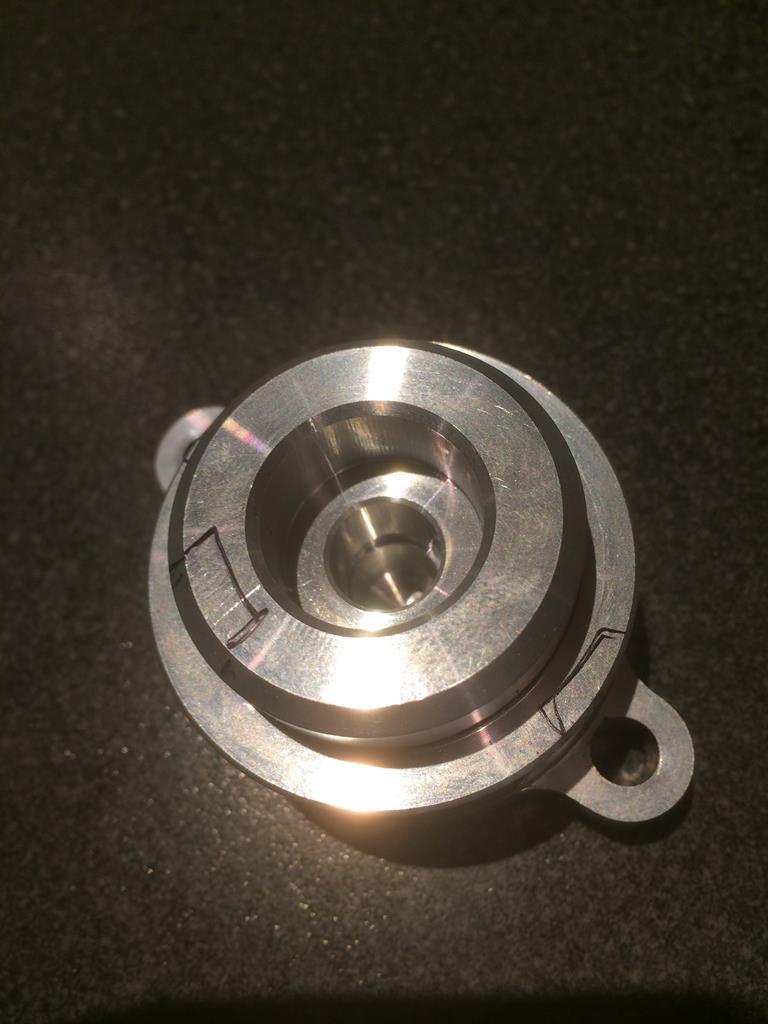 |
| |
Last Edit: Apr 14, 2018 1:36:51 GMT by Deleted
|
|
|
|
|
|
|
Decided it was a fool's game to try and finish off the Friday 13th special. More hassle than it was worth.... So, into the skip you go... Round number two. The eagle eyed might spot a slight ,deliberate change. Done for a reason,not only just to prove it wasn't he same photo posted earlier 😂 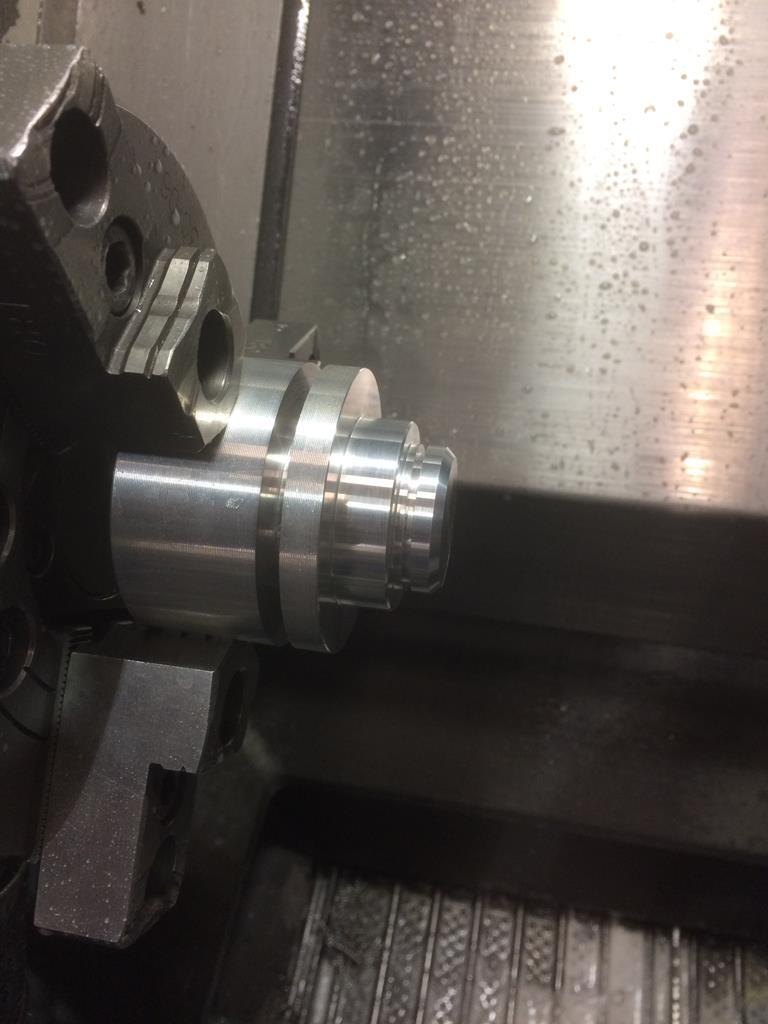 This time I did remember to put the undercuts in before paring off,and machined the oil return channel into it too. Made a jig to clamp it upside down. 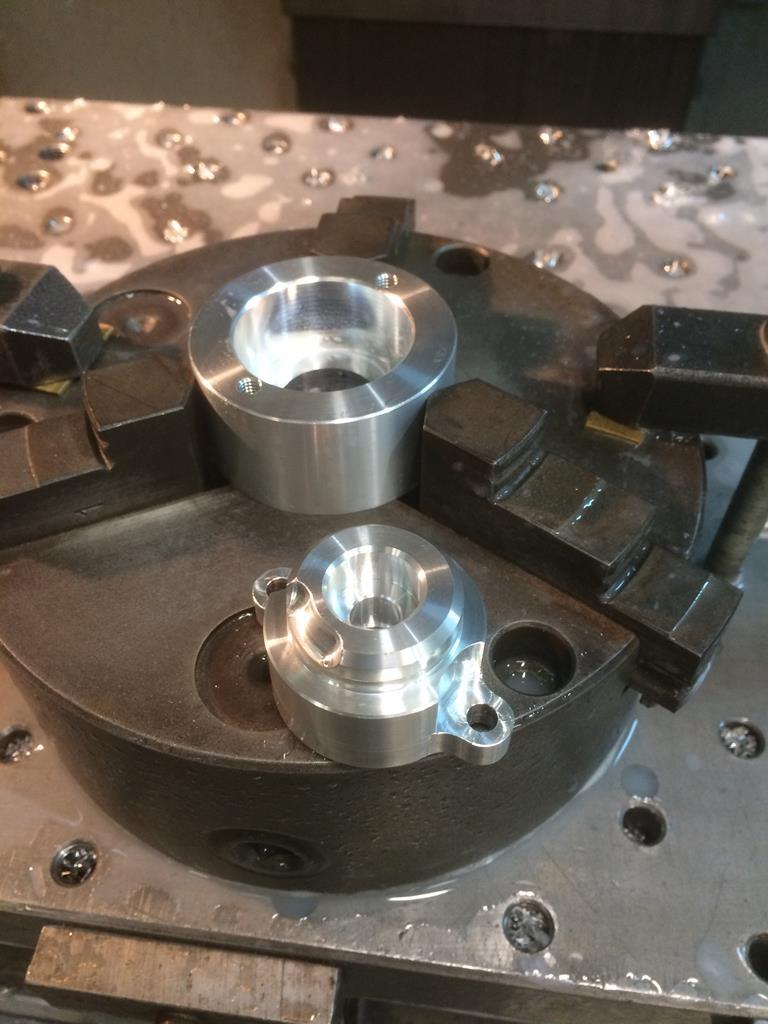 Ready to machine recess into the back 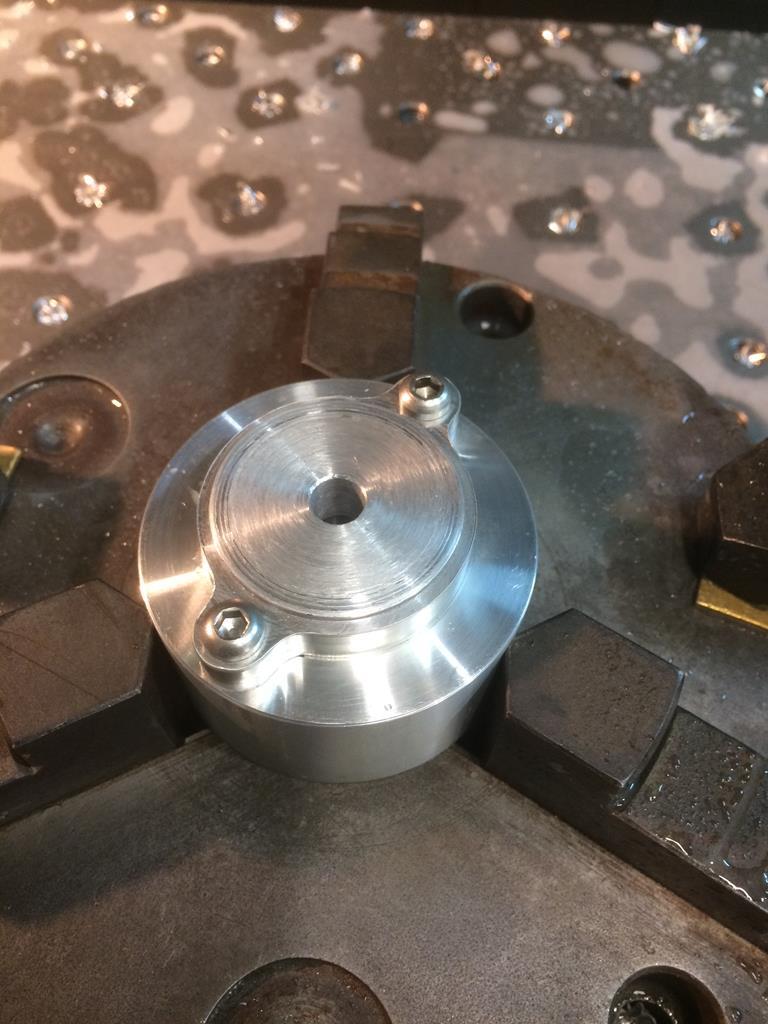 Job done. 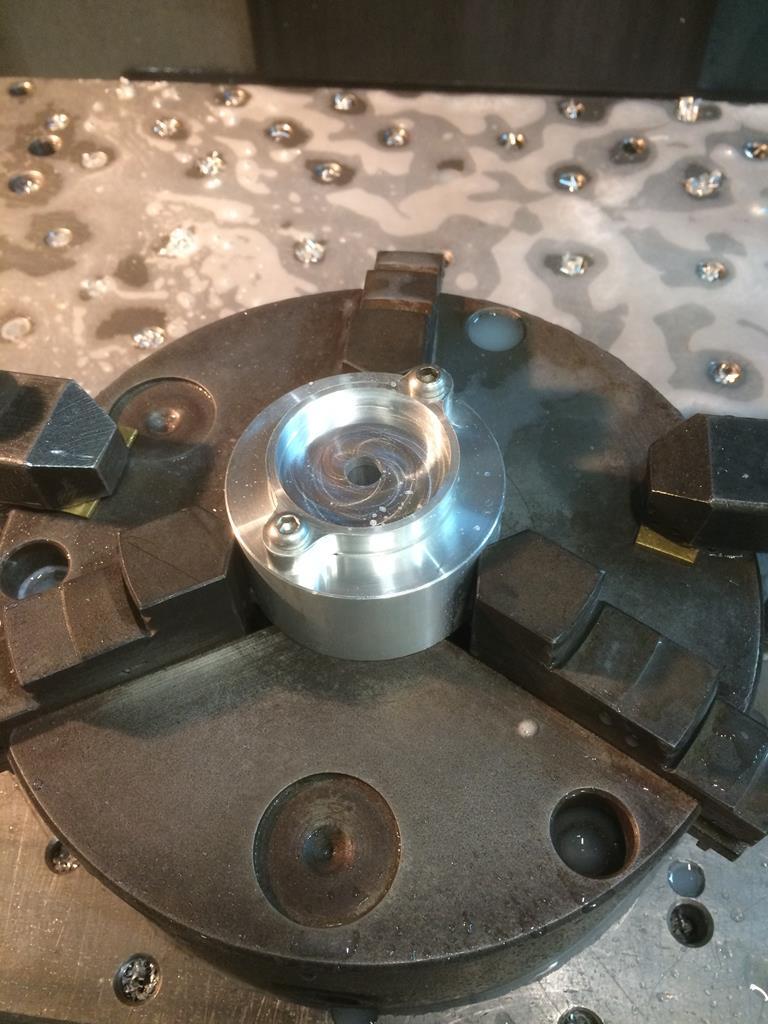 How Friday 13th should have ended... |
| |
|
|
|
|
|
|
|
Changed all the tools in the lathe and measured them all up to make the clutch cylinder itself 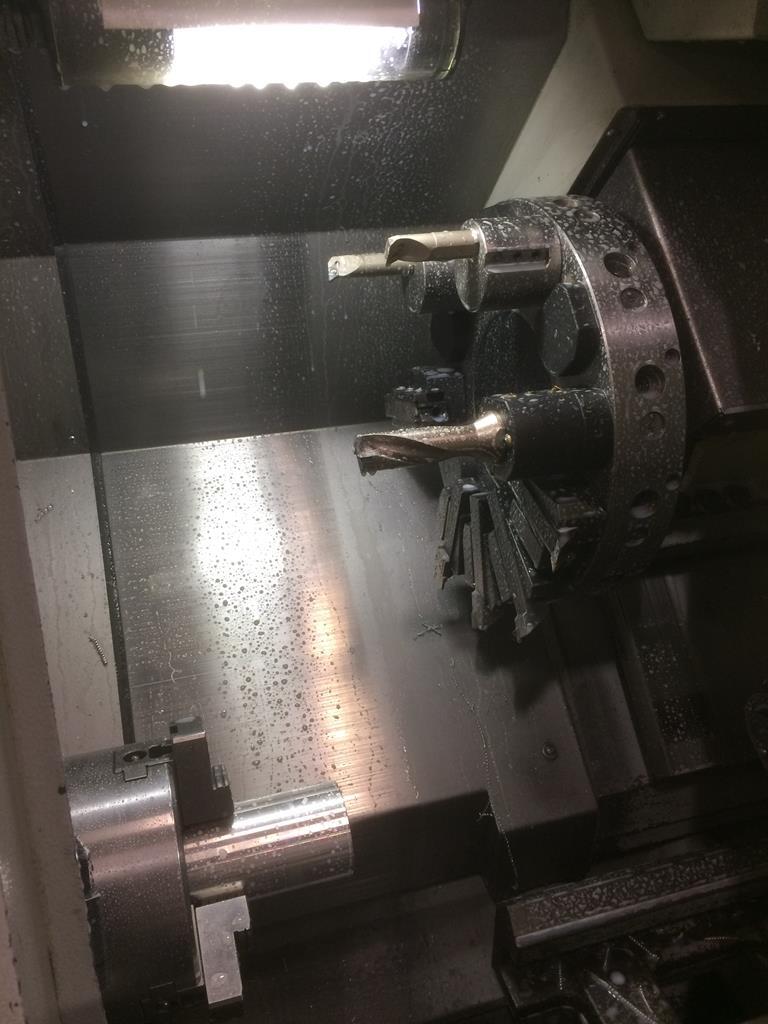 Turning done. Note to self,don't par it off 😂 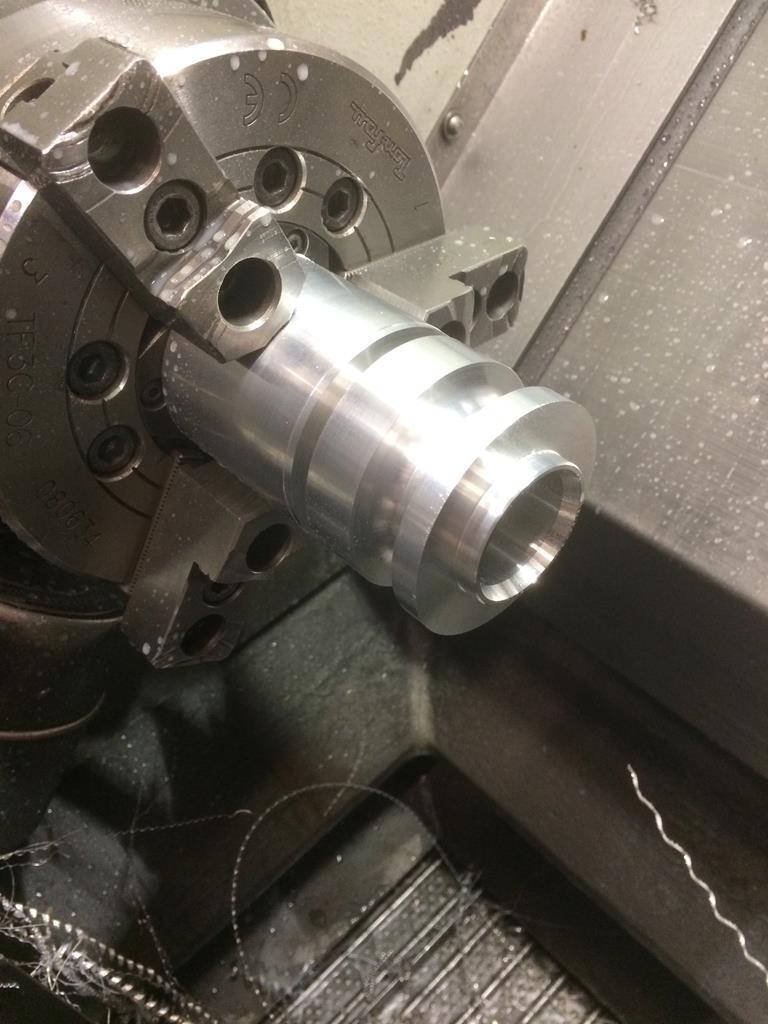 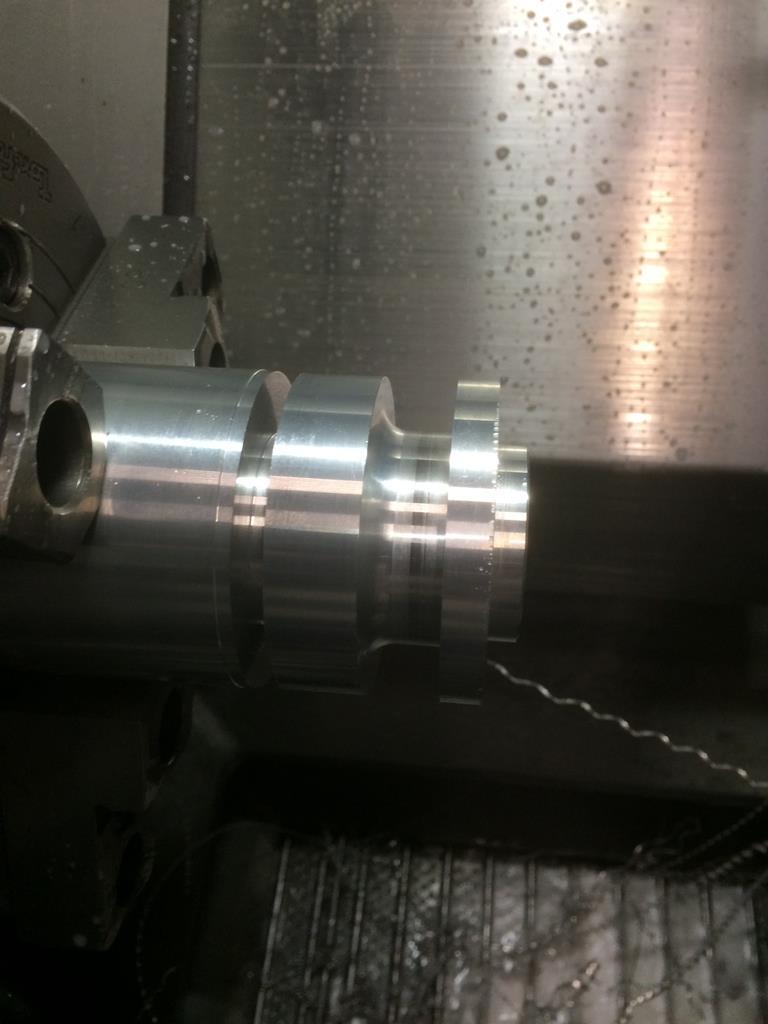 Into the mill 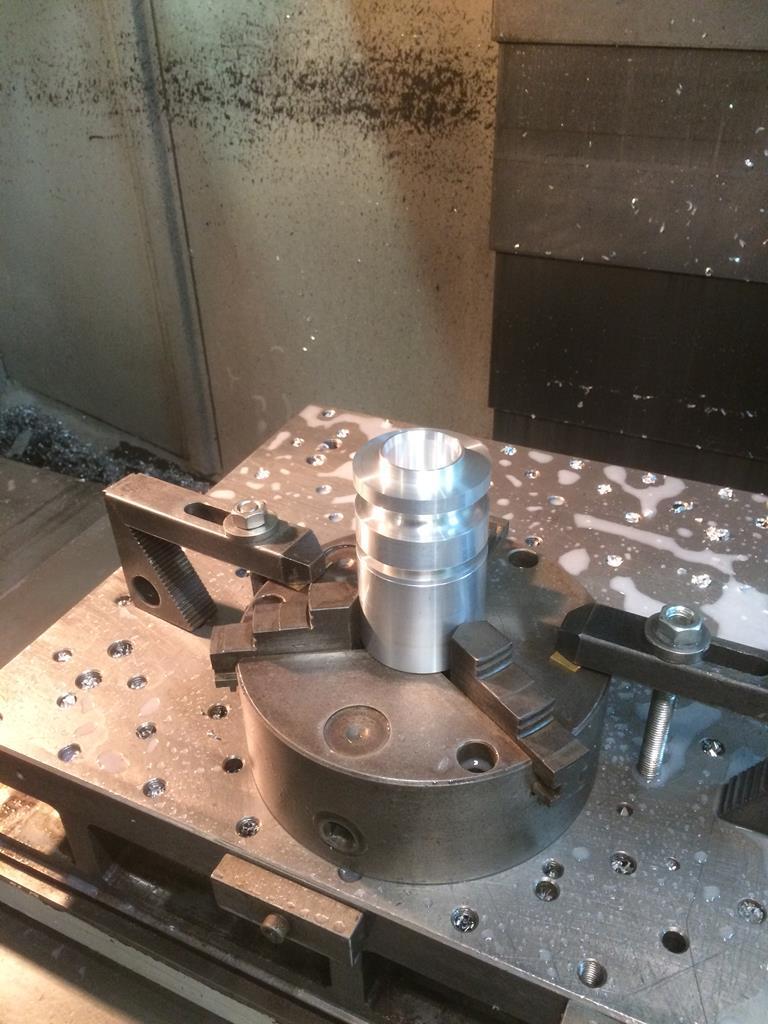 Shaped and drilled 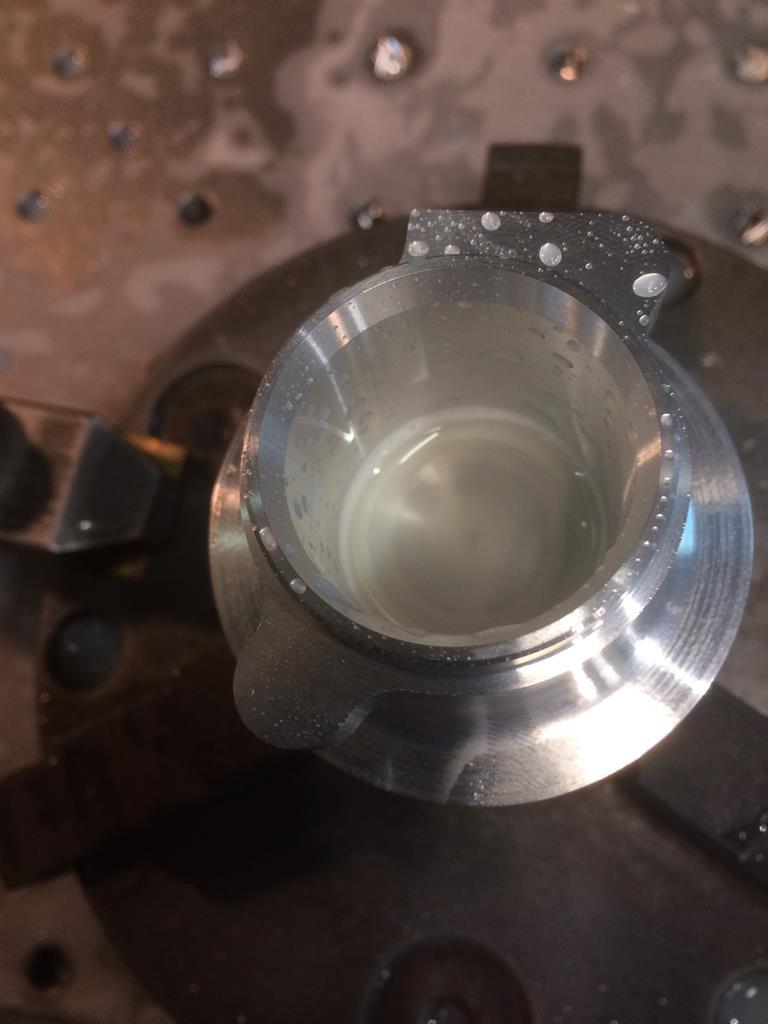 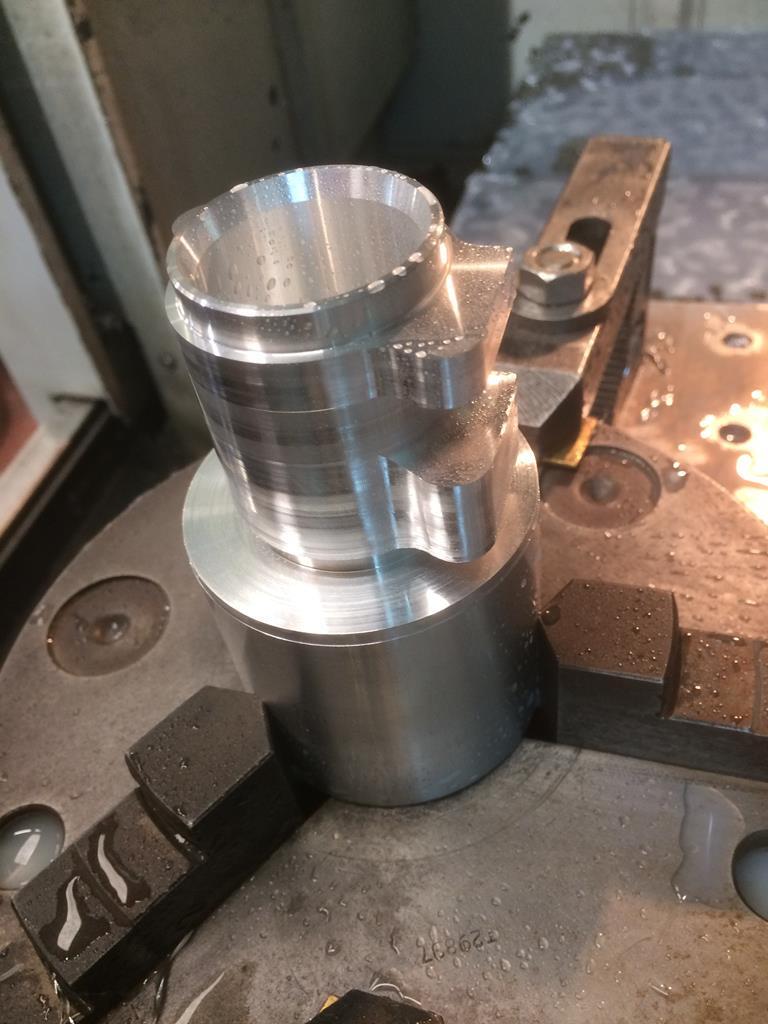 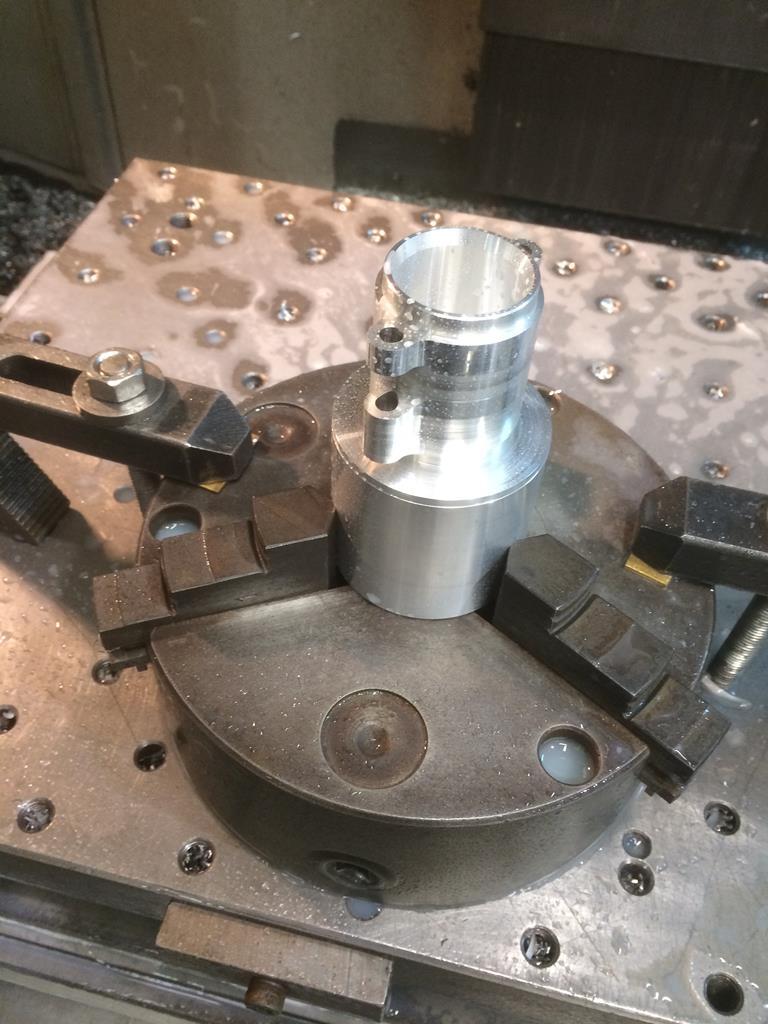 Beer o clock....🍺 |
| |
|
|
|
|
|
|
|
Back home 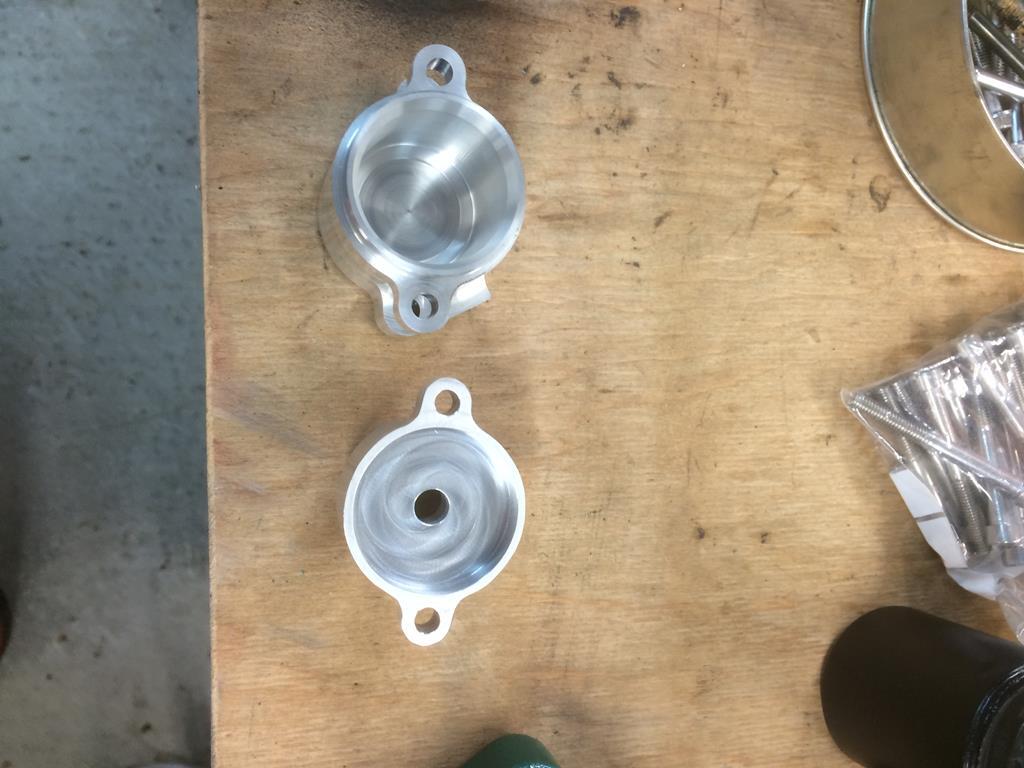 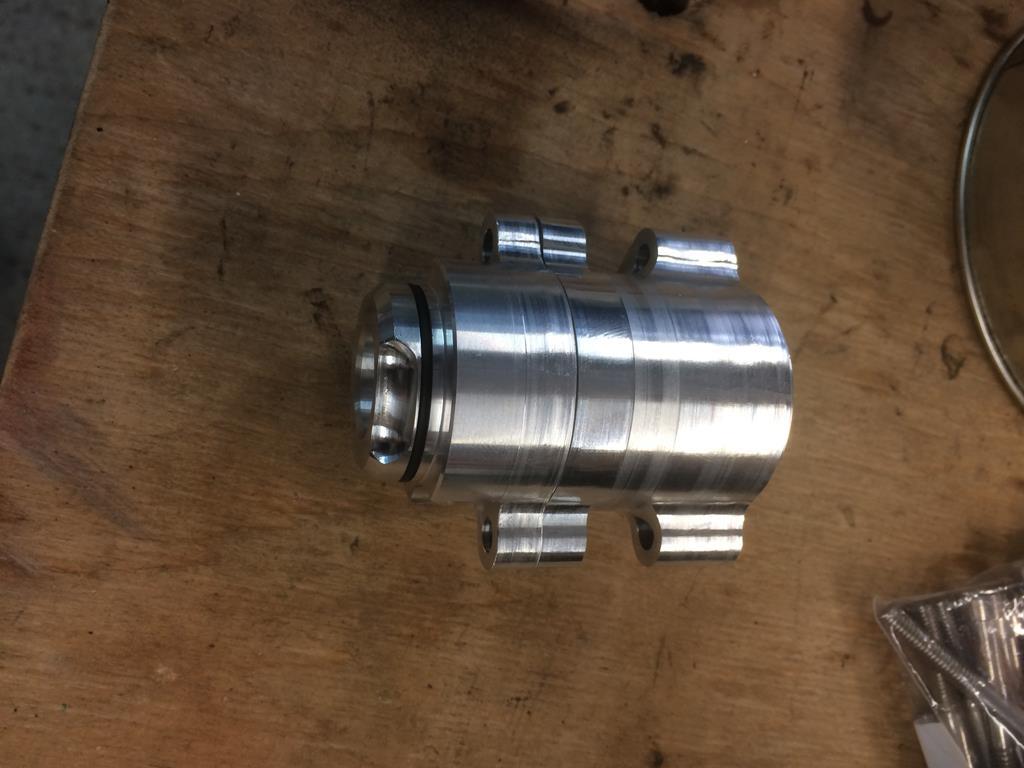 Two parts fit together ok. Now for the moment of truth 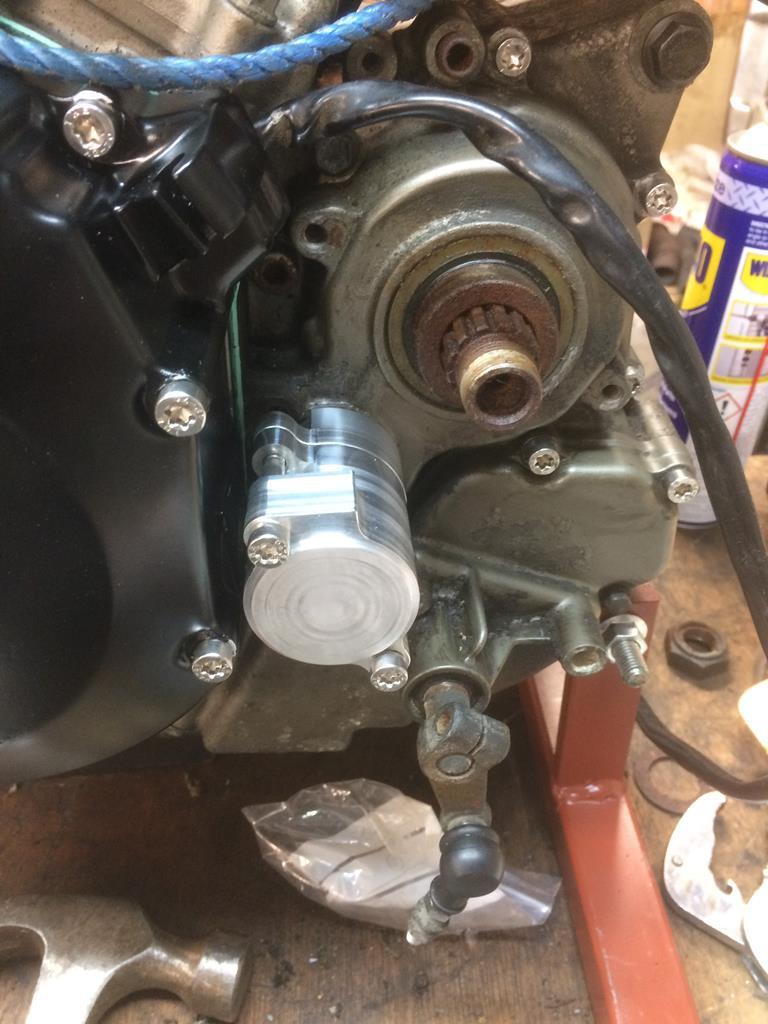 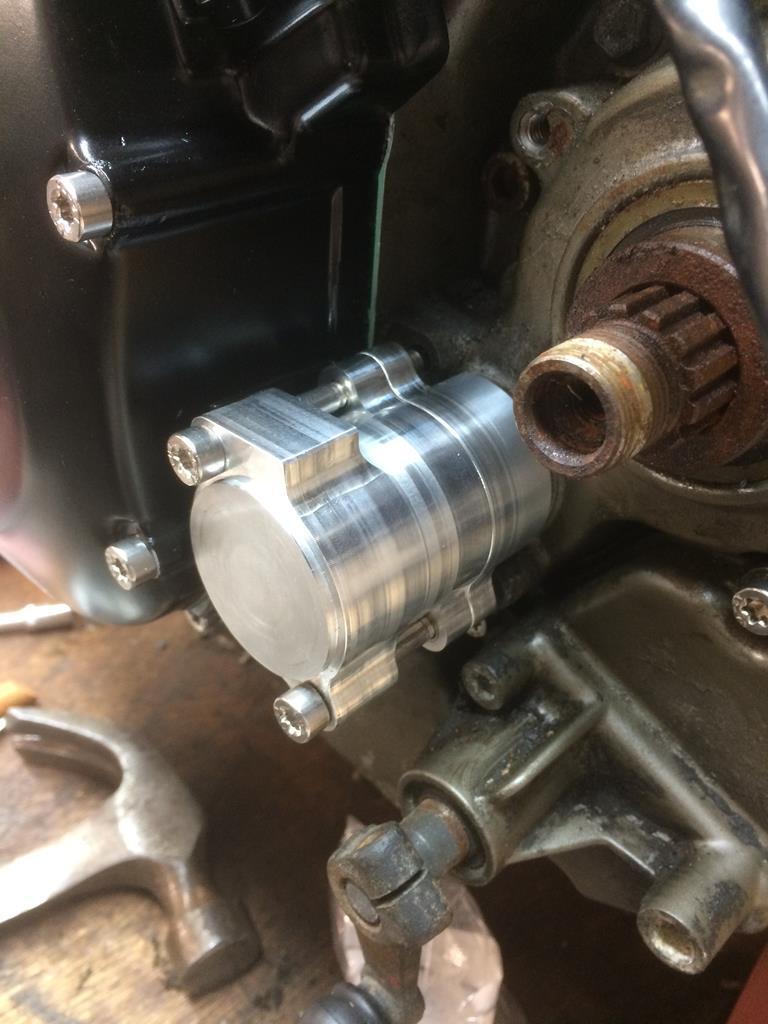 Yay! It fits ! That was a good guess then 😂😂 Just need to find a banjo fitting with a bleed nipple in the top before I drill and tap the hole , and then it can all be assembled. Next task is to get that stubborn spacer off the output shaft. It's well and truly rusted on. No amount of penetrating oil has helped. Cannot use the application of fire as I don't want to destroy the seal. Will have a go later... |
| |
|
|
|
|
|
|
|
|
Knowing nothing about bike engines but the spacer thingy is not top hat shaped and held in behind the seal in some way is it? just a thought!
|
| |
|
|
|
|
|
|
|
^^ Good thought,but no.😊 I have checked,it is a loose spacer,if it isn't rusted to curse word. It will yield ,hopefully without too much bloodshed 😂😂 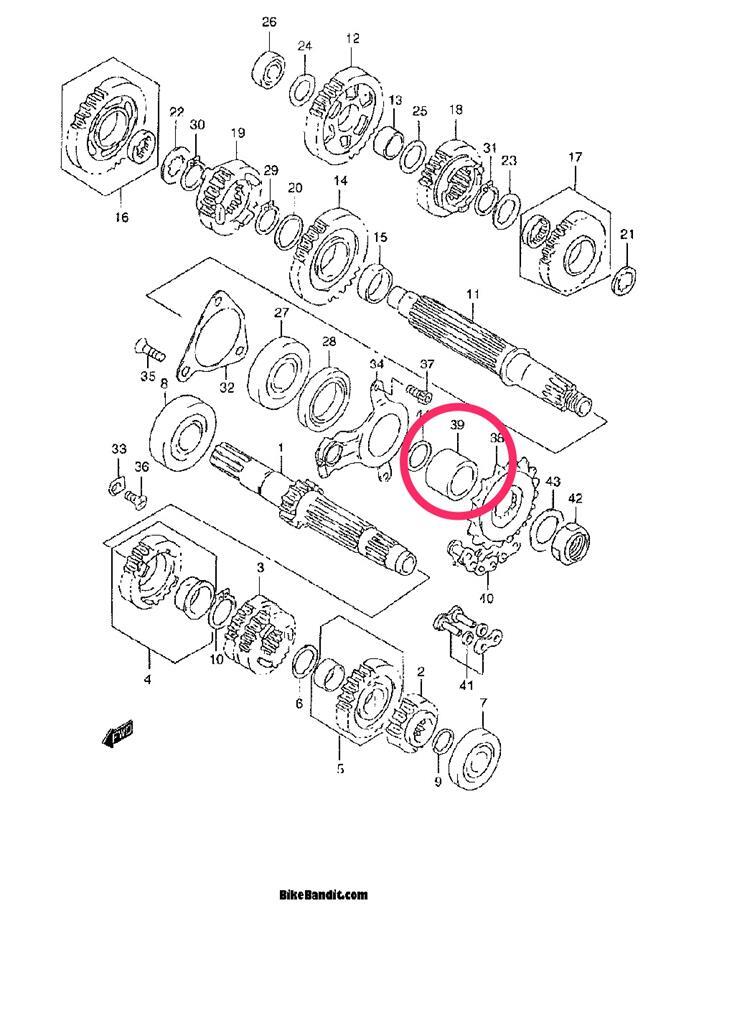 |
| |
|
|
|
|
|
|
|
|
Ho - If only I was has clever as 'Johnnybravo'
|
| |
|
|
|
|
|
|
|
Ho - If only I was has clever as 'Johnnybravo' No contest. You win hands down. You see, Johnny Bravo just happens to be a long time Lurker on your threads and is well in awe of what Mr Grumpy gets up to....😊 |
| |
|
|


