|
|
|
|
|
Not fancying braving the freezing cold garage,aka the Siberian interior,I decided to appease the Weather Gods else where. This looked too good to throw away 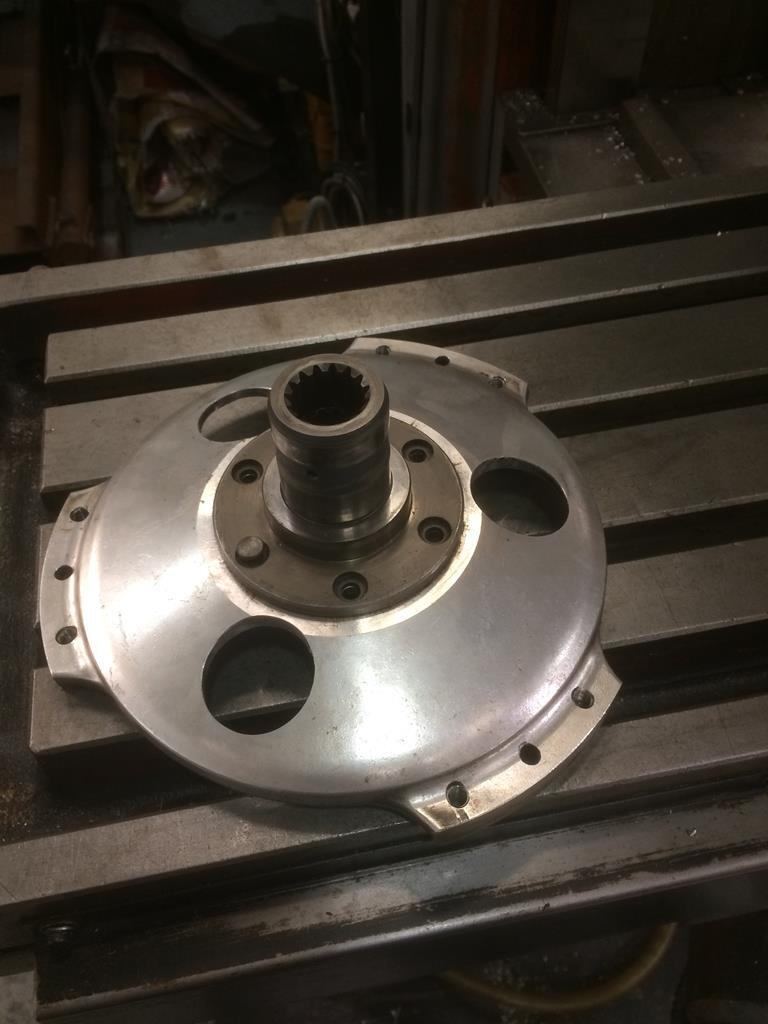 Its the flywheel from the scrap K100 engine. So I turned up a boss 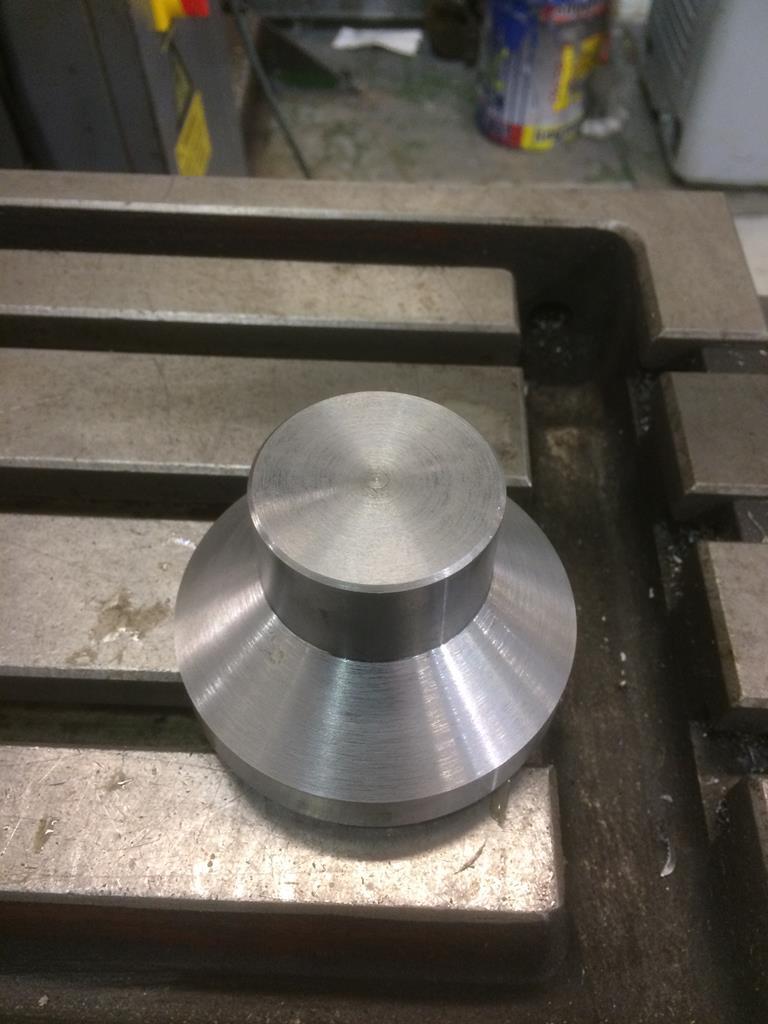 Slotted,bored and drilled it 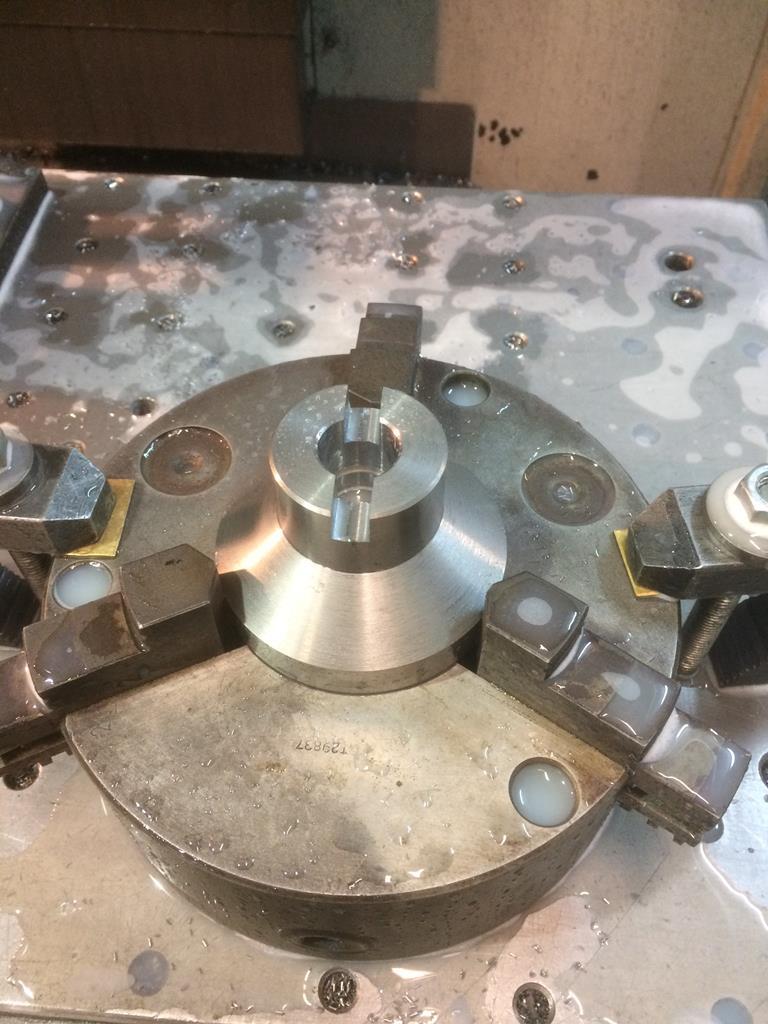 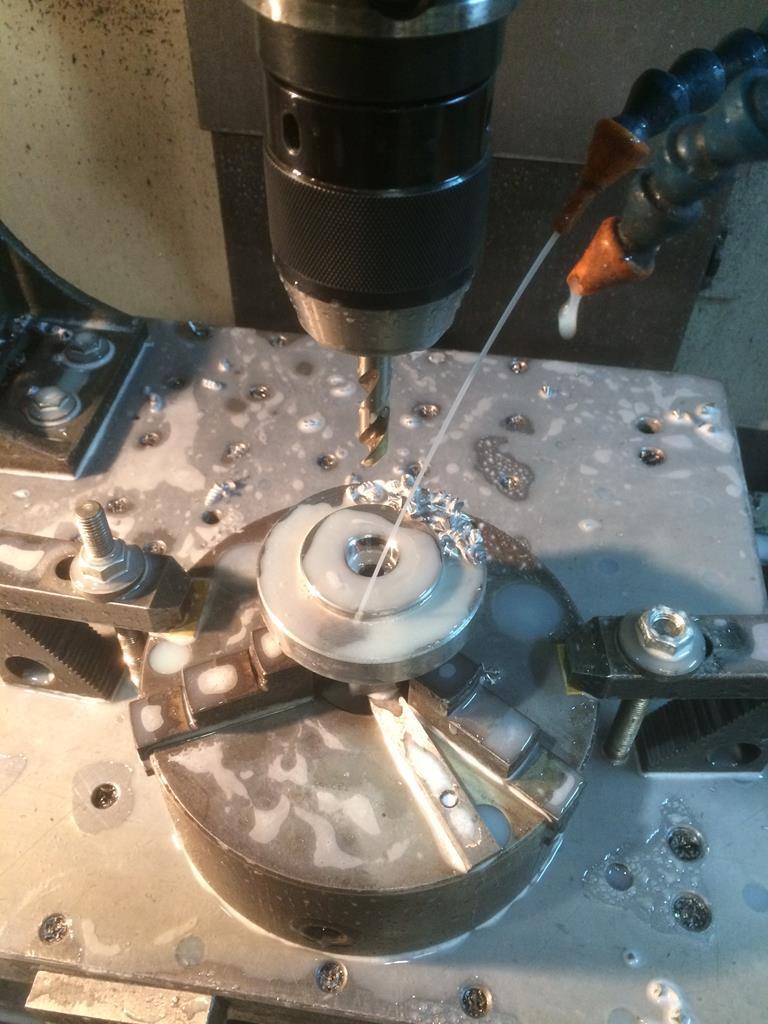 Then took a bit of scrap and milled it to shape 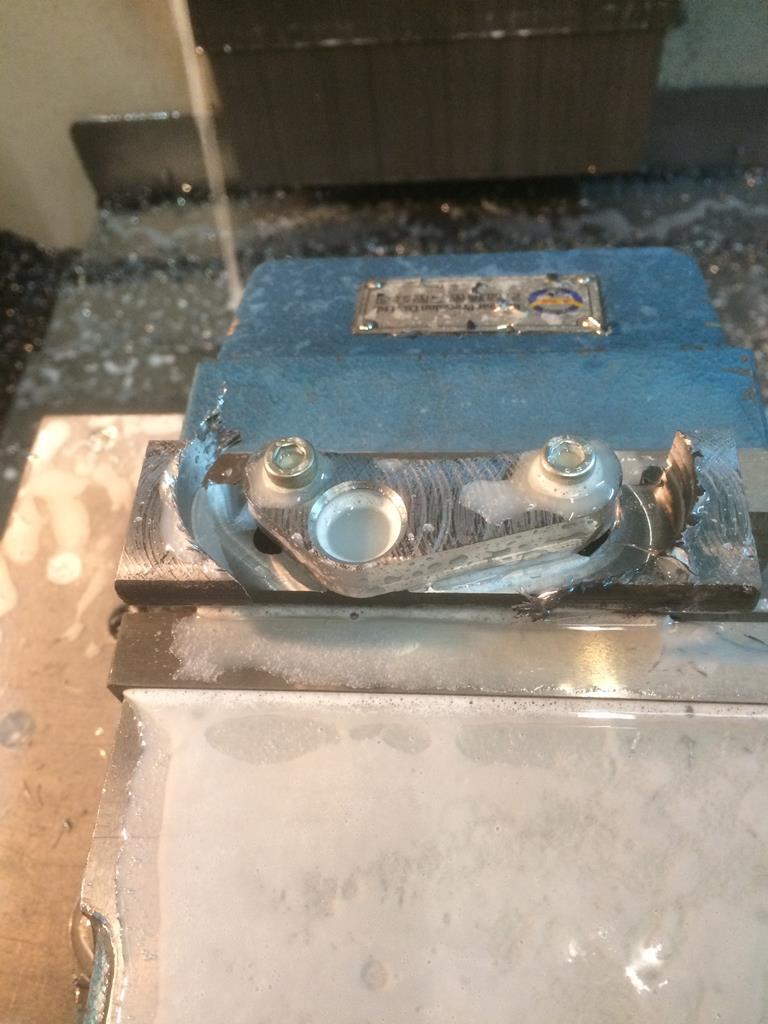 Repurposed an old turning tool 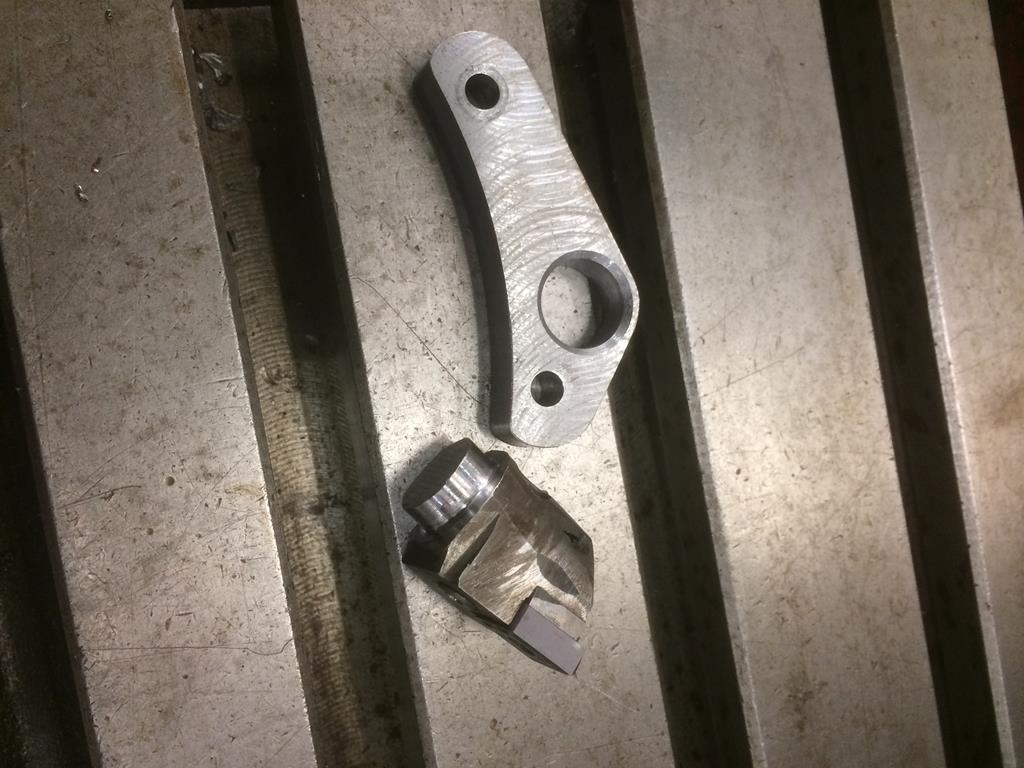 Welded it into the freshly made bracket 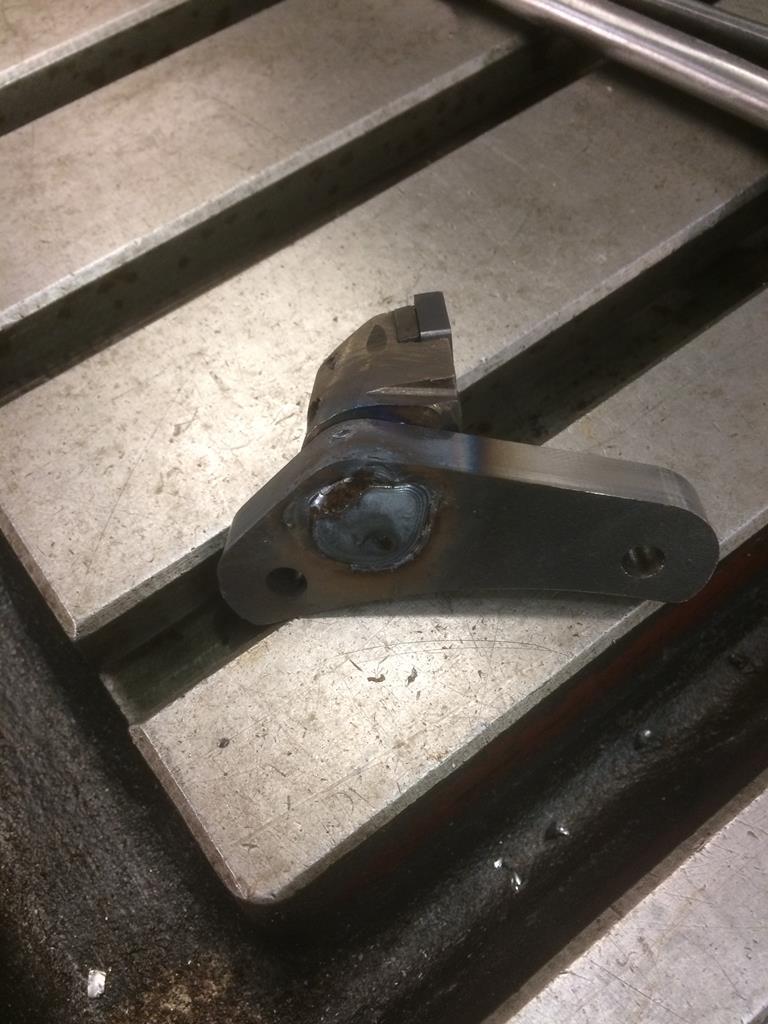 Then,hoping the Gods were happy ,it was beer o'clock. Off to check the status of my beer stock,solid or liquid? |
| |
|
|
|
|
|
|
|
|
|
Well,the beers were at an in between stage. Somewhere between palatable and unpalatable. Think slush puppy. Think Wheat smoothie 🙄😂😂 Anyway,yesterday I finished off the K100 Cutter 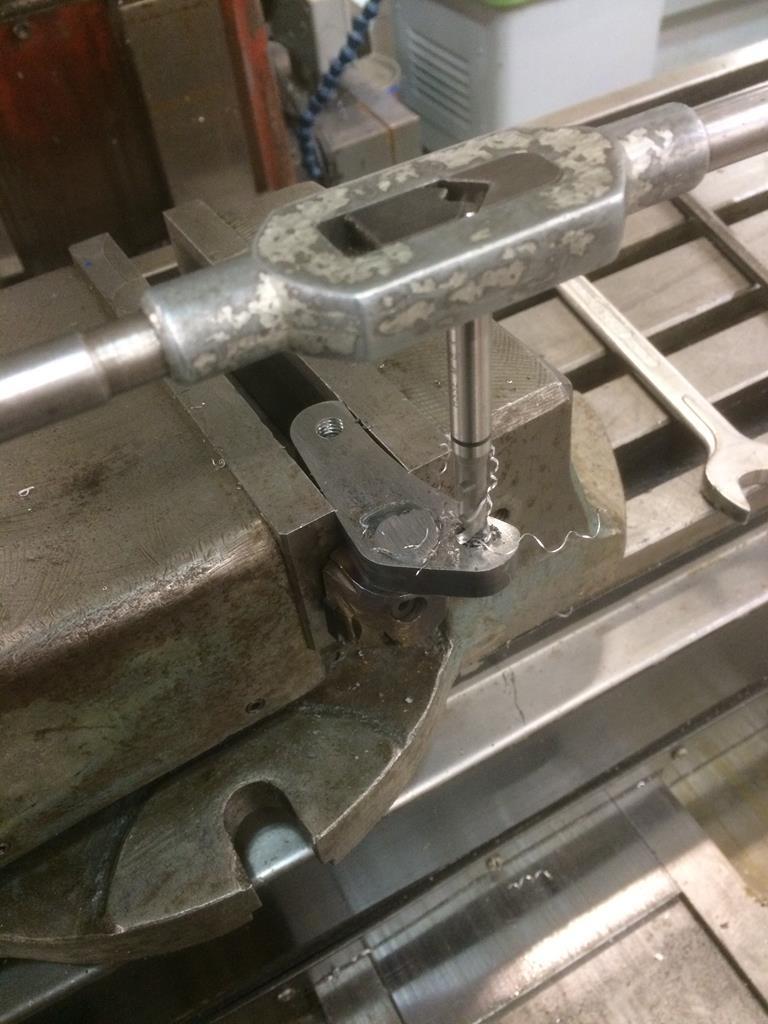 Slight modification needed as the tapped holes in it are M7 where the pressure plate used to bolt on,and I don't have any M7 capscrews. So tapped the bracket M8 and drilled the threads out the flywheel 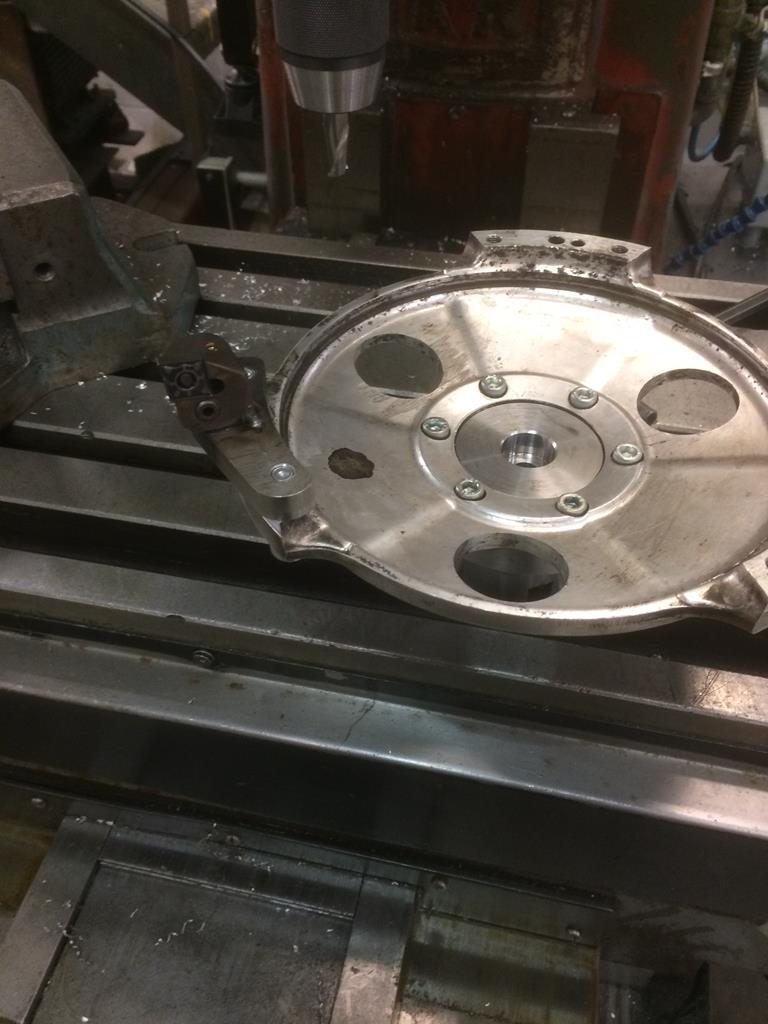 All together And into the mill we go 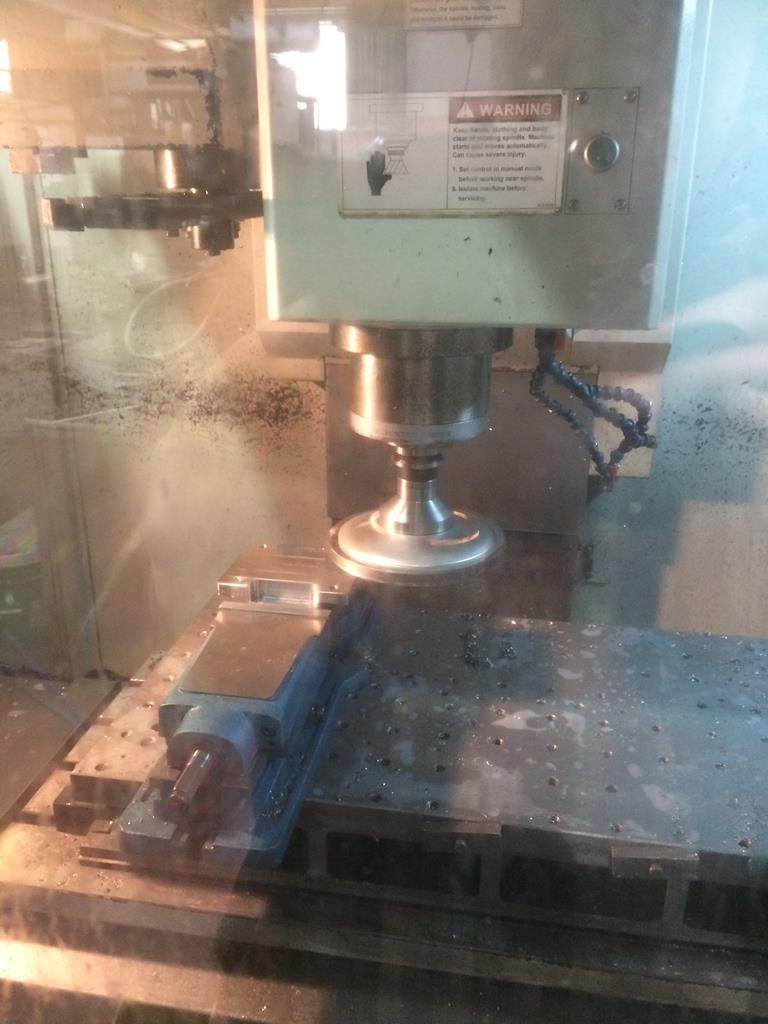 |
| |
Last Edit: Mar 5, 2018 6:06:47 GMT by Deleted
|
|
|
|
|
|
|
Initial results look promising 😊 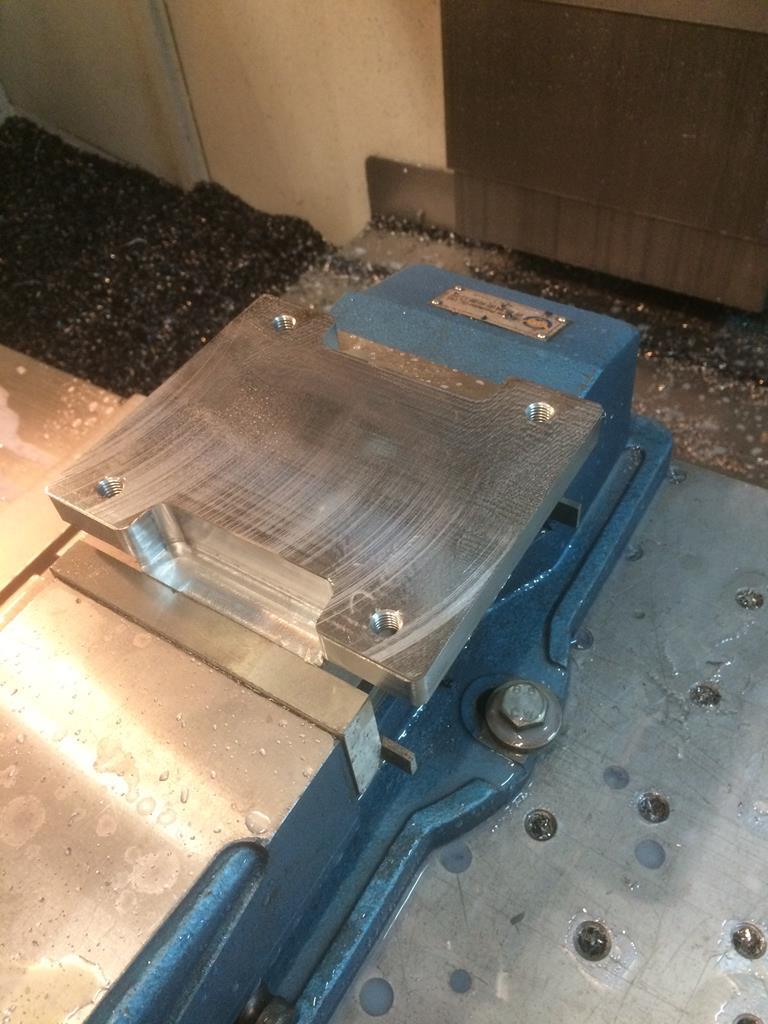 Compared to how the plate looked after I had roughed it out. Bear in mind the roughing out was just that,roughing material off with a 50mm cutter,five tips each taking a millimetre cut per revolution,so machining at 5 meters a minute...  So I now have a decent sized fly cutter. Still want to add some counterweights to it. Might also change the tip holder,as that style tip wouldn't be my first choice for this style of cutter ,geometry wise But the weather Gods are happy,and no more snow....😊 |
| |
|
|
|
|
|
|
|
|
May your beer thaw quickly. 😊
|
| |
|
|
|
|
|
|
|
|
So I was scratching my head thinking why does he need another flywheel...I should have course realised he was making another tool!!
|
| |
|
|
|
|
|
|
|
So I ventured out to the garage this weekend. More in my roll of chairman of the Beer Liberation movement,who strongly condones the cruelty recently being inflicted on off the shelf beers nationwide,but did get a bit further wiring wise on my tricycle. Baby steps and all that 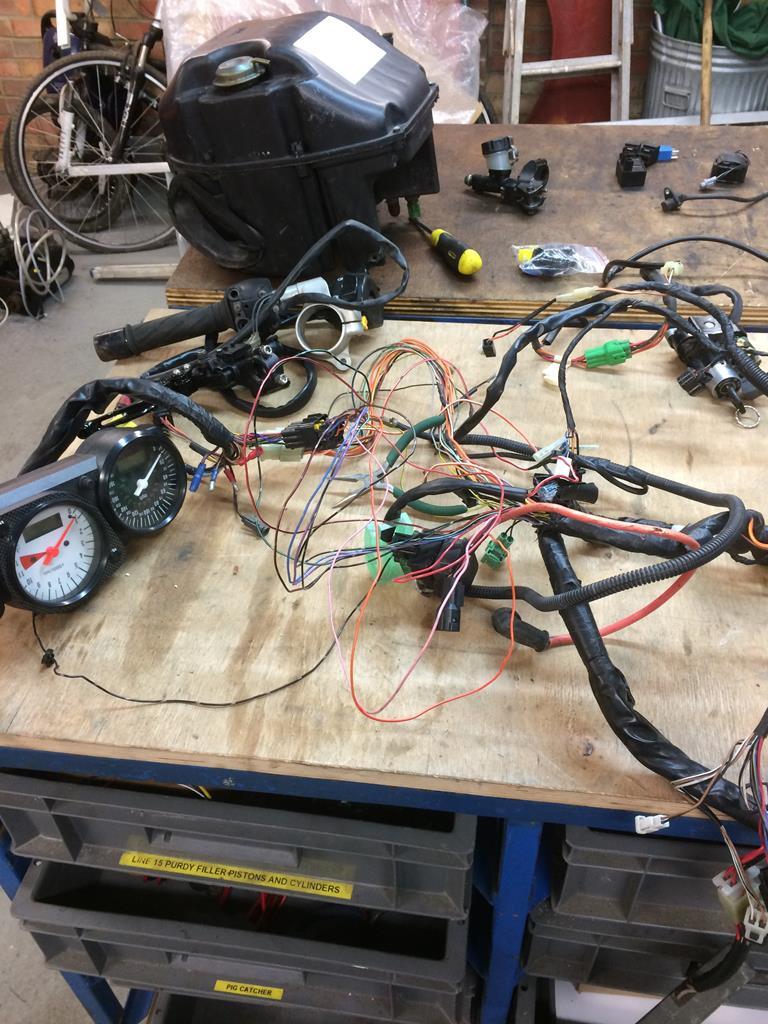 Managed to plug in most of the switches and sensors. Fuel pump and gauge connected along with kill switch,starter button,clutch switch,headlight,indicators etc. Figured out the wiring on the broken connector 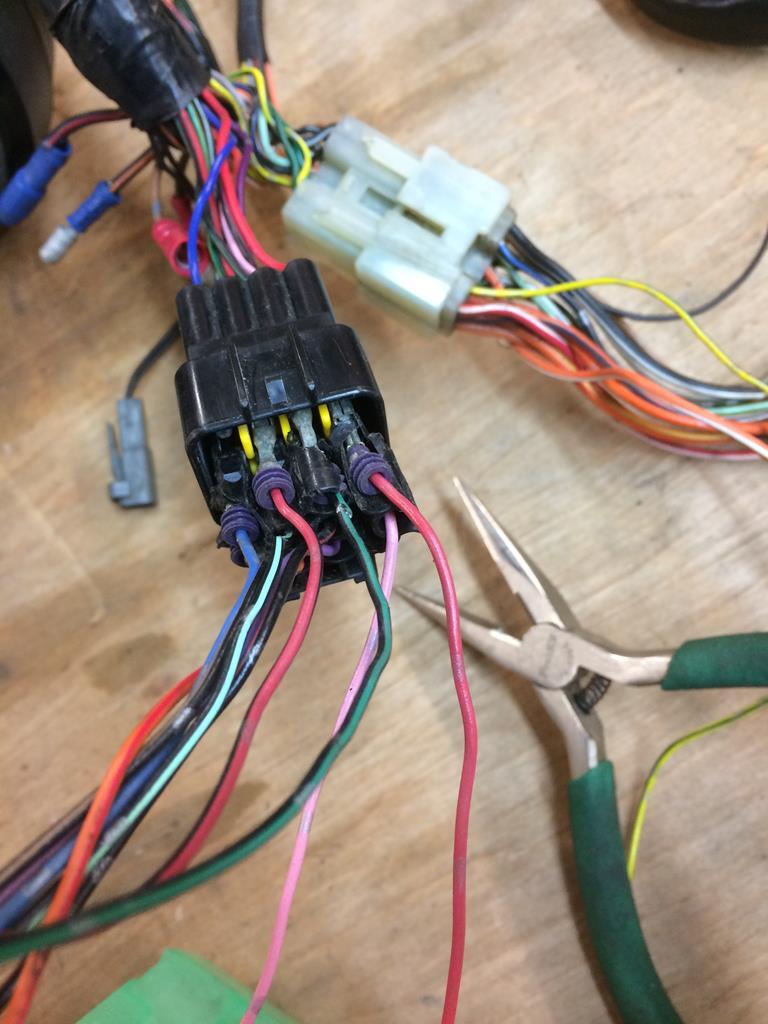 Still a couple of puzzles to sort out. Not sure what this is all about 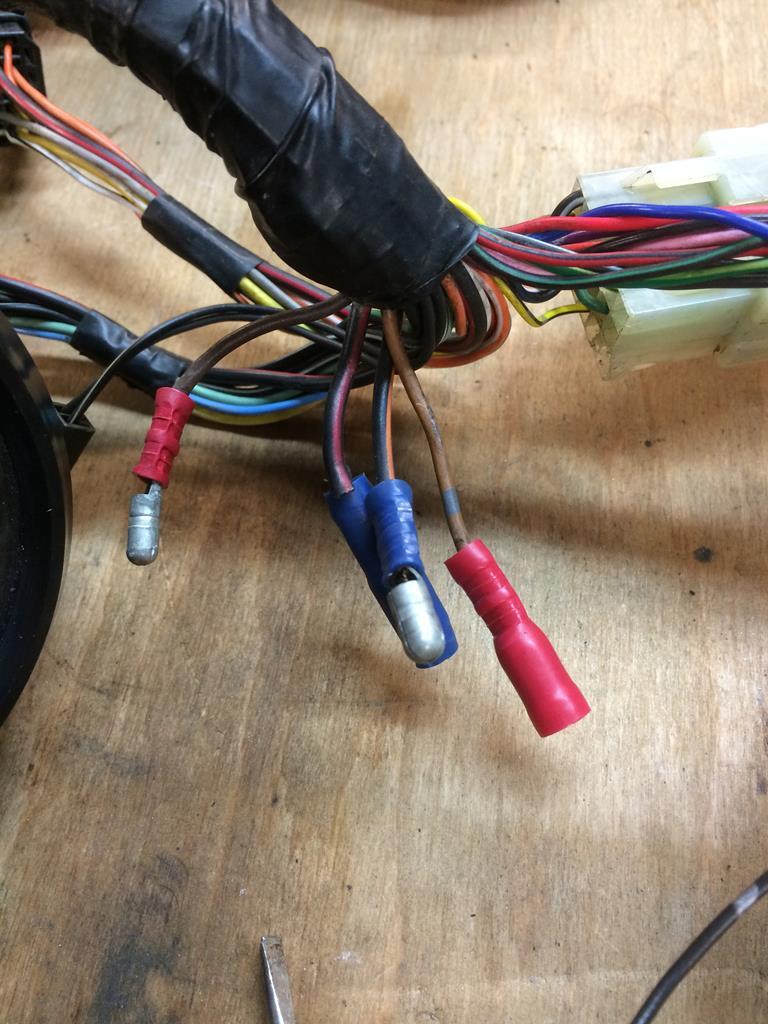 Two of the connectors could join together,the other two are a bit of a mystery,in that one is a bullet connector,but I can't find a corresponding plug. The other is actually a joiner with the remains of a wire still crimped in it,again cannot find that wire. And the last mystery is this 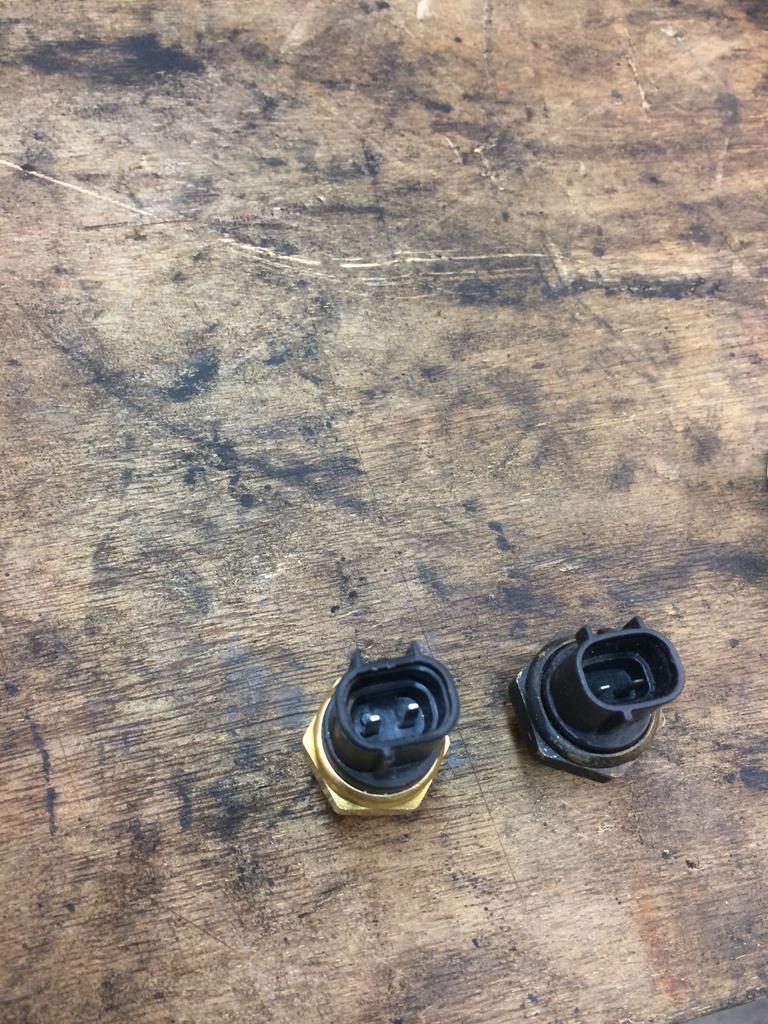 The fan switch that goes in the radiator. All the electrical connections related to the cooling system have a very distinct style . The problem is,I cant find any of them,not for the fan switch,or for the temperature sender unit in the thermostat housing. I think a bit more investigation is needed,as I haven't ruled out the possibility of a sub loom related to the cooling system,that I don't have. What I do have is another loom coming. Hopefully that might indicate where some of the crimped connector wires originally went. It will also give me all the correct colour wires for when I extend the loom to fit the Ape. More investigation required,and beers safely out of the freeze zone.All in all a good weekend. |
| |
|
|
|
|
|
Mar 19, 2018 11:33:38 GMT
|
|
Normally there is sub loom fitted to the cooling fan that will have the plug for the fan switch. Surprised that the connector for the thermostat housing isn't part of the main loom though
|
| |
|
|
|
|
|
Mar 19, 2018 13:00:17 GMT
|
|
There is another damaged connector with all the plastic broken away. I think that could be it. Will see when other loom turns up 😊
|
| |
|
|
|
|
|
|
|
Thought I would add some thread to my thread. Some of the reasons ,apart from blaming the weather for the slow progress. Everybody likes a good thread,so here are two recent ones that took a bit of thinking to do. Unfortunately both infringed on my Saturday "ape" time. 🙁 First up was a standard M16x2 thread. Not very difficult. Needed to cut 32 threads 40mm long onto 16 parts. The challenge you ask? 106mm between the two threads in a rather challenging way.....😂 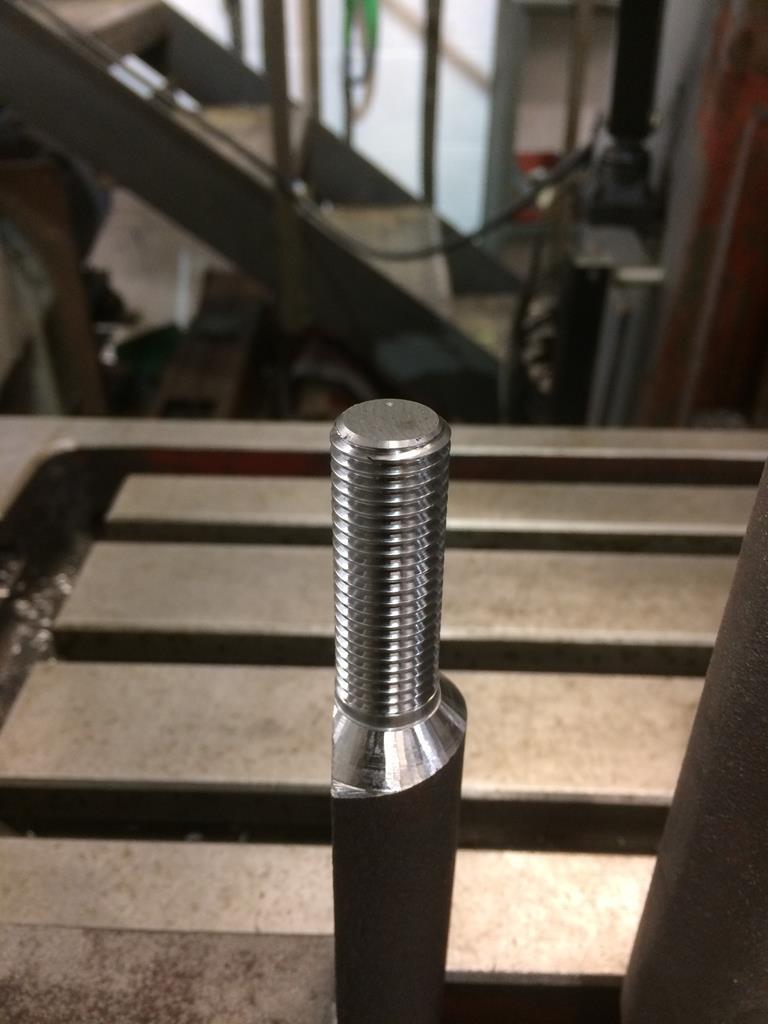 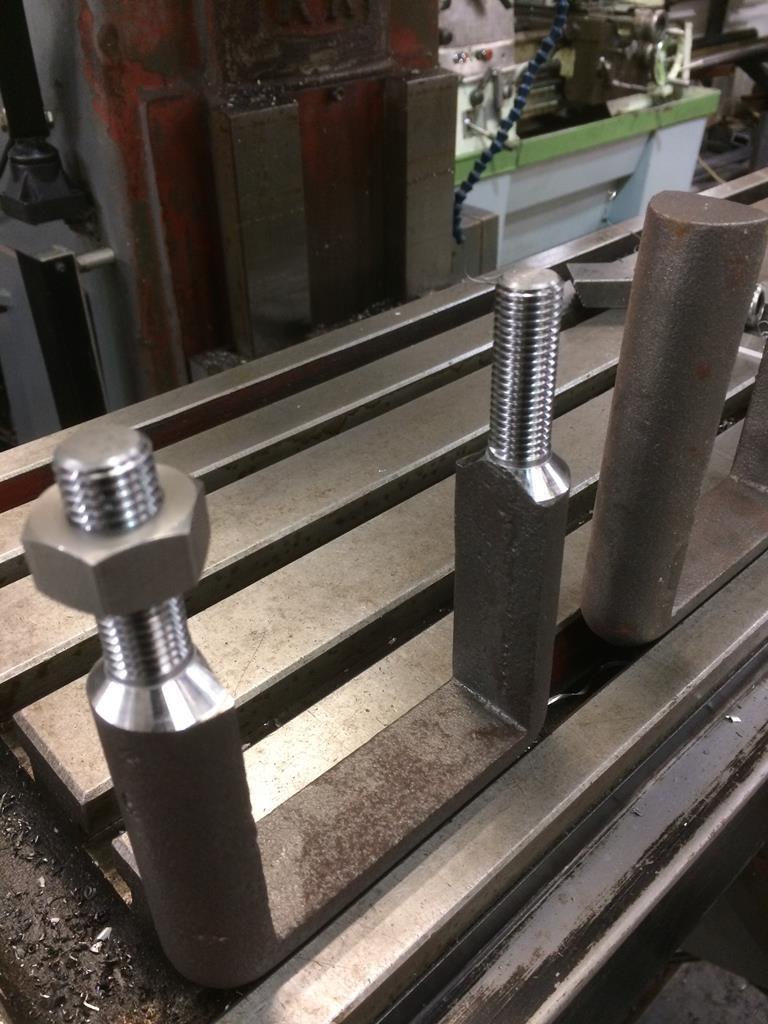 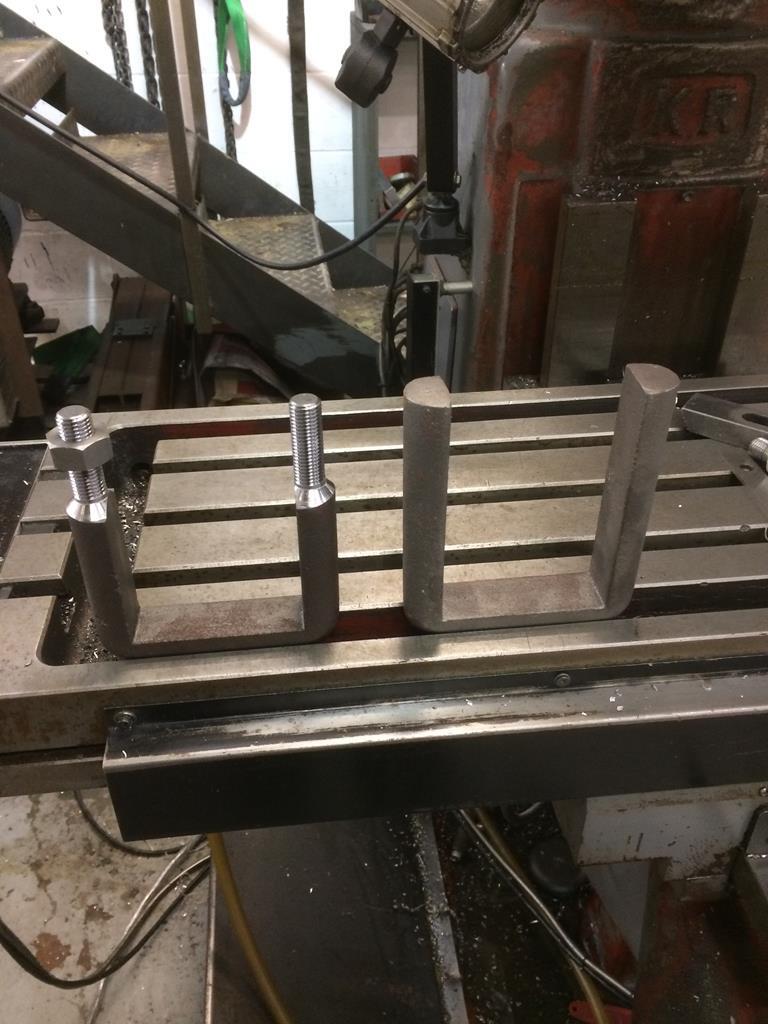 That challenge complete,it was onto the next one,or should that read three? 15/8" thread cut onto three aluminium copper components. 5tpi,200mm of thread." So,what's so hard about that",I hear you say? Parts needed urgently. Got the job Friday .Had to be finished Saturday afternoon the latest,otherwise the customer ,who shall remains nameless,but who is in the packaging business,and packs electrons into copper wire for home use,would be losing £1,25 M a day... 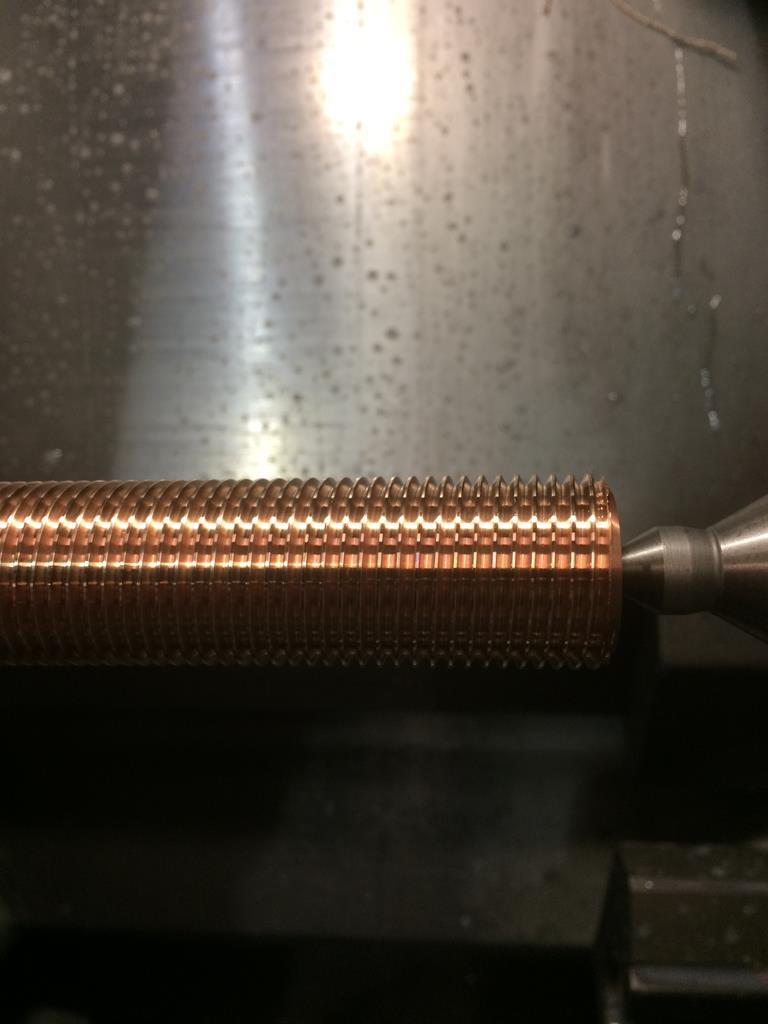 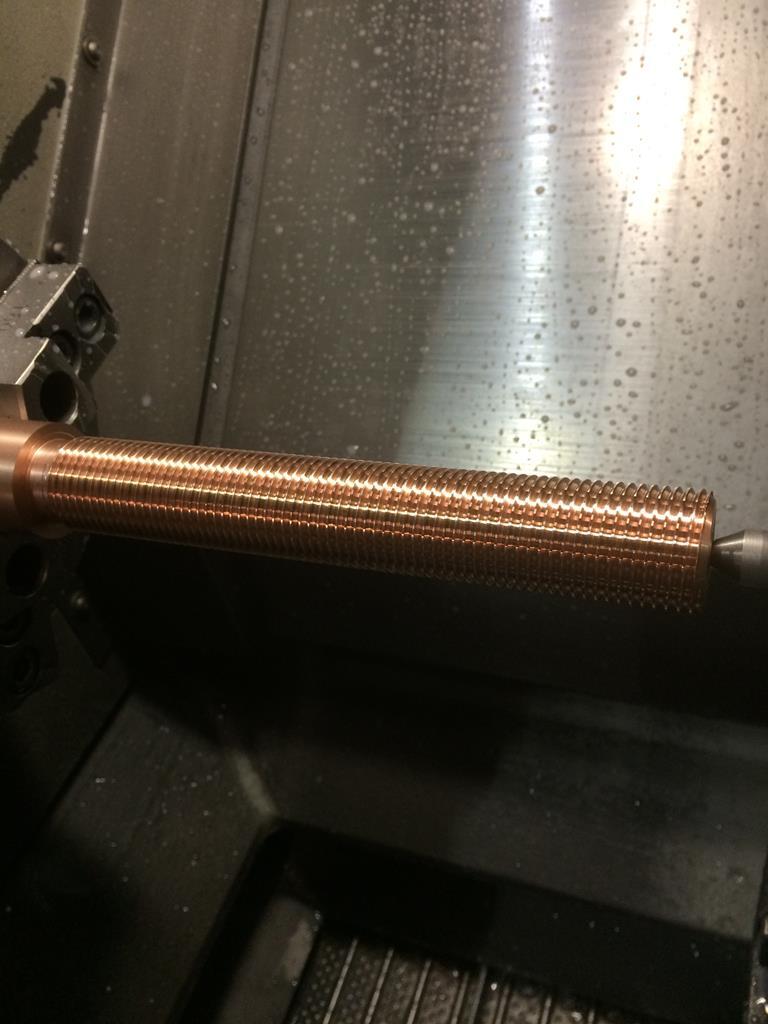 Oh,I forgot to say why that was a challenge. Not a normal 5 tpi thread. Two starts instead of one,and just to make it interesting,left hand thread as well ...So basically two threads cut onto the same end of the bar,180 degrees apart,that don't follow the normal standard of Lefty loosey,righty tighty. Got that? Good. Clear as mud....😂 |
| |
Last Edit: Mar 21, 2018 5:13:35 GMT by Deleted
|
|
eurogranada
Europe
To tinker or not to tinker, that is the question...
Posts: 2,552
|
|
|
|
Showing my ignorance here probably, but nope.... The left hand thread I get but "So basically two threads cut onto the same end of the bar,180 degrees apart" I can't get my head around. Nice looking pieces though! |
| |
|
|
v8ian
Posted a lot

Posts: 3,824
|
|
|
|
|
OOOH the joys of multistart threads, 2 threads on one turn means the pitch is normally quite steep so it screws on quickly but maintains the strength.. look at a jam jar top, they are normally 2 or 3 start.
Johnny, LH Multistarts, You are welcome to those, .... at least it was not 3 or 4 start
|
| |
Last Edit: Mar 20, 2018 8:44:29 GMT by v8ian
Atmo V8 Power . No slicks , No gas + No bits missing . Doing it in style.
Austin A35van, very different------- but still doing it in style, going to be a funmoble
|
|
|
|
|
|
|
Showing my ignorance here probably, but nope.... The left hand thread I get but "So basically two threads cut onto the same end of the bar,180 degrees apart" I can't get my head around. Nice looking pieces though! Will post photo explaining it tonight😊 |
| |
|
|
|
|
|
|
|
|
Hopefully they pay you properly, promptly and remember the service you delivered 😊
P.S. Good news about the beer!
|
| |
Last Edit: Mar 20, 2018 9:23:35 GMT by georgeb
|
|
|
|
|
Mar 20, 2018 11:26:41 GMT
|
Showing my ignorance here probably, but nope.... The left hand thread I get but "So basically two threads cut onto the same end of the bar,180 degrees apart" I can't get my head around. Nice looking pieces though! Will post photo explaining it tonight😊 Would you mind also explaining how you machined the "U" bolts to be able to thread them? Thanks. Mark |
| |
|
|
|
|
|
Mar 20, 2018 11:45:19 GMT
|
Will post photo explaining it tonight😊 Would you mind also explaining how you machined the "U" bolts to be able to thread them? Thanks. Mark My entirely YouTube based machine shop knowledge wants to suggest chucking them up in a 4-jaw chuck maybe? Finding centre could have been interesting though unless you just use the round face? I'm also really interested to see how it was done. |
| |
|
|
|
|
|
Mar 20, 2018 16:53:45 GMT
|
Would you mind also explaining how you machined the "U" bolts to be able to thread them? Thanks. Mark My entirely YouTube based machine shop knowledge wants to suggest chucking them up in a 4-jaw chuck maybe? Finding centre could have been interesting though unless you just use the round face? I'm also really interested to see how it was done. It was a little trick I learnt during my time at Hogwarts.....😉 |
| |
|
|
|
|
|
Mar 20, 2018 19:13:51 GMT
|
Showing my ignorance here probably, but nope.... The left hand thread I get but "So basically two threads cut onto the same end of the bar,180 degrees apart" I can't get my head around. Far from it. Only ignorant people don't ask questions if they don't understand... |
| |
|
|
|
|
|
Mar 20, 2018 19:34:59 GMT
|
OOOH the joys of multistart threads, 2 threads on one turn means the pitch is normally quite steep so it screws on quickly but maintains the strength.. look at a jam jar top, they are normally 2 or 3 start. Johnny, LH Multistarts, You are welcome to those, .... at least it was not 3 or 4 start Ian,To be perfectly honest,multistart threads left hand,righthand,metric or twelfty thirds really don't faze me. Number of starts also not an issue. But I hate buttress and trapezoid threads...Not that it stops me making them 😂 |
| |
|
|
|
|
|
|
|
Back to the multi start thread. As Ian already explained,multi start threads are normally fairly coarse,enabling you to tighten the nut quicker,yet retaining strength. The thread on the ally copper bar had 5 threads per inch. To put that into perspective,a pipe thread of a similar diameter would normally have 11 threads per inch ,(Tpi). Here in lies a bit of a problem,in that there isn't physically enough space to fit two 5tpi threads onto the same end of a bar that diameter . So, you use a threading tool with a finer pitch that what you are actually cutting. In this case I used a 10 tpi insert to cut the two 5tpi threads,and cut the threads to the depth you normally would a 10 tpi thread. That's all fine and well,and now having managed to add more mud to the mixture,and confused you even further,I thought a photo would help explain better. So I did a quick and nasty on a piece of acetal during lunchtime yesterday... As per all good cooking shows,here's one I made earlier... 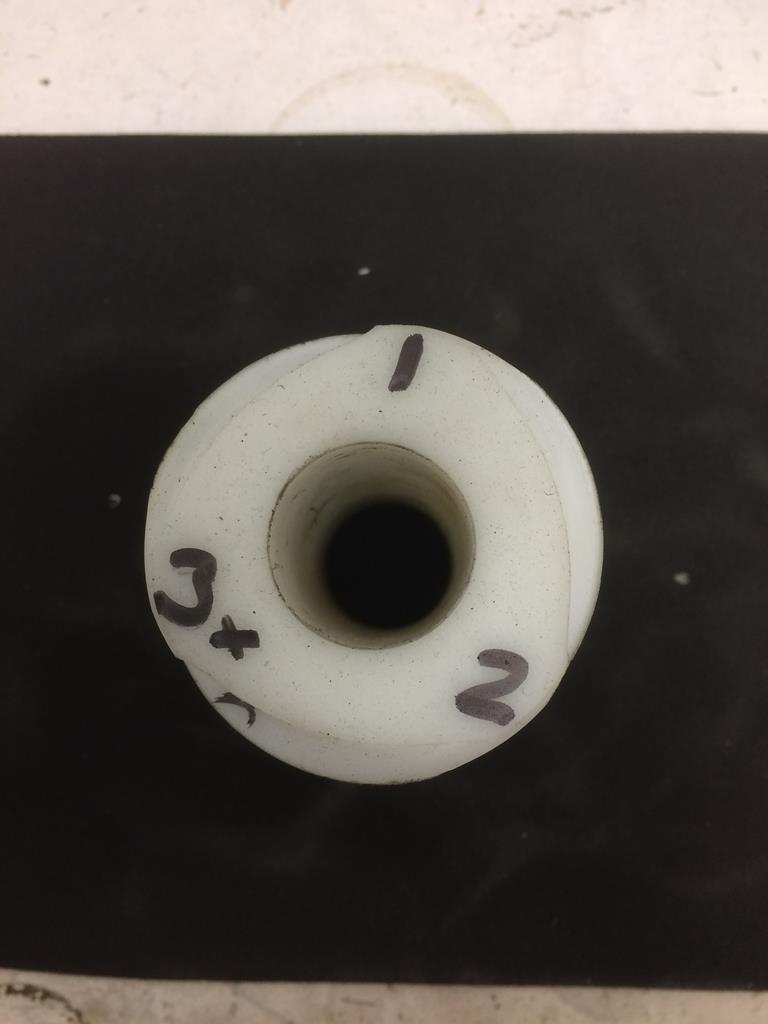 This time it's a total barsteward of a thread,don't ask for a corresponding nut 😂 It's got three starts this time,with a pitch of one turn in 60mm. I have numbered the starts one to three. I then took a marking pen and did a bit of colouring in.. Picasso I am not,but thread number one is marked with a line, thread number two isn't marked,and thread number three is marked with crosses. 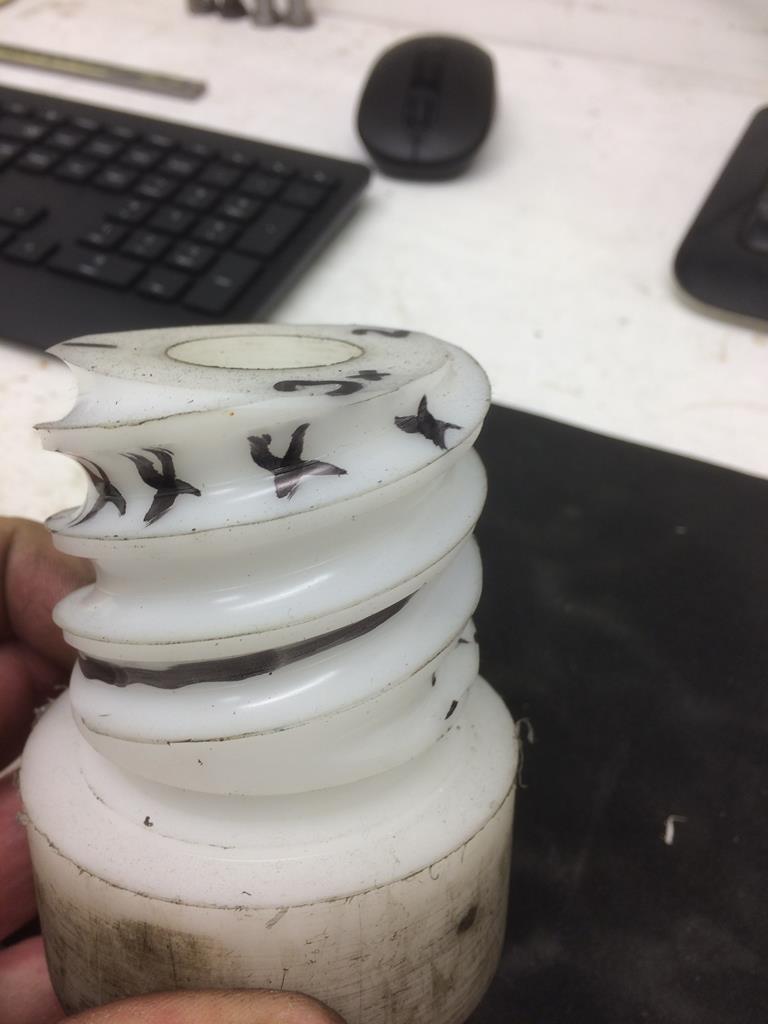 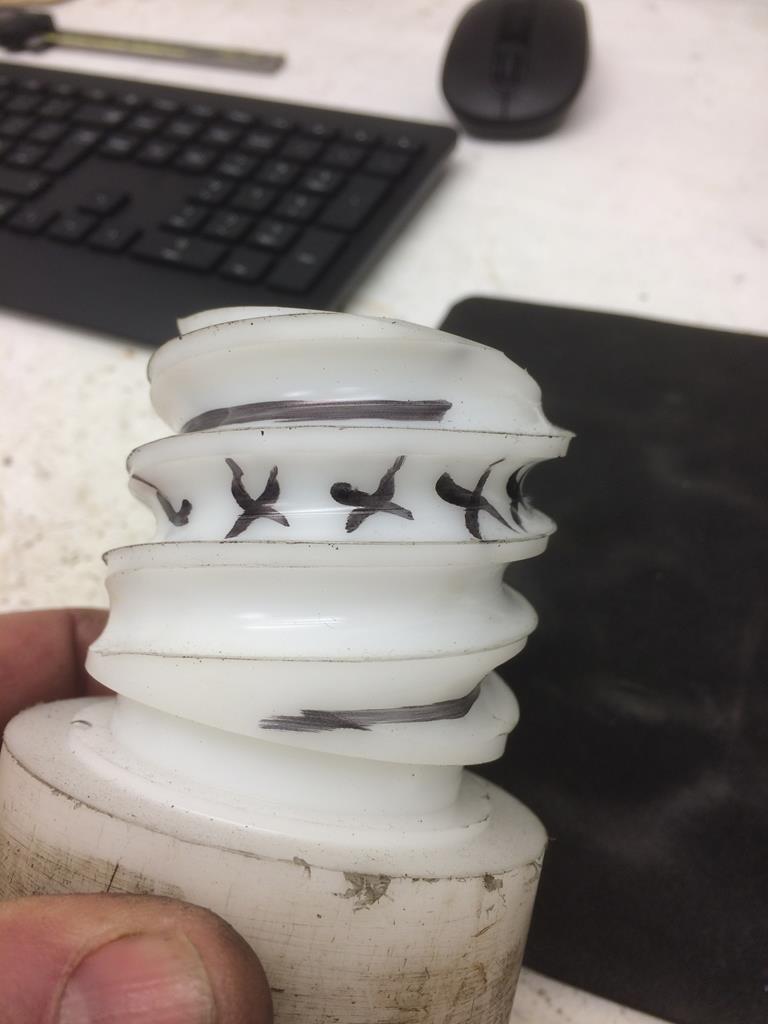 You can see the three distinct threads. I used a 10mm round insert,cutting to half its diameter,i.e. 5mm deep,so I had enough space to fit the three threads in,leaving a couple of mm between the threads. |
| |
|
|
|
|
|
|
|
Onto the u bolts. It may come as a bit of a surprise ,but they didn't go anywhere near the lathe,but were done all on the milling machine. I could have done it on the lathe,but probably would have ended up driving down to Rye harbour to borrow a fish to slit my wrists with,and put me out my misery,way before they were finished. I made a jig that I could accurately ,and repeatedly clamp the bolt blanks on to. I then found the centre of the jig. Then drew two 16,5mm circles on the computer, equidistant from the center,on the desired pitch,in this case each circle is 53 mm from the centre. Then I put this chamfer tool into the mill,and wrote a program to mill tthese 16,5 mm circles onto the blank to a depth of 48mm 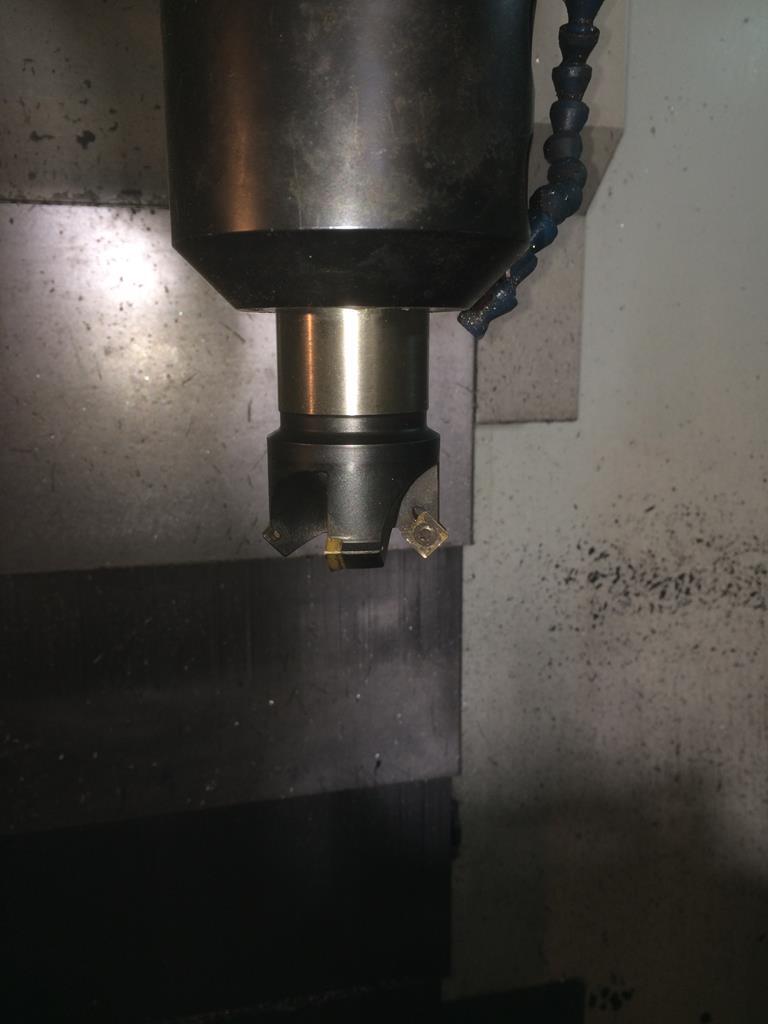 That done ,I then had a blank with both d shaped legs milled round to the right depth,with a nice chamfer at the bottom,with the correct spacing between the two circles,but still too big for the thread. 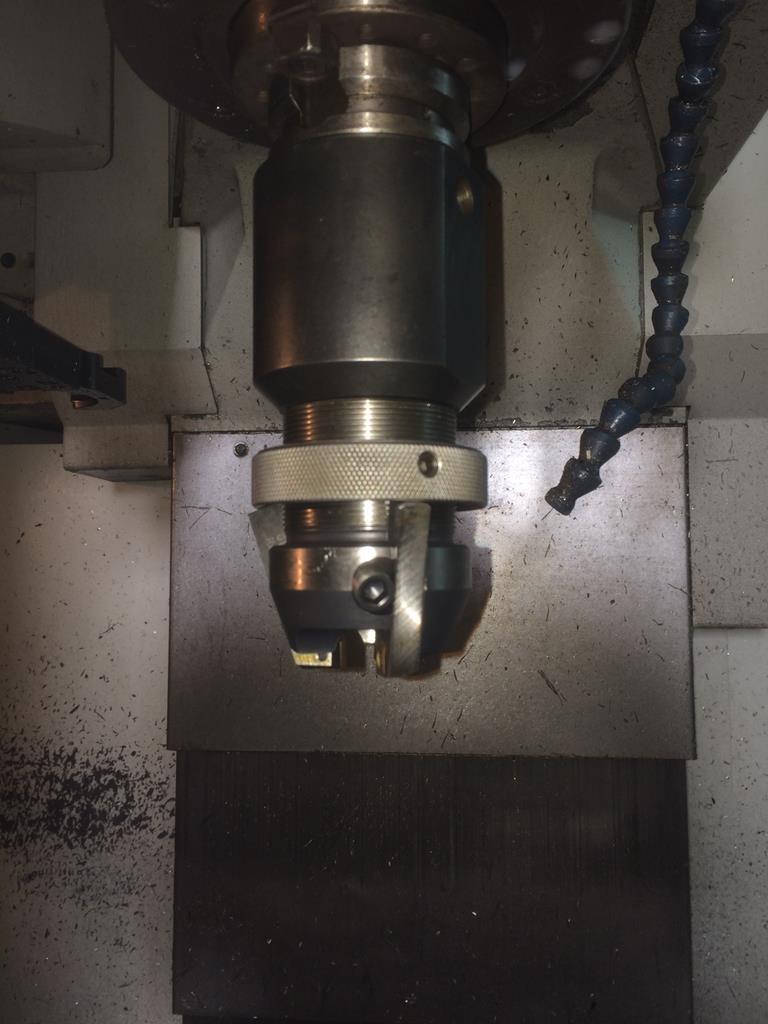 This tool then went in. It's a turning tool originally used on a capstan lathe,that I never used,but didn't have the heart to throw away . It seemed too good to be turned into cat food tins. So I made an adaptor to make it fit the cnc mill 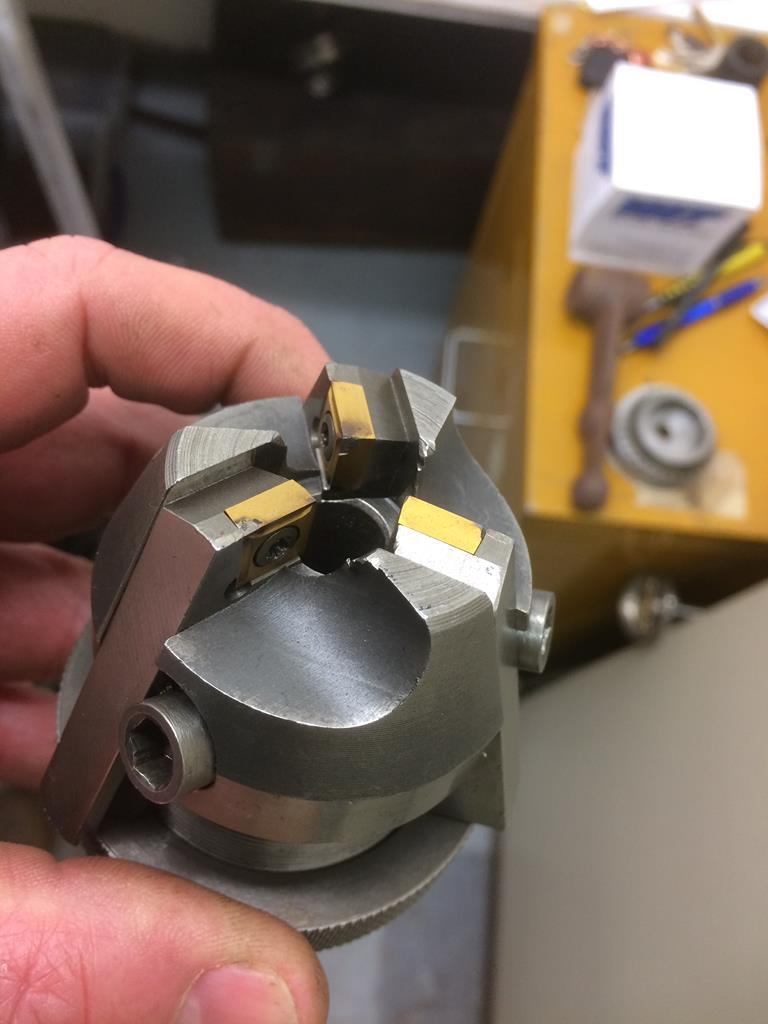 It's got three cutting inserts,and you can adjust it to cut what ever diameter required. The three inserts give a beautiful finish and locate the diameter you are turning,so you don't get tapered parts with varying diameters along their length with the part pushing away from the cutting edge.I then wrote ostensibly a drilling program,to feed this cutter down to 40mm,leaving the nice premachined chamfer at the bottom of the turned part,again on 53mm centres. That done,quick wiz around the top with a chamfer tool to prep the part for threading. The steel used in these bolts is hard,kin hard ,so threading could have been an issue. Seeing the customer,in all his wisdom,hadn't had many spare blanks made,I couldn't chance using a dienut to cut the threads. Chances were it would weld itself to the blank and vandalise itself,and the part to death. So,I used this,a thread mill 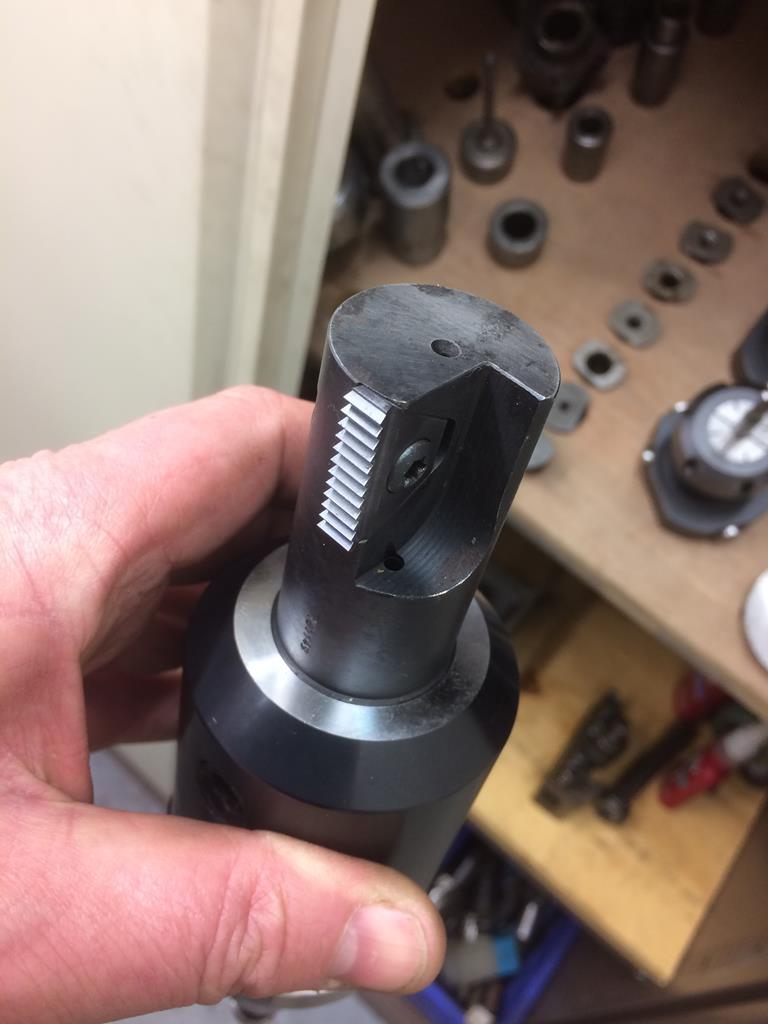 The insert has the same pitch as the thread you want to cut,and the cutter goes round the part,whilst simultaneously moving up the correct pitch for every turn it makes around the blank. Easy....😂😂 |
| |
Last Edit: Mar 21, 2018 6:35:07 GMT by Deleted
|
|