|
|
|
Sept 30, 2017 19:52:39 GMT
|
..., and whatever I may come up with in the future... 
Bicycles.
I have worked for several Hot Rod shops in this town ( some 15 to 20 years ago ), and it seems a couple of customers followed me around whenever I switched employers.
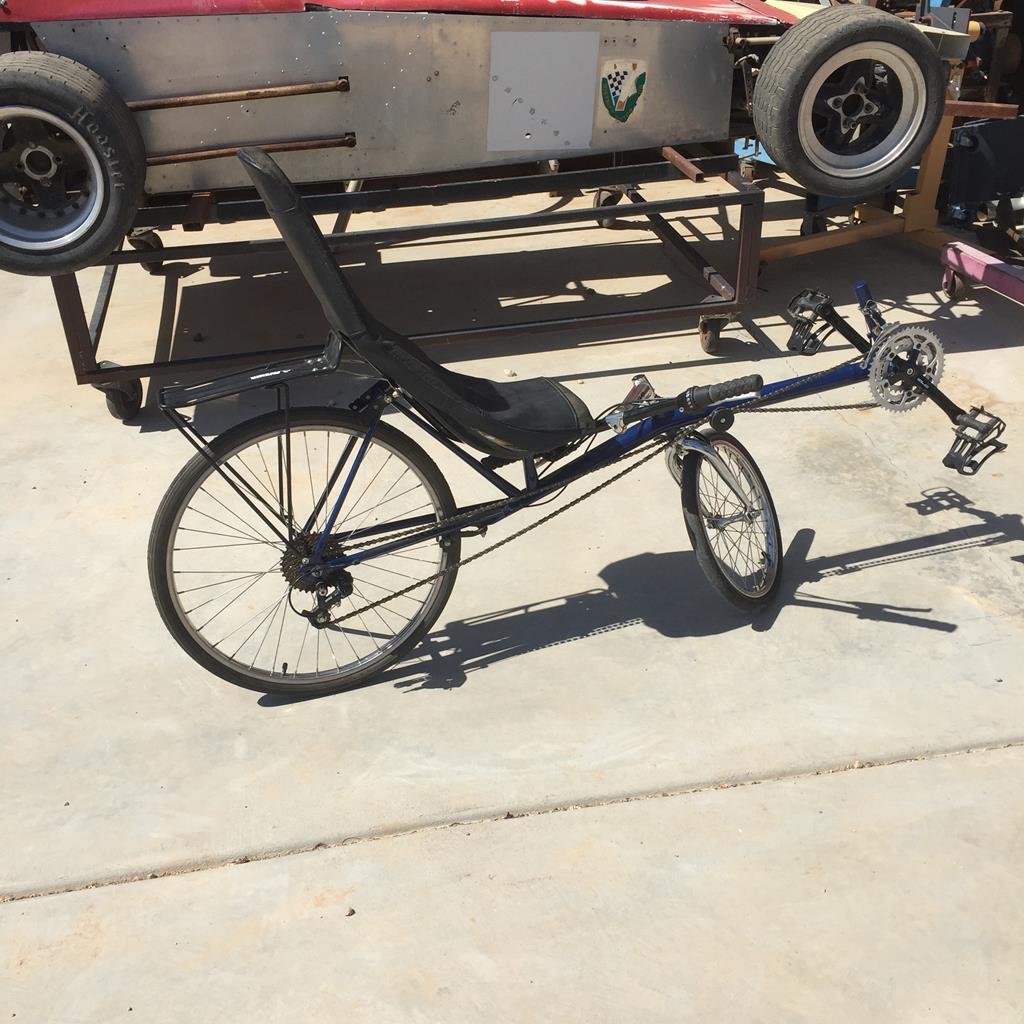
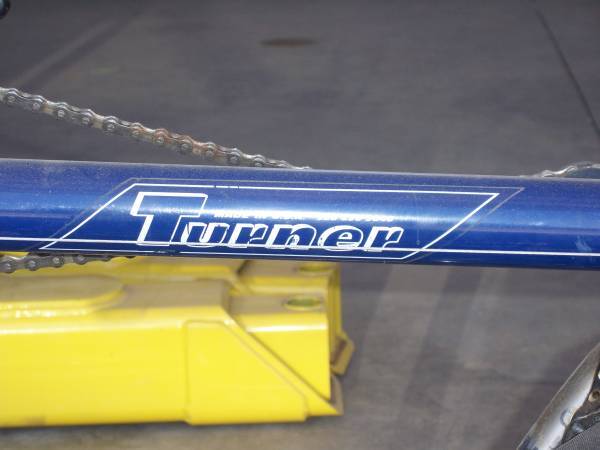
One of them was the owner of Turner Recumbents.
I always enjoyed working on them.
They were a nice change of pace, and TIG welding the thinwall Chrome Moly was a challenge I liked.
We went through a couple of stages of redesign ( each of those meant changes to the welding jig as well )
Being from Holland, I sort of have a love/hate relationship with bicycles anyway.
So I asked Milt Turner ( the guy we were doing this for ), what one of his bikes would cost me.
Even with a buddy discount, it was out of my budget...
A year or so ago, I was looking around on the local Craigslist page.
And this popped up...
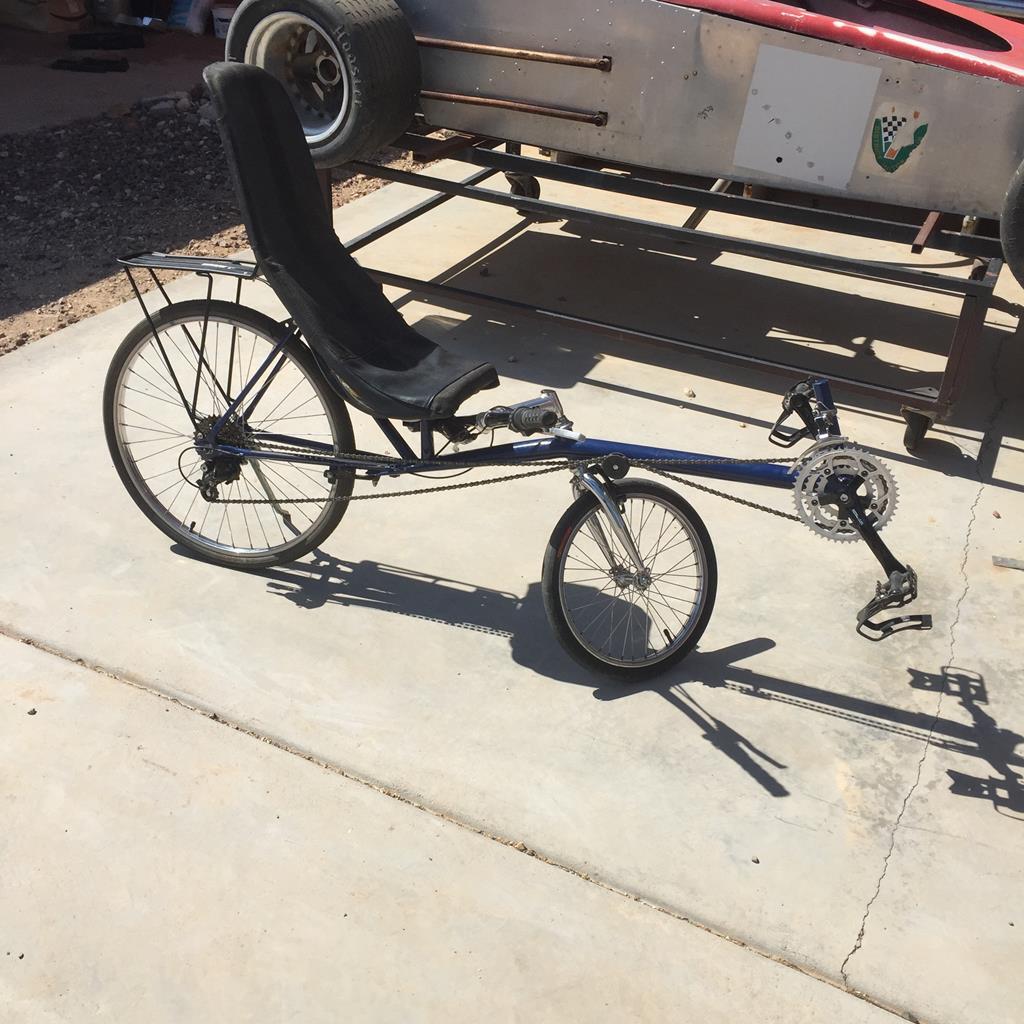
A Turner Recumbent with the right size frame to suit me, very little use over the years.
And its one of the frames I built.
This is one of the earlier SWB bikes ( he later moved to long wheel base )
And he stopped selling bikes several years ago.
So I'm pretty happy about finding this one... 
|
| |
|
|
|
|
|
|
|
Sept 30, 2017 19:53:09 GMT
|
|
Pics didn't post...
|
| |
|
|
|
|
|
Sept 30, 2017 19:54:44 GMT
|
|
|
| |
|
|
|
|
|
Sept 30, 2017 20:10:22 GMT
|
GoKarts. I have a buildthread about my spaceframe Fiat 500 racer already. When I got the car it had a souped up version of its original aircooled twin in it, but that didn't have enough horsepower to keep up with the other cars on the track. So I swapped in a bigger watercooled 4 cylinder ( which is now being replaced by another, out of a BMW motorcycle ) So I had all these beautiful highly tuned Fiat twins, and spare parts. What could a guy do with those...  I happened to find a cheap incomplete ( no engine ) shifterkart. So I made this mockup. Its a Polish 126 650cc aircooled twin, with the transaxle out of a Fiat 500 Giardiniera ( upside down to make it mid engine ) Seat moved from the right to the left ( works out better with the ignition, and other stuff hanging off this engine ) This project hasn't gone any farther than the mockup stage, and to be honest, I'm not sure it will. Because not much after finding the Kart I also found a engineless 1958 Fiat 500 Nuova. Which will take the same race engines and spares, but on that one its almost a straight bolt-in... 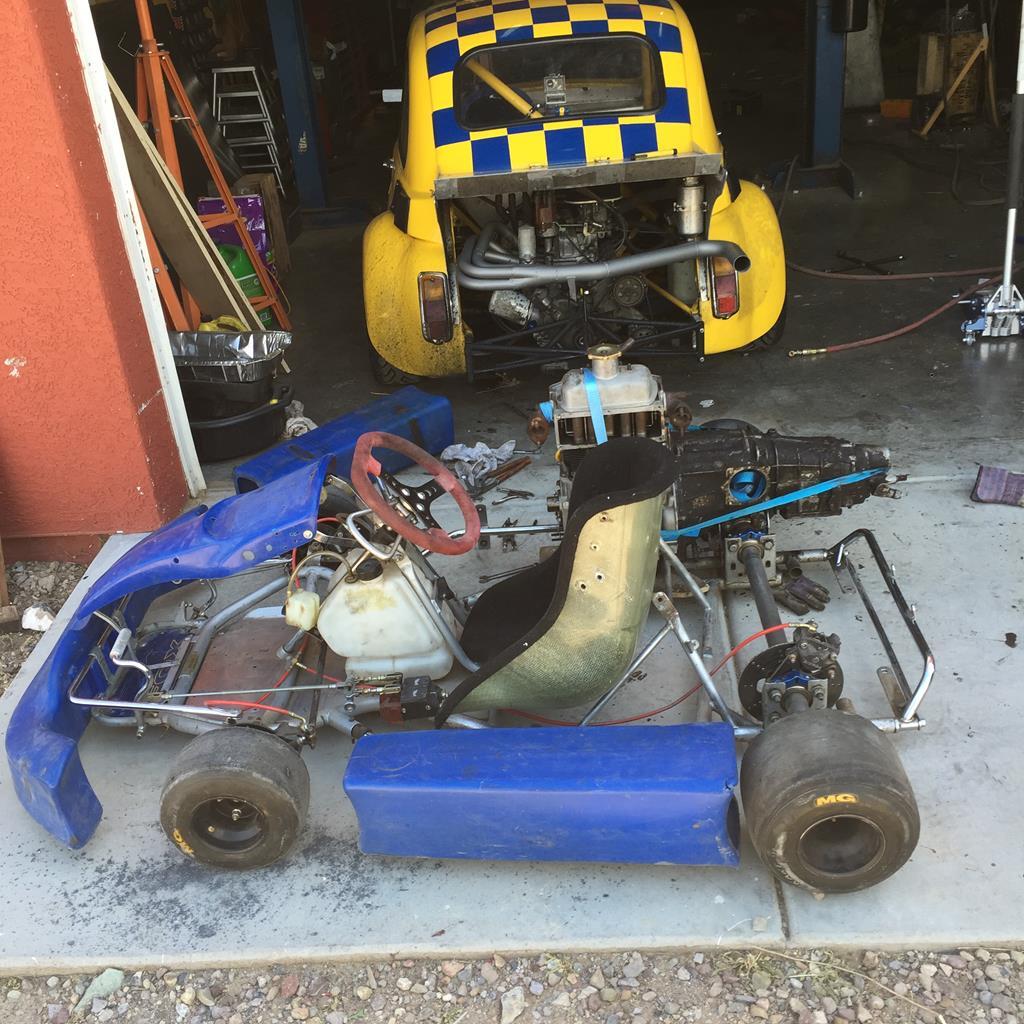 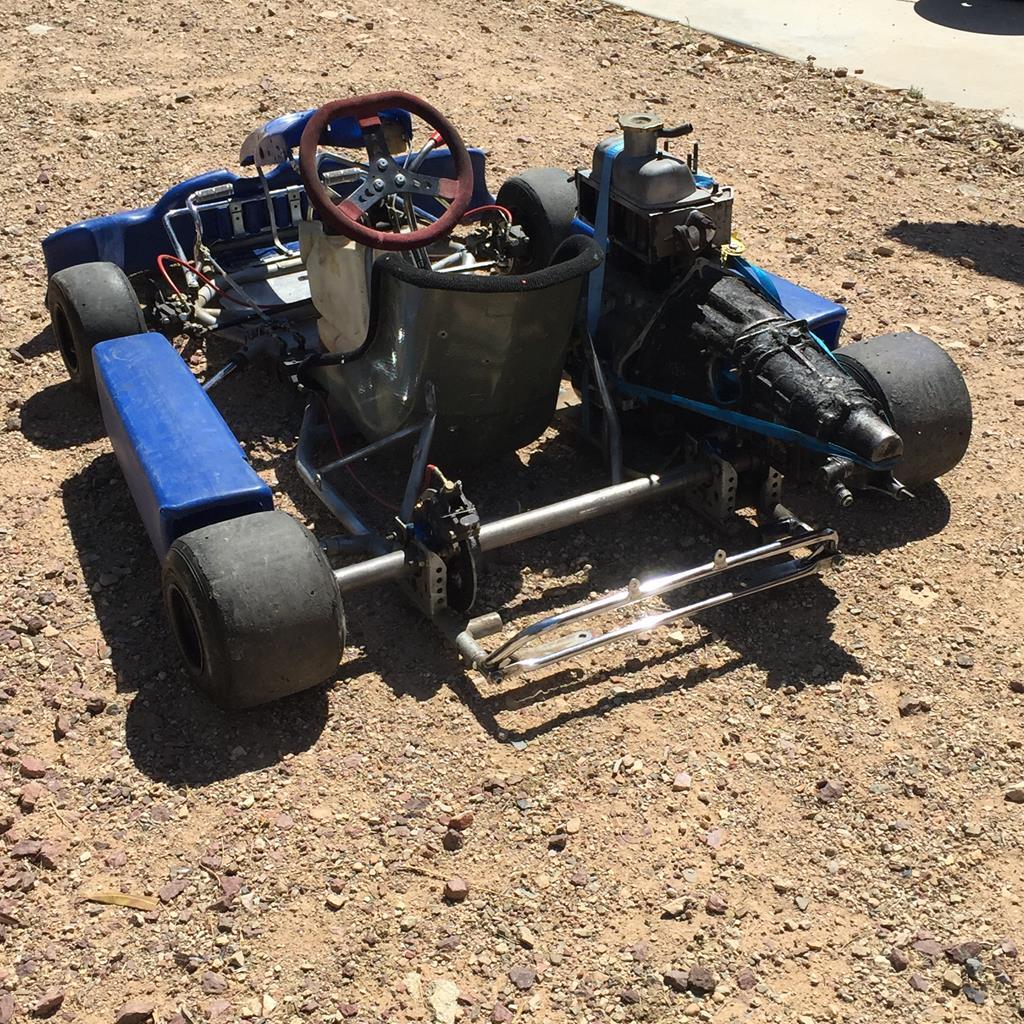 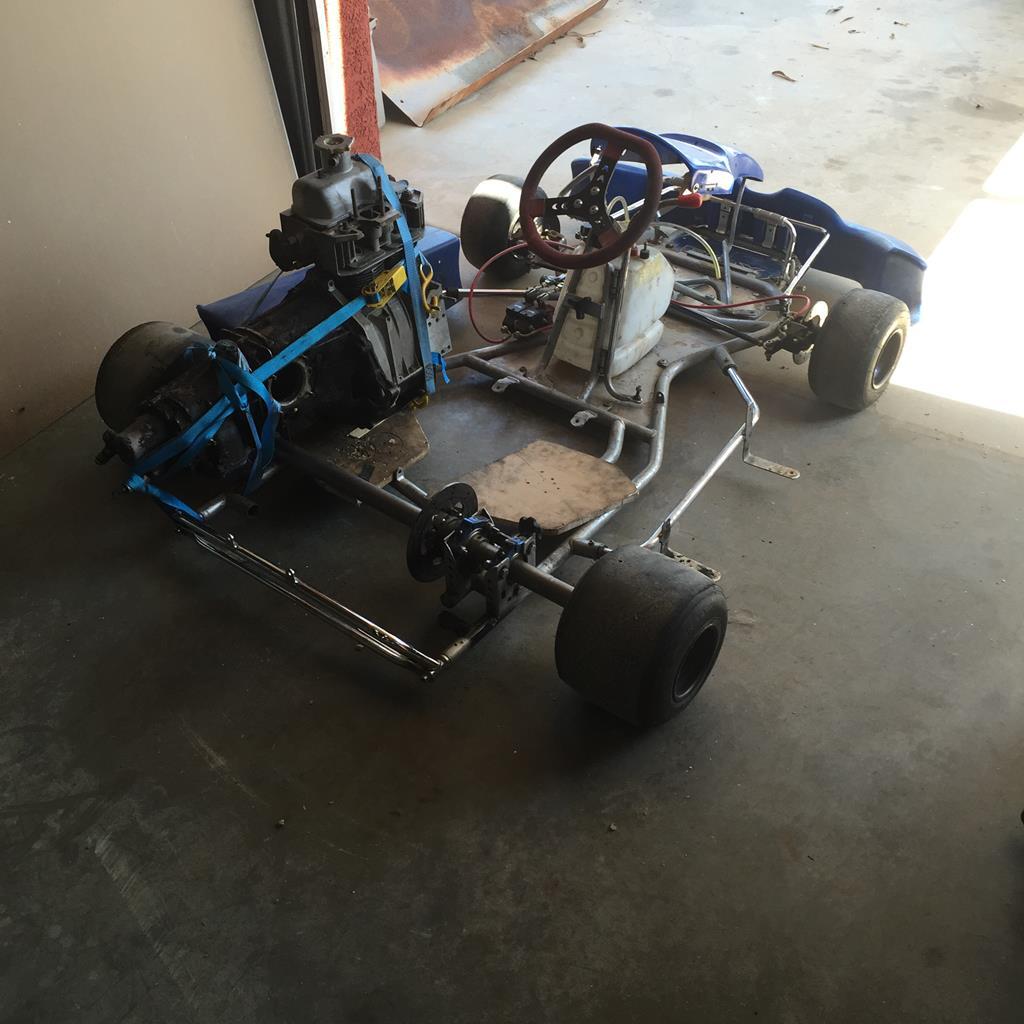 |
| |
|
|
Scott
Part of things
 
Posts: 51 
|
|
Sept 30, 2017 20:37:44 GMT
|
|
Probably a really stupid question...
But you made the frames, had access to the jigs... why not make your own frame and build the bike that way?
BTW cracking find on CL, and even better that you were the one who built it
|
| |
What looks right is not necessarily right,
but what looks wrong is definitely not right!
|
|
|
|
|
Sept 30, 2017 20:47:56 GMT
|
|
I wouldn't have gone behind his back, but I'm sure I could have worked out something with the frame.
But the derailers, wheels, tires, etc, added up to quite a lot.
Even at a discount...
|
| |
|
|
|
|
|
|
|
Downdraft heads and experimental carbs. Maybe this should be in the car section, but it might be a little while before they go on cars. So I'll just park it here for now... Pre Crossflow Downdraft MAE Ford head. Ex v. Zalingen ( a famous Dutch tuner from days gone by, also known for making stand up basses ) Part of the DAF F3 program, I traded some Lola parts for it long time ago. I have no desire to run it as a 1000cc, but I think I've found a way to run it as a 1.5 litre by using cut down 1300 Crossflow pistons in a 1500GT block. I had it redone with new valves, guides, and seats. And the inside epoxy coated to make sure there is no porousity. I have the 1 into 4 F3 intake, to use one throat off a Weber, but I also had a set of Clubmans intakes. But they were the wrong angle, and in really bad shape... I made an adapter plate so I could mount them upside down on the head, so I could start working on them. 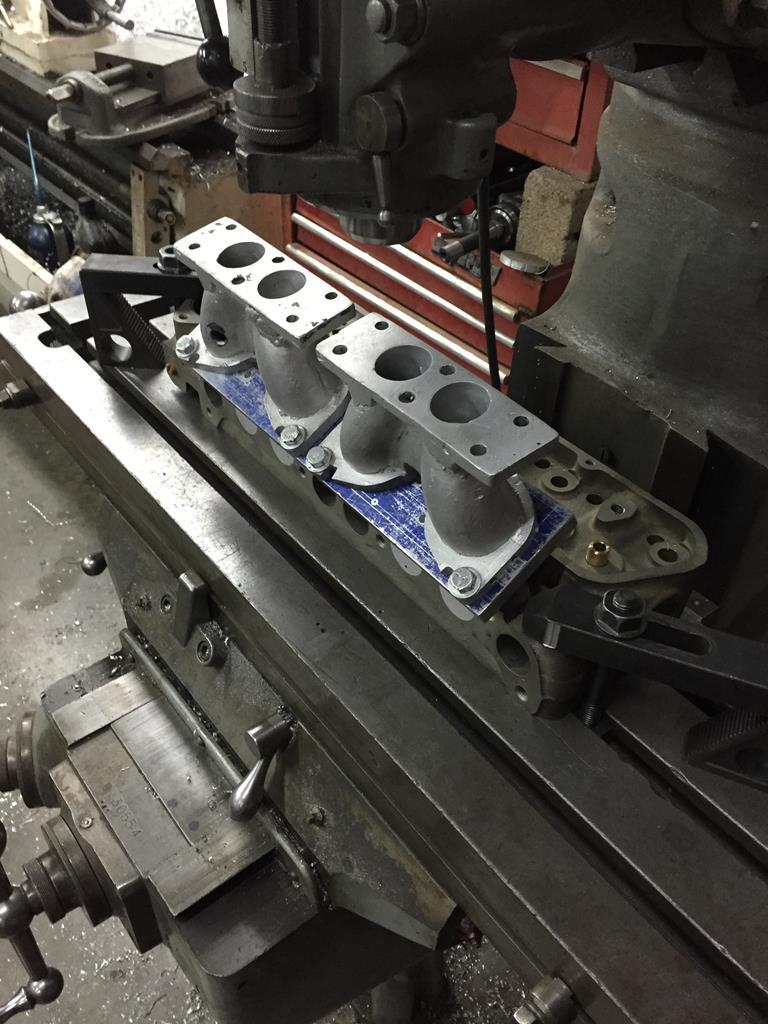 |
| |
|
|
|
|
|
|
|
I started by milling off the old flanges. And when I did, big chunks fell out because the manifolds were badly cracked through old repairs. 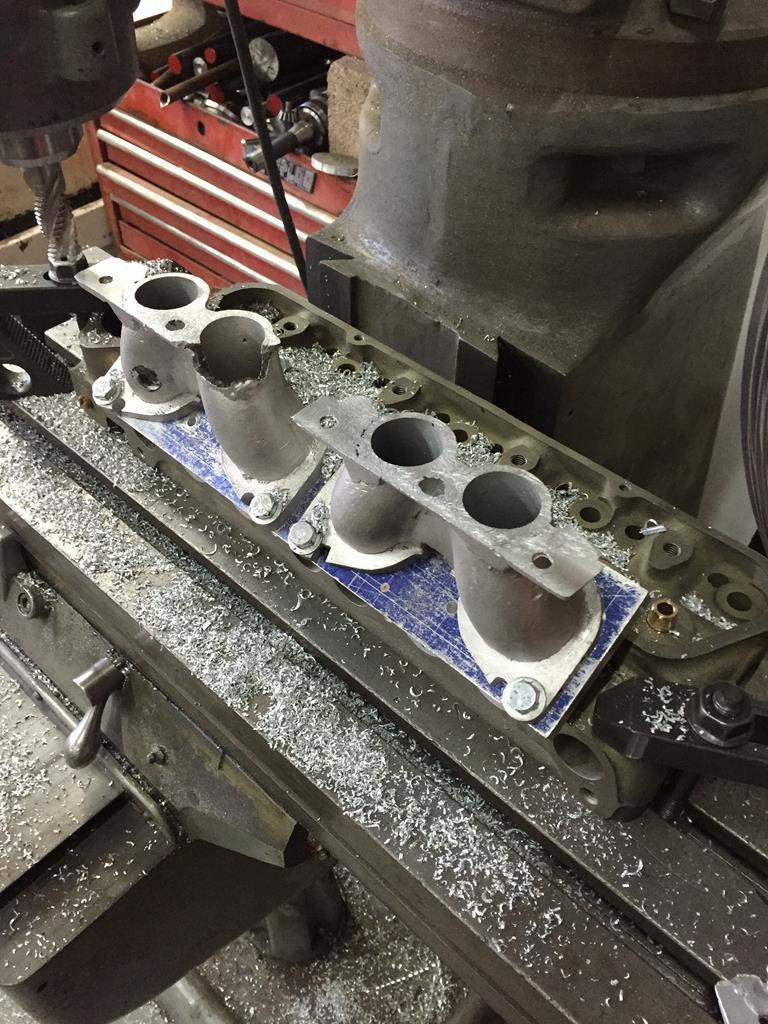 Cut back to where I found material I thought I could trust. 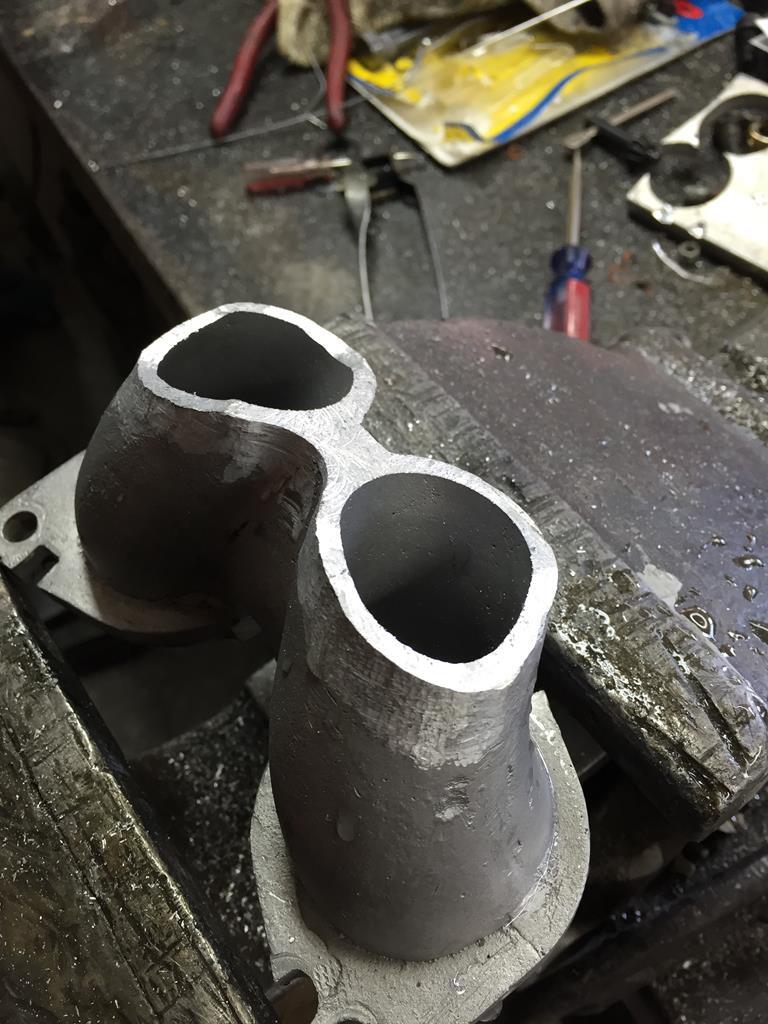 And welded back up again. 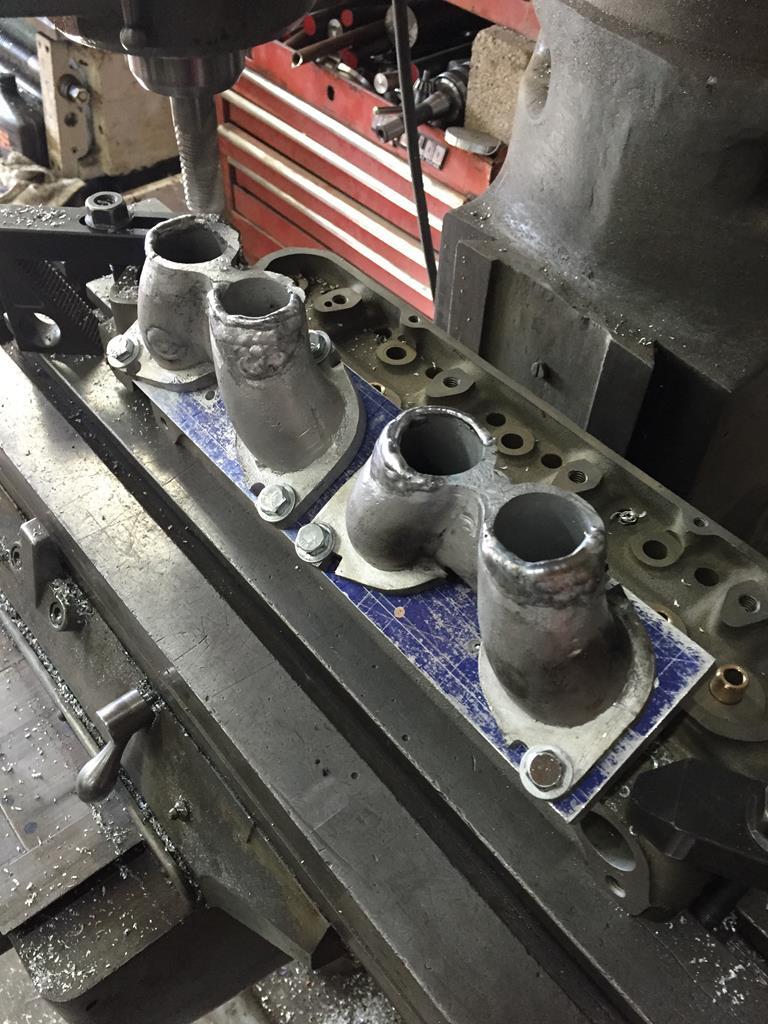 Milled flat. 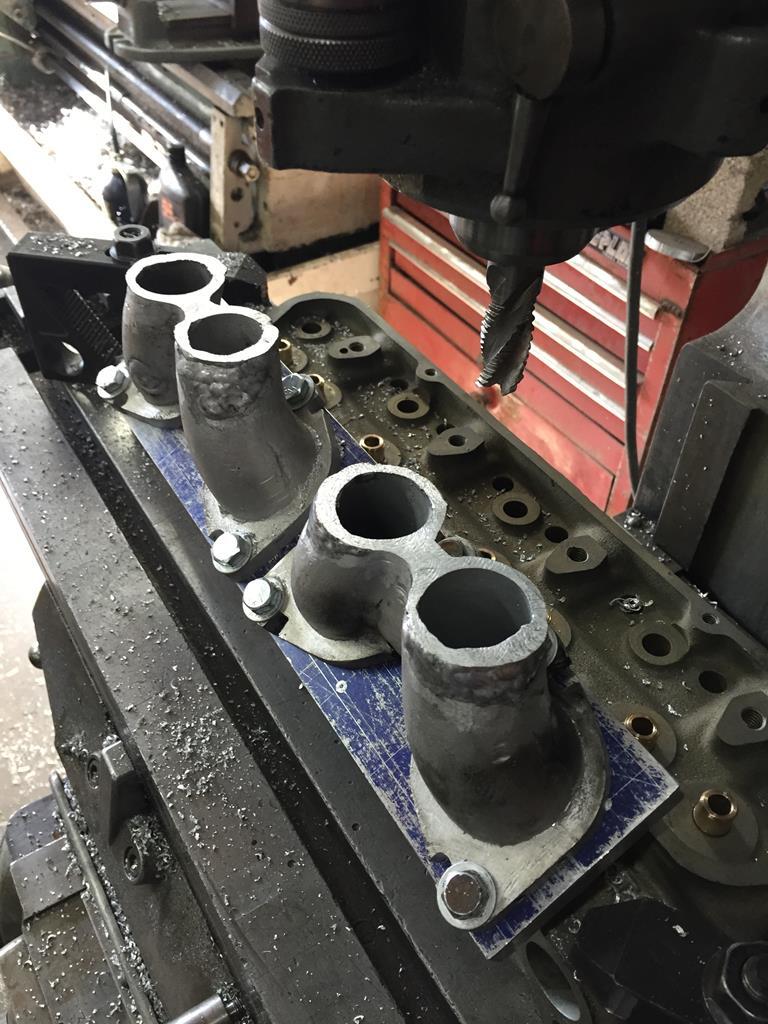 |
| |
|
|
|
|
|
|
|
New flange. 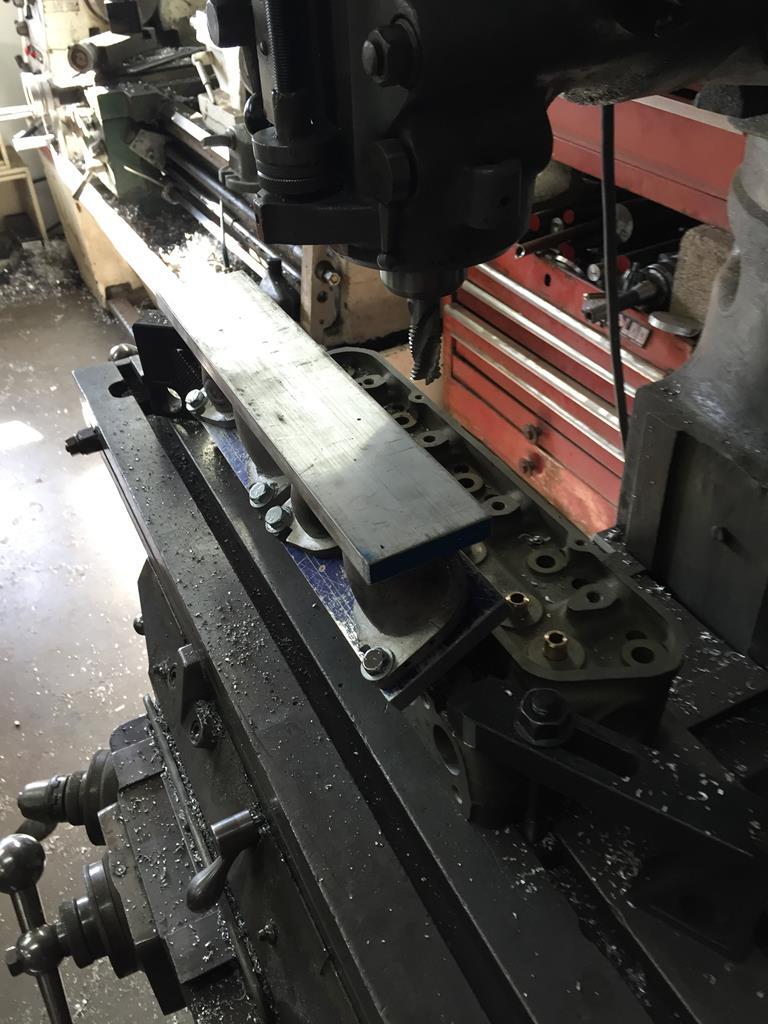 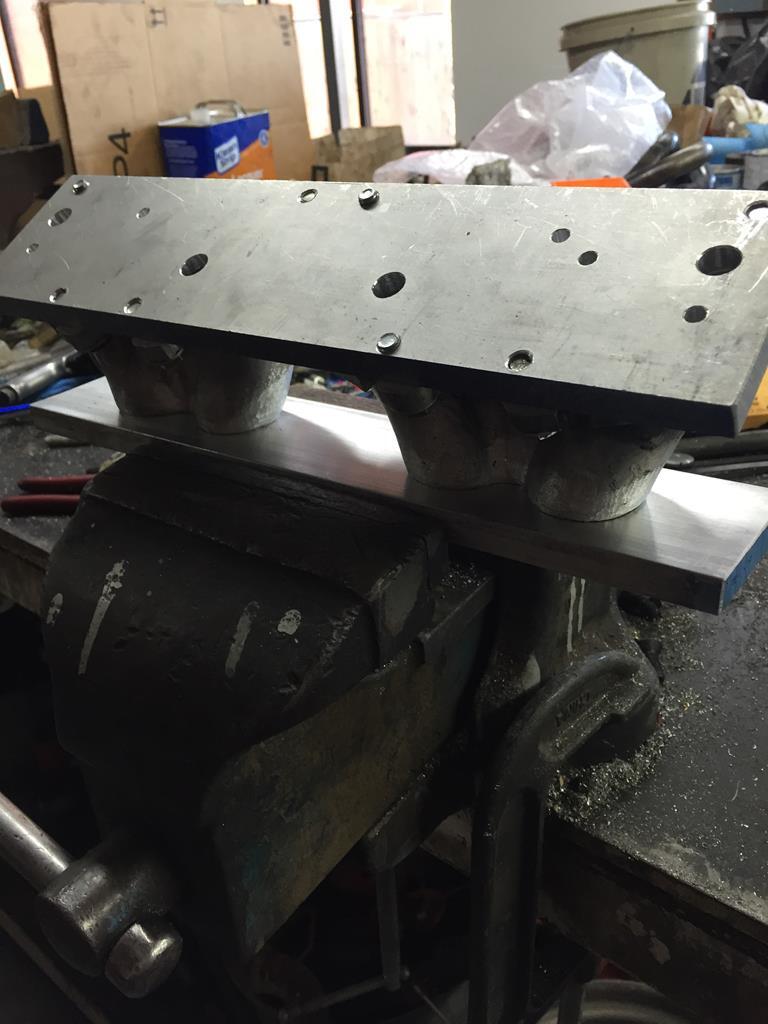 Welding & milling... 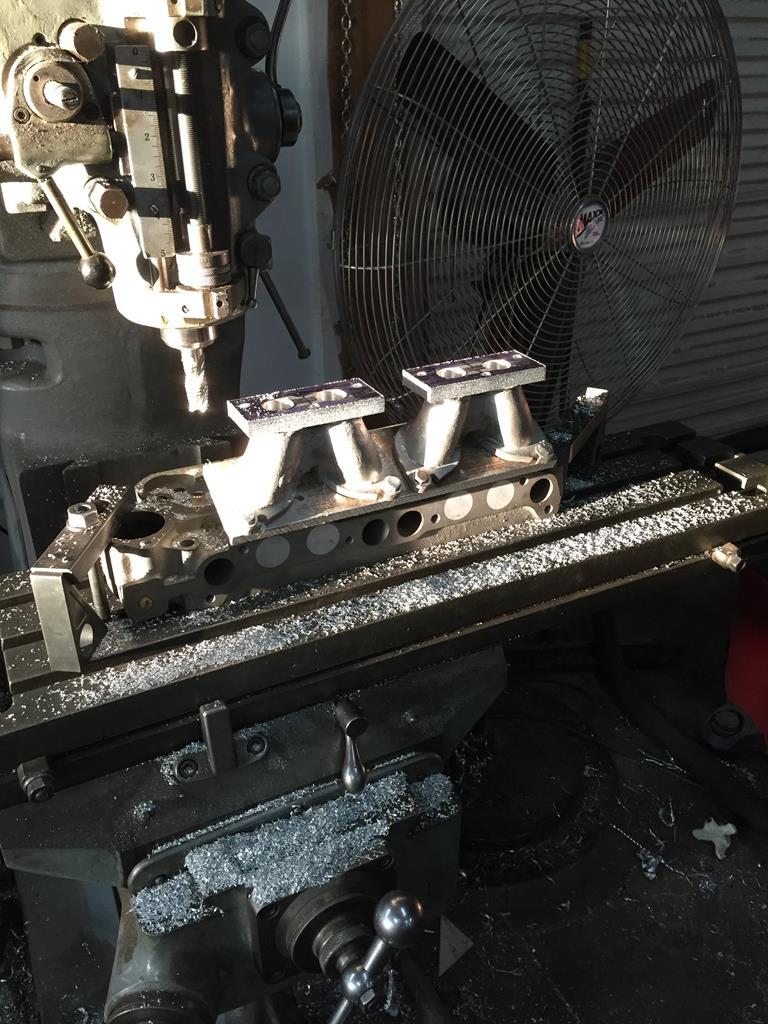 Done... 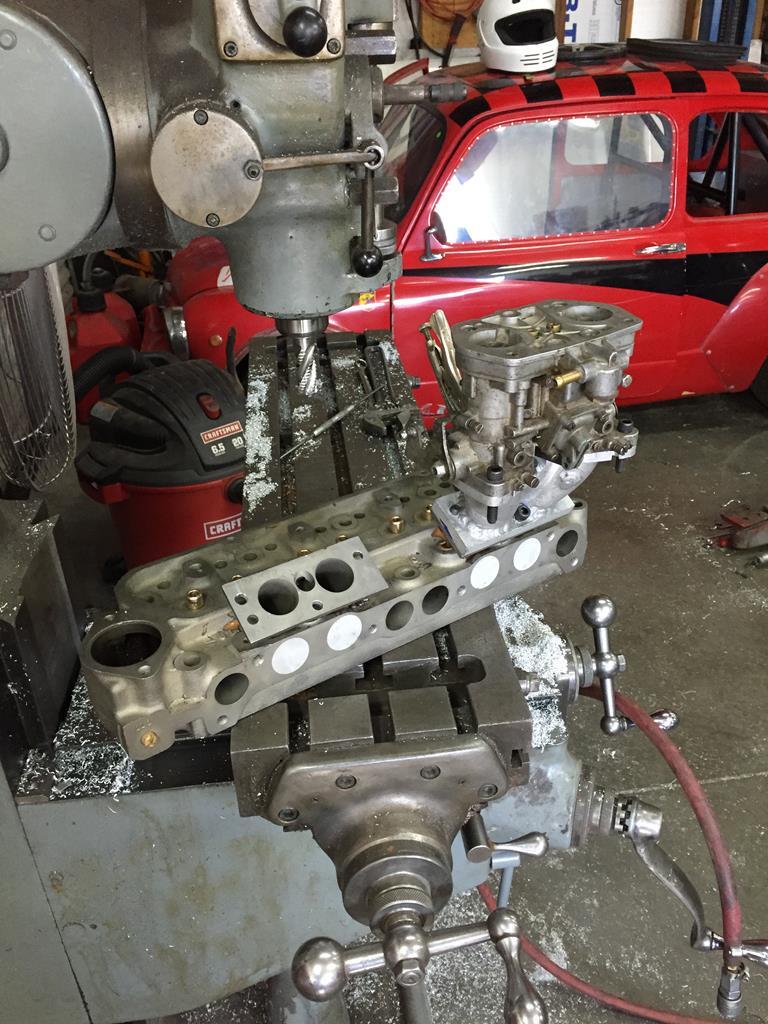 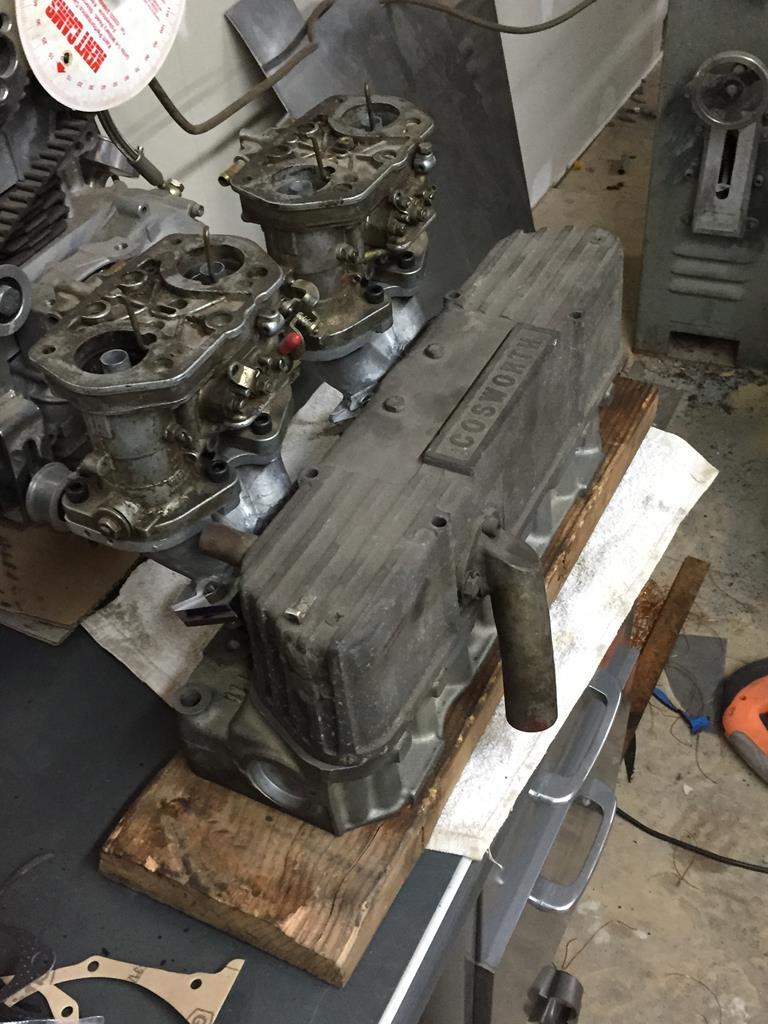 These are the carbs I will use, a set of 40IDF Webers off a Fiat 124 Spider. 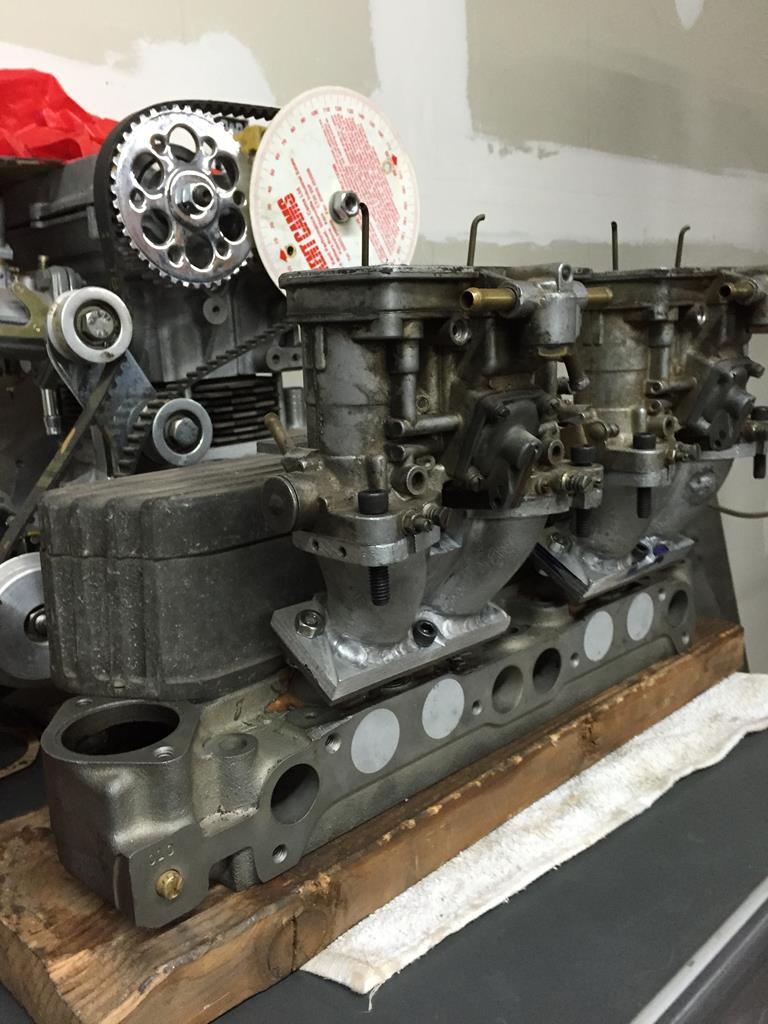 |
| |
|
|
|
|
|
|
|
Downdraft head #2. A PBS 8 port head for my Fiat Abarth 1000TC racer. When I bought it I got the regular intake for a set of 40DCOE Webers, and I got an extra intake to modify. I milled off the flanges, because the carbs I will use on this are not horizontal like the DCOE's ( not vertical like the IDF's either, for that matter...  ) 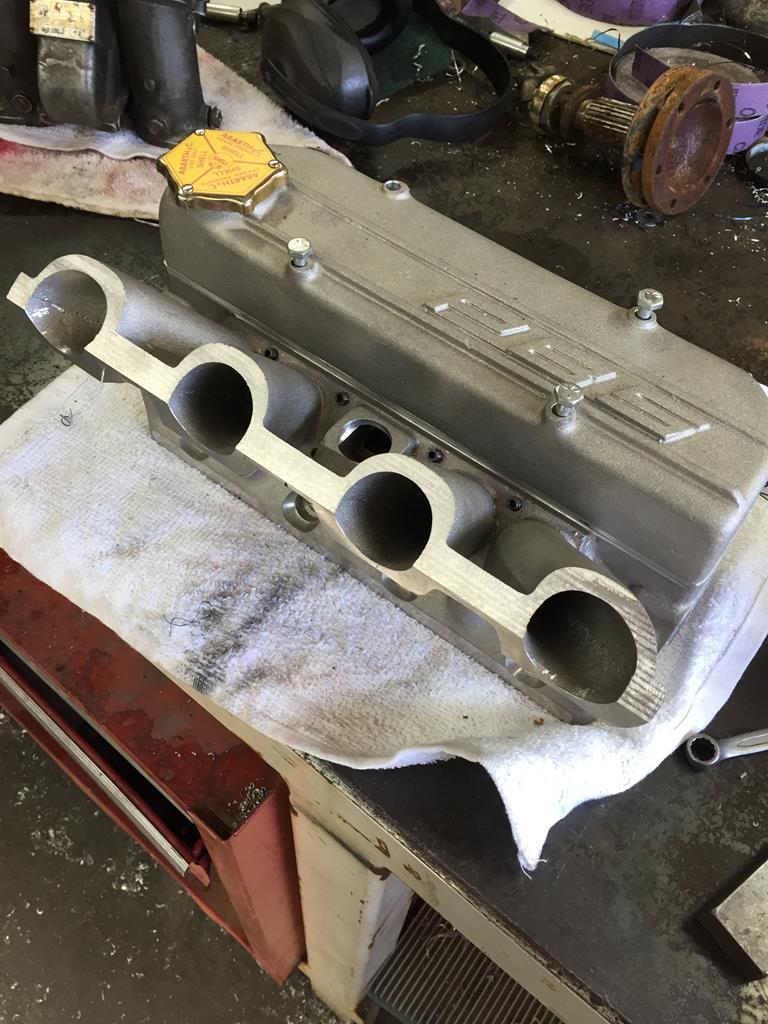 The carbs I will use are old sandcast 40IBL Webers, that were once used on a experimental Coventry Climax Godiva F1 engine from the '50s. 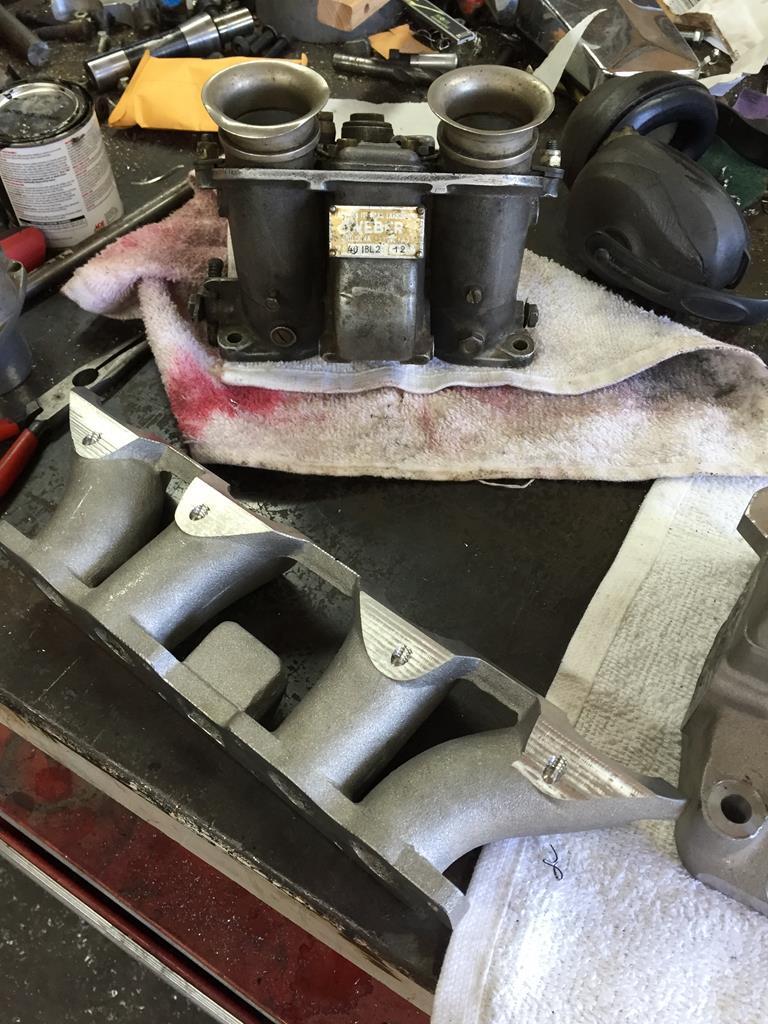 New flange. 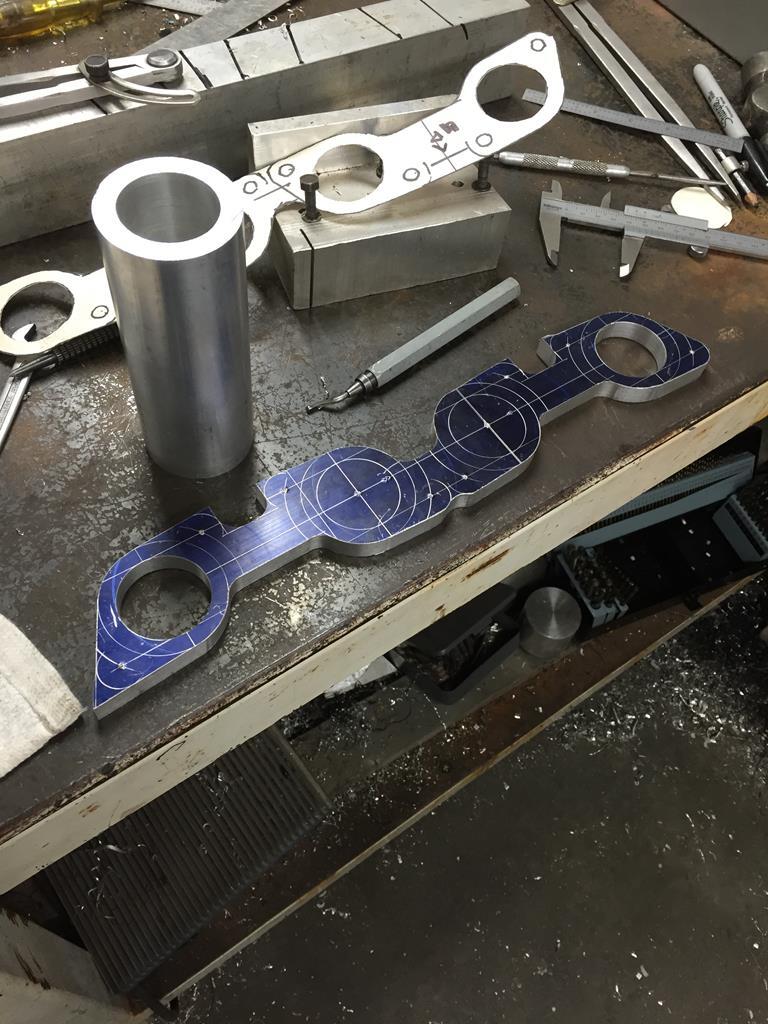 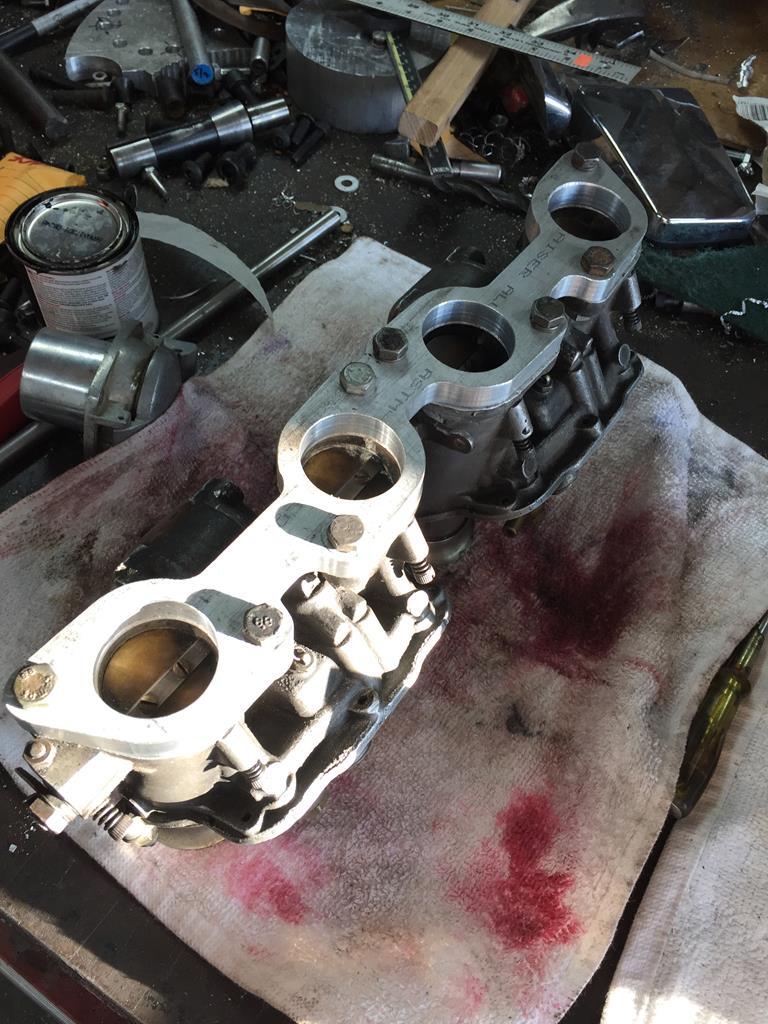 Looking at how much I need to change and lengthen the intake runners. 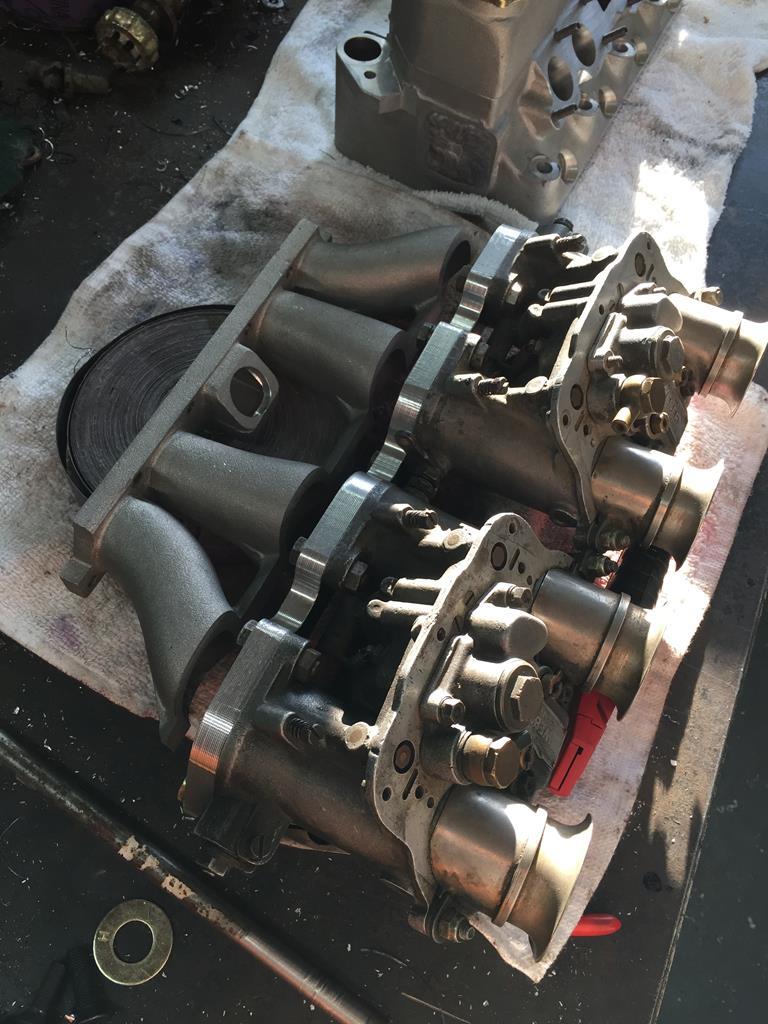 Done. 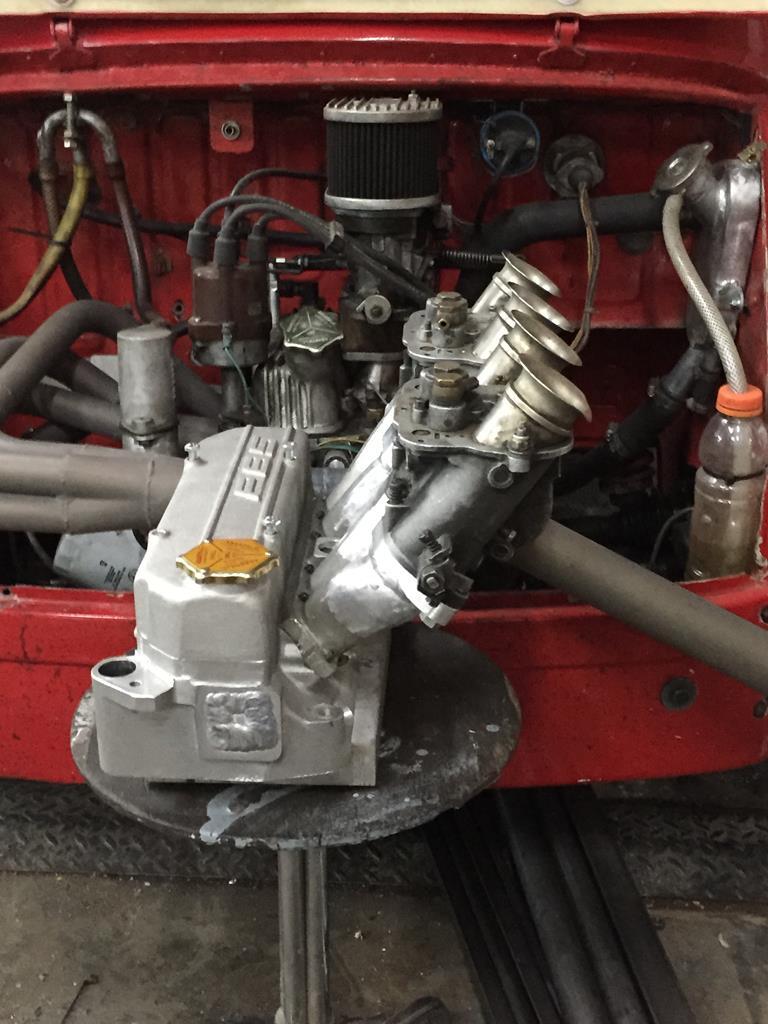 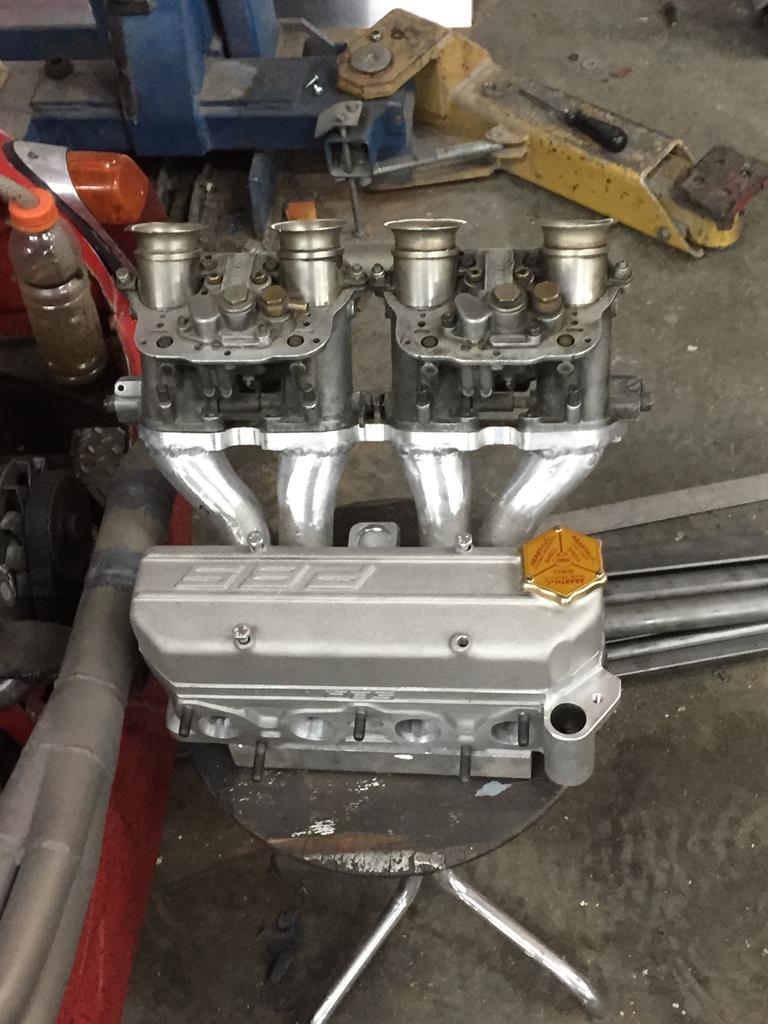 |
| |
|
|
|
|
|
|
|
|
|
Next thing will be to build the engine, but I'll do that in stages. I'll run it in with a stock 5 port head ( because everything is known with one of those, including the carb jetting ) Then I'll put the 8 port head on with DCOE's, so I have a baseline with it. And then I'll put the IBL's on. Can't wait...  |
| |
|
|
|
|
|
|
|
Funny story about the IBL carbs... Grand Prix rules were about to change in the mid '50s and everybody was scrambling to make/find/adapt suitable engines. Coventry Climax was a relatively small company with limited resources, but with a lot of talent. They already had the dyno results of their new Godiva engine when "leaked" through the press the Ferrari numbers came out. ( some stories say Maserati, some say Mercedes, but you can just picture Enzo doing something like that ) So much higher than the Coventry Climax' that the Godiva project got scrapped... ( years later, when Paul Emery was able to compare both engines, it tuned out to be the opposite. The Godiva was much more powerful ) To me this is one of the key moments in F1 history... Today there are 2 cars known that ran with Godiva engines. The Shannon that Paul Emery was involved with, and a front engined Kieft that was restored a couple of years ago. There was also a Super Saloon Cortina, but I believe that car is gone... I've never even seen pics of another set of IBL carbs ( other than period pics of the Shannon, before it got converted to Fuel Injection ), so I figured it would be nice to get a hold of the owners of those 2 cars to give them the option to buy them. ( who knows, they might have 1/2 set too. And that would be the right engine for those carbs...) The car world is pretty small, and I got the Shannon's owners Email address through a vintage racing historian In Belgium. No reply, so that one was handled, as far as I was concerned...  On the Kieft, I got the contact information of the owner through the specialist in Australia who restored it. But I had to deal with a guy who apparently wrenched on the car, not the owner himself. And the condescending attitude of this guy rubbed me the wrong way... He told me he would buy them, if he could get them "for next to nothing" I told him that wasn't going to happen, we both know what sandcast DCO's go for, and these are more rare than that. He thought they wouldn't be a fraction of what DCO's are worth, but he still wanted to hear a number. So I told him $25.000 for the set. Just to hear his jaw hit the ground...  Which it did... I think I've heard the thump... So that concluded that conversation, and I felt I was now free to do whatever I wanted with the carbs...  |
| |
|
|
|
|
|
Nov 13, 2017 21:12:26 GMT
|
My daily driver is a '03 Ford F250 Superduty ( not retro, so I'm posting this here ) Its my only modern vehicle ( my next newest is a '73), and I'm ashamed to say I really like it. ( with its working AC and heater, door rubbers that seal, full interior, and opulent luxuries like that...) I got one in icebox white so its completely incognito, which is also nice for a change. It looks like any other old guys truck...  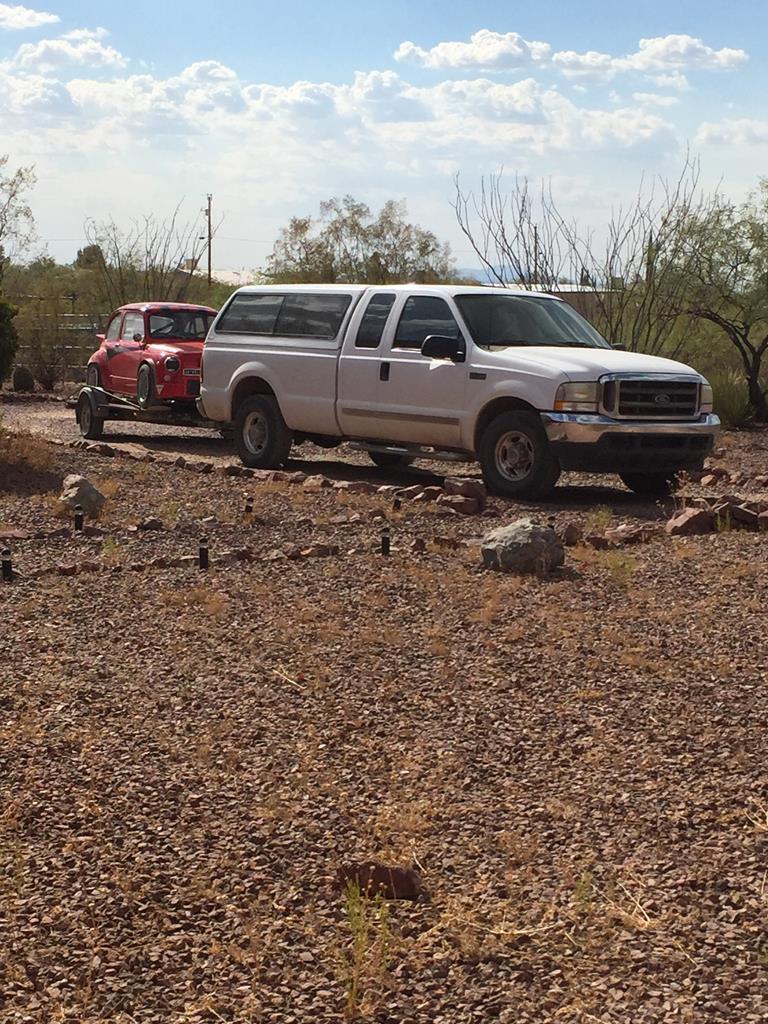 The one thing I really hate about it is this. Specially the seatbelt buzzer... I live on a dirt road, so there is always a film of dust on the ( tinted ) windows of my topper. The dirt road has no streetlights, so backing up on my driveway in the dark is pretty much impossible without getting out and making sure I'm not taking out any fence, etc, while trying to line the trailer up with the garage. I got a extra seatbelt buckle to fool the system, but getting one from a junkyard was not as easy as it should have been. ( they'd freak because of the "safety issue" when I asked to buy one ) Last saturday evening I came home after a day's racing, and my extra buckle was gone. So I had to back my truck up with this thing frantically buzzing at me. Not sure what happened to it, but even the next day when it was light out, it was nowhere to be found... So I took 5 minutes ( which is less than it took to write all of this, by the way...), and made a new SBSO ( Seatbelt Buzzer Shutter Offer...)  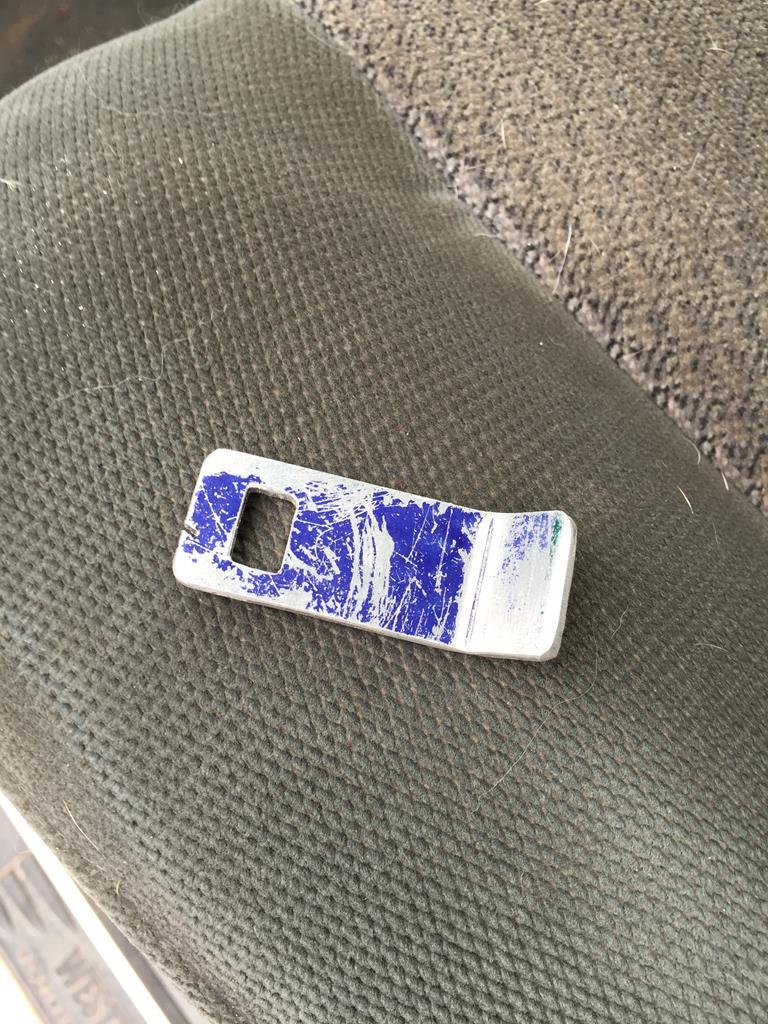 |
| |
|
|
|
|
|
Nov 13, 2017 22:23:53 GMT
|
BTW, can you tell I've got dogs?  |
| |
|
|
|
|
|
Nov 14, 2017 12:25:16 GMT
|
|
Nice work with the carbs and heads - interesting back story too!
|
| |
|
|
|
|
|
Nov 15, 2017 17:33:29 GMT
|
|
Enjoying this keep it up! we have standard poodles, proper big dogs with no hair loss! my seats still look like that but its my hair now!
|
| |
|
|
|
|
|
|
|
Thanks guys...  |
| |
|
|
|
|
|
|
|
So these were a couple of interesting days... I'm putting the 1000cc Abarth shortblock together for the 8 port head. The head has needed an obscene amount of work just so it would be usable, part of that I farmed out ( extensive porting of all 8 ports, the reshaping and cc-ing the combustion chambers, and blending in all the burrs and sharp edges that were left after they put the valve seats in, and giving them a nice multi angle grind, as well as some recontouring of the valve heads themselves for better flow ) But there are other problems like the ends of the exhaust ports that are cast way too big, so there would be a step going the wrong way where the gasses enter the pipe. So I'm making sleeves that fit inside the exh. ports to hopefully fix that and ( also hopefully) do good things for this engine's torque. But there were other problems too... For example, the holes for the pushrods were not inline with the rockers and the lifters, So I had to mill those oval. just so the pushrods would go in and center on both ends without lots of alumimum in the way... And, the machined part where the rocker assembly mounts is milled too deep. So I'll have to make spacers to raise it, to get the geometry right ( or at least have adjustability and have the rockers not hit the retainers...) So to put it mildly, this thing has been fighting me all the way... With that in mind, I wasn't really surprised to find out that the trick little adjustable cam gear set I got didn't fit either. The small gear ( crank side ) had a cast in shoulder on both sides that messed up the offset, and the clearance to the cover. To machine that off I first had to make an adapter to hold it in my lathe. So with all of that done I was ready to put it together. I then found out that the ring compressor I have doesn't really work that well on pistons that small, so I grabbed a 3X1.25 piece of aluminum bar, and I made a tapered sleeve to push the pistons in with. I went to the store to get some Playdoh ( clay... I didnt realize it had pretty colors and was scented until I had it home in the garage...  ) And a new calculator( so I can calculate the lobe centers ) Ready for the cam... So for the next couple of days I keep seeing the weirdest numbers. And it all takes a long time because something is clearly way off, and every time I try to adjust it more than the slots will allow I have to take the degree wheel off, so that means taking the head back off to find true TDC before it can all go together again. I really don't understand what is going on, why I cant find the problem, and I'm really starting to doubt myself... So I decide to go back to zero. I put in the stock cam, and the stock chain and sprockets, and re-measure everything. Not perfect, but in the ballpark. About what you'd expect from just lining up the dots and bolting it together... So now the new cam with the stock chain & sprockets. 17 degrees out!!! They put the dowel pin in the wrong spot! Line up the dots on the adjustable set ( with the adjustable part set in the middle ) re- measure that. Also out... ( visible by eye if you hold it next to the stocker... ) So then I counted the teeth on the adjustable gear, and calculated that back to degrees to see how many teeth I had to skip it. 2... I had to skip it 2 teeth... Put it all back together again, and re-measure. Now I'm about 5 deg out. Still curse word, but I think I'm now within the adjustability of the cam gear... We'll see tomorrow... I'm tired and my back hurts. |
| |
|
|
|
|
|
|
|
|
Right...
So I thought I was almost there...
Wrong.
After much measuring and re-measuring, I can only come to one conclusion.
The cam is ground wrong.
It is supposed to be 48/88 intake, with a lobecenter of 110
And 82/42 Exh. also 110.
I can get the intake to spec ( I even went as far as adjusting the valve lash to get the numbers )
And I got 48/90, 111 ( one deg off, good enough for now.)
Then going to the exhaust side I got 77/63, 97.
Way off...
Making it symmetrical would get me at 103.5 on both sides, so that doesn't make any sense.
So I finally made the decision to toss this one to the side and grab another cam I bought at the same time as I bought this one.
So stick it in and roughly put it in the right place.
Rotate to begin measuring the opening again and it hits something solid.
That's weird...
Never had that problem before...
Turn the engine over and what do I see?
A cam lobe hitting the crank.
I'm starting to think there might be something wrong with their quality control...
|
| |
|
|
|
|
|
|
|
|
Thanks to some timesaving tricks I was able to re-create the stock cam, adjustable chain and sprocket set measurements pretty quickly.
I cut a pushrod and drilled a hole in the cut off end, so I could put a dial indicator in it.
( so now I can measure without the head on it )
And I welded a socket to the big nut that holds the crank pulley on ( or the degree wheel, in this case )
A re-measured everything, find true TDC, find IO, IC, EO, EC, calculate the lobecenters, adjust until I had the centers where I wanted them, I got both intake and exhaust within 1 degree of spec.
So tomorrow I'll put the rest of the lifters in, re-adjust it for the last time ( hopefully )put the head on , etc.
Although... I should probably take the #1 intake and exhaust valve out to check if they are still straight.
I have rotated this engine with the timing way off, I cant guarantee they haven't touched...
So I'll have to use a used cam with new lifters, not ideal.
But better than using the lifters it is wear mated to, because that was in a different engine...
|
| |
|
|
|
|


