jonomisfit
Club Retro Rides Member
Posts: 1,789
Club RR Member Number: 49
|
|
Apr 13, 2020 18:54:39 GMT
|
shot to show relationship of seat bolsters to foot rest  20200413_194058 20200413_194058 by jono_misfit, on Flickr  20200413_194105 20200413_194105 by jono_misfit, on Flickr when sat in the seat (with big clompy (knackered) size 11 work boots on) 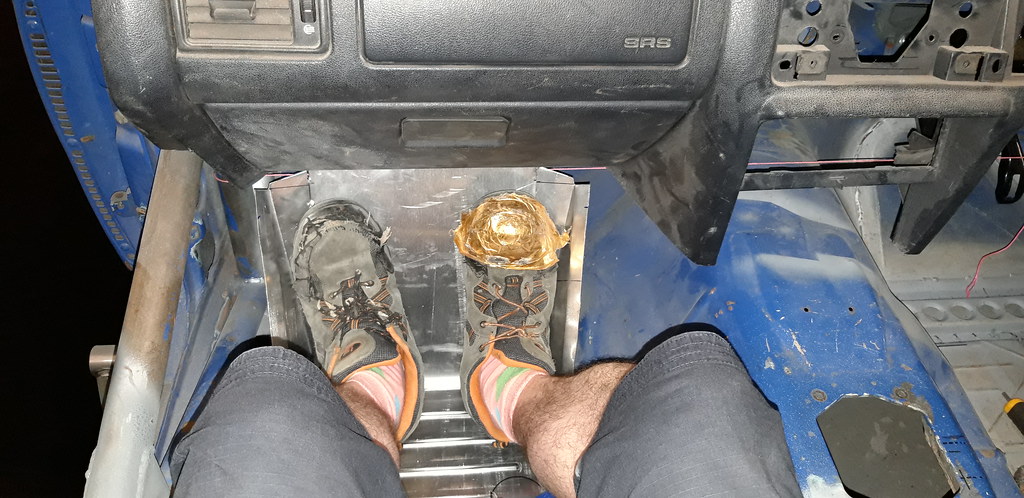 20200413_194125 20200413_194125 by jono_misfit, on Flickr quite a bit of space to move feet round when sat in the seat it difficult to have anything other than legs straight ahead due to the bolsters. This is my attempt to spread knees as wide as possible, and its really uncomfortable from seating position. I think your legs will naturally tend to straight out, bent at the knee.  20200413_194132 20200413_194132 by jono_misfit, on Flickr |
| |
|
|
|
|
|
|
|
Apr 13, 2020 22:23:59 GMT
|
Ah yep, that looks a fair bit wider from that perspective.  If your legs could go any wider they'd interfere with your brake anyway haha. Nice socks! |
| |
|
|
jonomisfit
Club Retro Rides Member
Posts: 1,789
Club RR Member Number: 49
|
|
Apr 14, 2020 19:33:51 GMT
|
thanks. That was my tame pair of socks :-) welded the seams  P1030403 P1030403 by jono_misfit, on Flickr folded a bit  P1030404 P1030404 by jono_misfit, on Flickr bent up some 6mm ali rod 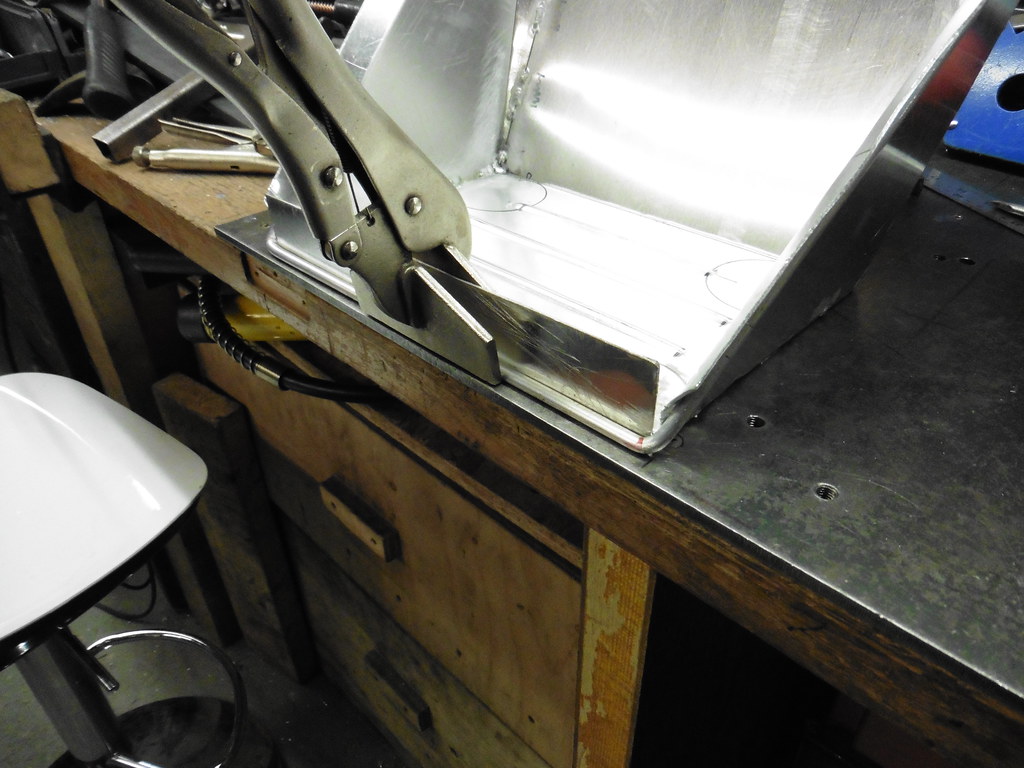 P1030405 P1030405 by jono_misfit, on Flickr tacked it in  P1030406 P1030406 by jono_misfit, on Flickr started dressing it  P1030407 P1030407 by jono_misfit, on Flickr dressed, folded, welded  P1030408 P1030408 by jono_misfit, on Flickr  P1030409 P1030409 by jono_misfit, on Flickr  P1030410 P1030410 by jono_misfit, on Flickr pretty lightweight, and pretty stiff started trimming a piece of box to act as the footbrace support  P1030411 P1030411 by jono_misfit, on Flickr hmmm... the works cars all had much lightness added. Better add some.  P1030412 P1030412 by jono_misfit, on Flickr swiss cheesed nicely. Hmmmm this looks a bit plain  P1030413 P1030413 by jono_misfit, on Flickr I wonder  P1030414 P1030414 by jono_misfit, on Flickr much betterer  P1030415 P1030415 by jono_misfit, on Flickr looks much more rally car now :-)  P1030416 P1030416 by jono_misfit, on Flickr Just got to sort the bosses for the base, then weld it all in. |
| |
|
|
jonomisfit
Club Retro Rides Member
Posts: 1,789
Club RR Member Number: 49
|
|
Apr 16, 2020 20:17:38 GMT
|
I turned up some bosses to use to mount the foot rest  P1030417 P1030417 by jono_misfit, on Flickr welded in  P1030418 P1030418 by jono_misfit, on Flickr support bar fully welded in and dash re-fitted to make sure everything still clears and feels a good position.  P1030419 P1030419 by jono_misfit, on Flickr then the engine went back in  P1030420 P1030420 by jono_misfit, on Flickr sierras and escort cosworth gearboxes are held in with two little floating tabs in slots. Fine normally, but if your bolts loosen at all, there's a good chance on a rally stage it'll pull the tab out.  P1030421 P1030421 by jono_misfit, on Flickr Solution to this is to drill a hole through and bolt into boss on the gearbox tunnel about here  P1030422 P1030422 by jono_misfit, on Flickr and here 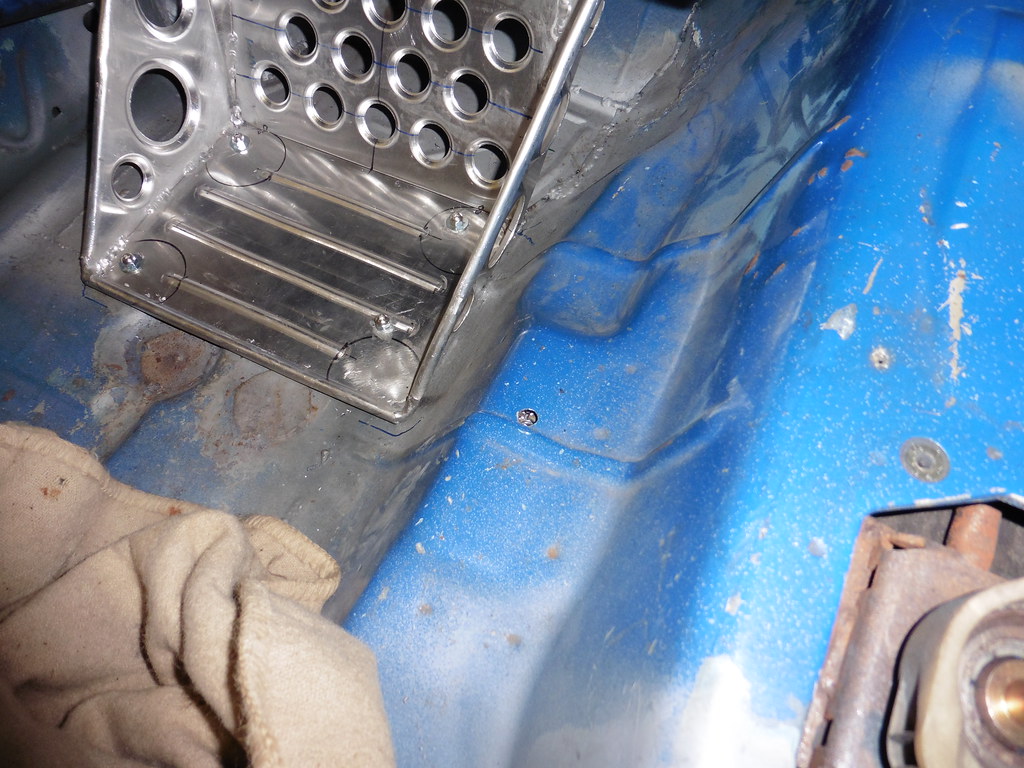 P1030423 P1030423 by jono_misfit, on Flickr different positions either side as the mount is staggered i need a boss something like this  P1030424 P1030424 by jono_misfit, on Flickr one boss, will go somewhere like here  P1030425 P1030425 by jono_misfit, on Flickr welded in  P1030426 P1030426 by jono_misfit, on Flickr Otherside was done as well then started reassembing the spit  P1030427 P1030427 by jono_misfit, on Flickr  P1030428 P1030428 by jono_misfit, on Flickr and removing everything from in the car again. 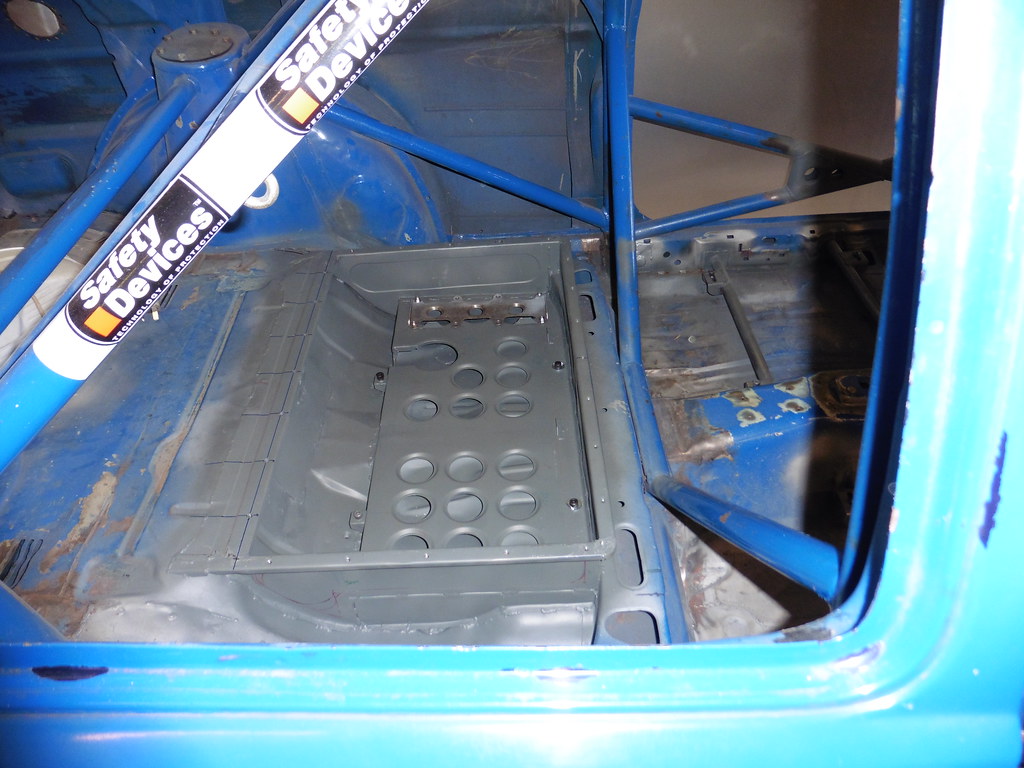 P1030429 P1030429 by jono_misfit, on Flickr  P1030430 P1030430 by jono_misfit, on Flickr gone  P1030431 P1030431 by jono_misfit, on Flickr  P1030432 P1030432 by jono_misfit, on Flickr this is to allow me to get back and clean back a few bits and pieces, a last few minor rust repairs, and seam weld the shell. |
| |
|
|
ian911
Part of things
 
Posts: 13
|
|
|
|
|
You have been busy, nice update.
|
| |
|
|
jonomisfit
Club Retro Rides Member
Posts: 1,789
Club RR Member Number: 49
|
|
Apr 18, 2020 18:18:09 GMT
|
todays update doesnt look spectacular but was loads of effort and ferkin manky to do! I went back to de-undersealing the car. This time I used a flexible wood cutting bit in the multi tool which just ploughed through it easily.  P1030433 P1030433 by jono_misfit, on Flickr  P1030434 P1030434 by jono_misfit, on Flickr i then spent ages trying to get the seal sealer out of the joins so I could weld them. A combination of rotary wire brush, a normal wire brush, a scribe/pick, a cheap wood chisel (bough specifically for removing the underseal), some screw drivers , and a blow torch managed to get as much out as I could, but still not all.  P1030435 P1030435 by jono_misfit, on Flickr marked out some welds, because.... you know..... someone might look at it at some point  P1030436 P1030436 by jono_misfit, on Flickr then started stitching away.  P1030437 P1030437 by jono_misfit, on Flickr  P1030438 P1030438 by jono_misfit, on Flickr  P1030439 P1030439 by jono_misfit, on Flickr  P1030440 P1030440 by jono_misfit, on Flickr  P1030441 P1030441 by jono_misfit, on Flickr  P1030442 P1030442 by jono_misfit, on Flickr  P1030443 P1030443 by jono_misfit, on Flickr  P1030444 P1030444 by jono_misfit, on Flickr still splattered a bit due to curse word in the seams, but I got a technique quite quickly of doing the first weld, then scrubbing out the burning seam sealer with the wire brush leaving the rest of the weld area clean to complete. I should have followed Mr Northerners advice and got the shell dipped thought. It was too expensive for me though. Cleaned up and gave welds a once over with cheap zinc primer, to prevent any flash rust before I clean / paint the floor. 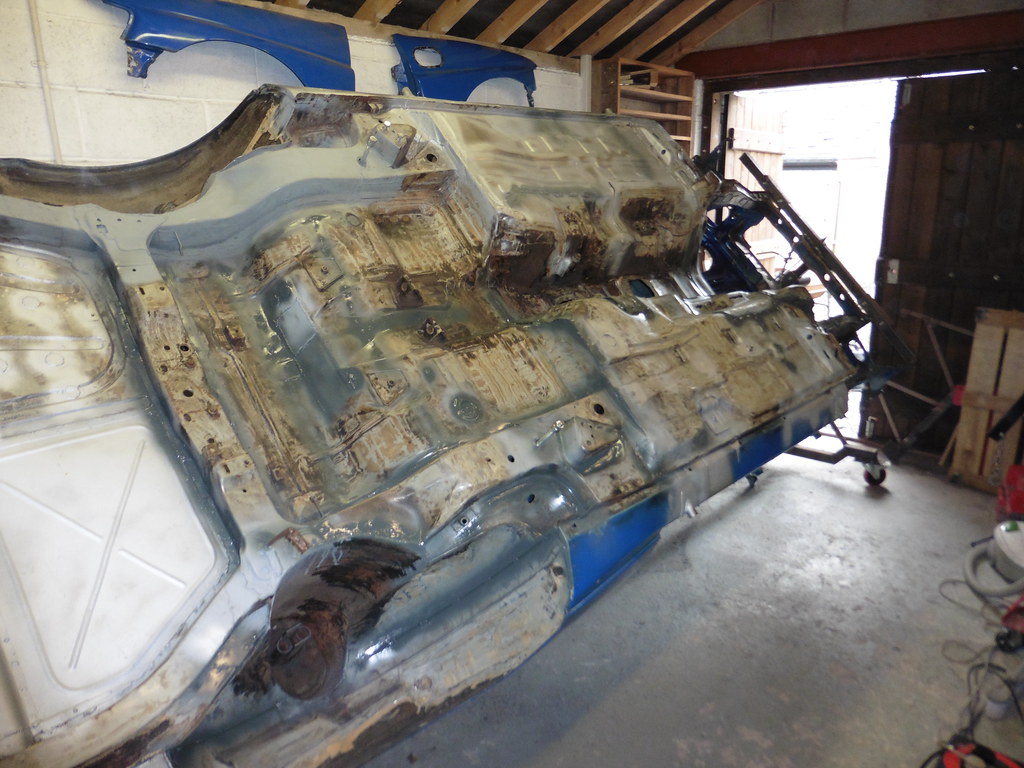 P1030445 P1030445 by jono_misfit, on Flickr then went into the car and started cleaning back some bits  P1030446 P1030446 by jono_misfit, on Flickr battery mount will go here  P1030447 P1030447 by jono_misfit, on Flickr having tested it before I welded in the drivers heal bar  P1030448 P1030448 by jono_misfit, on Flickr finished a few welds  P1030449 P1030449 by jono_misfit, on Flickr  P1030450 P1030450 by jono_misfit, on Flickr I had my face mask on the whole day, but it needs replaced now as its getting difficult to breath through. definitely worth wearing for a job like this. I'll have to see if there are any for sale still but I think its not so likely. |
| |
Last Edit: Apr 18, 2020 20:11:27 GMT by jonomisfit
|
|
jonomisfit
Club Retro Rides Member
Posts: 1,789
Club RR Member Number: 49
|
|
Apr 18, 2020 18:37:07 GMT
|
Speaking of battery mount, I figured I needed to start making one. I designed something that replicates the WRC battery mounts  Battery Mount Assembly - side view Battery Mount Assembly - side view by jono_misfit, on Flickr  Battery Mount Assembly angled view Battery Mount Assembly angled view by jono_misfit, on Flickr  Battery Mount Assembly - front view Battery Mount Assembly - front view by jono_misfit, on Flickr  Battery Mount Assembly - brackets Battery Mount Assembly - brackets by jono_misfit, on Flickr But figured this is just overkill. I'm not competing on gravel rallies so i'm not too worried about a big bolder smashing up under the battery and killing it. I decided to go for something more like used in a subaru WRC, seen here hiding behind the drivers seat. Extinguisher on the co-driver side. 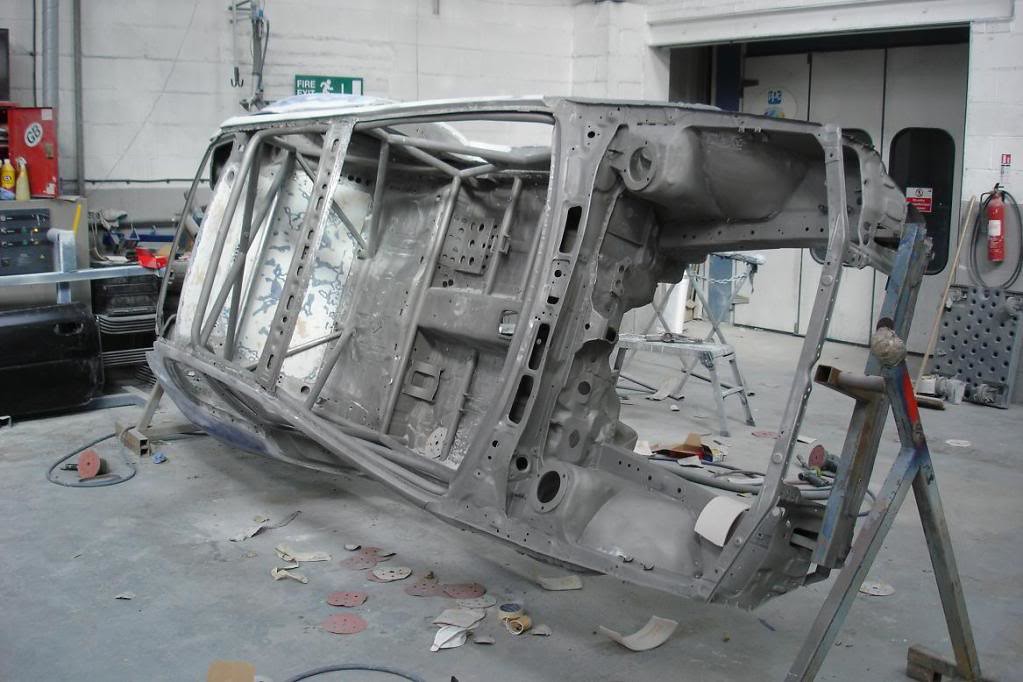 WRCshellSGM11thFeb2008148 WRCshellSGM11thFeb2008148 by jono_misfit, on Flickr (Someone elses pic, all credits to them) A hand sketch  P1030451 P1030451 by jono_misfit, on Flickr some steel  P1030452 P1030452 by jono_misfit, on Flickr marking out  P1030453 P1030453 by jono_misfit, on Flickr pilot holes drilled  P1030454 P1030454 by jono_misfit, on Flickr ...and ran out of time |
| |
Last Edit: Apr 18, 2020 18:38:05 GMT by jonomisfit
|
|
|
|
|
Apr 18, 2020 18:56:26 GMT
|
|
You can partially clear the masks / filters by blowing them backwards with an airline, Its not ideal but better than nothing.
|
| |
|
|
|
|
|
Apr 18, 2020 19:01:15 GMT
|
|
I spent last week seam welding my nephew’s Astra GTE that I’ve been turning from an Autograss car into a stage rally car. It’s amazing how far the sealer gets into those seams. And if you don’t get it all out it’s like welding with no gas. Fantastic build by the way.
|
| |
|
|
jonomisfit
Club Retro Rides Member
Posts: 1,789
Club RR Member Number: 49
|
|
Apr 18, 2020 19:56:24 GMT
|
|
yep. its a mare clearing them out. I kind of assume its applied before they spot weld the panels together going by how far into the seams it is!
|
| |
|
|
|
|
|
Apr 18, 2020 20:26:33 GMT
|
yep. its a mare clearing them out. I kind of assume its applied before they spot weld the panels together going by how far into the seams it is! Probably not in the era that this shell was built in but almost certainly now the vast majority of vehicle bodyshell assembly lines use a bonding sealer that can be spot welded through - the stuff that you and jonesy are finding that was applied in the 80's / 90's as a semi liquid creeping sealer at the factory - that's why the rally car builders send their brand new bodyshells for dipping to remove all traces of any paint & sealer from the seams but they will be a day in the future when they can no longer do this due to the fact that more vehicle producers are turning to bonding technology rather than relying upon a welded process - put one of these shells in a oven then dip it and it will just fall apart |
| |
Last Edit: Apr 19, 2020 14:27:45 GMT by Deleted
|
|
jonomisfit
Club Retro Rides Member
Posts: 1,789
Club RR Member Number: 49
|
|
Apr 19, 2020 20:39:10 GMT
|
I went out back for a bit tonight and did some things. holes made holier  P1030455 P1030455 by jono_misfit, on Flickr and it was at this point Jono_Misfit fudged up..... bending the flanges  P1030456 P1030456 by jono_misfit, on Flickr  P1030457 P1030457 by jono_misfit, on Flickr swaged in the holes.  P1030458 P1030458 by jono_misfit, on Flickr And it was was at this point Jono_Misfit realised he'd fudged up. Basically I should have cut the centre row of holes out to 12.5mm, not 19mm. With the hole spacings i've used there isnt enough space top get the 19mm swaging die in without it crimping the edges of the adjacent holes. its not horrific, the holes aren't really doing anything, and they will be under the battery when fitted. But i'll know they are there and wrong. I will see if I can live with it or if I need to remake it... Planing for the best I trial fitted it and realised I needed another mod to clear a feature in the floor. The pressing in the floor for the fuel lines I think.  P1030459 P1030459 by jono_misfit, on Flickr will fit like so  P1030460 P1030460 by jono_misfit, on Flickr and the pressing it needs to clear  P1030461 P1030461 by jono_misfit, on Flickr it fits nicely Some work to do on the captive nuts, and some swaged holes on the front face. |
| |
|
|
jonomisfit
Club Retro Rides Member
Posts: 1,789
Club RR Member Number: 49
|
|
Apr 19, 2020 20:39:52 GMT
|
|
I really need to tidy the bench.
|
| |
|
|
|
|
|
|
|
I bet that's annoying. Time to tig the donuts back in and then recut them?  |
| |
|
|
bstardchild
Club Retro Rides Member
Posts: 14,971
Club RR Member Number: 71
|
|
|
|
I really need to tidy the bench. At least you can see yours - I can't see any of mine Yeah lockdown tidy up in progress  |
| |
|
|
jonomisfit
Club Retro Rides Member
Posts: 1,789
Club RR Member Number: 49
|
|
Apr 24, 2020 18:53:19 GMT
|
added captive nuts and primed the under side 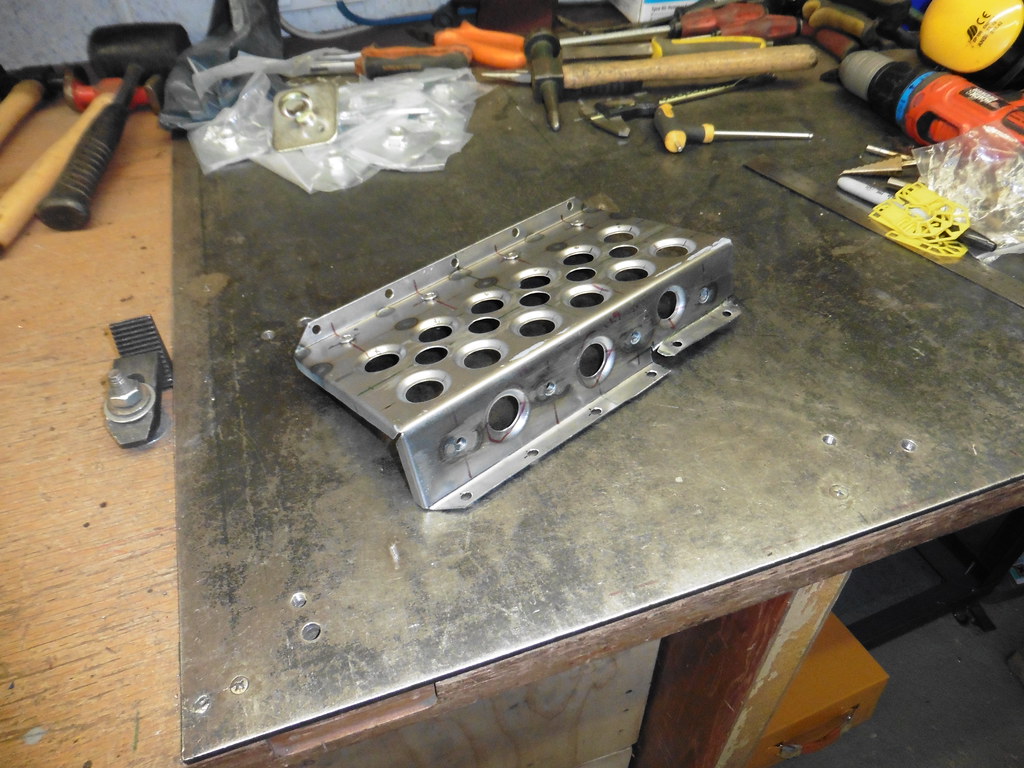 P1030480 P1030480 by jono_misfit, on Flickr the horizontal bolt side got a stiffener added first  P1030481 P1030481 by jono_misfit, on Flickr cleaned back the floorpan and welded in  P1030482 P1030482 by jono_misfit, on Flickr and started positioning new harness mounts.  P1030483 P1030483 by jono_misfit, on Flickr They still need welded in but i'm about to weld the other half of the underside so will do it then. flipped the car over and continued on with the scraping  P1030484 P1030484 by jono_misfit, on Flickr and scraping  P1030485 P1030485 by jono_misfit, on Flickr main bit left to do is shaving this inner arch down and the front as well  P1030486 P1030486 by jono_misfit, on Flickr I also spent 30 mins walking round the car marking up and last bits that need welding. Should get some progress on Sunday. |
| |
|
|
jonomisfit
Club Retro Rides Member
Posts: 1,789
Club RR Member Number: 49
|
|
Apr 26, 2020 19:29:45 GMT
|
today was a dirty day. Dirty dirty day. much shaving, scraping, and buffing with the wire wheel got the underseal off  P1030487 P1030487 by jono_misfit, on Flickr cleaned out the seams and welded  P1030488 P1030488 by jono_misfit, on Flickr then on to the front end for the same treatment  P1030489 P1030489 by jono_misfit, on Flickr and stitched  P1030491 P1030491 by jono_misfit, on Flickr  P1030492 P1030492 by jono_misfit, on Flickr  P1030493 P1030493 by jono_misfit, on Flickr i cleaned up the seams on the rest of the side as best i could, and marked out for welding.  P1030494 P1030494 by jono_misfit, on Flickr  P1030495 P1030495 by jono_misfit, on Flickr the stitched away  P1030496 P1030496 by jono_misfit, on Flickr  P1030497 P1030497 by jono_misfit, on Flickr  P1030498 P1030498 by jono_misfit, on Flickr  P1030499 P1030499 by jono_misfit, on Flickr then turned my attention to the remaining bits inside the car  P1030500 P1030500 by jono_misfit, on Flickr  P1030501 P1030501 by jono_misfit, on Flickr stitched the internal cross beams  P1030502 P1030502 by jono_misfit, on Flickr and round the wheel tubs  P1030503 P1030503 by jono_misfit, on Flickr  P1030504 P1030504 by jono_misfit, on Flickr then went round the engine bay cleaning back and stitching any seams that hadnt already been done  P1030505 P1030505 by jono_misfit, on Flickr getting into the seam at the back of the bulkhead was a pain as it was a long reach and I couldnt get my head anywhere near.  P1030506 P1030506 by jono_misfit, on Flickr there's a few more bits to do / tidy up, then it'll be onto clean down ready for treating any rust. |
| |
|
|
ian911
Part of things
 
Posts: 13
|
|
Apr 30, 2020 18:18:42 GMT
|
|
How you have the patients to photograph your work amazes me,but I'm glad you do.
|
| |
|
|
teaboy
Posted a lot
   Make tea, not war.
Posts: 2,125
|
|
Apr 30, 2020 19:32:05 GMT
|
How you have the patients I know that he’s doing plenty of surgery on his car but I didn’t realise that he was a doctor. |
| |
|
|
jonomisfit
Club Retro Rides Member
Posts: 1,789
Club RR Member Number: 49
|
|
|
|
How you have the patients to photograph your work amazes me,but I'm glad you do. If I'm doing a job and have to walk to the bench then I use that to pick up the camera Plus at the end I want to have a full record of what I've done. I can turn it into a book for me, or a YouTube video with dodgy music 😁 |
| |
|
|
 20200413_194058 by jono_misfit, on Flickr
 20200413_194105 by jono_misfit, on Flickr
 20200413_194125 by jono_misfit, on Flickr
 20200413_194132 by jono_misfit, on Flickr
 20200413_194058 by jono_misfit, on Flickr
 20200413_194105 by jono_misfit, on Flickr
 20200413_194125 by jono_misfit, on Flickr
 20200413_194132 by jono_misfit, on Flickr


