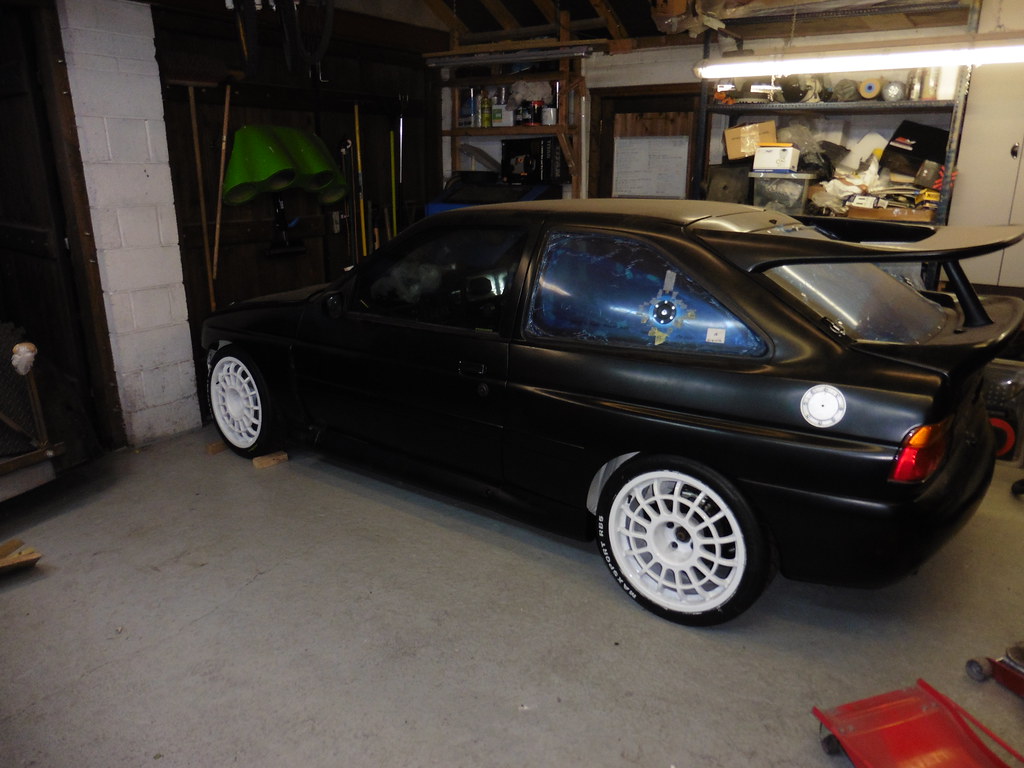
jonomisfit
Club Retro Rides Member
Posts: 1,788
Club RR Member Number: 49
|
|
|
|
More odds and sods not worth showing. I made up the link cable that goes from the reverse switch on the gearbox to the connection inside the car. got it installed and conencted up but it didnt work.... shorting the connection turns on the reverse lights but the switch itself doesnt. Will have to check out the switch but its a pain..... So went on to sorting the clutch feed hose, connected up the dry break side.  P1080076 P1080076 by jono_misfit, on Flickr then discovered I was missing another -4 straight fitting so have had to order one before I can finish it. So, next job. Making a catch tank. I've bought two catch tanks of different sizes and I cant get them to work anywhere in the engine bay. Will have to just make my own one. cut some tube  P1080077 P1080077 by jono_misfit, on Flickr closer plate  P1080078 P1080078 by jono_misfit, on Flickr welded on  P1080080 P1080080 by jono_misfit, on Flickr some more bits to make use of 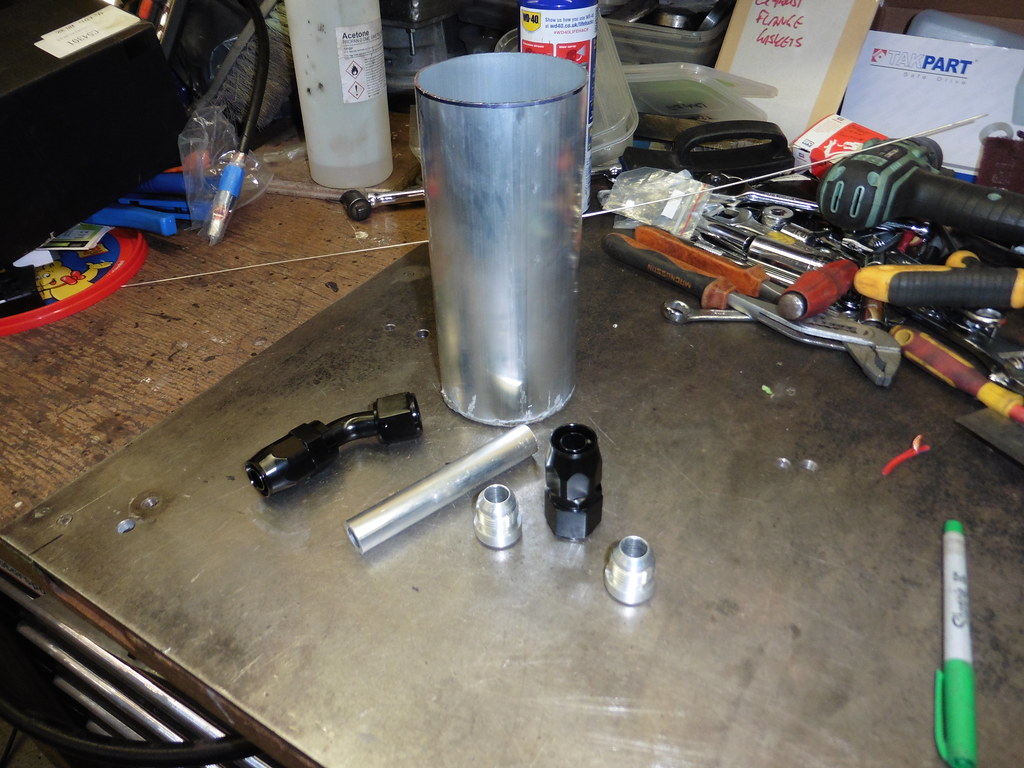 P1080081 P1080081 by jono_misfit, on Flickr  P1080082 P1080082 by jono_misfit, on Flickr I want to make a socket into the end of the AN weld on fitting, and reduce the wall of the tube down a bit as well  P1080083 P1080083 by jono_misfit, on Flickr Turn the socket  P1080084 P1080084 by jono_misfit, on Flickr really snug fit  P1080085 P1080085 by jono_misfit, on Flickr tube cut to length, shaped, and tacked on  P1080086 P1080086 by jono_misfit, on Flickr  P1080087 P1080087 by jono_misfit, on Flickr I finished the tube weld, drilled through up the tube into the body, then welded on the AN fitting  P1080088 P1080088 by jono_misfit, on Flickr  P1080089 P1080089 by jono_misfit, on Flickr welded on the second tube and fitting.  P1080090 P1080090 by jono_misfit, on Flickr  P1080091 P1080091 by jono_misfit, on Flickr They are welded on at the strange clocking to get the fittings roughly in the right orientation for getting to the engine. The i've made up a cap and drop tube to ensure there's a convoluted route so its less likely to blow any oil straight out the top. I need to put in a baffle to it as well  P1080093 P1080093 by jono_misfit, on Flickr will go on like so  P1080095 P1080095 by jono_misfit, on Flickr Some more bits to do on it, including making a drain port and mountings. |
| |
|
|
|
|
jonomisfit
Club Retro Rides Member
Posts: 1,788
Club RR Member Number: 49
|
|
Dec 10, 2023 20:34:15 GMT
|
My fittings turned up, so finished the clutch hose and fitted it  P1080096 P1080096 by jono_misfit, on Flickr then back onto the catch can. I added a closer with a few holes drilled in it for the vent tube. I managed to over heat the thin ally and melt it as well....  P1080097 P1080097 by jono_misfit, on Flickr  P1080098 P1080098 by jono_misfit, on Flickr I bought some stainless scouring pad and cut it up to put it in the vent tube to make sure only air / gas gets up to the vent filter.  P1080098 P1080098 by jono_misfit, on Flickr  P1080100 P1080100 by jono_misfit, on Flickr Way to get engine breather discharge into the catch can, check Way to get air minus oil vapours out of the catch can, check Way to get gunky breathed oil out of the catch can, not check. On with that than. these bits will sort it  P1080101 P1080101 by jono_misfit, on Flickr some lathe action happened (and photos taken but they have corrupted...) leaving these  P1080102 P1080102 by jono_misfit, on Flickr  P1080103 P1080103 by jono_misfit, on Flickr go together like so  P1080104 P1080104 by jono_misfit, on Flickr goes on the end cap like so  P1080105 P1080105 by jono_misfit, on Flickr  P1080106 P1080106 by jono_misfit, on Flickr welded on 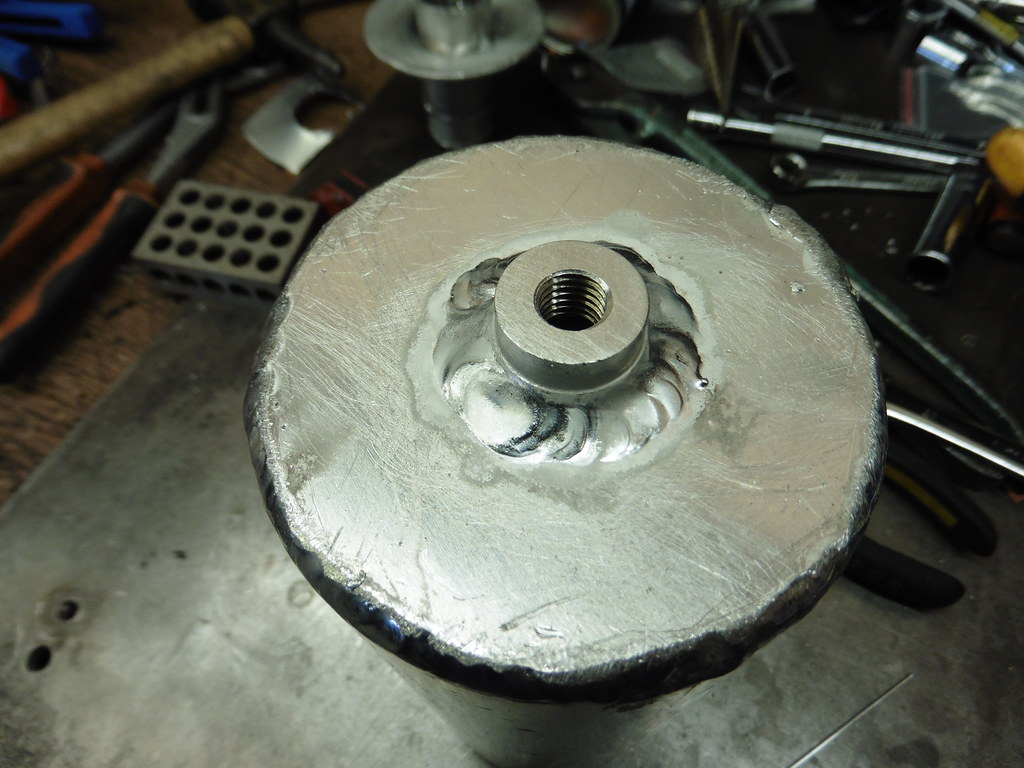 P1080107 P1080107 by jono_misfit, on Flickr  P1080108 P1080108 by jono_misfit, on Flickr When I need to drain the gunk I undo the bolt.  P1080109 P1080109 by jono_misfit, on Flickr needs a mount to hold it to the car  P1080111 P1080111 by jono_misfit, on Flickr  P1080112 P1080112 by jono_misfit, on Flickr its tight for space, but I can hang it from this cage tube and have it nicely out the way.  P1080113 P1080113 by jono_misfit, on Flickr using some scrap tube to dress the bracket to shape  P1080114 P1080114 by jono_misfit, on Flickr needs some tidying up still  P1080115 P1080115 by jono_misfit, on Flickr goes here  P1080116 P1080116 by jono_misfit, on Flickr lid welded on 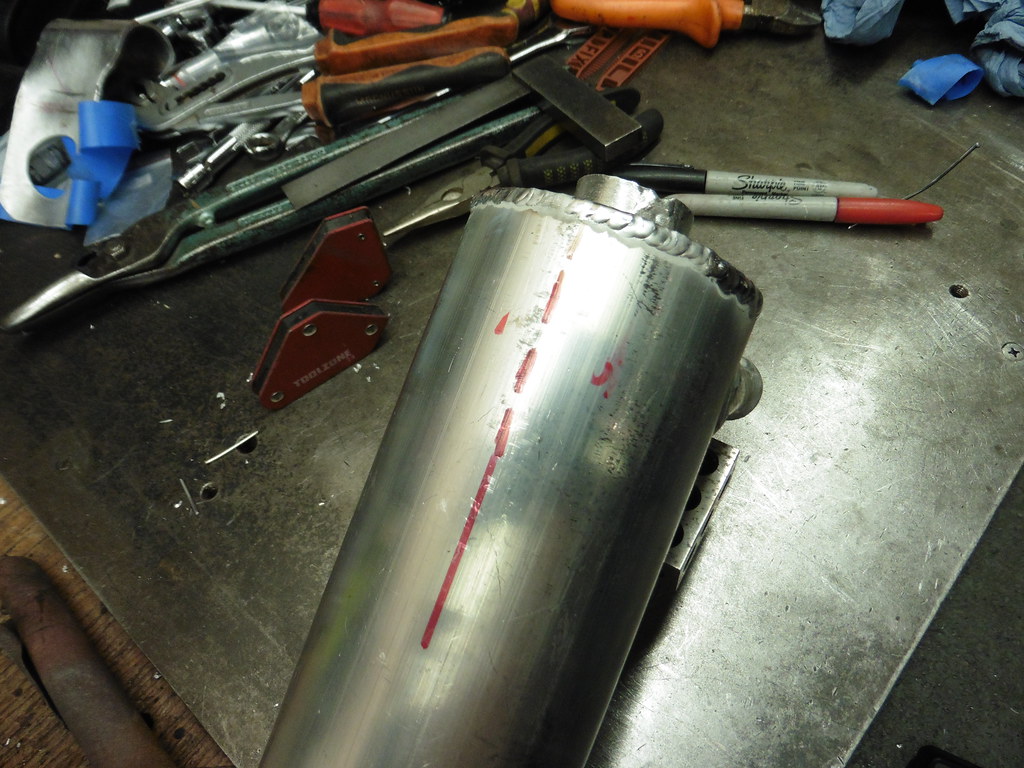 P1080117 P1080117 by jono_misfit, on Flickr  P1080118 P1080118 by jono_misfit, on Flickr bracket welded on 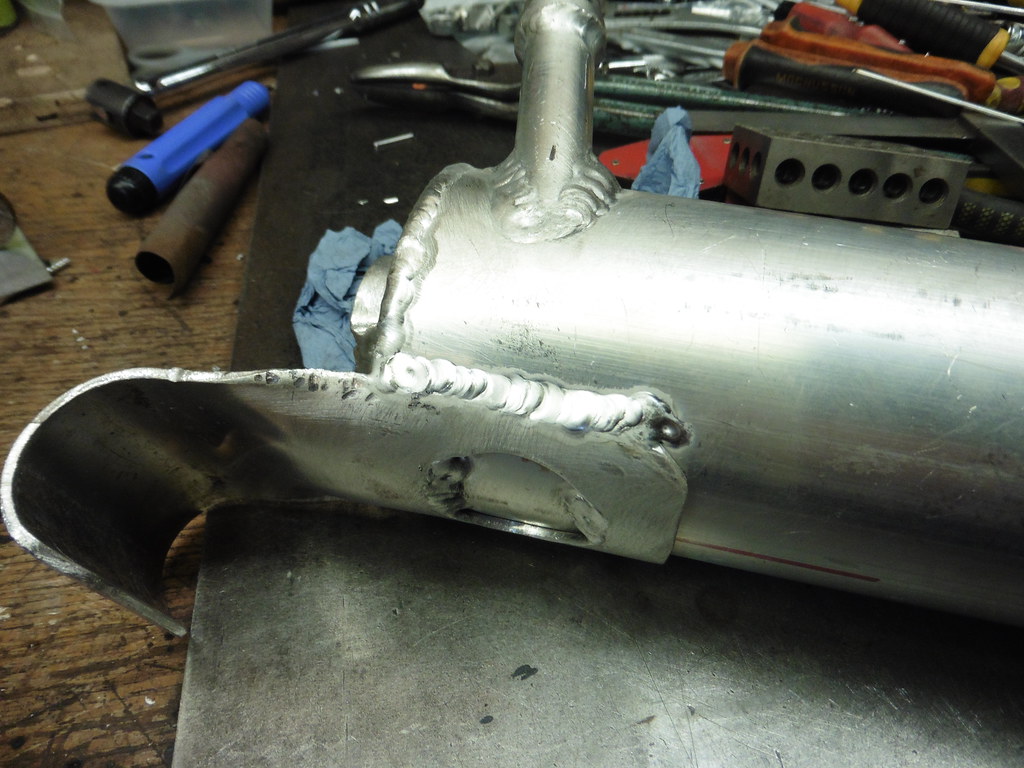 P1080119 P1080119 by jono_misfit, on Flickr  P1080120 P1080120 by jono_misfit, on Flickr sits in here  P1080121 P1080121 by jono_misfit, on Flickr  P1080122 P1080122 by jono_misfit, on Flickr  P1080123 P1080123 by jono_misfit, on Flickr  P1080124 P1080124 by jono_misfit, on Flickr Almost there. Needs a bracket on the front to stop it rotating  P1080125 P1080125 by jono_misfit, on Flickr 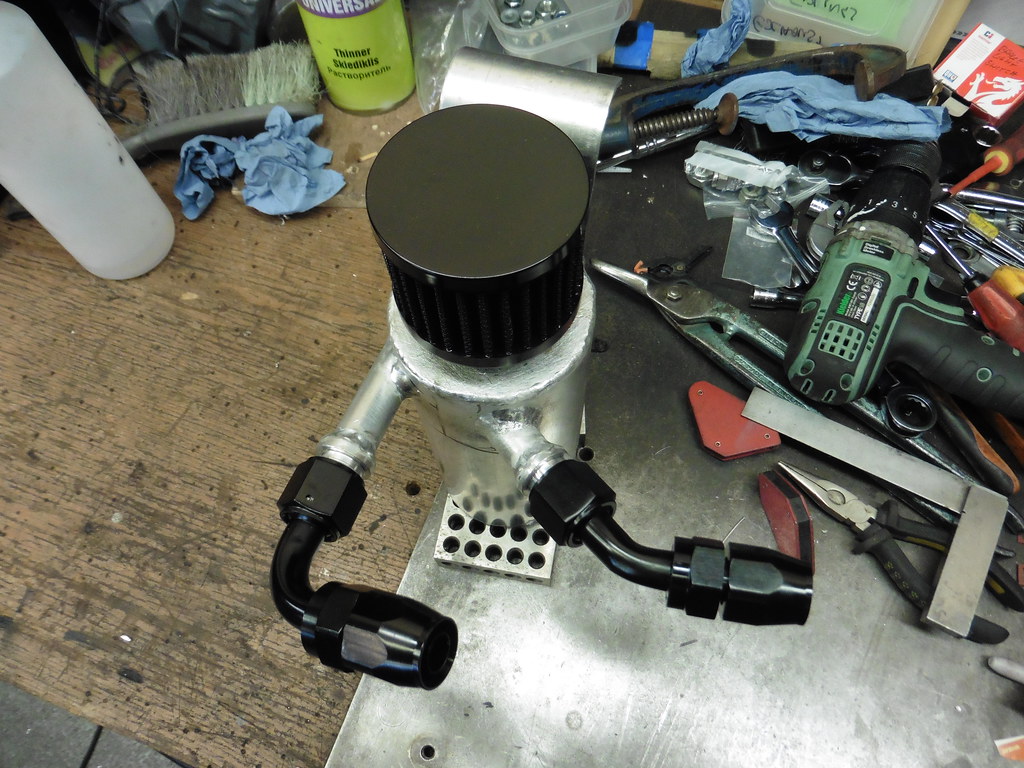 P1080126 P1080126 by jono_misfit, on Flickr  P1080127 P1080127 by jono_misfit, on Flickr But I ran out of time so need to make it next time... which may be in January. |
| |
|
|
jonomisfit
Club Retro Rides Member
Posts: 1,788
Club RR Member Number: 49
|
|
Dec 16, 2023 20:34:52 GMT
|
yesterday was my teams christmas doo.... I was surprisingly functional today so got some garage time. cut some ali  P1080128 P1080128 by jono_misfit, on Flickr marked out and cut a bit 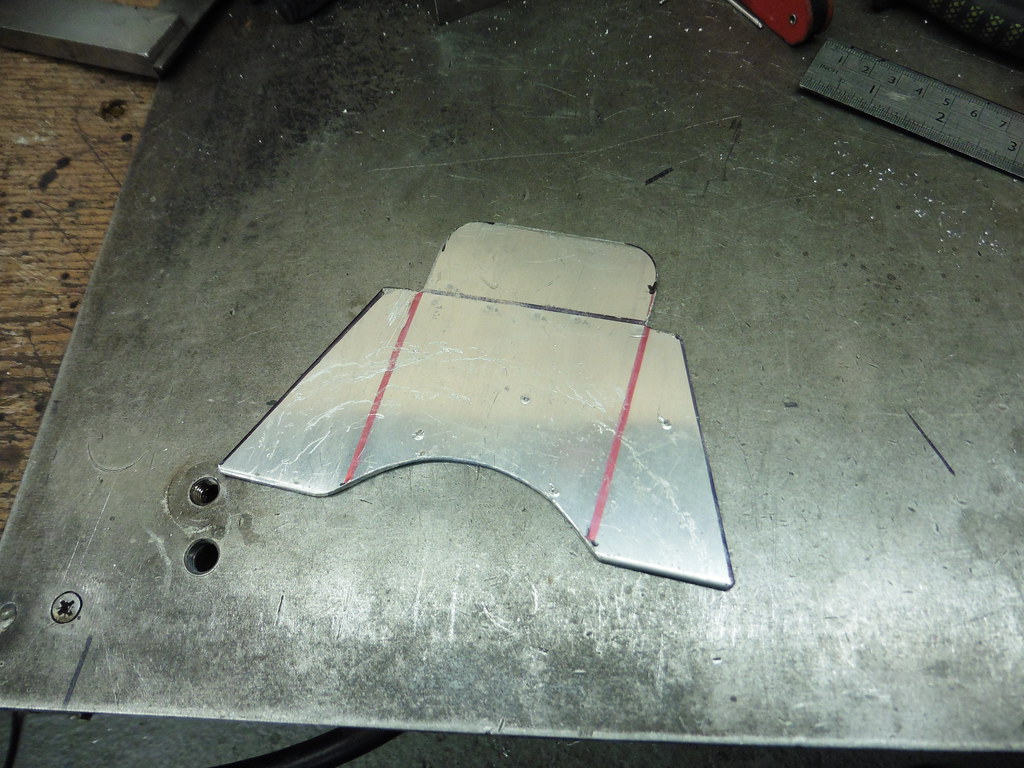 P1080129 P1080129 by jono_misfit, on Flickr folded up and welded on  P1080130 P1080130 by jono_misfit, on Flickr I think i need to turn my gas rate up a bit as there is a fair amount of contamination happening  P1080131 P1080131 by jono_misfit, on Flickr  P1080132 P1080132 by jono_misfit, on Flickr lightened and retaining holes added  P1080133 P1080133 by jono_misfit, on Flickr  P1080134 P1080134 by jono_misfit, on Flickr  P1080135 P1080135 by jono_misfit, on Flickr bolted into place  P1080136 P1080136 by jono_misfit, on Flickr clears all the important things  P1080137 P1080137 by jono_misfit, on Flickr  P1080138 P1080138 by jono_misfit, on Flickr then made off the breather hoses  P1080140 P1080140 by jono_misfit, on Flickr  P1080141 P1080141 by jono_misfit, on Flickr  P1080143 P1080143 by jono_misfit, on Flickr  P1080144 P1080144 by jono_misfit, on Flickr I used a jubilee clip to clamp the bracket to the engine bay cage cross brace  P1080145 P1080145 by jono_misfit, on Flickr Some more wiring to do, and also need to get back to sorting the radiator connections, and the roll bar mounts that i've been avoiding..... |
| |
|
|
jonomisfit
Club Retro Rides Member
Posts: 1,788
Club RR Member Number: 49
|
|
Dec 20, 2023 22:44:01 GMT
|
Hmmm. Radiator trying to work out what hose boes where  P1080146 P1080146 by jono_misfit, on Flickr header needs to be here 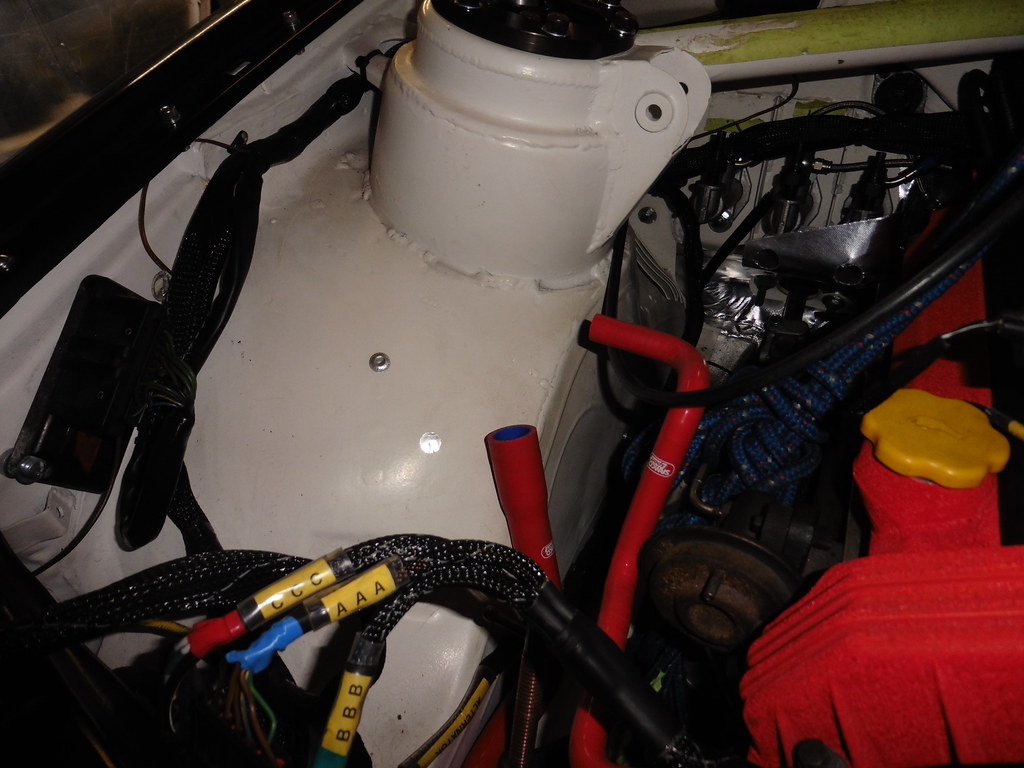 P1080147 P1080147 by jono_misfit, on Flickr Hmmm.... bit of a leap of faith for water there 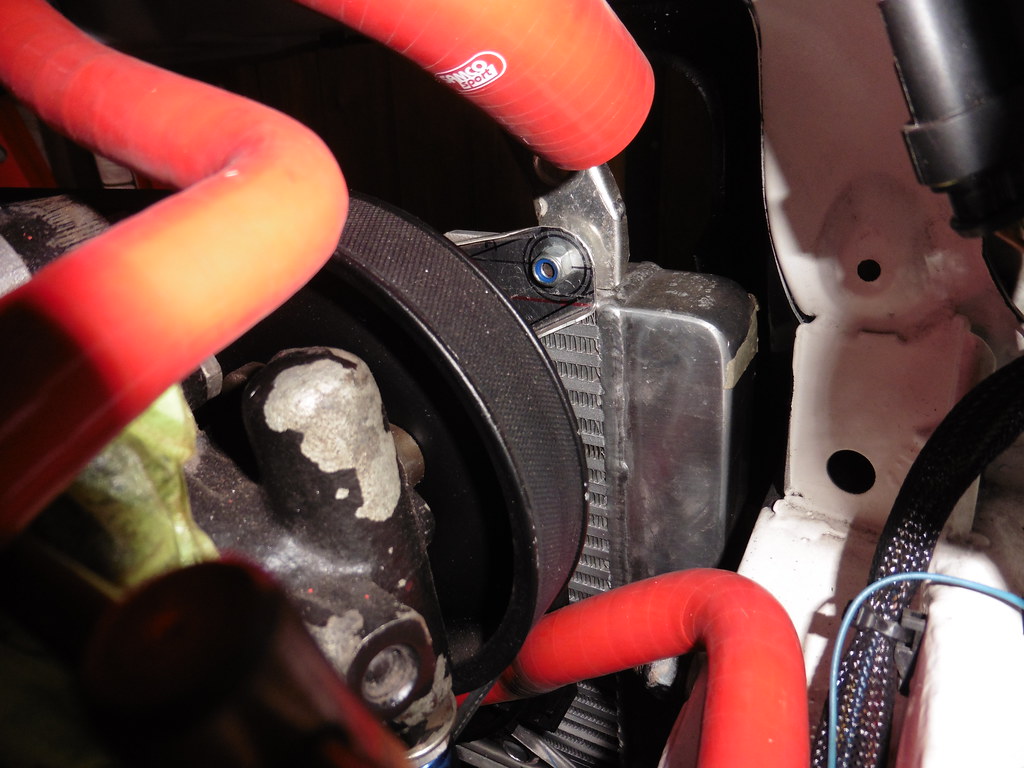 P1080148 P1080148 by jono_misfit, on Flickr that lines up  P1080149 P1080149 by jono_misfit, on Flickr with the radiator fan switch....  P1080150 P1080150 by jono_misfit, on Flickr one of these should be the right one 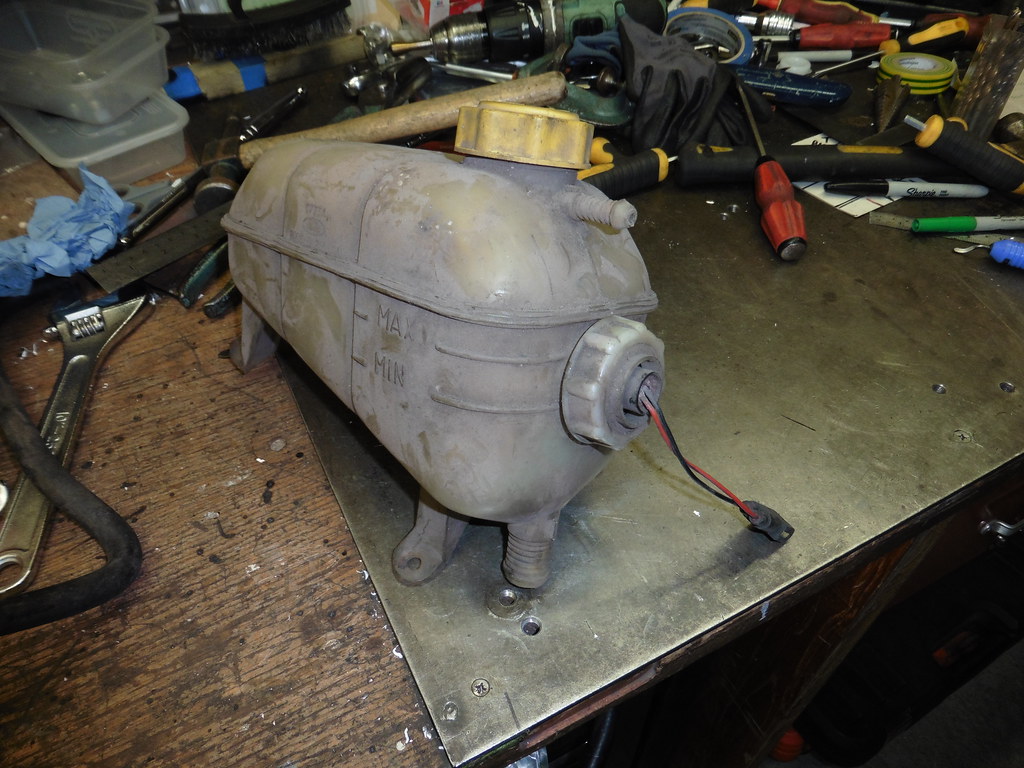 P1080151 P1080151 by jono_misfit, on Flickr  P1080152 P1080152 by jono_misfit, on Flickr goes in here  P1080153 P1080153 by jono_misfit, on Flickr like so  P1080154 P1080154 by jono_misfit, on Flickr Manky as anything, i gave it a quick clean up  P1080155 P1080155 by jono_misfit, on Flickr camera didnt work  P1080156 P1080156 by jono_misfit, on Flickr fitted  P1080157 P1080157 by jono_misfit, on Flickr clears the bonnet  P1080158 P1080158 by jono_misfit, on Flickr I'm surprised this fits, but it does and saves me one job in not having to make an expansion tank.... at least not yet What I do need to sort is this  P1080159 P1080159 by jono_misfit, on Flickr Sierra xr4x4 radiator.... but it looks like nothing is where i need it to be for the water connections for the BOA engine.  P1080160 P1080160 by jono_misfit, on Flickr  P1080161 P1080161 by jono_misfit, on Flickr  P1080162 P1080162 by jono_misfit, on Flickr  P1080163 P1080163 by jono_misfit, on Flickr some work with hacksaw, grinder, multitool, and files lead to 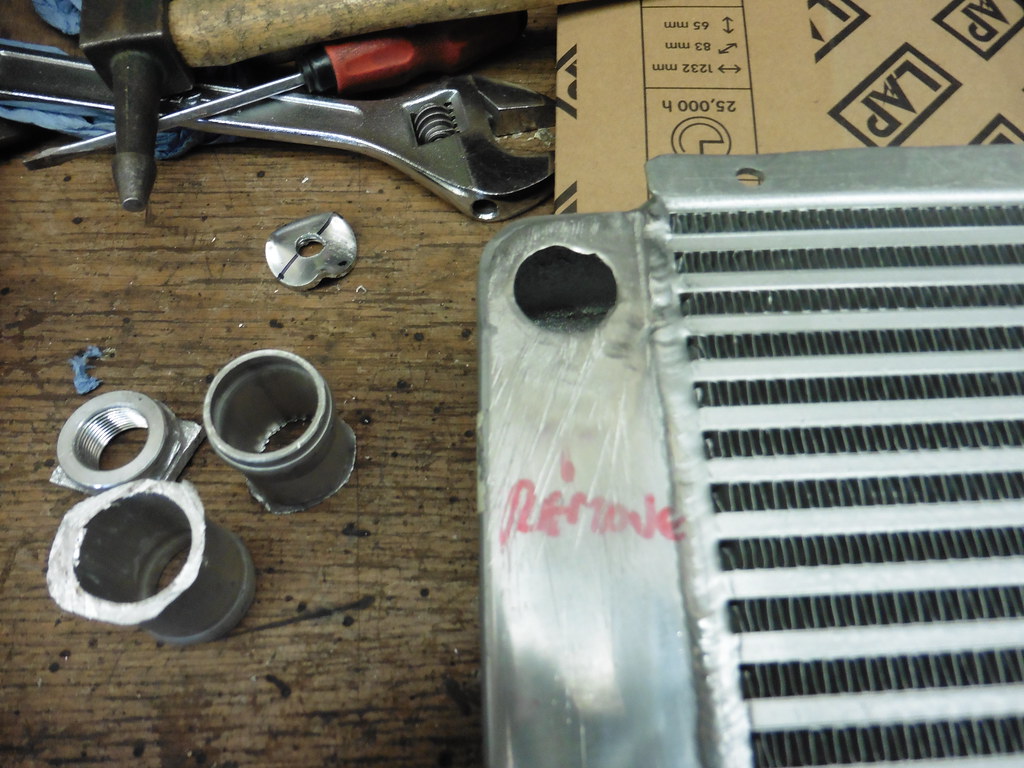 P1080164 P1080164 by jono_misfit, on Flickr  P1080165 P1080165 by jono_misfit, on Flickr  P1080166 P1080166 by jono_misfit, on Flickr  P1080167 P1080167 by jono_misfit, on Flickr recovered the fan switch boss  P1080168 P1080168 by jono_misfit, on Flickr Next step will be filling in the holes, making new holes, and then checking the radiator doesnt leak after I weld it... |
| |
|
|
jonomisfit
Club Retro Rides Member
Posts: 1,788
Club RR Member Number: 49
|
|
Dec 21, 2023 17:00:29 GMT
|
|
|
| |
|
|
jonomisfit
Club Retro Rides Member
Posts: 1,788
Club RR Member Number: 49
|
|
Dec 22, 2023 20:48:39 GMT
|
I needed to put a barb on the end of some of the tube so made a dodgy contraption.  P1080177 P1080177 by jono_misfit, on Flickr  P1080178 P1080178 by jono_misfit, on Flickr which worked  P1080179 P1080179 by jono_misfit, on Flickr cut some tube and started welding it together  P1080180 P1080180 by jono_misfit, on Flickr  P1080181 P1080181 by jono_misfit, on Flickr trimmed  P1080182 P1080182 by jono_misfit, on Flickr end swaged  P1080184 P1080184 by jono_misfit, on Flickr  P1080185 P1080185 by jono_misfit, on Flickr will go in like so  P1080186 P1080186 by jono_misfit, on Flickr gives good clearance  P1080187 P1080187 by jono_misfit, on Flickr |
| |
|
|
jonomisfit
Club Retro Rides Member
Posts: 1,788
Club RR Member Number: 49
|
|
Dec 29, 2023 19:21:14 GMT
|
|
|
| |
|
|
|
|
|
Dec 29, 2023 20:41:16 GMT
|
|
Nice work on the cooling system. I'd advise you to keep an eye out for fatigue cracks on the welds as you've got a lot of pipe sticking out trying to shake those welds to bits. Same on the catch tank as well. It might not be an issue at all, just something to keep on top of.
|
| |
|
|
jonomisfit
Club Retro Rides Member
Posts: 1,788
Club RR Member Number: 49
|
|
Dec 29, 2023 21:12:48 GMT
|
|
Agreed, something I plan to keep an eye on.
The catch tank i'm not so worried about, but I might look at adding a couple of supports to the radiator connection.
Somewhere...
|
| |
|
|
jonomisfit
Club Retro Rides Member
Posts: 1,788
Club RR Member Number: 49
|
|
|
|
I made a tube support bracket 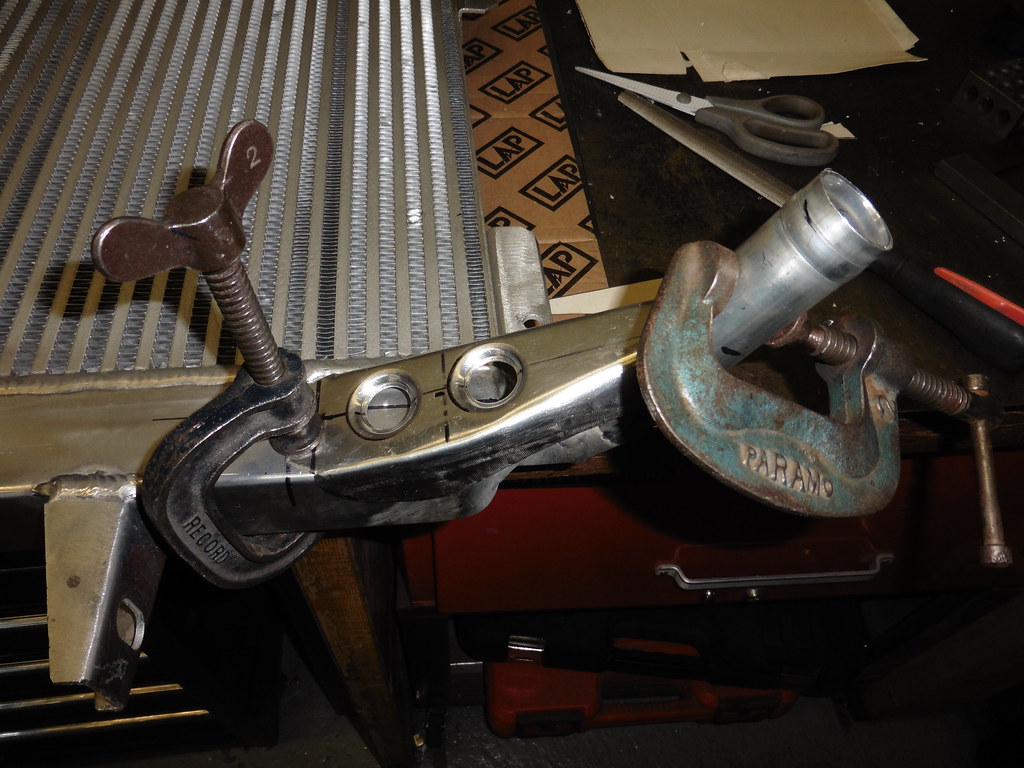 P1080206 P1080206 by jono_misfit, on Flickr 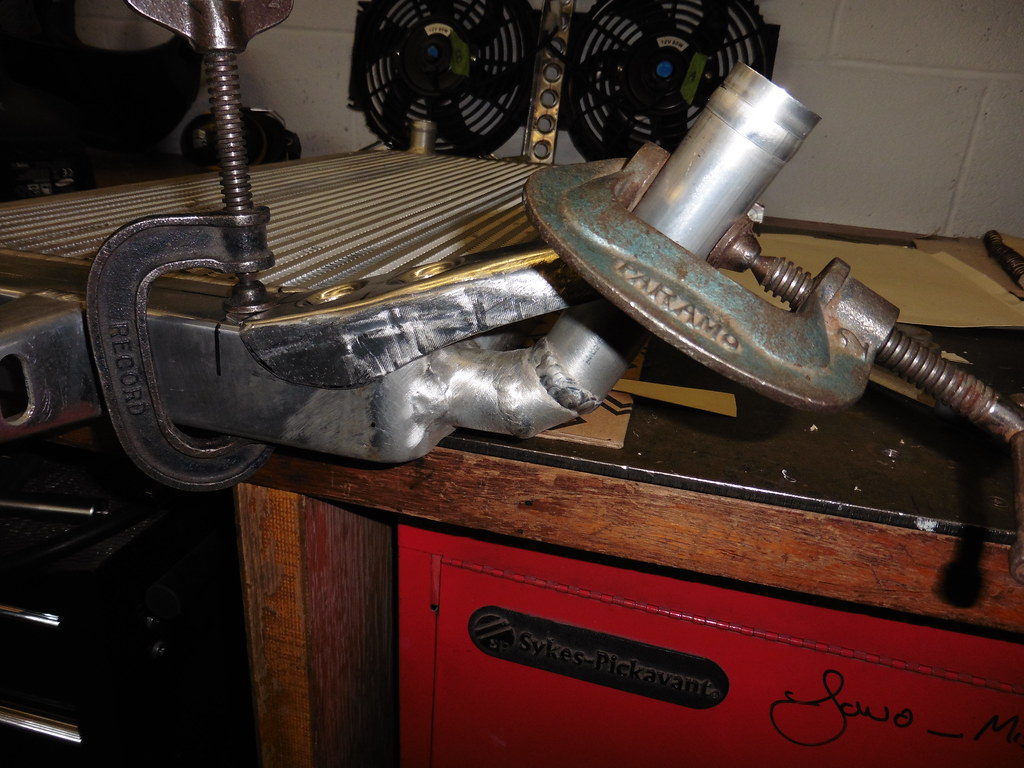 P1080207 P1080207 by jono_misfit, on Flickr  P1080208 P1080208 by jono_misfit, on Flickr Which should take a lot of the load off it. Having welded something that will be pressurised in use, I need to do a pressure check on the radiator to make sure there are no holes. some bits 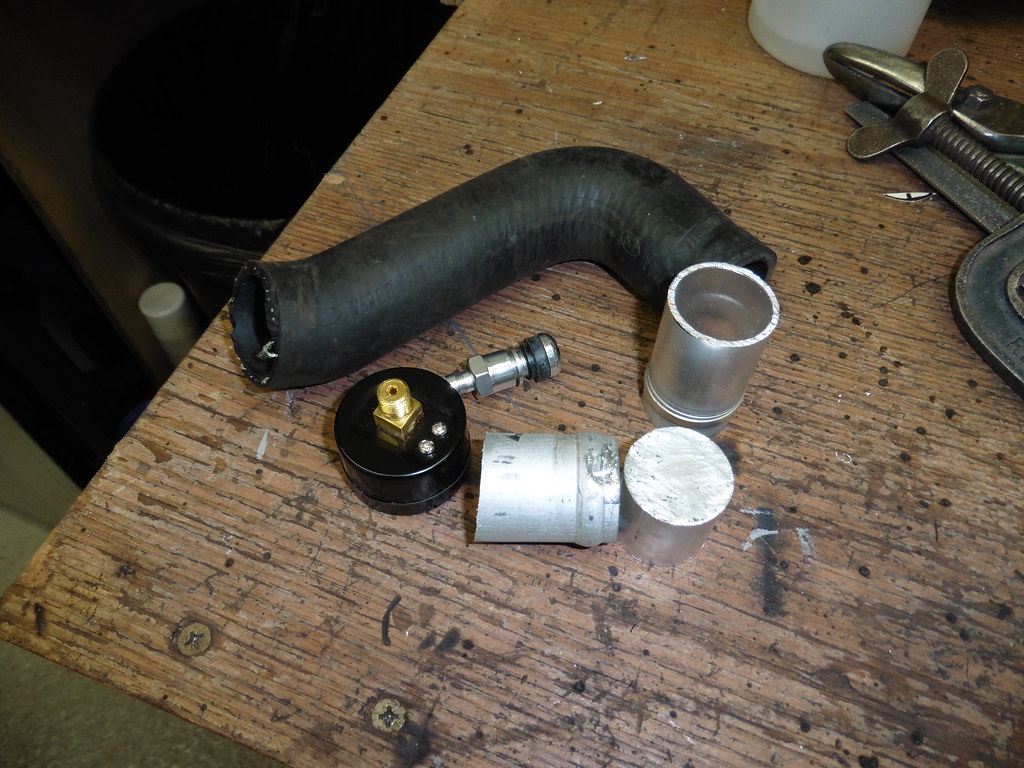 P1080209 P1080209 by jono_misfit, on Flickr roughly turned up an adaptor I can tape 1/8 BSP to fit a guage.  P1080210 P1080210 by jono_misfit, on Flickr Its a light inteference fit so pressed it in.... which cocked over a bit. doh.  P1080211 P1080211 by jono_misfit, on Flickr welded on the bits that needed welded  P1080212 P1080212 by jono_misfit, on Flickr  P1080213 P1080213 by jono_misfit, on Flickr assembled  P1080214 P1080214 by jono_misfit, on Flickr setup  P1080215 P1080215 by jono_misfit, on Flickr pressurised it to 18psi (cooling system should be 12-14psi in normal operation) pretty successful, only one minor issue point.  P1080216 P1080216 by jono_misfit, on Flickr cleaned up and you can see i've contaminated the weld and got some porrosity going on.  P1080217 P1080217 by jono_misfit, on Flickr cleaned it back up, and re-did the weld, then re-set up the pressure test.  P1080217 P1080217 by jono_misfit, on Flickr guage scale is completely wrong for the task, but I was using my tyre gun to set the pressure and this is just an indicator.  P1080220 P1080220 by jono_misfit, on Flickr in 2hrs the pressure didnt drop at all. Success. welded on the support bracket  P1080221 P1080221 by jono_misfit, on Flickr  P1080222 P1080222 by jono_misfit, on Flickr  P1080223 P1080223 by jono_misfit, on Flickr and re-pressure tested it 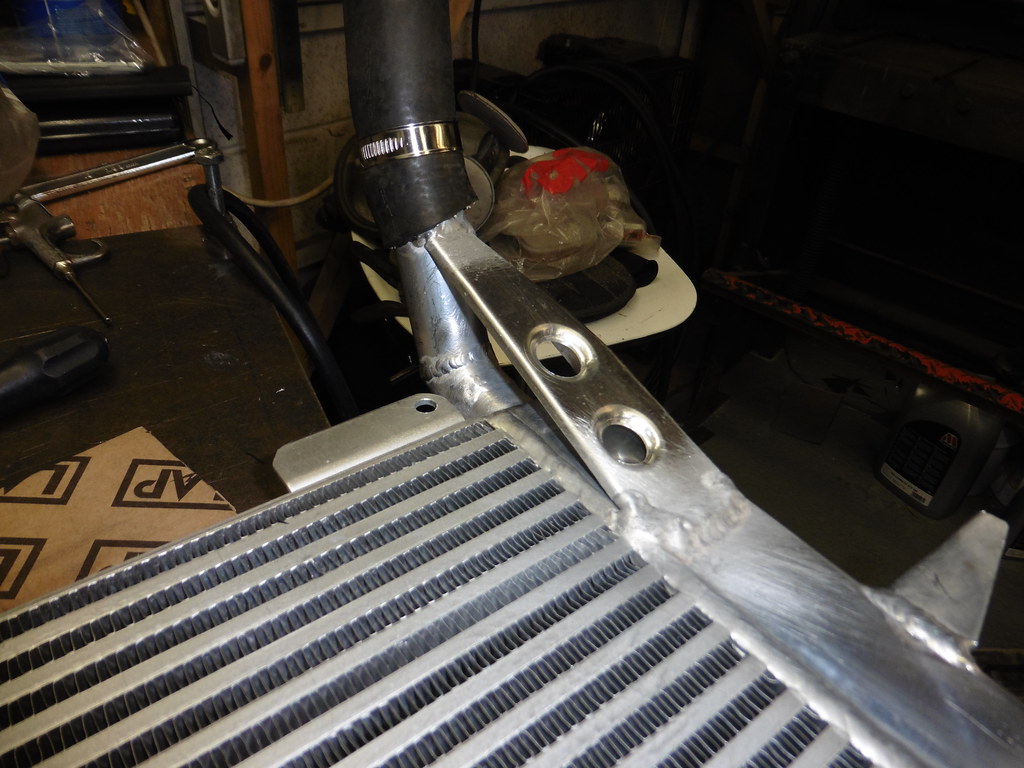 P1080224 P1080224 by jono_misfit, on Flickr no issues 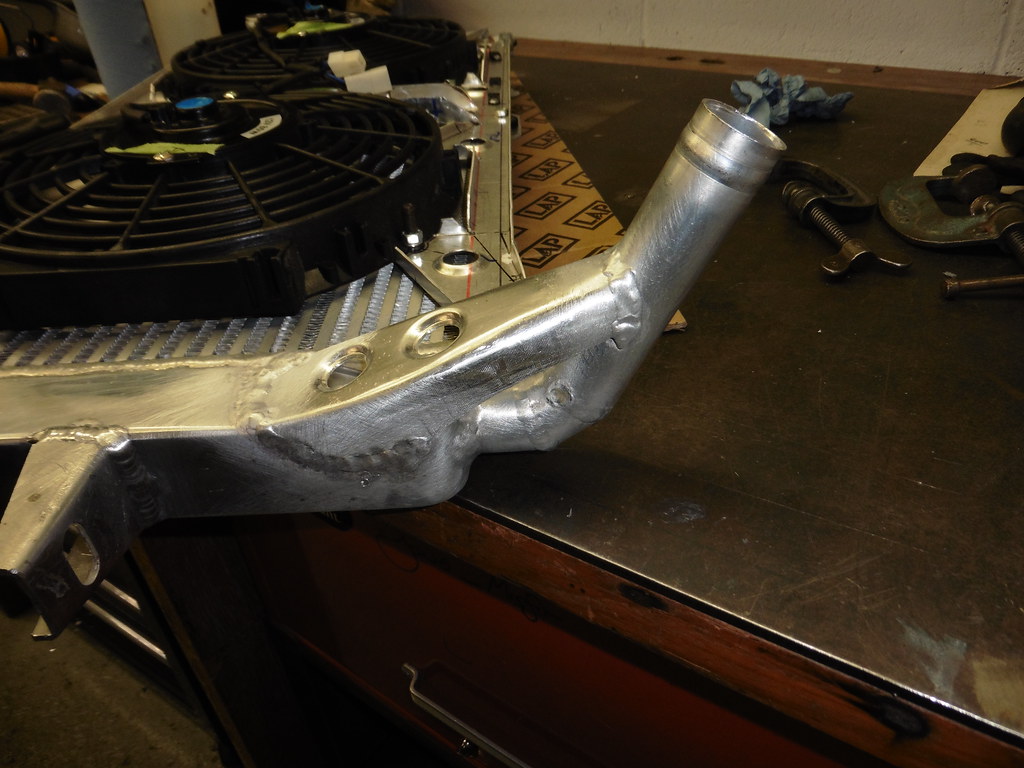 P1080225 P1080225 by jono_misfit, on Flickr checked the radiator fitted ok.. again  P1080227 P1080227 by jono_misfit, on Flickr  P1080228 P1080228 by jono_misfit, on Flickr 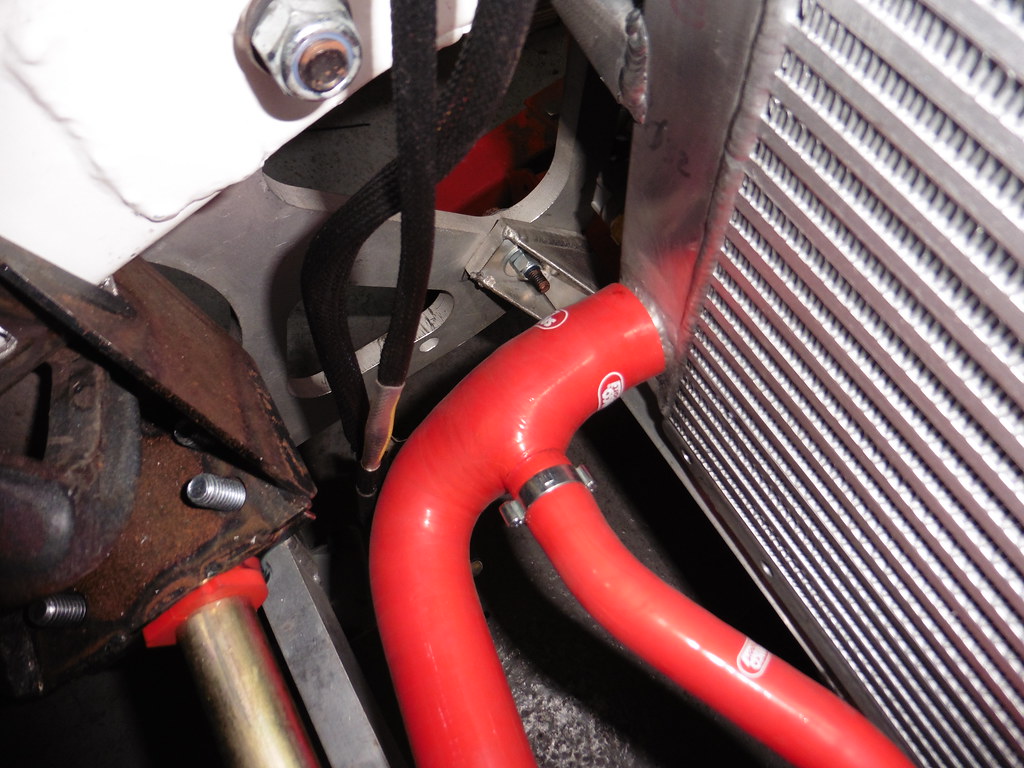 P1080229 P1080229 by jono_misfit, on Flickr then on to mounting the fans / shroud turned up some nylon spacers  P1080226 P1080226 by jono_misfit, on Flickr fitted some hard rubber at any risk contact points and foam tape on other points 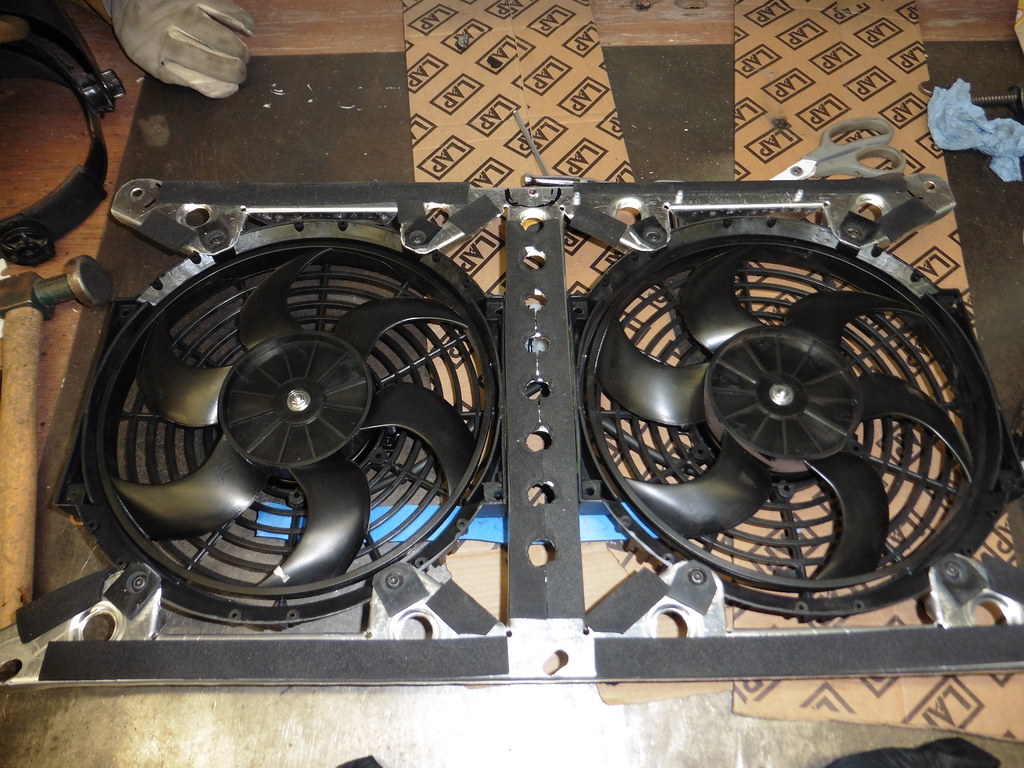 P1080230 P1080230 by jono_misfit, on Flickr need something to hold the litte radiator hose that goes across the front of the rad a piece of cut tube  P1080231 P1080231 by jono_misfit, on Flickr will go here  P1080232 P1080232 by jono_misfit, on Flickr brackets made, welded to the tube and rivetted in  P1080233 P1080233 by jono_misfit, on Flickr fitted the fans / shroud and clipped in the hose (albeit temporarily as the radiator needs to come out again)  P1080235 P1080235 by jono_misfit, on Flickr  P1080236 P1080236 by jono_misfit, on Flickr I need to do something this end to keep it all clear of the power steering pulley. 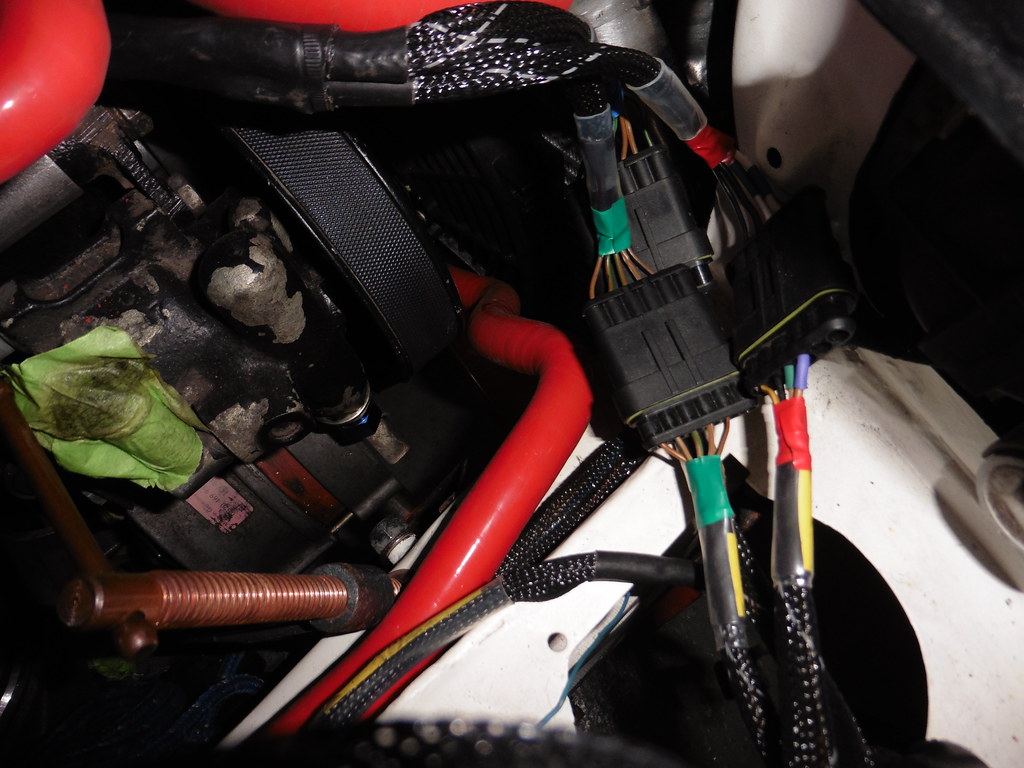 P1080237 P1080237 by jono_misfit, on Flickr I may change this all together. I don't really like the hose. I may make an ali tube on the bottom of the radiator and cut / re-route the hoses top this to sort it out. It just all feels like a bit of a Ford bodge as it is. |
| |
|
|
jonomisfit
Club Retro Rides Member
Posts: 1,788
Club RR Member Number: 49
|
|
|
|
|
|
| |
|
|
eurogranada
Europe
To tinker or not to tinker, that is the question...
Posts: 2,556
|
|
|
|
|
Looks great though. And as others said elsewhere, the workmanship is to a very high level!
You may have explained this and I may just have missed it in your story, but with you looking to go into rallying why not use the escort?
|
| |
|
|
jonomisfit
Club Retro Rides Member
Posts: 1,788
Club RR Member Number: 49
|
|
|
|
|
Cost mainly.
With the escort now 30 years old, and there not being that many of them, the prices are going insane.
An example is a wing. A non rotten wing is now something like £900 each.
The competition bits are even more expensive, so it's just not worth it. If I ever crashed it I couldn't afford to repair it.
Better to buy something cheaper and more expendable and keep the escort as just something to enjoy.
|
| |
|
|
jonomisfit
Club Retro Rides Member
Posts: 1,788
Club RR Member Number: 49
|
|
|
|
Its been a busy few weeks. Buyibng a rally car, doing my BARS test, and shuffling all the garage / storage content. The C2 rally car was off for its MoT this weekend, and I went and picked up a C2 VTS road car as a little run about to also get used to them. This afternoon i had a bit of time so did some bits on the escort. Machined up some larger nylon spacers / mounts for the radiator. Mainly as I could make it rock a bit on the others.  P1080310 P1080310 by jono_misfit, on Flickr  P1080311 P1080311 by jono_misfit, on Flickr fitted them  P1080312 P1080312 by jono_misfit, on Flickr had to trim them a bit to fit past some features on the legs  P1080313 P1080313 by jono_misfit, on Flickr holds it rock solid now. also did the job i didnt really want to do... trim the bonnet for clearance to the engine. I started out small and had to make it a bit bigger to clear as it went lower. very tight, but has clearance now.  P1080314 P1080314 by jono_misfit, on Flickr rough trimmed, then cleaned them up  P1080315 P1080315 by jono_misfit, on Flickr Then started making a mount for brake / clutch fluid reservoirs. This will mount between the roll cage at the strut tops and the bulkhead to hold them out the way. They just fit on when mounted direct to the master cylinders, however looking at the exhaust routing I'm concerned it may head soak the fluid, so this moves it further away. Did a template  P1080316 P1080316 by jono_misfit, on Flickr sits them like so  P1080317 P1080317 by jono_misfit, on Flickr  P1080318 P1080318 by jono_misfit, on Flickr transfer to a sheet of ali  P1080319 P1080319 by jono_misfit, on Flickr started shaping and run out of time  P1080320 P1080320 by jono_misfit, on Flickr I've cut it from 3mm ali, and I'm thinking its a thicker than it needs to be. I may re-do it in 1.5mm. |
| |
|
|
jonomisfit
Club Retro Rides Member
Posts: 1,788
Club RR Member Number: 49
|
|
Feb 11, 2024 20:21:01 GMT
|
It was a short day on the escort as was playing with the rally car. I decided that the bracket was too heft in 3mm ali, so remade in 1.5mm Cut the material  P1080321 P1080321 by jono_misfit, on Flickr folded and shaped, and cut a slot for the clamp  P1080327 P1080327 by jono_misfit, on Flickr tigged and bent the fixing, still needs trimmed/ tidied up  P1080328 P1080328 by jono_misfit, on Flickr  P1080329 P1080329 by jono_misfit, on Flickr as the tube it mounts on is at an angle this is set at the same angle so the mount is flat in the car  P1080330 P1080330 by jono_misfit, on Flickr Fits like so  P1080331 P1080331 by jono_misfit, on Flickr reservoirs added  P1080332 P1080332 by jono_misfit, on Flickr stiffened the base  P1080333 P1080333 by jono_misfit, on Flickr fitted in the car  P1080334 P1080334 by jono_misfit, on Flickr  P1080335 P1080335 by jono_misfit, on Flickr spagetti hoses  P1080336 P1080336 by jono_misfit, on Flickr Nicely gets the reservoirs away from the exhaust heat area. slowly getting there  P1080326 P1080326 by jono_misfit, on Flickr |
| |
|
|
mk2cossie
Club Retro Rides Member
Posts: 3,060  Club RR Member Number: 77
|
|
Feb 11, 2024 20:40:50 GMT
|
nice bit of progress there jonomisfit  Didn't realise that the EsCos bonnet doesn't clear the BOA manifold though  |
| |
|
|
jonomisfit
Club Retro Rides Member
Posts: 1,788
Club RR Member Number: 49
|
|
Feb 11, 2024 21:13:59 GMT
|
|
Its a tight fit. Likely not helped by my use of competion engine mounts that have 0 sag to them.
|
| |
|
|
jonomisfit
Club Retro Rides Member
Posts: 1,788
Club RR Member Number: 49
|
|
Feb 18, 2024 20:49:26 GMT
|
I need a header tank for the power steering, and a mount for some of the engine vaccum sensors / switches. May as well combine them. I'm going to squeeze in here.  P1080364 P1080364 by jono_misfit, on Flickr after looking about I found my remaining piece of alloy sheet  P1080365 P1080365 by jono_misfit, on Flickr I've got a power steering pump from a Xr4x4 with the integral tank, so measured that up and then added a bit of margin on the volume. tank marked out 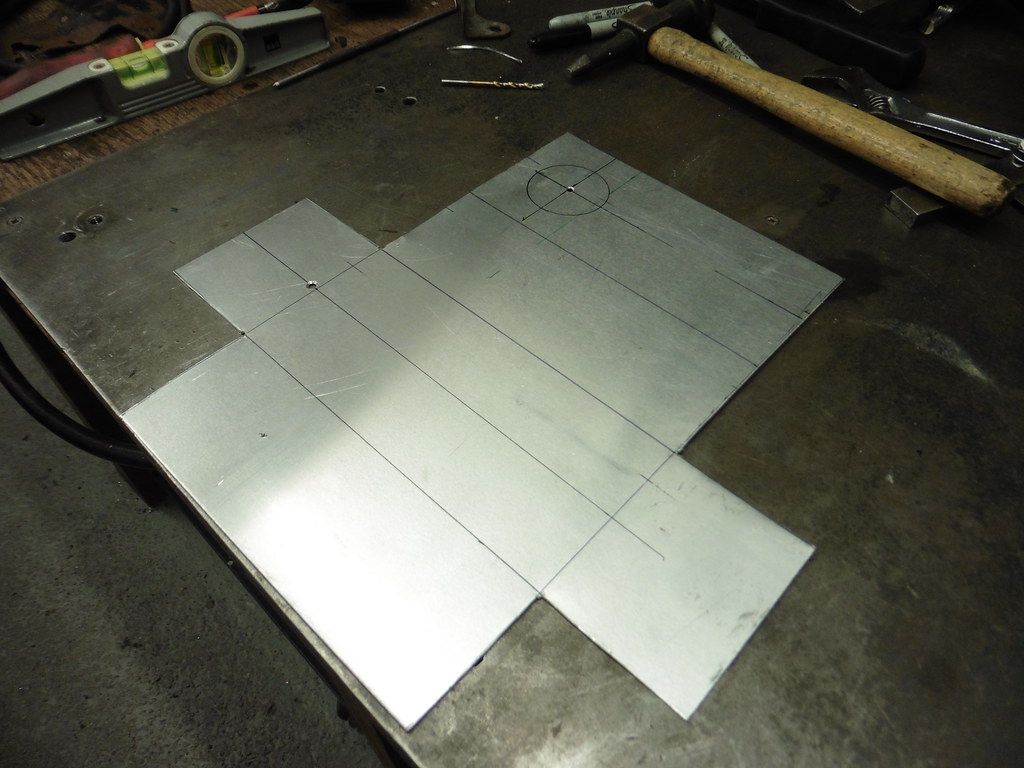 P1080367 P1080367 by jono_misfit, on Flickr  P1080368 P1080368 by jono_misfit, on Flickr seams welded up 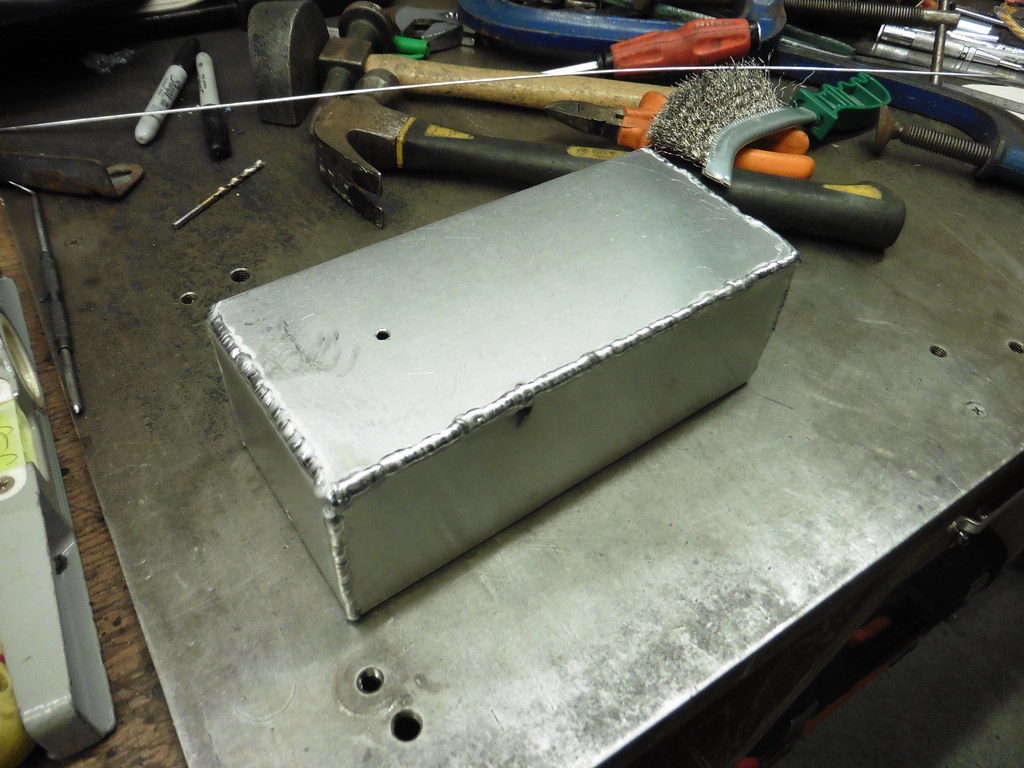 P1080369 P1080369 by jono_misfit, on Flickr  P1080370 P1080370 by jono_misfit, on Flickr I'm going to mount the sensors / switches onto the tank so need something to mount them to. I've also decided to get some practice on the mill. Cut some 10mm ali plate, squared it on the mill, then started adjusting for the mount. Just thinning the edges where it'll be welded as welding 10mm onto 1.5mm is a recipie for me blowing holes in it.  P1080371 P1080371 by jono_misfit, on Flickr I actually managed to cut it all parallel to within 0.02mm which I was surprised at.  P1080372 P1080372 by jono_misfit, on Flickr will sit like so  P1080373 P1080373 by jono_misfit, on Flickr  P1080374 P1080374 by jono_misfit, on Flickr will weld on here  P1080375 P1080375 by jono_misfit, on Flickr  P1080376 P1080376 by jono_misfit, on Flickr welded on then started mount for vac vent switch  P1080377 P1080377 by jono_misfit, on Flickr  P1080378 P1080378 by jono_misfit, on Flickr will fit like so  P1080379 P1080379 by jono_misfit, on Flickr |
| |
|
|
jonomisfit
Club Retro Rides Member
Posts: 1,788
Club RR Member Number: 49
|
|
Feb 23, 2024 20:30:33 GMT
|
welded on  P1080380 P1080380 by jono_misfit, on Flickr i need to mount this as well..  P1080381 P1080381 by jono_misfit, on Flickr I welded a ali block onto some tube  P1080382 P1080382 by jono_misfit, on Flickr Th ID of which is just slightly larger than the solenoid  P1080383 P1080383 by jono_misfit, on Flickr Drilled through and threaded the block, then cut a slit, and drilled out one side as a clearance hole as a clamp, then welded it on  P1080384 P1080384 by jono_misfit, on Flickr and... promptly ran out of gas.  P1080385 P1080385 by jono_misfit, on Flickr  P1080386 P1080386 by jono_misfit, on Flickr all together  P1080387 P1080387 by jono_misfit, on Flickr  P1080389 P1080389 by jono_misfit, on Flickr fits in here  P1080390 P1080390 by jono_misfit, on Flickr  P1080391 P1080391 by jono_misfit, on Flickr I think i may scallop the left hand side so I can move it further over and clear tha cabling for the EDIS module. then made an outlet spiggot 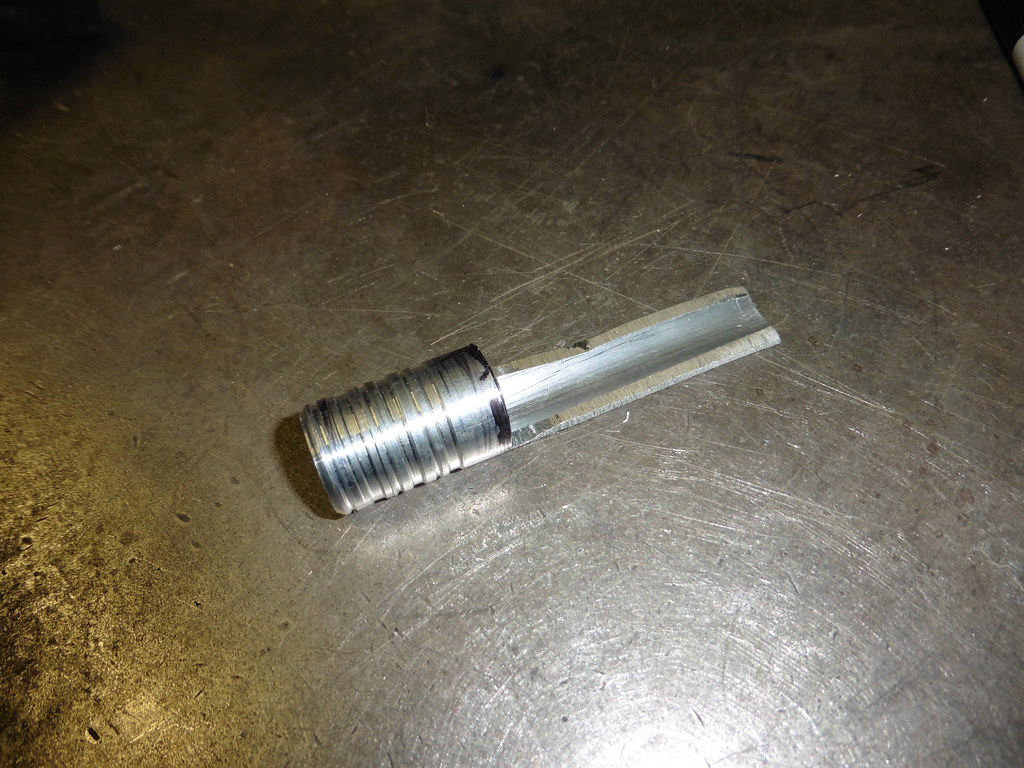 P1080402 P1080402 by jono_misfit, on Flickr will weld on here 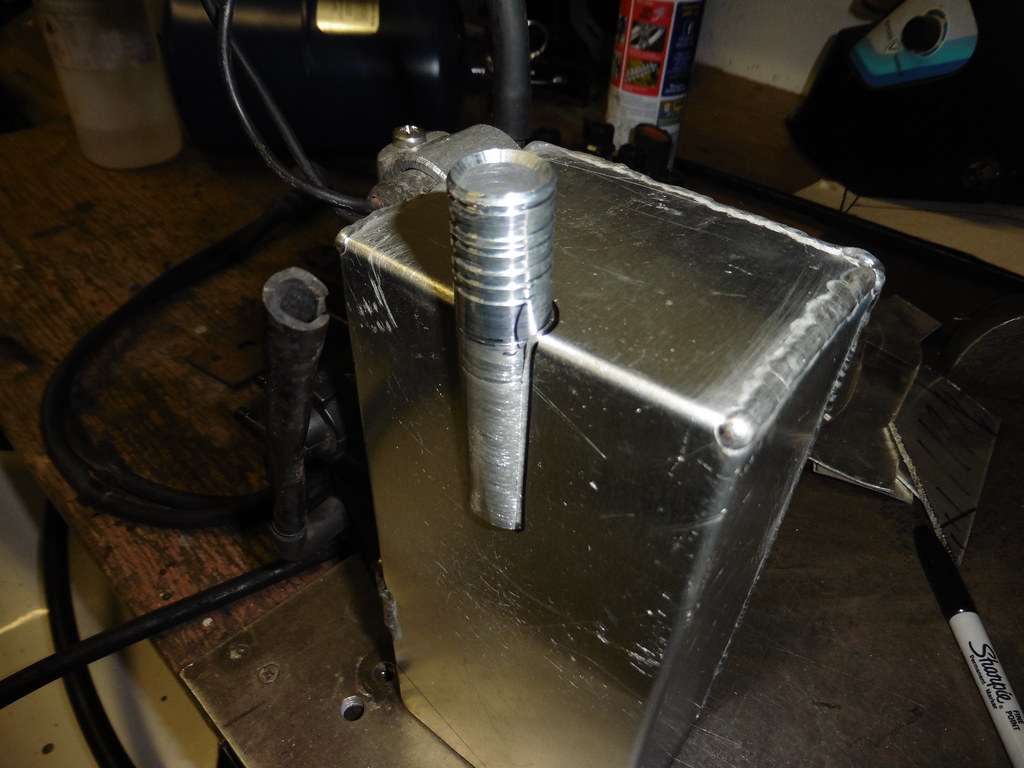 P1080404 P1080404 by jono_misfit, on Flickr when i have sorted more gas.... |
| |
|
|
mk2cossie
Club Retro Rides Member
Posts: 3,060  Club RR Member Number: 77
|
|
Feb 23, 2024 21:16:56 GMT
|
Nice looking solution for the EGR parts  |
| |
|
|
 P1080076 by jono_misfit, on Flickr
 P1080077 by jono_misfit, on Flickr
 P1080078 by jono_misfit, on Flickr
 P1080080 by jono_misfit, on Flickr
 P1080081 by jono_misfit, on Flickr
 P1080082 by jono_misfit, on Flickr
 P1080083 by jono_misfit, on Flickr
 P1080084 by jono_misfit, on Flickr
 P1080085 by jono_misfit, on Flickr
 P1080086 by jono_misfit, on Flickr
 P1080087 by jono_misfit, on Flickr
 P1080088 by jono_misfit, on Flickr
 P1080089 by jono_misfit, on Flickr
 P1080090 by jono_misfit, on Flickr
 P1080091 by jono_misfit, on Flickr
 P1080093 by jono_misfit, on Flickr
 P1080095 by jono_misfit, on Flickr
 P1080076 by jono_misfit, on Flickr
 P1080077 by jono_misfit, on Flickr
 P1080078 by jono_misfit, on Flickr
 P1080080 by jono_misfit, on Flickr
 P1080081 by jono_misfit, on Flickr
 P1080082 by jono_misfit, on Flickr
 P1080083 by jono_misfit, on Flickr
 P1080084 by jono_misfit, on Flickr
 P1080085 by jono_misfit, on Flickr
 P1080086 by jono_misfit, on Flickr
 P1080087 by jono_misfit, on Flickr
 P1080088 by jono_misfit, on Flickr
 P1080089 by jono_misfit, on Flickr
 P1080090 by jono_misfit, on Flickr
 P1080091 by jono_misfit, on Flickr
 P1080093 by jono_misfit, on Flickr
 P1080095 by jono_misfit, on Flickr


