jonomisfit
Club Retro Rides Member
Posts: 1,787
Club RR Member Number: 49
|
|
Aug 15, 2020 15:13:35 GMT
|
|
I'm pretty certain you can buy them somewhere as I've definitely seen them advertised in the past, but I'll be buggered if could find them when I looked.
There's a good chance I'm going to remake mine due to its shonkyness.
A light smear of PU on assembly should also see it pretty watertight.
|
| |
|
|
|
|
melle
South West
It'll come out in the wash.
Posts: 2,006
|
|
Aug 15, 2020 21:58:13 GMT
|
If you've got a wirring diagram that would be great thanks. If mk2cossie doesn't have a better/ factory wiring diagram, I have a Sierra V6 Haynes manual, which I suppose will have a diagram. Happy to scan it if that helps. |
| |
Last Edit: Aug 15, 2020 21:59:03 GMT by melle
www.saabv4.com'70 Saab 96 V4 "The Devil's Own V4" '77 Saab 95 V4 van conversion project '88 Saab 900i 8V
|
|
jonomisfit
Club Retro Rides Member
Posts: 1,787
Club RR Member Number: 49
|
|
|
|
|
Great! Thanks.
|
| |
|
|
jonomisfit
Club Retro Rides Member
Posts: 1,787
Club RR Member Number: 49
|
|
Aug 16, 2020 19:39:36 GMT
|
wiring continues more braid  P1040054 P1040054 by jono_misfit, on Flickr removing the Throttle position sensor connector, pull the red tab out, lift the tangs, out slide the pins.  P1040055 P1040055 by jono_misfit, on Flickr braid on loom ready for connectors  P1040056 P1040056 by jono_misfit, on Flickr first injector Junior Power Timer fitted. 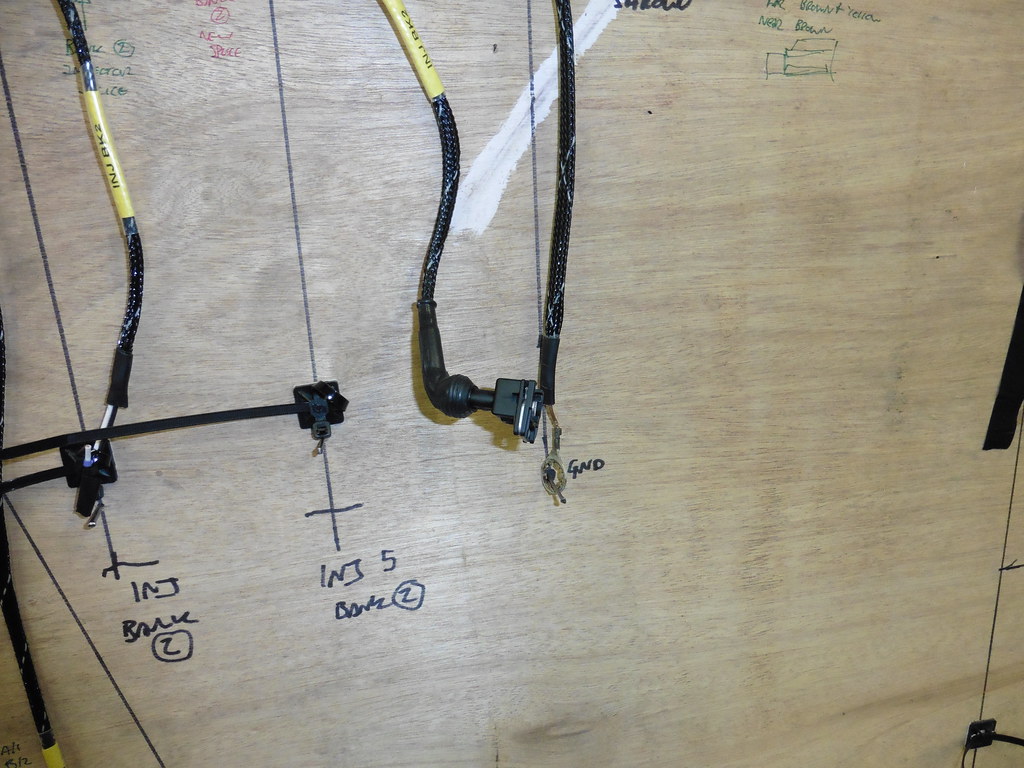 P1040057 P1040057 by jono_misfit, on Flickr Turns out not too difficult to do. boot on (a spray with WD40 inside first to get it over the heat shrink / braid)  P1040059 P1040059 by jono_misfit, on Flickr slide on the seal, strip the wire end and put the crimp into position.  P1040060 P1040060 by jono_misfit, on Flickr crimp with the JPT specific crimp tool  P1040061 P1040061 by jono_misfit, on Flickr then give it a tug test. do the other crimp, push the pins in until you hear the "click", then snap over the retainer.  P1040062 P1040062 by jono_misfit, on Flickr slide the boot back over, and done.  P1040063 P1040063 by jono_misfit, on Flickr all JPT's on  P1040064 P1040064 by jono_misfit, on Flickr loom tried out on the engine (on the wrong side of the fuel rail for convenience) to make sure the connectors / wires line up where expected.  P1040067 P1040067 by jono_misfit, on Flickr then onto making up the connectors for the engine harness to engine loom. I'm swapping from the ford 8 pin rounds as I cant find any spare pins for them. I'm using 6 way sealed connectors instead (meaning 3 not 2 as there are 15 connections).  P1040068 P1040068 by jono_misfit, on Flickr connectors labled for convenience  P1040069 P1040069 by jono_misfit, on Flickr all three done, and a splash of colour tape to help make Identifiation very clear / easy.  P1040070 P1040070 by jono_misfit, on Flickr one complete engine harness. 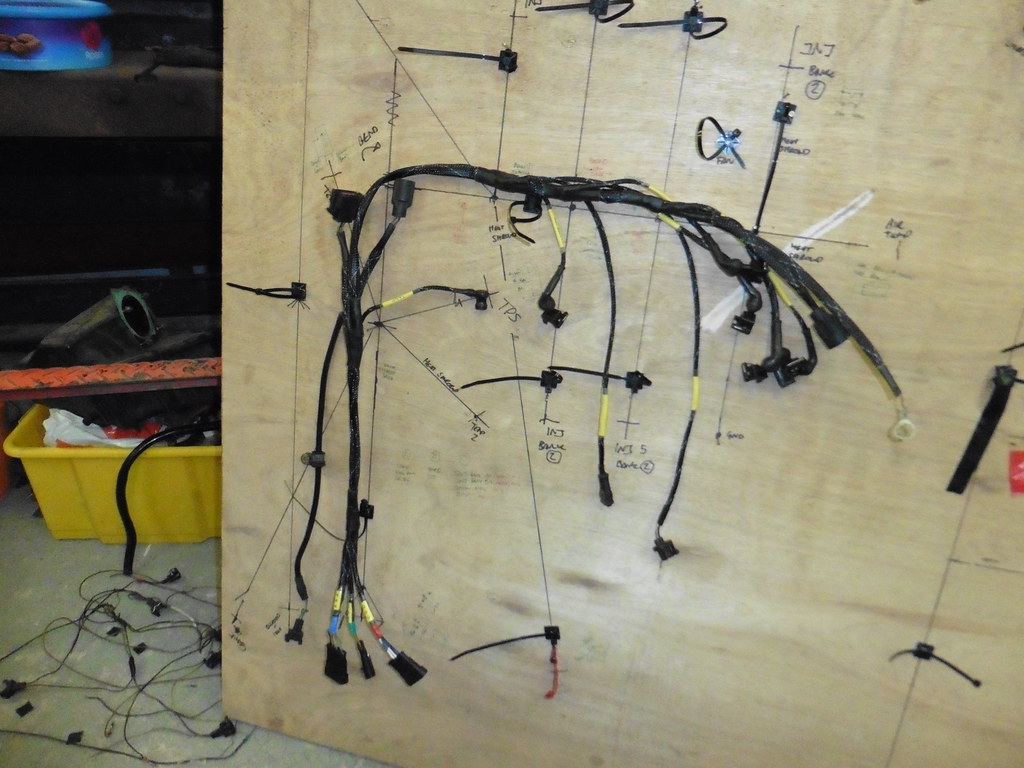 P1040071 P1040071 by jono_misfit, on Flickr Quick check round with the multi meter to see if there are any high resistance readigs, but all good so far. I then pulled the engine loom back out the car so I can change the connectors over. Removed the connectors then started inspecting the cable. Oh dear the individual cables feels very very stiff. Like baked to death type stiff. A close inspection shows.... 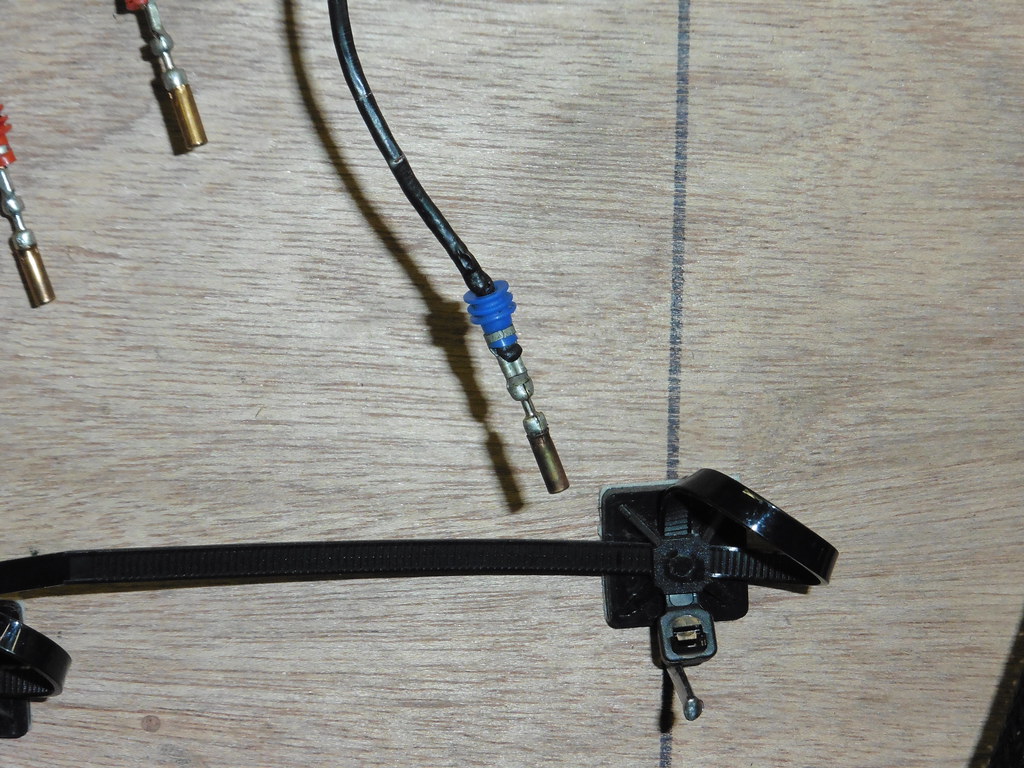 P1040074 P1040074 by jono_misfit, on Flickr Insulation is cracking up. Looking on the other wires they are all showing similar. Its all restricted to the area of cable that was exposed going into the connectors. I think a combination of heat, oil products, and UV have killed the exposed insulation. Pegged the end of interest out on the board.  P1040075 P1040075 by jono_misfit, on Flickr Luckily there is enough length to cut back the damaged insulation and terminate onto the new connectors. I'm going move the split out back further in the engine loom to get me the length back as the loom is over long aleady so I can loose 50mm without too much concern. I could cut back and extend all the cables, however I don't really want to put an extra 15 splices into it unless I absolutely have to. |
| |
|
|
melle
South West
It'll come out in the wash.
Posts: 2,006
|
|
Aug 16, 2020 20:03:39 GMT
|
|
Very nice job.
|
| |
www.saabv4.com'70 Saab 96 V4 "The Devil's Own V4" '77 Saab 95 V4 van conversion project '88 Saab 900i 8V
|
|
jonomisfit
Club Retro Rides Member
Posts: 1,787
Club RR Member Number: 49
|
|
Aug 21, 2020 19:45:29 GMT
|
And so it continues.... started terminating the other half of the connectors. Took a bit of figuring out which orientation the pins needed to go in 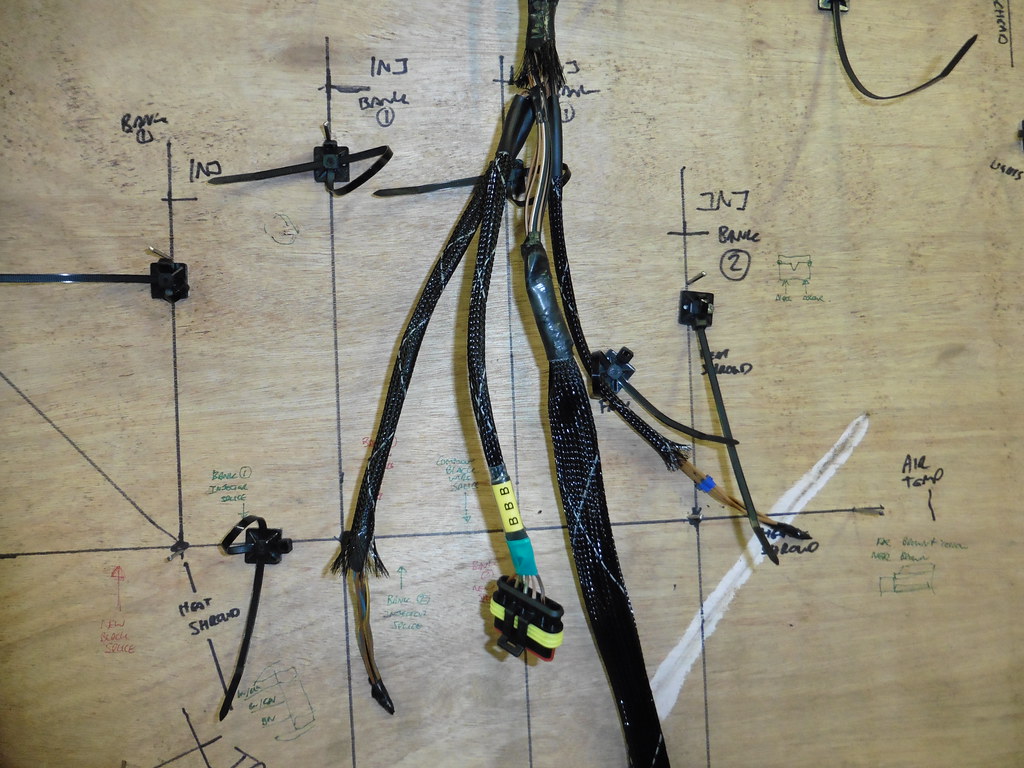 P1040076 P1040076 by jono_misfit, on Flickr and onto another conenctor 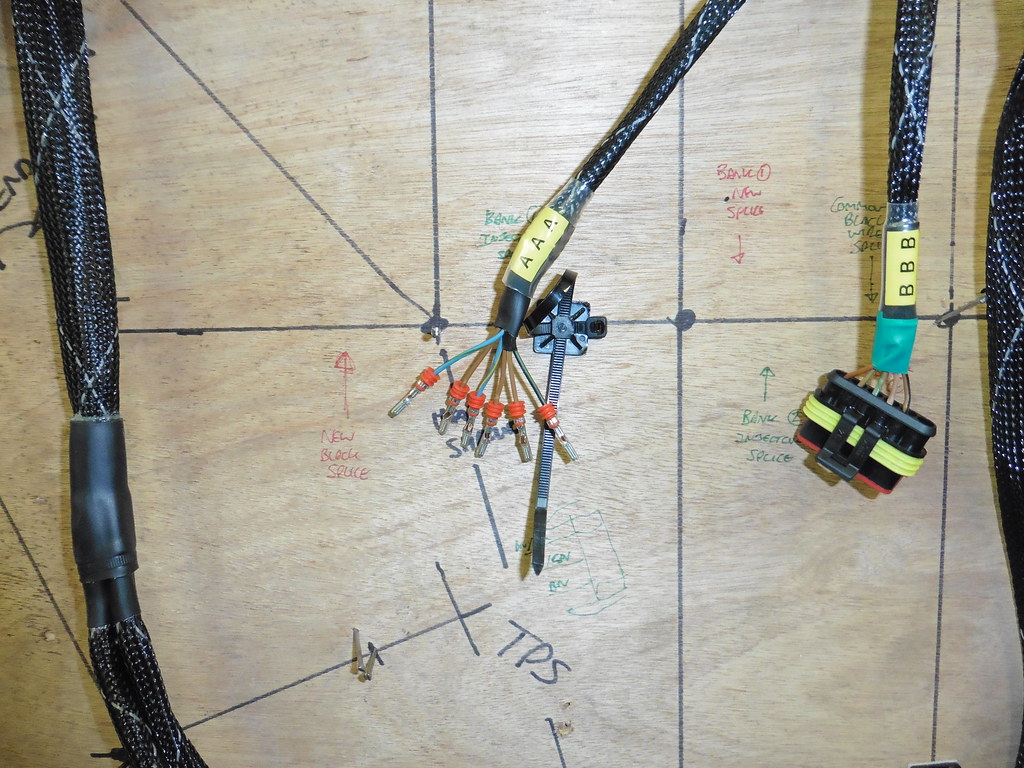 P1040077 P1040077 by jono_misfit, on Flickr all three complete and mated.  P1040078 P1040078 by jono_misfit, on Flickr A bit chunkier that the original connectors but should hopefulyl do the job. then on to this.  P1040079 P1040079 by jono_misfit, on Flickr applied a pen, some cutting and filing. and gave this Ignitiion, srart and hazard panel  P1040080 P1040080 by jono_misfit, on Flickr  P1040081 P1040081 by jono_misfit, on Flickr in good reach when belted up 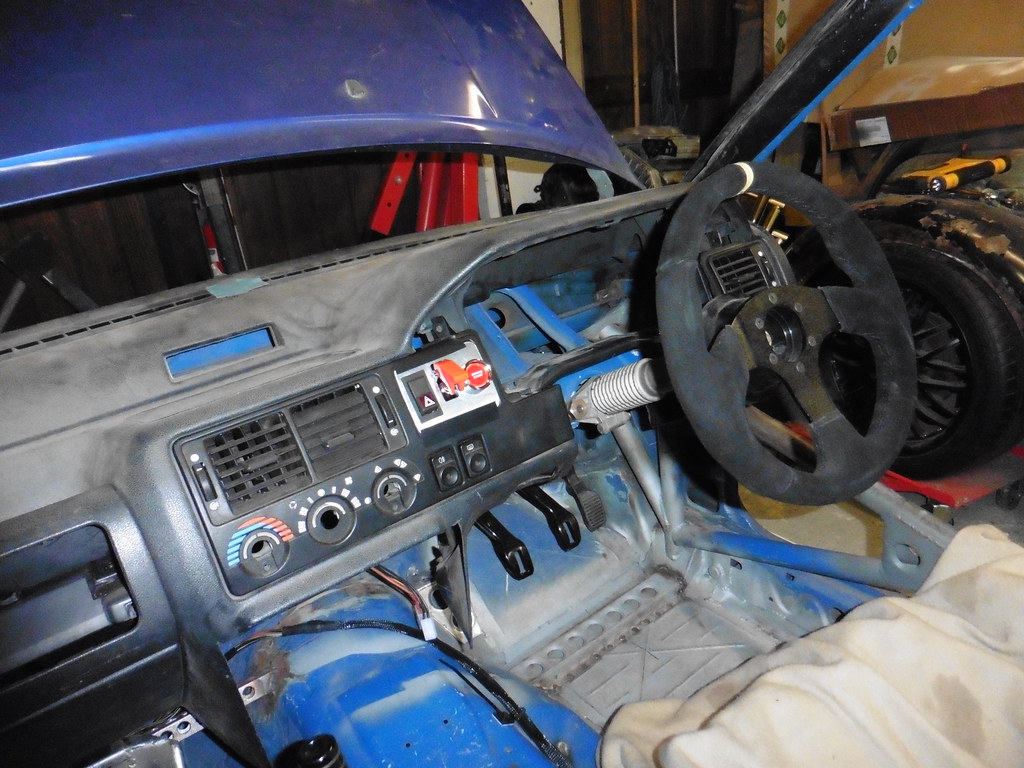 P1040082 P1040082 by jono_misfit, on Flickr Sunday will be starting the centre console. |
| |
Last Edit: Aug 21, 2020 19:46:50 GMT by jonomisfit
|
|
jonomisfit
Club Retro Rides Member
Posts: 1,787
Club RR Member Number: 49
|
|
Aug 23, 2020 19:48:55 GMT
|
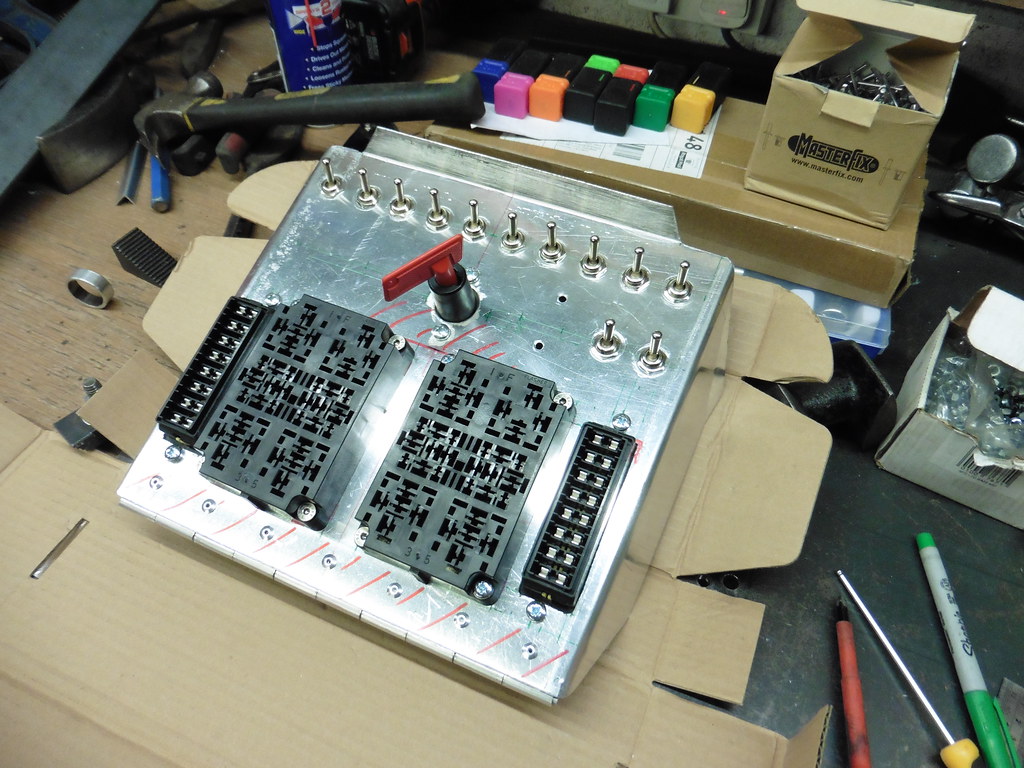
Mounting arrangements for the start panel  P1040083 P1040083 by jono_misfit, on Flickr folded up a piece of ali  P1040084 P1040084 by jono_misfit, on Flickr goes in here like so..  P1040085 P1040085 by jono_misfit, on Flickr wobbles are relief cuts for the nut on the start button and the hazard switch body drilled for riv nuts and two bolts  P1040086 P1040086 by jono_misfit, on Flickr top mounting done and addittional bolts in.  P1040087 P1040087 by jono_misfit, on Flickr in situ  P1040088 P1040088 by jono_misfit, on Flickr Bolts look huge, but they're only M5. Will probably buy some countersunk bolts and cups to use as the bolts. then on to the centre console. Measure, and cut some Ali sheet  P1040089 P1040089 by jono_misfit, on Flickr looking at it i'll tweak thte layout from the CAD model to this 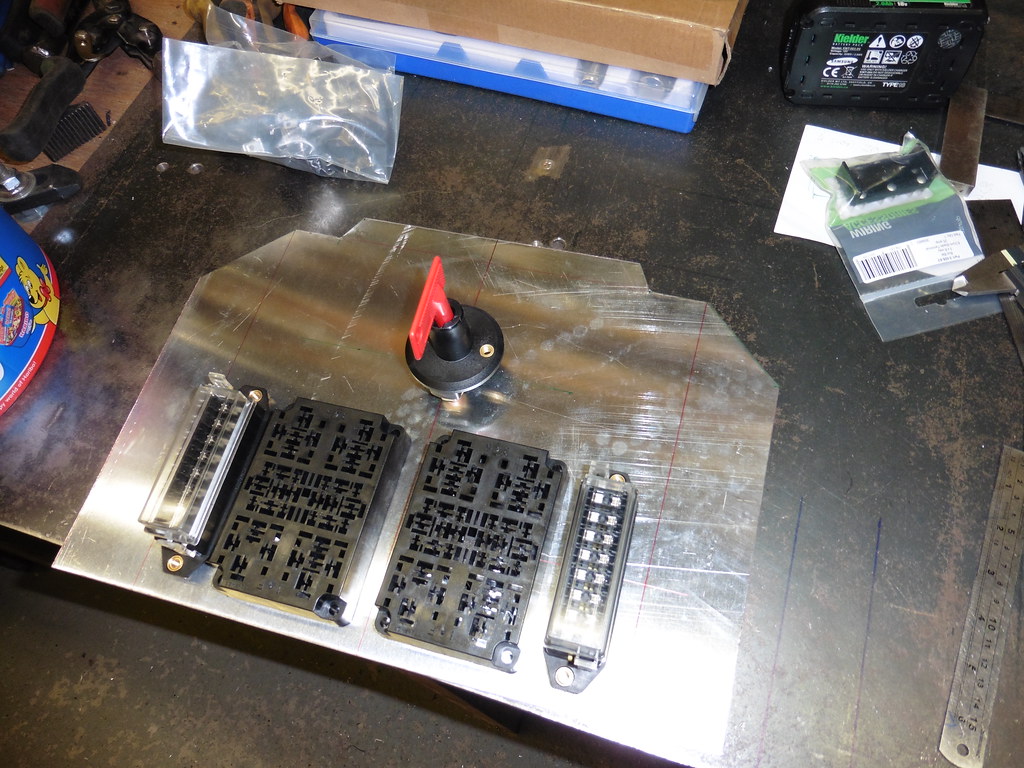 P1040090 P1040090 by jono_misfit, on Flickr  P1040091 P1040091 by jono_misfit, on Flickr mark out for the master switch and the row of toggles 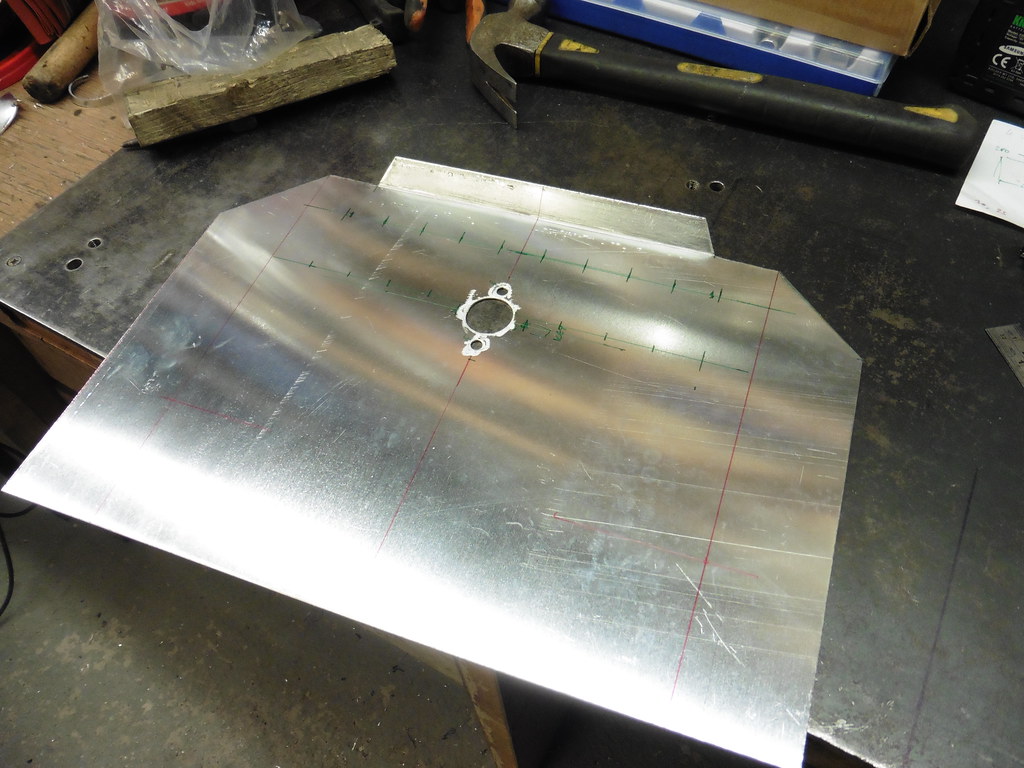 P1040092 P1040092 by jono_misfit, on Flickr holes drilled  P1040093 P1040093 by jono_misfit, on Flickr trial fit of the switches  P1040094 P1040094 by jono_misfit, on Flickr It'll be a fairly busy centre console  P1040095 P1040095 by jono_misfit, on Flickr fold the returns  P1040096 P1040096 by jono_misfit, on Flickr  P1040097 P1040097 by jono_misfit, on Flickr mark up the bottom mounting hinge  P1040098 P1040098 by jono_misfit, on Flickr rivet on 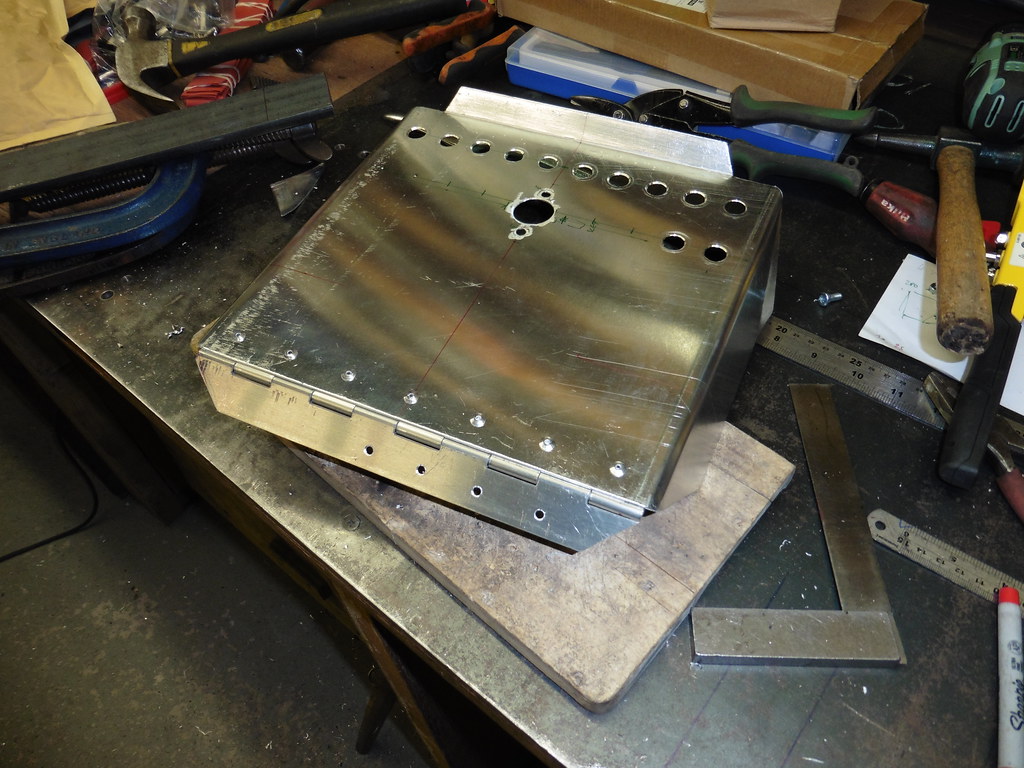 P1040099 P1040099 by jono_misfit, on Flickr check the layout / space  P1040100 P1040100 by jono_misfit, on Flickr It looks like the master switch / key wont clear the relay but it does. Ive also used the worst case relay (as its about 3x taller than normal). I don't actually need 12 relays, so the inner top two will likely be left empty at the moment. Bolted in relay mounts  P1040101 P1040101 by jono_misfit, on Flickr start marking out for the fuse panel  P1040102 P1040102 by jono_misfit, on Flickr it looks squint but there is a slight top to bottom taper to the console. cut a slot in the panel for the fuse box (which mounts up from underneath)  P1040103 P1040103 by jono_misfit, on Flickr the other side to do, then cut the access holes for the relay panel wiring. Its tight, but I think there's enought room to do decent cable management when connecting it all up. If not, i'll have to move on to centre console Mk3. |
| |
Last Edit: Aug 23, 2020 19:52:58 GMT by jonomisfit
|
|
|
|
|
|
|
All them holes and not a single one swaged!  |
| |
|
|
jonomisfit
Club Retro Rides Member
Posts: 1,787
Club RR Member Number: 49
|
|
|
|
|
I know. I was twitching a bit by the end.
|
| |
|
|
jonomisfit
Club Retro Rides Member
Posts: 1,787
Club RR Member Number: 49
|
|
Aug 28, 2020 18:54:35 GMT
|
|
|
| |
|
|
v8ian
Posted a lot
  
Posts: 3,831
|
|
Aug 28, 2020 19:18:15 GMT
|
|
don't forget, you cannot kill the engine and disconnect the alternator at the same time, at the same time as the alternator must have a load to use before it stops, otherwise you can fry the rectifier
|
| |
Atmo V8 Power . No slicks , No gas + No bits missing . Doing it in style.
Austin A35van, very different------- but still doing it in style, going to be a funmoble
|
|
jonomisfit
Club Retro Rides Member
Posts: 1,787
Club RR Member Number: 49
|
|
Aug 28, 2020 19:48:41 GMT
|
|
Thanks. Something I found out the hard / expensive way on a rally car.
There is an ignition switch that will be used to kill everything, then the isolator to disconnect it all.
There is an ignition line to the ECU (and the injectors are fed by an ignition driven relay with the ECU switching the earths), and drop off of ignition signal will cause the ECU to stop the engine / isolate the injector feed.
But i will need to ensure noone else trys to stop the car on the Isolation switch!
|
| |
|
|
v8ian
Posted a lot
  
Posts: 3,831
|
|
Aug 28, 2020 19:58:52 GMT
|
|
Yep, I killed 2 brise Alternators the expensive way the first one I returned as faulty, the 2nd, I realised I had a problem, and looked into the fault,
|
| |
Atmo V8 Power . No slicks , No gas + No bits missing . Doing it in style.
Austin A35van, very different------- but still doing it in style, going to be a funmoble
|
|
thomfr
Part of things
  Trying to assemble the Duett again..
Posts: 688
|
|
Aug 28, 2020 20:09:41 GMT
|
|
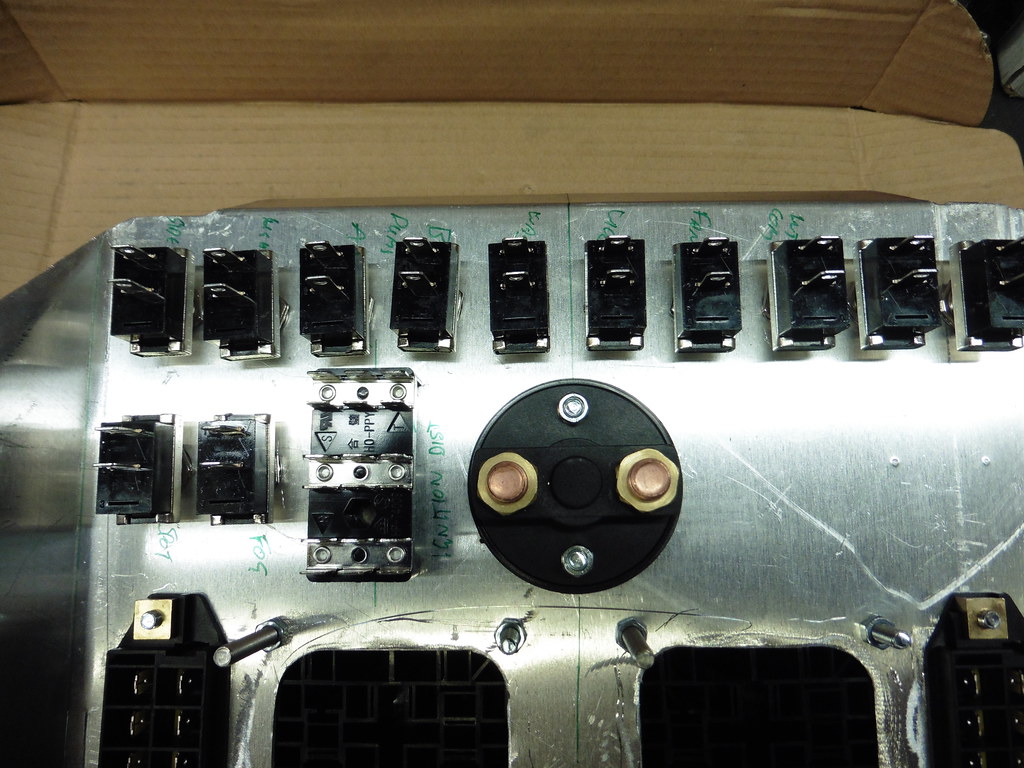
Why do you use the simple colored connectors behind the switches? You did a great job on the whole wiring etc. but these are (compared to their "naked" sisters) far worse. Would reconsider.
Thom
|
| |
73' Alfa Giulia Super
64' Volvo Duett
65' Volvo Duett
67' Volvo Amazon 123GT
09' Ford Focus 1.8
20' VW ID4
71' Benelli Motorella
65' Cyrus Speciaal
The difference between men and boys is the price of their toys
|
|
jonomisfit
Club Retro Rides Member
Posts: 1,787
Club RR Member Number: 49
|
|
Aug 28, 2020 20:59:57 GMT
|
|
Thanks.
Is it the latch onto the cable sheath / insulation that your refering to? As in these use the plastic to latch and the un-insulated / naked terminals use the metal fingers?
Is so you've probably got a point. I just used what I had to hand.
Will have a look over this next time and see what other terminals I have.
|
| |
|
|
thomfr
Part of things
  Trying to assemble the Duett again..
Posts: 688
|
|
|
|
Hi, Yes indeed. If you briefly dip the cable in Vaseline and crimp them correctly then it should be fine for a lot of years. Thom 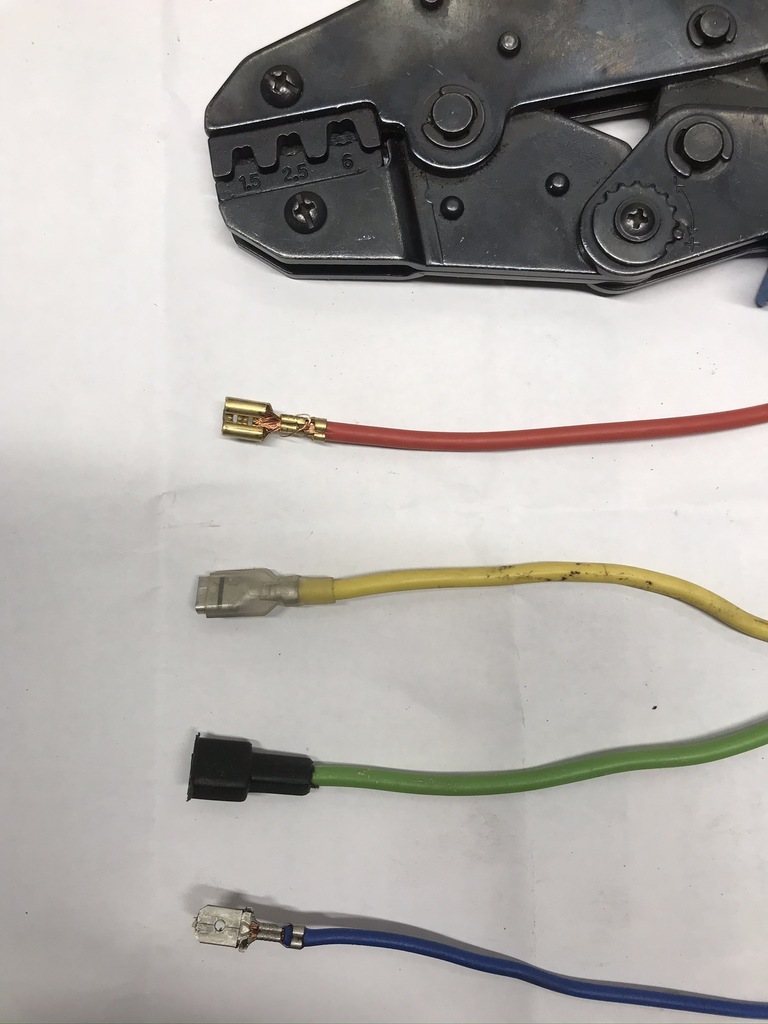 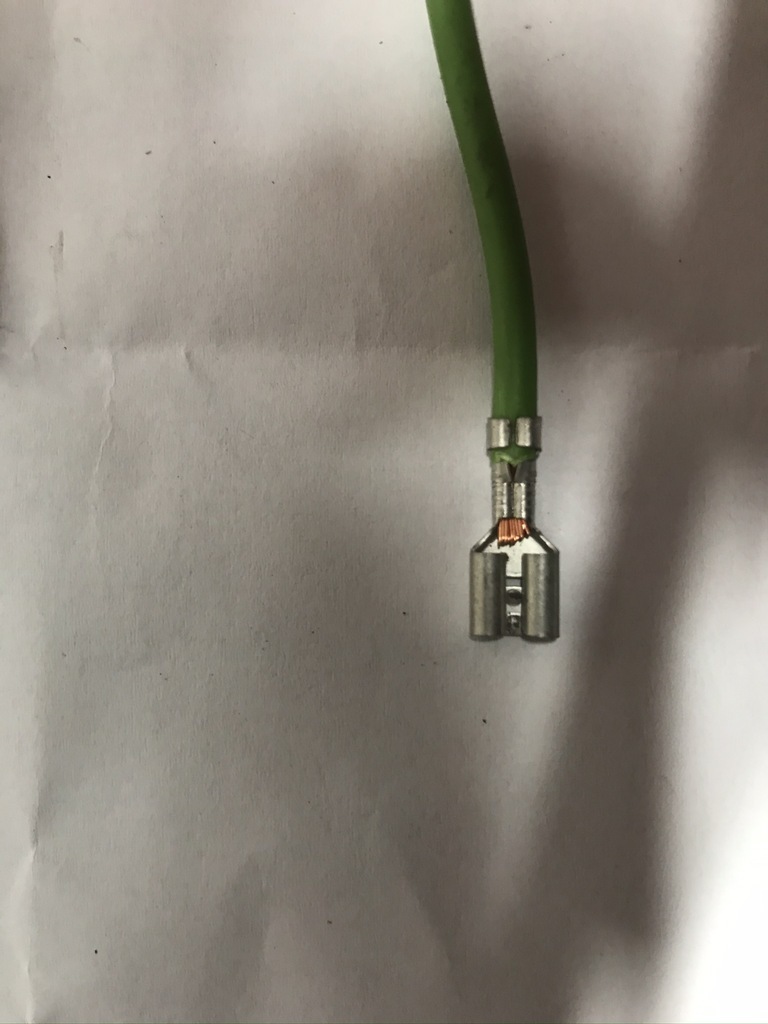 (Picked a few examples) |
| |
Last Edit: Aug 29, 2020 10:00:47 GMT by thomfr
73' Alfa Giulia Super
64' Volvo Duett
65' Volvo Duett
67' Volvo Amazon 123GT
09' Ford Focus 1.8
20' VW ID4
71' Benelli Motorella
65' Cyrus Speciaal
The difference between men and boys is the price of their toys
|
|
jonomisfit
Club Retro Rides Member
Posts: 1,787
Club RR Member Number: 49
|
|
Aug 30, 2020 17:37:20 GMT
|
I went through my box of bits and turned out I have a number of uninsulated crimps already (although I have ordered more as I needs quite a few) Began re-making the last bit I had done.  P1040112 P1040112 by jono_misfit, on Flickr  P1040113 P1040113 by jono_misfit, on Flickr starting to get busy  P1040114 P1040114 by jono_misfit, on Flickr  P1040115 P1040115 by jono_misfit, on Flickr start on the live feeds  P1040116 P1040116 by jono_misfit, on Flickr  P1040117 P1040117 by jono_misfit, on Flickr a couple of heavier duty ones  P1040118 P1040118 by jono_misfit, on Flickr  P1040119 P1040119 by jono_misfit, on Flickr and at this point, ran out of crimps... Found some rubber strip to act as an adaptor for the column switches  P1040120 P1040120 by jono_misfit, on Flickr Then looked for another job to do. Decided on routing of the fuel hoses. Need the bulkhead adaptors in first.  P1040121 P1040121 by jono_misfit, on Flickr As you can see on this pic I've moved them upward and inward compared to the existing holes. They struck me as being a bit too vulnerable to doing anything in the engine bay where they were. Plus they are too tight to the chassis leg meaning you cant fit them stright....  P1040122 P1040122 by jono_misfit, on Flickr I also dropped the heater ,matrix / manifold in, as I suddenly thought. Will it all fit....  P1040123 P1040123 by jono_misfit, on Flickr End of the weekend. |
| |
Last Edit: Aug 30, 2020 17:51:13 GMT by jonomisfit
|
|
jonomisfit
Club Retro Rides Member
Posts: 1,787
Club RR Member Number: 49
|
|
Aug 31, 2020 17:25:02 GMT
|
I continued other fettling whilst awaiting bits to turn up Drilled some holes in the fuel tank box  P1040124 P1040124 by jono_misfit, on Flickr Fitted some fittings  P1040125 P1040125 by jono_misfit, on Flickr ran the hose in to check for clearance / routing  P1040126 P1040126 by jono_misfit, on Flickr 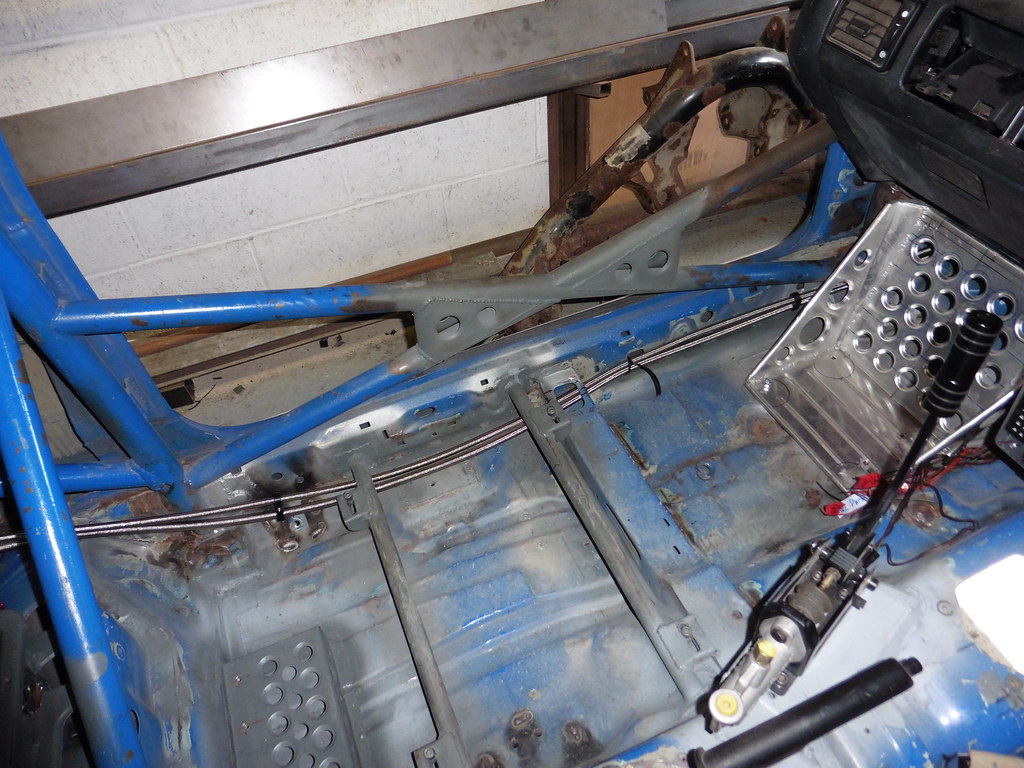 P1040127 P1040127 by jono_misfit, on Flickr I'm going to tweak the route to go over the top of the rear seat mount bar, as otherwise it'll end up tight to the eye bolt put all the dash etc. back in and tried out the centre console.  P1040128 P1040128 by jono_misfit, on Flickr which showed up an issue. With the routing of the top cables into the switch terminals, the cable loops stick up slightly to far causing a clash.  P1040130 P1040130 by jono_misfit, on Flickr I don't want to try bending the cables further as they are already tighter than i'd like, i don't want to bend the terminals, so i turned the switches round. Which likely means they are up to turn on, but thats not an issue.  P1040131 P1040131 by jono_misfit, on Flickr After this I tweaked it and changed the connections to the other terminal, as these were putting too much tension on the cables. whilst i was here I drilled the bolt holes.  P1040132 P1040132 by jono_misfit, on Flickr back in and all fits perfectly. 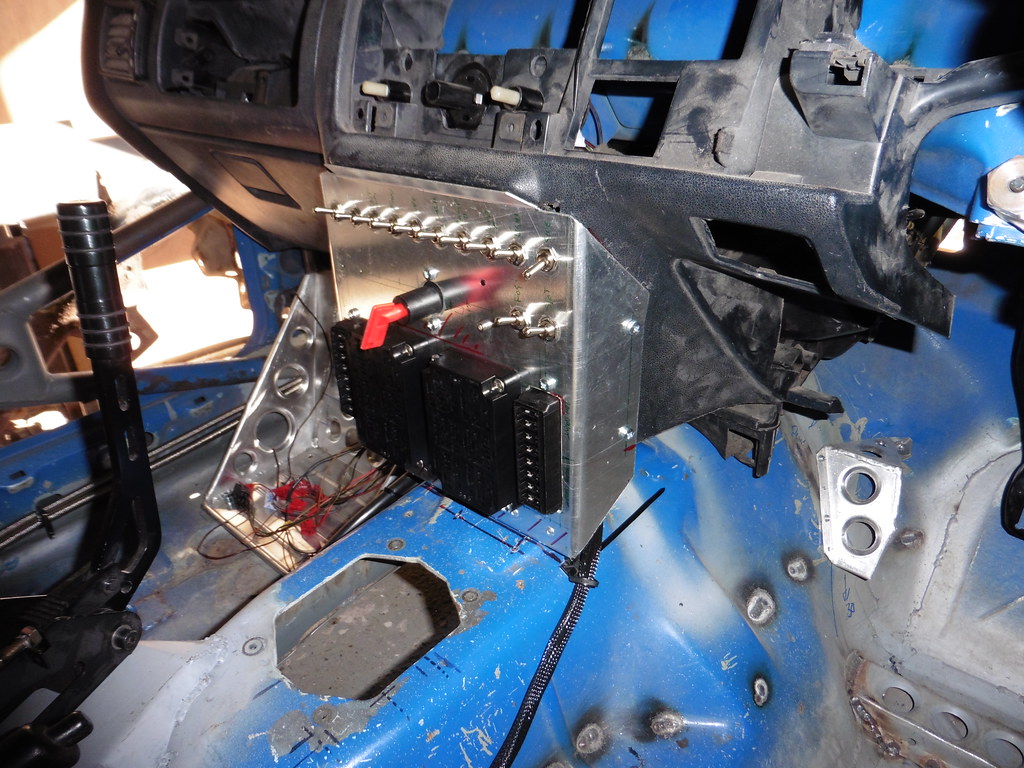 P1040133 P1040133 by jono_misfit, on Flickr Temporary bolted solid, but i've ordered some spire/chimney nuts as the first option, otherwise i'll fit rivnuts. I'm going to try the spire nuts first as I wouldnt like to crack the plastic. Tried out some battery cable routing.... I may have spare.... and have sized on the side of caution... 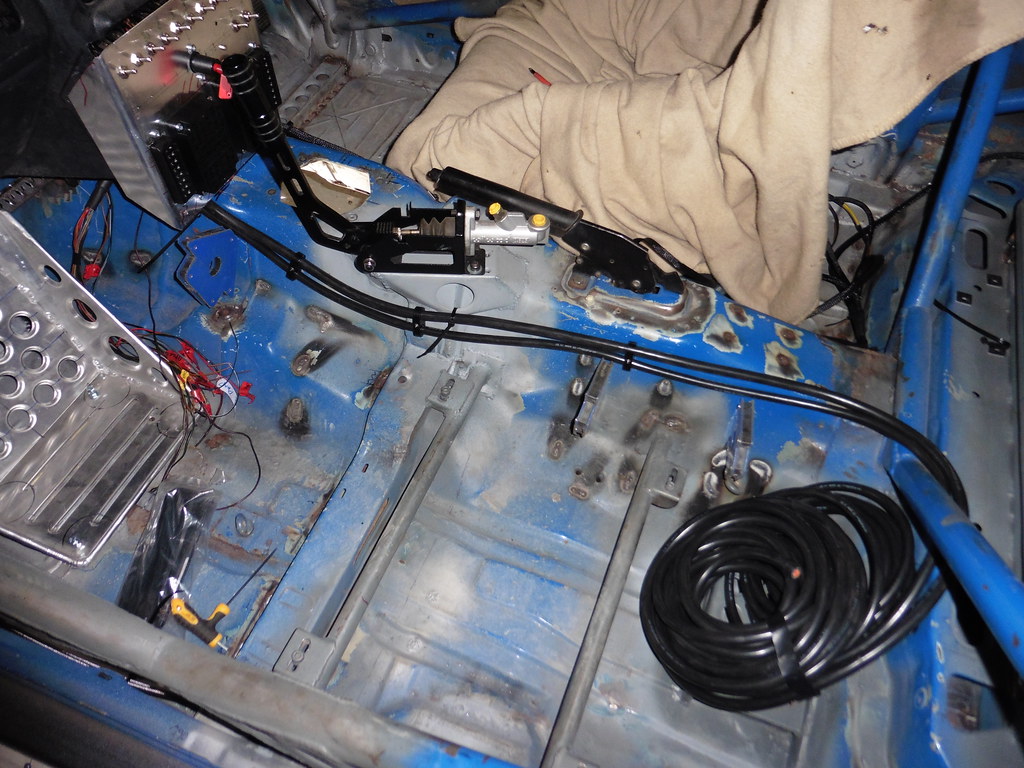 P1040129 P1040129 by jono_misfit, on Flickr Its plenty flexible enought. swapped the seat to the passenger side to check clearances of seat to cables / pipework but there is loads of space. I just need to move the seat back one notch on the rails. 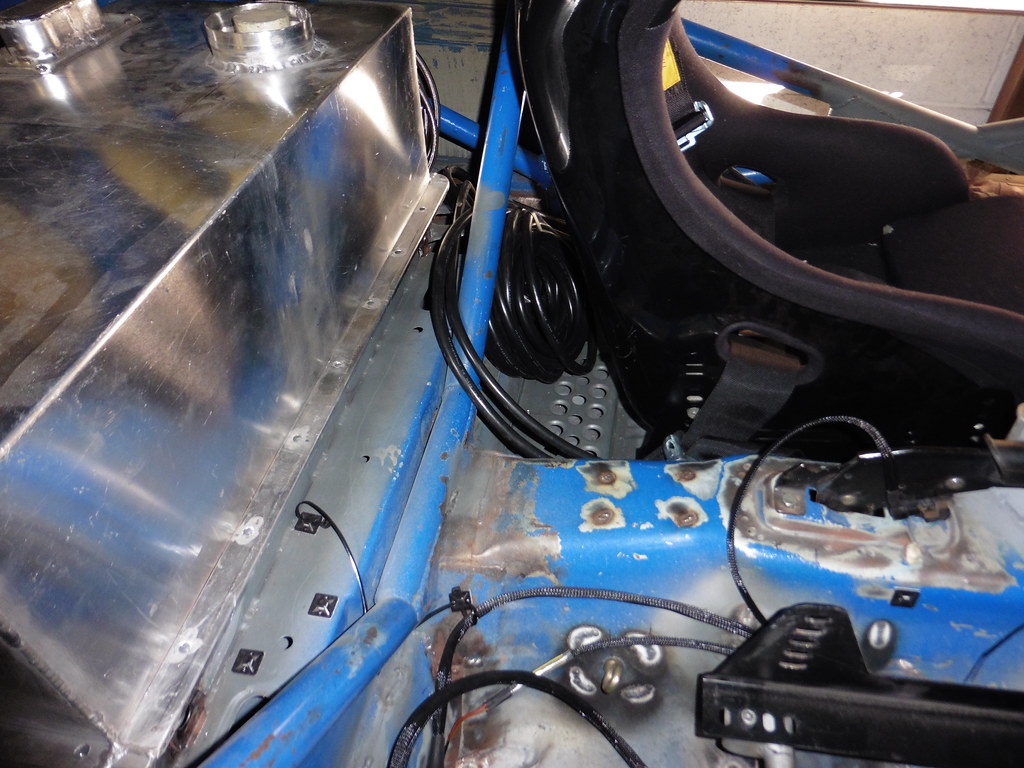 P1040135 P1040135 by jono_misfit, on Flickr I took the opportunity to check out you can operate all the buttons whilst strapped into the co-driver seat. The only thing that ist accessible is the start button. You can reach everything else without issue. I'll make a little panel for the passenger airbag space for the nav computer and some other features. I also wanted to check that with the passenger seat in and harness in place, there was enough space for the fuel filler routing. Which there is. I just need to kick out to the side of the car first before going up to the rear side window.  P1040134 P1040134 by jono_misfit, on Flickr I have a couple of days off this week, but I mainly need to get some things finished round the house and garden, so no car things for a bit. |
| |
Last Edit: Aug 31, 2020 17:27:47 GMT by jonomisfit
|
|
|
|
|
|
|
Lucky you don't need to round all those switches off for a BIVA! Looking good  |
| |
|
|
jonomisfit
Club Retro Rides Member
Posts: 1,787
Club RR Member Number: 49
|
|
Sept 6, 2020 19:18:53 GMT
|
It was a short day today, as like much of my week off its been spent on house type things... Some bits turned up. Spire / chimney nuts for the centre console. 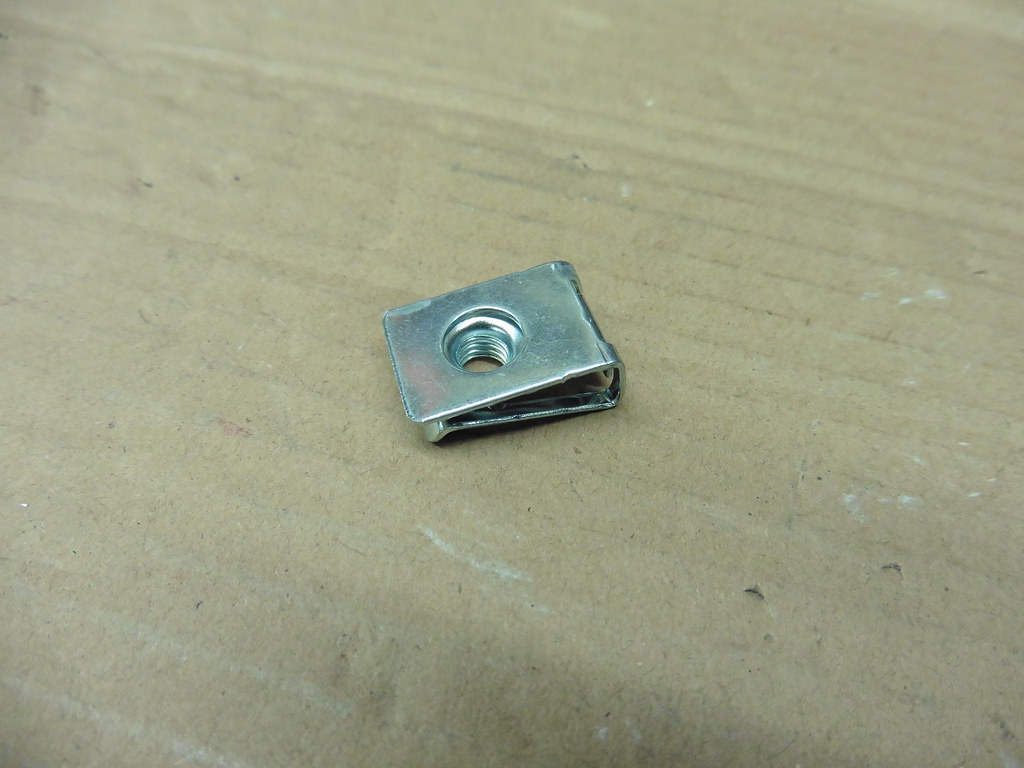 P1040138 P1040138 by jono_misfit, on Flickr  P1040139 P1040139 by jono_misfit, on Flickr go on here like so.  P1040136 P1040136 by jono_misfit, on Flickr Edge will be cleaned up once i'm happy this all works ok. Centre console suts like so.  P1040137 P1040137 by jono_misfit, on Flickr I've decided to terminate all the cables onto / off-of the centre console onto connectors to make everything fairly modular to do. This will also mean its easier dealing with the loom should I want to make changes at a later point. So with that in mind I made a start on the column switches to centre console link. cut some cable and mark up the cores with different colours  P1040140 P1040140 by jono_misfit, on Flickr twist the cores into a bunch  P1040141 P1040141 by jono_misfit, on Flickr Why twist? because it makes drape better / easier to bend round corners. Motorsport harnesses are all done this way (albeit better than I have done) called "concentric twisting". crimp the ends  P1040142 P1040142 by jono_misfit, on Flickr into the connector  P1040143 P1040143 by jono_misfit, on Flickr braid applied  P1040144 P1040144 by jono_misfit, on Flickr conection card added to it for when I make up the receptacle.  P1040145 P1040145 by jono_misfit, on Flickr  P1040146 P1040146 by jono_misfit, on Flickr then started doinn the same for the start panel  P1040147 P1040147 by jono_misfit, on Flickr including working out what wire does what as there was no wiring diagram provided.  P1040148 P1040148 by jono_misfit, on Flickr and the internal blower wiring as well.  P1040149 P1040149 by jono_misfit, on Flickr Will see what I get up to next weekend. |
| |
|
|


