|
|
|
|
|
The wood at the top of the rear doors aperture looks very the worse for wear. Will you replace it? No - it's a structurally sound section with some superficial loss of the outer face - this has had a resin wood hardener injected into it and then the rough outer face made good / levelled up with a skim of polyester filler - the section is strengthened on the inside face with factory fitted steel bracing - when finished with the fabric roof fitted and then the roof rain gutter which travels across the top of the rear doors very little of the section is visible at all - not that this matters - it's more about the strength that it retains - this is a restoration being undertaken to a sensible budget in order to return the van to the road in a sound / safe / practical & usable condition - had the restoration been to a concours standard the body would have come off the chassis and all the ash framing replaced with new, along with new alloy panels - in fact new most things really - however there is crossover here about being sensible with the budget and conserving / preserving the van rather than writing a cheque out for a £40k concours restoration on a van that is only worth £15k when completed regardless of how much has been spent on it or how it good is. Sensible really. The 40k build will never be as characterful as the reasonable restoration,anyway. |
| |
|
|
|
|
|
|
|
|
|
|
really enjoying this thread, just a quick question though, what are the diagonal lines that you draw over the doors for?
|
| |
|
|
|
|
|
|
|
|
lovely job so far , if am filling large panel i to mark high lows etc with pencil, skim up and use a number plate to run up the panel .this finds it own level taking of filler sitting high , the filler that comes of is filled into the low spots , and run with number plate again till i get it as straight as i can , little coat of mat spray , to show up low spots , i find it cuts down the amount of wasted filler
|
| |
|
|
|
|
|
|
|
lovely job so far , if am filling large panel i to mark high lows etc with pencil, skim up and use a number plate to run up the panel .this finds it own level taking of filler sitting high , the filler that comes of is filled into the low spots , and run with number plate again till i get it as straight as i can , little coat of mat spray , to show up low spots , i find it cuts down the amount of wasted filler Yep - I use the same process / technique but have a strip of stainless steel instead of a number plate - the use of a perspex number plate is a great tip for other forum users though  |
| |
Last Edit: Jan 7, 2018 20:50:56 GMT by Deleted
|
|
|
|
|
|
|
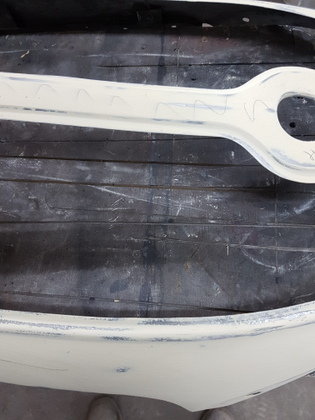
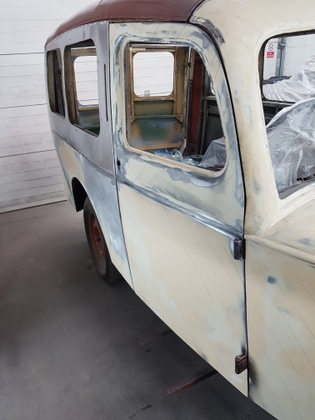
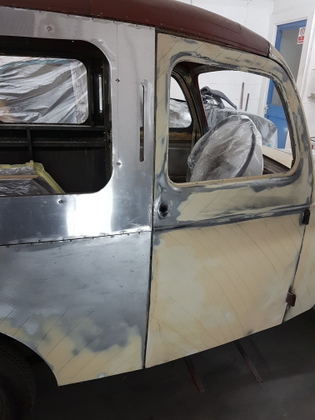
really enjoying this thread, just a quick question though, what are the diagonal lines that you draw over the doors for? Jan 4, 2018 at 12:32am tristanh said: May I ask the purpose of the black lines drawn across the panels being prepped? Please. Absolutely - So it's a working technique taught to me by a very wise & thorough old school chap that I was apprenticed to 40 years ago - when working large areas of skimmed filler / complex panels / multiple panels / bodyshells etc - It becomes all too easy to loose your way has to what areas are completed / part worked / require further work / skimming etc - During the filling process your hand is the main detector of low / high spots / defects / areas that require further working etc - sight is also used along with guide coats - most people will mix a batch of filler up and then just before application will use said hand to reassess the areas on the panel has to how much filler is required / location on the panel etc - With my method of working I assess the panel first then mark out the areas with pencil prior to mixing enabling the filler to go straight on (remember that you have a product that is now starting to cure since you mixed it - if you have several areas to address you may find the filler has cured before you have had the chance to apply it has you work around the panel - especially in summer months) Ideally you need a process that allows you the time to apply the filler quickly & easily but one that allows you the time to apply it neatly & smoothly - the rougher the application - the more wasted filler / abrasive / time spent in getting it profiled correctly - so that's the first part. Second part - when you have a lot of profiling to do - it's a laborious, intensively mind numbing process - it's easy to loose your way when working multiple panels - apply paint over poorly worked areas / panels and it will look dreadful regardless of how good / shiny the paint is - once I have a panel complete I drag pencil lines diagonally down it - when working around a complete car with a process has boring has this it's important that you have something that motivates the process - the more panels you have pencilled out the further on you are - it's good for focusing on what needs to be done / completed and from here you can target your days work to completion - critical when you have acres of profiling day after day after day to get done - with some large panels taking several skims before you achieve the correct results. You won't see this process in most bodyshops / vehicle restorers - it's a system that works for me - and the guy that taught me - it gave him a immediate picture of the progress on the restoration - along with the client and anyone else that visited the workshop / viewed the work. Most restorers / bodyshops will just roll their eyes into the back of their heads if I explained the process to them - but again it's what achieves the right results for me and is critical in a market where many, many others fundamentally judge on a 10 second glance of a completed vehicle restoration. |
| |
|
|
|
|
|
|
|
No - it's a structurally sound section with some superficial loss of the outer face - this has had a resin wood hardener injected into it and then the rough outer face made good / levelled up with a skim of polyester filler - the section is strengthened on the inside face with factory fitted steel bracing - when finished with the fabric roof fitted and then the roof rain gutter which travels across the top of the rear doors very little of the section is visible at all - not that this matters - it's more about the strength that it retains - this is a restoration being undertaken to a sensible budget in order to return the van to the road in a sound / safe / practical & usable condition - had the restoration been to a concours standard the body would have come off the chassis and all the ash framing replaced with new, along with new alloy panels - in fact new most things really - however there is crossover here about being sensible with the budget and conserving / preserving the van rather than writing a cheque out for a £40k concours restoration on a van that is only worth £15k when completed regardless of how much has been spent on it or how it good is. That's really the rub with all of these things isn't it. Take a £5k vehicle, spend £20k on restoration to transform it into a £10k vehicle. I find that's generally the tricky issue with even my own humble dabblings on very cheap unremarkable old cars. I bought my Scim for peanuts really, and for peanuts I got a very compromised and faulty vehicle. Just to have a car that I can depend on to start up, drive safely, and be good for the task I demand of it, it has probably cost me about £2k over two years so far, as a pure guess. And none of that has actually improved the look of the thing much so much as I've visually tuned it a little more closely to my own personal tastes in ways that could be fully reversible if somebody ever did want to do a proper resto on it. So for someone to persuade me to sell it now, the price would need to be far beyond what a buyer would anticipate paying for it. Given that my next step with this car is going to be cosmetics, and trying to give it a more respectable albeit non-standard/authentic interior (alongside addressing anything else that may arise along the way), I guess I'll spend another £1k on tidying in 2018. Once done, this car's major achilles heel is going to be the home-brew paint job it wears, because no amount of love will ever overcome the fact that it's not great paint job. The bodywork is sufficiently gnarled in various places that nothing short of a full body-off strip down and surface restoration, followed by a professional respray, will ever lift this car backup to anything considered decent by classic car enthusiasts. That would probably cost £4k-£5k if I was lucky. So to commit to this car in any meaningful way would mean I could end up spending £10-12k on a car that in pristine condition and presentation is capped by market valuations at about £5k if you're lucky. If the wood is original, and can be saved and kept as part of the vehicle, I personally think that's more interesting that taking it out and replacing it with modern wood which by all accounts is never as durable as the stuff they used to build these things with. I'd be more interested in this knowing it was original (or at least 'old') wood saved and kept in service for a while longer. That to me feels like the more desirable restoration approach. more cost effective, yet more valuable. |
| |
Last Edit: Jan 8, 2018 11:36:03 GMT by Deleted
|
|
|
|
|
|
|
Take a £5k vehicle, spend £20k on restoration to transform it into a £10k vehicle. welcome to the world of 1980s vauxhalls  we cant afford to sell them |
| |
|
|
Davey
Posted a lot
   Resident Tyre Nerd.
Posts: 2,348
|
|
|
|
You may have been asked this before and i'm sure its probably a vague question but what kind of man hours do you expect this will have put into it? Its clearly a very thorough and very very in depth process. Thanks - I think it's going to end up somewhere in the 500 hours region - bear in mind that's just panel & paint & trim - maybe a couple of hours on the odd mechanical bit - I always undertake my work on the basis that I am only has good has my last job so I'm not really into rushing the process - never have been and never will be has any shortcuts taken will without fail come back & haunt me - being a sole trading business I just can't afford to put myself into that position - for wants of a better expression 'it takes what it takes'  Thats very enlightening i'm sure to many people! People wonder why good restoration costs what it does. 500 man hours even at a very low hourly rate is still going to be a fair amount of money! No wonder many people run a mile! So much admiration for the commitment you have. |
| |
Last Edit: Jan 8, 2018 13:12:25 GMT by Davey
K11 Micra x3 - Mk3 astra - Seat Marbella - Mk6 Escort estate - B5 Passat - Alfa 156 estate - E36 compact
Mk2 MR2 T-bar - E46 328i - Skoda Superb - Fiat seicento - 6n2 Polo - 6n polo 1.6 - Mk1 GS300
EU8 civic type S - MG ZT cdti - R56 MINI Cooper S - Audi A3 8p - Jaguar XF (X250) - FN2 Civic Type R - Mk2 2.0i Ford Focus - Mercedes W212 E250
|
|
|
|
|
|
|
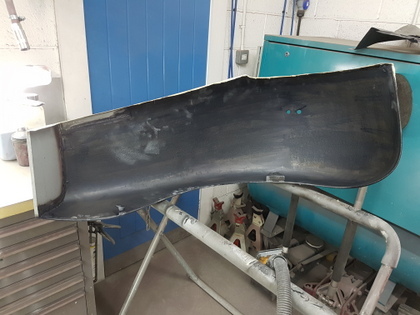
Profiles on the offside front door are now completed 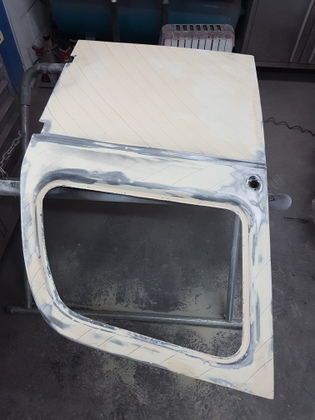 Started to progress the prep on the loose panels / inner wing / splash panels with a rust treatment - although all of the loose panels have been blasted they were all heavily pitted and you just cannot keep blasting the deep pits otherwise you would end up by thinning /holing the metal in the blasting process to the point that the panels become useless 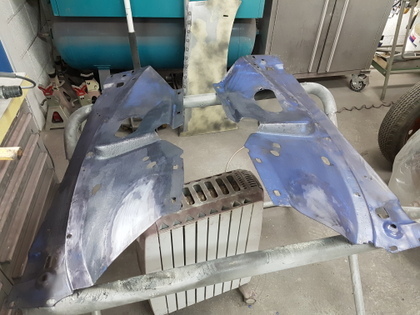 Then did the wing / headlamp brackets 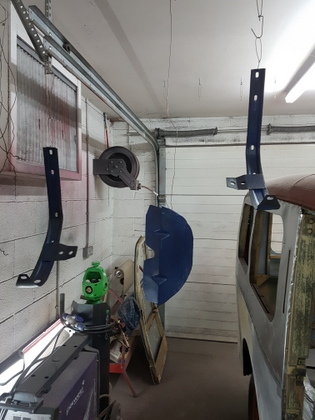 The bonnet side panel profiles are well advanced - taking care here not to loose too much of the original detail - the panels are dimpled / rippled on the top edge by the hinge where the rivets are pulled in which I am trying to retain - same goes for the bonnet catches - the panel is pulled in by the catch - should I attempt to profile what are factory original panel deviations - then the van would look quite false in detail - but it's a fine line between what would look right or wrong when the van is painted 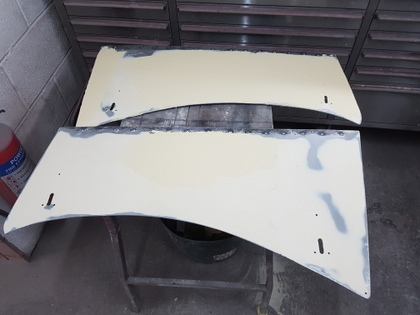 There is a alloy trim that covers the A post / door aperture that requires fitting - I will have to redrill the screw holes in the frame to attach it 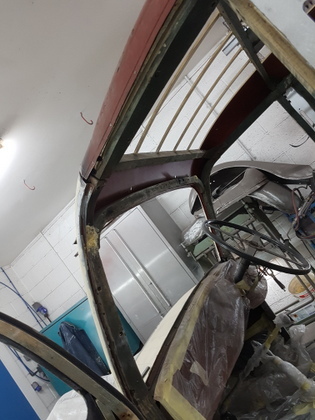 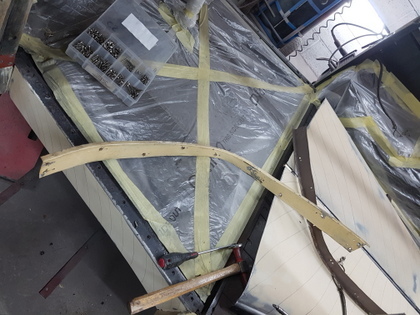 But now getting to the end of the profiling / shaping work on the main body - I still have the wings & radiator cowl to undertake but we are now striking the days off the calendar before the paint starts to get applied |
| |
|
|
|
|
|
|
|
lovely job so far , if am filling large panel i to mark high lows etc with pencil, skim up and use a number plate to run up the panel .this finds it own level taking of filler sitting high , the filler that comes of is filled into the low spots , and run with number plate again till i get it as straight as i can , little coat of mat spray , to show up low spots , i find it cuts down the amount of wasted filler Yep - I use the same process / technique but have a strip of stainless steel instead of a number plate - the use of a perspex number plate is a great tip for other forum users though  its excellent on curved panels too  |
| |
|
|
|
|
Frankenhealey
Club Retro Rides Member
And I looked, and behold, a pale horse! And its rider's name was Death
Posts: 3,885
Club RR Member Number: 15
|
|
|
|
Would the owner allow you to bring it to the RR Weekender so we could all see it in the flesh and marvel at your skills  |
| |
Tales of the Volcano Lair hereFrankenBug - Vulcan Power hereThe Frankenhealey here |
|
|
|
|
|
|
Would the owner allow you to bring it to the RR Weekender so we could all see it in the flesh and marvel at your skills  Good idea that man - Possibly for the Bradford I will have to ask the owner or maybe the maroon Jupiter that I did last year - the engine build on that is just being completed by the owner so that should be back on the road and the Javelin that I completed last year is also with me then (currently with the owner in Switzerland but is coming to the UK for a couple of months and being left with me in between events) |
| |
|
|
|
|
|
|
|
|
always a pleasure to read through the updates. looking good!
JP
|
| |
I know its spelled Norman Luxury Yacht, but its pronounced Throat Wobbler Mangrove!
|
|
|
|
|
|
|
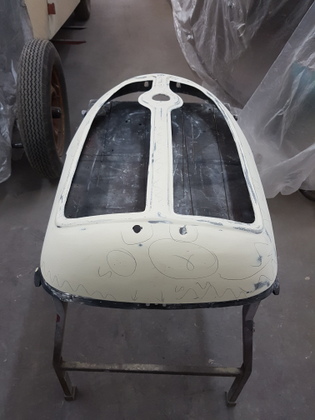
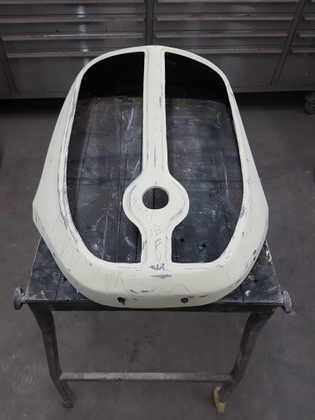
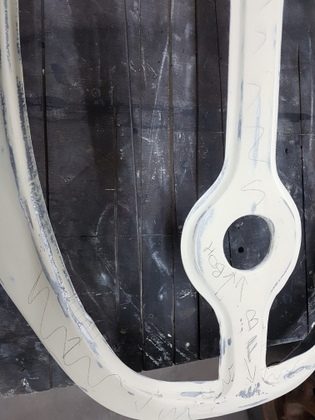
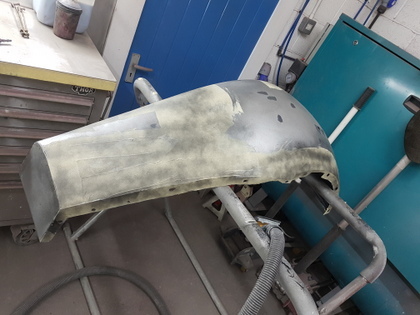
Bit more progress 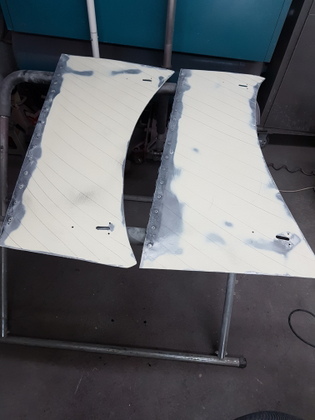 Profiles for the bonnet side panels were completed so that's all the panels for the main body completed that are being painted in maroon 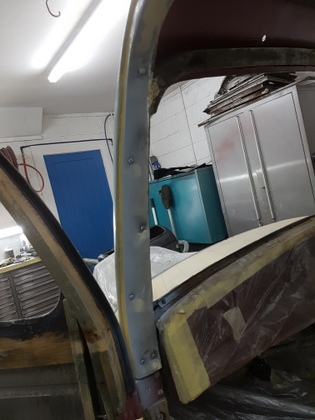 Fitted the nearside A post door aperture panel - sealed in the flange to prevent water ingress and just minor profiling around the areas where it had seen use over it's lifetime and become slightly misaligned 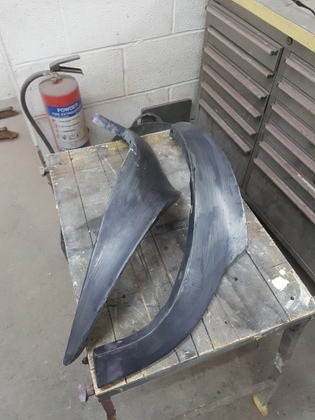 Now on with the loose / bolt on panels - rust treatment first with the profiling following - I shall undertake the initial profiling with the panel off the van then has I get close I will refit the panel to ensure correct profiling alignment prior to paint 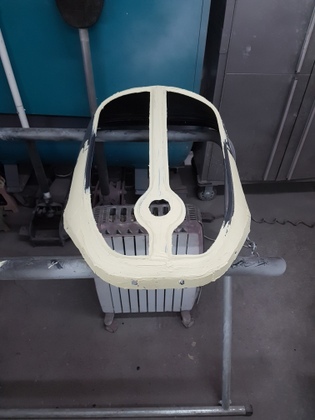 Radiator cowl with it's first profiling skimming - this is painted black in contrast to the maroon bonnet that it supports - Chrome radiator cowls were fitted to the much rarer 'Deluxe' variant of the 'Utility' model Meanwhile on the main body - just checking door fits / catches / locking operation etc and any other thing that needs to be addressed prior to paint - it might be hidden away in a door aperture and not seen until the door opens - in fact it would not bother most people - but it would bother me - so I always check to ensure that it's sorted before the paint goes on! |
| |
Last Edit: Jan 10, 2018 7:52:45 GMT by Deleted
|
|
|
|
|
|
|
|
OCD is an honorable trate in a good body & paint person.
|
| |
|
|
|
|
|
Jan 10, 2018 10:45:31 GMT
|
OCD is an honorable trate in a good body & paint person. And maybe a brain surgeon? 😊 |
| |
|
|
|
|
|
Jan 11, 2018 23:05:38 GMT
|
SWMBO has had a good attempt at giving me her lurge that she had so only half a day on the Bradford today before I felt dreadful and called it a day (very unlike me) 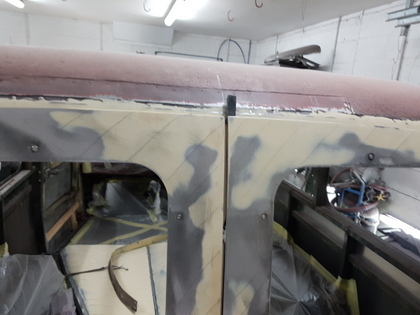 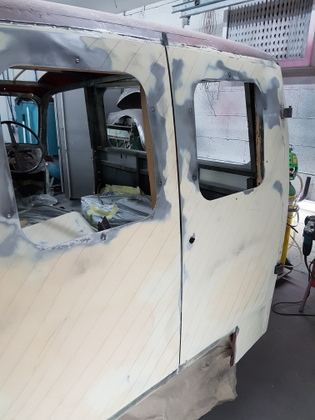 Rear door adjustments / aperture gapping 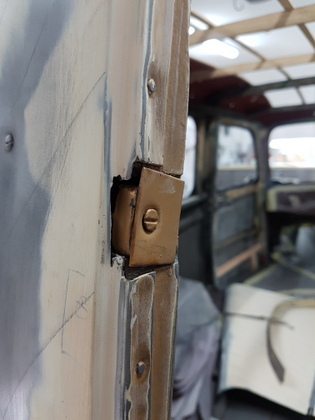 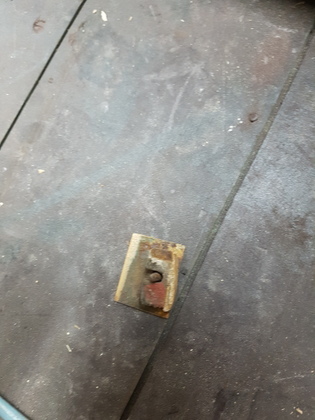 The left hand door used to rely on these bits of rubber buffer retained by a plate - but they are next to useless 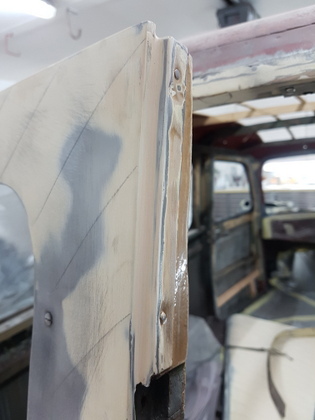 Plan is to place a rubber seal (glue on type) on the left doors rebate to contact & seal with the right hand door edge lip - not original equipment - but something that is practical and does the job and that 99.9% of people viewing the van would be unaware of 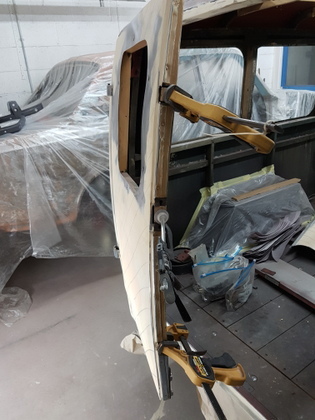 Made some hardwood blocks up and glued them in to rebates on the ash door frame that were left by deleting the old buffers - these I shall profile up so that they are not seen once the door is painted 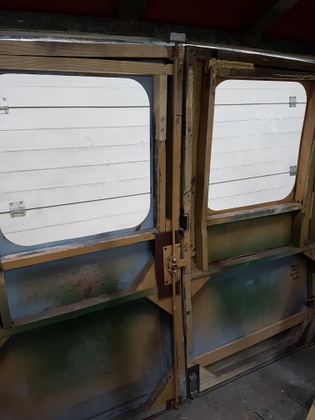 Slight adjustment on the door locking bars to gain a better fit but it's all or nothing has the doors overlap on the vans body - hence obtain too good a fit and not allow for paint depth and then the paint gets marked where the doors makes contact with the other panels 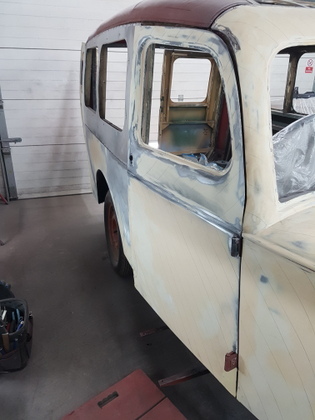 Hung the offside front door which required some minor tweaking to the lower front aperture edge - I will fit the door lock / catches tomorrow (provided madam's lurge has not tied me to a bed - but feeling better already so I should be back to it) 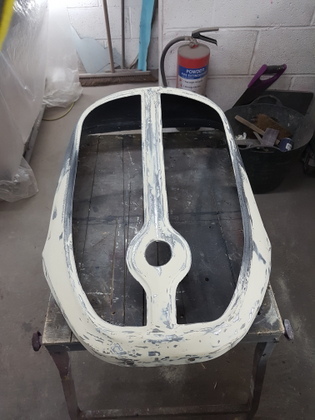 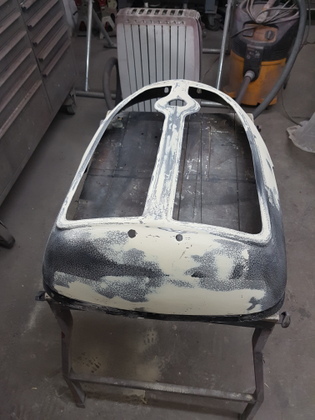 First skim sanded back on the radiator cowl 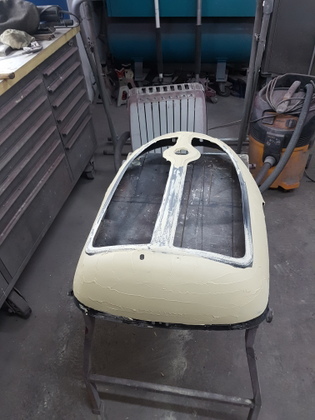 Second skim applied |
| |
Last Edit: Jan 12, 2018 10:29:39 GMT by Deleted
|
|
|
|
|
|
|
|
(provided madam's lurge has not tied me to a bed - ) i never complain when this happens lol
|
| |
|
|
|
|
|
Jan 12, 2018 20:22:13 GMT
|
|
|
| |
Last Edit: Jan 12, 2018 20:25:31 GMT by Deleted
|
|
|
|
|
Jan 12, 2018 21:09:00 GMT
|
|
Always nice to see the process you go through on these projects. Its inspiring me to approach the next section of my project more logically.
thanks, Grumpy!
JP
|
| |
I know its spelled Norman Luxury Yacht, but its pronounced Throat Wobbler Mangrove!
|
|
|
|


