|
|
|
|
|
Were the punters happy? (They bloody should be!) Seem to remember they were visiting, thus slowing kitchen progress.  Morning George (although it probably isn't where you are - what's the time difference between the UK and you ?) - Client very happy - they were passing through en-route to Belgium for the holidays - I am always honest with my clients - this restoration is taking longer than expected but then again they all do - I need a good weeks push at this to ready it for primer / paint but need to get back to the kitchen for now! - more updates soon |
| |
|
|
|
|
|
|
|
Dec 20, 2017 10:41:20 GMT
|
Good! +8 in the winter months. +7 when you change your clocks. So good evening! |
| |
Last Edit: Dec 20, 2017 10:41:42 GMT by georgeb
|
|
|
|
|
Dec 24, 2017 16:50:58 GMT
|
So had to shove the van out into the cold for a day whilst I fitted a new hood to a little Mazda MX5 (last job of the year) - but took the opportunity to give the van a good blow off with the airline and had a really good sweep up / tidy up around the workshop whilst it was outside 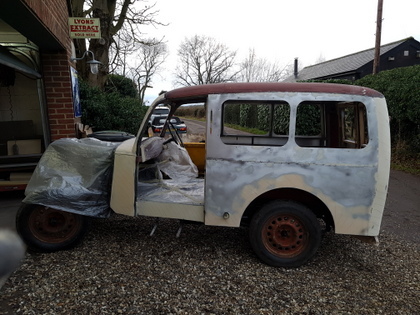 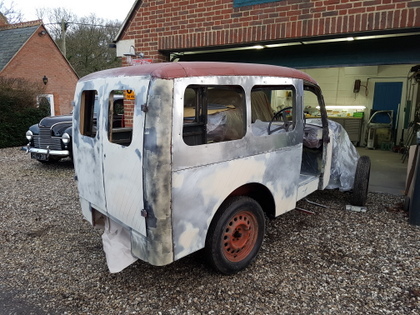 Then returned it to the workshop at the end of the day |
| |
|
|
|
|
|
|
|
So back to it after the hols - but not exactly been stood still in the holidays either - I had to move some of the Bradford stuff about and could not get to where it is stored up in the workshop loft - now the loft has been a bug bear of mine since we moved here 4 years ago - I found the time to board it out has the previous owner was just too lazy to do it but then everything was just piled up there - It frustrated me no end that I simply could not find the time to sort it properly - its a proper structurally braced floor with velux roof lights / windows in the roof etc and accessed by a custom heavy duty staircase - So over the hols it got sorted to the phase 1 stage which allowed me to sort through the Bradford parts and list any missing items- loft now looks like this 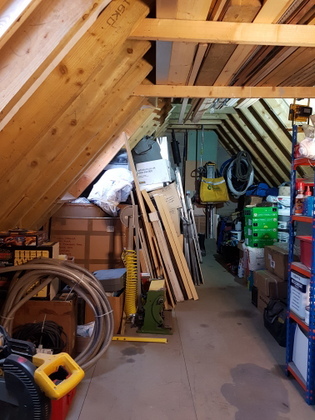 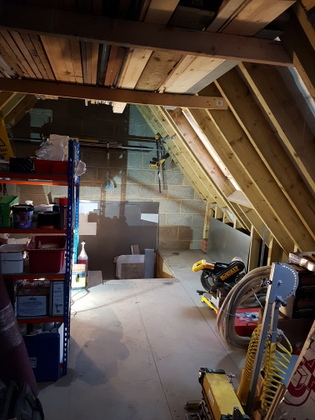 Access via these 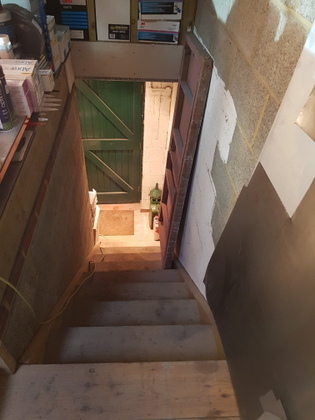 Sorted a proper shelving bay for paint / restoration consumables 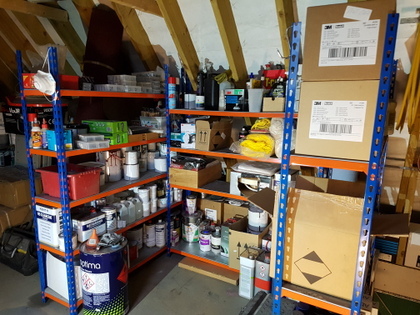 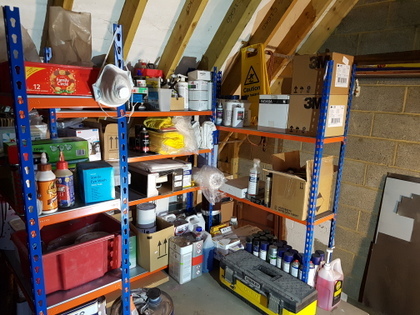 Sorted a couple of brackets for the steel / alloy stock with the sheet steel / alloy underneath it 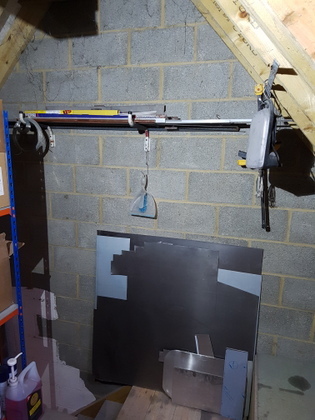 Phase 2 plan now is to build / install more shelving bays so that my kit / parts / tools can be stored correctly Along with building a bench at the top of the stairs & landing to house a vice & bench grinder 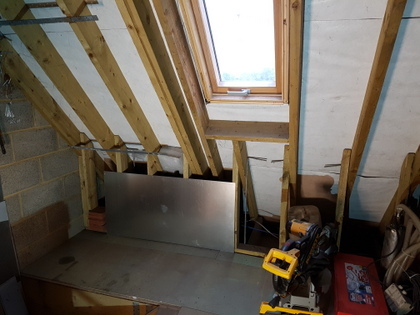 Whilst the adjacent area is earmarked for a freestanding sandblast cabinet & a new box pan sheet metal folder 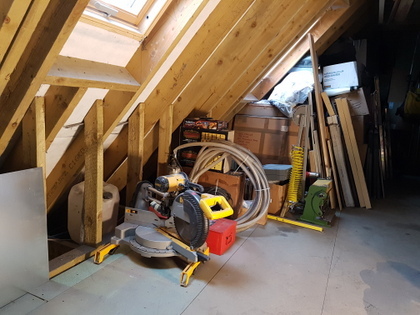 I also need to install power, lighting and a air supply - it just never, never stops at my place Meanwhile back on the van ! Removed the offside rear door to allow the profiles on the offside rear pillar to progress 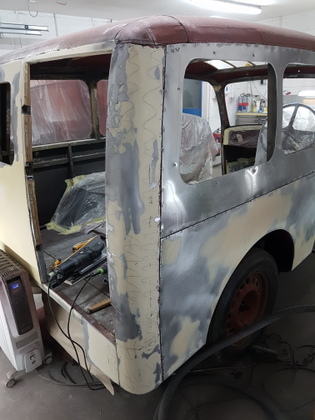 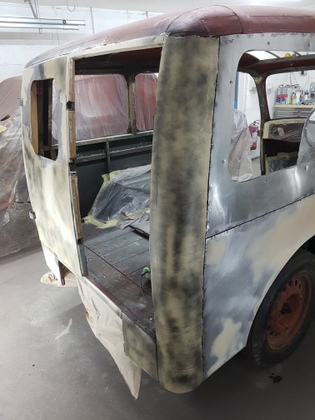 Nearside front door - getting close to completed profiles 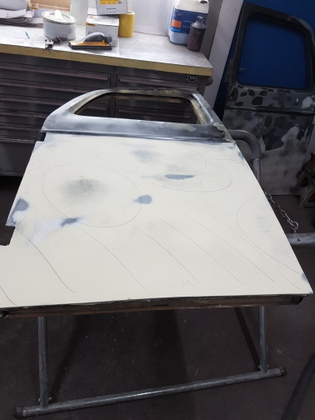 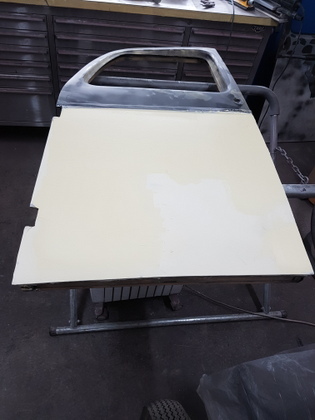 Whilst the nearside rear door is also straightened up & profiles progressed 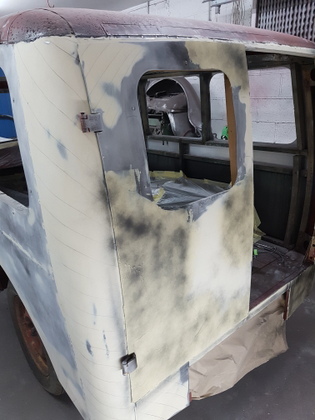 Need to crack on and get the main panels completed and into polyester - then I can start to commit some time to the Corsair structural repairs on the offside that is sitting patently in the wings |
| |
Last Edit: Jan 2, 2018 21:01:45 GMT by Deleted
|
|
|
|
|
|
|
|
Chris
Do you find it easier to to use the Body line on the door to split the complete door into, what's in effect two separate sections at this stage rather than having the full complete shape to work with as one large panel?
|
| |
Last Edit: Jan 2, 2018 21:16:28 GMT by peteh1969
|
|
|
|
|
|
|
Chris Do you find it easier to to use the Body line on the door to split the complete door into, what's in effect two separate sections at this stage rather than having the full complete shape to work with as one large panel? Pete - Exactly - that said 95% of the damage / distortion / repair area is below the swage line anyway - but having a swage line gives you a line to feather into with the profiles - Its not an easy panel either the door skin crests to the centre of the panel and you have to allow to reprofile to the original shape of the crest - if it was a flat panel it would be far easier and quicker to profile |
| |
Last Edit: Jan 2, 2018 21:50:43 GMT by Deleted
|
|
|
|
|
|
|
More panel profile progress 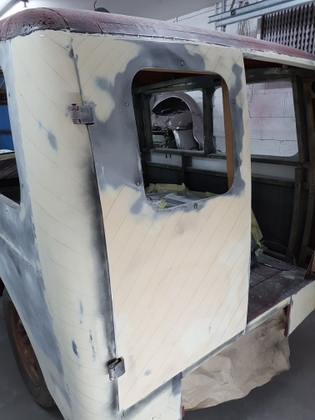 Nearside rear door completed 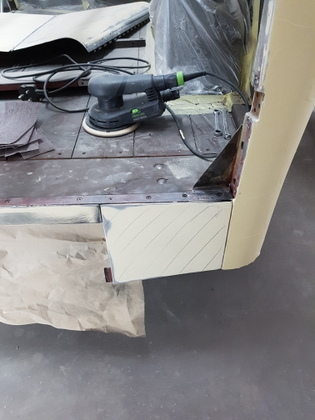 Offside rear panel completed 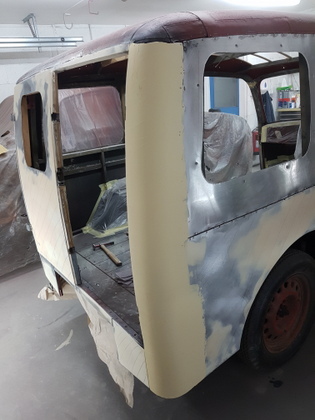 Offside rear pillar on it's final skim 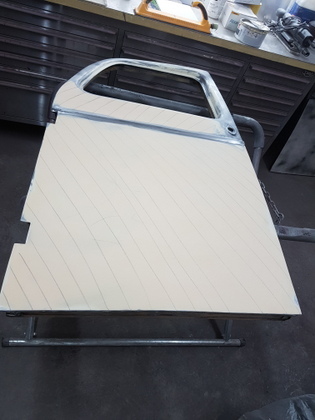 Nearside front door profiles complete I always like to refit any panels that I have removed for profiling in order to ensure the aperture gapping is still correct prior to applying any primers / polyesters - so I will refit the offside rear door & the nearside front door in the morning 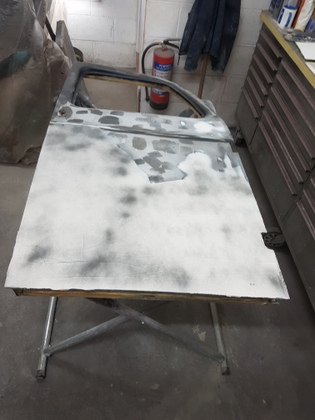 Next on the list is the offside front door profiles which is nowhere near has bad has the nearside one was 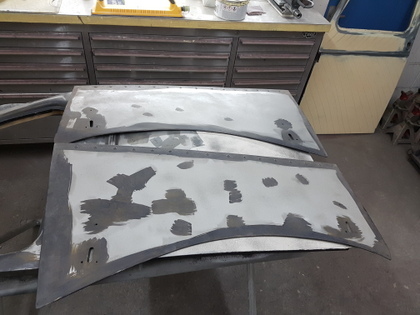 And both the bonnet side panels which just happen to be the straightest pair of panels on the entire van these need very little work Once these 3 panels are completed that will be all the panels for the main body - the van is being painted has per the factory in a 2 tone colourway (all Bradford vans were done to this spec) That will then leave the front & rear wings, rad cowl, front bumper & various other odds that need prepping - these all get painted black - then I have all the interior window trims & the dash board to paint in a third colourway |
| |
Last Edit: Jan 3, 2018 20:34:02 GMT by Deleted
|
|
|
|
|
|
|
|
Chris
Can you elaborate on what you mean when you say "painted as per the factory in 2 tone colourway" please?
|
| |
|
|
|
|
|
|
|
Chris Can you elaborate on what you mean when you say "painted as per the factory in 2 tone colourway" please? Certainly can - so the main body from the bulkhead back & the bonnet were offered in a range of solid colours, beige, mid brown, maroon, light green, dark green, light blue, dark blue & cream - and a number were in supplied in primer if you ordered a chassis cab for a custom built body ex works (a number were built with high roofs and became ice cream vans) further to this a moderate number were supplied has KDK (knock down kit form) so a kit of sub assemblies for export that were built up by the dealer when exported - these were also supplied in primer and then painted in the clients colour choice when built (good numbers of the vans exist today in Australia / New Zealand) So main body in a solid colour - front & rear wings, bumper irons, front valance & radiator cowl were all finished in black on every model - with exception of the Delux model which had a chrome radiator cowl The colour for this van will be maroon / black cherry with the wings etc black - interior metal trim I will do in cream / Old English White |
| |
|
|
|
|
|
|
|
|
Thank you Chris
That is going to look very nice in those colours when finished.
|
| |
|
|
|
|
tristanh
Part of things
  Routinely bewildered
Posts: 990 
|
|
|
|
|
May I ask the purpose of the black lines drawn across the panels being prepped? Please.
|
| |
Last Edit: Jan 4, 2018 0:39:35 GMT by tristanh
Whether you believe you can, or you cannot, you're probably right.
|
|
|
|
|
|
|
May I ask the purpose of the black lines drawn across the panels being prepped? Please. Absolutely - So it's a working technique taught to me by a very wise & thorough old school chap that I was apprenticed to 40 years ago - when working large areas of skimmed filler / complex panels / multiple panels / bodyshells etc - It becomes all too easy to loose your way has to what areas are completed / part worked / require further work / skimming etc - During the filling process your hand is the main detector of low / high spots / defects / areas that require further working etc - sight is also used along with guide coats - most people will mix a batch of filler up and then just before application will use said hand to reassess the areas on the panel has to how much filler is required / location on the panel etc - With my method of working I assess the panel first then mark out the areas with pencil prior to mixing enabling the filler to go straight on (remember that you have a product that is now starting to cure since you mixed it - if you have several areas to address you may find the filler has cured before you have had the chance to apply it has you work around the panel - especially in summer months) Ideally you need a process that allows you the time to apply the filler quickly & easily but one that allows you the time to apply it neatly & smoothly - the rougher the application - the more wasted filler / abrasive / time spent in getting it profiled correctly - so that's the first part. Second part - when you have a lot of profiling to do - it's a laborious, intensively mind numbing process - it's easy to loose your way when working multiple panels - apply paint over poorly worked areas / panels and it will look dreadful regardless of how good / shiny the paint is - once I have a panel complete I drag pencil lines diagonally down it - when working around a complete car with a process has boring has this it's important that you have something that motivates the process - the more panels you have pencilled out the further on you are - it's good for focusing on what needs to be done / completed and from here you can target your days work to completion - critical when you have acres of profiling day after day after day to get done - with some large panels taking several skims before you achieve the correct results. You won't see this process in most bodyshops / vehicle restorers - it's a system that works for me - and the guy that taught me - it gave him a immediate picture of the progress on the restoration - along with the client and anyone else that visited the workshop / viewed the work. Most restorers / bodyshops will just roll their eyes into the back of their heads if I explained the process to them - but again it's what achieves the right results for me and is critical in a market where many, many others fundamentally judge on a 10 second glance of a completed vehicle restoration. |
| |
Last Edit: Jan 4, 2018 8:07:17 GMT by Deleted
|
|
tristanh
Part of things
  Routinely bewildered
Posts: 990 
|
|
|
|
|
Thank you, makes perfect sense to me.
|
| |
Whether you believe you can, or you cannot, you're probably right.
|
|
|
|
|
|
|
|
sounds like a wonderful color combo....Ive always had a soft spot for black cherry or maroon on black with beige or tan interior colors....
JP
|
| |
I know its spelled Norman Luxury Yacht, but its pronounced Throat Wobbler Mangrove!
|
|
|
|
|
|
|
Some time off today to do some running about so not has much done has I had hoped - none the less 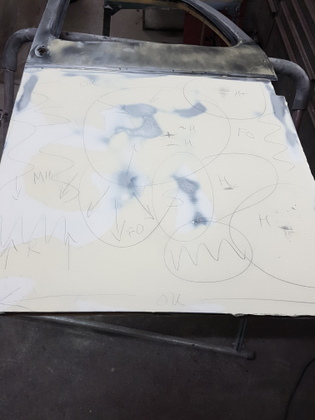 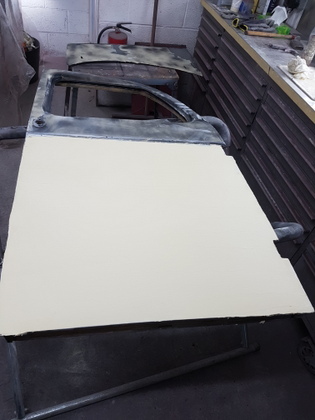 Offside front door on it's 4th profiling skim 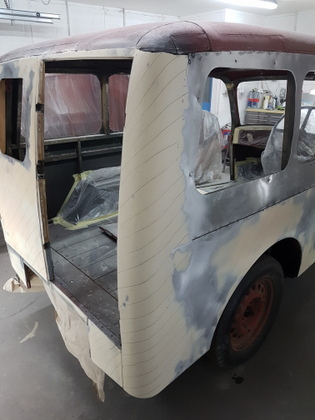 Offside rear pillar completed 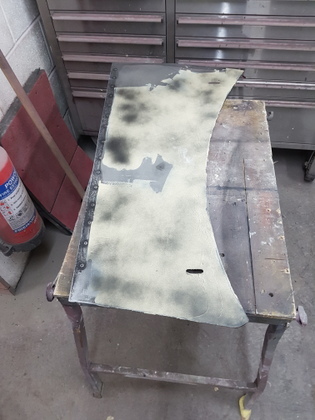 And a start made on one of the bonnet side panels - more updates tomorrow |
| |
|
|
|
|
|
|
|
Hung the nearside front door - then refitted the simple door lock to check for the fit to the aperture 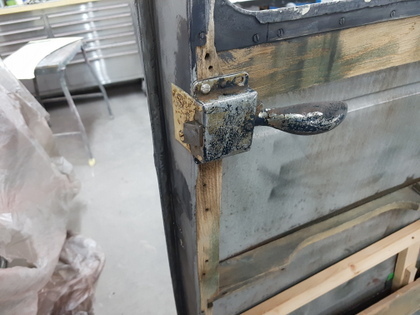 Door at the top was sitting into the aperture too deeply 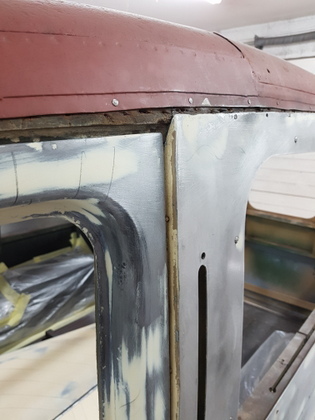 And at the bottom was not flush with the adjacent side panel 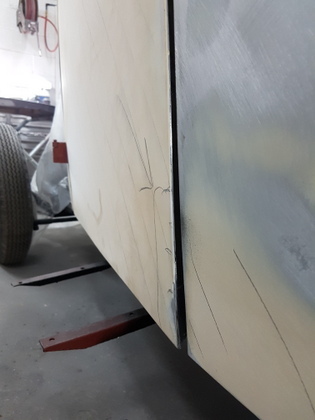 Door rubbers were not fitted to the van (did not really come about until bodyshells were produced has a unitary type construction) so there is nothing to hold the door off the aperture but with a 5mm rubber packer placed temporary at the top of the door 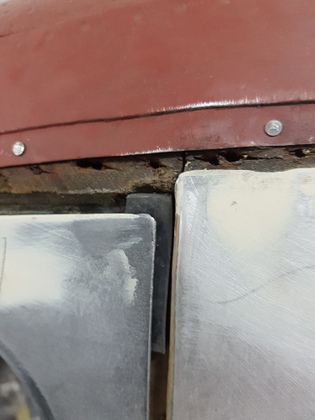 Which both aligns the top and bottom of the door so once the van is painted I will cut some rubber packing pieces and glue them at intervals on the inside edge of the return flange on the door - should look virtually factory original if done correctly 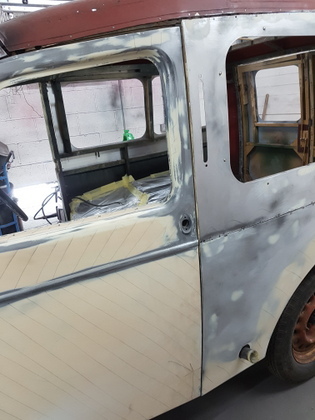 The door location pin actually prevents the door from closing correctly (holds the door too far off the aperture and in the wrong place) so I will have to modify this or remake a new one 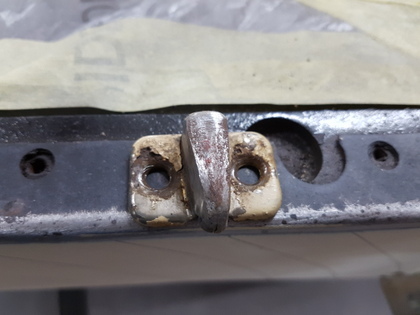 Locates here on the B post 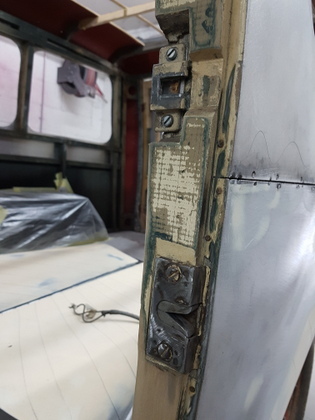 So with no door rubbers to form a seal the doors just had a rebated overlap on the outer frame - has small a gap has possible between the door & the aperture and then a tacked on furflex type interior trim to act has a draught proofing device 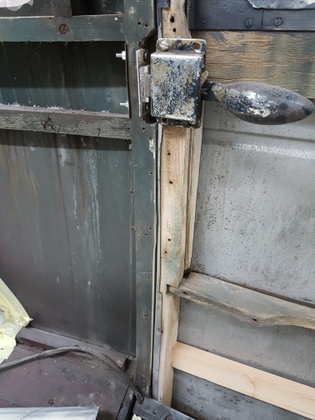 I then had to make some adjustments to get the door aperture gapping correct to the bottom of the door 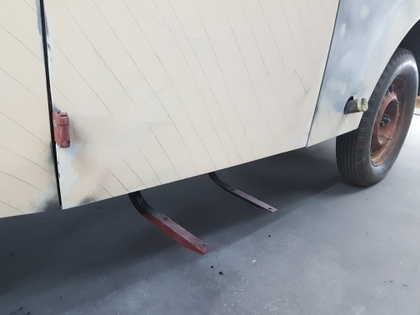 Hung the offside rear door and checked both doors fit & gapping - apart from the rubber stops to prevent the doors closing too far and some minor adjustment to the locking rod - nothing further is required to be done to these 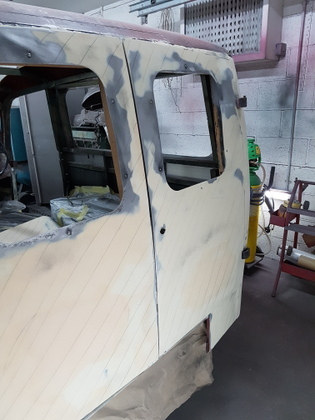 Meanwhile the offside front door is now into it's final polyester glaze coat to remove any minor undulations 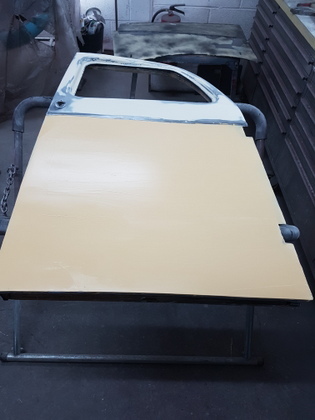 And the bonnet side panel profiles are being advanced 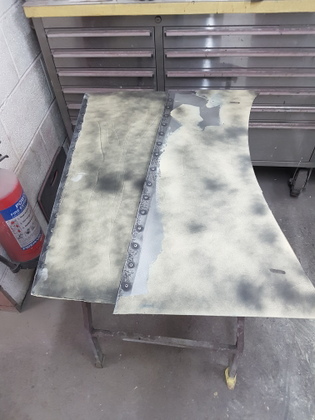 |
| |
Last Edit: Jan 5, 2018 20:58:28 GMT by Deleted
|
|
Davey
Posted a lot
   Resident Tyre Nerd.
Posts: 2,348
|
|
|
|
|
You may have been asked this before and i'm sure its probably a vague question but what kind of man hours do you expect this will have put into it?
Its clearly a very thorough and very very in depth process.
|
| |
K11 Micra x3 - Mk3 astra - Seat Marbella - Mk6 Escort estate - B5 Passat - Alfa 156 estate - E36 compact
Mk2 MR2 T-bar - E46 328i - Skoda Superb - Fiat seicento - 6n2 Polo - 6n polo 1.6 - Mk1 GS300
EU8 civic type S - MG ZT cdti - R56 MINI Cooper S - Audi A3 8p - Jaguar XF (X250) - FN2 Civic Type R - Mk2 2.0i Ford Focus - Mercedes W212 E250
|
|
|
|
|
|
|
You may have been asked this before and i'm sure its probably a vague question but what kind of man hours do you expect this will have put into it? Its clearly a very thorough and very very in depth process. Thanks - I think it's going to end up somewhere in the 500 hours region - bear in mind that's just panel & paint & trim - maybe a couple of hours on the odd mechanical bit - I always undertake my work on the basis that I am only has good has my last job so I'm not really into rushing the process - never have been and never will be has any shortcuts taken will without fail come back & haunt me - being a sole trading business I just can't afford to put myself into that position - for wants of a better expression 'it takes what it takes'  |
| |
|
|
|
|
|
|
|
|
The wood at the top of the rear doors aperture looks very the worse for wear.
Will you replace it?
|
| |
|
|
|
|
|
|
|
The wood at the top of the rear doors aperture looks very the worse for wear. Will you replace it? No - it's a structurally sound section with some superficial loss of the outer face - this has had a resin wood hardener injected into it and then the rough outer face made good / levelled up with a skim of polyester filler - the section is strengthened on the inside face with factory fitted steel bracing - when finished with the fabric roof fitted and then the roof rain gutter which travels across the top of the rear doors very little of the section is visible at all - not that this matters - it's more about the strength that it retains - this is a restoration being undertaken to a sensible budget in order to return the van to the road in a sound / safe / practical & usable condition - had the restoration been to a concours standard the body would have come off the chassis and all the ash framing replaced with new, along with new alloy panels - in fact new most things really - however there is crossover here about being sensible with the budget and conserving / preserving the van rather than writing a cheque out for a £40k concours restoration on a van that is only worth £15k when completed regardless of how much has been spent on it or how it good is. |
| |
Last Edit: Jan 7, 2018 8:46:16 GMT by Deleted
|
|
|
|


