scimjim
Club Retro Rides Member
Posts: 1,503
Club RR Member Number: 8
|
This was the NAUGHTY CORNERscimjim
@scimjim
Club Retro Rides Member 8
|
Mar 22, 2018 22:33:06 GMT
|
|
(Steering wheel)
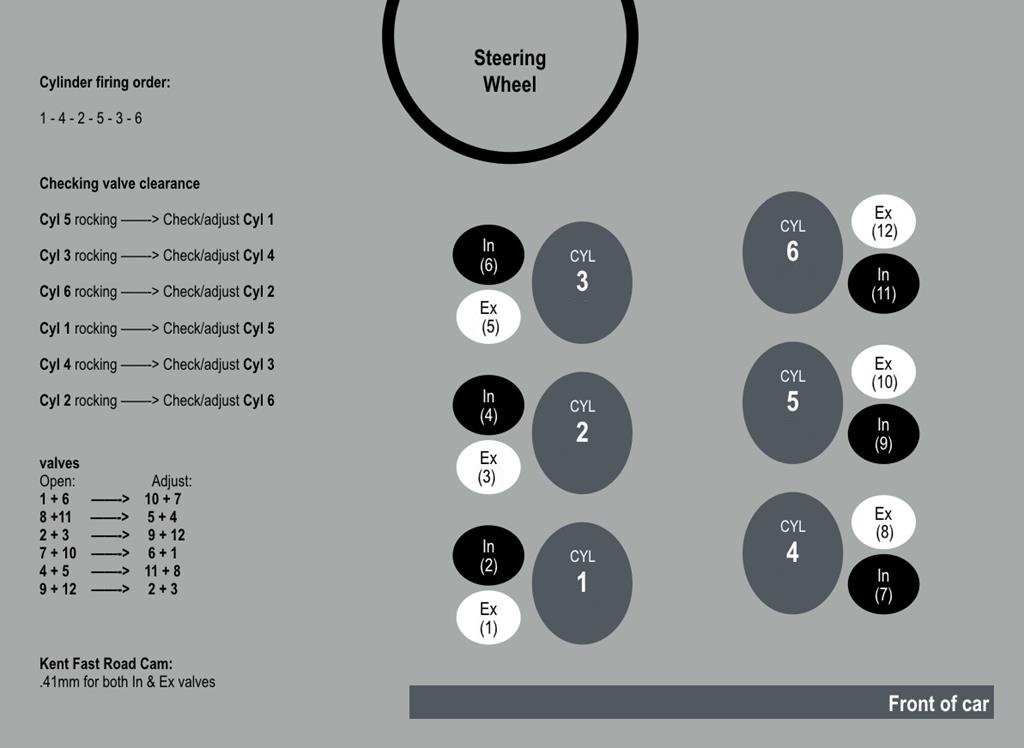
Number three cylinder..........valve 6 (Inlet)..........valve 12 (Exhaust).......Number six cylinder
.....................................valve 5 (Exhaust).......valve 11 (Inlet)...................................
Number two cylinder..........valve 4 (Inlet)..........valve 10 (Exhaust)..........Number five cylinder
....................................valve 3 (Exhaust).......valve 9 (Inlet).......................................
Number one cylinder..........valve 2 (Inlet)...........valve 8 (Exhaust)..........Number four cylinder
...................................valve 1 (Exhaust).......valve 7 (Inlet).......................................
.......................................(front of engine)............................................................
|
| |
|
|
|
|
|
|
|
Mar 22, 2018 23:48:39 GMT
|
|
Oh wow, thanks Jim. Just off to bed but I'll inspect this info in the morning.
I get the impression this can done two ways... One seems to be "loose rocker so work on the corresponding rocker" and the other is "open valve so work on the corresponding closed valve".
If I'm right I cant help thinking the second is slower but more accurate.
|
| |
|
|
|
|
|
|
|
|
yup , i tend to do this...
"take a pair of valves , from the same cylinder ... turn over engine until one of the valves is all the way down ,then adjust the other one." dab that one with a blob of tippex ,then look around to see what valve is on its way down ,and turn engine over till that one is all the way down ,and do its partner ,dab with paint , then repeat till all done .
|
| |
|
|
|
|
|
Mar 23, 2018 12:28:51 GMT
|
Yessss, tippex. Good shout. Cheers Ivanhoew. By the way is your personal courier still planning on dropping by today? Any idea what time if so? As for me and personal progress updates.... GAH! GAH! Such a WASTE OF A MORNING. Jeeeesh. I decided to whip my roof panel off again because my new sheet of vinyl had arrived and the last time I hadn't got a big enough bit so I had to patch it. Being temporary, and also patched, I didn't bother doing a very tidy job of the corners. No point really. Also, in the meantime, I'd found some plastic rivets that I thought would be an ideal way to firmly fix down the panel for a longer term temporary fixing that would look tidy. 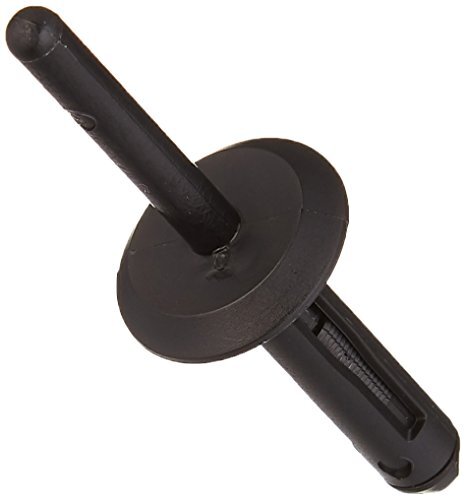 So I whipped the panel off, whipped the vinyl off it, and set about re-vinyling it. I also wanted to swage the edges of the metal so they sat down more against the roofline. Not having a swaging machine in my workshop... or a workshop... I had experimented and discovered I could swage thin sheet with my wife's fancy pizza cutter. So I did that. It probably wont cut pizza any more, but it did a good job of gently forming my panel. 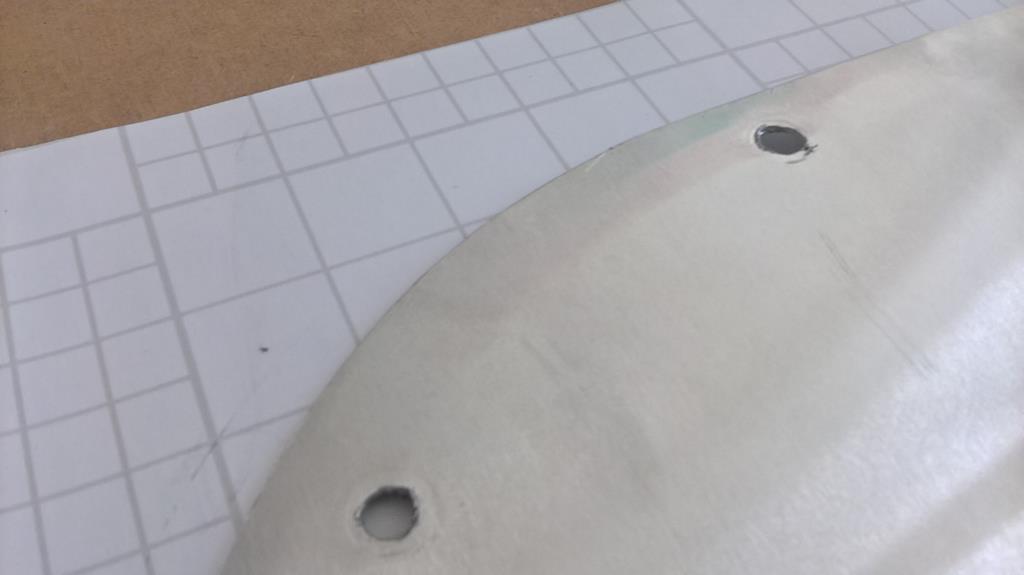 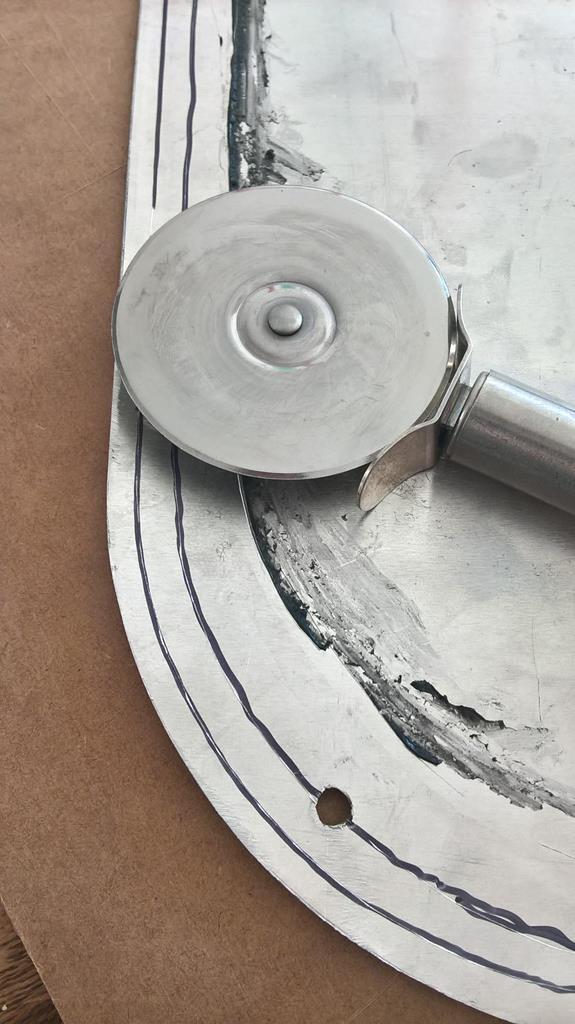 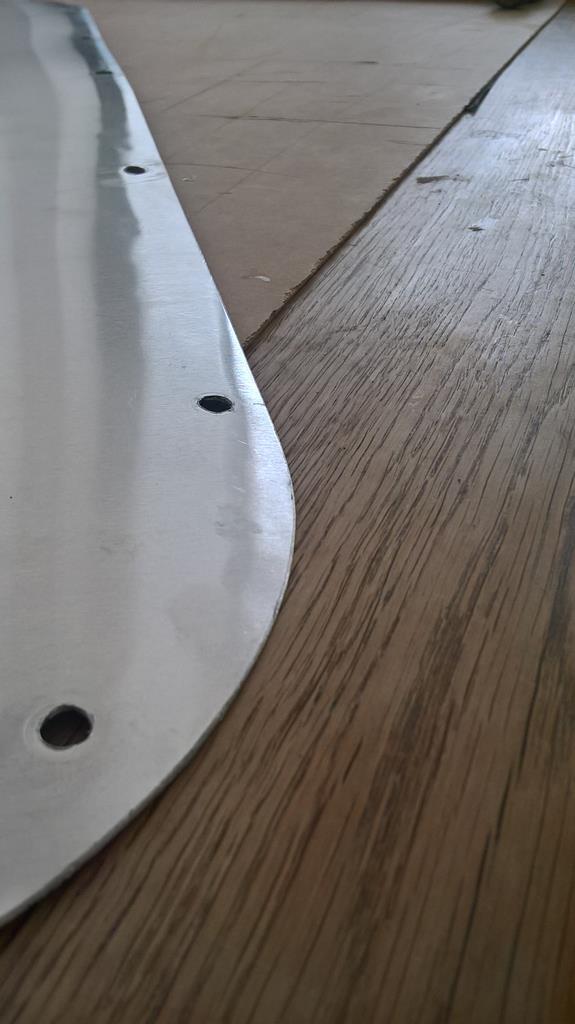 And then I set about re-covering it, taking greater care on the corners this time. 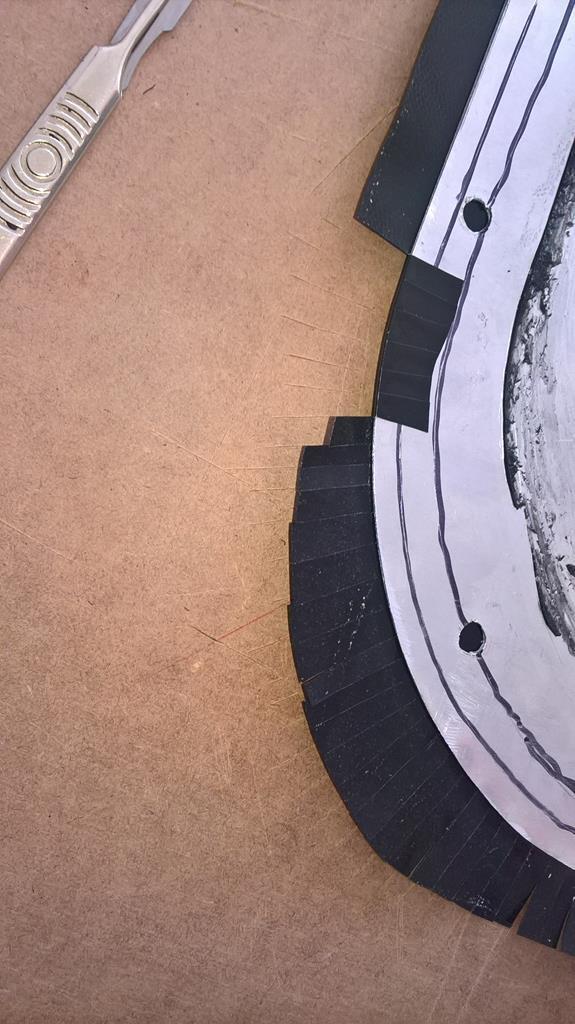 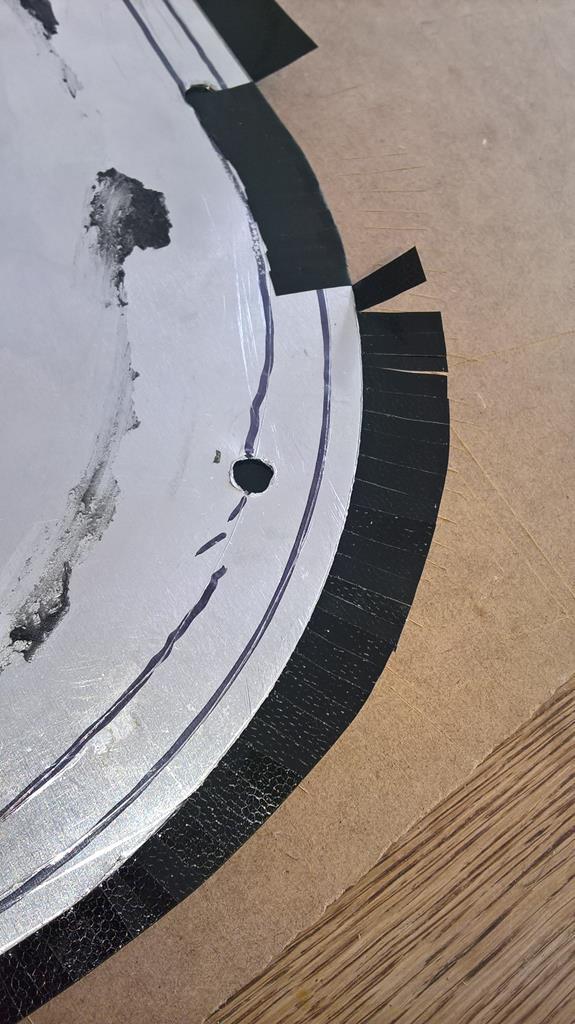 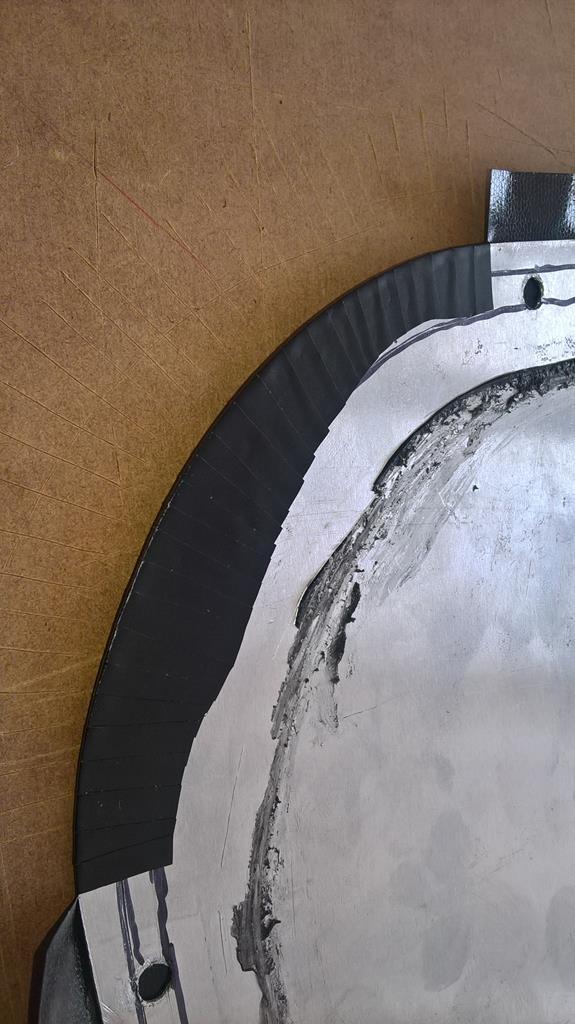 All looked very good indeed. So I set about properly sealing the new roof in place, and then discovered that the ruddy rivets weren't going to go into the holes for love nor money. I tested TWO of the sods beforehand and BOTH were snug and perfect. Somehow I picked the only two holes that were suitable and none of the others would play ball. So now I'm back to just having the bolts in there, and the panel still doesn't seem to be sitting snug to the roof despite my excellent pizzawheel swaging. Total waste of time. I should have gone the whole hog and executed "temp-fix 2" which would be a much longer job but would probably have yielded some actual results as opposed to me merely ending up back at square one with the added bonus of a blunt pizza cutter. |
| |
Last Edit: Mar 23, 2018 12:30:39 GMT by Deleted
|
|
|
|
|
Mar 23, 2018 21:34:38 GMT
|
Snatched a minor victory from the jaws of defeat this evening. Managed a feat of keyhole engineering brilliance that I really ought to get a medal for. I had a hole 35x50mm, behind which was an open space about 40mm deep then another hole in a metal bracket about 25x35mm. I needed to fix the choke cable so it could be pulled in and out, and I didn't want to remove the dash panel again. The problem though, was that the choke cable's fixing screw is behind whatever fills the hole in the panel, meaning I can't tighten it unless I start cutting holes in the side walls I'd made to reach it from behind, which I didn't want to do. I've tried four different things and so far nothing has worked. Until this evening. Now... I have a choke cable mounted on my console and sturdy enough to pull in and out to my heart's content. This was a real 'ship in a bottle' / 'Chinese puzzle' solution. I only wish it was for something more awe inspiring than merely fixing a cable that I really ought to have affixed first and foremost, before even starting to build my new interior. 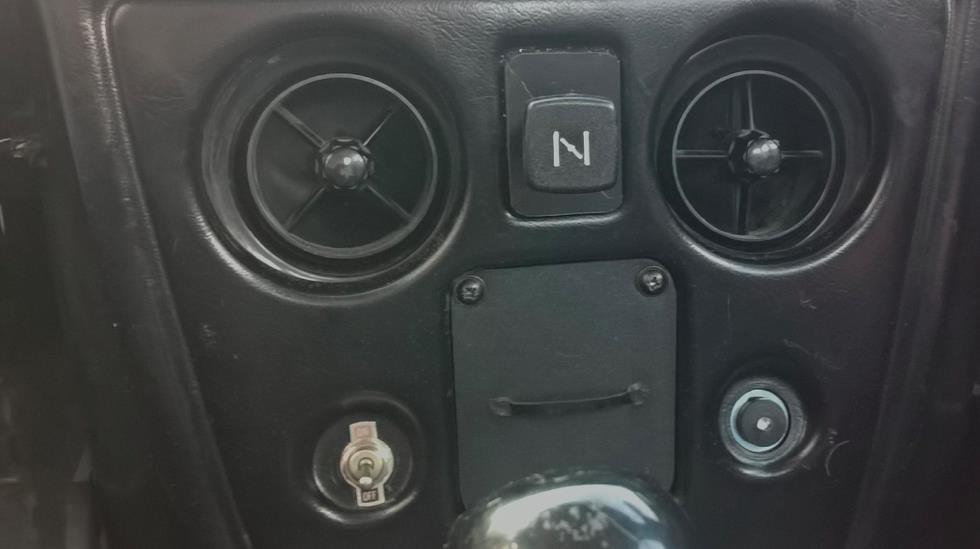 All needs tidying up of course. But.... ehhhhhh, when do I EVER get as far as finishing off and tidying up? |
| |
|
|
|
|
|
|
|
|
|
|
I contemplated it, but firstly I had already wrapped the metal and the drill would drag the vinyl into little whirpools, and secondly I'd just applied the sealant and dropped the metal on. As this is only temporary anyway it didn't feel worth delving deeper into that just to use some plastic rivets when I had twenty bolts just sat there fitting perfectly.
If it bugs me and I don't get any nearer to doing the roof properly, I suspect I'll start switching out bolts for rivets once the sealant has cured a bit. Hand filing each hole bigger as I go.
|
| |
Last Edit: Mar 24, 2018 10:00:44 GMT by Deleted
|
|
|
|
|
Mar 24, 2018 10:52:19 GMT
|
Not sure where you got that drawing but it’s wrong. I drewed it! I was picking up bits of info from various places and putting them together into a diagram I could understand and refer to. Is this correct now? Edit: Image removed as incorrect I hadn't realised that the position of in/ex wasn't consistent across all cylinders. What strange kind of voodoo is this that puts them all over the shop? |
| |
Last Edit: Mar 25, 2018 12:10:33 GMT by Deleted
|
|
scimjim
Club Retro Rides Member
Posts: 1,503
Club RR Member Number: 8
|
This was the NAUGHTY CORNERscimjim
@scimjim
Club Retro Rides Member 8
|
|
|
|
Still not right - I posted the order further up ^^^
The valve order IS consistent but because the heads can go on either side, they’re mirrored.
|
| |
|
|
scimjim
Club Retro Rides Member
Posts: 1,503
Club RR Member Number: 8
|
This was the NAUGHTY CORNERscimjim
@scimjim
Club Retro Rides Member 8
|
|
|
|
From front to back on the right hand bank (cylinders 1,2&3) is exhaust, inlet, exhaust, inlet, exhaust, inlet.
From front to back on LH bank (cylinders 4,5,6) is inlet, exhaust, inlet, exhaust, inlet, exhaust.
|
| |
|
|
scimjim
Club Retro Rides Member
Posts: 1,503
Club RR Member Number: 8
|
This was the NAUGHTY CORNERscimjim
@scimjim
Club Retro Rides Member 8
|
|
|
|
I’m guessing you looked at the post made in your other thread which showed the Cologne valve order - they have Siamese exhaust ports, so aren’t symmetrical (although the heads still fit either side, so they are still mirrored).
|
| |
|
|
|
|
|
Mar 25, 2018 12:02:50 GMT
|
Still not right - I posted the order further up ^^^ WHHHAAAAAATTT!TTT!!! My head hurts now. I followed what you'd written. I'm going to cry. Engines are stupid.  |
| |
|
|
|
|
|
Mar 25, 2018 12:11:17 GMT
|
Is this one right Jim? 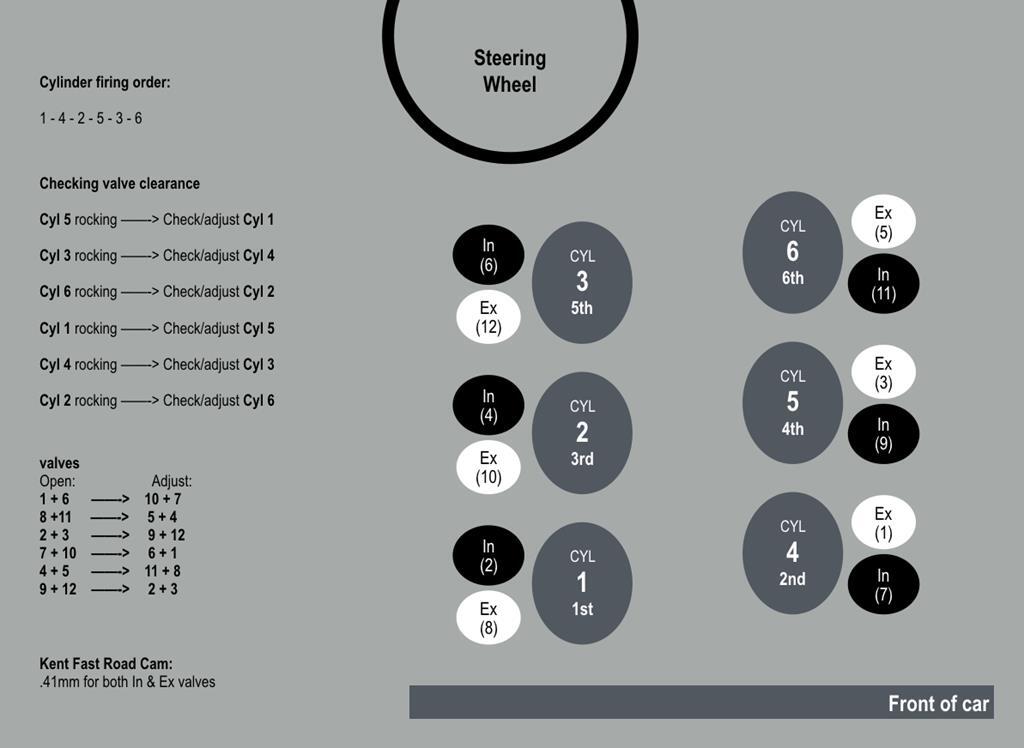 === Edit Update for personal records. Oil + filter change 25th March 2018. EFL90 + VALVOLINE VR1 RACING ENGINE OIL 20W50 === |
| |
Last Edit: Mar 25, 2018 14:44:26 GMT by Deleted
|
|
|
|
|
|
|
Mar 25, 2018 14:39:05 GMT
|
Great. Thank you Jim, you are a legend. Much obliged sir! ... ignoring the valve numbers. Wait, what now? WHAT IS THIS DEVILRY?. DAMN YOU JIM, YOU ARE A SCOUNDREL OF THE FIRST ORDER. What's wrong with my valve numbers? I triple-checked them. GET IT RIGHT JIM, OR GO HOME. I THINK I SPEAK FOR ALL OF US HERE WHEN I SAY WE'RE GETTING PRETTY TIRED OF YOUR SLOPPY WORKMANSHIP IN THIS THREAD.  === I've just checked the valve numbers against your list and it's what I've got. It matches... 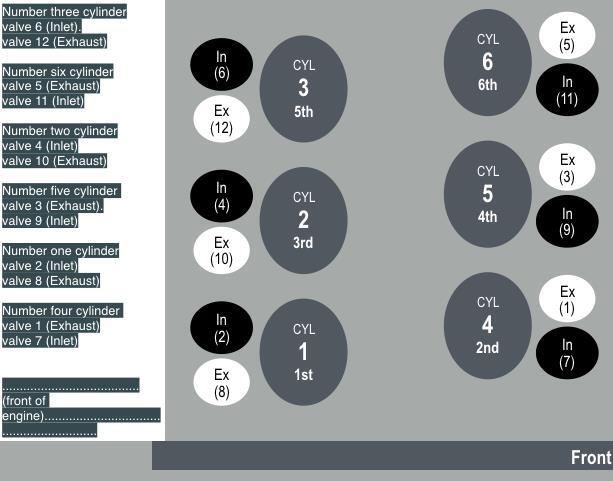 |
| |
Last Edit: Mar 25, 2018 14:42:56 GMT by Deleted
|
|
scimjim
Club Retro Rides Member
Posts: 1,503
Club RR Member Number: 8
|
This was the NAUGHTY CORNERscimjim
@scimjim
Club Retro Rides Member 8
|
Mar 25, 2018 15:21:16 GMT
|
|
LOL - the numbers on the drawing - 1-6 on cylinders 1-3 and 7-12 on cylinders 4-6.
I don’t have an image upload function on my phone or I’d just post one from the manual!
|
| |
|
|
|
|
|
Mar 25, 2018 15:24:18 GMT
|
Hmmmm, I literally can't make top nor tail of that. I guess I need to track down a reference image from the manual and try to work it out from that.  |
| |
|
|
scimjim
Club Retro Rides Member
Posts: 1,503
Club RR Member Number: 8
|
This was the NAUGHTY CORNERscimjim
@scimjim
Club Retro Rides Member 8
|
Mar 25, 2018 18:42:28 GMT
|
|
In the drawing, your valves are numbered (from the front RH to the rear RH) 8, 2, 10, 4 12, 6 instead of 1 to 6.
|
| |
|
|
|
|
|
|
|
Mar 25, 2018 20:16:14 GMT
|
|
Ah right. Okay.
So, I decided to change the way I presented the valve opening and closing order by just dropping the numbers into the valve ovals in brackets. This clearly caused confusion as they then looked like valve numbers.
So if I now see them as valve numbers and re-order them as you have done above, I then refer to your list of valve operation from above, and I can;t make it work because I have the cylinder order down as
1 - 4 - 2 - 5 - 3 - 6
but the order of the valve operation you presented above has it in this sequence:
3 - 6 - 2 - 5 - 1 - 4
so even if I cycle mine to start with 3 as per your list, gives me:
3 - 6 - 1 - 4 - 2 - 5
I'm going to assume that your list (3 - 6 - 2 - 5 - 1 - 4) is correct and try to find a way of representing the valve operation cycle on the diagram with the valve numbers now being the numbers in brackets inside the valves.
Stand By!!
|
| |
|
|


