79cord
Posted a lot

Posts: 2,615
|
|
May 12, 2023 12:18:11 GMT
|
|
Does look beautiful after all that frustration. Agree etch primer would absorb oil.
'Aluminium silver' would look good but shame to loose the contrast of your new gaskets & bolts.
|
| |
|
|
|
|
|
|
|
May 12, 2023 12:26:25 GMT
|
|
I paint all my engines and gearboxes with foliatec caliper paint. Brilliant stuff.
|
| |
|
|
logicaluk
Posted a lot
Every days a school day round here
Posts: 1,373
|
|
May 12, 2023 18:28:26 GMT
|
Top coat 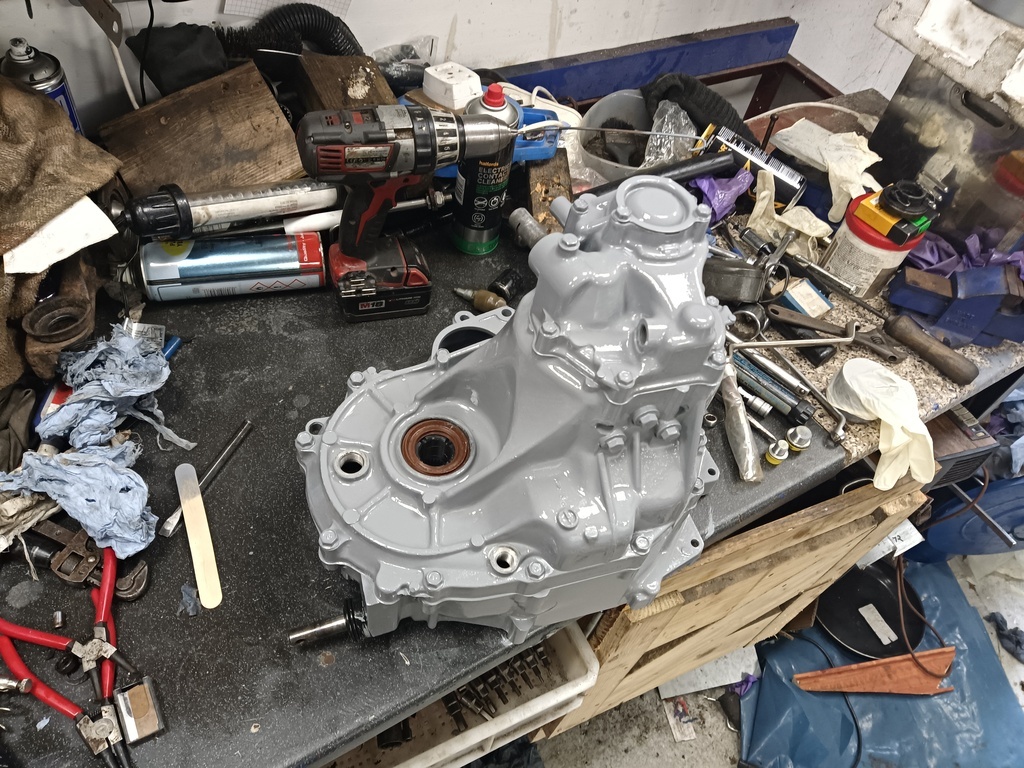 |
| |
|
|
logicaluk
Posted a lot
Every days a school day round here
Posts: 1,373
|
|
|
|
Does look beautiful after all that frustration. Agree etch primer would absorb oil. 'Aluminium silver' would look good but shame to loose the contrast of your new gaskets & bolts. Yes there is something nice about the gasket and bolt contrasting with the blue grey primer, TBH it's not something I'm really going to be looking at too much, and the main point of painting it grey is to show up any leaks. Dan |
| |
|
|
logicaluk
Posted a lot
Every days a school day round here
Posts: 1,373
|
|
Sept 3, 2023 21:02:40 GMT
|
I was sceptical, but needs must, and it was from Amazon so if it didn't a refund was easy. A few weeks ago I was booked on to a navigation event, but my co-driver has put his back out, so my wife stepped in, her biggest complaint was the noise, so she bought Frank a present. 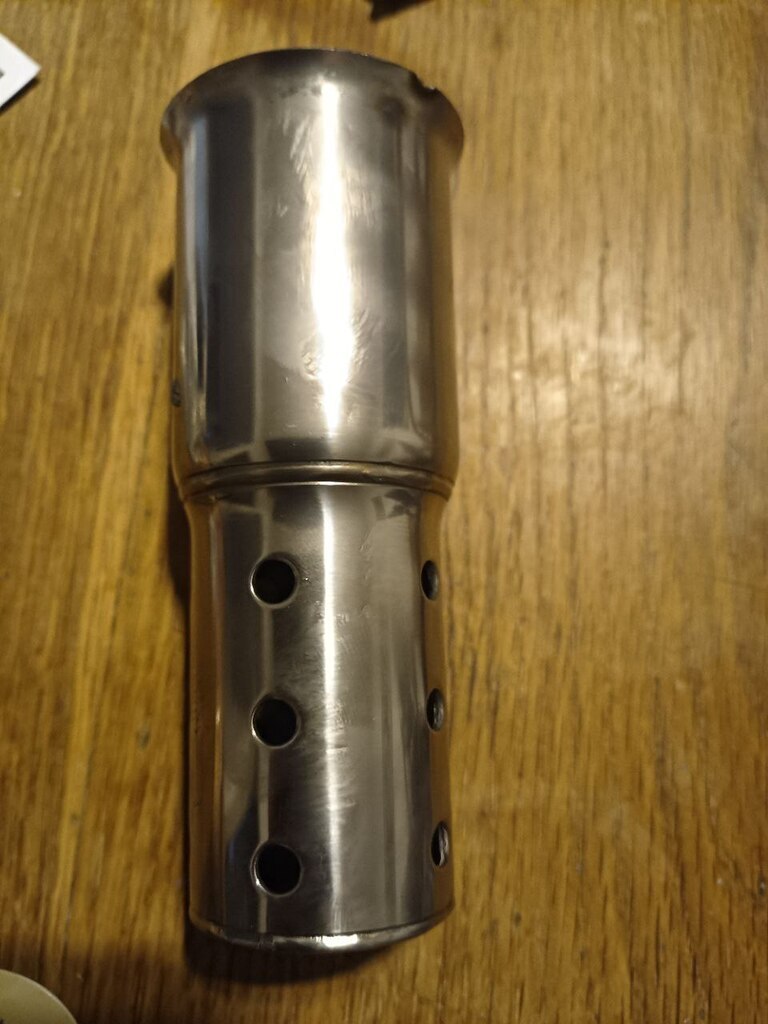 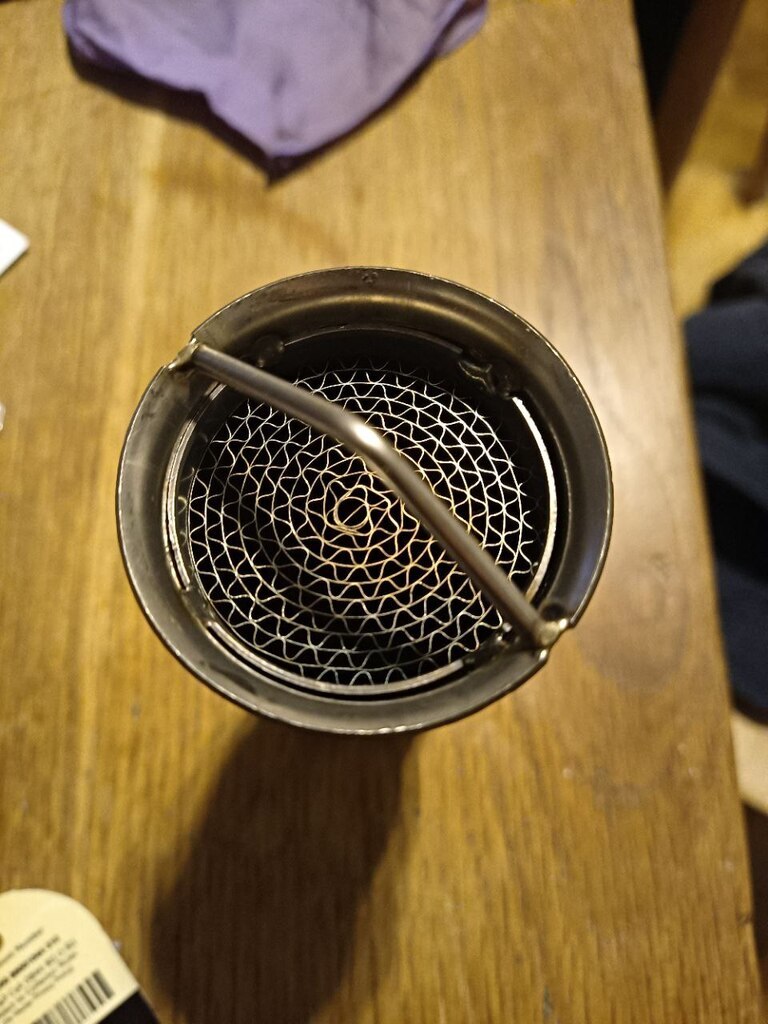 A £16 dB killer from Amazon. Some gun gum and a strip of ally, and 4 mins later and the exhaust note is strange almost no bass and the sound of the gas moving through the dB killer (a bit like blowing through a straw I suppose), there is no resonance through the body, no booming, the really loud nose through the 2500 - 3250 rev band has gone and most important of all I don't think it's made much difference to the top end, I'd call it a success. Cadwell, here I come Dan |
| |
Last Edit: Sept 3, 2023 21:08:28 GMT by logicaluk
|
|
logicaluk
Posted a lot
Every days a school day round here
Posts: 1,373
|
|
|
|
Warning, long, boring, dry, rambly, stream of consciousness type post. Well I had thought today I would be writing an update, albeit a small one on the Herald Estate project, but Saturday I awoke Thinking of Frank, due in no small part to the opening of registrations for the Club Triumph 10 CR. About 18 months ago I was being a fantastic friend and stripped off the fuel injection and fitted a set of carbs from a mates acclaim that he couldn't get to run right, (they didn't) then I fitted a "known good" set of carbs to check them, it was at this point that every thing went a bit Pete Tong, there was a flash I know not what it was, but the Microsquirt ECU no longer liked its fuse, which it blew every time the ignition was turned on, so I reverted to carbs and a dizzy, at this point I stopped writing this and re-read my thread so many, half thought out ideas that I didn't get follow through on, what must you all think of me..... So now for more of the same. But first a recap Acclaim carbs, they run a constant manifold air leak for the positive crankcase ventilation, they are tricksy bike carbs, they have a "Power Valve" which I believe is what Mike Nixon refers to here and hereas the air cut valve I'll come back to this bit later. The vac advance unit for the distributor is unavailable new or second had I have an auto one which has the wrong advance curve in it for a manual, but it's all I have, this is why I went down the ECU route originally. Frank has had 1mm skimmed off the head and high lift camshaft, as it's a OHC this has altered the cam timing ever so slightly, the dizzy runs from the cam, the cam is set up on the original timing marks (well as close to original as possible) setting up an Acclaim cam is a dark art, you set it up to the marks which is approximately half a tooth out on the belt then have to guess which way to turn it. The Newman cam is supposed to be set up on the original timing marks (but they have moved by about that much) Frank is a total pain to start, he will only start on all the choke, and he just kicks into life then revs to 3-4k as soon as he's running, if you touch the choke be for he's warm he stumbles and dies, when warm he's OK. In an attempt to fix this, I've tried different ways to set up the carbs, with no joy. So where to start? Pull out the ECU loom plonk it on the bench and test it, but just in case it's magically fixed its self, test the ECU in the car again, nope pops a fuse as soon as the ignition is turned on. 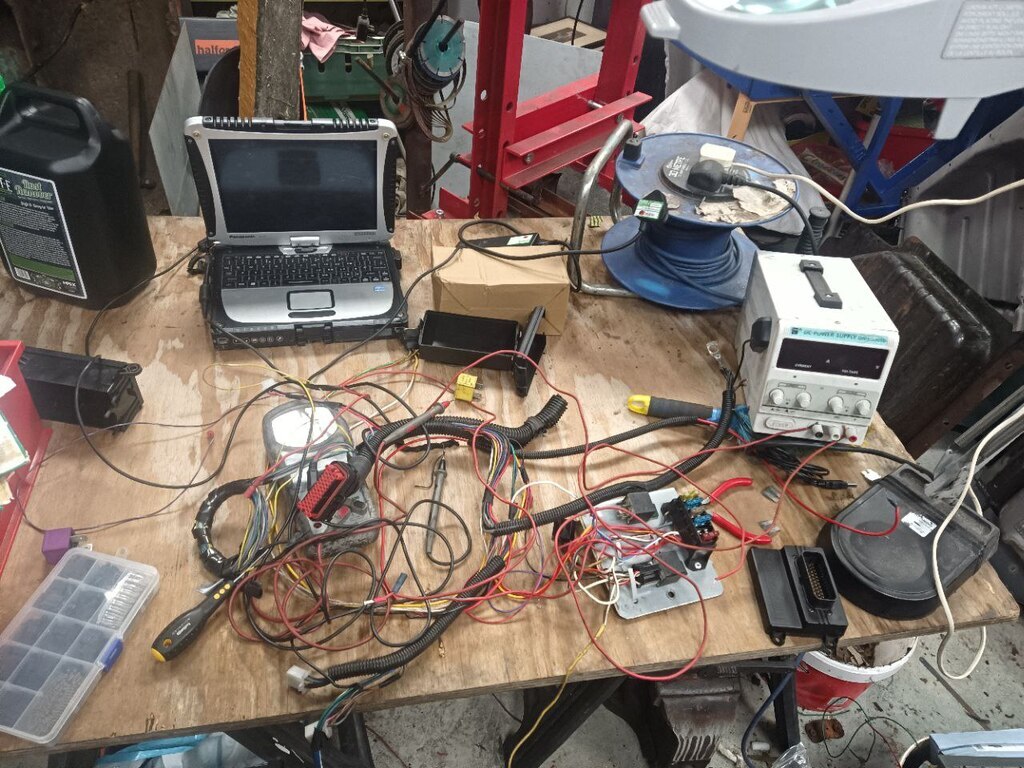 No issues with the Loom, it's definitely the Microsquirt, I've had the case apart and can see no signs of exploded components, so fingers crossed. It is now (as of 8.30pm on Sunday evening) with the post office on its way to Trigger Wheels LTD in Ely for testing and hopefully a repair. So how to at least get this car to run nicely, at this point I'm convinced it's the carbs fault. Can I make the mixture richer earlier on the choke, it's only really warm up I'm worried about because he runs well enough when warm, there are 2 places i can see to do this the choke relief valve adjustment. 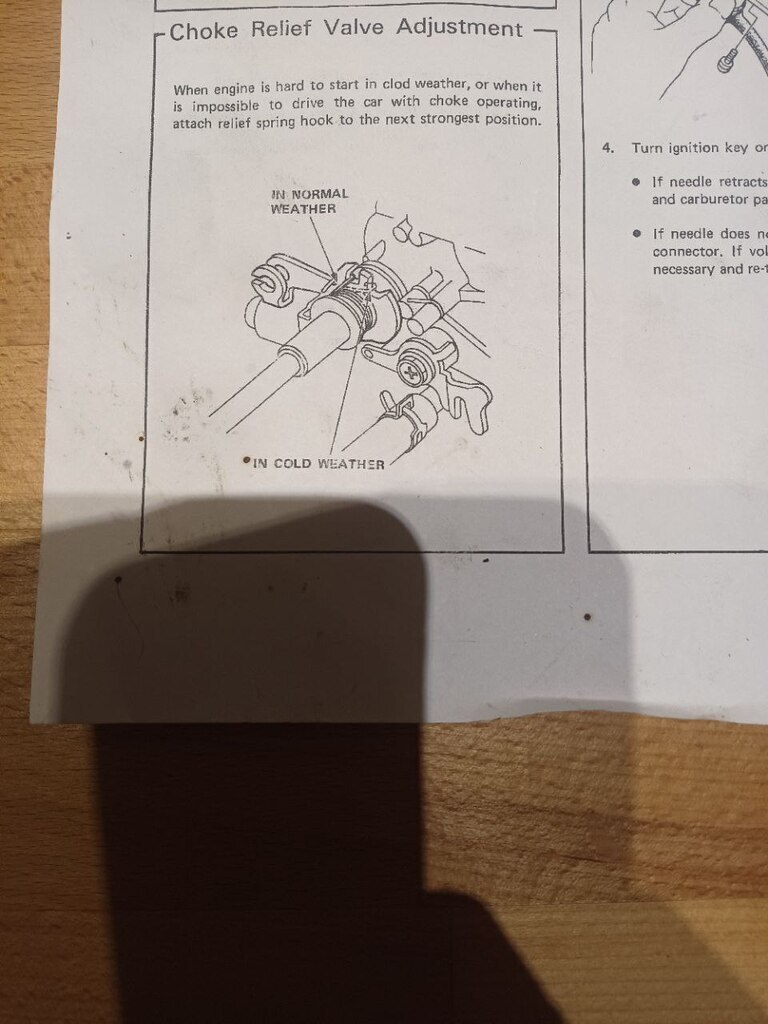 And the fast idle speed adjustment. 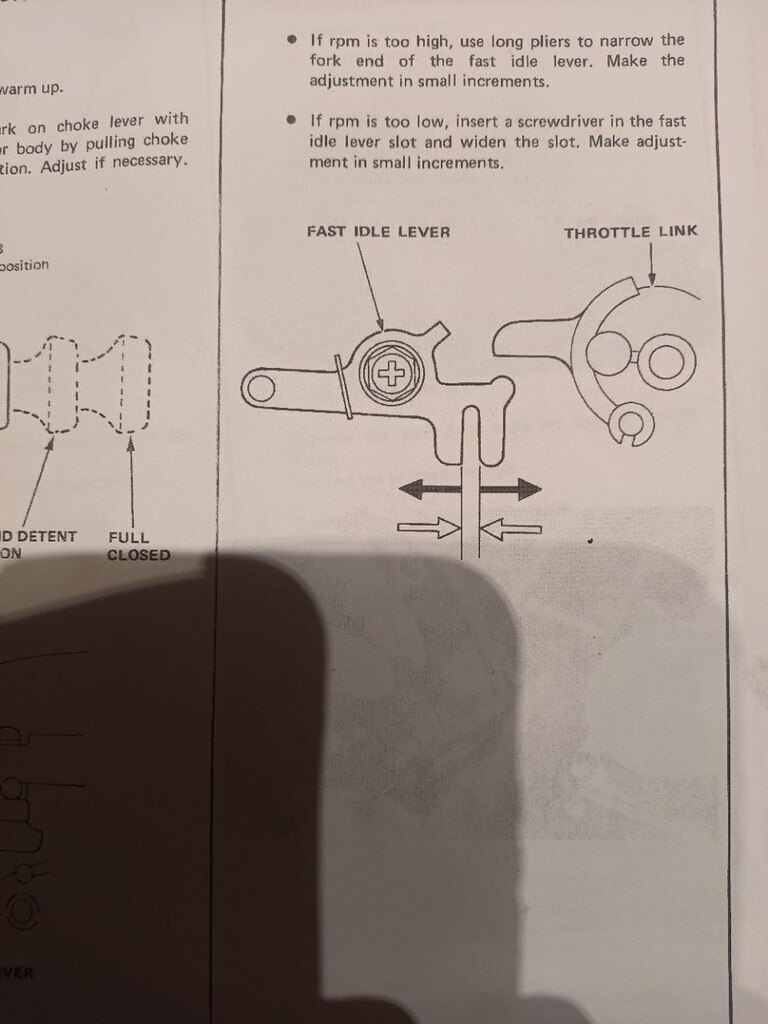 But of course me being me, I didn't look at the book first, I just thought I knew best and got the operation of the fast idle speed backwards and lost half an hour making a little clip on cover to reduce the gap between the forked arm and the operating leaver, which had the effect of revving it up to 4-5k, doh. When I narrowed the gap the max revs came down revving up to 2-3k, but it was surging, slowing down to the point of stalling a repeating, making me sound like a prize prick, I think it's the Air Cut Valve, now thanks to rereading my thread I have a way of defeating them, if necessary. But the other thing it could be is the timing, it's got an auto dizzy vac advance, and it probably has a different vacuum curve due to the raised compression and high lift cam, so I disconnected the vac advance. I can't find the timing marks with my timing light, this is not helped by the crank trigger pick up that's in the way. I'm not 100% sure my timing gun is right as it's an adjustable one, and if I rock the dizzy it hits the end of the adjustment slot, so I check the static timing, Acclaims have a good way of doing this, set the crank to TDC firing, pull the dizzy and check the marks.  It comes out at factory settings, but the car wants to be somewhere else, so I lined up the body mark one tooth clock wise when viewed from the cap end. That made a big difference, now it idles much happier, but it's lost its low to midrange acceleration, but at least it seems to start OK now, the test will be tomorrow morning. Dan |
| |
|
|
logicaluk
Posted a lot
Every days a school day round here
Posts: 1,373
|
|
|
|
|
Drove Frank to work today,
Starting was an issue every time he tried to fire the engine almost stopped, like it was trying to fire to far BTC, as soon as the choke was out he settles in to the best idle I've had from him in a while, the exhaust sounded less noisy, but hes definitely not accelerating as hard.
But I think this shows my issues are ignition map related not so much fuel.
Dan
|
| |
|
|
logicaluk
Posted a lot
Every days a school day round here
Posts: 1,373
|
|
|
|
|
I've just heard back from Trigger Wheels and it's dead, £400 for a replacement Microsquirt, I don't think so. I'm off on a speeduino adventure.
|
| |
|
|
logicaluk
Posted a lot
Every days a school day round here
Posts: 1,373
|
|
|
|
|
Speeduino NO2C is in the post
|
| |
|
|
logicaluk
Posted a lot
Every days a school day round here
Posts: 1,373
|
|
|
|
With so many Speeduinos to choose from why did I choose the NO2C, price, price and size but mainly price. At the time of writing, diy-efi.co.uk are selling the V3 or 4 kits at £119 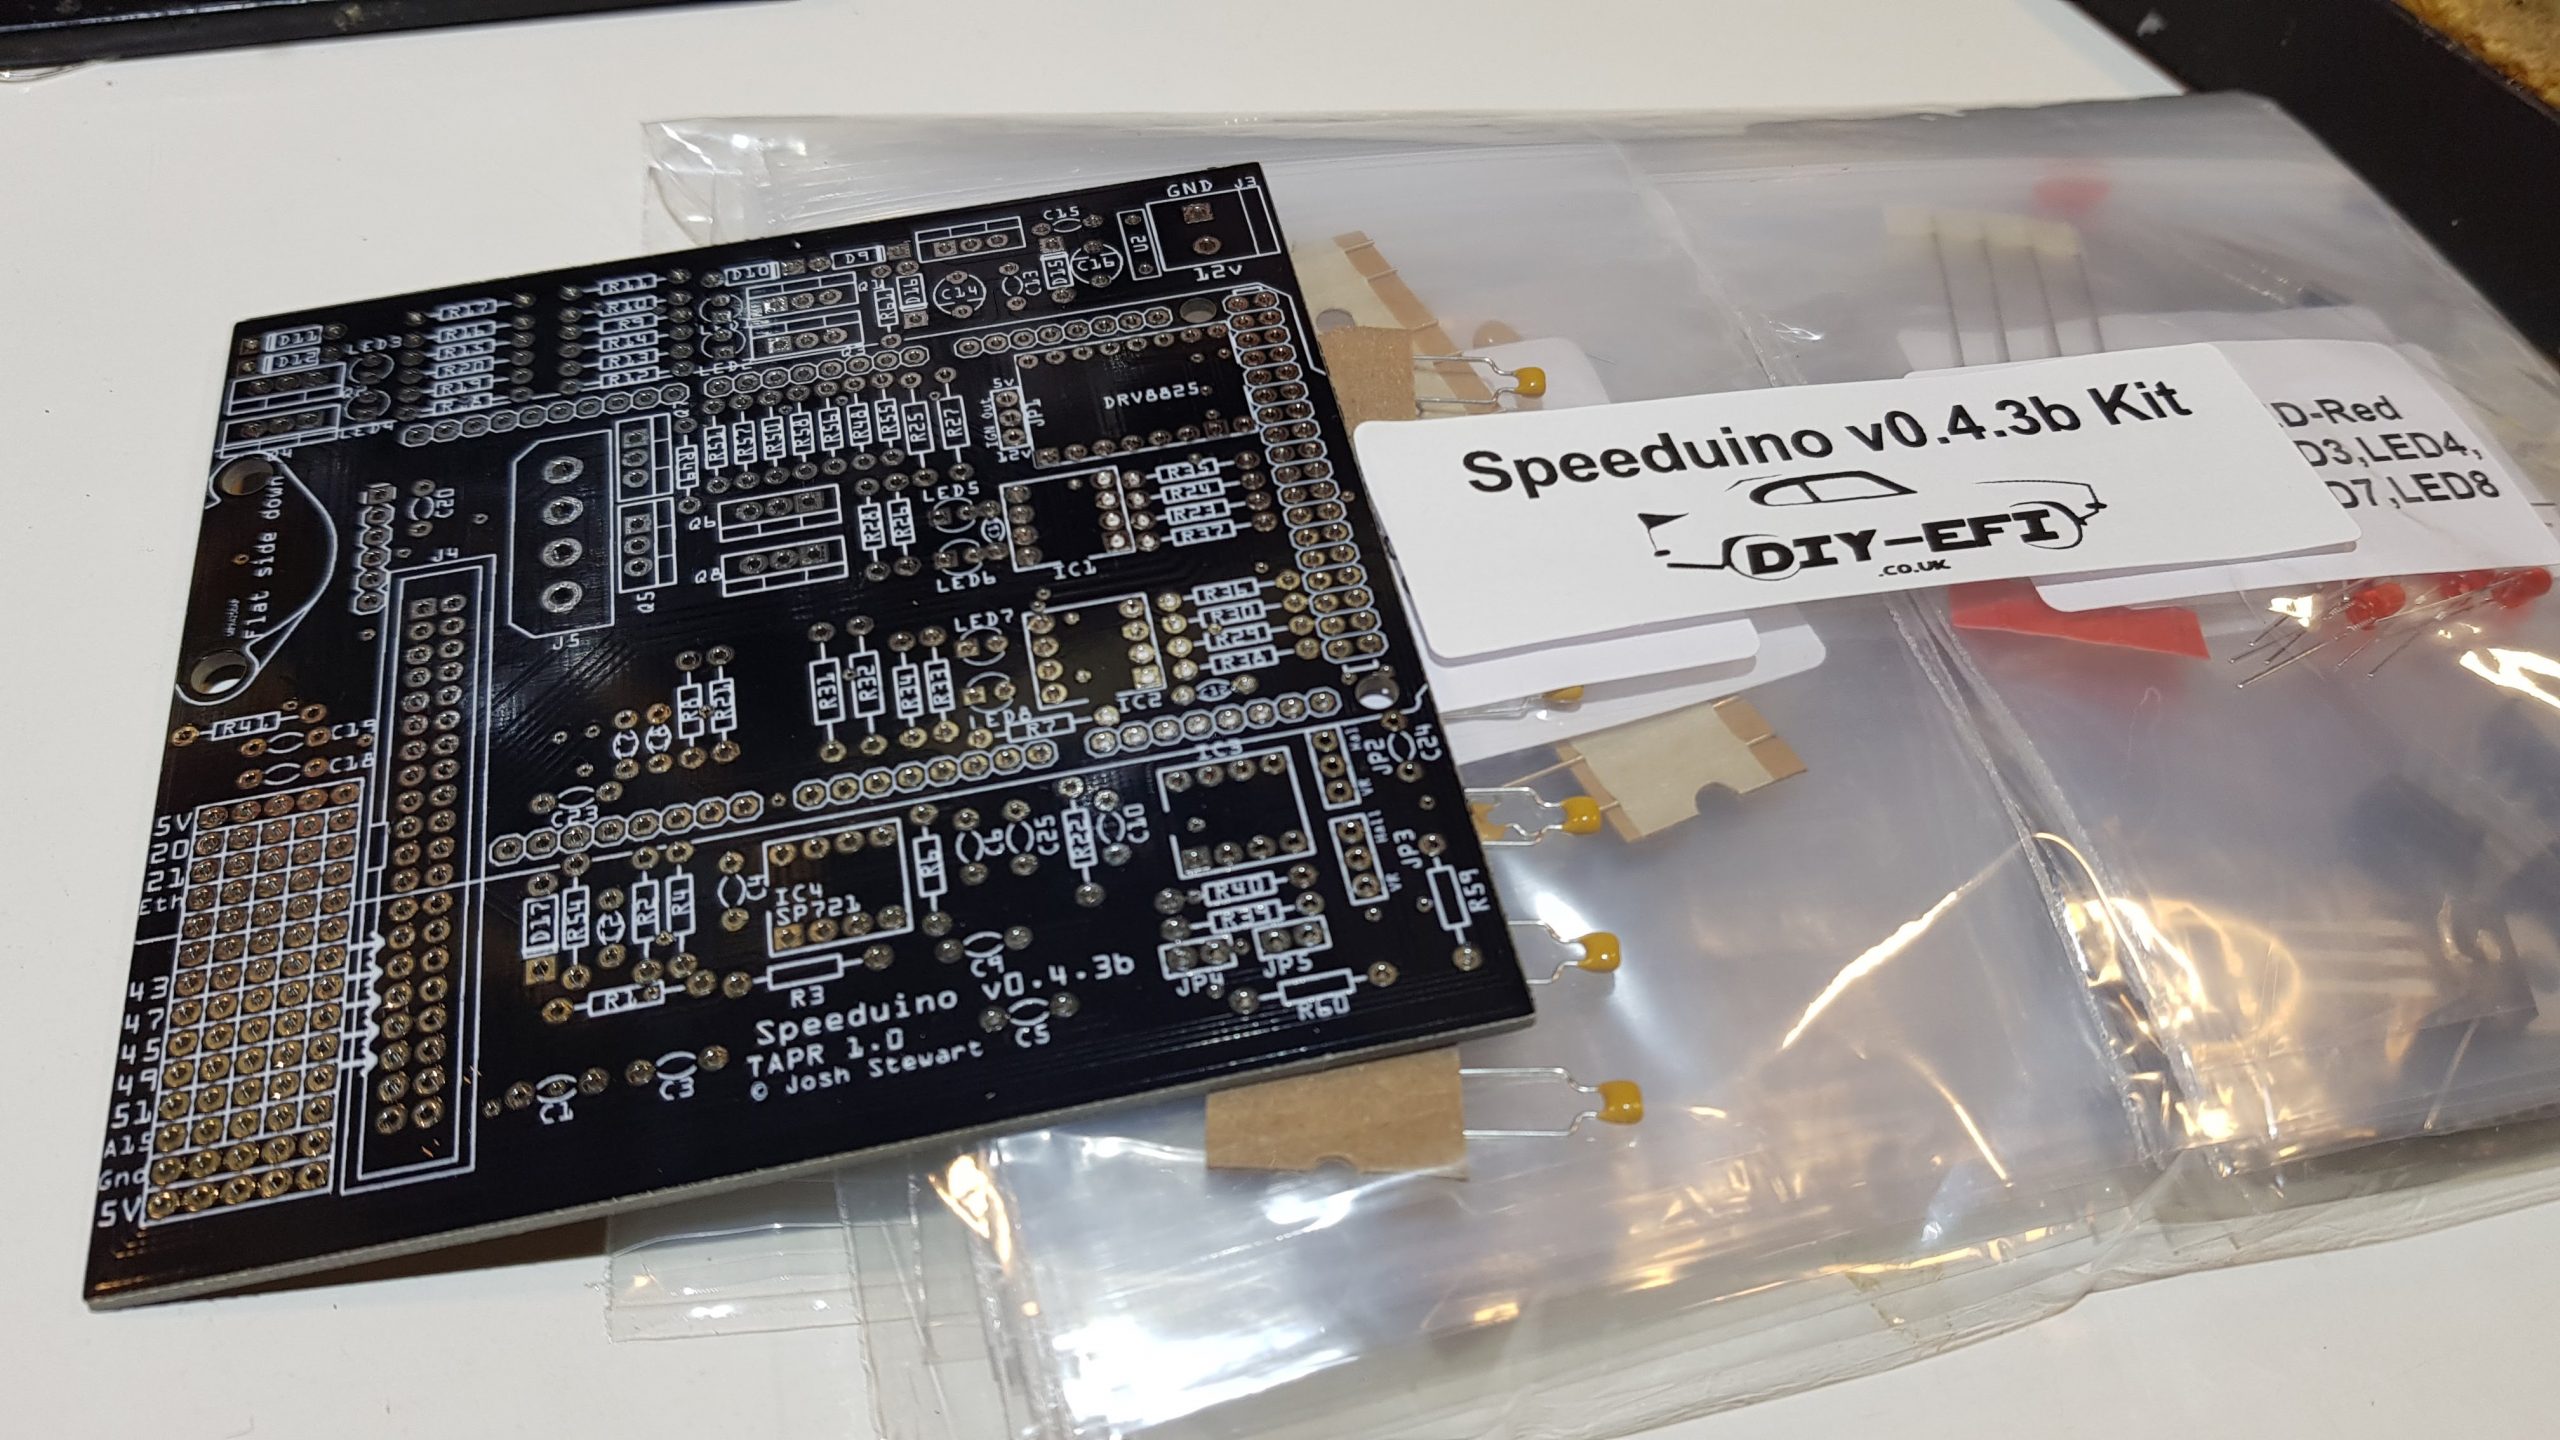 or the NO2C vD1 for £89  As you can see the kits consist of the PCB, all the components and the connectors (all from reputable UK suppliers apparently), add on an Arduino for £16, a VR conditioner (for the VR crank sensor) for £19, special delivery postage for £8 and a 20% cut for the government, and you're out-of-pocket to the tune of £192 for a V3 or 4 or £158 for the NO2C. As for the size, it's about the size of a pack of cards, which is the same as the Microsquirt I had previously except the cables don't have to exit in the most awkward place possible. What can it do, I can't hear you ask, 2 injector output channels 2 coil output channels Dedicated tachometer output 4 medium/high current outputs (idle, boost, VVT, fuel pump, fan, etc) IAT, CLT, TPS, and O2 inputs (protected) On-board MAP sensor Add on boards Stepper idle control through board mounted DRV8825 accessory PCB, ready to fit £3-8 on eBay, Amazon etc VR conditioning through board mounted VR conditioner accessory PCB, ready to fit £19 diy-efi.co.uk Bluetooth adaptor HC-05 accessory PCB, ready to fit £3-8 on eBay, Amazon etc DB2 daughter board 2, bare PCB £4 eBay, not sure about components but prob £10 ish DB2 adds a lot of functionality 2 additional coil output channels (through hole) 4 low current outputs 2 general digital inputs (protected) 1 analogue input (protected) Flex-fuel input (protected) Barometric pressure sensor (adds constant correction to the map) With the low current outputs, you could reconfigure two of the medium/high current outputs on the NO2C to act as injector drivers. To do this, you will have to make minor changes to the firmware before programming the Arduino. In short, it will run batch fire injection and wasted spark ignition: 4cyl engine with a lot of functionality. 6cyl with reduced functionality, you lose 2 of the 4 medium/high current outputs, or use DB2. 8cyl with the daughter board If it's as good as they say it is, that's a lot of bang for ones £. So what's the plan? Several things bugged me about the Ms install, although the engine bay side of the installation was fairly tidy the mess behind the dash wasn't neat it had cable tucked behind the carpets, there was no fuel pump cut out switch, the Vauxhall coil pack always looked out of place. Although for now It's going to run ignition only for now, I'm going to build it for EFI. I picked up a VW polo 6n4 coil pack with leads for £25 and a bag of 4 plugs to fit it for £11, an Ardustim i/o simulator kit for £30 and a new solder station for £47. Total spend so far £276 I should comfortably come in under £300 and have a new soldering iron an ECU tester and a load of fun and learnings to boot. Dan |
| |
Last Edit: Feb 10, 2024 18:10:10 GMT by logicaluk
|
|
|
|
|
|
logicaluk
Posted a lot
Every days a school day round here
Posts: 1,373
|
|
Feb 14, 2024 22:22:11 GMT
|
I spent a very pleasant evening with my new soldering iron, 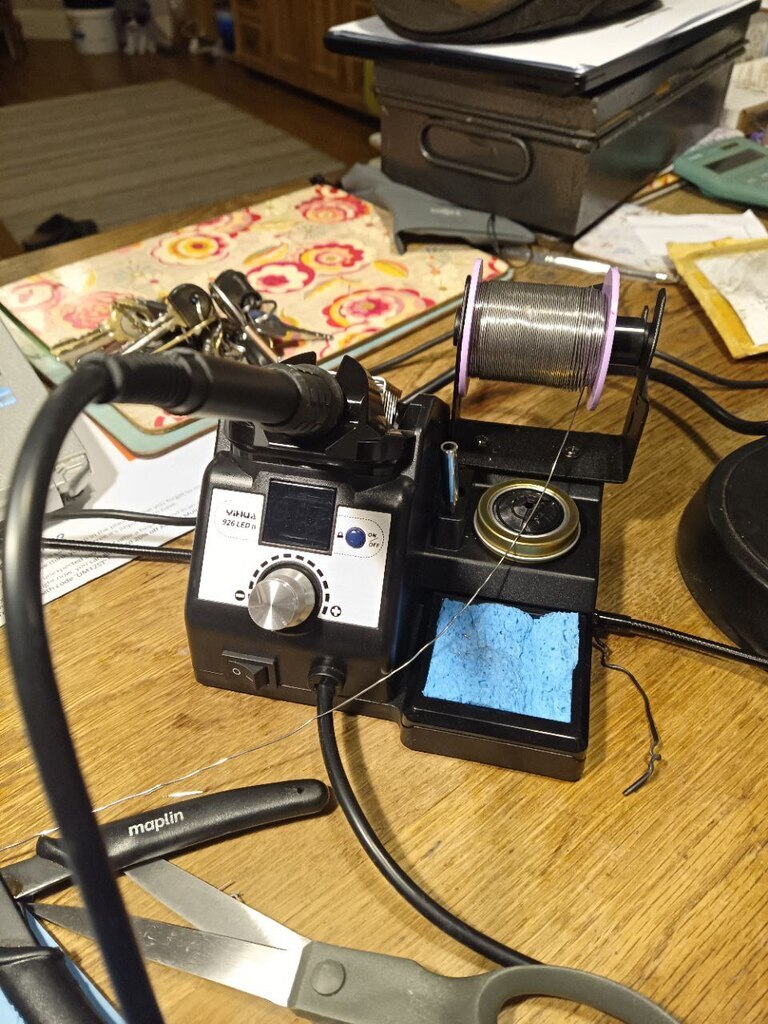 practising my soldering skills, turning this bobtron engine simulator kit 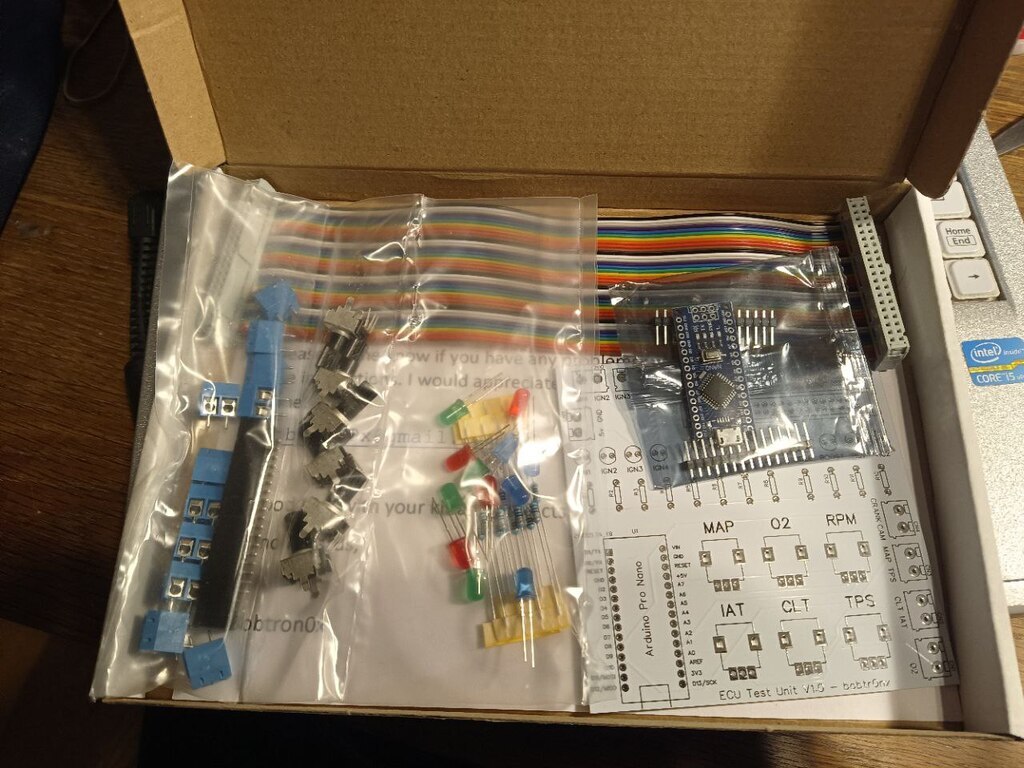 have to say I'm very happy with the results 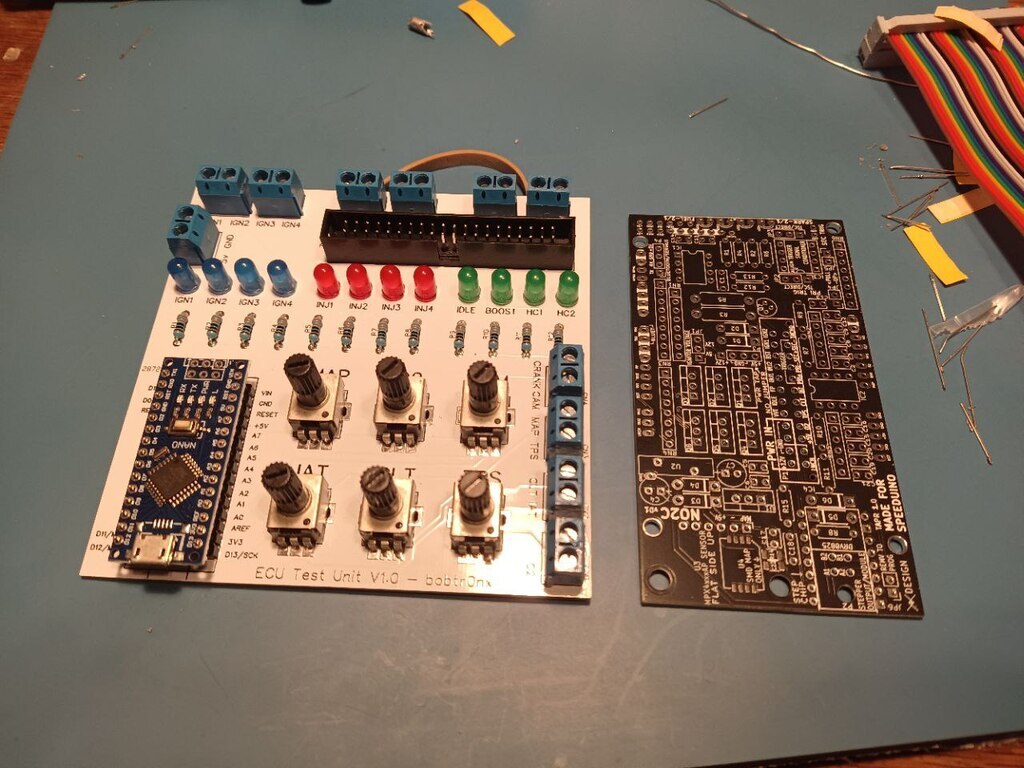 Even the back looks pretty good. 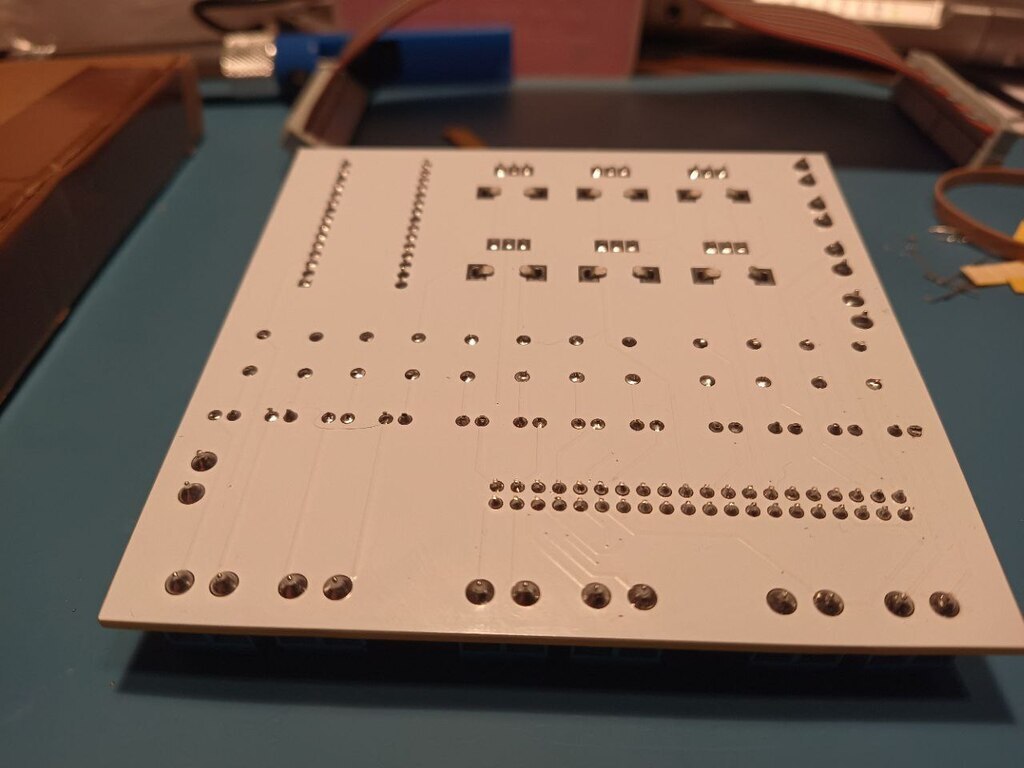 happy with that. Dan |
| |
|
|
logicaluk
Posted a lot
Every days a school day round here
Posts: 1,373
|
|
Feb 15, 2024 23:01:06 GMT
|
3 soldering iron tip changes, 2 and a half hours, 1 numb bum and a moment of blind panic later. Ladies and gentlemen, I give you an almost complete Speeduino NO2c ecu. 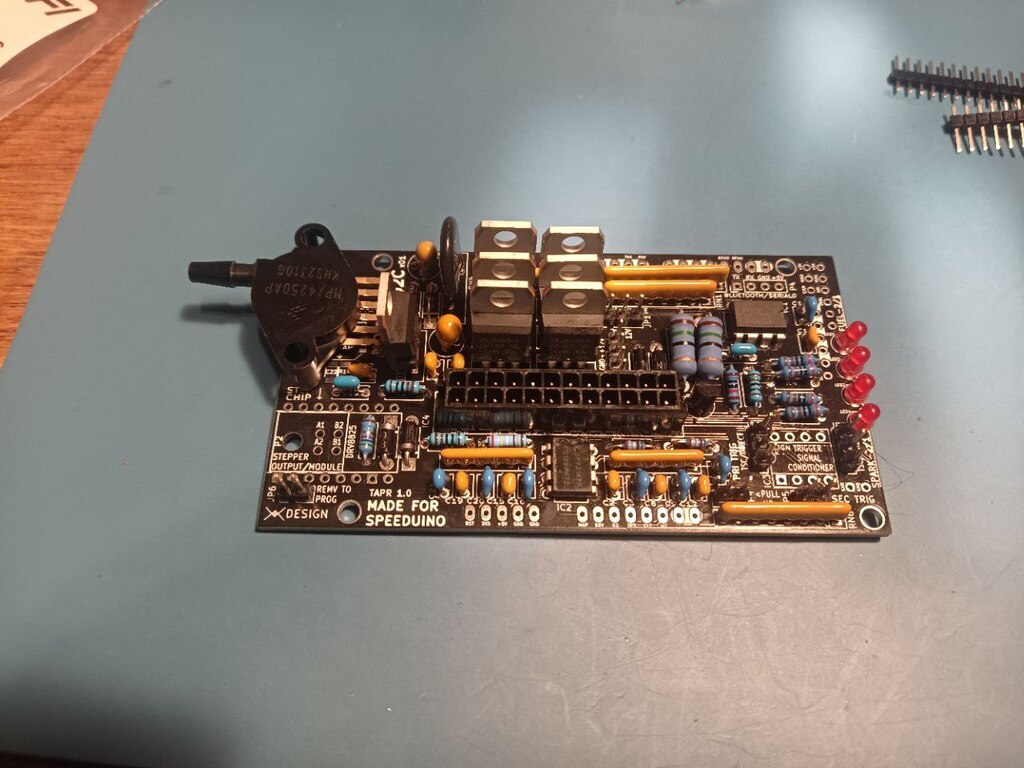 Almost complete because I have to wait for the daughter board to turn up in the post, so I can solder some extra long pins in to pass through to the Arduino and I need to get the long pins from my local friendly electronics shop, yes I have one it's called switch electronics, Website thing hereits run but a really nice guy called Ben and i totally recommend them, I'm off down there tomorrow, ill warn him he's about to receive a ton of orders from the Retro Rides crew. Anyway shameless plug over, my first mistake was deciding the tip on my new iron was too big as all the pads are smaller than the last project, not enough heat transfer not even for the lovely juicy lead based solder I'm using, I didn't even manage 1 joint with it, then i went for the small chisel tip that looked like a good choice and that was almost as bad as the first one, so I went back to the original bit to big one, which worked OK ish, then I just sat there for 2.5 hrs, picking a bag of components and fitted them one by one, yes my bum was numb. Then I took it off to the kitchen and cleaned the flux off with some break cleaner and an old tooth brush, bought it bach to the dinning table work bench and noticed 2 surface mount component spaces, just under the edge of the MAP sensor panic set in, as I went through the bag of components trying to find them, then through the stuff on the table, when I couldn't find them I lifted the MAP sensor only to see printed on the board, only for surface mount map sensor....... Another small step forwards. Dan |
| |
|
|
logicaluk
Posted a lot
Every days a school day round here
Posts: 1,373
|
|
Feb 17, 2024 22:11:45 GMT
|
When I bought the NO2C I ordered an extra plug for the board thinking I could make an adaptor to plug it in to the simulator, but I struggled to crimp the pins on, then decided to solder them, then found out they didn't want to stay in the plug housing at this point i gave up and spent 2 hours desoldering the socket from the board and failed to clear all the solder out of every hole which of course bit me in the bum later. I was very glad that it was a very good quality circuit board, as last time I had to desolder a socket like this I lifted a track and had to bodge a wire on. Then at 12 o'clock I had to find some wire, as the test wire I had was to think for permanent installation, I have loads of new 1.5mm TRI rated wire but of course, that's way too big, halfords smallest is 2.5mm, but I have a Saab loom I have for supplying such emergencies, so I went and dug that out, spent about half an hour finding it and cutting out enough small wires to do what I wanted, only to find out it's just too big to fit in the hole, only just mind, so back outside to see what else there was in my store of surprises, I turned up a disco loom that had been hacked about, and i completely for got I had which luckily had some thin stuff. An hour to do battle with the tiny it of solder I'd left in the holes, and we have wires actually soldered in place, some of which can be connected to the simulator, thus 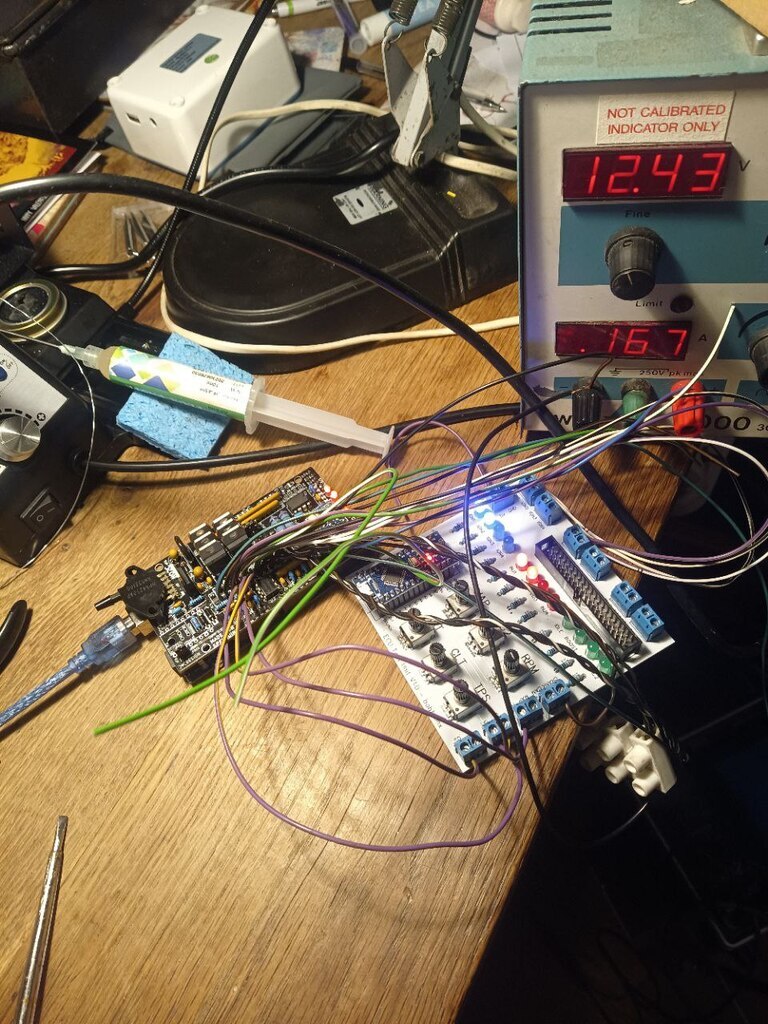 Now this isn't strictly a true representation of what I saw, only 1 LED was flashing at an odd rate, cue sinking heart. Disconnect the board and inspect all the solder joints, again. Run the high speed tooth logger app on tuner studio, get the scope out and check for crank signal, follow it through the board, 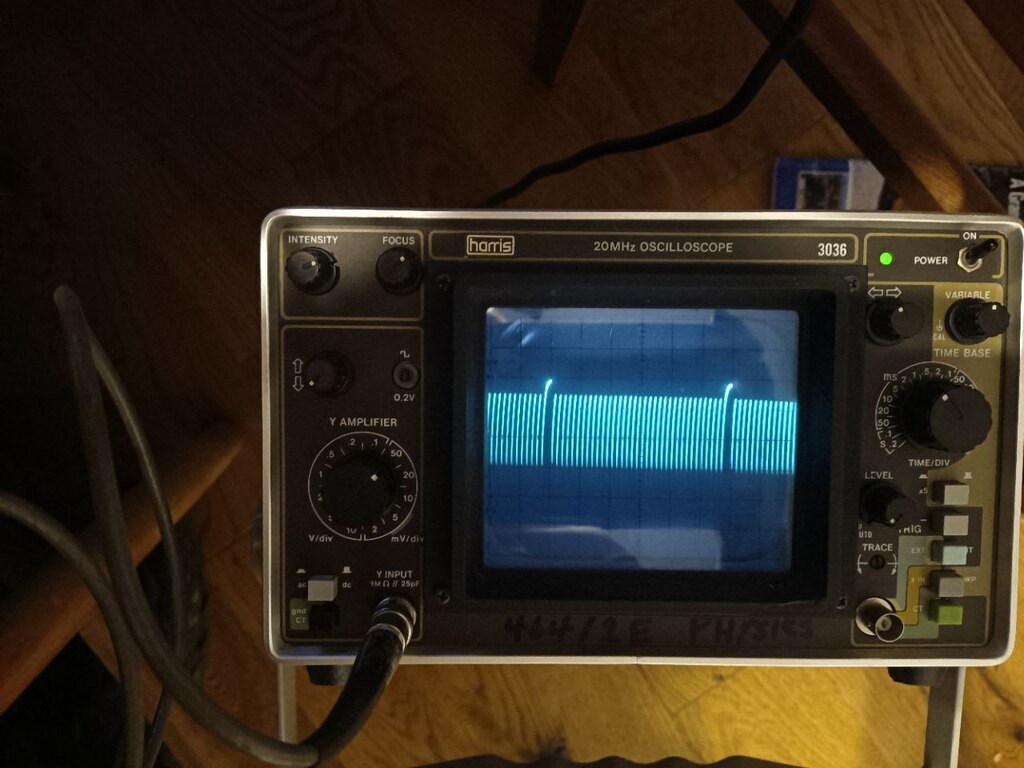 Yep that's where it should be, check the second ignition channel signal, can't find it, unplug the board again to re recheck the soldering, nothing, re load the firmware, no change, bang head against table, no change. Give up and have a poke around to set up the TPS, MAP, AIT and Coolant sensor. Nope the Air Temp Sensor doesn't want to play, OK what else can I find that's not working right, the Battery voltage is reading 18+v, I check with the meter and the output from the power supply is what it says on the display, go and check the circuit to find the wrong resistor, check all the other resistors to find there all OK and the one 3k9 resistor in the build has been sent out as a 2k49 which is an odd value, and just so happens to be the one I can't find for the daughter board when it finally turns up. So I leave a message on the Speeduino forum, with the tune file attached from tuner studio, with in the hour I get a reply saying there's a lot of bad data in there, I should load the Speeduino base tune in again, oh facepalm I forgot to do that bit. I did it the first time I set TS to run the Arduino without the NO2C on, then forgot to do it the second time after I deleted the project and started again. That fixed the ignition and bought the injector channels to life. But not the IAT, that was because it had pulled out of the terminal on the simulator. IT VERKS!!!!! woo and might i say hoo.. Next up is wiring it up to fuses, relays and terminals then I can work out what size enclosure to use, I'm planning on having everything in one box, with a lot of plugs |
| |
|
|
logicaluk
Posted a lot
Every days a school day round here
Posts: 1,373
|
|
Feb 19, 2024 18:38:13 GMT
|
I thought the NO2C board was small 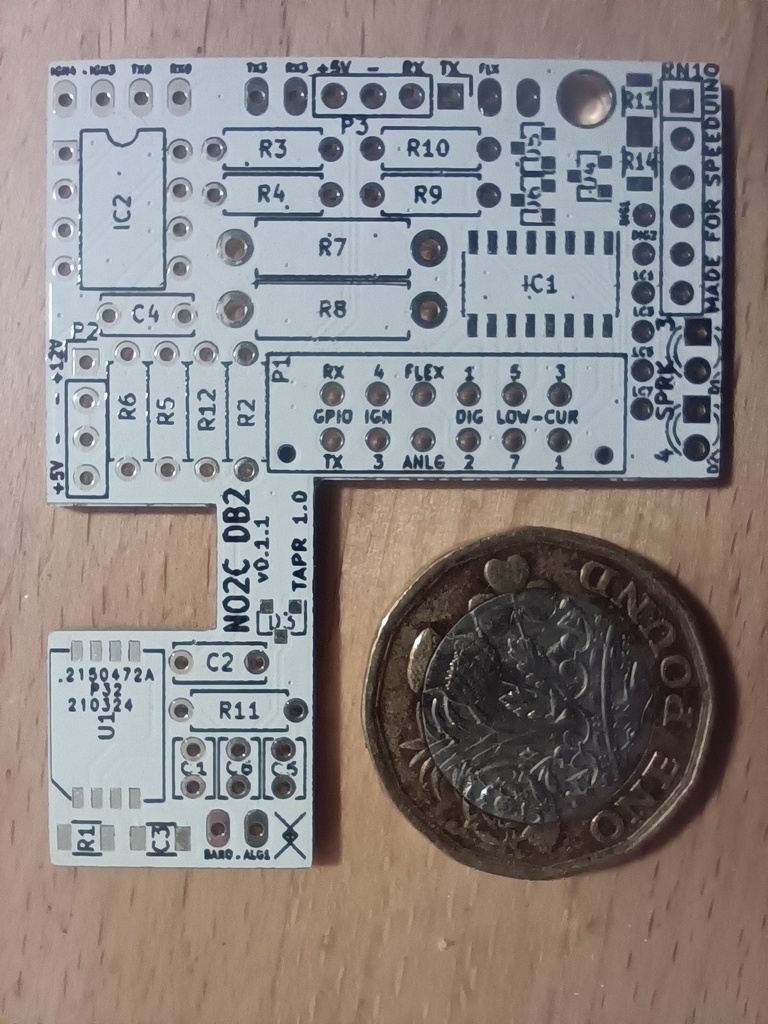 This is not going to be easy. Dan |
| |
|
|
|
|
|
Feb 20, 2024 19:36:20 GMT
|
|
very informative. I'm now convinced my soldering skills are not up to it and will buy a ready built ecu for my range rover!
|
| |
|
|
logicaluk
Posted a lot
Every days a school day round here
Posts: 1,373
|
|
Feb 20, 2024 22:23:34 GMT
|
very informative. I'm now convinced my soldering skills are not up to it and will buy a ready built ecu for my range rover! Thank you, I know my soldering skills aren't fantastic, but I chose the smallest of the speeduino boards to work on. Any of the other speeduino boards would be better suited to your application. Speeduino dropbear (someone been reading Pratchett) is fully built in a case complete and has 8 fuel 8 ignition channel ECU with canbus it's the most fully featured speeduino and costs $420 + tax and shipping, but I can't seem to find a UK supplier. The UA4C seafox has 4 injection 4ignition built in a case for £288 Inc vat but if the connector is the same as the one on mine I really struggled with them, it could have been me, they may be different. The V3 V4 boards have 4 injection and 4 ignition channels come fully built but will need case a case and comes with a 40 pin I'd type connector for £186 Inc VAT. Hop that is of some use, you have probably look it all up by now anyway. Dan |
| |
|
|
|
|
|
Feb 21, 2024 16:59:26 GMT
|
|
Interesting stuff. I've been thinking about ECU options for the SD1 and Speeduino was one of them. Ideally I'd want to do a little less course batch-firing than the 14CUX (batch fire by bank), so I'd be looking at the V3 or V4 boards at least.
Following along!
|
| |
|
|
logicaluk
Posted a lot
Every days a school day round here
Posts: 1,373
|
|
Feb 24, 2024 14:41:24 GMT
|
Good to have you along for the ride BT, BTW you can re-purpose medium current outputs for injection channels. Between working for a living and trying to build the best Acclaim ever, rebuild the herald estate and ignoring the Bond, I'm also reworking the speeduino manual as it's a bit lacking in the build up area. A small update All the components and the circuit board, have arrived for the DB2, oh how I'm not looking forward to my first attempt at surface mounted components, but I'm not good get around to building it for a week or so, there is plenty of time to worry about it. In the meantime, this turned up 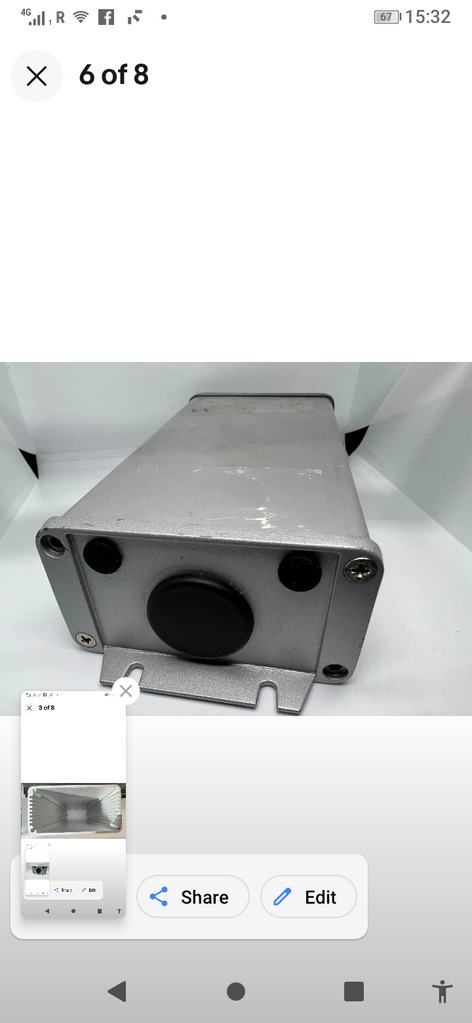 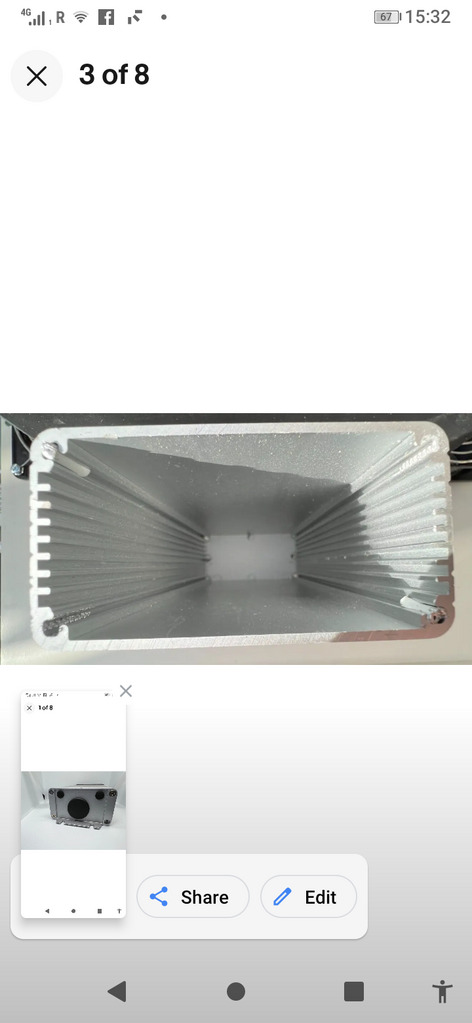 I'd been looking for suitable enclosures for the speeduino and found these on eBay for £6.50 delivered but wasn't sure if it would work. Then the seller offered a quid off and I thought what the hell it'll come in for something eventually, and it looks like it's going to be just to short to fit the way I want it to, luckily the chap has a longer version but I'm going to wait till the connectors turn up before ordering it. |
| |
|
|
logicaluk
Posted a lot
Every days a school day round here
Posts: 1,373
|
|
|
|
And that case is too small, rethink required. The DB2 is almost done I say almost because, I've lost one of the chips for it, it was the first to arrive, and it's gone, so I've ordered another one luckily at £5 It's not too bad, not as bad as the connectors, I was planning on using some plugs I recovered from some scrap parts, like this but 8,10,12 way plugs all i needed was the sockets 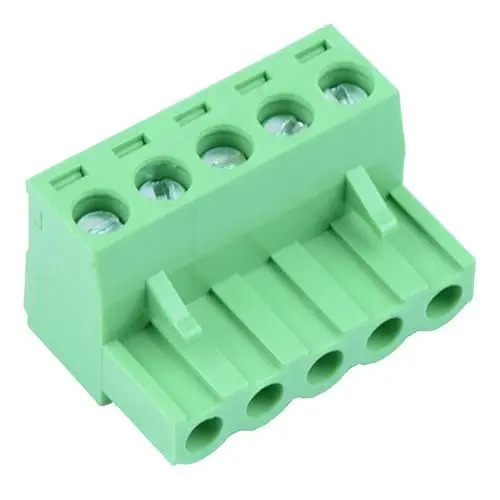 Eventually after working out what they were & buying the sockets, I changed my mind, they are screw terminals and I want his to be as reliable as the MS as it will probably be fit and forget I changed my plan. I managed to scrounge up some Deutsch DT connectors, 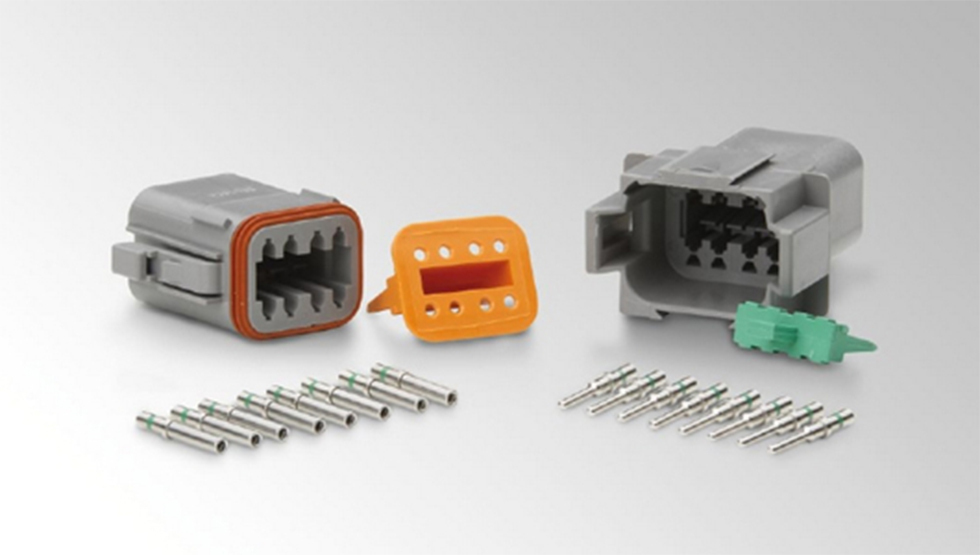 These things are great, they are fully sealed, completely re-buildable and best of all I could get 3x12 pin plugs ad 2x3 pin plugs for free, (that's my second favourite price BTW) just needed to find some panel mount sockets, I was struggling to find a baro sensor in a quantity of less than 1000, but digi-key had the sockets and the baro sensor lot delivered for £50 job done. Or so I thought, when they turned up though they were just sockets, no pins or retaining bar, so I had to spend another £38 on a box of mixed sizes just to get the pins and retaining bars but at least I have some useful connectors spare now....... |
| |
|
|
|
|


