|
|
|
|
|
One of the more useful tips I found when doing this ![]() I have a regulator at the gun so that I know that I have the correct pressure at the end of my air-line. There is a considerable drop so you might see 22 psi at the gun when you have 40 psi at the tank outlet I open the air pressure regulator wide open and the same for the air volume control knob on the gun. Then I use the regulator at the wall to adjust the pressure until I see the desired 22 psi at the gun. Then I remove the regulator at the gun knowing that it wont change. Who needs to be dragging that thing around on the end of the gun anyways. If you are going to be shooting high fill primer, get rid of the little strainer doinkus that goes at the bottom of the cup; it is too fine to let the thick primers pass through. Use paint strainers when filling the gun with product. |
| |
|
|
|
|
|
|
|
Feb 11, 2019 11:19:10 GMT
|
I will soon be at the 'All the gear but no idea' stage :-) 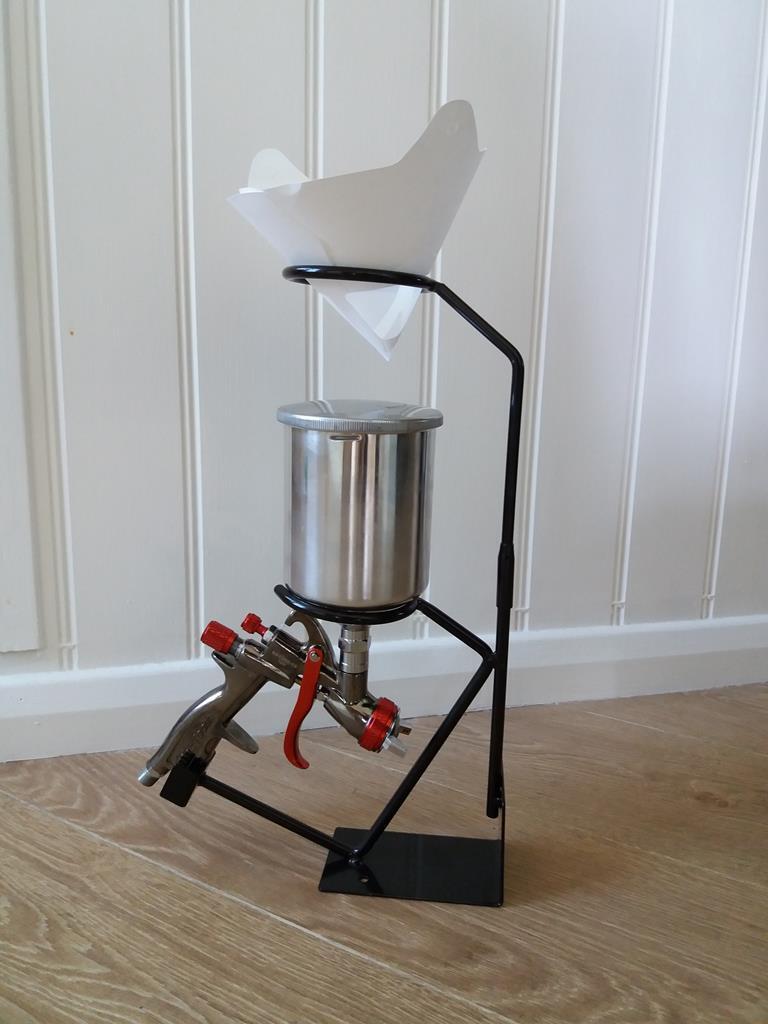 |
| |
|
|
|
|
|
Feb 11, 2019 13:15:02 GMT
|
|
Which gun did you go for in the end?
|
| |
|
|
|
|
|
Feb 11, 2019 15:21:03 GMT
|
|
Well. I was talking to my son about which gun to get and he told me that he bought one a few years ago but never used it! It is a Mac Tools HVLP 1.3 costing around £140 so not a cheapo. Can't find any reviews on it so we will have to wait and see how it performs, but it can't be worse than my old suction one.
|
| |
|
|
|
|
|
Feb 11, 2019 15:24:41 GMT
|
One of the more useful tips I found when doing this ![]() I have a regulator at the gun so that I know that I have the correct pressure at the end of my air-line. There is a considerable drop so you might see 22 psi at the gun when you have 40 psi at the tank outlet I open the air pressure regulator wide open and the same for the air volume control knob on the gun. Then I use the regulator at the wall to adjust the pressure until I see the desired 22 psi at the gun. Then I remove the regulator at the gun knowing that it wont change. Who needs to be dragging that thing around on the end of the gun anyways. If you are going to be shooting high fill primer, get rid of the little strainer doinkus that goes at the bottom of the cup; it is too fine to let the thick primers pass through. Use paint strainers when filling the gun with product. Cheers. You have confirmed what I have seen on YouTube re setting the gun up. I have been spraying with the curly lead still attached but that has now been removed. Good tip re the strainer, thanks. |
| |
|
|
|
|
|
Feb 11, 2019 16:14:35 GMT
|
1.3 is perfect for topcoat, might be worth buying a cheap gun with around 1.8 tip for primer though. Edit ....curly lead!!!! Nooooooooo  Get a nice soft hose if you can, no tugging on your arm then. If you don't already know, carefully pour a half bucket of water on the workshop floor (avoid any potential splashes on what you want to paint) and gently spread it around with a broom. This will suck all the dust down to the floor and gives a huge improvement in the final finish. |
| |
Last Edit: Feb 11, 2019 20:01:33 GMT by blackpopracing: fixing spelling
|
|
|
|
|
Feb 11, 2019 18:45:58 GMT
|
|
I've discovered in painting my imp that a workshop can be too hot. It was 34 degrees when I did my top coat and at the time I thought great.. The paint will set nicely. But I think it just went to help in creating my new awesome orange peel finish :-(
Not that you'll have a problem there in the UK with 34 degree temps... In winter.
|
| |
|
|
|
|
|
Feb 11, 2019 22:34:50 GMT
|
I've discovered in painting my imp that a workshop can be too hot. It was 34 degrees when I did my top coat and at the time I thought great.. The paint will set nicely. But I think it just went to help in creating my new awesome orange peel finish :-( Not that you'll have a problem there in the UK with 34 degree temps... In winter. 34 deg F maybe :-) |
| |
|
|
|
|
|
Feb 11, 2019 22:37:54 GMT
|
|
|
| |
Last Edit: Feb 11, 2019 23:14:35 GMT by nalesutol
|
|
|
|
|
Feb 11, 2019 23:36:47 GMT
|
How often do you do something only to discover that is affects something else? A case in point. Finally sorted out how I plan to allow the bonnet to be pulled forward prior to being opened. Works fine but I have just realised that where the sliding restraint goes is where I had planned to mount rubber AV bobbins to locate the air filter box on to! A redesign was called for. After a little thought I came up with this. Bent up some aluminium to form patterns and threw some carbon onto them and cooked at gas mark 5 for 90 minutes. Once rubbed down they will be presentable. They will be glued to the frame and the sliding bonnet restraints will slide under the filter box. 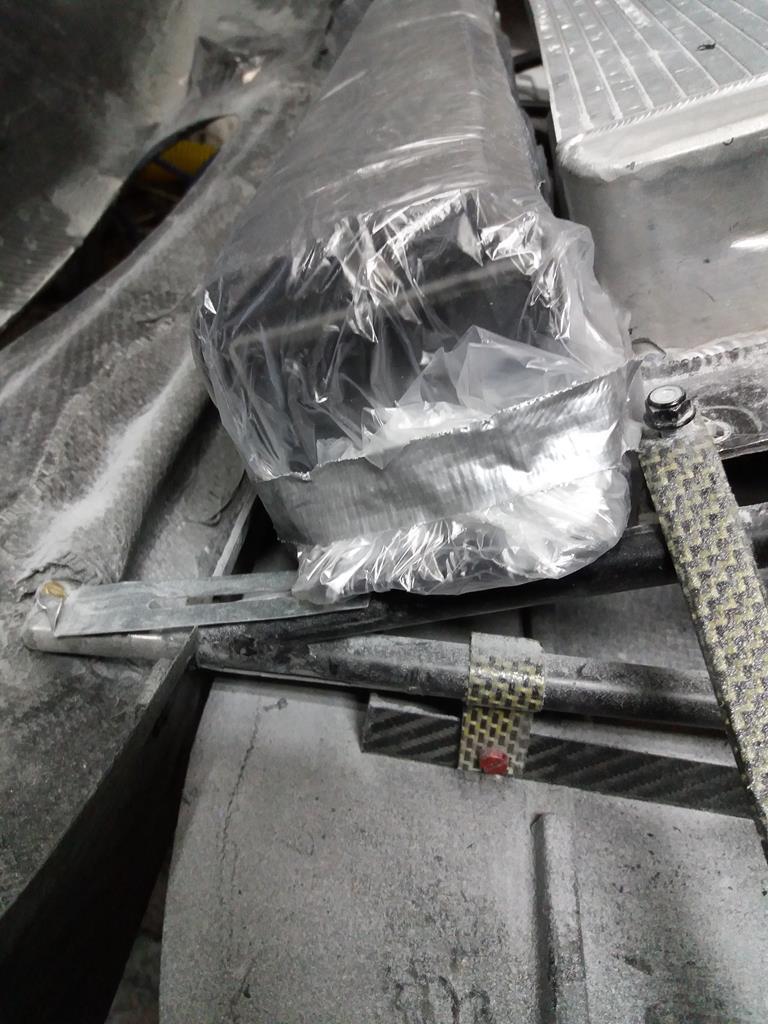 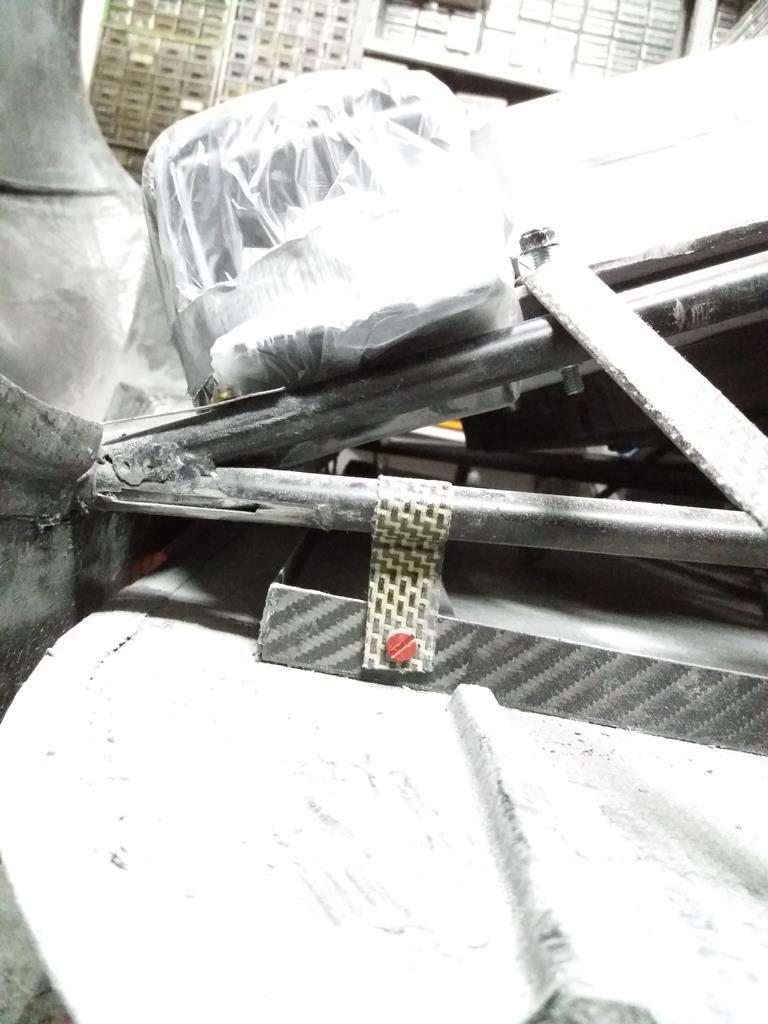 The filter box is covered in plastic as the filter is oiled.  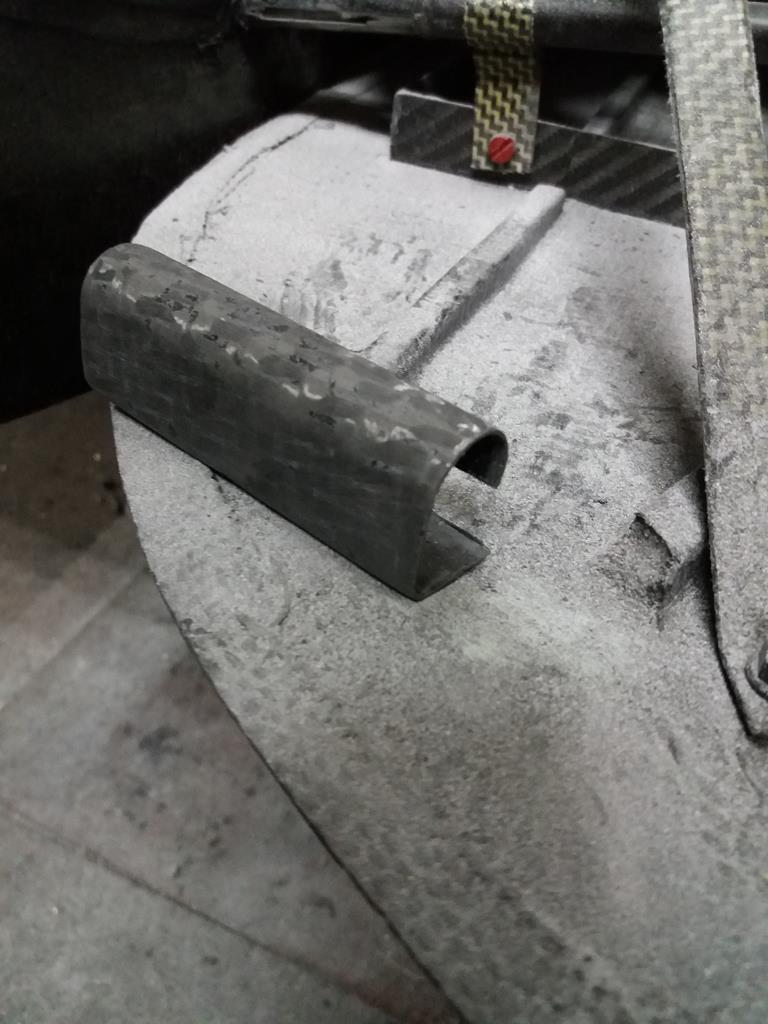 |
| |
Last Edit: Feb 11, 2019 23:38:05 GMT by nalesutol
|
|
|
|
|
Feb 11, 2019 23:42:33 GMT
|
Yes the hose looks about right. You just need one that is soft enough it does not want to stay coiled so as you pull it around the room it does not lift up and touch you nice fresh paint. I looked at that gun when searching for recommendations for you - if it does spray ok it's teriffic value with all 3 tips & aircaps. Worth a punt as it's cheap enough. Remember what I said about the silicone grease though. Look for SATA grease for gun reassembly, it's expensive but a tube will last a lifetime, and the grease does not contaminate paint. SATA grease |
| |
|
|
|
|
|
Feb 12, 2019 18:19:22 GMT
|
An ill wind etc. Well, sort of. Having to redesign the filter box fixings due to the bonnet opening limiters, I ended up with a weight saving :-) New fixings (when both have been trimmed) including clips and glue, came out at 20gms the pair. The original bobbins and nuts plus the steel tags to be welded to the tubes, weighed in at over 110gms. 90gms saving may not seem a lot to most, but I am doing this over the whole car and to every new and existing part. Everything I do is subjected to the same question, can I make it lighter but still functional and safe? Original car with the Lotus twincam engine weighed exactly 700kg wet. I now have a much heavier engine, gearbox and diff, a full roll cage, underfloor panels, intercooler, pneumatic system, twin fuel pumps, swirl pot, induction system (ran open trumpets on the twincam), nitrous etc etc but hope to keep the car below 650kg. 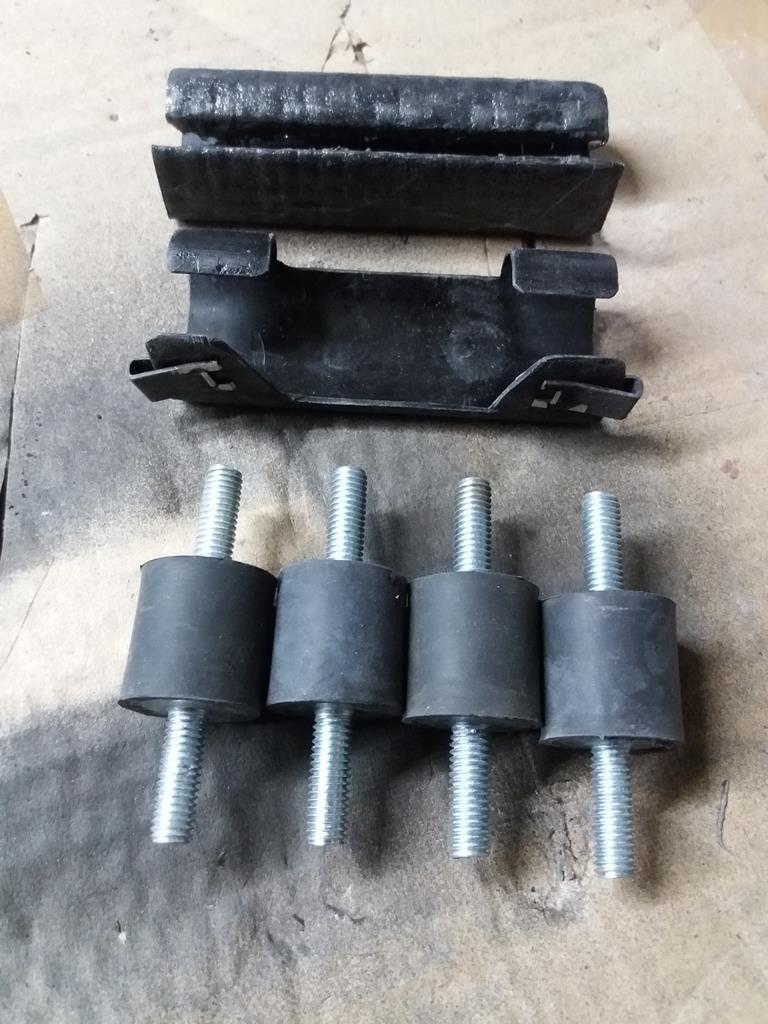 |
| |
Last Edit: Feb 12, 2019 18:20:07 GMT by nalesutol
|
|
|
|
|
Feb 14, 2019 22:45:48 GMT
|
Working out the fine details on the front clip and the adjacent aero. Looking at how to get the air out of the rear of the front wheel well as it is a bit of a mess. I will fill and smooth the hole and tidy up the end of the removable floor panel, but I also want to direct the air along the side of the body. To that end I have designed a strake that will also act as a support for the end of the side splitter (one item doing two jobs - Colin will be impressed :-) ) 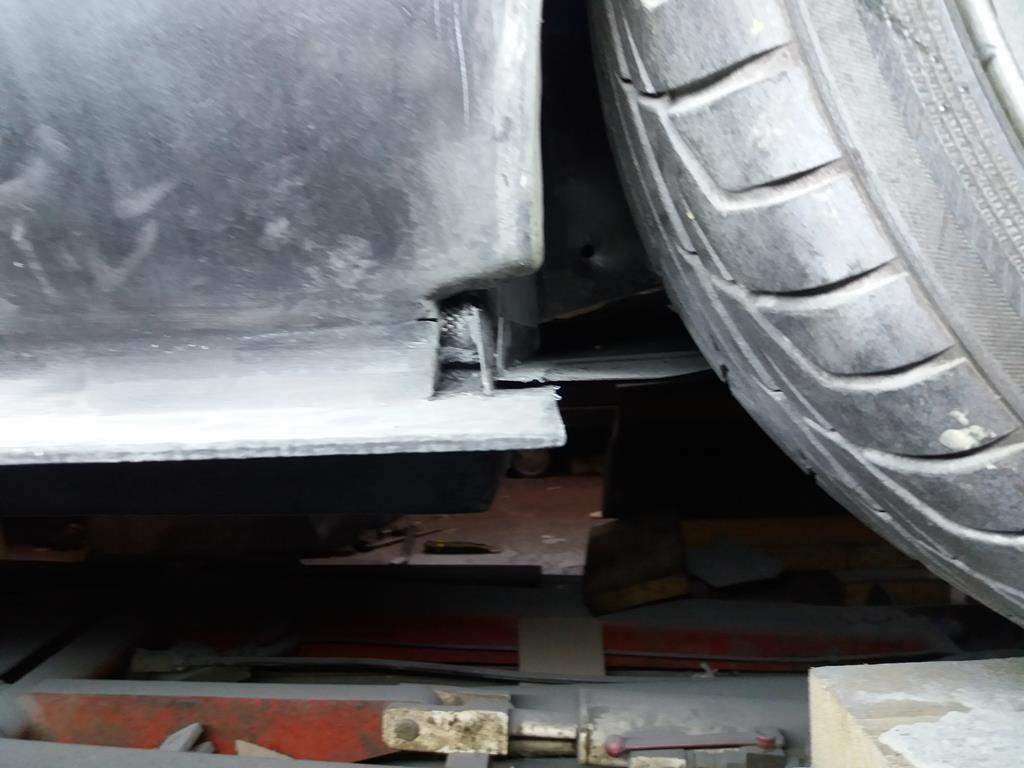 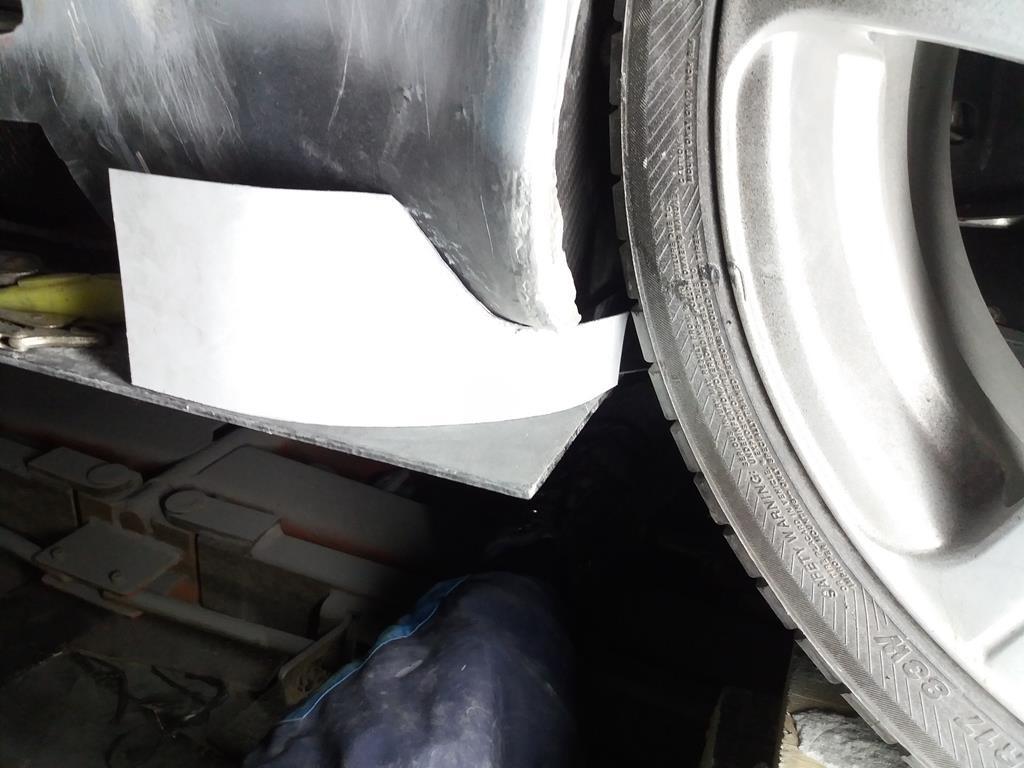 I have yet to decide whether to remove the section of splitter in front of the strake or not. 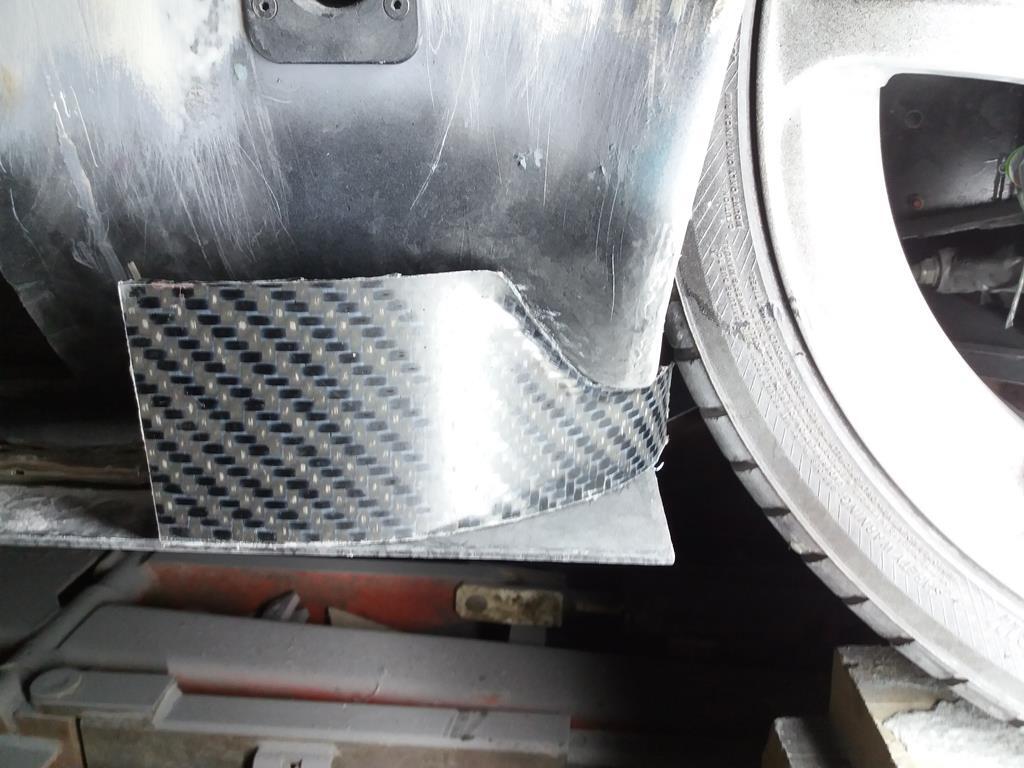 |
| |
|
|
jamesd1972
Club Retro Rides Member
Posts: 2,908  Club RR Member Number: 40
|
|
|
|
|
Might stop you catching ankles / hands on it !
Some nice progress.
James
|
| |
|
|
|
|
|
Feb 15, 2019 14:55:42 GMT
|
Might stop you catching ankles / hands on it ! Some nice progress. James Good point. |
| |
|
|
|
|
|
Feb 15, 2019 18:02:50 GMT
|
Taking James' advice, I have trimmed the side skirt to match the strake. Roughly shaped, it will be sanded to shape tomorrow. Apologies to the form over function aficionados, but it isn't all swoopy and shapely, just functional :-) 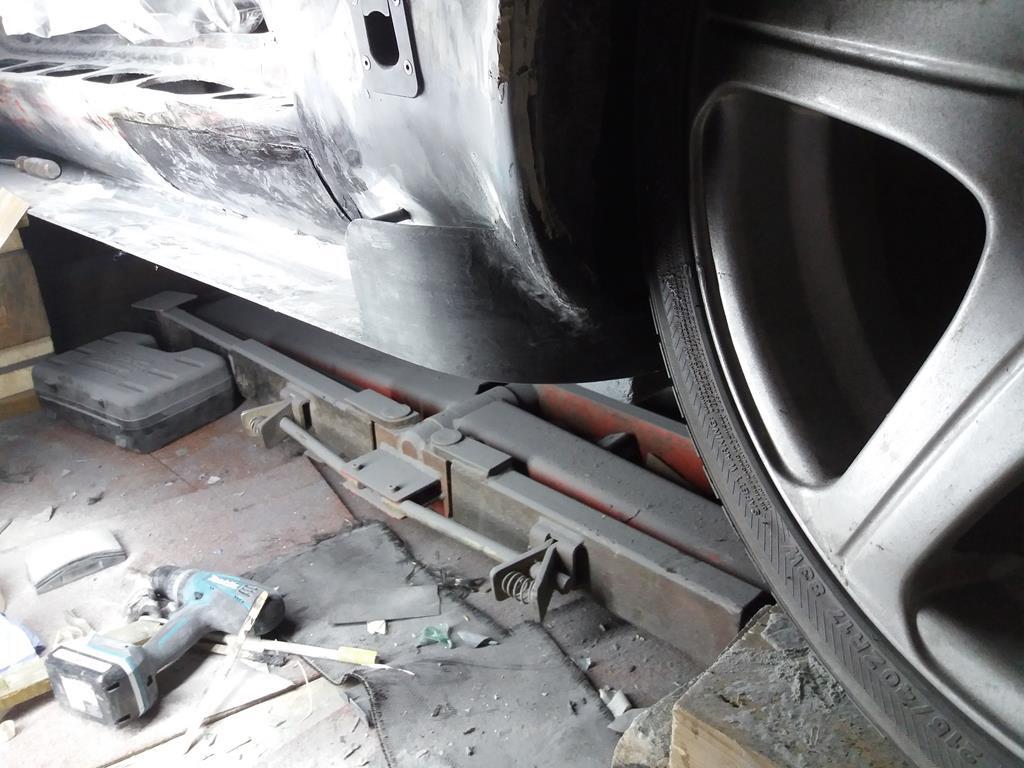 |
| |
|
|
|
|
|
Feb 16, 2019 15:03:16 GMT
|
More toys arrived today :-) 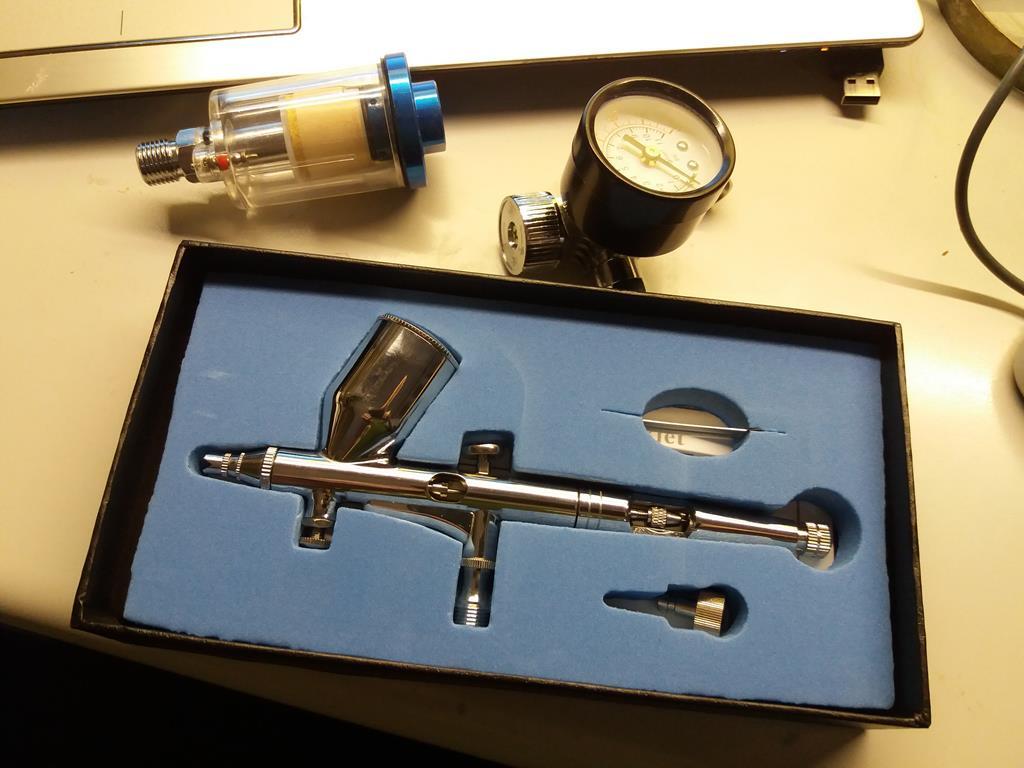 |
| |
|
|
|
|
|
Feb 16, 2019 20:28:28 GMT
|
|
What exhaust diameter did you go for? The boy racers think anything less than 3-inch diameter is too small. I'm of a different view and just wanted to see if a highly detailed build like this confirms my suspicions.
|
| |
|
|
|
|
|
Feb 16, 2019 23:54:41 GMT
|
What exhaust diameter did you go for? The boy racers think anything less than 3-inch diameter is too small. I'm of a different view and just wanted to see if a highly detailed build like this confirms my suspicions. That was discussed with my engine guru. He has built many YB engines, in fact he built the first RS500 engine so he knows a thing or two about them. He recommended 3" for the 520bhp I have so that is what I went for. Complete system (apart from 4WD manifold) prior to ceramic coating. 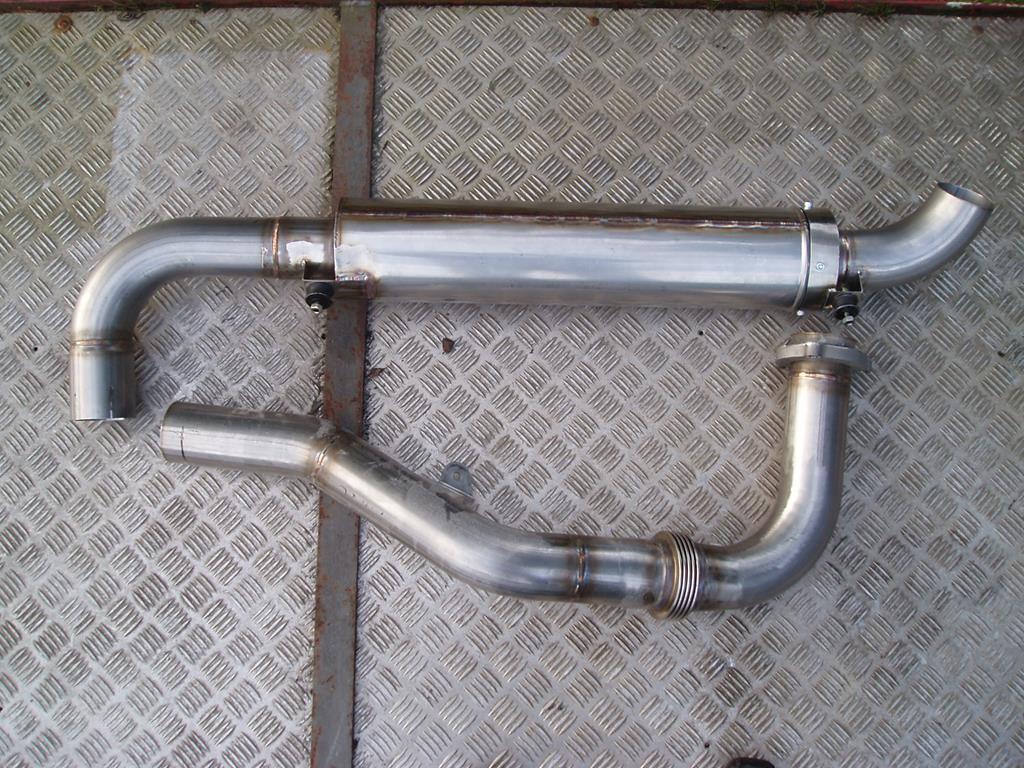 Manifold and main pipe coated. 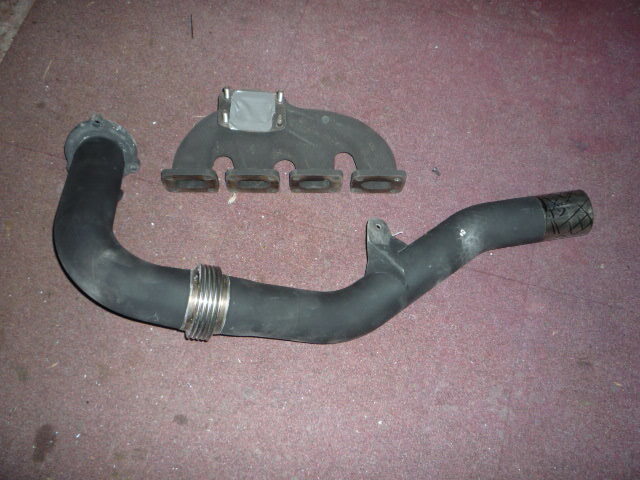 |
| |
Last Edit: Feb 17, 2019 0:02:05 GMT by nalesutol
|
|
tristanh
Part of things
 Routinely bewildered
Posts: 990
|
|
|
|
|
The coating is the business. Who did it?
|
| |
Whether you believe you can, or you cannot, you're probably right.
|
|


