|
|
|
Sept 28, 2019 9:09:25 GMT
|
Don't you just love working on cars! It is always the most awkward bolt/nut that breaks or rounds or shears off! Well done on getting it sorted.....and inspiring us with your work. Thanks, it could have gone very tits up. Must learn to weld properly :-) The most baffling part of this episode is why I only fitted 3 titanium bolts when I had spares in my collection? |
| |
|
|
|
|
|
|
|
Sept 28, 2019 9:29:53 GMT
|
Looking as good as Swiss cheese👍 Where do you buy your aluminium and titanium bolts? For the larger, structural or visible metric bolts I use Competition Fasteners: www.competitionfasteners.com/They specialise in metric but do a few imperial sizes. Most of my imperial stuff came from the States. However, there are a lot more outlets around these days. Pro Bolt have been around for a while. I haven't used them as they aren't cheap, but they do offer pretty colours :-) For the smaller run of the mill bolts that aren't in your face so I am not to concerned about the surface finish I use AliExpress. They also offer polished bolts similar to those from Competition Fasteners. I am not a metallurgist so can't confirm that they are made from the same grade (although they state that they are). However, I have compared weights and they are identical to the same bolts from Competition Fasteners. You takes your choice and I am not recommending anyone, just stating what I do :-) www.aliexpress.com/premium/titanium-bolts.html?SearchText=titanium+bolts&d=y&initiative_id=SB_20190928012408&origin=y&catId=0&isViewCP=y&switch_new_app=y |
| |
|
|
|
|
|
Sept 28, 2019 10:29:59 GMT
|
I have yet to decide on hose clamps. Mikalor are designed to clamp 360 but, as you say, they are 3-4 times heavier than an equivalent diameter 'jubilee' clamp. I will probably go with the best quality jubilee clamp but have Mikalor on standby as they tend to be used by the high boost boys. Yep, just to confirm my decent jubilees have fixed my coolant leak problems, and for less weight too! Perhaps the issue with them for boost is they pop off the threaded section where mikalors have regular screw threads. Still, I'd be happy using jubilees everywhere and then replacing with mikalors on boost pipes if there's a problem. |
| |
|
|
stealthstylz
Club Retro Rides Member
Posts: 14,929
Club RR Member Number: 174
|
|
Sept 28, 2019 10:44:06 GMT
|
|
I'd use Mikalor clamps on boost pipes - the weight saving of Jubilees won't be worth curse word compared to the power lost from boost leaks.
|
| |
|
|
|
|
|
Sept 28, 2019 18:43:16 GMT
|
I'd use Mikalor clamps on boost pipes - the weight saving of Jubilees won't be worth curse word compared to the power lost from boost leaks. That is a good call :-) |
| |
|
|
|
|
|
Sept 28, 2019 18:49:57 GMT
|
Continuing to work on the exhaust heat shields. First section completed. The second section can be seen in place but not covered on Zircoflex yet. 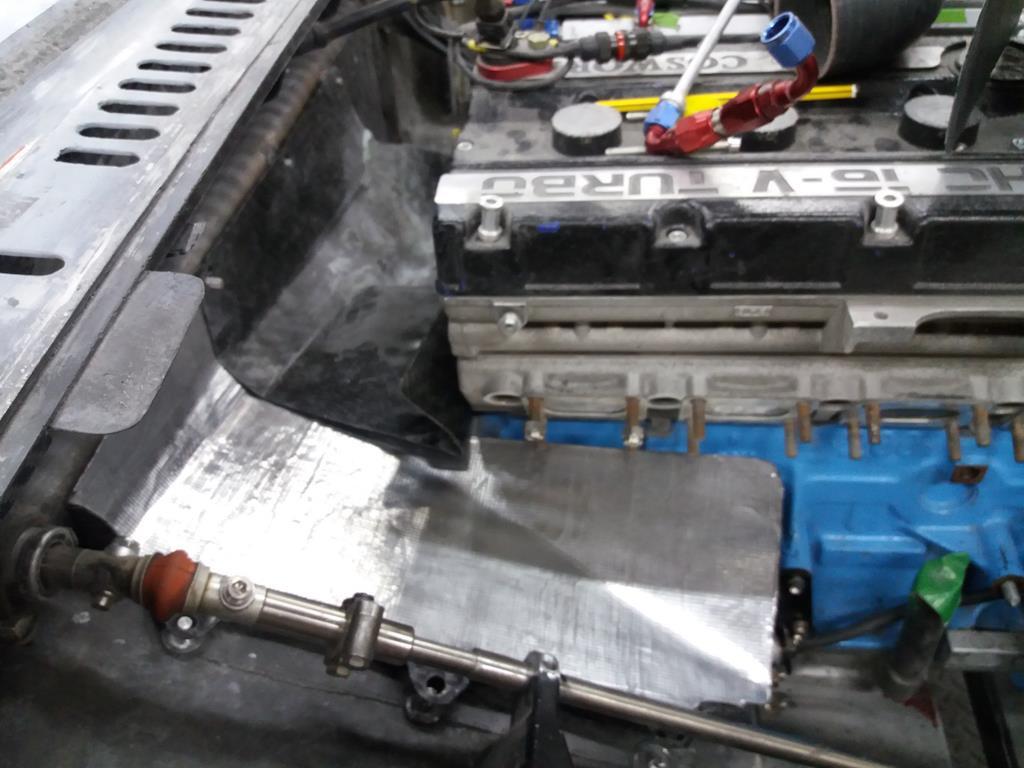 These three sections are part of the top cover. The section in the background abuts the turbo. The two sections in the foreground used to be one piece. When made out of aluminium I was able to twist and bend it into place behind the engine. You can't do that with carbon plus I hadn't allowed for the main wiring loom cable coming through the bulkhead (just visible in the photo above), restricting wriggle room. The easiest solution was to cut it into two and form an overlapping joint. 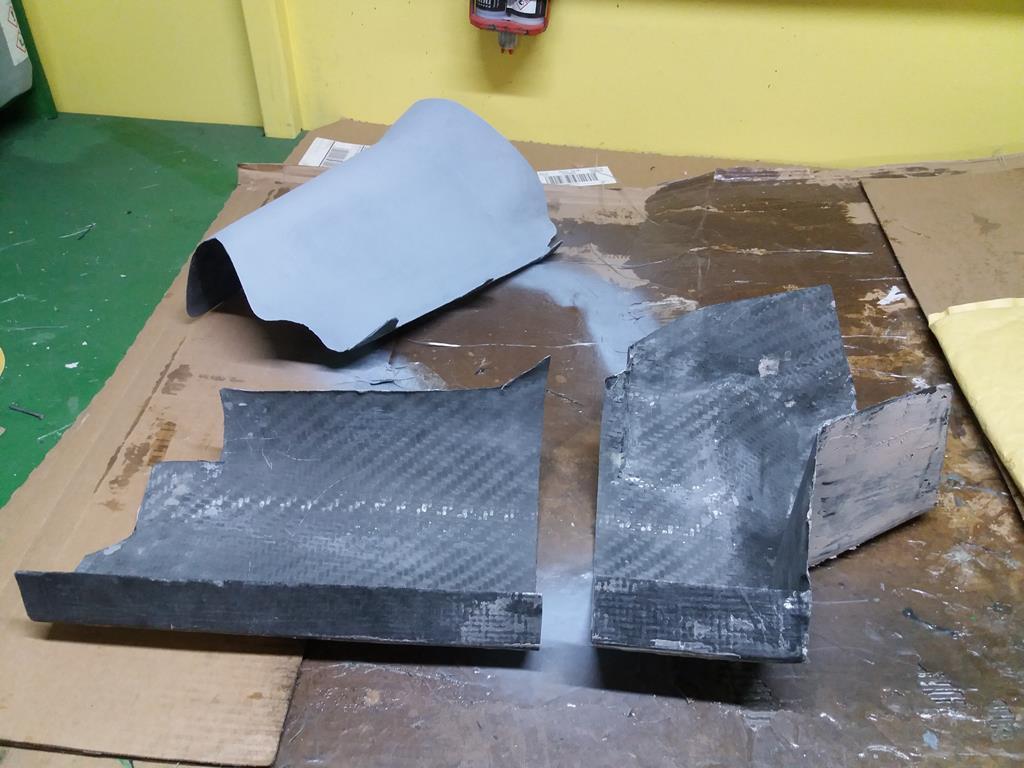 |
| |
Last Edit: Sept 28, 2019 18:52:05 GMT by nalesutol
|
|
jamesd1972
Club Retro Rides Member
Posts: 2,907  Club RR Member Number: 40
|
|
Sept 29, 2019 7:32:12 GMT
|
Don't you just love working on cars! It is always the most awkward bolt/nut that breaks or rounds or shears off! Well done on getting it sorted.....and inspiring us with your work. Well said. I think that getting it sorted without having to take the engine out counts as a winning day - you got there ! James |
| |
|
|
|
|
|
Sept 29, 2019 9:38:48 GMT
|
Don't you just love working on cars! It is always the most awkward bolt/nut that breaks or rounds or shears off! Well done on getting it sorted.....and inspiring us with your work. And it is nearly always the last one :-) Thanks, but I hardly think my amateurish efforts would inspire anyone, I see far better stuff all over this site that is way beyond my capabilities. |
| |
|
|
|
|
|
Sept 29, 2019 17:57:25 GMT
|
Continuing to add heat shield. Using ZircoFlex I on the exhaust box surround as the temp will have reduced somewhat. Only 426 holes left to punch out :-( 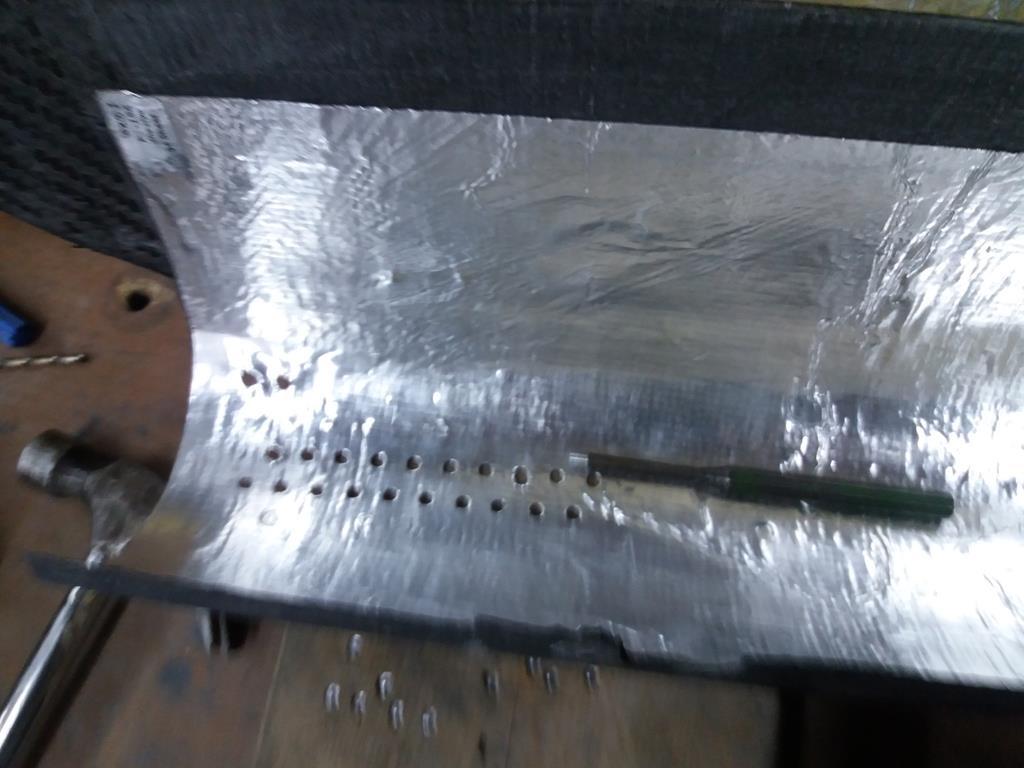 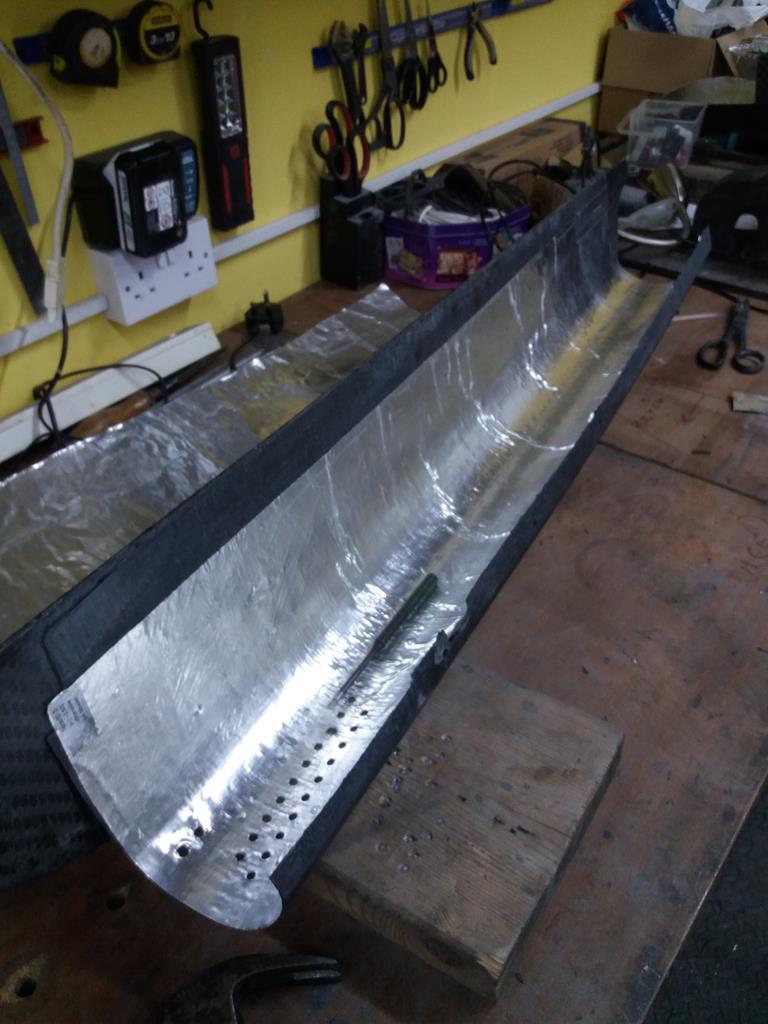 |
| |
|
|
|
|
|
Sept 30, 2019 17:43:22 GMT
|
All holes punched out. 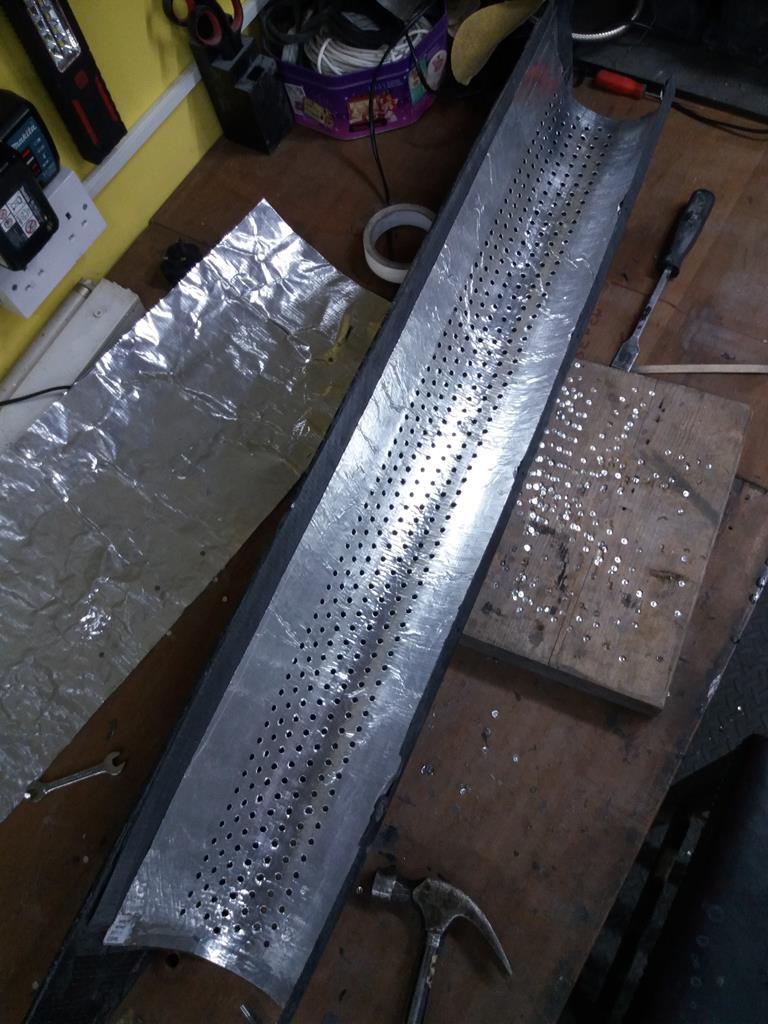 |
| |
|
|
|
|
|
|
|
Aren't you going to weigh the bits?  |
| |
|
|
|
|
|
|
|
Aren't you going to weigh the bits? No need as they aren't lightening holes. They allow heat to escape from the area around the exhaust box. The holes were in the original steel panel and I duplicated them in the carbon version. . . . . . . . . . . . . 4gms :-) |
| |
|
|
|
|
|
|
|
Excellent!  |
| |
|
|
|
|
|
|
|
Thank you I may get the £10 pack to test if I do end up getting a lot I may get some wood mats laser cut for the cars to sit on once the mats are down. They are also good for putting behind your layout to stand on all weekend - especially in hard floor exhibition centres  |
| |
|
|
|
|
|
|
|
|
This might be a silly question, but why have a heat shield with holes in so it lets the heat out? Surely the idea is to keep the heat in / away from something. Am nearing exhaust work myself so interested in this.
|
| |
|
|
|
|
|
|
|
This might be a silly question, but why have a heat shield with holes in so it lets the heat out? Surely the idea is to keep the heat in / away from something. Am nearing exhaust work myself so interested in this. In the engine bay, I agree. However, this is an external cover so letting the heat out helps to reduce the heat getting into the passenger compartment. The photo below shows the exhaust box cover prior to the heat shield material being added. The inner sill behind and above the box will also be covered with Zircoflex I. 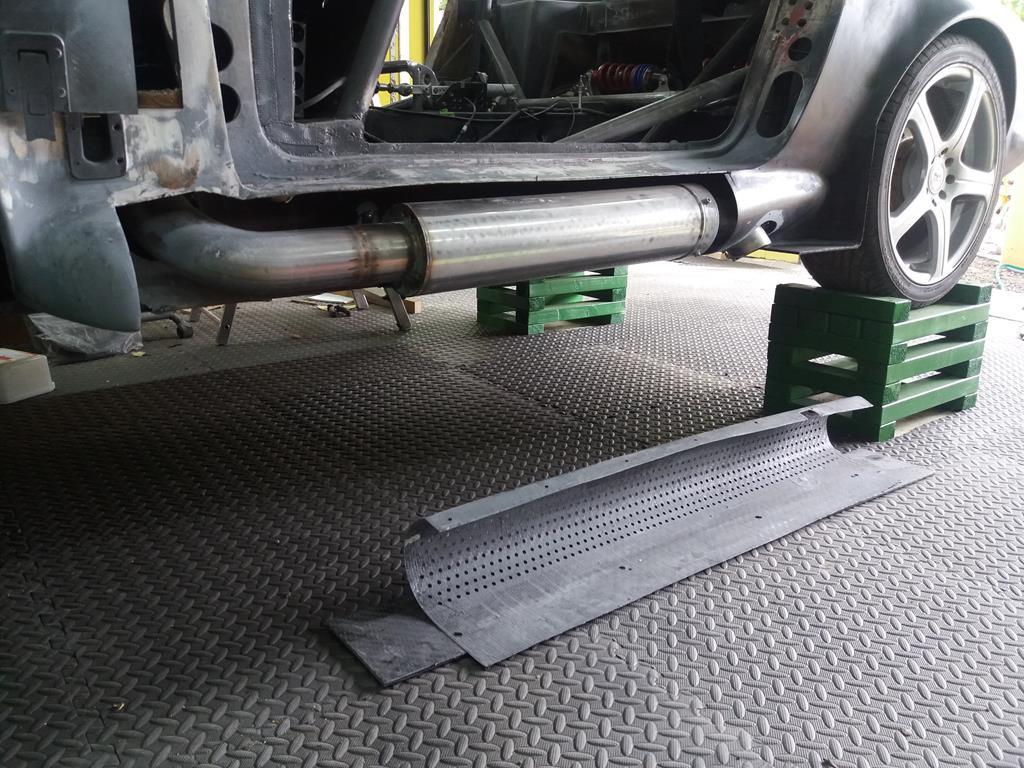 |
| |
Last Edit: Oct 4, 2019 14:13:42 GMT by nalesutol
|
|
|
|
|
|
|
Dug out the old CAD system in order to make a mould for a modification to the heat shielding. 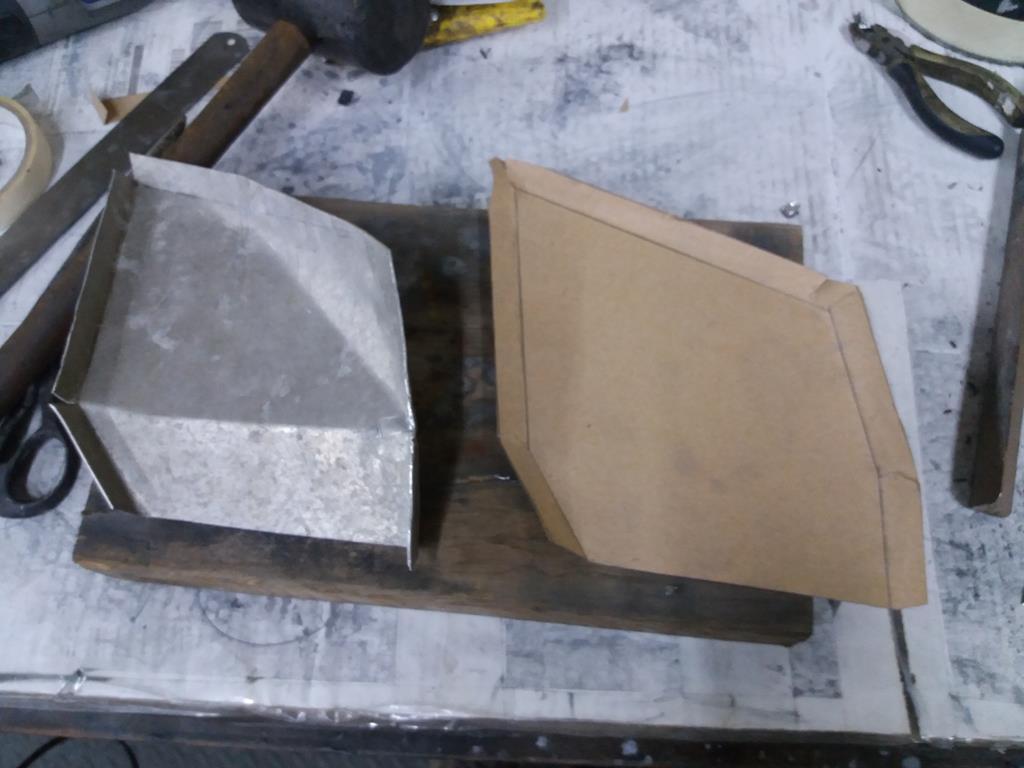 |
| |
Last Edit: Oct 7, 2019 10:50:27 GMT by nalesutol
|
|
|
|
|
Oct 13, 2019 23:12:02 GMT
|
Two steps forward, one step back. The modifications to the section of exhaust shield on the passenger side of the engine bays is progressing well. The little curved cutout is to allow more clearance for the water temp sensor wire. However, I came up against an issue on the shield next to the turbo. On trying to install the Lambda sensor it fouled the cam cover! B.u.g.g.e.r. Solution was to swap the Lambda and EGT sensors. Although this required alterations to the threads, not a difficult job in itself but it created another issue as the Lambda now sits higher than the shield! That word with the full stops in it. Rather than completely rebuild the shield I accommodated the sensor by allowing it to protrude. Hopefully this will work. 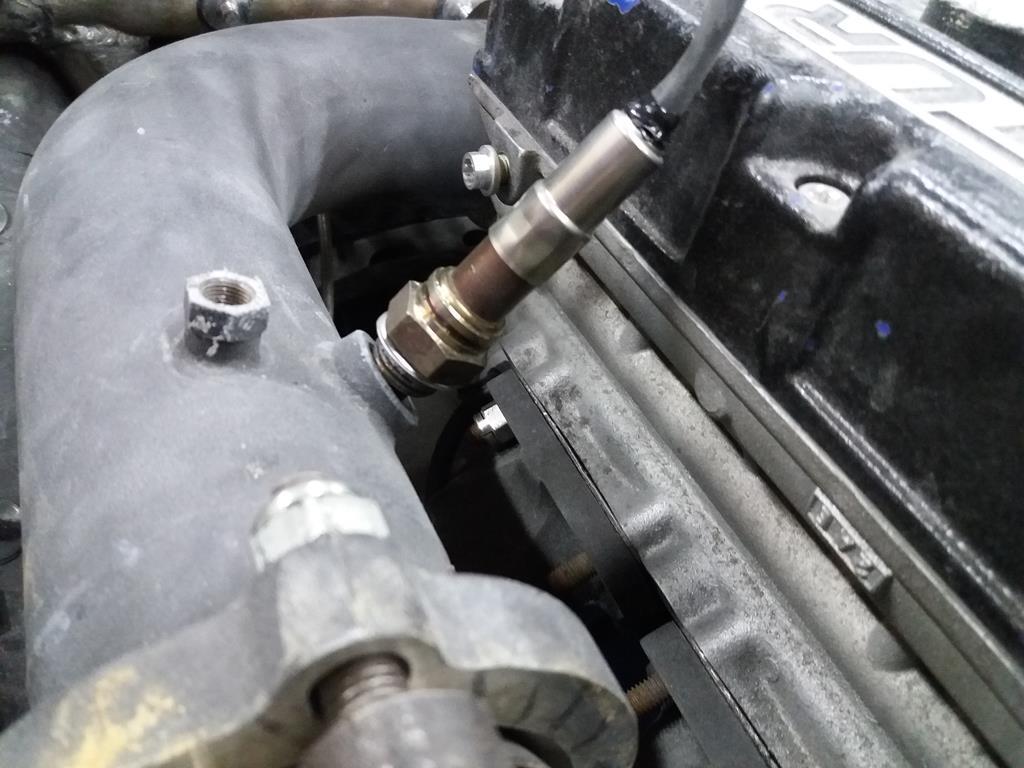 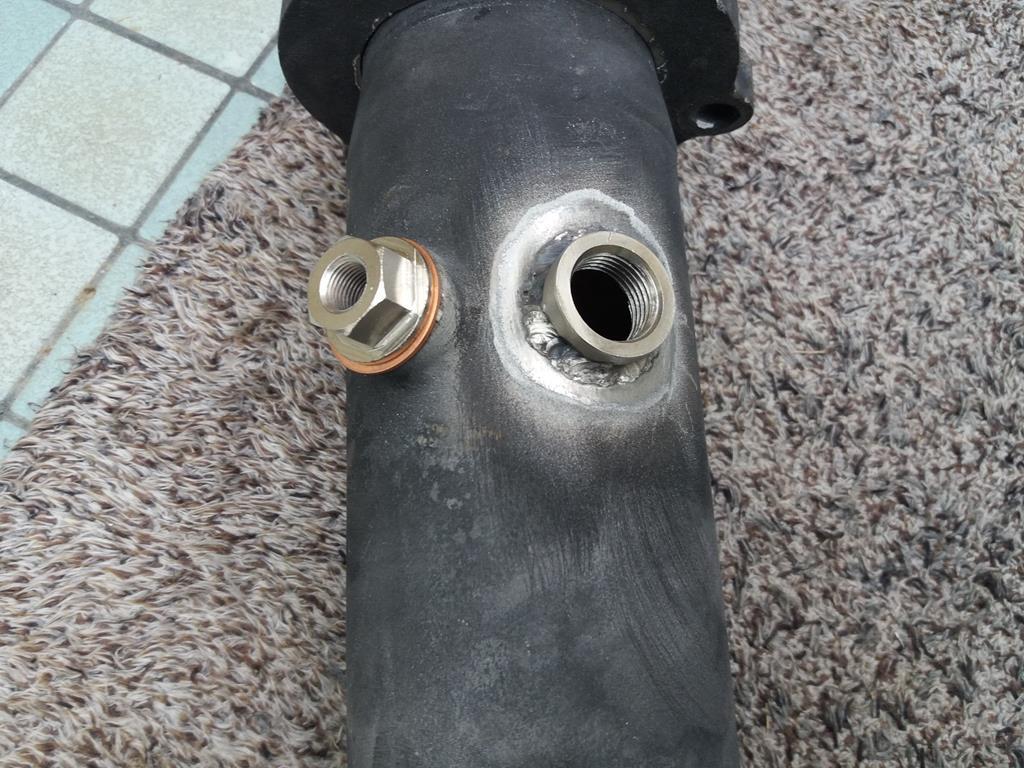 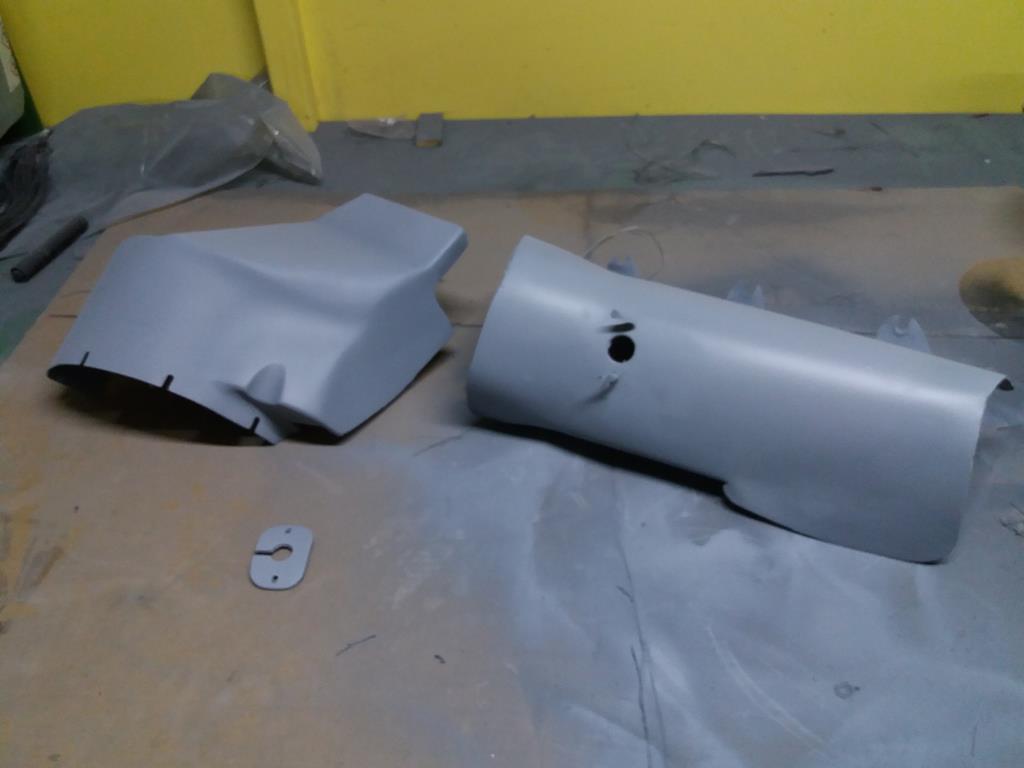 |
| |
|
|
|
|
|
Oct 14, 2019 12:14:35 GMT
|
|
Mine is in a tall bung like that - still seems to work fine.
|
| |
|
|
|
|
|
Oct 14, 2019 13:48:52 GMT
|
|
It would work if I could fit it but, even screwing it in before installing the pipe, it fouls the cam cover.
|
| |
|
|


