Darkspeed
Club Retro Rides Member
Posts: 4,882
Club RR Member Number: 39
|
|
Jul 16, 2016 15:36:02 GMT
|
Having a play with engines for a bit. As I have a spare C27A I thought I would rip a head off and have a look at the ports to see what the likelihood is of grabbing a few easy BHP from it. The spare engine was a fair bit dirtier and likely a higher mileage than the engine in the car but after pooping off the cam covers its pretty nice in there with no real areas of concern. 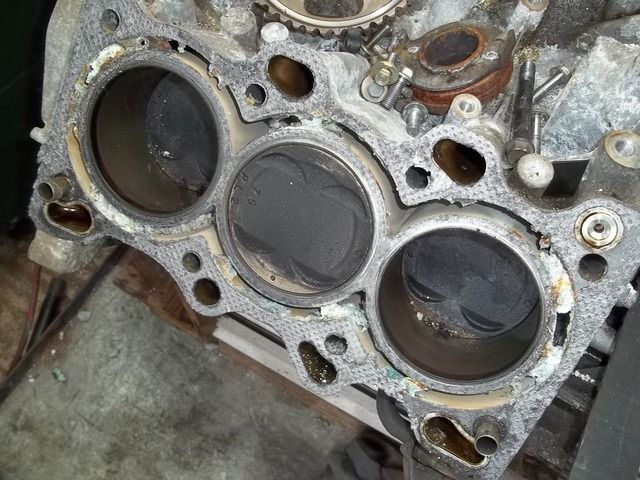 Pistons come up nice and high in the bore so we will have a decent bit of squish 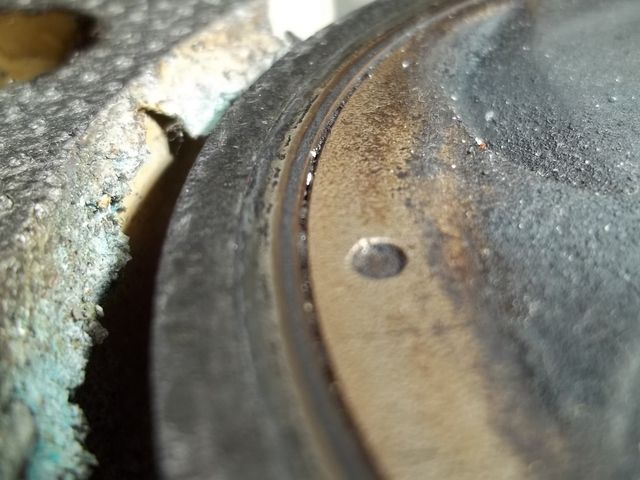 The chamber is quite good and as the engine is a lowish compression there is scope for a bit of a skim - The chamber shape is also nice. 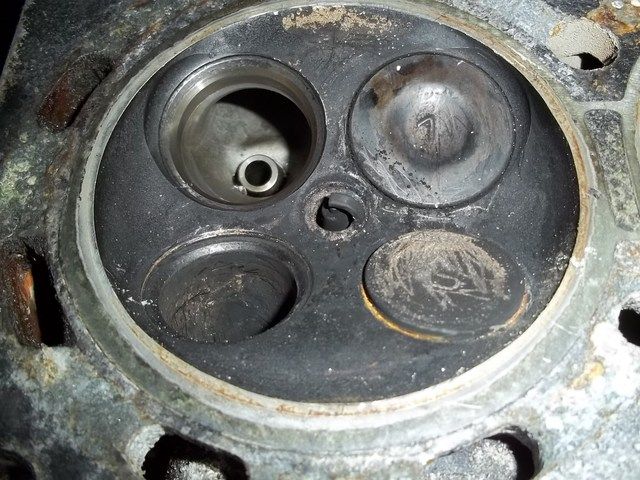 What I was very pleased to see was that there is plenty of scope for improvement in the ports. 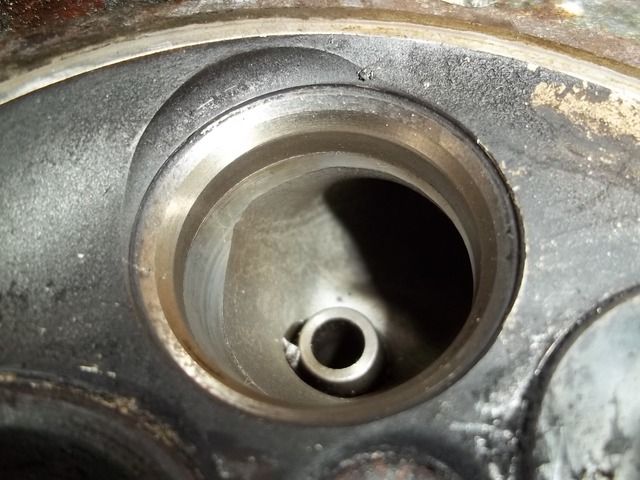 The seat is very basic - a 45 and then a 60 into the throat and both the 45 and 60 are quite wide - the inlet valve is a 33mm diameter and the seat ID is 27.5 and it will be quite easy to increase the seat ID to 29mm. What that 1.5mm increase in diameter offers is an 11% increase in the area of the throat. Not only that but moving back into the port the area reduces quite a bit and there is loads of potential to open it out so that it is greater in area than the seat. There are also a fair amount of lumps and bumps further into the port that need to be smoothed. 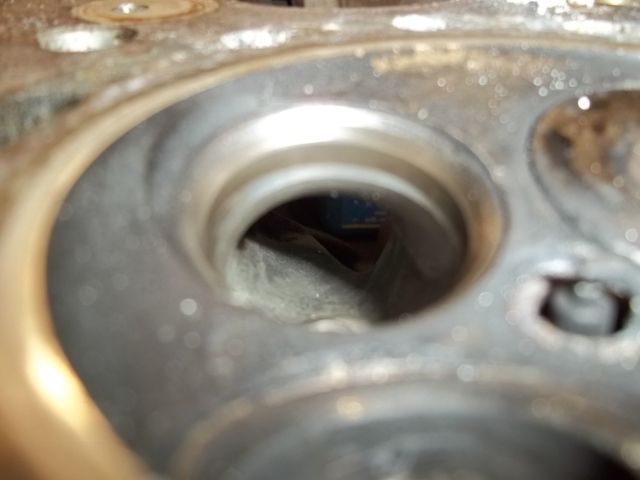 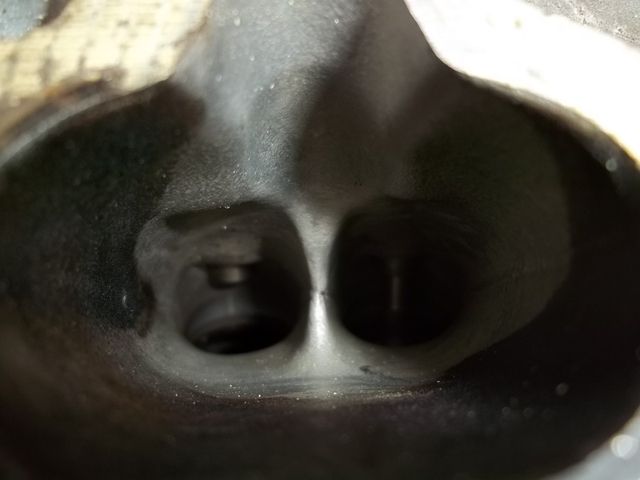 On the exhaust side there is even more scope for improvement as that port is pretty tight around the guide area so plenty of room for flow gains. 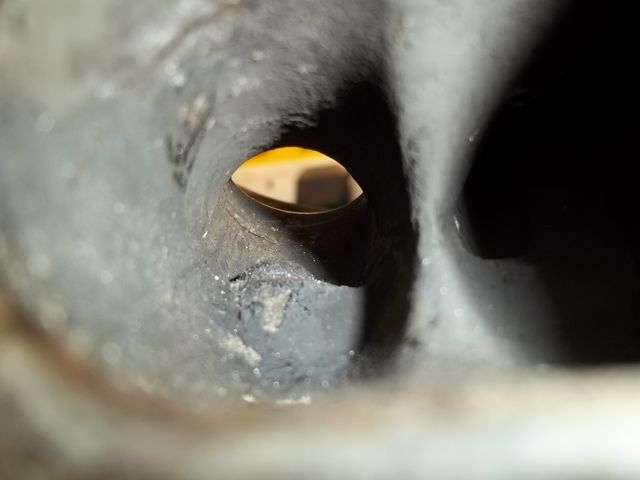 Seat wise there is less scope with the Ex. as the valve is a 27.5 and the seat throat is a 23.5 - there is a 30 degree lead then the 45 seat drops straight into the port without a cut so we may try and break the edge with a 60 but not reduce the seat width too much - I may be able to grab 0.5mm on the diameter but the biggest gain will be further into the port as its pretty restrictive in the port.  Guides are perfect. Interesting valve train on these engines, the intake valve operates from a small finger follower sitting on a hydraulic pivot - the exhaust valves have a finger follower sitting on a similar hydraulic pivot but the follower connects to a small push rod that then acts on a rocker to the valve. To compensate for the additional train weight on the exhaust Honda fitted a double valve spring on the exhausts. Next step is to drop the head on the bench and see what it flows - after that we will work the two ports and then sling it back on the bench - if what we do pays in flow then we will do the two heads and then have them skimmed to give about 10.5CR. Other job is the manifold. |
| |
Last Edit: Jul 16, 2016 15:44:21 GMT by Darkspeed
|
|
|
|
Darkspeed
Club Retro Rides Member
Posts: 4,882
Club RR Member Number: 39
|
|
Jul 16, 2016 19:12:46 GMT
|
I decided to strip the head and give all the ports a quick clean out with the windy drill and high speed wire brush - As you can see the head is really nice and clean with the alloy having just a nice shade of golden brown and no sign of any sludge. 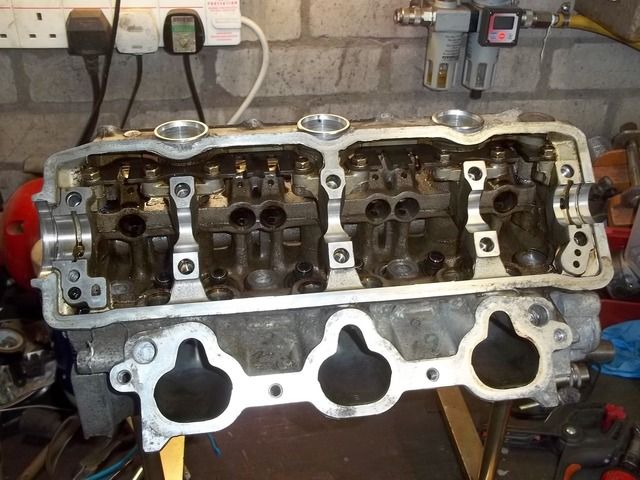 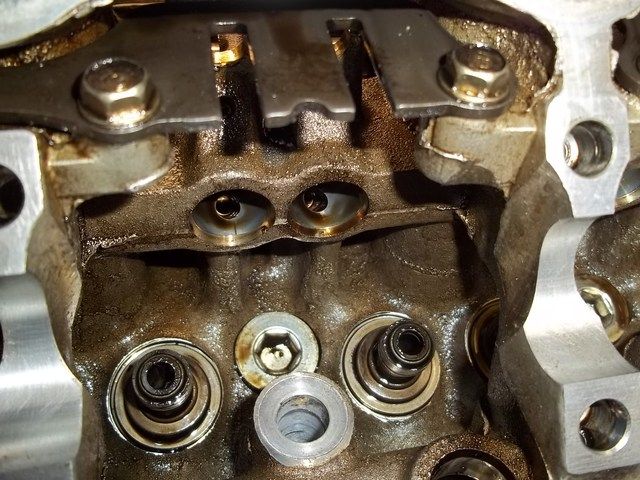 Handy bucket for keeping all the valve parts in and you can just see one of the tiny push rods for the exhaust. 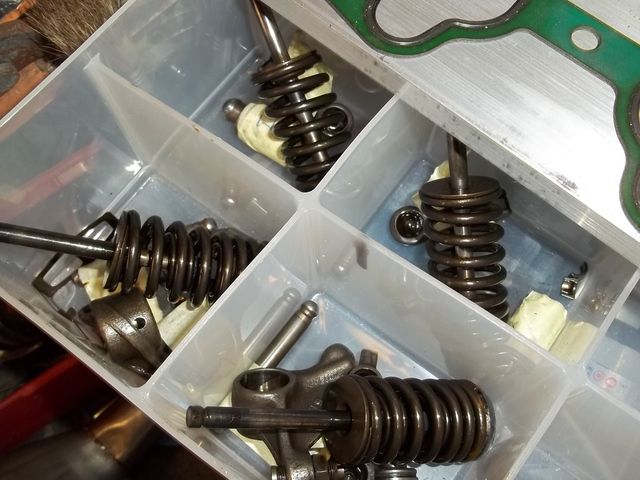 Exhaust carbon brushed out with ease so we now have a nice clear view for material removal. 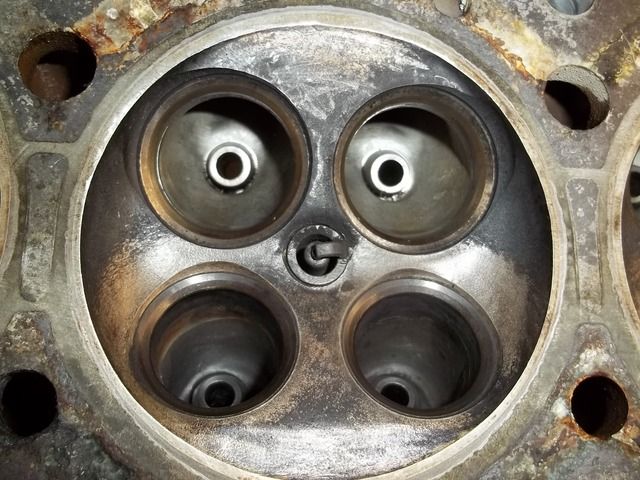 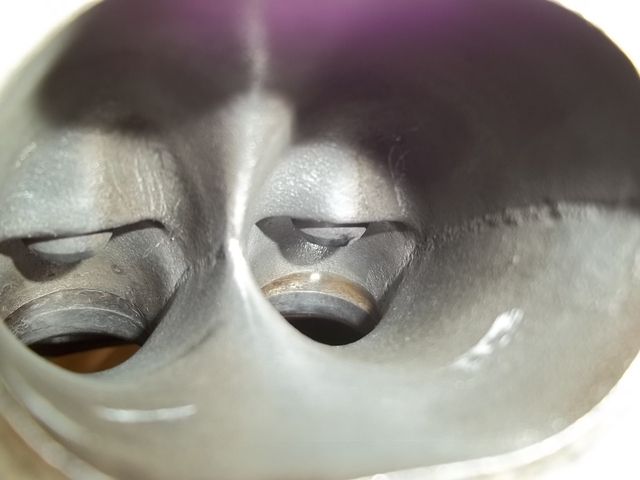 The next challenge will be making a valve lifting fixture for use on the bench and a bore adapter I may start on the manifold tomorrow - lots of measuring and marking before making any holes. 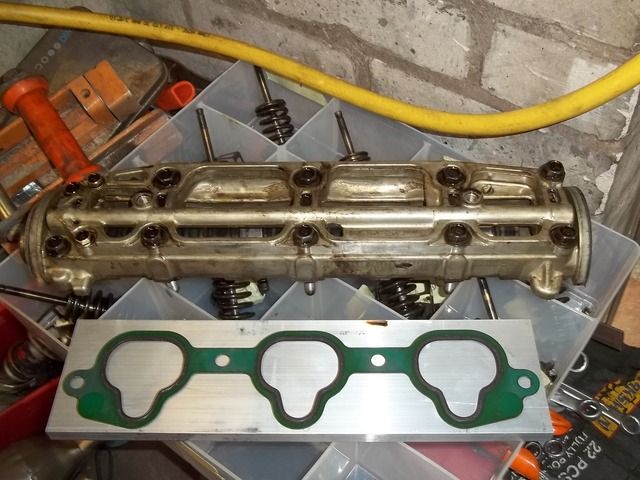 |
| |
|
|
Darkspeed
Club Retro Rides Member
Posts: 4,882
Club RR Member Number: 39
|
|
|
|
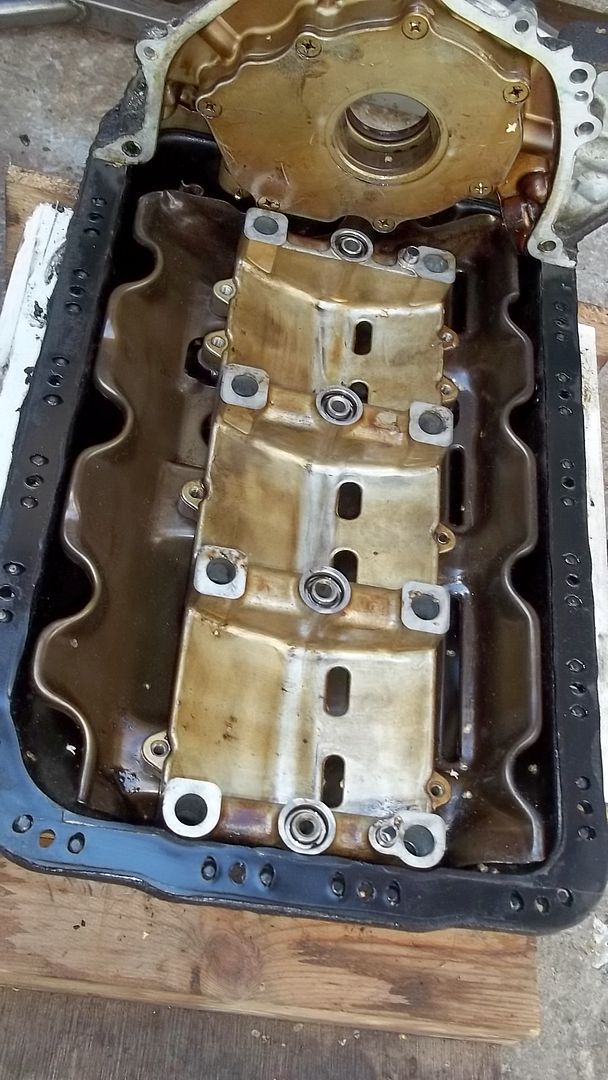
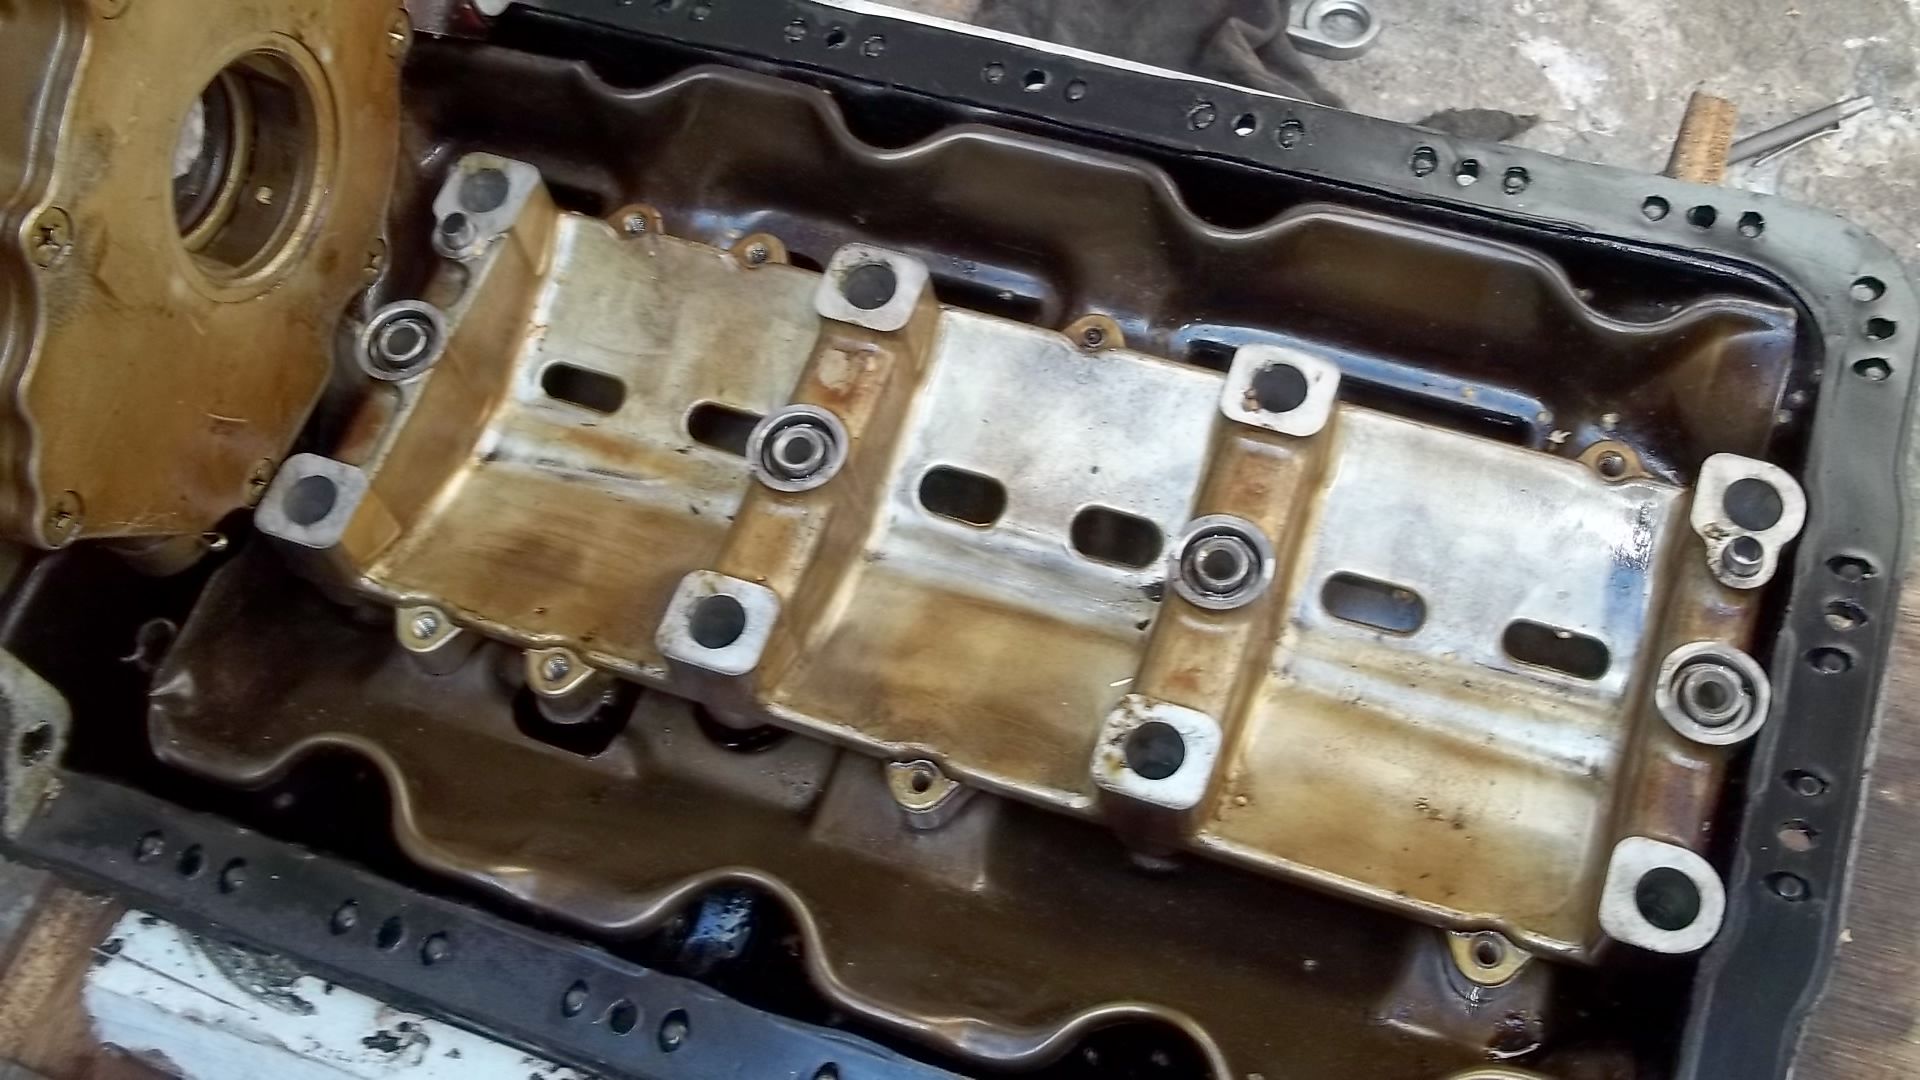
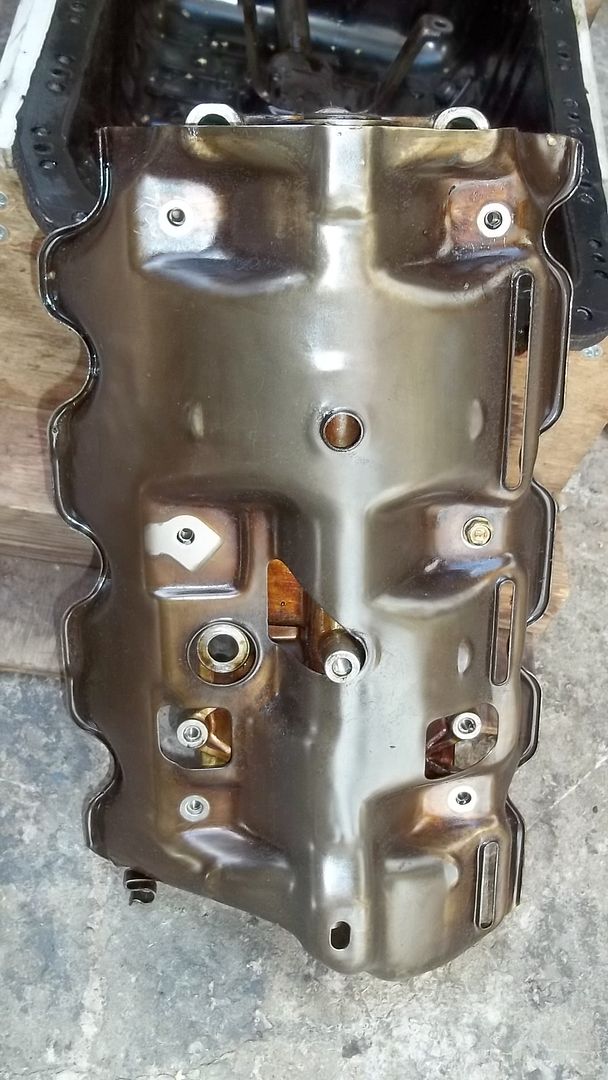
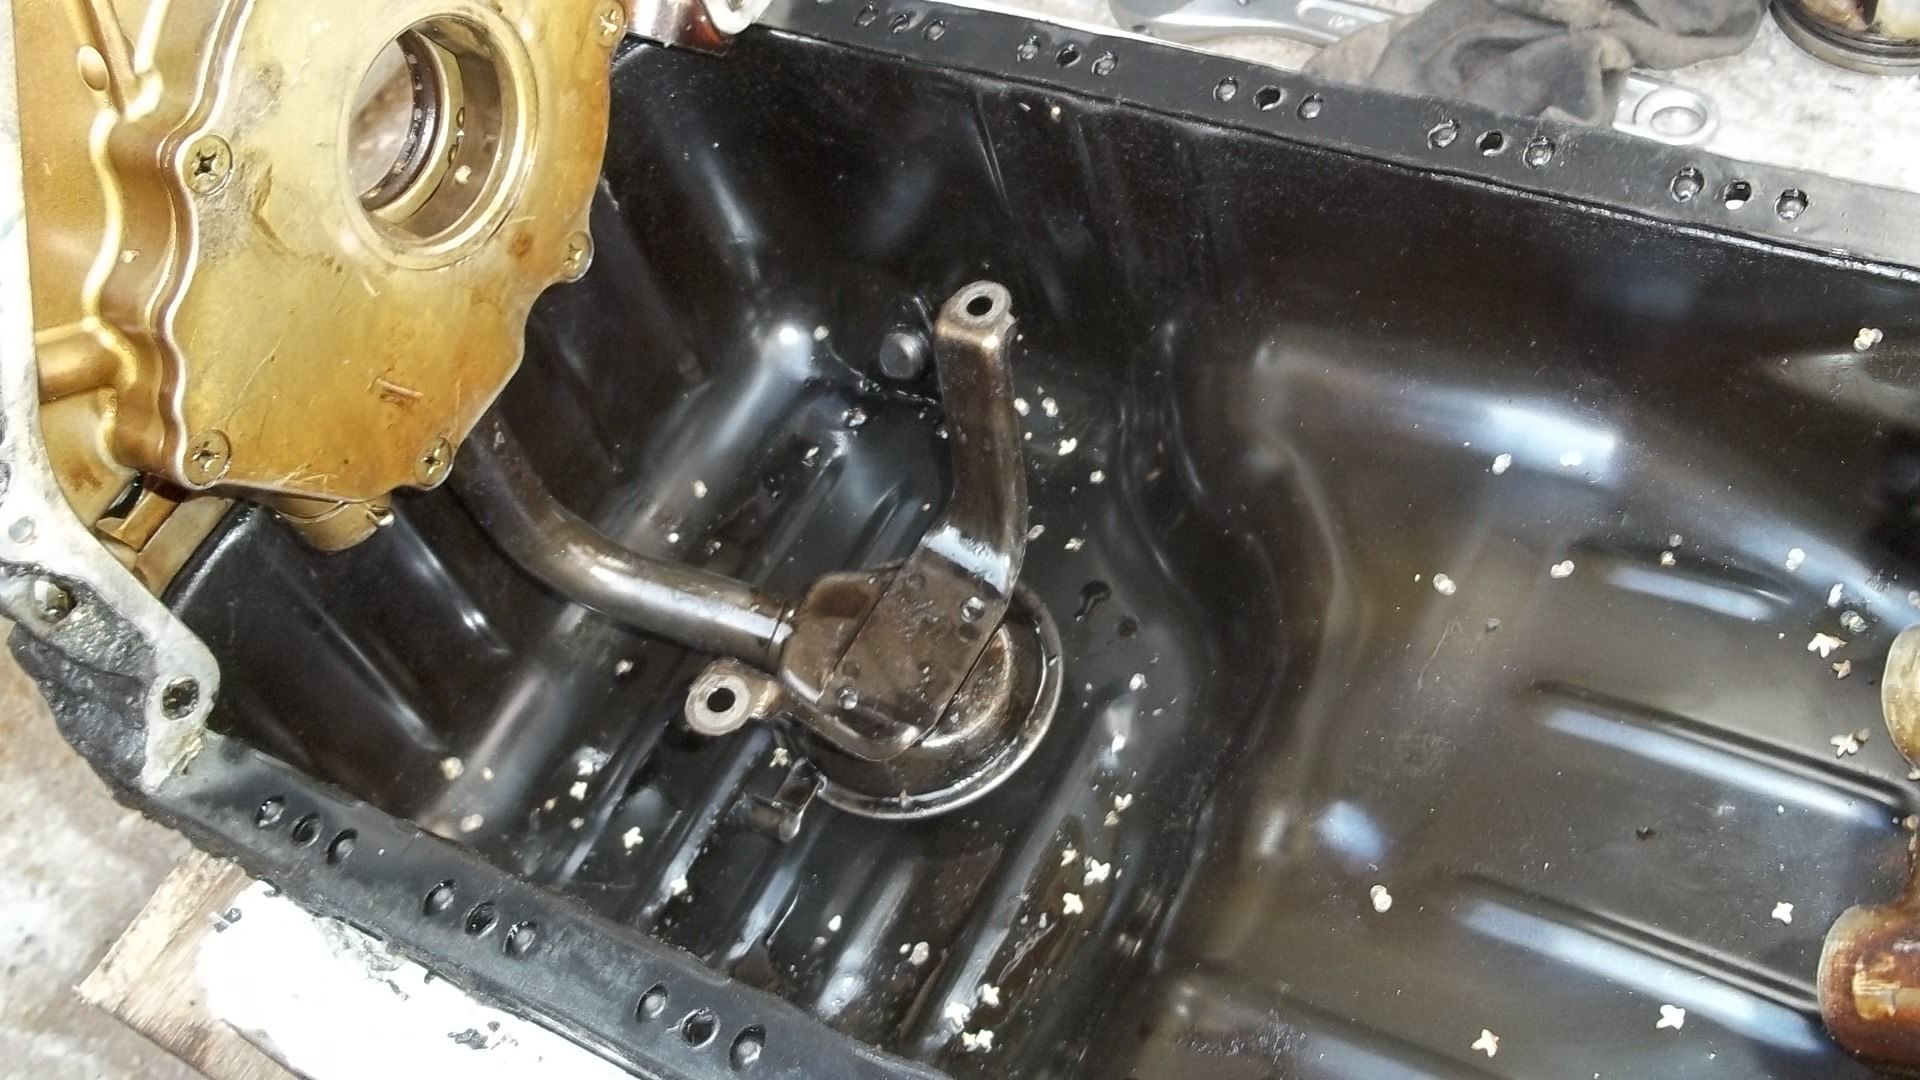
Before getting started on the manifold I thought I would take the other head off the spare engine. I did have concerns about one of the cylinders as there was evidence of water ingress in one of the intake ports. The result is that the head is fine as there is no damage to the seats but the bore and the the block are scrap. Downside is no spare block, upside is I don't have to find storage space for a spare block. As I needed the sump off the engine that was removed. The sump needs to be modified to clear a larger chassis member I will be fitting to the chassis. The engine is very compact, light and built to be very stiff, the mains are 6 bolt with large strong main caps. The con rods are quite long the pistons are quite short and light. It looks built to rev as I guess you would expect from Honda. The castings on the water pump and any covers and seal housings are ultra lightweight and I had to be so careful in releasing them as the casting were bending as I carefully prised them free of the block! For a 1980's engine sitting in the front of a executive Rover barge it was a hidden gem but I am sure that those driving aroung in 827's knew there was something a little special under the bonnet. Corrosion to the casting around the liner - electrolytic I suspect to the construction of the gasket.  Water damaged bore 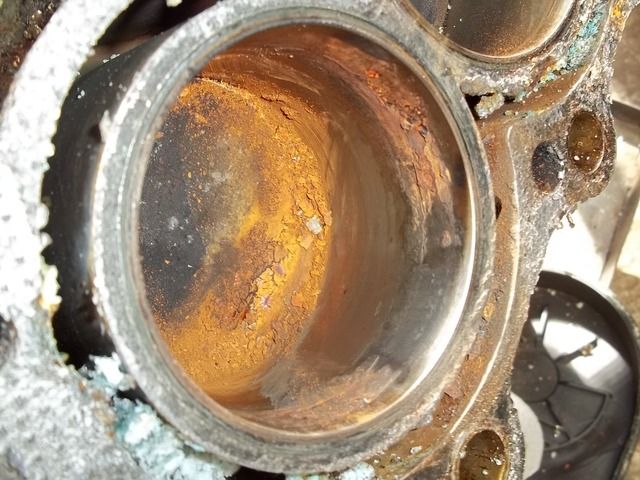 Wonderful crankcase and crankshaft construction - there was a very close fitting windage tray over all this and a large cast oil gallery feeding the mains. 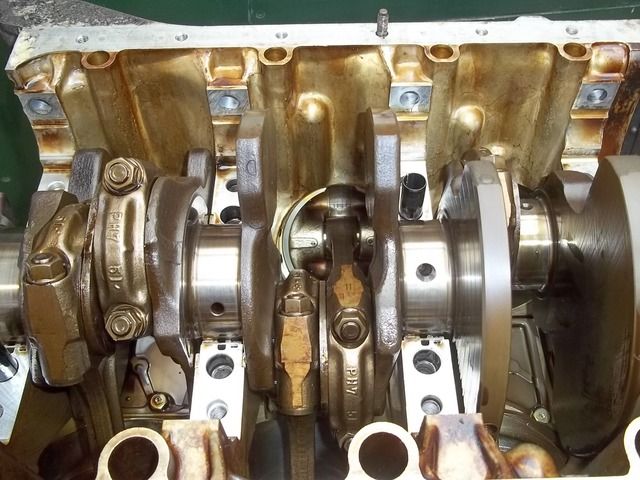 Large 6 bolt X bolted main caps - with hardly are wear. 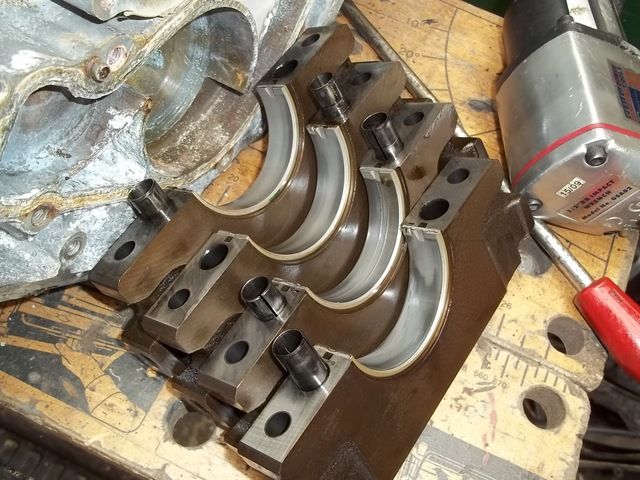 No wonder that with good engine servicing these engines go for hundreds of thousands of miles. Oh well into the skip down the dump - Unless a Rover/Honda fan wants a coffee table project. Better get on with those manifolds. |
| |
|
|
Darkspeed
Club Retro Rides Member
Posts: 4,882
Club RR Member Number: 39
|
|
|
|
Manifold build prep.  As the throttle bodies mount at an angle I have to take into account the angle when mounting on the manifold plate as I need that angle to continue smoothly through the manifold - all 12mm of it - into the port. They also need to be re-spaced to 100mm centres - I found a handy piece of alloy channel to use for this purpose 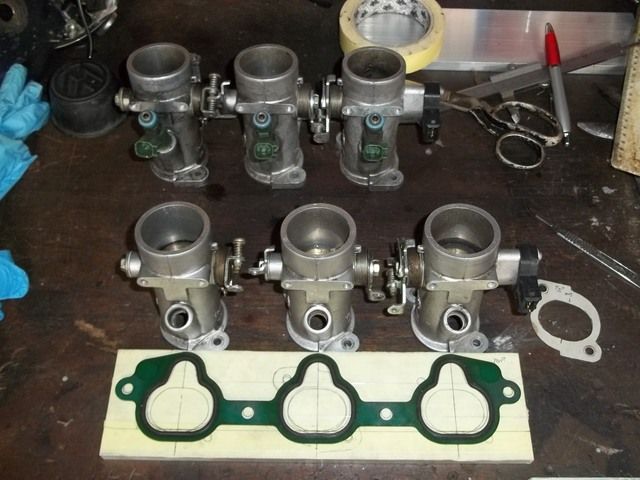 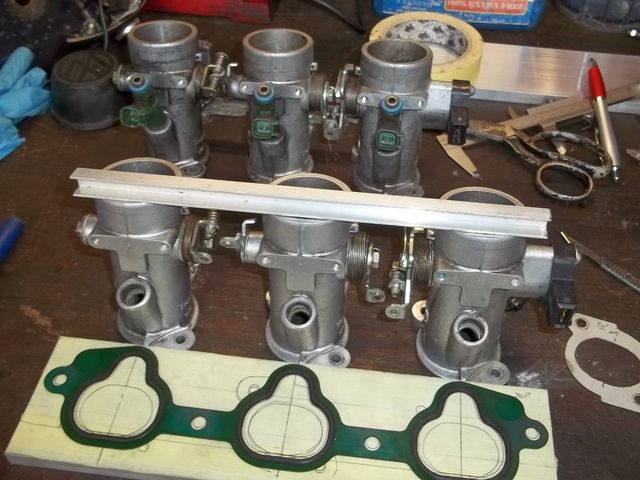 |
| |
|
|
Darkspeed
Club Retro Rides Member
Posts: 4,882
Club RR Member Number: 39
|
|
Jul 30, 2016 17:04:57 GMT
|
Some measuring drilling tapping and alloy carving later we have a slab of alloy that attaches the Throttle bodies to the head.  Once this one is done it should be a simple case of putting them together and then drilling through to copy for the other manifold. A bit of head scratching will then be required for the linkages. First up fit the bar to space them correctly and drill some holes so that the manifold can sit on the head.  Marked off the mounts for the TB's and then drilled an tapped for the M6 bolts. 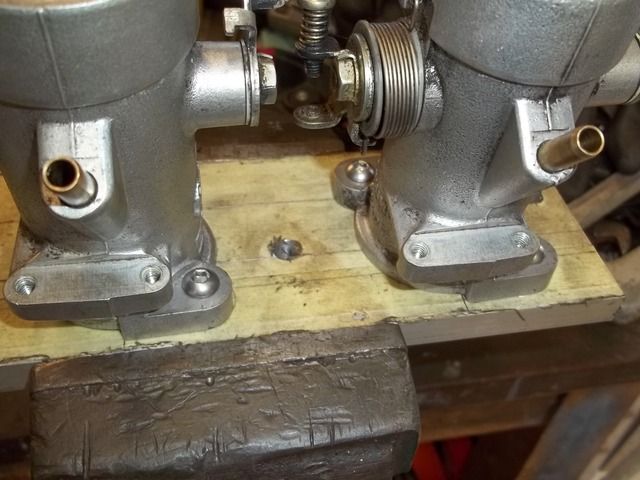 Drilled some big holes and then attacked with the carbide to get it roughed out.   I will take it out a little further but the final work will be on the head to port match it. 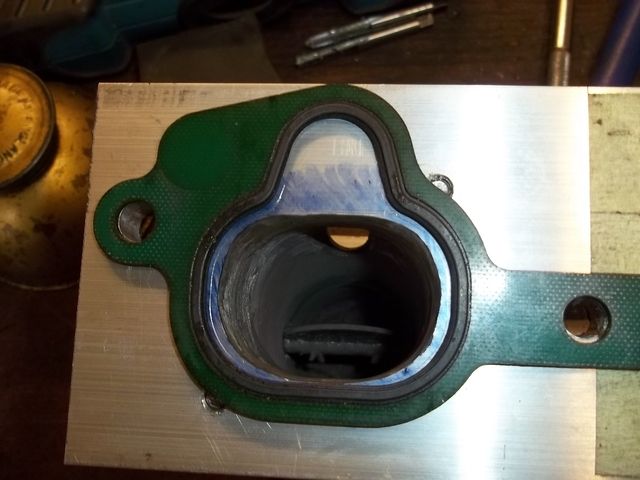 Quite pleased with that. |
| |
|
|
|
|
|
Jul 30, 2016 19:49:06 GMT
|
|
Nice engine - a hidden gem as you say! And good work getting it ready for the detailed porting.
|
| |
|
|
Darkspeed
Club Retro Rides Member
Posts: 4,882
Club RR Member Number: 39
|
|
Jul 31, 2016 20:44:26 GMT
|
Nice engine - a hidden gem as you say! And good work getting it ready for the detailed porting. Cheers Phil - here's a a shot for you should you fancy going newer school  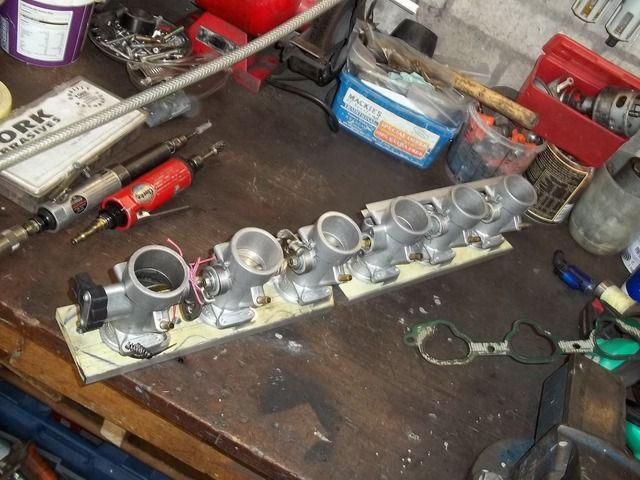 Completed the second manifold.  And continued with the porting on the first manifold - 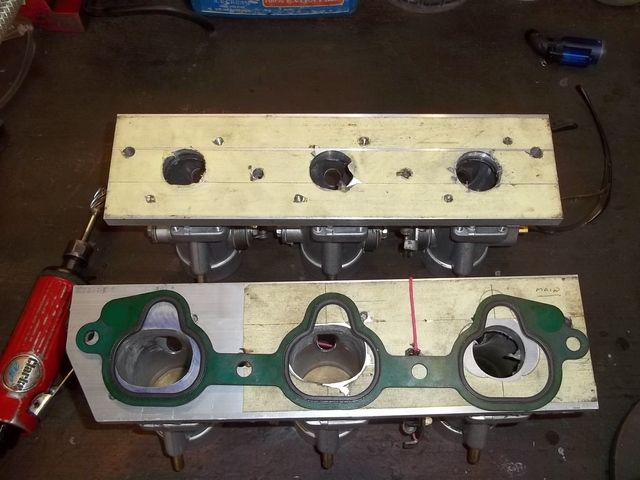  Progressing okay but I think I may need a different alternator. 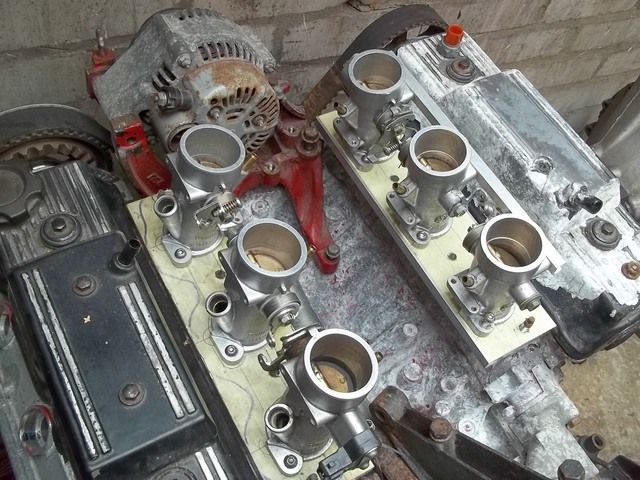 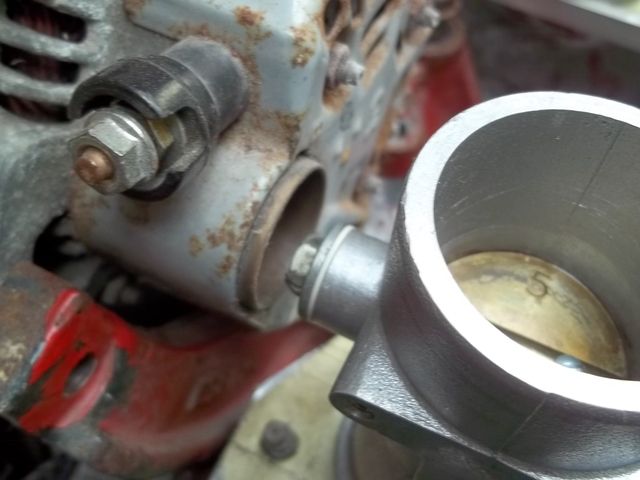 Before and after 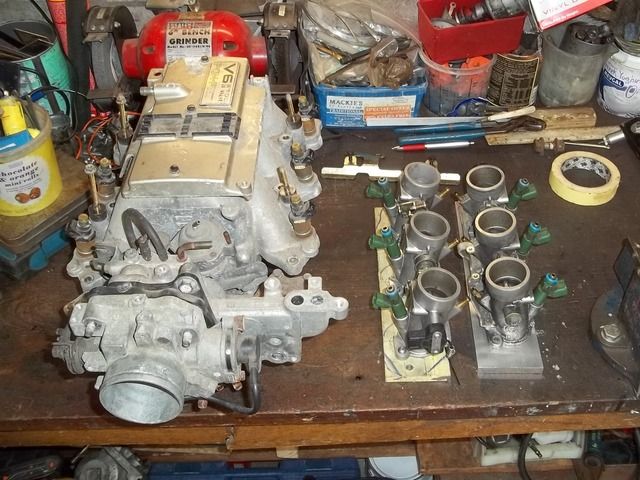 End of the week should have the manifolds fully ported for the throttle bodies and I will then get stuck into giving the engine a further clean up as well giving lots of thought to the linkages. |
| |
|
|
Darkspeed
Club Retro Rides Member
Posts: 4,882
Club RR Member Number: 39
|
|
Aug 16, 2016 15:17:21 GMT
|
I finished up porting the manifolds and then got on with extending the linkages so that I could get the butterflies syncronised. I have given the linkages for throttle actuation a bit of thought and have done a sketch which will mean removing the parts I have just modified - to weld on another little tab for an M5 stud to be welded to - this will then go to a centrally located pivot via a M6 rod with M5 rod ends. I have a little bit more thought about pedal ratio's but I think it should work fine. 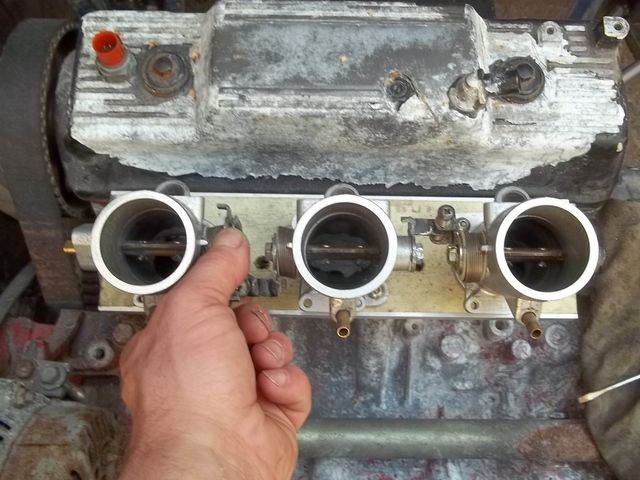  I also got tired of looking at those horrid cam covers so I replaced them with some clean standard ones. 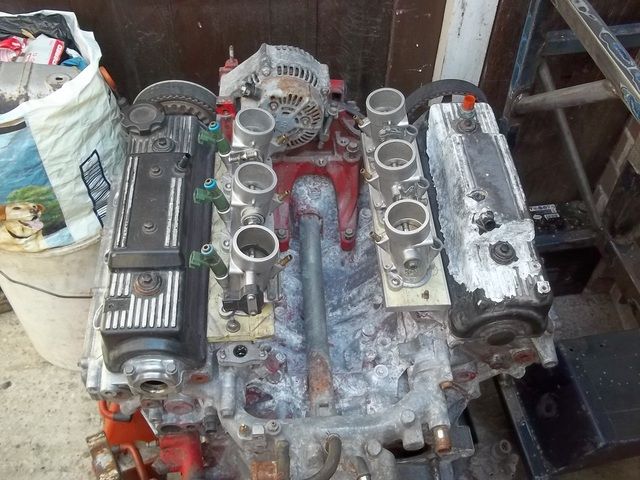 Which are a little more pleasing to the eye.  Got some work to do on the G27 for a bit so apart from the linkage and occasionally attacking the engine with paint stripper to get rid of the last of that dreadful red paint and an attempt to reduce the oxidation in the valley not much will be going on with the Stratos. Back soon though. |
| |
|
|
crahel
Part of things
 
Posts: 210 
|
|
|
|
|
Good work, A thought can you not make one spindle rod going through all the throttle bodies and have one quadrant at the end?
|
| |
1973 Lancia Fulvia s2 coupe (sold)
1998 Audi a4 sedan (sold)
2000 Nissan maxima (sold)
2007 Audi convertible.
|
|
|
|
|
|
|
Good work, A thought can you not make one spindle rod going through all the throttle bodies and have one quadrant at the end? Whilst that seems logical, it may be problematic with a steel rod not expanding quite as much as the block/inlet manifold, it could start to bind. At least that happened to me a long time ago - albeit with a much longer straight six Alfa! |
| |
|
|
Darkspeed
Club Retro Rides Member
Posts: 4,882
Club RR Member Number: 39
|
|
Aug 17, 2016 13:07:15 GMT
|
Something along this sort of line is what I have in mind.  May have to treat myself to a 5mm left hand tap and some 8mm hexagonal bar in the near future. |
| |
|
|
|
|
|
Aug 18, 2016 16:30:56 GMT
|
my friend did almost exactly the same on vauxhall 24valve 2.5 V6, it had quite a significant loss of torque in low to mids rev range, even after mapping  not much better with the long jenvey cow horn trumpets  |
| |
|
|
Darkspeed
Club Retro Rides Member
Posts: 4,882
Club RR Member Number: 39
|
|
Aug 20, 2016 21:24:03 GMT
|
my friend did almost exactly the same on vauxhall 24valve 2.5 V6, it had quite a significant loss of torque in low to mids rev range, even after mapping  not much better with the long jenvey cow horn trumpets  Shame he went to all that work and expense and ended up with poorer performing engine - I have one benefit - I can't miss what I didn't know I had in the first place. Plus, all-in if this does not pan out I would have invested no more than £100 that I may not get back and I can offset that with time spent enjoying myself immensely in this process. What parts did he use that are the same as anything I am using? |
| |
|
|
|
|
|
Aug 22, 2016 18:18:44 GMT
|
you are right, none of the parts are the same as you are using, other than it had stubby inlet manifold and 6x 42mm individual throttles. it was that picture of the stubby inlet manifolds and IDA style carbs in the previous reply that twigged the memory. he had these on straight trumpets, then moved to the actual cowhorns pictured www.jenvey.co.uk/images/stories/virtuemart/product/ckvx06.jpgas cringeworthy and formulaic as it sounds, most of issue was due to the deletion of resonator and reducing the induction length considerably. bhp at higher revs did increase significantly |
| |
Last Edit: Aug 22, 2016 18:19:03 GMT by darrenh
|
|
Darkspeed
Club Retro Rides Member
Posts: 4,882
Club RR Member Number: 39
|
|
|
|
|
As the build parameters are to make the lightest possible Strato's replica I can, increasing low end torque is not a primary consideration as the torque/tonne will be pretty good although the head porting work and the increase in compression will in theory compensate for some likely losses. The original inlet variable runner length systems primary function was to enhance torque at the bottom end to assist in shifting over a tonne and a half of executive "automatic" saloon. I hope to have the Strato's tip the scales around 850kg and it's manual. That said - just getting it running is the first priority and there is a huge list of other priorities before worrying about a few lost lb feet that may or may not be lost anyway!
So what's the latest? - Not a great deal.
|
| |
|
|
mrluke
Part of things
 
Posts: 242
|
|
Aug 25, 2016 16:49:35 GMT
|
|
Wow.
After reading through all of this I guess I can forgive you letting the G31 go.
What a brilliant project!
An awful lot of man maths happening on page 1 but fair play you are getting there and going to have a wonderful little car when its all done.
Looking forward to seeing this on the road, it'll probably be done before mine!
|
| |
|
|
Darkspeed
Club Retro Rides Member
Posts: 4,882
Club RR Member Number: 39
|
|
Aug 25, 2016 18:35:40 GMT
|
Letting the G31 go is no easy decision - it is the world most famous G31 after all  - and I also sold my G32 this week - Gulp. The loss will be softened by the fact that it will release funds, and as importantly time, for the G27 and the Strato's. I will miss it hugely and I only hope a howling V6 Strato's will somehow fill the void  |
| |
|
|
Darkspeed
Club Retro Rides Member
Posts: 4,882
Club RR Member Number: 39
|
|
Sept 1, 2016 20:30:32 GMT
|
|
|
| |
Last Edit: Sept 2, 2016 8:09:19 GMT by Darkspeed
|
|
|
|
|
|
|
|
you could get the low end torque back with an airbox if the harmonics are right and you have the space. some ferraris have a 2 part airbox, one on each bank, with a butterfly in between that opens at various points to cater for different demands/revs/vac etc. I guess something like an e38 drive by wire throttle body could be between the boxes and you could operate it with the ecu.
|
| |
|
|
Darkspeed
Club Retro Rides Member
Posts: 4,882
Club RR Member Number: 39
|
|
Sept 2, 2016 13:37:37 GMT
|
you could get the low end torque back with an airbox if the harmonics are right and you have the space. some ferraris have a 2 part airbox, one on each bank, with a butterfly in between that opens at various points to cater for different demands/revs/vac etc. I guess something like an e38 drive by wire throttle body could be between the boxes and you could operate it with the ecu. Just like the system I took off and threw in the bin  - It really is of no concern or consequence as I am really not going to notice it - I will be far to busy grinning from ear to ear whilst the 6 fully open inlet port trumpets 18 inches from my head try to fight with the near open exhaust system for right to deafen me.  |
| |
|
|


 not much better with the long jenvey cow horn trumpets

 - It really is of no concern or consequence as I am really not going to notice it - I will be far to busy grinning from ear to ear whilst the 6 fully open inlet port trumpets 18 inches from my head try to fight with the near open exhaust system for right to deafen me.