samta22
Club Retro Rides Member
Stuck in once more...
Posts: 1,276  Club RR Member Number: 32
|
|
Apr 26, 2018 14:08:04 GMT
|
Thankful that lighter evenings are here again, I made a start on the axle last night now that the Hydrate 80 had cured Started with this:  And after it's first dust coat of primer I finished with this  I also started on the springs but didn't take any pics of those. More following this weekend's Bristol trip hopefully! |
| |
'37 Austin 7 '56 Austin A35 '58 Austin A35 '65 Triumph Herald 12/50 '69 MGB GT '74 MGB GT V8'73 TA22 Toyota Celica restoration'95 Mercedes SL320 '04 MGTF 135 'Cool Blue' (Mrs' Baby) '05 Land Rover Discovery 3 V8 '67 Abarth 595 (Mrs' runabout) '18 Disco V |
|
|
|
samta22
Club Retro Rides Member
Stuck in once more...
Posts: 1,276  Club RR Member Number: 32
|
|
|
|
So the aforementioned Bristol weekend came around and I was on the road early. Now I must confess I wasn't looking forward to the trip too much as it had been a rough week at work and the M4 is rather boring at best. Was going to be a case of settling in, putting cruise control on and mostly sponsoring myself with coffee. Although I knew it was going to be a good day when there was a retro spot at the first services...  First stop was to pick up a radiator for a fellow member of this parish after I put up a post in the pony express section, after a couple of postcode scares (think an additional 2hr round trip!), it eventually transpired to be 6 mins from where I was headed - Love it when a plan comes together   Met a really nice guy who wanted to talk retro cars and tell me stories of his past projects, sadly I was on a bit of a schedule so I made my excuses and departed. I had the main event to get to... So what was I heading to pick up? A number of things that I managed to negotiate while at the NEC in March - a GT headlining which is an insurance policy for when I have to do the welding on the roof and will need to remove mine, a replacement bonnet catch, the chrome strip that runs underneath the front bonnet edge and most importantly of all, a very rare NOS driver side sill with front bull nose section (is it wrong that I was far too excited about this). Essentially it means I can now make a mirror copy for the near side and I will have all I need to complete the sill work and major welding.  Now as it happens, the person I happened to visit has also restored a few of these cars in the past, he's also broken a few, so after talking shop for quite some time including showing me a car he was currently painting the underside of so I could take some reference pics  He then asked the fatal question; 'is there anything else you are looking for?' I pulled out my phone and recited a list, this seemed to ignite something and the next thing I knew boxes were being opened and another shed was opened which seemed to contain pretty much everything I needed and a whole lot more that I'd not even thought about - absolutely speechless. Suffice to say I ended coming away with rather a lot of parts I could not have imagined, albeit with a slightly lighter wallet, and a rather large grin on my face. A few bits from the parts haul  Despite spending over two and a half hours there (time flies when you're having fun), I knew I had to get back on the road as I had one more stop to make courtesy of a very kind offer from one @grumpynorthener (see posts above). I won't say any more for now other than it was great to catch up again Chris and you are a true gent - seriously I'm very, very grateful. I will keep you informed of progress but things should start moving at a pace now... Well once I can find some free time...  |
| |
Last Edit: May 2, 2018 13:22:58 GMT by samta22
'37 Austin 7 '56 Austin A35 '58 Austin A35 '65 Triumph Herald 12/50 '69 MGB GT '74 MGB GT V8'73 TA22 Toyota Celica restoration'95 Mercedes SL320 '04 MGTF 135 'Cool Blue' (Mrs' Baby) '05 Land Rover Discovery 3 V8 '67 Abarth 595 (Mrs' runabout) '18 Disco V |
|
|
|
|
|
|
My other half would skin my jewels if I had car things on the kitchen side, well done if yours never saw them there  |
| |
|
|
samta22
Club Retro Rides Member
Stuck in once more...
Posts: 1,276  Club RR Member Number: 32
|
|
|
|
My other half would skin my jewels if I had car things on the kitchen side, well done if yours never saw them there  Ha, that's in the utility room which was specifically built when I did the main kitchen with as much worktop space as possible so I could do such things... I've not tried oily parts yet though  ...and just to be clear, if I did that in the kitchen itself it'd be a whole different matter  |
| |
'37 Austin 7 '56 Austin A35 '58 Austin A35 '65 Triumph Herald 12/50 '69 MGB GT '74 MGB GT V8'73 TA22 Toyota Celica restoration'95 Mercedes SL320 '04 MGTF 135 'Cool Blue' (Mrs' Baby) '05 Land Rover Discovery 3 V8 '67 Abarth 595 (Mrs' runabout) '18 Disco V |
|
samta22
Club Retro Rides Member
Stuck in once more...
Posts: 1,276  Club RR Member Number: 32
|
|
May 25, 2018 12:52:09 GMT
|
Brief update time! After work decreeing that I can no longer use Imgur on my work laptop (it's a file sharing site afterall), this has subsequently meant that I can't see any images I've previously posted, so I've decided that it's time for an alternative approach, so hopefully adding them straight to RR works... So last weekend was the RR weekender at Goodwood, but as I wasn't able to attend both days I decided that I would spend part of Saturday fitting up some of the treasures from my road trip and carring on with the axle and spring refresh. First up was the fog lights and N/S indicator. Yes there's a bit of bumper adjustment required, the marks on the wing illustrate the point of the dry build! Look closely and you will also see my heath robinson method of temporarily fastening the chrome bonnet strip on  it's a bit twisted so hoping by doing this it will start to resume it's proper form. 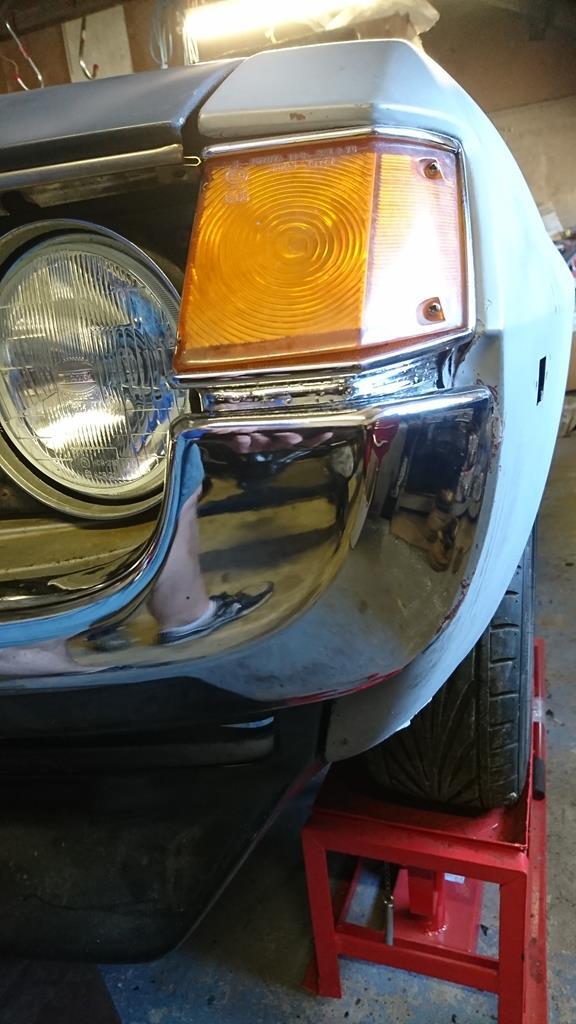 Just one side left to do - It's almost starting to look like it should again  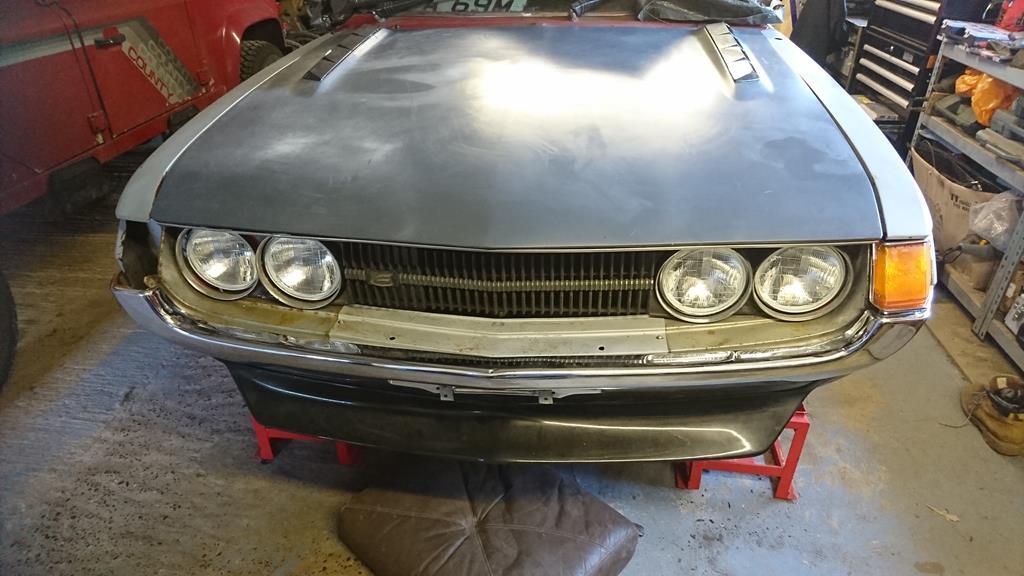 It was then time to crack on with giving the springs a paint - the old cattle feeding troughs do still have a use  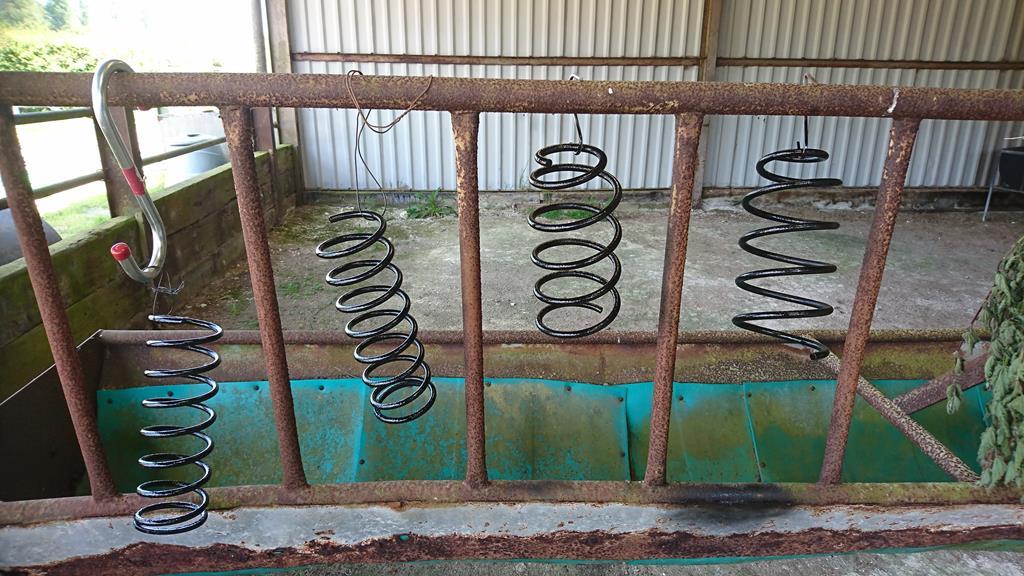 as well as putting the first dust coat on the axle 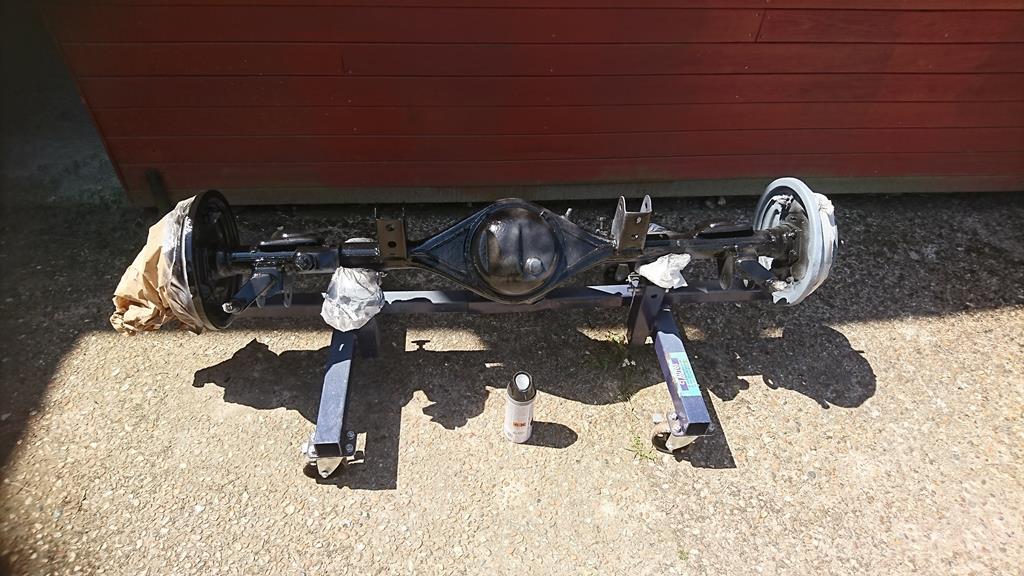 Due to other farm jobs that was about as far as I got... but no need to worry, plenty of car related activity was to follow on the Sunday.  After a somewhat early start, I headed south to rendezvous with @johnnybravo before winding our way along the south coast to GoodWood. As it happens we made rather good time and arrived at the campsite/parking at 7.30am... that tells you the time we left! Unfortunately we were greeted with words to the effect of "your names not down, so you're not coming in", or just simply that we couldn't park till 8... Johnny also hadn't revealed his party piece t-shirt at that point. Breakfast hunt it was then, needless to say we didn't have to head too far away and we joined some similarly like-minded folk at the golden arches for their finest fayre. The car park resembled a bit of an eclectic car meet with everything from a classic AMG merc through to a collection of Peugeot 309's heading to the RR event. Everyone then got buzzed by a whole host of mini's who were heading across to Brighton to the London to Brighton run. If a farmer hadn't turned up in his crop sprayer and taken up most of the car parking spaces then I've sure we'd have seen even more. Breakfast (of sorts) sorted, it was past the witching hour of 8am so we headed back to Goodwood to try and park, sure enough we were let in and while the main event wasn't open still we decided to have a wander round the campsite to witness the hungover and those hastily prepping their cars... yup we were in the right place  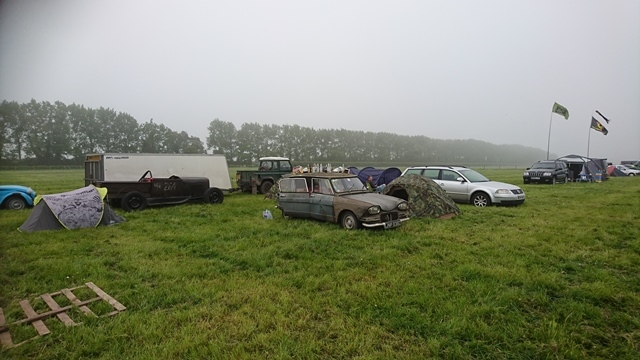 There are plenty of threads depicting the show, but a few highlights for me that I've not seen elsewhere:  3.9 V8 in something that looked rather cool and probably moved along rather well... 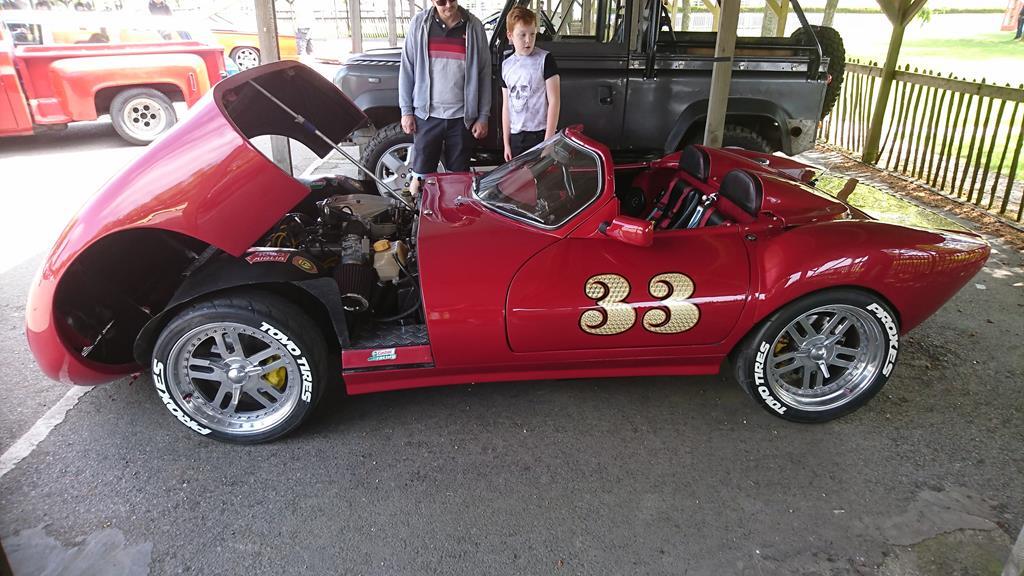 A classic Japanese shape with some interesting wheels that until now I had considered for the Celica... however on seeing them the initial impression was 'a bit big' for what my uses so will stick to the plan I've some up with. Talking of which, my 'new' wheels were also at the show, although as they were still stuck on something also from japan and rather rare I decided I wouldn't replace them for bricks... was tempting though   Loved this, so much attention to detail 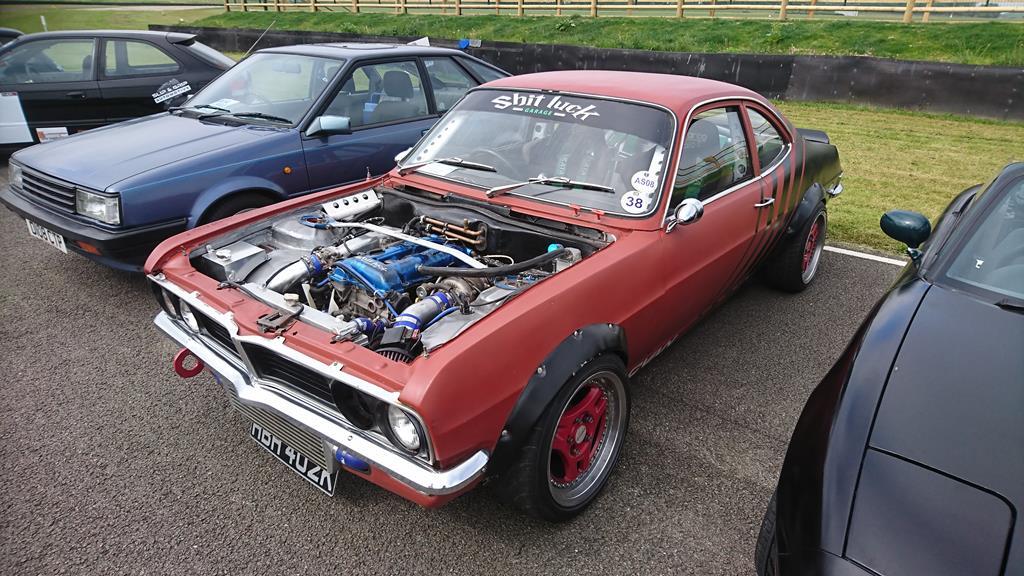 and the perfect car to pull off my folically challenged Vin Diesel impression in:  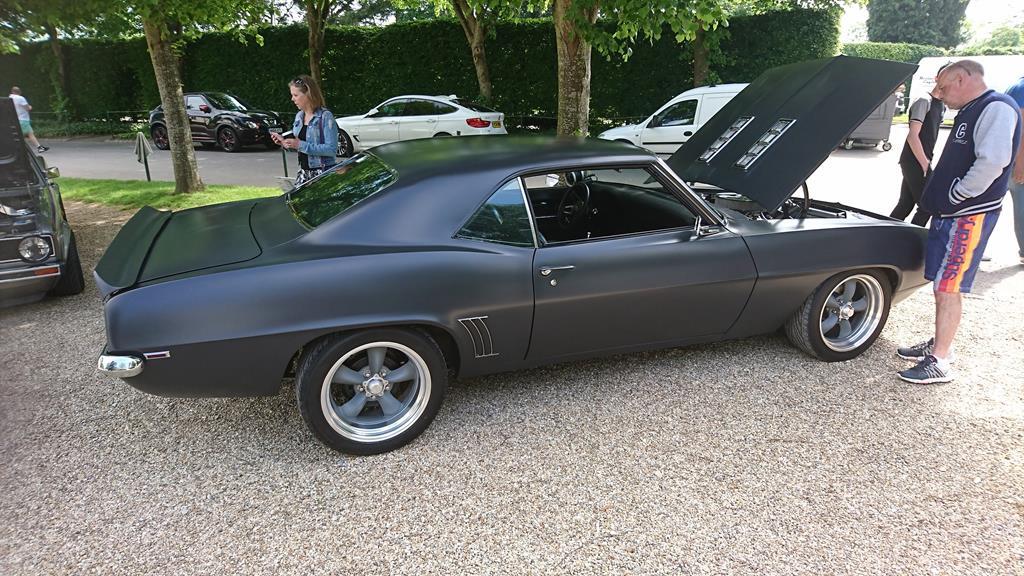 As mentioned in another thread, big thanks to the organising team, was a good day out and I'll certainly be keen on making a weekend of it next time. Met some familiar faces, some not so familiar and a whole lot more besides. Well done HoTWire, bstardchild et al. your heroic efforts certainly paid of from this visitors perspective. As folk started to drift off and make their journeys home, we decided to do the same. After dropping johnny off and popping in to see a mate with a newly acquired stag project, I even managed to get back to the workshop in time for a final coat on the axle. 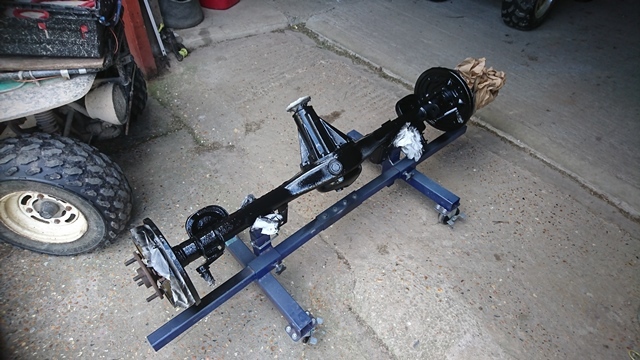 Came out rather well I'd say. 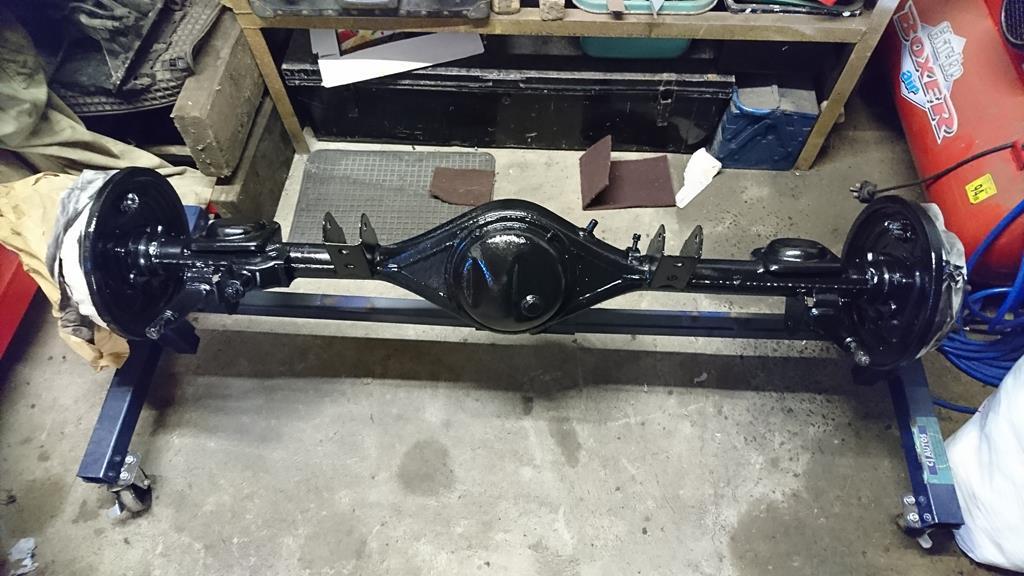 Long weekend and another automotive adventure beckons - lets hope it's a productive one too.  |
| |
'37 Austin 7 '56 Austin A35 '58 Austin A35 '65 Triumph Herald 12/50 '69 MGB GT '74 MGB GT V8'73 TA22 Toyota Celica restoration'95 Mercedes SL320 '04 MGTF 135 'Cool Blue' (Mrs' Baby) '05 Land Rover Discovery 3 V8 '67 Abarth 595 (Mrs' runabout) '18 Disco V |
|
samta22
Club Retro Rides Member
Stuck in once more...
Posts: 1,276  Club RR Member Number: 32
|
|
|
|
So this weekend was supposed to be a restful one after a bit of a hellish time at work... instead it turned out to be quite the opposite, but all for a very good reason. As a bit of back story, it was a relatively significant birthday for my FIL on the Sunday and the plan was to pick up another 'little' addition to the fleet that would mean something to him (one was his first car), and have something that father/daughter/family/friends could make some memories with. In order for this to happen however, some modifications needed to be made to my trailer - the addition in question is a bit narrow you see. First job of the weekend was therefore to collect some already cut ply to board out the trailer, so at 7am on saturday morning we arrive at B&Q to be told that no boards had been cut and the person who supposedly would be able to cut them had hurt his back... bu**er! Nothing for it but to do it ourselves then. With the A-team theme tune playing in my head we got to work 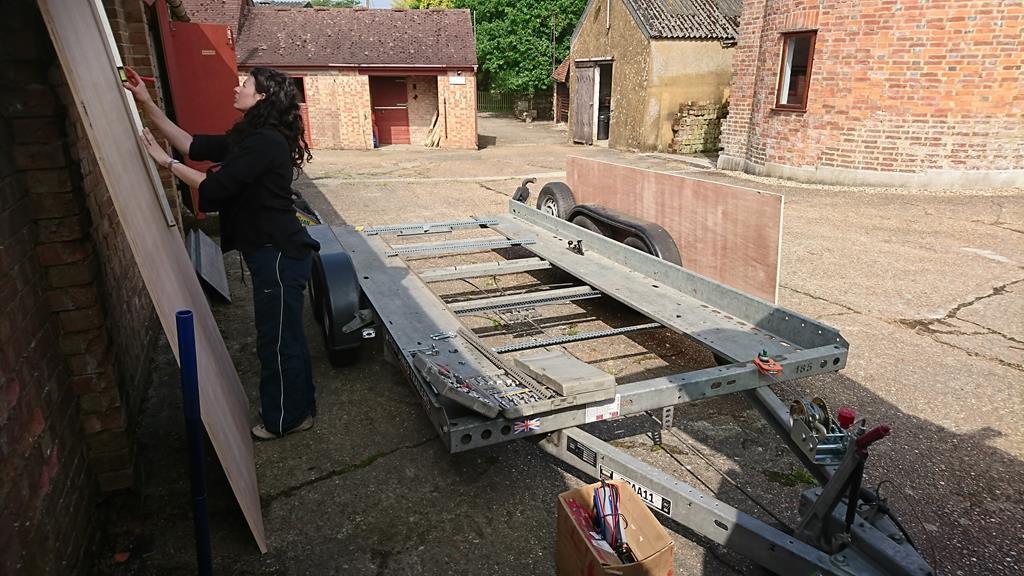 With braces installed and the boards slotted into place I was actually rather pleased with the outcome 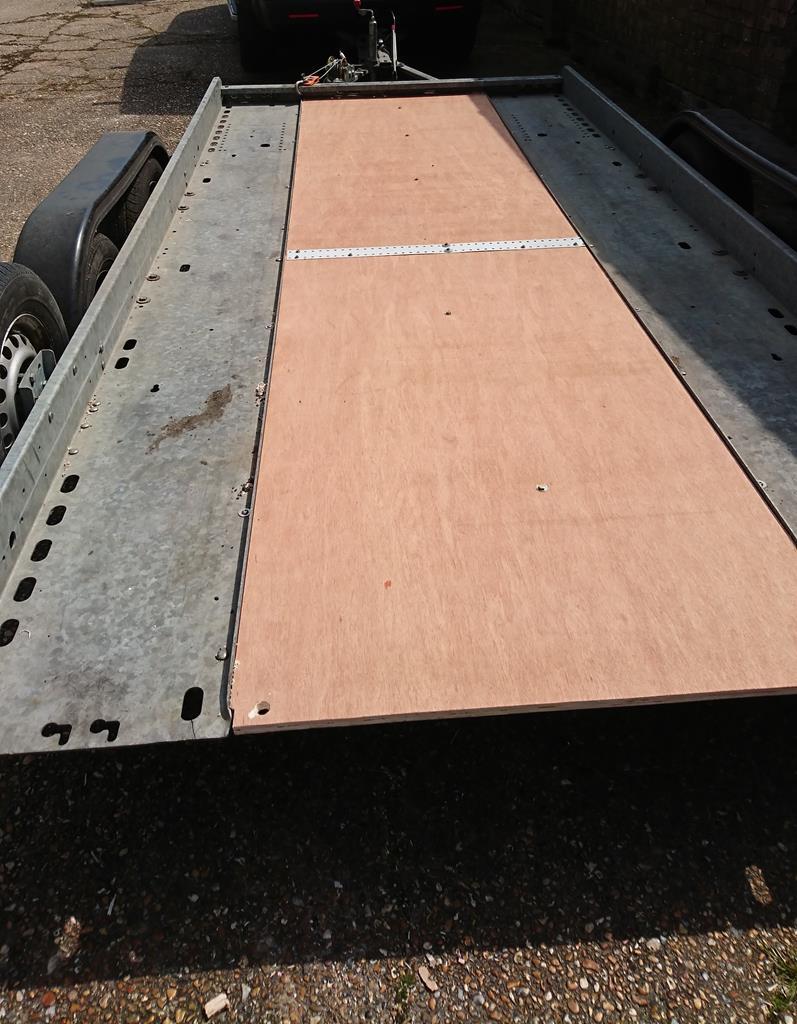 On to the road and straight onto the world's biggest car park that was the M25... wonderful. Upshot was that a journey that usually takes a little over 2hrs took nearly 5. This was going well... Pleasantries exchanged with the very sweet couple that were selling the car, including tea and rather wonderful birthday cake (it was the sellers also on the Saturday), it was time to load and head back south to the drop off... another 4 hours drive away.  Thankfully the journey was pretty uneventful, unlike the lightning storm towards the end which was rather spectacular to witness. Luckily we avoided any major downpours and were able to drop the car off and get it covered before heading home in the early hours of Sunday. Up early it was a case of dividing and conquering, the mrs went to fetch her dad, and I went to where the car was dropped off to set everything up for the surprise. All went perfectly with unloading the car and getting it set up for the reveal 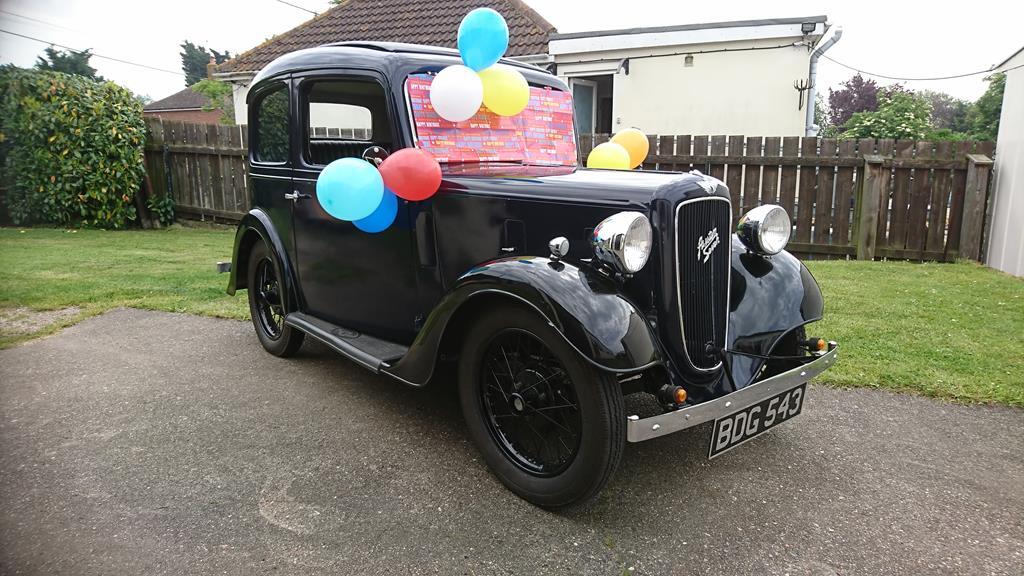 ...I even managed to pick a not too shabby hiding place with some excellent company 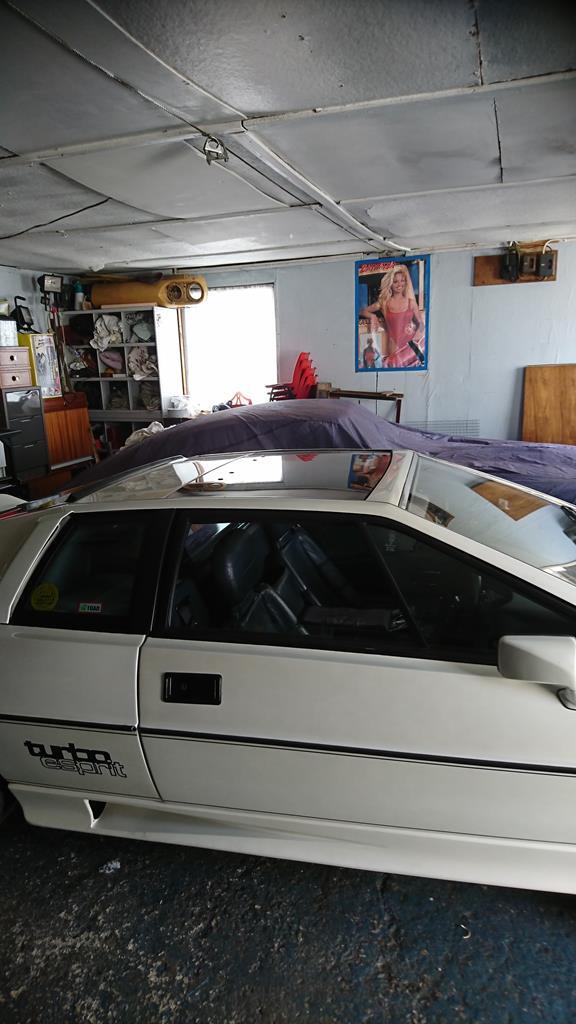 Pamela Anderson in her heyday... there may have been a couple of nice toys in there as well  Suffice to say the surprise went down very well indeed and the FIL and his best mate swiftly reverted to being in their 20's again and took it for a spin. Given the last time they saw each other they were saying goodbye as one if them was very, very ill, it made the whole trip and effort very worthwhile indeed. 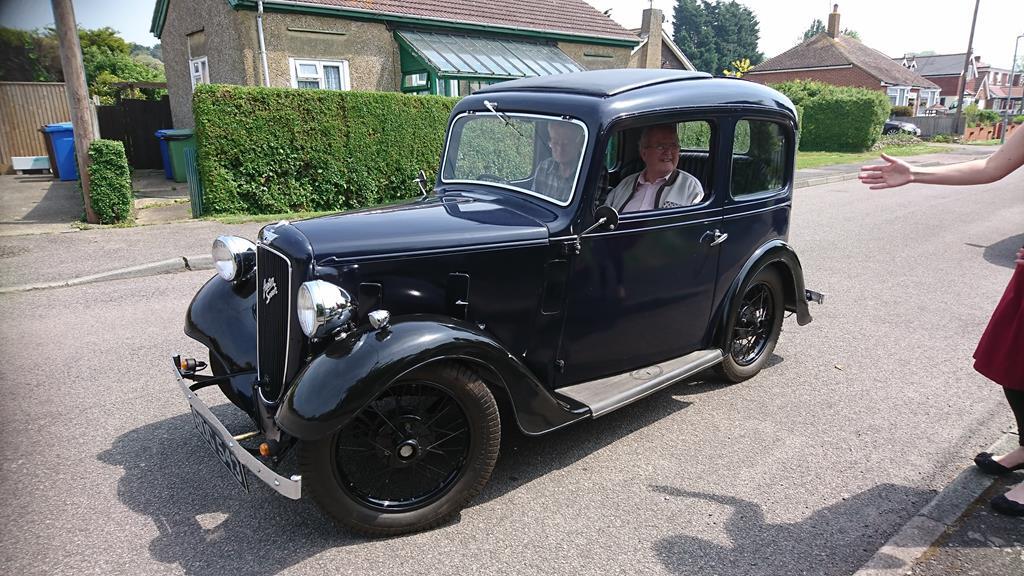 Fun had, it was time to bring the matured ones home  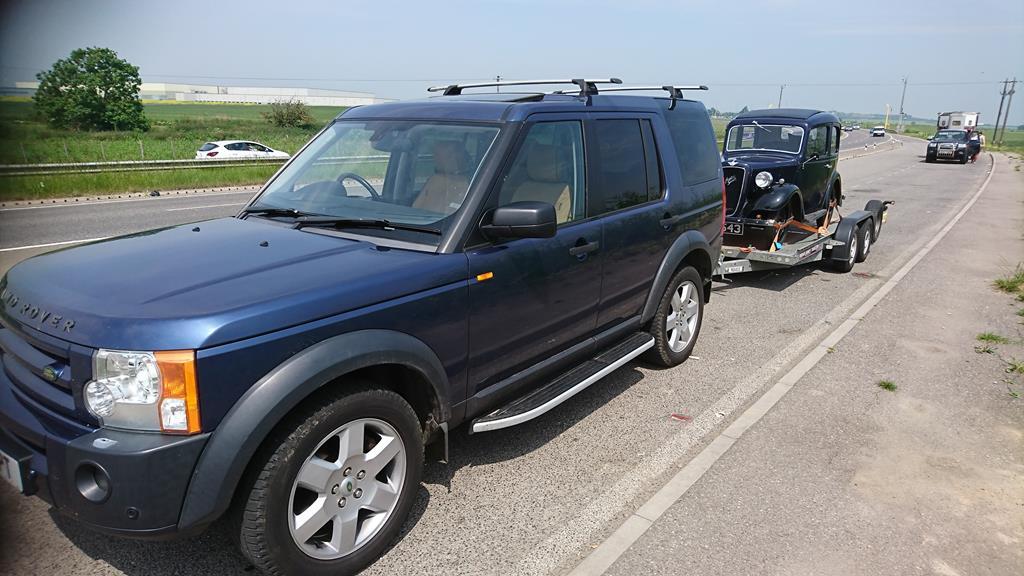 A modicum of energy remaining I also managed to sort a couple of bits on the Celica. Finding the elusive O/S indicator bracket in amongst a load of spares I decided to get it all cleaned up, so after a quick wire brush it was into the electrolysis tank again 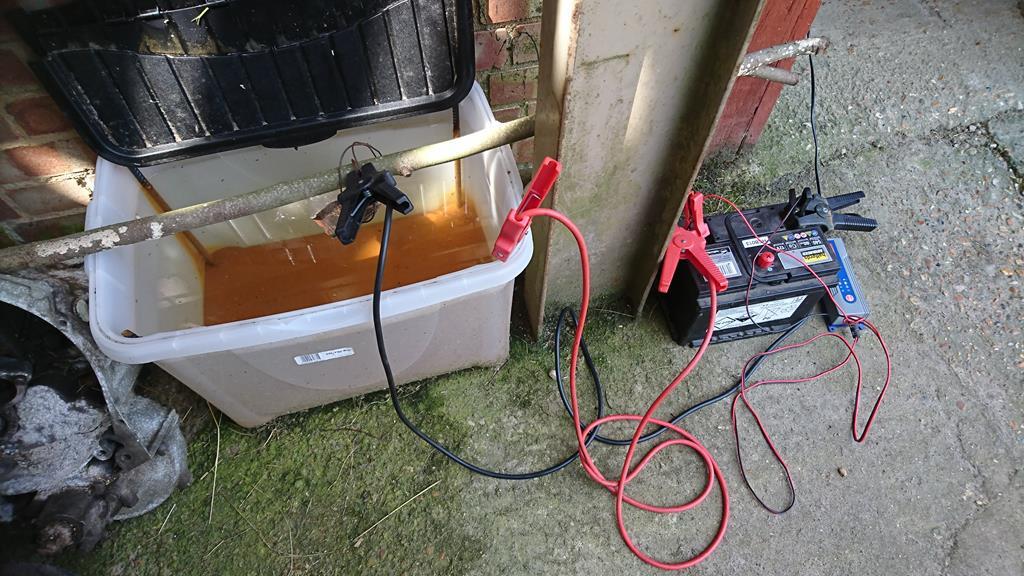 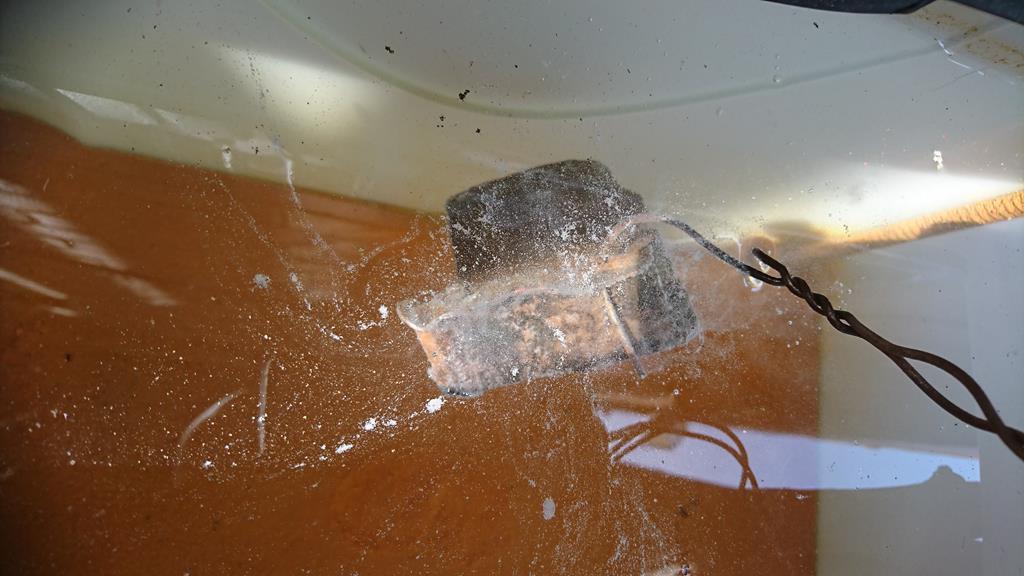 And after a couple of hours, stuff had happened 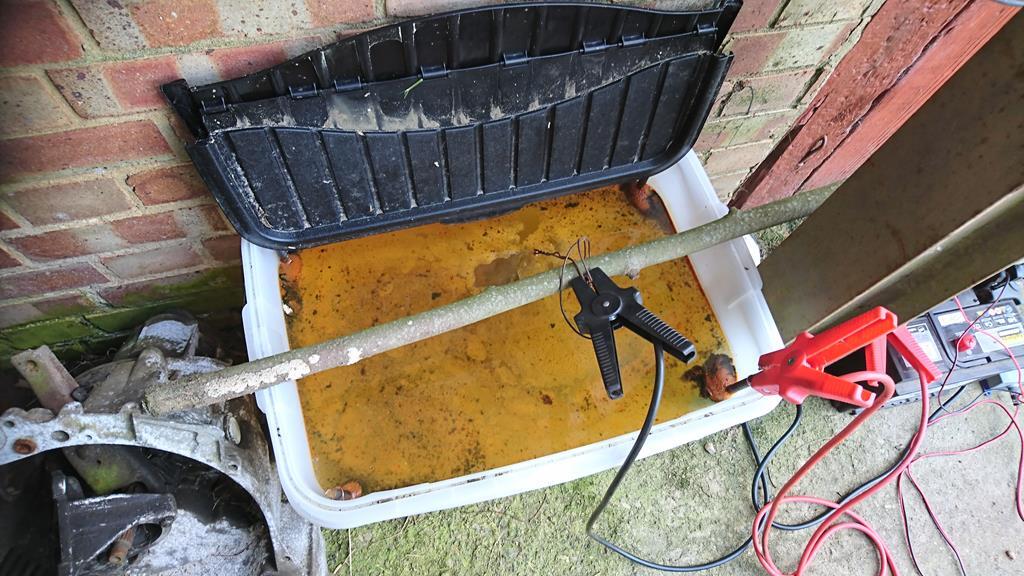 Another wipe over and wire brush off and things are looking a lot better. I'll give it a good coating of hydrate 80 before priming and painting the same as the rear axle and springs. 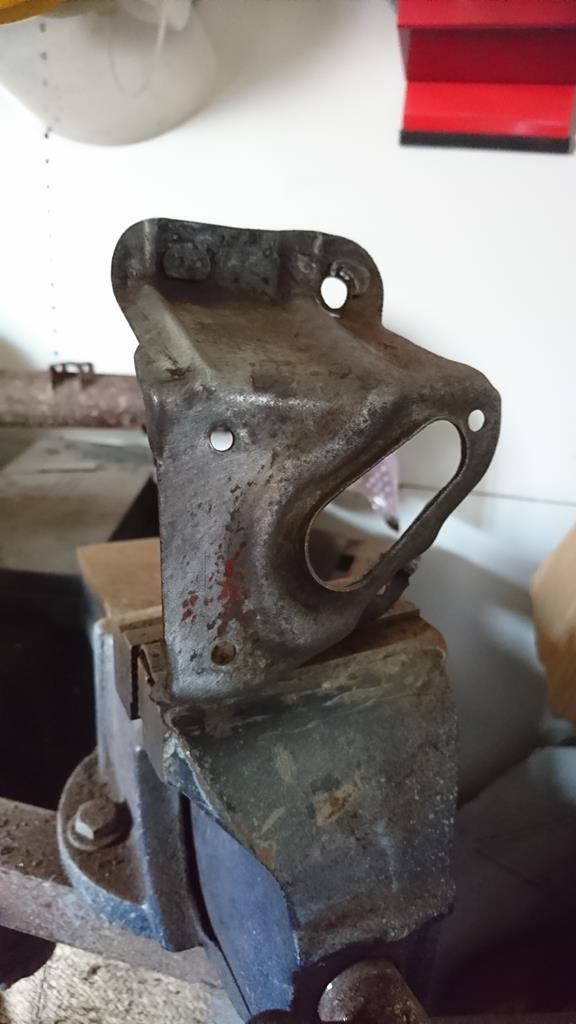 I also started to inspect the underside ready for attacking when I have some time off next week. 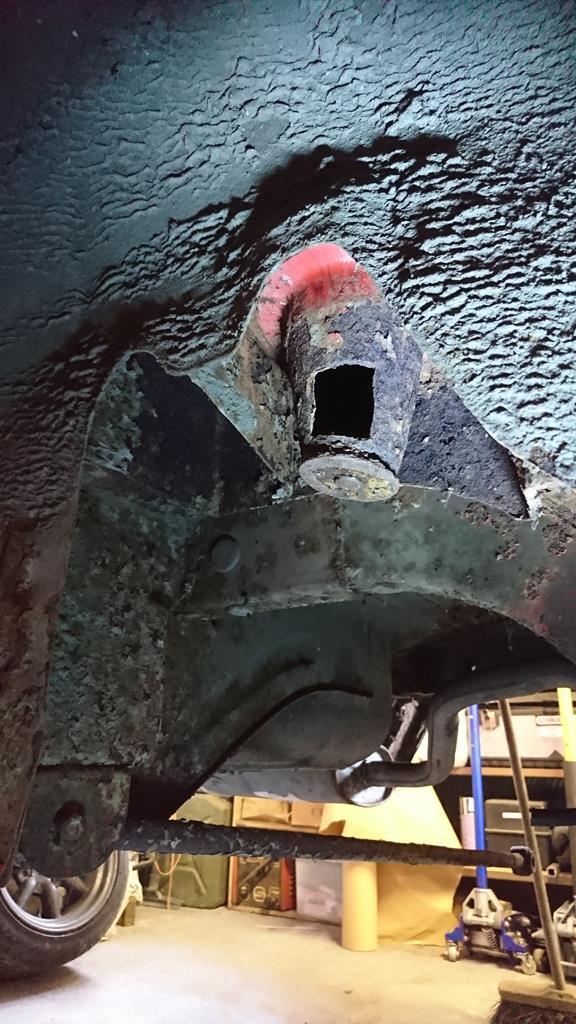 As it is going to be one of those horrible jobs I need to knuckle down and get on with, I definitely didn't have the energy or motivation to start it this weekend. A nice cold beer was calling instead... |
| |
'37 Austin 7 '56 Austin A35 '58 Austin A35 '65 Triumph Herald 12/50 '69 MGB GT '74 MGB GT V8'73 TA22 Toyota Celica restoration'95 Mercedes SL320 '04 MGTF 135 'Cool Blue' (Mrs' Baby) '05 Land Rover Discovery 3 V8 '67 Abarth 595 (Mrs' runabout) '18 Disco V |
|
jhc928
Part of things
 
Posts: 12 
|
|
May 30, 2018 10:31:22 GMT
|
Lovely. Is the centre of the steering wheel also a horn push? I hope so!  Cheers Matt I worked on these when they were new 72/75 we used to pull the centre out of the steering wheel and leave a message inside ! |
| |
|
|
samta22
Club Retro Rides Member
Stuck in once more...
Posts: 1,276  Club RR Member Number: 32
|
|
May 30, 2018 10:42:33 GMT
|
Ha, I'll have to take a look next time I'm over at the car  |
| |
'37 Austin 7 '56 Austin A35 '58 Austin A35 '65 Triumph Herald 12/50 '69 MGB GT '74 MGB GT V8'73 TA22 Toyota Celica restoration'95 Mercedes SL320 '04 MGTF 135 'Cool Blue' (Mrs' Baby) '05 Land Rover Discovery 3 V8 '67 Abarth 595 (Mrs' runabout) '18 Disco V |
|
|
|
|
May 30, 2018 11:18:42 GMT
|
|
Nice tale, made me smile anyway. 😊
|
| |
|
|
|
|
|
|
|
|
Thanks to a Greek cockerel seemingly only audible to me I’ve managed to read through the whole tale so far over the last two mornings.
I’ve not read since the first page or two and not had the chance to catch up since it ran too far ahead of me but glad i have now.
Hopefully I have caught it just at the right time for things to all come together but if not at least I should be able to keep up now.
|
| |
|
|
|
|
samta22
Club Retro Rides Member
Stuck in once more...
Posts: 1,276  Club RR Member Number: 32
|
|
Jun 12, 2018 13:14:49 GMT
|
Ahhh sun, sea, sand and heart attack inducing ice cream... Hockings proper ice cream to be precise, all smeared with a good dollop of clotted cream. It tastes truly amazing... 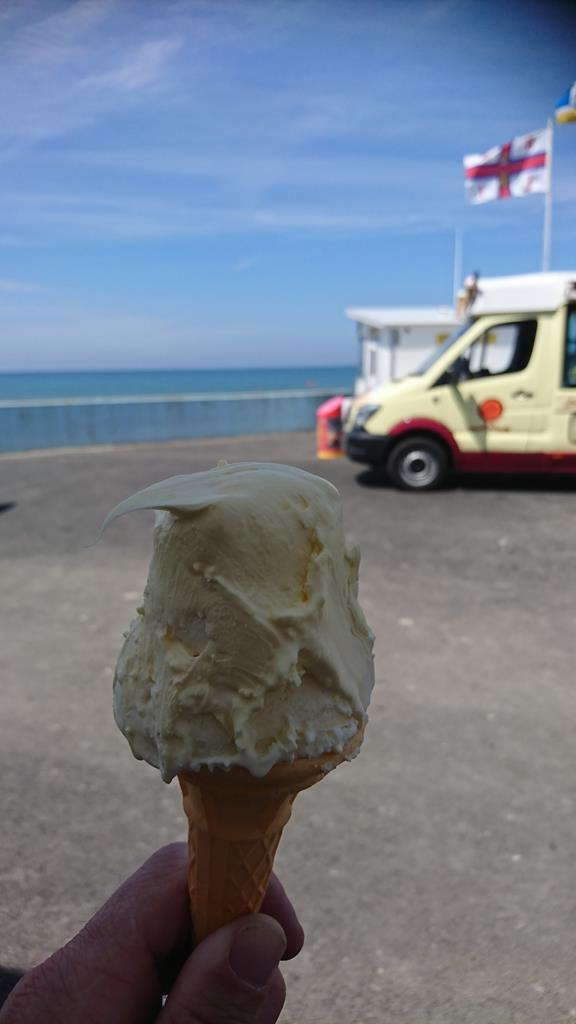 The beach wasn't bad either!  T'was a brief 3 day escape to Devon to recover from a friends wedding, celebrate the Mrs' birthday and essentially have some time out for some well-needed R&R. However it was soon back to reality for some more jobs on the house - so much for my week off with grand plans to work on the Celica.  I did get one day to play however so what was I going to do... well essentially the messy stuff I'd been avoiding. Starting with some rather crusty brake drums while I procrastinated  . 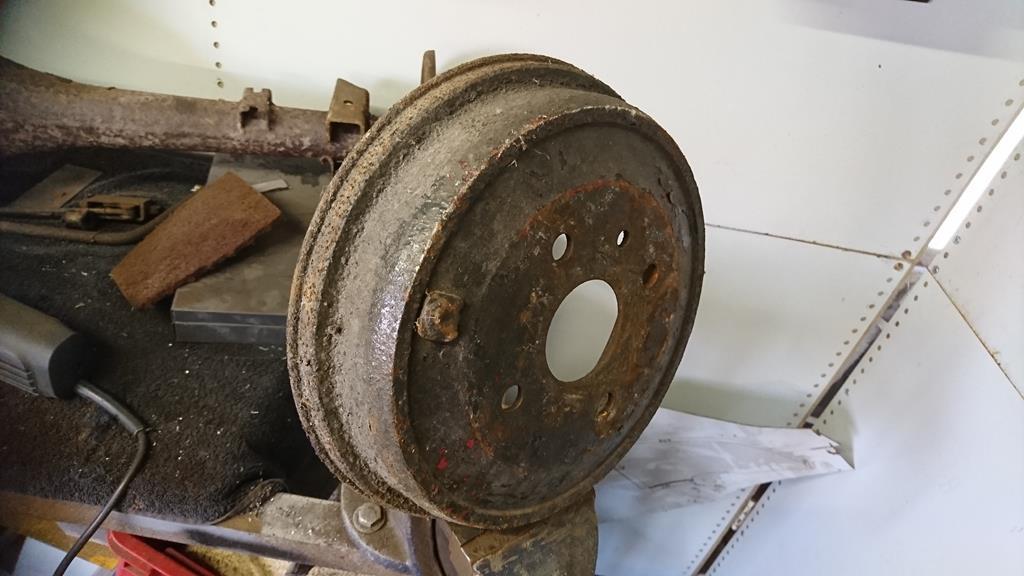 These were effectively attacked with a wire-wheel to clean off as much rubbish as I could (including at least three layers of paint!). One down... 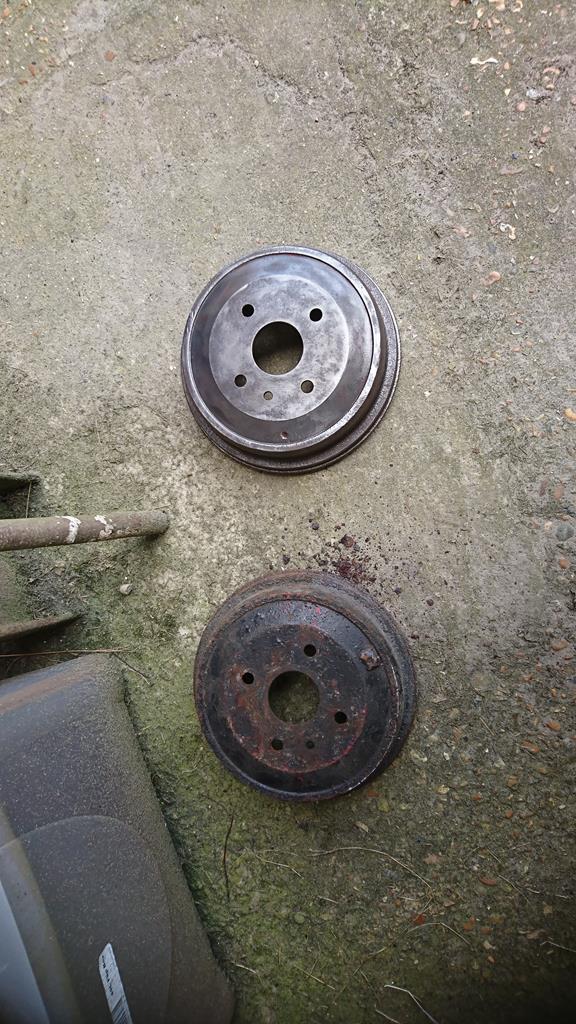 they were then covered in primer and left to dry in the sun while I cracked on with the main job 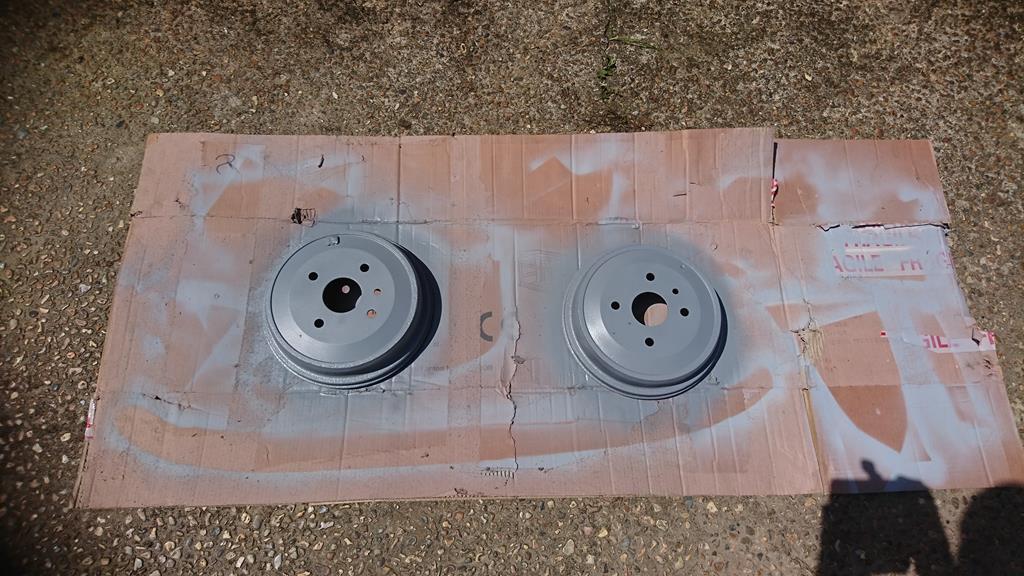 Which was angling the car enough to allow me to get underneath to start cleaning the underside - I won't lie this is probably my least favourite job and I was severely procrastinating by this point. Still it needs to be done. (those who like a tidy work area, look away now!) 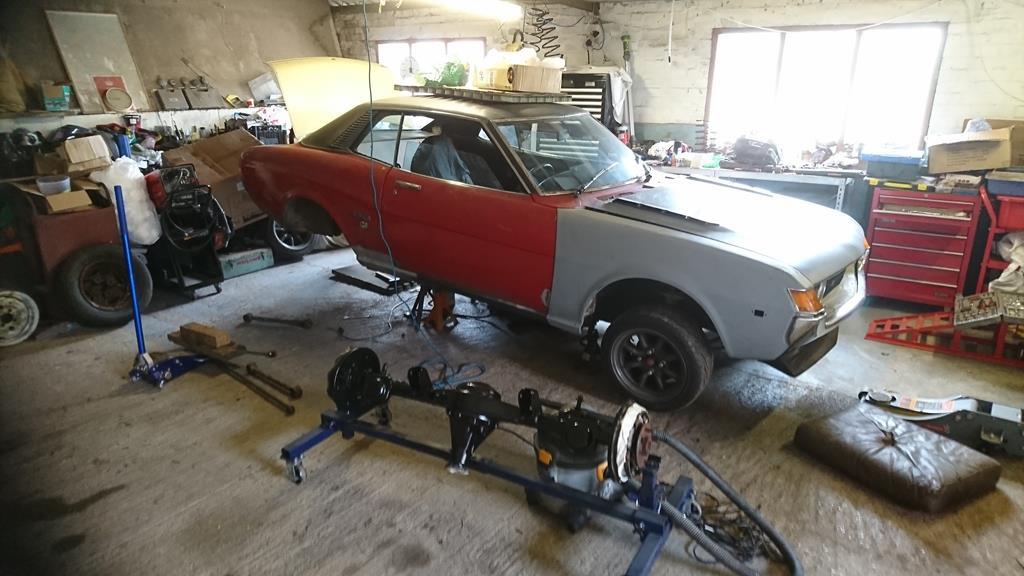 Here's what I was going to be dealing with (the exhaust did get removed...again!), and so did the arms, once they'd put up a bit of a fight! 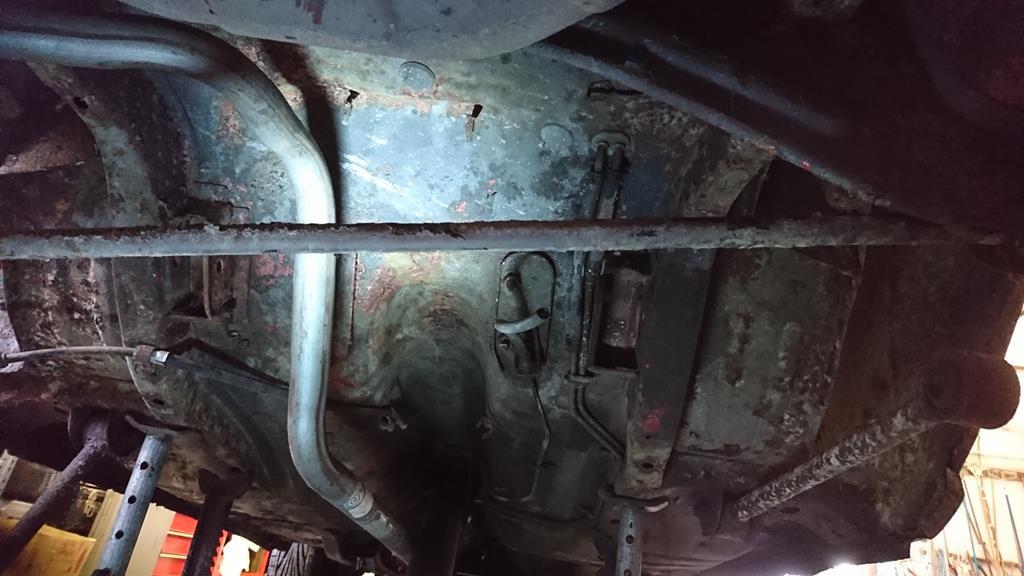 after much swearing, sweating and covering myself in all sorts of rubbish that resulted in me looking like I'd been down a sooty chimney, I sort of achieved this... all surprisingly solid which is a result. It'll eventually all get a good coating of hydrate 80 before priming and painting, I have yet to decided on the best protection/paint yet so thoughts/suggestions welcome. 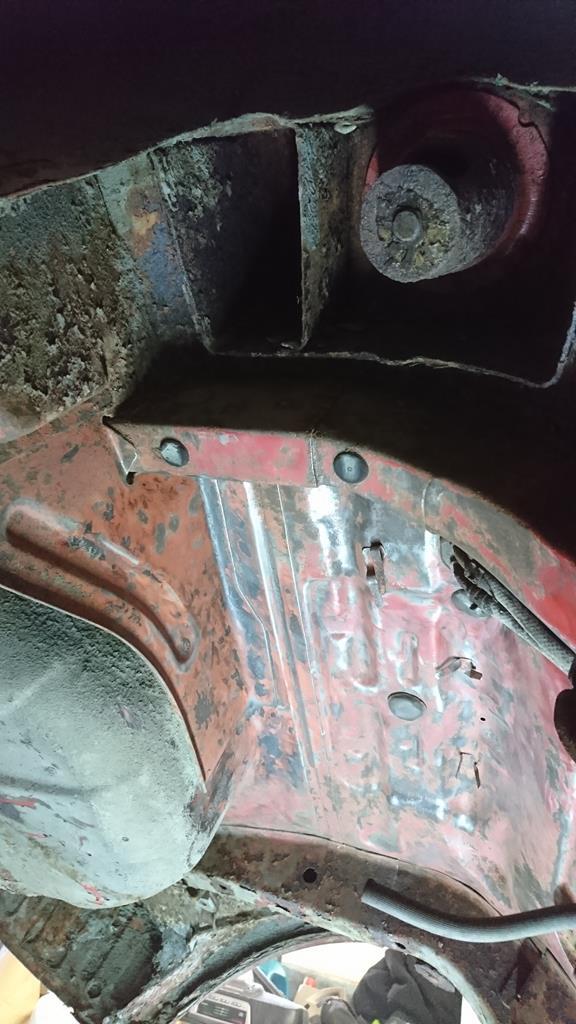 The next hit will involve trying to get in those areas that can't be accessed with a grinder and needle file, especially the rear suspension box sections which are classic dirt traps. Deep joy. My current thinking is to use a drill with a variety of smaller wire attachments to get right in the corners but may be a case of experimenting to see what works. The alternative is to try to get hold of one of the handheld soda blasting kits for small areas but will try the cheaper option first! While doing this I also painted the drums so they had plenty of time to dry and also finished cleaning and painting the O/S bracket for the front indicator which meant I could get that fitted on the car - starting to look almost decent if you squint a little  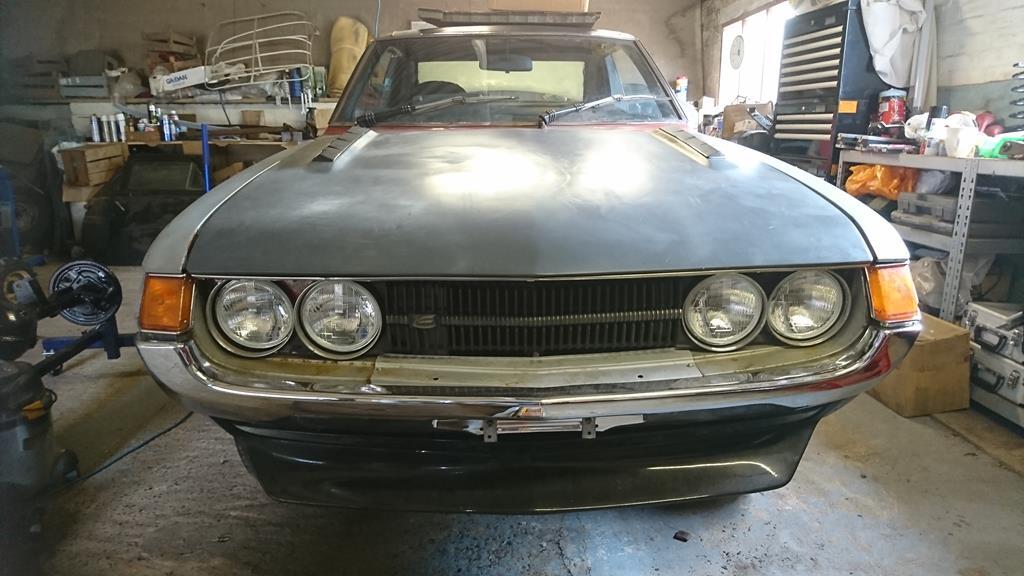 Last job was to fit the drums back on the rear axle - quite chuffed with how much better the axle looks compared to before. Going to have to do something about the centres though... 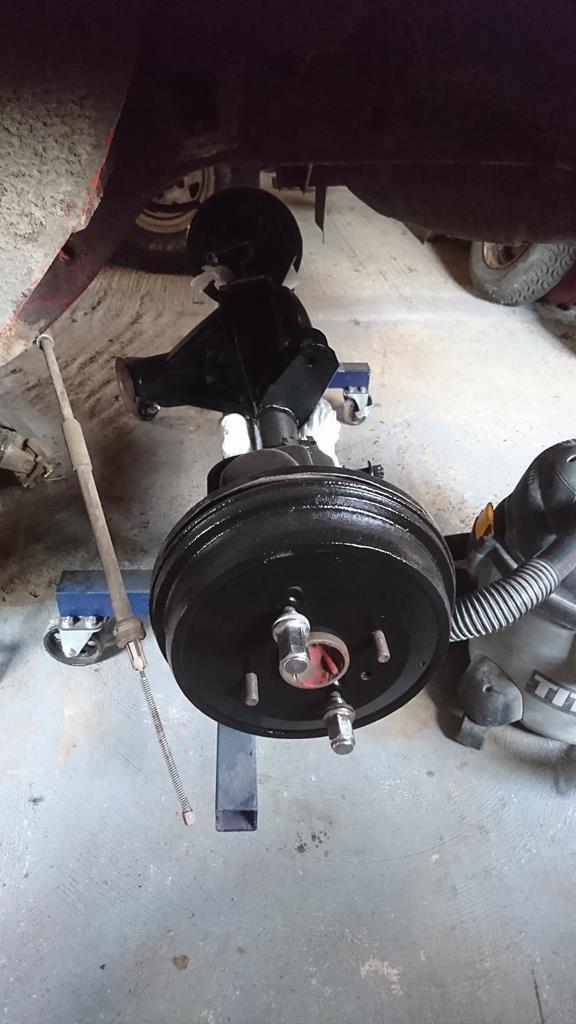 Another job on the list is to deal with the arms and replace the rubbers, unfortunately I ended up cutting a couple of the bolts so will need to replace those at some point too. 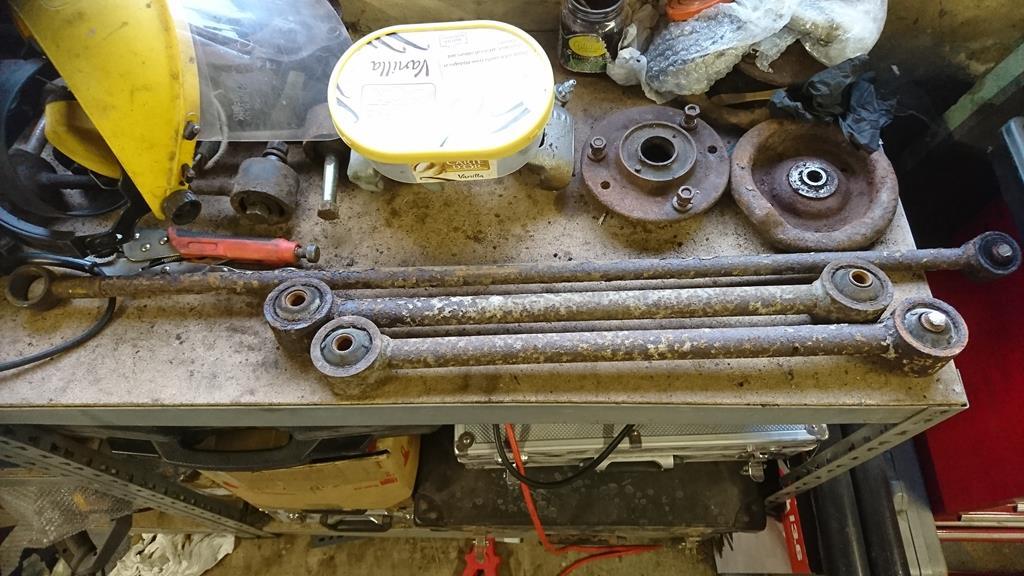 Boy do I wish I had booked another week off! Despite making a reasonable start on one of the jobs I was avoiding, I couldn't help feeling a little despondent with how much there is still to do, this is certainly not helped by having to snatch brief amounts of time whenever I can at the moment, meaning I'm never able to get into any kind of flow  . The joys of car restoration - perhaps my feelings will change with another go this weekend. |
| |
'37 Austin 7 '56 Austin A35 '58 Austin A35 '65 Triumph Herald 12/50 '69 MGB GT '74 MGB GT V8'73 TA22 Toyota Celica restoration'95 Mercedes SL320 '04 MGTF 135 'Cool Blue' (Mrs' Baby) '05 Land Rover Discovery 3 V8 '67 Abarth 595 (Mrs' runabout) '18 Disco V |
|
|
|
|
Jun 12, 2018 17:43:16 GMT
|
|
That all looks like the nice kind of work to me! At least it’s making things pretty and preserved rather than fixing broken things!
|
| |
|
|
samta22
Club Retro Rides Member
Stuck in once more...
Posts: 1,276  Club RR Member Number: 32
|
|
Jun 12, 2018 22:04:19 GMT
|
That all looks like the nice kind of work to me! At least it’s making things pretty and preserved rather than fixing broken things! To be honest I quite enjoy the fixing bit, makes me feel like I've actually achieved something... Well other than the fixing of others previous bad repair attempts. Sadly have got that to come - the bottom of the rear wings are full of the hole repairers favourite weapons - P38 and P40 🙄🙈 |
| |
'37 Austin 7 '56 Austin A35 '58 Austin A35 '65 Triumph Herald 12/50 '69 MGB GT '74 MGB GT V8'73 TA22 Toyota Celica restoration'95 Mercedes SL320 '04 MGTF 135 'Cool Blue' (Mrs' Baby) '05 Land Rover Discovery 3 V8 '67 Abarth 595 (Mrs' runabout) '18 Disco V |
|
trimtechniques
Part of things
  Porsche 928 4.7 ltrs of German grunt. Mazda MX-5 MK1 Dakar. VW T4 camper
Posts: 158
|
|
Jun 12, 2018 23:40:28 GMT
|
|
I love this shape Celiac. Remember them from when I was a kid about 1973 and they looked so modern compared with most other cars of the day.
Great work and I am looking forward to following your build.
|
| |
|
|
|
|
|
|
|
|
I've been reading this over the last several days and thoroughly enjoyed it. In regards to underseal, I've recently bought everything (i think) i need from Bilt Hamber, you've already got the hydrate 80.
I've bought Electrox which is a zinc rich corrosion resistant primer and their 2 part Epoxy Mastic. Also dynax s50 for cavitites and their seam sealer. Their prices are very reasonable too. You are upto the same stage as me (stripping underseal/paint etc. Hot air gun or a butane torch (used carefully) with a scraper works well.
Good old knotwheel angle grinder attachment, file sander for hard to reach places, black scotchbrite attachment also works brilliantly at attacking old paint/rust.
Oh and bookmarked!
|
| |
Mk2 Golf 16V resto
|
|
|
|
|
|
|
Sam - With regards to what to coat the underside with, your use of Hydrate 80 like on the other parts is well recommended and I would use a good quality primer over the top of this - ideally one with a zinc content / equally a good quality etching primer would do the job - over this a high quality underbody wax - one that is resistant to chipping / shelling off - when impacted by minor road debris / stone chippings etc - avoid at all costs any 2 pack industrial hard setting coatings - these chip easily - the chipped surface acts has a capillary to water and before you know it you have a rust perforated panel for your efforts. There is a reason why I have used Dinitrol products for the last 40 years in my restorations - it's very effective so I would highly recommend Dinitrol 4941 underbody wax & Dinitrol ML for the cavity wax protection - both products are utilised worldwide by OM manufactures and is easy to apply - link to the Dinitrol site below - let me know if need any further info - Chris www.dinitroldirect.com/ |
| |
|
|
samta22
Club Retro Rides Member
Stuck in once more...
Posts: 1,276  Club RR Member Number: 32
|
|
Jun 18, 2018 16:19:36 GMT
|
I've been reading this over the last several days and thoroughly enjoyed it. In regards to underseal, I've recently bought everything (i think) i need from Bilt Hamber, you've already got the hydrate 80. I've bought Electrox which is a zinc rich corrosion resistant primer and their 2 part Epoxy Mastic. Also dynax s50 for cavitites and their seam sealer. Their prices are very reasonable too. You are upto the same stage as me (stripping underseal/paint etc. Hot air gun or a butane torch (used carefully) with a scraper works well. Good old knotwheel angle grinder attachment, file sander for hard to reach places, black scotchbrite attachment also works brilliantly at attacking old paint/rust. Oh and bookmarked! Glad you enjoyed catching up with my meandering musings  . In truth it's been a bit of a sporadic journey so far, but that's part of the fun I guess, have to keep reminding myself to enjoy it as much as I hope to enjoy the final outcome - I've certainly met some truly fantastic folk on the way. I do have a trio of Bilt Hamber products already; the Hydrate 80, Deox C gel and the Deox C concentrate for mixing and submerging particularly rusted parts in, however I've not used their electrox primer yet. I do have a few tins of the U-Pol equivalents but am always wary of mixing 'systems' in case there is a reaction. Thankfully the underseal has not been too stubborn - age has played it's part in that I think. My technique so far has been a mixture of knot wheel on grinder, wire drill attachments and a needle power file kindly lent to me by a very generous individual. Unfortunately there are still some hard to reach areas that I cannot get to with any of the above so have opted to purchase a reasonably inexpensive soda blaster for those tricky spots... time will tell if it proves successful. I'll update in due course on how that goes. Sam - With regards to what to coat the underside with, your use of Hydrate 80 like on the other parts is well recommended and I would use a good quality primer over the top of this - ideally one with a zinc content / equally a good quality etching primer would do the job - over this a high quality underbody wax - one that is resistant to chipping / shelling off - when impacted by minor road debris / stone chippings etc - avoid at all costs any 2 pack industrial hard setting coatings - these chip easily - the chipped surface acts has a capillary to water and before you know it you have a rust perforated panel for your efforts. There is a reason why I have used Dinitrol products for the last 40 years in my restorations - it's very effective so I would highly recommend Dinitrol 4941 underbody wax & Dinitrol ML for the cavity wax protection - both products are utilised worldwide by OM manufactures and is easy to apply - link to the Dinitrol site below - let me know if need any further info - Chris www.dinitroldirect.com/Chris, many thanks for the advice. The Dinitrol cavity wax I've used in the past for the MG but wasn't aware there was an under body product also, will look order some shortly... I say shortly as I have a little bit of metal work to get on with first... |
| |
'37 Austin 7 '56 Austin A35 '58 Austin A35 '65 Triumph Herald 12/50 '69 MGB GT '74 MGB GT V8'73 TA22 Toyota Celica restoration'95 Mercedes SL320 '04 MGTF 135 'Cool Blue' (Mrs' Baby) '05 Land Rover Discovery 3 V8 '67 Abarth 595 (Mrs' runabout) '18 Disco V |
|
samta22
Club Retro Rides Member
Stuck in once more...
Posts: 1,276  Club RR Member Number: 32
|
|
Jun 18, 2018 16:37:51 GMT
|
This weekend bought another Saturday afternoon of my lying on my back getting covered in muck. The positive was that I appear to have developed neck muscles that F1 drivers can only dream of and the abs got a good workout in my manoeuvrings. Who needs to go to a gym when you have a car underside to clean!  Thankfully there weren't too many nasty surprises (more on those in a minute...) and in actual fact things started to clean off rather nicely (the eagle eyed amongst you will have already spotted the double-arch feature that this car now sports... as I said more on that in a minute 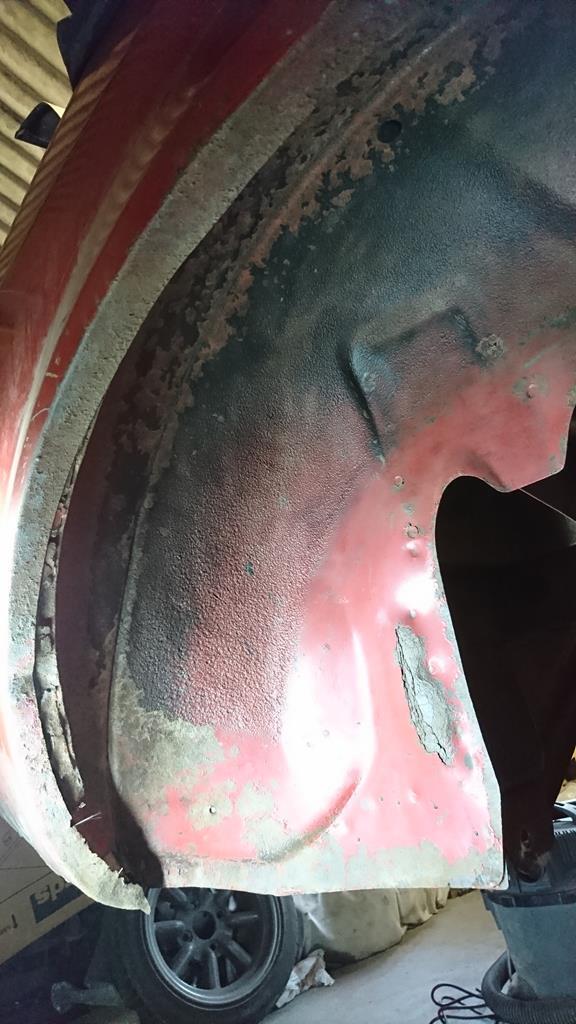 Box sections even cleaned up with no horrors 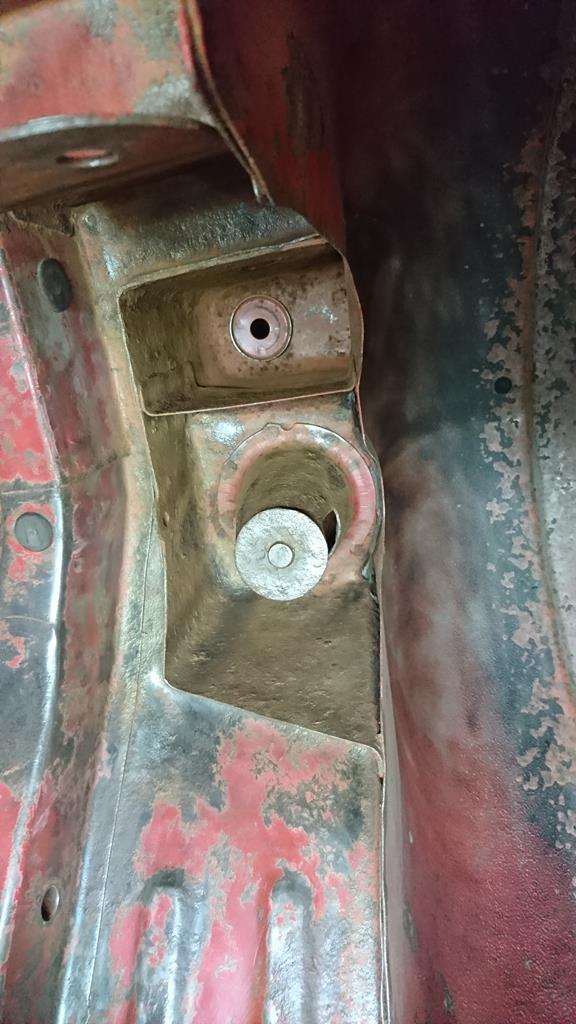 Now the fun bit - check out the end of the sill 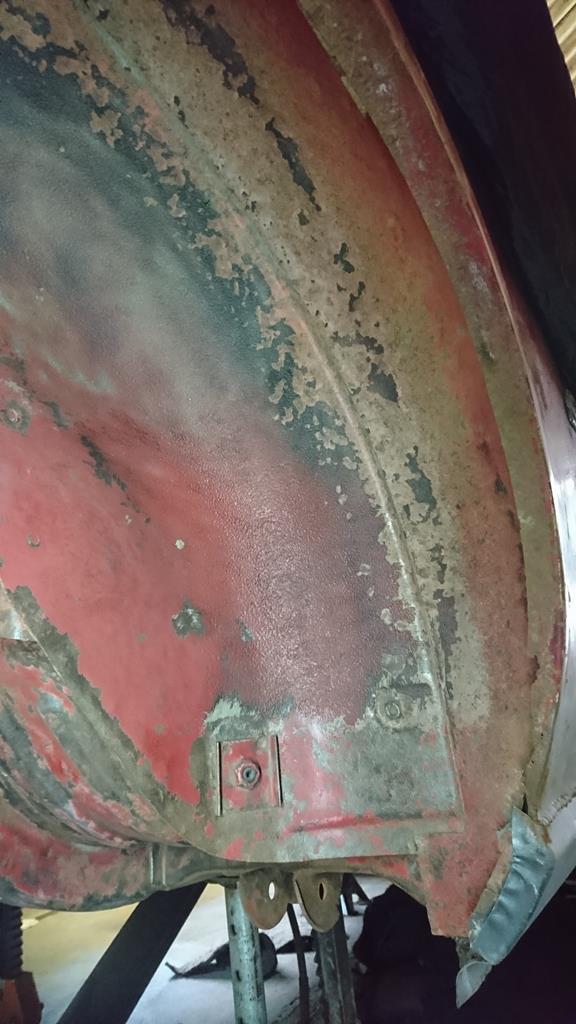 'plate over and hide' was obviously the mantra in the office that day! 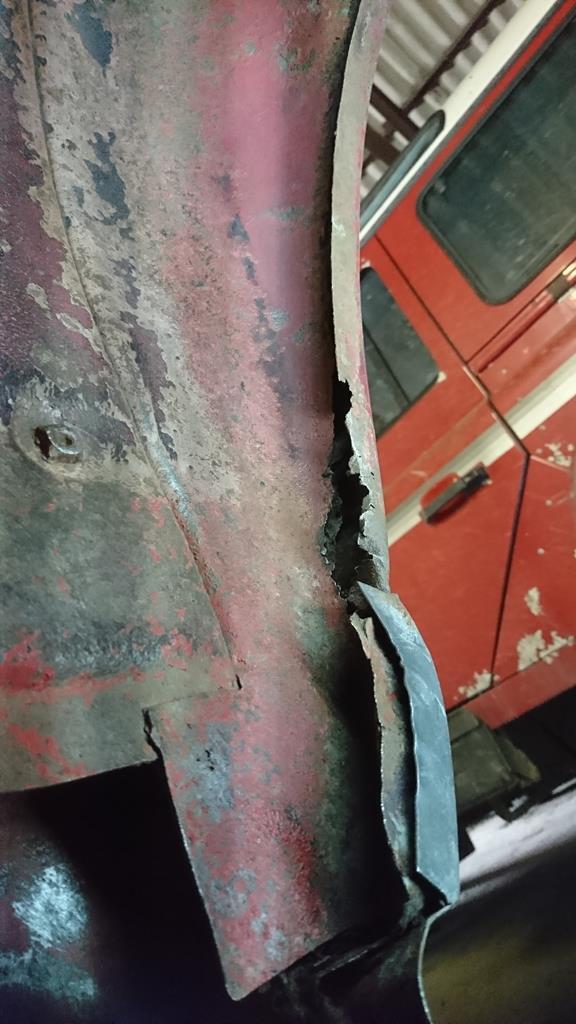 A similar story with the replacement arches that have been added 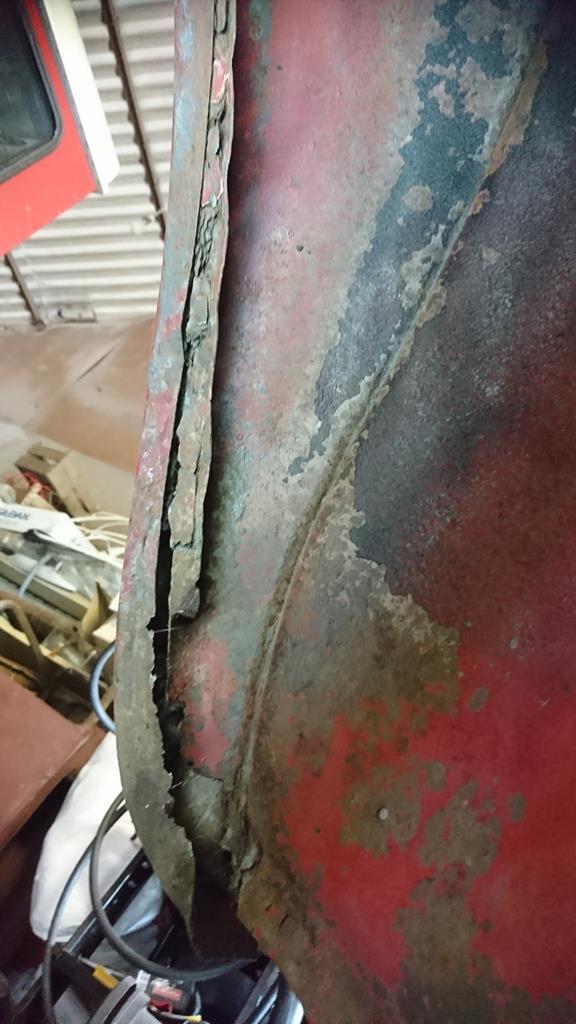 We then got onto the horror that was the aforementioned P38/P40 zone at the base of the O/S rear quarter 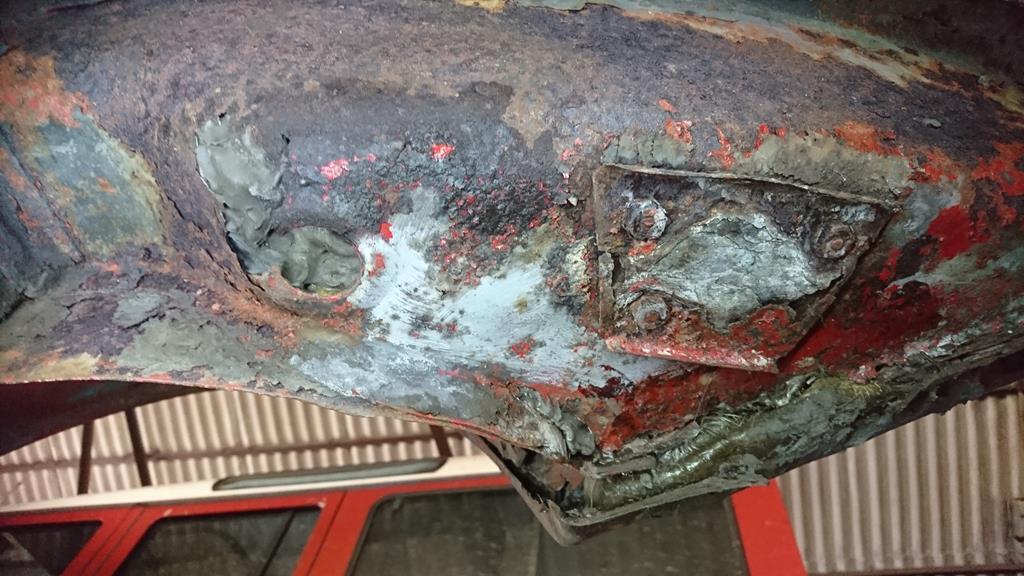 Still not pretty but at least it's relatively solid and I can see what I'm going to be dealing with 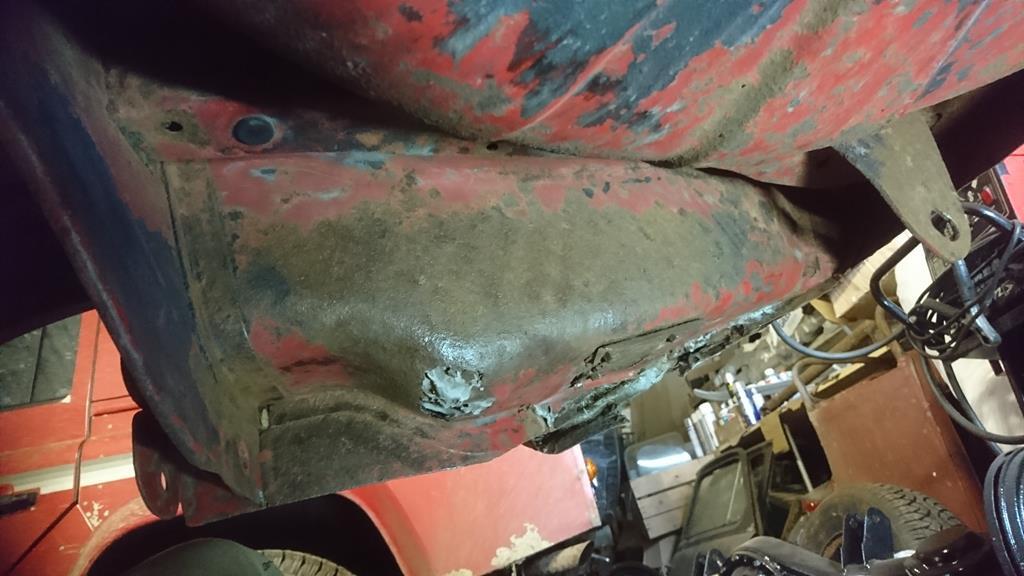 the other arch thankfully also came up issue free 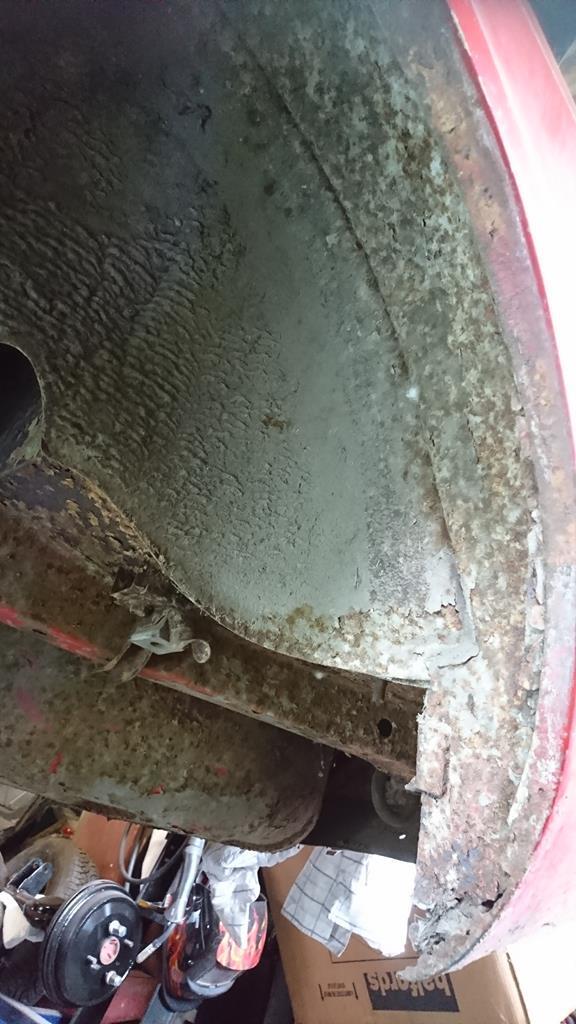 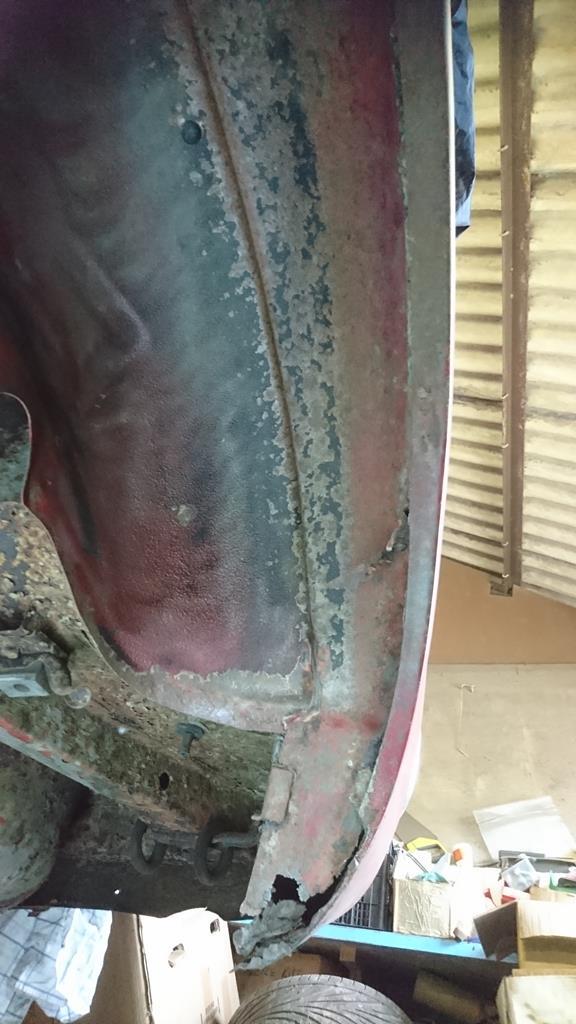 With the exception of more arch skullduggery 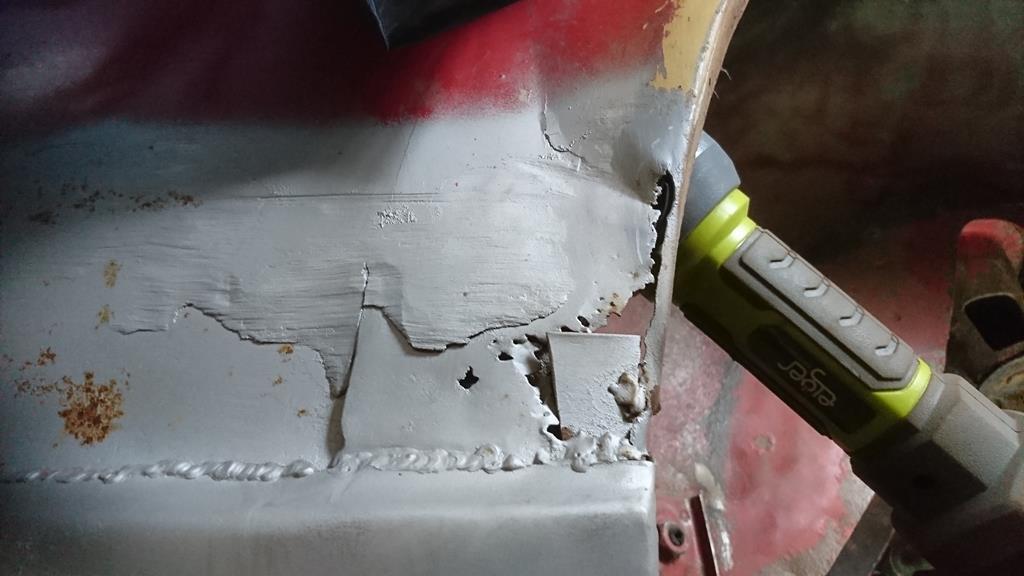 spare wheel well also appears to be doing a great impression of a colander 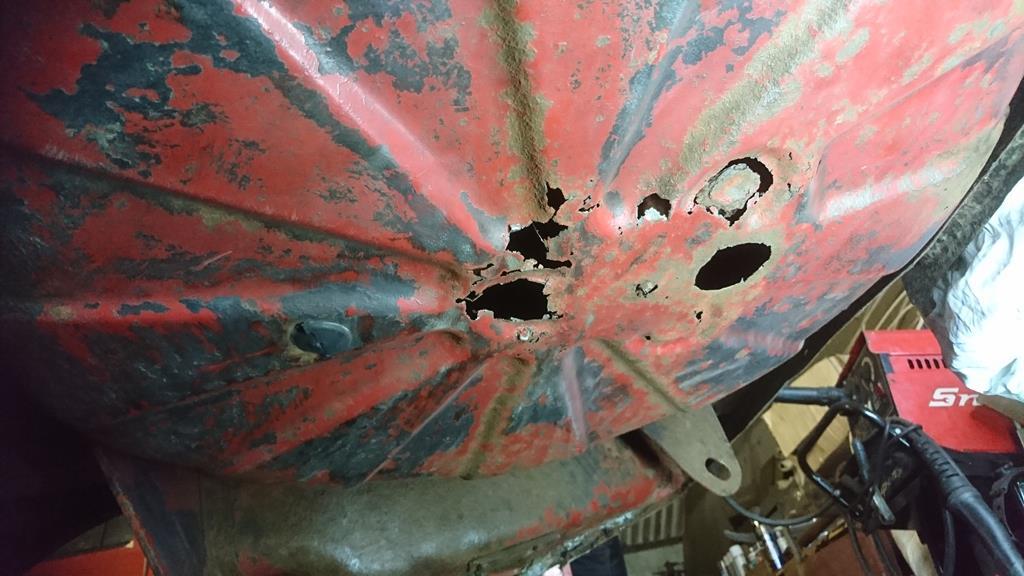 But on the whole the main underside was rot free 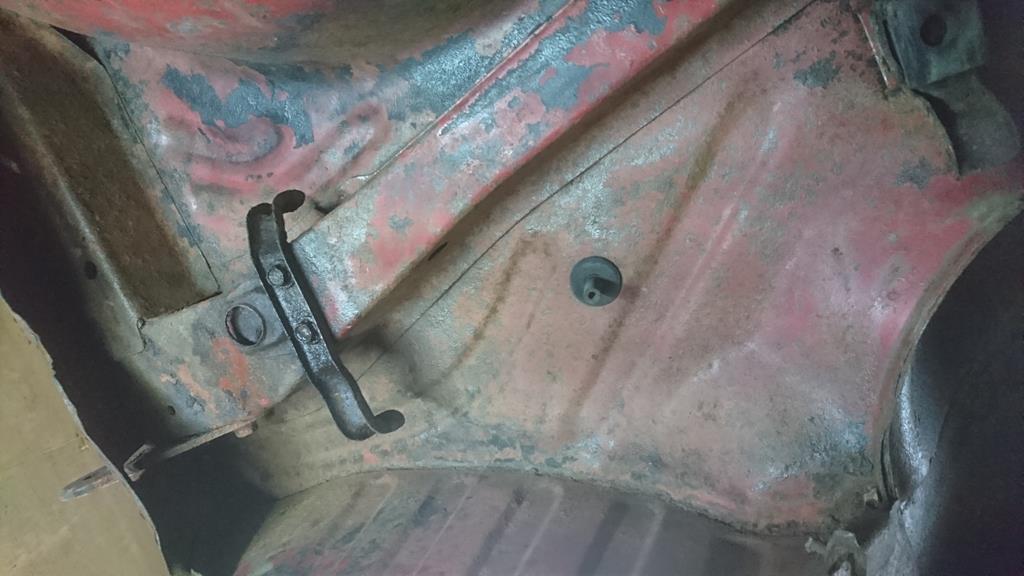 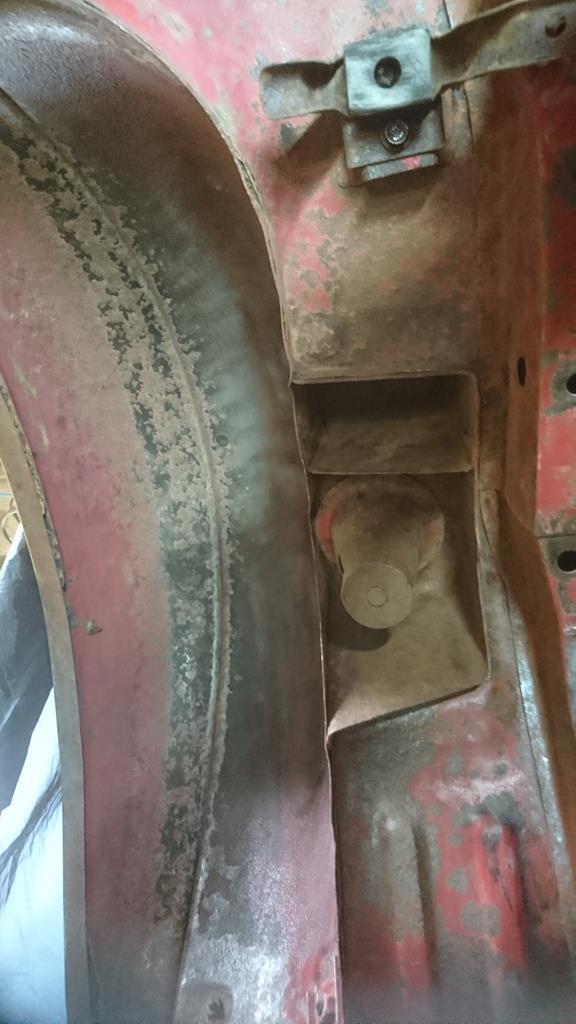 The delightful working conditions 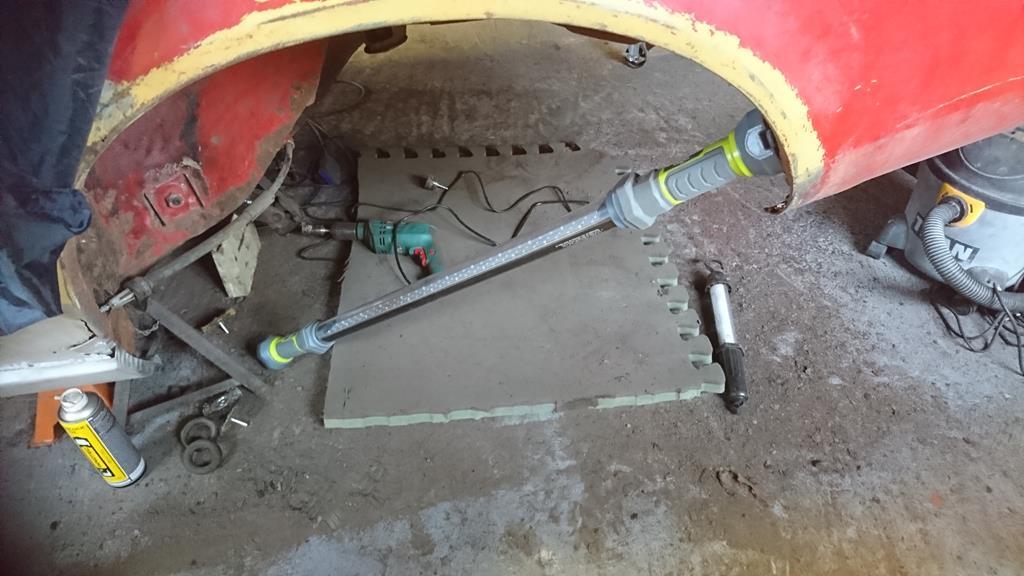 More in a bit... |
| |
'37 Austin 7 '56 Austin A35 '58 Austin A35 '65 Triumph Herald 12/50 '69 MGB GT '74 MGB GT V8'73 TA22 Toyota Celica restoration'95 Mercedes SL320 '04 MGTF 135 'Cool Blue' (Mrs' Baby) '05 Land Rover Discovery 3 V8 '67 Abarth 595 (Mrs' runabout) '18 Disco V |
|
|
|
|
Jun 18, 2018 17:28:16 GMT
|
|
Just want to add, a blaster is a great addition to the tool box, but it won't help you with the underseal, the mediawill just bounce off, heat gun and a scrapper is the way forward.
Nick
|
| |
|
|
samta22
Club Retro Rides Member
Stuck in once more...
Posts: 1,276  Club RR Member Number: 32
|
|
Jun 18, 2018 20:41:55 GMT
|
Just want to add, a blaster is a great addition to the tool box, but it won't help you with the underseal, the mediawill just bounce off, heat gun and a scrapper is the way forward. Nick Nick, you are completely right. The blaster in this case though is for the bits that not even underseal got to, more the flaking paint and patches of surface rust that the usual tools just can't reach. |
| |
'37 Austin 7 '56 Austin A35 '58 Austin A35 '65 Triumph Herald 12/50 '69 MGB GT '74 MGB GT V8'73 TA22 Toyota Celica restoration'95 Mercedes SL320 '04 MGTF 135 'Cool Blue' (Mrs' Baby) '05 Land Rover Discovery 3 V8 '67 Abarth 595 (Mrs' runabout) '18 Disco V |
|
|
|


 .
.


