|
|
|
Sept 5, 2018 13:29:19 GMT
|
I love it when parts arrive! 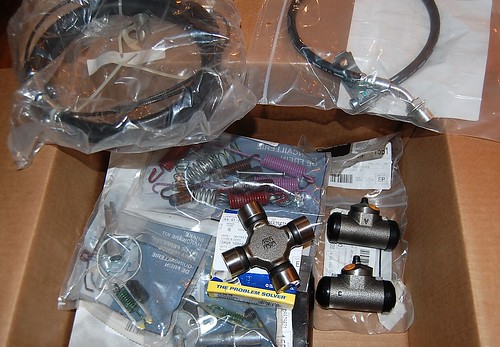 parts list: 1) rear brake hardware kit: springs, clips, fasteners for both sides. 2) self adjusting hardware and E-brake springs kit. One left side, one right. 3) rear e-brake cables. one left, one right. 4) rear brake hose. 5) rear axle seals 6) rear driveshaft U joint not bad all in all. I already have the brake shoes and the drums are in good shape. Ill still need hard brake lines which Ill bend up myself, some brake fluid and rear differential fluid. progress! thanks for looking JP |
| |
I know its spelled Norman Luxury Yacht, but its pronounced Throat Wobbler Mangrove!
|
|
|
|
|
|
|
Sept 9, 2018 23:26:59 GMT
|
Progress this weekend does not look like much, but I got quite a few small details taken care of.... New axle seals installed: 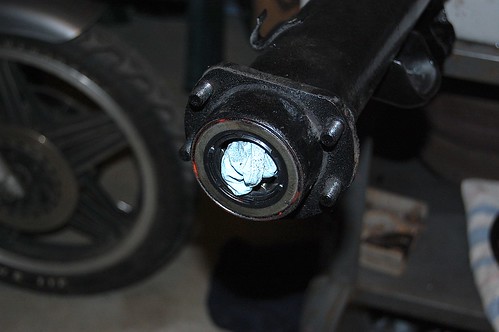 the speed sensor connection sorted and the Pinion flange swapped for the old one.... 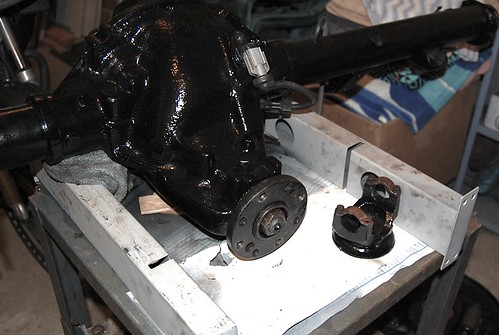 and the mating surfaces of the pumpkin and cover prepped for new sealant. There were a few spots on the cover and the pumpkin flange that were nearing failure, so they were smoothed out and rust treatment and paint was added in the appropriated spots:  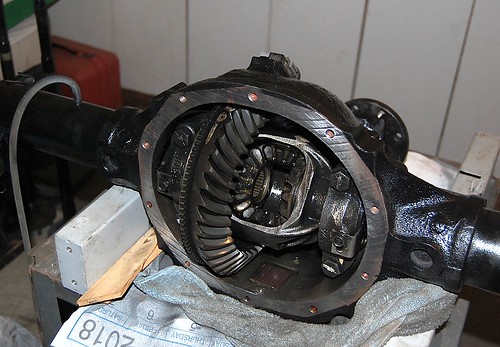 I also dismantled my original rear axle as the inner parts looked like they had very little wear and Ill keep them just in case.The pumpkin was so rotted it felt really thin in places....and the gasket material on the cover had all but failed all along the top right side..... sometimes you get there in the nick of time! (after procrastinating, of course) thanks for looking JP |
| |
I know its spelled Norman Luxury Yacht, but its pronounced Throat Wobbler Mangrove!
|
|
|
|
|
Sept 9, 2018 23:31:48 GMT
|
|
That axle, much like everything else you've done to that Dakota is looking mighty fine! Keep up the good work!
|
| |
|
|
|
|
|
Sept 10, 2018 3:14:42 GMT
|
|
Thanks, Piston!
I'm going to elicit the help of a neighbor to give it the once over before I put the cover back on for good. I want him to take a look at the lash adjustment and preload setting on the pinion gear.....
I will also need to transfer my sway bar mounts to the new axle if I want to use the bar....which I probably will....
JP
|
| |
I know its spelled Norman Luxury Yacht, but its pronounced Throat Wobbler Mangrove!
|
|
|
|
|
Sept 14, 2018 0:31:41 GMT
|
|
I did some research on adjusting the rear pinion, drive gear lash, and contact area on the gear and will be adding that to my list of things to do before buttoning up the rear axle. Its all new to me, but does not sound impossible.
Hopefully the correct brake cables have come in and Ill be picking them up tomorrow. Ill also get some hard lines for the rear brakes, some rear diff fluid and a few other minor supplies......
more to follow!
JP
|
| |
I know its spelled Norman Luxury Yacht, but its pronounced Throat Wobbler Mangrove!
|
|
|
|
|
Sept 15, 2018 2:19:51 GMT
|
The brake cables came in so I decided to pick them up after work along with some hard brake line, a few fittings, ect..... Here is the rear brake line with upcycled fittings from the old brake line. luckily, they are brass, so are in good shape. I guess the rear line requires them for some reason....the new hard lines will bolt right in after shaping them....all good there...peace of mind! 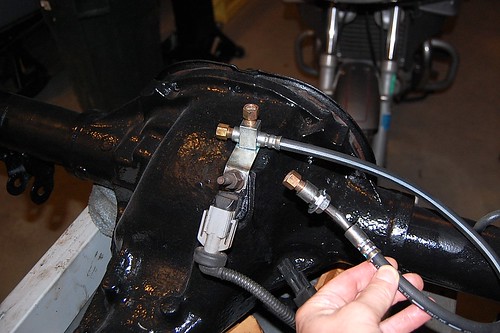 Here is a cool device I built from a U tube video suggestion...works like a charm. You have to reach inside the axle tubes to adjust the pre-load on the drive units bearings...how you do this also adjusts the lash between the pinion and drive gear. it sounds a bit tedious, but getting that lash right is important. getting the wear pattern correct between all the teeth on the gears correct is also important...so that is where tightening the nut on the pinion shaft comes in...all these adjustments must work in concert with one another....wish me luck on that....anyway the device I built is made with 2 metal pipe fittings and a length of pipe....the fittings fit the pre-load adjuster perfectly...especially after I filed the galvanizing smooth. I will tack weld the fittings in place and we should be good to go.......(I can use a 1.25" socket to tighten or loosen the pre-load adjusters....) 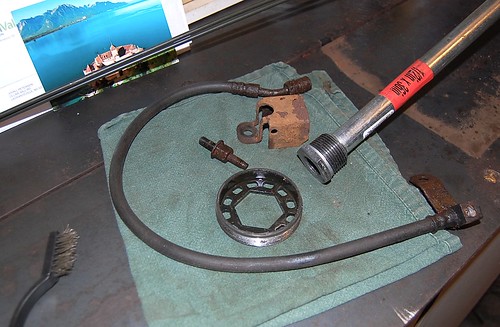 and the hard brake lines with the old crusty broken remnants 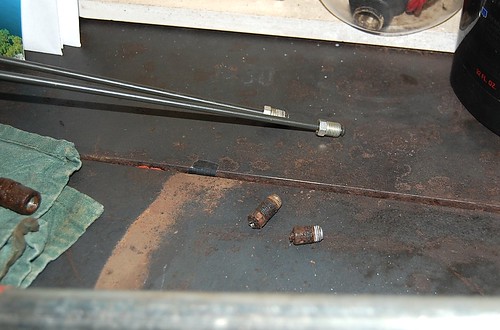 I also decided to try my hand at what I thought to be a fad....but this stuff really works wonders...I'm sure you have all heard about our used clay bars...but I had not yet...The local parts store had a kit for sale so I decided to try it out. Guys, its amazing how much debris sticks to your paint after you wash or even hand polish.....the clay bar just picks it all up leaving a silky smooth surface that wax is then applied to. I did buy this polisher (on sale!) and cleaned off the truck hood and wow...amazing results...... 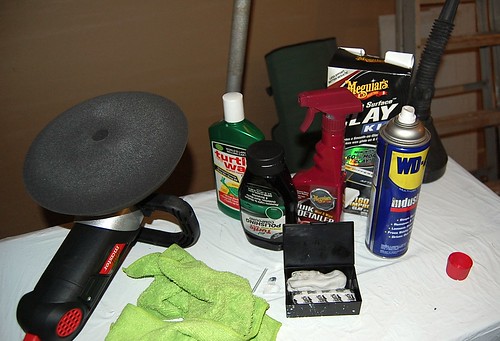 Ill try to get some pics up tomorrow of the hood of the truck...you can see before and after results, just not at night with a flash! thanks for looking JP |
| |
I know its spelled Norman Luxury Yacht, but its pronounced Throat Wobbler Mangrove!
|
|
|
|
|
Sept 19, 2018 2:35:20 GMT
|
|
Not much to show here, but I made good progress on adjusting the gear lash and pinion pre-load adjustments...
I borrowed a dial gauge from a neighbor, and through a lengthy process, achieved a 6-8 thousands tolerance between the final gear and pinion. I also was able to get the main bearings preloaded without changing the tolerance! Everything is connected and it took many repeated procedures of tightening each bearing in small increments, spinning the gears, checking the tolerance, tightening the gears, spinning the gears, checking the tolerance until I could finally tighten the bearing caps to their 100 lb specs....after final tightening of the adjusters to preload the side bearings, and a final check on the tolerance with the dial gauge, I was able to fit the adjuster locks and oil the bearings and gears in prep for installing the axle back in the truck....
This was a long time coming.....one of those little victories
JP
|
| |
I know its spelled Norman Luxury Yacht, but its pronounced Throat Wobbler Mangrove!
|
|
|
|
|
Sept 20, 2018 16:20:25 GMT
|
Here is a pic of the dial gauge set up: 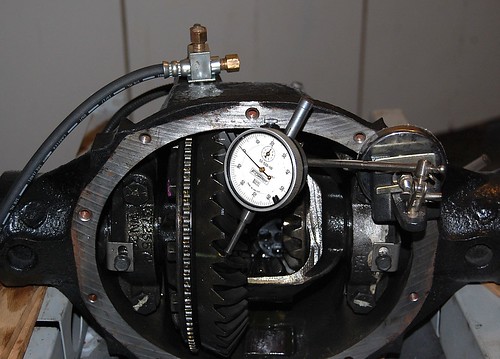 and the shocks Ive had on the shelf for more than a year....the old ones still have good charge in them, they are just rusted quite badly: 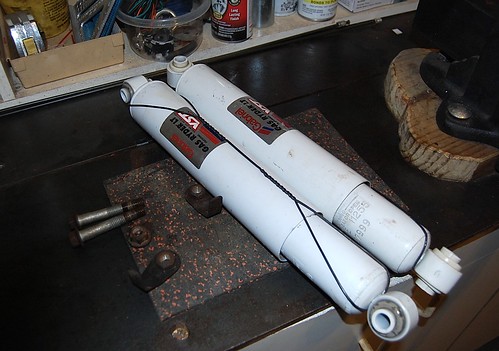 and the brake backing plates pre done up for easier installation.... 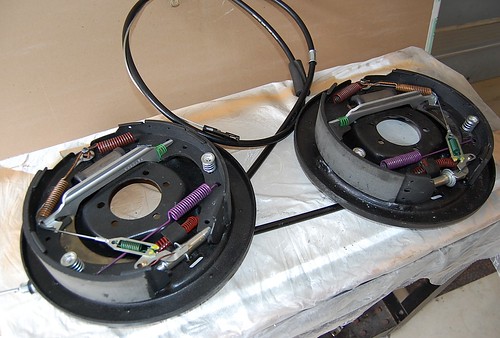 Ill clean up the springs a bit, throw some paint on them and get this axle back in its cradle! thanks for looking JP |
| |
I know its spelled Norman Luxury Yacht, but its pronounced Throat Wobbler Mangrove!
|
|
|
|
|
Sept 20, 2018 20:49:36 GMT
|
|
It's all looking good.
Never had to set preload, backlash etc so quite educational, thanks.
|
| |
|
|
|
|
|
Sept 21, 2018 2:28:58 GMT
|
|
This was a first for me too, morris63. I have learned alot by what I thought was to be a simple axle swap!....didnt turn out that way, really, but in return for my time, I got a mini education.....
JP
|
| |
I know its spelled Norman Luxury Yacht, but its pronounced Throat Wobbler Mangrove!
|
|
|
|
|
|
|
Sept 23, 2018 18:43:02 GMT
|
The final pieces of the axle puzzle getting put in place. I'm happy to say the sway bar mounts have been transferred to the new axle and I was a bit nervous about doing this. I just cranked the welder up to 10 and fiddled with the wire speed until I was happy and it went well. I clamped them in place, tacked them first, then welded opposite corners as I went. Measuring them was not exactly straightforward. especially if you take into account that when I measured where they were on the old axle, I didnt realize that I was measuring off points that would be just about impossible to measure off on the new axle because of the drive gear being in the way!....(DUH!) 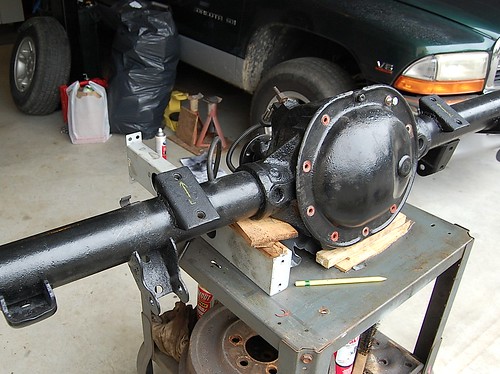 I found a few other points that I could measure from and once square, the brackets match right up to the sway bar. (and there is just enough play in the bushings and arms so that I am confident it will go back together...(famous last words!) 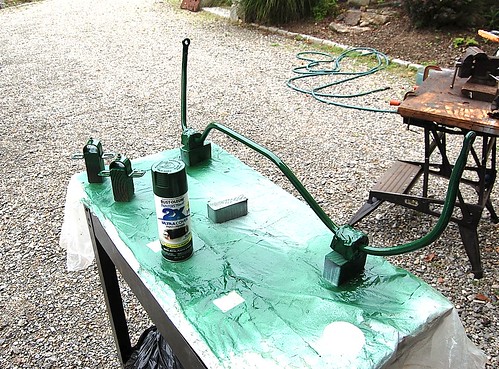 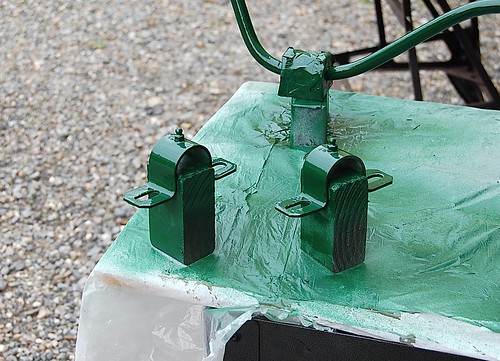 so its down to the brake lines bent to shape, and swapping in the new universal joint (grease-able!) and I will then be able to get the axle back in place. then the backing plates/brakes, axles/locks, diff cover and fluid!..... wow, the laundry list is getting shorter. JP |
| |
I know its spelled Norman Luxury Yacht, but its pronounced Throat Wobbler Mangrove!
|
|
|
|
|
Sept 24, 2018 20:28:09 GMT
|
ITS IN! 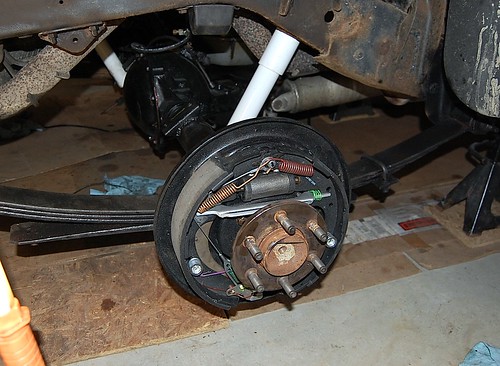 -drive shaft U joint installed. (nightmare! the c-clips were so badly rusted they all broke, and 2 were missing altogether!...but its done!) -shocks bolted up -backing plates installed -axles cleaned and installed -new bump stops installed -rear diff cover installed next: -brake lines bent and installed -anti-sway bar installed -diff fluid added -axle u-bolts tightened with vehicle weight oddly, the pics make everything look really rusty...but it looks much better in person!....  ?? thanks for looking JP |
| |
I know its spelled Norman Luxury Yacht, but its pronounced Throat Wobbler Mangrove!
|
|
|
|
|
Sept 25, 2018 5:35:41 GMT
|
|
Morning JP,
Not been on any threads for a while, as I was running around the USA and the last week right up to today, I have been trying to catch up with work.
Looking great.
You,really have moved along.
|
| |
|
|
|
|
|
Sept 25, 2018 14:27:47 GMT
|
|
Hey, Grizz....a road test is only a day or two away!
cant wait!
I hope you had good travels while you were "in the area"...you must pop east one of these times.....
JP
|
| |
I know its spelled Norman Luxury Yacht, but its pronounced Throat Wobbler Mangrove!
|
|
|
|
|
Sept 26, 2018 3:13:09 GMT
|
The checklist gets shorter! brake drums cleaned up, brake lines run and secured, parking brake cables installed, sway bar and links done...... 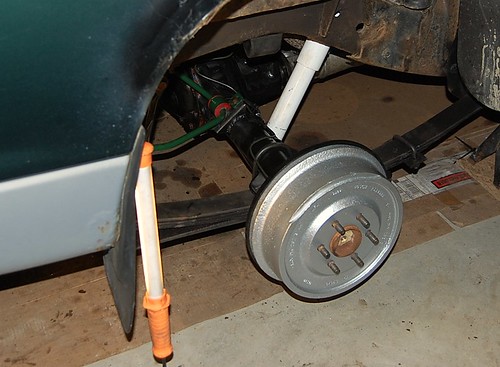 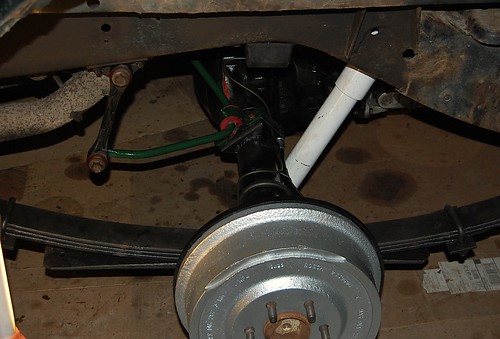 ran to the parts store and picked up some more diff fluid and some more cleaning products as I ran through everything I had on this project! I'm looking forward to using the Mityvac pump I bought years ago for the motorcycle....should make bleeding the brakes a breeze.... JP |
| |
I know its spelled Norman Luxury Yacht, but its pronounced Throat Wobbler Mangrove!
|
|
|
|
|
Sept 28, 2018 1:56:20 GMT
|
|
So after 2 days of driving it again I am happy to report it seems to be working quite well. I still need to bleed the brakes again...but so far, "No Leaks, No Drips, No Errors".....
I was not sure about the silver drums, but they look great through the aluminum wheels.
I'm glad I added the sway bar and mounts to the new axle and the new shocks definitely feel better.
thanks for looking.....
JP
|
| |
I know its spelled Norman Luxury Yacht, but its pronounced Throat Wobbler Mangrove!
|
|
|
|
|
Sept 28, 2018 15:52:25 GMT
|
|
I quite like the silver drums myself. What colour are the wheels?
|
| |
|
|
|
|
|
|
|
I quite like the silver drums myself. What colour are the wheels? They are silver too...I was not sure about the color at first with the drums...but they look nice behind the wheels, ect.... JP |
| |
I know its spelled Norman Luxury Yacht, but its pronounced Throat Wobbler Mangrove!
|
|
|
|
|
Oct 23, 2018 17:43:52 GMT
|
|
Lil update:
so after 800 miles, the truck is doing quite well. Had a bit of concern with the charging system, but all checks out. though a bit higher than I would like, it is charging at 14.4, 14.5. I'm quite sure when I got things all settled down with the voltage regulator and wiring, alternator, ect...we were at 14.3 steady.....Ill keep an eye on it. (alternator, battery, gauge, secondary gauge all agree on voltage so as long as I have that condition going on...I think Ill save real concern for something else...)
the rear end swap is running smoothly, though I am getting a slight vibration at speeds...maybe Ill rotate the tires around and see if that changes things...I guess it could be the orientation of the drive shaft/pinion flange, ect.......
getting the wagon back on the road soon so the truck can take a much needed rest!
JP
|
| |
I know its spelled Norman Luxury Yacht, but its pronounced Throat Wobbler Mangrove!
|
|
|
|
|
|
|
Got a pic of the wheel and tire together....I like the effect.... I think I have always painted the drums black in the past. 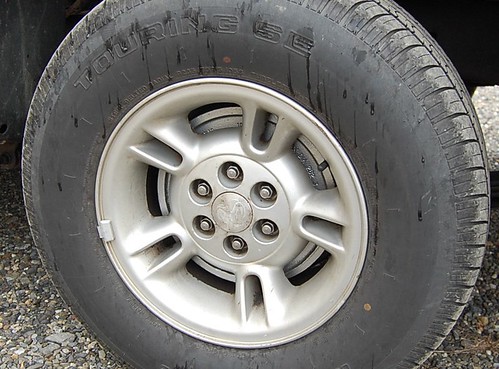 Now that this adventure with the rear axle is done, I'm back on the bodywork! JP |
| |
I know its spelled Norman Luxury Yacht, but its pronounced Throat Wobbler Mangrove!
|
|
|
|


 ??
??

