steveg
Posted a lot
  
Posts: 1,586
|
|
|
|
Thought I would start something on here about some of the stuff I mess about with other then cars. It started off when as soon as I had my first pedal car really. This is the only reference to it I can find on the net although there are some old pictures of me riding mine somewhere. 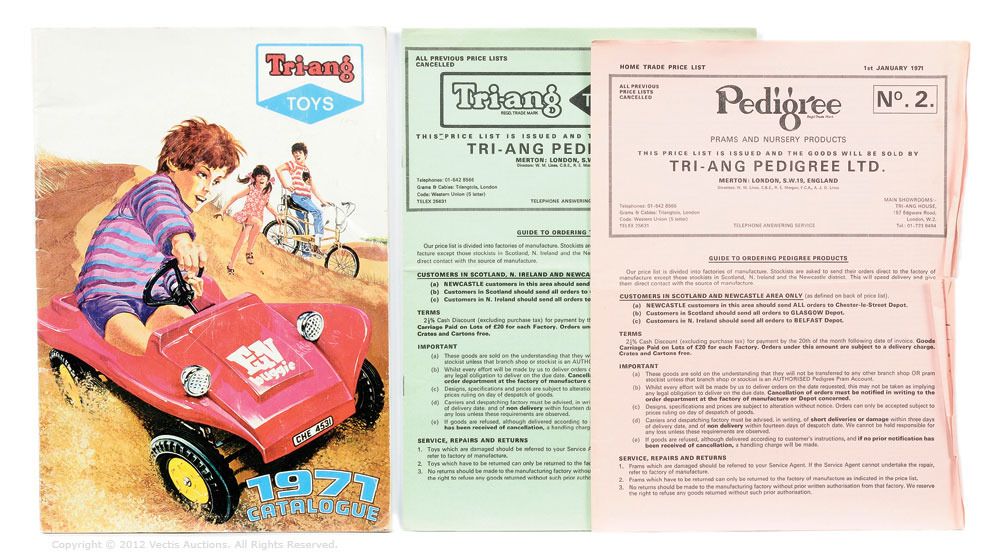 Unfortunately this was made from a 1 piece plastic moulding which, over time started to break up. My dad made many repairs to it, it would have been easier to take a mould from it and make a new one from GRP ! Due to the large supply of Anglia and Classic parts in the garage I rode it round for a while with an Anglia instrument panel taped to the front of it. My Dad eventually made a really nice aluminium housing for it to fit into which was fixed to the body. I outgrew this just before it completely fell apart and was given a bigger Raleigh go-kart by my Uncle. His 3 boys had already used and abused it so it was in a bit of a mess. Again my Dad fixed it up a bit and it lasted for many years. It was still in my Mums garage untill I dug it out last week. I had planned on re-building it for my son who is 6 now but the frame is quite bent and the important hubs and rear axle are a bit far gone. Just out of interest I did a search on ebay and this popped up. 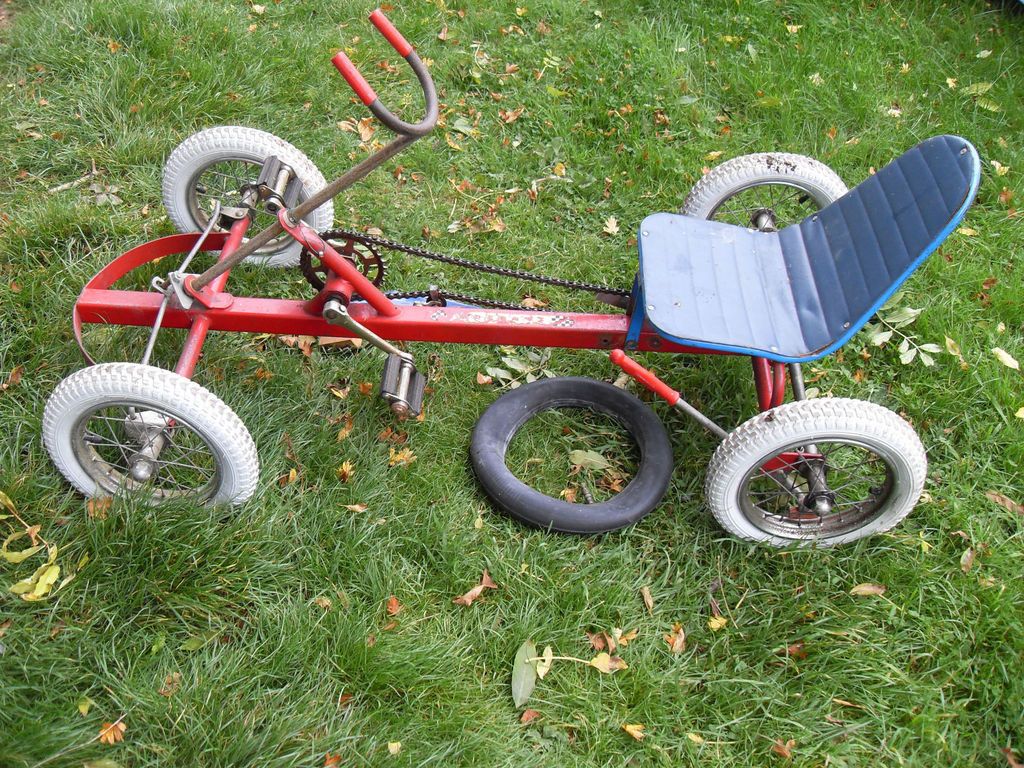 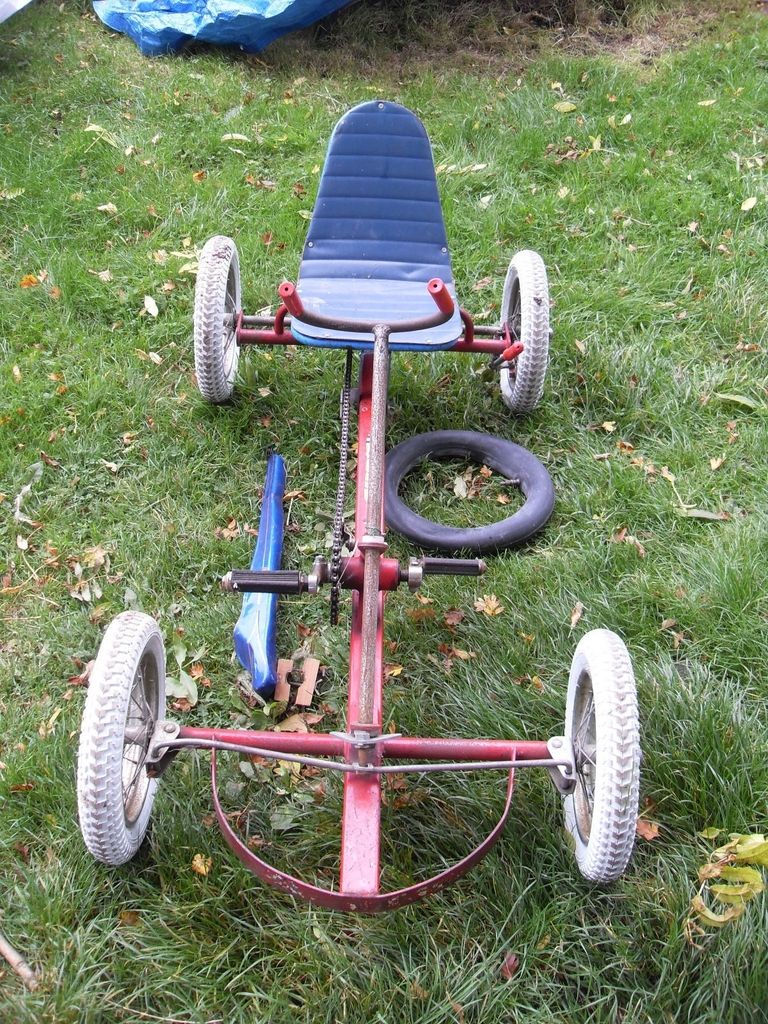 The last one I spotted was up in Scotland so getting that wasn't going to happen but this one was about 50 miles away. Not sure if they are collectable or not I put a pretty high bid on it and ended up getting it for not a lot. So today my son went on his first road trip to get a project ! 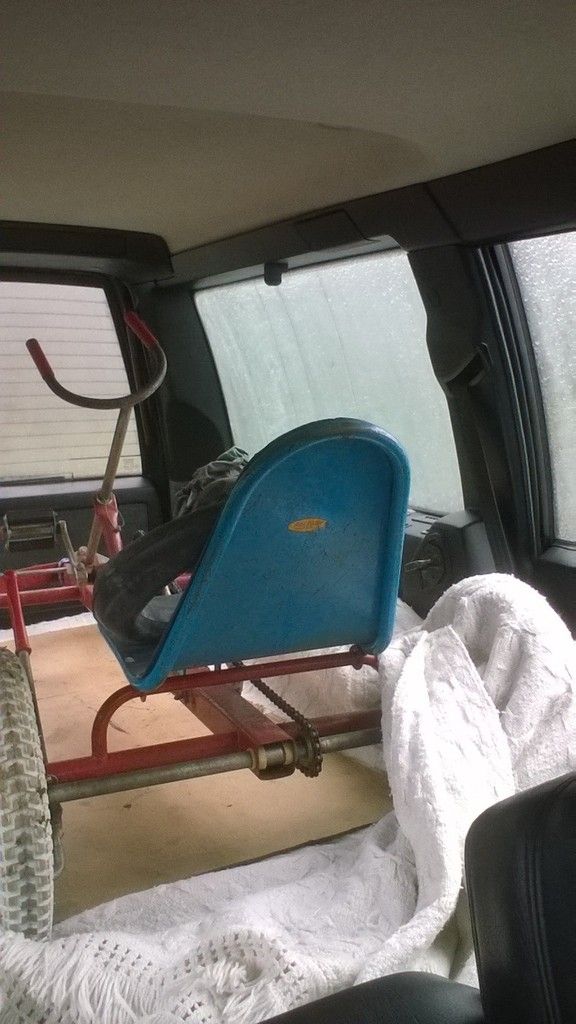 This is it after a bit of a tidy up and a temporary mod to move the seat forward a bit. The bit of ply I used is a bit long at the moment but has given me the idea of fitting some sort of pickup bed on it that can be easily remove when my son needs the seat moving back a bit. He has already given it a good test around the local area but really needs a seat with some side location as he nearly came off a couple of times ! I straightened out a few bent bits and tightened some bolts. The wheels either need the spokes tightening a bit or I will use the ones ones off my old one which have new spokes in. They will have to be painted as they are a bit rusty. I rebuilt these when I was about 12 and they have been in a box since ! 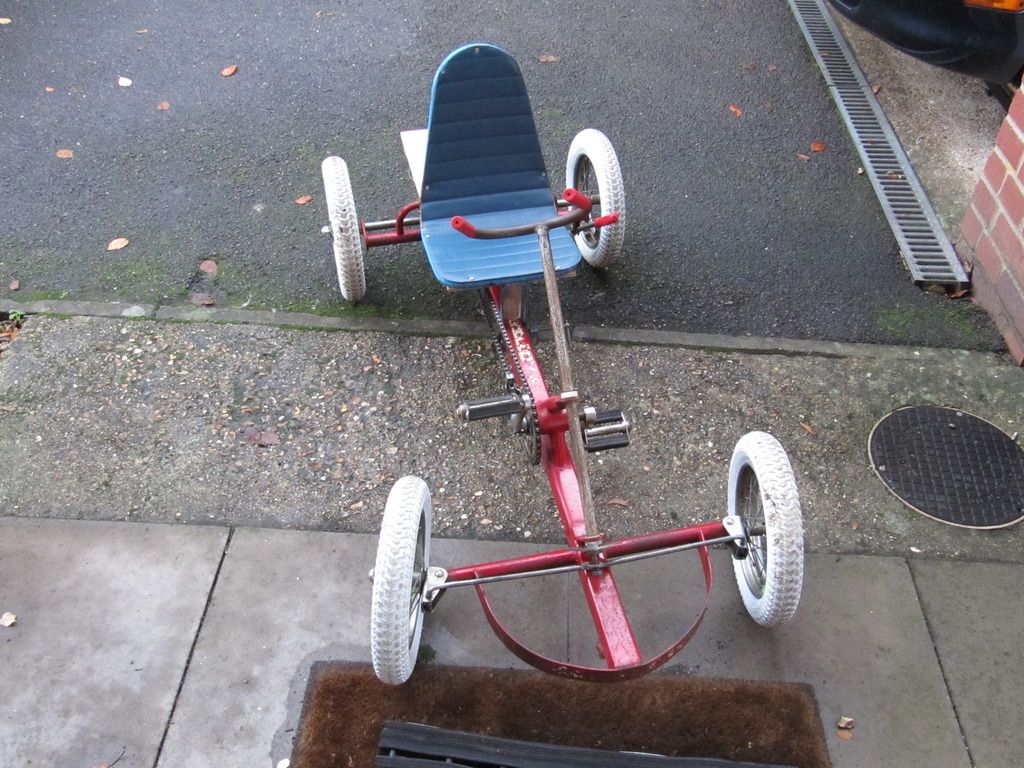 More to come with this and I might add some stuff about all the other things I have been hoarding over the years if it's of interest. |
| |
Last Edit: Jul 10, 2023 20:35:42 GMT by steveg
|
|
|
|
steveg
Posted a lot
  
Posts: 1,586
|
|
Dec 14, 2015 17:18:42 GMT
|
What with fixing the daily (I think) and spending far too much time in the garage I thought I better update this a bit. I've been busy de-rusting the wheels by soaking them in vinegar. It doesn't all fall straight off you need to rub at it a bit but it's done a lot of the hard work. This is one of the best ones before. 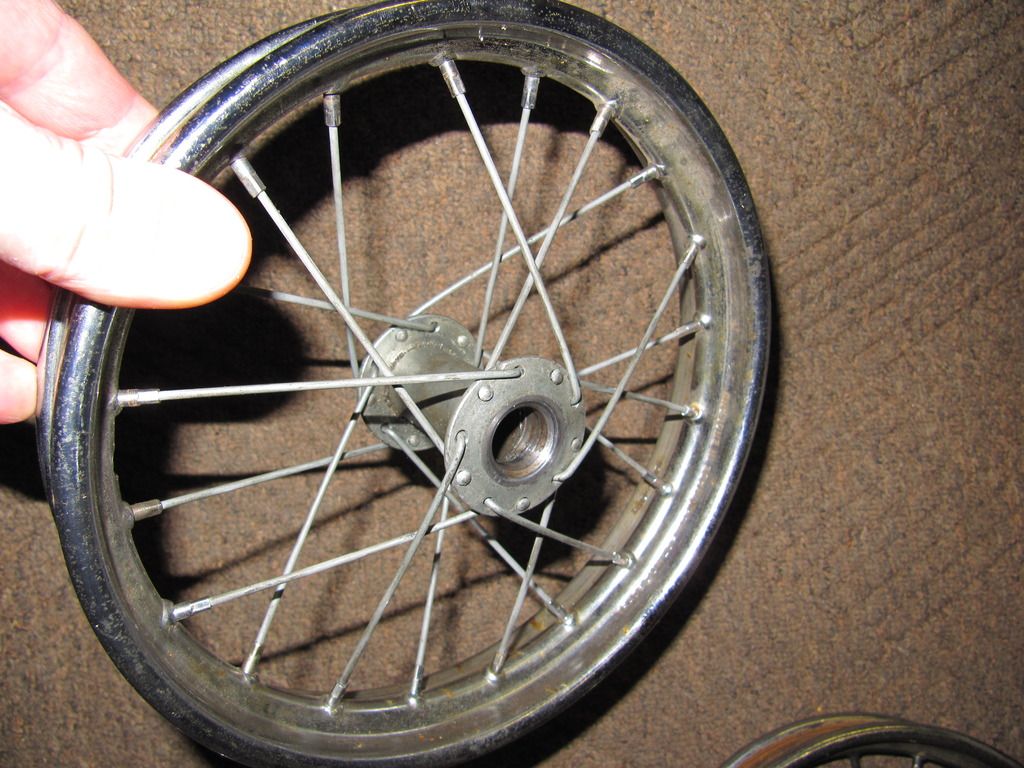 During. 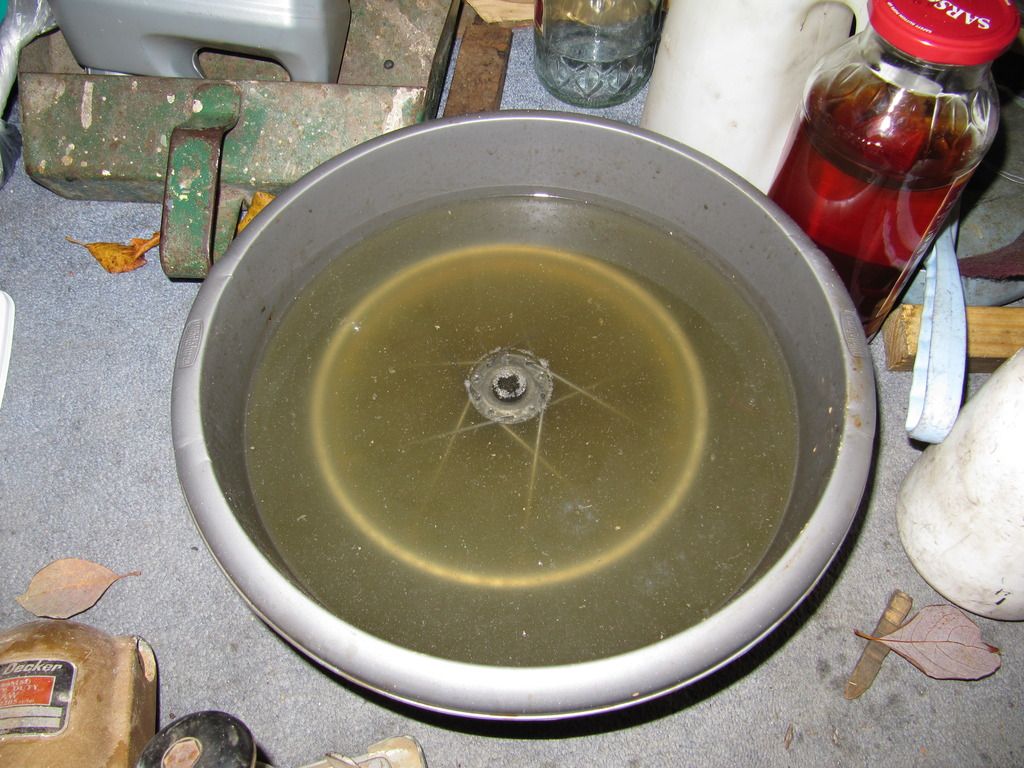 And after. This one was very bad. All of the crusty stuff is gone but I might put it back in some fresh vinegar to see if it removes a bit more form the deeper pits. 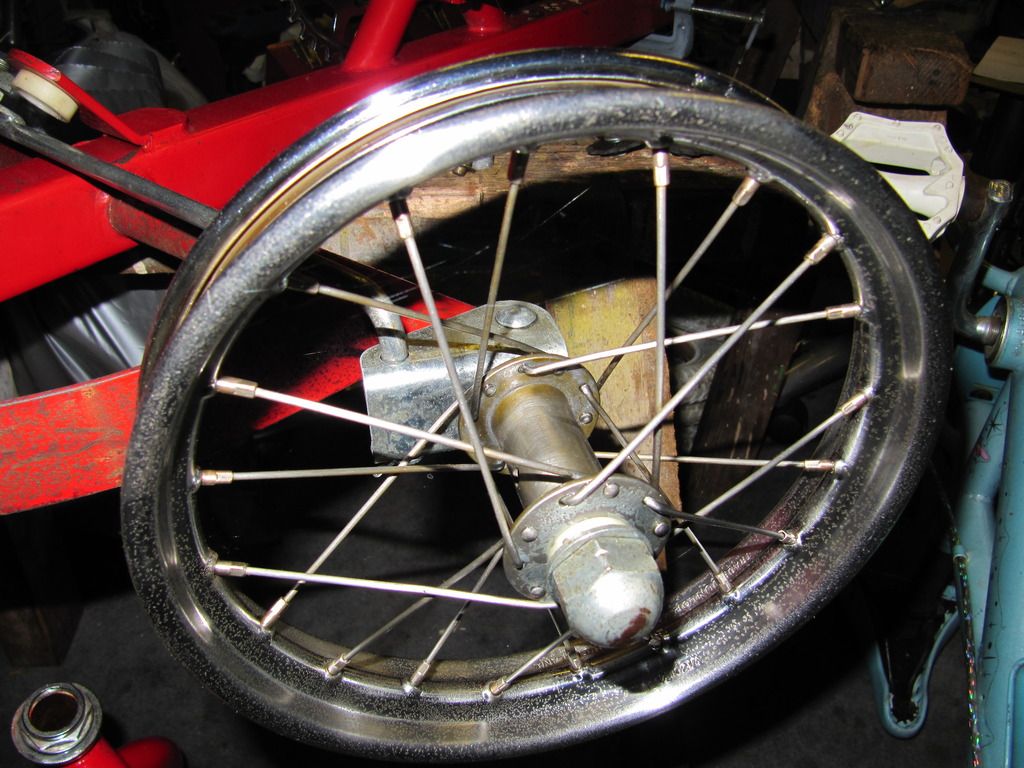 With the wheels a bit cleaner I tightened the loose spokes and straightened them up as best I can. I made something so I could spin them by hand in the lathe which made it a bit easier. The steering column was a bit worn where the steering plate attaches to the bottom of it. Everything is made with old bike threads so there's no chance of re making some parts. Instead I modified it a bit and made a small stub shaft which I welded onto the plate. This fits into the column and is attached with a clamp ring. The column is now in the drying room (downstairs toilet) after a quick coat of paint.  Apart from a fairly useless handbrake stopping isn't really catered for very well. I've got a spare coaster brake hub and looking at that got me thinking. A lot of tricycles and quadracycles have 3 speed hubs. Some have coaster brakes built in and others have a reverse mechanism. A hub like this costs about £120 so was out of the question really but I can make the coaster brake work and think making it so the Kart will reverse is possible as well. 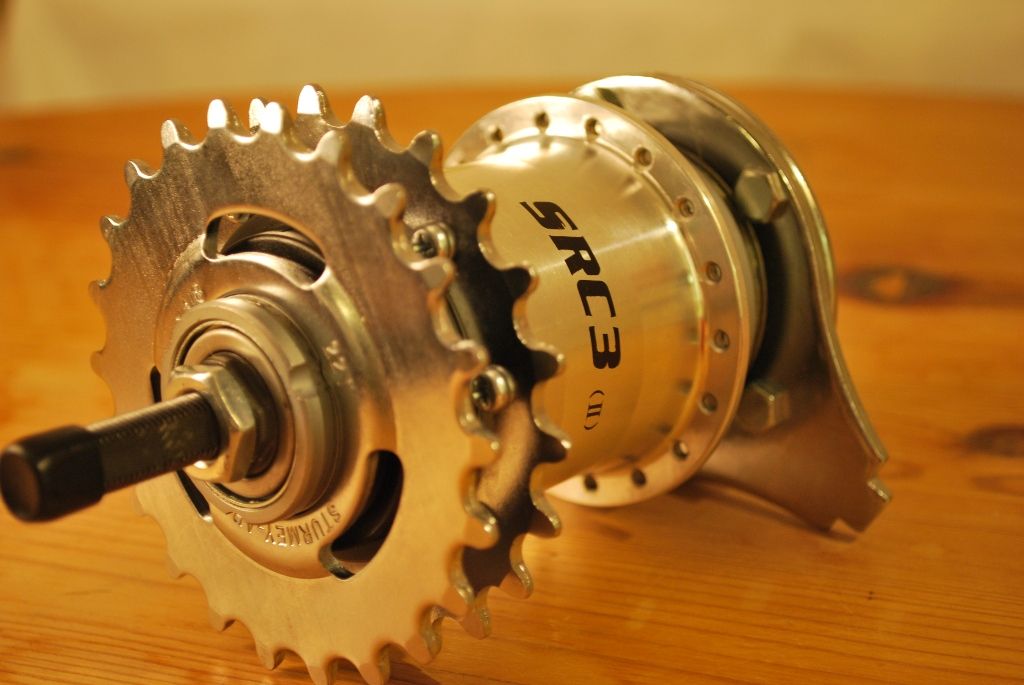 |
| |
Last Edit: Feb 15, 2016 21:01:38 GMT by steveg
|
|
steveg
Posted a lot
  
Posts: 1,586
|
|
Dec 14, 2015 17:32:04 GMT
|
I've started to fit a sprocket to the coaster brake casing. The bore needed making slightly larger. 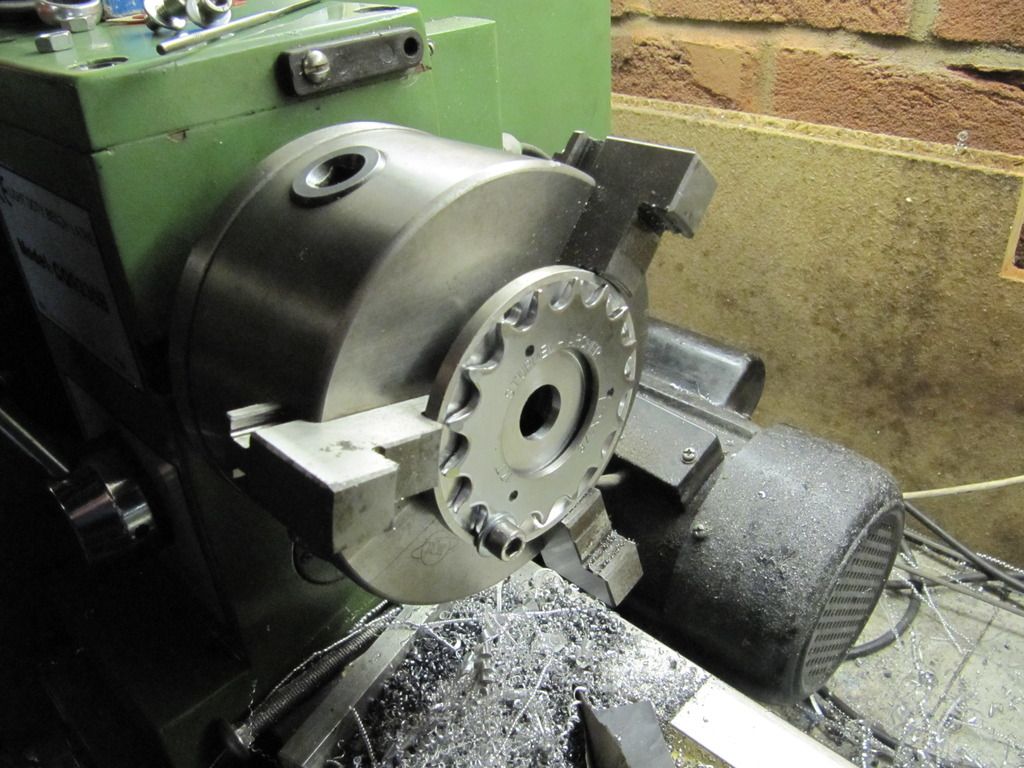 This will fit onto the casing like this. 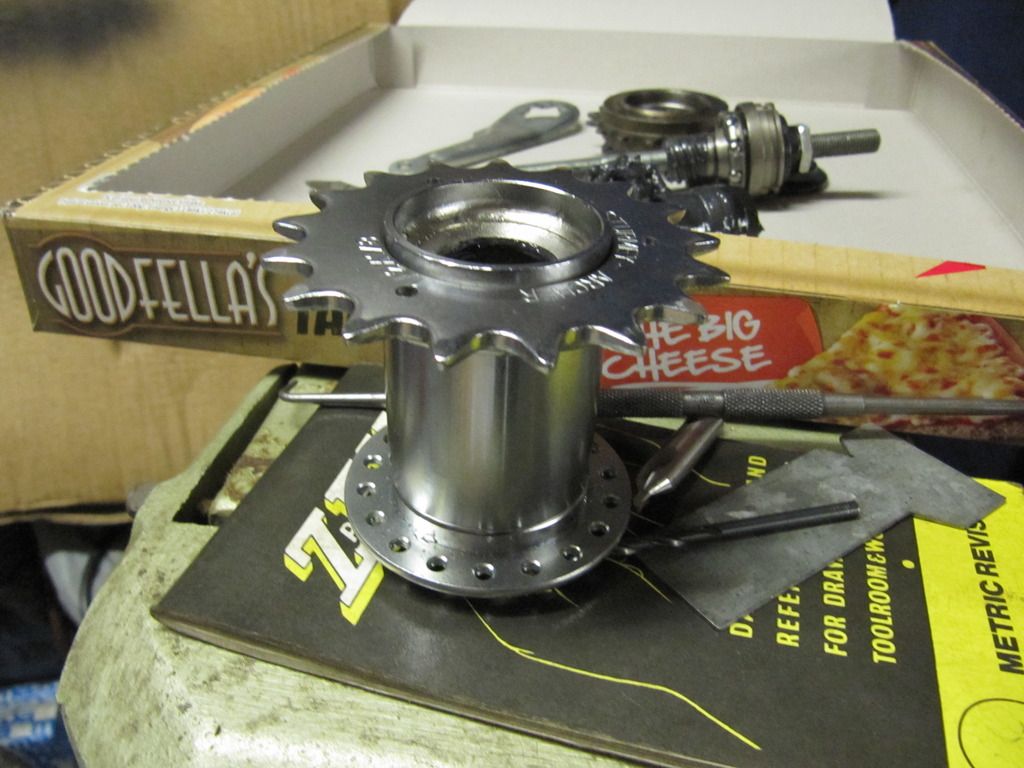 The reverse mechanism got me thinking. Instead of the coaster brake being help still with an arm the quaracycle hub has a special non toothed freewheel that only holds things still in the forward direction. Threads are a problem again so I cut up an old steel hub. I will then wed the end bit of the brake arm to it. 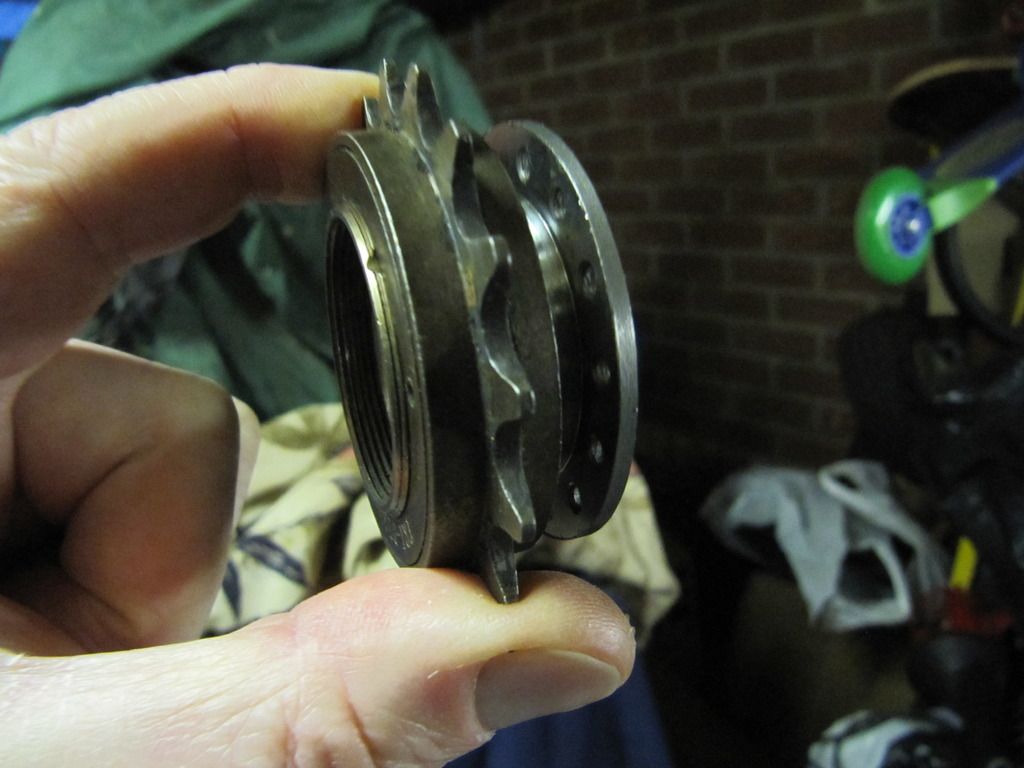 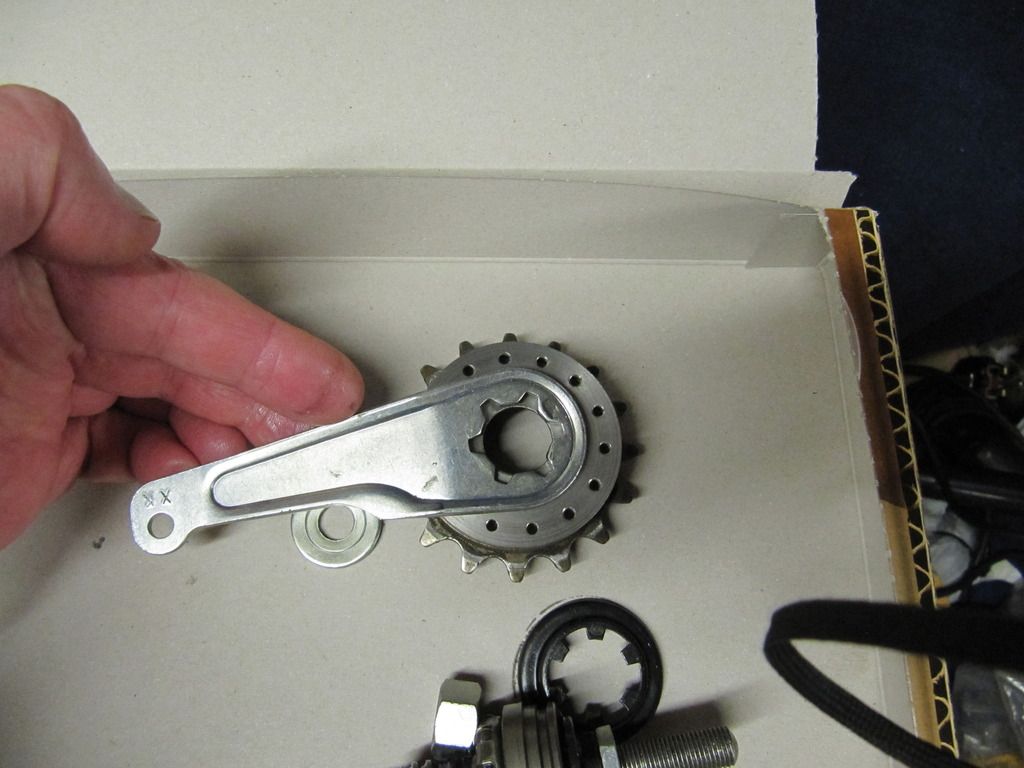 Once it's all finished I will mount it under the seat roughly here. 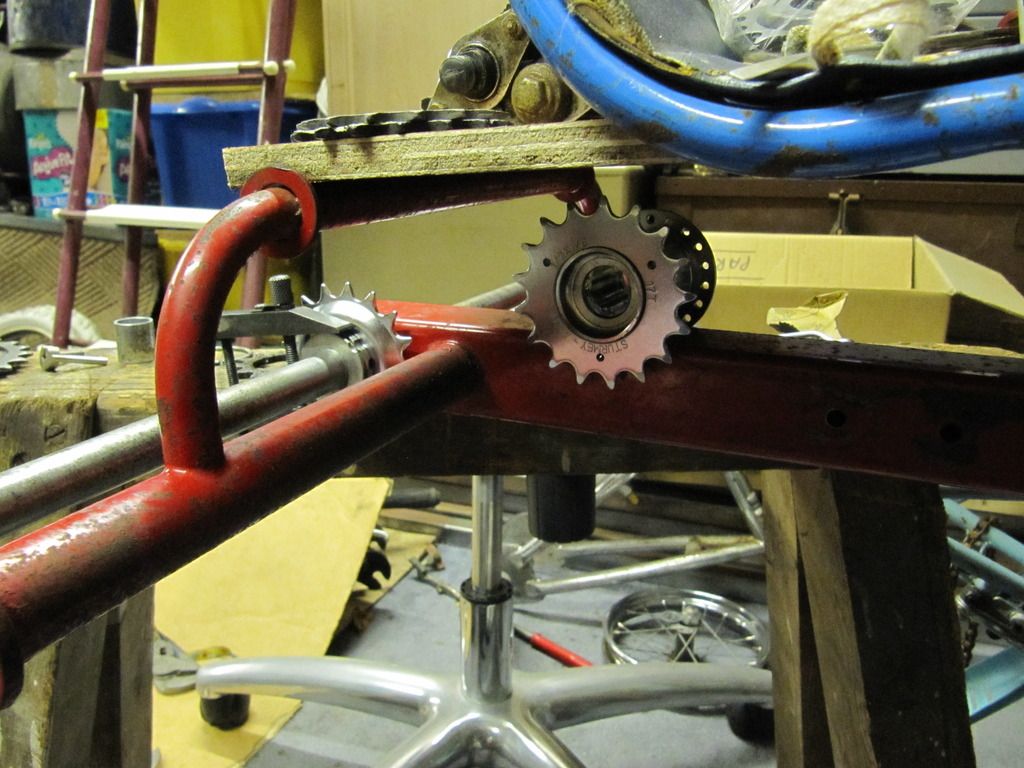 That's about it for the moment. I need to beg some metal from the local steel supplier for the coaster mounts but it's getting there slowly. It's not a proper Christmas present but I want to get it done for the Christmas holidays. Here is a general view of the state of the garage at the moment with various old bikes scattered about. 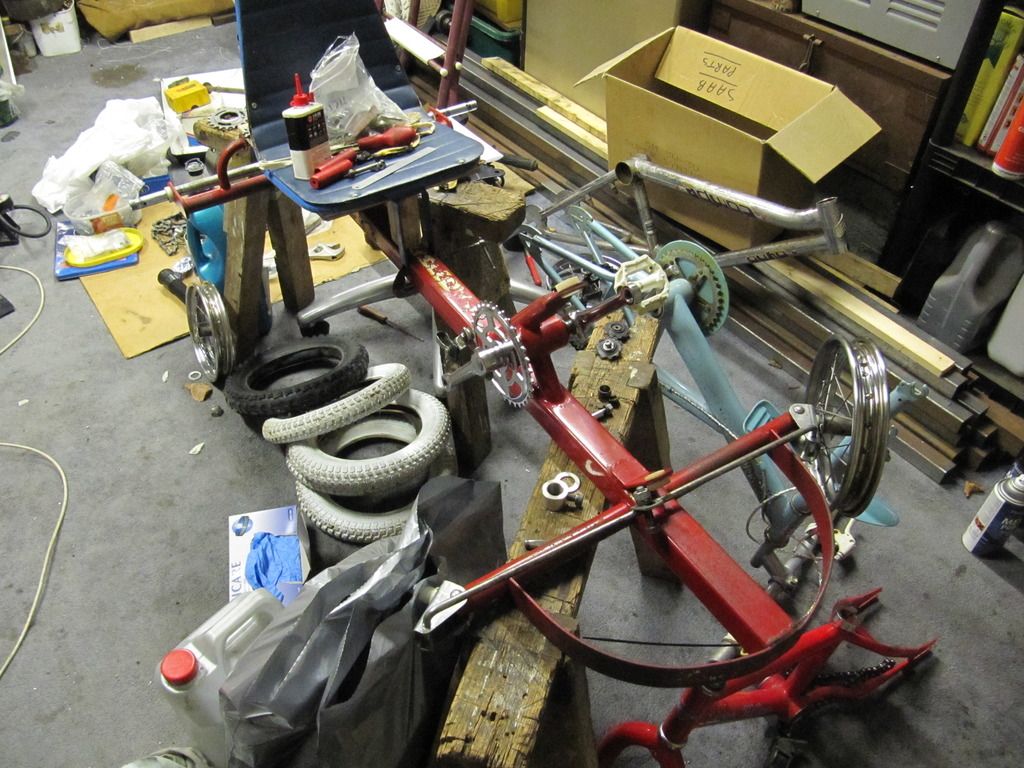 |
| |
|
|
chubz
Part of things
 
Posts: 339
|
|
Dec 16, 2015 13:33:20 GMT
|
love things like this, cant wait to see the updates your little boys gonna be over the moon  |
| |
|
|
|
|
|
Dec 16, 2015 14:46:20 GMT
|
|
looking good
|
| |
|
|
steveg
Posted a lot
  
Posts: 1,586
|
|
Dec 16, 2015 23:00:41 GMT
|
|
Thanks for the comments. I finished truing the wheels up today and have started to make up the mount for the coaster brake. Just waiting on the special freewheel to turn up.
|
| |
|
|
steveg
Posted a lot
  
Posts: 1,586
|
|
Dec 17, 2015 17:06:26 GMT
|
Today's exciting instalment isn't showing much apart from the wheels spraying stand I made up. 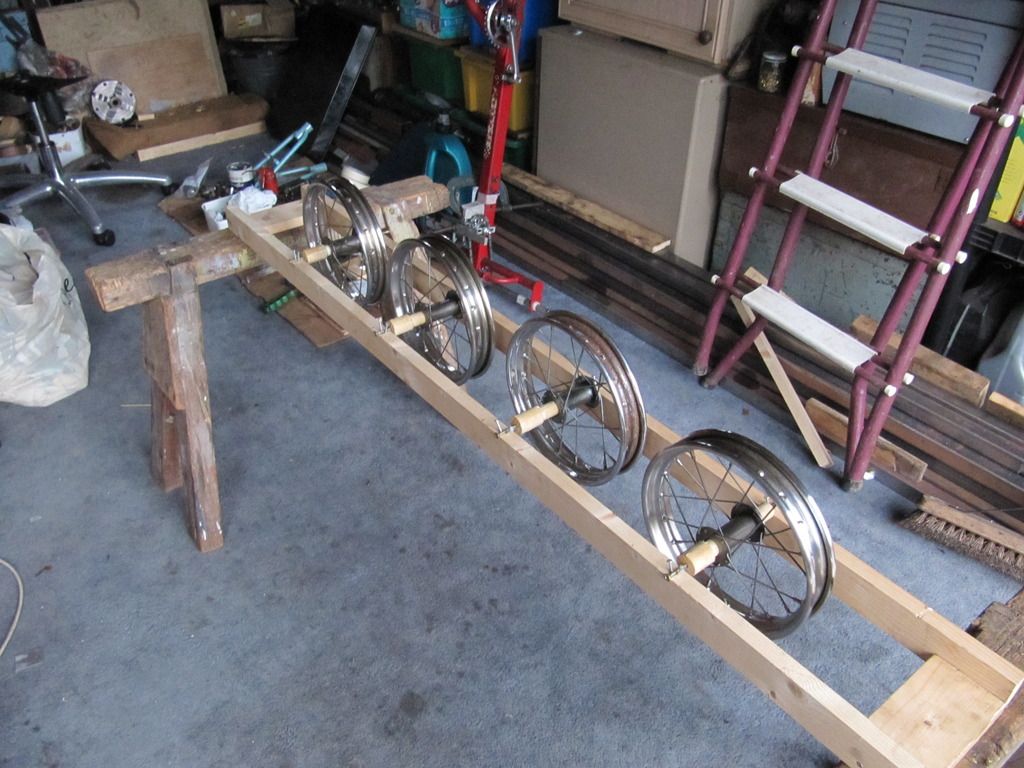 One of the wheels is getting soaked in the vinegar a bit more so the rusty spare was used in the photo. I ought to do a video od the painting as I think it's going to turn into the Generation game. Will I manage to spray all 4 before the last wheel stop's spinning ? This is the freewheel I am waiting for. Hopefully it will turn up tomorrow so I can get on with making the mount between coats of paint on the wheels. 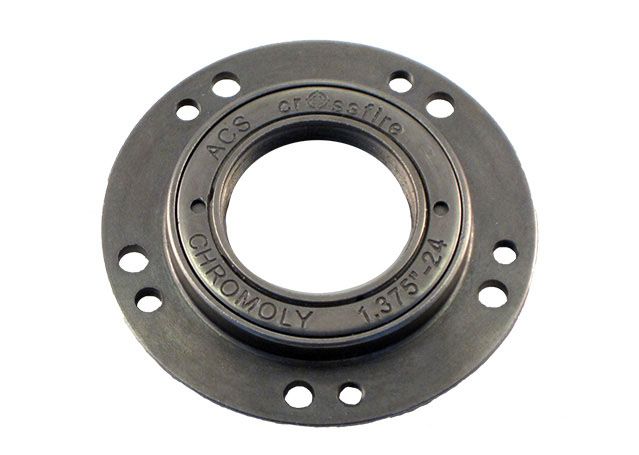 |
| |
|
|
steveg
Posted a lot
  
Posts: 1,586
|
|
Dec 22, 2015 18:18:51 GMT
|
The freewheel turned up so I thought I ought to get on and fit everything together. All the bits of metal were found in the garage. The main carrier was folded up from a strip once the large hole for the freewheel had been cut out. Tis slided on the chassis bracket to allow the short rear chain to be tensioned. It all turned into a bit of a nightmare trying to get everything lined up and running properly and I ended up staying out in the garage until 5:30 am this morning. 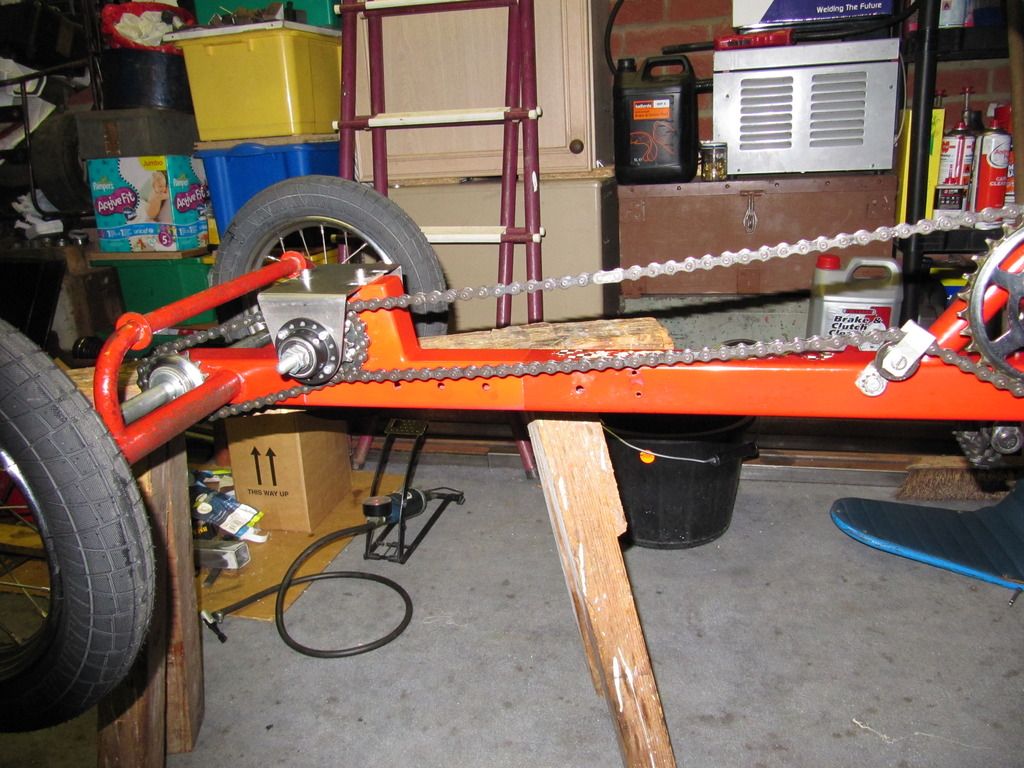 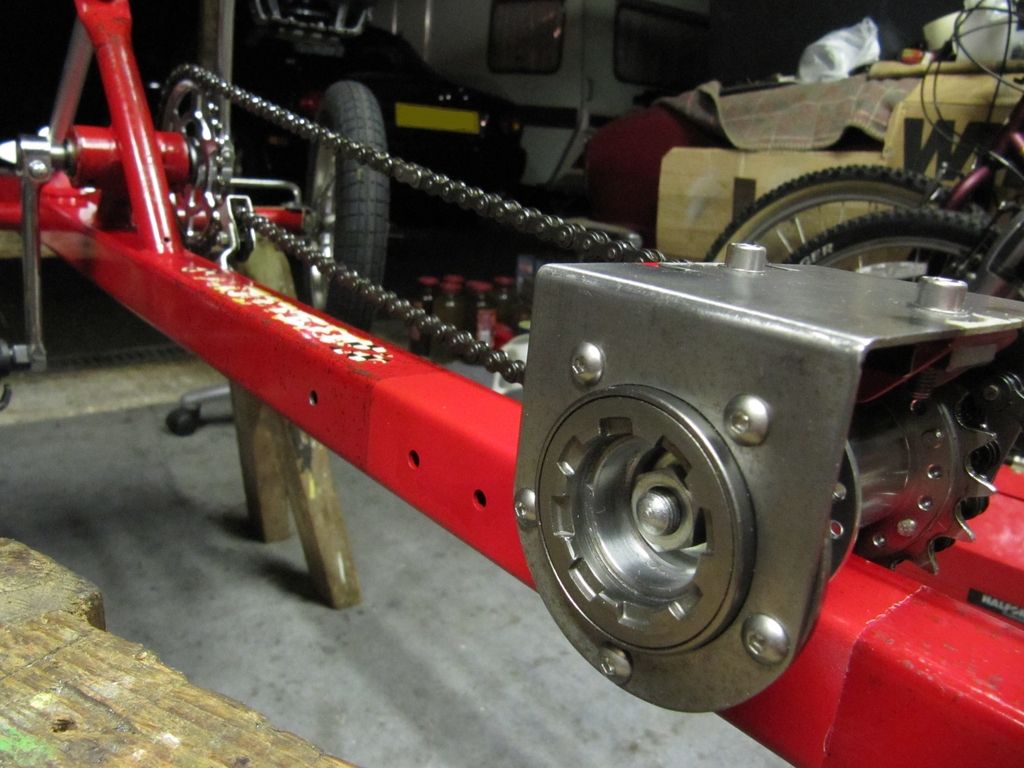 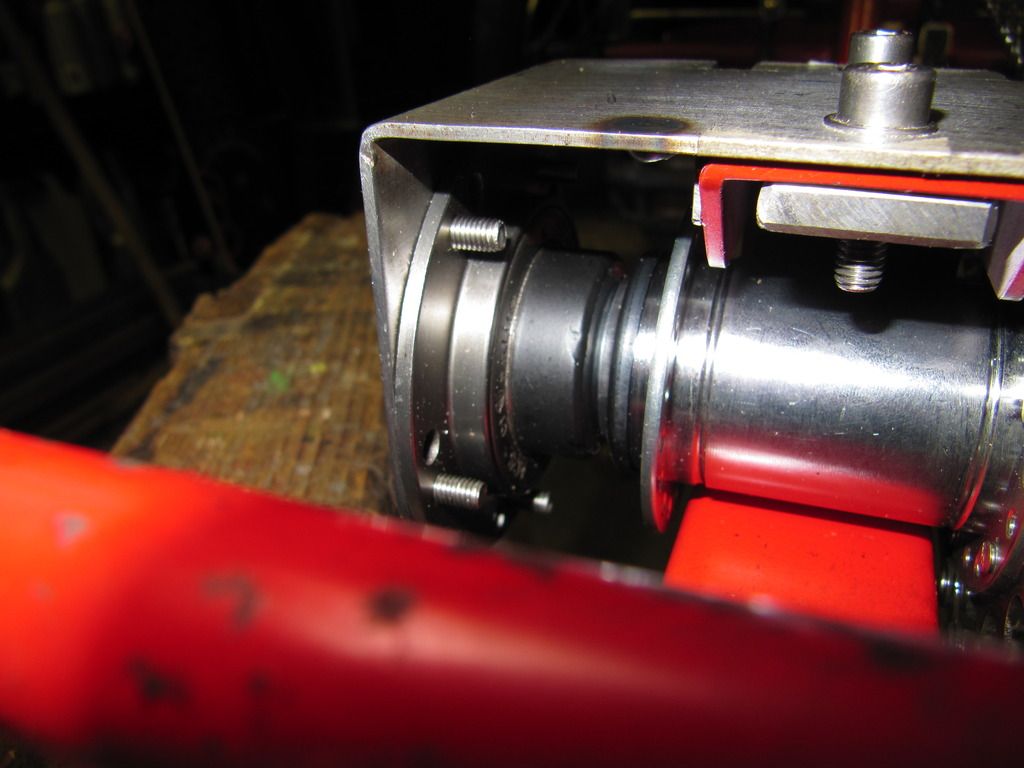 The bearing holder and threaded section I use to attach the freewheel were made from a cheap childrens bike steel hub. Fortunately with the hardened bearing track removed it left a 30mm diameter hole to fit a sealed bearing into. 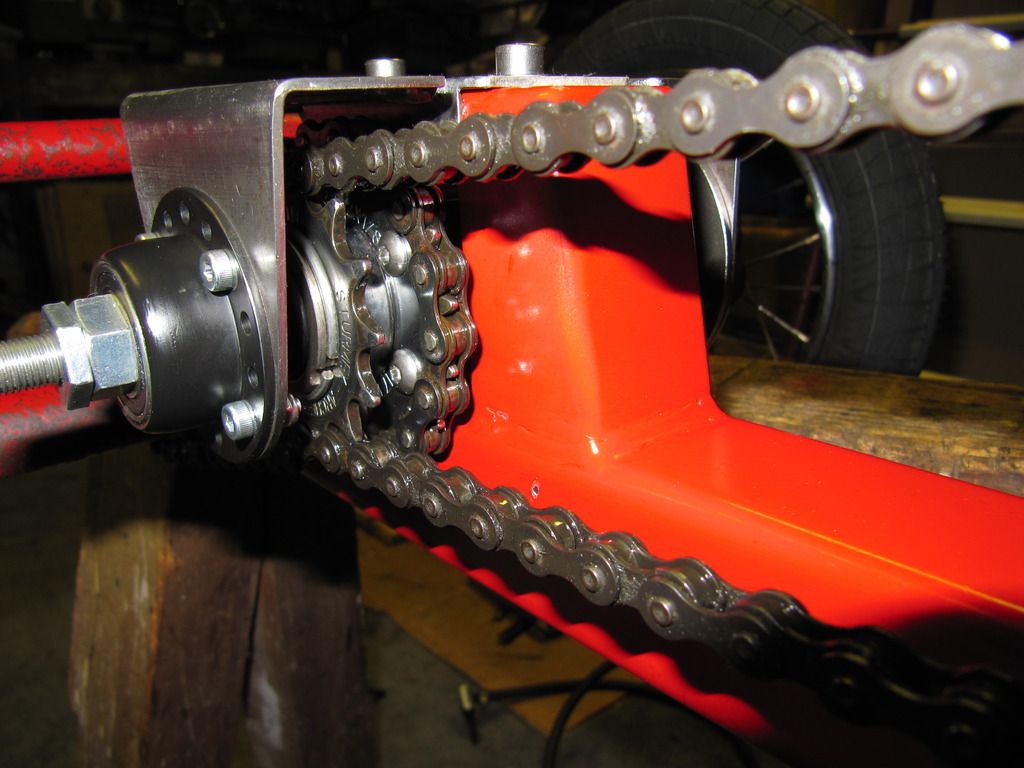 I decided not to bother painting the wheels at the moment so fitted the tyres and built the kart up. I had to strip the seat down to straighten the frame and once that was done and rivetted back together I drilled a new hole for the seat. My rough and ready wooden seat support got tidied up a bit and here is the result. 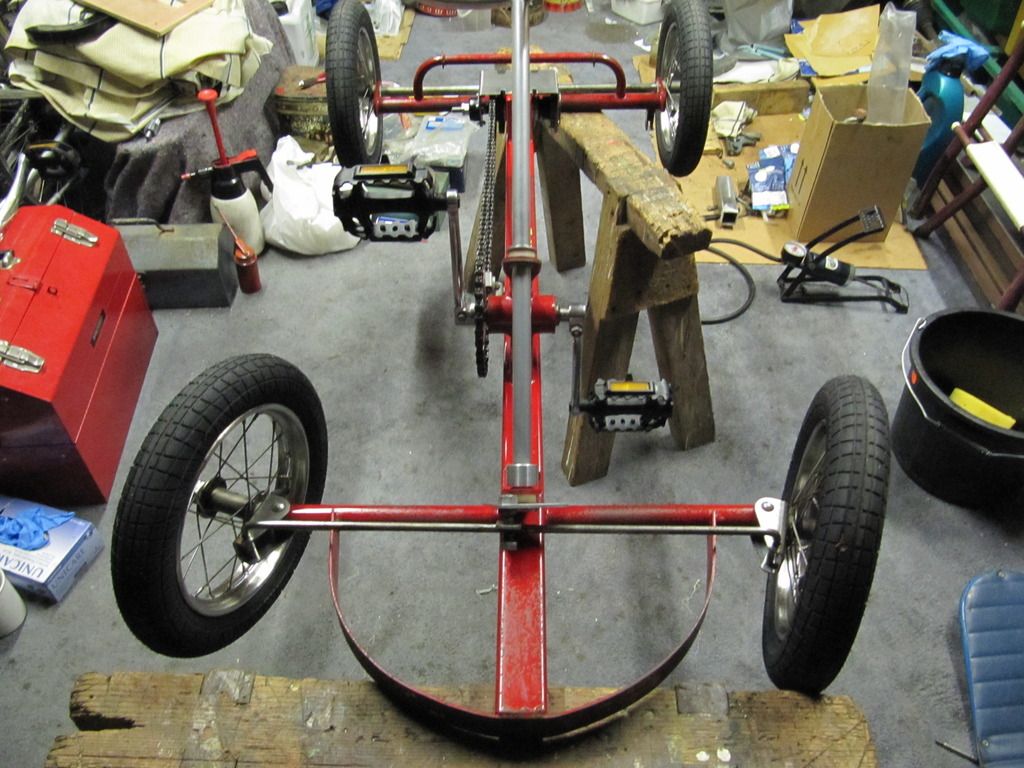 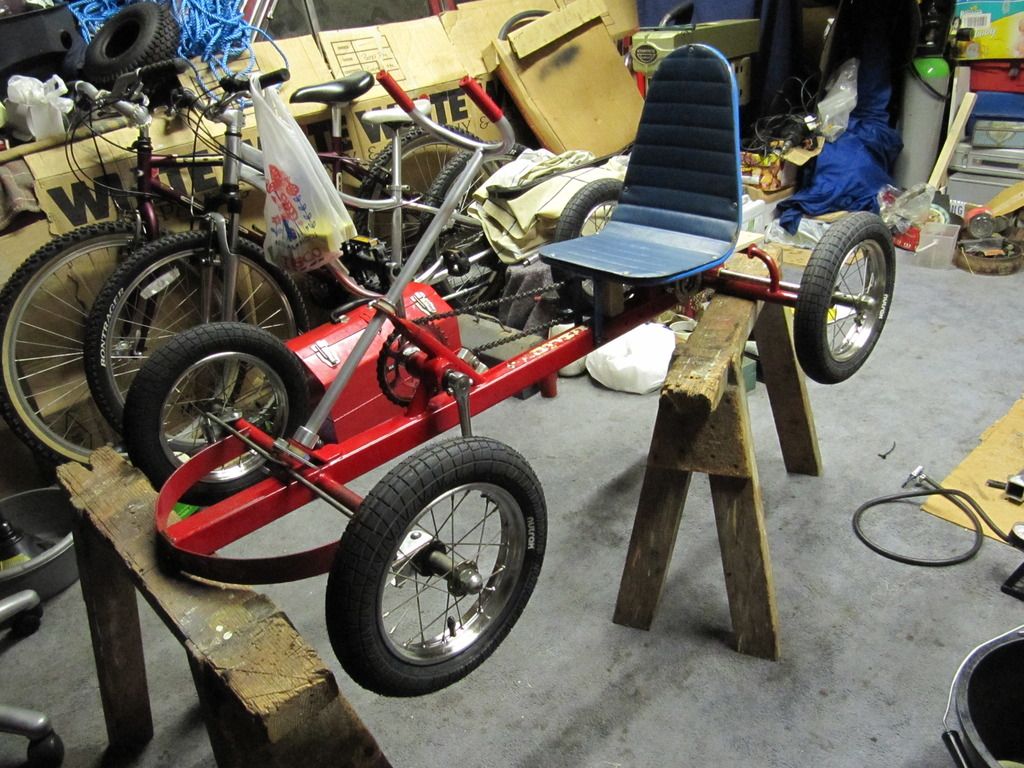 My son has had a go to test it and go the hang of the brake quickly. It works as I had hoped, you can coast which you couldn't before, pedalling backwards whilst moving forward gives good braking and once stopped it can be reversed. It's possible by adding a drive pin to make both rear wheels lock to the axle, not only will this give a bit more grip it could also make sliding possible. Not sure how bad an effect it will have on the steering and life of the axle which is a hollow tube though. Once Christmas is done I will take it apart and paint it. Not sure on colour yet, I was going to do it something a bit old fashioned but my son mentioned lime green with black wheels ! |
| |
Last Edit: Dec 22, 2015 18:38:28 GMT by steveg
|
|
steveg
Posted a lot
  
Posts: 1,586
|
|
Jan 14, 2016 15:48:10 GMT
|
I have been busy doing some more work on this over the last week. My son has been riding it about a bit and mentioned the seat was a bit uncomfortable. The original seat isn't great and doesn't have any padding and I can remember sliding off the one I had. I had considered fitting some sort of kart seat so I had a search on ebay. I found an unused unbranded one for not a lot and grabbed it. Fitting the seat onto the kart was the next problem so I dug around to see what metal I had and a plan was formed. Much chopping and welding later I had this. 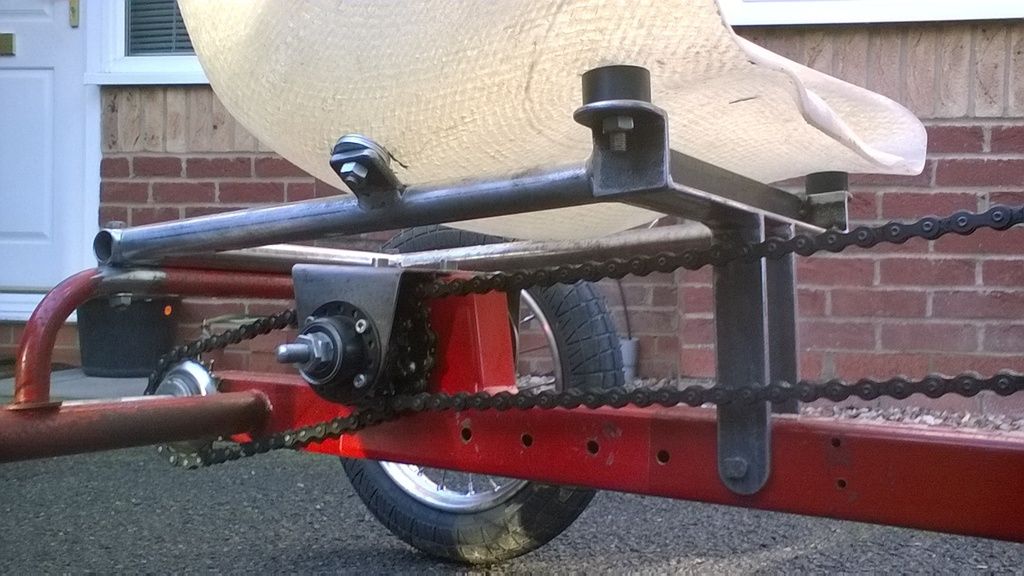 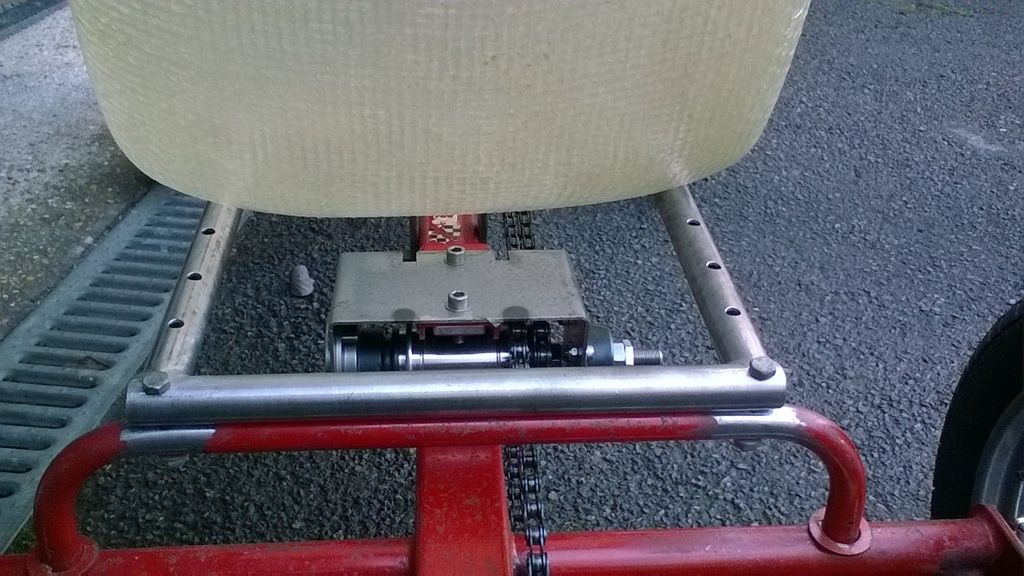 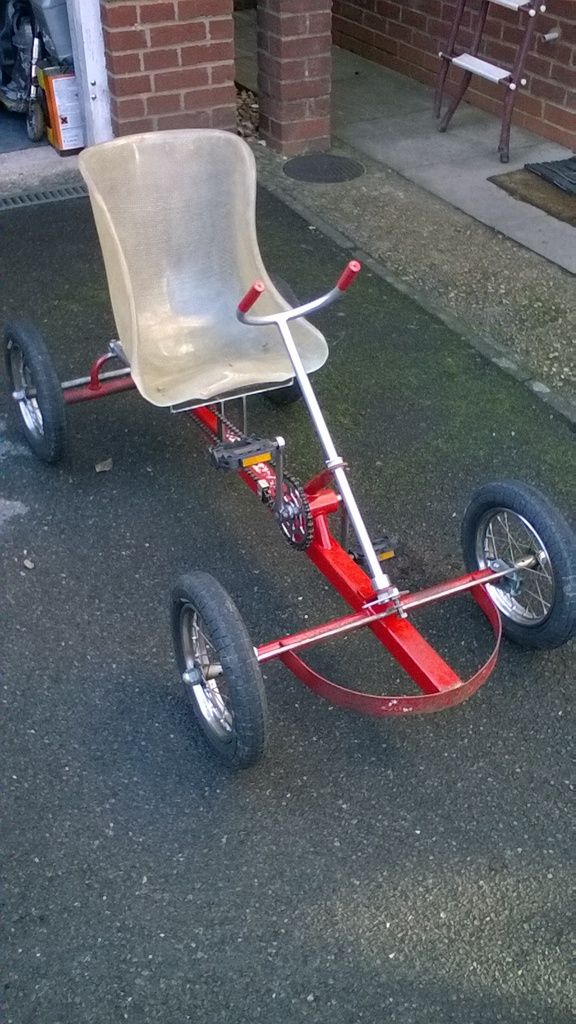 All I need to do now is come up with something better then the old chainguard I temporarily fitted. Looking round the net I have seen that quadracycles run the chains inside tubes of some sort so this might be one way to go. I'm not sure what material to use. I guess it's nylon of some sort. |
| |
|
|
|
|
|
Jan 14, 2016 18:49:23 GMT
|
|
Excellent work and nice to see your son's input , proper teamwork
|
| |
|
|
|
|
steveg
Posted a lot
  
Posts: 1,586
|
|
|
|
I've been making a few brackets today to hold the tubes that enclose the chain. I can still remember my nicest flaired jeans being dragged round the chain ring on the one of these I had. All it's made from are some bits of conduit tubing and suitably sized cable cleats. Handy things to remember for use on other projects for holding hoses etc and very cheap. Might drill a few hols in some of the seat frame to lighten it a bit and then it's time to get it painted ! 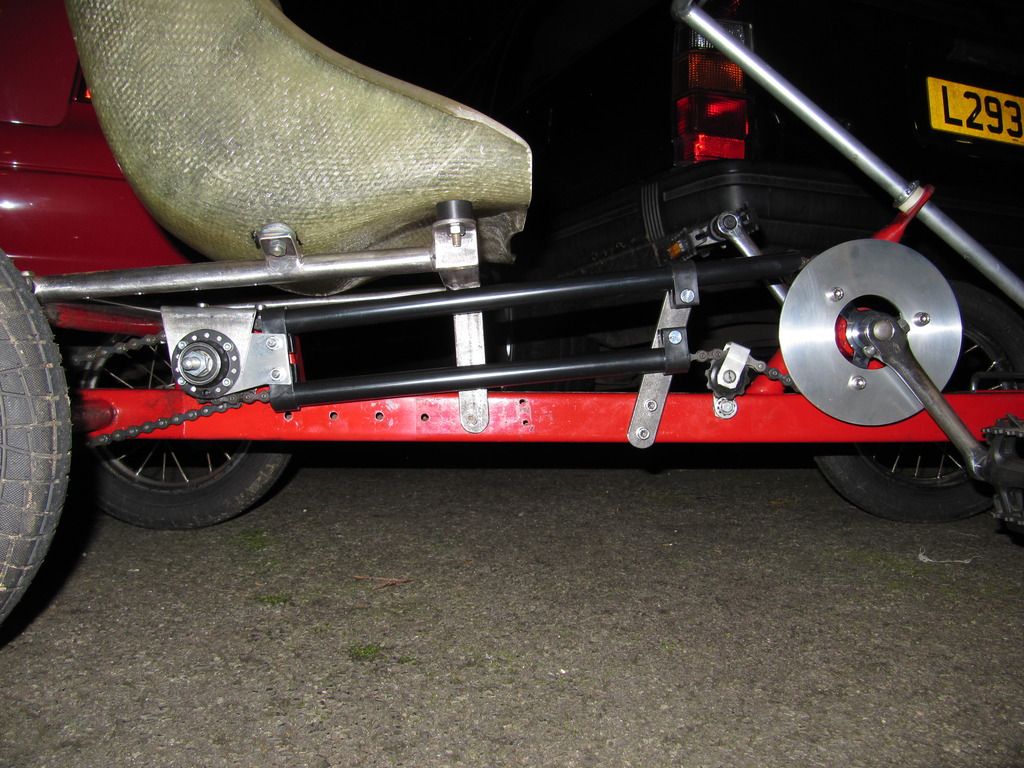 |
| |
|
|
|
|
|
|
|
|
Nice work, this looks very well done!
|
| |
|
|
steveg
Posted a lot
  
Posts: 1,586
|
|
|
|
Nice work, this looks very well done! Thanks for the compliment. I want to get back to doing some proper car stuff but this keep me thinking and is cheap ! When I get a chance I will post some of the other things I have done in the past. |
| |
|
|
steveg
Posted a lot
  
Posts: 1,586
|
|
Feb 15, 2016 21:16:29 GMT
|
As the go kart is nearly finished I though it was about time I did something with the collection of dump saved BMX frames I have. I picked up another complete bike last week, nothing great but it's got tidy wheels with good tyres. I will save the frame for now and use the part on something else. So digging through the pile I picked this. 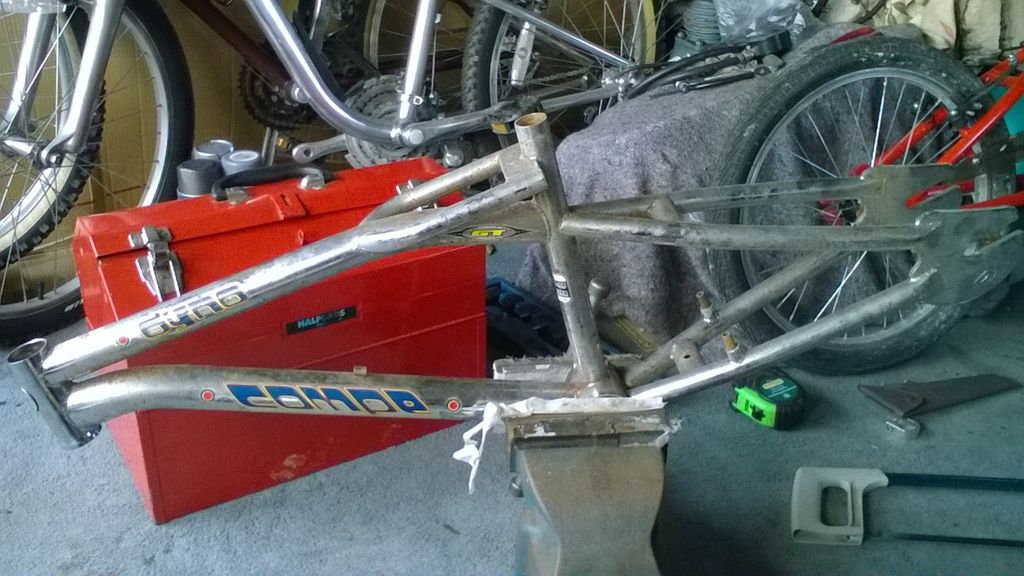 It did have a seat post stuck in it so I heaved that out and started to work out what to do. My son isn't quite big enough for a full size BMX so I thought I would have a go at building a mini one but using 20" wheels. I cut the extra foot rest off the frame and cut the seat tube down as low as I could get it to start with. As I was going to have to shorten it a bit as well I decided after looking at one of the other frames to join the most suitable bits together. Much chopping and filing later I ended up with this. 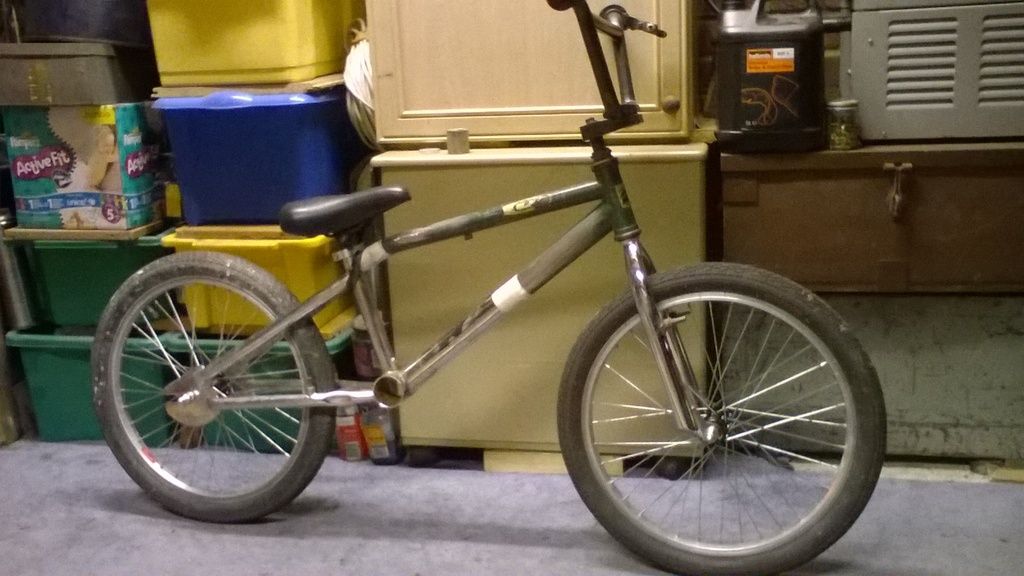 The joint of the bottom tube is covered by the tape and the top tube will end up being welded to the seat tube. He had a careful sit on it and it's still too long. It needs about 2 inches taken out of the length really so I will give that a go tomorrow hopefully. |
| |
Last Edit: Feb 15, 2016 21:18:33 GMT by steveg
|
|
steveg
Posted a lot
  
Posts: 1,586
|
|
Feb 16, 2016 21:55:29 GMT
|
Did a bit more today although not much to show for it. Normal BMX bars are a bit tall so after another dig around I found some old bars that will do the job once the ends are trimmed down. My son had another sit on it and he fits much better. I took another inch out of the bottom tube and made a tight fitting joiner up. The top tube is nearly where I want it but needs slicing at the front so I can bend it down slightly. 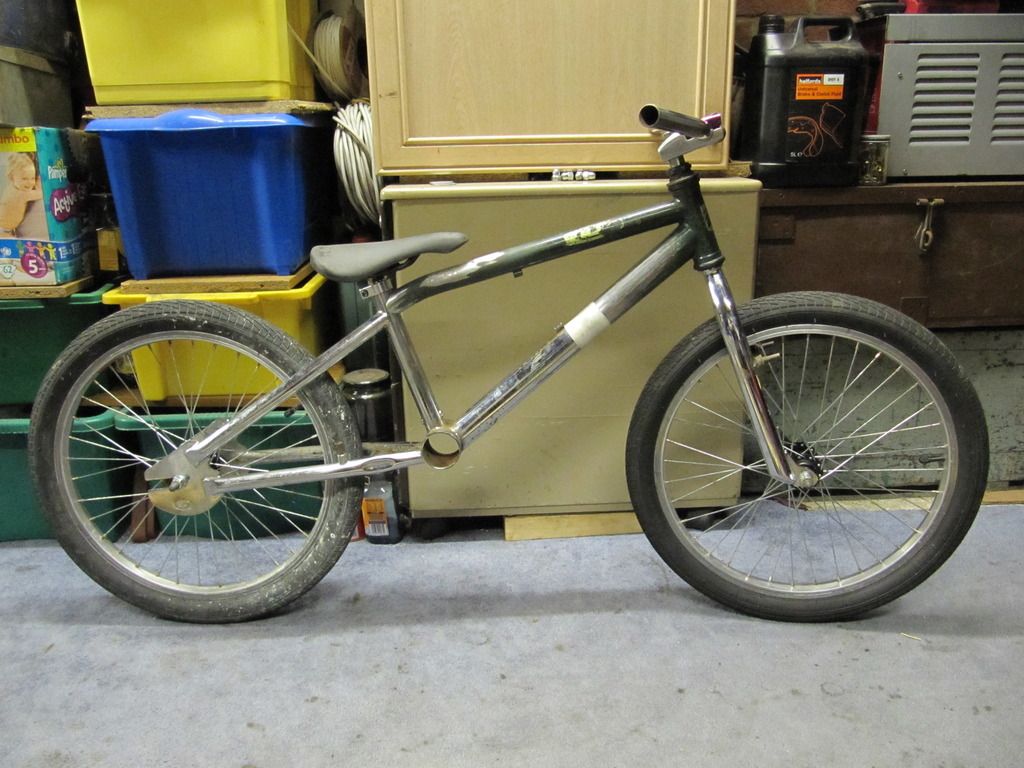 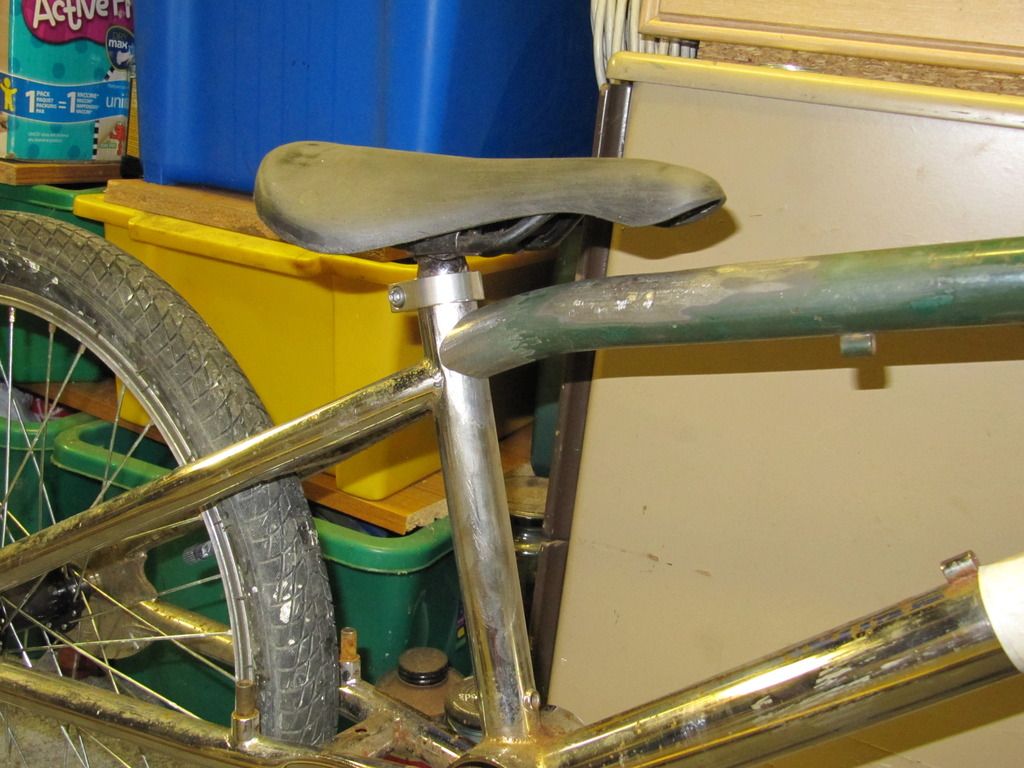 The seat is temporary at the moment but if I cover it with something it might be OK to use. The original cover was torn so I pulled it all off. The adjuster under the seat was turned upside down to make the seat a bit lower and when the top tube is lowered slightly I can trim the seat post a little more. Should be just the right heigh for him then. 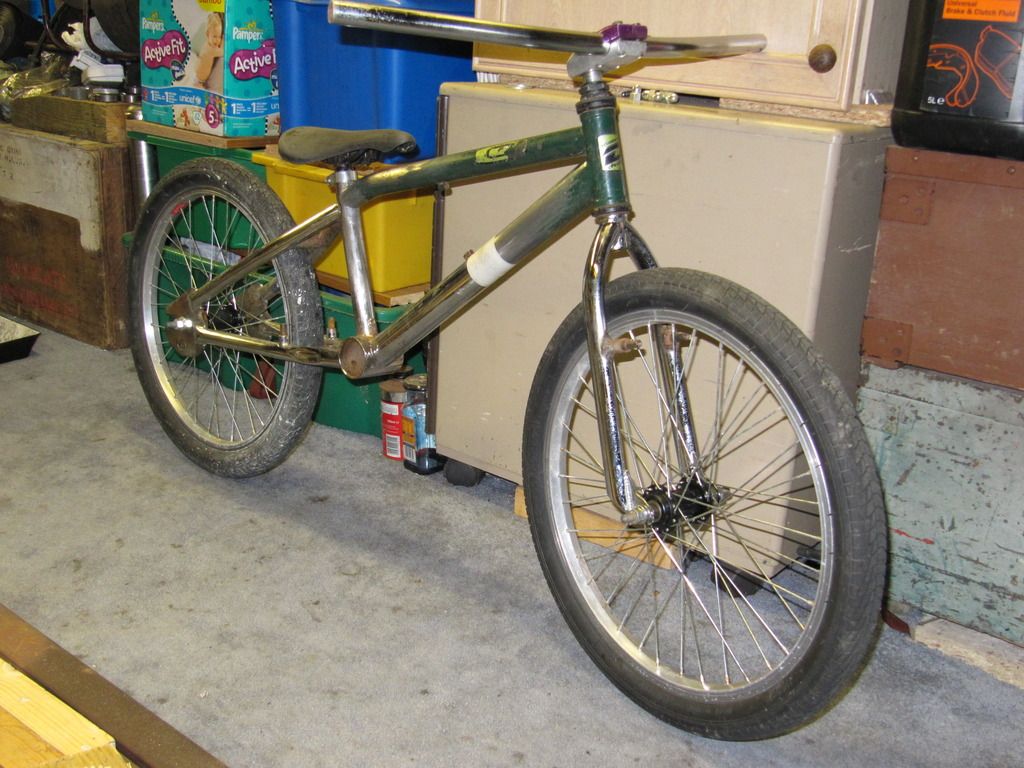 |
| |
Last Edit: Feb 16, 2016 22:00:03 GMT by steveg
|
|
|
|
|
|
|
|
Cool.
Can you put a standard Bmx beside it to scale the work??
|
| |
|
|
steveg
Posted a lot
  
Posts: 1,586
|
|
|
|
|
I'll try and do it tomorrow as I am interested to see the difference. Modern BMX frames are a fair bit longer than the early 80's ones. The wheelbase is roughly the same as my old early 80's Redline but thats happened by accident. Getting the seat down low enough was the main challenge.
The two frames I used were both damaged in different ways. What I have come up with used the beat bits and allows me to use parts I have laying around.
The only problem I might have is the crank. I will have to fit one with shorter arms, unfortunately all the short ones I have are off cheap childrens bikes that use different size threads.
I did start off looking for an old school mini BMX frame but they are all collectable and reasonably expansive.
|
| |
|
|
steveg
Posted a lot
  
Posts: 1,586
|
|
Feb 22, 2016 17:09:08 GMT
|
My 2 children were off last week for half term so I didn't get to do much. I did weld the frame up and build it up so my son could sit on it. I hit a bit of a snag though. The bottom bracket has ended up very close to the seat and despite his legs being young and bendy it was asking a bit much so I either need a very short crank or lower the bottom bracket. I dug out th spare bits of frame and mocked up how it would be with a lower bottom bracket. 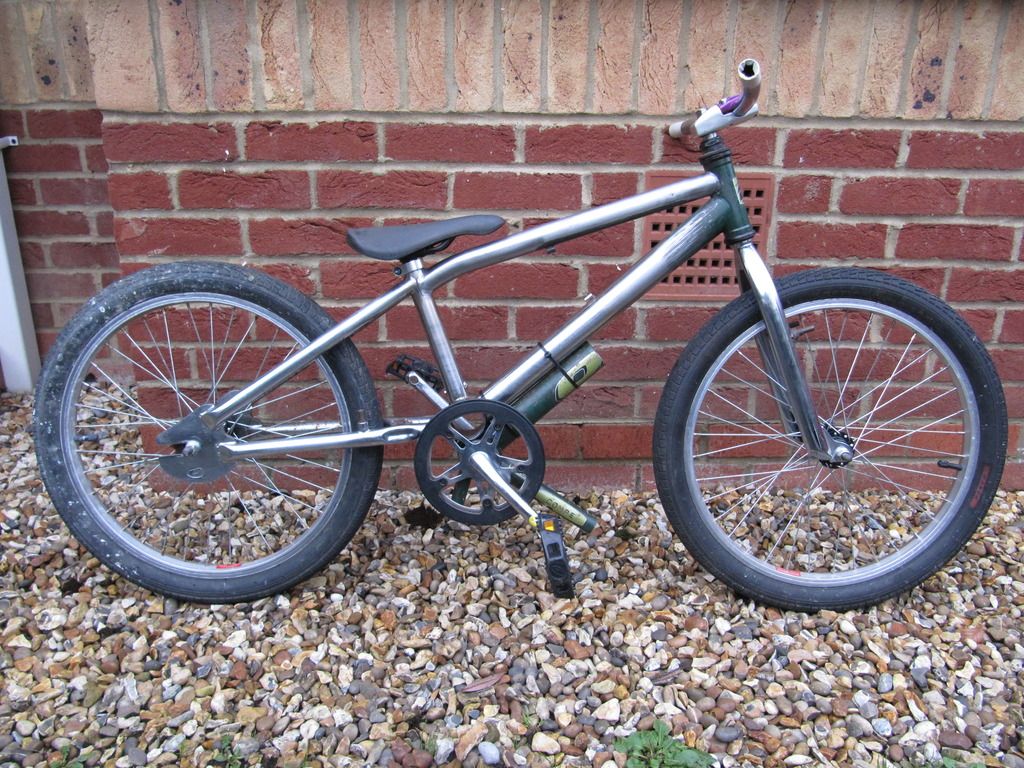 This is what I have. Not sure what to do really without it looking a complete bodge. One thing that did spring to mind was to fix the back wheel and make the cain tension adjustable by altering the bottom bracket. It's a bit over the top when I only need to weld it on but covers up the bodge a bit ! 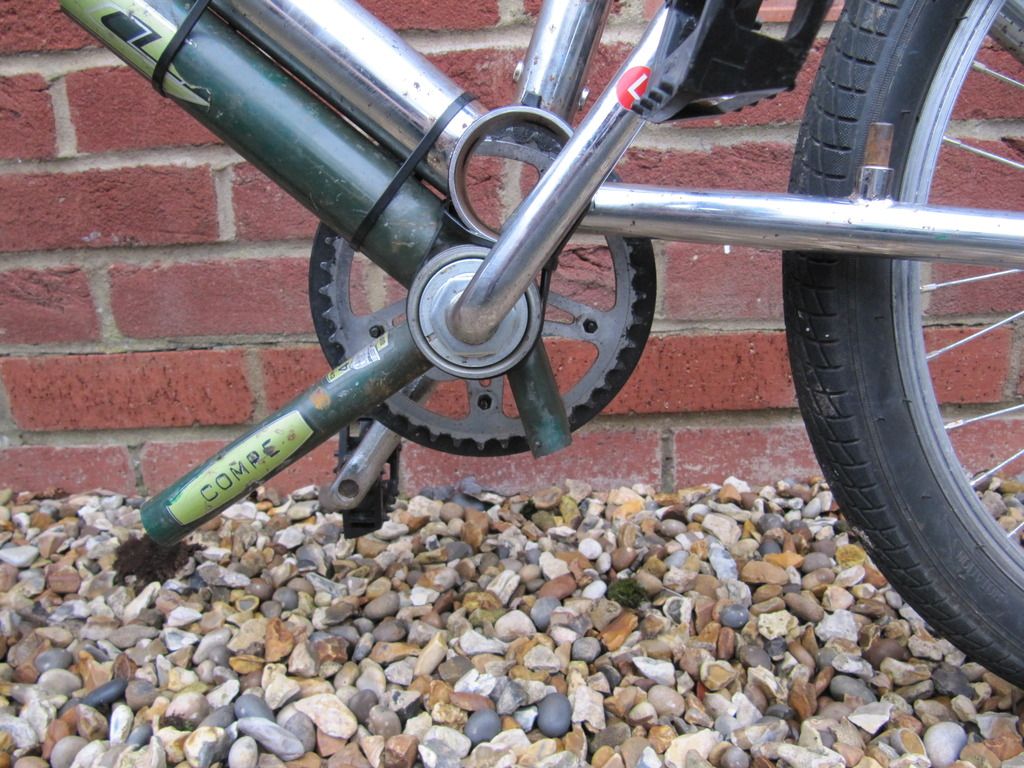 |
| |
|
|
steveg
Posted a lot
  
Posts: 1,586
|
|
Feb 29, 2016 23:25:43 GMT
|
I mentioned I have a few karts on another thread so here are a couple of pictures ! This is the oldest. I still don't know what make it is. I think it was home built and possibly uses as a grass kart rather then for tarmac use. It's got a 197cc Villiers engine and a 3 speed gearbox. Driving it will be fun (if I ever get it finished) as it has an accelerator and brake pedal a column gear change and a hand clutch ! 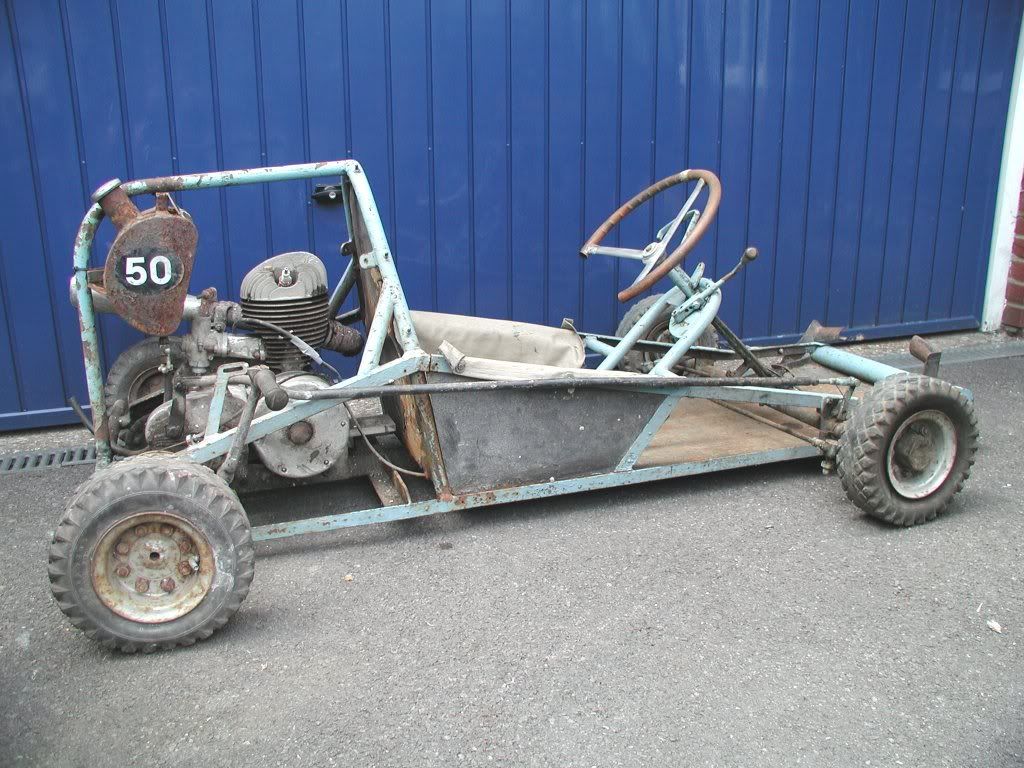 This is the new one although it was made in 1979. It's a 100cc Hewland engined Deavinsons Kart. It was rebuilt after I managed to straighten the chassis out. 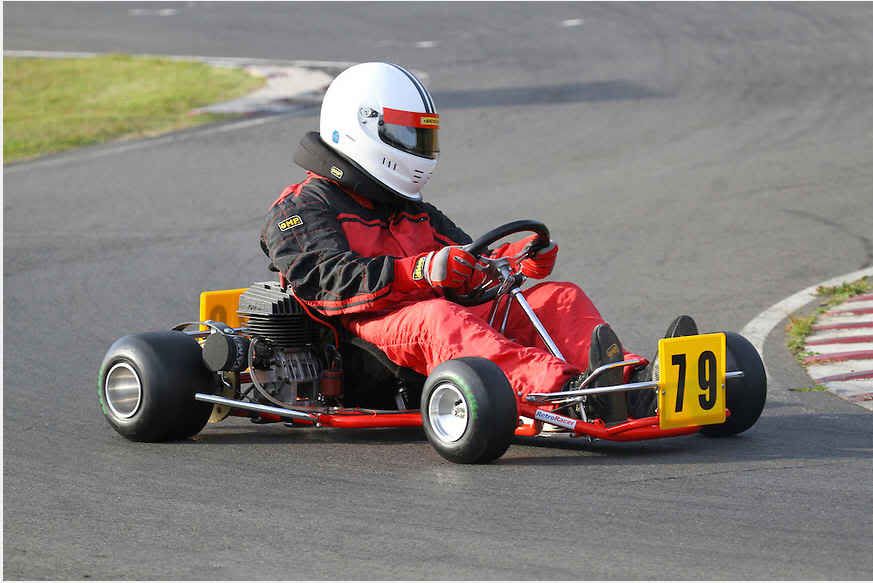 I don't have pictures of the other one handy as they are on my other PC thats broken at the moment. |
| |
|
|
|
|
|
|
|
|
The 1st Kart has a certain Mad Max look about it :-)
|
| |
|
|
|
|


