lewis
Part of things
 
Posts: 82
|
|
Jan 25, 2016 19:05:37 GMT
|
Very cool bike! I bought a 68 T200 in boxes a couple years ago, I threw it all together and got it running. Had a blast thrashing it around on sunny days making lots of noise and blowing clouds of smoke. I don't know much about two strokes, but I knew it needed a rebuild so I sold it on. Only picture I have of it, looks pretty similar to the 500. 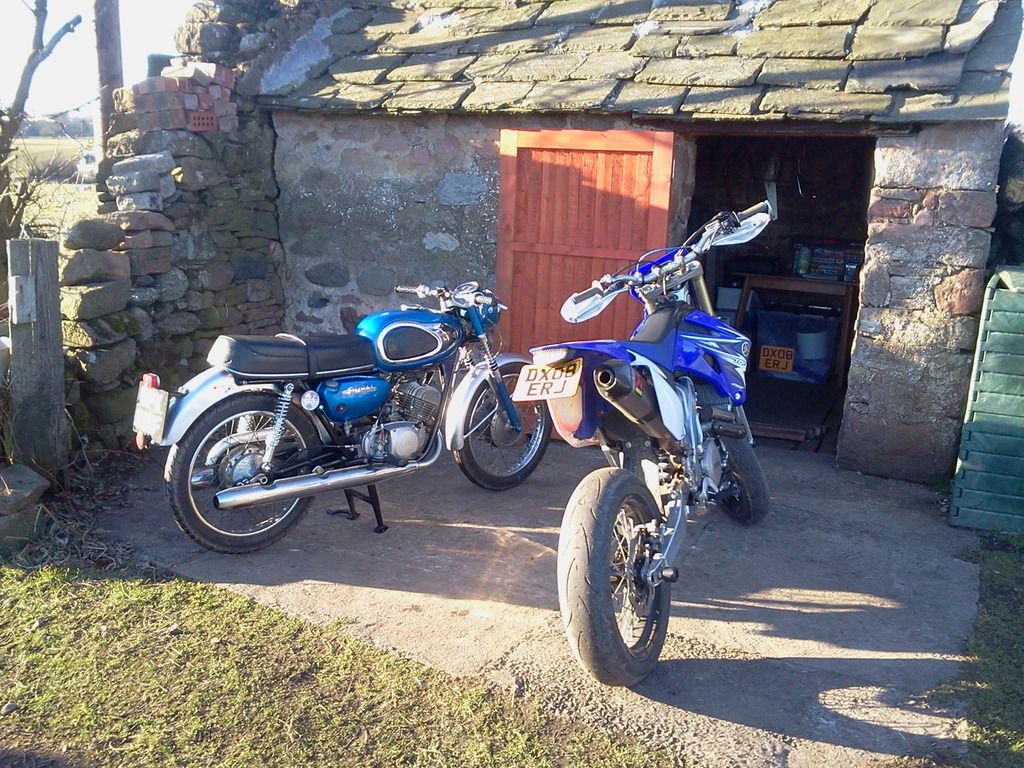 |
| |
|
|
|
|
goldnrust
West Midlands
Minimalist
Posts: 1,887
|
|
Jan 25, 2016 19:17:52 GMT
|
Cheers George  Lewis, sunny days and blasting about in a cloud of blue smoke sounds just perfect  haha. Your T200 looks pretty tidy there. I suspect lots of them need a rebuild really, I image there's a lot running round on less that perfect crank seals if nothing else. 40 year old rubber seals don't tend to hold air pressure so well. I feel more comfy with a 2 stroke than I do 4 really, so my engine will be getting a complete rebuild.  Being just that couple of years older than mine, you got a shorter swing arm, larger mud guards and the more rounded tank shape, but otherwise there's a lot of similarities. I think the T500 is slightly scaled up generally compared to the 200. |
| |
|
|
|
|
|
Jan 29, 2016 16:17:18 GMT
|
|
Cool bikes. I used to own 2 cbr400s. A nc23 tri arm and then later I bought a nc29 gull arm. I stuck a cbr600 engine in the second one. It was crazy fast but spoiled the handling a bit.
|
| |
|
|
goldnrust
West Midlands
Minimalist
Posts: 1,887
|
|
Jan 31, 2016 12:02:38 GMT
|
Sounds like fun stevepeanut. I've read the 400/600 hybrids can be a bit of a wild ride! Over the course of an evening this week, with the help of a friend, I got on with the strip down on the T500. I always forget just how quickly bikes come apart, and as such all I've got in the way of photos is where we got to. A rolling chassis, an engine and a box of parts! For now I'm just taking it all apart and keeping track of the pieces. I'll properly asses the condition of each piece at a later date and decide what will be cleaned up and what will be replaced. 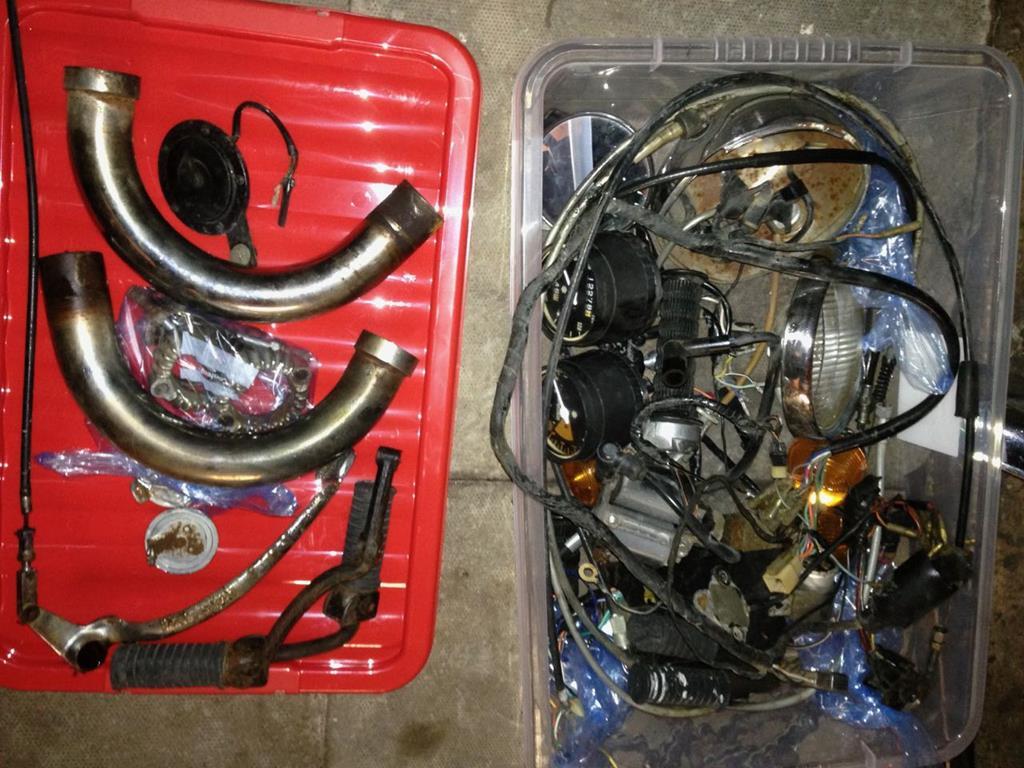 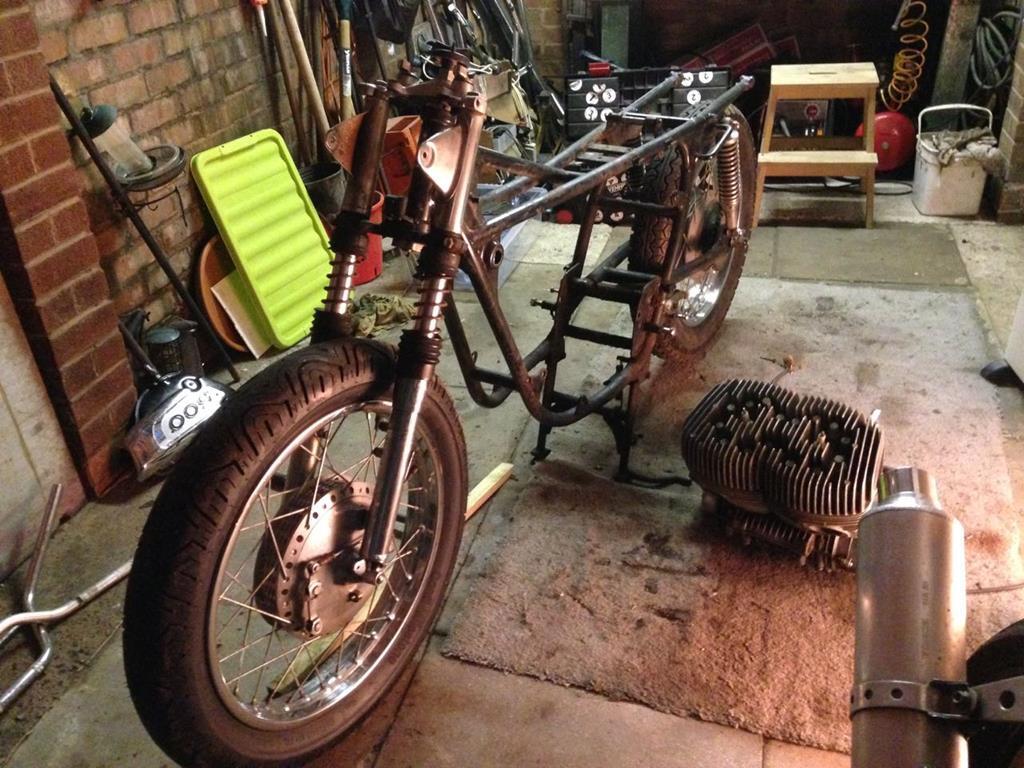 On the whole, the strip down was fairly uneventful, one interesting/worrying thing I found was a rattle inside the right exhaust chamber. I turned it upside down and this dropped out... 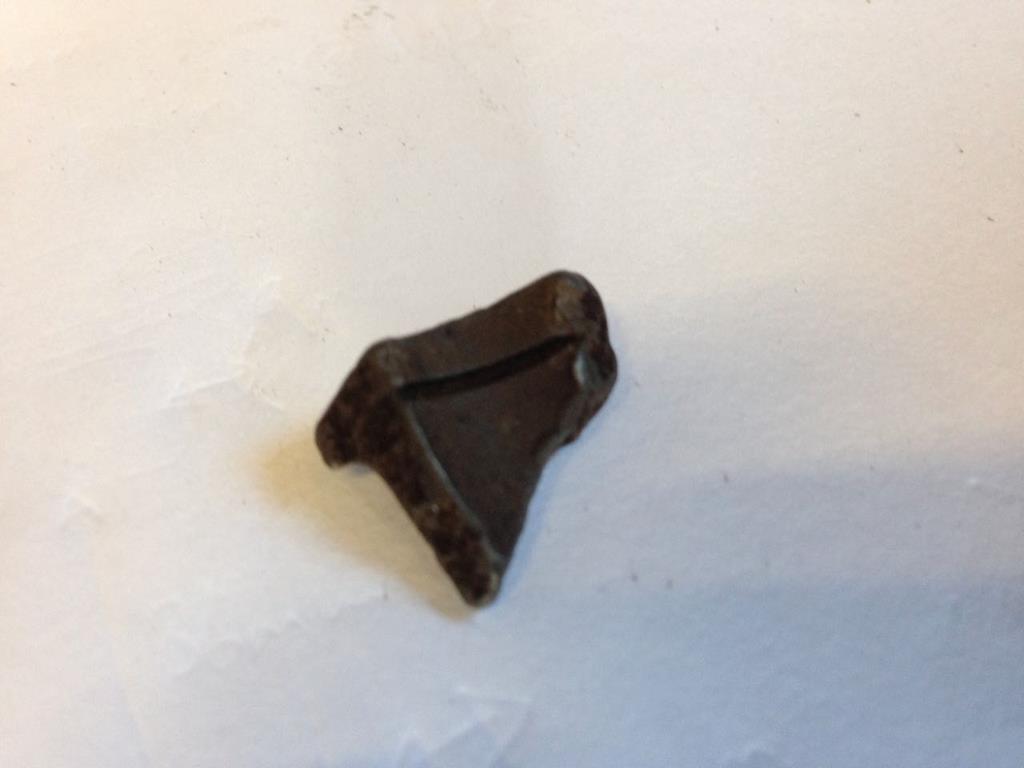 Hmmmm... It puzzled me and my friend Ian at the time, but it would later become apparent what it was! Anyway... A while ago Suzuki decided that it's heritage was important enough to it, that it started remanufacturing parts for some of it's more iconic bikes. The good news is that the T500 was one of these bikes, so lots of consumable parts are available over the counter at a Suzuki dealer (...for a price!). Unfortunately not all parts are available though, and I'm aware that the main bearings and big end bearings are one of these parts. The T500 crank is a sturdy old thing, and wear on the main bearings shouldn't really be a problem, corrosion on the other hand can kill any bearing. With that in mind, I decided my next move would be to strip the engine down, investigate its condition and stop any corrosion due to condensation etc in it's tracks. It was immediately obvious that it was a good job I didn't 'just clean the carbs and pop a battery on it' and try to start it, as the seller had suggested in their eBay advert. The first sign that something was up, was the head studs. One of these is not like the others... 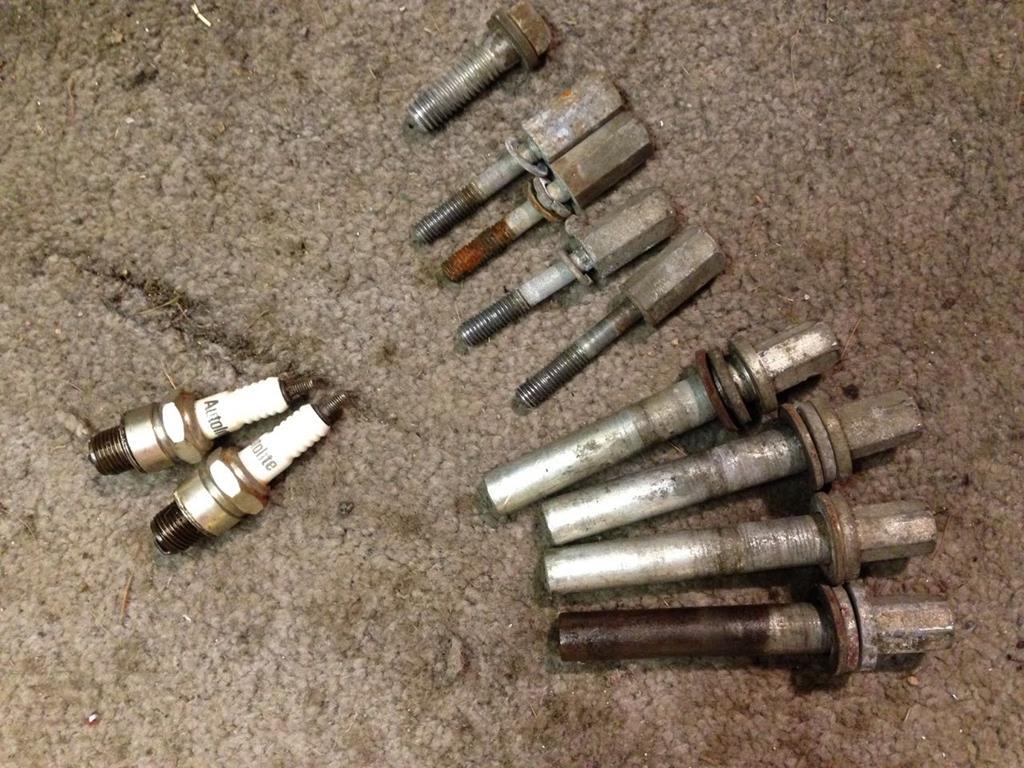 Oh yes it's the hugely oversized, coarse thread, imperial bolt that someones wedged in the left head/barrel. And oh good, they've butchered the head to make it fit. Not even nicely drilled, it looks like it's been dremmeled out or something? 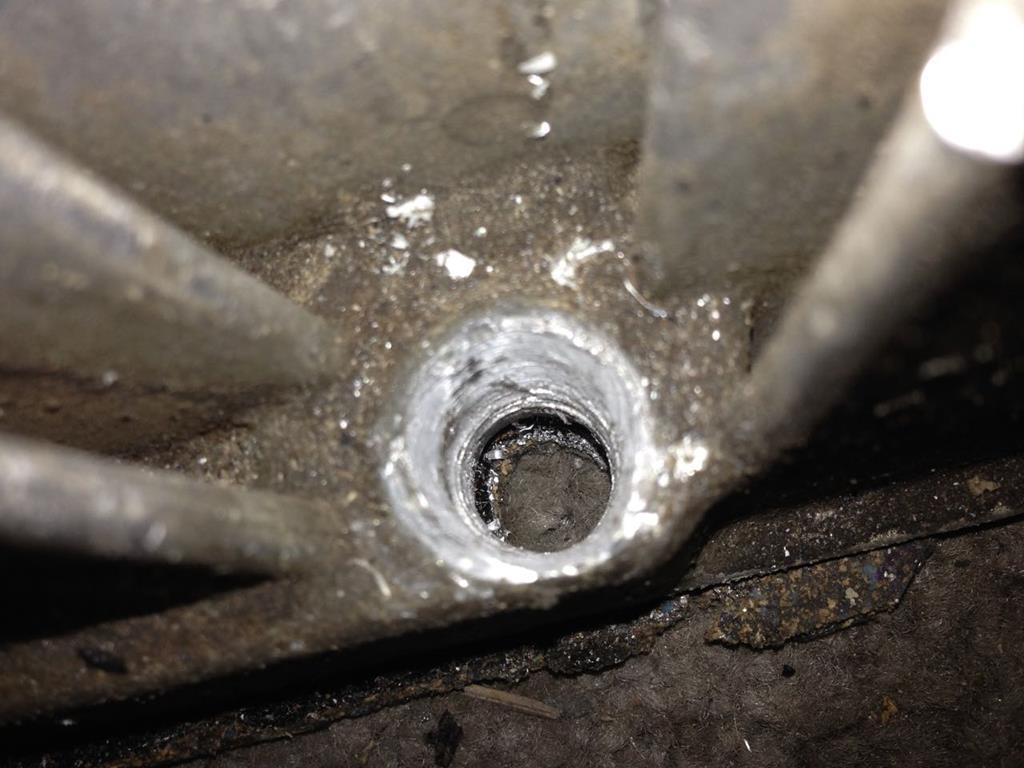 Lifting the cylinder heads off, and looking underneath, it gets even more worrying... 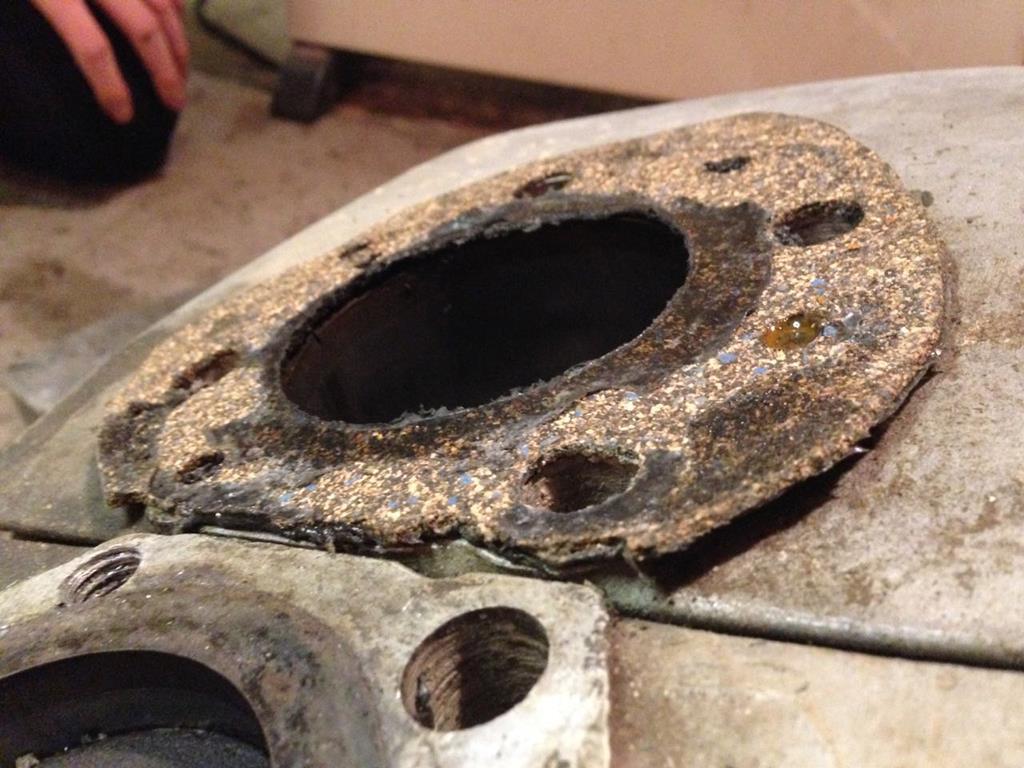 Yes, yes I'm sure that 2+mm thick cork gasket and plenty of silicone will be just as good a head gasket as the 0.5mm thick aluminium Suzuki one... I don't think it'll make much difference to the compression ratio either.....  Whilst I was now very concerned about the level of mechanical skill being shown in this engine, the gasket situation is at least easily solved! The damaged head bolt, might be more tricky. The head will survive, but I'm not sure about the barrel as the bolt hole has been drilled out to such an extent that it touches the liner. So I can't pull it out bigger and helical it down. I would weld it up and re-drill/tap but I'd worry about distorting the bore? As it turned out, I think I what have to worry about sorting the barrel. With the barrels removed I could get a good look at the condition of the liners. The left barrel (with the damaged head) had this lovely chewed section near the bottom. 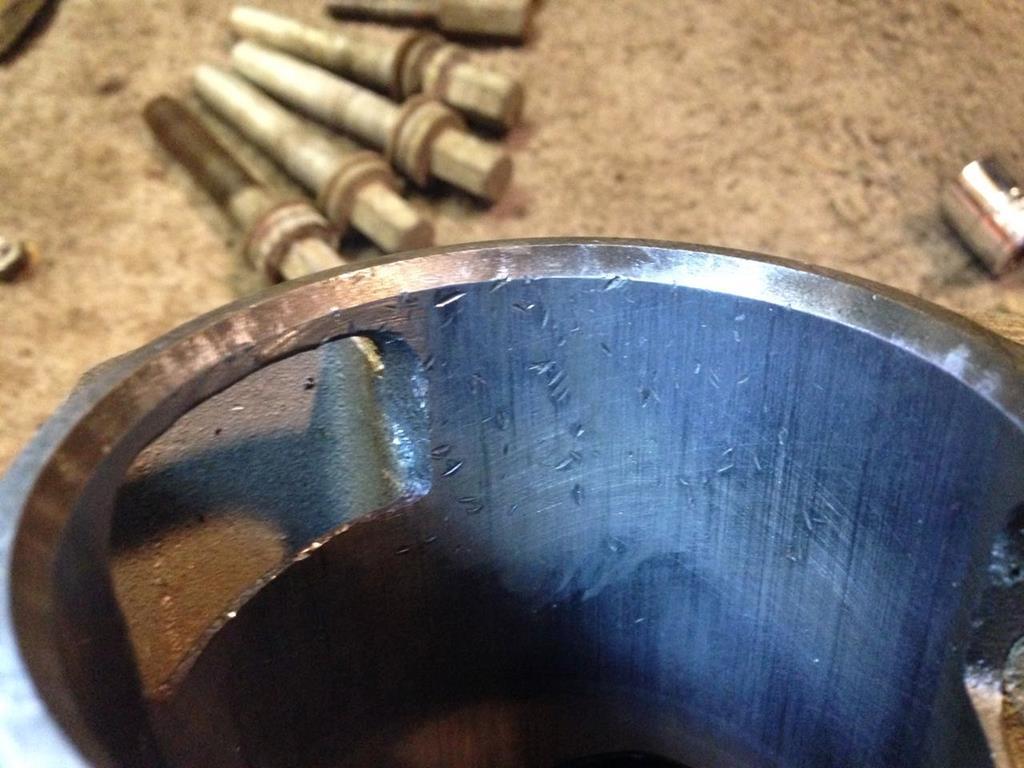 Mmmm... yes. And the piston was nicely gouged too... 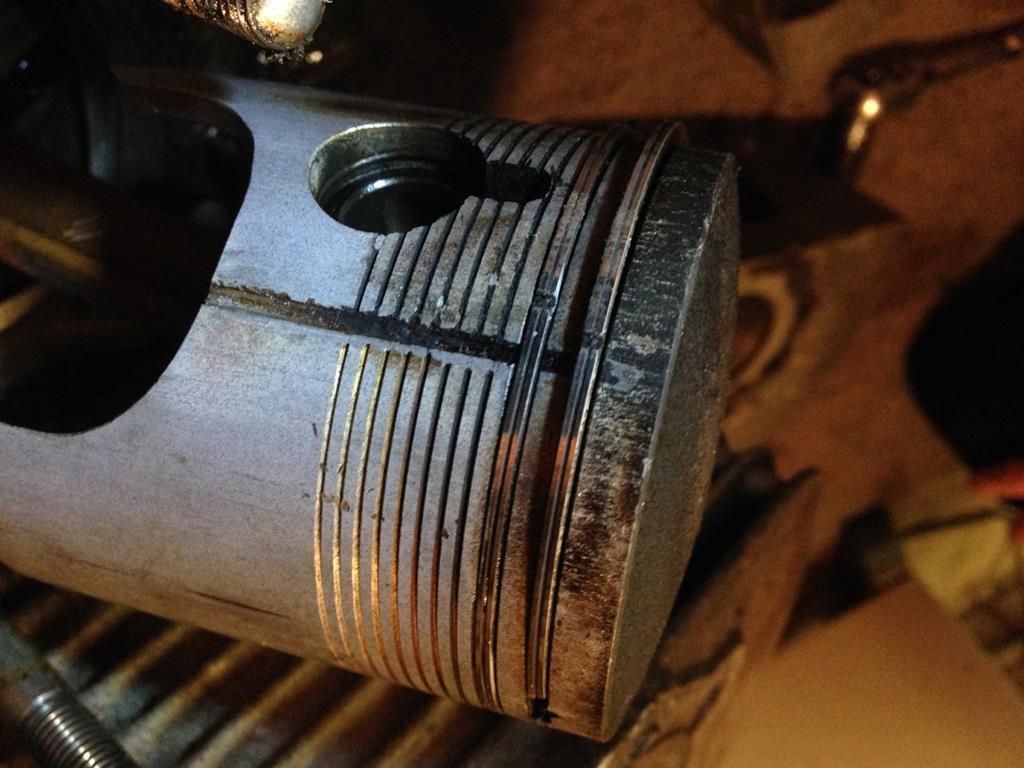 Lovely. It was now that the penny dropped. The chunk of metal in the exhaust.... that's part of a shattered piston. Broken piston skirts are not unheard of in these engines, especially if the pistons have worn and become sloppy in the bore. I think the piece we found in the exhaust is a section of the outer edge of the piston, where the gudgeon pin goes through. The grove is for the retaining clip. New pistons and rings were always on the cards, it is a two stroke after all and pistons are pretty much a service item, so I'm not worried about that. The damaged to the bore is more worrying. The heavily damaged area is not an area the rings pass over, but it's a case of whether I can smooth it out so it wont score the piston without opening out the bore allowing the piston to slop. I think the best move at this stage is to try and find myself a good secondhand left barrel, killing two birds with one stone as I will then have a good bore and no head bolt issues. Looking deeper into the cases it was looking pretty mucky, and like there might be some signs of water ingress. So yesterday I spent the day stripping the engine down. Like the rest of the bike it came apart fairly easily. Draining the gearbox oil, was not pretty. The oil heavily contaminated with water and dirt. It looked more like a latte the gearbox oil.... 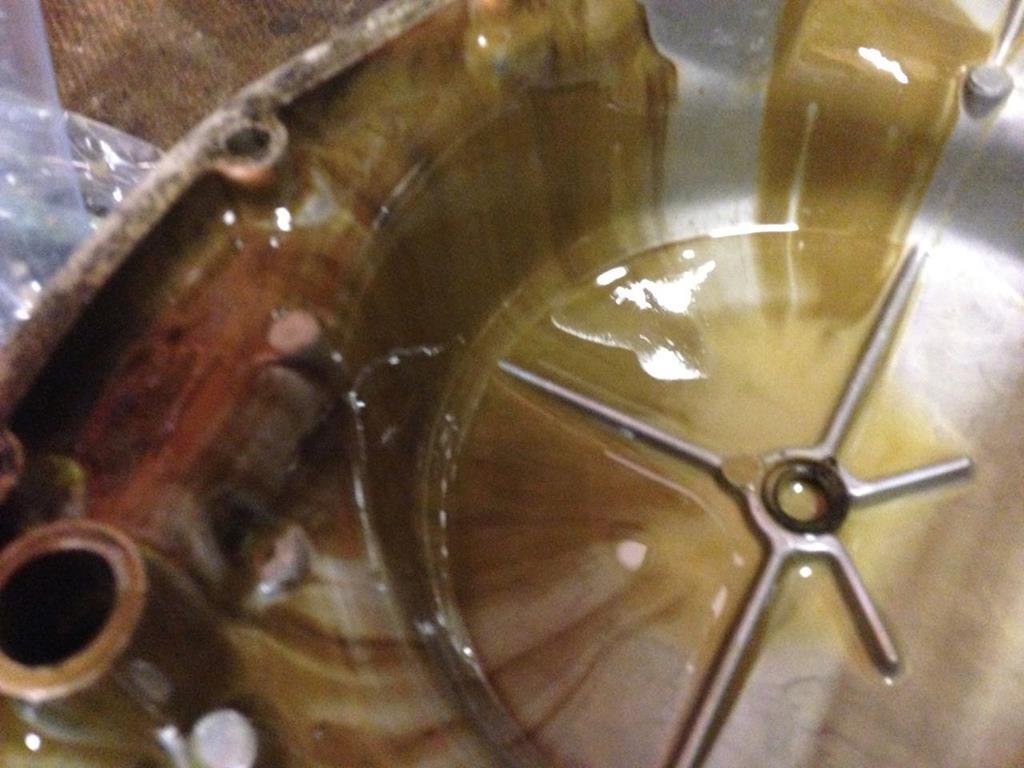 I took my time, carefully bagging up each part of the engine and labelling all the bags... 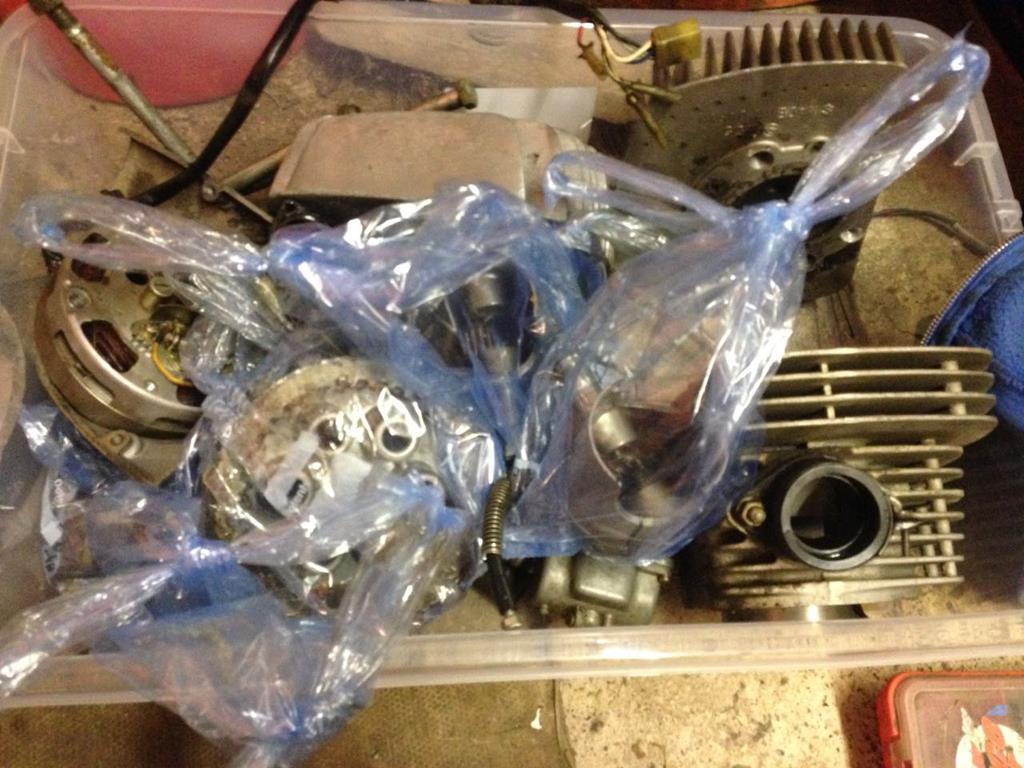 And soon it was time to split the cases, the moment of truth! 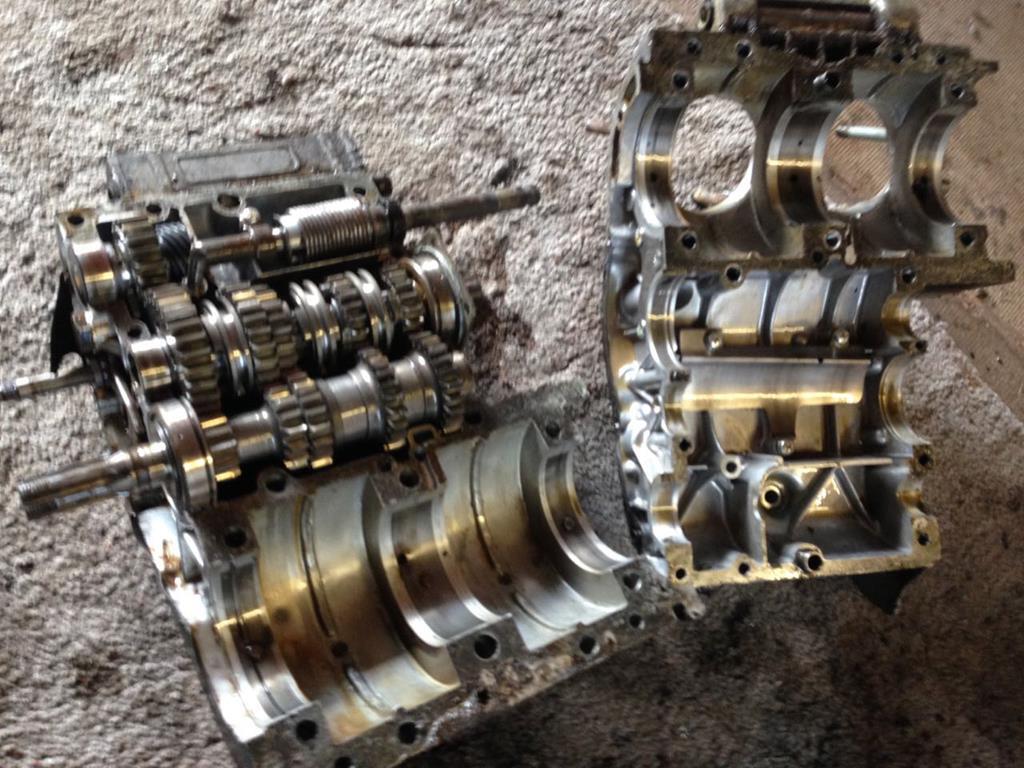 I feel tentatively optimistic about the results. While there are signs of corrosion going on in there, it seems to be in un-important places, all the gear contact surfaces and bearings seem in good condition. As there's a known design flaw (easily rectified) with these gearboxes that deprives 4th and 5th gears of oil at prolonged high speed running, it was good to see that all the gears look in great condition. 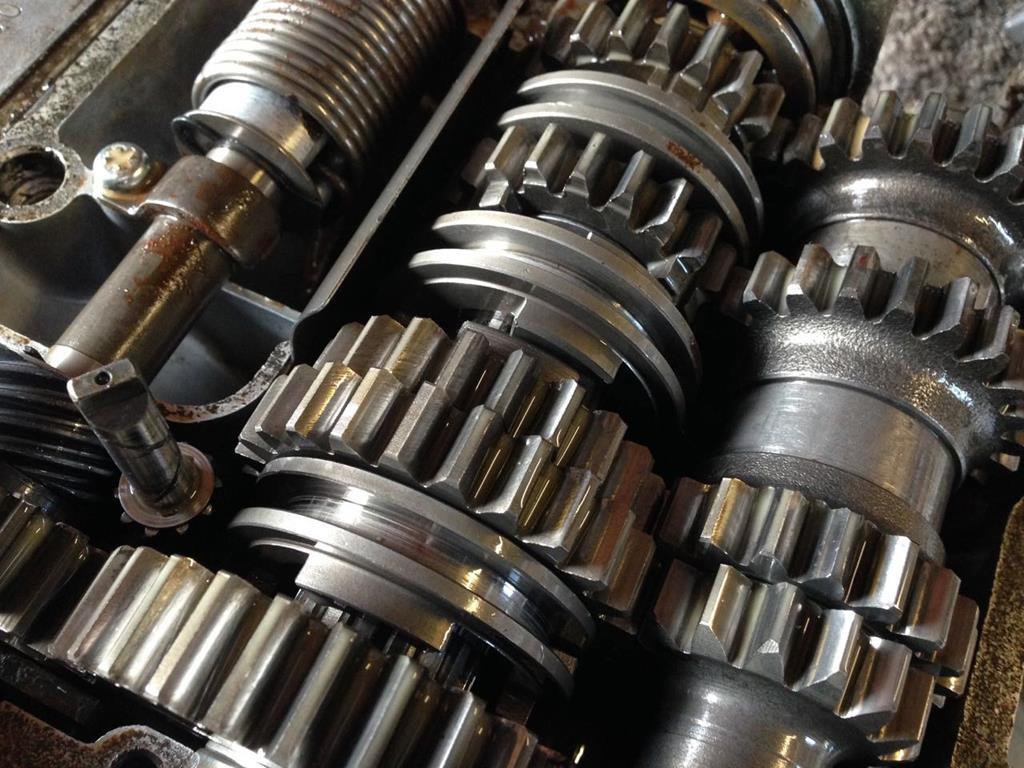 Moving on to the crank, again mild optimism. It looks a bit cruddy, but once I'd washed all the crappy old oil out of it, the bearings are smooth and have no radial play in them. 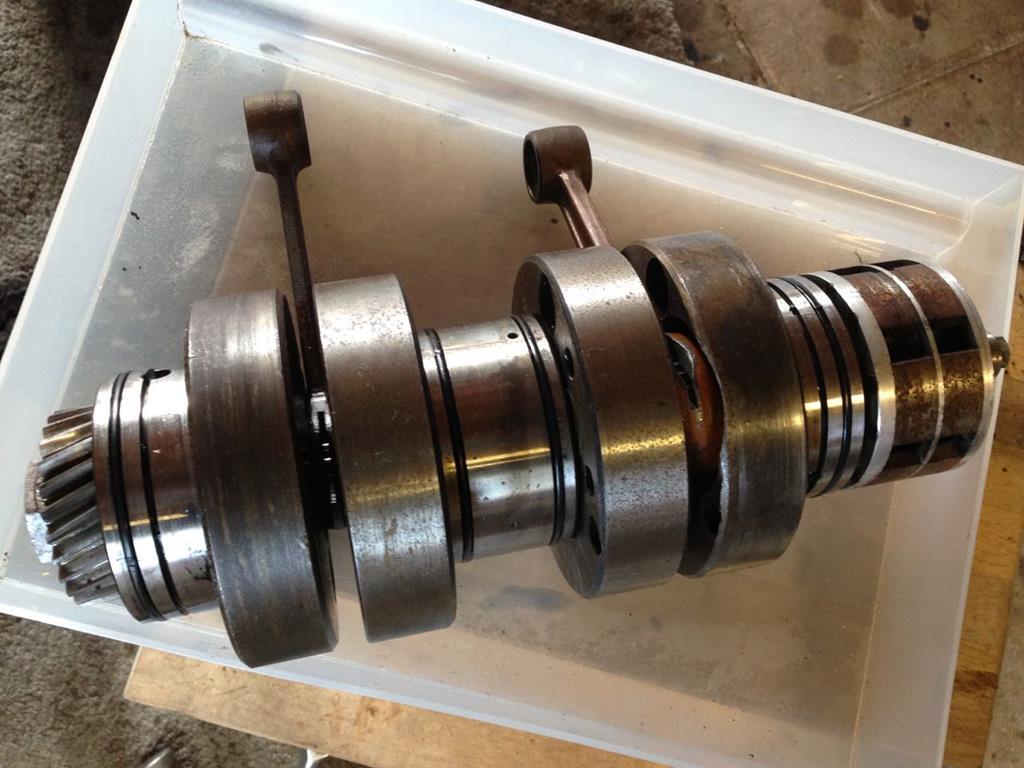 Knowing that the crank seals will be quite old, my initial plan had been to rebuild this crank, but now thinking about how easily the engine comes apart, and knowing there's a risk I could damage one of the bearings while doing the rebuild, and seeing that it all feels 'ok', I think I'll just refit the crank when the time comes and see how it is. If it turns out it needs new seals, I've lost nothing. For now I've given the crank a bath of 2t oil and wrapped it in cling film and packed it away safely. Inside the crank case, there's more signs of the chewing the engine took wit the shattered pieces of piston floating about inside it, but nothing that's an issue. I'm sure I'll tidy it up before putting the engine back together, but there's no real need to do anything about it. 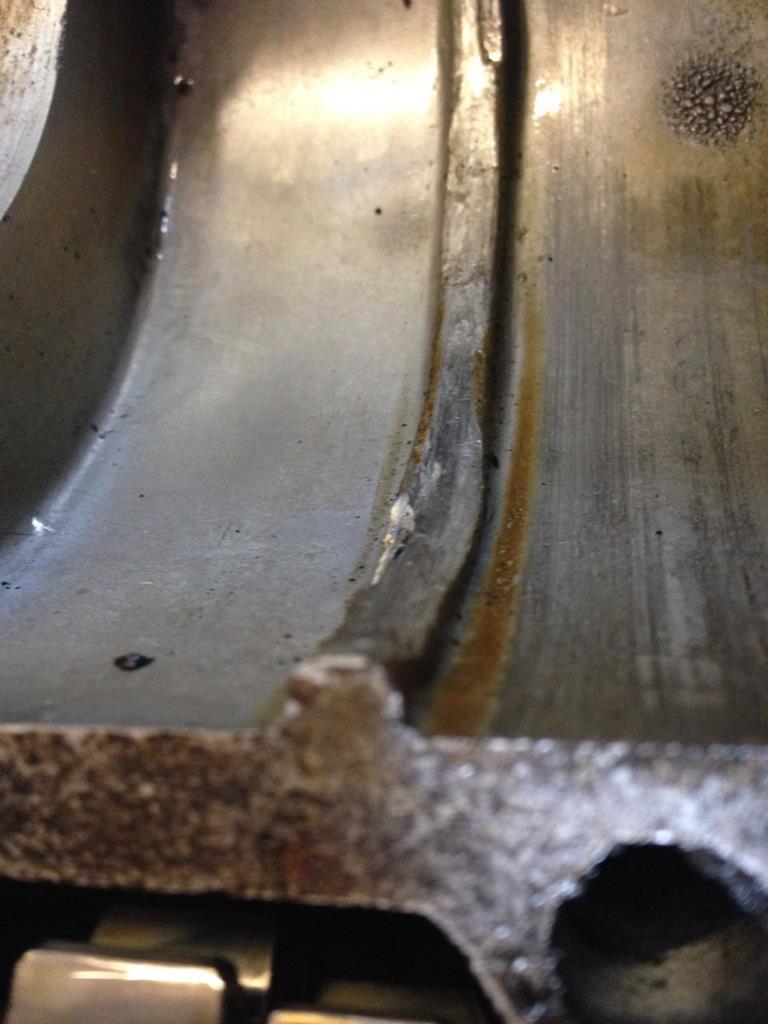 So a mixed bag really. Could be better, could be worse.The main thing is now I've pulled it apart, and got that manky oil out, it's not going to get any worse over the next few weeks/months while I work on other areas of the bike. On e of the key elements to the look of the bike, and to it's improved performance will be some proper expansion chamber exhausts. There are various exhausts available off the shelf, but one of the things I've always fancied having a go at is making my own pipes. With that in mind, now the engine was in pieces I could make some measurements... 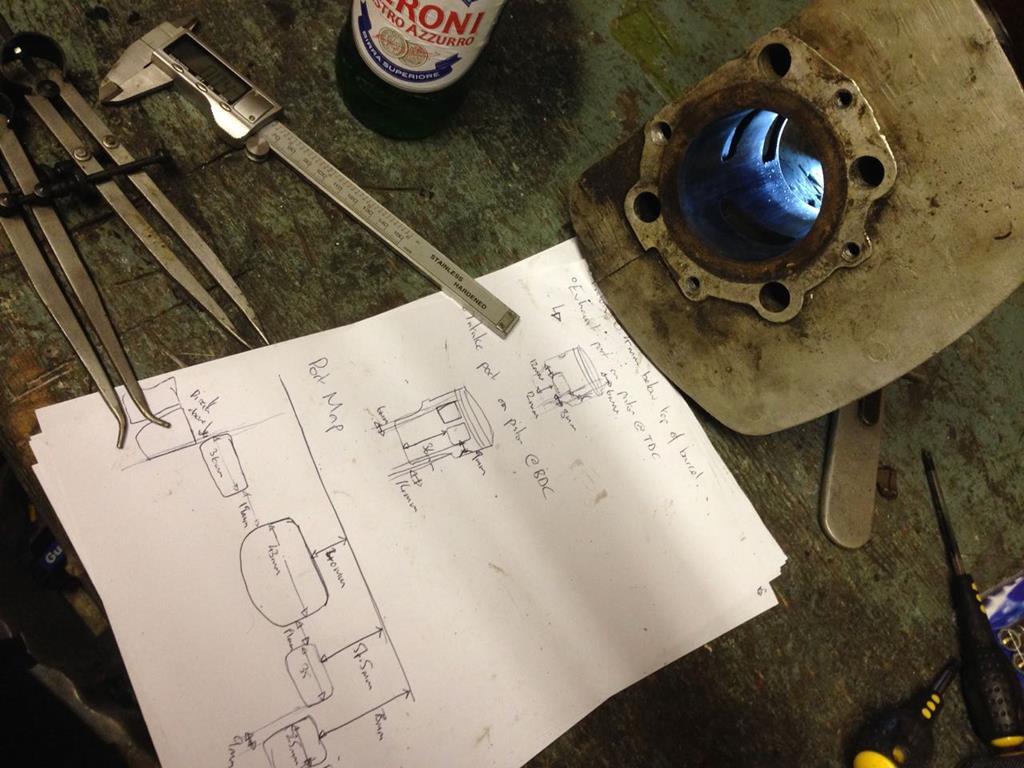 ...which allowed me to calculate the standard port timings and the physical limits of how far I can open the ports out. Armed with this information, various snippet of information from websites, old magazine articles and Graham Bell's Two Stroke Tuning book, last night I started working out how my exhausts might look  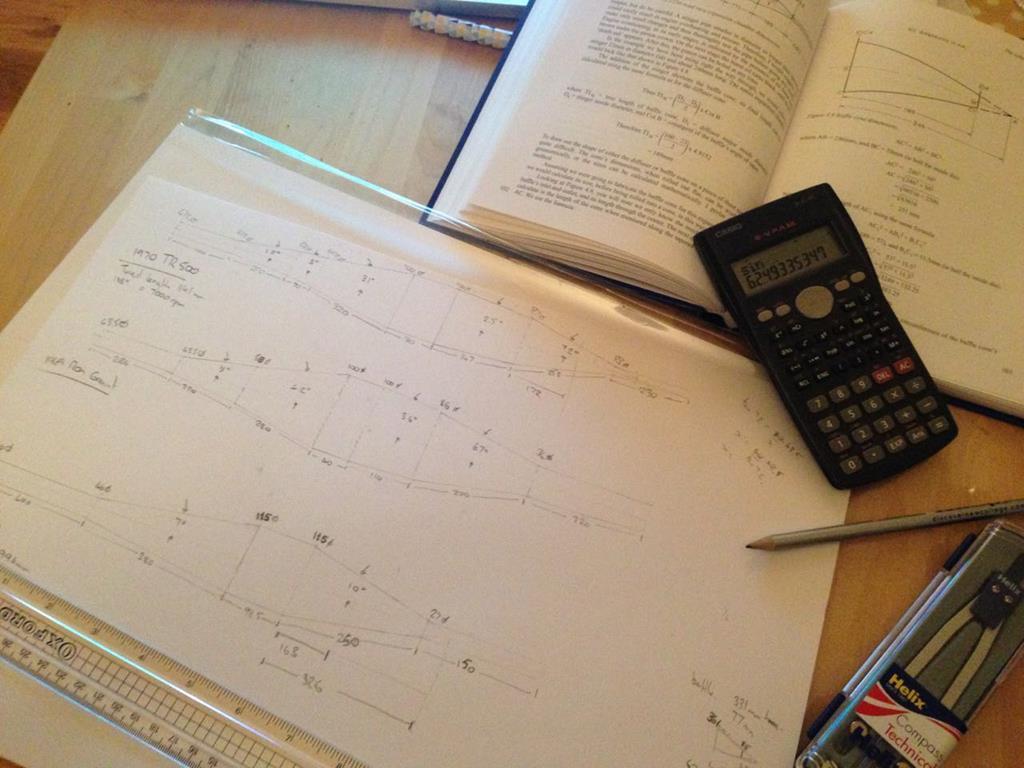 I'm really enjoying getting stuck into this bike project, next move is to properly inspect the rolling chassis. Then I'll have all the pieces of the puzzle and can start to mock up what modifications I'm going to do and how the bike will look.  |
| |
Last Edit: Feb 27, 2018 22:48:52 GMT by goldnrust
|
|
duncanmartin
Club Retro Rides Member
Out of retro ownership
Posts: 1,320
Club RR Member Number: 70
|
|
Jan 31, 2016 17:59:03 GMT
|
That is sounding like a mighty cool project.  The engine doesn't sound too hot, but hopefully you can get the new barrel and it an all go back together again without too much difficulty. Cheers Duncan |
| |
|
|
|
|
|
|
|
|
Have you come across Titan Performance, based somewhere near Dover. Specialises in parts for the T500 and has built some stunning race bikes.
|
| |
|
|
|
|
|
|
|
|
You've got a nice project on your hands that's for sure! Do you know how long the bike has been standing before you got it? If it has been standing for more than 5 years (some people even say 3!) you really need to replace those crank seals. I have a GT750 which had been standing for 8 years and seemed to run just fine, until I opened it up in the hills of Luxembourg (1000km after first start mind you) and one of the middle seals let go, stranding me and seriously bumming me out.
It may take hundreds or even thousands of km before the seals fail, but they will fail if the bike has been standing, especially if they're still the old seals.
I used non-suzuki replica seals on purpose as I feel that replacing 40 year old seals with 40 year old seals from a plastic bag wont help much.
Have you considered using more modern calculations for the exhaust chambers? There has been a serious amount of development with regards to calculating chambers and gas flow compared to the days of Overmars, Bell and Jennings.
|
| |
|
|
goldnrust
West Midlands
Minimalist
Posts: 1,887
|
|
|
|
Hi pod70 , welcome to retrorides! I hadn't heard of Titan Performance. I'll check them out.  Thanks for the input joostvdw  I've no idea how long the bike has stood, it's freshly imported from America, and I have no idea of it's history at all. I didn't realise that standing for a while was likely to cause seal failures. I did think that 40 year old seals would probably have gone hard by now, but also often with these things, it's fine till you disturb them! I've got some time to think and make a plan, it'll be a while till the engine goes back together. Suzuki are now re-manufacturing some parts for the T500, including crank seals, so I'd probably go with genuine Suzuki ones. I've been using the 2nd edition of Bells book (first printed in 1999) for my pipe design reference. It's clearly light years ahead of the period correct style of pipe designs that I've found specs for online, or that are available off the shelf for the T500. I didn't realise things had moved much much further forward in 2 stroke road bike engines since then really? Not much progress to report this week, been very busy with work. This afternoon I did grab a couple of hours to finish stripping down the gearbox, many more labels sandwich bags. Hopefully I'll remember how it goes back together... 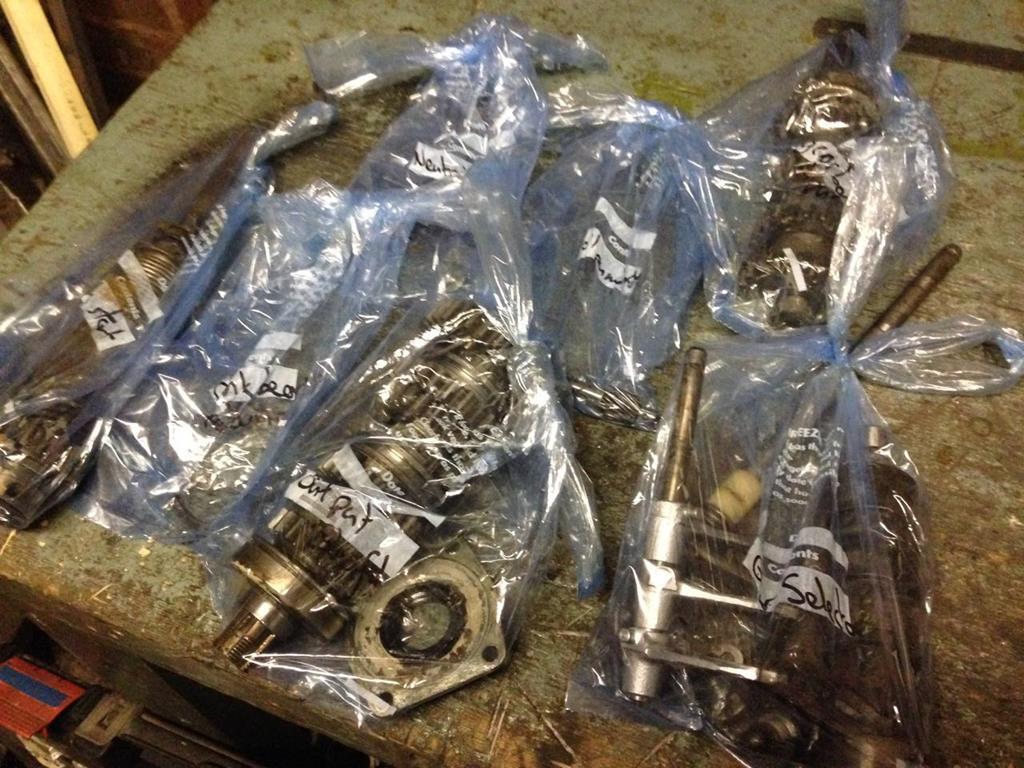 I also mad a start on cleaning up the cases. The inside of the gearbox was disgusting. It had about 1cm of mud in the bottom of it, very odd. Much better once I'd wiped that out, still a long way to go yet... 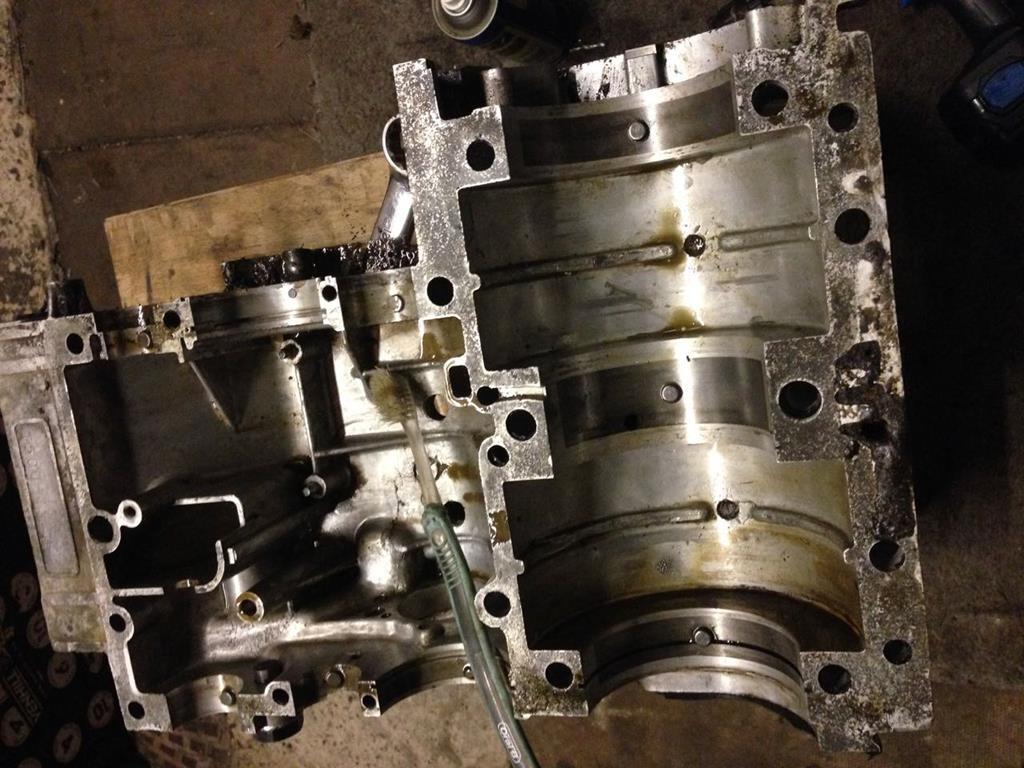 The gearbox contents all look to have survived, and should all go back together no problem. Sadly, one of the bearing locating pins in the case, for the output shaft bearing, has been damaged. Someone has clearly bolted the cases together, without lining the pin in the case up with the hole in the bearing, and has crushed the pin. It would then have leaked oil, and they've applied lots of silicone to the area to stop the leak.... Arrgghh. I hate dealing with other peoples bodges. |
| |
Last Edit: Feb 27, 2018 22:53:08 GMT by goldnrust
|
|
|
|
|
|
|
Thanks for the input joostvdw  I've no idea how long the bike has stood, it's freshly imported from America, and I have no idea of it's history at all. I didn't realise that standing for a while was likely to cause seal failures. I did think that 40 year old seals would probably have gone hard by now, but also often with these things, it's fine till you disturb them! I've got some time to think and make a plan, it'll be a while till the engine goes back together. Suzuki are now re-manufacturing some parts for the T500, including crank seals, so I'd probably go with genuine Suzuki ones. I've been using the 2nd edition of Bells book (first printed in 1999) for my pipe design reference. It's clearly light years ahead of the period correct style of pipe designs that I've found specs for online, or that are available off the shelf for the T500. I didn't realise things had moved much much further forward in 2 stroke road bike engines since then really? Hadn't realized there was a new(er) 2 stroke book by Bell! I don't think that there was an awful lot of progress after that as well, just don't use the formulas from the 70s then;) If Suzuki actually has been making new seals recently then by all means get those, but if they are NOS then I wouldn't bother. When a 2 stroke is not used for an extended period of time the seals will dry out, shrink and get stuck on the crank, then when it's awoken from it's slumber the seals tear off the crank and wont seal properly anymore. My GT did this and a mates T500 did it, so I would strongly recommend getting them replaced. Luckily for you it's only a twin and there are loads of two stroke shops over there, so it shouldn't be a (costly) problem  |
| |
|
|
goldnrust
West Midlands
Minimalist
Posts: 1,887
|
|
Mar 19, 2016 20:44:43 GMT
|
So... well over due for an update on the T500. It's turning out to be a much slower burning project than any of my cars have been. Party as I'm busier with work than ever (a good thing I suppose!) so I just don't have the days off to work on it, secondly due to the fact that I'm not got any major pressure to finish it (again probably a good thing really!) and finally due to my 166 being very needy of my attention (damn thing, can't live with it, can't live without it!). Anyway... So starting where we left off, after many hours with a tooth brush, I finished the basic clean up of the cases. 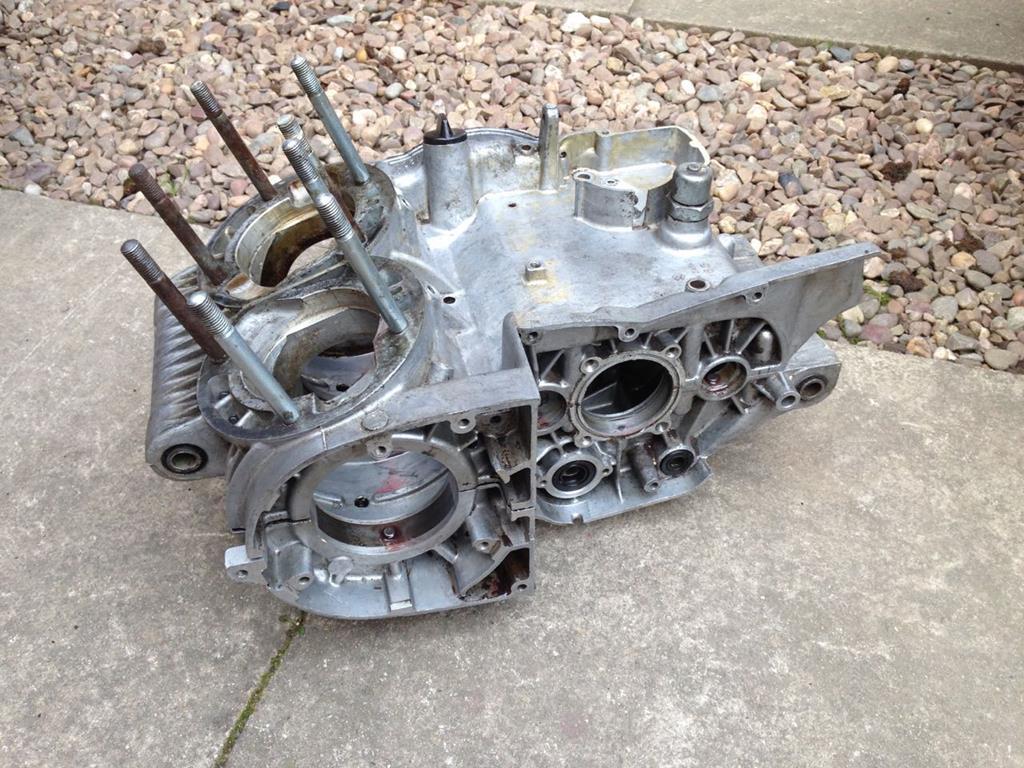 Which mean the only thing left that needed an initial cleanup was the frame. Below the engine it was upto 1/2" think in a hardened combination of oil and american soil. 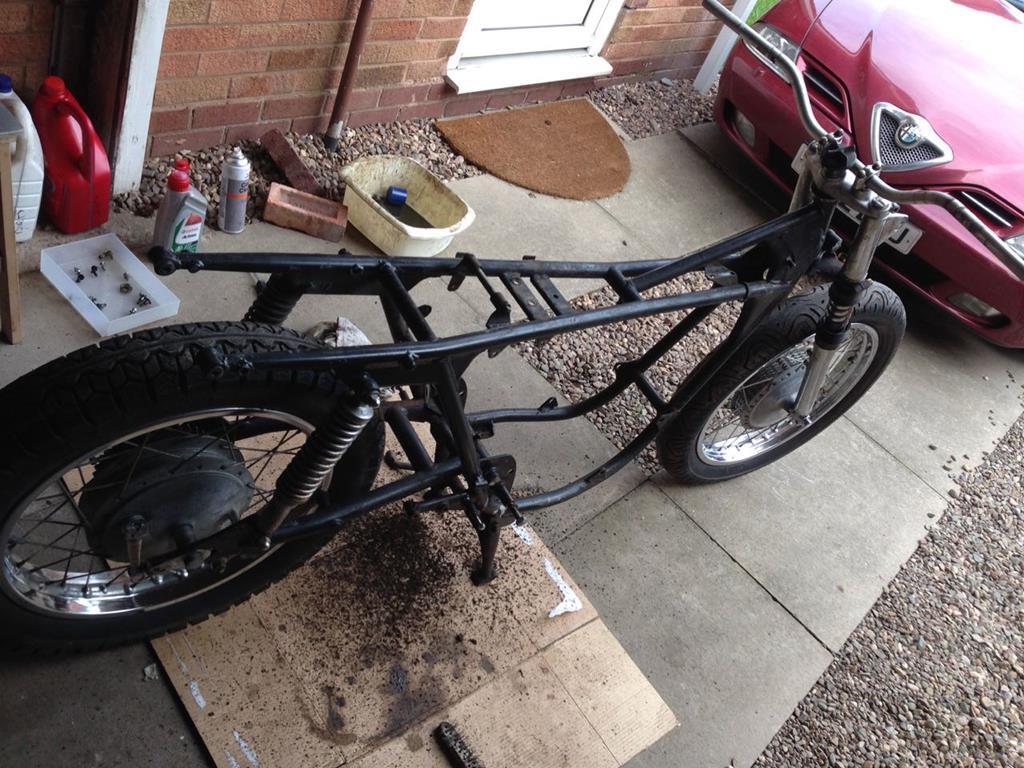 Much wire brushing and a bit of a wipe down petrol later, and we were getting somewhere. It'll need a proper clean up before paint but for now the main thing is I can start on the bits of fab work without getting constantly covered in curse word. Speaking of which, the next step really is to work through my major modifications, do the basic fabrication work, while I don't have to worry about getting curse word in my freshly rebuilt engine, or damaging my freshly painted tank  I haven't attacked this with any kind of plan or order, I'm just making a start as and when I have ideas. So the first thing I did was look at the speedo mount, the bike originally had the speedo and rev counter side by side, but I've always liked the look of just having the one central dial. I want to keep using the original speedo, as I like it's dial design and it's nice to keep the original millage on the bike. Loosing the stock rev counter wont be a problem anyway, they are apparently slow to respond and inaccurate and I don't need one to ride, the engine soon tells you whether it wants a different gear or not! To make a central speedo mount, I took the standard bracket and reworked it. I know it's only a flat plate, but I'm quite pleased with how the shape has come out, it certainly retains the same design feel as the original bracket and that's what I was aiming for. 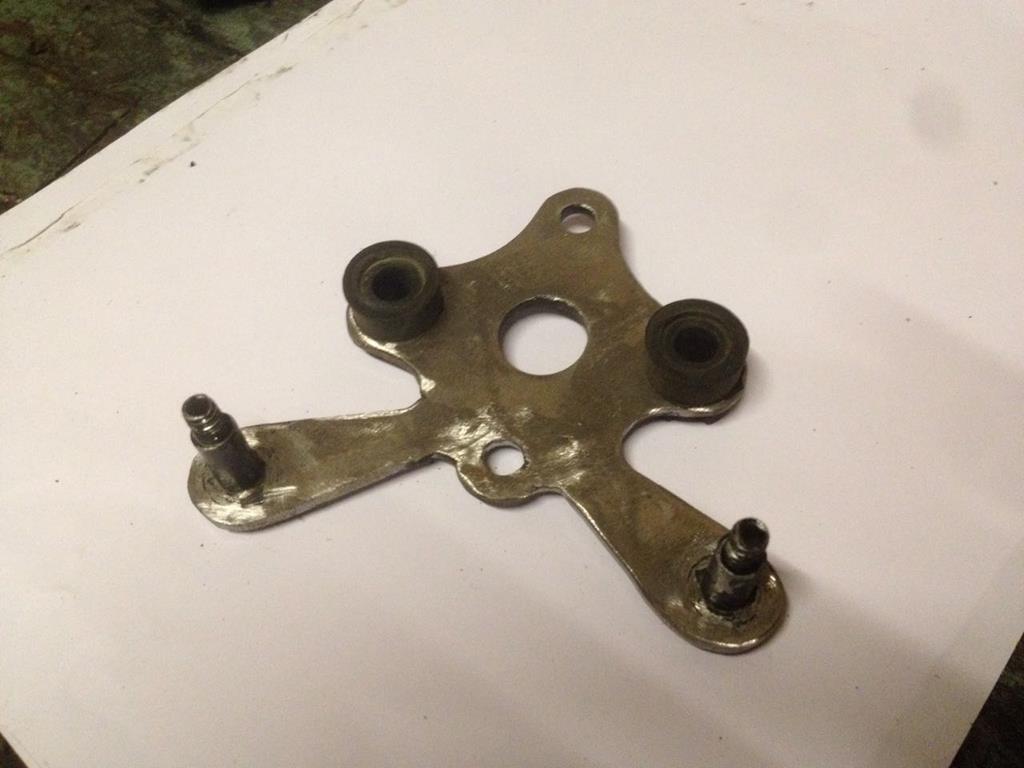 The speedo sits nicely, and looks great with the Renthal bars I'll be using on this bike. 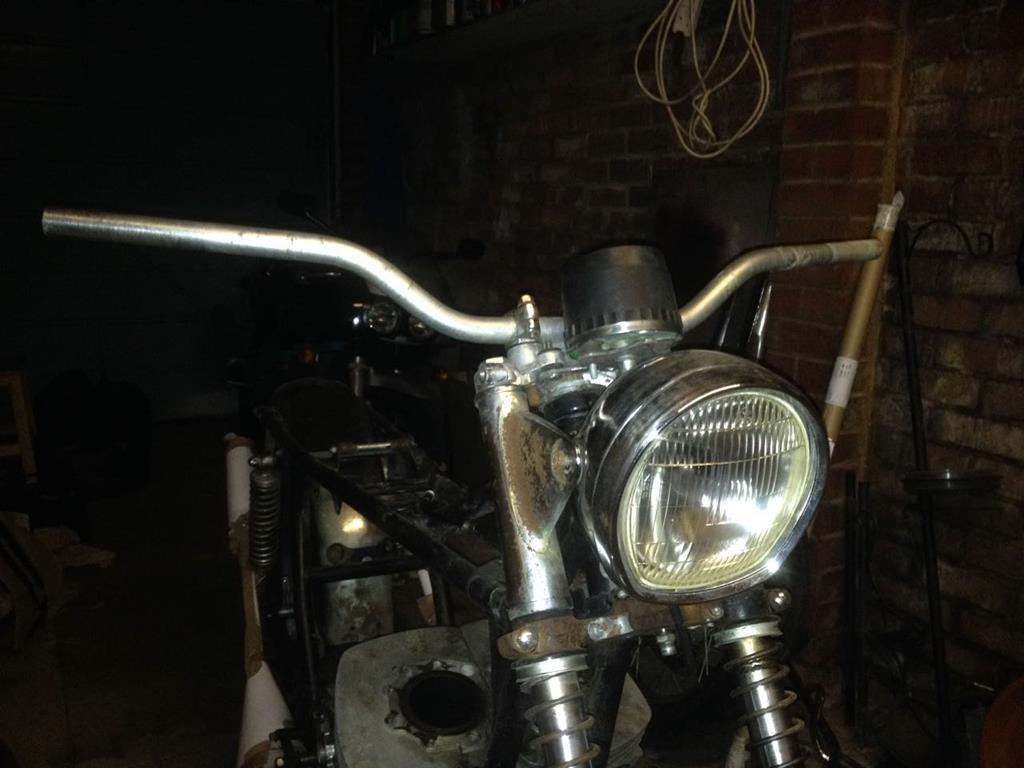 The mechanical speedo cable, is proving to be slightly awkward, currently running though the back of the headlight bowl via two grommets where wiring should be running. Might end up having to mod the back of the headlight bowl a little to make it work. One of the big visual parts of this bikes look will be the pipes, so taking my calculations one step further, I made up some cardboard and sellotape exhausts to work out where they'll run. I knew this was going to be slightly challenging. Normally one of the first things people do with customised bikes is to lop all the brackets, except for engine mounts, off the frame so it looks clean and they can remake any brackets to suit their needs. In this case, I don't want to make any changes to the frame, mainly because these T500s are getting rare and I wouldn't want to do anything too destructive that stops me from rebuilding it back to standard at sometime in the future should I change my attitude. The problem is that most racey looking pipes run below the frame, tucked up close under the engine. Without cutting of the centre stand bracket the pipes would have to run very low, not only does this cause a ground clearance issue but it just doesn't look right. 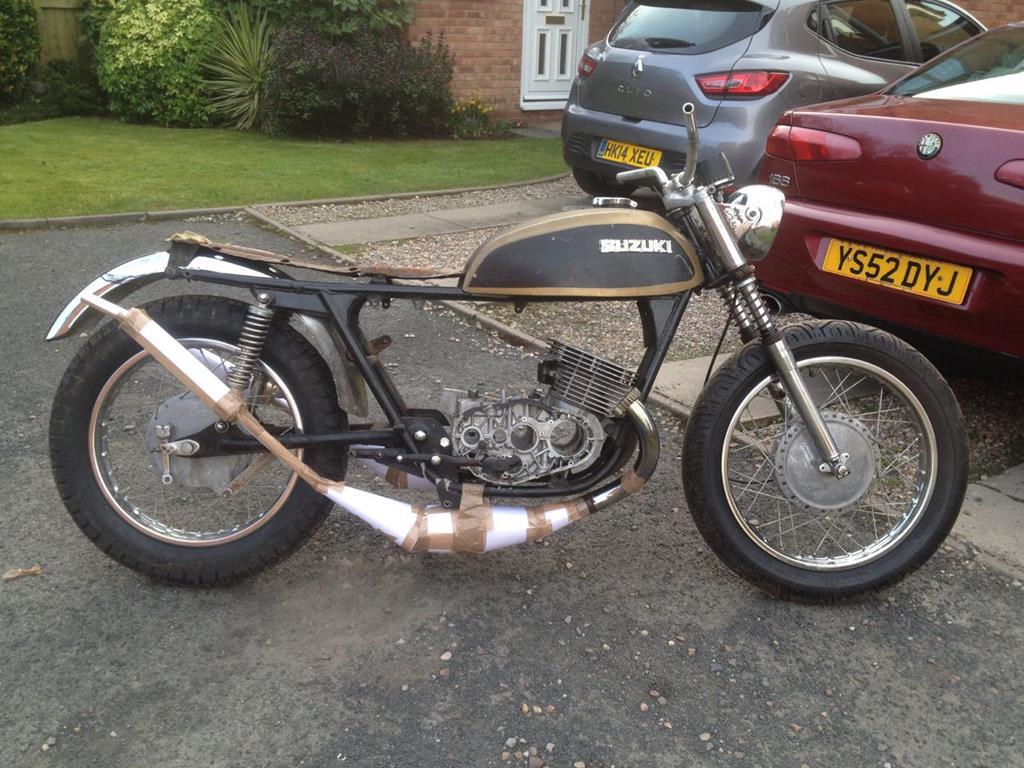 After trying a few things I tried just running them in the stock location, albeit still with the kicked up end can. 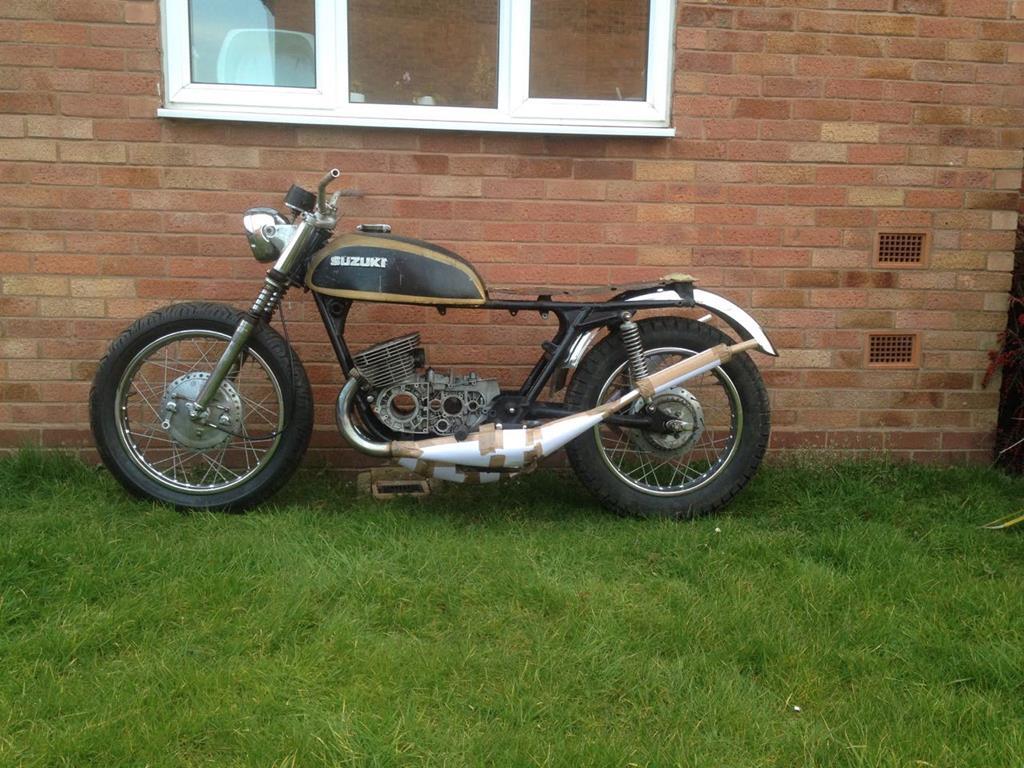 Which visually I think looks much better. I was still worried about ground clearance though, as the pipes are now widely spaced either side of the frame. It's fairly easy to test though, just slowly lean the bike over further and further till something touches the floor! In this case, seeing as I'm keeping the standard foot peg locations, these were in fact the first to touch down so the pipes will run here. You can also see that I've taken the old seat cover, along with its damp mouldy seat foam, off and binned it. The seat base is totally rotten, and will be remade from scratch. The new seat base wont be too different to the standard one, though it'll be slightly narrower, so the seat will follow the lines of the frame rather than hang over the sides of the frame. I'm also going to use a slightly firmer seat foam, so the seat itself can be shallower. For the moment I'd done some basic hacking up off the original seat base to get a feel for where I want to go with the new seat base design. Finally on the fabrication front I've started on my fork brace / front mudguard mount. I wanted this to end up quite strong, as the standard forks are known not to be the stiffest and a good fork brace does a lot of good. So I've got some 8mm tube, and spent a good while today bending into the right profile, and I intend to try and make some nice drilled cross braces, and will hopefully end up with something good and sturdy. 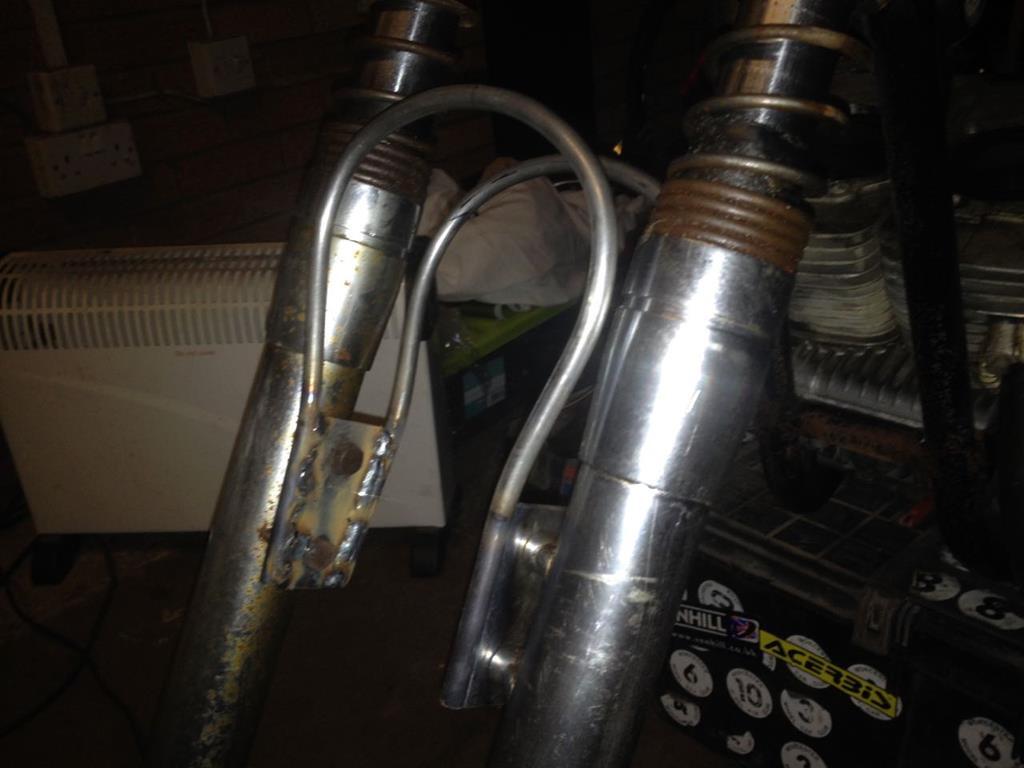 Long old way to go with this one yet. But it's nice to be able to just take it slow and make small steps each time I get in the garage. |
| |
Last Edit: Feb 27, 2018 23:00:14 GMT by goldnrust
|
|
|
|
goldnrust
West Midlands
Minimalist
Posts: 1,887
|
|
Apr 22, 2016 21:34:55 GMT
|
Ok time for a long overdue update  First up, as you can imagine the Honda is generally doing the Honda thing, and working just fine, which is nice. It means I've been able to get out and get my two wheeled fix, I even wash it once in a while! 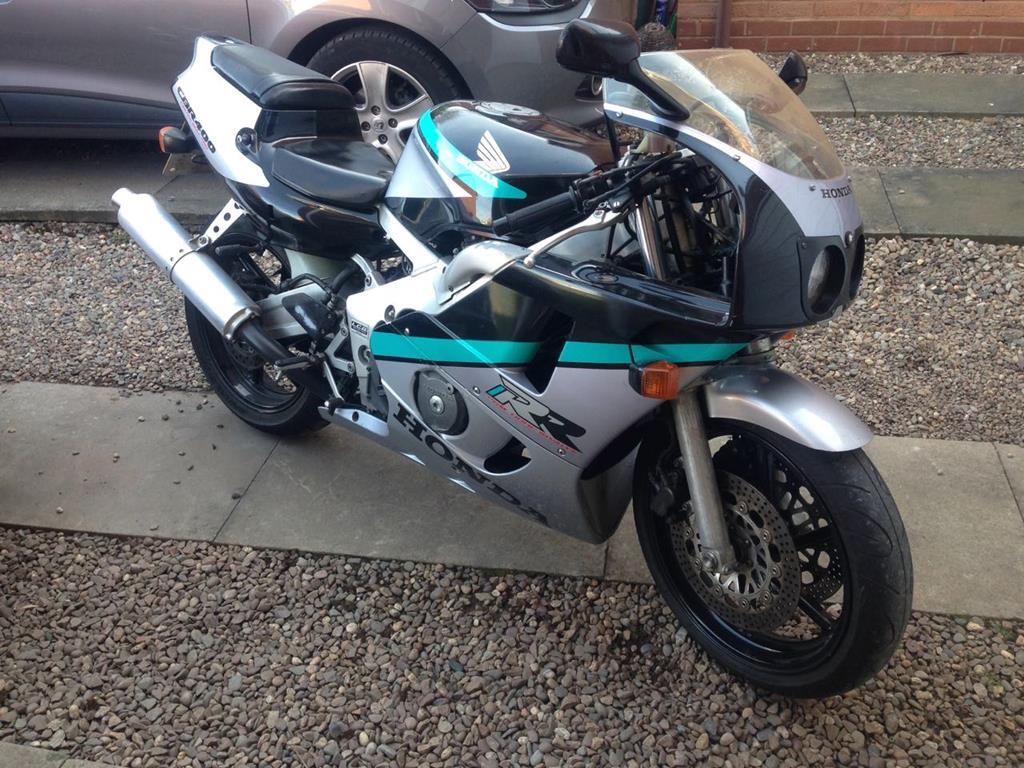 Progress on the T500 has been slow but steady. Starting where we left off, the next step in the front mud guard support was to brace the two tubes to actually create some strength, I was really pleased by how much more solid it started to feel. Hopefully it'll offer more resistance to twisting than the stock mudguard did, and will help keep the very old fashioned forks in control a little! Underneath this brace I welded on three studs that would the actual mudguard in place. For the mud guard I bought a generic 19" mudguard off ebay, and cut it down to a more suitable length for the style I'm going for. I did try to form a nice rolled/folded edge on the cut end as the original end had, but it didn't look that pretty so there's no pictures  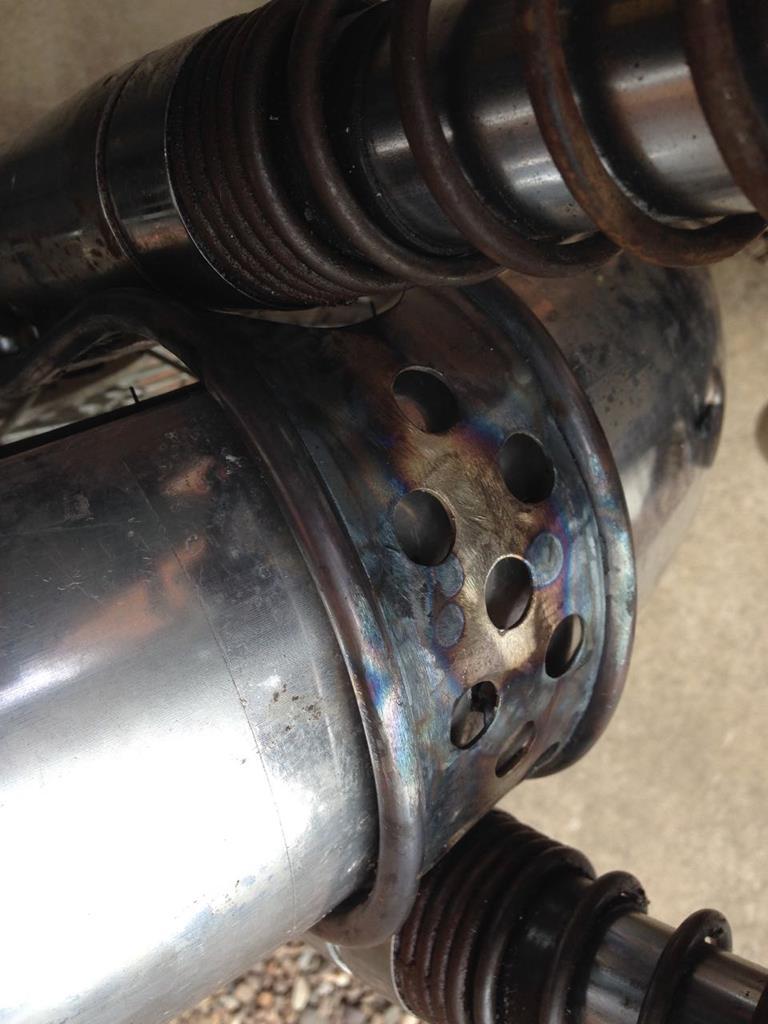 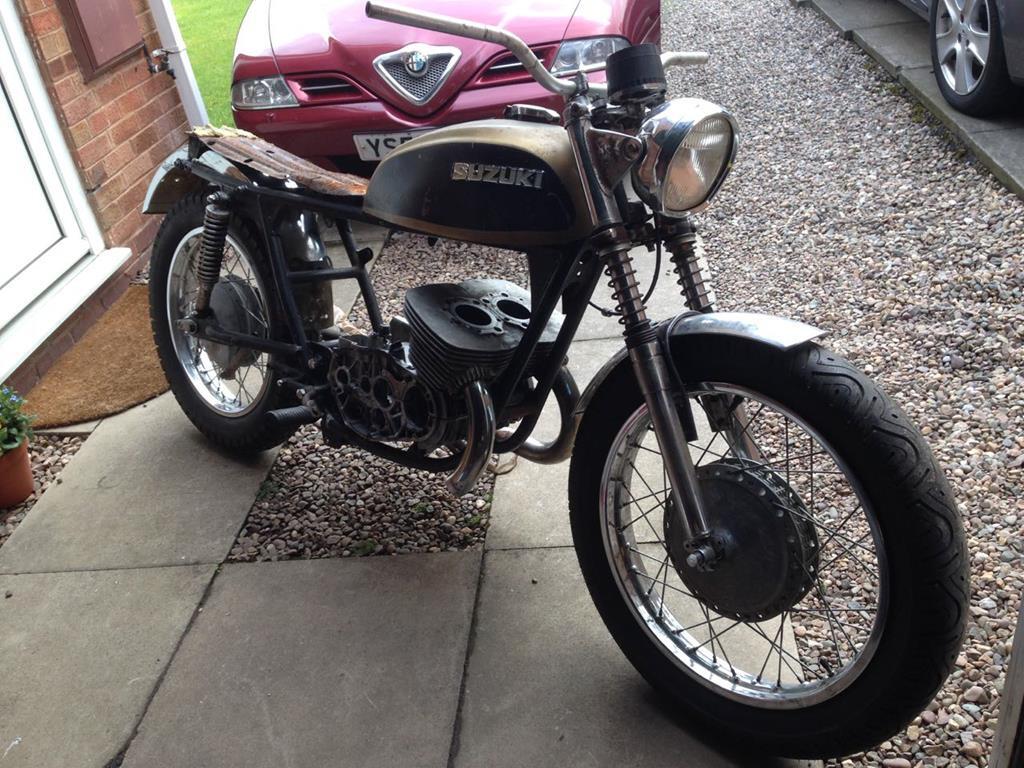 As you can see in that second picture, the next move was to work on the seat pan. Whilst ultimately I would have liked to make my own seat, it might have waited a while till the bike was on the road, but my hand was forced. The stock seat pan turned out to be very very rotten, and very much a health hazard! I want this bike to work well as a 2 seater for me and my wife, so a cafe racer style seat was out. My aim is to make something that had a bit of the flat tracker/brat look to the seat, but also with a nod to the standard seat, just a bit slimmer. So it started with a cardboard rough template. 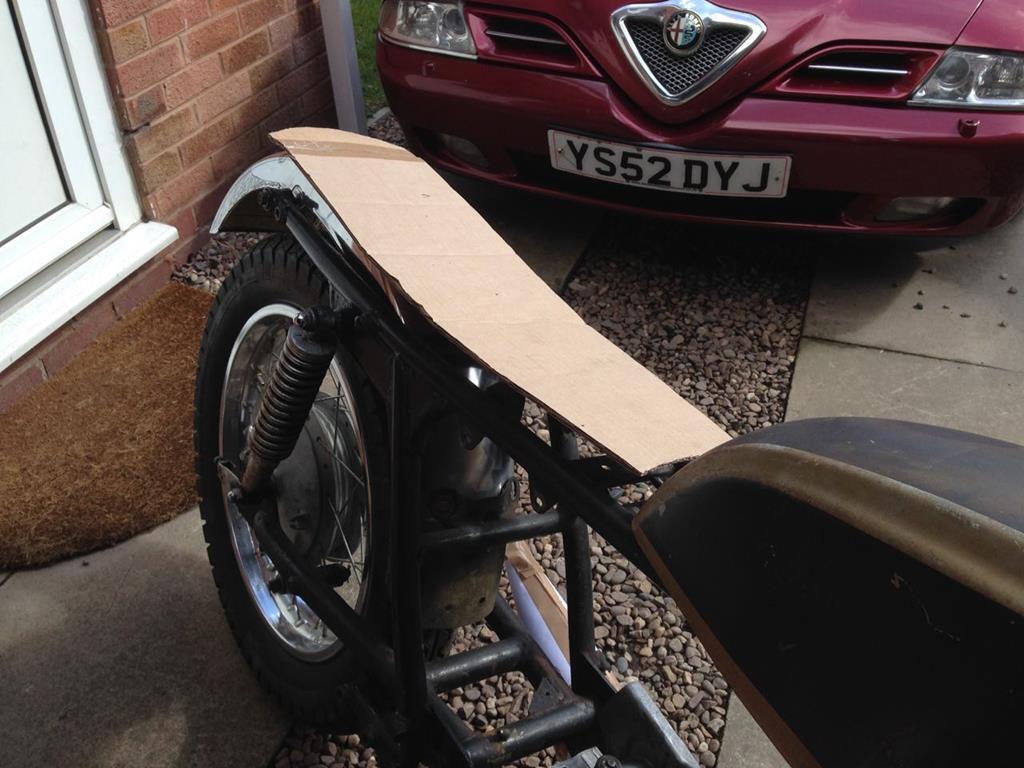 I then cut the rough shape out of steel and looked into how to mount it. As I'd like to keep this frame essentially standard, I figured the best route would be to rescue the mounts from the original seat pan. I want this seat to sit as low to the frame as I can, within the various constraints of mountings and the rear mudguard. So I modified the rear mounts and added a small curve to the rear of the pan brining the edges down. Here I've started to add a rough 20mm drop round the edge of the pan, which will allow me to have somewhere to attach the seat cover and will also create that lower tighter to the frame look. I appreciate it's compromised compared to lots of the custom builds out there, but I'm not out for pure form wit this bike, there will be some function too. 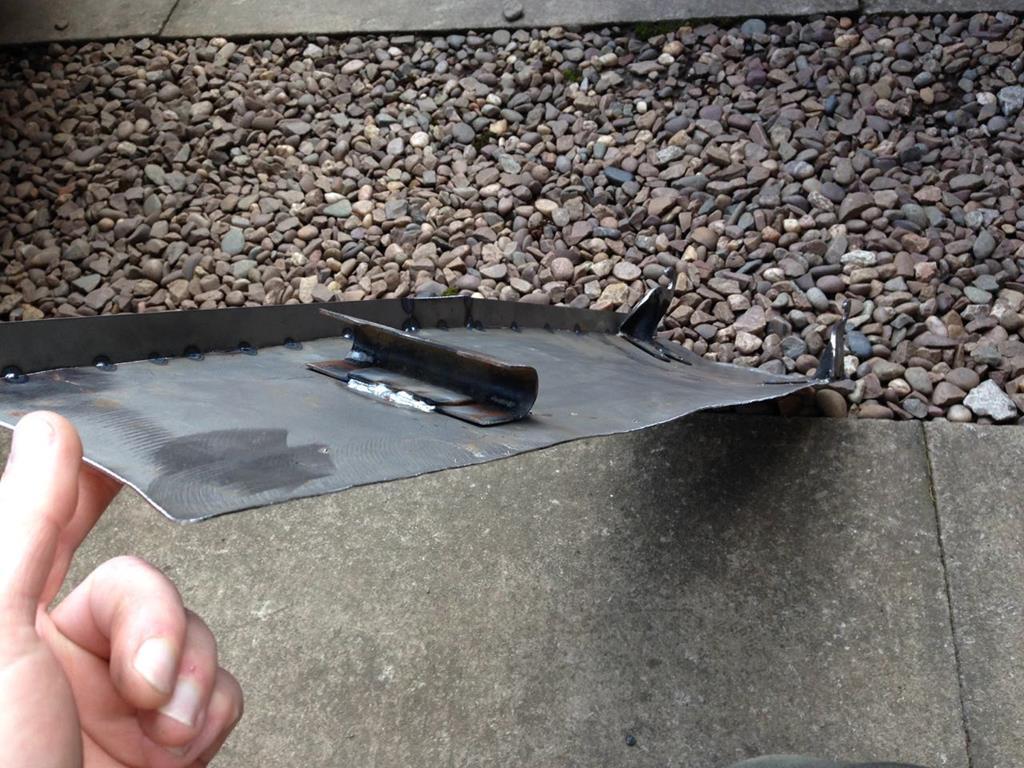 A couple more hours work later and we're starting to get somewhere. As you can see there's a few ripples to sort out yet in the lines, but over all I'm please with how it's sitting. 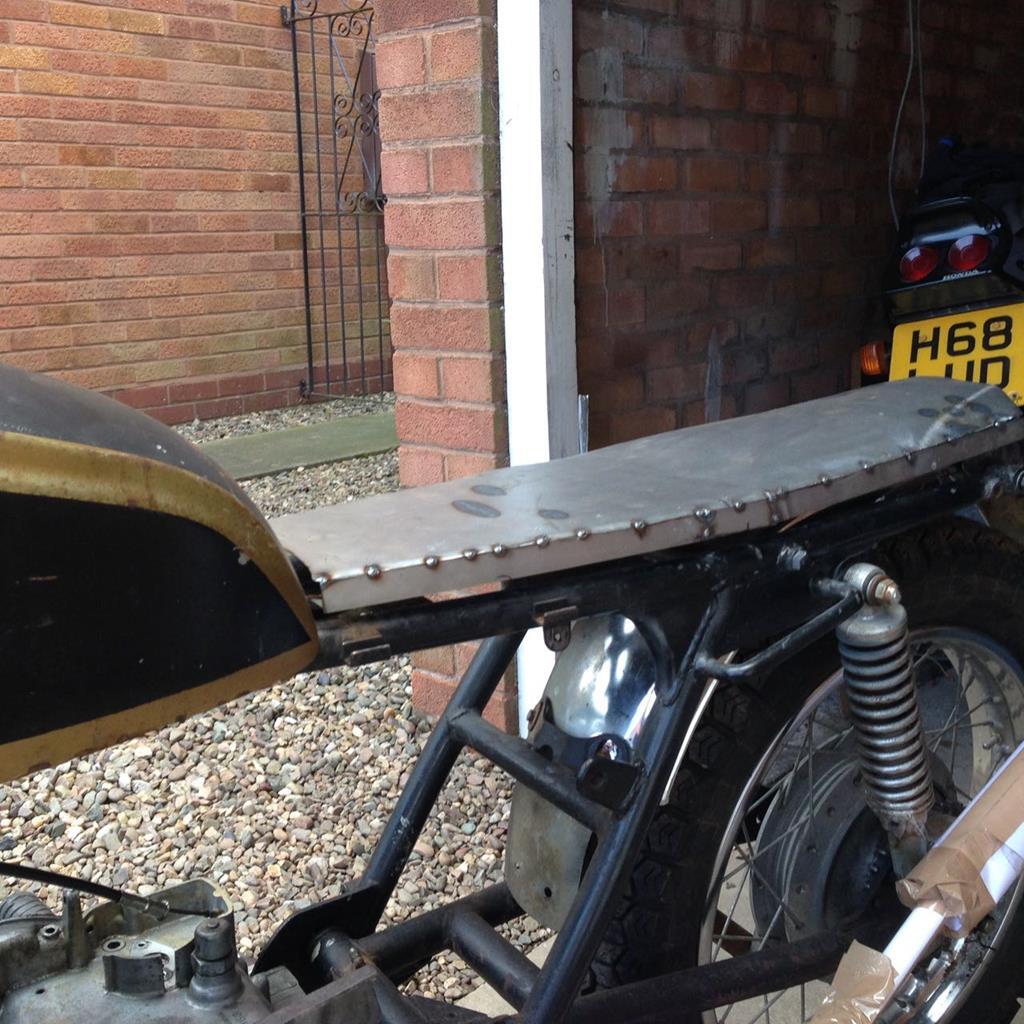 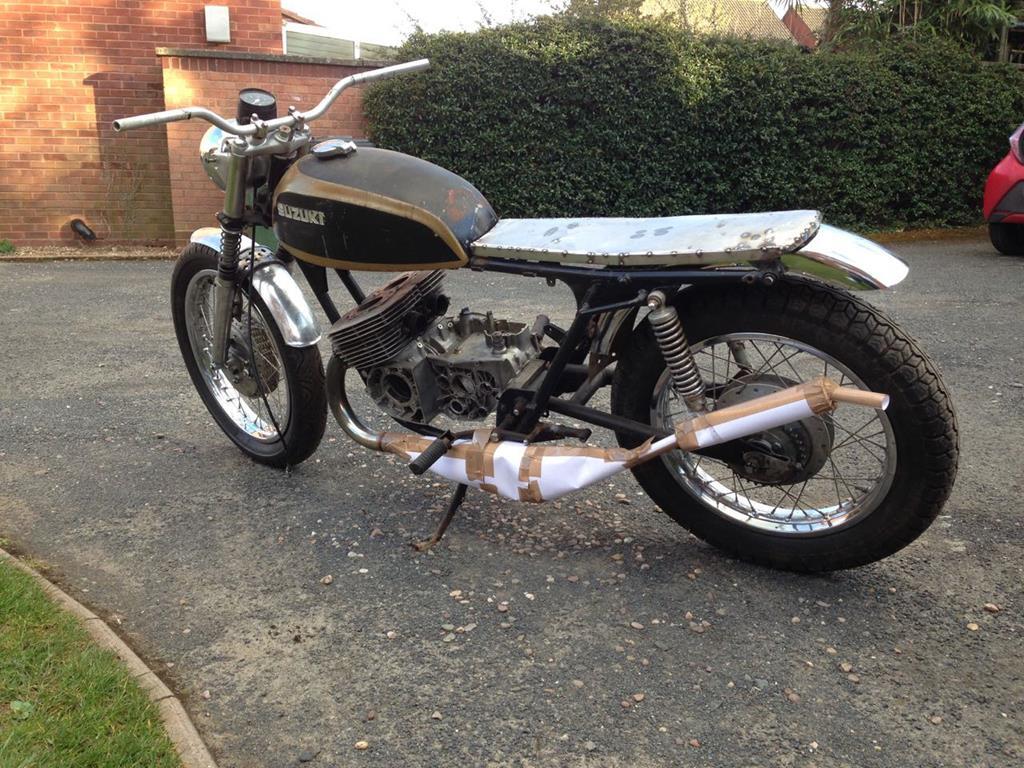 In the last photo you'll see I've also cut the rear mudguard down to a length that balances better with the front.  This left me with one major piece of fabrication still to figure out, that was the oil tank. While trying to work out what I was going to do I held up the off cut of mudguard, and had an idea! I used the mudguard as a form to bend some more steel round to give a basic hope to the oil tank, here is the first rough idea held roughly where it will sit in the frame. 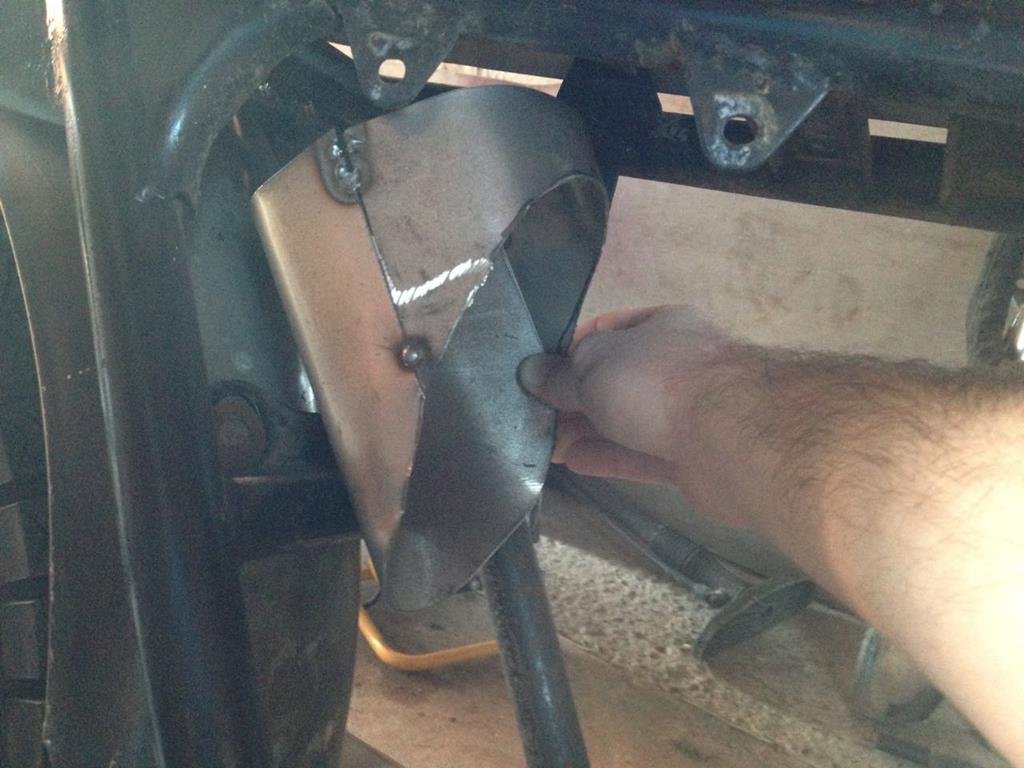 A couple of revisions later, and flipping to round to face the other way and I was getting somewhere with it. I chopped the filler and main pump feed out of the original side panel type oil tank and integrated them into my design. 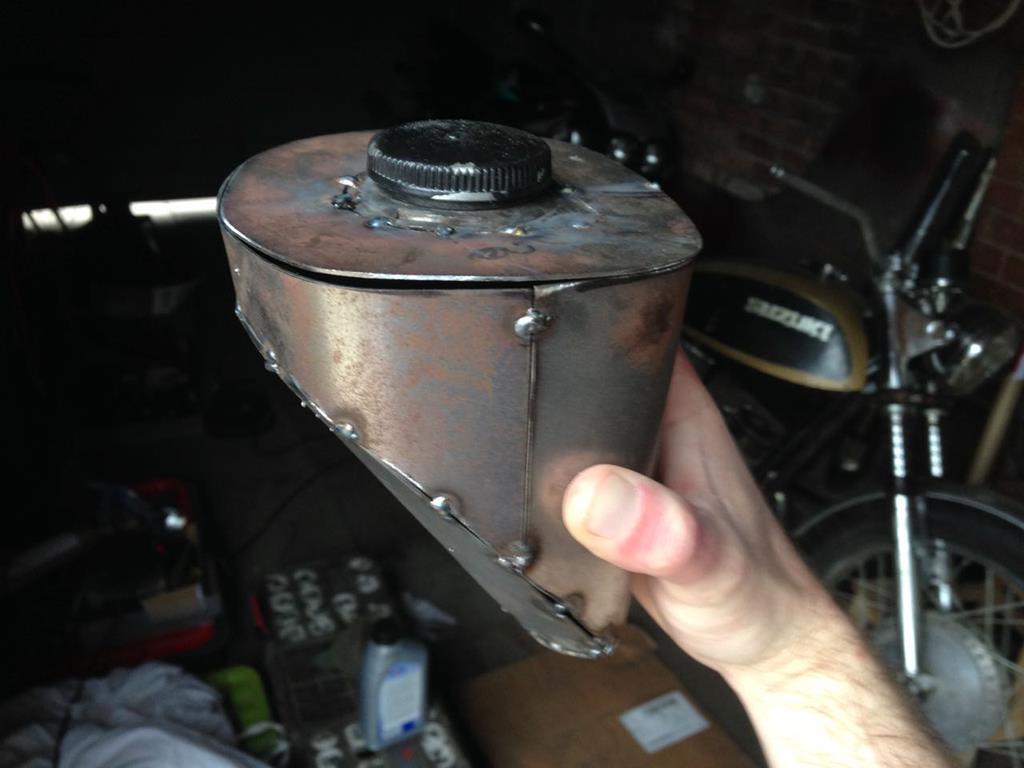 Finally with a couple of brackets, a breather take off and a couple of little pipes which when joined with a bit of clear hose will work as a nice simple level gauge. 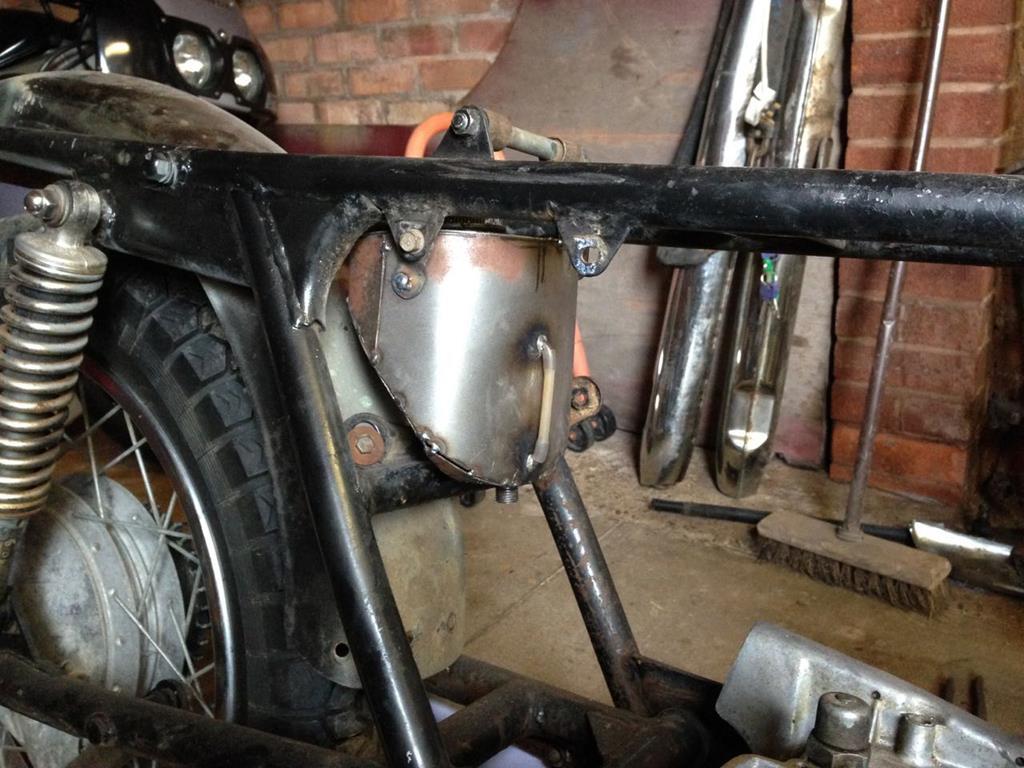 So with the majority of the modifications done, or at least fairly well planned out, I figured it was time to actually get stuck into some restoration. So I started stripping the rolling frame down, so I could prep it for paint. Removing the front wheel and starting to clean it up, I found something very worrying. This doesn't look too bad... 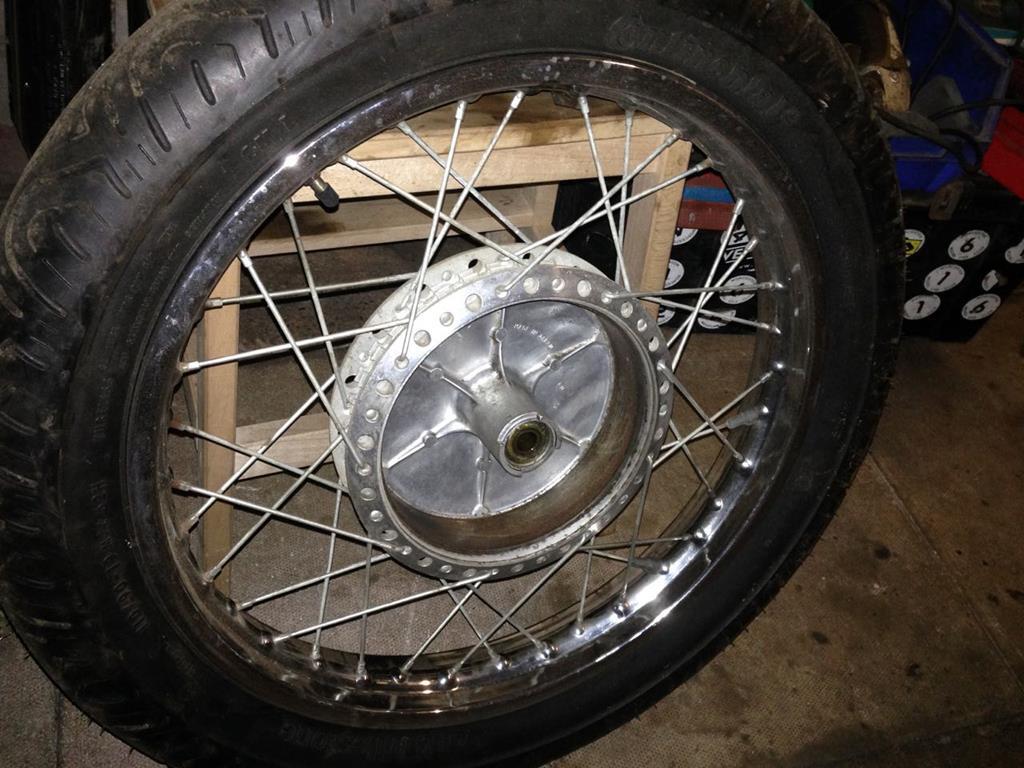 ... but look closer and there are many horrors. 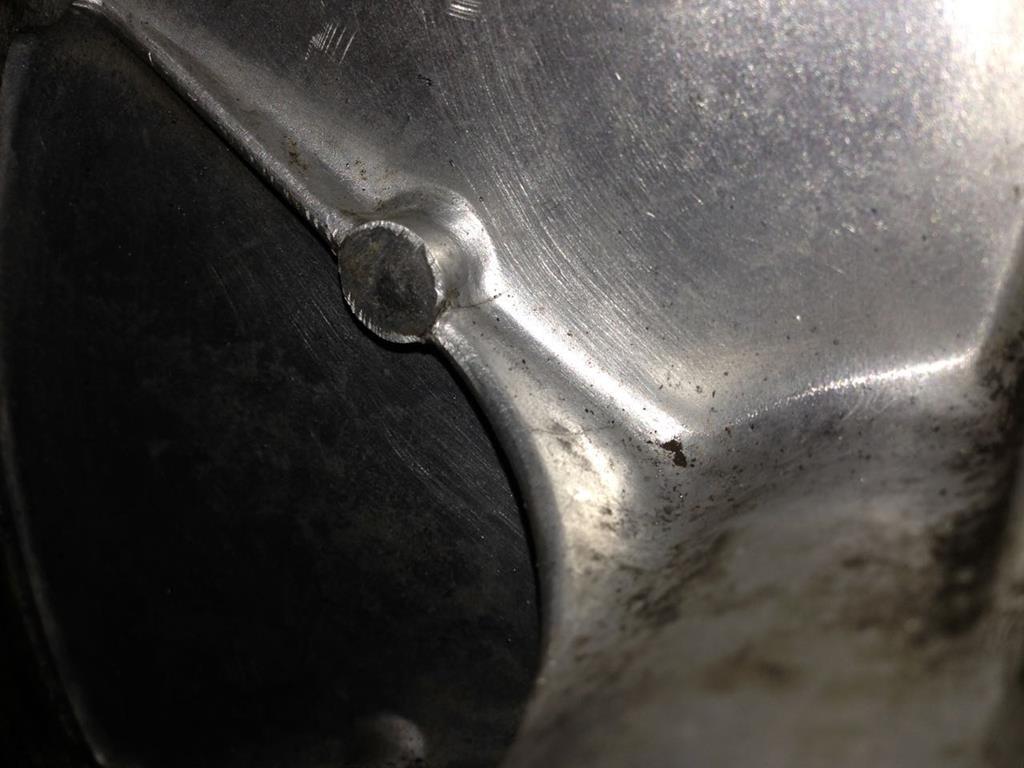 Yup, all 6 strengthening ribs inside the hub are cracked, some of them in multiple places. A bit of googling later and it appears that cracking T500 front hubs is a well known problem. Lots of sources suggested that they're all cracked and some people just look for a less cracked hub than their own and live with it. Now personally that's the sort of thing that would give me nightmares! It's going to be scary enough riding a 1970's motorbike, let alone one that I keep expecting the front wheel to collapse. Thing s ground to a halt for a bit while I felt a bit gloomy about the cost/hassle of sorting this unexpected challenge. It seems Suzuki kept the same headstock dimensions for many many years, and so with the right bearings you can bolt up pretty much any front end you like. GT500 and GT550 front ends are popular, as they look period correct but gain better damping and a disc brake. Sadly the parts are very expensive nowadays and also hard to find. I saw this mock up with an old slingshot GSXR front end and thought it looked super cool... 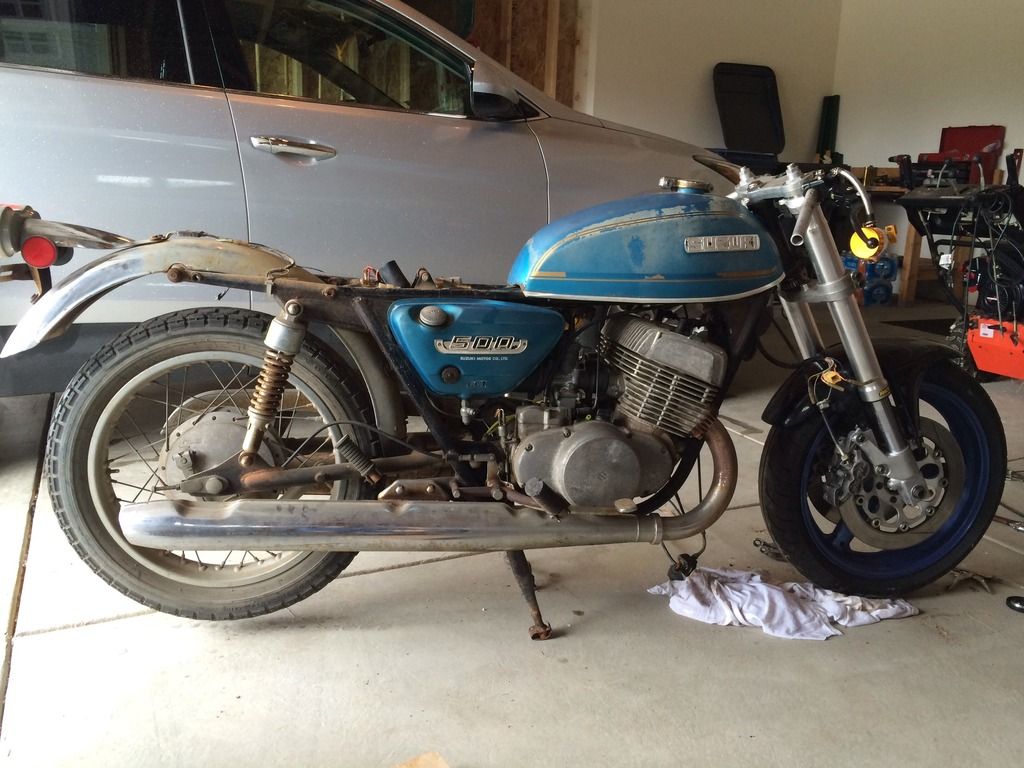 ... but more reading showed that the owner abandoned the project due to the problems of either getting a narrow enough front wheel working wit the GSXR front end, or a wide enough rear wheel into the T500 to not upset the handling too far. In the end I decided that if I wanted to go down that route then finding an old GSXR and dropping the T500 engine into it would be the best move. And then I looked over at my CBR and had bad thoughts for 10 mins before reminding myself that I was trying to build a cool retro/classic bike not some crazy 2 stroke hybrid. So back to the drawing board, and eventually I've decided the best move is to source a Honda CB450/CB77/CB72 front wheel and brake. Here's a random pic I grabbed off the net to see what they look like.  It's a 200mm twin leading shoe drum, very similar to the T500. Marginally less powerful, marginally heavier and much stronger. It should be pretty much bolt in, I just need to add a mount for the torque reaction bar to my forks. The only thing that really differs from the T500 is that the Honda wheel is an 18" rim, whereas the T500 is a 19" rim. Reading up on it, lots of T500 owners lace 18" rims to their bikes to improve the turn in anyway, so it could work in my favour. So with that sorted in my mind, I broke out the grinder ad spent a hateful nice couple of hours wire wheeling all the old paint off the frame and swing arm ready to paint it up. 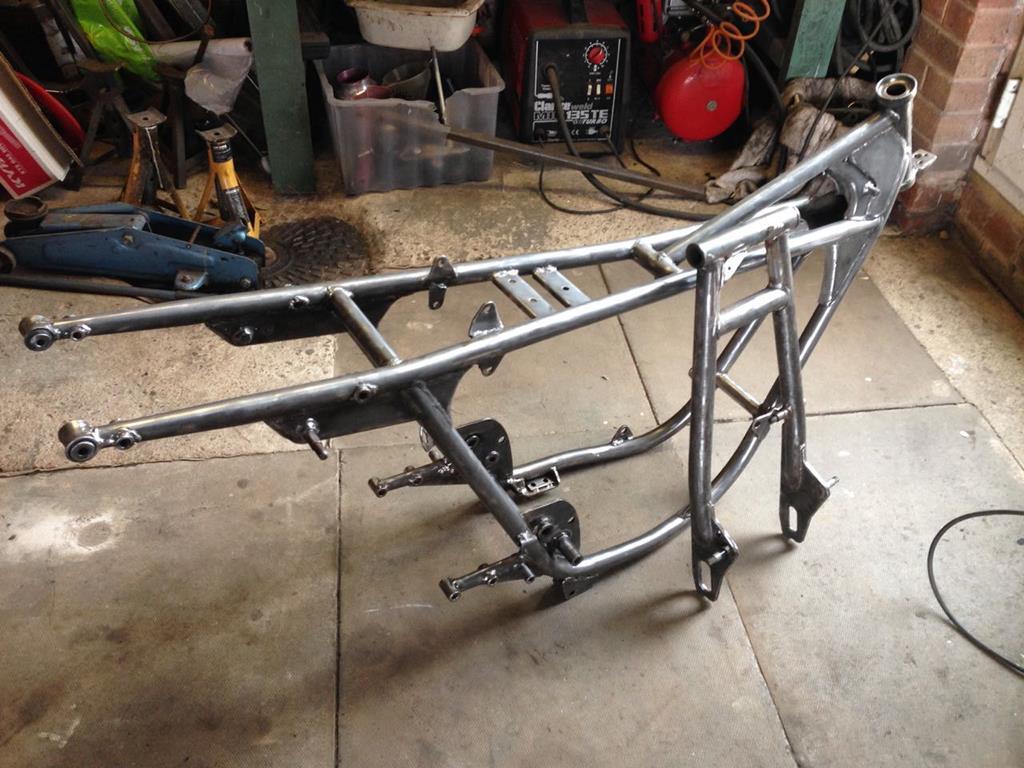 I'm going to treat it with some rust killer stuff, then get it primed up. I need to decide on what finish to go for. Essentially it will be satin/gloss black. I just can't decide whether to go for that old fashioned feel with a brushed on finish, or to go for a spray paint. Far from the end of the world, I'll make a decision before I'm done priming it I'm sure! Seeing as the 166 is poking her nose into a couple of those pictures, I ought to mention her. Now with 4 fresh tyres she's got a fresh MOT as of this week, I'm continuing to enjoy the Italian luxury life, it's such a fantastic engine, and such a relaxing place to be. That said I am missing my smaller more nimble cars recently, and with potential house purchasing on the cards in the next few months, I suspect the 166 will have to make way for something smaller and more frugal soon. Maybe another mx5, or some form of hot hatch, seeing as I've never owned one. Obviously can't advertise the 166 here as it's too new but can't stop anyone PMing me about it  haha. |
| |
Last Edit: Feb 27, 2018 23:13:35 GMT by goldnrust
|
|
goldnrust
West Midlands
Minimalist
Posts: 1,887
|
|
Feb 27, 2018 23:48:00 GMT
|
So.... nearly 2 years since I updated this, much has happened! First up to tie up a loose end from the last post, I didn't sell the 166 immediately, I realised I liked it too much to sell and intended to keep it more long term, and then in December 2016 it started showing signs of head gasket failure. It also decided to not like shifting into 4th gear properly. So I decided it cut my losses and sell it for spare/reapirs. Took me a long time to find a car I liked as much as that 166, I had a couple of things, but it wasn't till I found my current Jag XJ6 about a month ago that I really found something that lived up to the 166 experience. By July 2016 I had got the Suzuki frame painted up and was starting to clean up parts one by one and start re-assembling. 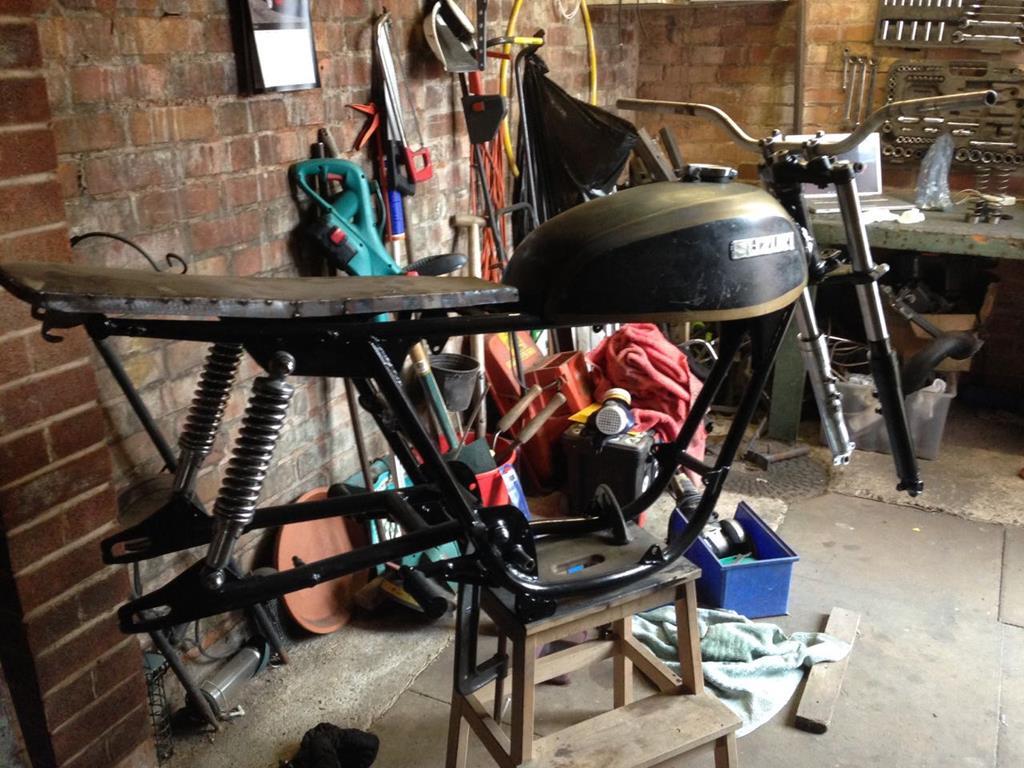 There was lots of painstaking painting and polishing of the smaller components. 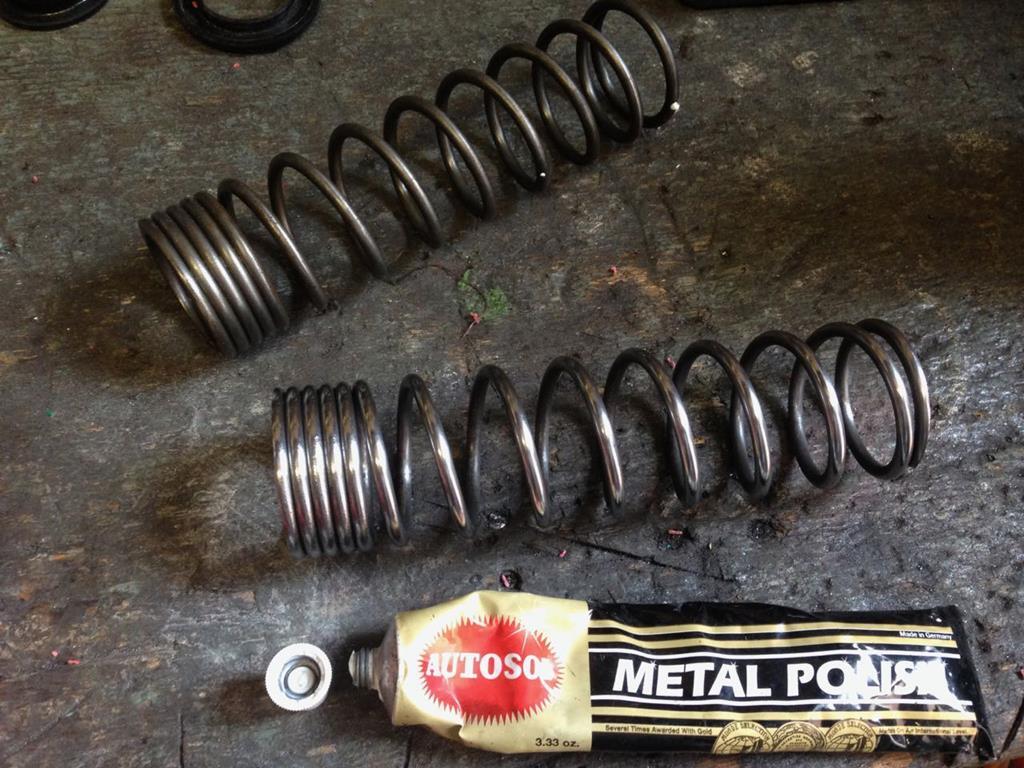 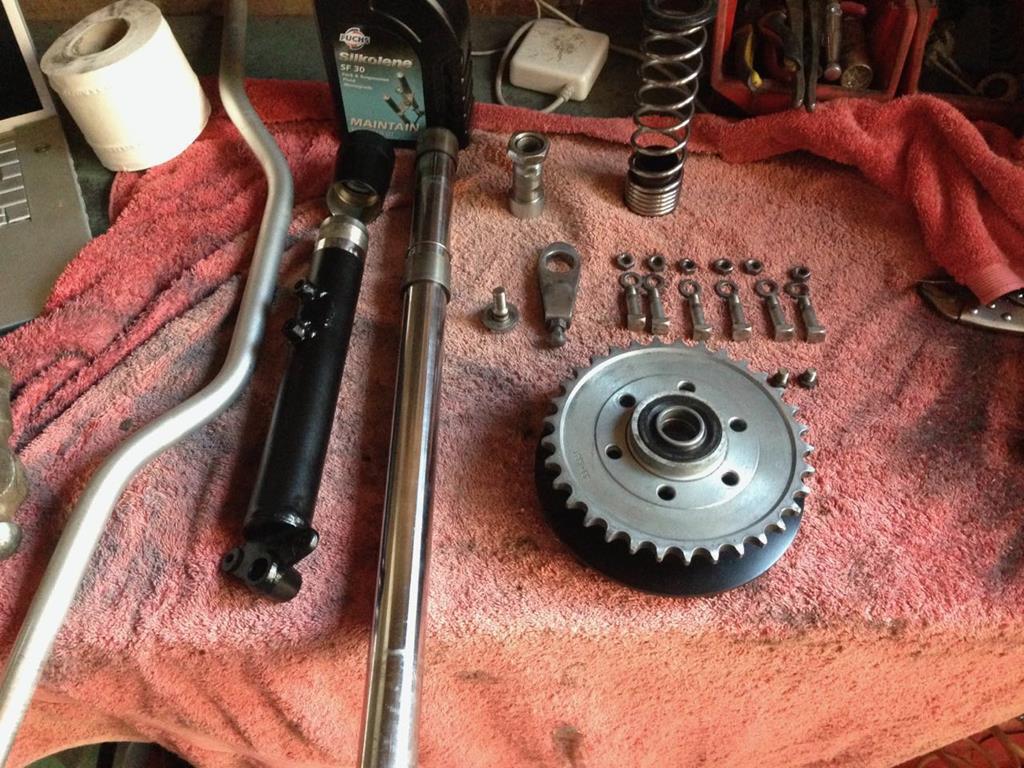 I decided to just clean up the original rear shocks, with the intention that at some stage in the not too distant future I'd replace them with something a little more modern/functional. The front forks got a good clean up with new seals and, on recommendation from one of the forums, heavier weight shock oil. They still feel pretty damn soft! I purchased a Honda CB77 front wheel, as I mentioned I planned to in the last post. What I hadn't counted on was that the front rim would only be 1.65" wide. I really wanted a 1.85" wide rim to match the T500's original, and to match my choice of tyres. So I purchased a new rim and laced that up to the CB77 hub. With a lick fo paint the wheels just needed some tyres now. 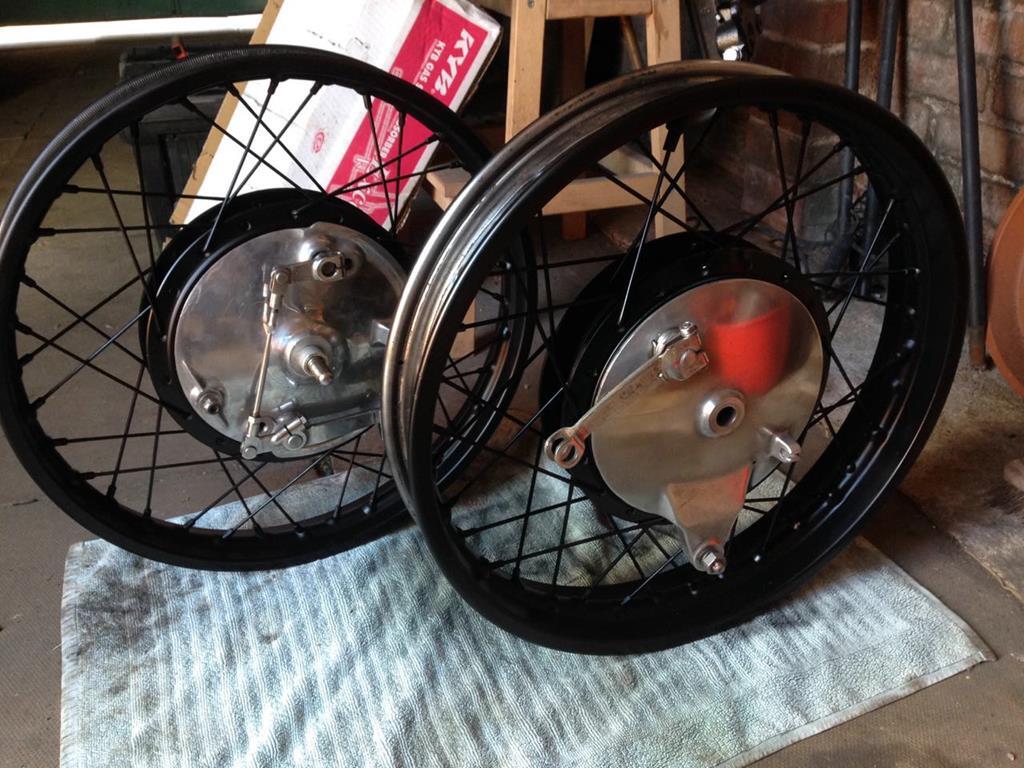 As the summer wore on, the next thing on my list was to turn my attention back to the seat. I bought a couple of different types of foam, and worked out a shape I was happy with. 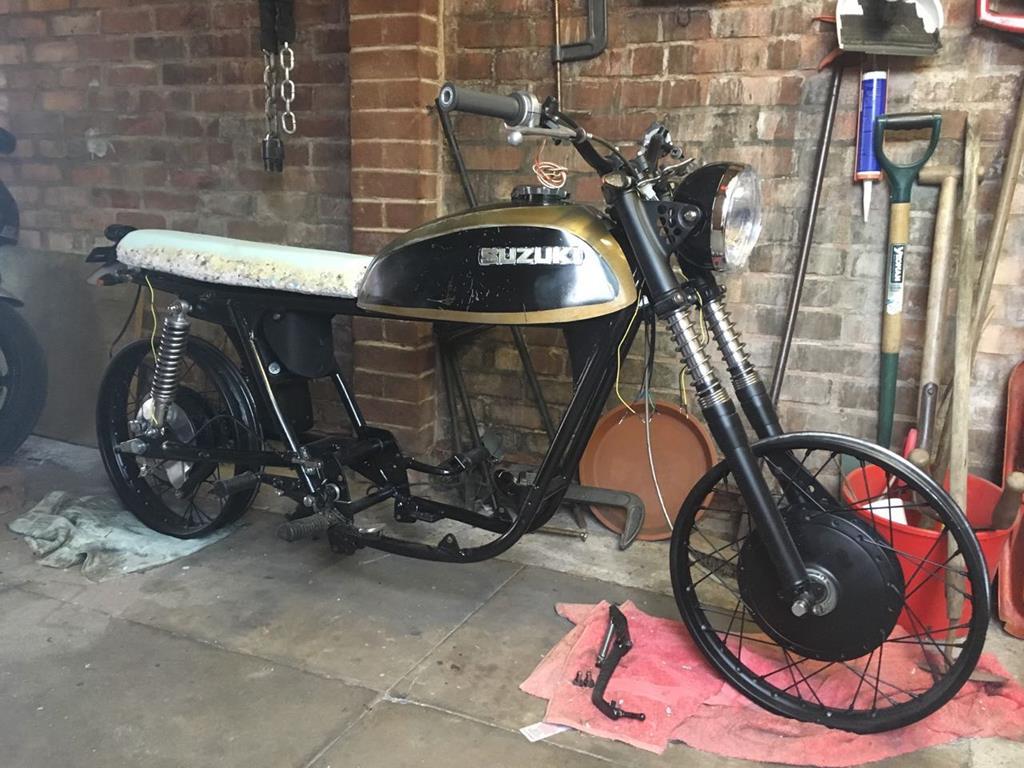 Rolling the bike outside, and draping an old rag from the garage over the seat foam shape, I was pleased with how the silhouette was starting to look. 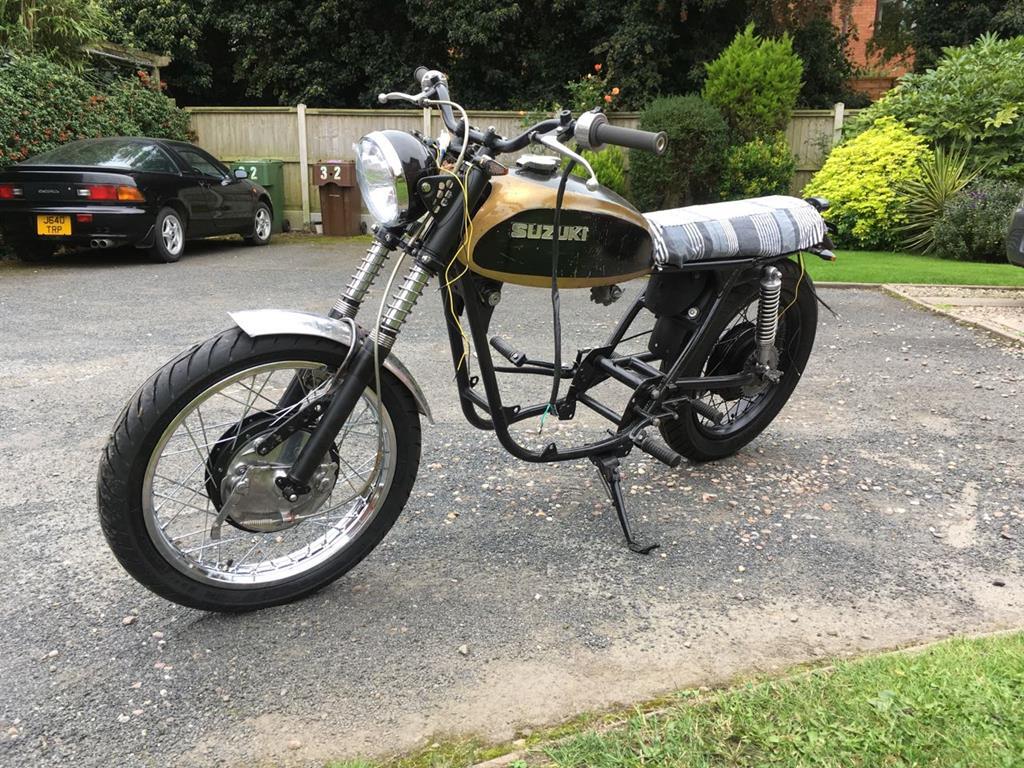 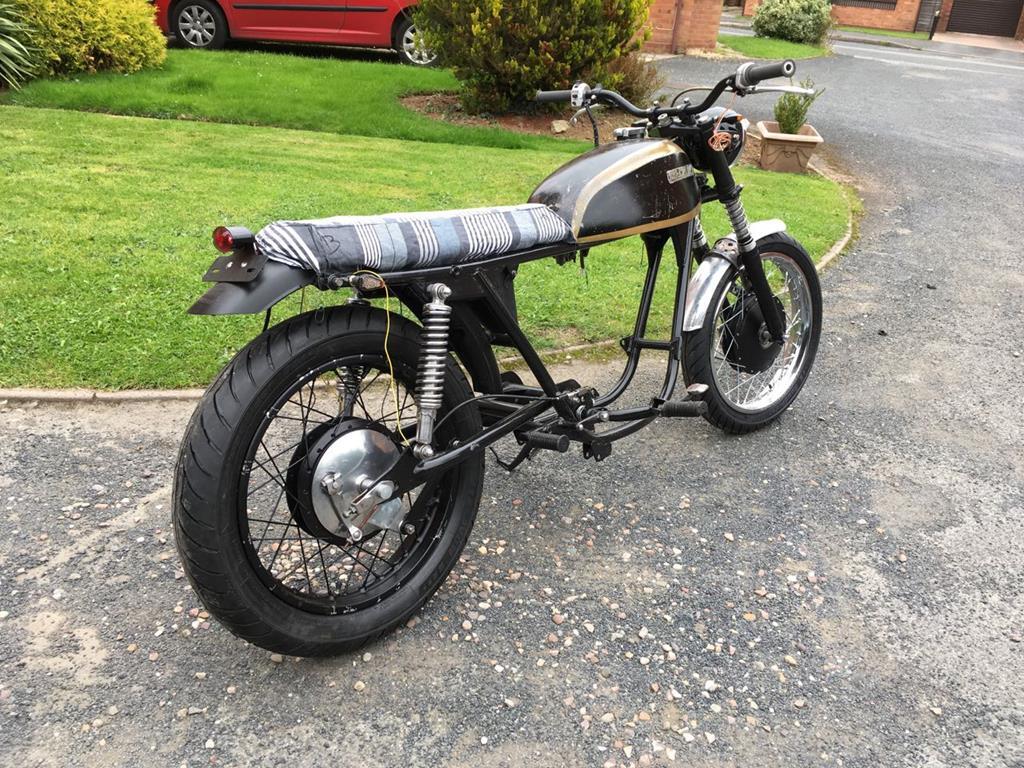 A proper seat cover was needed. Thankfully we live in the 21st century, and have many online resources to hand, so after many hours of youtube videos on upholstery (and a few bits of advice from my wife and mum!) I had a stab at making up a seat cover. It's not perfect, I'd approach things a little differently if I were to make another, but I'm pretty happy with it. 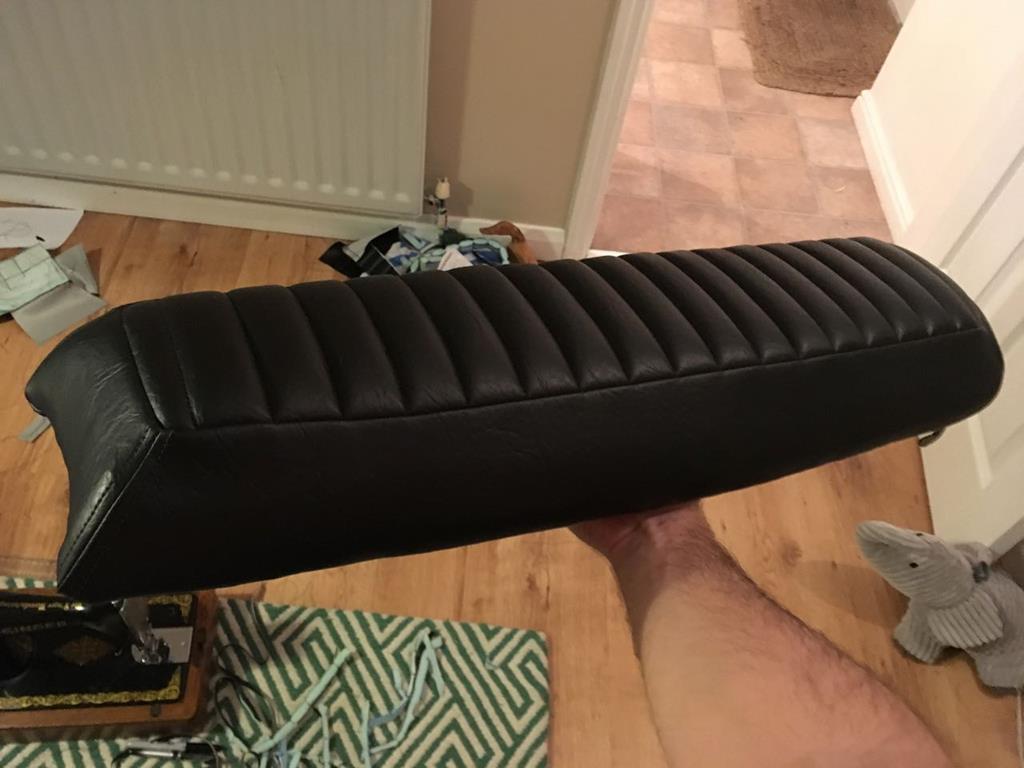 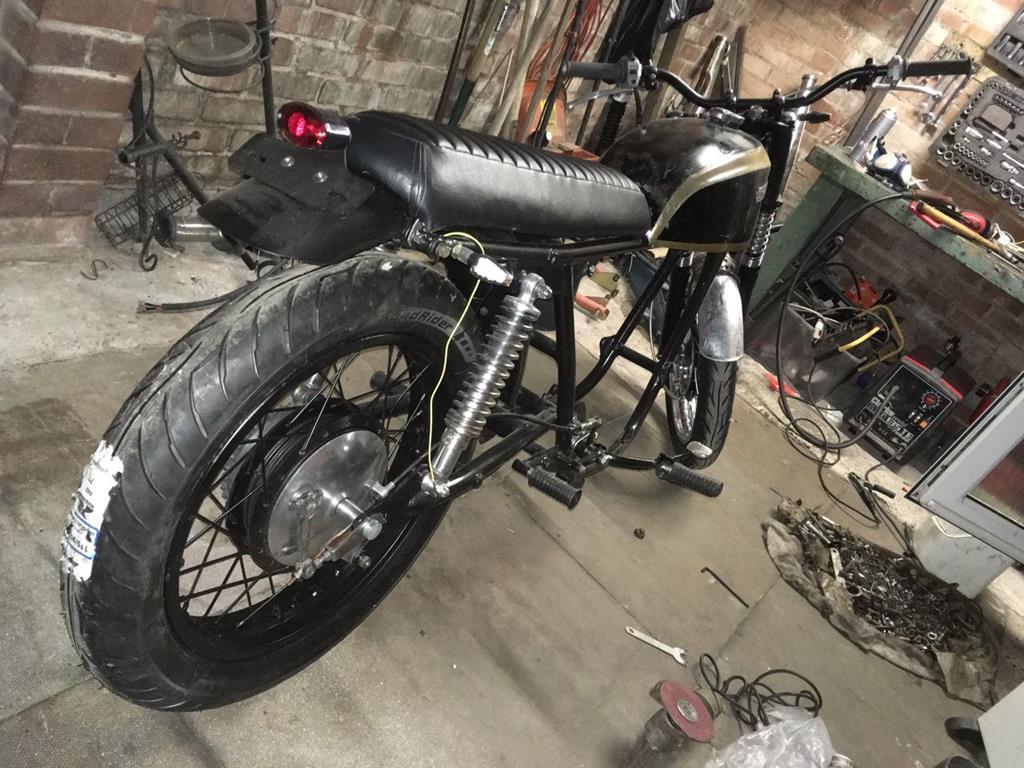 That brings us up to November 2016. Still a long way to go... |
| |
|
|
|
|
|
|
|
|
Excellent work, great thinking.
|
| |
Bicycle x1
Alfa Giulietta (now wife's)
Alfa 156
BMW 630i
Honda rc36
|
|
goldnrust
West Midlands
Minimalist
Posts: 1,887
|
|
Feb 28, 2018 19:59:42 GMT
|
Cheers  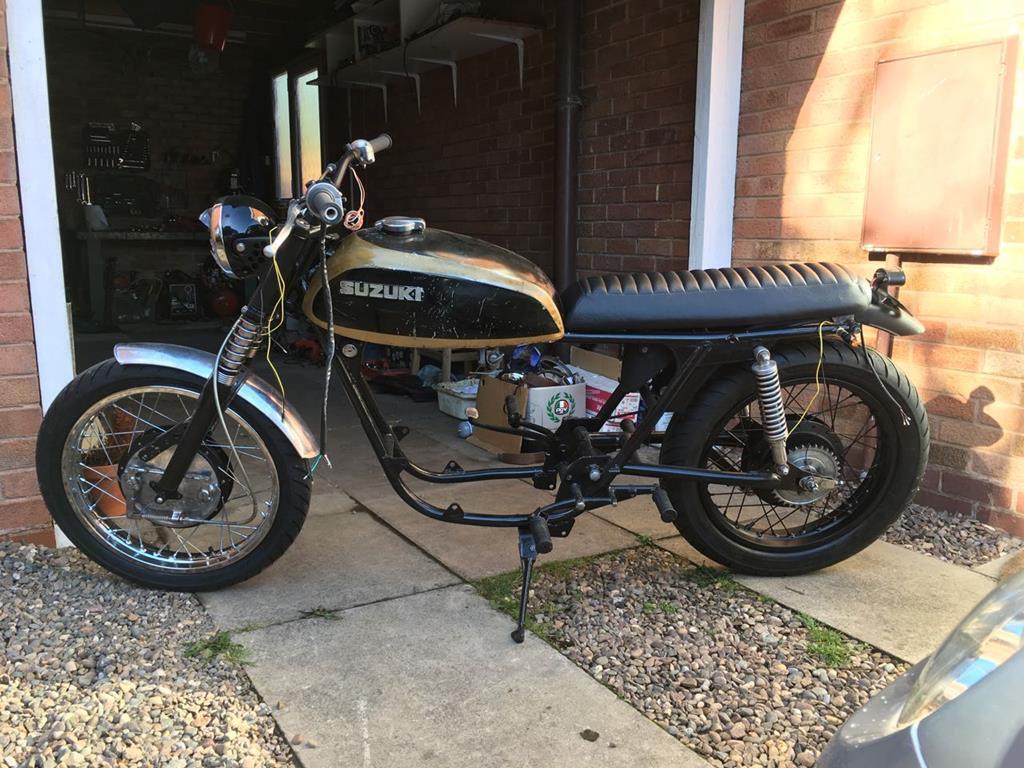 So picking up where I left off last night... I was working towards having the rolling chassis sorted. Working on bikes, instead of cars, is nice sometimes. I feel like because there's less components it's easier for a mere mortal, such as my self, to get the details right. An example of which was the head light brackets, which I carefully measured out and drilled. The next big part of the build, was to make a start on the exhausts. 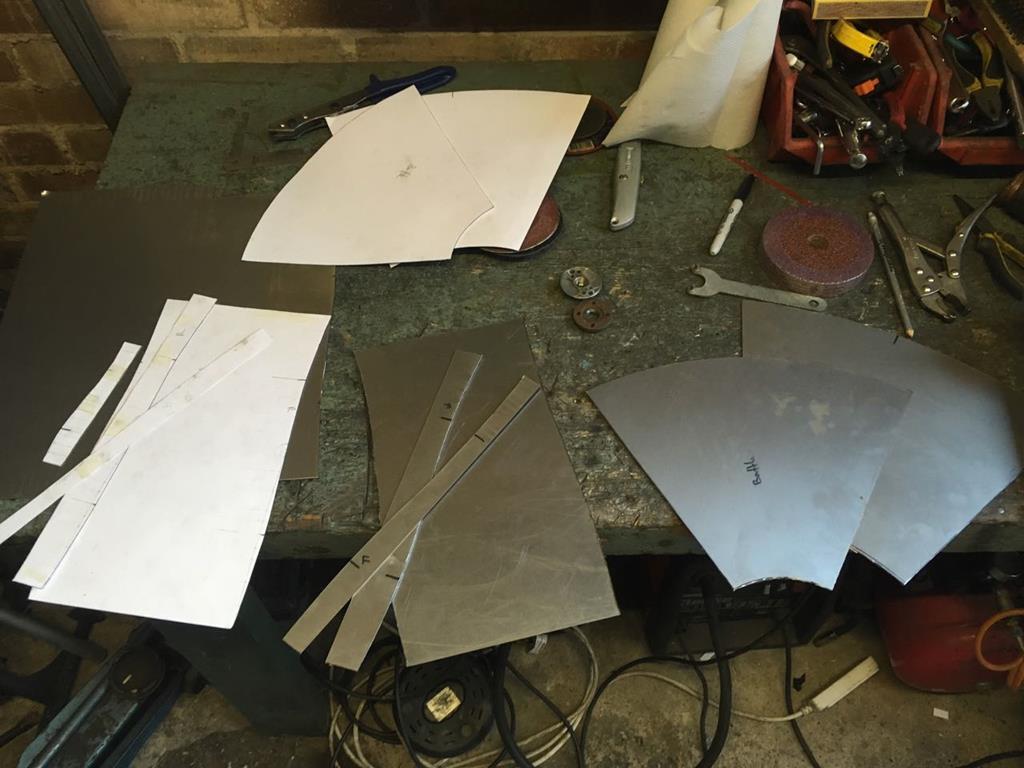 It was easier than I expected to get the flat plate rounded out, using a variety of tube off cuts and round objects I could find in the shed, like this paint can, to help. 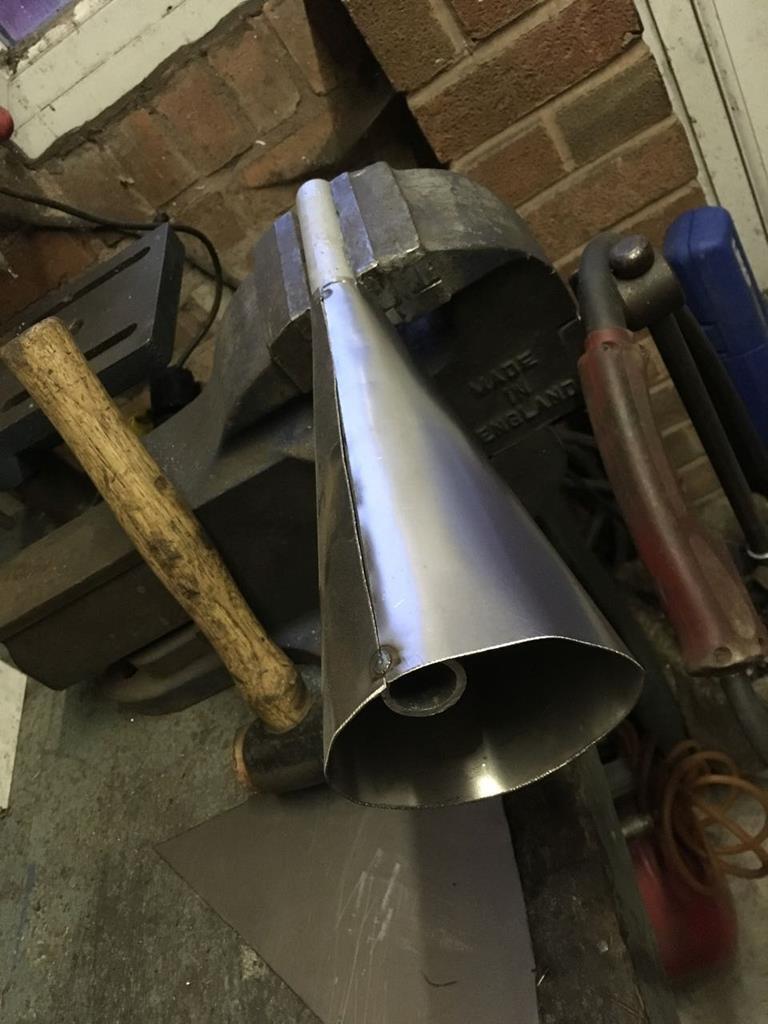 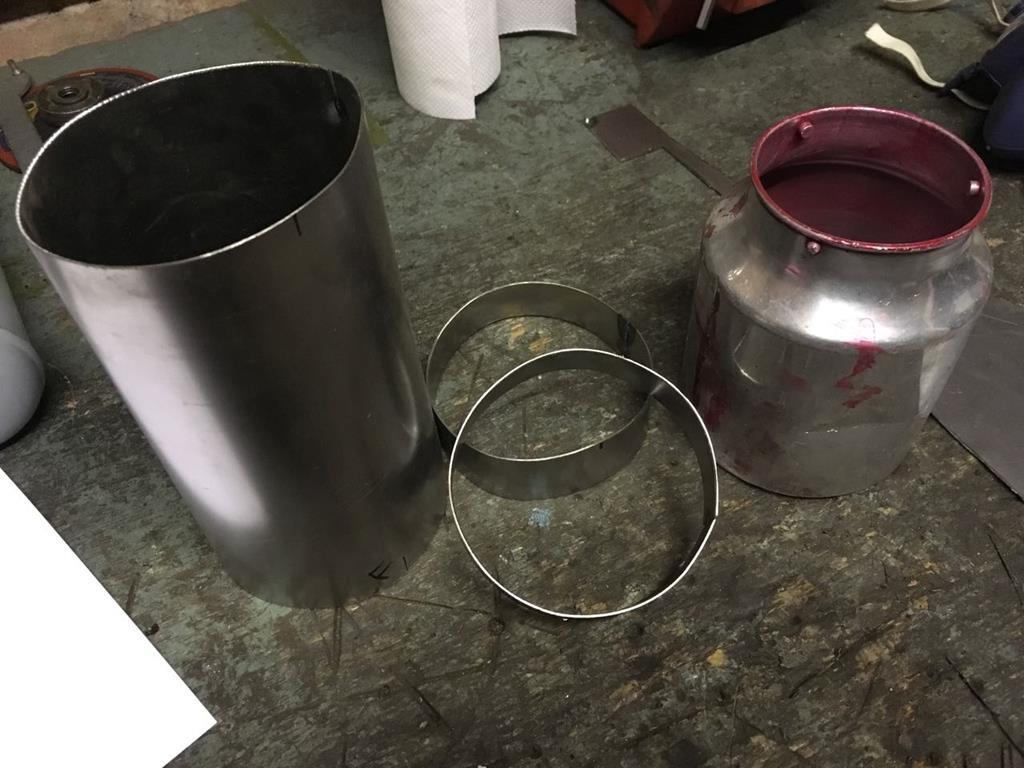 Once I got the plate turned into rough cones and tubes, and tacked together, I refined their shape. The internet suggested a nice trick of drawing many concentric circles on a piece of card, and placing each section on it, which made it easy to see where they were out of round. This is before... 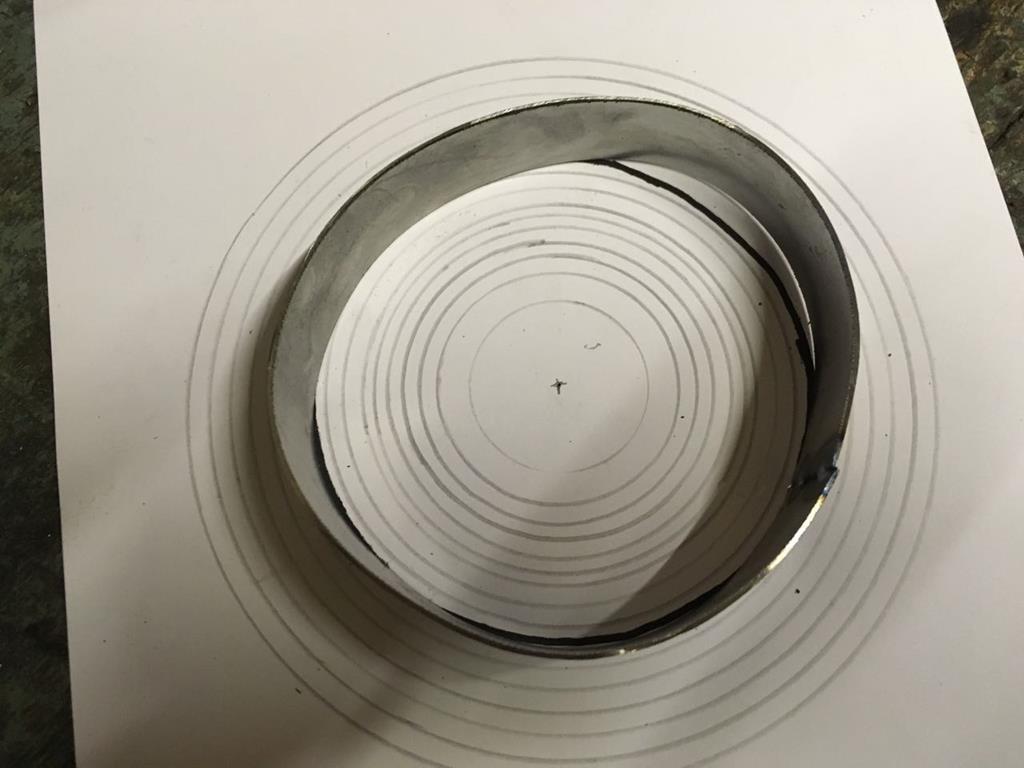 And after a bit of tapping and general man handling... 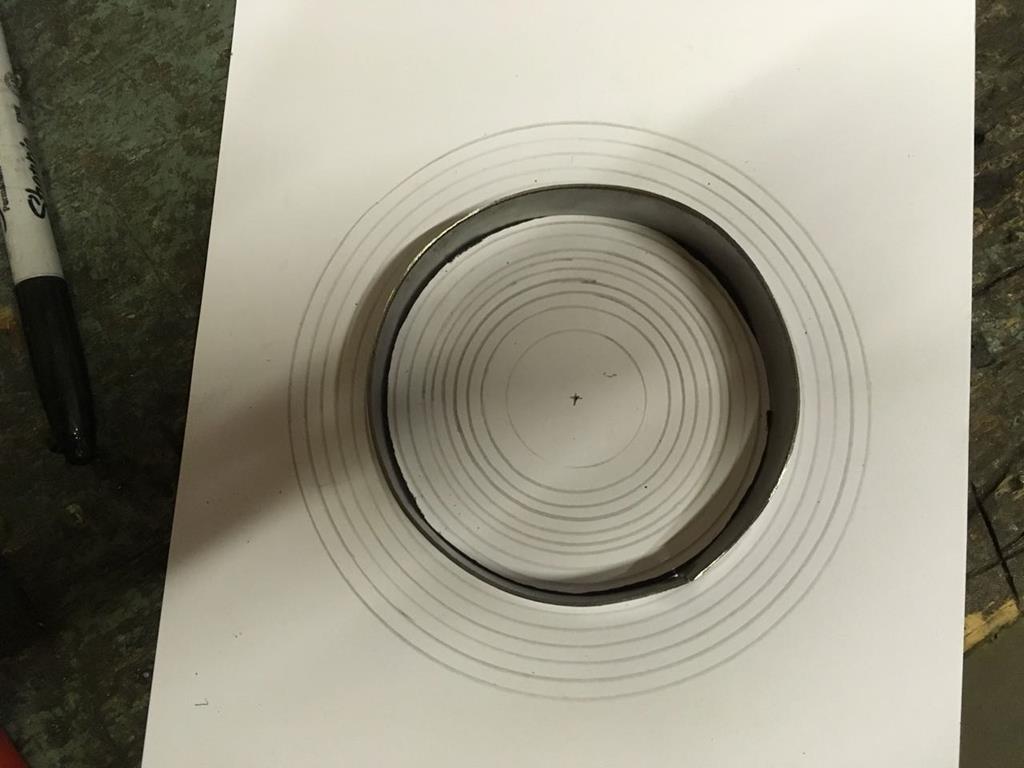 So that left nothing for it, but to start tacking the sections together. 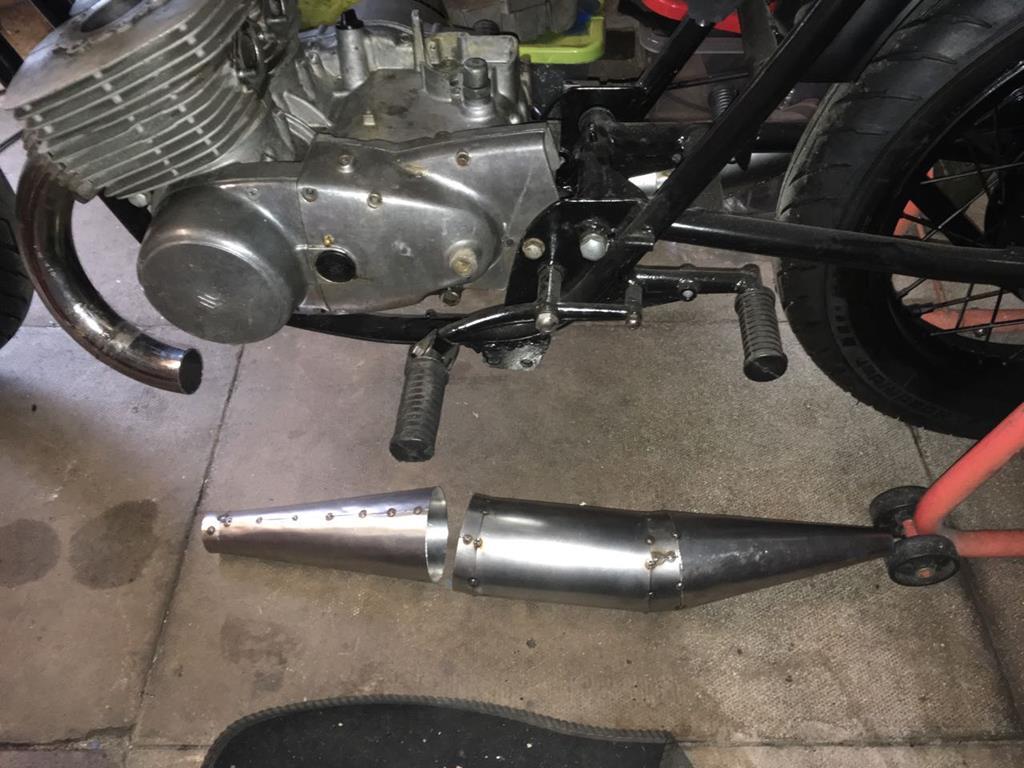 Till we had a full expansion chamber. 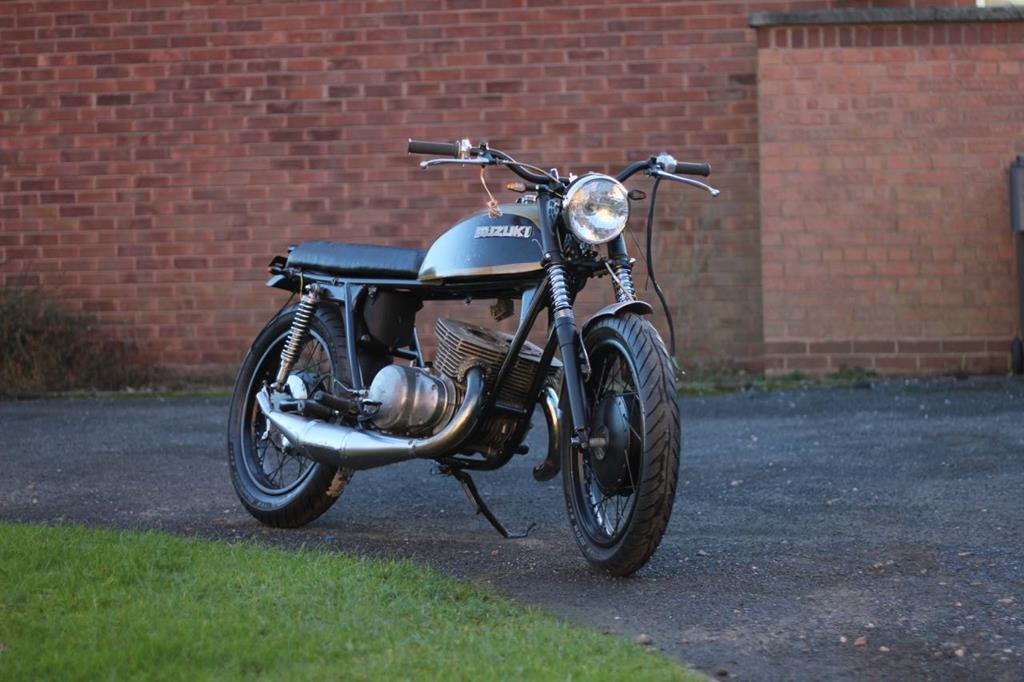 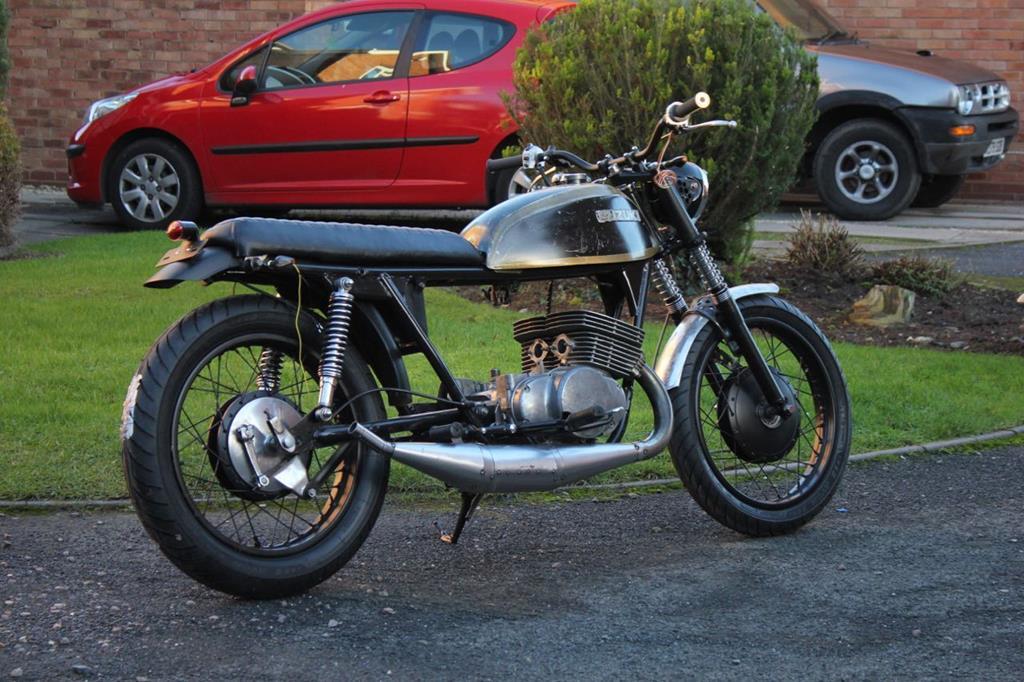 I actually got both sides built up and on the bike and thought they looked pretty cool! It was at this stage that some concerns were raised again about ground clearance by the guys on the forum. Re-checking the ground clearance, it was still ok, but what I hadn't taken into account was suspension movement. Simulating the clearance with some compressing in the suspension, they were going to hit the floor much earlier than I hoped. It was time to go back to the drawing board. I went through various different ideas of how I could run them under the bike, but even that was going to struggle with ground clearance without cutting up the brackets under the frame, which is something I wanted to avoid. After some soul searching and advice from the forums, I decided the lesser of the evils was to reduce the pipes belly diameter. The book I'd been following to design them suggested that the belly should be 2.2-2.5x the diameter of the header. By reducing this to 2x the header diameter I gained some vital millimetres, hopefully without compositing the power the pipes were capable of making. So I had to re-calculate all of the pipes dimensions again. 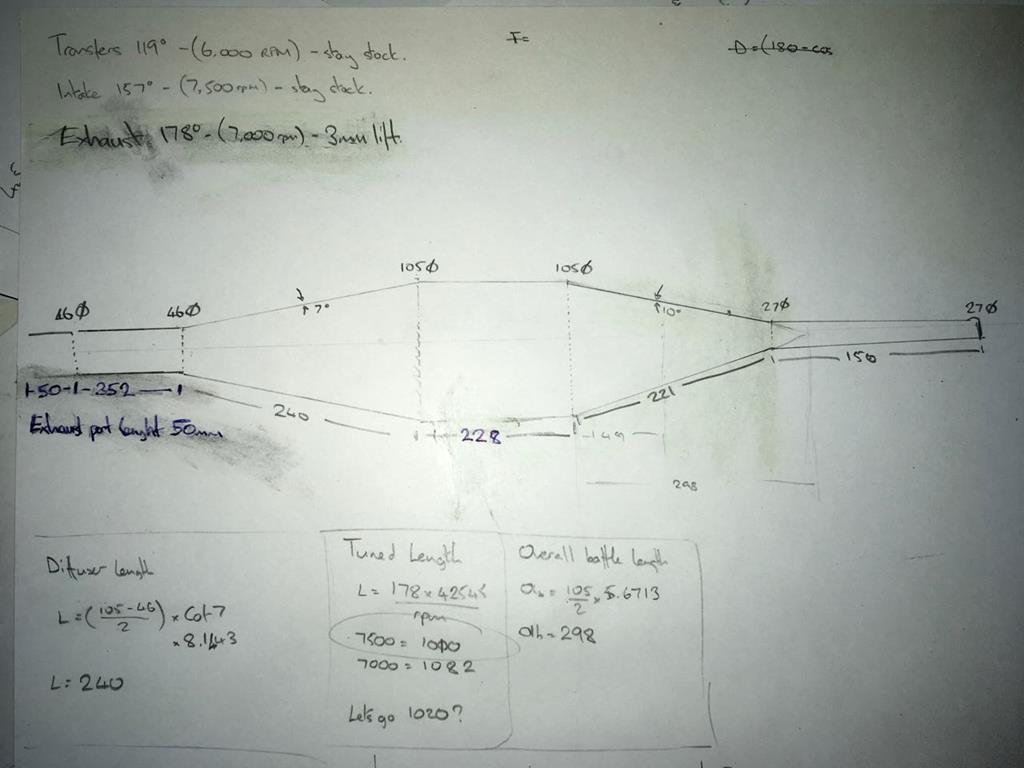 Before turning that into card templates, then steel shapes, rounding them into cones and starting to tack them all together. I changed the shape of the pipes slightly too, making them straighter, which allowed them to tuck in closer under the foot pegs. 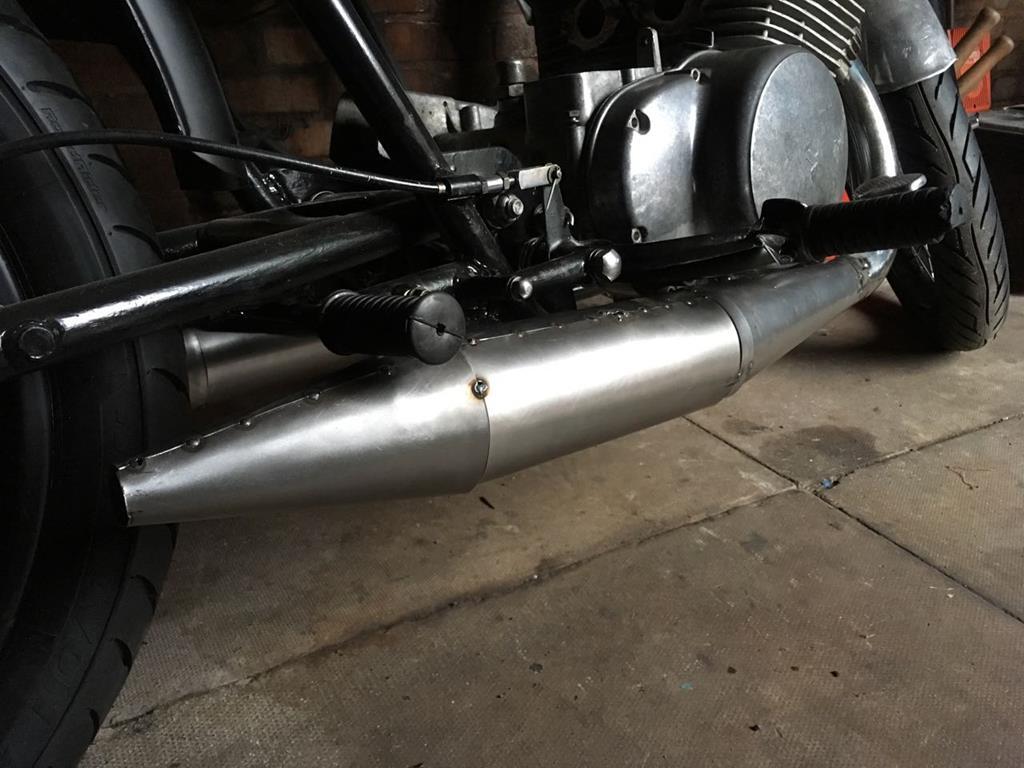 This meant that even with the suspension compressed quite a way, the foot pegs would hit the ground just before the pipes, which would atlas give me some warning! Now I was happy, I could get on a seam weld the pipes. 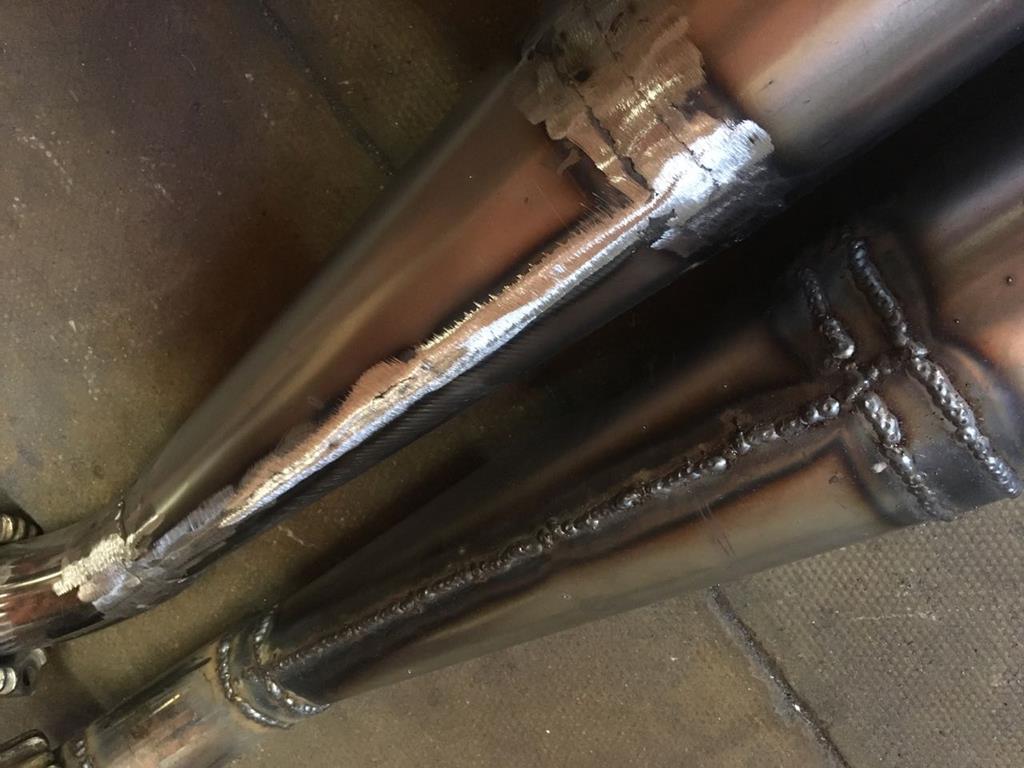 I'd spent quite a lot of time looking for some silences that would work. As with any 2 stroke, the internal diameter of the silencer is pretty critical. I wasn't having any luck finding silencers to buy, so as they are a pretty simple straight through type design, I decided to build my own. 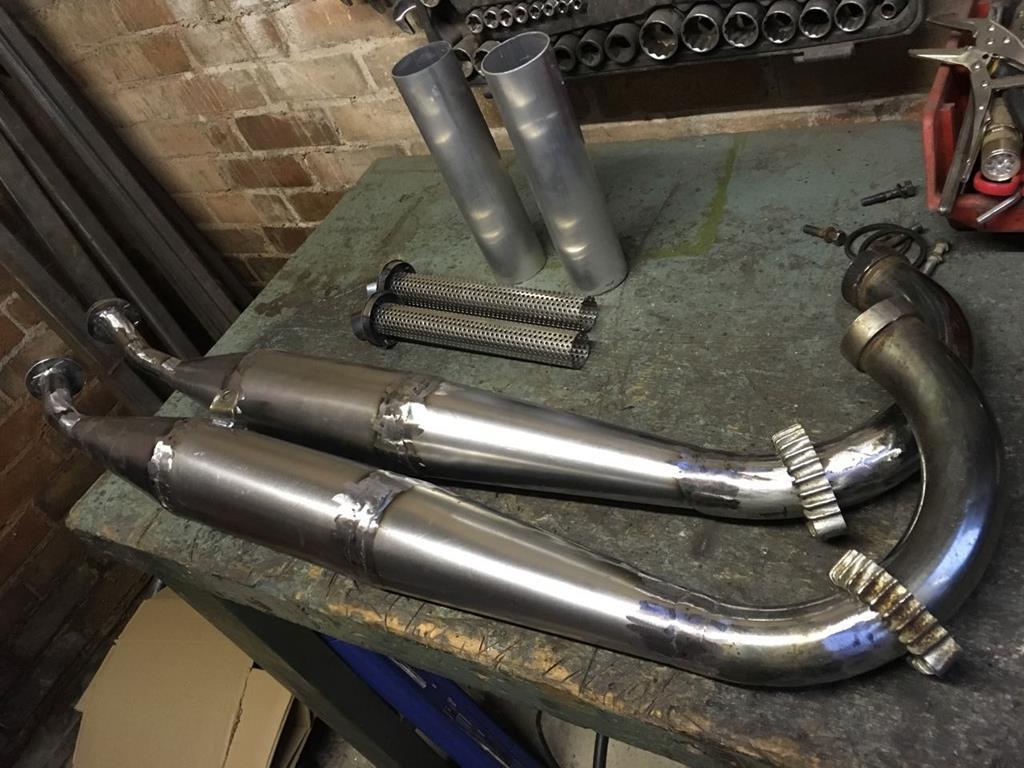 Popped them on the bike for a quick visual test, and I was really pleased with how they sat. 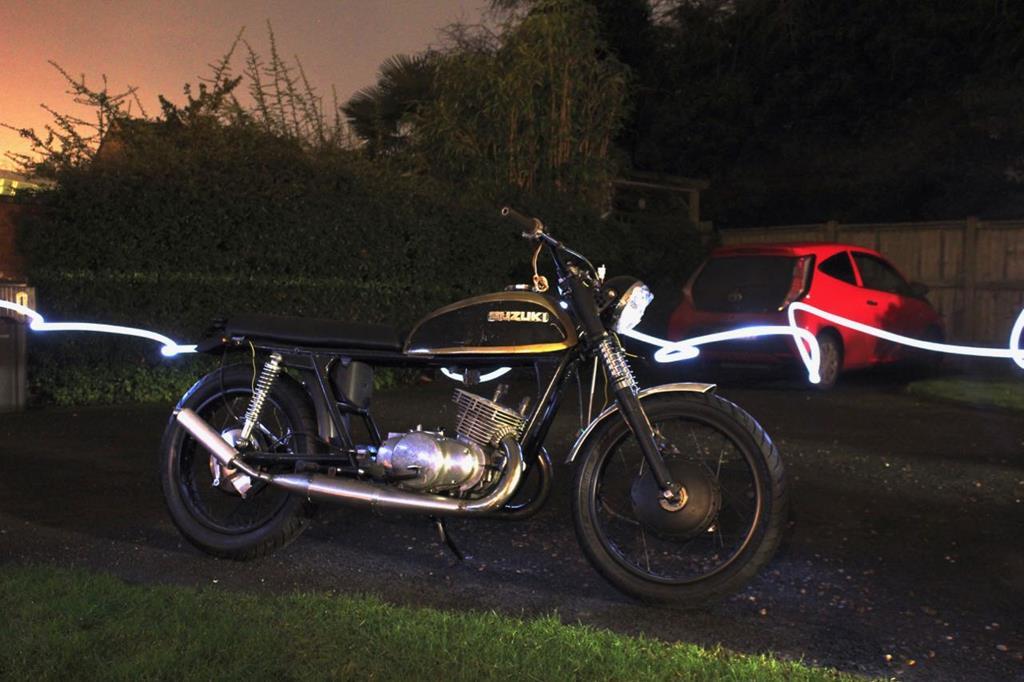 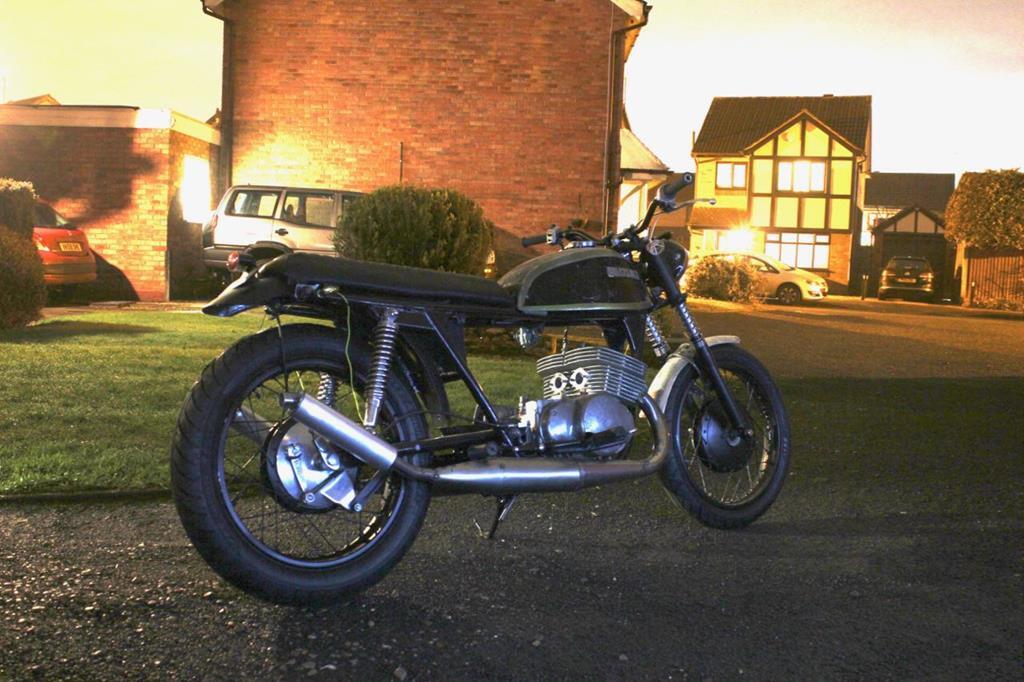 About the same time, I came to the conclusion that my original idea of using the Suzuki speedo wasn't going to work for two reasons. One, it required the cable to occupy the same space as the headlight, and two, as I'd now fitted a Honda front wheel, getting the speedo drive to work was going to be a bit of an issue. So I decided to change plan and buy a modern electronic speedo. 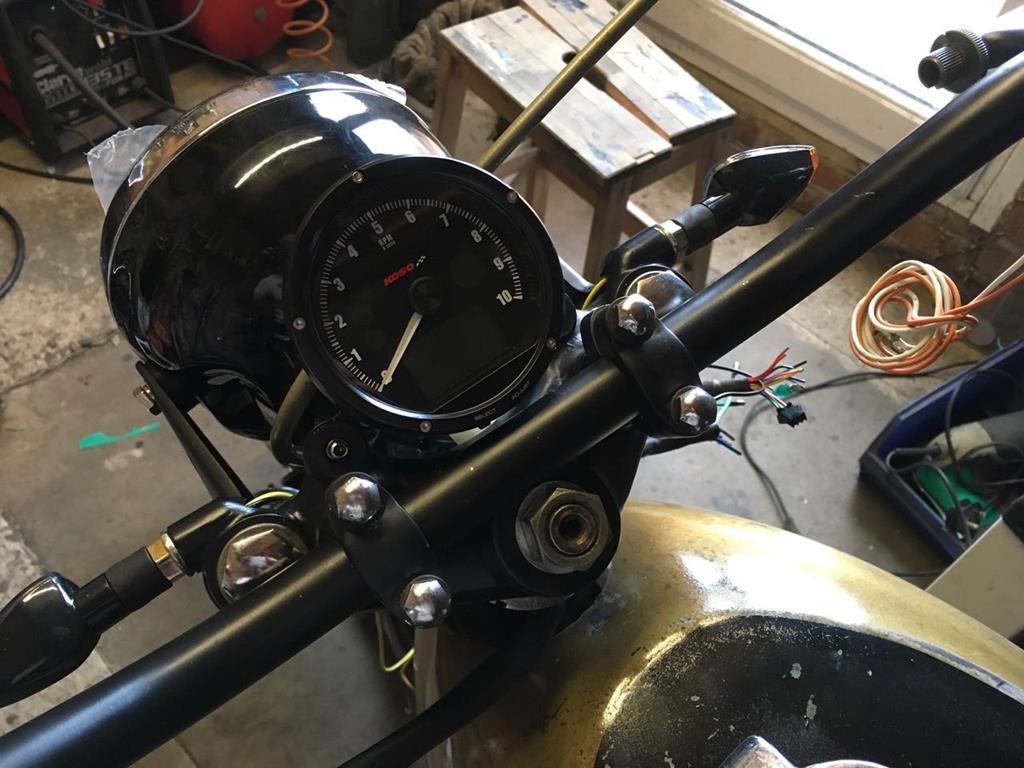 It's actually worked out well that I was able to get a nice tidy unit with a small digital speedo, a nice big tach and even the idiot lights(high beam/neutral/etc), which will keep the MOT man happy. While I was at it I sorted the handlebar switch gear and tidied up various other loose ends like painting the mud guard and sorting the chain guard. 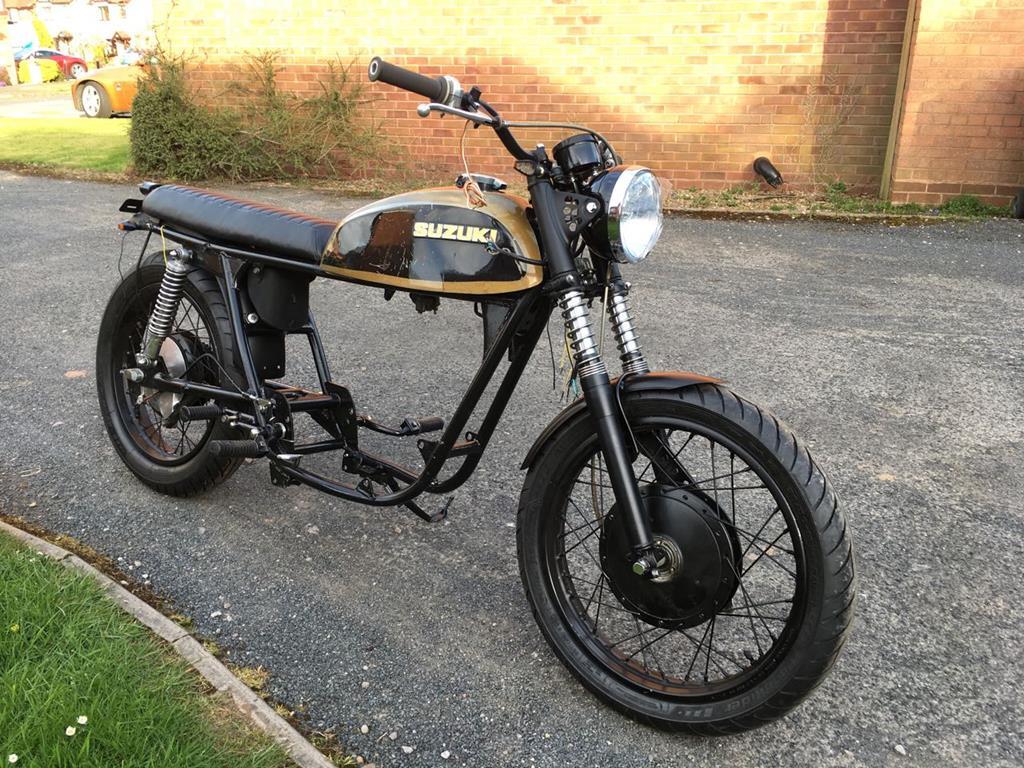 So all I needed now was an engine that worked! |
| |
Last Edit: Feb 28, 2018 22:29:09 GMT by goldnrust
|
|
goldnrust
West Midlands
Minimalist
Posts: 1,887
|
|
Feb 28, 2018 21:07:24 GMT
|
Now into March 2017, and all this time the little Honda CBR400RR had been doing a grand job of being a Honda, and just working every time I turned the key. To reward it for working so hard for me, I gave it the thrashing of its life! 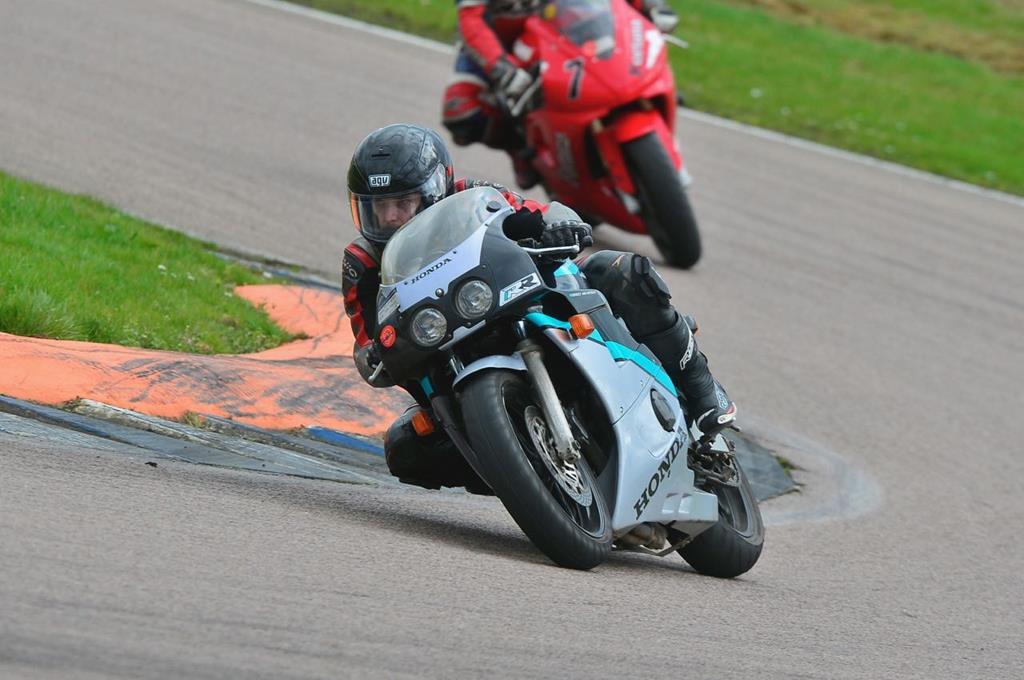 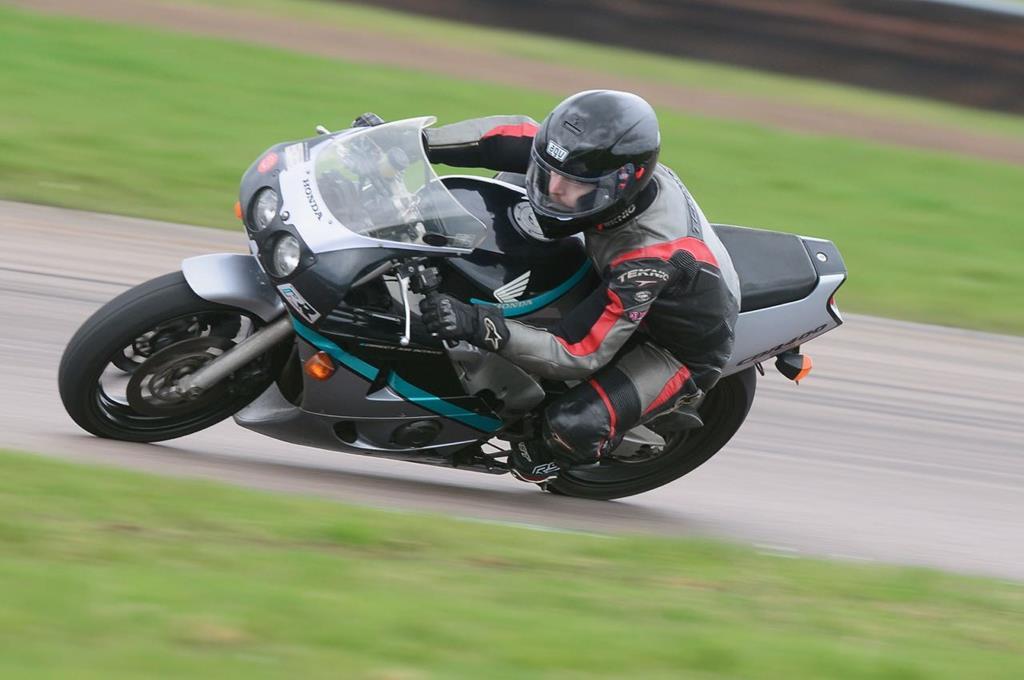 As a 30th birthday present to myself I finally got up the courage to book a track day. Luckily an old friend regularly does track days so was there to show me the ropes. Setting out at 6am, I rode the bike the 90 odd miles to the track, thrashing it round all day and rode it home. Didn't miss a beat  I really enjoyed getting on the track, I didn't score full pub chat point by getting my knee down, but I had the pegs down on both sides and got very close to getting my knee down. Looking at the pictures, I can see how I'd need to adjust my body position and I'm sure it'd be down next time. Whilst I'd really enjoyed the experience, the 'bug' for track days hadn't bitten. I think as much as I like the feeling of riding a bike fast, I'm not sure I enjoyed going as fast as I could for lap after lap as much as I expected to? Maybe my inexperience on track meant I wasn't getting as much reward out of it as I could have. Maybe If I'd had a go-pro or something that meant I could work out my lap times I would have something to aim for? I'd like to do another track day again for sure, but I don't think I'd want to go every month and turn my road bike into a dedicated track bike like lots of people do. Having ridden on the track with properly warmed up tyres and brakes and found out just what my bike could do, especially in the higher speed corners, riding on the road felt very different. It was very apparent where most of the time previously on the road I'd felt I was pushing the bike, I was nowhere near. It was my own personal level of risk taking, bravery and the road conditions that I was pushing. It certainly gives me even more respect for road racers! After that interlude it was back to the Suzuki, time to get that engine sorted. Having tidied up the damage to the crank case, it got a good deep clean. I also did a small modification to it, which means it's oil capacity can be raised by 200ml, which makes all the difference for keeping 4th and 5th gears well oiled. 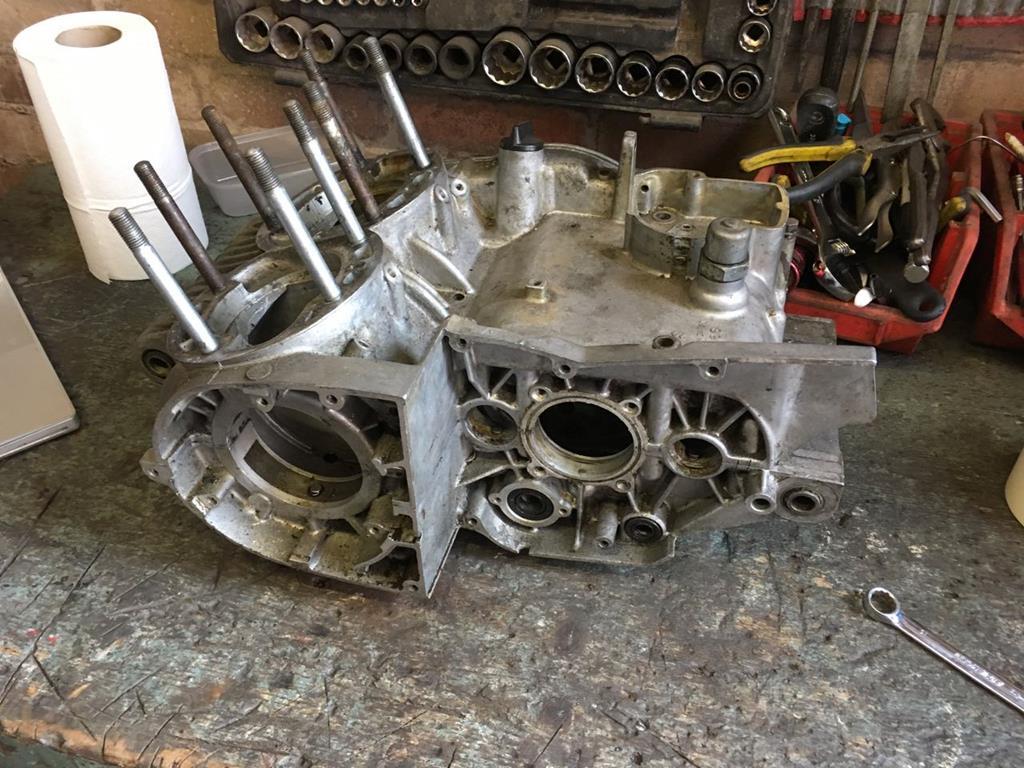 I carefully cleaned and then measured the crank. Thankfully the main bearing and the big ends were in spec. The crank seals, which are critical in a 2 stroke, weren't looking so good though. With that in mind I did a basic split of the crank, keeping the webs attacked to the big end pin, just getting the 3 bearings off so the seals could be replaced. 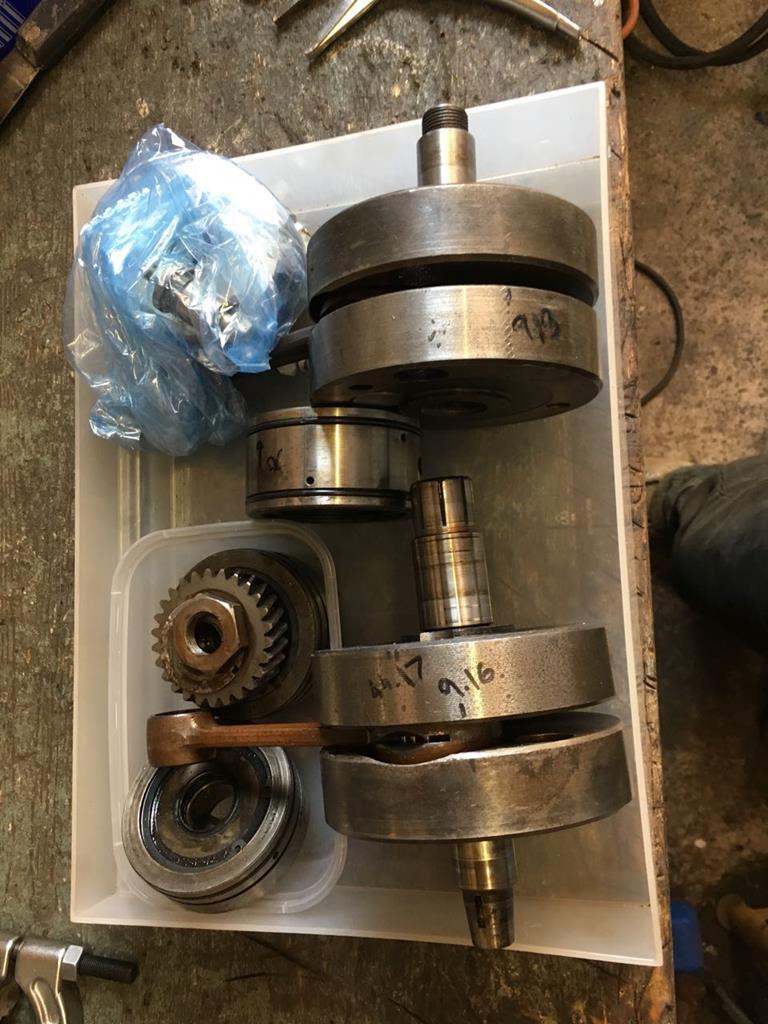 While I waited for shiny new bits from Suzuki, I started work on the barrels. As some of you who are eagle eyed might have noticed, on my exhaust pipe design, I had planned the exhausts around a modified exhaust port timing. The standard porting on the T500 was very conservative. Suzuki wanted the bike to be smooth and tracktable from low revs and to rely on its torque to make progress. I wanted something bit wilder  There was no point going too wild with the porting though, in stock form the pistons can crack if run above 7,000 RPM for long, if you remember this bike has already seen shattered pistons once in its life! I'd read that using later GT750 pistons, which were stronger and lighter, meant that the engine was safe to rev higher, how high? Not sure... The stock crank is also a heavy old thing, and if I really want to spin it fast it would probably need lightening and rebalancing. Knowing this, I'd decided to play safe, I'd keep the stock crank and use the GT750 pistons and plan my porting and pipes around max power at 7,000 RPM ish. My tuning book suggests it's important to tune each element to slightly different RPM figures, as otherwise the engine can end up very peaky. Measuring the stock ports, the intake was timed for max power at 7500RPM and the transfer ports for max power at 6000 RPM, so in the right range for what I wanted. The stock exhaust port was timed for max power down at 3000-4000 RPM. By lifting the port by 3mm, it would have a longer duration, and would be timed for max power at 7000 RPM, so thats what I went for. 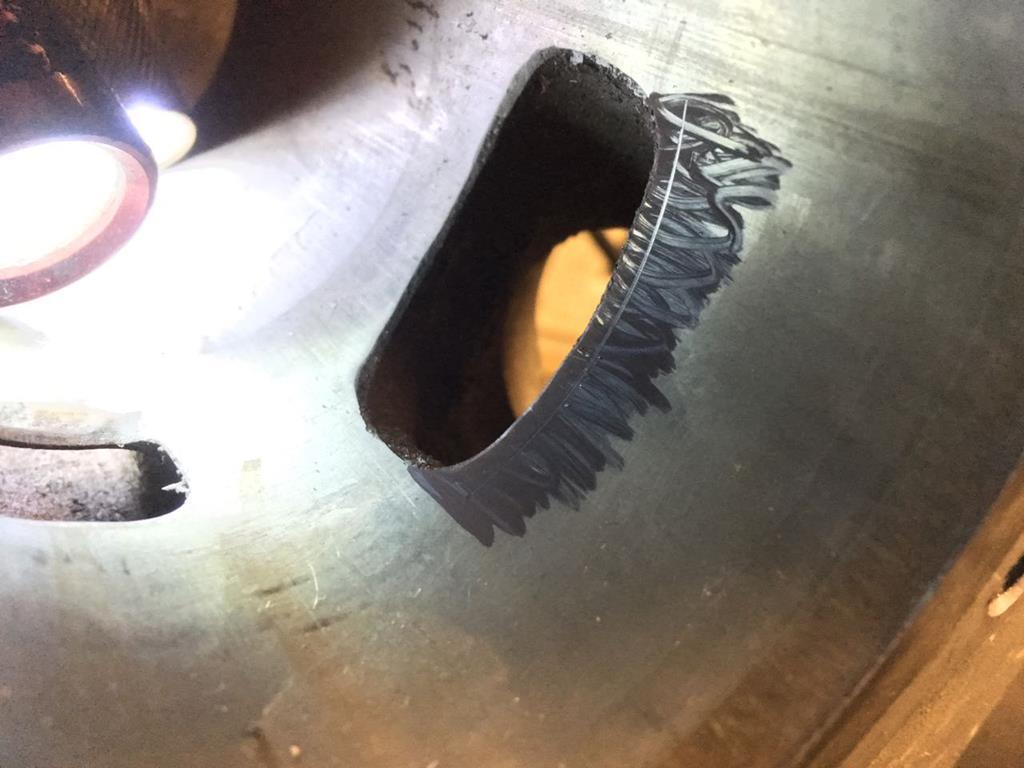 I marked up the barrel at 3mm above the stock port, then using a die grinder carefully opened up the port. 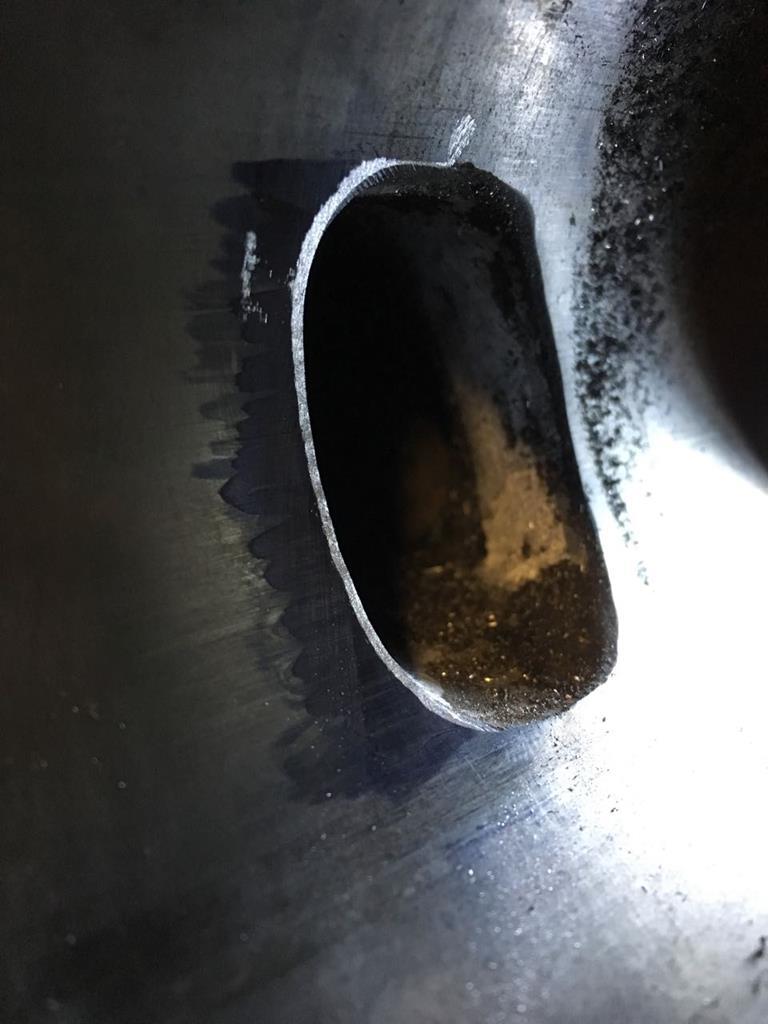 After that I sent both barrels off to be bored out to 1mm oversize, this would get ride of all the previous damage to the cylinder walls. 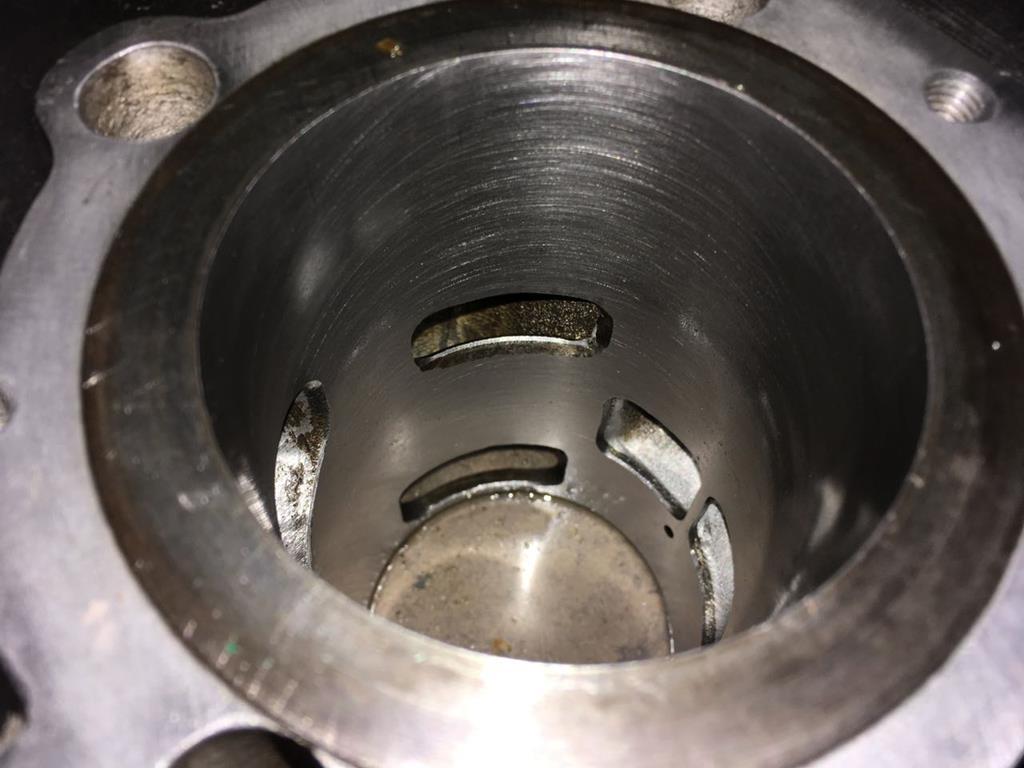 Not long after that my new parts from Suzuki arrived and I was able to start building it all up. 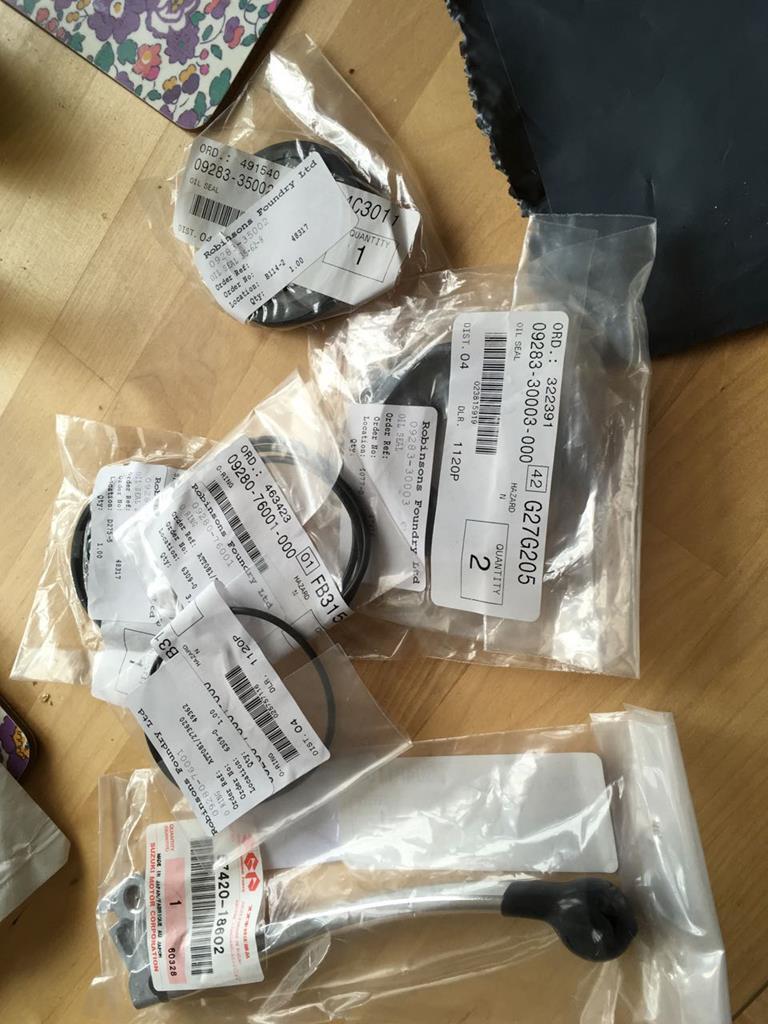 First up, I fitted the new crank seals into the main bearings and borrowed a friends press to put the crank back together. I'd only ever trued a single cylinder crank before, and thankfully this one only needed a small adjustment, as it's way harder on a twin. With the crank back together I could start assembling the gearbox ready to put the cases back together. 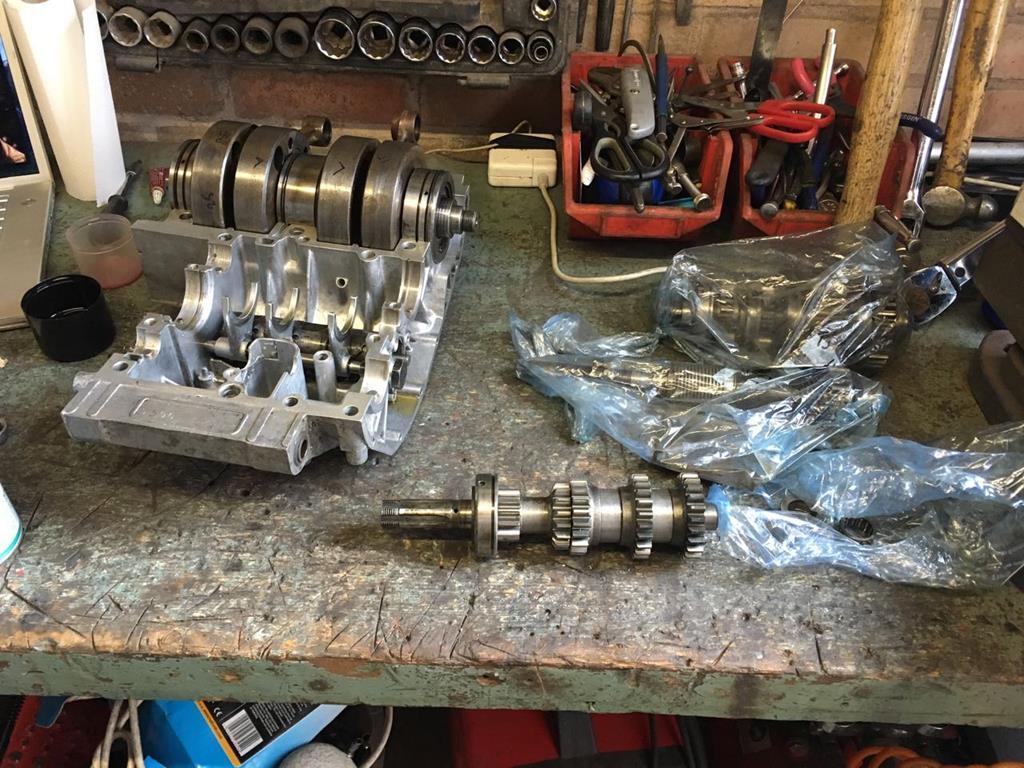 With the case halves bolted together I could fit the gear selector, primary drive gears and start on the clutch. 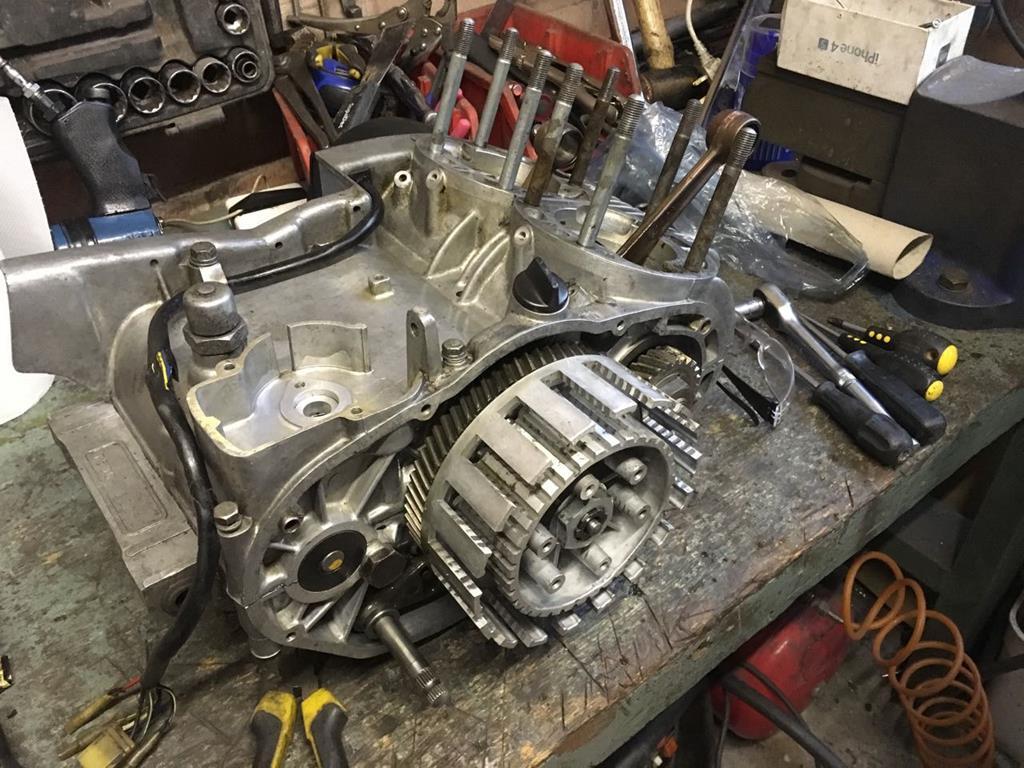 After that it was pretty straight forward to pop in the new pistons, drop on the barrels, heads and carbs, and it was an engine! 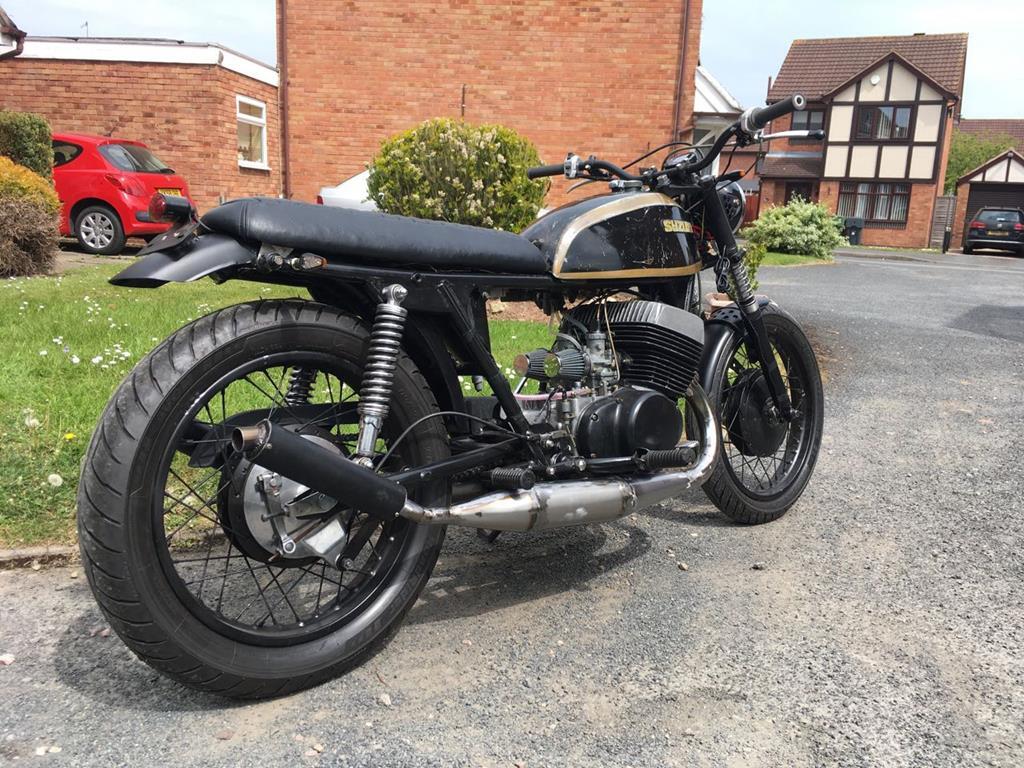 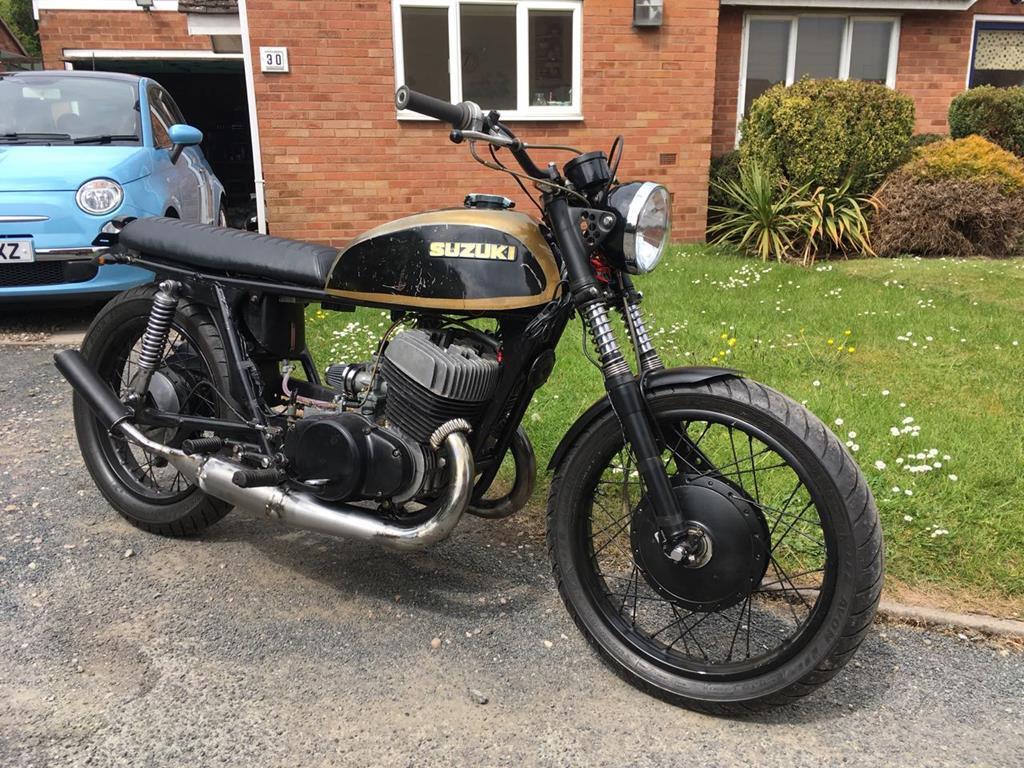 An actual complete bike! The question is would it run? I got all set with a fresh charged battery and some fuel in the tank and.... of course it wouldn't. There were quite a few teething problems that shower up as soon as I put fuel in it, firstly the fuel tap was leaking pretty badly, and once I'd bodged that and kicked the bike over a few times it was clear that something was up with the left carb. It was overflowing badly. Stripping the carbs apart again it was clear there was a problem with the float on the left carb, it had filled up with fuel! They are old brass floats and one of the chambers had a hairline crack in it. I attempted to fix it by soldering the crack, which worked for a while, but was a bit temperamental, so I ended up just replacing the float after a couple of months. Anyway with my fuel system issues sorted, and a bit of a tweak to the idle mixture would it run? YES! That was a quick clip from the 3rd or 4th time it ran, I'd done a bit of further tweaking to the idle screw, but there was still plenty of tuning to be done. First impressions, holy hell it's loud! hahaha. There first ride was rather interesting... I took it the short couple mile run to the MOT station. I needed an MOT before I could get it registered, and thankfully you are allowed to ride to and from the MOT on an unregistered bike as long as it's insured on the chassis number. Again, blimey it's loud... It really doesn't stop well at all, I was sure the brakes were going to fail the MOT. It vibrates a lot! After sitting nervously at my local bike shop while they did the usual MOT checks I was rewards with a nice clean sheet and a pass! Woo. Apparently the brakes weren't as bad as I thought, they were just drum brakes, I guess I'll just have to get used to them! So in good spirits I set off home, trying to make the most of this short ride as it's all I could do till I'd got the registration sorted which would take a few weeks. I got about 1/2 mile into my ride home and the bike cut out.  . No amount of kicking or fiddling with it would make it start, so on a nice hot late May day, in full leathers I pushed it home. Was rather hot and sweaty by the time I made it. Once I'd got home and I could investigate further it quickly become apparent why the bike had stopped, battery voltage was 5v... I charged the battery back up and the bike started up fine, but the battery was slowly discharging, Clearing something had gone wrong with the charging circuit in the short run to the MOT. Wasn't the end of the world and I now had a 4-6 week wait while they sorted out my registration paperwork, so plenty of time to sort it before I could go for a ride. |
| |
Last Edit: Feb 28, 2018 22:39:30 GMT by goldnrust
|
|
goldnrust
West Midlands
Minimalist
Posts: 1,887
|
|
Feb 28, 2018 22:08:17 GMT
|
While I waited for the registration to come through, there were two main problems to solve. firstly the charging. The solution to this was fairly simple, once I put the multimeter across the stator, it was clear one of there coils had shorted to ground. I took the stator of and found some old corroded insulation of one of the windings. With a bit of careful heat shrink and insulation tape work I was able to fix the short and once again the bike was charging. The second problem was the volume! Theres 'oh cool bike loud' and theres 'this is gonna get me pulled over' loud. It was definitely in the latter camp. I decided my home made silencers were at fault. I switches from the 'straight through' design to what my 2 stroke book describes as a 'low volume' design, which is meant to have minimal impact on power. 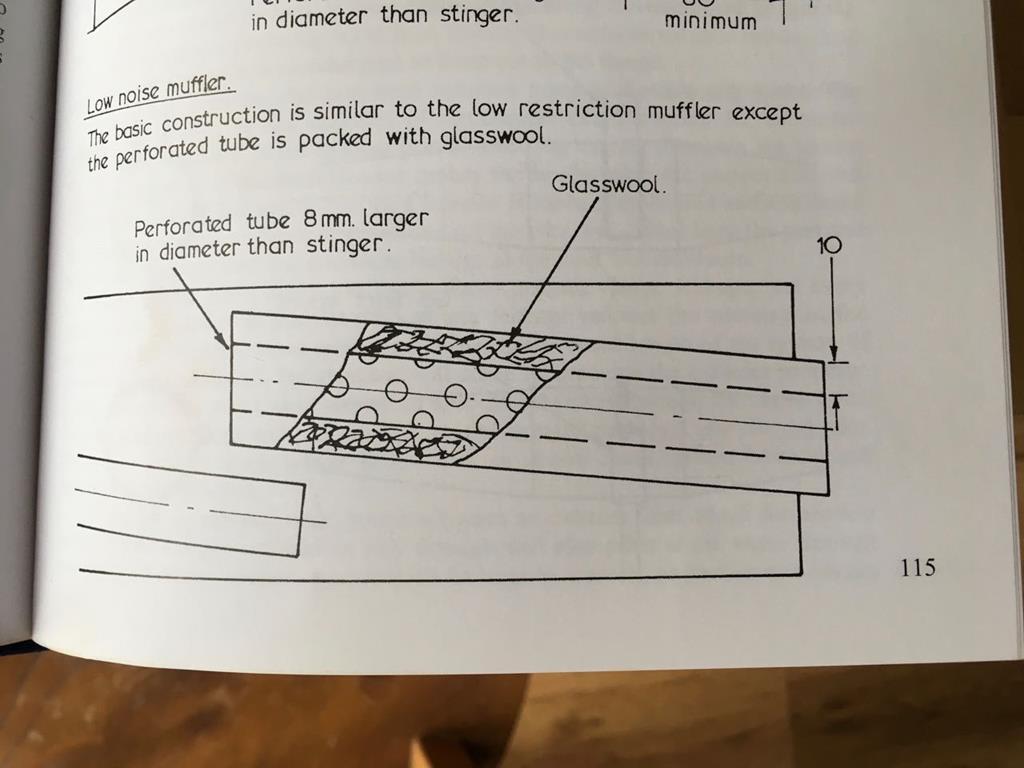 I also made the silencers physically larger than before. 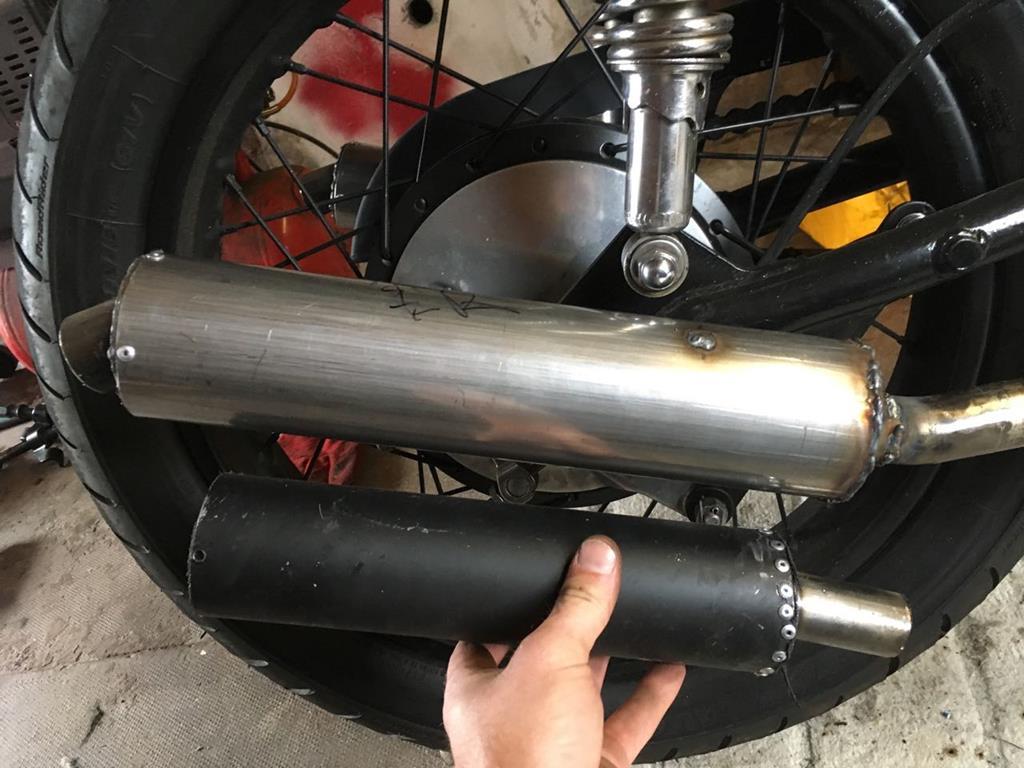 Painted black their extra size isn't too obvious. The noise was now a little better, still on the loud side of acceptable though! 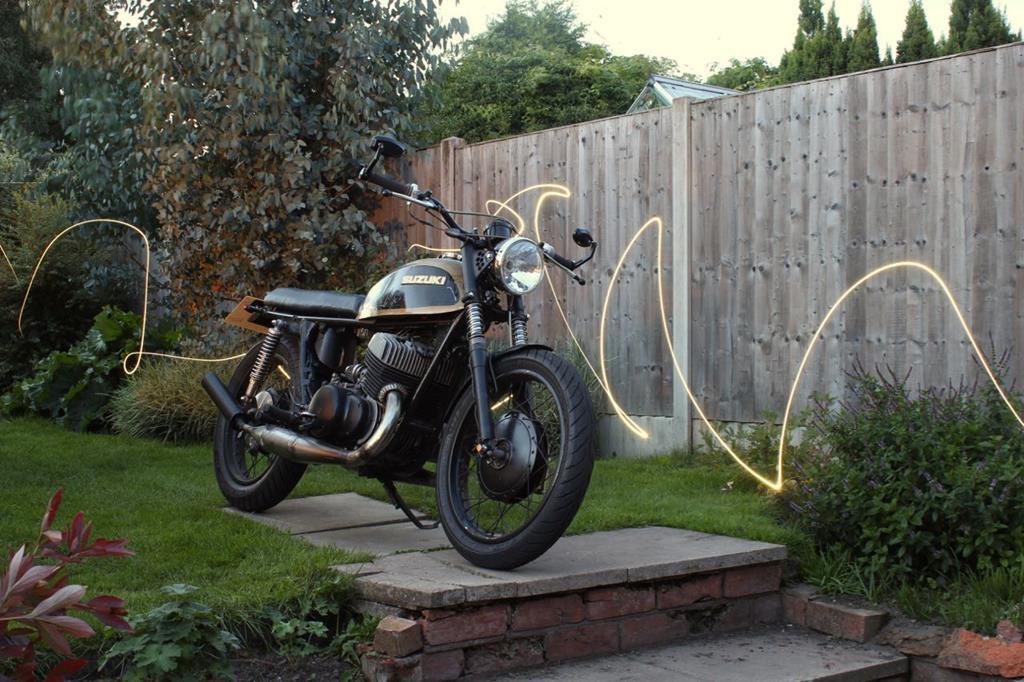 The registration came back, and I was all set to get out and ride, it was about this time that I moved house, and despite being desperate to get out on the bike it had to take a back seat for a while. Still I was able to get out on some rides. The jetting had been a bit of guess for, so I played it safe and went pretty rich. Far too rich... It was '4 stroking' all over the place, especially once opened up a bit. To add some excitement into the mix on those early rides, I was having some trouble with the exhausts cracking. If I thought the old silencers were loud, then trying to limp the bike home after the exhaust cracked in half at the header was next level! haha. I tried adding some gussets to the pipe brackets, but that didn't work and soon I was riding home with half an exhaust again. I tried switching to rubber mounts, made from a cut up MG ZR drop link of all things, and that was much more successful. This meant I could now go out and get some more riding done. I've managed to put around 1000 miles on it across the summer and the autumn. I've made progress with the jetting in that time but I've sent myself down a blind alley a couple of times due to failed condensers. The bike seems to be killing them in rapid succession, truth be told I'm sure it would benefit from new points but they're expensive so I've held off so far. The only other time the bike has properly let me down was when my friend talked me into riding to the bike show at the NEC on my classic motorbike, in the pouring rain, on salted roads, in November... I'm an idiot for letting him talk me into it. We got half way across town before my bike started spluttering, we turned round and headed for home but it died shortly before we got there. It doesn't like the rain. After that ride it also became apparent that the VHT clear-coat I'd used on the pipes wasn't really unto the task as they quickly turned orange. Despite the issues, when the bikes been working well I've really enjoyed riding it. After the track day, riding the CBR on the road was never as much fun. I always felt like I was holding back and couldn't use what the bike could offer me. The T500 is the opposite of that, there's so much satisfaction on just getting from A to B on it, you can sit back and enjoy the view, or try and push on. When ridden harder the bikes handling and braking limitations soon show, but they do so in a kinda fun way, where it makes riding on the road at sensible speeds feel thrilling. As I was enjoying the T500 more, I actually sold the CBR in the autumn. There are times when I miss having a bike that 'just works' though, and I a few weeks ago I was weighing up whether changing the T500 for something else was the solution. After some soul searching I decided giving up is not he answer, and what I needed to do was to make that final push which gets the T500 running reliably. Which brings us nicely unto the present day. |
| |
|
|
goldnrust
West Midlands
Minimalist
Posts: 1,887
|
|
Feb 28, 2018 22:26:27 GMT
|
This how the bike currently stands: 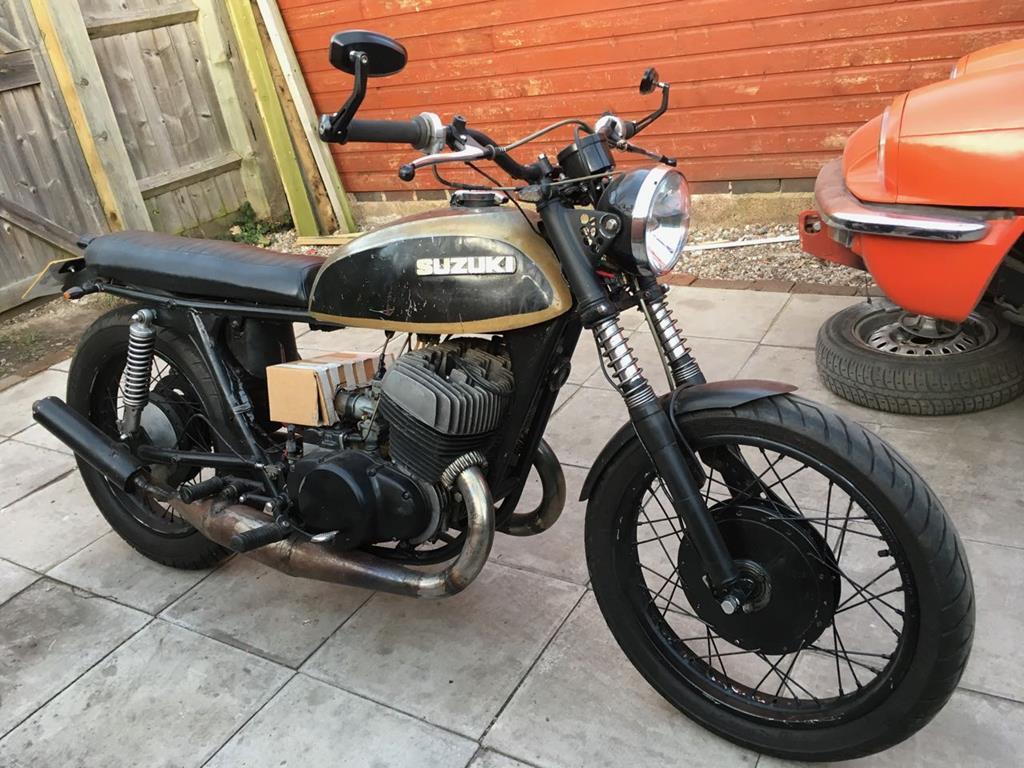 Before you ask, yes the cardboard airbox is mock up! I've got 3 main areas to sort out. Firstly I need to get the jetting right. I've tried quite a few combinations but haven't yet found a set-up I'm truly happy with. Having done some research, my pod filters could be making my life difficult. The original airbox fed the carbs via a couple of 2" long tubes, from what I've been reading recently, the bike is much easier to tune with this extra intake length. I made a mock up from some old bits of Triumph exhaust to try the idea out. 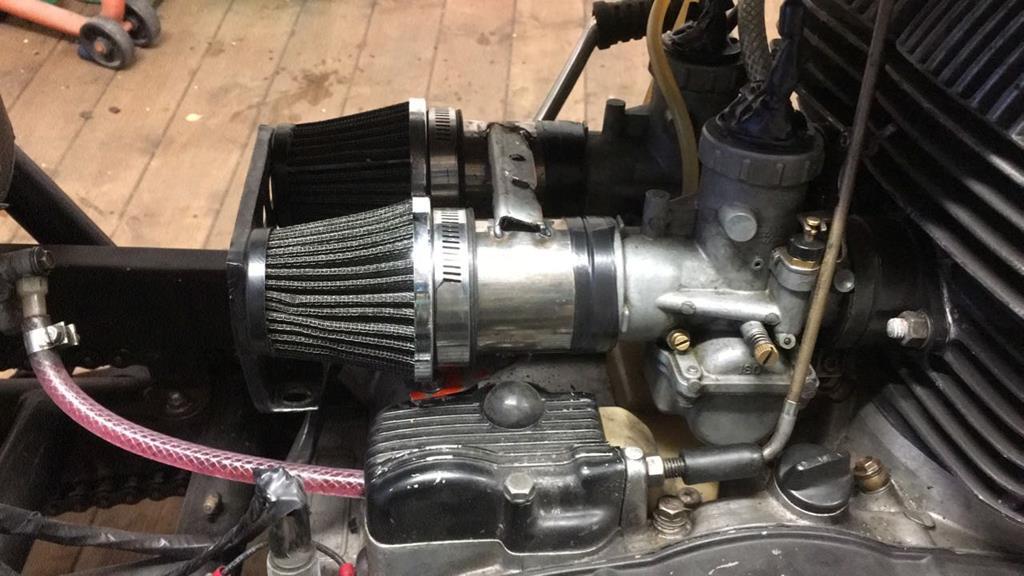 It did seem to make a good difference. The other thing people said is that the pod filters can be susceptible to side winds, messing up the jetting and that an airbox is helpful, hence the test with the cardboard. The same short run up the road yielded no worth while improvement over just the intake length change. So I've ordered some aluminium tube that matched the carb bore properly and over the next week or two will sort out a neater installation of the intake and air filters. Secondly, on the last test ride I was once again getting the signs of a failing condenser, so it's time to bite the bullet and try to rig up an electronic ignition. There are some kits available to do this, but they aren't cheap and apparently often require some fettling. I'm going to try and take inspiration from how these kits are put together and make my own using a pair of modified Powerspark kits and my own brackets/backing plate. Finally if those changes can get the bike running right, then its time I gave the cosmetics an update. The pipes have suffered and need painting properly. I might even look at wrapping them, which might help keep the noise down. The crank cases have also suffered when I was having fun leak issue and could do with repainting. I kept the original paint that was on the tank, as it had a bit of history, a link to the bikes original life in America, but now I'm getting a bit bored with how it drags the rest of the bike down, so I think that could do with a proper respray in a nice clean colour. So I'm looking forward to spring and getting my bike sorted so I can hopefully go out on some longer. runs this summer, and hopefully not have to push it home as often! |
| |
|
|
goldnrust
West Midlands
Minimalist
Posts: 1,887
|
|
|
|
It's been a bit love hate with the old bike over the past few months, but I think things are looking up a bit. Working my way through the ongoing reliability issues has made me quite tempted to sell it a few times, so I've been pushing on getting it working right, whether thats for me or for a new owner! First up was a switch to electronic ignition. I was sick of condensers failing and other points related issues, so it was time to bite the bullet and sort an electronic ignition set-up. Doing some research it appeared most of the kits out there had a slightly DIY feel to them, the T500 isn't popular enough to have many dedicated aftermarket tuner parts out there. One of the kits I found looked suspiciously like it was just a modified pair of car electronic ignition kits. So I thought I could probably have a go at making something like that myself. It took a little experimentation, but in theory it was pretty simple, buy two Powerspark kits and mount them of a custom backing plate. Then use the magnet ring they came with, but with 3 of the 4 magnets removed, and made a custom extension for the end of the crank to replace the points cam. Simple to type, took a lot more fiddling than that to build it! 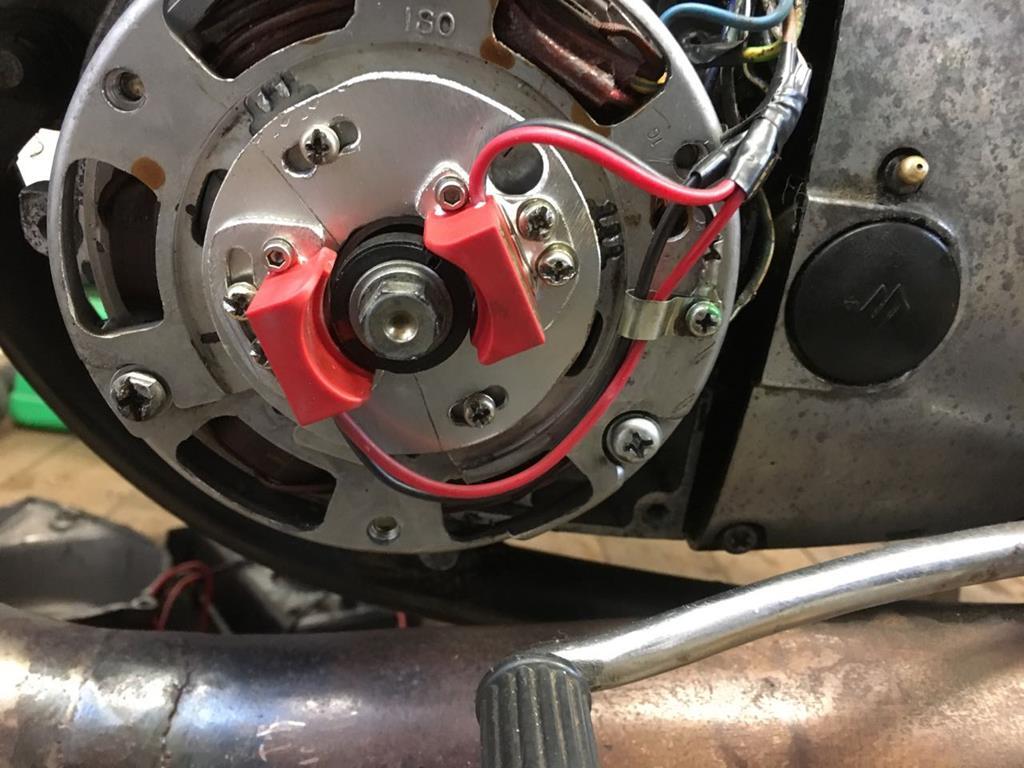 The biggest teething problem is that despite the guy from Powerspark assuring me that the two pickups were the same ( I bought two different kits to give me two different size magnet rings to play with) they actually fired at different times, so I had to modify it a little from that neat simetrical picture above! Still once I'd got to the bottom of that, it has been brilliant, the bike runs better at pretty much all points in the rev range.  While out enjoying my new found strong ignition, the bike suddenly got really loud. I mean its really loud anyway, but this was painfully loud. The exhaust silencer had fallen off  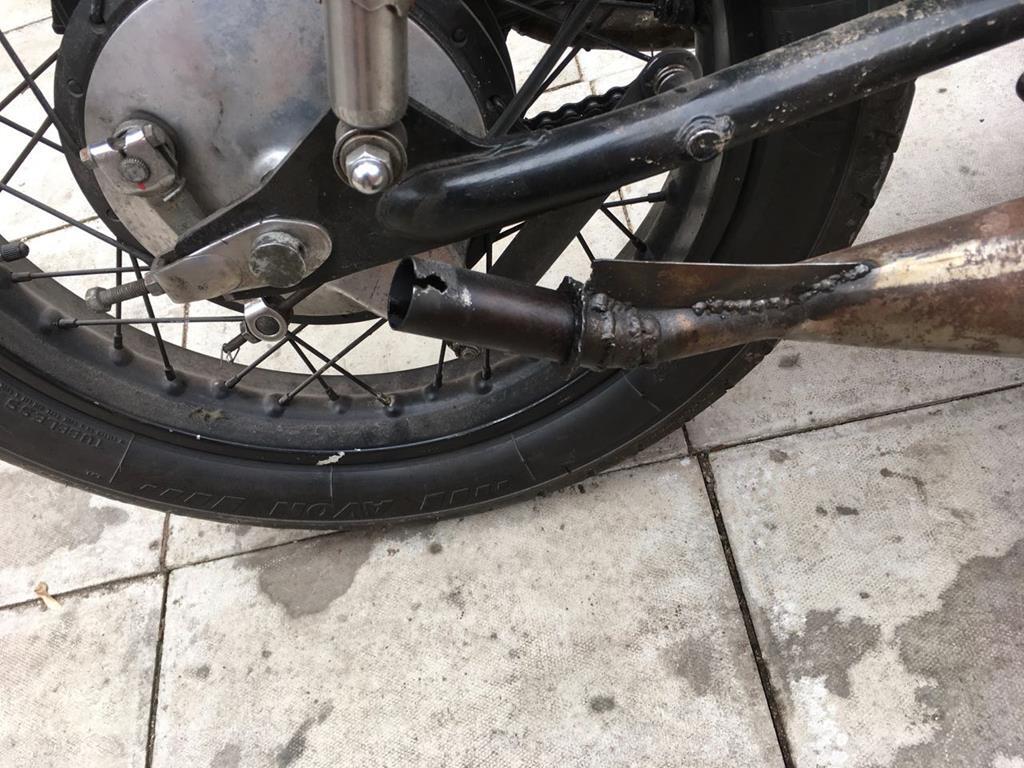 Urrghh. This seemed like a good time to try and make the bike a bit quieter. I put a few different ideas together, so firstly the stinger section of the exhausts is now inside the belly of the expansion pipe, which is meant cut down volume a little. It also meant the overall length of the pipe is shorter, and I could mount the silencer lower and closer to the mounting bracket so its less likely to escape again! This picture shows how much of the stinger will sit inside the belly section. 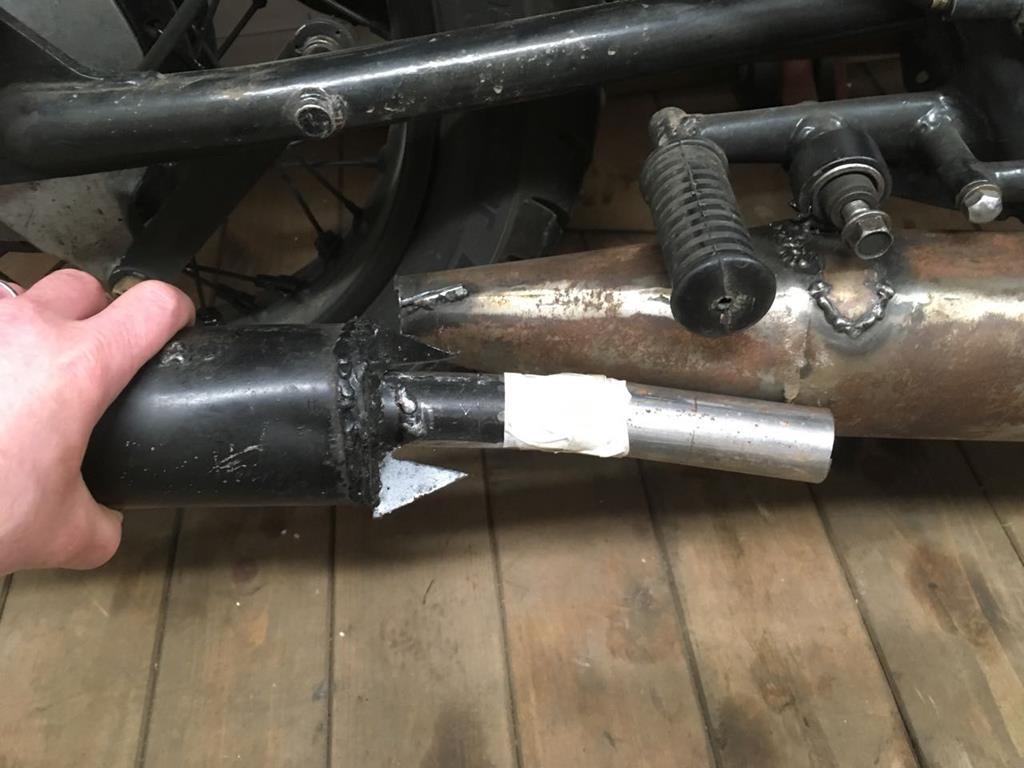 I also made new silencers up, longer and larger diameter than before, and painted the pipes as I was sick of them looking rusty and curse word! 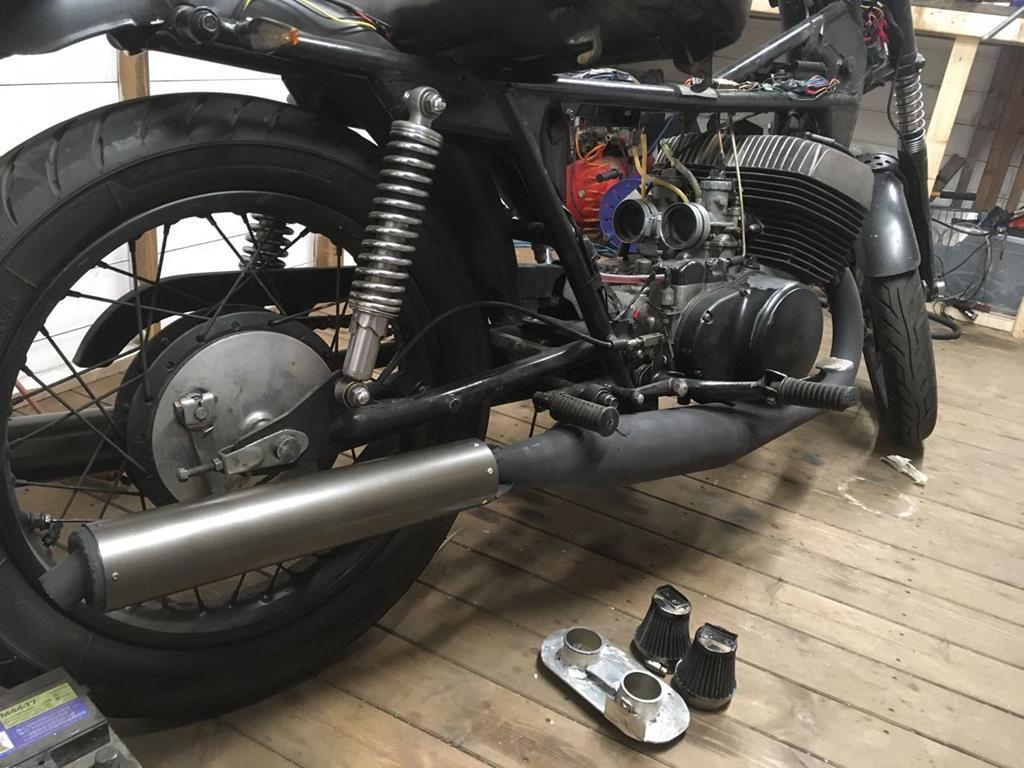 Was it any quieter? no. not really. Hmmm. Back the the drawing board, and back to the airbox ideas I was thinking about when I lasted posted here. Despite the failings of my cardboard mock up, I kept reading about how important an airbus is ot nice reduction on a 2 stroke, so I decided to make a better mock up. This time I made a aluminium backing plate that mounted to my intake tubes, and then a perspex air box taped together. This time I could hear the benefits so it was worth trying to get it a bit more sorted out. This is the end result (before painting!) its got an intake tube thats the same diameter as the air filter intake tubes, and its got fibreglassed together inside, the pod filters will sit inside. 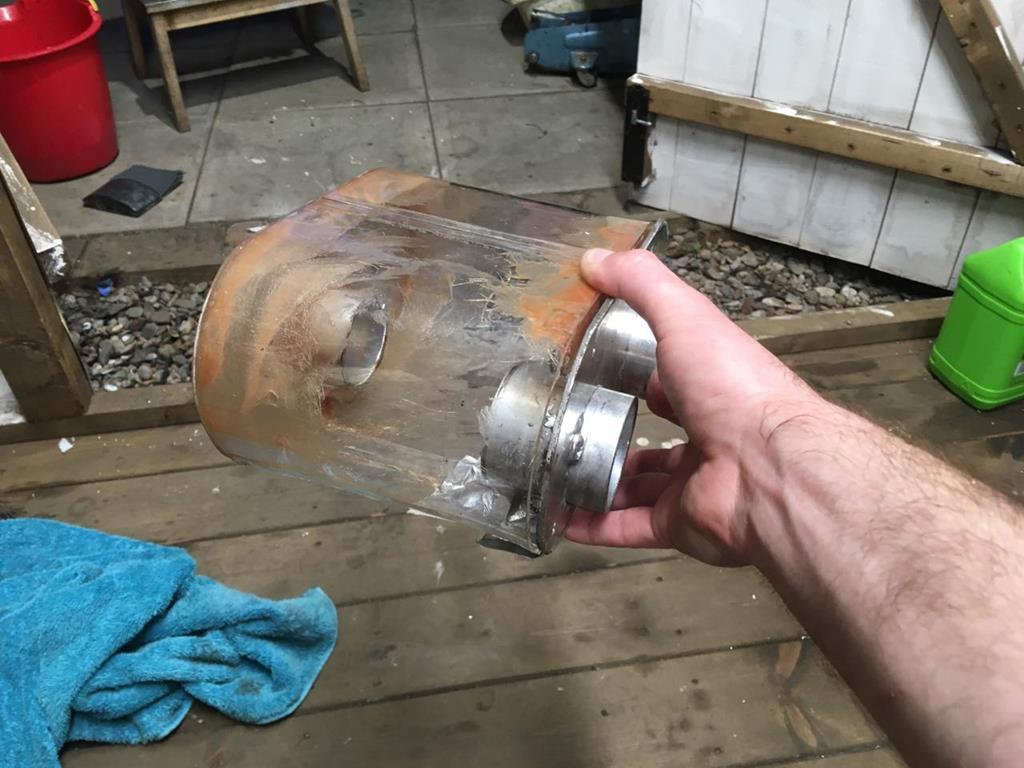 I sealed up the joint between the perspex and aluminium backing with some foam and then painted it back. I also added a mount from above that would make it easier to fit than the small lower mount, it should also me more solid. 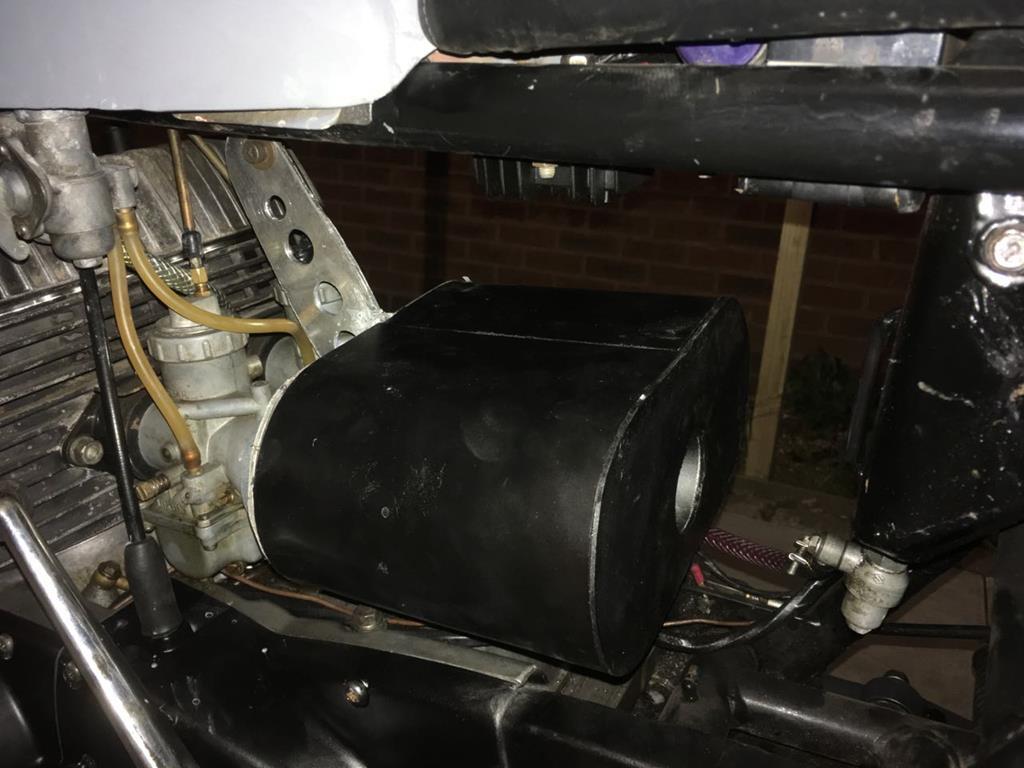 It had definitely made a difference ot the overall volume of the bike, but I still wanted it a bit quieter. I'd also read that lots of the sound actually comes out of the side of the expansion chambers, and that wrapping them could help. For the sake of £10 worth of exhaust wrap from eBay it seemed worth a go. Using the exhaust wrap was a pain, and I'm still not happy with the neatness of it, but its a start! 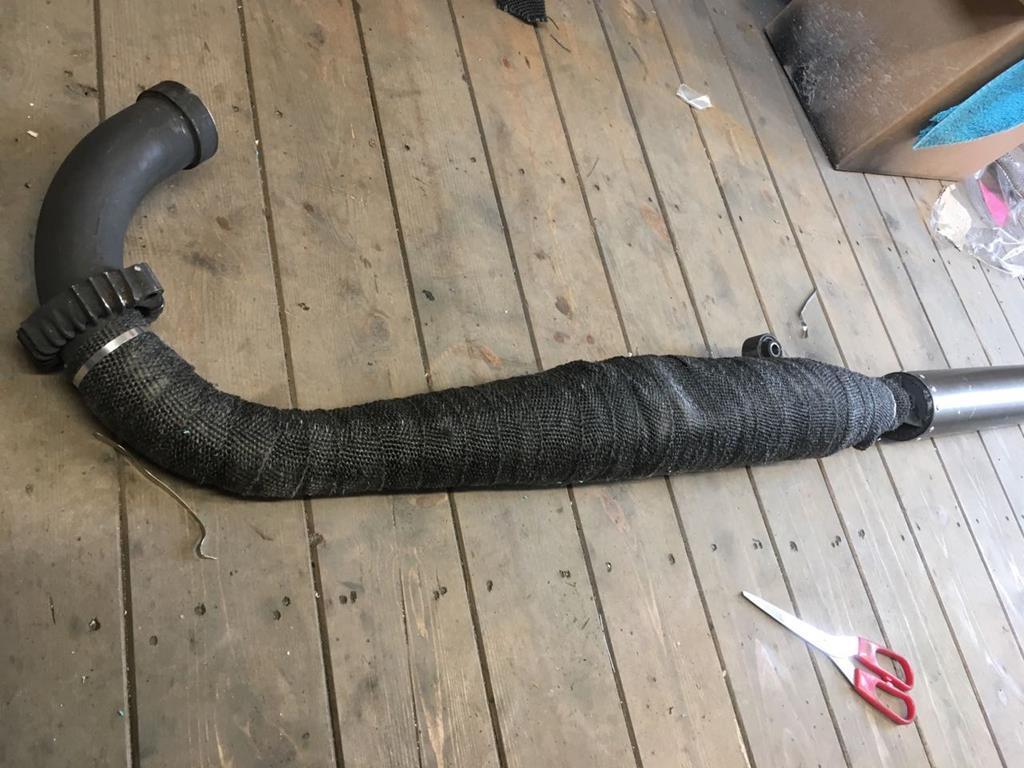 Now we're talking. Its lost a lot of that 2 stroke cackle, the tinny clatter inside the pipe, which is kinda a shame, but it really has helped bring the overall volume down. I'd say its now 'loud bike' rather than 'antisocial' hahah. Wit the rest of the bike now starting t look a bit neater and tidier, it was time to sort the tank. I had originally liked the idea of keeping the paint it came with, a bit of patina and history. But as times' gone on I just feel like it lets the rest of the bike down. So I stripped the tank back to bare metal, and in the process revealed a number of dents I didn't know it had... 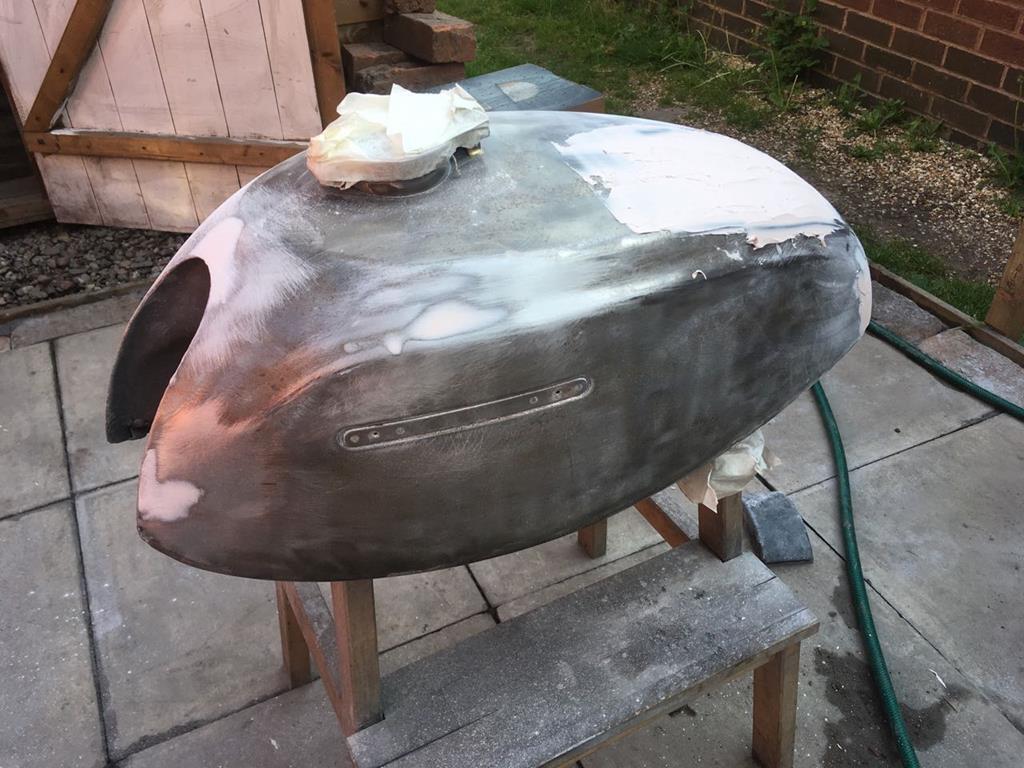 Many hours of sanding filler later it was time to paint. I didn't have anything specific in mind, so just browsed the selection on the shelf in Halfords, ended up with a Ford 'Petrol Blue', which I think looks pretty cool and suits the sort of slightly greeny/grey I've used on the silencers and some other details on the bike. 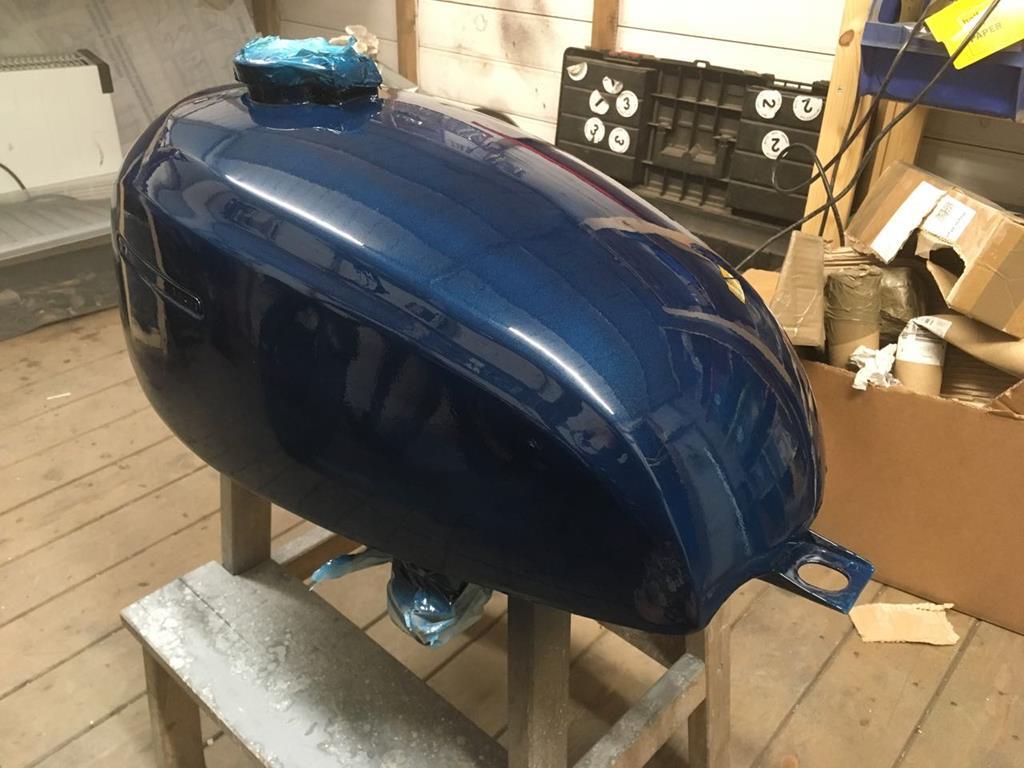 It looks great there I think, but in the cold light of day, it's far from perfect, and I wish I'd just chosen a metallic colour, rather than one thats also pearlescent. Anyway I think it passes the 6 foot test, and I'm really pleased with how the bike is now looking and riding.  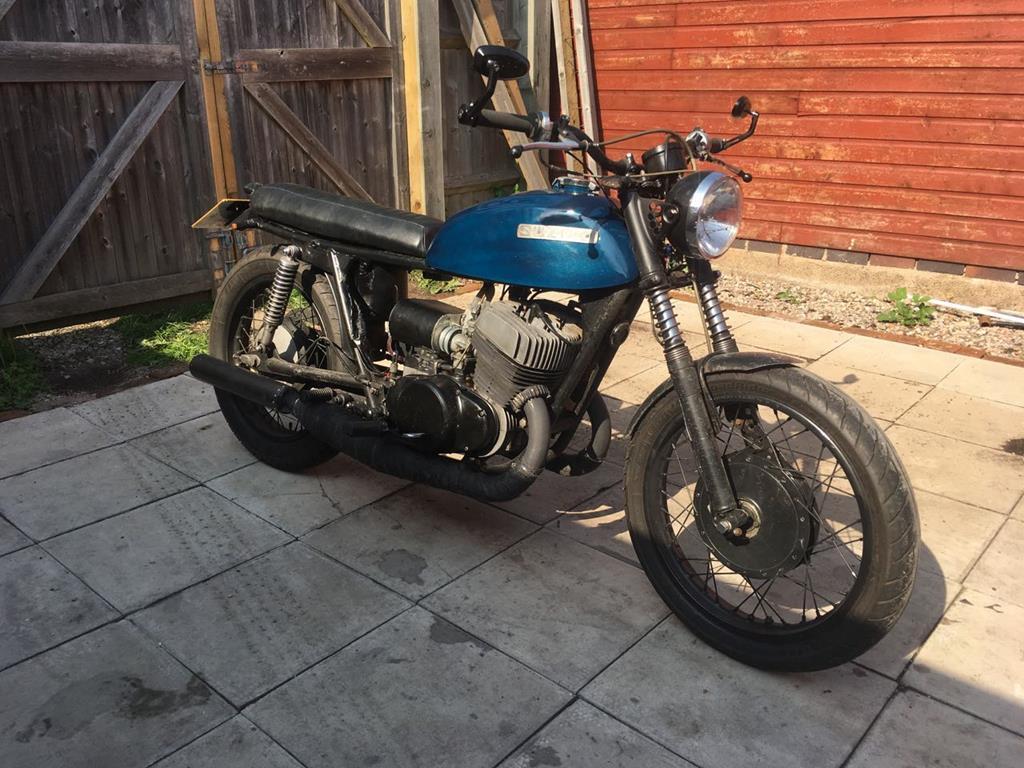 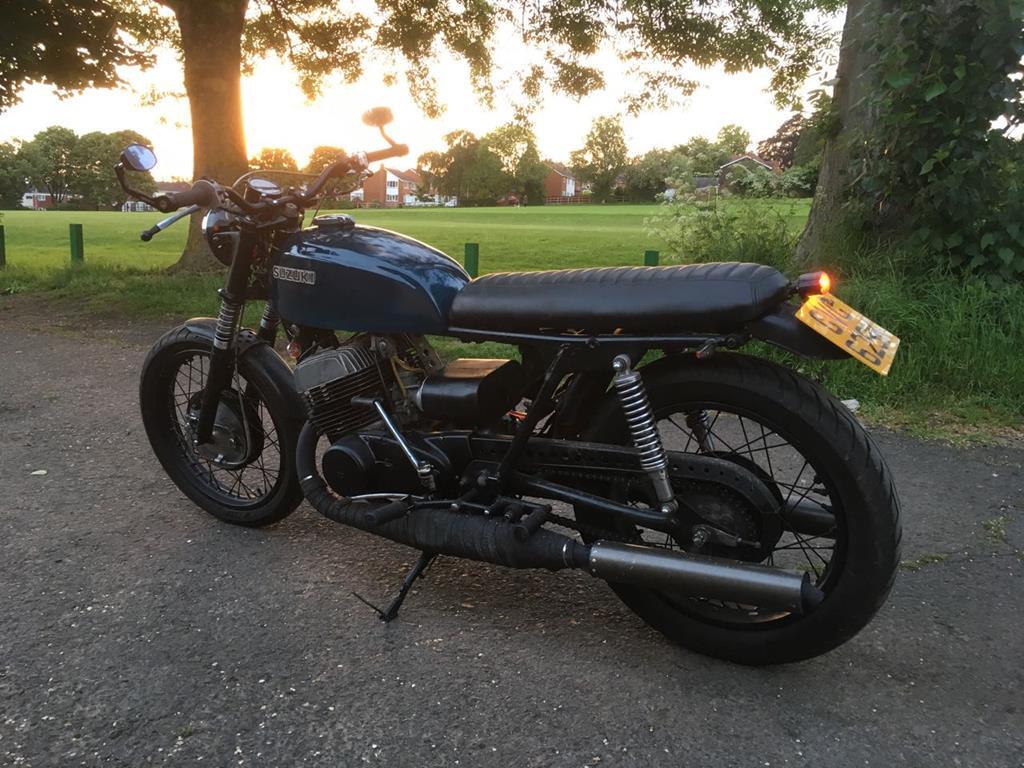 |
| |
Last Edit: Jun 2, 2018 9:28:57 GMT by goldnrust
|
|
|
|
|
|
|
|
You really do have the touch.
Love a two stroke.
|
| |
|
|
bstardchild
Club Retro Rides Member
Posts: 14,971
Club RR Member Number: 71
|
|
|
|
Great Job - I do like an old smoker One question - if you raised the exhaust port did you correct the compression by skimming either heads or barrels? Oh and I'd spray the Suzuki Badges same colour as the tank and then polish off the paint from the lettering  |
| |
|
|
|
|


 haha. Your T200 looks pretty tidy there. I suspect lots of them need a rebuild really, I image there's a lot running round on less that perfect crank seals if nothing else. 40 year old rubber seals don't tend to hold air pressure so well. I feel more comfy with a 2 stroke than I do 4 really, so my engine will be getting a complete rebuild.


 Whilst I was now very concerned about the level of mechanical skill being shown in this engine, the gasket situation is at least easily solved! The damaged head bolt, might be more tricky. The head will survive, but I'm not sure about the barrel as the bolt hole has been drilled out to such an extent that it touches the liner. So I can't pull it out bigger and helical it down. I would weld it up and re-drill/tap but I'd worry about distorting the bore?


 haha.
haha.


 .
.


