51mo
Part of things

Posts: 39 
|
|
Jul 21, 2015 18:56:22 GMT
|
|
|
| |
Last Edit: Apr 16, 2016 12:41:39 GMT by 51mo
|
|
|
|
51mo
Part of things
Posts: 39
|
|
Jul 21, 2015 19:01:21 GMT
|
|
|
| |
|
|
51mo
Part of things
Posts: 39
|
|
Jul 21, 2015 19:02:17 GMT
|
|
|
| |
|
|
51mo
Part of things
Posts: 39
|
|
Jul 21, 2015 19:03:23 GMT
|
|
|
| |
|
|
51mo
Part of things
Posts: 39
|
|
Jul 21, 2015 19:04:40 GMT
|
Wells chaps, here is an update to cover the past 2 weekends worth of work. This work is all on the passenger side. One of 3 holes under the front wing/bulkhead 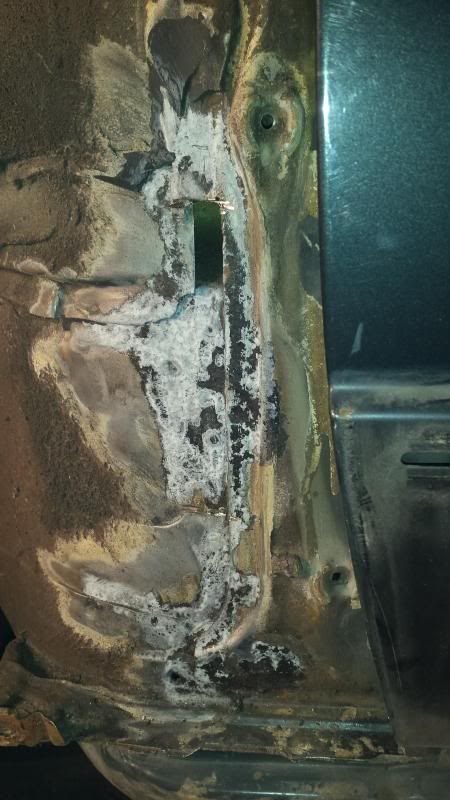 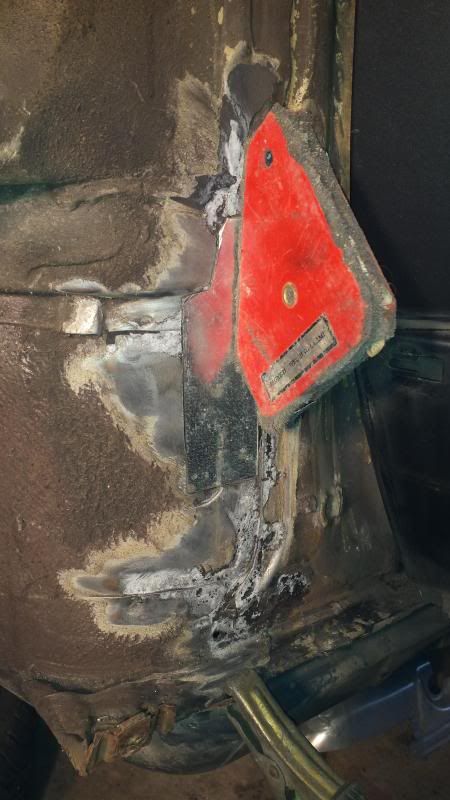 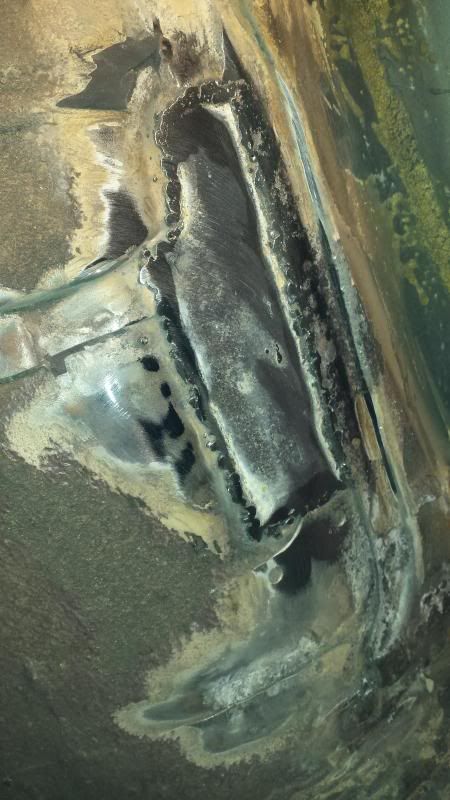 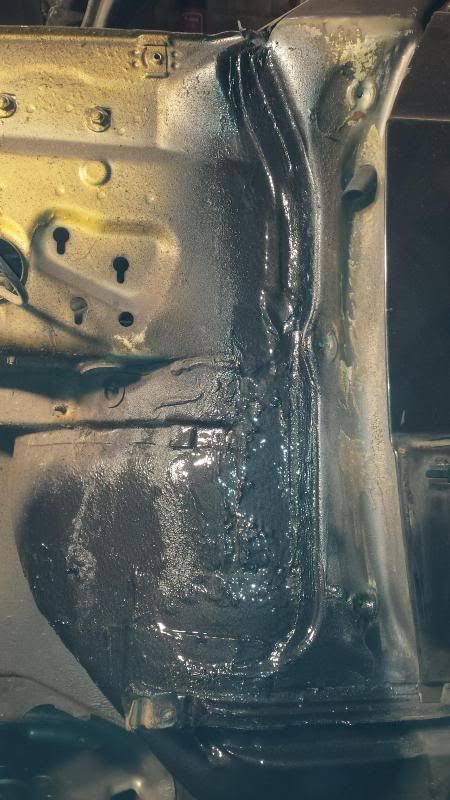 A small hole in the foot well which we managed to repair just by welding 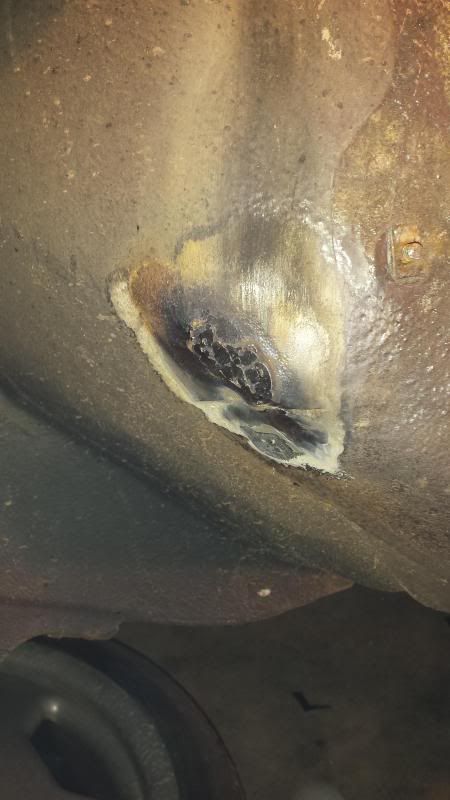 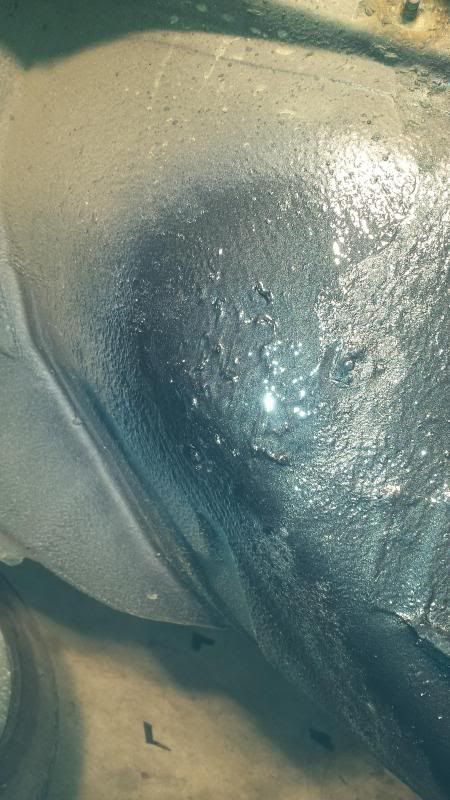 And another pin hole welded over 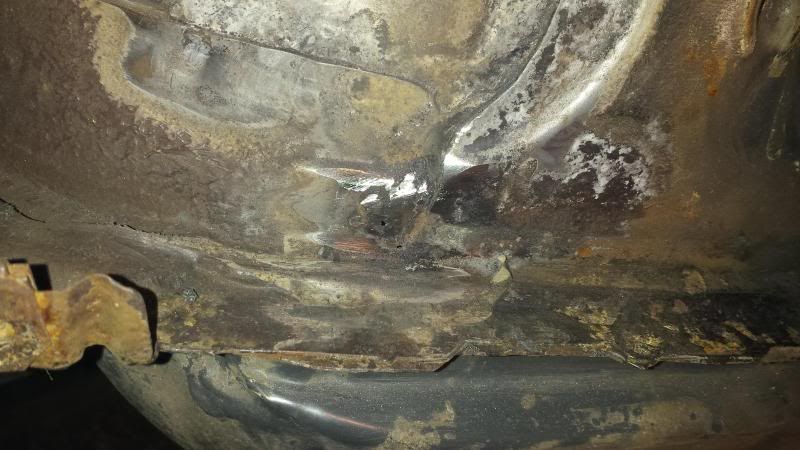 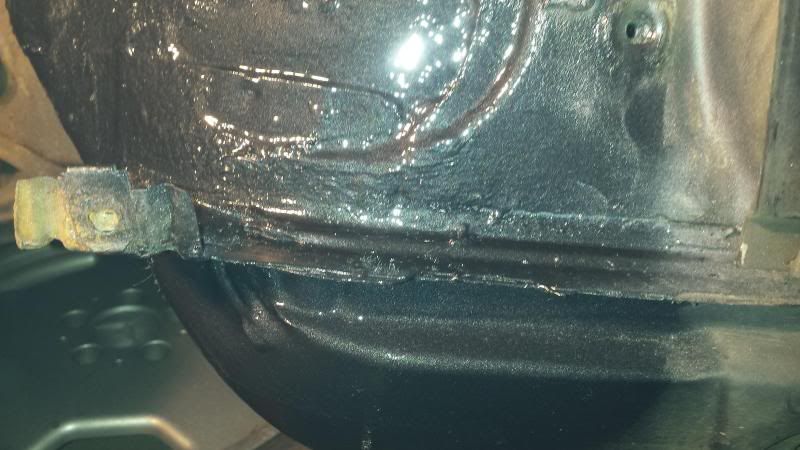 Sill repairs 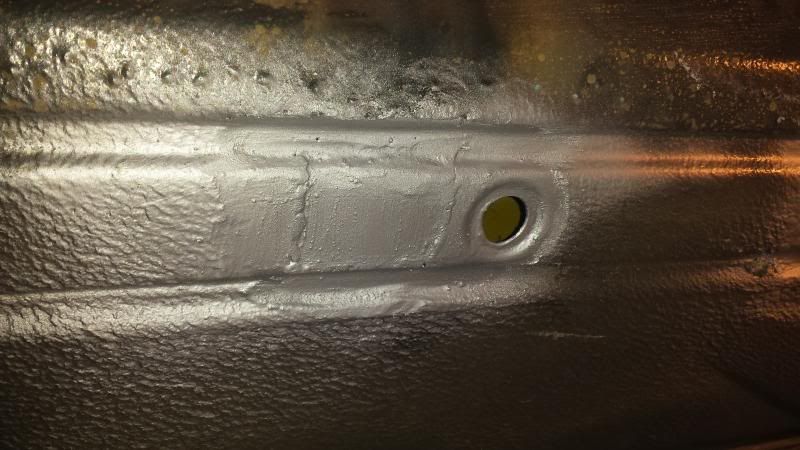 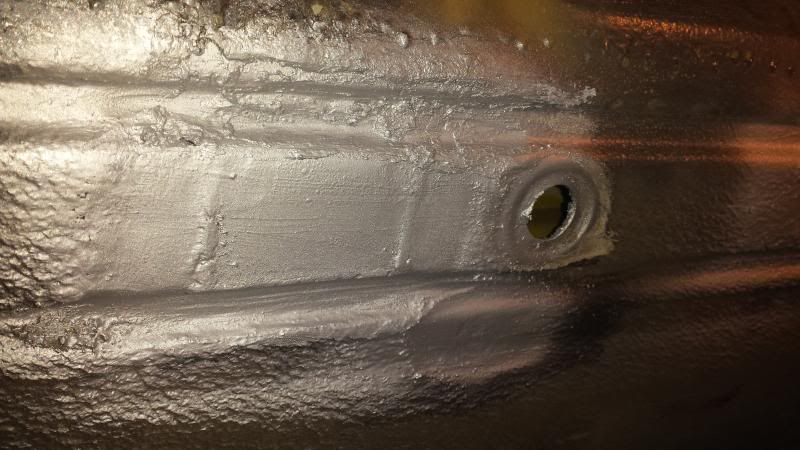 We was then waiting for a new sill to be delivered so we can use the front and back profile off it so we started working on the rear arch. On this side there was more of the inner wing left so we decided to keep as much of it as we could whilst making sure we was welding back on to good thick metal. This will hopefully make the fit of the outer wing better and more original. 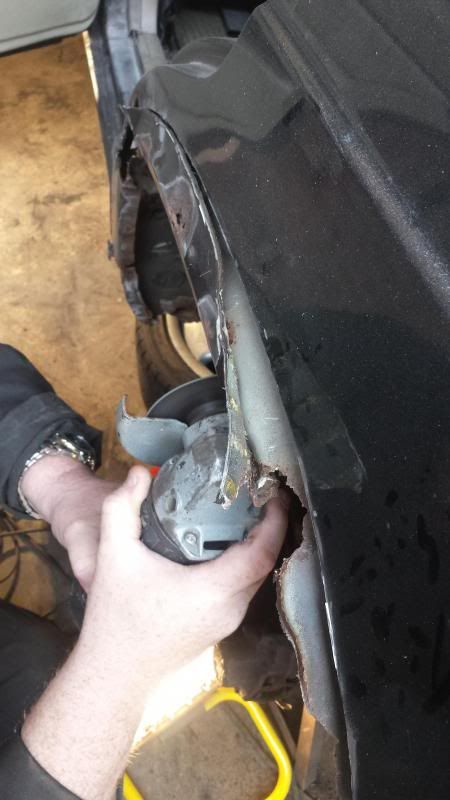 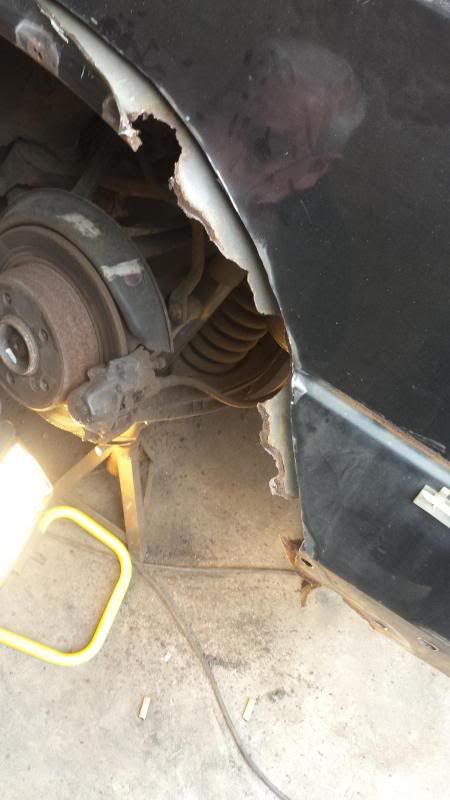 Finally got the outer wing separated from the inner without too much trouble 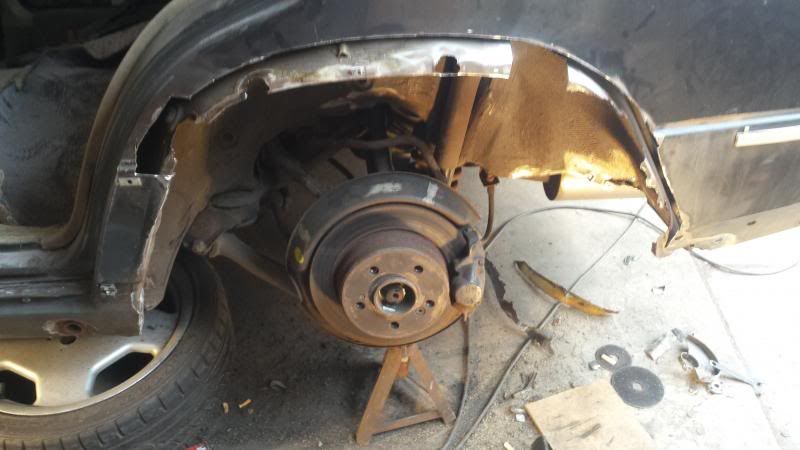 Then we started to attack the inner wing 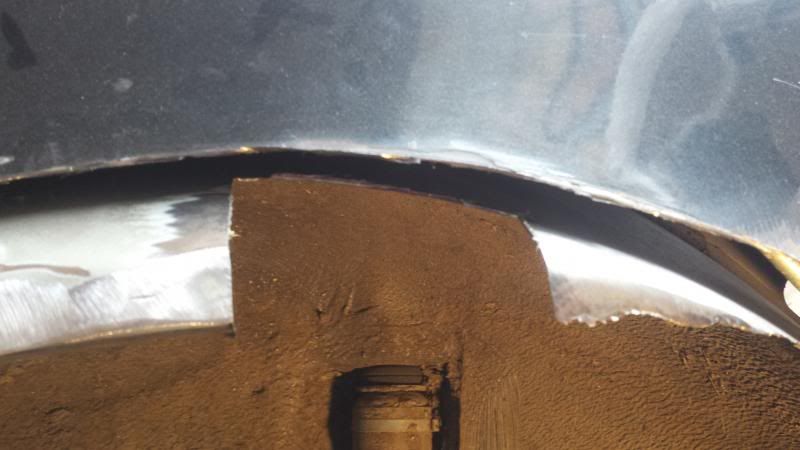 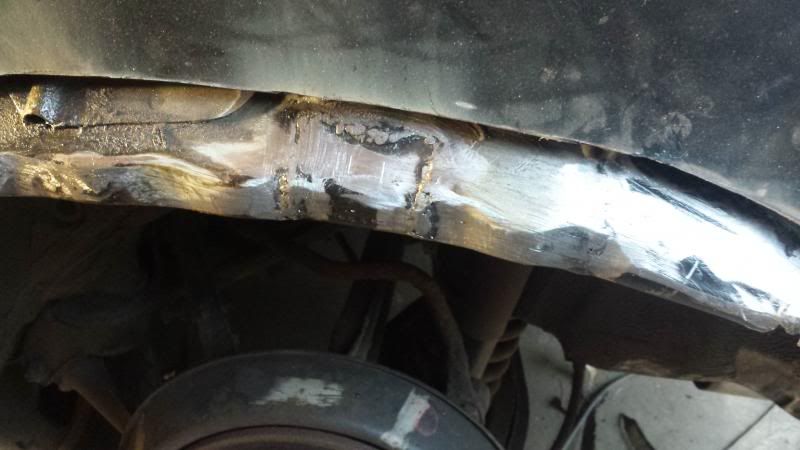 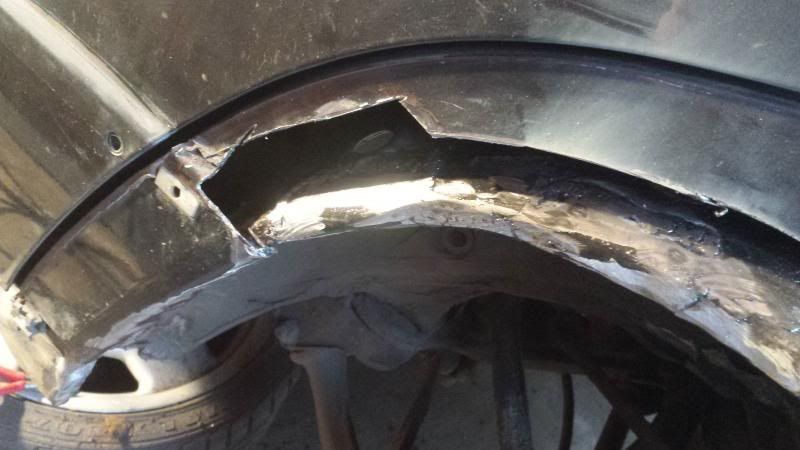 lastly can anyone tell me what this is? it looks like it goes to a motor in the boot but the end of it is un supported and I am not sure if its meant to be clipped or bolted somewhere? 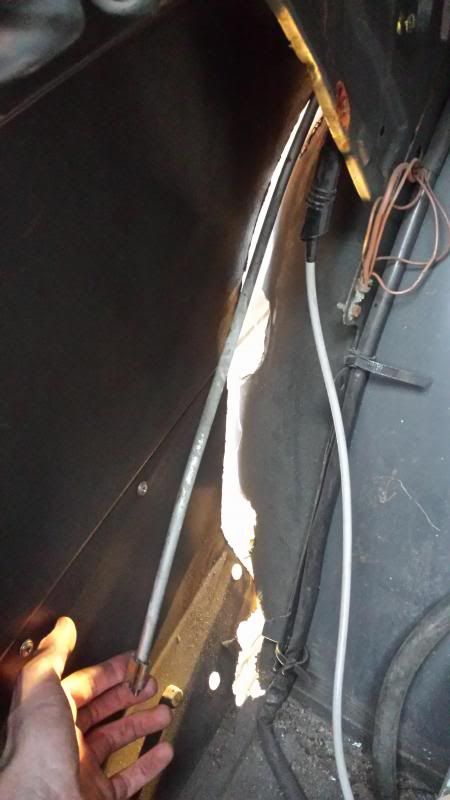 So an overall update on the bodywork left to be carried out is: Front of the sill Rear of the sill & floor Rear arch |
| |
|
|
51mo
Part of things
Posts: 39
|
|
Jul 21, 2015 19:05:26 GMT
|
So its been a while since the last update but work has been progressing.....Slower than anticipated but still progressing! This is the rear inner arch which has had some metal welded back in to where metal was once... 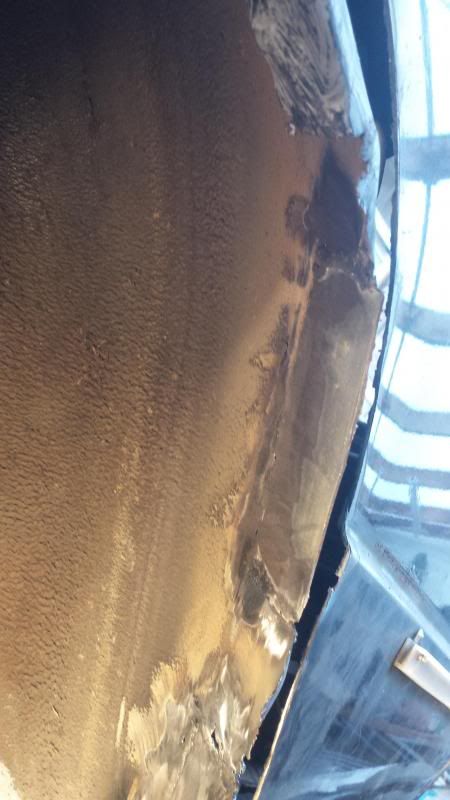 Working on figuring out the line of the inner arch 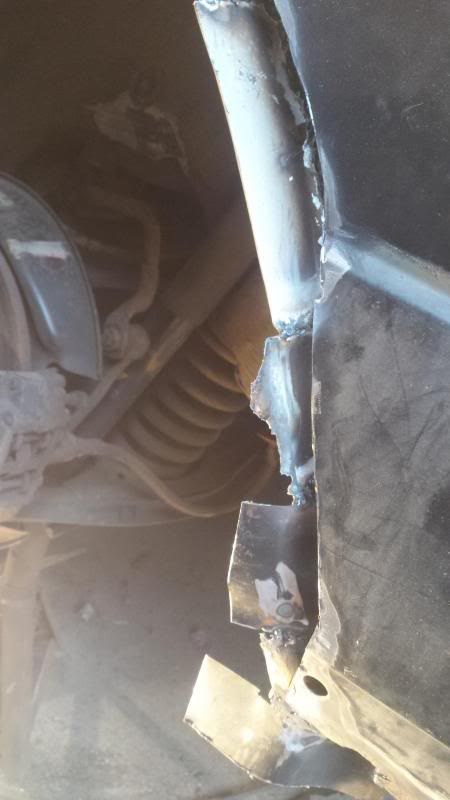 And then I seen an engine, gearbox, ECU, intercooler and whatever else I wanted to take off a car for £250 so as you can imagine I think I got everything except for the wheels and body! Anyway here is what you want to see. The M111 2.3L supercharged engine 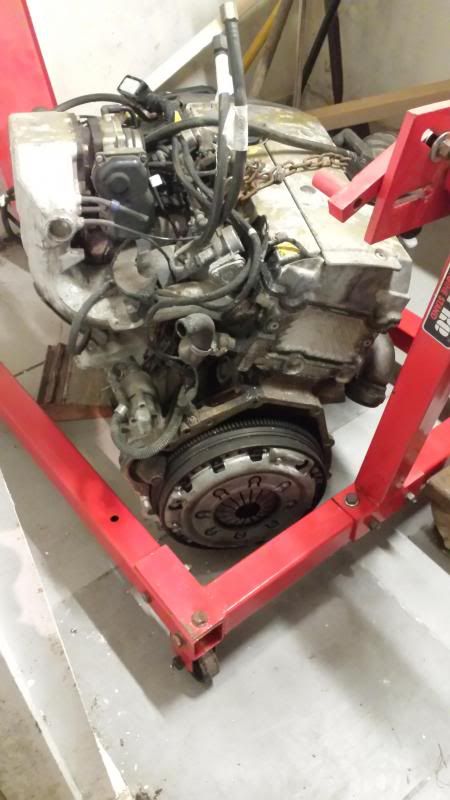 A selecting of procured parts (except the fabric softener! 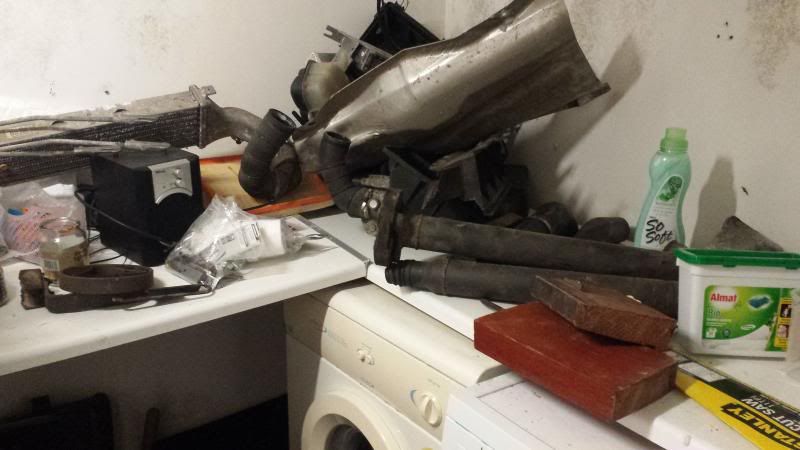 Clutch off the engine looks like it has plenty of life left 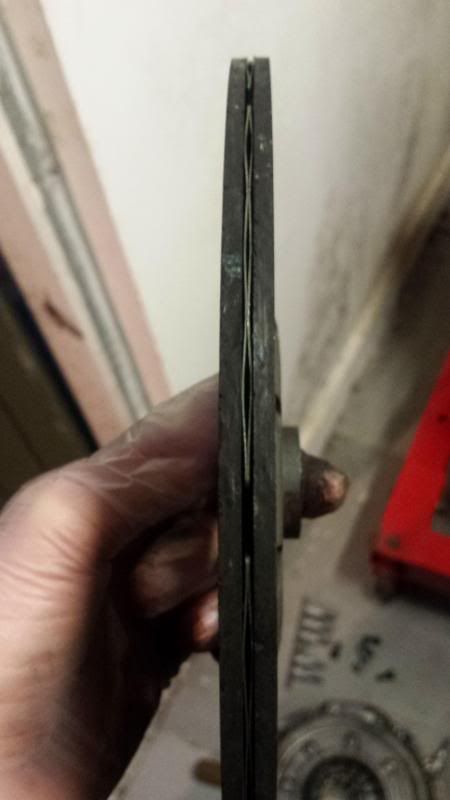 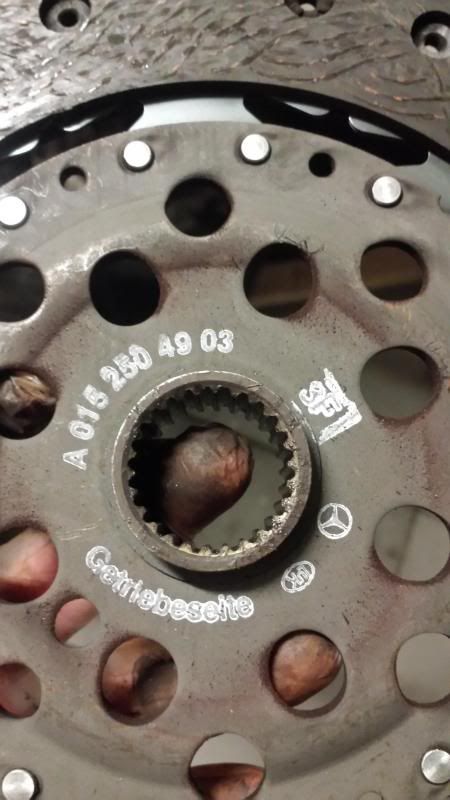 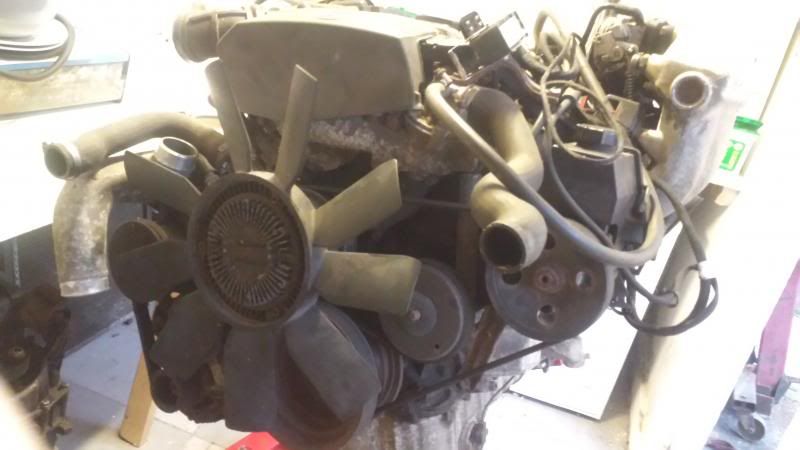 The bit that matters. 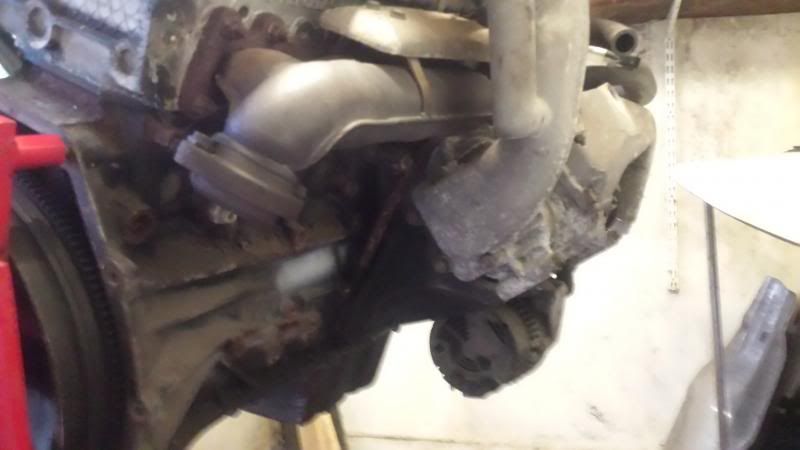  This gave me the much needed inspiration I needed to get my act together and carry on putting in the hours on the welding front So it continues.... (Front passenger sill) 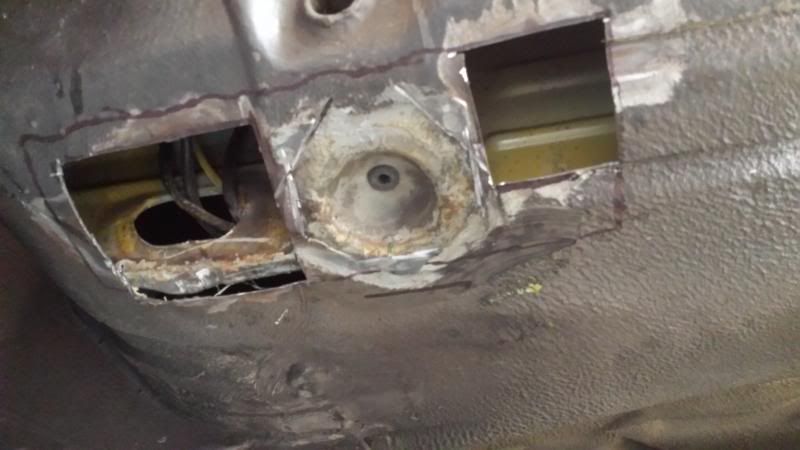 Rear sill/floor 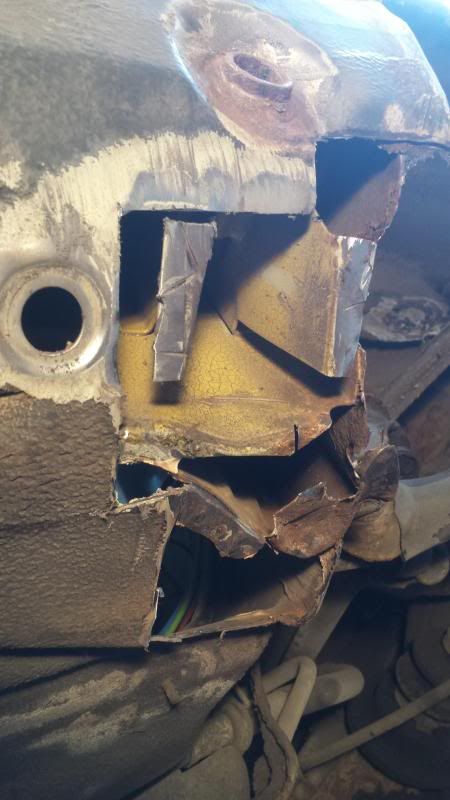 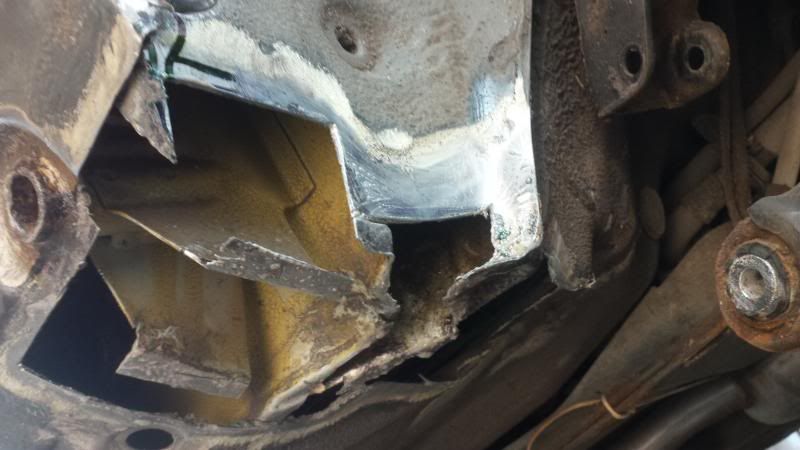 All of which aren't looking very pretty. That's better 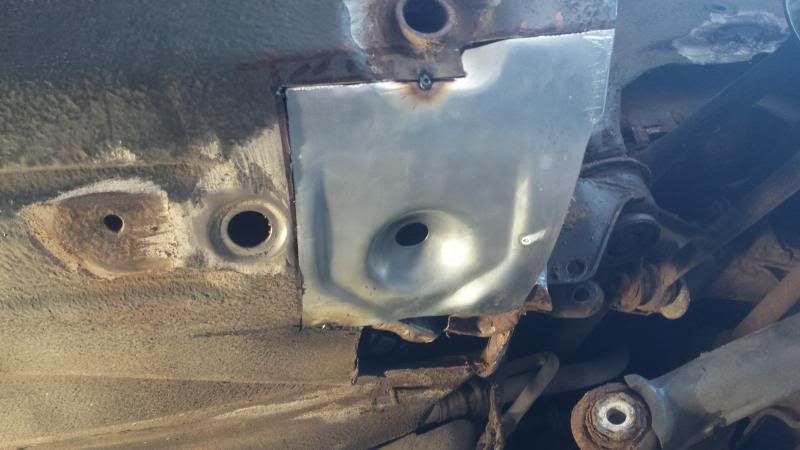 Front of the rear passenger wheel arch  Starting to look a bit better 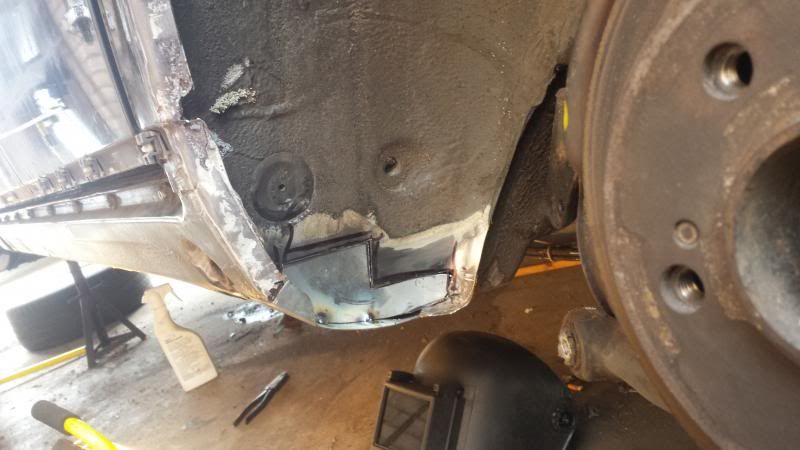 Finally got the outer wing in place 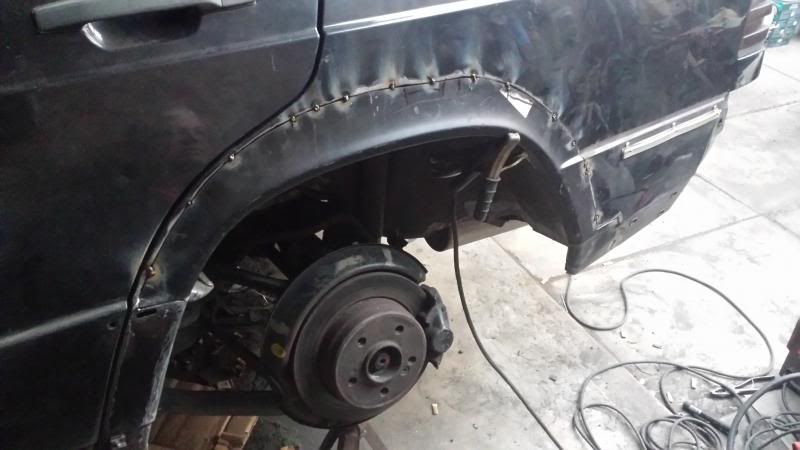 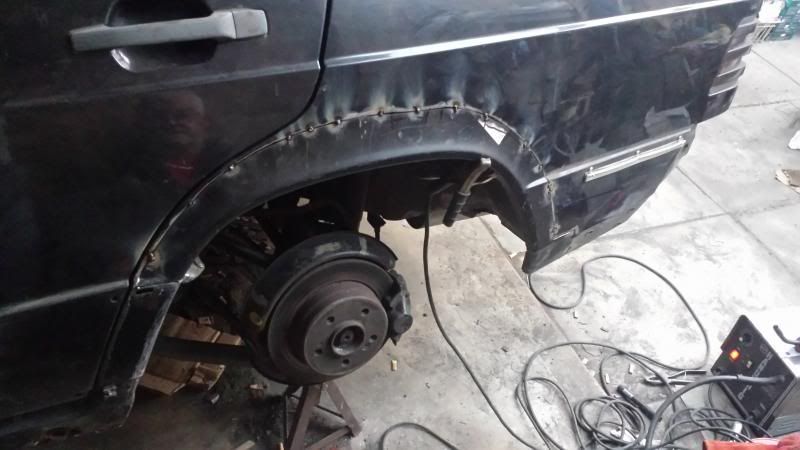 More to follow shortly. |
| |
|
|
51mo
Part of things
Posts: 39
|
|
Jul 21, 2015 19:06:42 GMT
|
So we finally attacked the spare wheel well which we was not really looking forward too. At the start 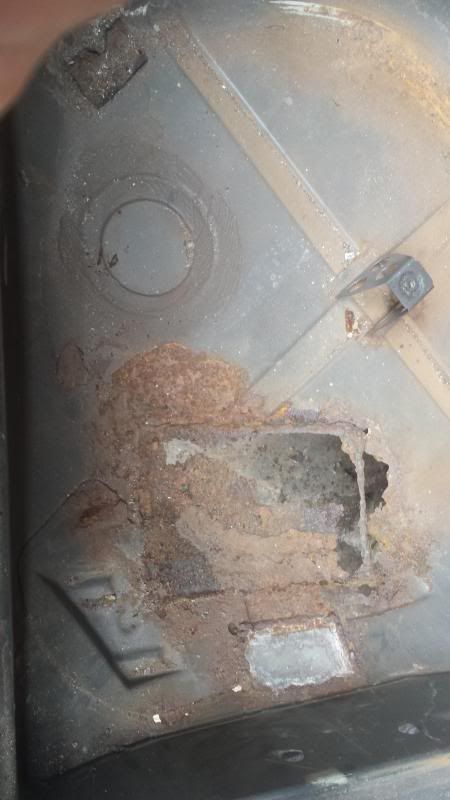 Cut out the rust 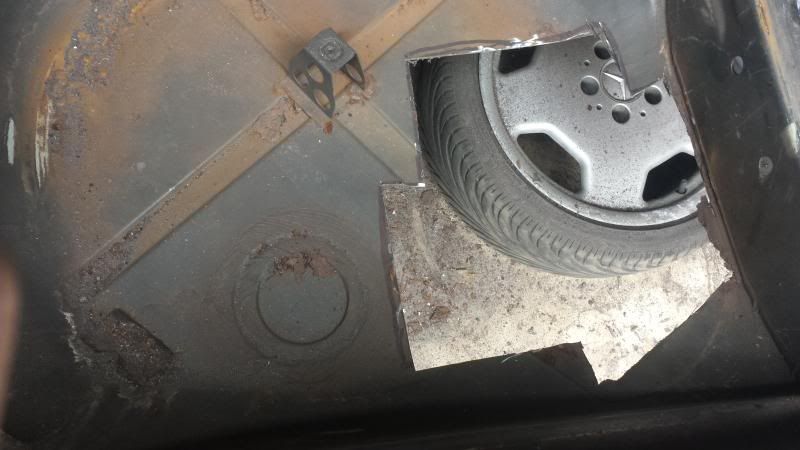 Welded in place 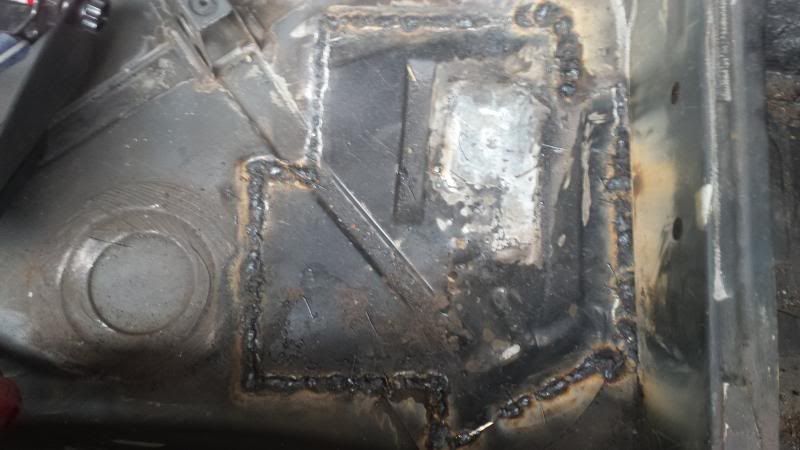 Welds ground down 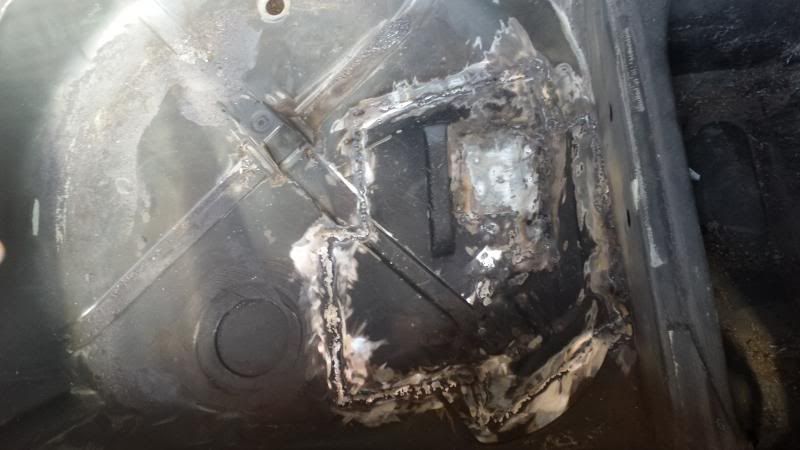 Galvanise sprayed & seam sealed 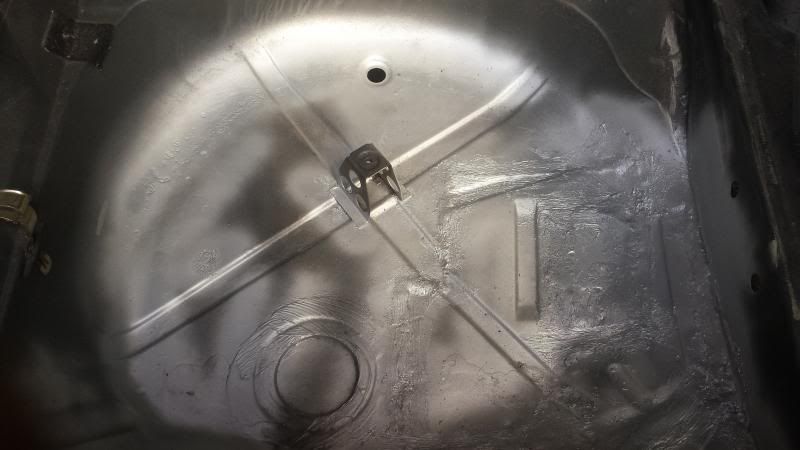 And finally painted in body colour  Cleaning up the old towing eye 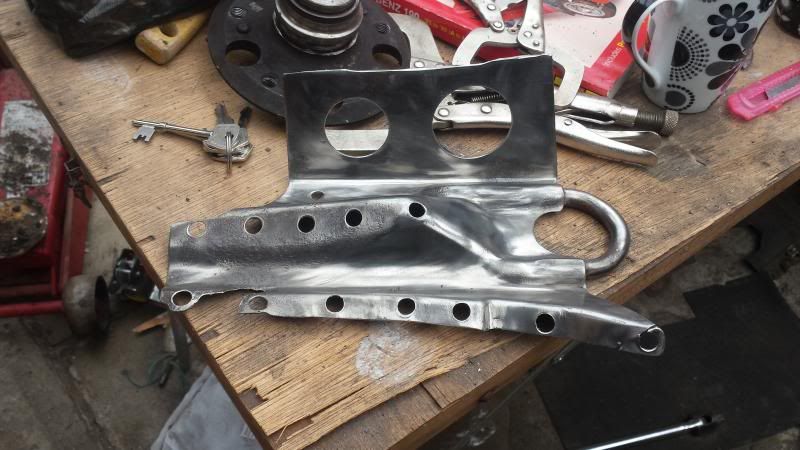 Small repair 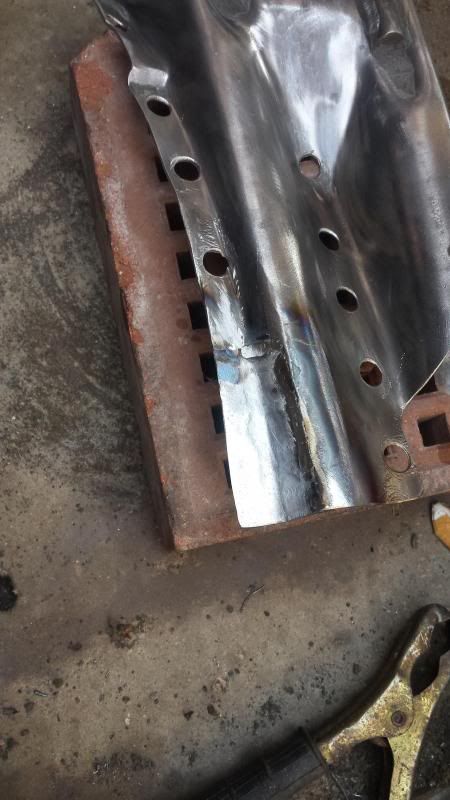 And a bit of paint 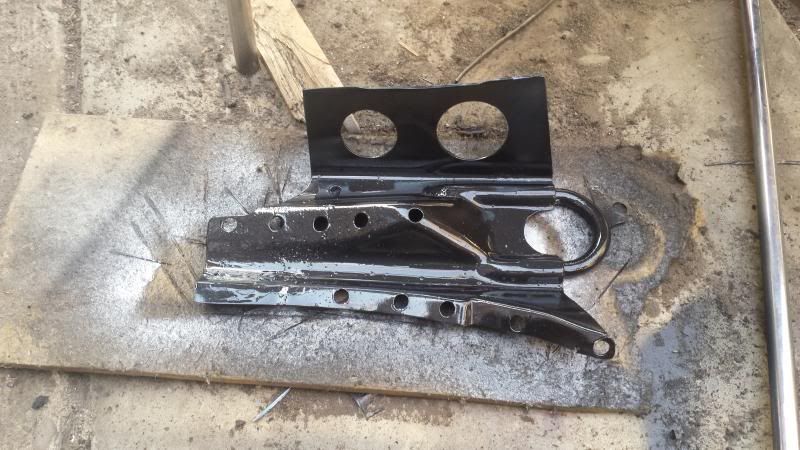 Welded back in place 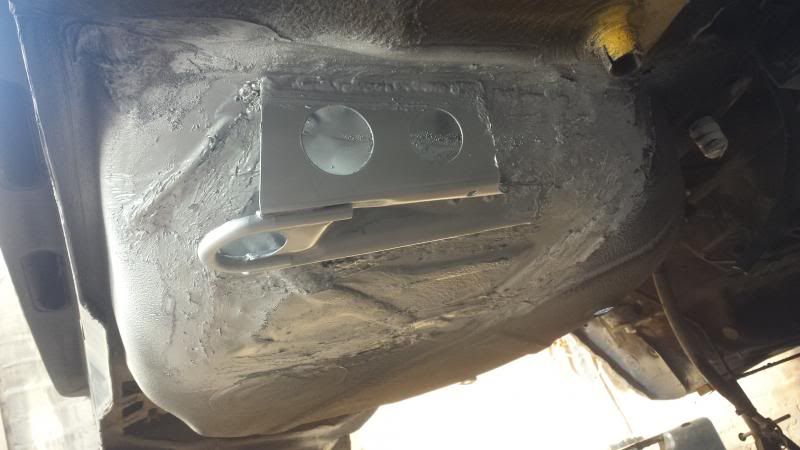 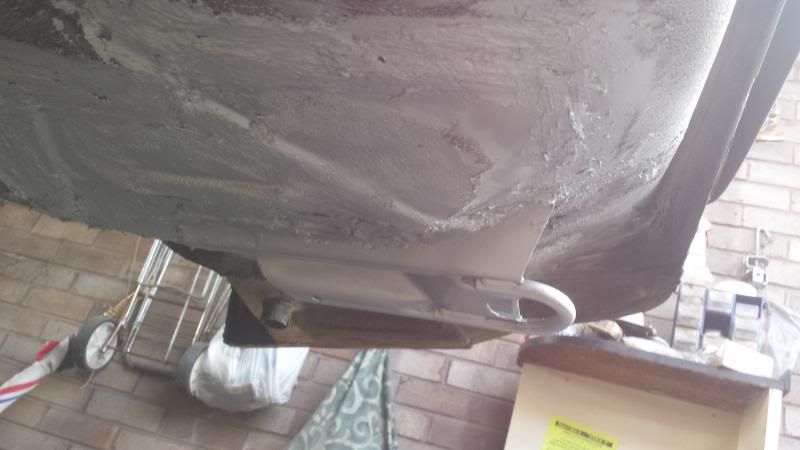 Its also pretty level from the back (quite lucky!) After removing the sub frame and giving the underneath a bit of a fettle the only hole we found was above the passenger side ARB mount  We couldn't cut it out and replace because of the lip so we had to created a plate to cover it. 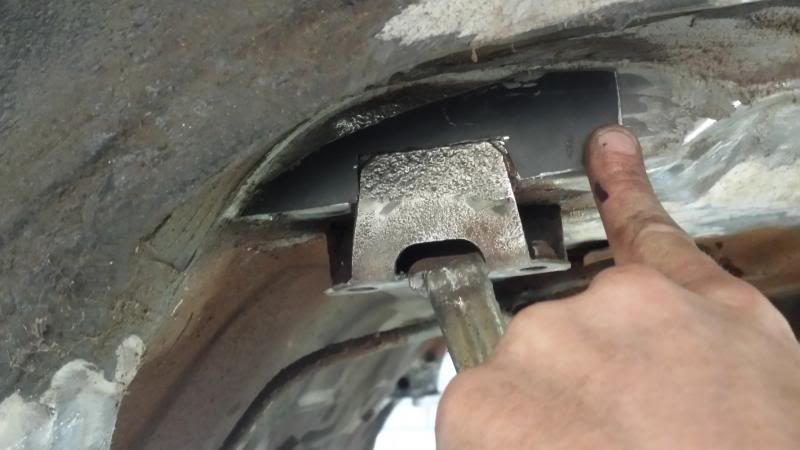 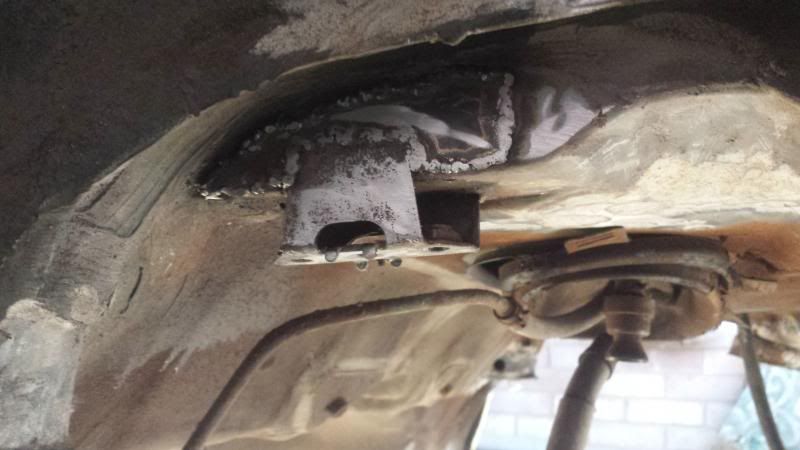  Whilst we were working on this I sent the sub-frame, bottom arms and hub carriers to the powder coaters and bought some new bushes, wheels bearings, CV boots & lowering springs 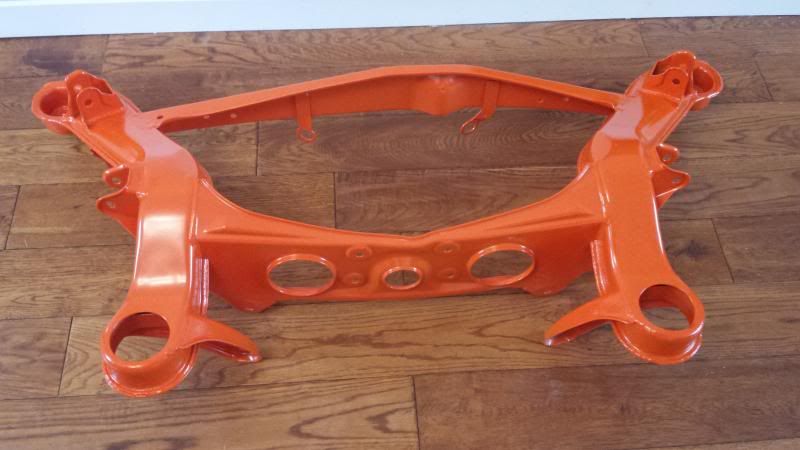 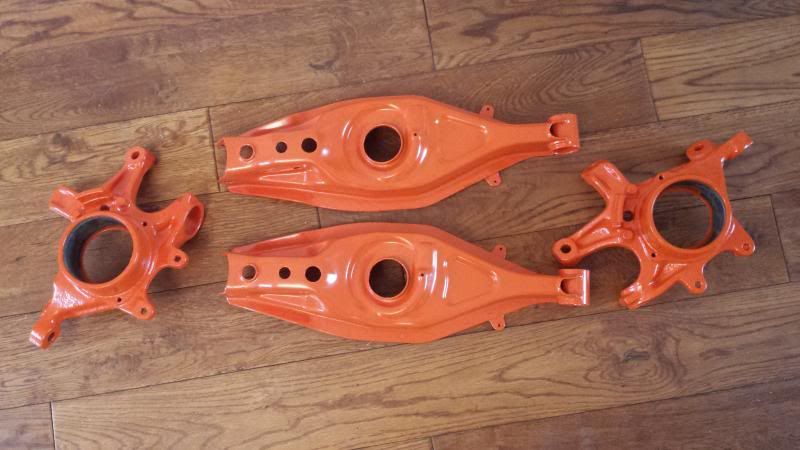 And QA checked by the hound 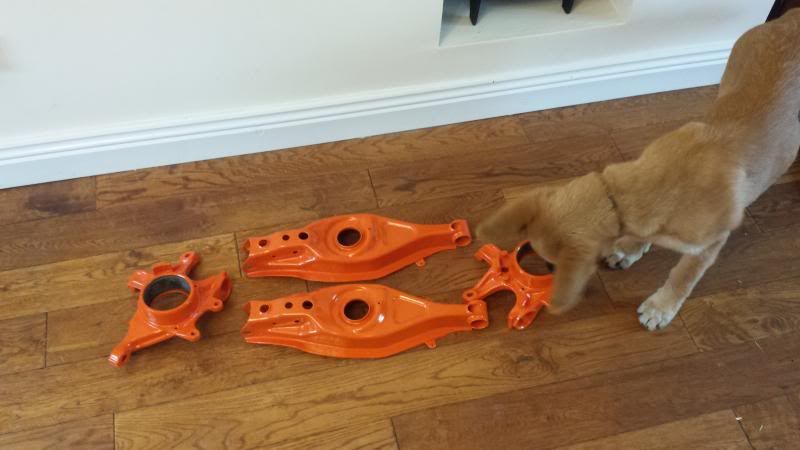 Accumulation of parts to fit 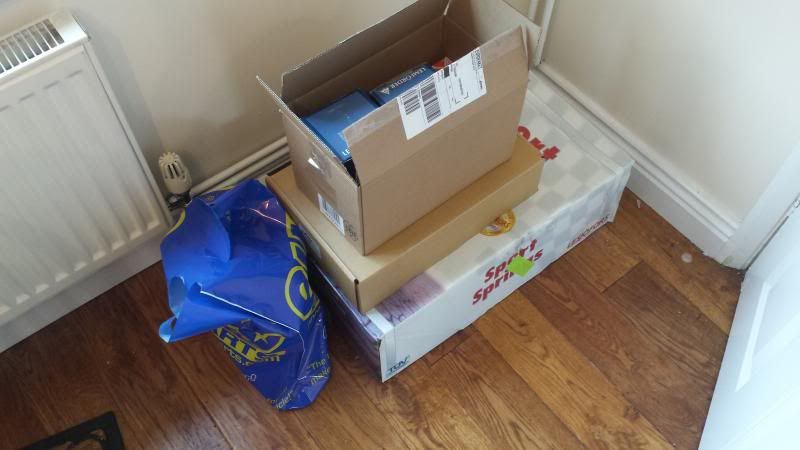 That's up to date. What's next: Buy a better compressor Under seal the back end De grease and paint differential, half shafts & shock absorbers Fit bearing and bushes Re fit sub frame and re build rear end Fit new rear to front brake line and centre to each side lines Buy and fit new brake disc's, pads and hand brake cables All the above will hopefully be done in the next 2-3 weeks Then put the wheels on and move to the front end (Front suspension & start taking the only puny 2.0 Auto out |
| |
|
|
51mo
Part of things
Posts: 39
|
|
Jul 21, 2015 19:07:32 GMT
|
Ok so since the last update a small amount of quality work has taken place. So a couple of weeks back when we had the first bit of good weather I decided to have a painting weekend so I had a go at painting up the gearbox Partly primed 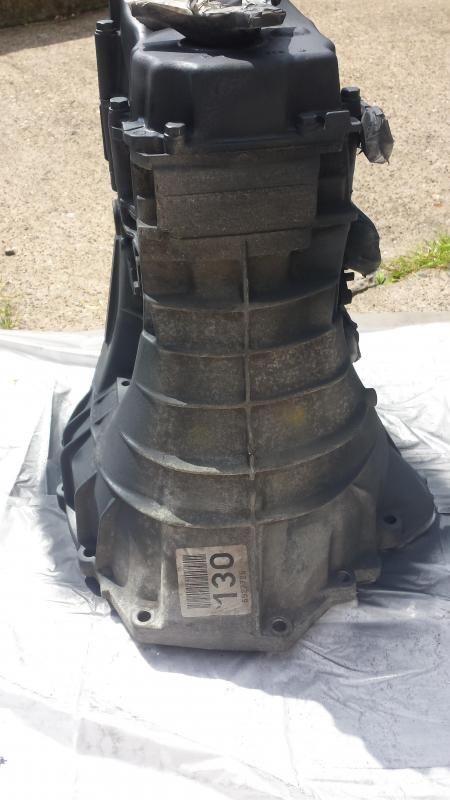 fully primed in 2/3 coats of etch primer 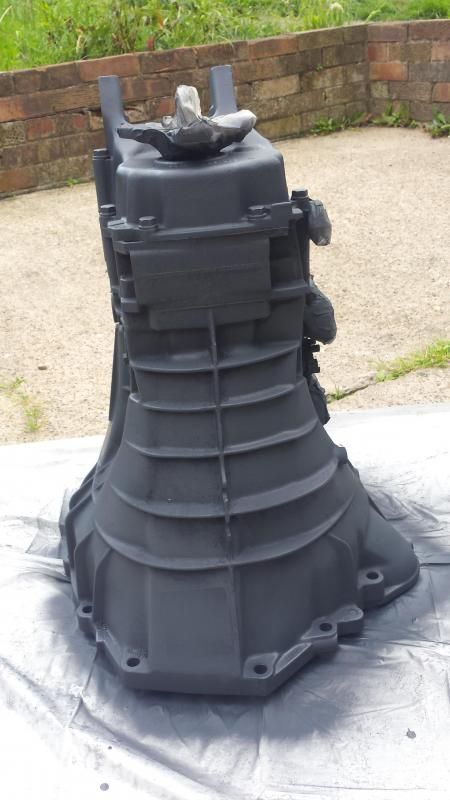 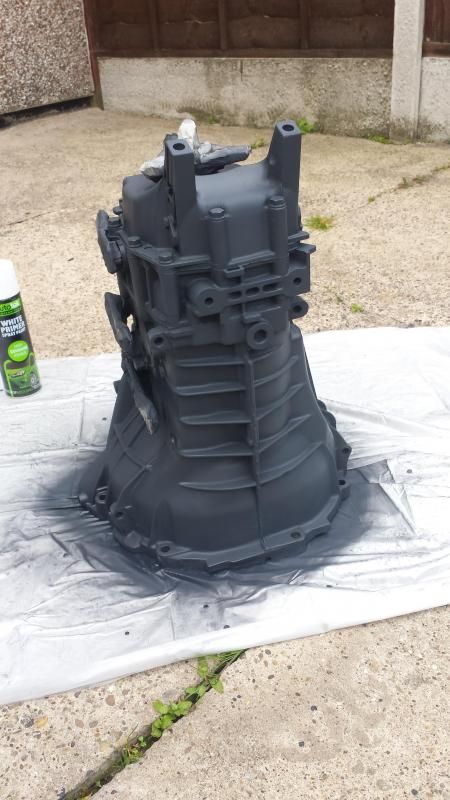 First coat of paint which when it first went on in the sunshine looked like chrome! 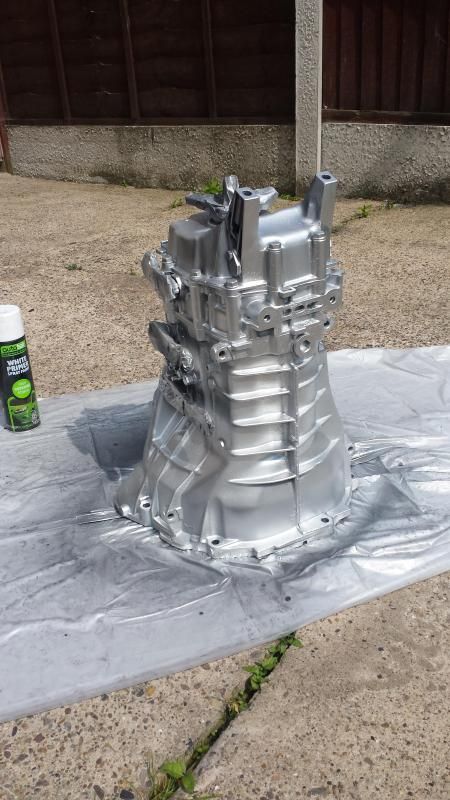 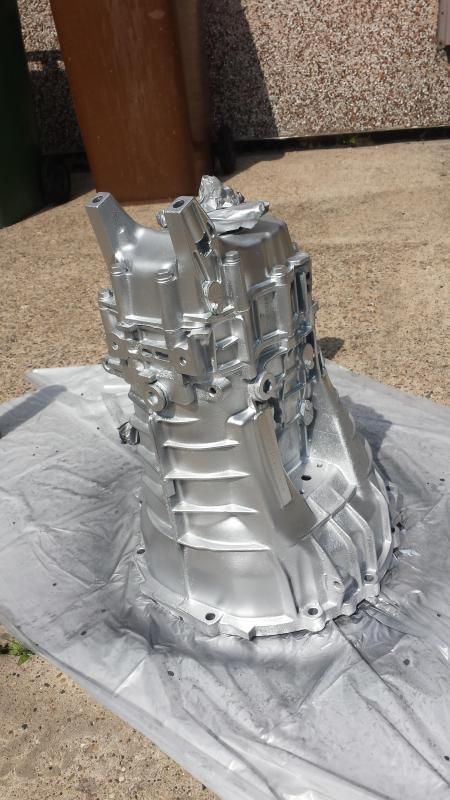 After drying overnight & 2 coats of clear lacquer 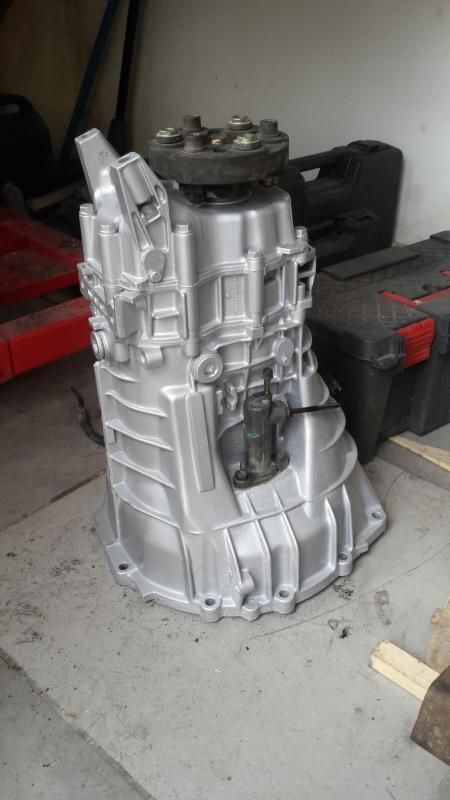 We then bought a new compressor for the spray able under seal and spray painting to be done at a later date. 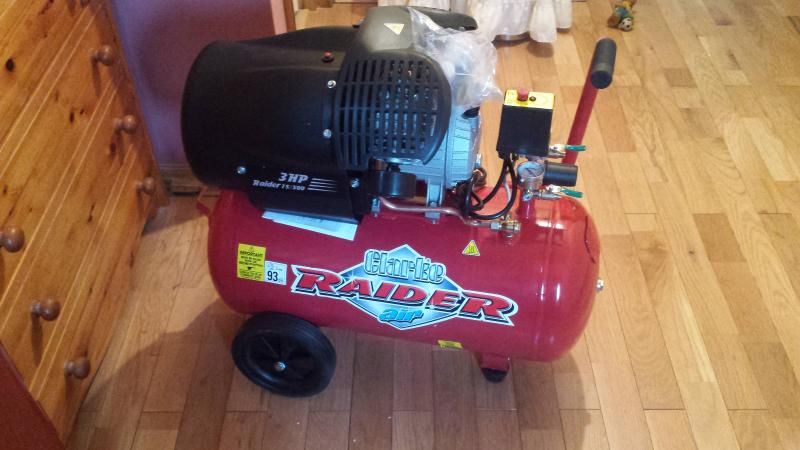 Priming the control arms and new brake disc shield 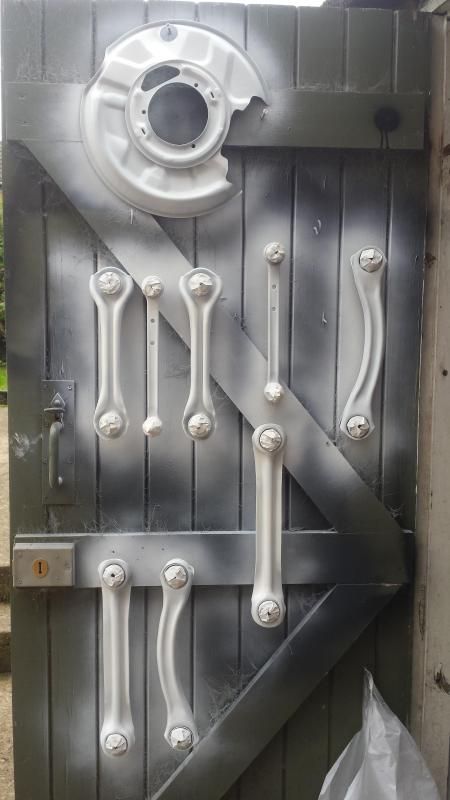 |
| |
|
|
51mo
Part of things
Posts: 39
|
|
Jul 21, 2015 19:08:22 GMT
|
|
|
| |
|
|
51mo
Part of things
Posts: 39
|
|
Jul 21, 2015 19:09:06 GMT
|
After a bit of bad news at work yesterday I decided to do a bit more on the car to take my mind of it and set about getting the sub frame in place. 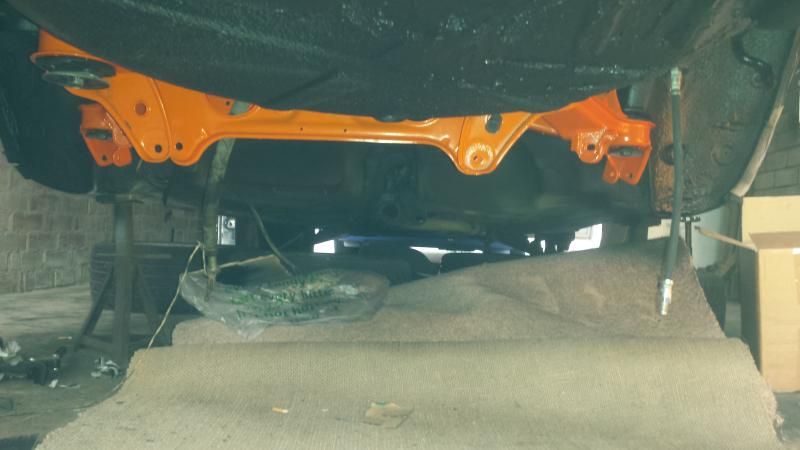 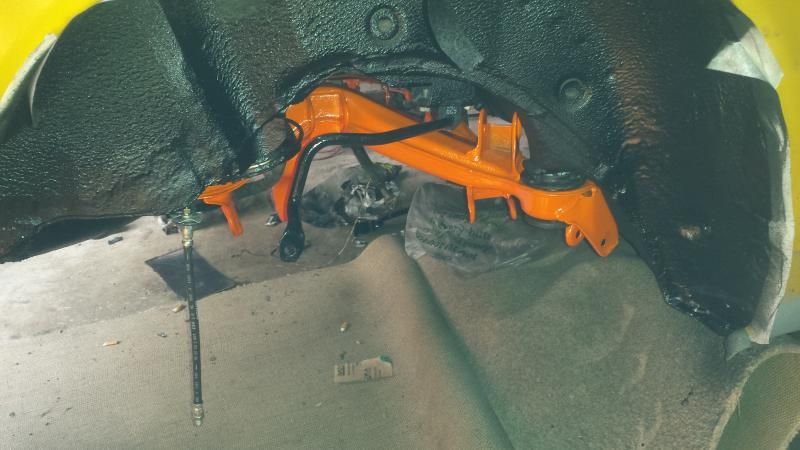 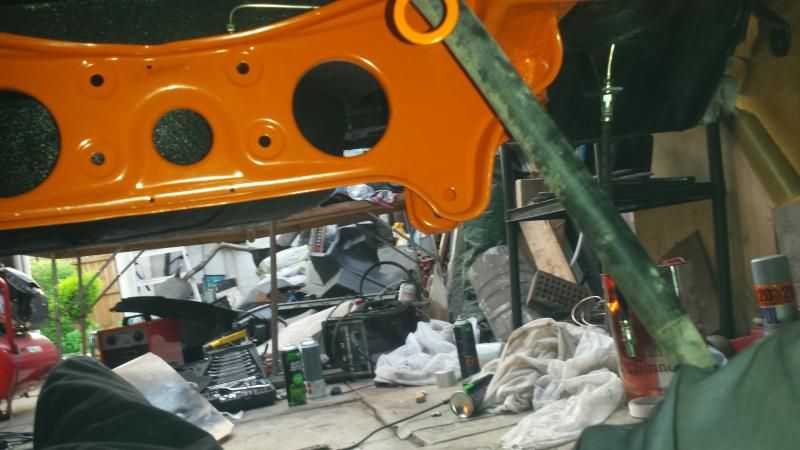 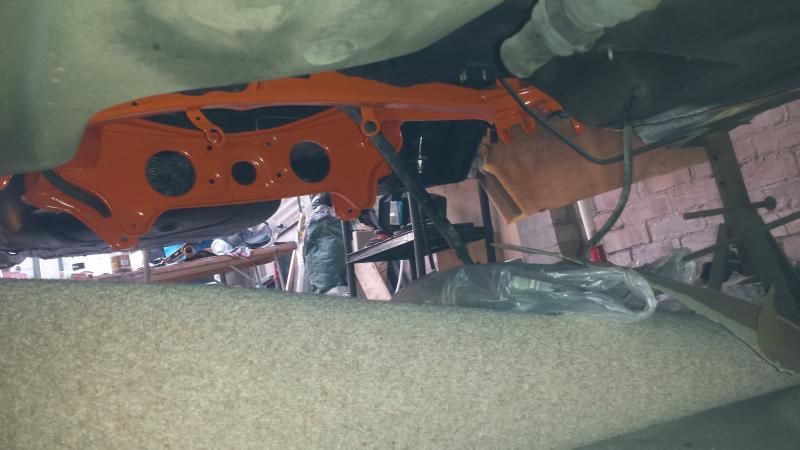 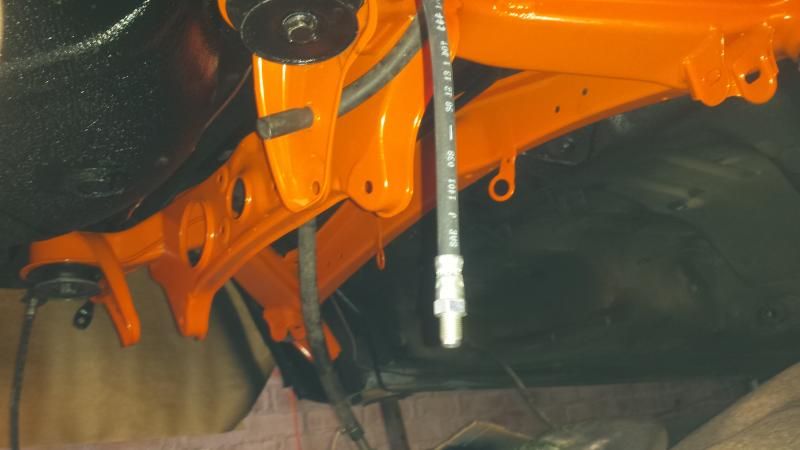 I also found some clips whilst combing ebay to hold the flexible brake lines in place 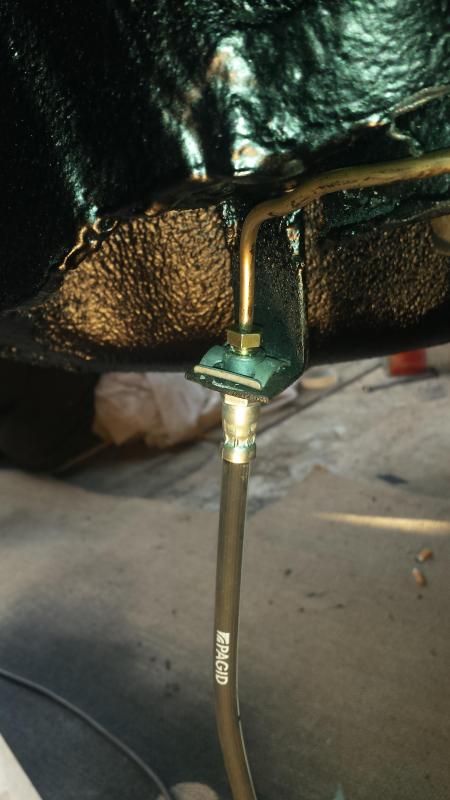 I don't think there bad for £1.10each This is now up to date and shows where the car is currently. Thanks for reading up to press and thanks for your encouraging words :evo2: |
| |
|
|
|
|
51mo
Part of things
Posts: 39
|
|
Jul 21, 2015 19:09:35 GMT
|
*update* The back end is now finished! 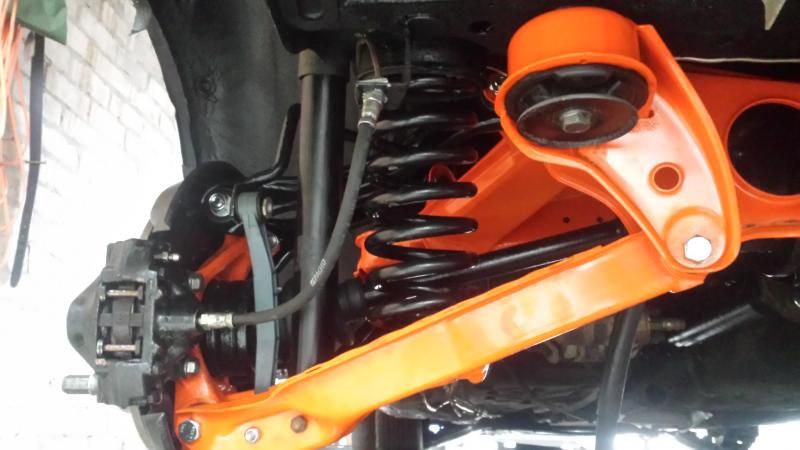 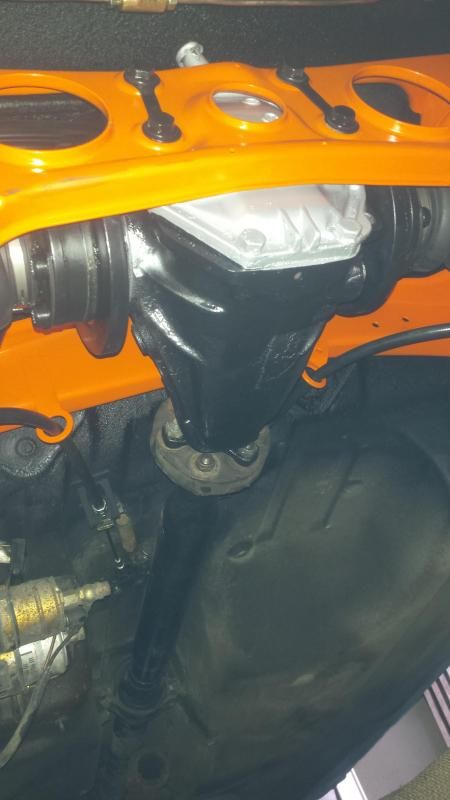 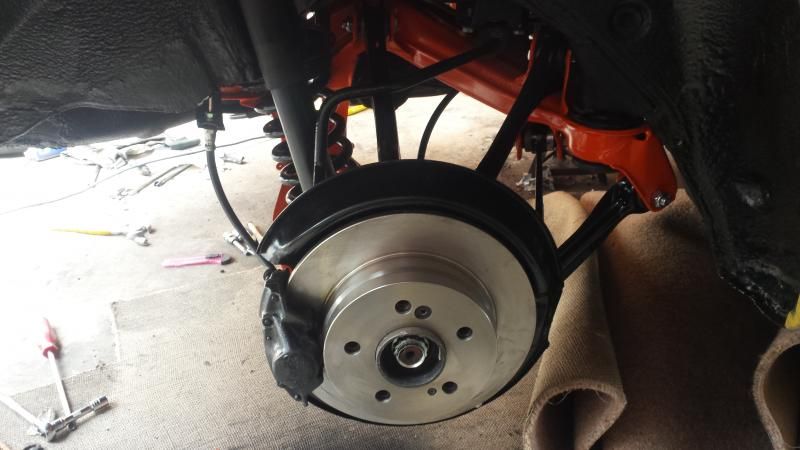  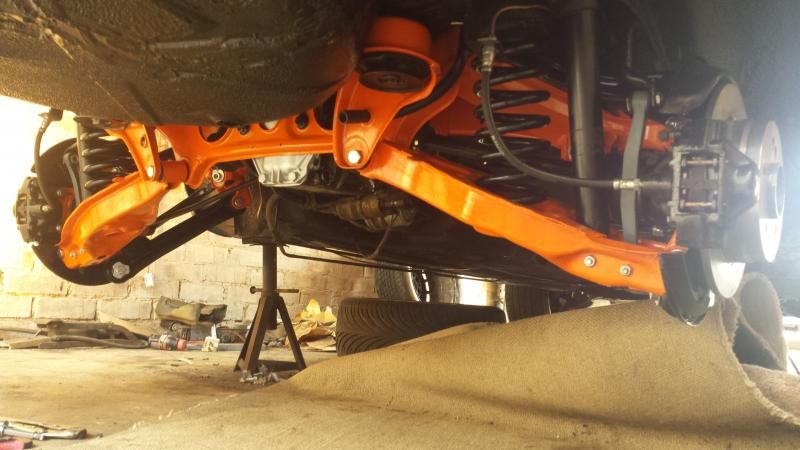 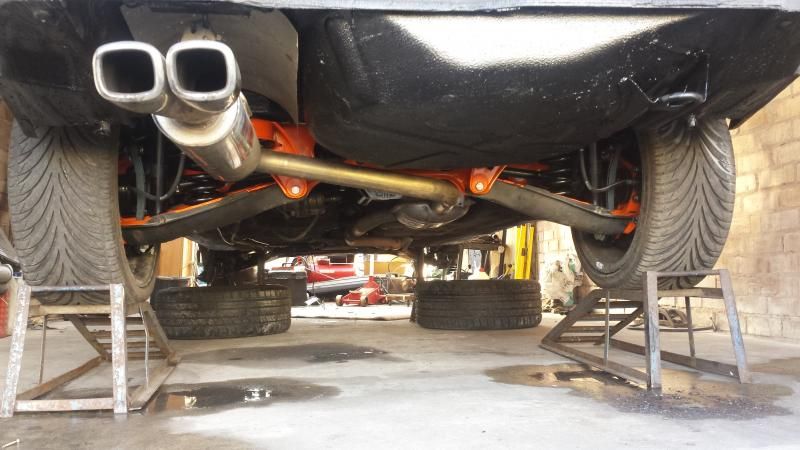 The covers were put on just to jack the car on to the ramps So after we finished the back we lowered the car to the ground again, took it outside to wash it and turn it around and then re positioned it to start working on the front end. 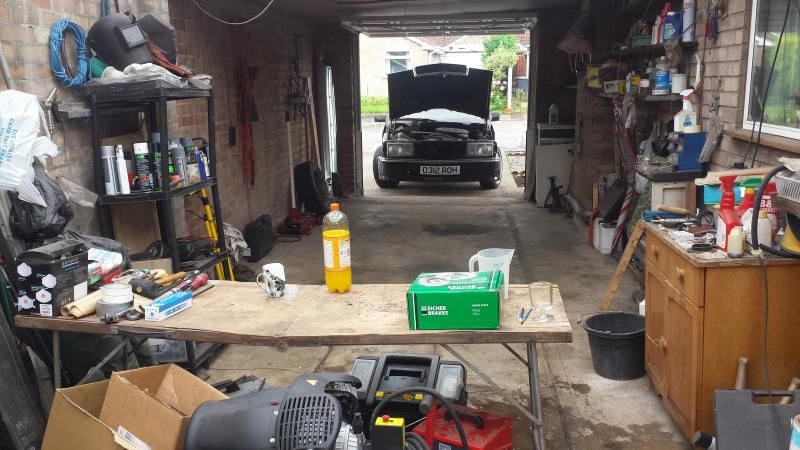 Then in the space of an hour it ended up like this. 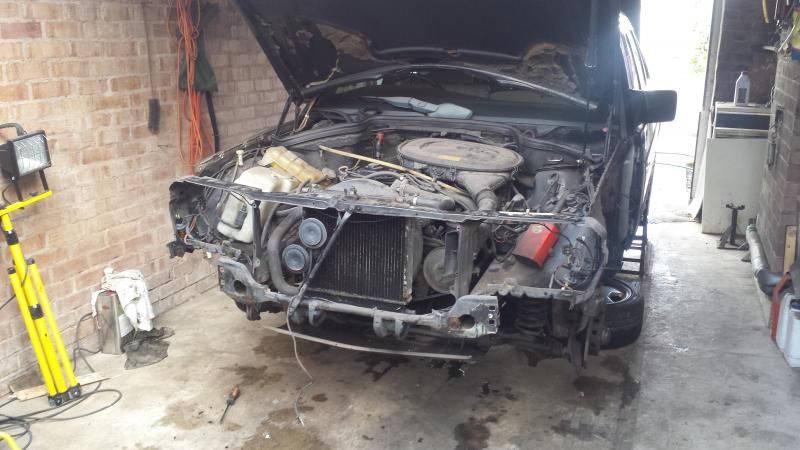 If anyone is after any parts from the engine or gearbox from a 2.0l Auto let me know and we can come to an arrangement because I have no use for any of it as a different engine is going in it. The Plan: Exhaust off Prop shaft off Front suspension both sides off Engine & gearbox out Under seal the middle and front section Wire brush the front of the car to find rust and repair what's needed Spray engine bay That's probably the next 2 months planned for. |
| |
|
|
51mo
Part of things
Posts: 39
|
|
Jul 21, 2015 19:10:27 GMT
|
|
|
| |
|
|
51mo
Part of things
Posts: 39
|
|
Jul 21, 2015 19:11:29 GMT
|
*Update* So work has been continuing although I haven't been on here to update the thread. The following updates cover the past 4 - 6 weeks approximately. Had a look to see how the C Class radiator would fit in the original mounts and it was quite obvious it wasn't going to work off the bat. 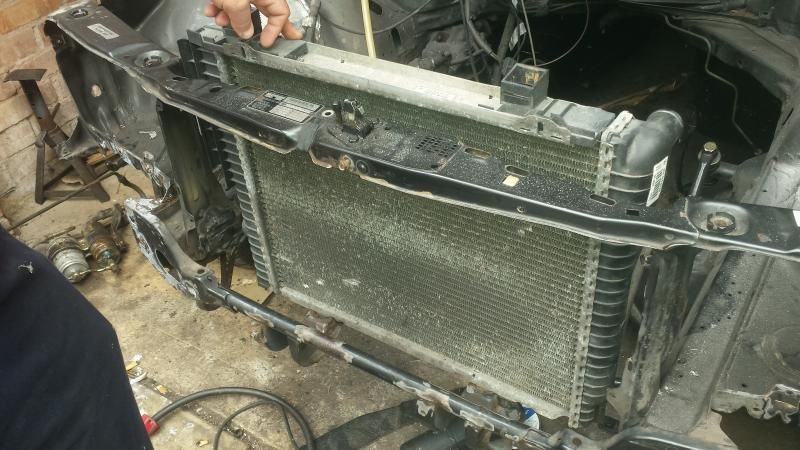 We have now cut off the mounts on the cross bar and when the engine is in we will rig up something to hold it in place. compared to the 190 radiator it is massive! We then started work on the inner wings in the engine bay as you could see the floor through them which is good for weight reduction but we though the MOT tester wouldn't see if that way, so we decided its best to repair them. We marked up the area to cut and decided to go with a square instead of a circle so we could get a better fit between both panels. 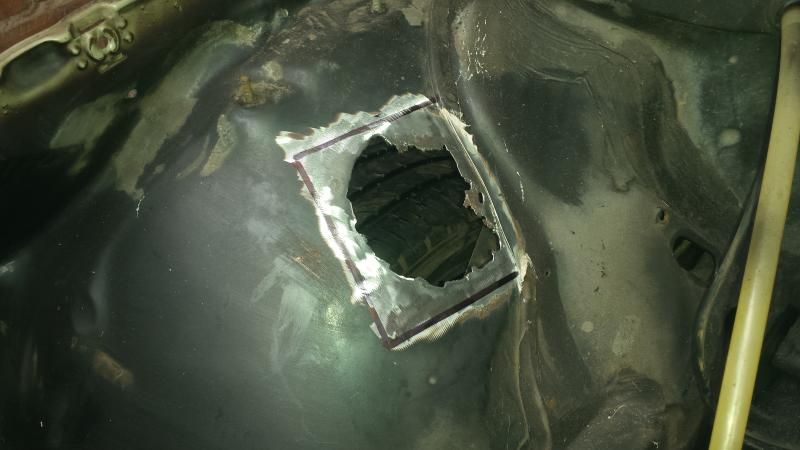 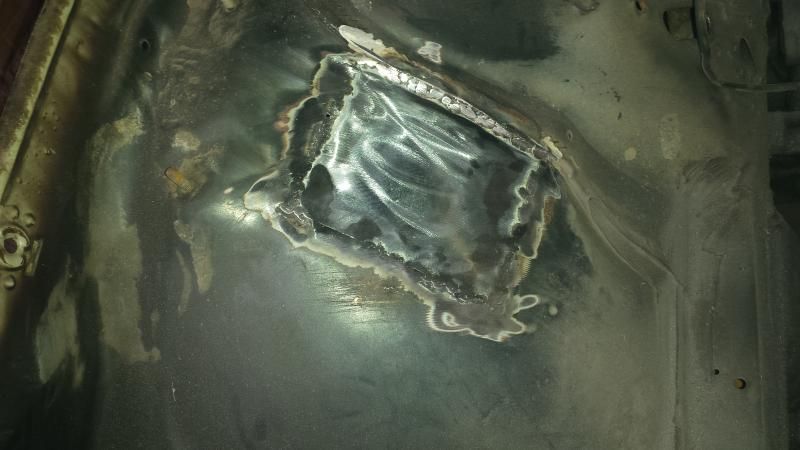 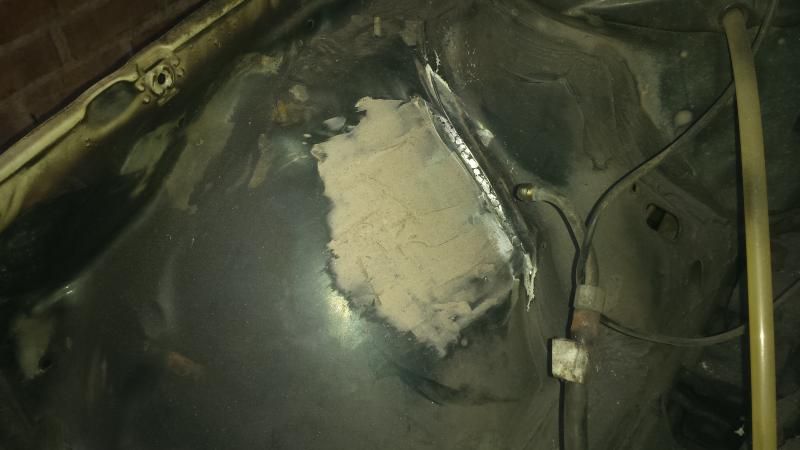 After priming in high build and re dressing a couple of areas 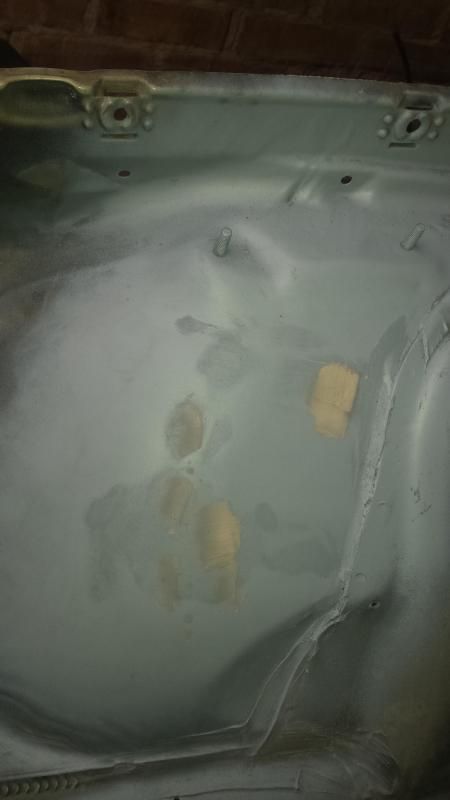 This is the repair on the other side. Top right is where the hole was and the other couple areas of primer is where I cut off the studs that were in place to hold the ignition control module. 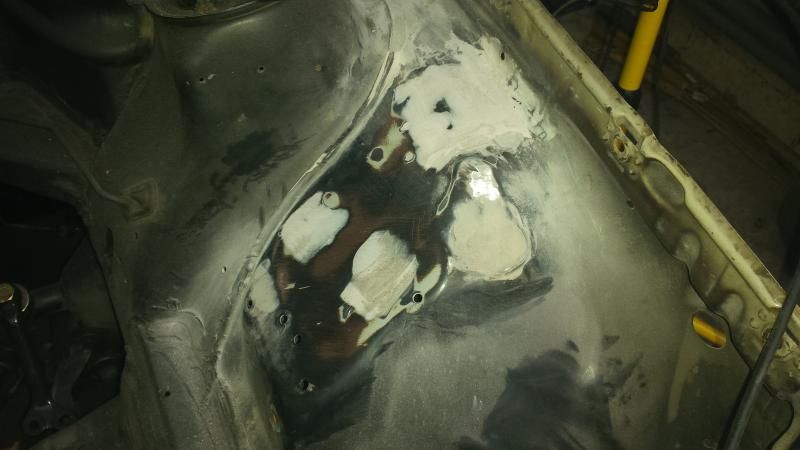 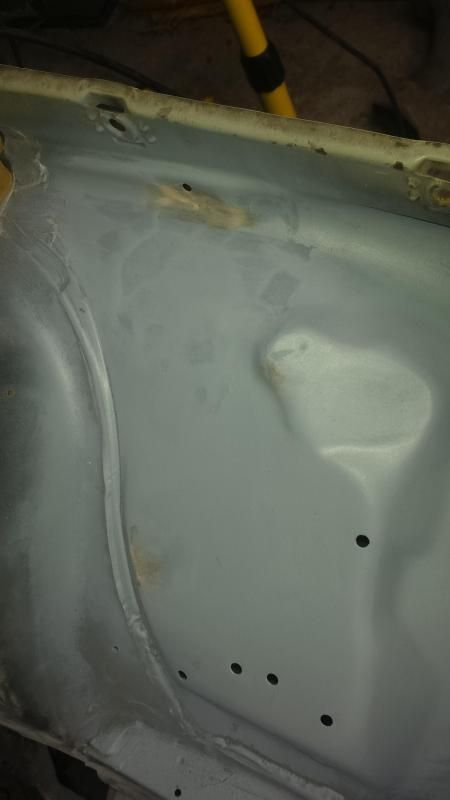 Its all progress right?! 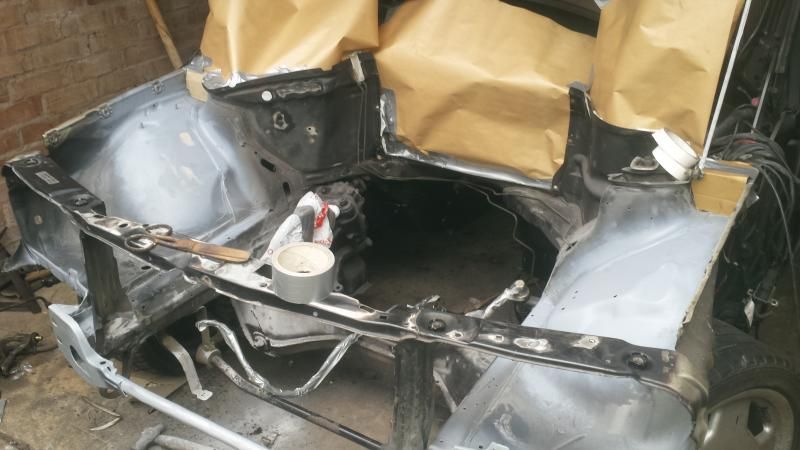 Getting there! (Since this photo the cross member has been degreased and primed) 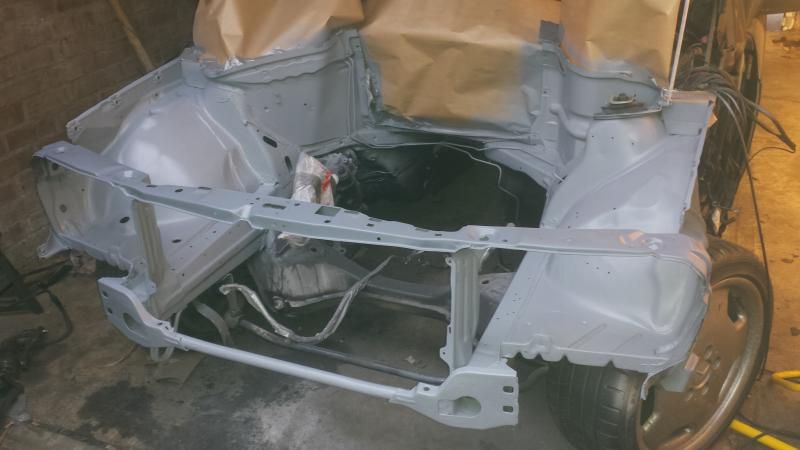 Looking good, this is where the holes were. 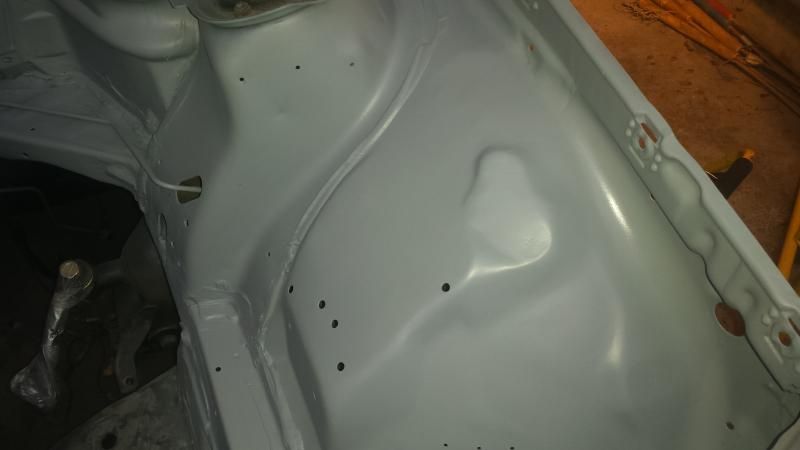 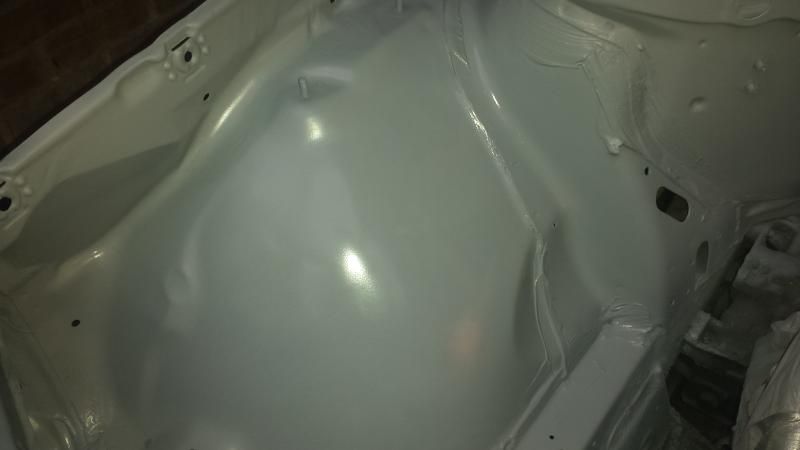 Ready for paint. 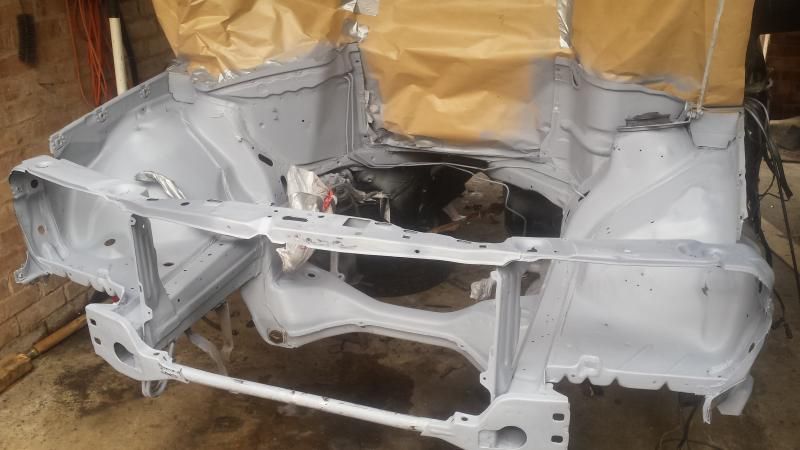 After the first coat of paint. 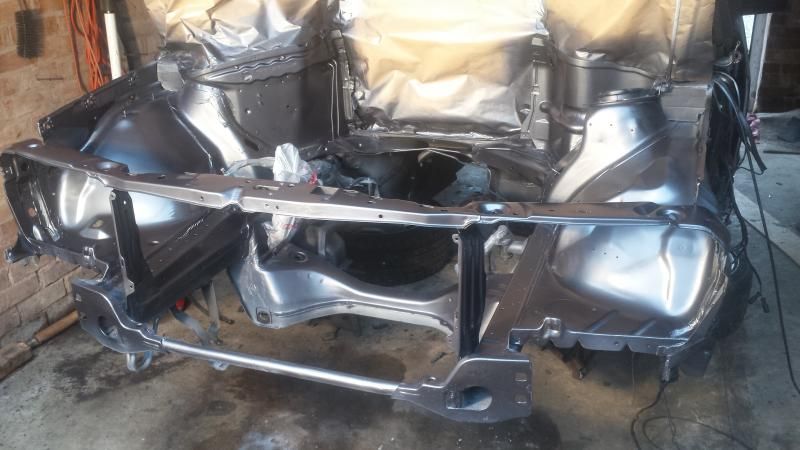 After 2 coats of paint and 1 coat of lacquer (about 20mins since being laid) 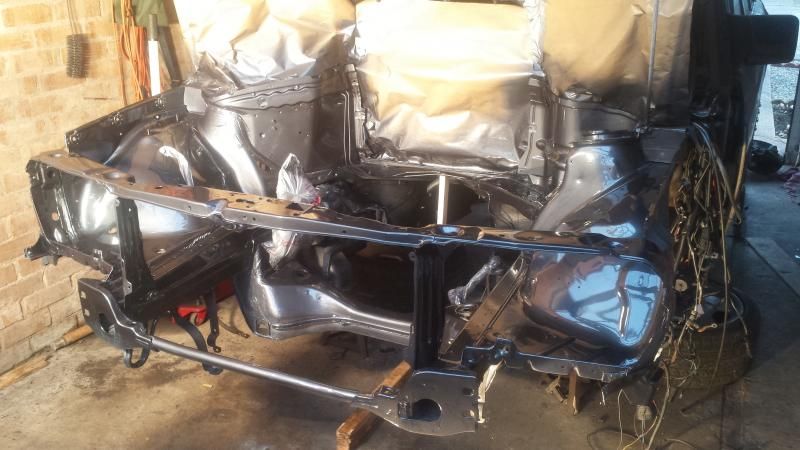 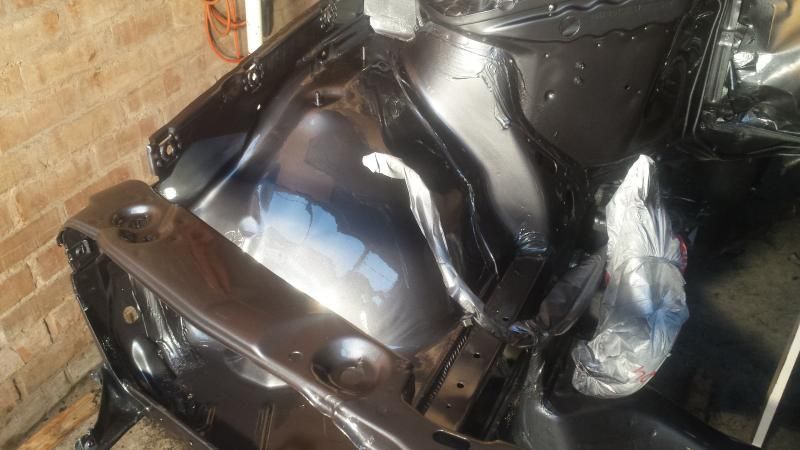 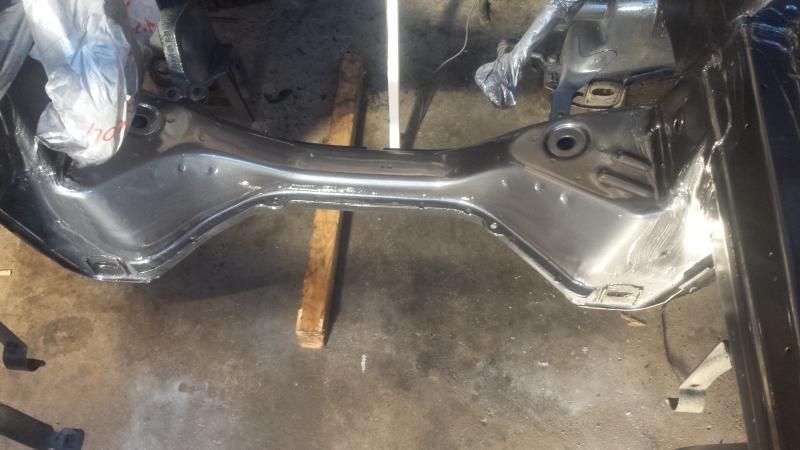 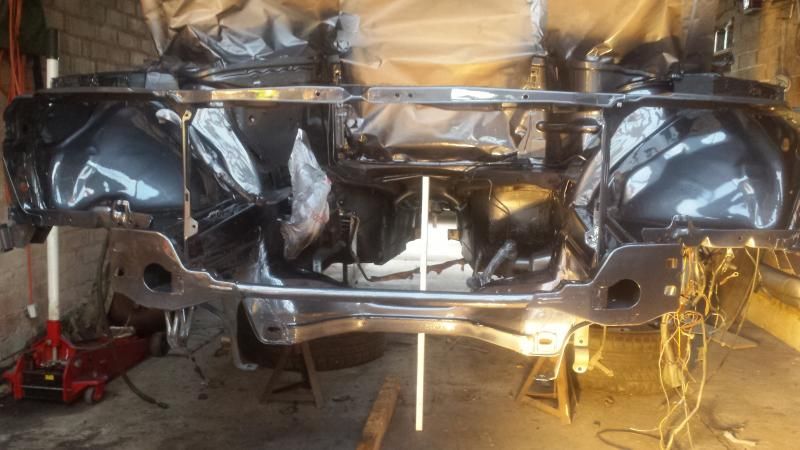 What holes?!?!? 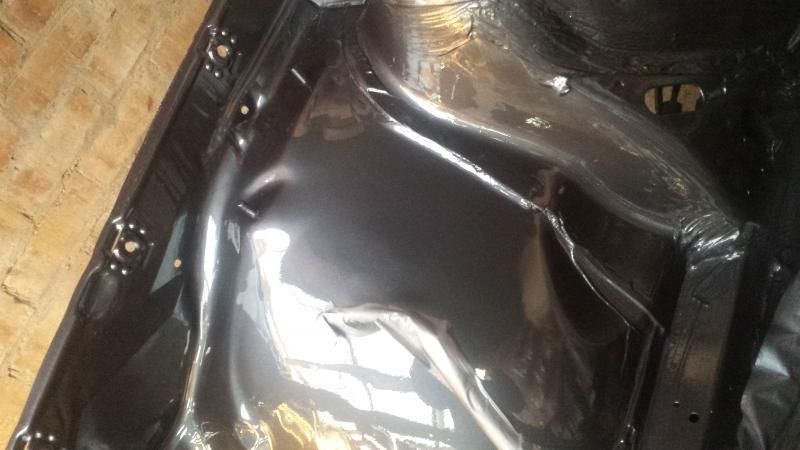  That's all up to date as of today. All I can say is we are really pleased with the finish we have achieved and not bad for 2 blokes in a shed right?! Plan of attack: Tomorrow give it another coat of lacquer next week, get the engine painted and partially re built and complete some under sealing again that has got painted body colour The week after, trial fit the engine and see what's needed to keep it in the car By the end of the year we are aiming to have the engine fully in place and running, anything extra is a bonus. Thanks for looking. |
| |
|
|
51mo
Part of things
Posts: 39
|
|
Jul 21, 2015 19:12:35 GMT
|
So this weekend we got round to fitting the engine. 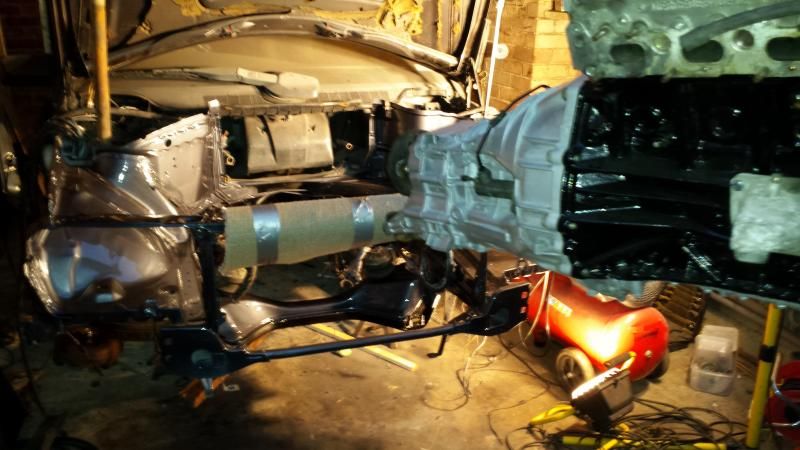 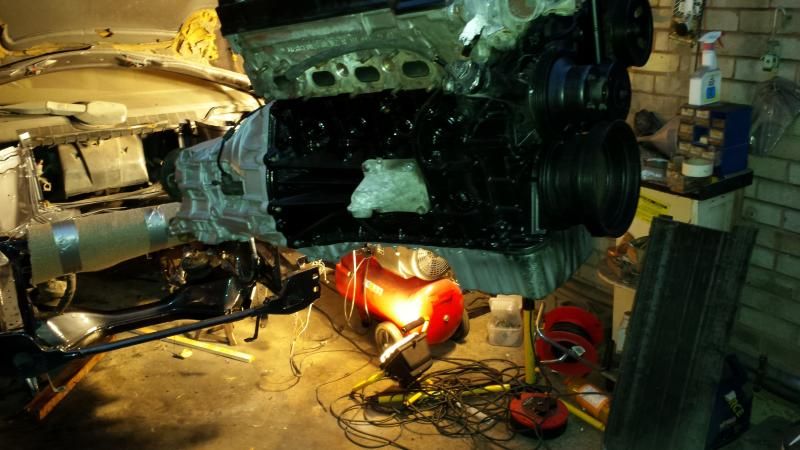 The good news is the engine bolted up on the standard 190 mounts with the C class mounts that came with the engine however the positioning isn't right, it is a bit too far back towards the bulk head and also as can be seen n this picture the passenger side mount is tilting the engine. 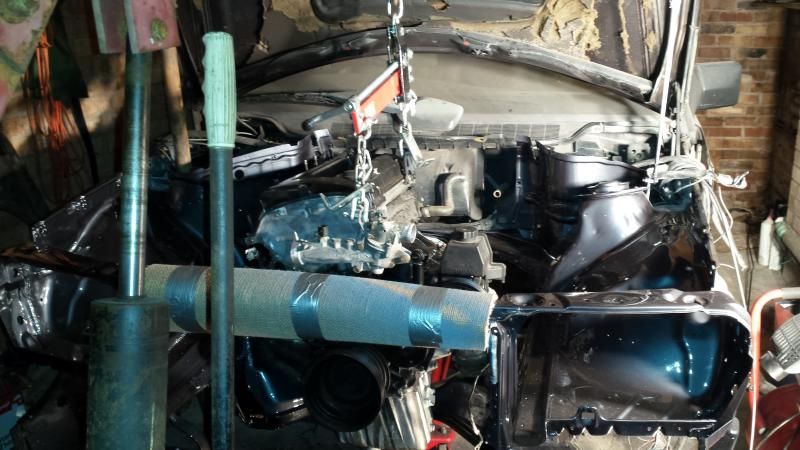 A bit too high 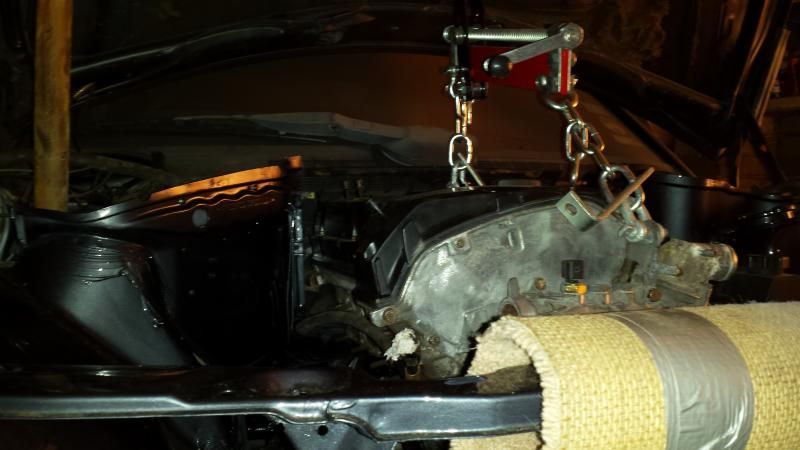 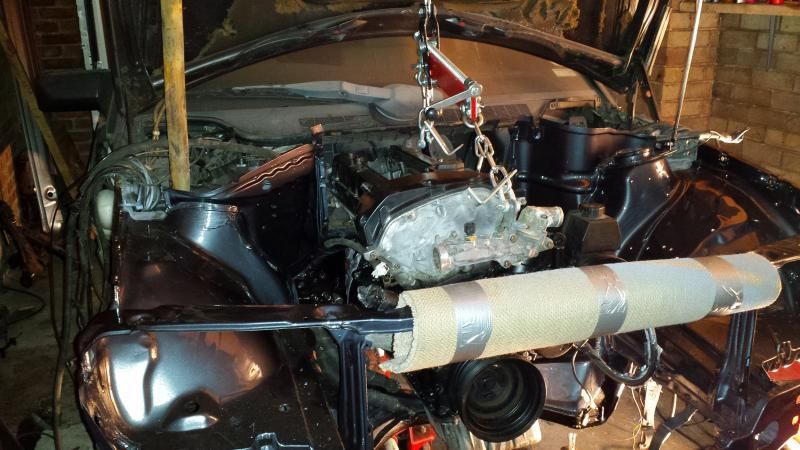 underseal needs another coat (and the sump isn't finished!) but the clearance between the sump and cross member is a little bit tight! Talking around 2mm in the tightest point 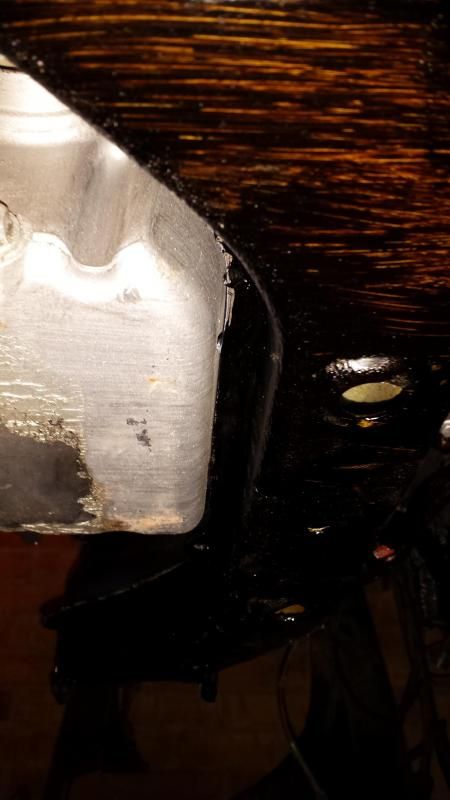 Plenty of space on the intake side 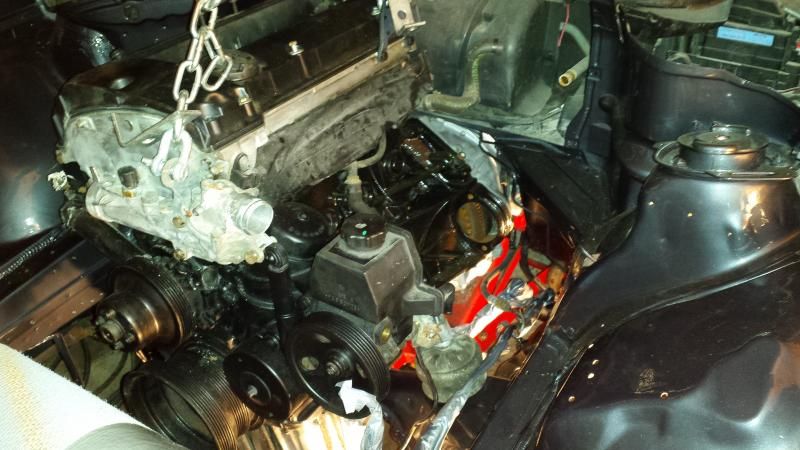 The back panel would probably fit but it would be a pig to connect everything up and it isn't right so it will be addressed. 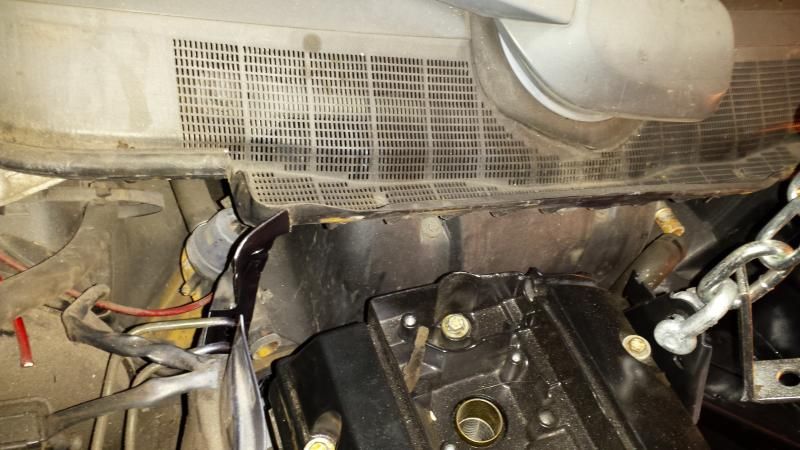 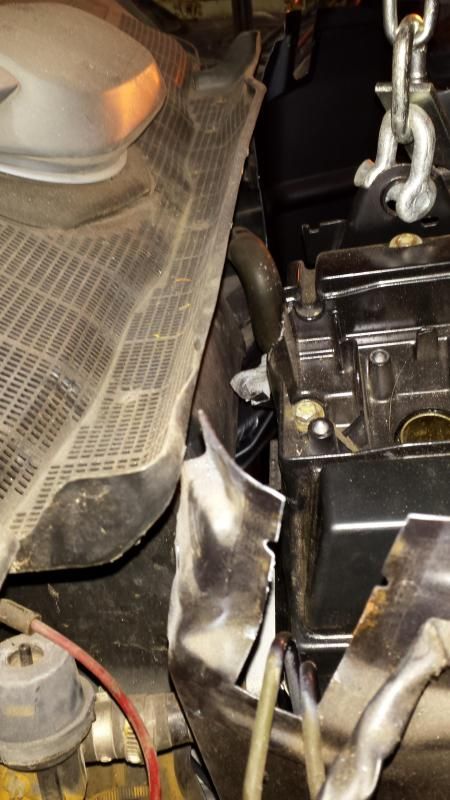 The mounts are virtually straight 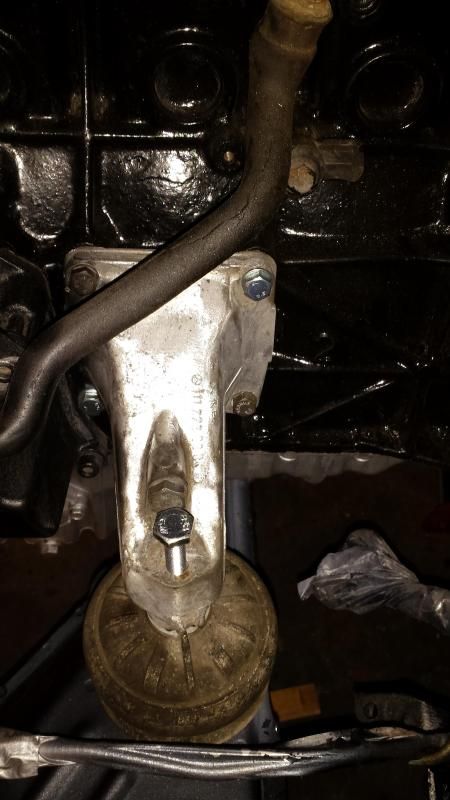 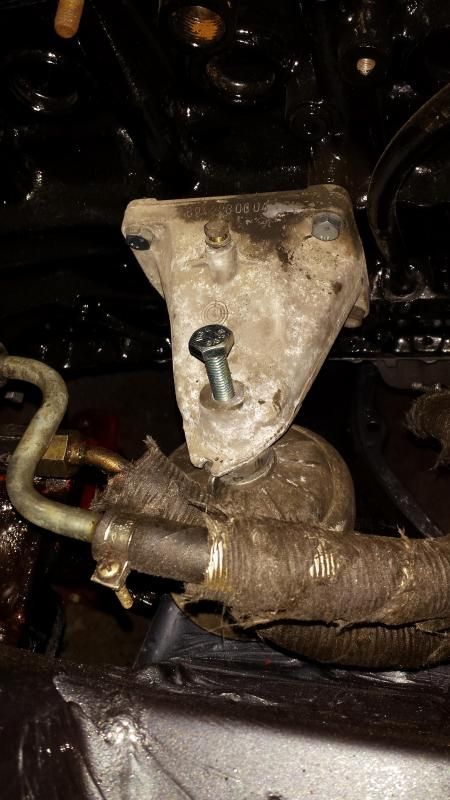 Look at the height of the mount on the passenger side! No wonder its sitting high. I also have new crank case breather pipes to fit when the positioning is sorted. 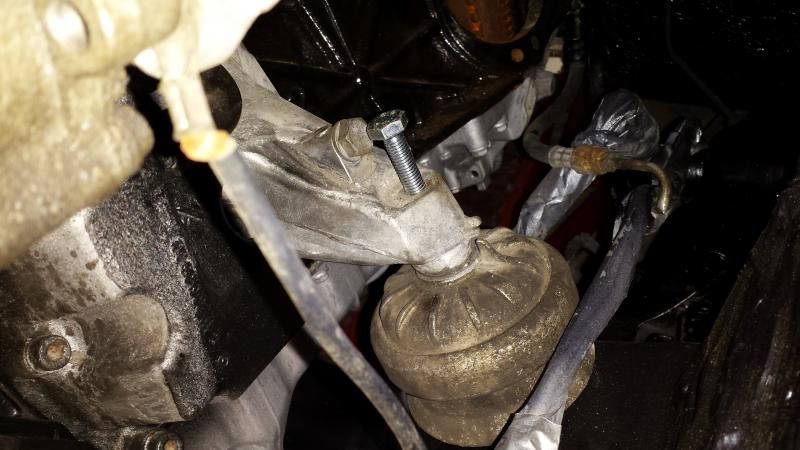 The plan is to get the right mounts for next weekend so we can progress, until we get them we are snookered. We want to avoid making custom mounts so it still provides a OEM look. |
| |
|
|
51mo
Part of things
Posts: 39
|
|
Jul 21, 2015 19:13:27 GMT
|
Here is the past couple of weeks updates. Fitted new engine mounts 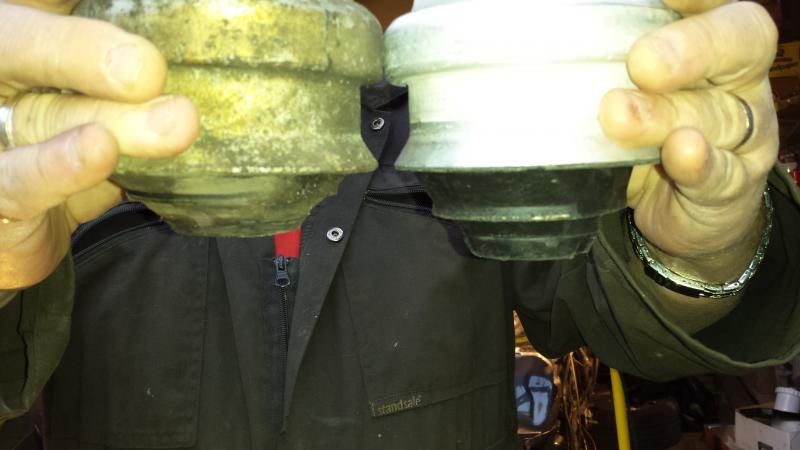 Gearbox mount made from the C class car and trimmed and reinforced to fit, this way the gearbox rubber is as standard and the heat shields were rubbed down and painted. 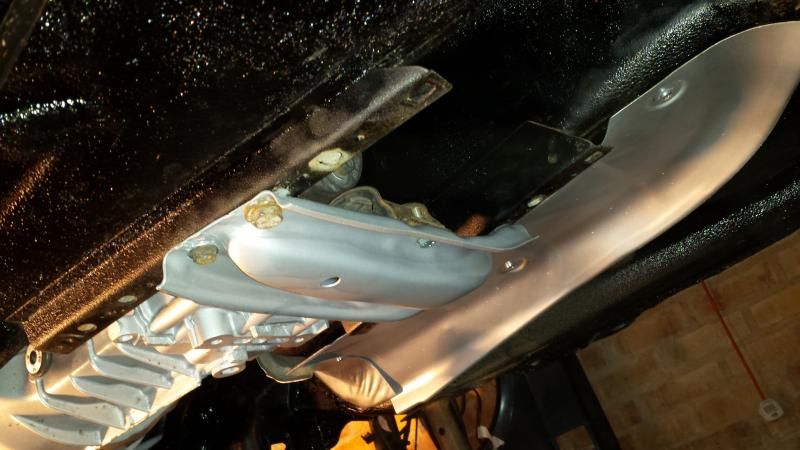 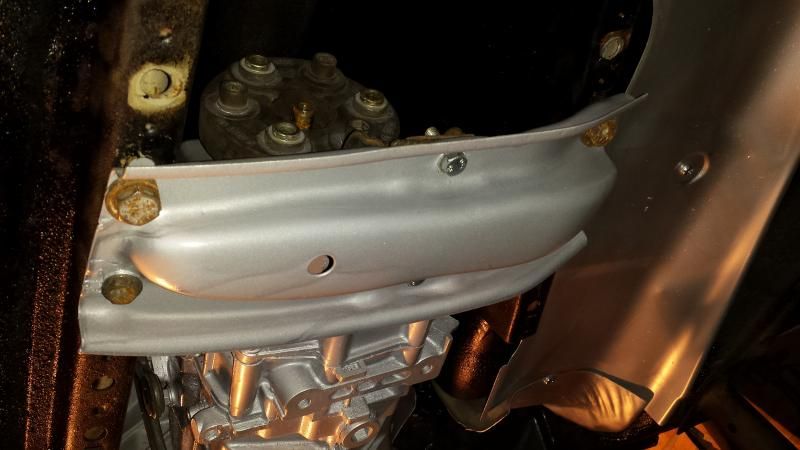 Test fitting a 190E diesel downpipe (no cat) to the C class manifold......fits perfect, the only down side is there is no lamda sensor hole but a cutter and a weld will soon sort that out. 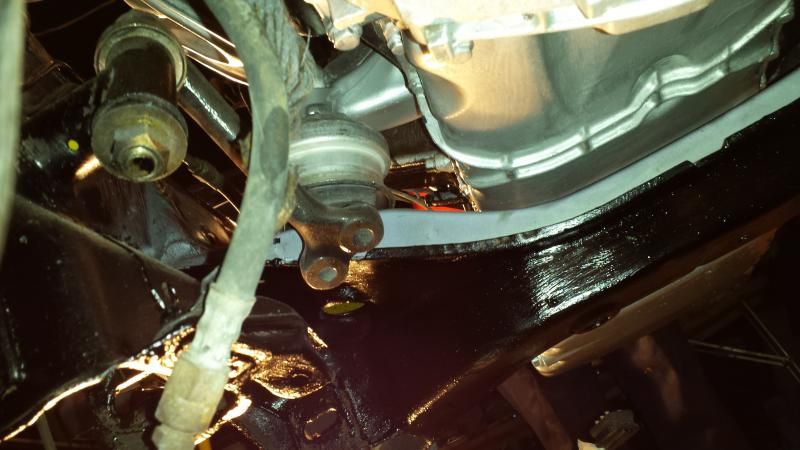 We had to fabricate a support that fits to the top of the engine mount and then on to an up right to help support the monstrous intake and this was the end result. 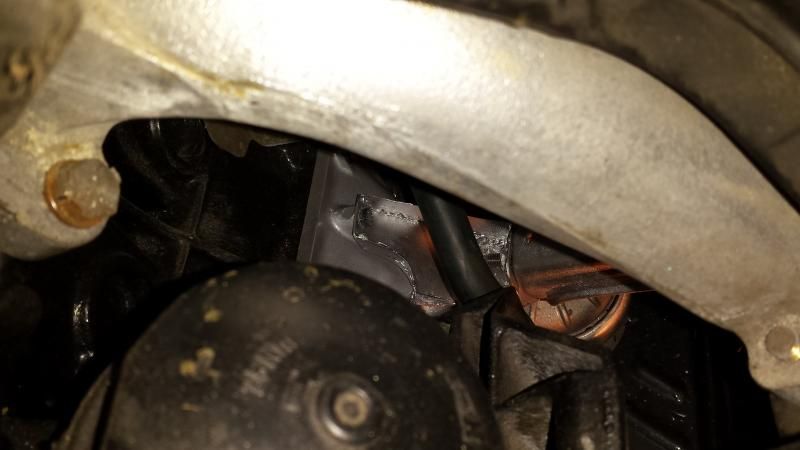 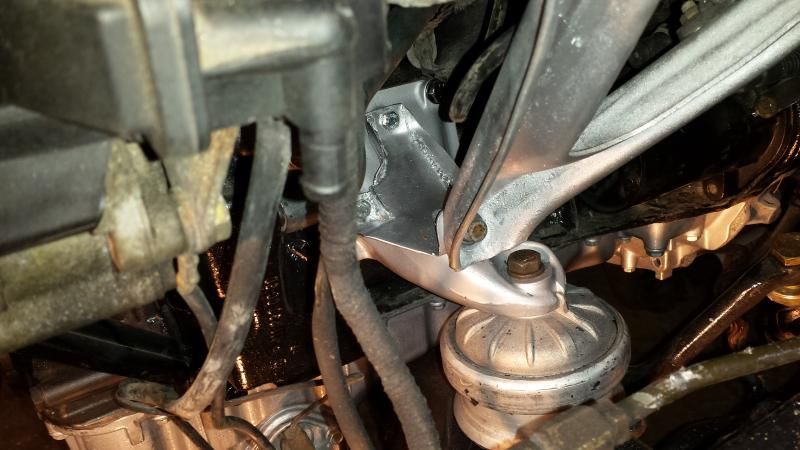 Then it was time to fit the wiring harness back on - the engine cover infill is in high build primer but will be finished in a bright obnoxious orange to compliment the suspension parts that have been powder coated. 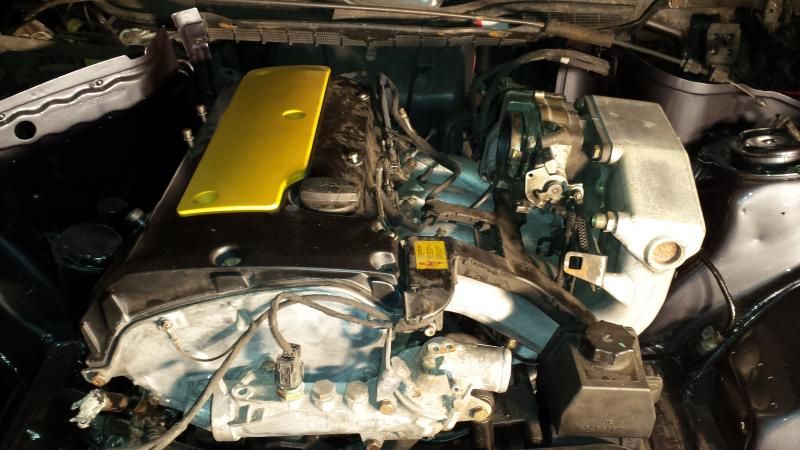 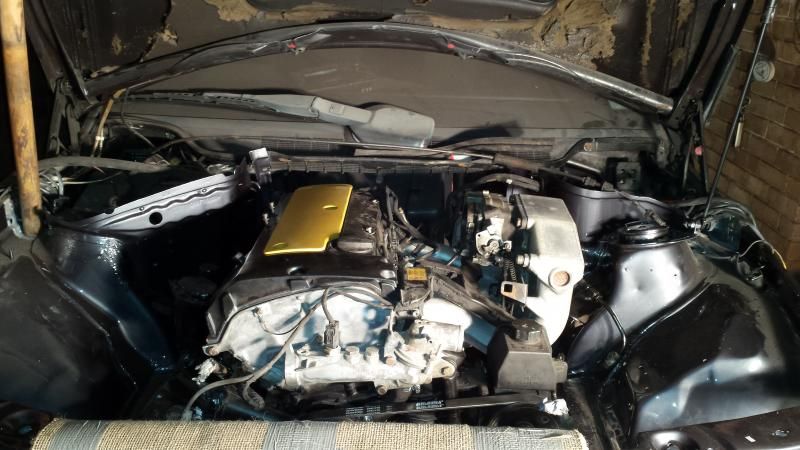 Next weeks work is: 1) Fit fuel rail 2) See if the standard fuel flexible's will fit and if not find a solution 3) Look at sorting the power steering pipes The following week: 1) Wiring 2) Wiring 3) Wiring Then hopefully get it started over Christmas *Fingers crossed* |
| |
|
|
51mo
Part of things
Posts: 39
|
|
Jul 21, 2015 19:14:01 GMT
|
Been a while since the last update but work has been progressing. So over Christmas we spent 3 days trying to get the car to start on the OEM ECU, we had spark, fuel, power but still couldn't get it to fire and the engine wasn't even coughing or trying to start so some signal was missing but because we didn't have the original car we could only do so much. Due to this I have now put a deposit down for an aftermarket ECU to be fitted and tuned at anytime of my choosing this year which will give me more power from the off :S Here are some photos of the visible progress made. New radiator and intercooler mount. Not the prettiest but strong enough. 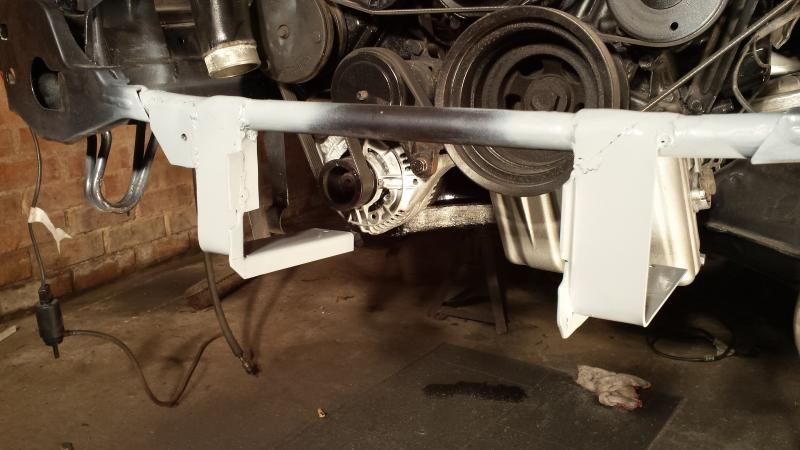 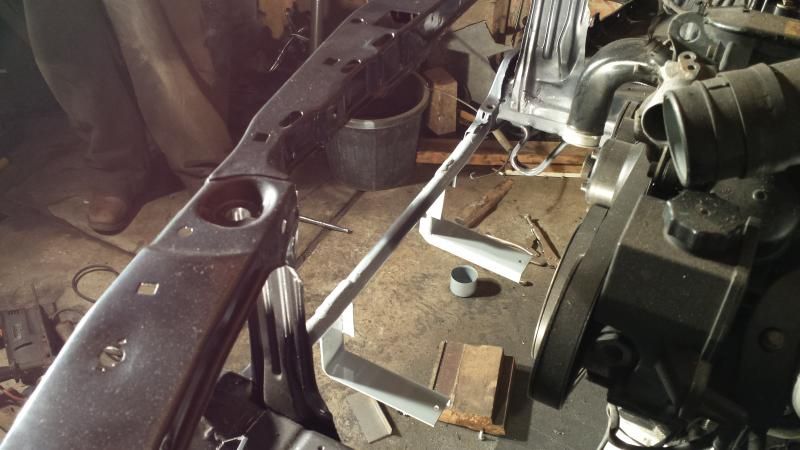 Missing the second most important pedal 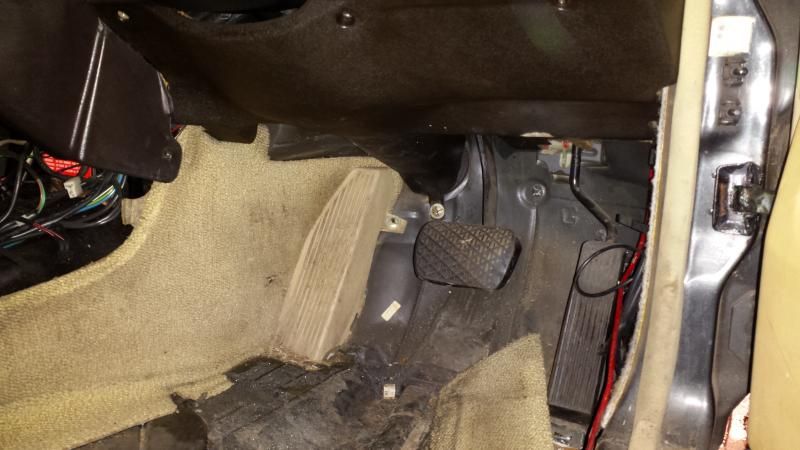 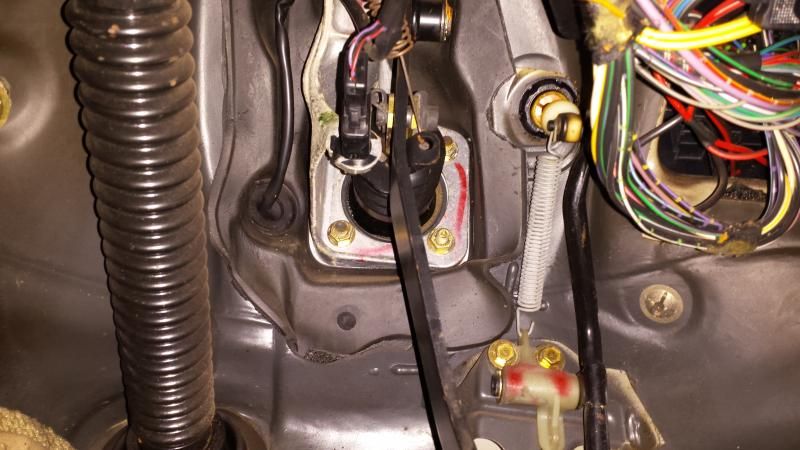 That's better 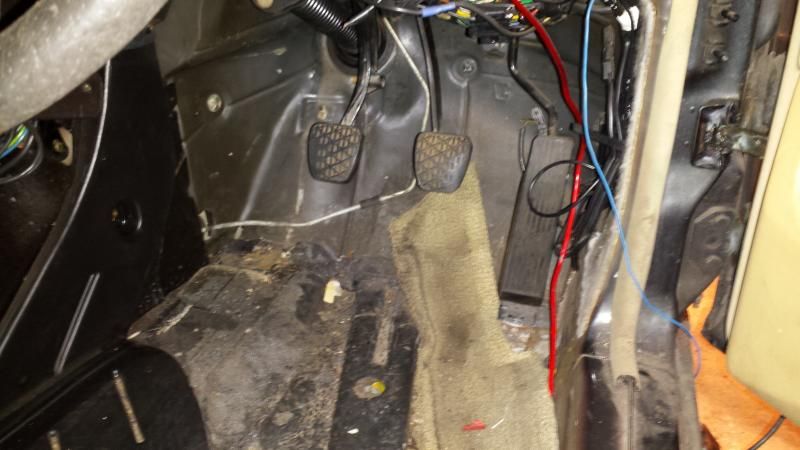 Both front inner wings double under sealed and new brake lines added 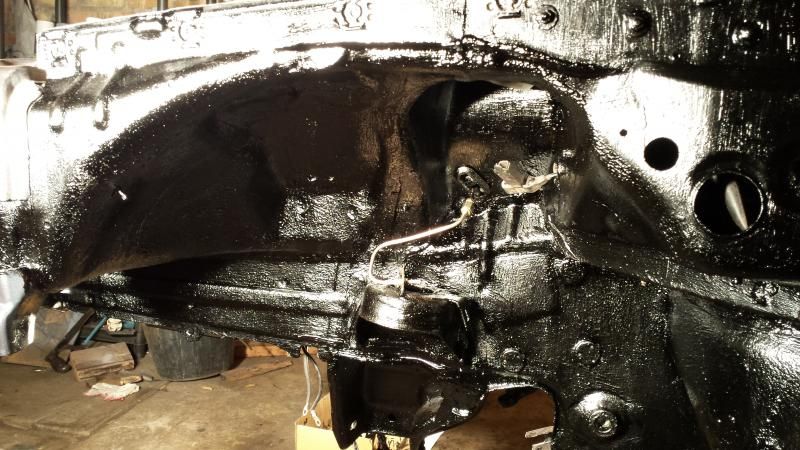 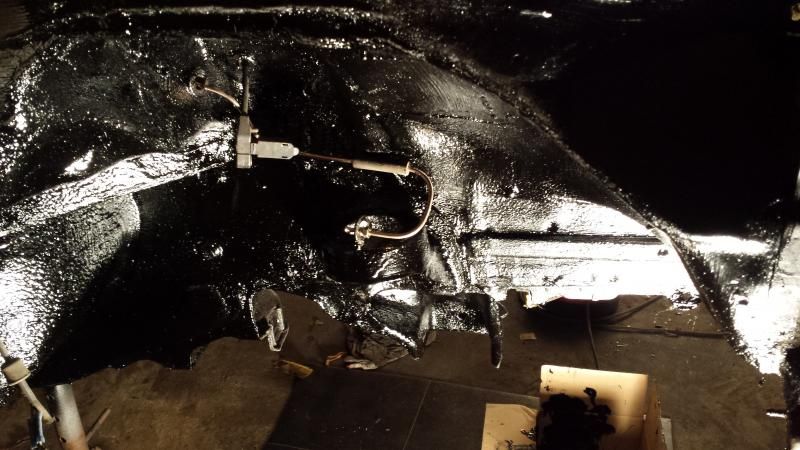 Also the front wishbones & hub carriers are currently at the powder coaters and the intercooler is on its way to be and should be here for fitting next weekend. |
| |
|
|
51mo
Part of things
Posts: 39
|
|
Jul 21, 2015 19:14:54 GMT
|
I collected the front suspension today from the powder coaters and its as striking as expected. 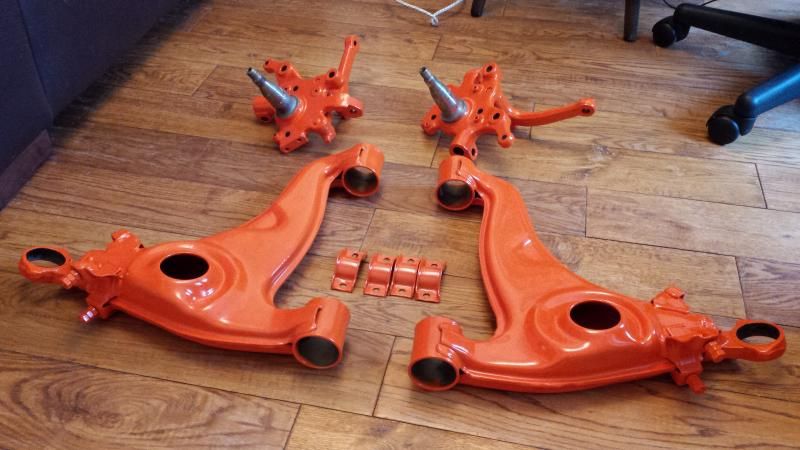 And being inspected by the QC hound (Passed, but she cant tell they are orange!) 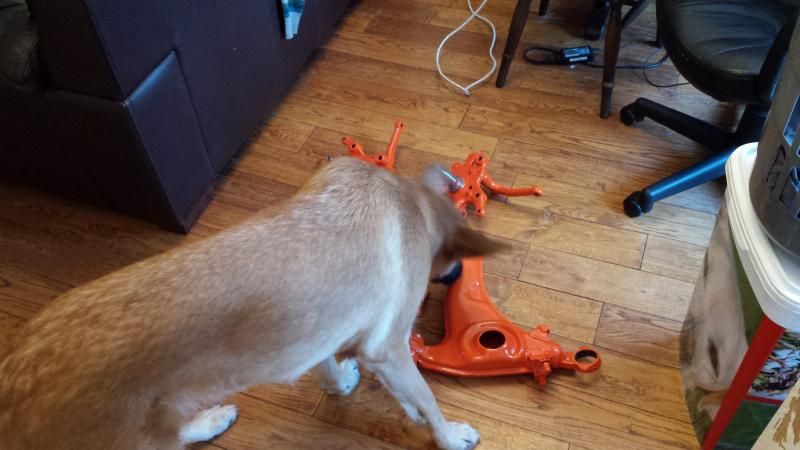 I have new ball joints, wishbone bushes and anti roll bar bushes to fit when they are reassembled which will hopefully be this weekend & now the search for some bigger brakes is on the agenda (anyone selling any please PM me) More updates to come at the weekend. thanks for looking |
| |
|
|
51mo
Part of things
Posts: 39
|
|
Jul 21, 2015 19:15:42 GMT
|
Here is the last 2 weeks worth of work. 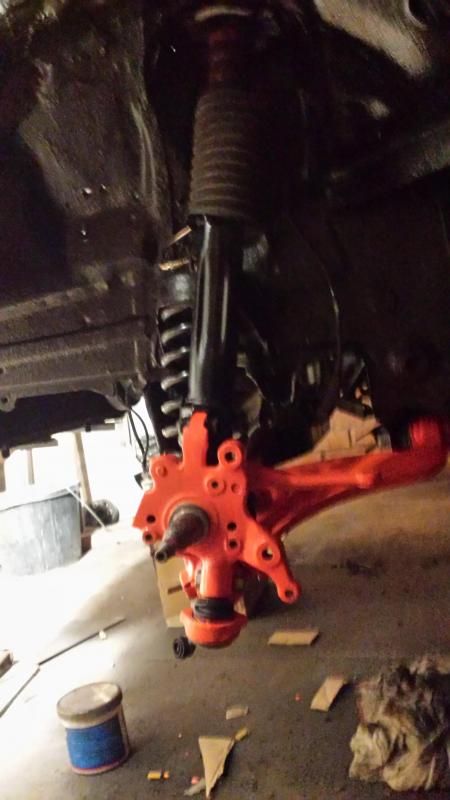 Trial fitting the intercooler & radiator combo & starting work on the brackets 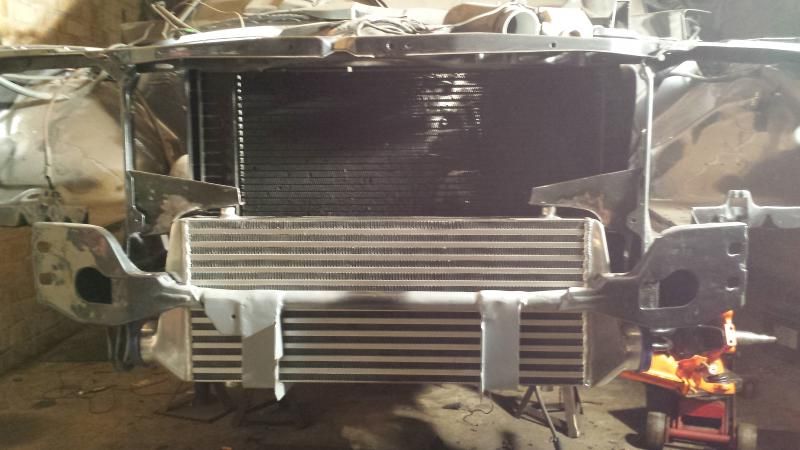 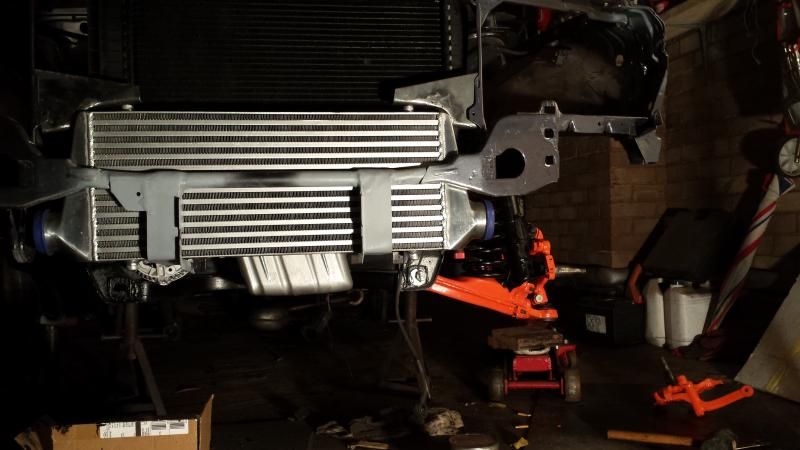 Unfortunately working out close sizes theoretically and applying to the real world it didn't quite work for us. We couldn't extend the brackets we had made because of an outlet pipe on the radiator so the only option was to go forwards which meant.....  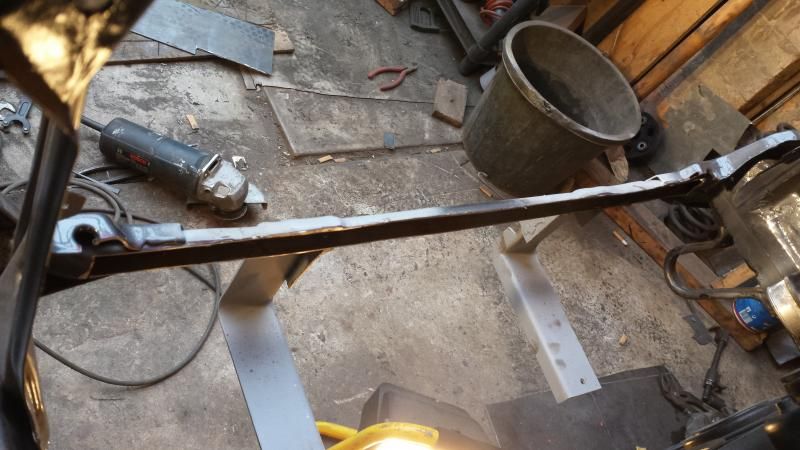 The 'C' shape created was reinforced to created a 'D' shape to add some of the strength back. The end result I cannot do anymore on the hub carriers until I have sourced a larger brake set up and have altered the brake shields. 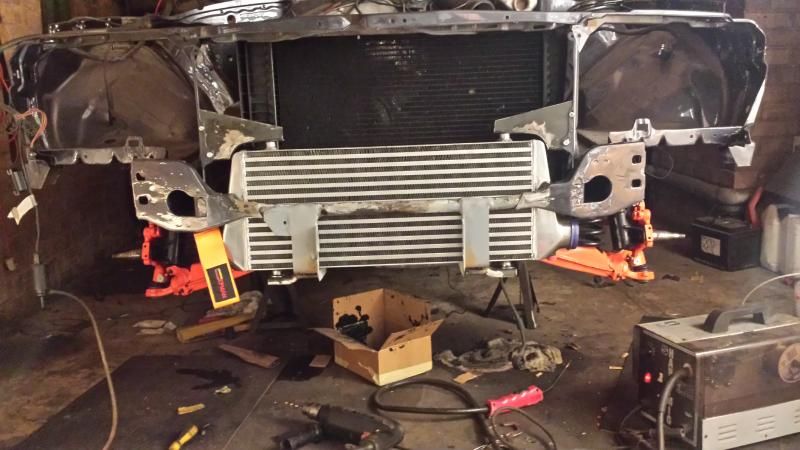 Next weekends work schedule: 1) Fit boost pipes & air filter (emailed Automotive Silicone Hoses for a price on the assortment required) 2) Refit header tank 3) Refit washer bottle 4) Refit headlights 4) Refit slam panel gubbins We need the weather to pick up now so we can finish the few bits of painting we have left so anything that can be refitted without making masking difficult will be. Parts I am on the look out for now are: Big brake set up - Currently talking to a few friendly Germans to get a deal but nothing secured yet. That's all for now. |
| |
|
|
51mo
Part of things
Posts: 39
|
|
Jul 21, 2015 19:16:34 GMT
|
So whilst still working on the pipe work i needed a bit of a pick me up and decided to resort to some retail therapy and this is what I ended up with. 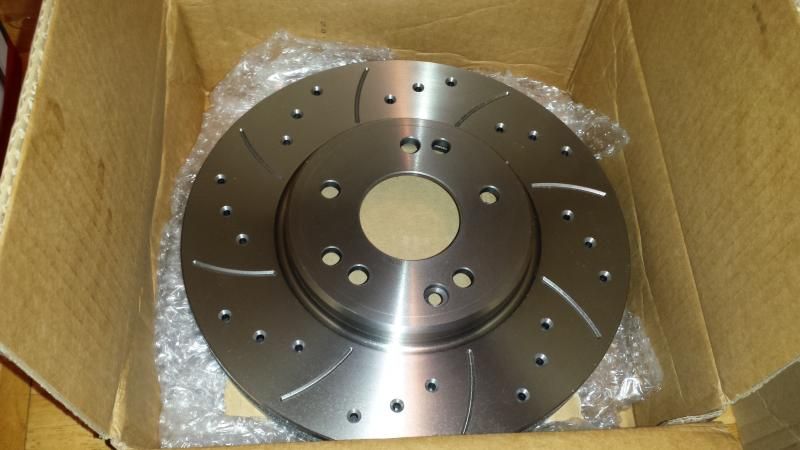 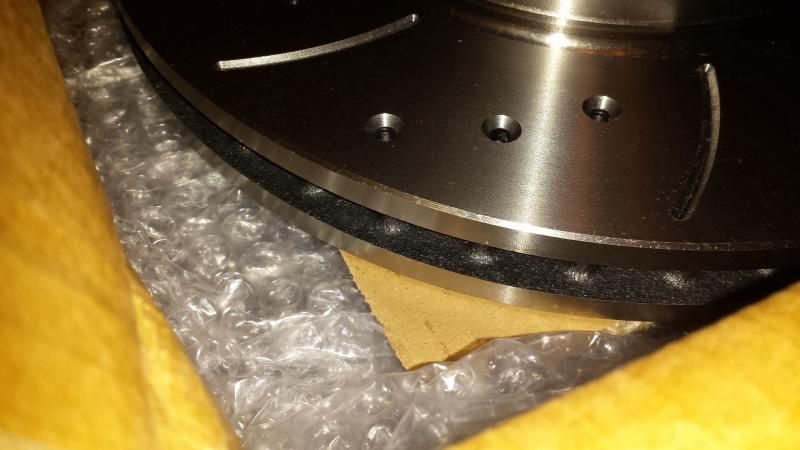 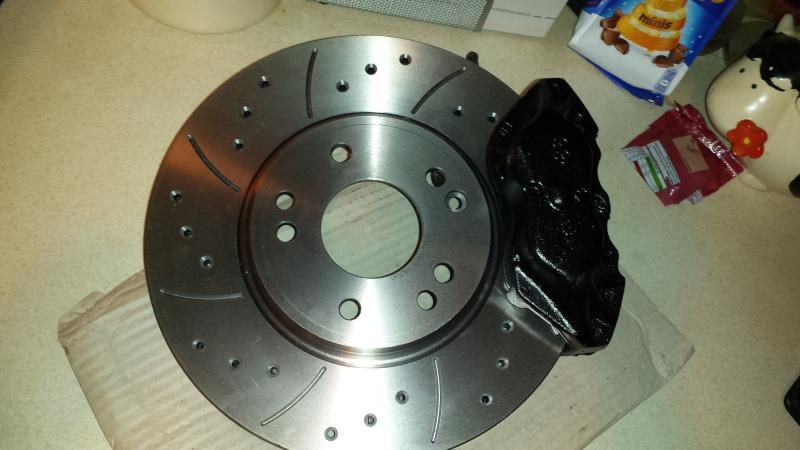 I can't wait to get these fitted this weekend. |
| |
|
|
51mo
Part of things
Posts: 39
|
|
Jul 21, 2015 19:17:15 GMT
|
Here is a comparison between the old and new brake set up 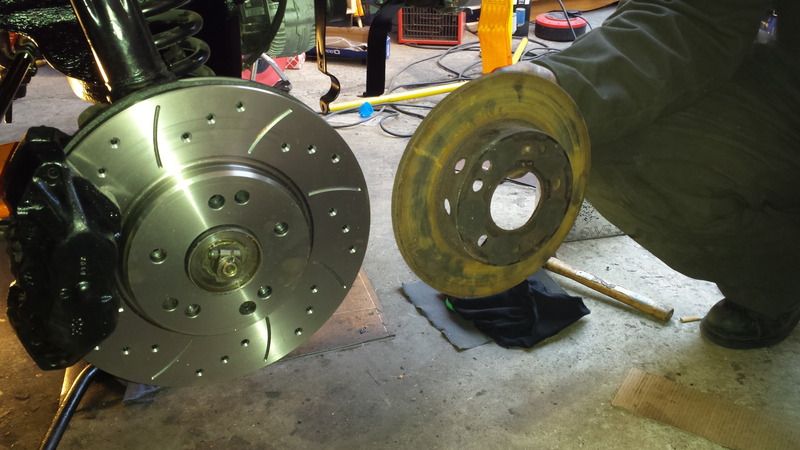 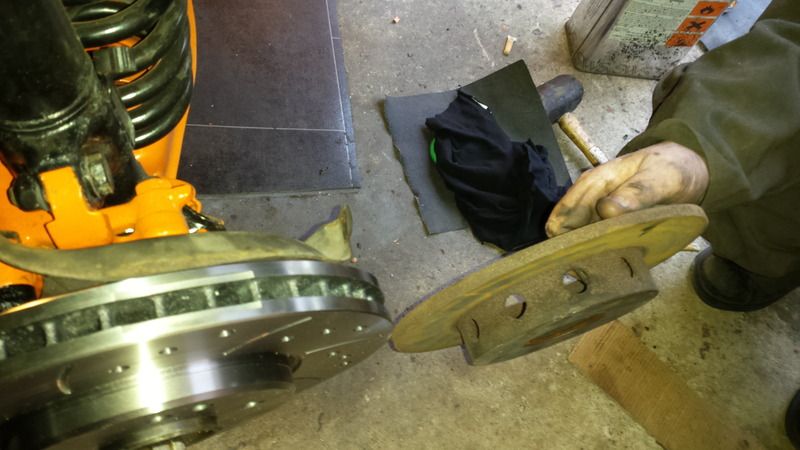 I think the upgrade was needed and here they are fitted 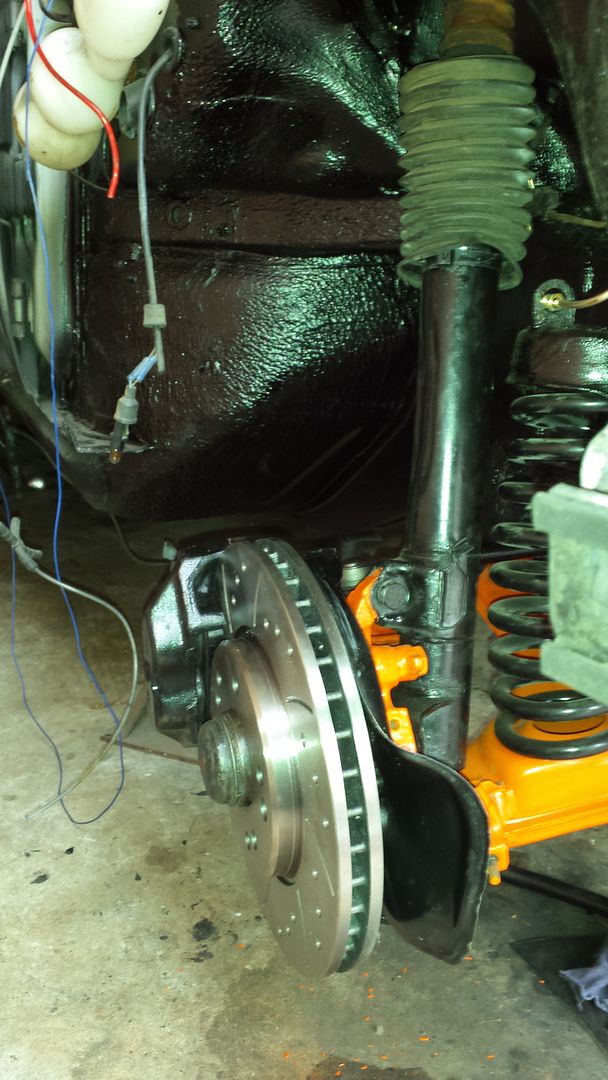 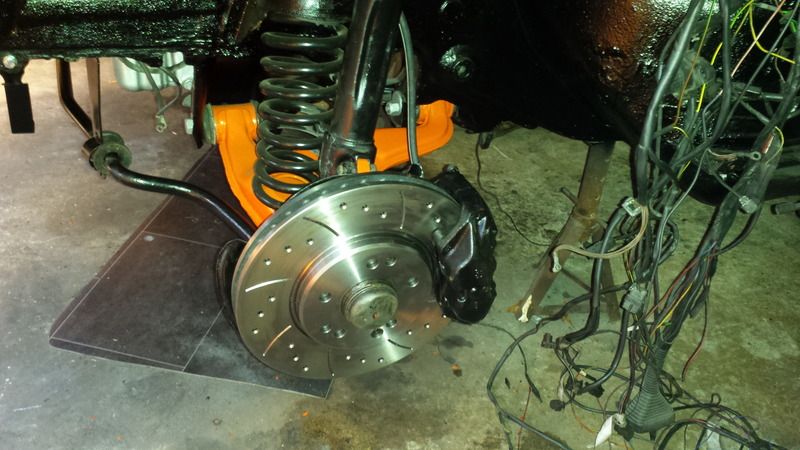 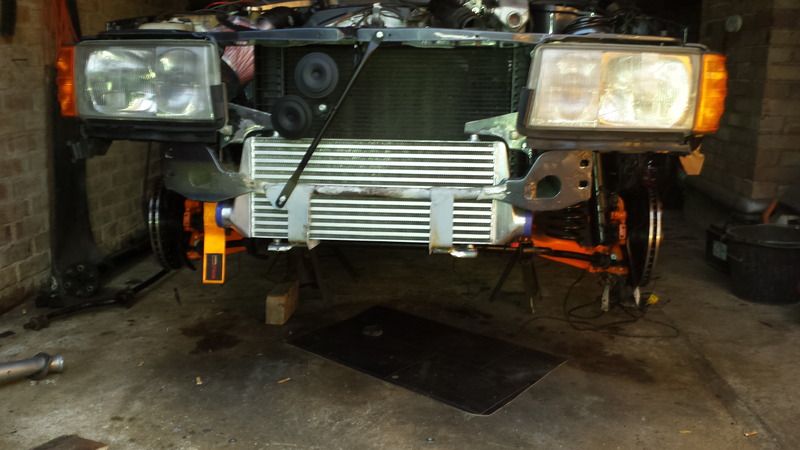 The roll bar was being tested in place because it now fouls on the alternator as its mounted low down on the M111 engine so a big of ingenuity is required to make a bit of space and for reference the roll bar of a W202 DOES NOT FIT as I brought one hoping it would but its not even close. And finally bled up and the steering components dropped in place (still need adjusting and bolting up properly) 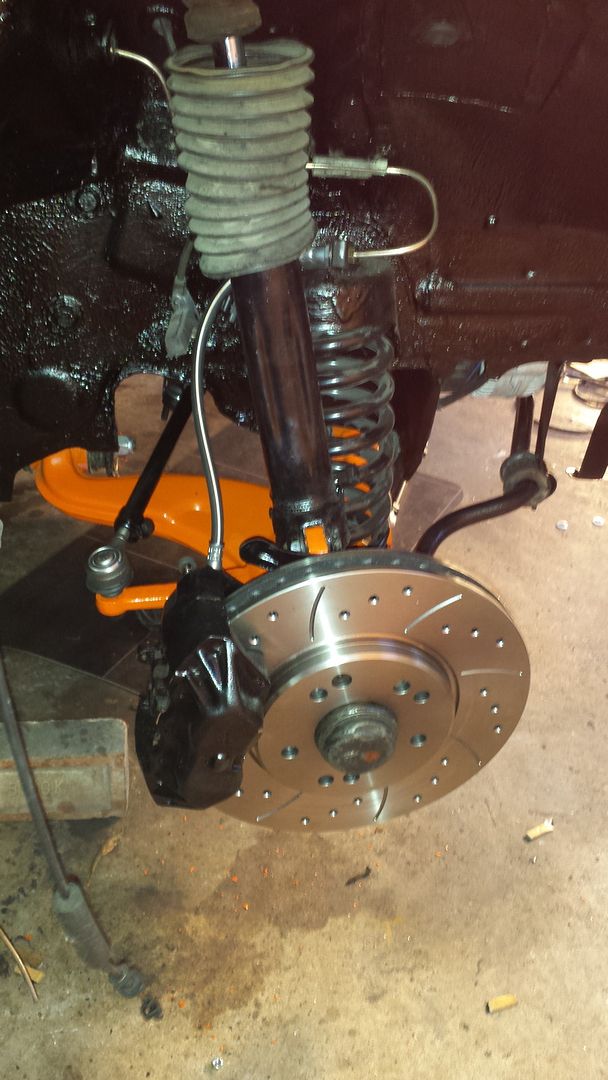 Here is the altered drive shaft 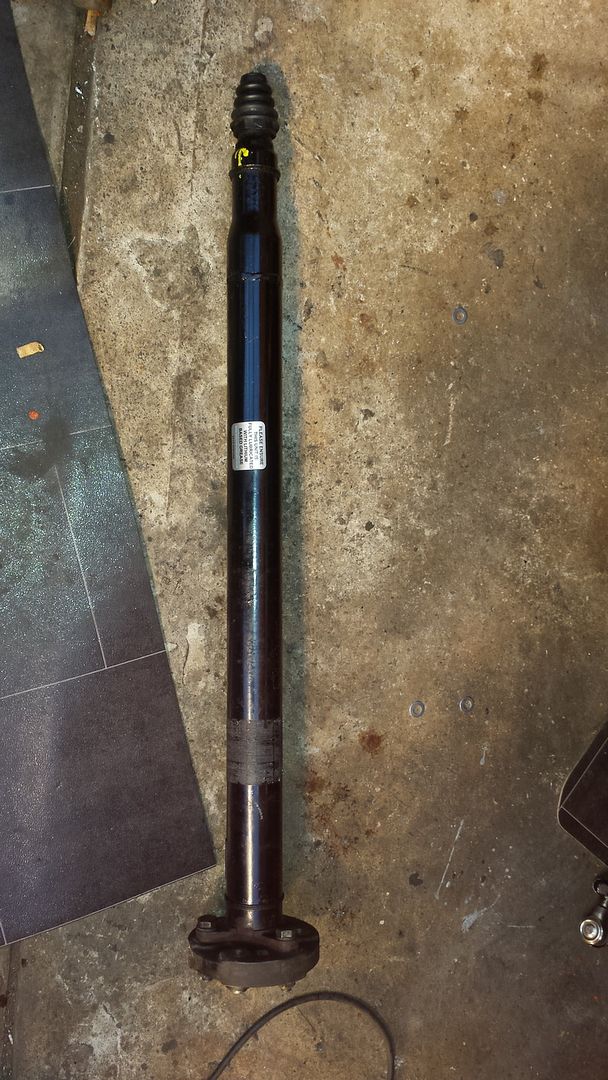 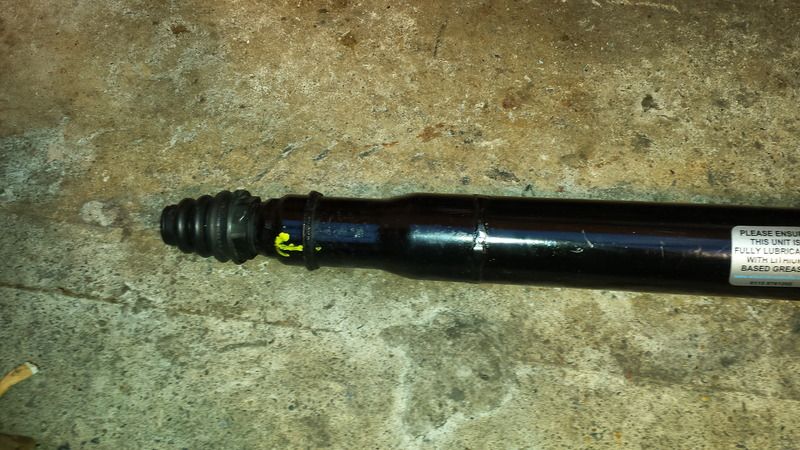 The spline end is off the 190 shaft but the rest is from the W202. the reason for having to do this is because the flange on the W202 gearbox is bigger than the 190 one. The other option would have been to swap the flange on the output shaft of the gearbox but I didn't fancy taking it to bits so we opted for this option. We have put it in position and it fits, it just needs bolting up. We then spent a bit more time piping the engine up (still waiting for 2x U bends for the boost pipework so its only together loosely) 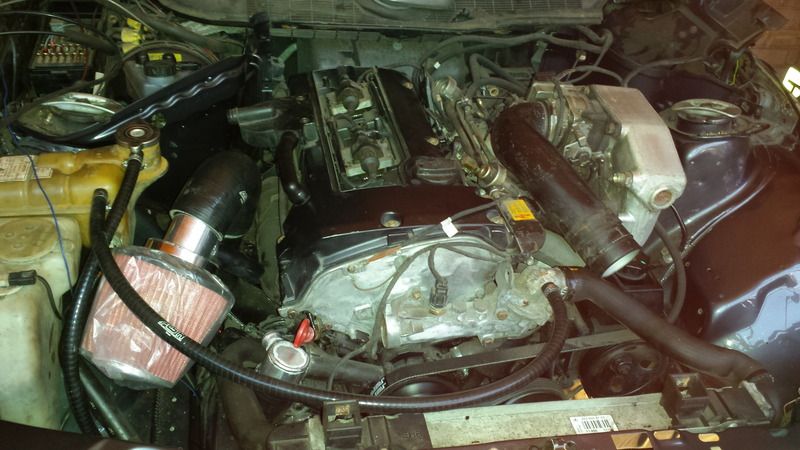 Then last off I found out the allen key bolt head in the middle of this picture is where I think the oil pressure sender needs to be fitted which is below the exhaust manifold which needs the supercharger taking off......Looks like it will be a case of working blind to try and fit it. 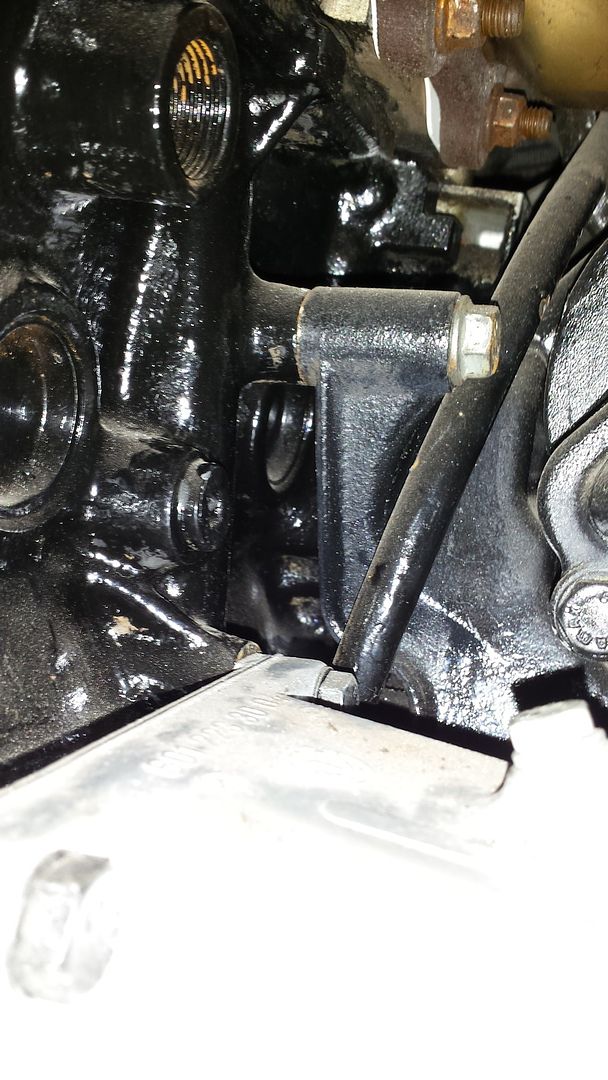 We also got all the breaks and the clutch bled so the car is now a fully manual car! :driver: rockon |
| |
|
|
|
|


