|
|
|
|
|
OK, I started a weeks vacation with a "To do" list that had 21 items on it. Got may be two of them done. In my defense, "Build a chassis rotator" was not on the list. So, what I did get done that felt good was to get the covers welded on over where I stretched the Miata frame in front of the firewall. As usual, this took about 4 times longer than expected by the time I prepped the panel and the frame. Clean metal with tight fit-up is the key to good welds, and I have paid the penalty many times when taking shortcuts in this department. DS done: 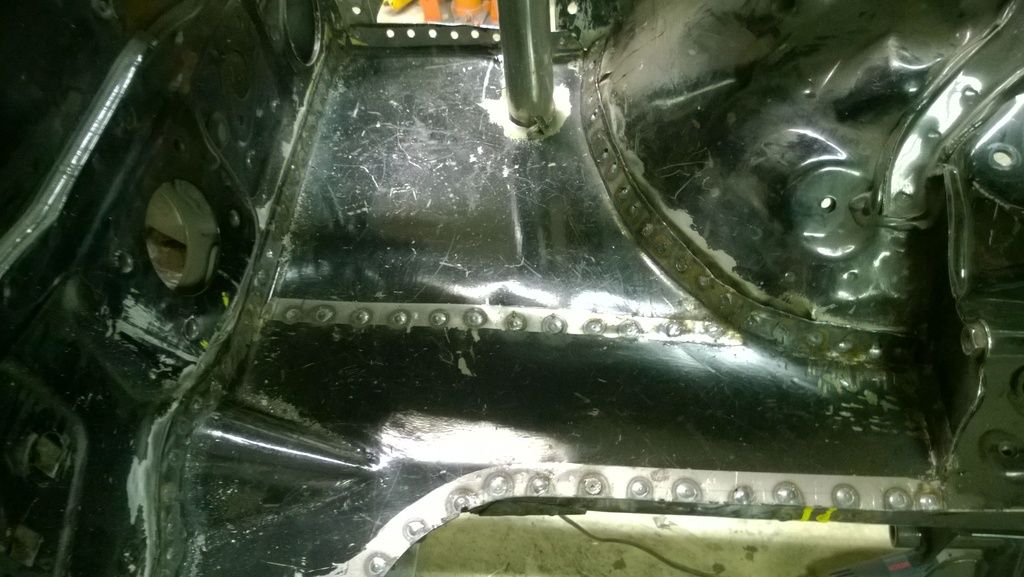 PS done: 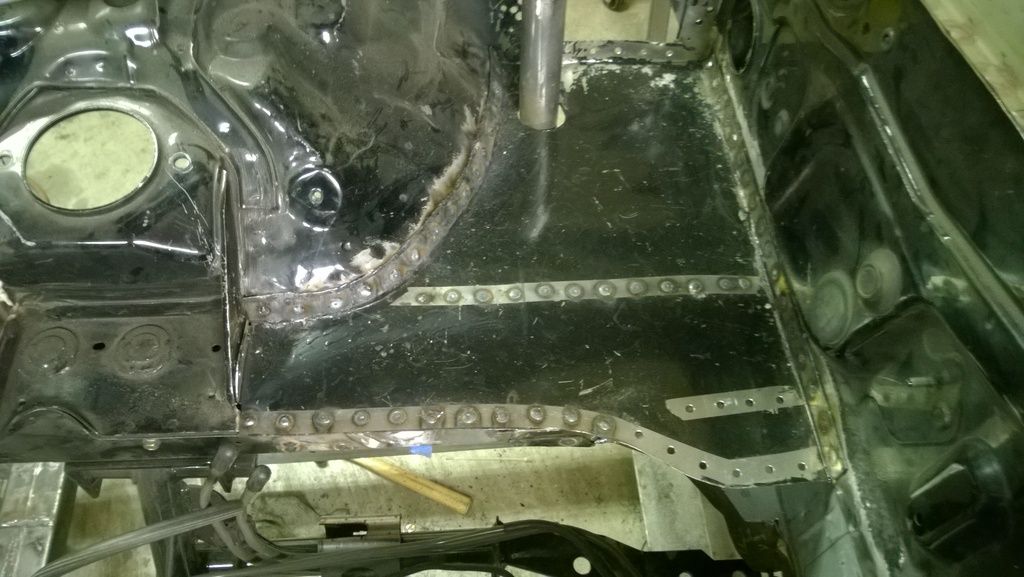 On a totally different subject. I am incredibly lazy and hate grinding spotwelds. As such, I strive to keep those buggers as low as possible. The way to do that is to weld at a heat setting way above what seems correct (or sane). The heat settings on the Lincoln 180 go from A to E. E is for 1/4" and most people want to do spotwelds on the B setting. I load the welder up with 0.035 wire and use a 1/4" punch to make the holes. Honestly, it does not burn through as you would expect. Just aim right down the middle of the hole (two hands to steady and a bright light to see) and hold the trigger till the puddle just floods the hole. (did I mention the metal must be tight to each other). Nice flat spotwelds that will require little to no final finish. Save time and save $$$ on abrasives. 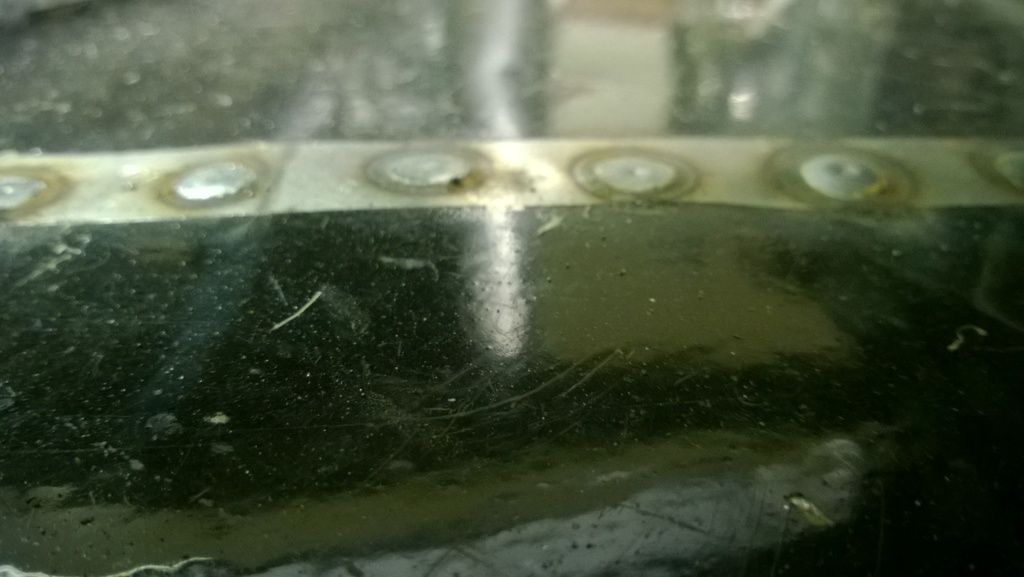 The black paint on these panels is just temporary until the engine compartment gets repainted. Everything will bet prepped and epoxy primed before color goes on. |
| |
|
|
|
|
fer4l
Posted a lot
   Testing
Posts: 1,497
Club RR Member Number: 73
|
|
|
|
Lovely!  |
| |
|
|
vulgalour
Club Retro Rides Member
Posts: 7,284
Club RR Member Number: 146
Member is Online
|
|
|
|
|
Did you mask bare panels before painting them then? I was trying to figure out how you got such a crisply cleaned back edge but I'm guessing masking and painting is what you really did. It's a good idea for keeping flash rusting to a minimum. I'm admiring how factory looking that will be when finished too, it's already most of the way there. Nobody will ever know.
|
| |
|
|
|
|
|
|
|
Did you mask bare panels before painting them then? I was trying to figure out how you got such a crisply cleaned back edge but I'm guessing masking and painting is what you really did. It's a good idea for keeping flash rusting to a minimum. I'm admiring how factory looking that will be when finished too, it's already most of the way there. Nobody will ever know. The factory look is kind of the theme for the project. Now that I have it on the rotisserie, its kind of fun to look at the underside and not have any real evidence of a graft. I am actually looking for a transmission crossmember/mount from a production car that I can adapt to my needs: A fabricated tube crossmember would not suit the look I am aiming for. And while the frame stretch might not be evident, going to be hard to hide the 302 V8 engine! |
| |
|
|
vulgalour
Club Retro Rides Member
Posts: 7,284
Club RR Member Number: 146
Member is Online
|
|
|
|
|
Hiding the engine is easy, just shut the bonnet hood.
|
| |
|
|
|
|
|
|
|
|
Just glue a Mazda cover on top... or two.
|
| |
|
|
|
|
|
|
|
Just glue a Mazda cover on top... or two. At one time, in the marine world, there was a Volvo sterndrive that used a ford 302. I have been trying to get my hands on a set of the "Volvo Penta" valve-covers. No luck so far, might have to make up a set of my own. |
| |
|
|
vulgalour
Club Retro Rides Member
Posts: 7,284
Club RR Member Number: 146
Member is Online
|
|
|
|
|
|
| |
Last Edit: Jan 5, 2016 1:02:55 GMT by vulgalour
|
|
|
|
|
|
|
|
|
|
I think the Penta was a small block Chevy
|
| |
|
|
|
|
|
|
|
Good morning all. These are small block chev Penta used a wide variety of engines including 6 cylinder falcon
|
| |
|
|
|
|
|
Jan 10, 2016 23:01:38 GMT
|
The goal today was to tie the chassis support tubes into the Miata front frame structure. These are 1.5" roll bar that curves down to pick o loads from near the Miata shock towers. The challenge was to fabricate a 1/8" plate that would conform to the rather complicated geometry of the Miata in this location. By using a tape template to define the dimensions, and lots of heat to shape it to the non-uniform surface, I manged to make a good fit to the Miata surface. 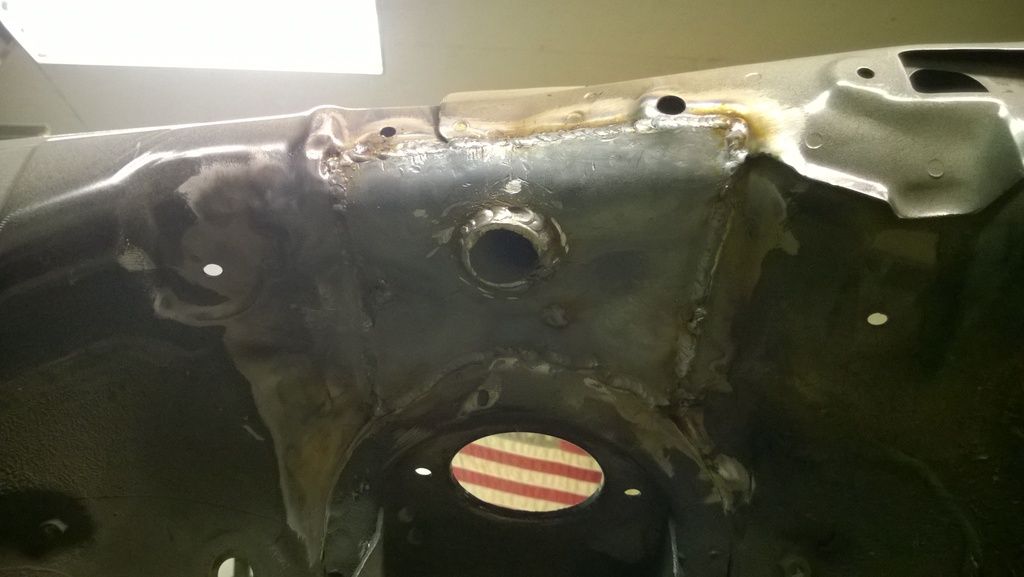 The next step in the the reconstructive surgery to heal the scar from the 7" wheelbase stretch was to make a flange to accept a closing panel from the Miata to the Volvo a-post. This was done using the shrinker stretcher to make the flange follow the curve of the Volvo a-post. The closing panel will be spotwelded to this flange. 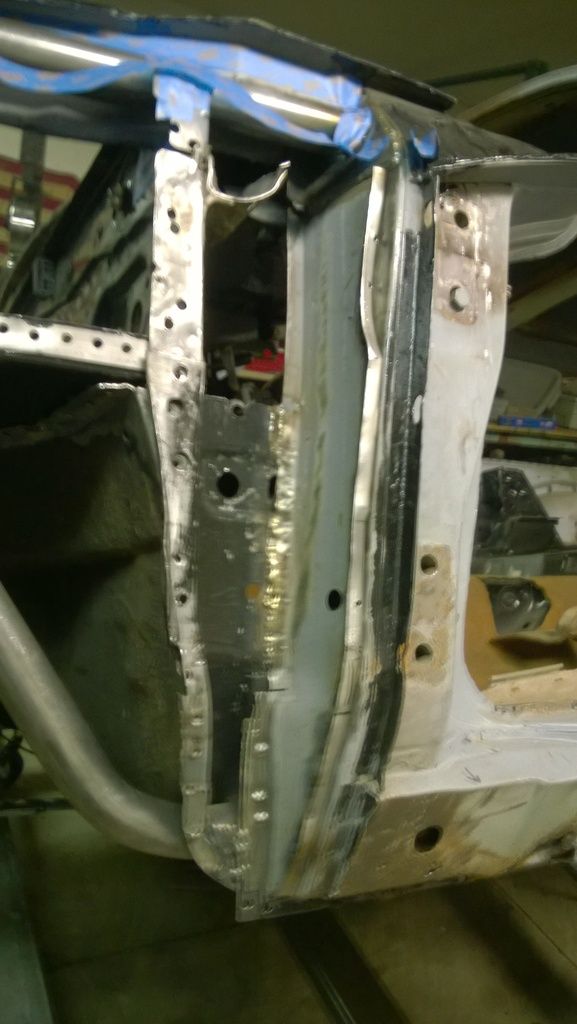 |
| |
|
|
|
|
|
|
|
The new car rotisserie earned its keep tonight. I was originally going to have to weld the lower pinch weld seam while laying under the car. MUCH easier this way. 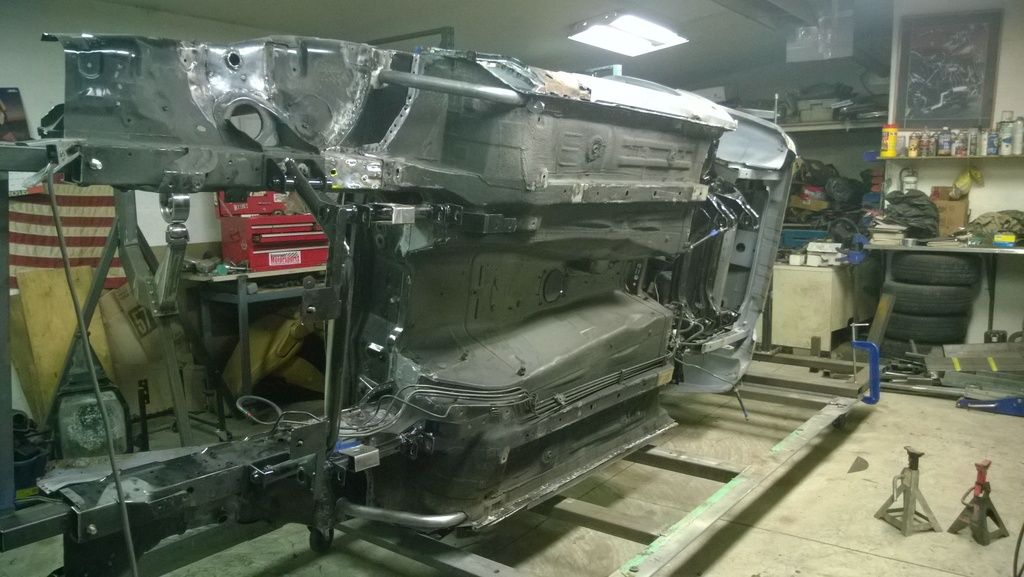 Before and after: Note how well the Miata lower pinch welds fit inside of the Volvo sills. It is pretty much a perfect fit and I used the original holes where I drilled out the Miata outer sill.   Here is a better picture of the shock tower reinforcement that I welded in last time. Its 1/8" plate that distributes the roll bar tube stress.  The joys of a sandblasted unibody. Been two years and a few efforts with the air hose to clear out the sand, and I can still get this: (going to be right unhappy if this stuff blows out during paint)  Still lots to do, but item #16 crossed off the list tonight. Not sure if I am in this for the fabrication challenge or if I just like to cross things off a list!  |
| |
Last Edit: Jan 13, 2016 4:26:47 GMT by bjornagn
|
|
|
|
|
Jan 16, 2016 23:25:57 GMT
|
Items # 2, #17 and #18 are now done. The wheeltubs and the dash brace bar are now integrated into the Volvo. 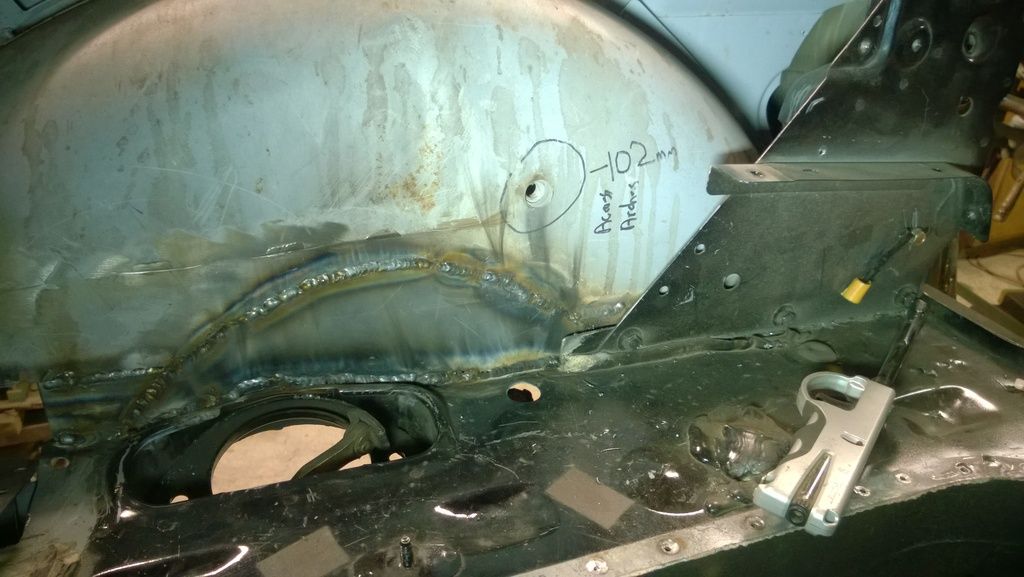 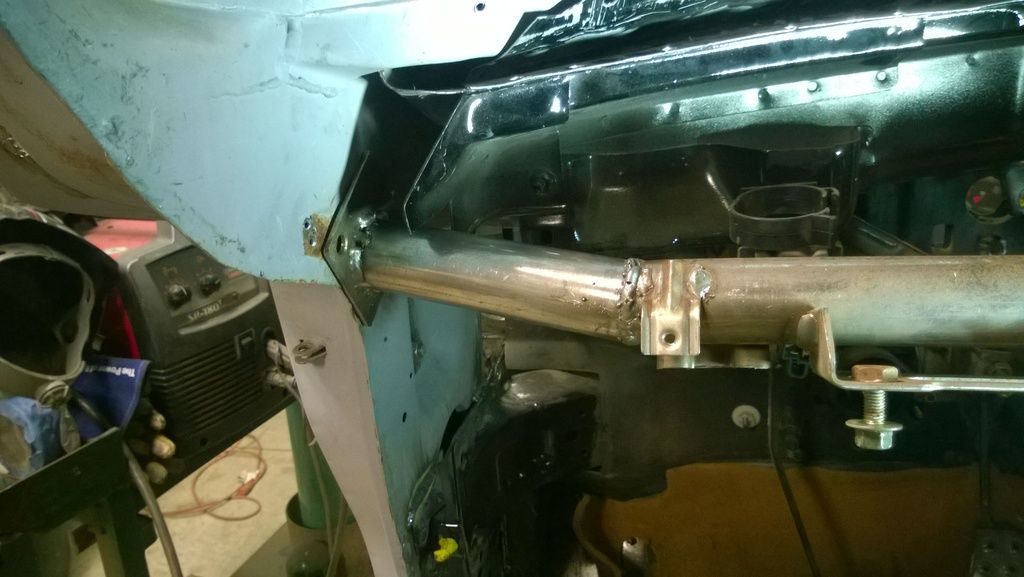 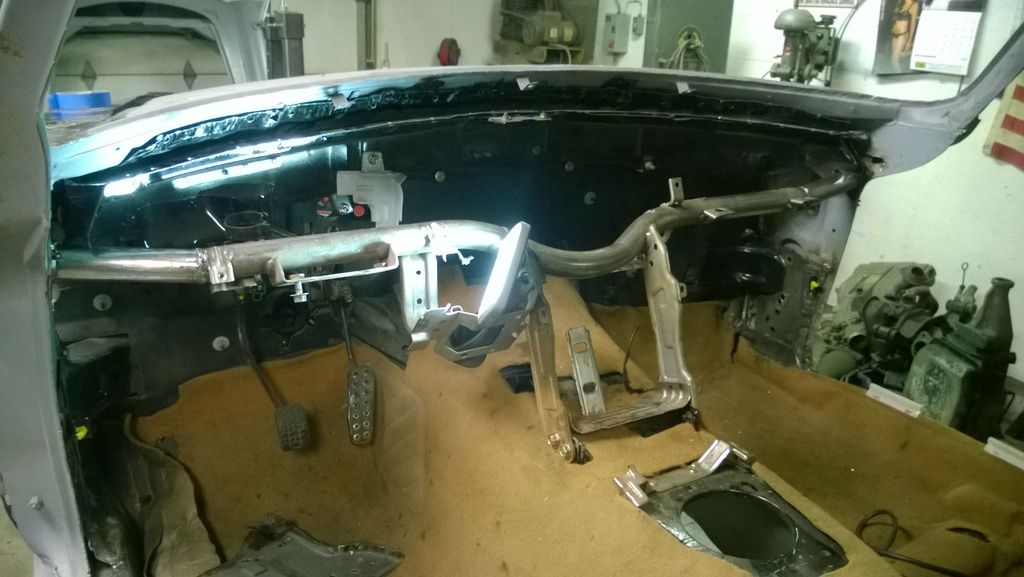 What has been fun is observing the sound of the chassis as it comes together. What used to be a fairly "ringy" sound has become a solid "THUNK" as each component gets welded in. |
| |
Last Edit: Jan 16, 2016 23:30:48 GMT by bjornagn
|
|
vulgalour
Club Retro Rides Member
Posts: 7,284
Club RR Member Number: 146
Member is Online
|
|
Jan 16, 2016 23:47:21 GMT
|
|
It's getting harder and harder to see where one car ends and the other begins.
|
| |
|
|
|
|
|
|
|
It's getting harder and harder to see where one car ends and the other begins. Thank you very much! That is the whole goal of this project. I have two goals for the finished project. 1-Drive in to the Provincial Volvo meet without being detected. 2-Be allowed to park in the Flying Miata parking corral at the Walter Mitty event . Still at the dreaming stage, but one step at a time will get me there!  |
| |
|
|
|
|
|
Jan 17, 2016 11:58:03 GMT
|
|
Good progress!
|
| |
|
|
ozzy
Part of things
 
Posts: 745 
|
|
Jan 17, 2016 15:38:30 GMT
|
|
liking how this is going. keep up the good work
|
| |
1985 GMC camper family wagon
1989 nissan sunny
1994 fiat cinq my boys car
|
|
|
|
|
|
|
Been putting this job off for some time because I did not have an elegant solution until now. The problem is that when I stretched the wheelbase in the front of the Miata, the crossmember's rear mounting points no longer aligned with the mounting points on the Miata underside. You can see the mount hanging in mid air. 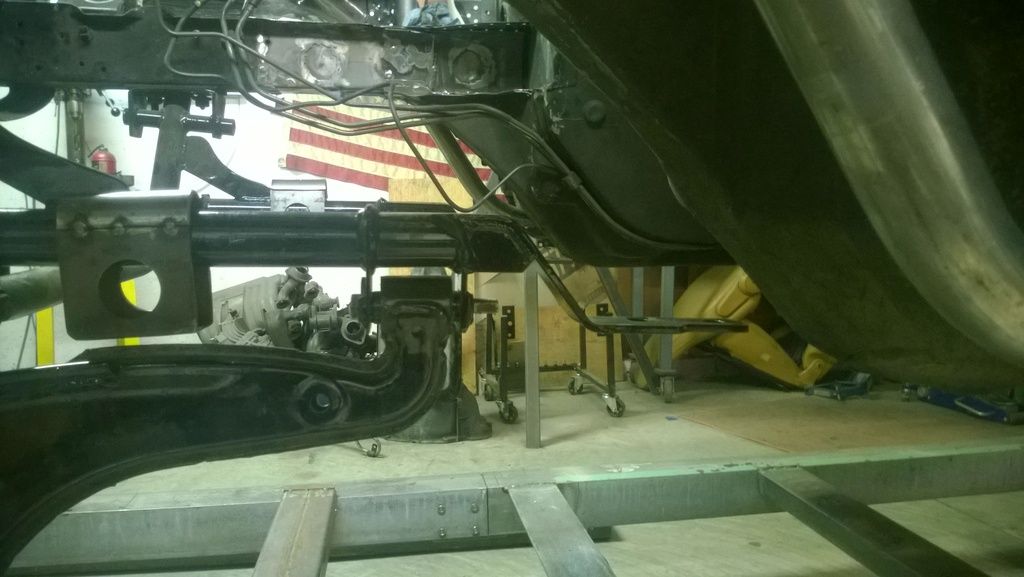 For the longest time I tried to figure how to build the Miata tub up to meet the subframe. Finally decided that I was going to have to bite the bullet and cut up my nice expensive V8 conversion K member. Would then extend the tube and rejoin the two pieces of K member . Would also need to replace the two tabs that make the rear mount for the a-arm. First things first, jig everything in position so it cant move. 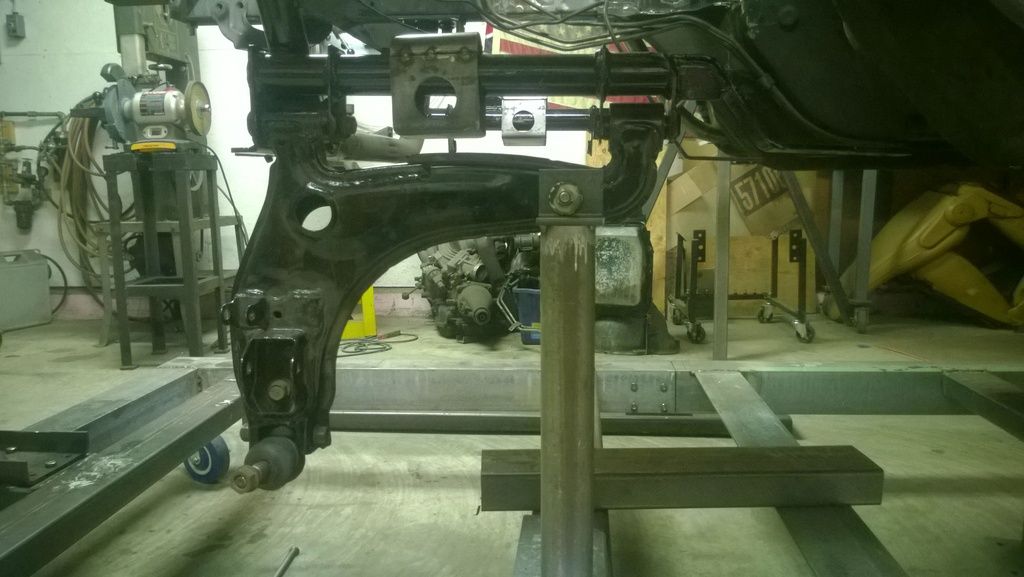 So, next challenge was how to make a nice straight cut on the K member. Used some pieces of 1.75 OD tube to make a collar that I clamped over the frame. This provides a guide for the sawzall and leaves me with two square cut ends. Simply run the sawzall down the grove between the two collars. 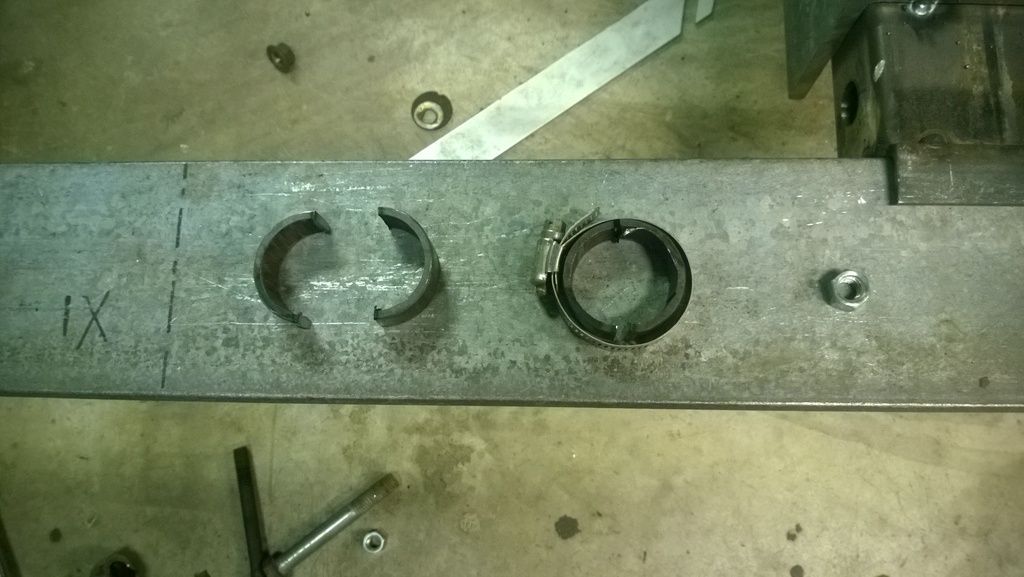 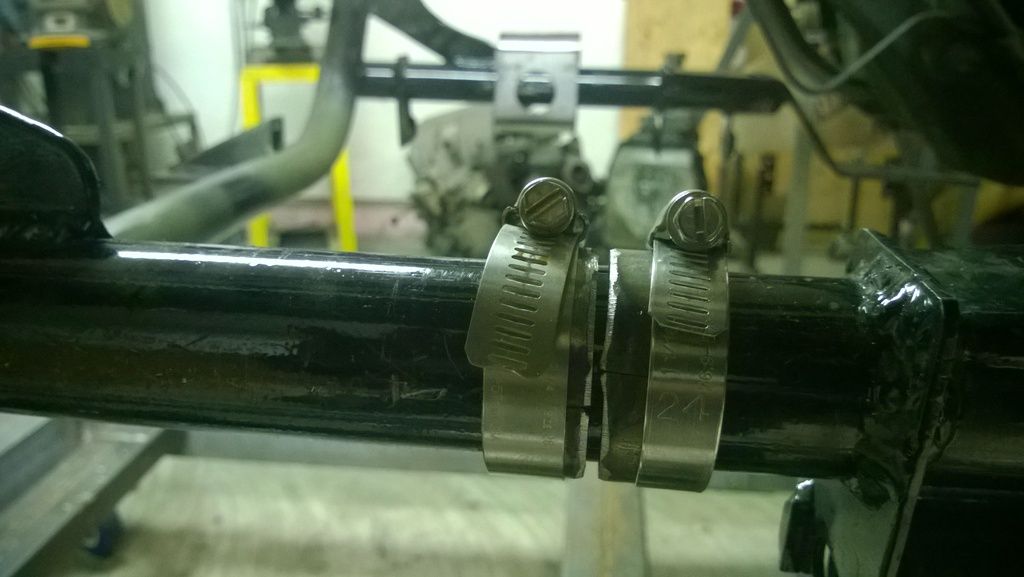 Finished product. 1.25 OD inside of the original frame tube. A 7" long piece of 1.7 OD to act as a filler piece and somewhere to mount the new pick-up point for the back of the A-arm. The person who sold me the K member was nice enough to ship me some spares free of charge! Saved having to fabricate those. 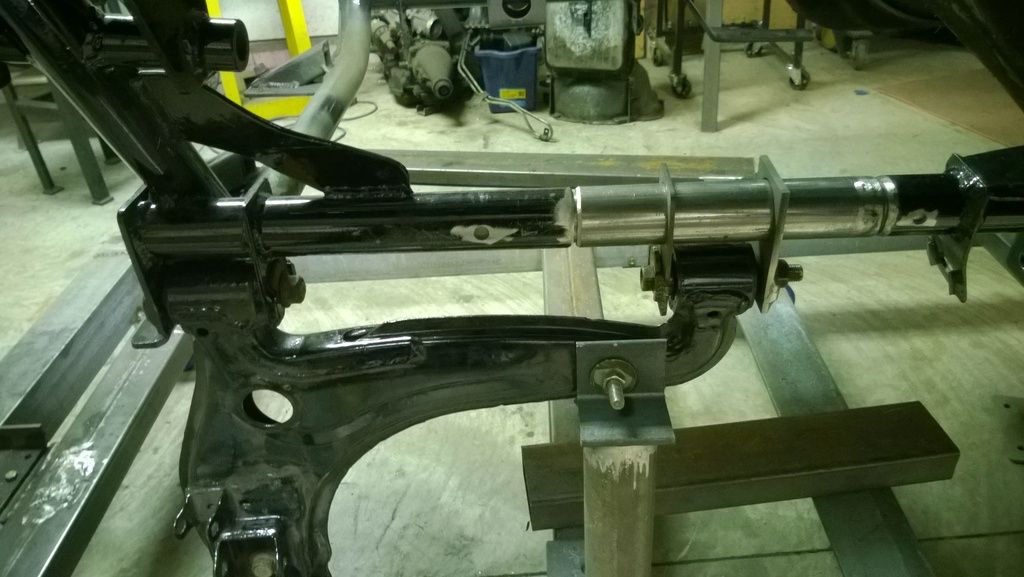 So far everything seems to line up nice. Good proof that when I put the front end back together it was square, or else the extended pick-up points would not have lined up with the mounting points. |
| |
|
|
smeden
Part of things
  "Full throttle until you see God,then shift to second"
Posts: 356
|
|
Jan 24, 2016 10:39:12 GMT
|
|
Really nice work you are doing there!
|
| |
Jaguar xj6 S1 swb manual
VW Bay Camper
Audi A3 1998 1.8
VW Beach Buggy (sold)
Ford Mondeo mrk I RS Celebration (written off)
Ford Escort Mrk II RS 2000 (rust in peace)
|
|


