glenanderson
Club Retro Rides Member
Posts: 4,345
Club RR Member Number: 64
|
|
|
|
|
Battery light is probably a sticky regulator. A gentle tap may see it working.
Wipers look to be the type held on with little pegs.
Autosparks for a wiring loom if you decide you need one, but at the very least it needs a thorough check.
Engine will be perfectly happy on bog standard unleaded. It was built to run on “pool” petrol, which makes even modern ethanol content stuff look good.
If you need new tyres, then you need new tubes too. I wouldn’t trust 40/50+ year old tubes to hold up under the stresses of running at speed, even if they’re airtight when parked up.
|
| |
My worst worry about dying is my wife selling my stuff for what I told her it cost...
|
|
|
|
|
|
|
|
|
Perfect patina car - the welding to that perforated area is nothing - most of your trim will clean & tidy up - has you say a lot of it will be where the thread has rotted and let go - re-stitching will be a slow but very worthwhile process - now leather also weakens & rots so you might have challenge on your hands attempting make anything of those ripped areas - however its all simple stuff and there is nothing stopping you from removing the covers where required and stitching in new sections or panels has required - I can help / donate some hide offcuts if required to make the replacement panels up - don't worry about matching the colour - you can just recolour the seats or the repair area with one of the kits from the furniture clinic (they will colour match to a sample) The are so many similar traits with the Javelin - battery is in the same place / same trimming methods / furflex door seals / carpet to the bottom quarter of the door cards etc - scumbling is fairly easy - should be something that you could master after a few practice sessions (if its not something that you have already done ) - I would check to see if the car is positive earth - its more than likely to be 12 volt by this age You have done very well with this and has already implied by others its got you written all over it  First thing I thought when I saw the interior is that it looks similar to the jowetts you have been posting. Made me wonder if lanchester also bought their interiors in, maybe from the same company jowett did. |
| |
|
|
|
|
|
|
|
|
Loving the lanchester, it has a great shape.
Makes me want to build a sort of South London ish look one in the same way people used to build 100e Ford's.
|
| |
|
|
vulgalour
Club Retro Rides Member
Posts: 7,280
Club RR Member Number: 146
|
|
|
|
It's still positive earth, so red earth cable to the positive post, black negative cable (that runs up to the engine bay) to the negative post. That looked like the correct way to do it, was it not? --- I don't like to feel like I've wasted my free time, so when it was too hot to move outside, I tackled the rear seat base inside and gave it the first leather feed. The leather feels vastly improved and smells nice and some of the scuffs and scratches are now much reduced. 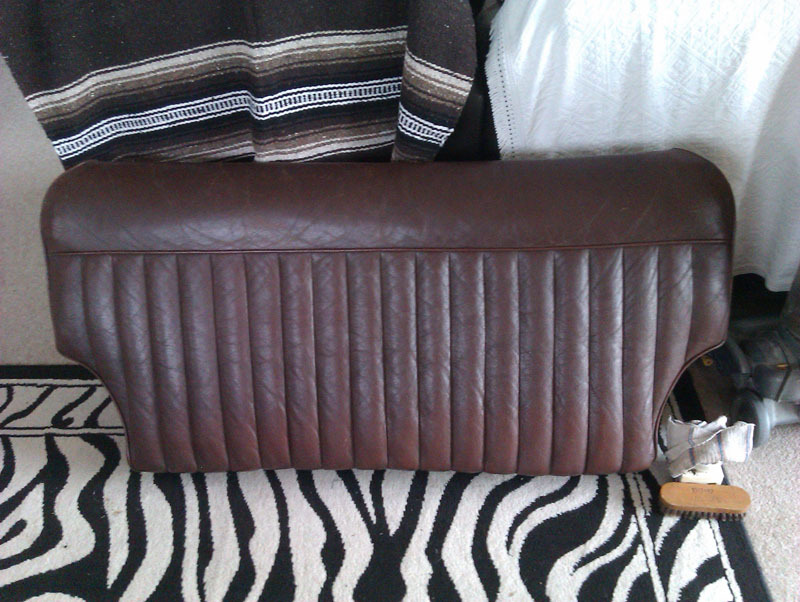 Then the temperature finally fell to something approaching reasonable and it became a little overcast. In fact, the weather became ideal for getting a bit more of the bodywork done and all it took to finally tempt me back outdoors was a refreshing breeze. Spent an enjoyable little while cutting through the oxidised paint by hand and actually getting some shine back to the paint. For the front wing, I used some 400 grit sandpaper in a piece about the size of my palm and carefully worked away the roughest of the surface rust, revealing quite a lot of paint which has just about taken some shine. I'm not expecting miracles with that wing, the paint is incredibly thin and seems to have been done well after the original paint that remains on the car. 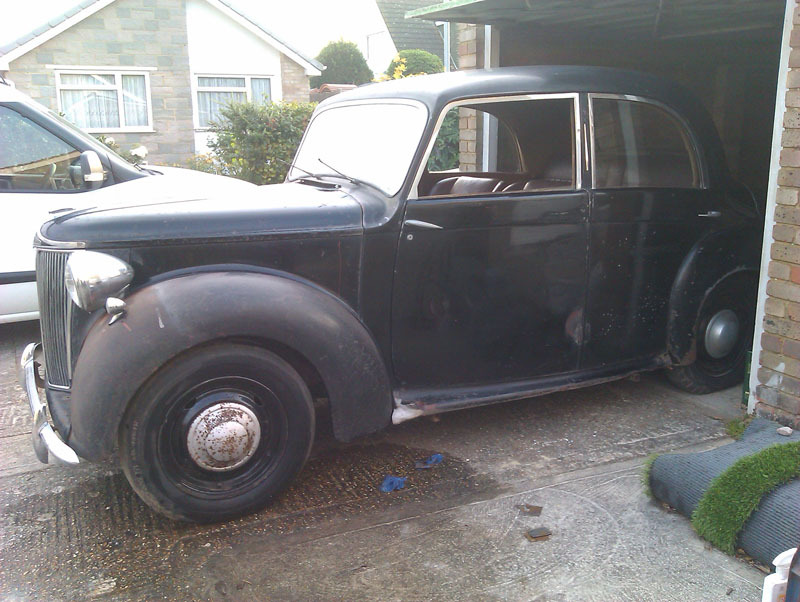 The bonnet has become a nice display of before and after. There's still a bit of fogging to work through on the polished section, a couple more passes should get it. 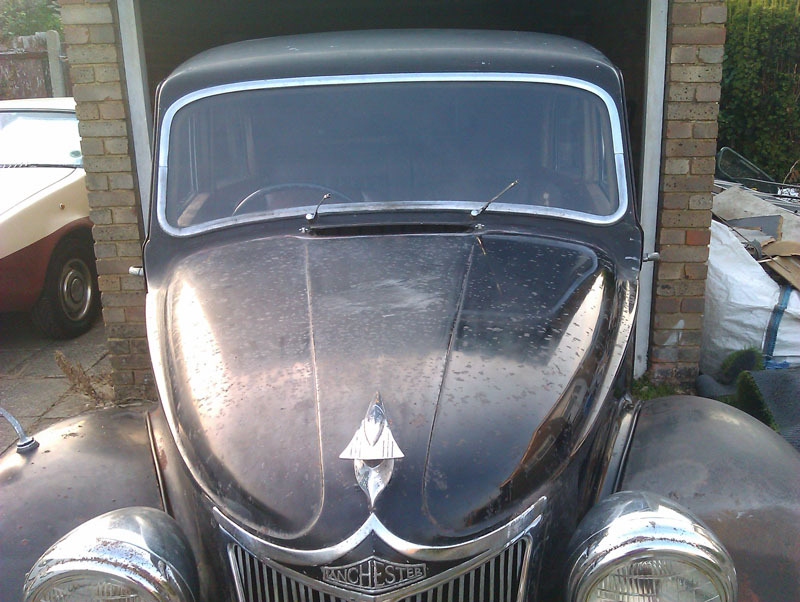 I'm really enjoying how this is coming together and brightening up. Seeing all the layers of neglect, and use come through as the oxidisation is cleared away is really quite rewarding. This is far more satisfying to me than getting the car resprayed. 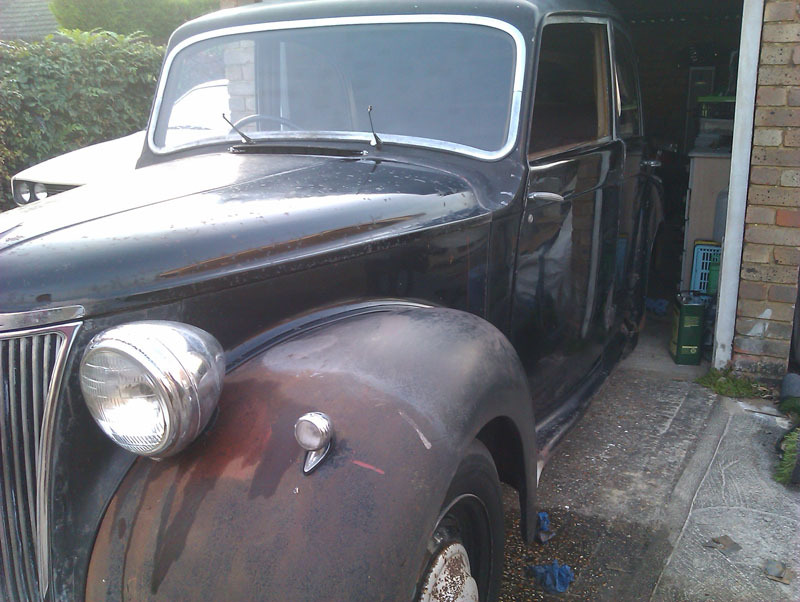 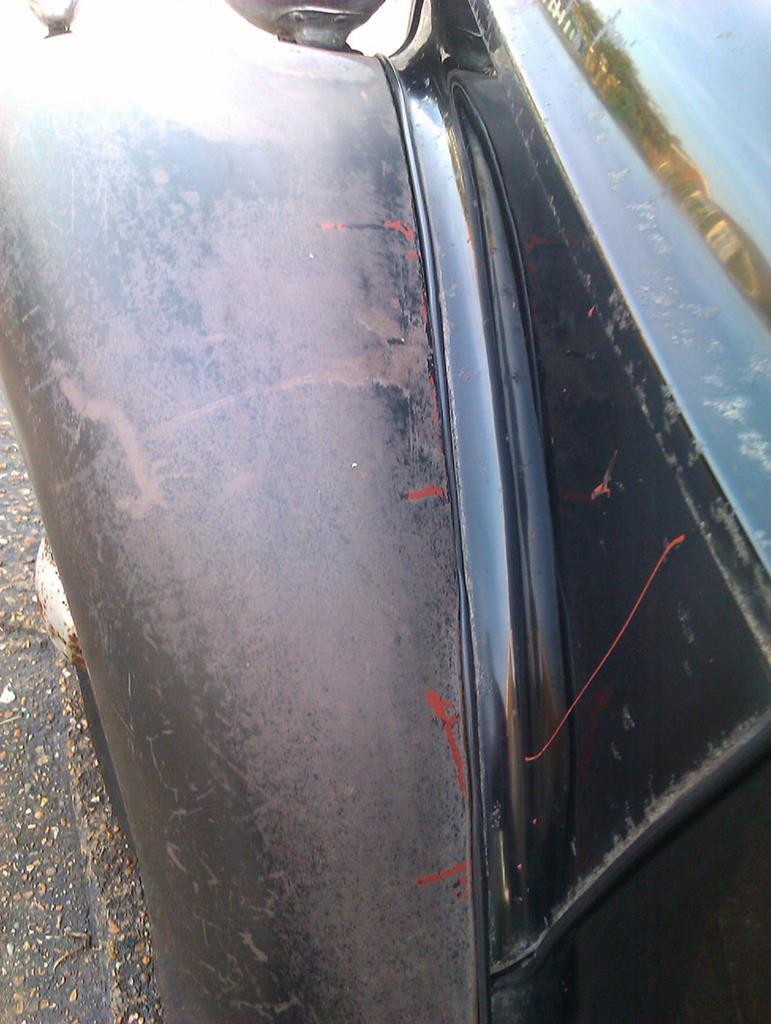 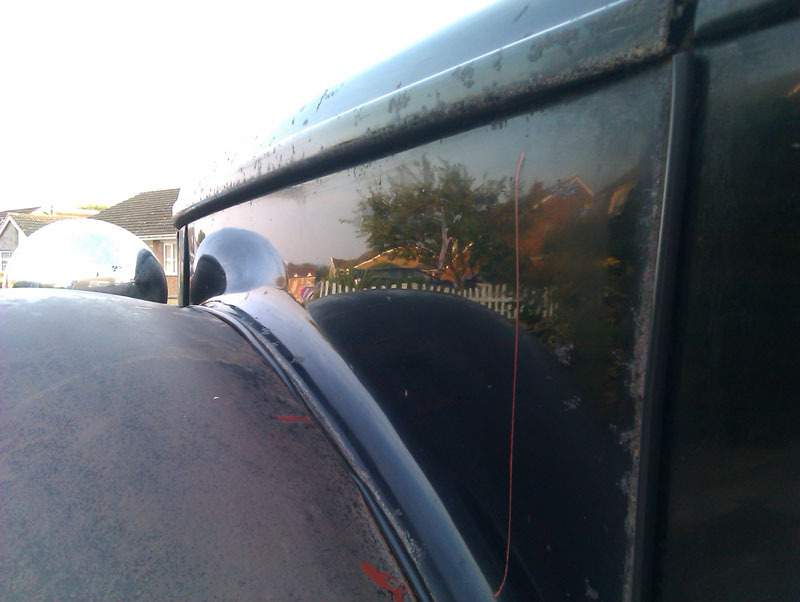 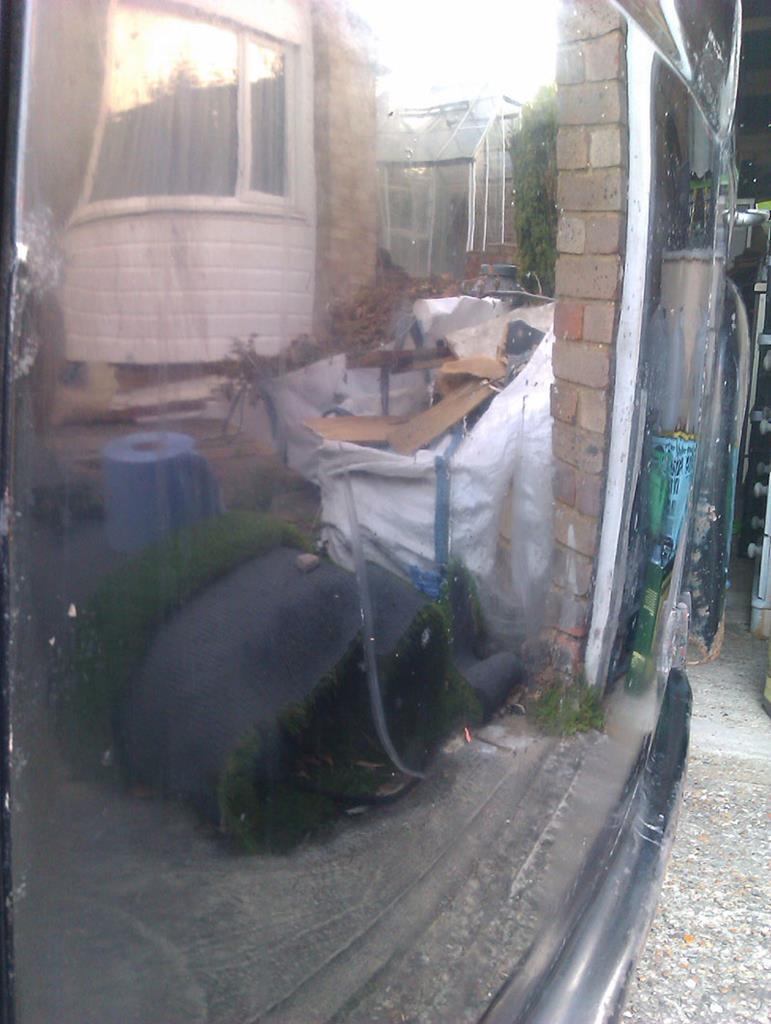 Other half and I will keep plugging away at this and getting everything shipshape again. I'm not much of a fan of doing the brightwork because it's fiddly, so it's nice that the other half likes doing that bit, we have a similar thing with the bodywork preservation which is very much my domain, while the mechanical stuff we share equal duties on. It's felt thoroughly wholesome to work together on this, it's done us a lot of good to have something to do while we wait for life to return to something more like normal. |
| |
|
|
|
|
|
|
|
|
Good to see you getting stuck into it, You might try going over it with some of the coloured polish, it does make a noticible difference.
|
| |
|
|
|
|
|
|
|
I'm liking this a lot  |
| |
|
|
vulgalour
Club Retro Rides Member
Posts: 7,280
Club RR Member Number: 146
|
|
|
|
Got an eBay notification on an item I didn't expect to win, definitely didn't expect to win for only £16. A driving and fog (I believe) set of Marchal auxilliary lights. These will hopefully drop straight into the holes in the bumper infill panel where some auxilliary lights used to live, and they're just the right amount of scruffy to match the rest of the car. Look to be period appropriate too, and just the right amount of posh for the Lanchester. Hopefully they survive being posted. 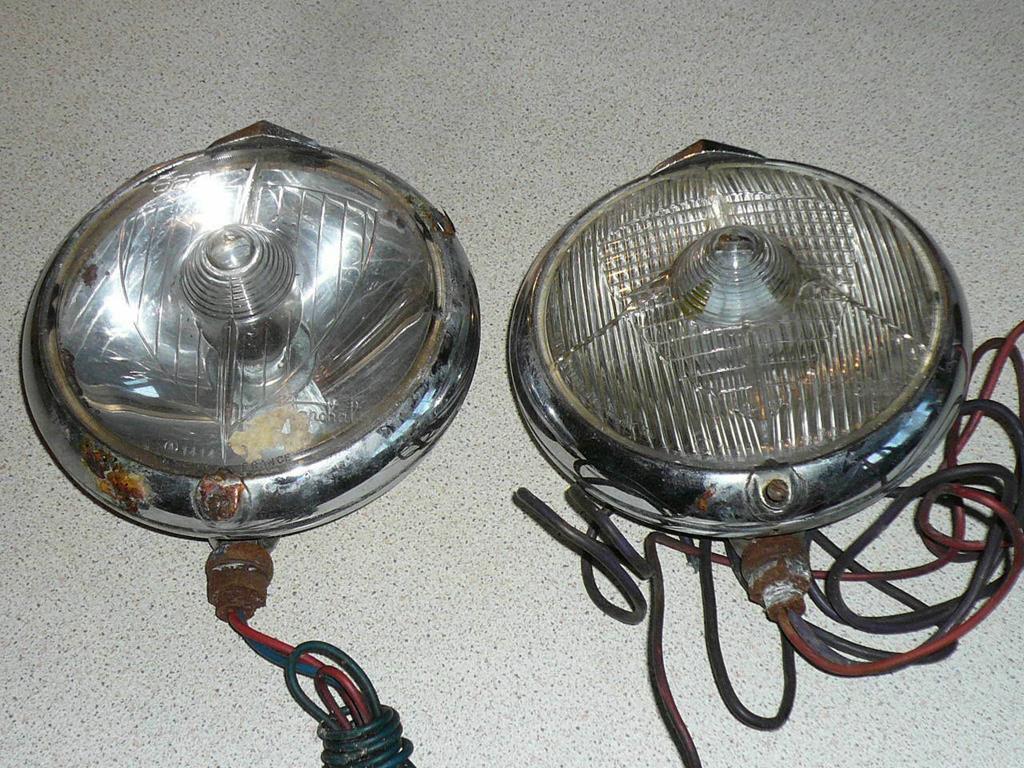 |
| |
|
|
|
|
|
|
|
My Lanchester also only has a lock on the passenger side, apparently it’s a throwback to the days of horse and carts and unpaved roads. Interestingly my '51 Chevrolet pick up only has an external lock on the passenger side, it was suggested on another forum that this was an early attempt at road safety, the driver sliding out across the bench seat to avoid passing vehicles when parked at the kerbside. |
| |
|
|
|
|
|
|
|
|
I would start on a rewire tbf. You know it'll run. But last thing you want is to get a lecky fire.
|
| |
|
|
penguin45
Part of things
  Still welding......
Posts: 70
|
|
|
|
|
If the car has been stood for a long time, you may need to "flash" the dynamo to re-polarise it.
P45.
|
| |
|
|
vulgalour
Club Retro Rides Member
Posts: 7,280
Club RR Member Number: 146
|
|
|
|
Been speaking to a friend of mine who did a full rewire on a Riley special not so long ago and getting some tips on how to make a modern rewire look old where it matters. Original isn't always best, some of the original wiring on the car is looking a little sketchy so we will be redoing it fully as funds and time permits, it's one of the higher priority items. Presently, we're going to carry on with the cosmetic tidy while we wait for the plug leads, hopefully the new leads allow the car to idle properly so we can check the gearbox will at least go into first and reverse, and then we can start on mechanical refurbishment. We're going to do as many of the free jobs as we can before spending on parts, that way we should have a nice list to work through of what the car needs and hopefully bundle some paid jobs and orders together to save on postage costs. We're not going to be short of things to occupy our time with this one. Hopefully we'll get it safe enough to get out on the road before we get too late into the year. Another issue is originality versus practicality. Keeping it positive earth and incandescent bulbs throughout is good for originality. However, we do intend to use this car as a car, in modern traffic, doing modern things, so we may have to make some concessions to modernity. The semaphores will remain, and must remain operational (that stiff driver's side one is now working normally, it just needed a little use), but we have considered updating them with the flashing LED internals upgrade as they are incredibly dim and hard to see as standard in daylight. The rear lights are surprisingly bright and visible, so we've no plans to change those. The front lights are quite dim, seemingly by design, and the sidelights we're less than impressed with. We're considering a halogen bulb upgrade to the headlights as it doesn't change the appearance of them (you keep the same lens) while improving light output, and since seeing those sidelight/indicator combination lights that Rich posted we've been unable to think of a better discrete installation and will likely go for those or something very like them. At the back, we're probably going to put one of those combination high level brake lights and indicator LED strips in the bottom of the rear window, it's something we can easily install on a plug so it can be removed if we're at a show or something while also putting the important lights right in the eye line of the modern driver. Externally this should keep the car looking completely original, while also updating it where it matters. I assume positive earth versions of the LEDs required are available, and we can fit a flasher relay without changing the original semaphore control or adding extra switches. We may also add a fog and reversing lamp on the back, if we do it will be period auxilliary lights probably mounted from the bumper or similar to avoid drilling holes in the bodywork, rather than fitting a modern LED item since this is something the car could have had in its 70 year lifespan so we should make the effort to find something correct looking for that job. The only other bit of modernisation is going to be a hidden power point, something that's surprisingly easy to mount under the dashboard. Anything truly modern on the car we've decided should be hidden, until in use. It's trickier to do this way because you can't just slap something where it'll work best, but it feels wrong to have anything obviously modern stuck onto the car. |
| |
|
|
|
|
|
|
|
|
A good selection of modern flame retardent cotton covered wire is available but I found it too expensive to consider as primary for a full rewire.
At this age the wiring has served a useful life and the same as any part of the vehicle eventually needs repair or replacement. The car has the original engine and gearbox, frame and most of the body panels and that tells the story of the car. The wiring does too but retaining it does come at a cost and potential hazard. If nothing else, consider the engine bay wires and charging circuit in it's entirety.
I decided to loom up in fabric tape and use modern pvc covered wire.
Like mine, you may find the headlights are actually adequate once they've got some decent wire feeding them. Even 35/40 Watt bulbs with clean lenses and good reflectors spread a useable amount of light onto an unlit road.
Mine were utterly useless until they'd been rewired. The original wiring by design was inadequate, as is often the case with old headlights. You may want to put in a marine constant-rated solenoid relay* for the lights, those old fiberboard and bakelite switches are not really up to much, even cleaned.
You can get positive ground LED's (they're just wired backwards) but depending on the gauges and such it may be prudent to convert it to negative ground if you want it to be a regular use car with the potential to go places. You want chain store outlets to be a useful source of spares when on the road. That is 100% the reason I completed the 12V conversion of mine.
Keep it up though, it's looking good.
Phil
*because they don't look out of place in an old car visually
|
| |
Last Edit: Aug 10, 2020 3:39:59 GMT by PhilA
|
|
|
|
|
|
|
Autosparks list the wiring harness for this model & granted its not cheap www.autosparks.co.uk/finderAt just under £370 - however to bit & piece a wiring harness that's heading for its 70th year from my experience is false economy you are just storing up problems in the areas of the harness that are hidden - the Javelins & Jupiter's are all of the same age and it's frightening on how some of the cars have not gone up in flames due to the wiring insulation deteriorating to the point its non existent in places - do what you can where you can on the rest of the car but I would suggest budgeting for a new harness prior to returning the car to the road - you could build your own harness of course but by the time you have purchased all the materials involved and again from experience I think that you will find that you wont be making much of a saving on a ready made loom - although its listed at Autosparks they make to order and the lead times are normally 8 - 12 weeks |
| |
|
|
glenanderson
Club Retro Rides Member
Posts: 4,345
Club RR Member Number: 64
|
|
|
|
|
I’m with Chris on the loom issue. I’ve made numerous ones in the past, but unless you are already in possession of the bulk of the parts necessary to make one, then the savings are negligible unless you’re happy to use the cheapest of components and stuff that’s visually out of place. The cloth loom wrapping is, in itself, almost worth the expense on its own. You could, undoubtedly, build a functioning loom for much less, but you’d need to put a considerable amount of time into it, and be happy with the end result. You’d likely risk devaluing the car by more than you’d save too.
If, once you get it properly assessed, all it really needs is time, new tyres and a wiring loom, then you’ve done very well indeed.
|
| |
My worst worry about dying is my wife selling my stuff for what I told her it cost...
|
|
vulgalour
Club Retro Rides Member
Posts: 7,280
Club RR Member Number: 146
|
|
Aug 10, 2020 10:12:33 GMT
|
|
We hadn't priced up the components for a new loom, the plan was mostly to use modern wiring throughout and where it's seen in the engine bay and the like, either apply loom tape or salvage good sections of the cotton covering from the old loom so it keeps the relevant appearance. Apparently you can salvage the old cotton covering and put it on new wire, it's just difficult and fiddly to do.
The Autosparks loom isn't that expensive for the time it saves, but it might be a nice learning experience to actually build our own, it's not something we've done and regardless of cost savings, it could be an enjoyable project to do together.
|
| |
|
|
|
|
|
Aug 10, 2020 11:31:53 GMT
|
|
I imagine the wiring on this will be pretty simple, spade, eylet and bullet terminals, these cost pennies. The wire will be the expensive bit if you want to retain all the original colours, you could buy a couple of large rolls and label each connection.
The easiest way to make the loom is remove it from the vehicle labeling anything which may need a little extra or less length and fix it at regular intervals and each connection to a 8x4 sheet of board using p clips or tie straps cut the wrapping off then replace 1 wire at a time, while you are at it include extra wires for anything you may ever need in the future. When you have finished tie strap each branch and remove from the board then wrap it cutting the straps off as you go.
You will also need to buy some decent crimping tools and decide if you are going to solder the terminals or not (many opinions the pros and cons on that one)
|
| |
|
|
|
|
|
Aug 10, 2020 12:01:46 GMT
|
|
£370 is damn good for a ready-to-fit loom.
I would put that at about 1:4 in terms of parts:labor ratio in terms of their prices, which is not unreasonable at all.
Having just done the rewire on mine because there isn't a viable premade option for mine... My advice is save up for it. It will sting a bit but it's well worth trying to stomach it because simply removing the old loom, fitting the new one and connecting it up is enough of a pain in the ass by itself.
I also believe they make them to order so you should be able to request additional wire for power outlets, reversing lights and front fog and spotlights and have it all built into the loom.
Phil
|
| |
Last Edit: Aug 10, 2020 12:05:28 GMT by PhilA
|
|
glenanderson
Club Retro Rides Member
Posts: 4,345
Club RR Member Number: 64
|
|
Aug 10, 2020 14:08:35 GMT
|
|
What Phil says ^^^
Terminals are pennies, granted, and multi-core trailer cable is a cheap way of getting a rake of different coloured wires, but cheap terminals are pants. Decent terminals need proper tools to crimp them, and adding the cost of those to the job isn’t trivial.
Please, please, don’t solder terminals. From an engineering perspective it’s completely the wrong environment for that.
Making a new loom from scratch for something like this would take me at least two full days, probably three and that’s with the tools, experience and materials to hand. Snags involving inaccessibility or the unforeseen could easily double that. Fitting a new loom for me would be a day. I would humbly suggest that it would take you between two and four times as long.
Yes, Autosparks will add circuits as required. A couple of additional engine bay to rear boot area cables is a good idea, as are a couple of additional switched and unswitched cables behind the dash. Similarly, if you already know you’re going to have dual amber/white LEDs in the sidelights, get them to run an additional cable to there too. Beyond that though, I’d not bother with further additions, I’d just make up simple sub-looms for things like spot and fog lights, indicators etc. and that way you don’t have to second-guess where things are going to have to run.
It would be quite straightforward to use some relays triggered by the semaphore system to have flashing indicators all worked off the existing switch.
If making a loom remains something that you really want to do, then you can get cloth tape to wrap it in, or non-sticky pvc. Heatshrink tubing is my go-to material for loom sheath, as it’s neat, flexible, hard wearing and doesn’t look out of place. Avoid sticky tape like the plague.
And remember, if you spend a fortnight making a loom yourself, and only pay yourself half the minimum wage for your time, then it’s still dearer than an Autosparks one.
If you want indicators, additional power outlets, and a few accessories, then there’s still going to be a nice (but manageable) chunk of bespoke wiring for you to get your teeth into.
Nothing on these is difficult, electrically. They make even your Princess look like the space shuttle by comparison, but it’s easy to get overwhelmed if you’re not careful.
|
| |
My worst worry about dying is my wife selling my stuff for what I told her it cost...
|
|
|
|
|
Aug 10, 2020 14:35:02 GMT
|
|
Heck, what's the semaphore switch like on this? I didn't see anything but perhaps you could leave the semaphores as original and just add in a flashing light indicator system.
The car is old enough you can have side and turn signals, both white in one housing up front, and you can have flashing red brake lights. That way, externally, the car looks 100% original. With a little work you could have the semaphores trigger from it too.
Just a thought. It was a "safety" upgrade back in the day to do it that way too.
|
| |
|
|
goldnrust
West Midlands
Minimalist
Posts: 1,887
|
|
Aug 10, 2020 14:37:20 GMT
|
And remember, if you spend a fortnight making a loom yourself, and only pay yourself half the minimum wage for your time, then it’s still dearer than an Autosparks one. Not to pick on you Glen, as I appreciate you have the best intentions in mind, but there's always another way to look at this. Presuming the time vulgalour is spending on the car is his spare time (and he's not turning down work to spend time on the car!), then no matter how many hours he puts in to the loom, if the materials to make the loom are cheaper than the pre-made loom, then he will always have saved money. From a business point of view, it's really important to value your time (as a self employed person I know this well!), but when it's things you want to do as a hobby, where there's enjoyment in the satisfaction in learning and knowing you did it yourself, then different rules can apply.  |
| |
Last Edit: Aug 10, 2020 14:38:19 GMT by goldnrust
|
|


