vulgalour
Club Retro Rides Member
Posts: 7,279
Club RR Member Number: 146
|
|
May 14, 2020 20:58:07 GMT
|
|
well, nothing really lost in this instance, it would have had to come off for someone else to work on it anyway and I couldn't drive the car before I removed it. I'll be switching attention to fixing the Princess first now because that's much easier to sort, providing I can get hold of the correct shims. Who knows, maybe I've got enough of the correct sizes in the two heads I do have to set them properly. We shall see.
I'll be happy when I can go back to bodywork and interiors, it's much less terrifying than engine stuff.
|
| |
|
|
|
|
vulgalour
Club Retro Rides Member
Posts: 7,279
Club RR Member Number: 146
|
|
May 18, 2020 15:22:13 GMT
|
Good news! Sort of. The second hand pump arrived today, it wasn't listed as being for my car specifically but looked similar enough that I hoped it would at least yeild the parts I needed. Original pump is the one nearest the wall. 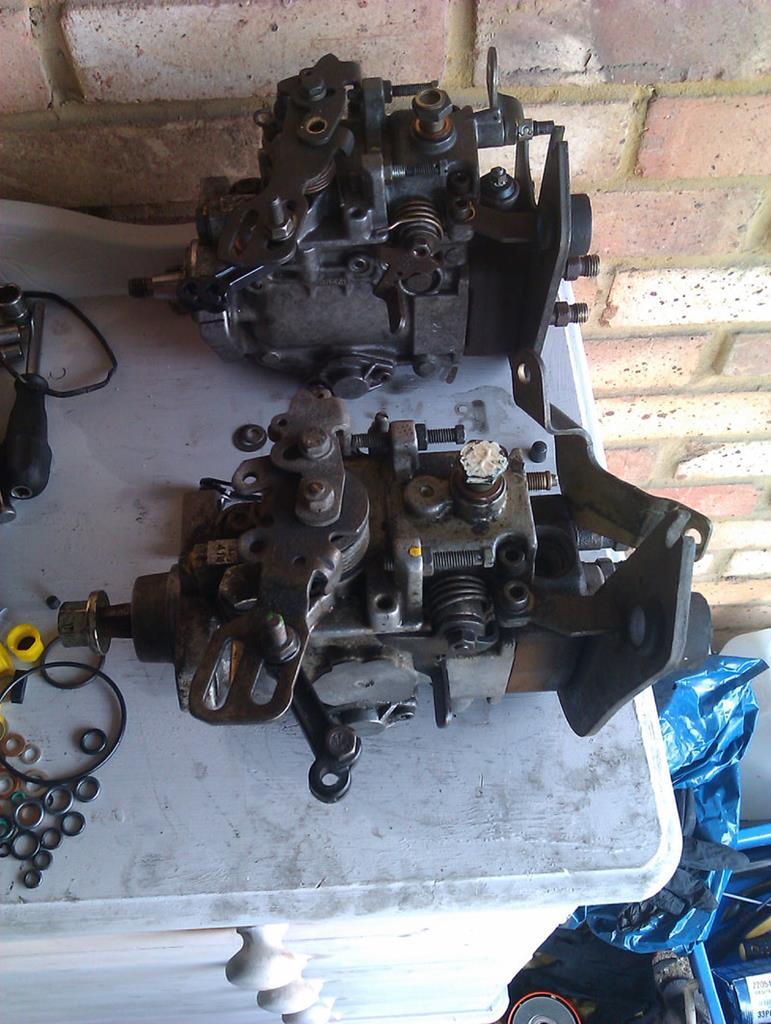 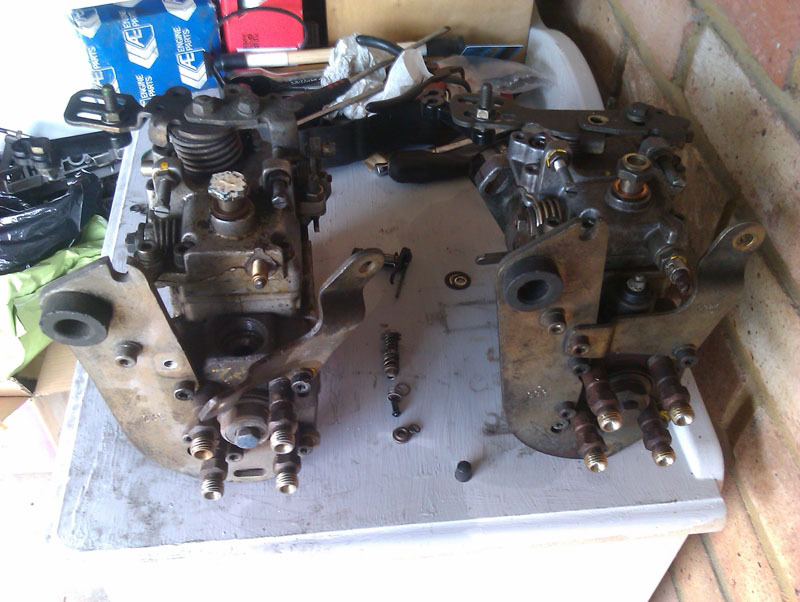 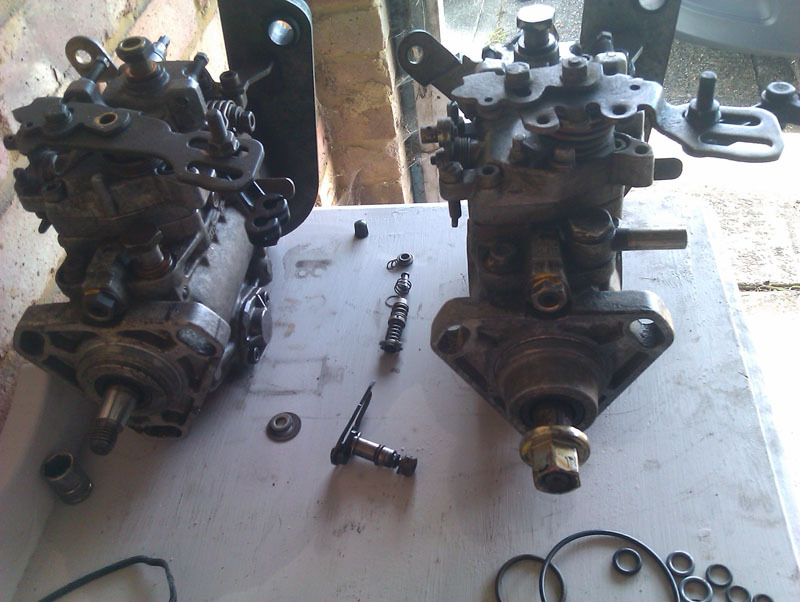 Whatever route I took from here, I knew that I wouldn't just be putting the second hand one on the car and hoping it worked. It's expensive to get the pump rebuilt and it would be cheaper to just throw the second hand one on the car and see if it worked, but if it's rebuilt I stand the best chance of whatever pump I refit actually working and not leaking. Fundamentally, both pumps do look the same. There's a slight difference in the throttle mechanism on the top, and a slight difference in the lower casing where the second hand one has a big flat area that the original doesn't. Otherwise, everything that connects looks similar enough that I hoped it would work. Unfortunately, the second hand pump has had a fall at some point which has bashed part of the top casing off and bent the bracketry on the injector line side so even if I did want to fit it to my car that wasn't going to happen without some parts swapping. Whatever I did, I was going to have to open up the second hand pump so that's exactly what I did next. Happily, the broken piece with the springs on was intact and now I understand better how things go together, it remained that way when I removed everything. This was the main reason for getting this particular pump. I had also hoped the throttle shaft would be the same. 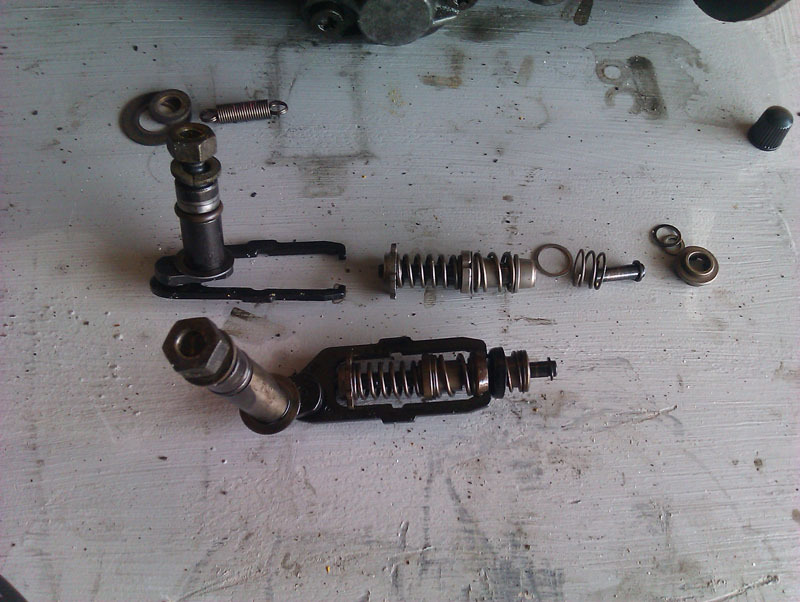 Unfortunately, the throttle shafts are completely different and, as far as I can tell, not interchangable. That means I'll have to get a new throttle shaft which is another £40ish, providing I can get the one that my pump needs. 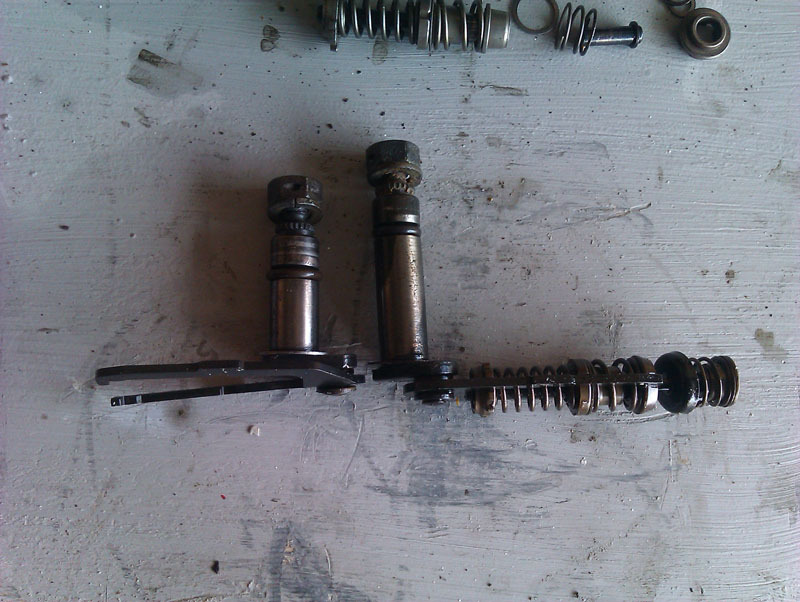 They do both at least have part numbers on them, so replacement should be easier. It's worth noting too that removing the throttle shaft from the second hand pump was much more difficult, the o-ring was providing a much better seal than on my original pump, which lends credence to the theory that it was that o-ring that was leaking on my original pump. I need a 777 throttle shaft, the second hand pump is equipped with a 716 throttle shaft, so it's shorter but otherwise the same. There's also additional plastic bits on the throttle shaft spring that my original pump doesn't have. 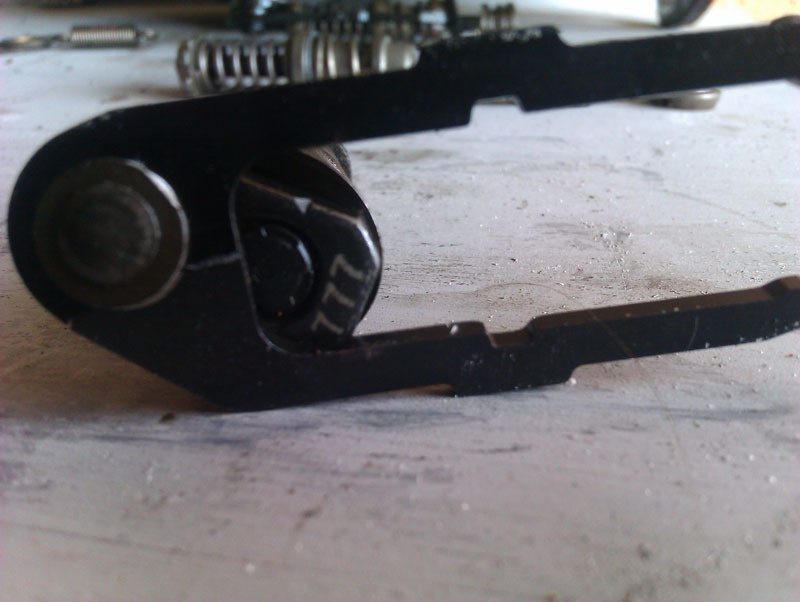 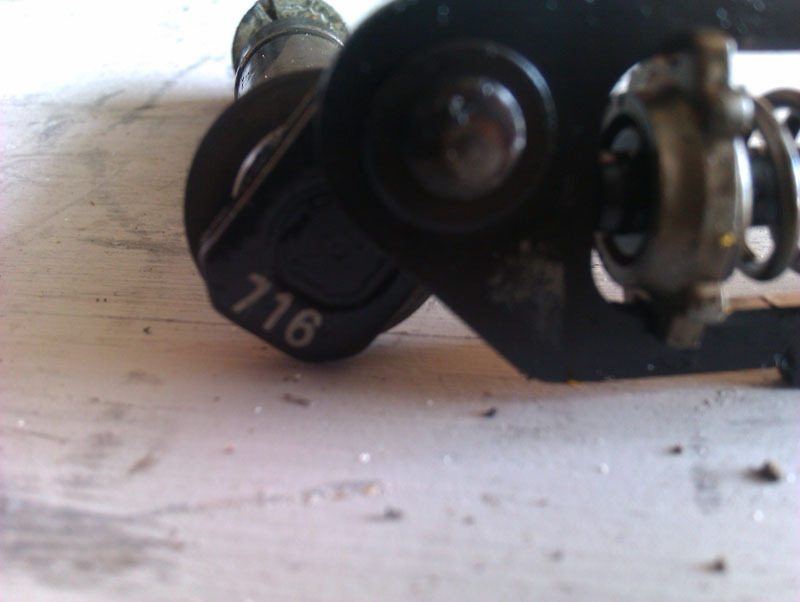 Oh well, one step closer at least. I'll call some injection pump rebuilders and see what they suggest, it may be more cost effective for them to get the throttle shaft my original pump needs, or it may be possible to make one good pump out of the two I've got here. It's also worth noting that the pump I bought we didn't know exactly which engine or car it fitted, so this was always a bit of a gamble. There are a lot of variations on the Bosch VE pump for whatever reason and like many things mechanical on French cars, it's just part of the fun of ownership when trying to find the correct bit. Now, I just need to save up a good chunk of cash to get this moved along to the next stage. |
| |
|
|
vulgalour
Club Retro Rides Member
Posts: 7,279
Club RR Member Number: 146
|
|
May 18, 2020 15:36:54 GMT
|
I now have all the tools required to rebuild the head and install the valves on the Princess. Special camshaft clamping tool in the pink box, and an old fashioned mechanical metric micrometer for measuring the shims. I'm unlikely to use a micrometer that often, so it made sense to go for one that didn't need batteries. 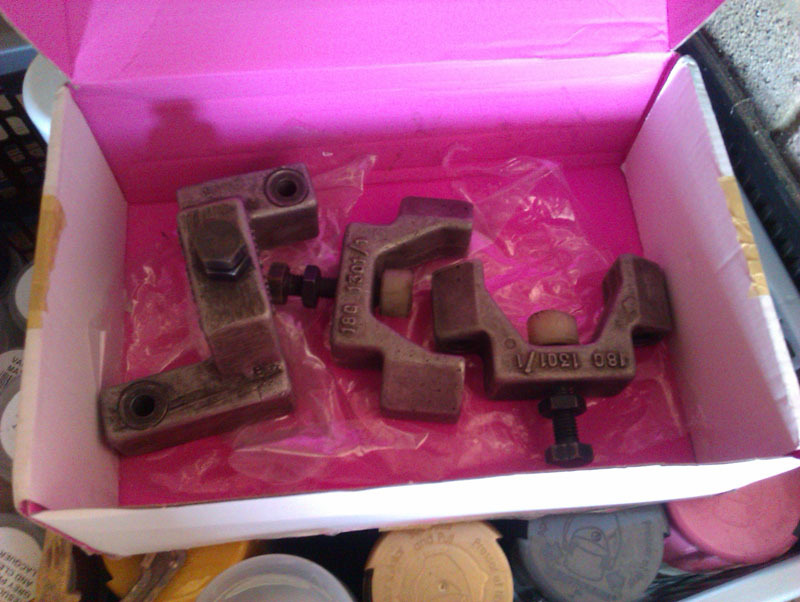 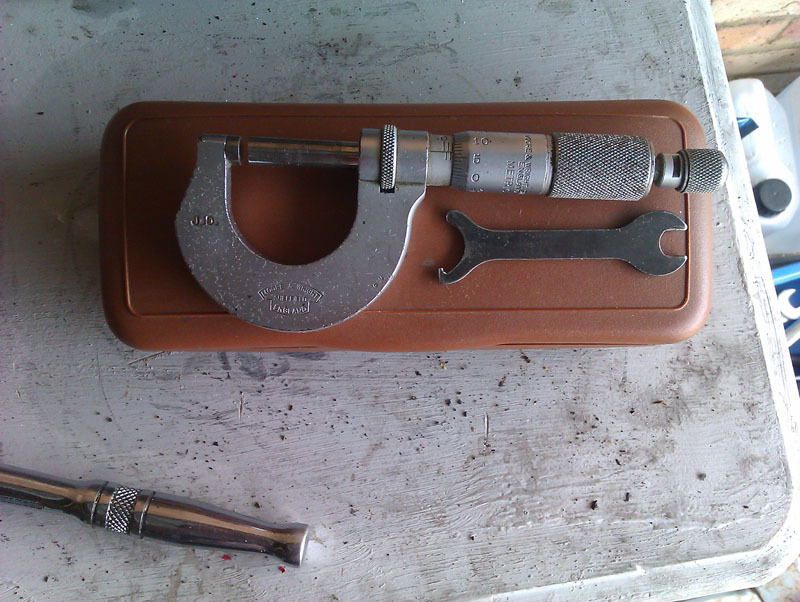 If I'm really lucky, the shims I've already got in the head I'm building, and the spare, will be the correct sizes. I'm not pinning my hopes on that, it's very unlikely, it would just be nice if that's how it went. |
| |
|
|
Rich
Club Retro Rides Member
Posts: 6,327  Club RR Member Number: 160
|
|
May 18, 2020 15:39:03 GMT
|
|
Looking at the photos I am unsure as to why you needed to swap the accelerator linkage (technicalities, no throttle on (this particular) diesel)
It looks to me like it would have worked just fine?
|
| |
|
|
vulgalour
Club Retro Rides Member
Posts: 7,279
Club RR Member Number: 146
|
|
May 18, 2020 15:43:24 GMT
|
I haven't swapped the linkages, you have to take it off to get the throttle shaft out, that's the only reason they're disconnected. They do differ slightly for some reason, though I can't see how it affects operation. The second hand pump seems to have a taller spring which seems to be why it needs the longer throttle shaft and, since making the post above, I'm wondering now if I can just use the throttle shaft in my original pump. The only difference between the two throttle shafts is the length and the location of the o-ring.
EDIT: Actually just noticed in the pictures that the top plate casting around the linkage spring is actually different so I probably can't just swap the shafts around. The second hand pump top plate is broken on one end so I can't even just swap the top plates between the two of them.
|
| |
Last Edit: May 18, 2020 15:45:53 GMT by vulgalour
|
|
|
|
|
May 18, 2020 16:03:20 GMT
|
|
A proper micrometer is a nice tool to have.
The digital ones are no-where near accurate enough for what you are measuring, so you made the right choice.
|
| |
|
|
|
|
|
May 18, 2020 17:14:24 GMT
|
|
Good luck with the pump. My 1.7 bx was just amazing at starting even in really low temps, had several citroens after and none as good. Once you have sorted it will be on the button.
|
| |
|
|
Rich
Club Retro Rides Member
Posts: 6,327  Club RR Member Number: 160
|
|
May 18, 2020 18:14:09 GMT
|
I haven't swapped the linkages, you have to take it off to get the throttle shaft out, that's the only reason they're disconnected. They do differ slightly for some reason, though I can't see how it affects operation. The second hand pump seems to have a taller spring which seems to be why it needs the longer throttle shaft and, since making the post above, I'm wondering now if I can just use the throttle shaft in my original pump. The only difference between the two throttle shafts is the length and the location of the o-ring. EDIT: Actually just noticed in the pictures that the top plate casting around the linkage spring is actually different so I probably can't just swap the shafts around. The second hand pump top plate is broken on one end so I can't even just swap the top plates between the two of them.
But this was my point, why did you need to swap the shafts? Why didn't you just fit the pump? EDIT: Wait, I see it. I was concentrating too much on the accelerator links to notice.  |
| |
Last Edit: May 18, 2020 18:15:54 GMT by Rich
|
|
vulgalour
Club Retro Rides Member
Posts: 7,279
Club RR Member Number: 146
|
|
May 18, 2020 18:25:59 GMT
|
|
It's okay, money will be thrown, problem will be fixed. Eventually. To top things off nicely, all three of the cars in the household are now immobile since the other half's van got a puncture due to a screw in the tyre... and because it's a modern van it doesn't have a spare wheel, it doesn't even have a can of tyre gunk.
|
| |
|
|
Rich
Club Retro Rides Member
Posts: 6,327  Club RR Member Number: 160
|
|
May 18, 2020 18:33:36 GMT
|
|
|
| |
Last Edit: May 18, 2020 18:34:12 GMT by Rich
|
|
vulgalour
Club Retro Rides Member
Posts: 7,279
Club RR Member Number: 146
|
|
May 19, 2020 14:07:04 GMT
|
|
I've worked out which throttle shaft I need, there's a lot of variation for some reason, and found a supplier of just the o-rings which I need, that comes out at about £40-50. I'm now considering a second DIY attempt since I know what not to do. I'm also considering doing this after I've put the Princess head back together so that if that job goes well I'll have maximum mechanical confidence for the BX job and, potentially, two working cars again.
Or I might chicken out and just keep saving up for someone else to rebuild the pump.
|
| |
|
|
vulgalour
Club Retro Rides Member
Posts: 7,279
Club RR Member Number: 146
|
|
May 19, 2020 16:37:24 GMT
|
|
|
| |
|
|
|
|
|
May 19, 2020 19:10:38 GMT
|
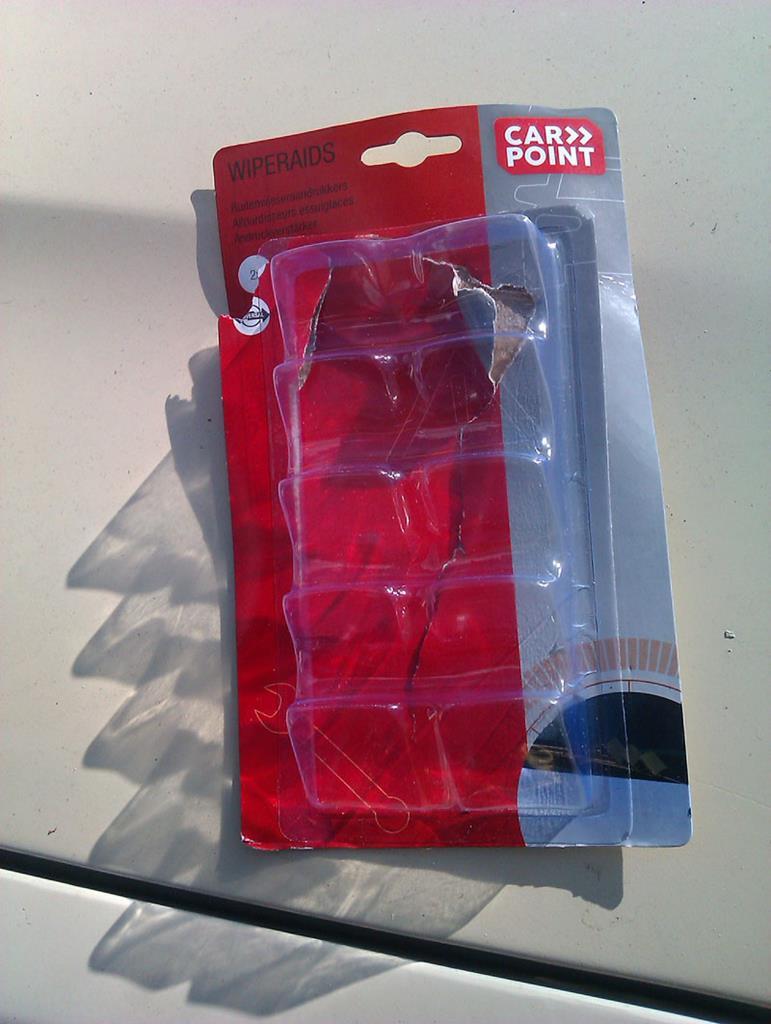
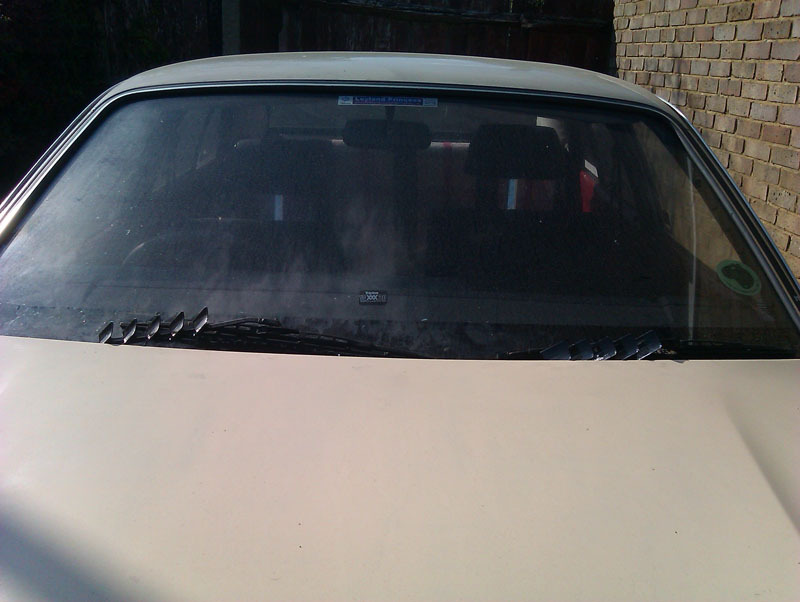
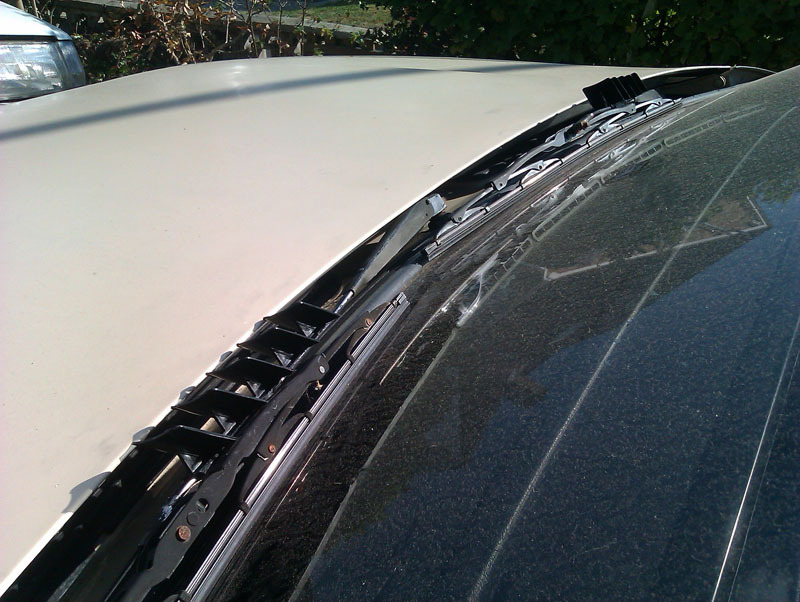
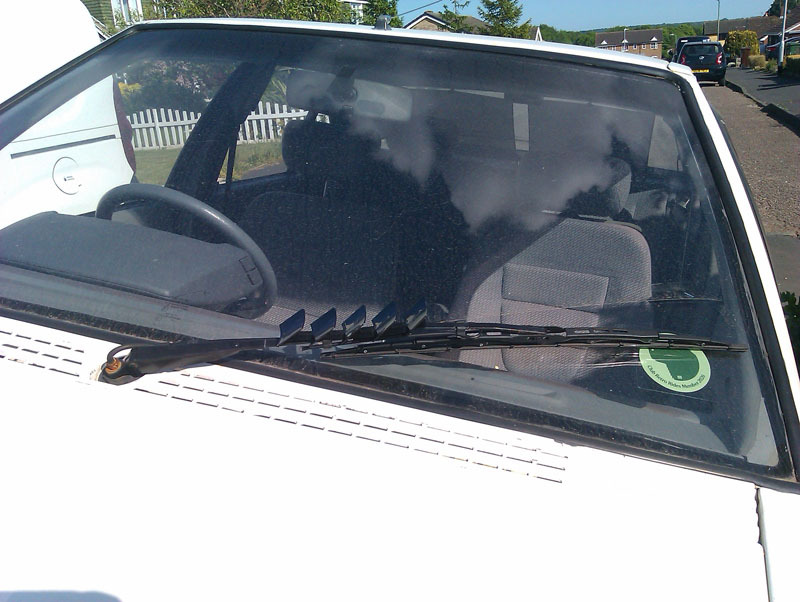
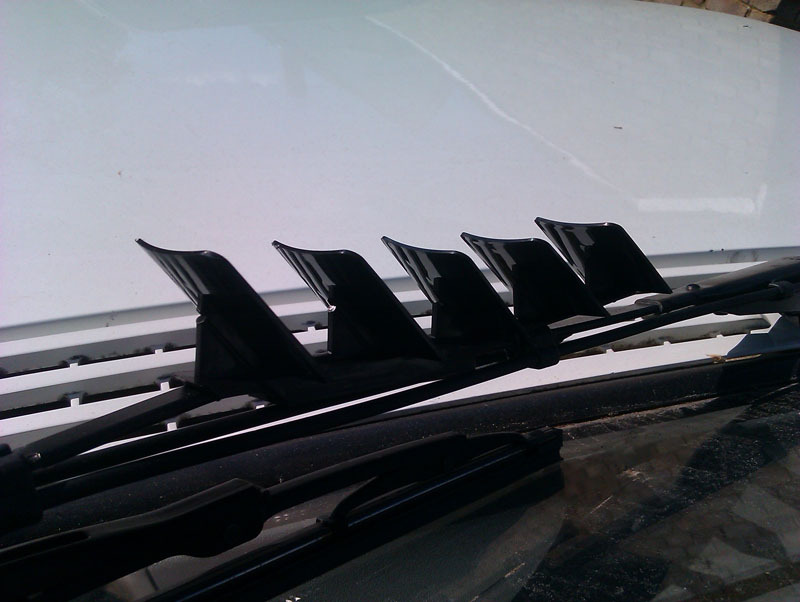
Quite often new wiper arms will fix that. The springs get soft with age and don't press down as hard. Bit more expensive than your solution of course  |
| |
|
|
|
|
|
May 19, 2020 20:22:40 GMT
|
top part of the pump is not pressurised as such (in the grand scheme of diesel injection i mean) its just a reservoir like the float chamber of a carburettor. i'll bet a shilling the accelerator O ring wont be the cause of the running issues, but obviously the primary concern is keeping diesel inside. every fibre of my being is willing the pump to be ok after the spruce up  |
| |
|
|
glenanderson
Club Retro Rides Member
Posts: 4,340
Club RR Member Number: 64
|
|
May 19, 2020 20:36:00 GMT
|
|
It’s also worth taking time to make sure the wiper blade is sitting square to the screen. Hold the arm firmly on the flat part near the pivot end, with an adjustable spanner, and use a second spanner to twist the arm so that the blade, when lifted just clear of the screen, rests exactly perpendicular.
|
| |
My worst worry about dying is my wife selling my stuff for what I told her it cost...
|
|
vulgalour
Club Retro Rides Member
Posts: 7,279
Club RR Member Number: 146
|
|
May 19, 2020 22:00:22 GMT
|
|
I assume the injection pump, even in the top 'float bowl' bit will generate some vacuum when the system is running, which is how I suspect it's pulling air in past the worn o-ring. I'm also assuming that because the o-ring is worn and diesel likes to creep like a creepy thing that it's making use of capillary action rather than pressure to work it's way out of the pump. There's also a strong possibility that even a full rebuild of the pump won't rectify the air ingress, there's been so many other points air has been getting in that I'd be very surprised if there aren't more locations for it to happen, all the rubber parts just seem to have decided to wear out simultaneously, regardless of age.
Wiper-wise, the problem with the Princess wipers is mostly down to the side-peg arrangement holding the blades. Eventually I'll convert them to hook-type wiper arms, I just keep not getting around to it because other jobs pop up that need sorting. You can do the twisting of the arm all you like with the Princess wipers and that peg can make just enough play between blade and arm that the sweep is messed up, even if you twist the arm a little too far around to try and compensate. The BX is more as BPR suggests, it doesn't have a very strong spring in the arm. Problem with the BX is it's not quite as simple as just putting a new arm on because BX front wiper arms have special little nubbins and a square hole to hold the clips that hold the washer spray bar, so I'd need to find a brand new BX wiper arm somewhere or waste a lot of time modifying a standard arm, or find a totally different washer jet solution (there's several to choose from, lots of people dislike the wiper arm spray bar).
|
| |
|
|
vulgalour
Club Retro Rides Member
Posts: 7,279
Club RR Member Number: 146
|
|
May 20, 2020 14:14:47 GMT
|
Princess news: New valves have all been lapped in, this took less time than I was expecting, got to nice clean even surfaces fairly quickly. This is possibly due to the valves having only just been done before I bent everything, I just expected the new valves to require more work to align. 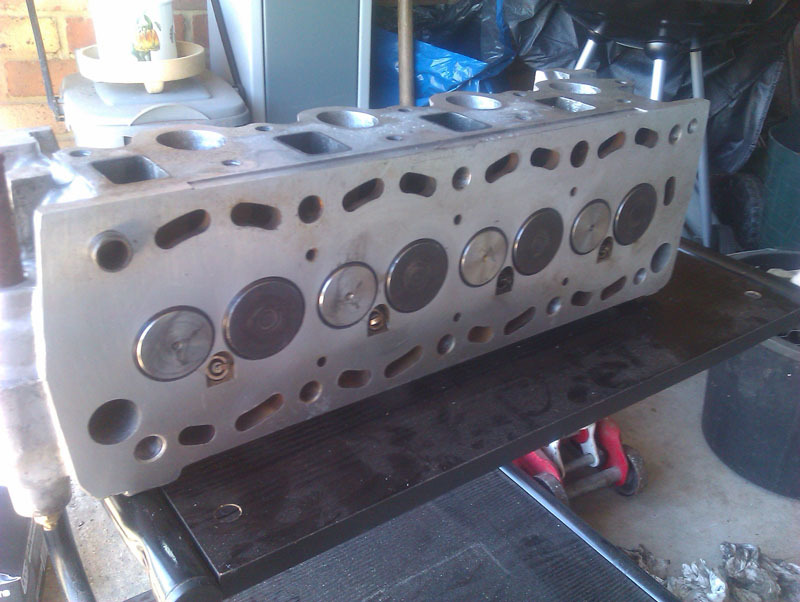 Unfortunately I didn't have time to do more than fit the camshaft clamp ready for measuring the valve clearances tomorrow, so that's what I did and that's where we leave it for now. 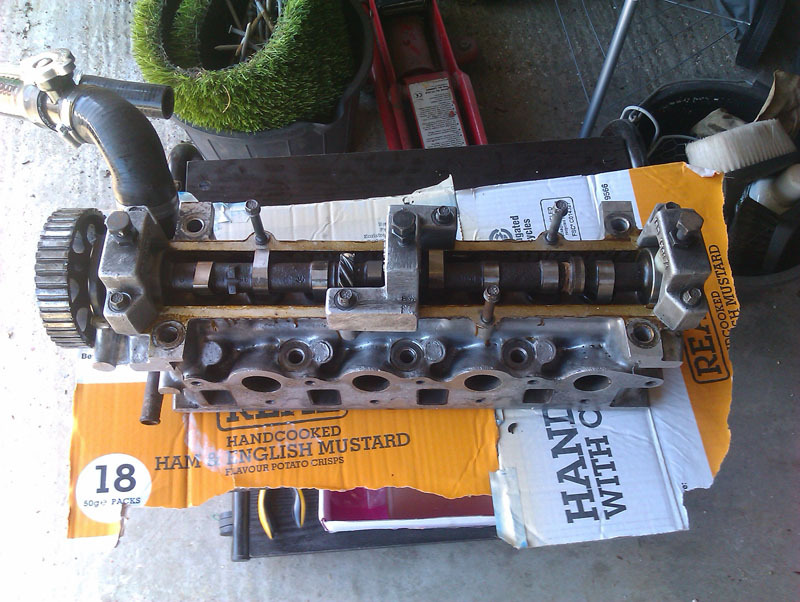 BX news: I've ordered the parts to DIY the pump and I'm going to have another go at it, very carefully. |
| |
|
|
vulgalour
Club Retro Rides Member
Posts: 7,279
Club RR Member Number: 146
|
|
May 21, 2020 14:59:53 GMT
|
Spent some time today trying to get the valve clearances what they should be. The book states Standard Tappet Clearance to be .30mm plus or minus 0.03mm. It also states adjustment is only required if clearances are below .20mm. I was going to do this job in the shade in the garage until I found how frustrating it was to try and turn the crankshaft without everything sliding off my wobbly table, so I improvised with some cardboard and loosely bolting the head to the block. This made measuring etc. a lot easier. 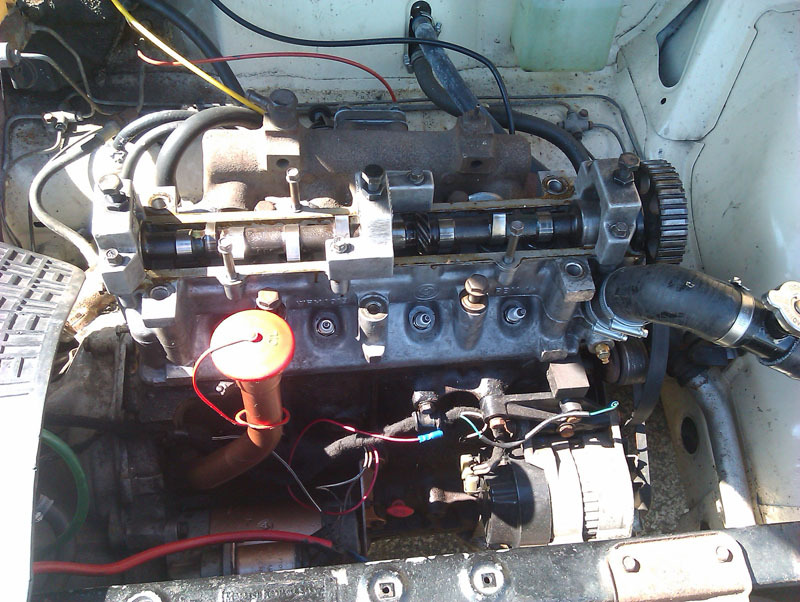 After measuring everything I had my first readings. I hadn't changed the order of any of the shims from how they were previously, the only change was fitting the new valves. From left to right we had .35mm, .10mm, .40mm, .30mm, .45mm, .05mm (just, this one very tight), .45mm, .20mm I then did some maths to figure out what size shims I needed along with measuring and labelling all the shims out of the head I was working on so I could figure out what best went where. 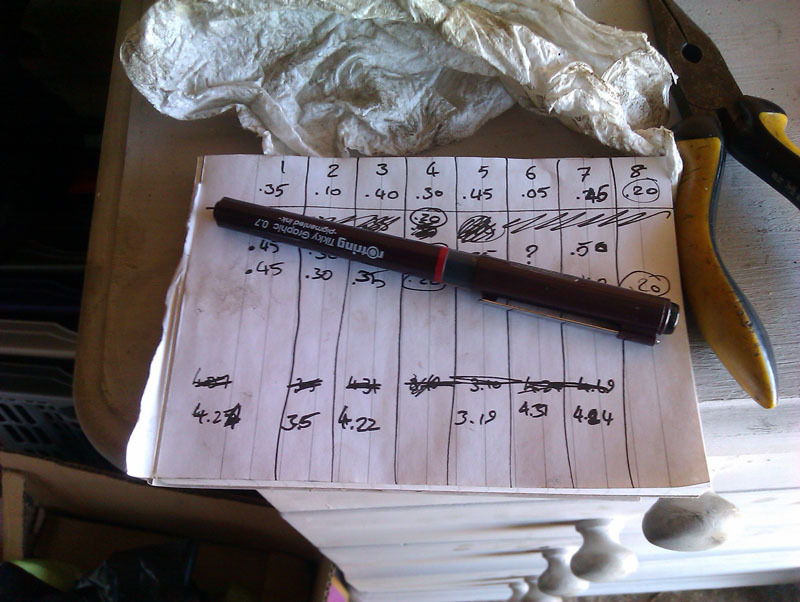 This quickly became quite frustrating as I didn't have exactly the shim sizes I wanted, so I shuffled things around to try and improve and got: .45mm, .30mm, .35mm, .20mm, .35mm, too tight to measure, .50mm, .20mm I then robbed the shims out of my spare head to try and improve matters, most of the shims in that head were a good bit thicker, and even with those the only measurement I improved was getting #7 to go from .50mm to .40mm I ran out of patience at that point. I was too hot and working in a spot I couldn't shade. I'm going to have another crack at this tomorrow when I've more free time to devote to it, I suspect if I do a bit of shim swapping I might be able to get the numbers a bit more balanced, moving the .20mm ones into the .45 and .50mm ones might just balance things out so we're more in the .30-.33mm range. I have a lot of shims that are too big and I was wondering if it's safe to file or sand them down to the thickness you want since they are, on the face of it, just a disc of steel. |
| |
|
|
|
|
|
May 21, 2020 15:30:26 GMT
|
|
Assuming they are between the valve head and the bucket like TR7 and Lotus twin cam ones yes you can file , if you can file dead flat, or even better surface grind them down.
Let me know the outer diameter and thickness you need if it is the same as the TR / Lotus ones I have a few, I'll see if any will fit and pop them on the post.
|
| |
|
|
|
|
|
May 21, 2020 15:38:27 GMT
|
|
Aren't they hardened steel? If so you can't file them.
|
| |
|
|


