vulgalour
Club Retro Rides Member
Posts: 7,279
Club RR Member Number: 146
|
|
May 12, 2020 17:34:33 GMT
|
Had some time and perfect weather to do more dye work. Thought I needed four cans, ended up needing five and a half, so I was right to order six. Top tip: However much dye you think you need, it's more than that. I'm seriously impressed at how well this dye has gone over black, even if it did take up to seven coats in places. First thing I sorted out were the front seats, topping up the dye on the driver's seat and doing the passenger one from scratch. Also made use of @morrisitalslx's suggestion of doing the sides of the head restraints in marooon and it really has tied the seats together nicely and made them look more finished than they did. Excuse all the curse word in the background, we're still doing decorating and DIY on this house so keep having to shift stuff into the wrong rooms. 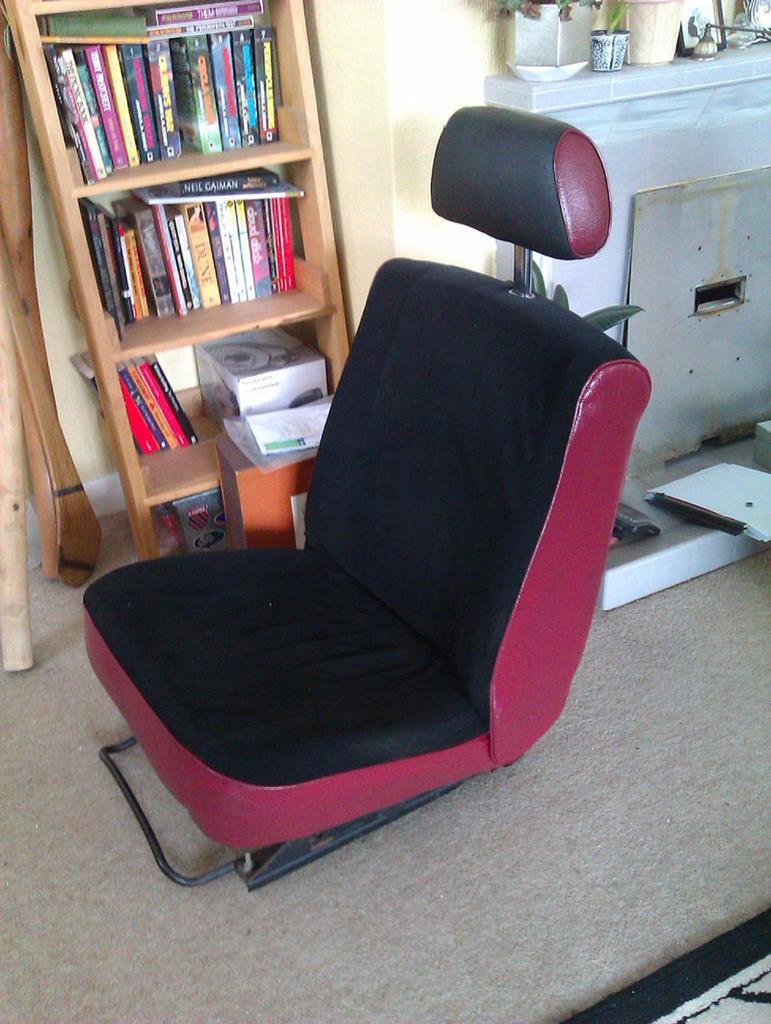 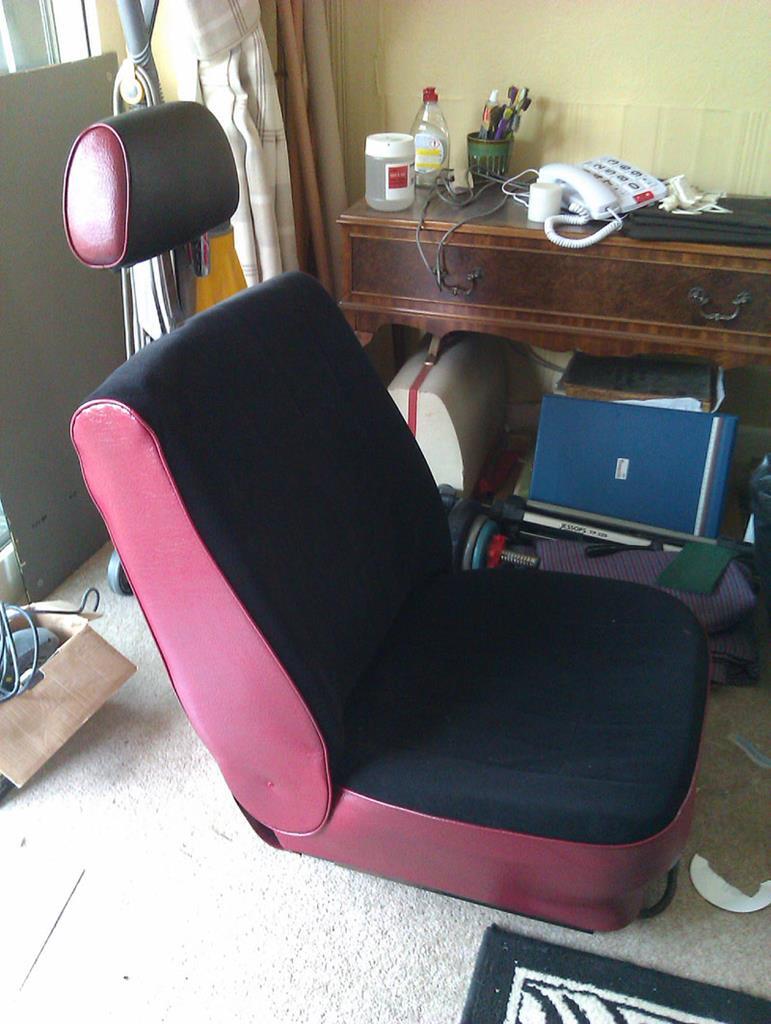 The rear seat got the same vinyl-not-velour dye treatment, even the upright part of the back seat which you barely see. I wasn't entirely sure if I had enough dye for that bit so I saved it until last. 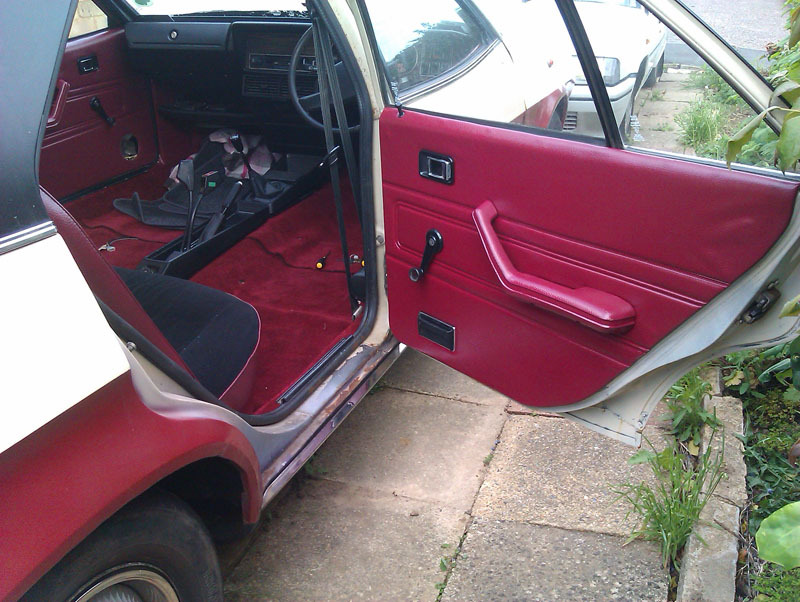 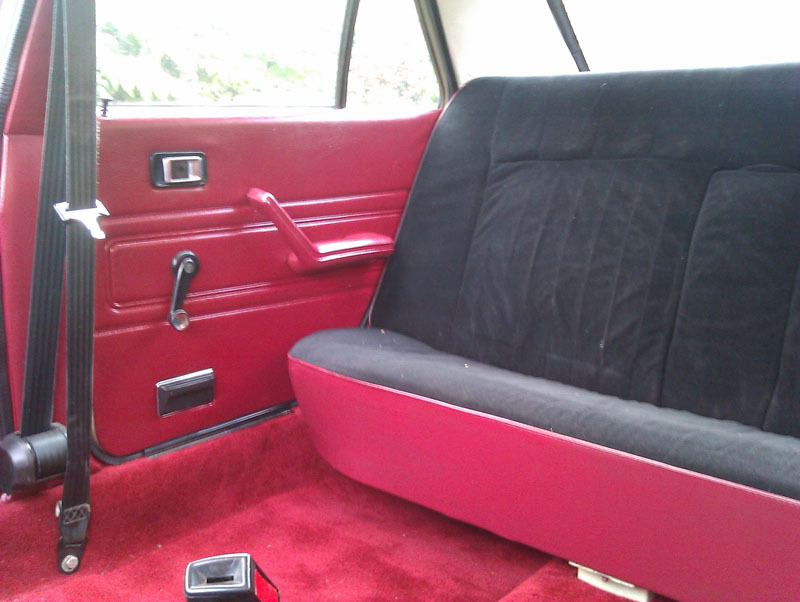 I am delighted at how well that seat looks with the sole exception of the mounting bracket which I think I'm going to repaint using the maroon on the outside of the car, just because it jumps out so much now. The last little detail is one I've wanted to do for ages which is the recess in the top of the lock buttons. Normally, the lock buttons are plain black, I've add just a bit of chrome into the recess in the top of them, it's a subtle little detail that ties them in nicely to the other door furniture. 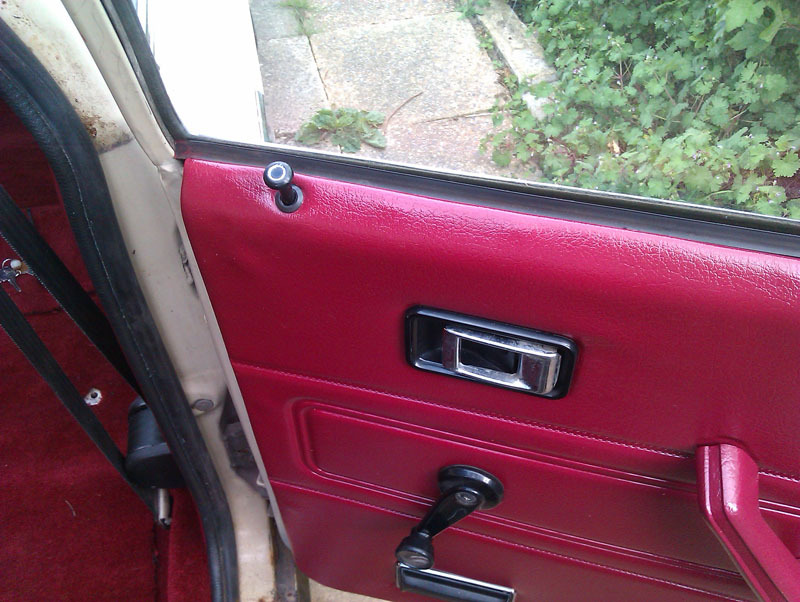 I haven't installed the front seats yet as they need handling a lot more than the rear seat to get them in place and I'd rather give the dye a few more hours to cure before I risk handling them. The only problem so far is that the rear driver's side door card, one of the first items I dyed, feels a bit tacky in places. The dye isn't lifting or transferring and doesn't seem to want to scrape off so I'm just leaving it alone. I suspect because it was one of the first panels I did on a hot day I may have been too heavy with the dye and it may have been too hot a day to do it and it's just taking a bit longer to cure, especially since the other items I did on the same day don't have this issue. The newer parts don't have this issue at all and I used incredibly light coats on much cooler days for those. I also used the vinyldye cleaner on the other panels and a generic one on the rear card that's giving problems so that's worth considering too. All in all, I'm very happy with how this is looking. |
| |
|
|
|
|
|
|
|
May 12, 2020 19:05:49 GMT
|
|
|
| |
|
|
|
|
|
May 12, 2020 19:19:37 GMT
|
|
I agree with Chris. You need that car! Sorry.
Mind you it has a fairly grumpy face and a really odd gearbox pattern. Presumably 4th is an overdrive of 3rd.
Like the interior of the Princess by the way. I wasn't sure from the photos of the seat in the house, but in the car it all ties in nicely. And the quality of the result is really impressive.
|
| |
|
|
vulgalour
Club Retro Rides Member
Posts: 7,279
Club RR Member Number: 146
|
|
May 12, 2020 19:29:18 GMT
|
|
Cor, that Ami is lovely. Lovely colour and just right condition. I already know I can't afford it, Ami's are out of my league.
|
| |
|
|
|
|
|
May 12, 2020 20:17:13 GMT
|
|
Great work on the interior, I have always enjoyed your updates and the work you are doing.
Warren
|
| |
|
|
|
|
|
May 12, 2020 21:01:54 GMT
|
|
Good progress, I'd do the rear seat bracket black I think as it would tie in with the seat black.
|
| |
|
|
vulgalour
Club Retro Rides Member
Posts: 7,279
Club RR Member Number: 146
|
|
May 12, 2020 21:28:54 GMT
|
|
Wouldn't black draw the eye more than the maroon? What with the bracket being separated from other black items - centre console, velour - by the maroon carpet and vinyl.
|
| |
|
|
|
|
|
May 12, 2020 21:36:35 GMT
|
|
I don't think so, I think it will just dissappear if black. You wont really be looking down there in reality anyway especially with the front seats in.
Paint it satin black to start, and go over with maroon if you don't like it.
|
| |
|
|
|
|
|
|
|
Cor, that Ami is lovely. Lovely colour and just right condition. I already know I can't afford it, Ami's are out of my league. I think you would be surprised - there is lots to put people off purchasing such a delightful little car like this - firstly its left hand drive and its not registered in the UK - Secondly its a non runner - Thirdly its for sale via a weird online live auction format that no one is familiar with - Fourthly its currently a buyers market with a lack of buyers due to current pandemic status - the traders are not purchasing stock simply because they are not selling anything Although I fully understand you have recently relocated / purchased a property and have enough on your plate with the 2 cars that you have already - but would you kick yourself if this rolled out the end of the auction block for sub £2k ? (There is a non running Jowett Bradford in the same sale and I'm avoiding looking at it - its probably going to be cheap - that's also a non runner and I'm over run with Jowett's everywhere I look & hide them and I need another like I need a hole in my head but I will probably register for the sale) |
| |
Last Edit: May 13, 2020 6:05:57 GMT by Deleted
|
|
vulgalour
Club Retro Rides Member
Posts: 7,279
Club RR Member Number: 146
|
|
May 13, 2020 11:10:41 GMT
|
|
I don't want an Ami that much that I'll feel like I'm missing out. Buyers market or not, I'm not really in a position to buy anyway, house and existing cars come first and I'm being boringly sensible just at the moment. As I've been reminded by the other half, I could go out and spend a couple of grand on an interesting old car OR I could spend a couple of grand on the existing interesting cars that live with us.
|
| |
|
|
vulgalour
Club Retro Rides Member
Posts: 7,279
Club RR Member Number: 146
|
|
May 13, 2020 12:53:54 GMT
|
Speaking of interesting cars that live with us... the interior is now done*. The front seats went in really easily which was very unusual, normally at least one bolt refuses to line up. I'm very pleased with the end result. Worth noting, I did actually do the piping on the seats where it wasn't dyed as well as I'd've liked by simply standing the seat up and spraying from the top with the fabric masked, which gave a really crisp finish. If you get your face right up to it you can see its been dyed in places, if you know what to look for. Overall, the casual observer won't notice and indeed there's nothing that bothers me about the interior redo. I'm so much happier with it now than any other interior colour this car has had. I'm seriously considering using this dye (in white) to cover up the glue staining on the headlining too, a common Princess problem, something about the glue means it stains the vinyl this horrible yellowy colour and you can't clean it off. That's something for another day. For now, enjoy the maroon-and-black, Captain Picard's uniform, interior splendour. 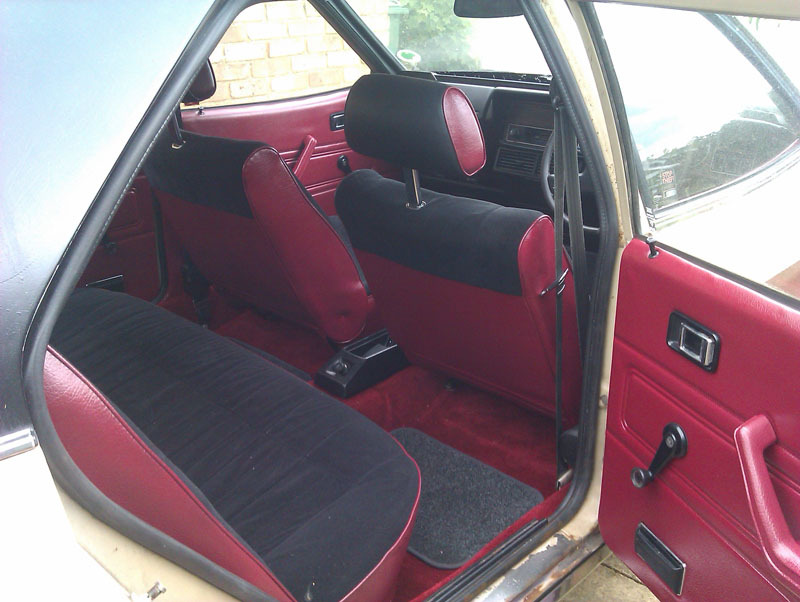 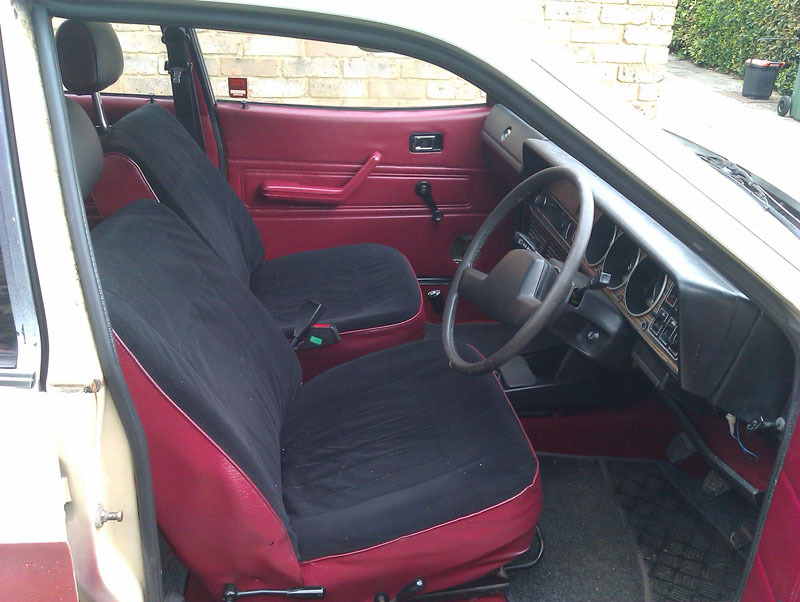 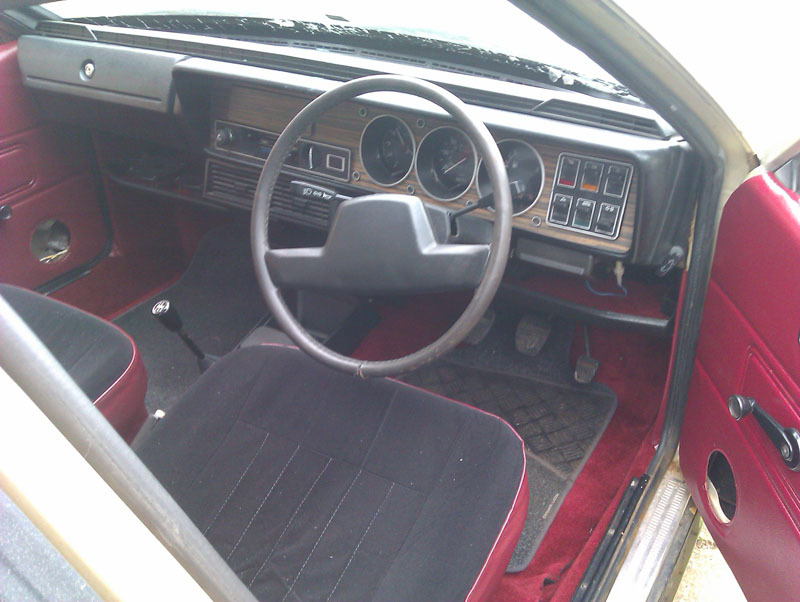 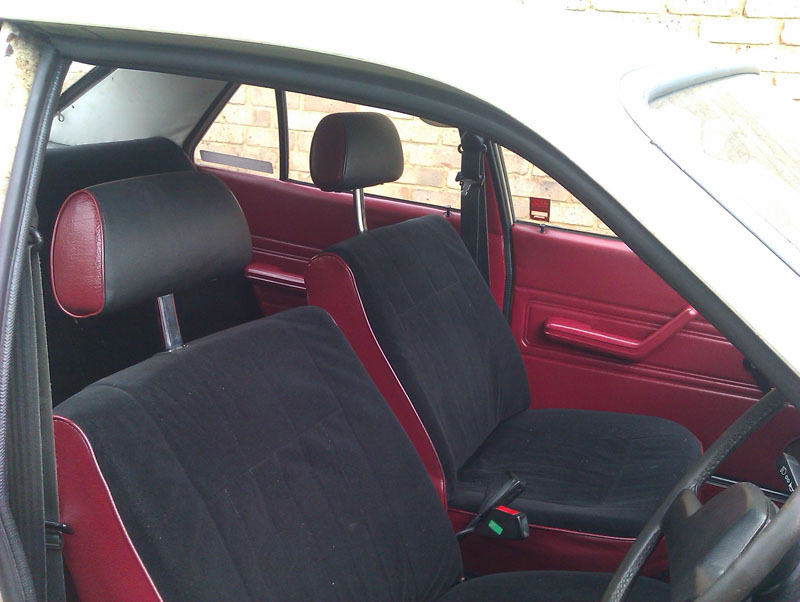 Oh wait, one last thing... 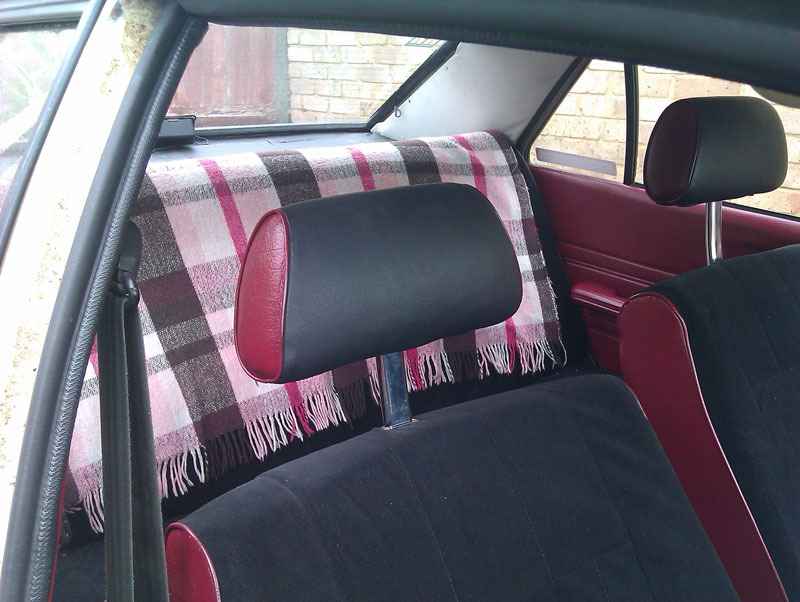 Perfect. *we'll pretend I've painted the rear seat bracket and front speakers for the purposes of this post. |
| |
|
|
glenanderson
Club Retro Rides Member
Posts: 4,340
Club RR Member Number: 64
|
|
May 13, 2020 12:56:47 GMT
|
|
You proved that with the Renault. I’m in the same position. I’m constantly tempted with “new” projects, yet still have unfinished/unstarted ones here. I’m being really firm with myself and refusing to commit to anything new unless either something here already goes to make space, or all the wheeled projects are roadworthy.
|
| |
My worst worry about dying is my wife selling my stuff for what I told her it cost...
|
|
eternaloptimist
Posted a lot
   Too many projects, not enough time or space...
Posts: 2,578
|
|
May 13, 2020 20:09:42 GMT
|
|
That interior looks fabulous!
|
| |
XC70, VW split screen crew cab, Standard Ten
|
|
eurogranada
Europe
To tinker or not to tinker, that is the question...
Posts: 2,556
|
|
|
|
|
Well done on the interior. I like it...
|
| |
|
|
|
|
|
May 14, 2020 11:54:10 GMT
|
|
very nice.
|
| |
|
|
vulgalour
Club Retro Rides Member
Posts: 7,279
Club RR Member Number: 146
|
|
May 14, 2020 16:23:47 GMT
|
Buoyed by the success of the Princes interior, I decided it would be time to replace the O-ring that was suspected as having failed on the BX injector pump. This should be a straightforward job. The first attempt was to use the guide and information from another forum for removing the pump top plate without removing the pump from the car. This would be the idea if it was the throttle shaft o-ring at fault since I should in theory be able to do that with minimal risk. While this did work, once I'd figured out which combination of tools was needed... 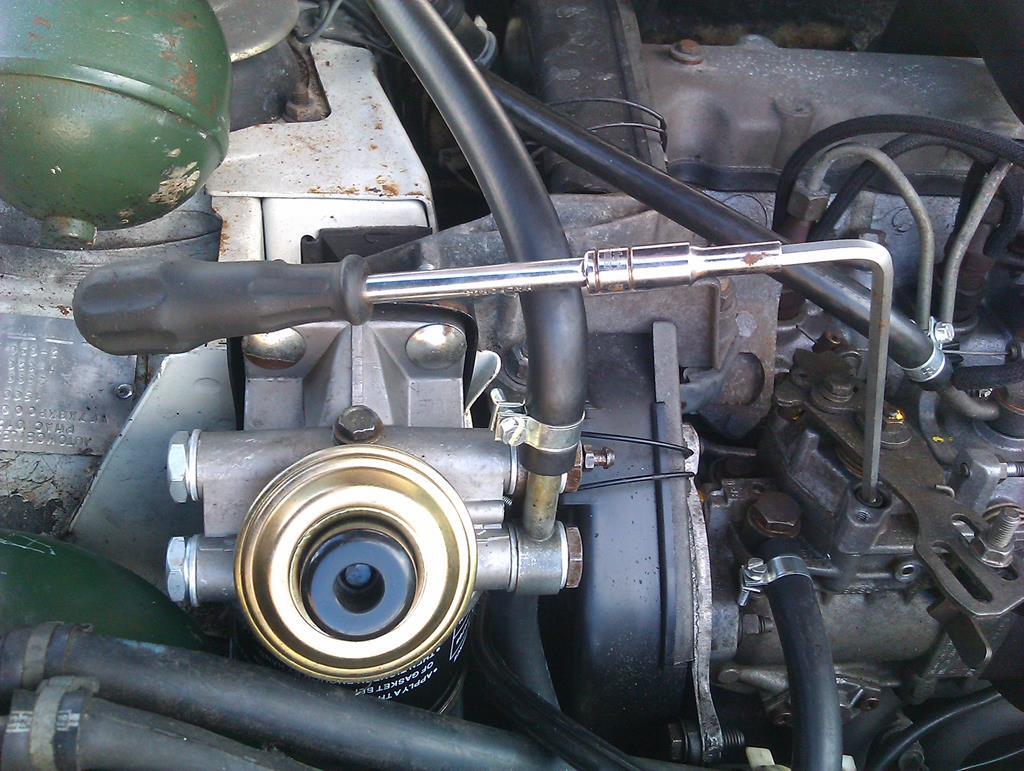 There was something holding the plate on that I couldn't see, possibly just an o-ring since it had that sort of springy-rubbery feel to it. Rather than risk breaking something, I opted to screw the top back on and remove the pump. This is a much more involved proceedure. It also means if other seals are damaged I can deal with them all in one go if just doing the top o-ring wasn't going to cut it and, given that I have a full seal kit, I might as well. Next challenge was jacking the BX up when you can't get it running. Fortunately there was just enough of a dip in the paving slabs where the jacking point is that I could get a jack under if the other half lifted the car as far as he could (which was about 2mm, cars are heavy!) and I could get it on an axle stand. Jacking up the BX is one of the things I hate the most, there just aren't enough strong points on the car's structure to lift it that you can get a jack to when its sat on its bum. 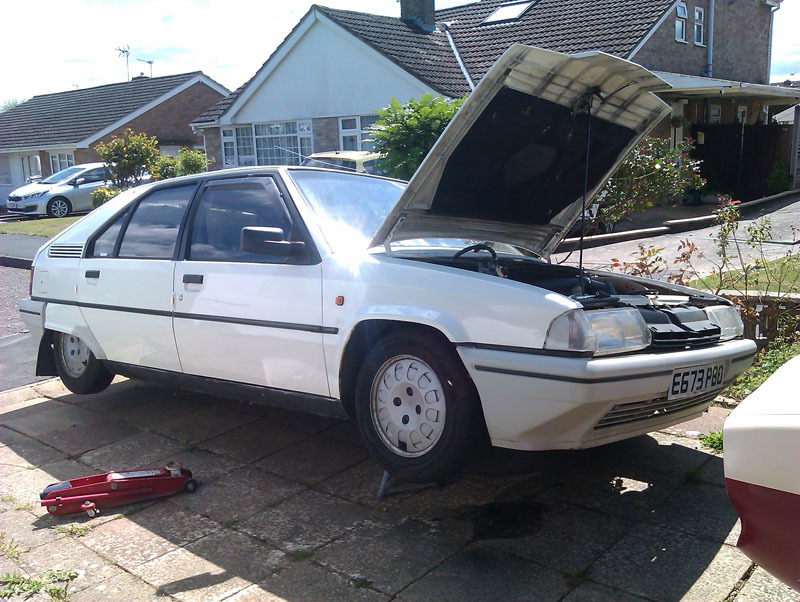 Handbrake off, car in fifth, rotate the front driver's side wheel until the bolt holes in the end pulley line up with the holes in the injection pump mounting plate. Then hope that you've actually got two M10 bolts (I did) and that your tools will fit in the gap (they did, but as you'll learn later this is not always the case with stupid French cars). That done, mark the pump location against the mounting plate to ensure (hopefully) the timing doesn't get buggered up later. Oh, I forgot to mention, make sure that when you remove the cambelt cover that you somehow jam it between the components in the gap and one bit of it snaps off, pinging into the heavens, never to be seen again. 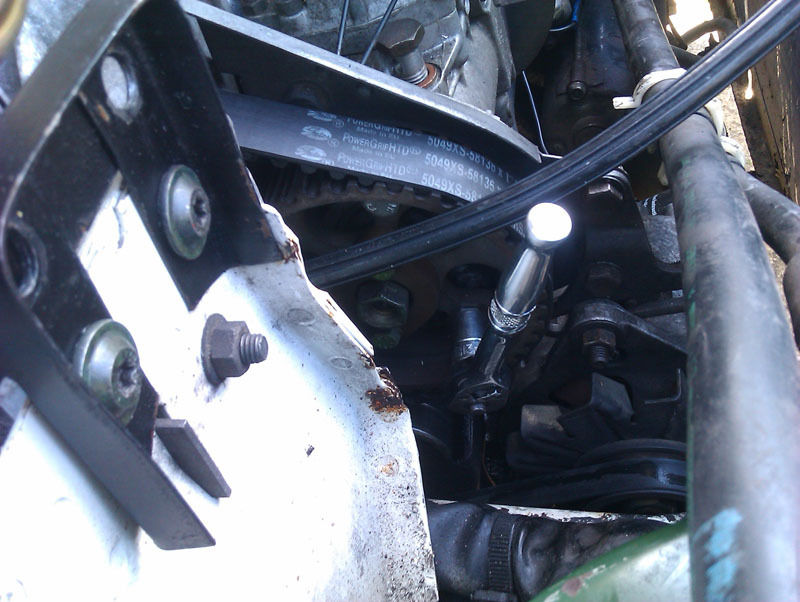 Then disconnect the throttle cable, the other cable the name of which I've forgotten once you mark that to make sure you know where it goes, mark the two screw things on top of the pump for the throttle bracket thingy so you don't mess up that setting, disconnect the four injection lines, the bottom back one of which has separation anxiety and likes to hide behind the other pipes, disconnect the stop solenoid wire, and the battery at some point in these proceedings too, and then try and undo the three bolts holding the pump in place. Go on, have a go, it's great, you'll love it. 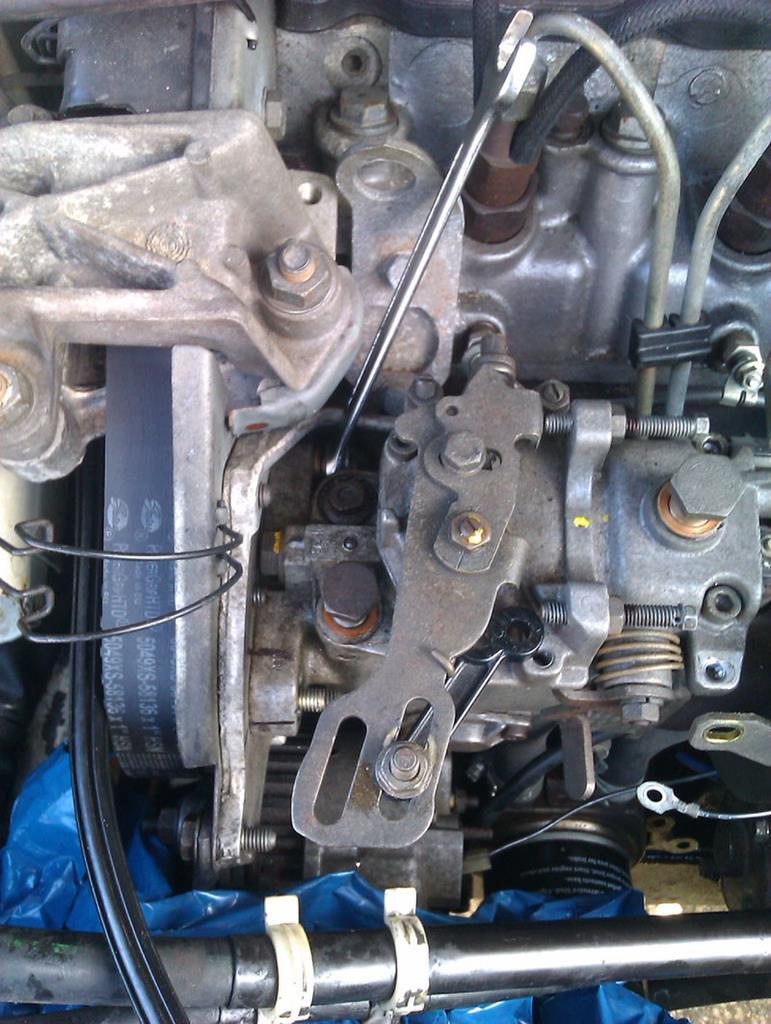 You will not love it. A spanner is the only tool that fits and if your hands are too big and/or don't dislocated, you can't actually get a tool on the bottom bolt that you can't see no matter how hard you try without removing the alternator. Great. At one point when trying to remove the alternator it was refusing so steadfastly to come out of its bracket that I thought I was going to have to remove the radiator to get purchase on the alternator... and then it popped out no drama because cars like to cause stress like that. 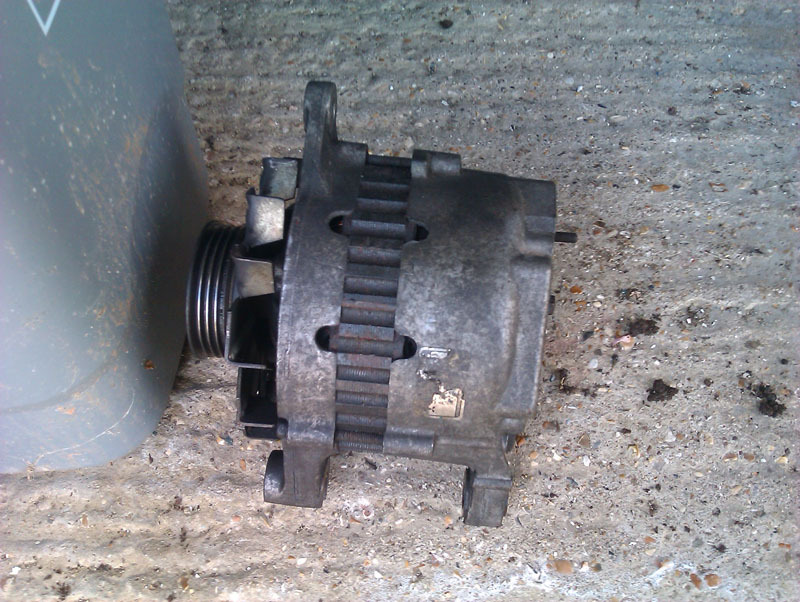 Then, you simply undo the bolt on the pulley you locked earlier with the two m10 bolts so that you can sImpLy ReMOvE the injector pump. SIMPLY. Grr. Many swears later after finding the ONLY tool I had that would fit in the gap between the car body and the nut I needed to undo was a frigging ring spanner I had it undone. Then I had to fight with that injector pipe that kept reconnecting itself, and then the pump which did not want to be separated from the car until all at once it did. Magnetic screwdriver to the rescue to save the woodruff key that tried to join the cambelt cover fragment from earlier too. I have highlighted the troublesome nut that I needed to remove the alternator for (I seriously have no idea how anyone does this with the alternator in situ) so you'll know what to look for when you do this job. 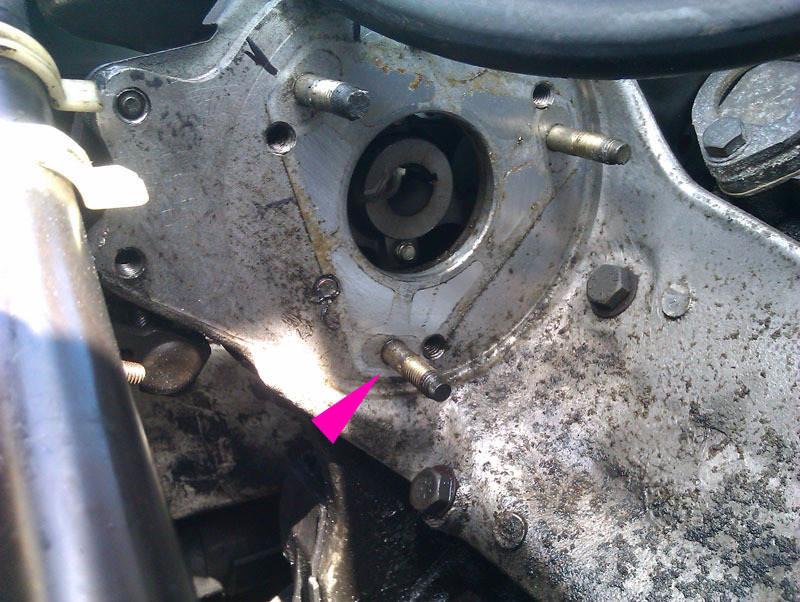 It's a big old thing this pump, leaves a massive hole in the engine bay when it's out. 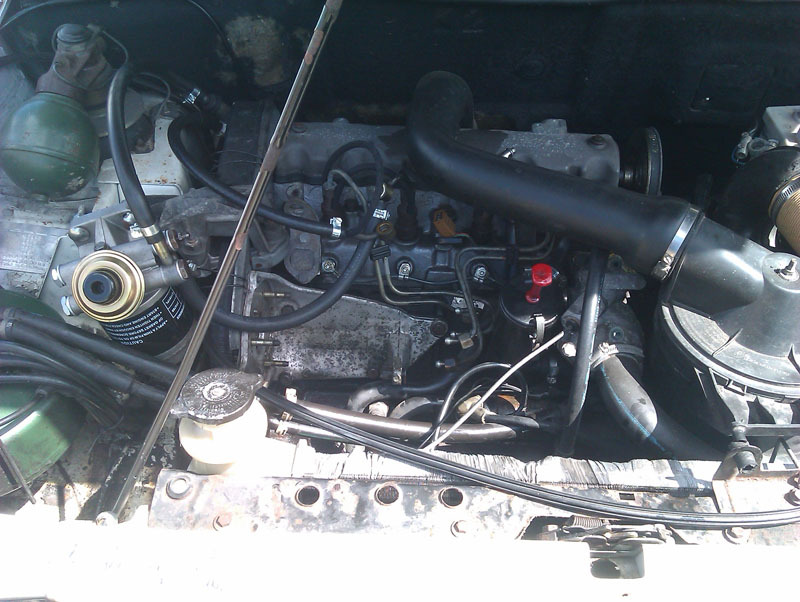 Set it on the bench, checked the time and realised this had taken me nearly 3 hours! That's absurd. 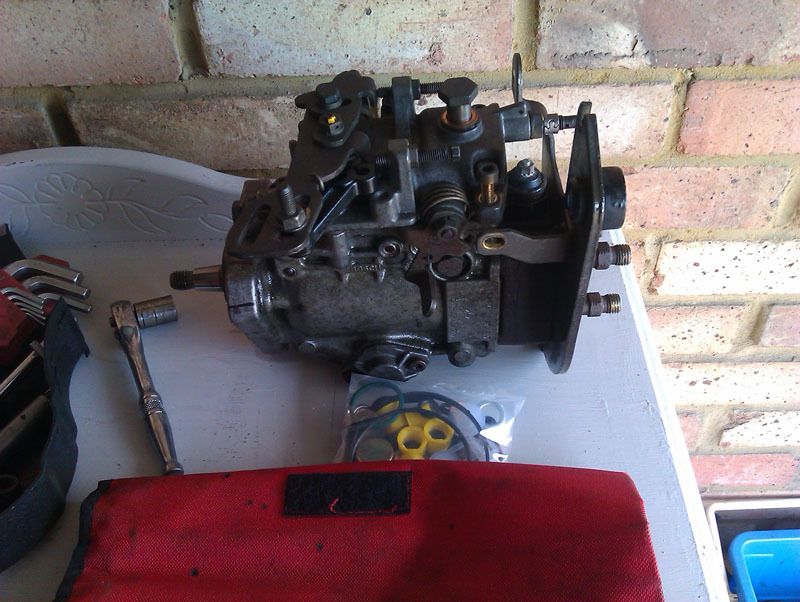 I then had a break to regroup and gain a bit of confidence before tackling the next bit. For reference, took a snapshot of how the bracket is set on the top before removing it, this would allow me to get to the throttle spindle. 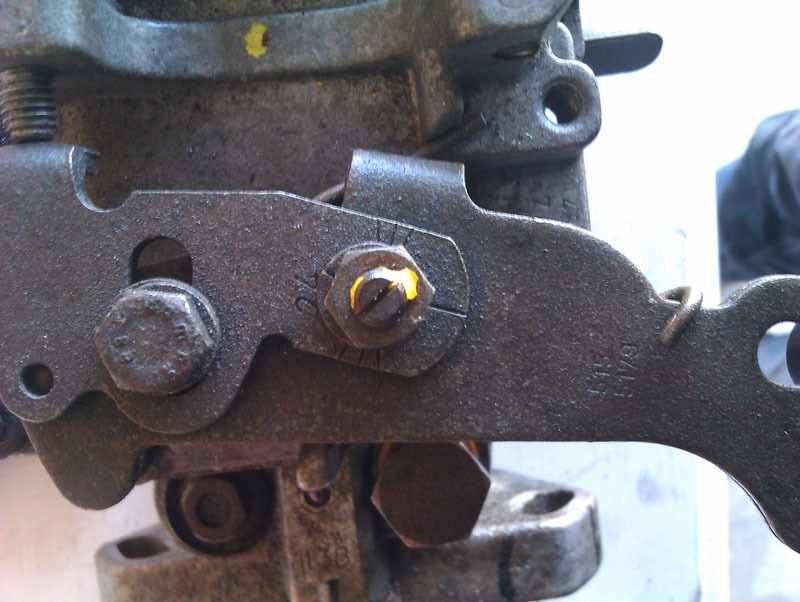 I'd already marked the pump position before removing it, as instructed in the manual and on fora variously. The o-ring on the throttle spindle was quite loose and discoloured. No particularly obvious signs of wear otherwise so I was moderately hopeful this was the cause of the air ingress given other symptoms presented as documented in recent posts. 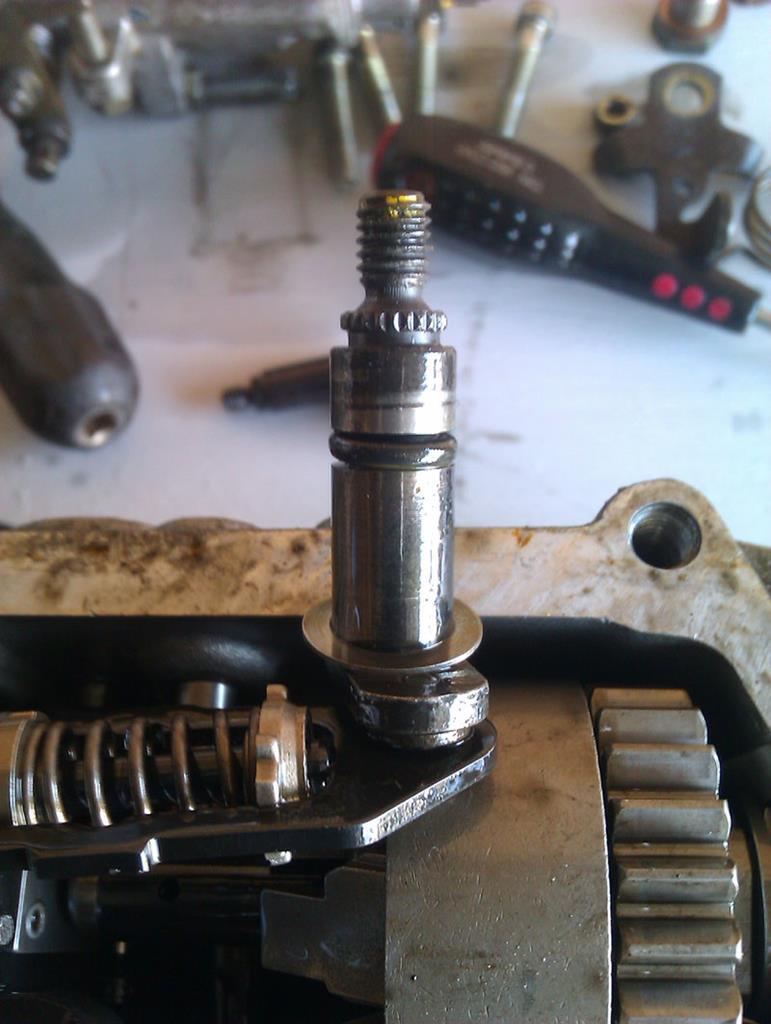 I figured out that what was stopping me removing the top plate while it was on the car was the throttle bracket assembly that bolts to the spindle, once you unbolt that, the spindle can be pushed out and the top plate lifted free. I would have found this very difficult to do on the car since I dwasn't entirely sure what I was looking at even with instructions. On the bench it was much easier to work out. Happily got the top plate off and decided not to strip it down further than that since it looked a bit beyond my skill set so I kept myself to the comfort zone. The top plate gasket did look fine but since I had a new one in the kit I'd bought, I decided to fit it. The new seal doesn't seem to fit very well, perhaps there's a knack to it, perhaps it's a rubbish seal, I don't know. I also had trouble finding which of the supplied o-rings was the correct one for the spindle, none of them seemed a better fit than what was already on there being either a shade too large or a shade too small. I was beginning to have misgivings about this job. Undeterred, I started reassembly. 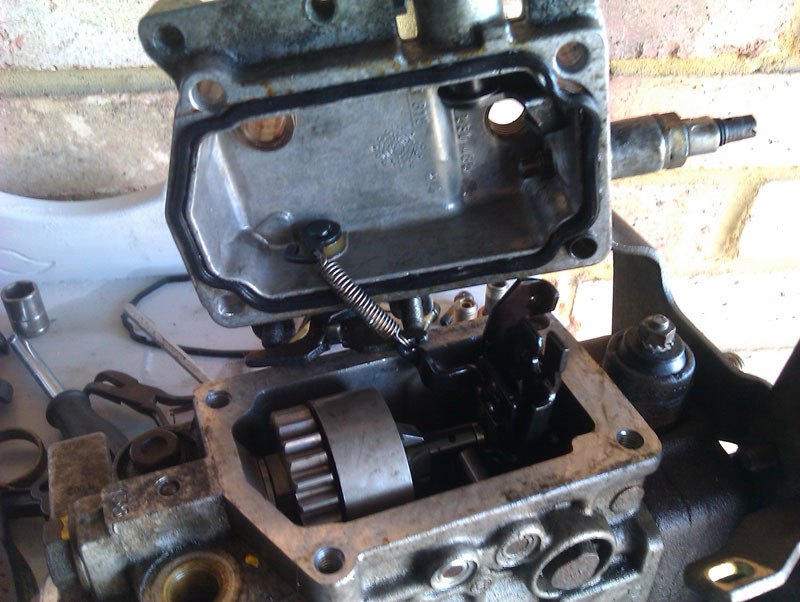 I don't know why but it just felt wrong going back together. I didn't force anything, I was very careful to make sure things went back together the way they came apart, as much as I could tell at any rate. But it just felt... I don't know... off. Gut feeling was that something was perhaps not properly aligned so I gently eased the top plate off again and discovered that the plastic piece that supports all the complicated little springs in the top of the pump had snapped. I will reiterate, and no doubt some readers will ignore, that I used the absolute minimum force here, I hadn't even got the top plate bolts more than a couple of turns in, nothing was tight. 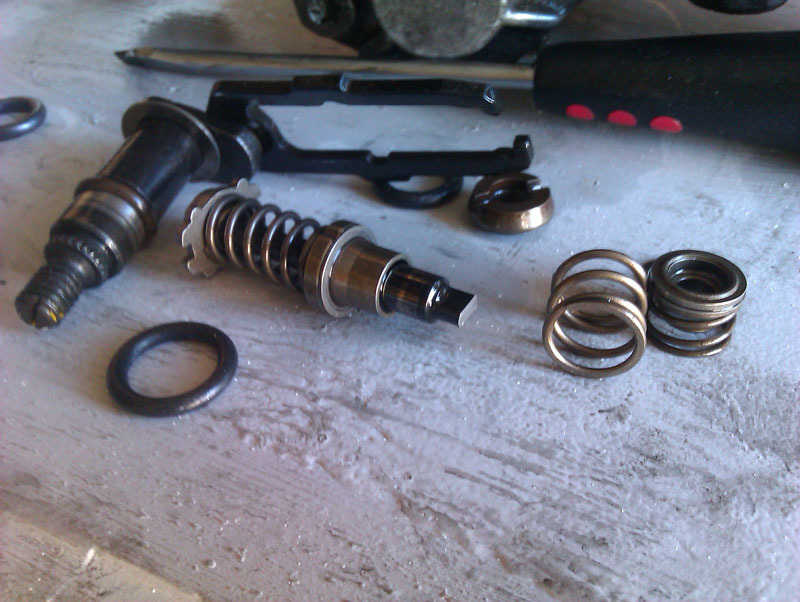 So that's buggered that. I do not have the relevant skill to rebuild this and what should have been simple o-ring replacement has now become a bit of a nightmare. Not really sure how to fix this at this point. The pump was fine apart from sucking air in, presumably through the top o-ring (I guess we'll never know for sure now) and nowit's broken and there's no point putting it back on the car. |
| |
|
|
vulgalour
Club Retro Rides Member
Posts: 7,279
Club RR Member Number: 146
|
|
May 14, 2020 17:30:12 GMT
|
Right, I've figured out what I did after finding a useful resource with exploded diagrams. It is part #68 on this diagram: injectionpumps.co.uk/interactive/interactive-bosch-ve-parts-diagram.htm and what I've broken is both the rod that holds the springs and the two pronged fork bit. The reason I've managed to do that is I didn't seat the rod correctly on reassembly, which is why it felt wrong going back together, but by the time I realised that the parts are so delicate that I'd already broken them. Lesson learned. 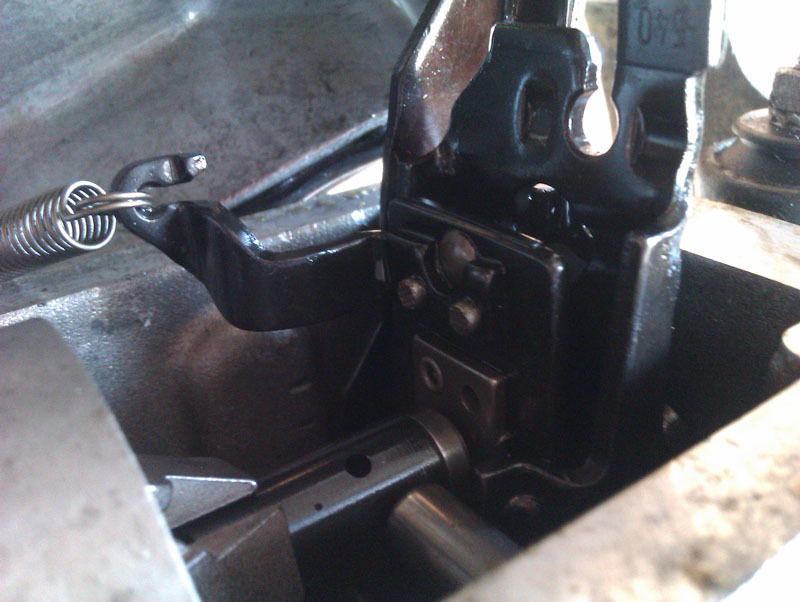 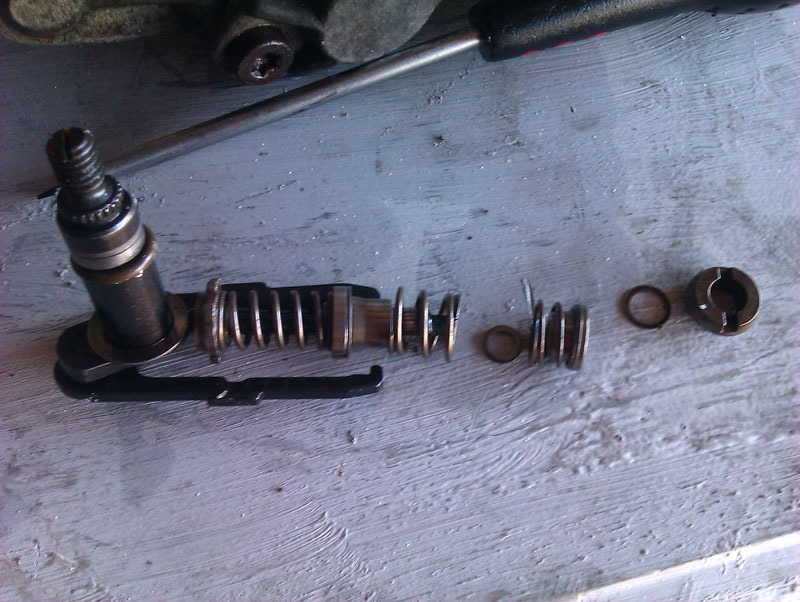 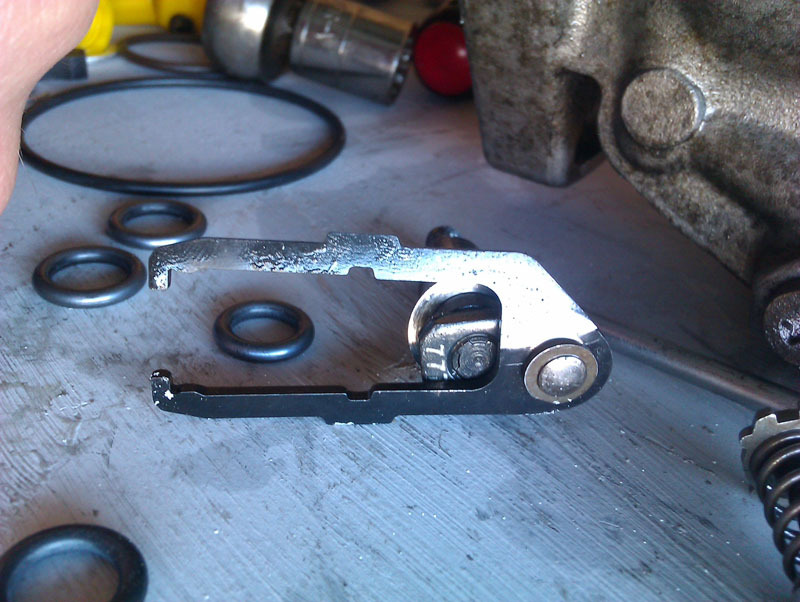 I'm not going to attempt this myself, I need to find a specialist to give it an overhaul and repair. While I probably could DIY it, I'd rather quit while I'm ahead. |
| |
|
|
Flynn
Club Retro Rides Member
Posts: 143  Club RR Member Number: 166
|
|
May 14, 2020 18:22:59 GMT
|
|
Argh how annoying!
I feel your pain, just getting the pump off in the first place looks like no fun at all.
Maybe long term this will work out for the best... Perhaps the o ring replacement would have cured the air leak for now, but it is likely the next weakest point would've given in and then you need to remove the pump again. At least this way once you reassemble everything, that should be it for a while!? I hope so anyway.
In brighter news - the interior on the Austin looks very smart, good work.
|
| |
1971 MGB GT
1983 Daimler Sovereign 4.2
1999 Jaguar XJR
|
|
vulgalour
Club Retro Rides Member
Posts: 7,279
Club RR Member Number: 146
|
|
May 14, 2020 18:26:42 GMT
|
|
Now just trying (and failing) to find a supplier of 15mm diameter valve/tappet shims for the Princess. All I'm getting are sites that died in 2014, and links to Amazon, eBay, etc. for things that are not the thing I'm trying to acquire.
|
| |
Last Edit: May 14, 2020 18:26:59 GMT by vulgalour
|
|
|
|
|
May 14, 2020 20:41:23 GMT
|
|
I'm sure Glen will be along in a minute to say 'I told you so' sadly his prophecy came true.
I've built loads of engines in my life, but only one deisel, I vowed never to do another. I rebuilt it well and it ran fine but the injection pump required very careful dialling in with with dial guages - all done with the engine on the stand for easy access.
It took forever to get the carbon out of my skin and the smell gone.
|
| |
|
|


