|
|
|
Oct 25, 2014 16:36:56 GMT
|
Too many pics x folks viewing = dead 'free' Photobucket account. It'll reset at the start of the month. I'm too tight to pay to upgrade my Photobucket account, and too set in my ways to change to another service  Must be more careful with the number of pics I post. |
| |
|
|
|
|
|
|
|
Oct 31, 2014 16:20:25 GMT
|
If you use google drive you can set a folder on there to be shared with everyone, then you just copy them to your google drive folder on your PC, goto drive.google.com and copy the "hosting" link from the side bar  . Much quicker than any other way I do it. I've got an app on my phone which uploads them automatically when i tag it as "scimitar" too which makes it even easier. |
| |
|
|
|
|
|
Nov 15, 2014 18:10:43 GMT
|
Just 'cos it's a campervan doesn't mean you can't find excuses for a few fun fibreglass projects  Ducting the fridge, using 2 separate mouldings. [edit: if it looks discoloured, that's the insulation bunged in behind it] 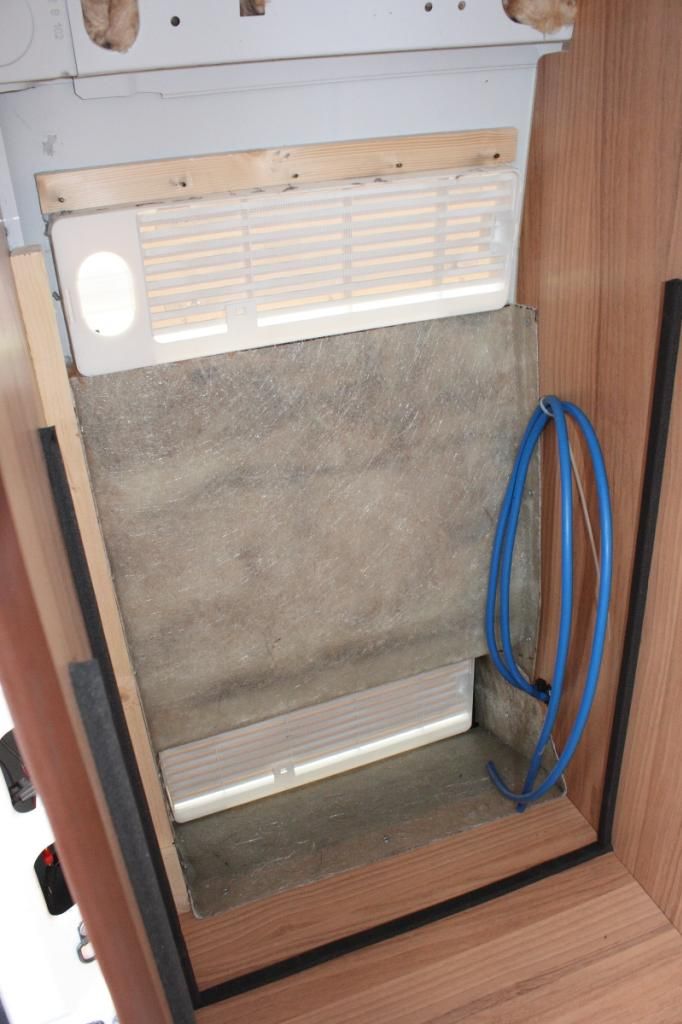 And the 3rd piece for the top of the fridge. 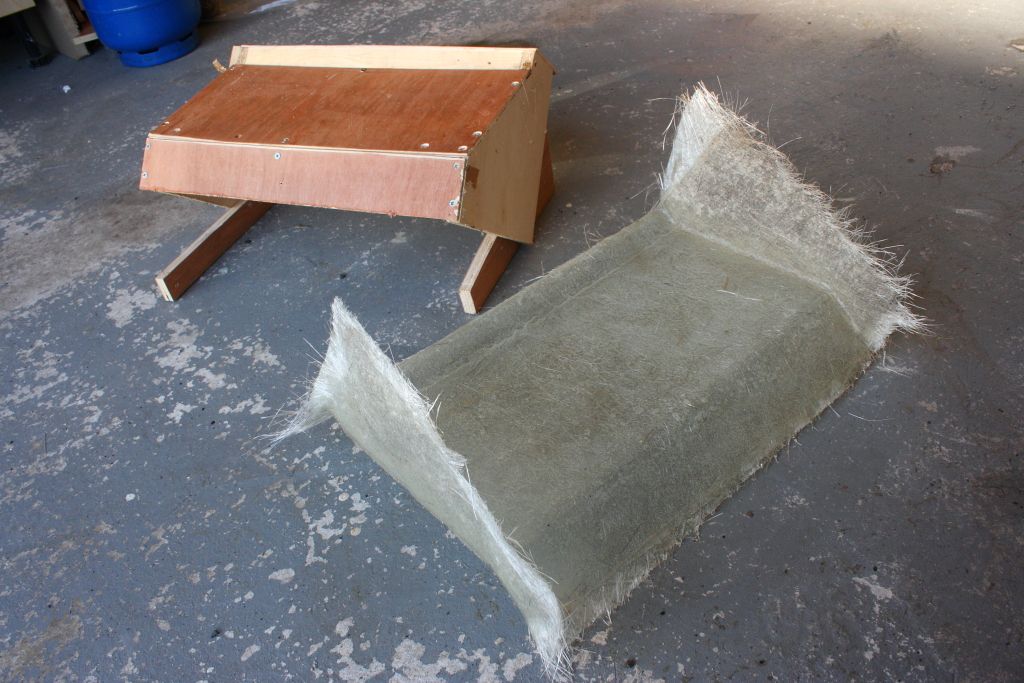 Simple, functional pieces can be moulded up from just about anything. For example, scraps of plywood and faced chipboard made this mould. Packing tape is your friend for releasing 1 or 2 parts from something this simple. 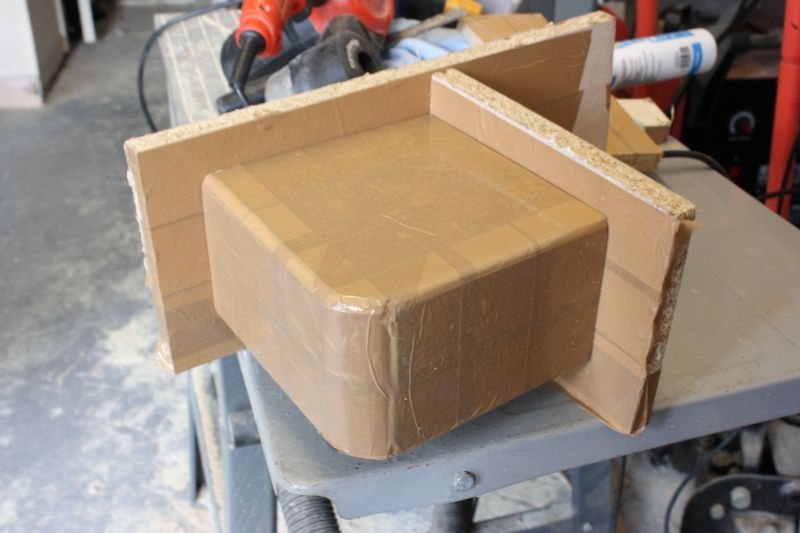 A couple of layers of chopped-strand-matt makes this. Spot the black fibres for extra strength : bristles from the seriously cheap disposable brushes I used.  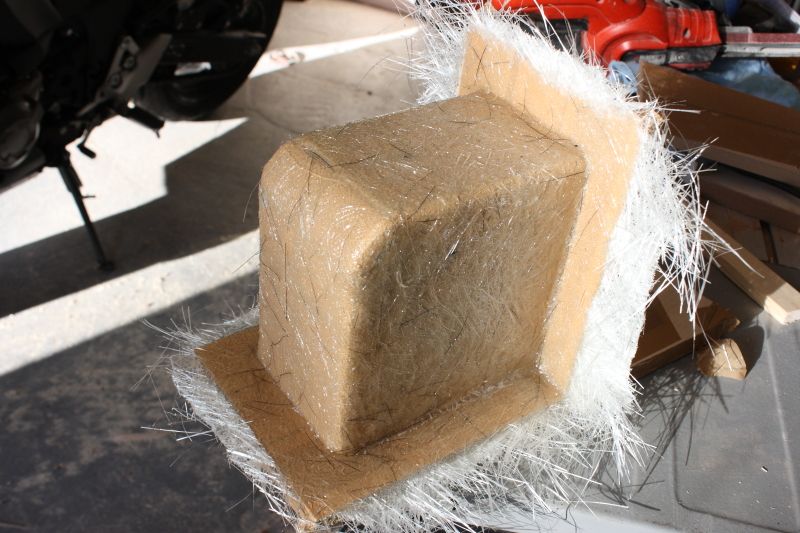 With a lick of paint, this part encloses the check-straps of the rear doors which intrude into the cupboards. 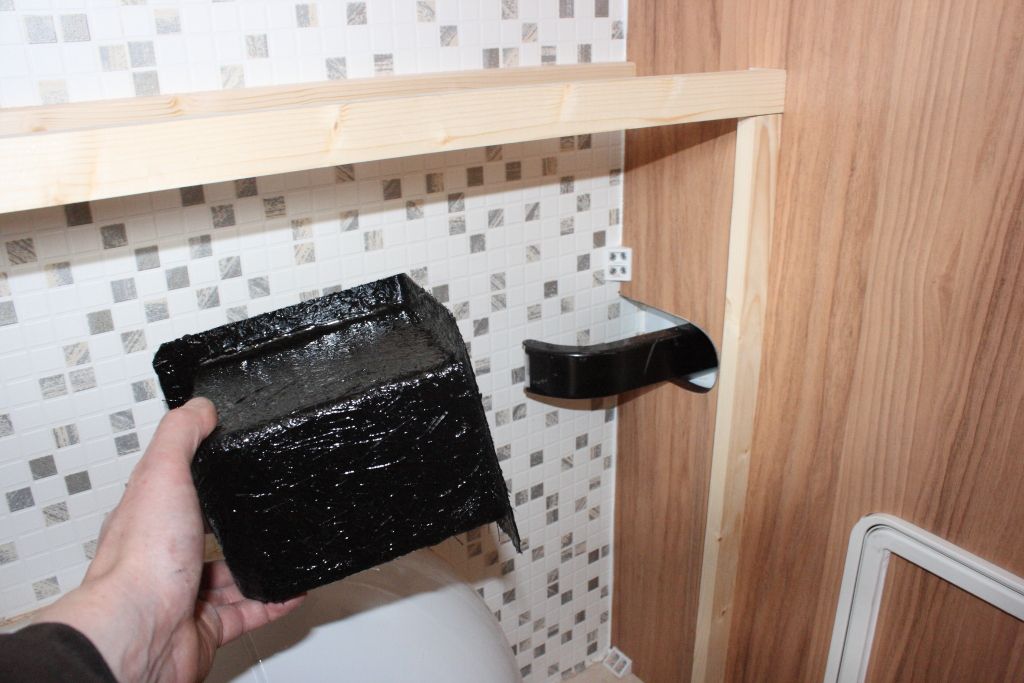 |
| |
|
|
eternaloptimist
Posted a lot
   Too many projects, not enough time or space...
Posts: 2,578
|
|
Nov 15, 2014 20:58:20 GMT
|
|
Good work there on the housings. I'm going to have to try playing with GRP one day.
|
| |
XC70, VW split screen crew cab, Standard Ten
|
|
|
|
|
Nov 16, 2014 12:59:23 GMT
|
Go for it. It seems such a black art when you start. Once you grasp the basics, being able to make a part of whatever shape you want is hugely satisfying. Well, to me it is  |
| |
|
|
|
|
|
Nov 18, 2014 12:42:35 GMT
|
|
This is a great build. Top work.
|
| |
|
|
|
|
|
Nov 19, 2014 22:02:50 GMT
|
Thanks!  |
| |
|
|
|
|
|
Dec 12, 2014 16:40:31 GMT
|
Things have got fiddly, hence the gap in posting, but time for an update I guess. More cabinet making, this time some cupboards over the kitchen area. Fiddly building down from the roof again. For doors, I've used the 500mm 'drawer' doors left over from the drawer/door pack. And what do you know, 3 of them fit to perfection lengthways to the side door. 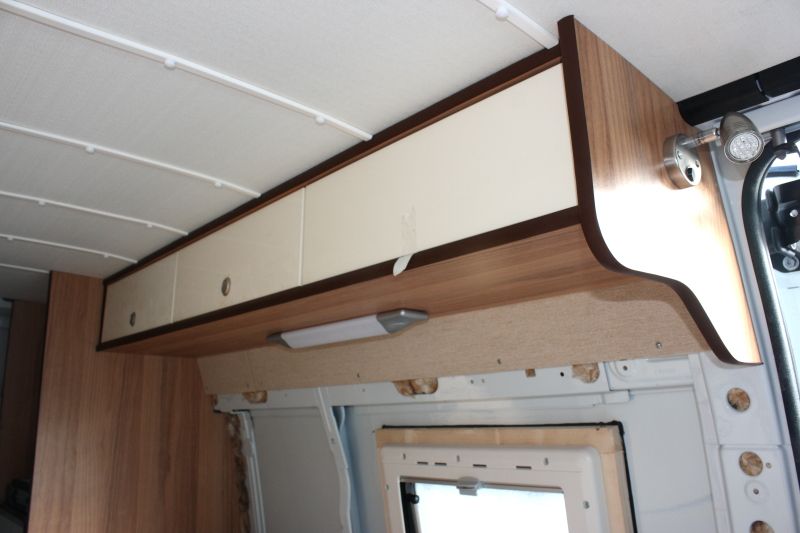 as you can see I've fitted some of the door catches. These come like this. 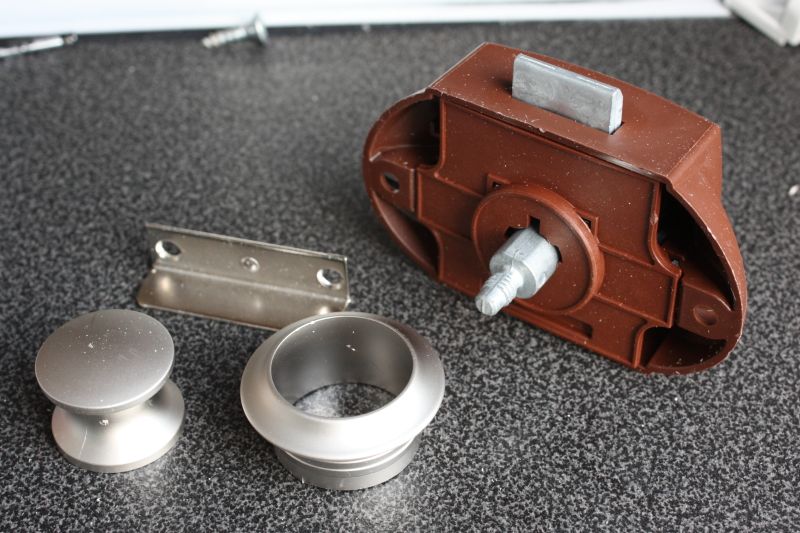 Drill with a 25mm flat-blade drill and they fit in like this. The push button latches them closed. 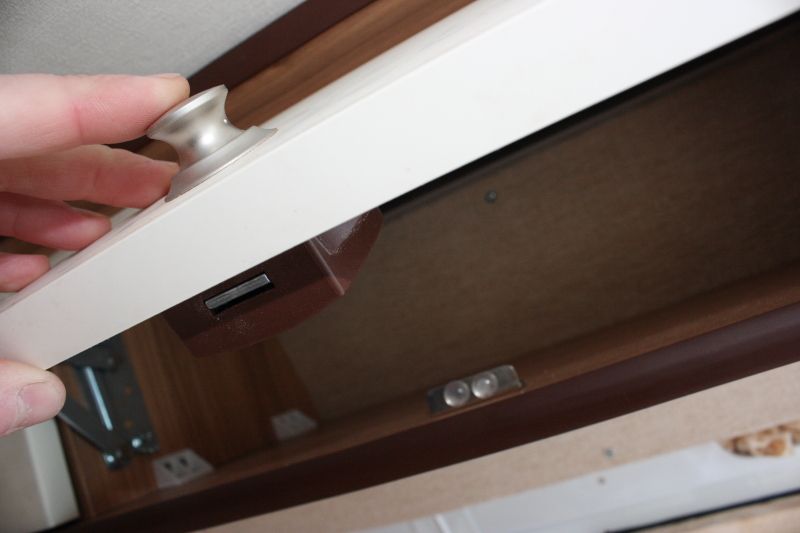 There's no getting away from it. I have to start on the electrical system sometime. When you're sitting in a steel box in a damp field in UK weather, what better idea could there be than plugging yourself into the 240v mains? With this socket in the side of the van, 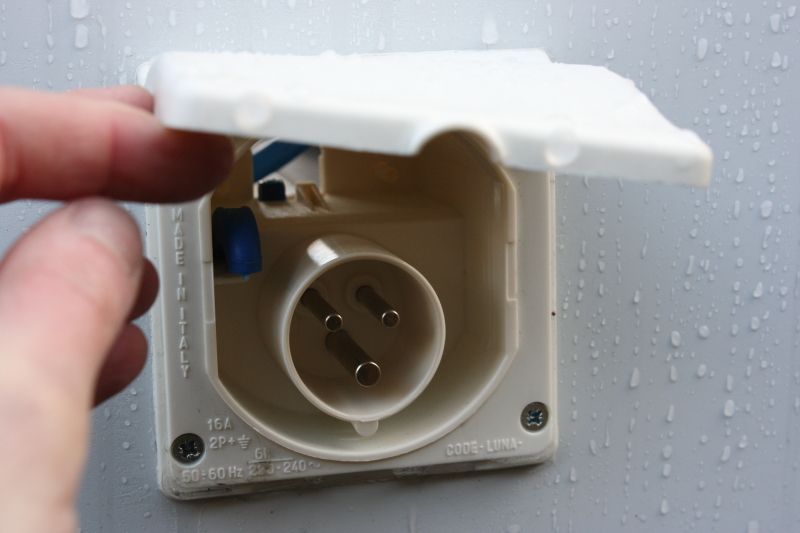 a 3-core arctic flex lead from the back of it runs to a consumer unit. My mains system will be very basic, only running the charger for the leisure battery and some sockets, one of which will run the 3-way fridge. With these plug-kit bits crimped and soldered onto the flex ... 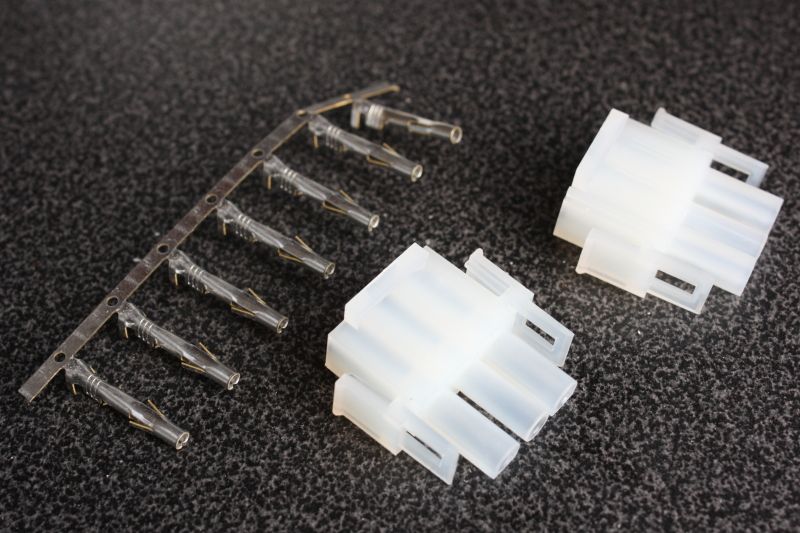 that makes a pretty tidy job if I do say so myself. 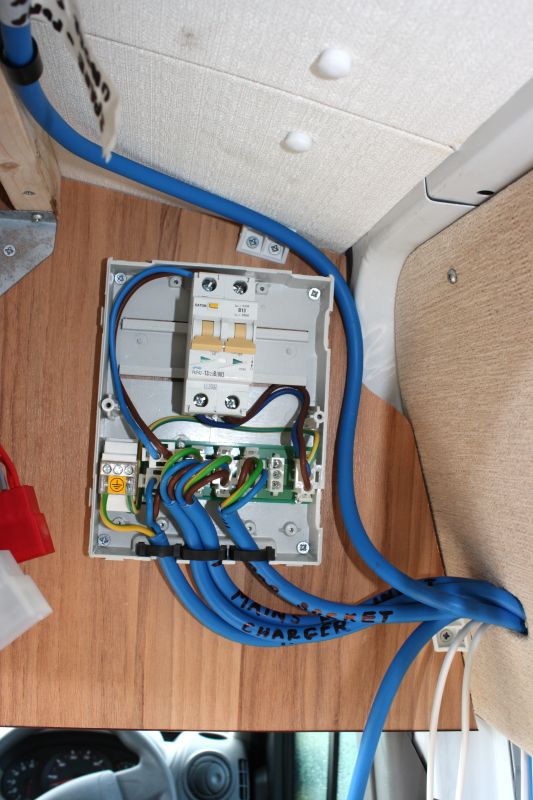 There's still the 12V system to consider, and the connection between the mains and 12v via the leisure battery, and the wiring into the van's own system. That's one of the main reasons I held onto the old van, so I can remind myself how I installed it all. |
| |
|
|
Stu
Posted a lot
  
Posts: 2,913
|
|
Dec 12, 2014 16:57:24 GMT
|
Lovely work, I'll be keeping an eye on this as I do like a camper van  |
| |
'89 BMW E30 325i Sport, '04 MINI Cooper S, '09 Volvo V70 D5
|
|
|
|
|
Dec 12, 2014 17:26:16 GMT
|
|
I have a volt sensing relay on my canal boat. It's a durite one. You charge the batteries when driving, the minute you stop the engine, the starter is isolated from the supply. It's so you always have power to start. Cheers and love your work. Jed
|
| |
|
|
|
|
|
|
|
Dec 12, 2014 17:33:48 GMT
|
Thanks, chaps. Ta for the info, Jed. Yeah, boats and motorhomes need the same sort of systems. I have all the charger and battery separator equipment (all from an Italian company called CBE, and bought from CAK tanks). I just need to refresh my memory how to wire it  |
| |
|
|
|
|
|
Dec 12, 2014 17:53:54 GMT
|
Oh, forgot to post this pic too. The plumbing system will be much simpler than the last van. For fresh water supply we'll go with large cans of bottled water : lately we've not used water from the onboard tank in the old van, wondering how clean a tank can be after a few years. So no tap, and a kettle is a water-heater is it not?  Grey water (i.e. washing up) will go into this removable tank. There aren't so many campsites in the UK (and even fewer in Ireland) that have a motorhome service point for driving up and emptying out. The removable tank will be more convenient. And what about water for the loo, you might ask? We've gone for one that has its own tank, so will fill that separately. 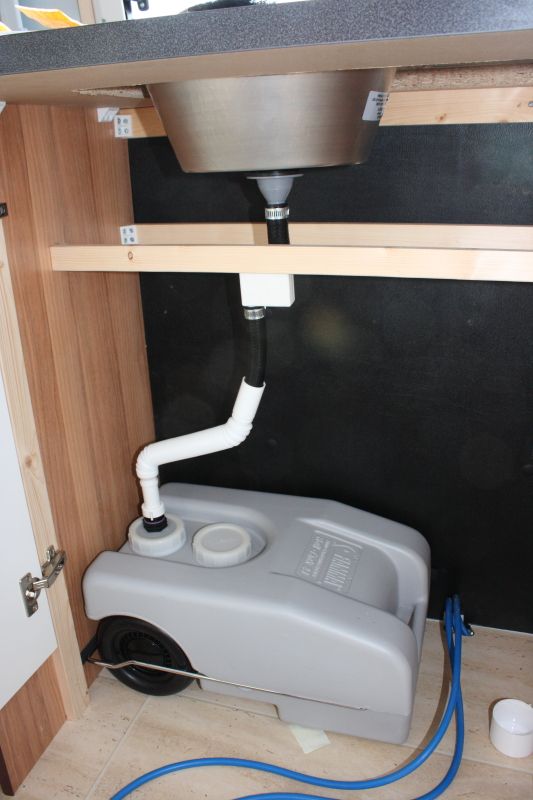 |
| |
|
|
|
|
|
Dec 28, 2014 16:53:23 GMT
|
Happily, electrics are almost complete. I went back to the old van to understand the wiring. I'm not much of an electrician, so I went with the same CBE components as the old van, even though I won't use some of the features of their system. The 12V control panel is all wired up. Lack of English instructions provide a little challenge. 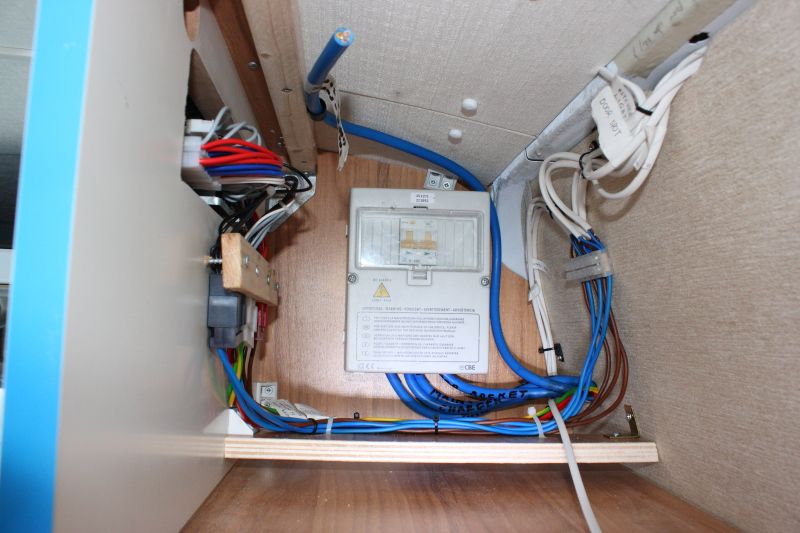 and working 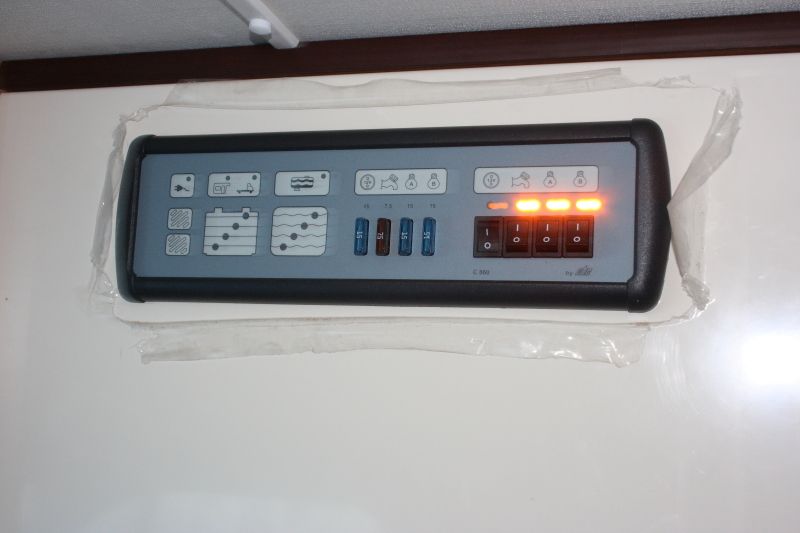 The other components : leisure battery, battery separator and battery charger. 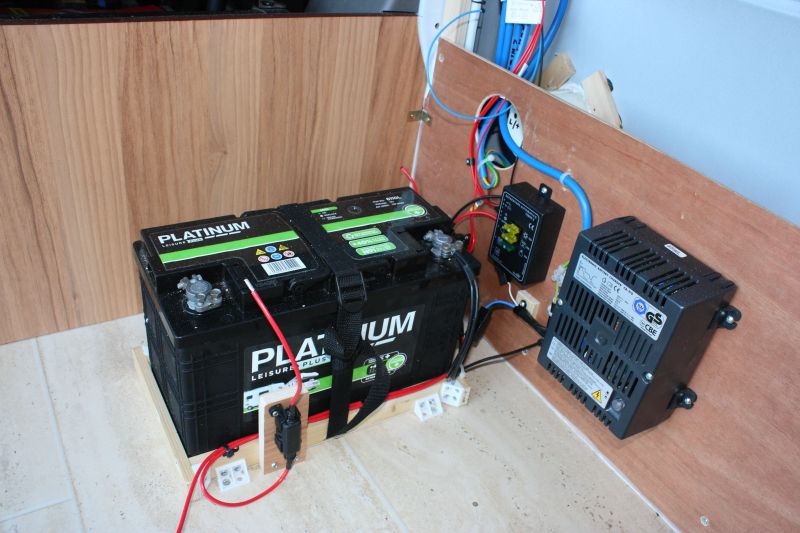 Let's see if I can explain it. Remember, I'm no electrician  For a simple van installation you probably want to run a few 12v lights, a water pump, a fridge, a couple of mains sockets. There are 3 possible sources of electrical power. 1. the van battery. It'll run 12V devices fine, but it's not a good idea if you want to be sure of the van starting the next morning  2. so for the 12v system in the living area it's best to run a leisure battery. The van battery and leisure battery are connected to let the van alternator send excess charge to the leisure battery if the van battery is already charged (correct me if I'm incorrect). But they must be separated so the leisure battery doesn't drain the van battery. Hence the battery separator. The leisure battery can also be charged by 3. mains charger when you're plugged into a campsite's electric hook-up. The one connection I still need to make is to the alternator signal output. This is how the battery separator tells if the van is running or not. It's not very accessible in the engine bay, so I hope to connect to some wiring in the footwell heading to the gauges. I've sent for the Renault TIS DVD to work out where I need to connect into this. One thing that bugged me this weekend : I couldn't get the fridge light to work. Cue gaining access to electrical connections and cursing. Then my wife comes out to check on progress. "Does the fridge need to be switched on for the light to work?" GnnnnAHHHH!!!! She has a habit of offering the infuriatingly obvious explanation. Tadahh! 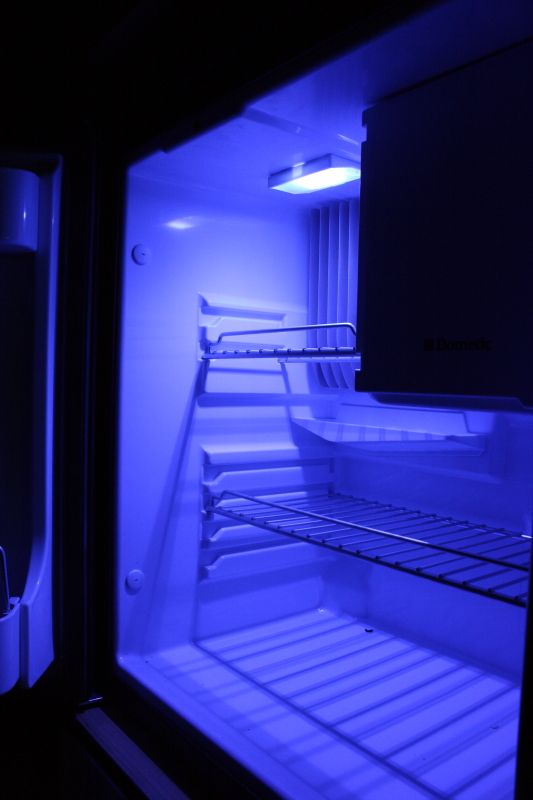 So with that almost complete I can finalise some joinery. |
| |
|
|
dungbug
Posted a lot
   'Ooligan!
Posts: 2,852
|
|
Dec 28, 2014 20:42:27 GMT
|
|
Cracking work, hope you get many adventures after all the work you've put in :-)
|
| |
Past: 13 VW Beetles from 1967 - 1974
Bay Window Campers (1973 & 1974)
Mini's (1992 Cooper lookalike & 1984 '25 Anniversary)
MK2 Polo Coupe S (1984 & 1986)
MK2 Polo Breadvan (1981 & 1984)
MK4 Escort (1989)
MK2 Granada Based Hearse (seriously)
Fiat Uno 60S (1986) Punto 60S (1998) Cinq (1997)
1998 Yamaha YZF600R Thundercat
2003 Ford KA
Current: 2004 Ford Focus (barely alive)
|
|
|
|
|
|
|
|
Great work going on here, love the fibreglass moulds, I'll be using this technique myself on a few pending pieces on the Panther.
|
| |
|
|
|
|
|
|
|
I had loads of time off over Christmas, so I made a big push on progress. Apart from festivities and walking the dog, I was either in the house, the garage or the van!
With electrics almost finished, I built this top cabinet, then set about fitting door catches everywhere, and completing joinery such as the small kick-panels.
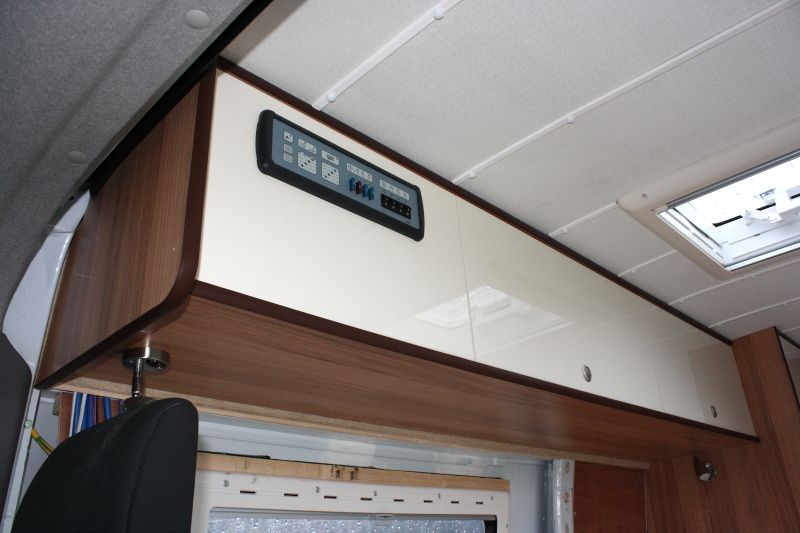
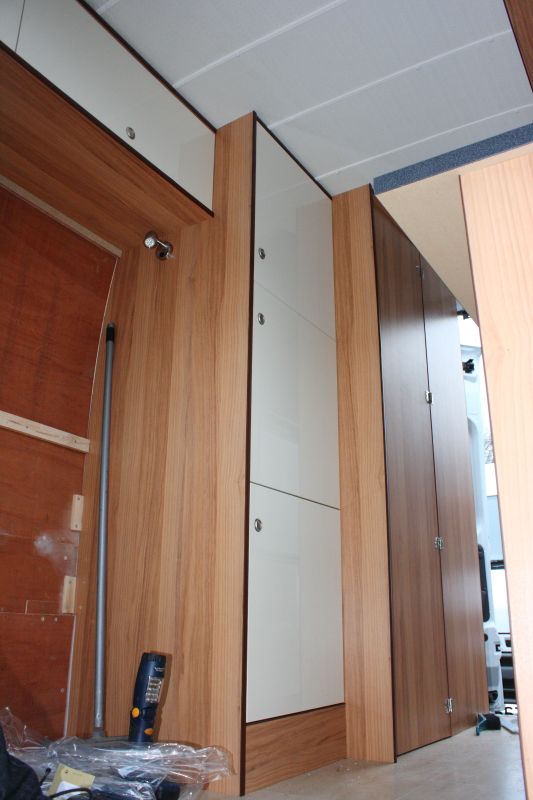
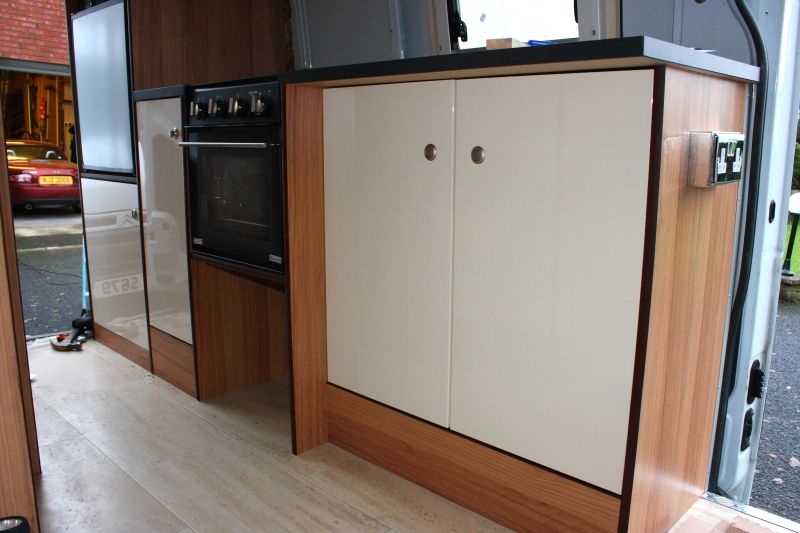
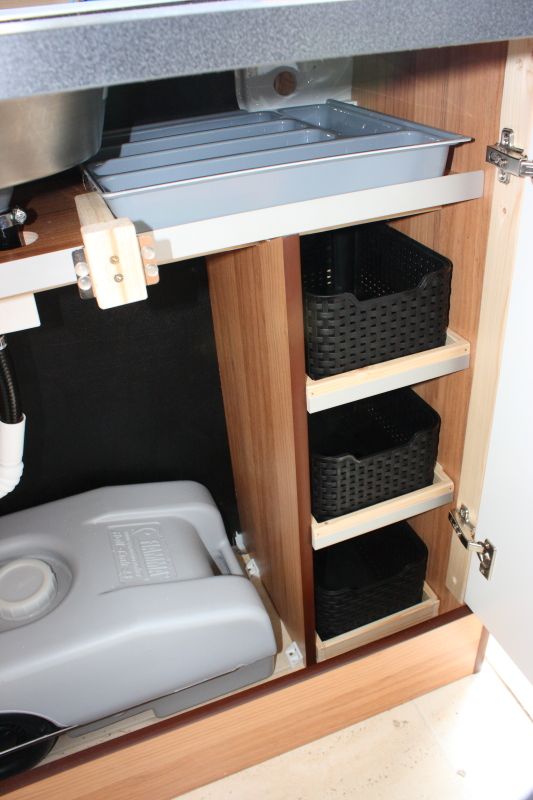
So that's all looking a bit more complete. I'm well under way with internal shelves. I'm particularly pleased with these little storage bins.
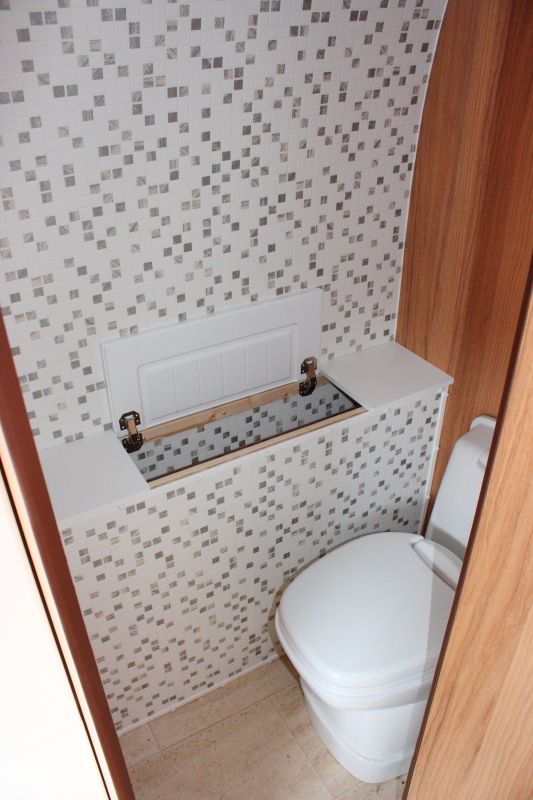
I made a bit of storage over the rear wheel arch in the loo. The lid parts are more B&Q kitchen doors cut down to size.
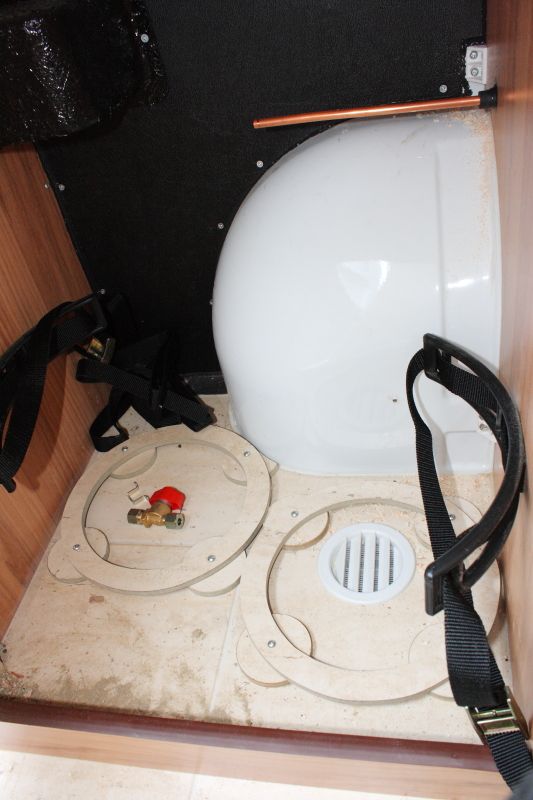
The gas locker is coming along. The vent in the floor is a drop-out hole. It's needed in case of a gas-leak. I was a bit limited on where to place it as the van's chassis legs are in the way underneath. The vent is under one of the gas bottles, so I've made a step to the gas bottle mount to leave a clear exit for the gas. I don't like messing around with gas, plus the gas fitter I'll have out to inspect the gas fitment is pretty demanding, rightly so. BTW, the cabinet door isn't gas-sealed. I have an idea for sealing it with a GRP panel, but it's still just an idea in my head.
The gas pipe has also been run from the gas locker to the cooker, with both ends left overly long so I can confirm with the gas fitter the most acceptable way to finish them.
|
| |
|
|
|
|
|
|
|
|
Looks amazing. What did you use for the cupboard doors? What saw did you use to cut done the wheel arch storage doors? Looks mint.
|
| |
|
|
|
|
|
|
|
|
Thanks.
They're kitchen doors from B&Q. The size of them sets the size of the cupboards. That one in the loo was cut on a cheap table-saw. A circular saw or even a handsaw is fine if you're careful.
|
| |
|
|
|
|
|
|
|
|
That's a clever way of designing the units. I see a lot of boats that need refit sand that's a top tip. Cheers. Jed
|
| |
|
|
|
|
|
|
|
Be careful with the weight though! Kitchen doors are usually either chip-board or MDF. The proper lightweight ply is about 60% of the weight by my rough arithmetic. I can get away with a few doors in a van, but extra weight in a thing that needs to float might be less clever  |
| |
|
|
|
|


