|
|
|
|
|
Well today i used up the last of my cutting discs left over from the dolomite resto. I got through four of them chopping out rust from the N/S sill area. This is the result: 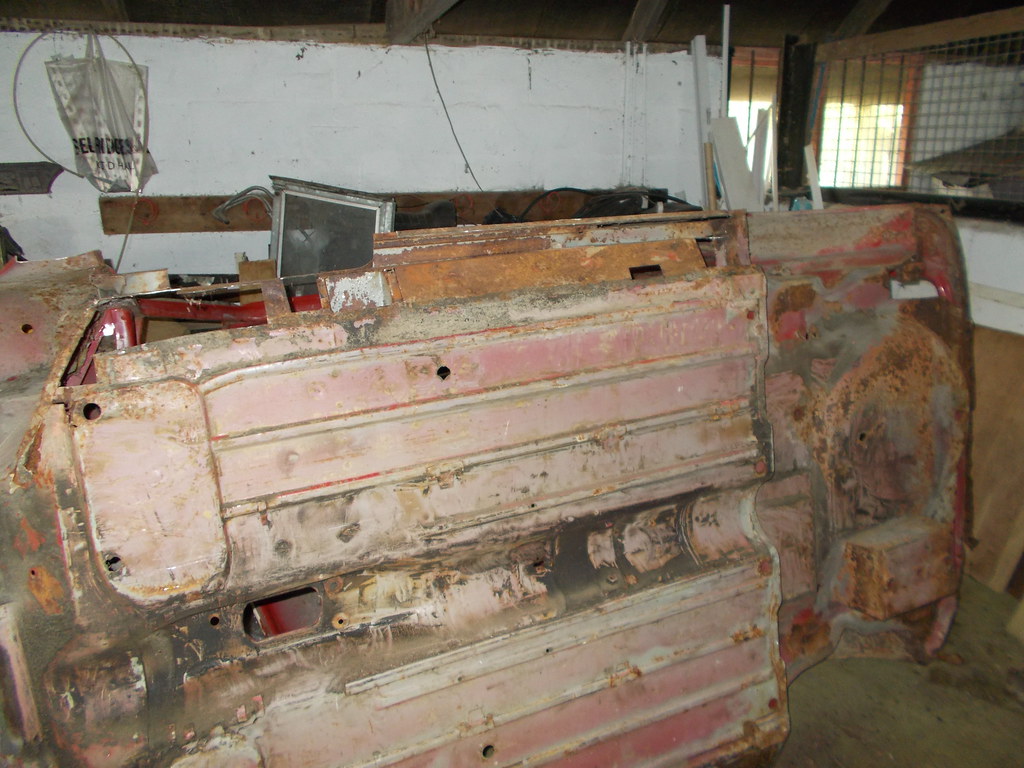 I couldnt do much more after that because i had no more consumables, but i set about cleaning up the engine as best i could as we had beautiful weather. 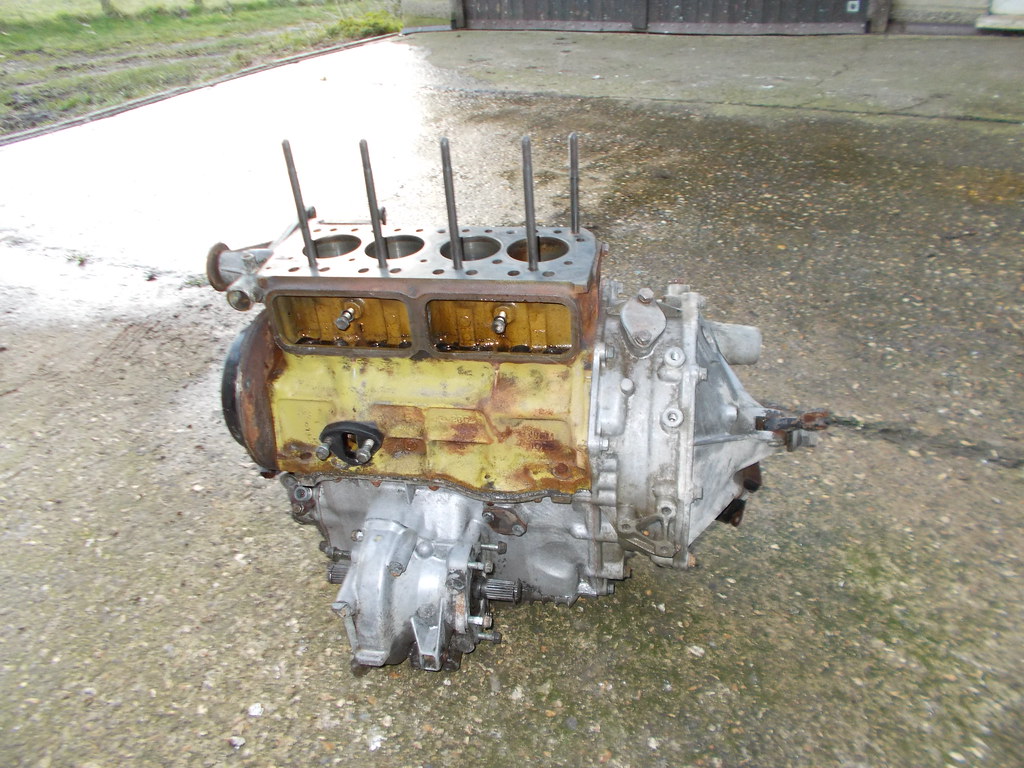 It look a lot of faffing with degreaser and pressure washers, and despite a pressure washer being a labor saving device, it saved no labour. Still needs a good going over with a wire brush (for the second time), then i can paint it. Once ive tracked down the rest of the pushrods and engine studs i can put the head back on and i'll have a decent engine ready-ish to fit. |
| |
|
|
|
|
leaky
Part of things

Posts: 323
|
|
|
|
|
I have a box full of 998 bits in my garage if they any of parts or bolts you can't find man.
|
| |
1962 Morris Mini Traveller
1973 Commer Suntor
1979 Mini Clubman Saloon
1983 Austin Mini City e
1988 Austin Metro L
1989 Austin Metro 310
|
|
|
|
|
|
|
|
Funny you mention that, I cant find two push rods and I cant find any of the rear engine studs that are missing (x4) if you've got any!
|
| |
|
|
leaky
Part of things
Posts: 323
|
|
|
|
|
I have some push rods for sure. I am certain I will have the other bits as well TBH. When you come get these brakes you can have a route though and see what you want.
|
| |
1962 Morris Mini Traveller
1973 Commer Suntor
1979 Mini Clubman Saloon
1983 Austin Mini City e
1988 Austin Metro L
1989 Austin Metro 310
|
|
|
|
|
|
|
|
Good to see that you're saving it! I'd like to do a resto like this at some stage, but I like driving my car too much to pull it apart
|
| |
|
|
|
|
|
Mar 15, 2014 17:31:29 GMT
|
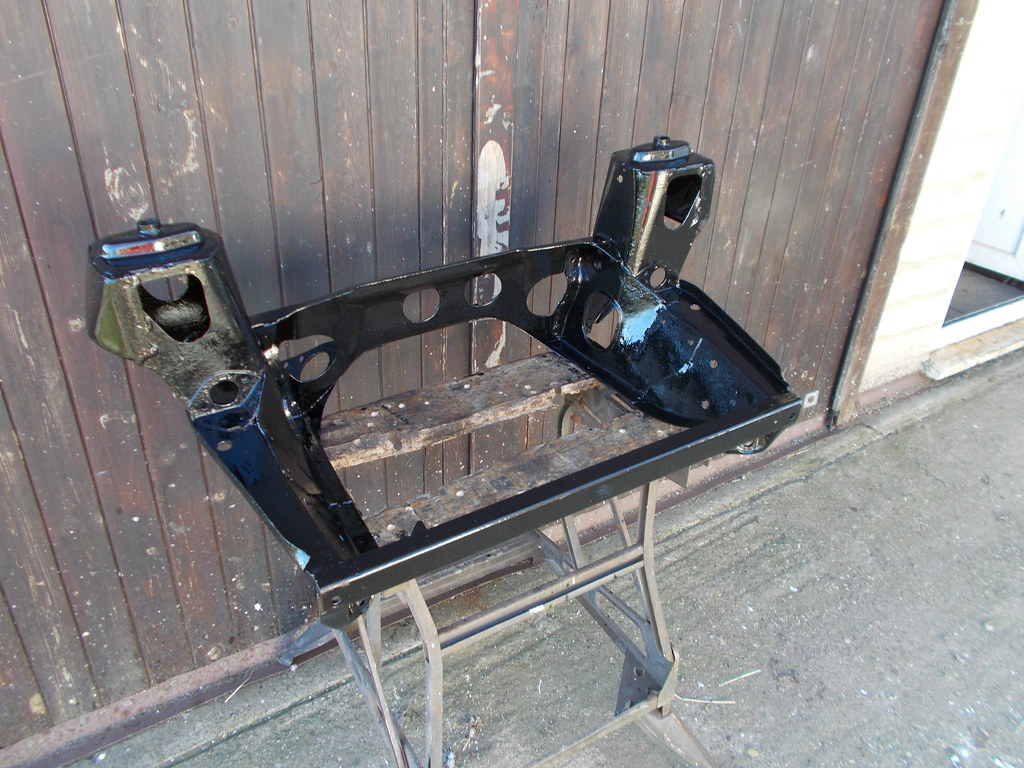 Finally got me a subframe painted up! Its actually different to the one i jetwashed because that one was covered in underseal. I spent 4 hours today with petrol, paintbrushes and scrapers getting this thing clean enough to paint. The suspension towers were the worst bit. Mostly painted now. Just got to turn it over and do the bottom of it then i need to find a suspension cone compressor and assemble the thing! Then I'm hopefully going to buy a new trolley and assemble the engine in the subframe so i can install it easily at a later date. |
| |
|
|
|
|
|
Mar 18, 2014 11:04:51 GMT
|
|
Great build. Man it's good your keeping it original
|
| |
|
|
|
|
|
|
|
Built up the subframe.  Driveshafts are fitted wrong but thats because i wanted to keep all the subframe bits together. Getteing there! |
| |
|
|
|
|
|
Aug 16, 2014 16:17:00 GMT
|
Well, i've actually started welding! Ran out of wire earlier, but this is what ive achieved in a few days.. Started off easy.   Then today i bought a floorpan and replaced a large section.  Had to buy a full floorpan as the inner sill repair sections are the wrong pressing. And a bad one at that. You can see its turned into a bit of a patchwork quilt but its starting to look like it should again! |
| |
|
|
|
|
|
Aug 23, 2014 14:19:02 GMT
|
Further progress. Nearly got a rebuilt o/s sill and floor area. Started work on the heelboard using a subframe as a jig. Nightmare. Just need to patch the rest of the inner sill, replace a section of the inner wing, then ive got a good enough jig to weld in a jacking point and then attach the outer sill. Things are going well, for once!  |
| |
|
|
|
|
|
|
|
Sept 2, 2014 17:02:55 GMT
|
Well I've nearly got a proper sill back. Took lots of faffy patch making and careful cutting of panels. Ive replaced various bits of inner sill, a length of doorstep, welded in a new jacking point, reinstated the n/s rear heelboard and surrounding sections and most a flitch (inner wing) panel, resulting in:  Ive also test fitted the Heritage sill. Nothing actually required before i weld it on, i just painted what i'd done in hammerite so the box section had a little extra protection, though i'll cavity wax it anyway.  Should have a mini with a proper sill tomorrow. For the first time in my life. Curse 'cover sills' and all those who buy them.... |
| |
|
|
|
|
|
|
|
Forgot to update this with a finished sill picture!  Ive just ordered the last panels i need to finish doing the boot floor/rear valance. Will go out and get some gas soon, attach the N/S a-panel, and then do the rear. Once the rear is done, its just a case of the O/S sills, doorsteps, door post, flitch, and so on. Then its solid! Sounds easy, but it wont be... |
| |
|
|
79cord
Posted a lot
Posts: 2,608
|
|
|
|
|
Glad to see the progress anyway
|
| |
|
|
|
|
|
Nov 10, 2014 17:13:09 GMT
|
Spent today welding together the rear end panels. Decided to do the lot off the car as access is easier and it means they all go on at once at a later stage.  Thats the valance, boot floor repair and closing panels all sorted. Panels are super grim cheap ones, but i'm not overly worried as it will be a daily driver when its finished. Some i bought years ago (valance and boot floor), and the closing panels i bought recently. All i need to do is reinstate the lip at the bottom of the rear panel, chop a section of boot floor out and then i can weld the whole thing in! |
| |
|
|
adam73bgt
Club Retro Rides Member
Posts: 4,867
Club RR Member Number: 58
|
|
Nov 29, 2014 18:29:10 GMT
|
Woah. That would make me run a mile! looking forward to seeing you reconstruct the sill  |
| |
|
|
|
|
|
Dec 31, 2014 16:57:13 GMT
|
Woah. That would make me run a mile! looking forward to seeing you reconstruct the sill Cheers! it looks horrendous, but as of today, after lots of chopping and swearing, and after cutting out and replacing the outer door post, i've fitted a full length inner sill and it looks like this!  Next port of call is jacking point, rear bin closing panel, doorstep, flitch and then the outer sill goes on. Two a-panels after that and then all i have to do is the rear end. I've also ordered 5l of Targa red, some anti-bloom thinners, 2kg of filler and i've got some Upol filler primer in stock. Hoping to paint when it warms up a bit in spring. Getting there! |
| |
|
|
|
|
|
Dec 31, 2014 17:10:16 GMT
|
|
progress is looking great. just a suggestion. you may want to weld some plate in the 4 corners for jacking points on the car. that way the floor won't buckle later on when jacking the car up.
|
| |
|
|
|
|
|
Dec 31, 2014 17:15:01 GMT
|
|
Thanks!
What do you mean by four corners? the jacking point attaches directly on top of the end of the crossmember which is the strengthening point of the entire floorpan. Its also boxed in by the doorstep and outer sill so in theory at least it shouldnt move..
Cheers though, always open to ideas.
|
| |
|
|
|
|
|
Dec 31, 2014 17:44:33 GMT
|
|
Jacking points on minis is either the factory jack hole half way along the sill or under the subframes. Anywhere else will buckley the floorpan.
|
| |
|
|
|
|
|
Dec 31, 2014 17:50:28 GMT
|
Jacking points on minis is either the factory jack hole half way along the sill or under the subframes. Anywhere else will buckley the floorpan. Yes, i've already done one side, i use the outer sill to line it up before welding it on. |
| |
|
|
|
|