Hi all
I thought I'd do a thread on this in the Porsche forum but to be honest it seems pretty flat on there... I want some inspiration, ideas and maybe even guidance so thought I'd copy my progress so far here! Feel free to comment, praise, grumble or constructive critisism - It's all good
Here goes... !
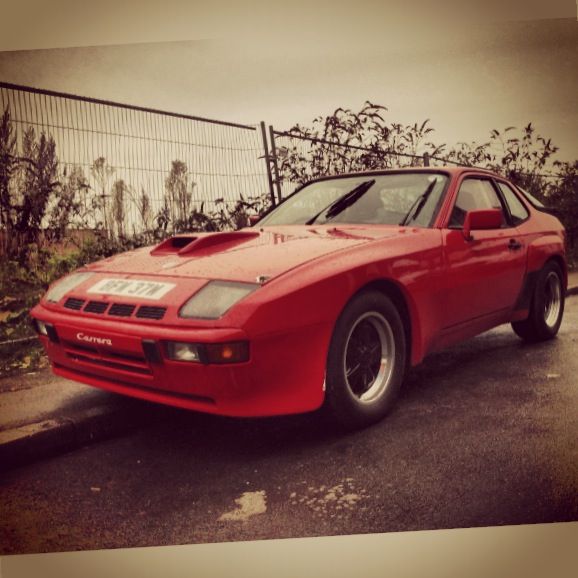
Brooklands auction ad from 3 years ago here showing more detail on the car!
www.historics.co.uk/buying/auctions/2011-07-19/car/1980-porsche-924.aspx:
Shamelessly copied from my thread over at Porsche924.co.uk I thought some of you may be interested in my newly acquired car...
I'm sure some of you will know my car, it's 'that' GTS replica (ish) which was built by an ex member of Porsche924.co.uk a few years back. I bought it along with a friend from the chap who originally picked it up from Brooklands 3 years ago.
We were unsure what to do with the car but are growing fonder as times go by! We both have a strong Porsche background/passion. I personally own an '84 911 Carrera, and have had 5 928's in the past as well as a 944... My buddy Marcus who is the "co-custodian" of our turbo grew up with 911s and more broadly speaking we love 80's German performance oldtimers. I've had Mercedes SEC/SL's and various 80's BMWs, whilst Marcus still owns his flawless original mk2. Golf G60. Suffice to say the car is in safe hands!
The guy we bought it from basically picked it up on an utter whim and decided he didn't really like it when he got it home so it has basically sat (albeit MOT'd) not doing a lot for the best part of three years.
When we picked it up it was looking rather sorry for itself, with dull faded paint and evidence of general neglect. However I could see through the sadness and knew it has potential to be a special car
Our goal is to end up with a clean, tidy and mechanically robust streetable car with a decent level of comfort for long trips but the ability to have some fun in when required. Basically I'd like it to be as light and powerful as possible but with the following caveats -
1. High reliability
2. Girlfriend approval factor (if I can take her out for a meal in it with no comfort/noise/scent complaints I'll be a happy man!)
Jobs done so far -
Removal of Perspex windows.
I bought a pair of doors complete with motors, regulators, glass, seals etc and refitted all the good parts from said doors onto the car. I now have working windows (although the switches are buggered) and it's a mega improvement to the frankly bodged and crappy Perspex slidey things. A good job well done.
Removal of bucket seats.
Ripped out the shoddy and faded Sparco bucket seats and fitted some stock pinstripe tombstone seats,which are in good condition - with these and the glass windows fitted it's made the world of difference.
Machine polish.
I'm amazed at how well the paint has renovated. It will require regular waxing I'm sure but it has come up beautifully!
Brake inspection/clean up.
The car has more or less brand new EBC green stuff pads and cross drilled discs fitted but they were unfortunately rusty and glazed over due to being left standing then driven with rust on the discs. We have stripped all the brakes down, cleaned up and greased the carriages and scuffed the pads up. The discs have been cleaned up and the rust/glaze has been cut away so hopefully she will stop with a bit more urgency now!
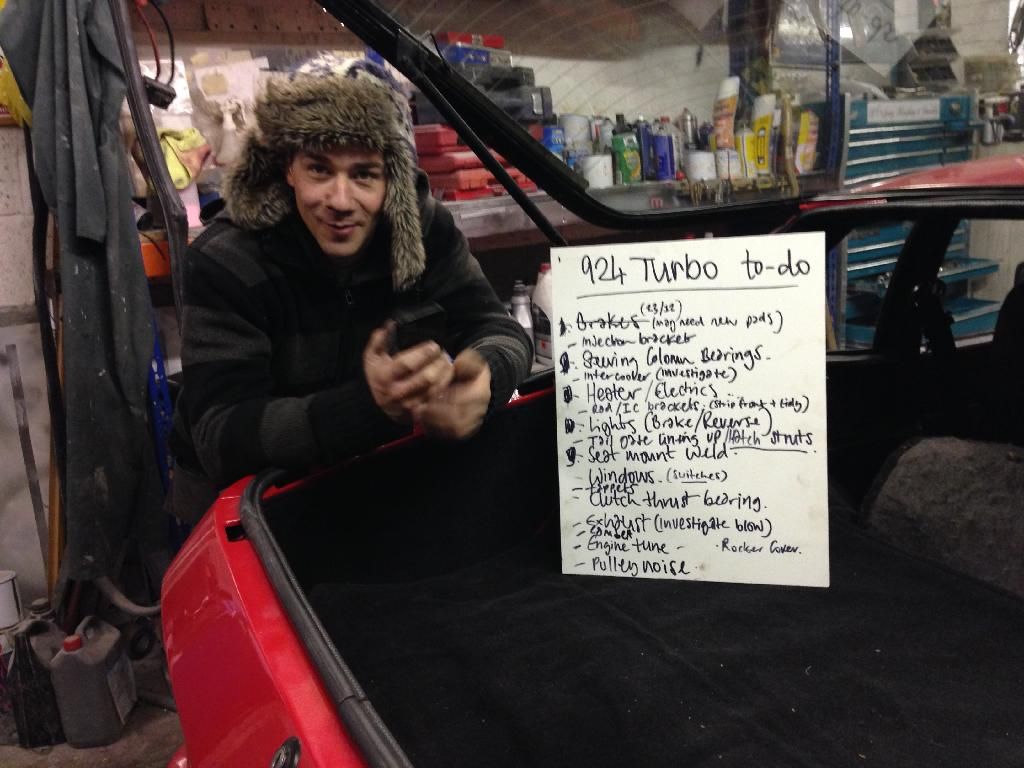
There's loads of jobs to do including electrical foibles and the steering column bearings (if anyone knows where I can source parts it'd be appreciated!) so I'll keep on posting as time goes by.
We are in Leicester if anyone local fancies popping by/helping out?
Some pics:
And an update... 30.12.13
A bit more work done today....
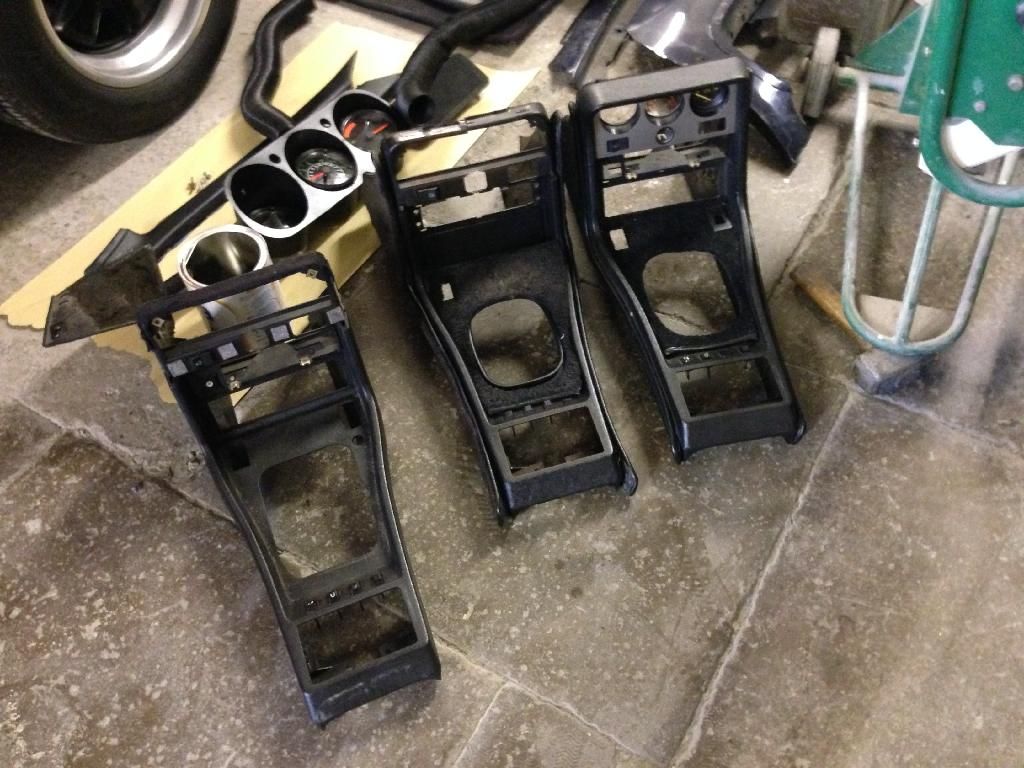
AC removed (for sale if anyone wants it?!? Includes rotary knob to replace dial in centre console):
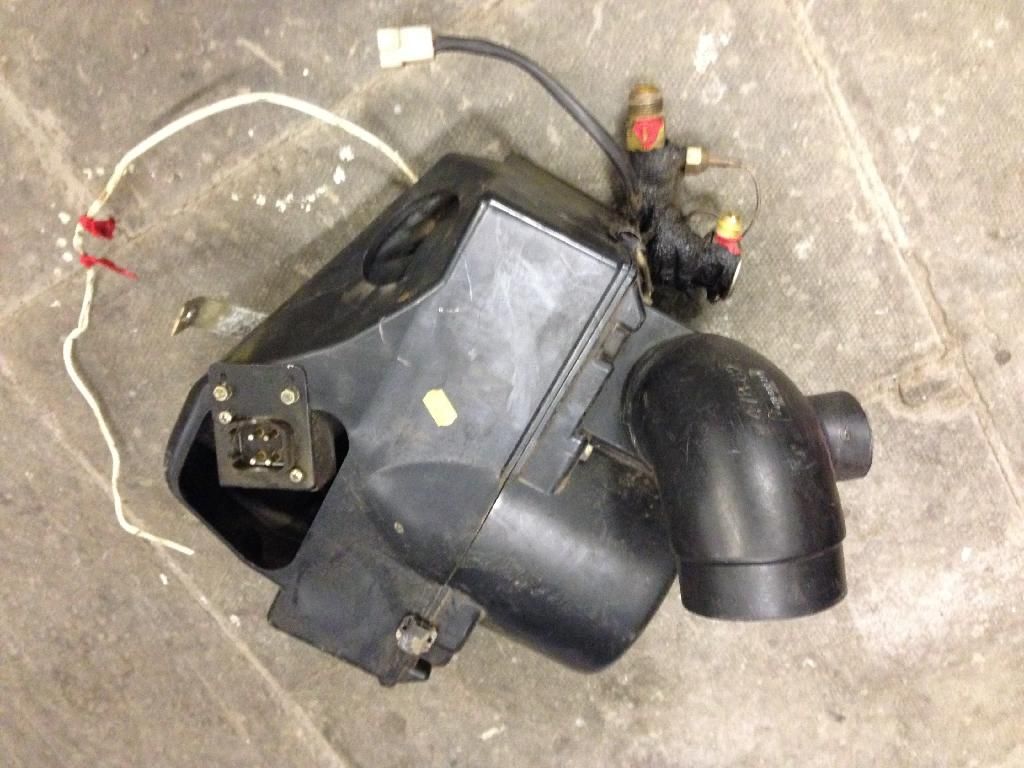
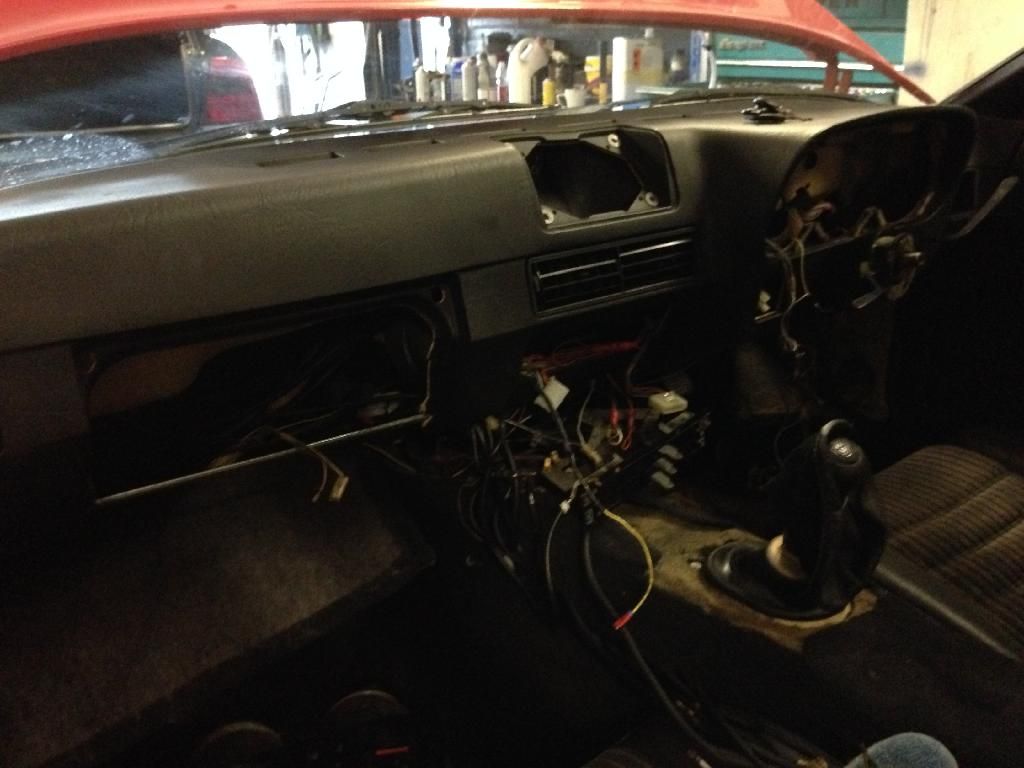
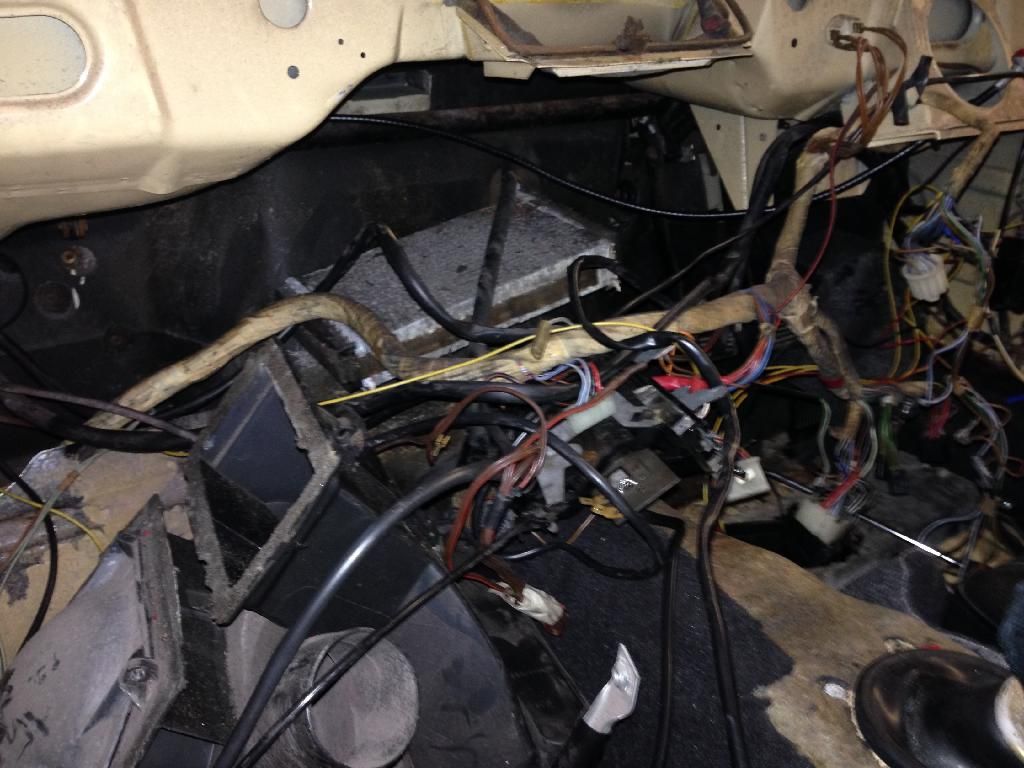
Cleaning of all fuses/relays/connectors/ground points etc in the fuse box:
What a fun job that was
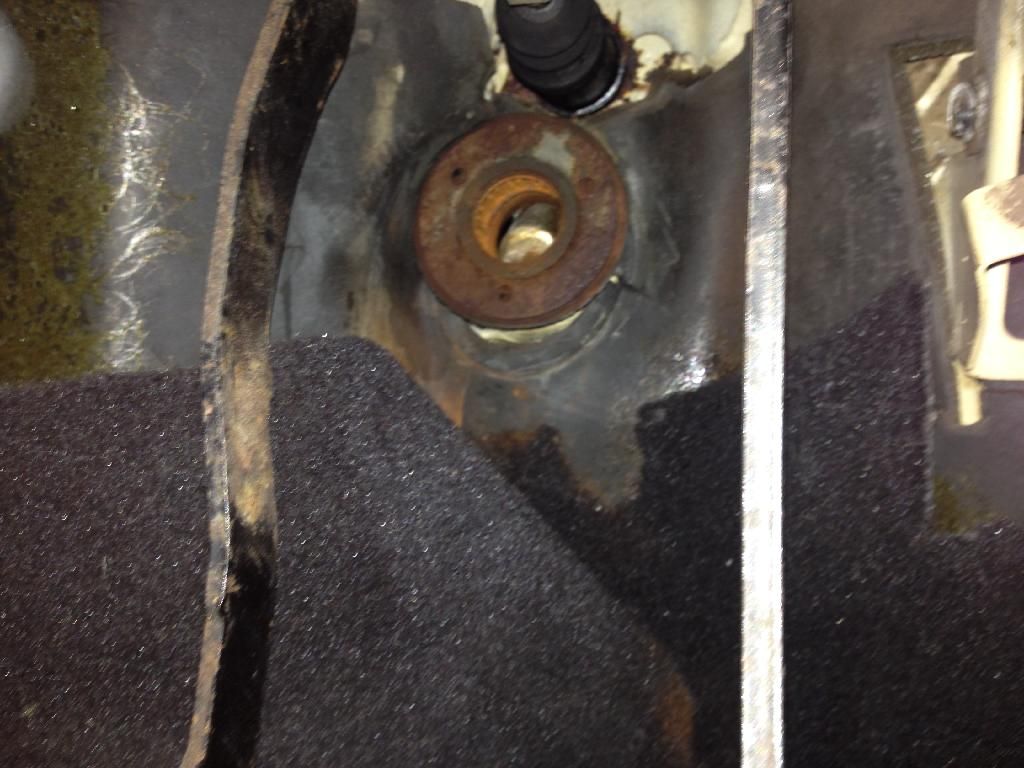
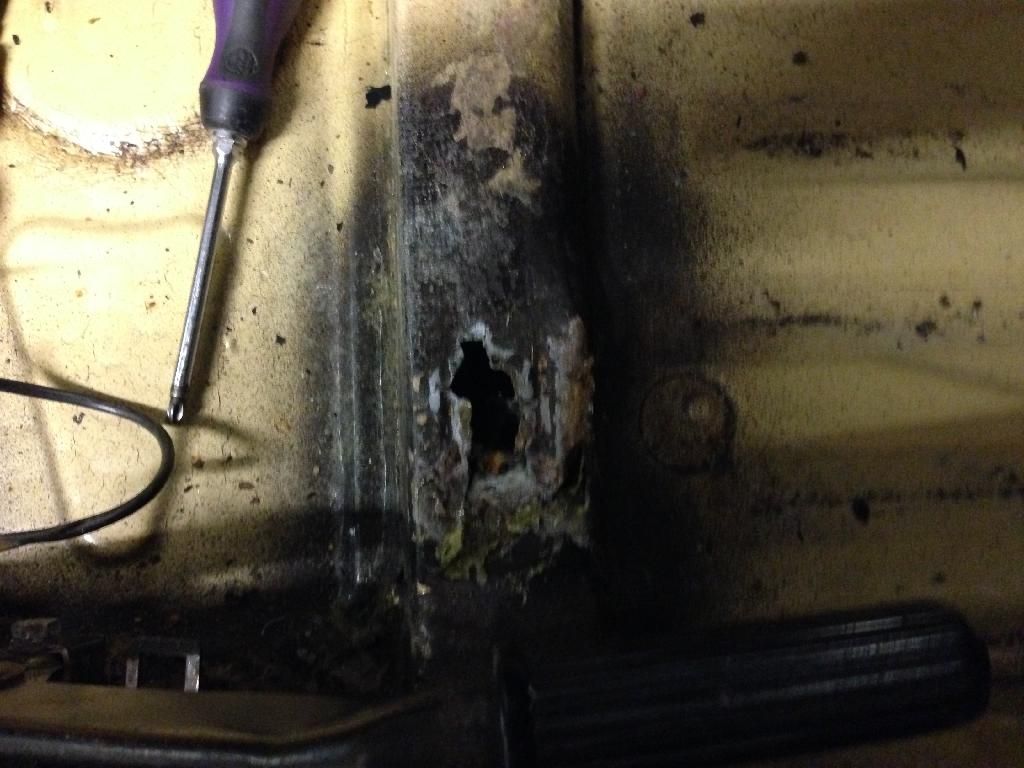
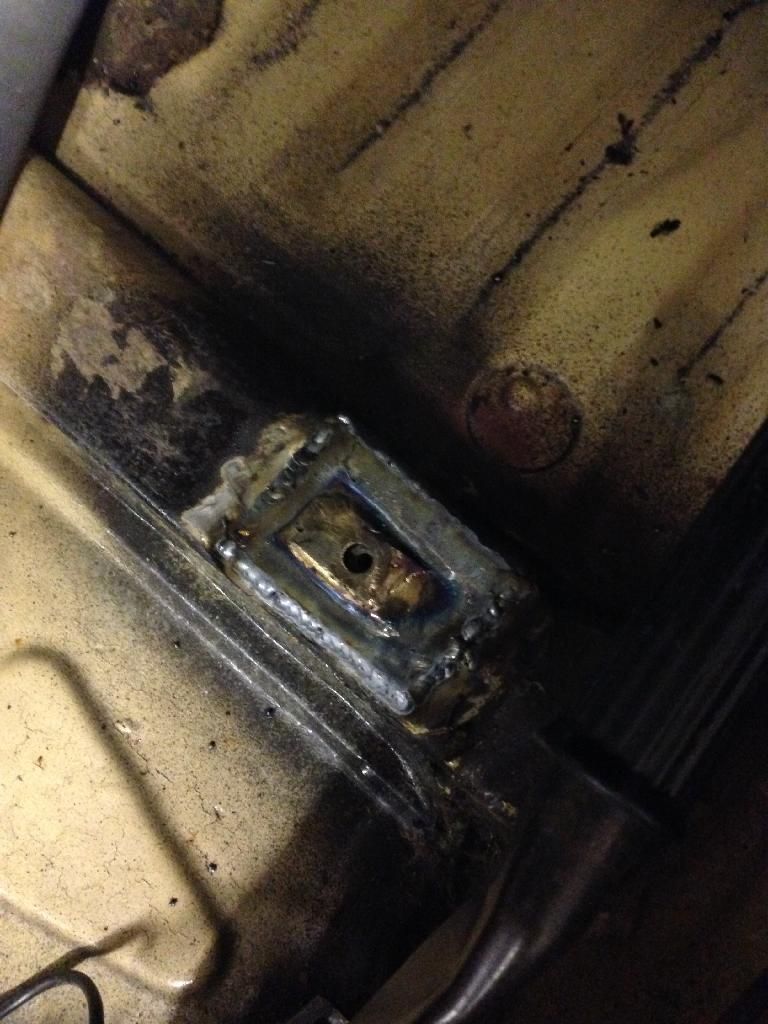
Drivers seat mount repair:
Before:
After (ish):
New handbrake switch fitted (the old one was missing which meant the light was constantly on the dash annoyingly) - Also shows finished seat mount repair:
I'll be back on it tomorrow installing a brake light switch because I just cannot seem to find one. The only thing I can think of is that the master cylinder has been changed for a later one without the pressure switch and the previous owner never actually bothered to fit one... Interesting since it is MOT'd but I'm not going to worry too much about that! Either way there is definitely no pressure switch or mechanical switch on the brake pedal assembly so I am wiring one in tomorrow with it's own relay/fuse etc.
Another update - 31.12.13
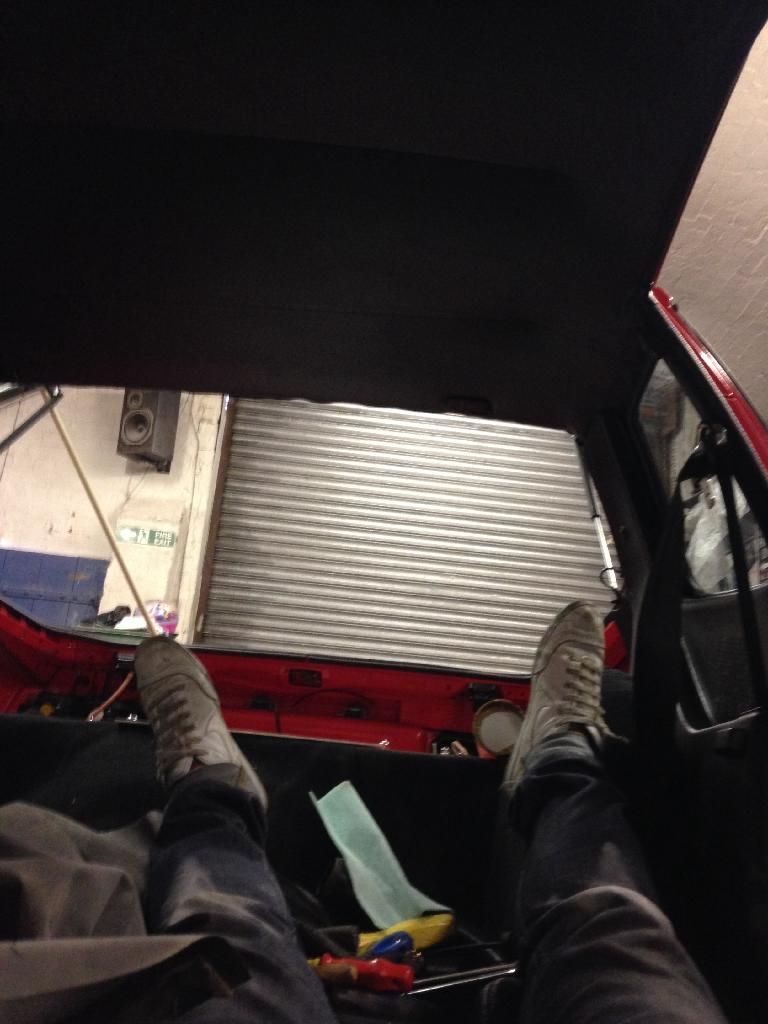
Fitted a brake light switch to the brake pedal assembly. Not a particularly fun job so I didn't take any photos, but for those interested I used a standard automotive relay, fuse and fresh cable - I found everything I needed at the light switch block loom which was useful. The wires I needed were carefully extended and spliced into using solder and heatshrink. The wiring was very straightforward actually but spending most of the day upside down under the drivers footwell was less than ideal!
I used a motorcycle brake light switch (from an R6) with is basically a SPST normally closed, plunger limit switch with a spring on the end, which was mounted to the steering column plate and attached- Drilling the mounting hole in that tight space was fun... Not!
The switch for anyone interested looks like this:

Next up....
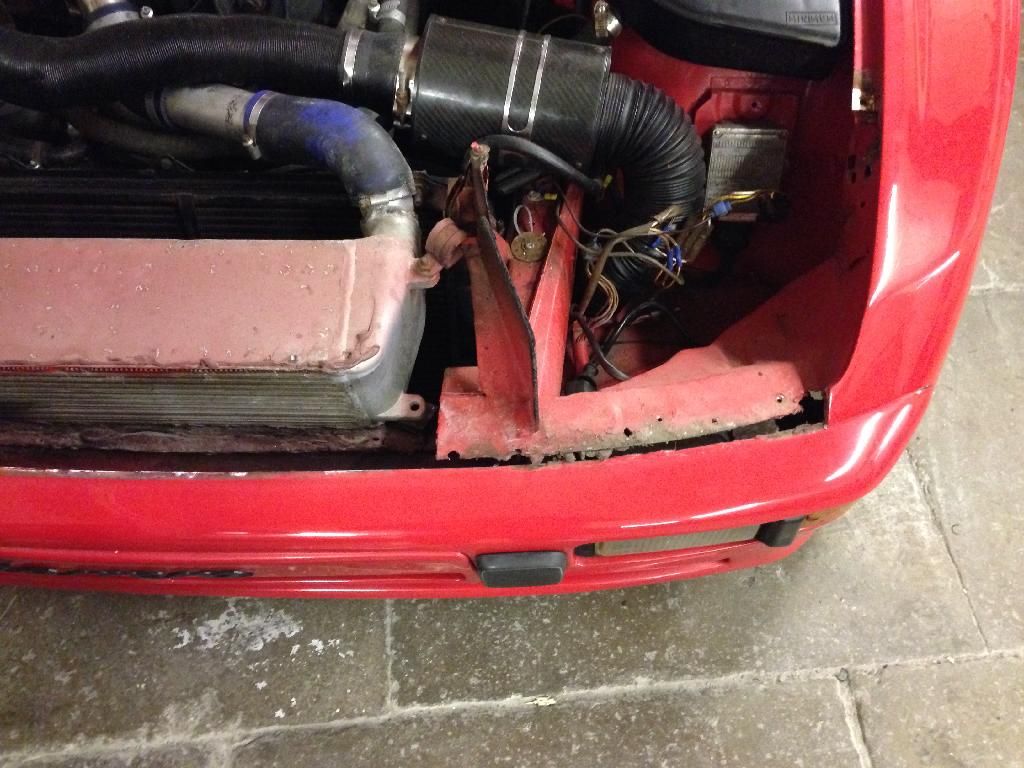
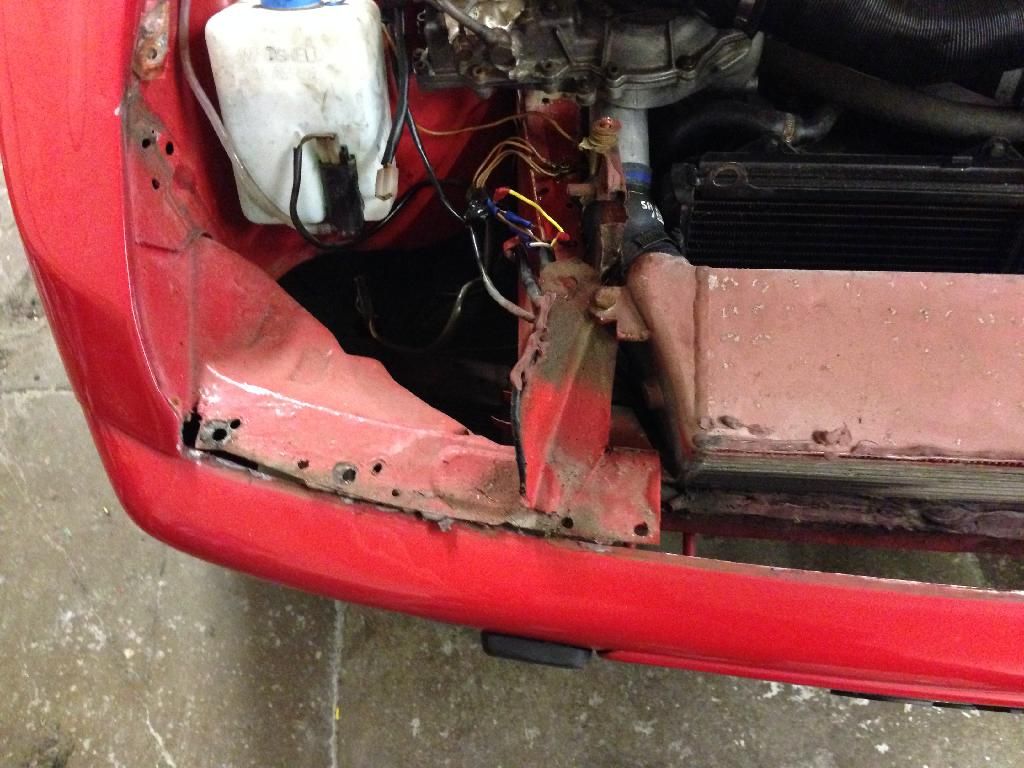
I am extremely fussy about mechanical fittings etc not being bodged. We always knew the front end could be improved and there was never complete certainty as to how the nose cone/FMIC/headlight buckets etc were mounted.....
Areas of particular concern:
- Rad mounting (or lack of)
- IC Pipework mounting (squeezed in and pushed up against the chassis leg
- Nose cone/bonnet pin mounts, general untidiness
- CIS distributor flapping around loosely
- Also, and more generally, how was the front end actually fitted?!
Well we decided to investigate properly and make good where necessary.
What did I find.... Well I am guessing Dick does not have a welder! The nose cone was glued on. As was the intercooler! !
(Dick if you are reading this I am not knocking you, it's obvious to me that you were basically working with what you had and you didn't forsee the need for it to be stripped in the short term future!)
Bonnet pin mounts to be refabricated and mounted UNDER the wing instead of on top. Will also be tidied up, also the nose cone mount will be removed and improved. We will probably fit this underneath as opposed to on top for a cleaner finish. i thought I'd photographed this but hadn't - Oh well!
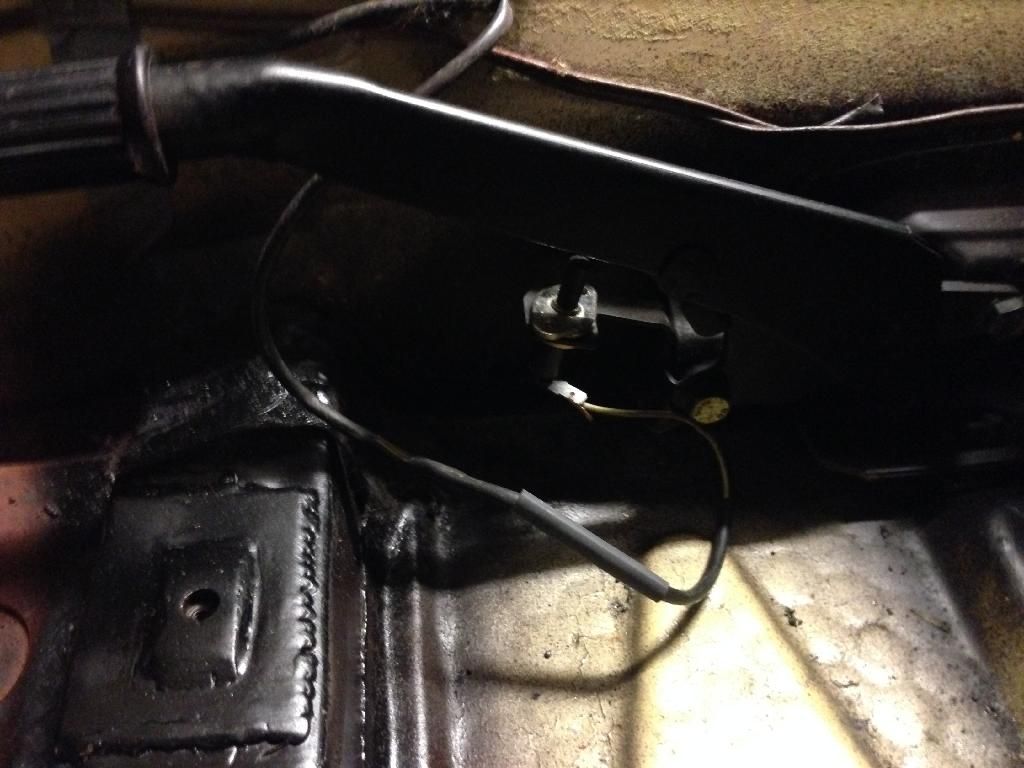
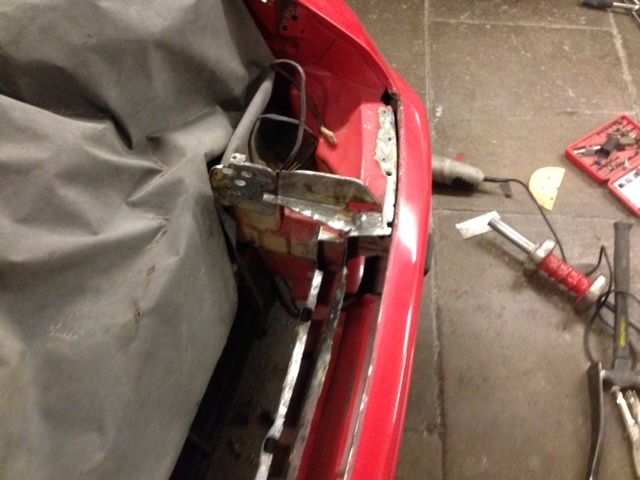
Headlamp wiring tidied:
To this:
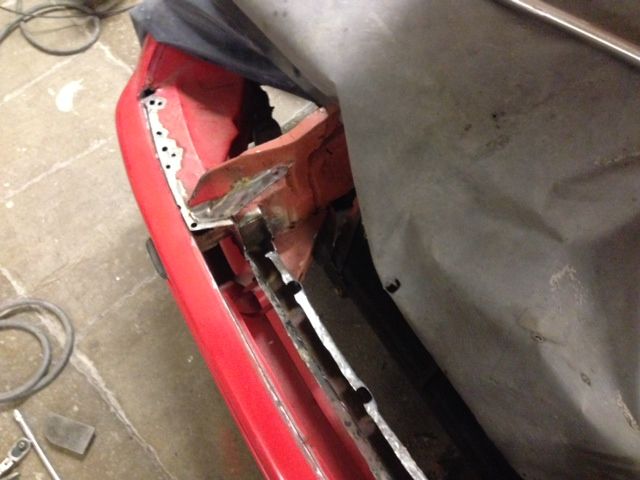
Front end after we stripped it:
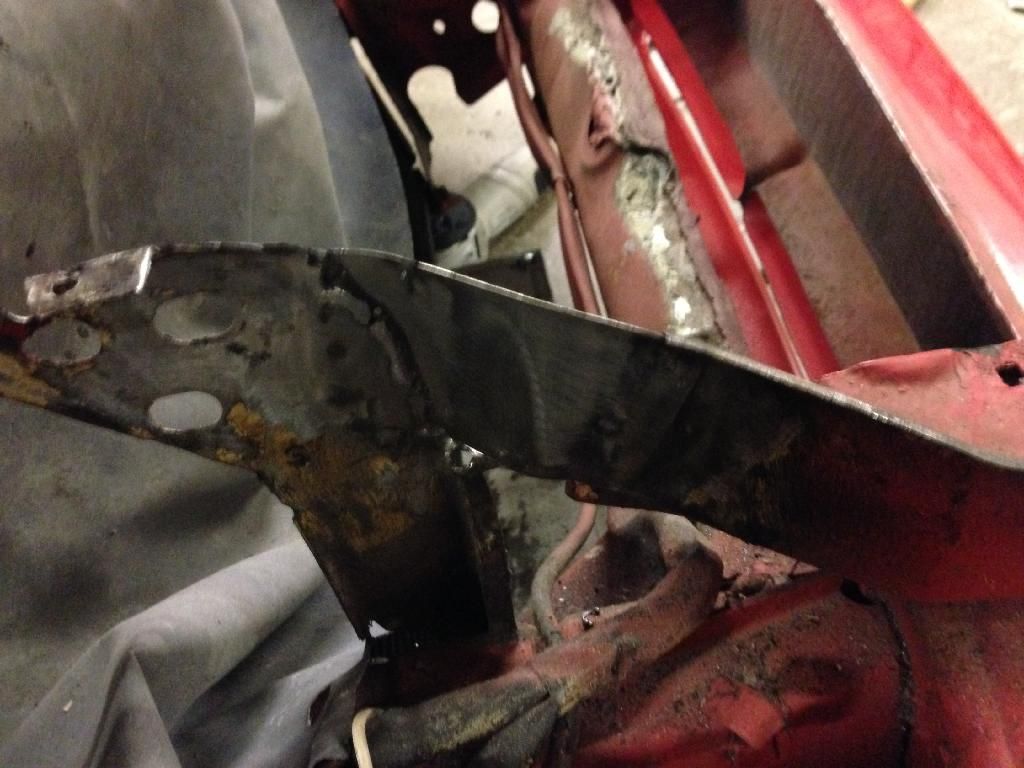
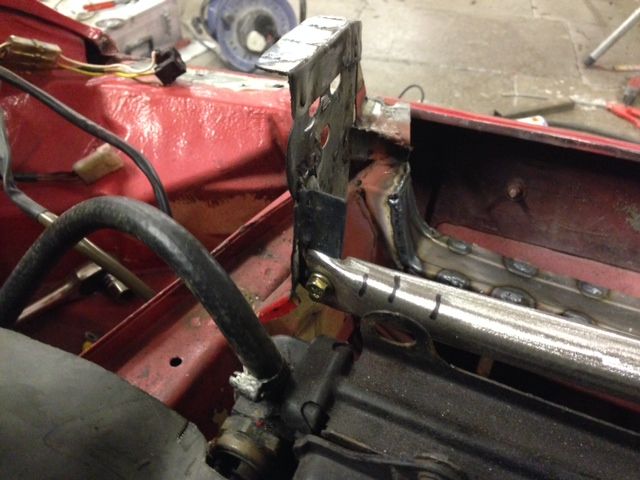
Beginnings of a new bracket/mounting area:
Bracket progress and bar to be fitted:
Obviously everything will be zinc primer'ed and painted/finished nicely when it's done. There won't be any bodges and hopefully everything will be bolted up and fixed nicely when it is done.
The IC will be leak tested and made good if necessary before it goes back in too
Further progress and updates tomorrow, thanks for reading!
UPDATE 02-01-2014
It's great having free time over Christmas.
A bit more progress today....
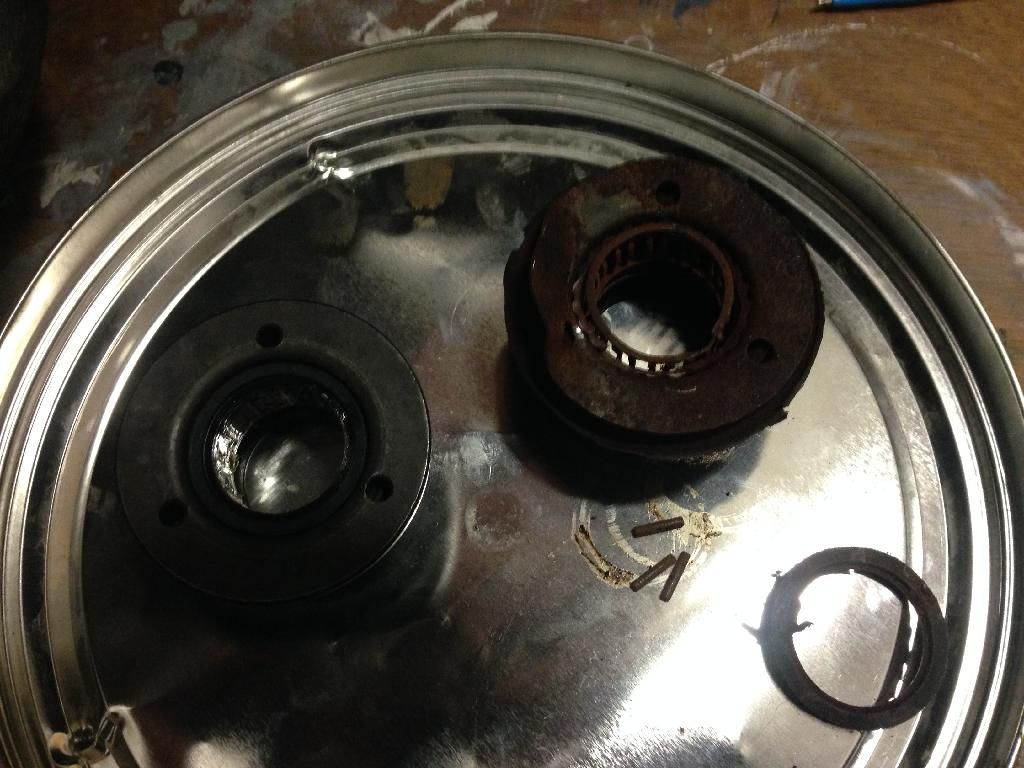
Needle bearing from the steering column ordered from my OPC which should arrive tomorrow :-)
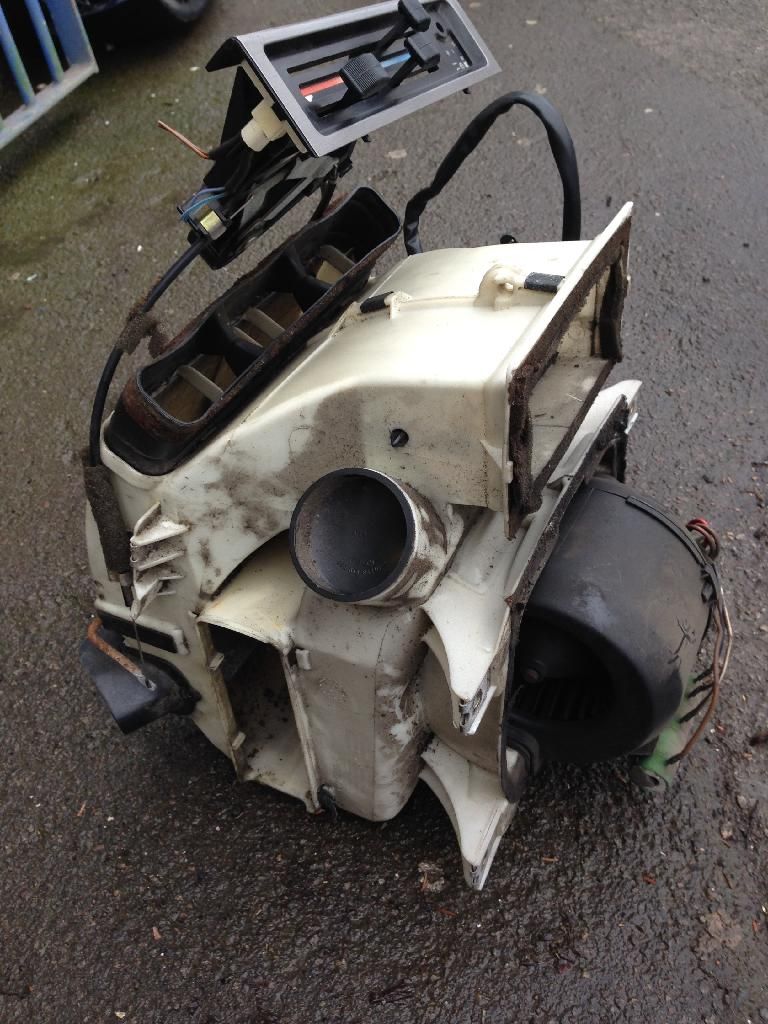
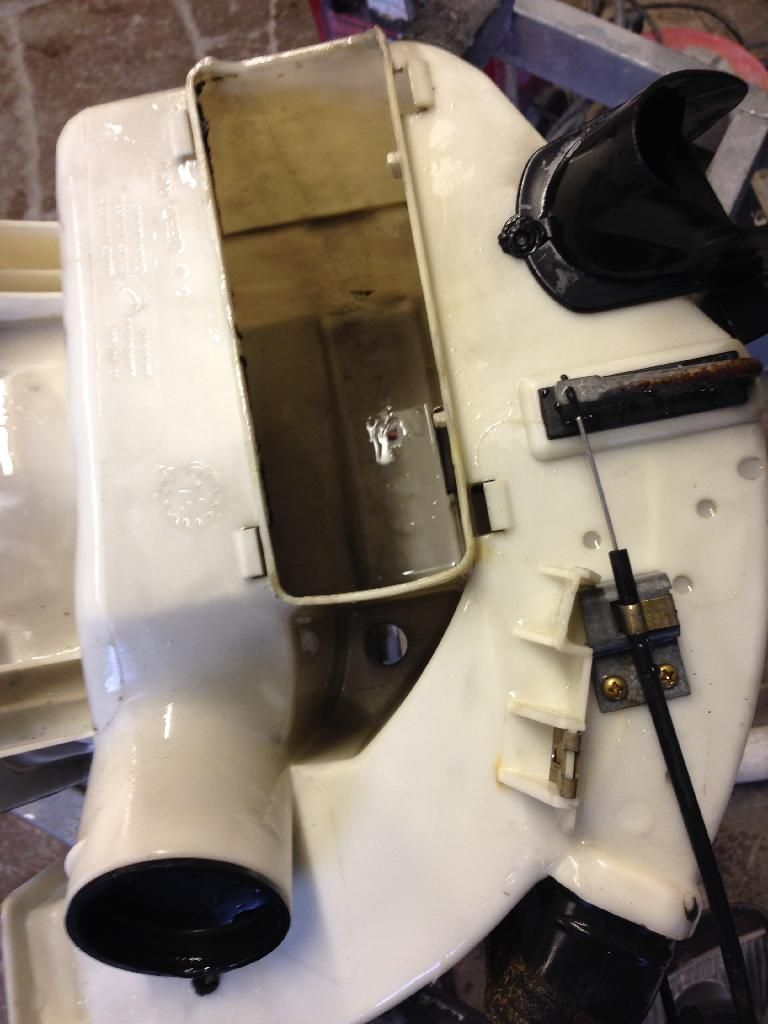
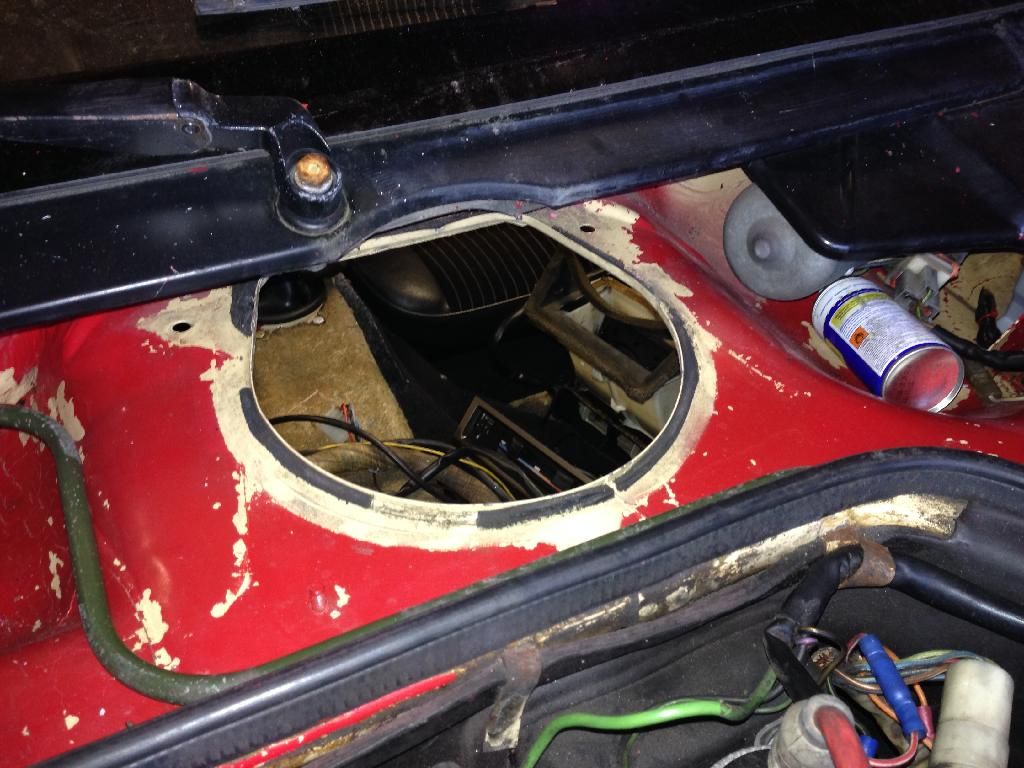
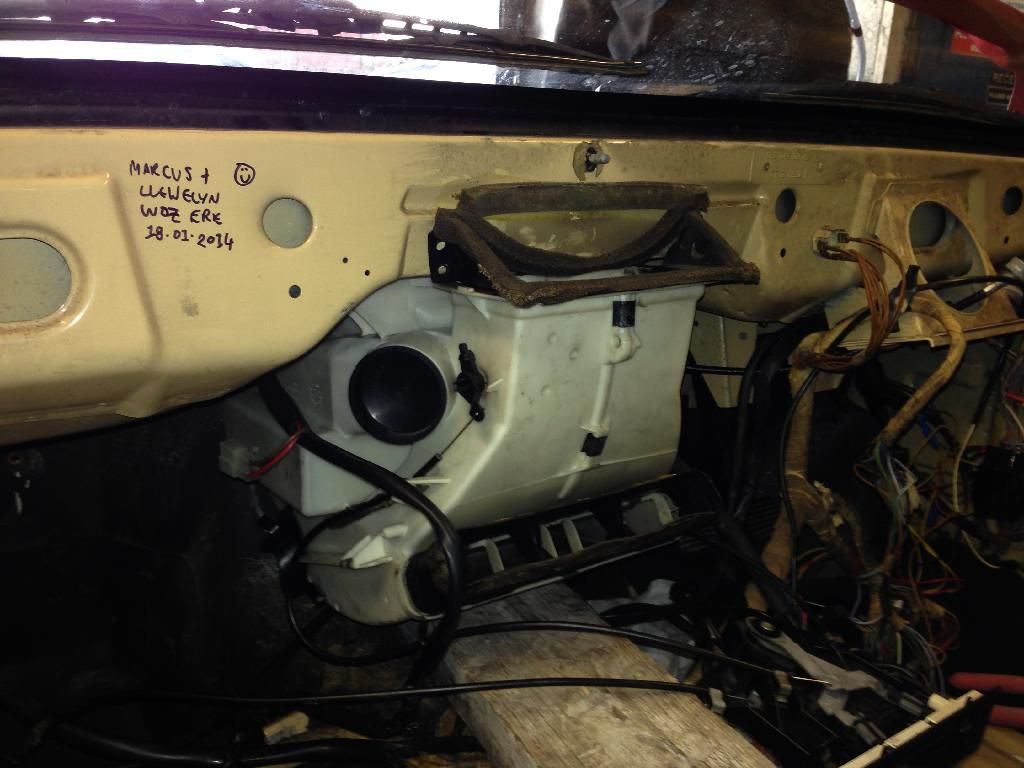
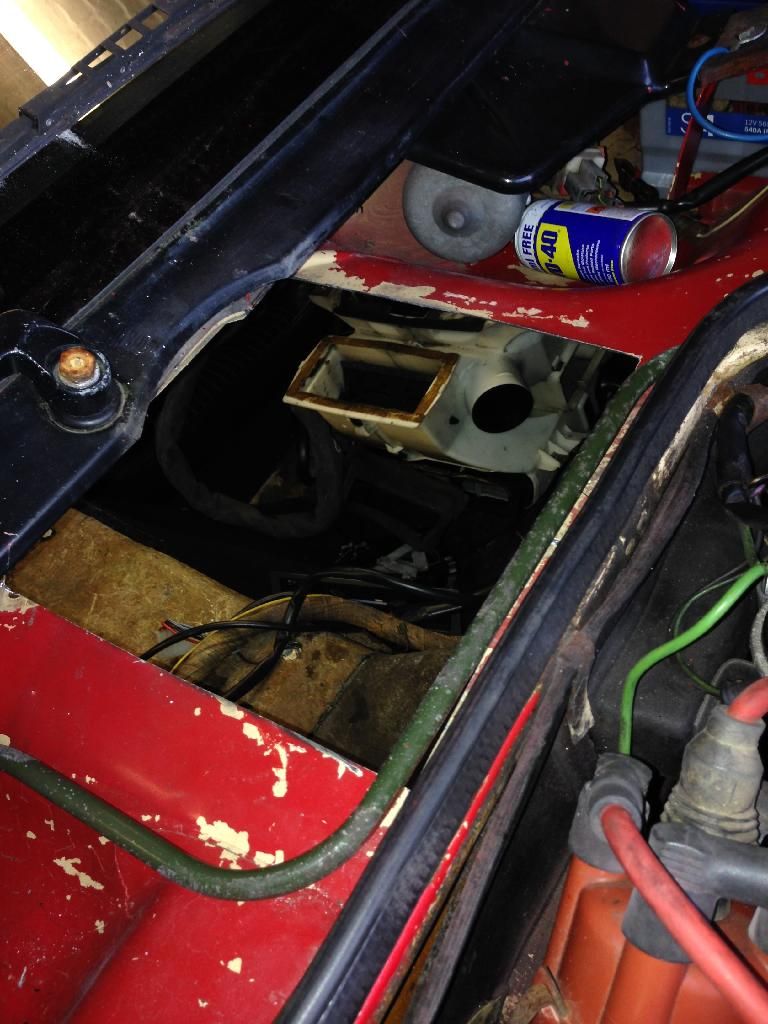
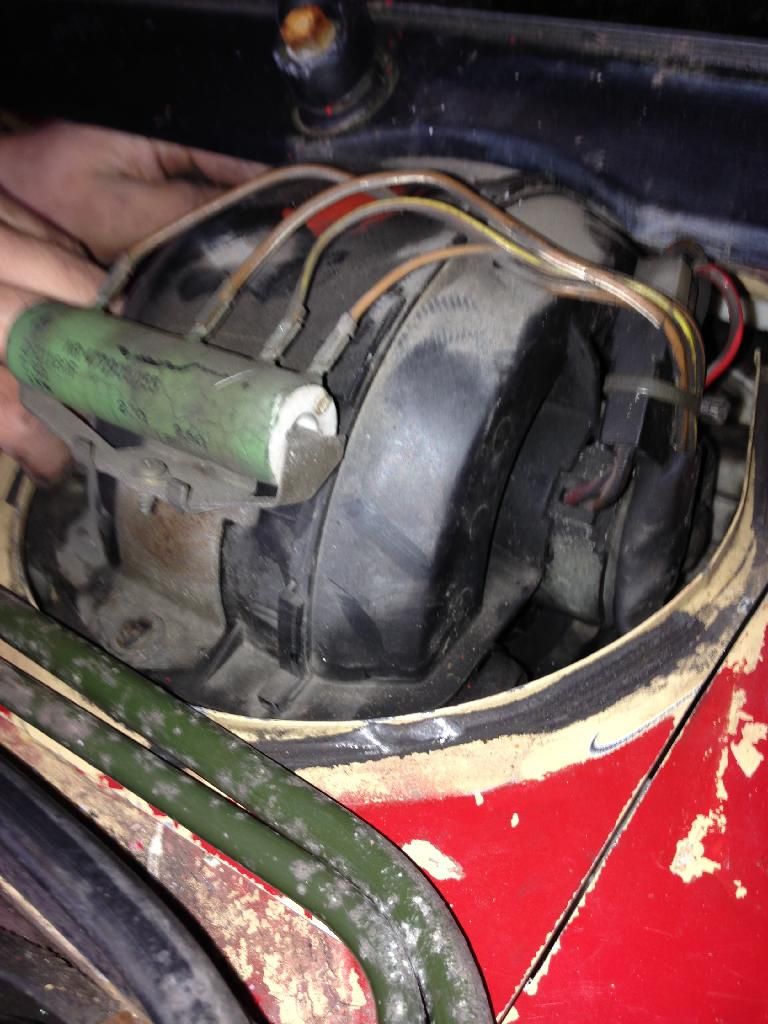
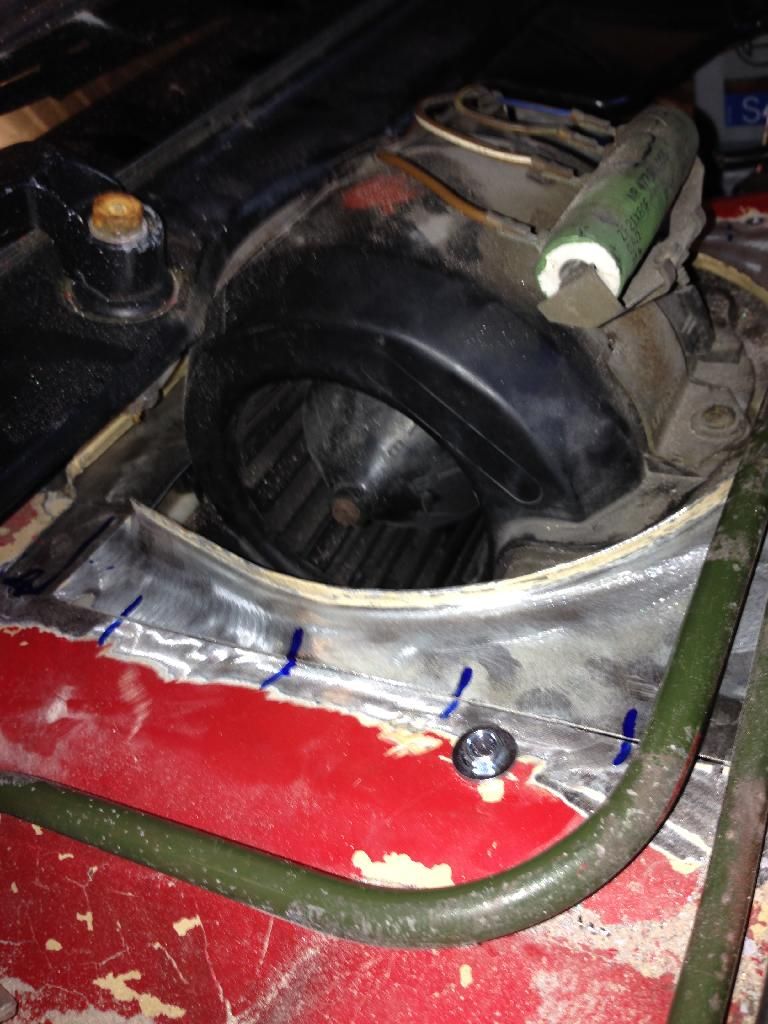
Also checked the blower fan which I can now confirm is u/s so that will have to be replaced. I have the earlier heater control with the slide contacts so I may take the opportunity to rip everything out and stick a later matrix/blower/control box etc in it's place!
Most progress was on the front end though which should be just about finished tomorrow evening!
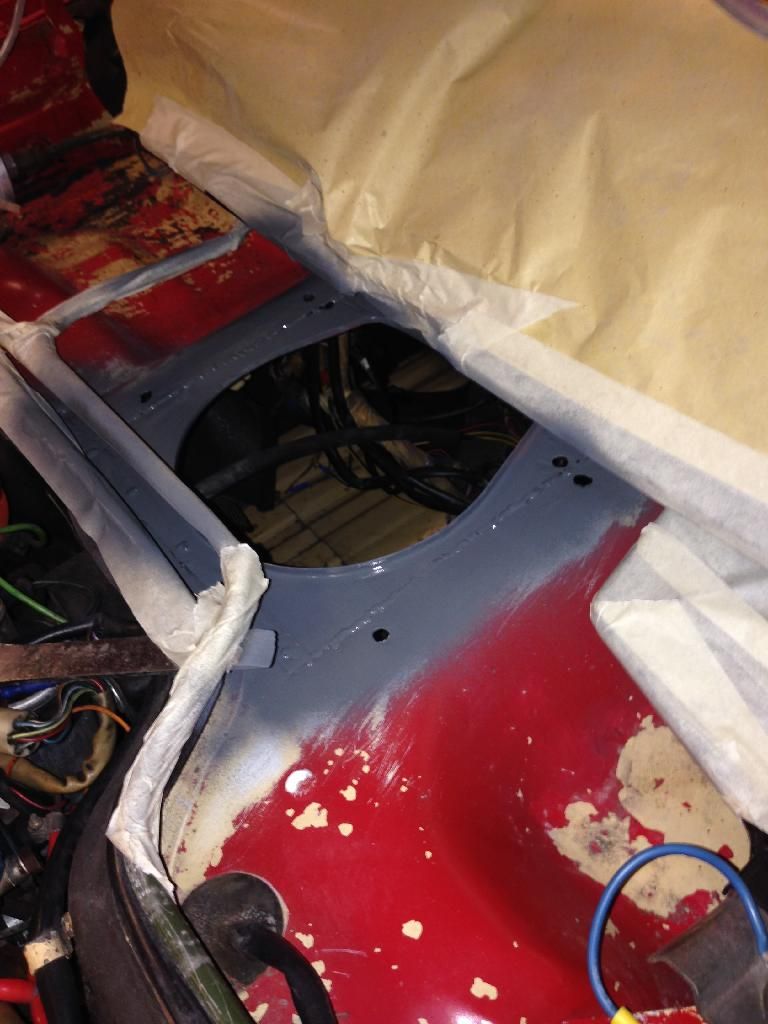
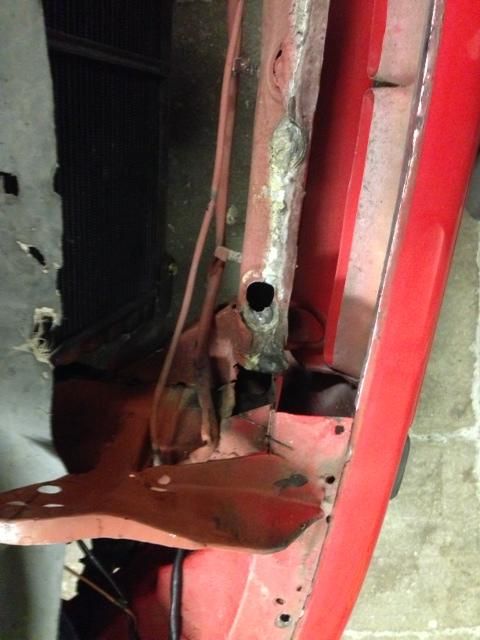
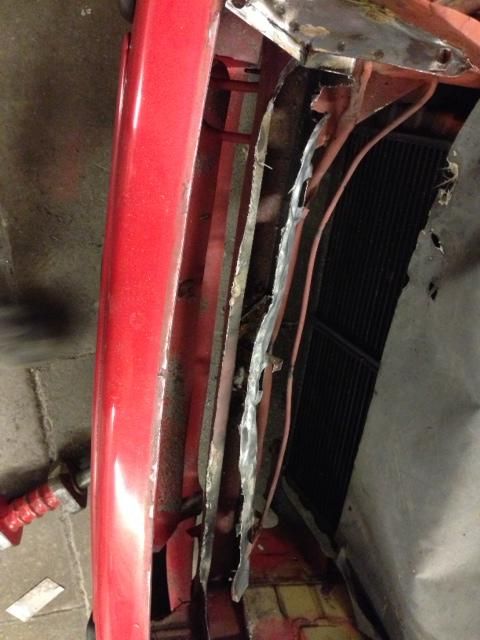
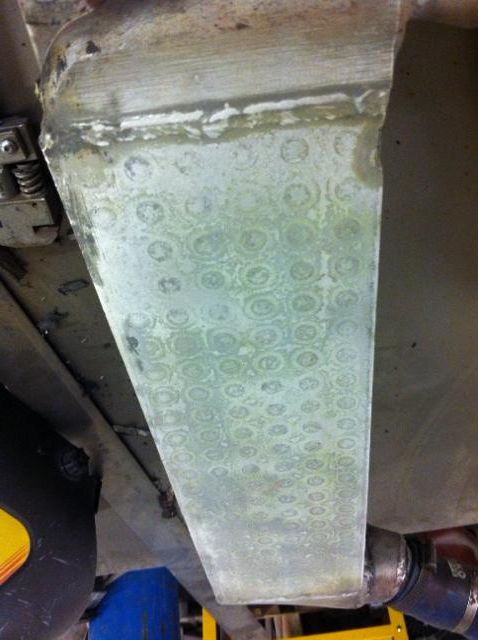
Moving forward from my previous post regarding the nosecone and IC fitment, further investigation revealed DD's method to increase the size of the aperture in order to squeeze the 951 IC behind the nose.
What he had done was cut the front panel up and hammer the rear section down, gluing it in place and then resting/gluing the IC on top (!!!). It was hard to photograph but I tried:
You can sort of see the panel lifting up when using the slide hammer on it. Nothing had been welded.
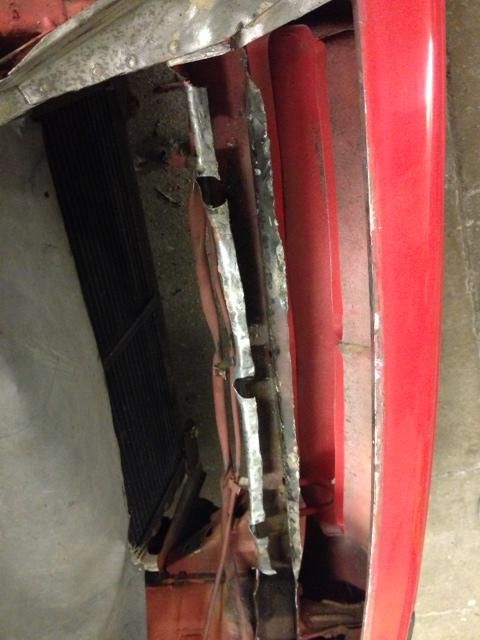
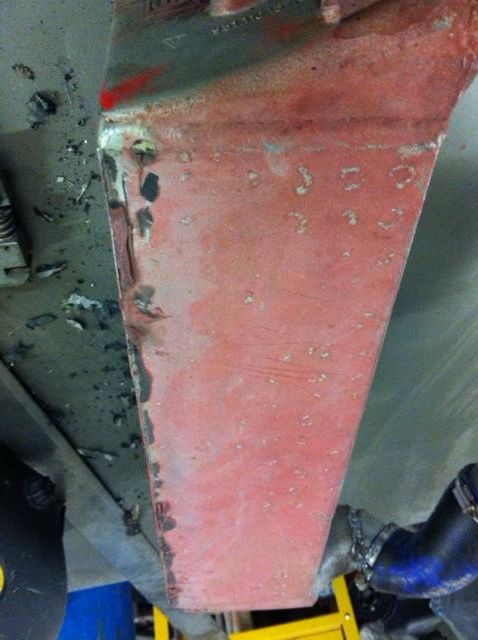
Before:
Prising up the folded rear edge of the front panel:
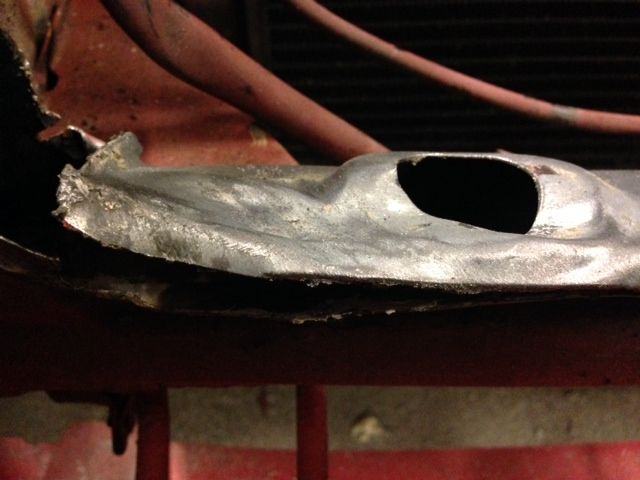
Opened up.... Which sort of displays what had been done (!!!):
Bashed a bit:
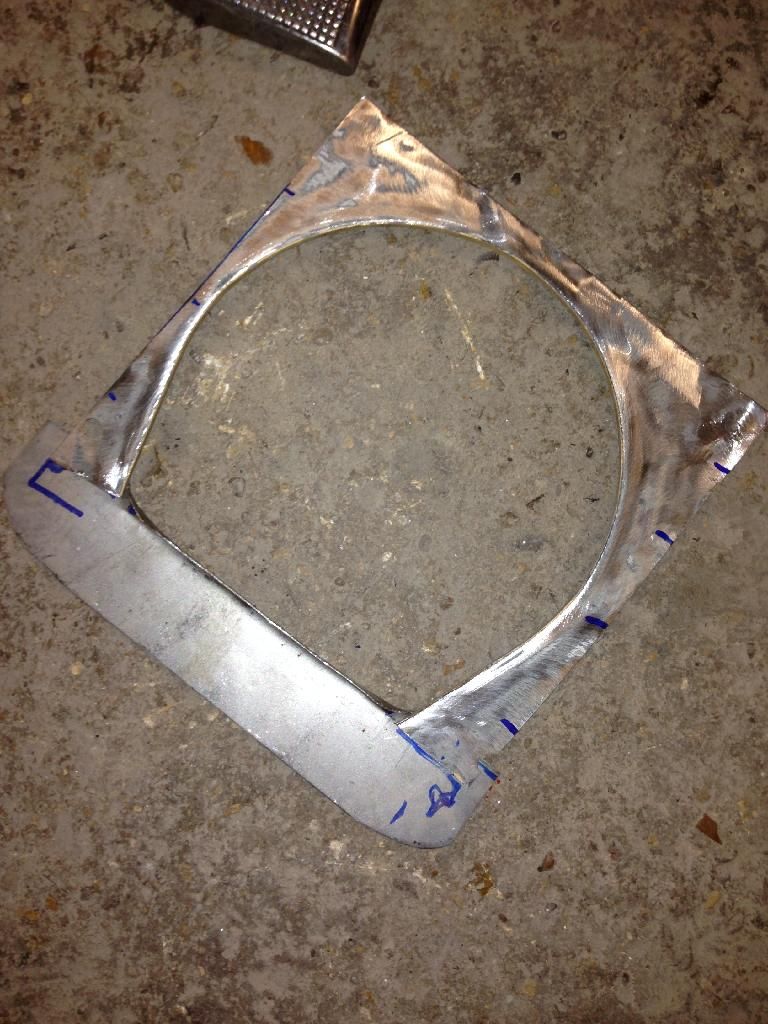
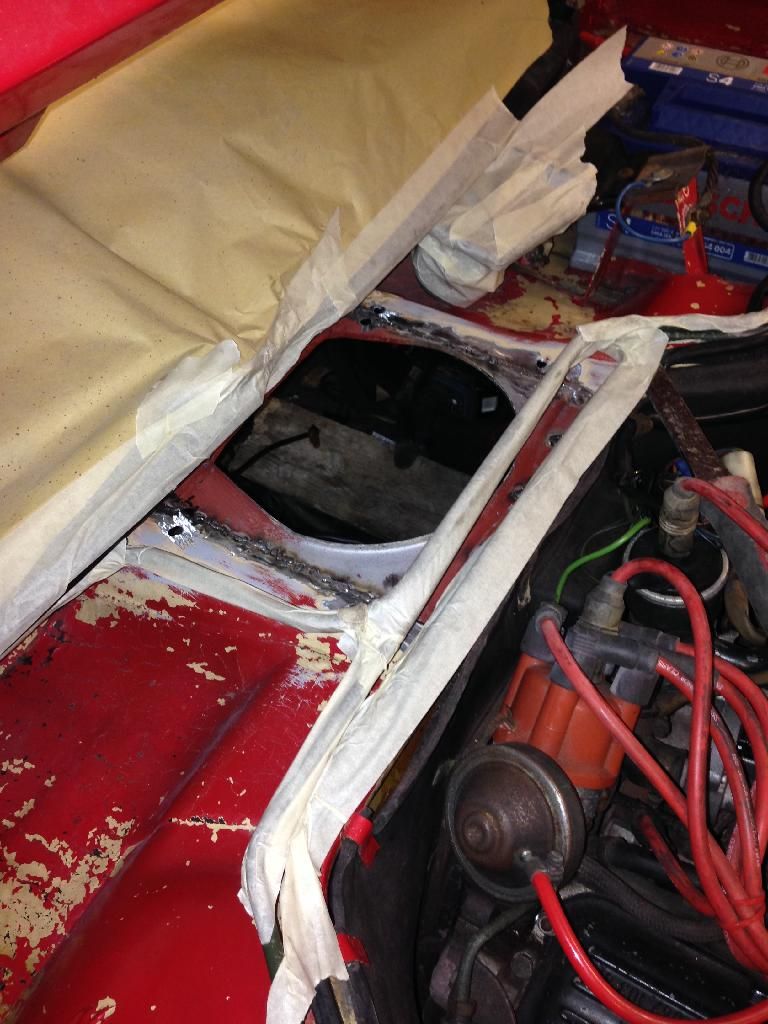
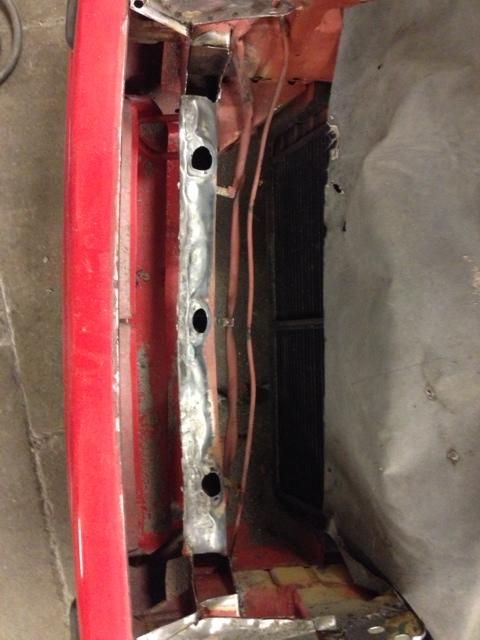
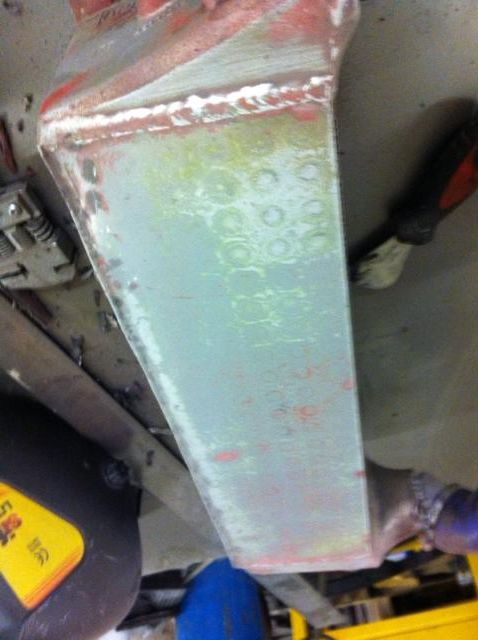
This is fine for a temporary or quick fix but is unacceptable for us and in essence not strong enough, so we decided to basically fab up our own front panel rather than mess around fitting a 944 one which is way too much work at this stage:
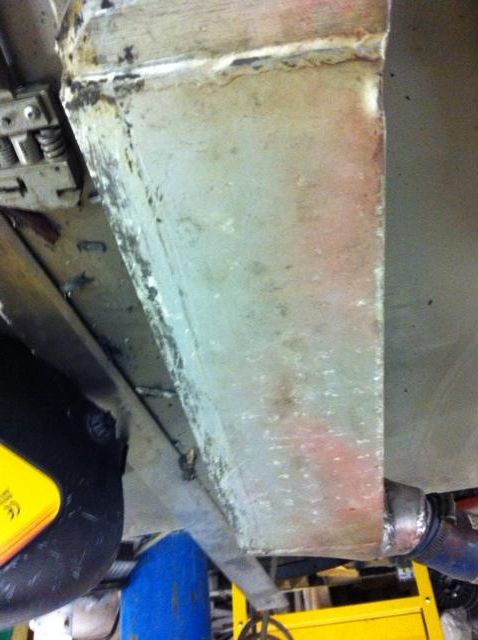
Fresh tin:
Ridged:

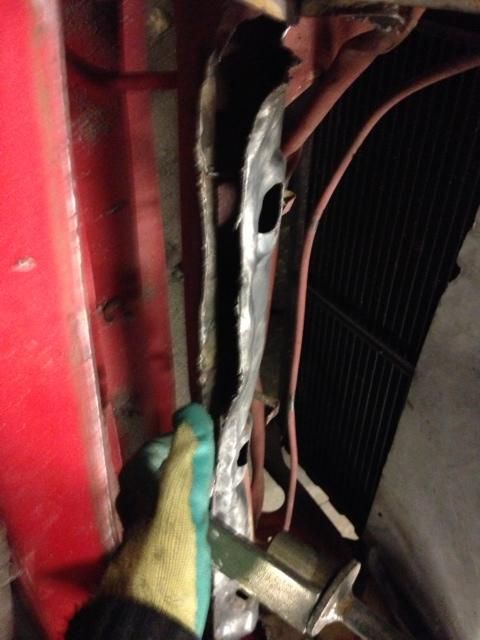
Spot welded (to be seamed in and tidied tomorrow):
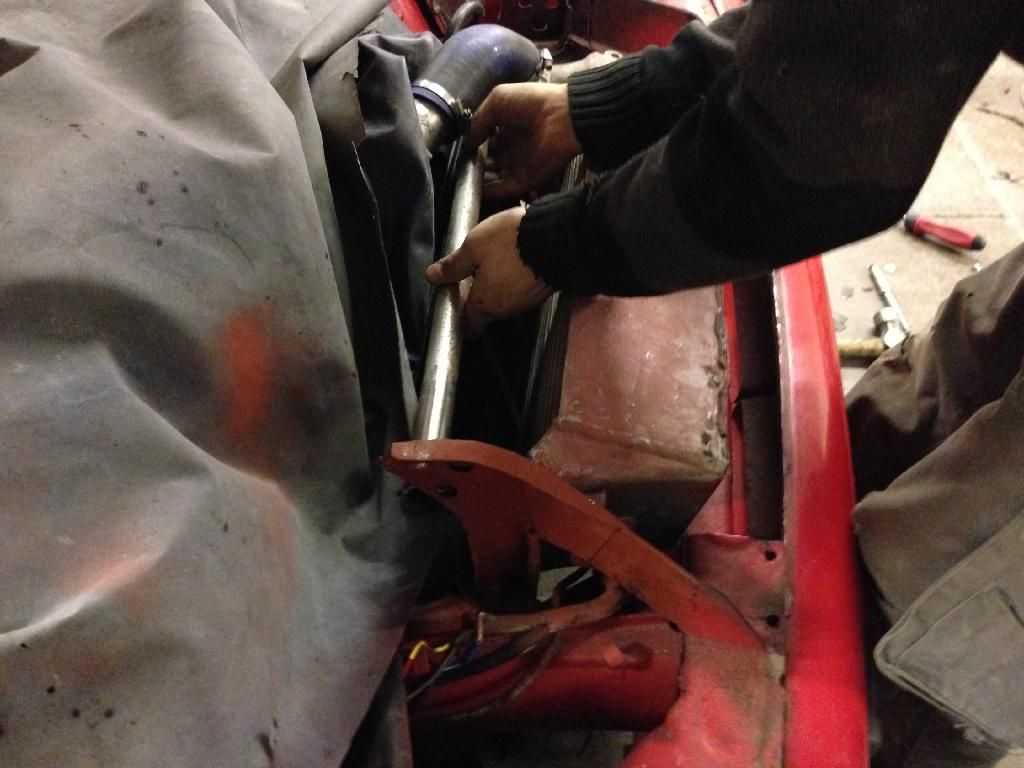
Trialling mounting bar:
Bracket fabbing (obviously all this is to be tidied properly, zinc primered and sprayed with indischrot red and certain areas black so it's all nice and neat and OE-esque):
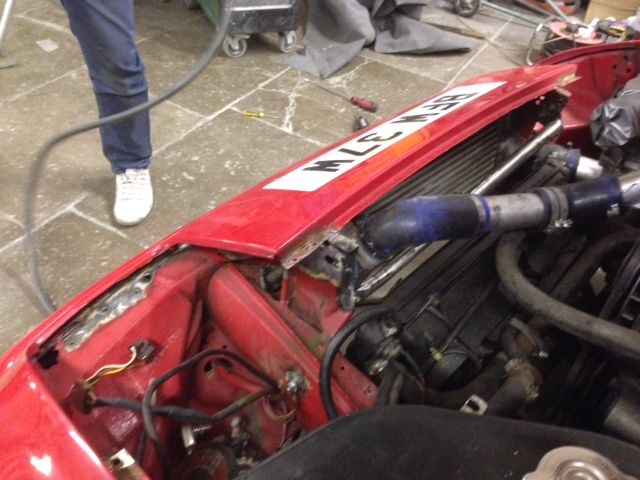
Trial fit nose and IC:
![]()
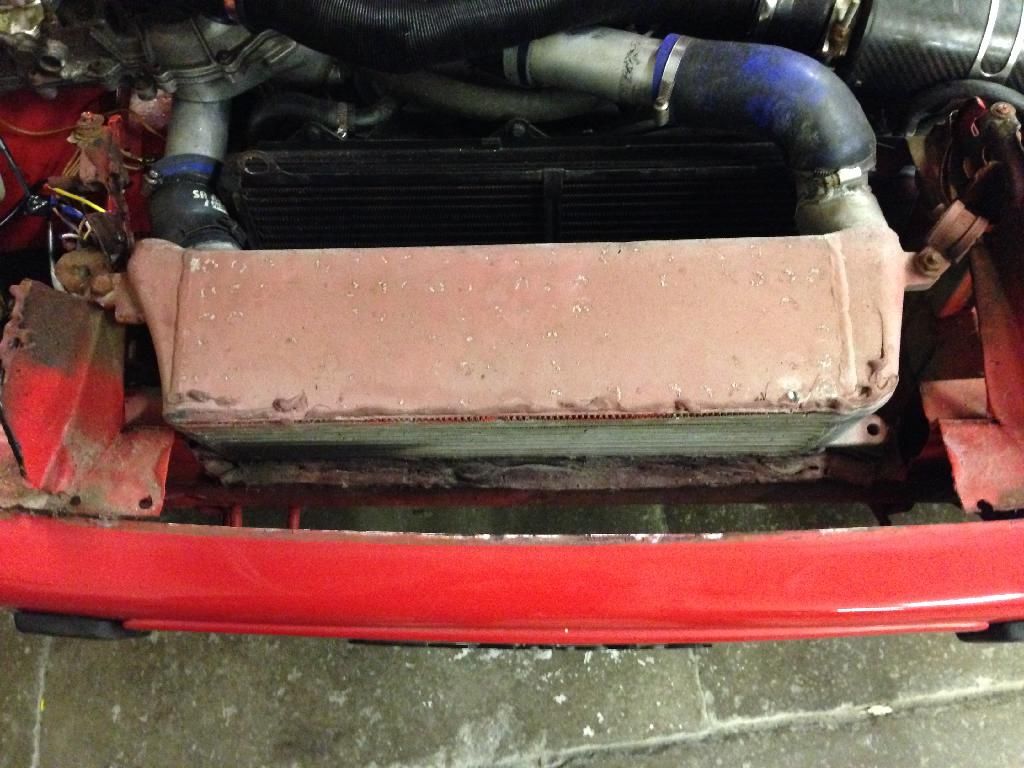
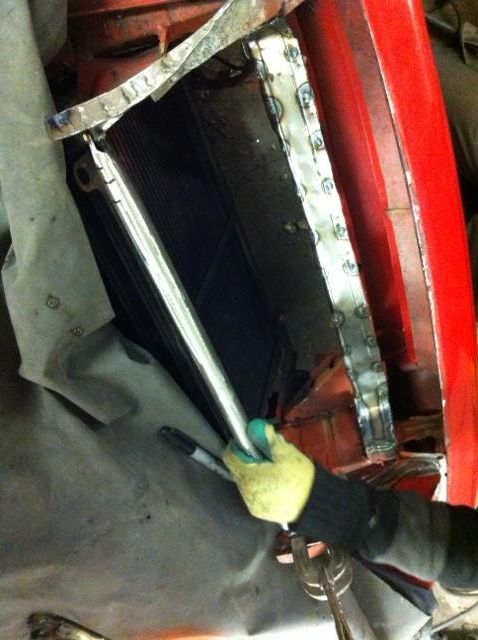
On the subject of the IC it was a bit scruffy so I have began to prep it for a tidy up:
What do you think? Satin black or bare alu finish??
TOMORROW:
Continue work on/finish the front end for now. Jobs on the list include fabricating light bucket mounts in a way which ties into the front panel for further rigidity. I will explain and show photos tomorrow....
Also we have a small mod idea for the bonnet pins which I will show you tomorrow
I am off to PH in Shardlow tomorrow to pick up a few bits including an S2 or 944 Turbo Rad to go in while we are tickling around in the nose.
Finally a lick of zinc primer and paint coupled with further tidying should see us roughly where we need to be for the weekend.
(and by that time I should have all the heater bits I need along with the needle bearing so we can crack on with the creature comforts!)
That's all for now folks! Thanks for reading!
I thought I'd do a thread on this in the Porsche forum but to be honest it seems pretty flat on there... I want some inspiration, ideas and maybe even guidance so thought I'd copy my progress so far here! Feel free to comment, praise, grumble or constructive critisism - It's all good

Here goes... !
Brooklands auction ad from 3 years ago here showing more detail on the car!
www.historics.co.uk/buying/auctions/2011-07-19/car/1980-porsche-924.aspx:
Shamelessly copied from my thread over at Porsche924.co.uk I thought some of you may be interested in my newly acquired car...
I'm sure some of you will know my car, it's 'that' GTS replica (ish) which was built by an ex member of Porsche924.co.uk a few years back. I bought it along with a friend from the chap who originally picked it up from Brooklands 3 years ago.
We were unsure what to do with the car but are growing fonder as times go by! We both have a strong Porsche background/passion. I personally own an '84 911 Carrera, and have had 5 928's in the past as well as a 944... My buddy Marcus who is the "co-custodian" of our turbo grew up with 911s and more broadly speaking we love 80's German performance oldtimers. I've had Mercedes SEC/SL's and various 80's BMWs, whilst Marcus still owns his flawless original mk2. Golf G60. Suffice to say the car is in safe hands!
The guy we bought it from basically picked it up on an utter whim and decided he didn't really like it when he got it home so it has basically sat (albeit MOT'd) not doing a lot for the best part of three years.
When we picked it up it was looking rather sorry for itself, with dull faded paint and evidence of general neglect. However I could see through the sadness and knew it has potential to be a special car
Our goal is to end up with a clean, tidy and mechanically robust streetable car with a decent level of comfort for long trips but the ability to have some fun in when required. Basically I'd like it to be as light and powerful as possible but with the following caveats -
1. High reliability
2. Girlfriend approval factor (if I can take her out for a meal in it with no comfort/noise/scent complaints I'll be a happy man!)
Jobs done so far -
Removal of Perspex windows.
I bought a pair of doors complete with motors, regulators, glass, seals etc and refitted all the good parts from said doors onto the car. I now have working windows (although the switches are buggered) and it's a mega improvement to the frankly bodged and crappy Perspex slidey things. A good job well done.
Removal of bucket seats.
Ripped out the shoddy and faded Sparco bucket seats and fitted some stock pinstripe tombstone seats,which are in good condition - with these and the glass windows fitted it's made the world of difference.
Machine polish.
I'm amazed at how well the paint has renovated. It will require regular waxing I'm sure but it has come up beautifully!
Brake inspection/clean up.
The car has more or less brand new EBC green stuff pads and cross drilled discs fitted but they were unfortunately rusty and glazed over due to being left standing then driven with rust on the discs. We have stripped all the brakes down, cleaned up and greased the carriages and scuffed the pads up. The discs have been cleaned up and the rust/glaze has been cut away so hopefully she will stop with a bit more urgency now!
There's loads of jobs to do including electrical foibles and the steering column bearings (if anyone knows where I can source parts it'd be appreciated!) so I'll keep on posting as time goes by.
We are in Leicester if anyone local fancies popping by/helping out?
Some pics:
And an update... 30.12.13
A bit more work done today....
AC removed (for sale if anyone wants it?!? Includes rotary knob to replace dial in centre console):
Cleaning of all fuses/relays/connectors/ground points etc in the fuse box:
What a fun job that was

Drivers seat mount repair:
Before:
After (ish):
New handbrake switch fitted (the old one was missing which meant the light was constantly on the dash annoyingly) - Also shows finished seat mount repair:
I'll be back on it tomorrow installing a brake light switch because I just cannot seem to find one. The only thing I can think of is that the master cylinder has been changed for a later one without the pressure switch and the previous owner never actually bothered to fit one... Interesting since it is MOT'd but I'm not going to worry too much about that! Either way there is definitely no pressure switch or mechanical switch on the brake pedal assembly so I am wiring one in tomorrow with it's own relay/fuse etc.
Another update - 31.12.13
Fitted a brake light switch to the brake pedal assembly. Not a particularly fun job so I didn't take any photos, but for those interested I used a standard automotive relay, fuse and fresh cable - I found everything I needed at the light switch block loom which was useful. The wires I needed were carefully extended and spliced into using solder and heatshrink. The wiring was very straightforward actually but spending most of the day upside down under the drivers footwell was less than ideal!
I used a motorcycle brake light switch (from an R6) with is basically a SPST normally closed, plunger limit switch with a spring on the end, which was mounted to the steering column plate and attached- Drilling the mounting hole in that tight space was fun... Not!
The switch for anyone interested looks like this:
Next up....
I am extremely fussy about mechanical fittings etc not being bodged. We always knew the front end could be improved and there was never complete certainty as to how the nose cone/FMIC/headlight buckets etc were mounted.....
Areas of particular concern:
- Rad mounting (or lack of)
- IC Pipework mounting (squeezed in and pushed up against the chassis leg
- Nose cone/bonnet pin mounts, general untidiness
- CIS distributor flapping around loosely
- Also, and more generally, how was the front end actually fitted?!
Well we decided to investigate properly and make good where necessary.
What did I find.... Well I am guessing Dick does not have a welder! The nose cone was glued on. As was the intercooler! !
(Dick if you are reading this I am not knocking you, it's obvious to me that you were basically working with what you had and you didn't forsee the need for it to be stripped in the short term future!)
Bonnet pin mounts to be refabricated and mounted UNDER the wing instead of on top. Will also be tidied up, also the nose cone mount will be removed and improved. We will probably fit this underneath as opposed to on top for a cleaner finish. i thought I'd photographed this but hadn't - Oh well!
Headlamp wiring tidied:
To this:
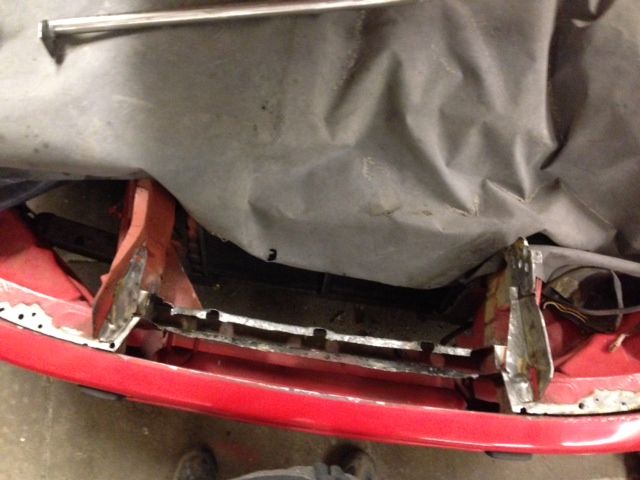
Front end after we stripped it:
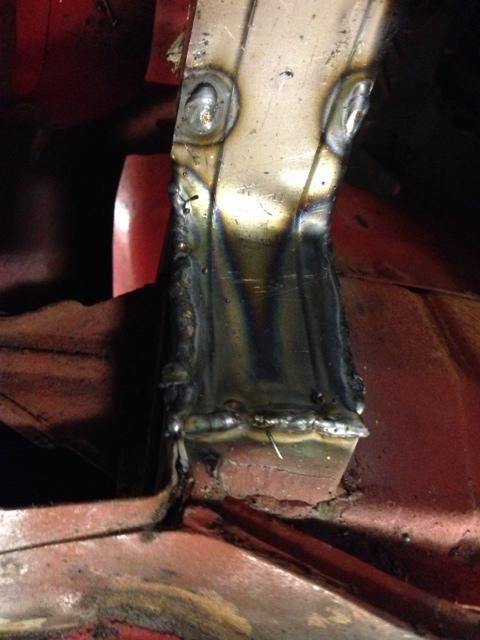
Beginnings of a new bracket/mounting area:
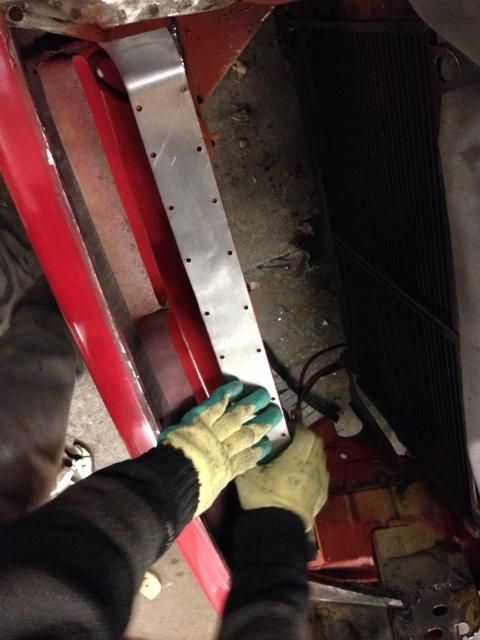
Bracket progress and bar to be fitted:
Obviously everything will be zinc primer'ed and painted/finished nicely when it's done. There won't be any bodges and hopefully everything will be bolted up and fixed nicely when it is done.
The IC will be leak tested and made good if necessary before it goes back in too
Further progress and updates tomorrow, thanks for reading!
UPDATE 02-01-2014
It's great having free time over Christmas.
A bit more progress today....
Needle bearing from the steering column ordered from my OPC which should arrive tomorrow :-)
Also checked the blower fan which I can now confirm is u/s so that will have to be replaced. I have the earlier heater control with the slide contacts so I may take the opportunity to rip everything out and stick a later matrix/blower/control box etc in it's place!
Most progress was on the front end though which should be just about finished tomorrow evening!
Moving forward from my previous post regarding the nosecone and IC fitment, further investigation revealed DD's method to increase the size of the aperture in order to squeeze the 951 IC behind the nose.
What he had done was cut the front panel up and hammer the rear section down, gluing it in place and then resting/gluing the IC on top (!!!). It was hard to photograph but I tried:
You can sort of see the panel lifting up when using the slide hammer on it. Nothing had been welded.
Before:
Prising up the folded rear edge of the front panel:
Opened up.... Which sort of displays what had been done (!!!):
Bashed a bit:
This is fine for a temporary or quick fix but is unacceptable for us and in essence not strong enough, so we decided to basically fab up our own front panel rather than mess around fitting a 944 one which is way too much work at this stage:
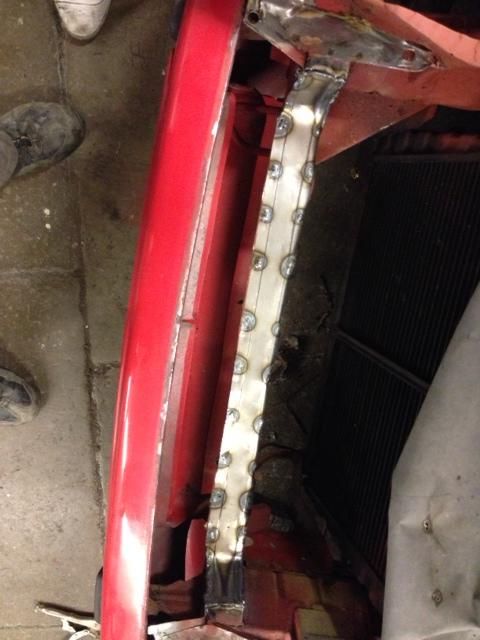
Fresh tin:
Ridged:
Spot welded (to be seamed in and tidied tomorrow):
Trialling mounting bar:
Bracket fabbing (obviously all this is to be tidied properly, zinc primered and sprayed with indischrot red and certain areas black so it's all nice and neat and OE-esque):
Trial fit nose and IC:
On the subject of the IC it was a bit scruffy so I have began to prep it for a tidy up:
What do you think? Satin black or bare alu finish??
TOMORROW:
Continue work on/finish the front end for now. Jobs on the list include fabricating light bucket mounts in a way which ties into the front panel for further rigidity. I will explain and show photos tomorrow....
Also we have a small mod idea for the bonnet pins which I will show you tomorrow
I am off to PH in Shardlow tomorrow to pick up a few bits including an S2 or 944 Turbo Rad to go in while we are tickling around in the nose.
Finally a lick of zinc primer and paint coupled with further tidying should see us roughly where we need to be for the weekend.
(and by that time I should have all the heater bits I need along with the needle bearing so we can crack on with the creature comforts!)
That's all for now folks! Thanks for reading!