|
|
|
Nov 27, 2013 16:06:49 GMT
|
A few things are running in parallel...depending on my mood and whether additional hands are at hand. 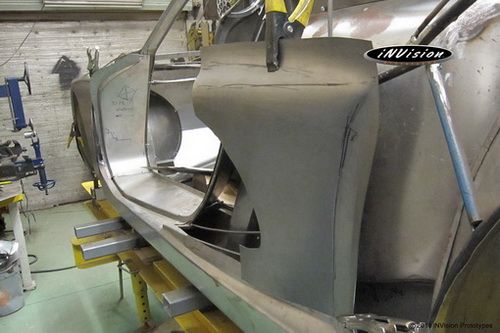 Fabricating the side scoops. A few passes in the wheel to develop the feature. Next thing to do is tip the leading(left side of panel) edge. 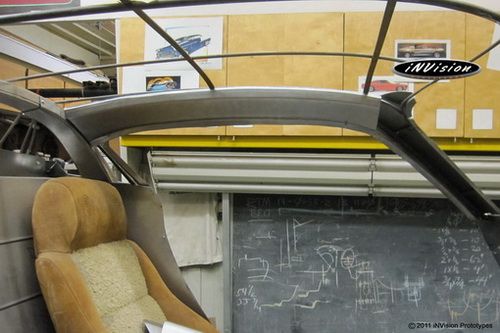 The first piece of the roof's substructure is underway....but can't be completed till the front windscreen surround is in place. Using 18Ga material for this area. The skateboard wheel in the tipping machine gives a nice smooth finish on all the curved bends. 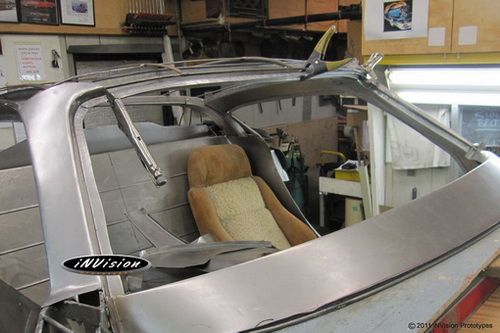 Once the windscreen surround was finalized with a 3/16" gap around the glass the remaining structural components for the roof were created. 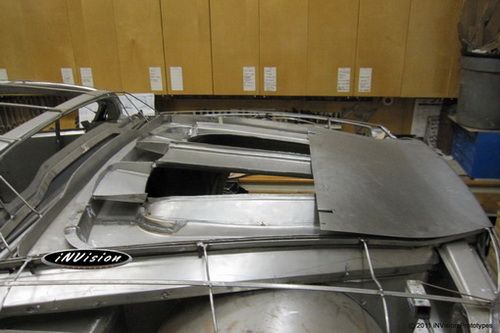 With the help of my Dad on the other side of the wheel to support the sheet, we rolled the rear hatch's dove tail area. This completes all the upper pieces for the rear hatch. Now time to glue them together somehow ... While we're in the stage of creating the panels we only focus on shaping, not really stopping to start scribing/fitting/welding the pieces together. That will come later. |
| |
|
|
|
|
|
|
|
Nov 27, 2013 16:32:31 GMT
|
|
dear lord,. mad skillz!
|
| |
|
|
zircon
Part of things
 
Posts: 327
|
|
Nov 27, 2013 16:41:59 GMT
|
|
Once again I have fallen off my chair!
|
| |
|
|
DMS
Part of things
 
Posts: 57 
|
|
|
|
Nice work! But I've been searching around the net for a bit and found that you're already much further ahead in this build  It's truely an insane and very impressive built! One question though: I've read that you're welding up the final structure. Some surface rust is already on the panels and also on the overlapping pannels. How will you treat the body for this? |
| |
Last Edit: Nov 28, 2013 7:11:31 GMT by DMS
|
|
tdk
Part of things
 
Posts: 967 
|
|
|
|
|
Sorry if I missed it, but glass - what are you going to use? I guess you can use perspex for the sides/rear but what about the windscreen?
|
| |
|
|
zircon
Part of things
 
Posts: 327
|
|
Nov 28, 2013 15:24:31 GMT
|
|
^ I'm sure they would have constructed the frame to the screen proportions of a production car.....I would have thought.
|
| |
|
|
|
|
|
Nov 28, 2013 15:38:56 GMT
|
Nice work! But I've been searching around the net for a bit and found that you're already much further ahead in this build  It's truely an insane and very impressive built! One question though: I've read that you're welding up the final structure. Some surface rust is already on the panels and also on the overlapping pannels. How will you treat the body for this? Yes, I am much further ahead on this build than the photos posted here indicate. Whenever I get a moment I try to catch this thread up to where the build currently stands. Although there's a link to my facebook page with build highlights, I go into many more build details and explanations here on Retro Rides. In regards to your question about surface rust, at the end of the day it's unavoidable. What you're seeing is insignificant in the grand scheme ... basically, you can rub it off down to clean metal with your fingers. That's why after the structure has been assembled we degrease, sand and spray it with a reduced 2k epoxy etching primer which seeps into all the small crevices bonding to the metal. The joints are then sealed with body caulking that eats into the primer preventing any additional moisture from getting in. Great question! Thanks for checking out the build.  |
| |
|
|
|
|
|
Nov 28, 2013 15:48:31 GMT
|
Sorry if I missed it, but glass - what are you going to use? I guess you can use perspex for the sides/rear but what about the windscreen? Zircon, you're spot on! We only use real glass for our projects. It takes a bit of time for the research, but well worth it in the end. R2's windscreen shape is that of a Triumph...but cut down to fit our required shape. The rear window will be cut from a flat sheet of laminated automotive glass. Not only is Lexan/plexi-galss not approved by the DOT for automotive use here ... it doesn't stand up very well to wipers or felt door wipes and yellows over time. |
| |
|
|
jpsmit
Posted a lot
  
Posts: 1,274
Member is Online
|
|
Nov 28, 2013 16:02:07 GMT
|
|
Nick, loving this build! and the one before it.
Now the request. Elsewhere on this forum Tonybmw has provided a fabulous how to for welding and fabrication. Is there any chance you might be willing to do the same? I would love to see you take a part from beginning to end, with an emphasis on steps required and tips - like a "skateboard wheel in the tipping machine" - whatever that is.
Come to Toronto and I will gladly buy you beer in exchange for knowledge!
please....
|
| |
|
|
|
|
|
Nov 28, 2013 16:30:27 GMT
|
Is there any part in particular you'd like to see created from beginning to end? I recently completed a pair of custom '40's Ford Coupe rear fenders... but due to time I didn't document every single step to create it. However, there is a tutorial I did creating a template for R2 using only a cereal box which indicates every step taken(well except for welding it into place... of course  ). |
| |
|
|
|
|
jpsmit
Posted a lot
  
Posts: 1,274
Member is Online
|
|
Nov 28, 2013 16:48:30 GMT
|
|
I would be happy to see anything as I am in awe of your skills, however, if I were to request anything specific, it would likely involve compound curves and a minimum of fancy tools - in other words DIY stuff. Certainly the tutorial you describe would be awesome!
|
| |
|
|
|
|
|
|
|
|
|
|
When I get some time I'll post a 'from start to finish' sheet metal fab process.
|
| |
|
|
Speedle
Posted a lot
   Need a Country Rock band in the Hampshire Area? https://www.facebook.com/DirtRoadDiaryUK
Posts: 2,221
|
|
|
|
this thread is beyond awesome, really enjoying the posts dude! Can't wait to see the build continue  Thanks for taking the time to document and post, this type of metal work really is a lost art these days. |
| |
|
|
forde
Part of things
 
Posts: 377
|
|
Nov 29, 2013 11:05:19 GMT
|
|
I don't know how you find time for it lol
I understand that you have the skills but it must take a million man hours to scratch build a sports car like this, you are awesome
|
| |
'15 Royal Enfield Continental GT
'95 CZ 125 Type 488
'91 Vespa PX125E
'77 Camino, '86 Camino
'82 Puch Maxi S '70 Puch Maxi N
'80 Maxi S "Sport"
|
|
jpsmit
Posted a lot
  
Posts: 1,274
Member is Online
|
|
|
|
|
Wonderful! And thanks so much for the tutorial! Will keep watching
|
| |
|
|
ratso
Part of things
 
Posts: 20
|
|
Nov 30, 2013 13:37:49 GMT
|
|
Nice work Nick.Looking forward to seeing you and R2 out.Any idea of when we might see you out.
|
| |
|
|
|
|
|
Nov 30, 2013 13:56:09 GMT
|
|
this is fabrication porn, can't wait to see more of this
|
| |
|
|
|
|
|
Nov 30, 2013 14:05:28 GMT
|
When my dad and I were building the body for our Rhythm - specifically the upper rear 1/4's, due to tool limitations, they were created from 5 pieces. And there was nothing wrong with that. But, creating, fitting the pieces to each other and welding them was a really tedious process. Since we built the English wheel, I've had some practice making pieces for R2 and other projects. The thought crossed my mind about making the upper 1/4's for R2 as one long piece to eliminate some welding. However, the thought was a bit intimidating. Reason why?... the 1/4 had 3 reverse curves - one for the fender flair, one on top to accentuate the taillight and one for the dove tail. You'll see what I mean in the photos below. So here it goes. Interchanging the upper wheel with a rubber wheel provided a consistent initial roll. Placing the panel on the buck shows just how much more curvature the 1/4 panel requires. 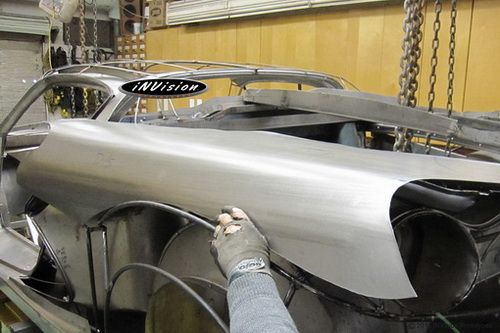 Switching back to the hard upper wheel and moving some metal fast. I'm not worried about the tracking marks as they'll soon be smoothed out. The tracking pattern can be seen throughout the panel ... the ends are starting to curve downwards. 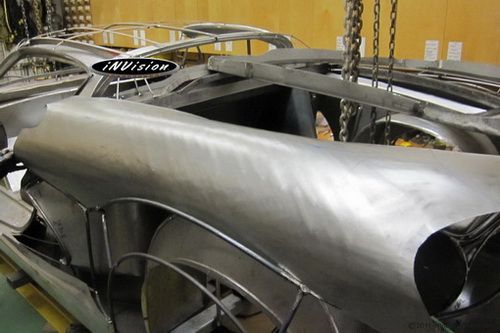 After some rolling, the 1/4 panel is starting to take on a nice shape. But we have a little ways to go yet... 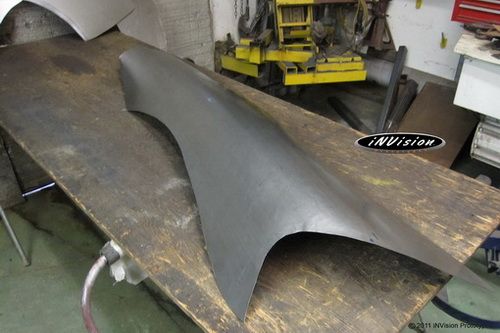 Most of the tracks have been smoothed ... the next step is to create the fender flair(reverse curve #1) and the tail light feature. 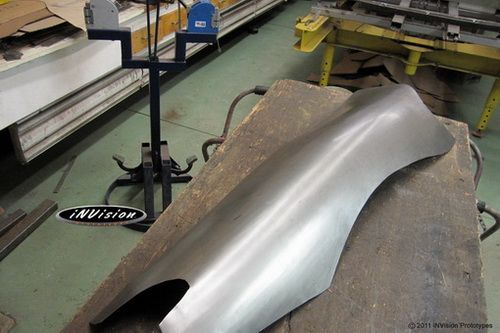 After putting in the fender flair, the panel needed some more material to make the reverse curve 'right'...meant some more wheeling... 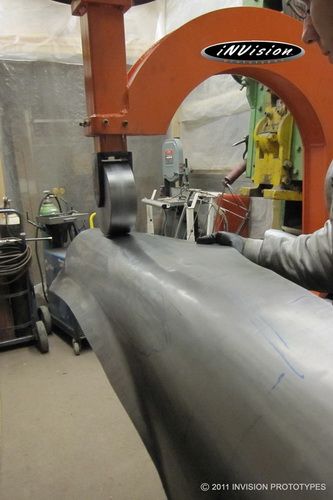 The reversed curve fender flair is coming in nicely, but we've lost some curvature in the horizontal plane...so a few more passes in the wheel to bring it back in before moving onto the taillight feature(reverse curve #2) 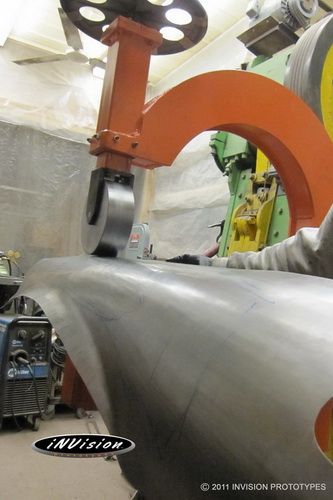 1/4 Panel almost there...a tweak here and a tweak there...then onto the other side. You can just make out the taillight feature and the dip(reverse curve #2) on the top. When the panel has the right shape it should sit there without forcing it down with clamps. 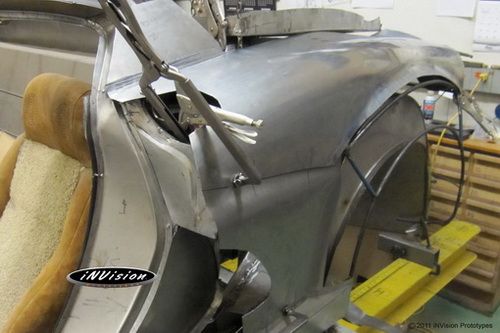 Here is the 1/4 panel for the other side being fit to the buck...some more wheeling is still required to get the centre up/ends down...can't just depend on the squeeze clamps. 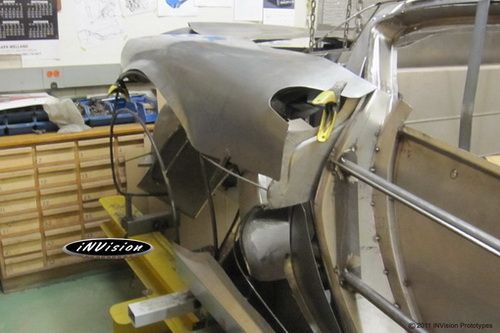 |
| |
Last Edit: Nov 30, 2013 15:03:49 GMT by invision
|
|
|
|
|
Nov 30, 2013 14:16:07 GMT
|
Here are a few snap shots of items being knocked off the list while working solo in the shop. A bit of wheeling was done to develop the low CROWN centre for the hood according to the wire frame's complex contours. Panel is clamped in place to mark and tip the edges. Once tipped, the sheet metal centre section is clamped to the hood's wire-frame buck again which is bolted to the body's wire frame for orientation. Next step will be to create the right and left panels. In case you haven't noticed, the old glass we were using for mock-ups had an unfortunate accident. 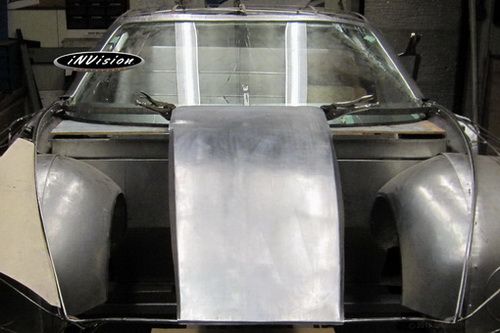 Taking a break from the hood, attention was moved to the front fascia. A basic profile template was created as a guide for the final piece. 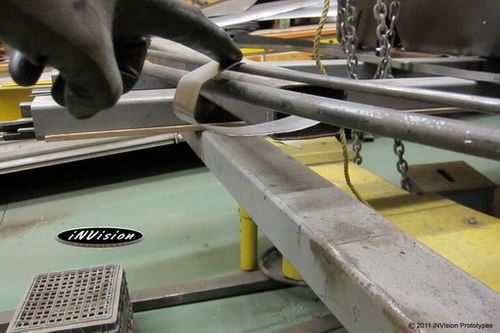 Bottom of the actual front fascia created. Some adjustments still need to be made to the top of the opening. More on this later. 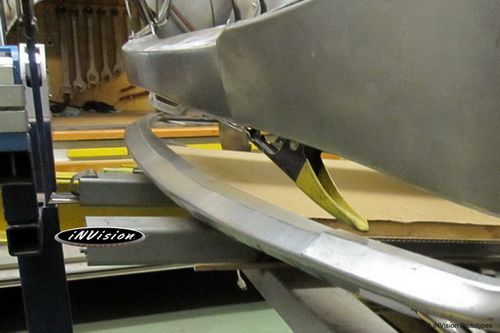 |
| |
Last Edit: Nov 30, 2013 15:05:03 GMT by invision
|
|
|
|


