|
|
|
Oct 29, 2013 12:07:15 GMT
|
Firewall located and installed. The centre section which was temporarily removed needs to be trimmed before going back in. 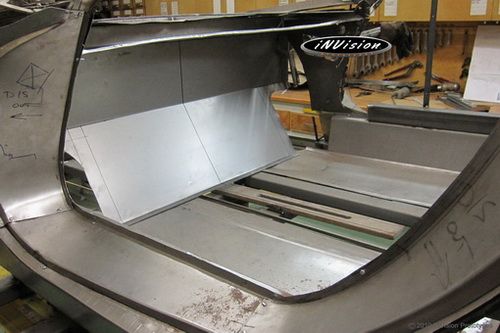 Inner front fender mocked up for the first time after being created by the english wheel. A little tweaking here and there will have it sitting where it needs to be. Now onto the other one...only in reverse! 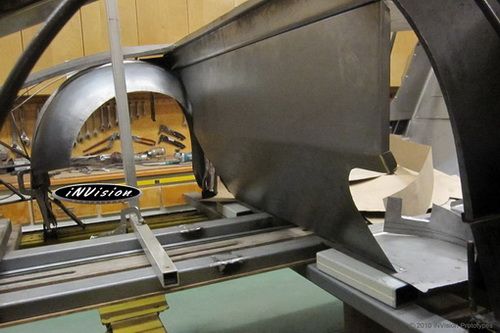 Fabricating the seat rail supports. 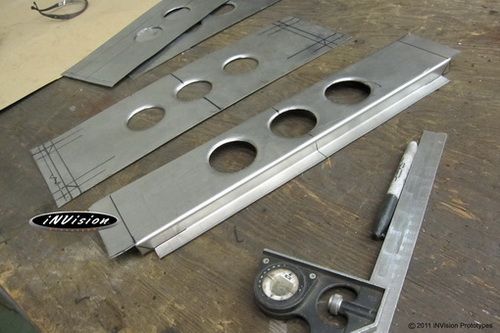 Some work on the rear fascia as well as the roof support hoop. Cardboard/pressed paper gets used a lot around our builds. Every piece is mocked up in cardboard first...then transposed onto sheet metal. Could probably build 1/2 of R2 if I wanted to  Rear exhaust scoop mocked up with cardboard. 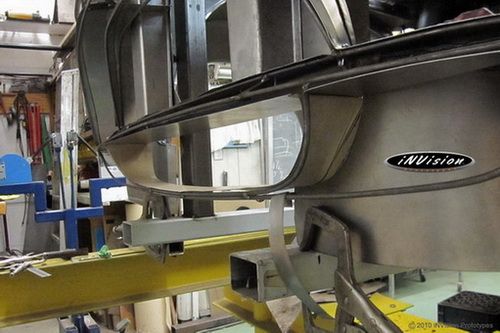 Slip roll used to create the sheet metal inside piece for the rear exhaust scoop. 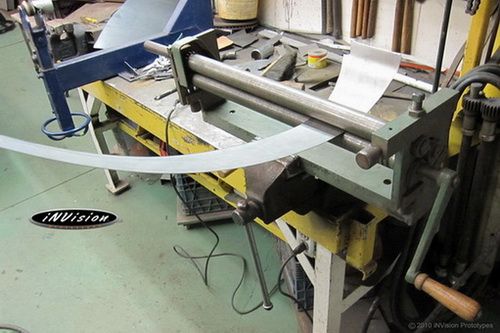 Front inner fenders are next  |
| |
|
|
|
|
|
|
|
Oct 29, 2013 12:10:18 GMT
|
So here go the front inners. It's deceiving how much sheet metal these eat up out of a 4'x8' sheet. What started as an almost straight piece of sheet metal had a lip created in the tipping wheel and now having this lip shrunk to create the curvature for the drivers side inner front fender splash. ... that was a mouth full. A particular inner profile was required to create exterior joint that won't trap moisture down the line. 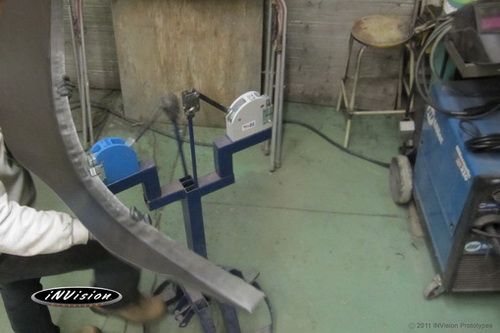 ... and the shrinking continues... 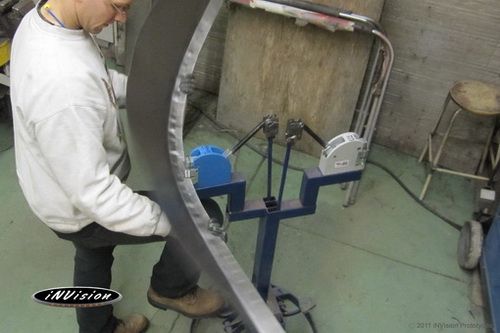 ... and some more... The distortion isn't an issue at the moment as it can easily be cleaned up later.  ... almost there...tweaking the shape here and there to finalize the curvature. 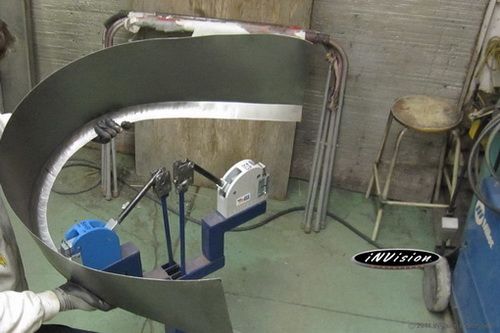 Inner fender splash formed into a nice curve. Now just need to smooth out all the shrinking ripples and fit it into the vehicle. 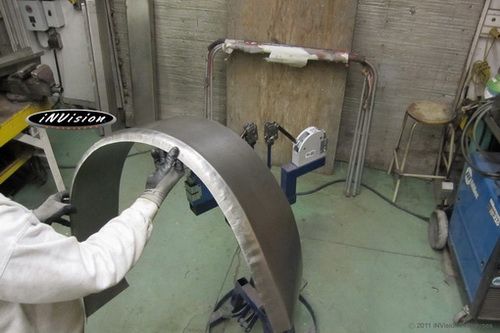 Using the wheel to touch up the new piece. Then onto the other one...only in reverse. 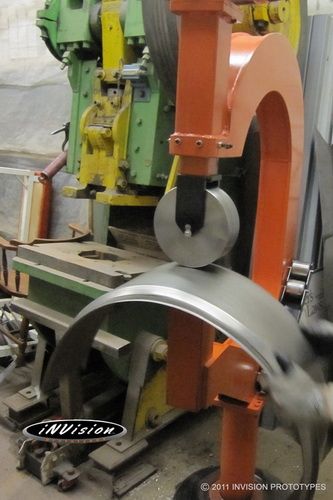 |
| |
|
|
|
|
|
|
|
Got ahead of myself and ended up rolling the P/S before taking a picture of how it started. So here is the flat D/S piece(left) next to the completed P/S piece(right). After cutting them out of 22Ga sheet metal with two different arcs extrapolated from an imaginary cone within the front compartment, the longitudinal edges had a quick pass though the shrinker prior to rolling in the wheel. 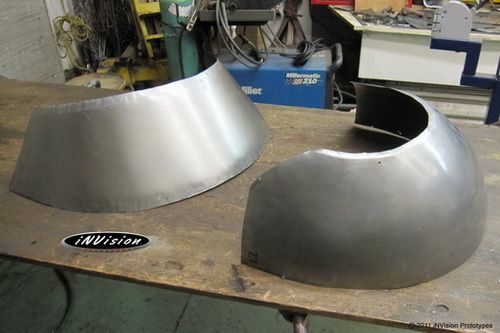 Here we are starting the wheeling process for the drivers' side inner fender. In the background you can just see the template box getting fatter. 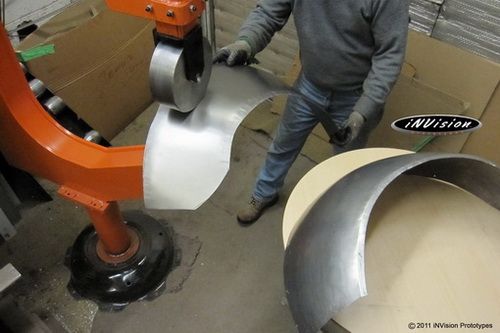 After only a few longitudinal passes the piece is starting to get some curvature. At this point I switched to about a 60*-70* diagonal wheeling pattern in order to speed up the rate of rise. Sorry no photos of this stage, but you can just make out the marks on the passenger side comparison piece on the right. I wasn't too concerned about initial wheeling marks since the piece had a ways to go and would be smoothed out with a lower anvil that closer matched the curvature later on the diagonal passes. The completed passenger side piece provides a visual comparison of the shape we need to attain. 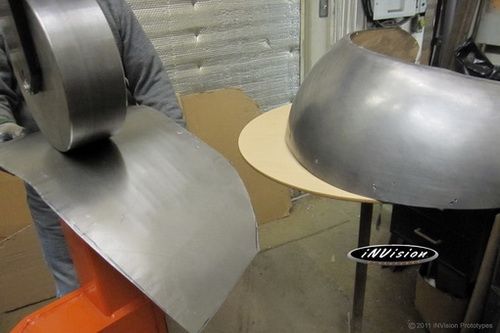 Front inner fenders complete and temporarily installed with some self drilling/self tapping #8's. The moisture trough has yet to be redone... After finishing this version, I wasn't happy with the narrowness along the sides. You'll see what I mean when I post photos of the new trough later. 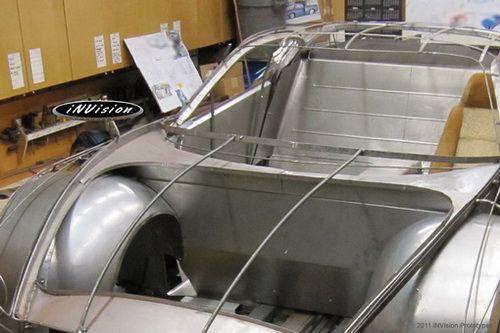 |
| |
|
|
|
|
|
|
|
Here are a few snap shots of fab work being done on the rear hatch structure. Creating the rear hatch's vent areas. 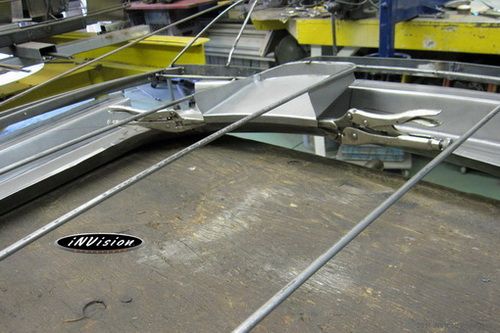 Filling in corners. Once the pieces have been fit and welded into place the seams will be tapped out, ground and finished to appear as though the rear structure was fabricated as one piece with no joints... at least that's the plan. 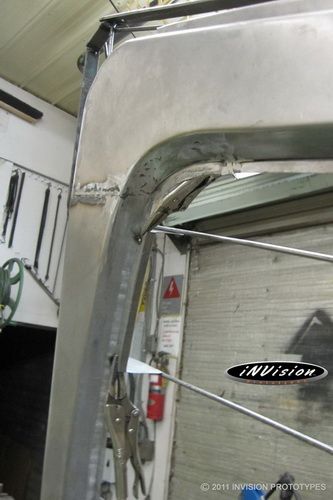 'Hammering' out the rear hatch's substructure. Looking from the inside out, vents have been created to facilitate more effective cooling. 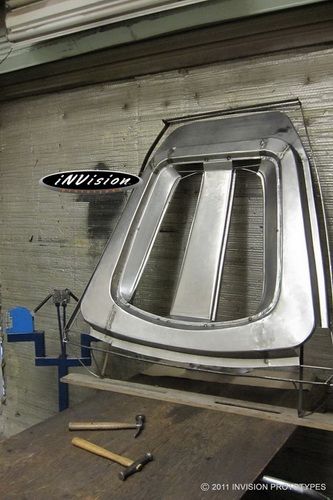 A few more pieces to go yet...then onto the top skin. |
| |
|
|
|
|
|
|
|
|
|
|
Awesome
|
| |
sweaty palms slip off joystick
|
|
Mark
Posted a lot
  
Posts: 3,825
|
|
|
|
|
Just awesome.
|
| |
E36 BMW 318is saloon (rare as a hens false tooth)
VW Caddy Maxi 2010 (usually full of Labradors)
|
|
|
|
|
Nov 13, 2013 13:20:12 GMT
|
More progress on the rear hatch ... the outer skin this time. At this point I'm not too worried that the pieces don't fit exactly to each other...that will come. Once the momentum is set for shaping the pieces to the buck, one side is done followed by the other side. That way I don't forget a particular sequence taken to create the panels. Starting with D/S the sail panel. Fitting it into place, the sail panel inner piece flat horizontal surface will be bent down into the vent area with the end bent to close in the end - trimmed where required - then hemmed 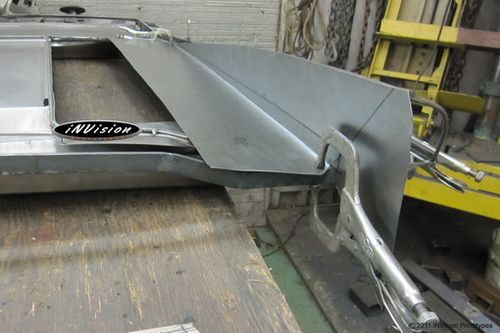 Fitting up the sail panel outer pieces. 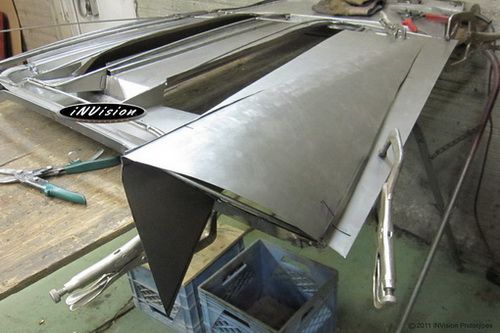 Creating the front pieces for the rear deck. 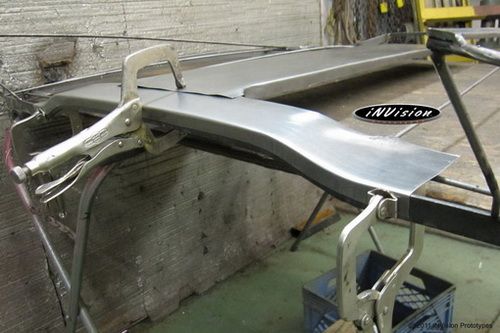 |
| |
|
|
|
|
|
Nov 13, 2013 13:22:06 GMT
|
Here's some work done on the front fascia/headlight surrounds. First a quick flexible pattern was created of the headlight bucket area using some masking tape. It's then removed from the wireframe buck and transferred to pressed cardboard where an appropriate cut and bends were made. Here are the two together to confirm the final shape. 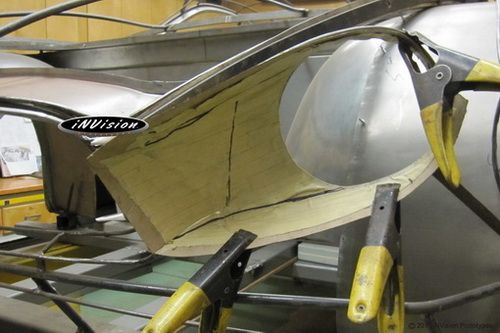 The template was transferred to sheet metal which was then cut out with some excess added to the perimeter. Used the slapper and dollie to clean up the waves around the edges caused by the shear. 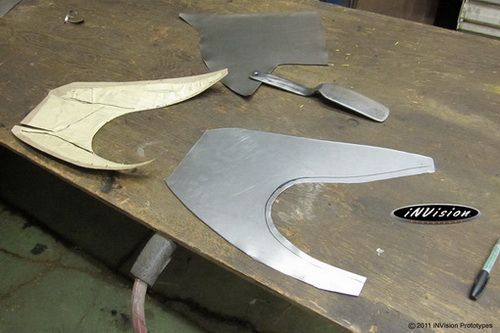 The piece is taking shape. The initial shape was created using the tipping wheel. After some perimeter shrinking was completed excess material was trimmed away. The top as well as the bottom areas needed to be torch shrunk and finally planished to create the vertical accent . At this point I was preparing to weld up the joint, grind, and take a soft abrasive disk to take care of the HAZ areas. 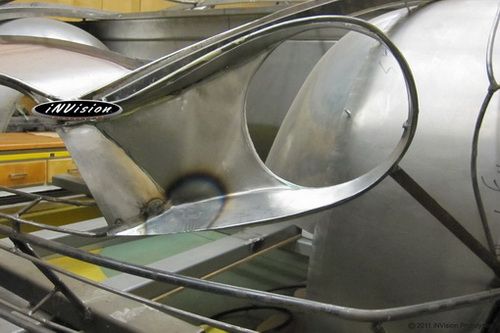 Unfortunately, I forgot to take a photo of the final result. You'll have an opportunity to see it later on in other photos as to how it came out. |
| |
|
|
|
|
|
Nov 16, 2013 13:07:02 GMT
|
Moving on with the front fascia. Initial layout out of the grill's centre bar. Piece is clamped and the rear surface is about to be scribed. Shrinking down the material to create the required curvature. This slow process resulted in some deformation of the surfaces - too much material having no where to go. 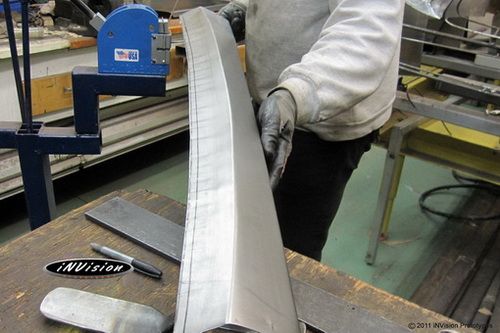 In order to eliminate the buckling, the torch is used to heat the affected area. Then while still hot, the area is quenched with a wet rag. This increases the curvature a little more than necessary, but when the piece is planished it should end up close to what we need. 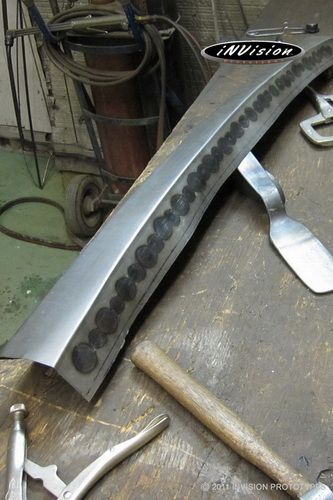 After some hammer and dollie work the piece is fitted ... not too bad for the first time. However, some additional shrinking needs to be done as the curvature isn't just right yet. 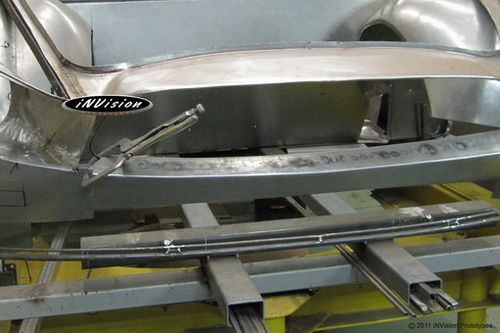 |
| |
|
|
|
|
|
|
|
Nov 16, 2013 13:10:07 GMT
|
After most of the structural components were completed ... the stuff no one sees once the car is complete...it was time to start on the exterior panels. Here go the door skins. 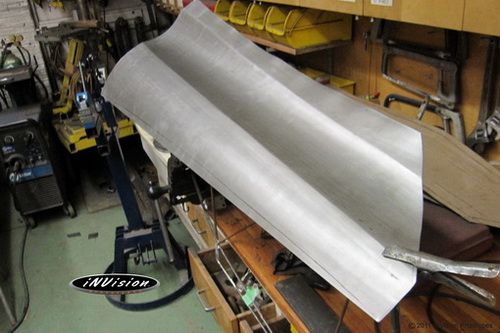 The beginnings of the upper door skin. Using the wire frame buck as a jig, the concavity in the sheet metal is shaped using the e-wheel followed by the tipping wheel to run in the features and then fit to the established profile. 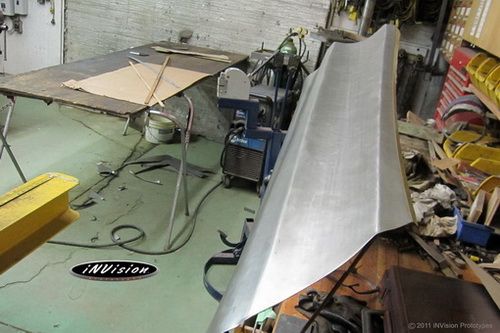 A combination of English wheeling, tipping, and hand tweaking gets the panel closer with every pass. 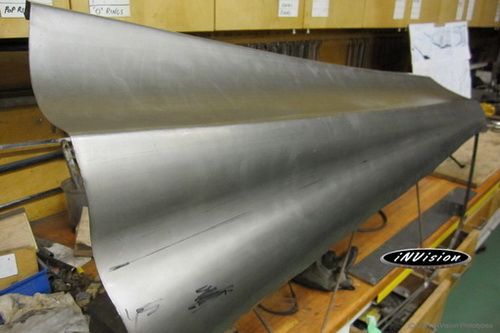 Passenger top door section done! Now the edges need to be hemmed, but not before the upper area is fit and welded to the lower section. The process in making this panel with multiple reverse and convex curves as a single piece really got to a be a head scratcher. Initially, due to the reverse curves, I had planned to make what your see there out of 4 pieces. That meant an additional 80" of welding, hammer/dollie work, and finishing. Starting from the middle and working outwards with a little pinch of patience and some metal shaping black magic...we pulled it off in one. 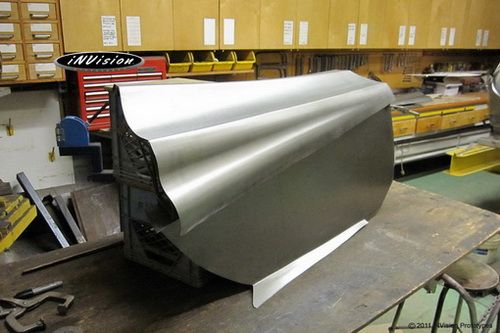 Door panels shaped and mocked up on the wire frame. Now the fun begins to trim and weld the two together and hem the edges over the door buck. Both sides of the vehicle are being run in parallel...that's the beauty of having built a wire frame buck to use as the guide. You can just barely make out the wire frame for the door under the skin on the left side of the panels. Thanks for looking. |
| |
|
|
|
|
|
Nov 16, 2013 19:25:21 GMT
|
|
Amazing skills there.
Keep up the posts, they are inspirational
|
| |
|
|
DMS
Part of things
 
Posts: 57 
|
|
Nov 16, 2013 20:45:29 GMT
|
|
I've never seen anything like this. Thank you very much for sharing!
|
| |
|
|
|
|
|
Nov 16, 2013 22:44:15 GMT
|
|
Wow this is so amazing, You my man have some top-notch skill there,
you should be proud to be such a good engineer.
keep us updated as we all wait in anticipation for more...
|
| |
Isle of Wight Graphics is now Ztam Design for all you lot out there, still offering the excellent service as before : mail me on design@ztam.co.uk
|
|
|
|
|
|
|
|
Thanks, thanks very much guys!
|
| |
|
|
crahel
Part of things
 
Posts: 210 
|
|
|
|
|
Nick, what gauge metal you using? out of interest. You doing a great job at it and inspiring others on the forum. Thank you.
C
|
| |
1973 Lancia Fulvia s2 coupe (sold)
1998 Audi a4 sedan (sold)
2000 Nissan maxima (sold)
2007 Audi convertible.
|
|
eurogranada
Europe
To tinker or not to tinker, that is the question...
Posts: 2,556
|
|
Nov 18, 2013 10:33:25 GMT
|
|
Stunning skillset! Just wow and in awe!having had a small taste of shaping metal the past year', it's really an artform!
|
| |
|
|
|
|
|
Nov 18, 2013 13:01:23 GMT
|
Nick, what gauge metal you using? out of interest. You doing a great job at it and inspiring others on the forum. Thank you. C The exterior shell is being fabricated using 22Ga. It's considerably lighter than what guys use on hot rod bodies, but comparable to what manufacturers used for production materials in the '80's & 90's ... before they started experimenting with high strength steel(HSS). As for the structural areas, where strength is required, 16Ga and 18Ga material was used. Weight is a large factor and keeping it to a minimum is quite important when building this ride so when I designed the vehicle I carefully controlled what material was used and where. When complete, R2 should come in around 2600-2800lbs. Thanks for checking out the build. |
| |
|
|
remmoc
Part of things
 
Posts: 931
|
|
Nov 18, 2013 17:15:59 GMT
|
|
Stunning
|
| |
|
|
|
|
|
Nov 19, 2013 11:42:32 GMT
|
|
Gobsmacked!!
Nice to see craftmanship of this level.
|
| |
|
|
|
|


