|
|
|
Apr 26, 2020 10:10:36 GMT
|
That's unfortunate. But on the upside, now you can take this opportunity to craft new trims the way that Toyota should have 35 years ago. Out of wood. You could even lay a nice veneer over them. Only the poshest cars have veneer on the OUTSIDE. It'd practically be a boat. Yes the MR2 Traveller. |
| |
|
|
|
|
|
|
|
Apr 26, 2020 10:17:40 GMT
|
That's unfortunate. But on the upside, now you can take this opportunity to craft new trims the way that Toyota should have 35 years ago. Out of wood. You could even lay a nice veneer over them. Only the poshest cars have veneer on the OUTSIDE. It'd practically be a boat. Yes the MR2 Traveller. Or Waggoner for the American market! |
| |
|
|
|
|
|
Apr 26, 2020 11:00:01 GMT
|
I'm not totally sure you're taking this seriously.  |
| |
|
|
|
|
|
Apr 26, 2020 12:51:21 GMT
|
|
I’m totally sure they are not.....
As an orangutan I appreciated the remarks about knuckles dragging and high heels. Great idea, got to get me some heels......
Nick
|
| |
1967 Triumph Vitesse convertible (old friend)
1996 Audi A6 2.5 TDI Avant (still durability testing)
1972 GT6 Mk3 (Restored after loong rest & getting the hang of being a car again)
|
|
|
|
|
Apr 26, 2020 18:51:09 GMT
|
Lets see the plastic carnage then… This is the trim from the back of the C pillar 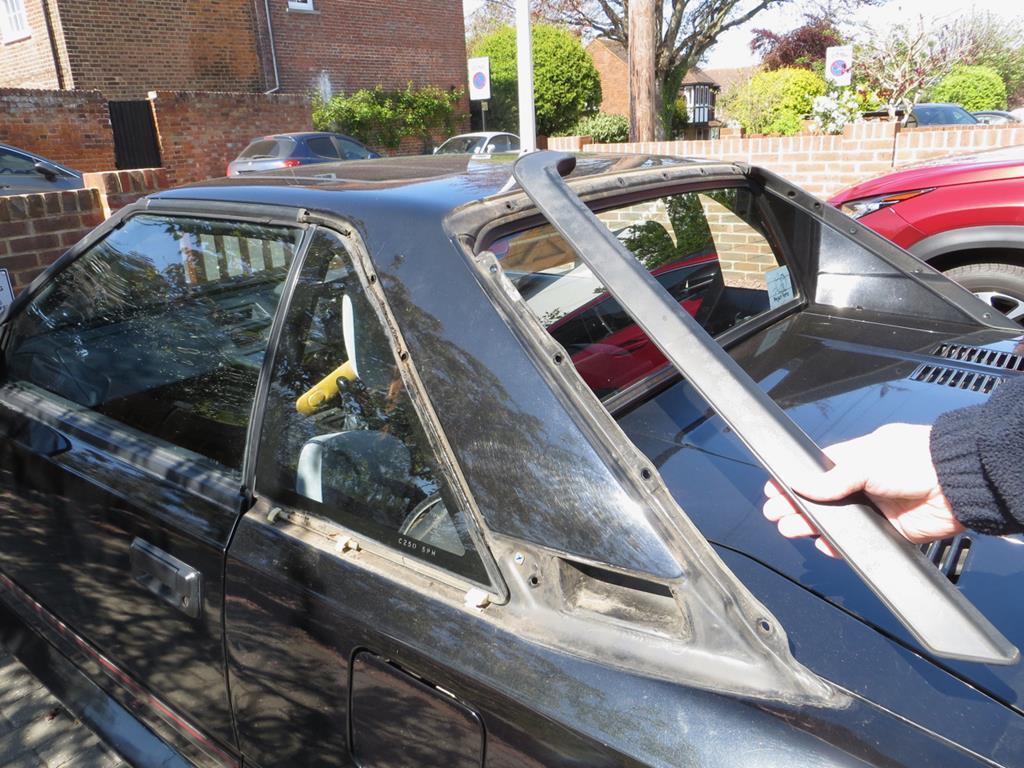 It has bushes embedded in the plastic like this.  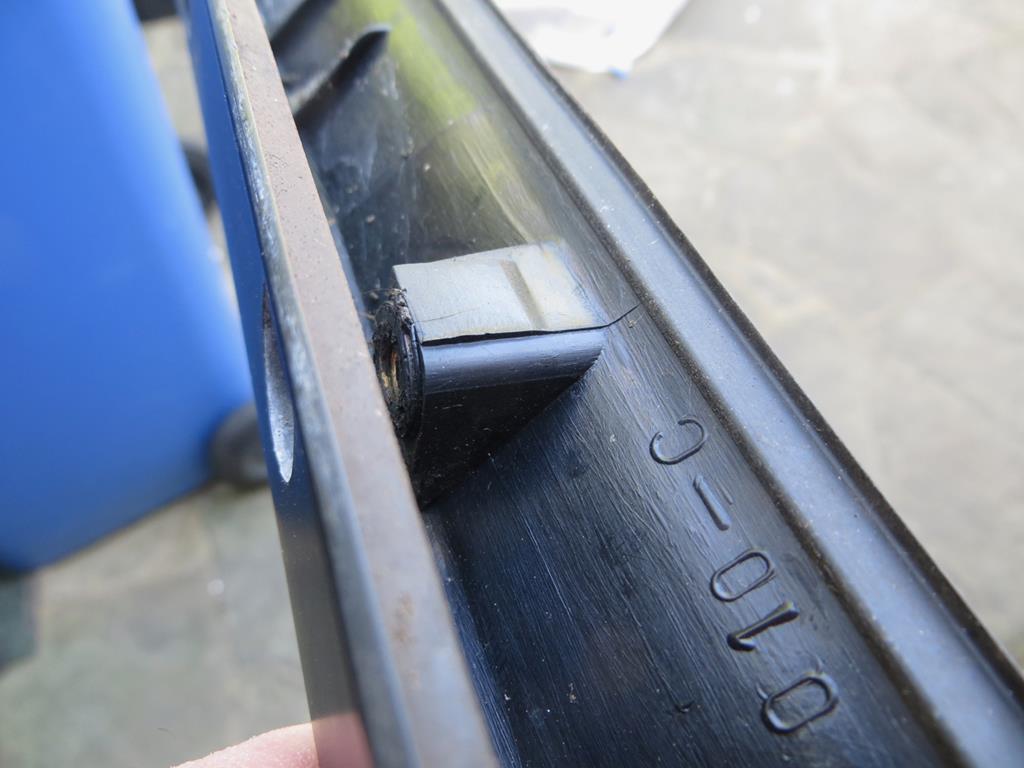 Two of the 4 on the left side now look like this.  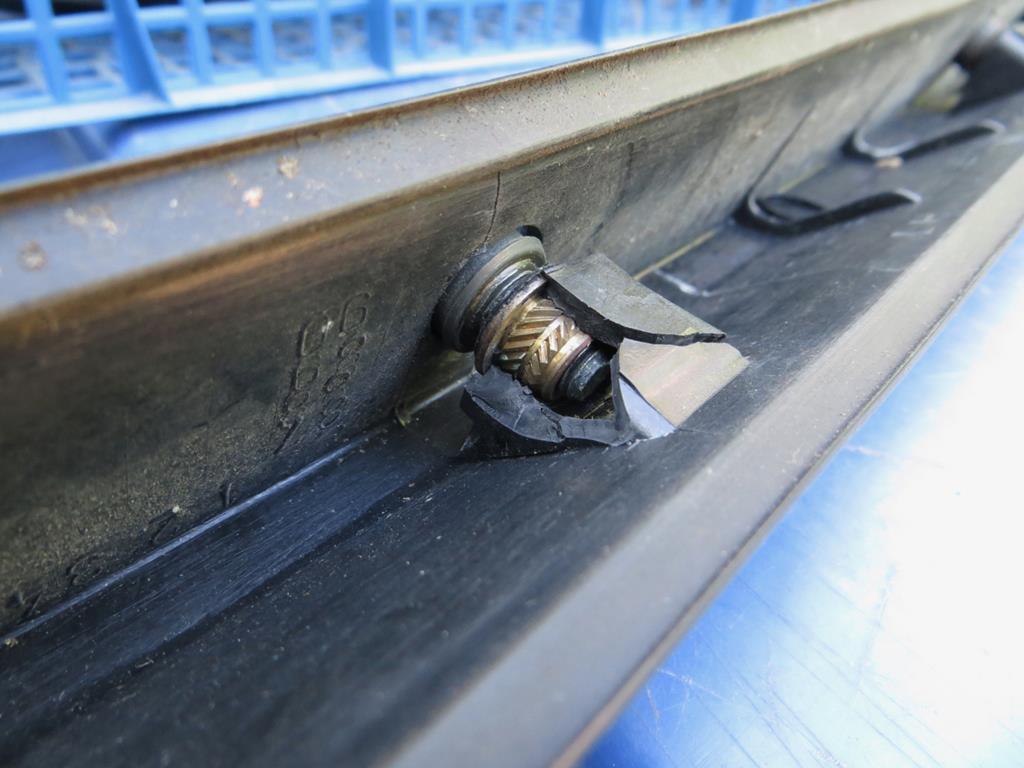 So that’s no use. I’ve not removed the trim from the right side but I had to remove one bolt to get the roof spoiler off. The bush is now missing presumed dead so that’ll have to come off too. This bit goes across the top of the rear window.  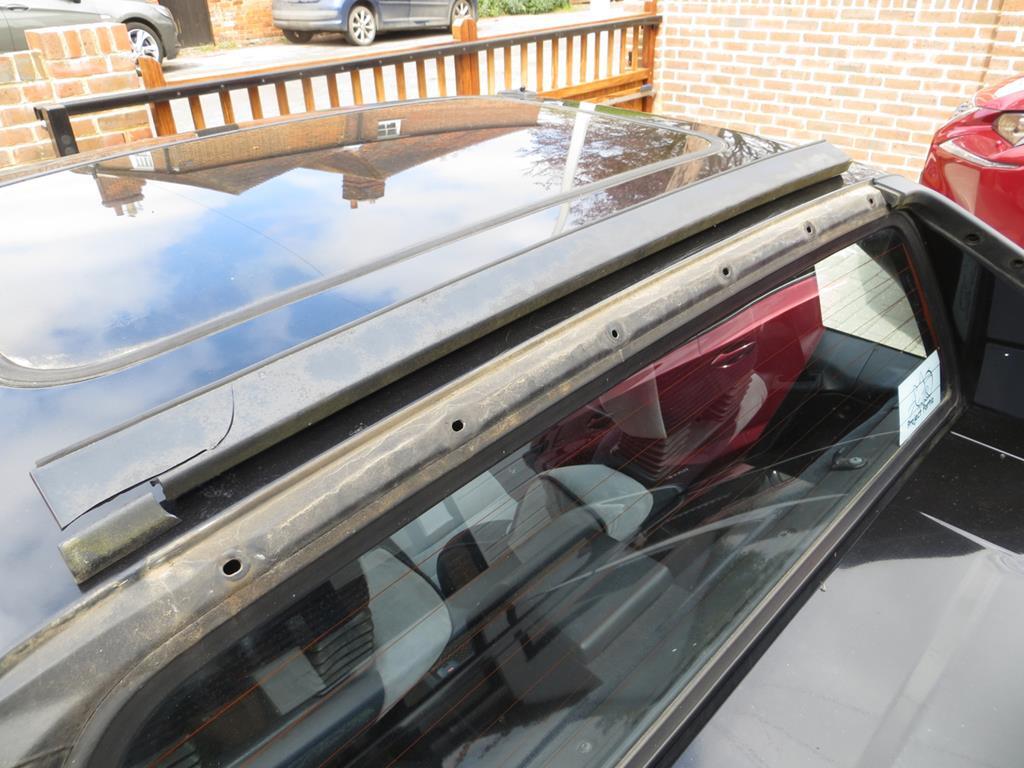 You can already see part of the problem. It has captive bolts that go through the holes in the roof. Like this one.  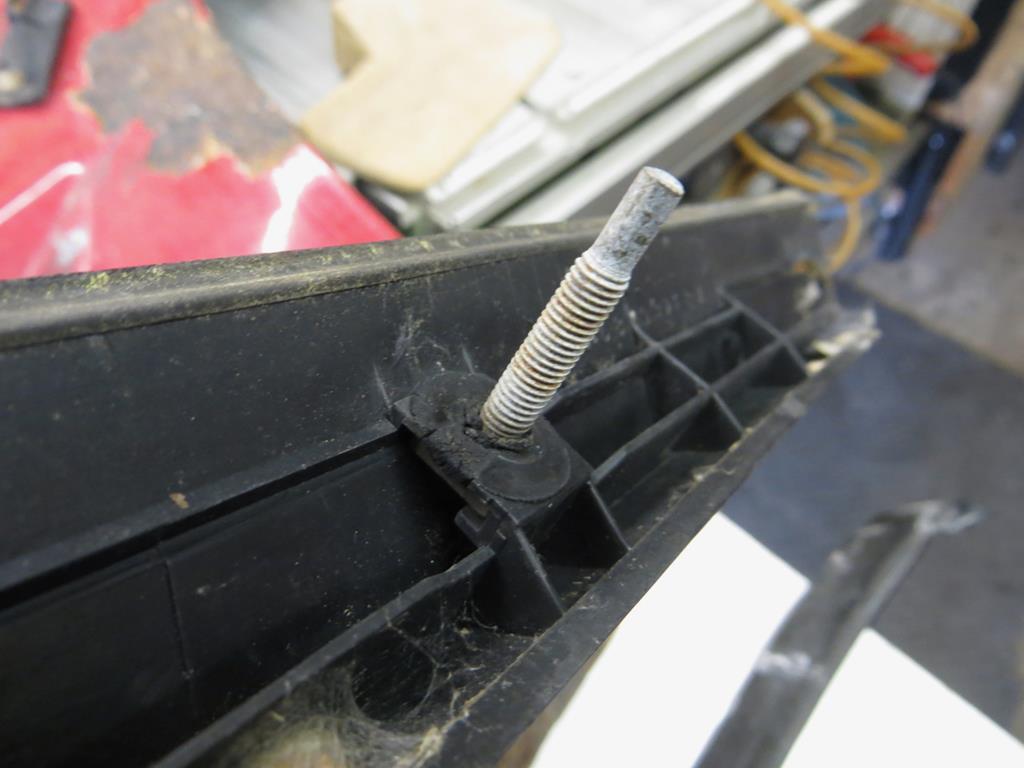 Five of the six spun round ripping the plastic boss apart. The one on the end blew the trim apart in the process.  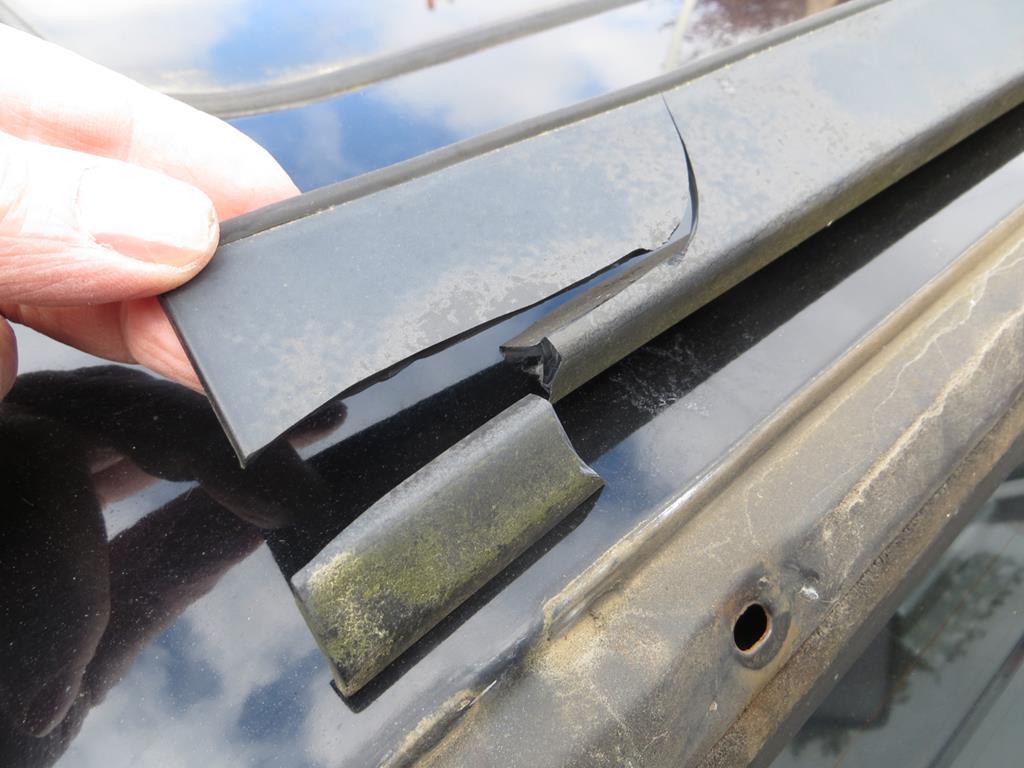 And, if that’s not enough… The clear roof spoiler bolts on with metal tangs spot welded to a channel on the top edge.  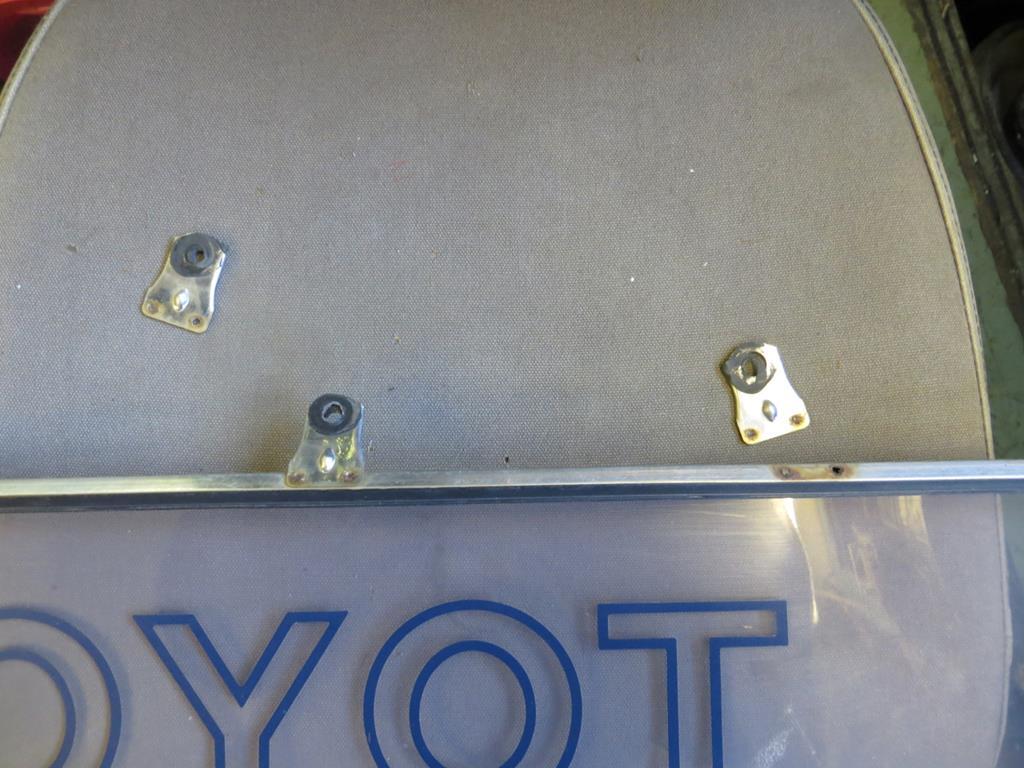 And two of them are no longer attached. How the hell they came off is anybodies guess. I can only assume they had already cracked off years ago. Well that’s a ball ache. |
| |
|
|
pabblo
Part of things
 
Posts: 435
|
|
Apr 26, 2020 22:12:43 GMT
|
Hopefully you can find a fix for those plastic bits, I always dread removing any plastic trim for this reason! Anyway the amount of effort, that you've put into it so far is amazing. Nice to see a 80s classic, being saved  |
| |
|
|
|
|
|
Apr 26, 2020 23:35:55 GMT
|
|
James, at least yours put up a bit of a fight before they break. Mine do it if I look at them wrong. However, I know how bloody frustrating it is!
I guess 1990s UK plastic and tropical climes aren't a good mix.
Found a guy here who has repaired/remade the worst of the interior stuff, using fibreglass funnily. Done a nice job too.
Got some more bits for him in the future as well.
|
| |
|
|
|
|
|
|
|
Thanks pabblo! I've already started putting it together again. I'll write something up later in the week. I'm guessing the plasticiser leaches out in the heat and there isn't a lot you can do about that. It's going to be an increasing problem for our hobby in the future. The obvious solution would be 3D printers but the beds on domestic machines would have to get a lot bigger and the finish a lot better to be able to do it. And I suspect a lot of trim has compound curves that wouldn't sit on a flat 3D bed at all well. Poor thing would spend half its life printing the scaffold rather than the part. georgeb, I remember you talking about your chap. I can't remember if he was bonding the broken parts back together with fibreglass as a strengthener or making a complete reproduction part. I thought it was the latter? James |
| |
|
|
Paul Y
Posted a lot
  
Posts: 1,950
|
|
|
|
Having looked at your new found skills could you not remake these parts in carbon fibre? Since our enforced break from the world I have spent a lot of time on YouTube, there is a chap who has made carbon fibre doors for his Volvo Amazon - looks fairly simple once you understand the process. Or MDF is easy to work with..... Good work. P.  |
| |
Last Edit: Apr 27, 2020 7:27:08 GMT by Paul Y
|
|
|
|
geoffc
Part of things
 
Posts: 56 
|
|
|
|
|
There is a chap in Llandeilo, mid Wales that has a workshop stuffed full of these mr2's, can get you contact details if you want, he's advertising 10.000 new and used parts plus car for breaking and restoration.
I've seen the place and it looks a right alaldins cave
|
| |
Last Edit: Apr 27, 2020 8:25:13 GMT by geoffc
|
|
|
|
|
Apr 27, 2020 11:38:39 GMT
|
georgeb, I remember you talking about your chap. I can't remember if he was bonding the broken parts back together with fibreglass as a strengthener or making a complete reproduction part. I thought it was the latter? James He did both. The instrument surround was in about seven pieces, he repaired that one beautifully. A work of art, hard to know where the old bits finish and the new bit begins. The carpet trims were either smashed or missing completely, he remade those. To be fair, I jumped on the back of an order he was doing for someone else for the latter, so he had full originals to work from. |
| |
|
|
|
|
|
Apr 27, 2020 16:39:01 GMT
|
Thanks all! So, the problem with replacement parts is that they are all 35 years old and likely to be in the same (or similar) state as mine. Anyway, I normally see these things as a challenge. How can I fix what I have or remake it in the garage. The piece across the back window is probably a good candidate for making in fibreglass (or carbon) but I think it's repairable so I'll try that first. The side trims are a bit more complex but probably achievable. I've already fixed one of them. Need to test fit it and see if the bushes pull out again. Thanks for the www.croooober.com/en/ link. I'd not heard of them but I'll have a poke around. Out of interest if nothing else. georgeb, interesting. The reason I asked is I wasn't sure how well fibreglass resin would bond to the old plastic. I'm interested because that's what I've tried. If it works for your chap I'm a happy person! |
| |
|
|
|
|
|
Apr 28, 2020 18:52:33 GMT
|
I really should stop reading adam73bgt's thread and explain how I’m going o fix some of this broken stuff. I seem to have a respectable pile of it. Start with something easy, the roof spoiler. The mounting tags had broken off a rail that was somehow fixed to the top of the spoiler. I’m fairly sure it’s all stainless steel and had originally been spot welded. My plan was to plug weld them back on with the MIG. But to do that I needed to get the rail off the plastic spoiler. A bit of firm but gentle persuasion with a couple off screwdrivers and it came off with a few frighteningly loud cracks. I think it had been glued on with a pretty solid adhesive in a few spots.  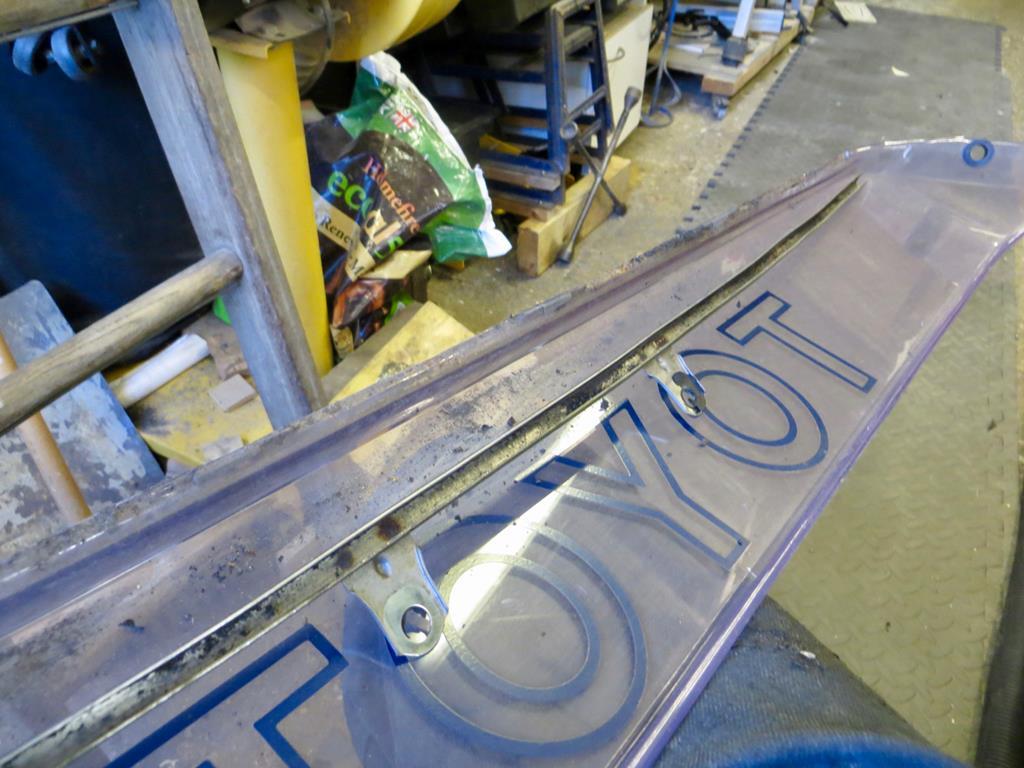 Next I used the finger sander to clean up the mounting areas and drilled through the remains of the old spot welds in the tag.  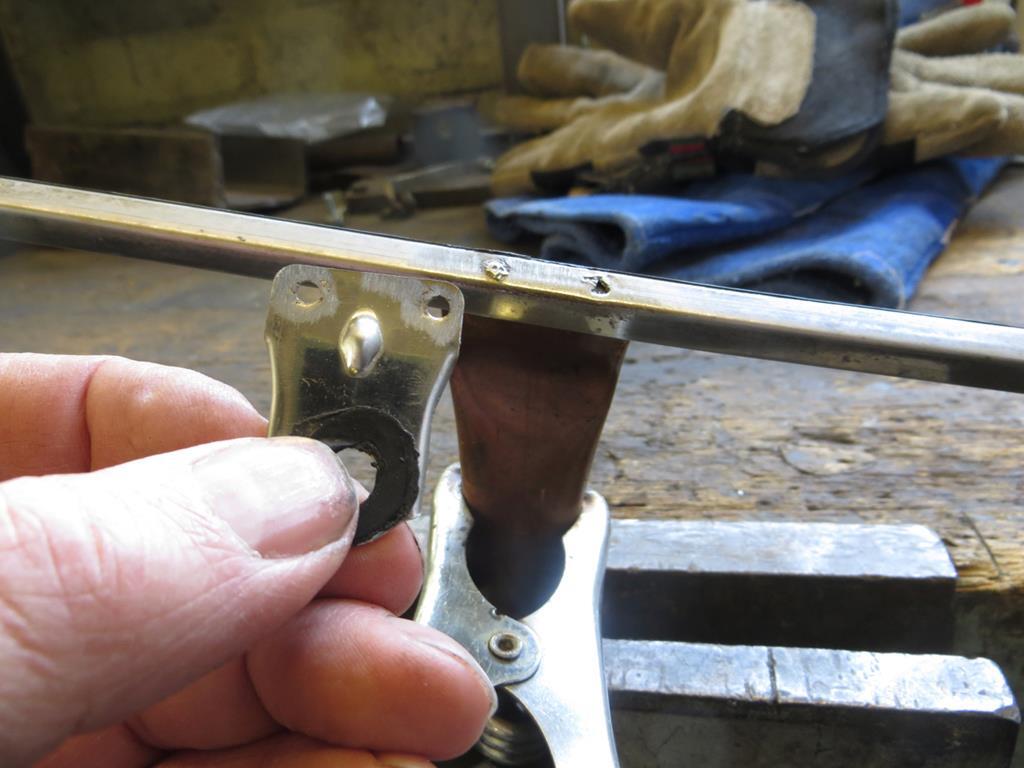 It’s all pretty thin and in a couple of places it had left a hole in the rail too. So to avoid more bother I used a bit of flattened copper pipe to suck the heat away and for the weld to sit on. And buzzed it together.  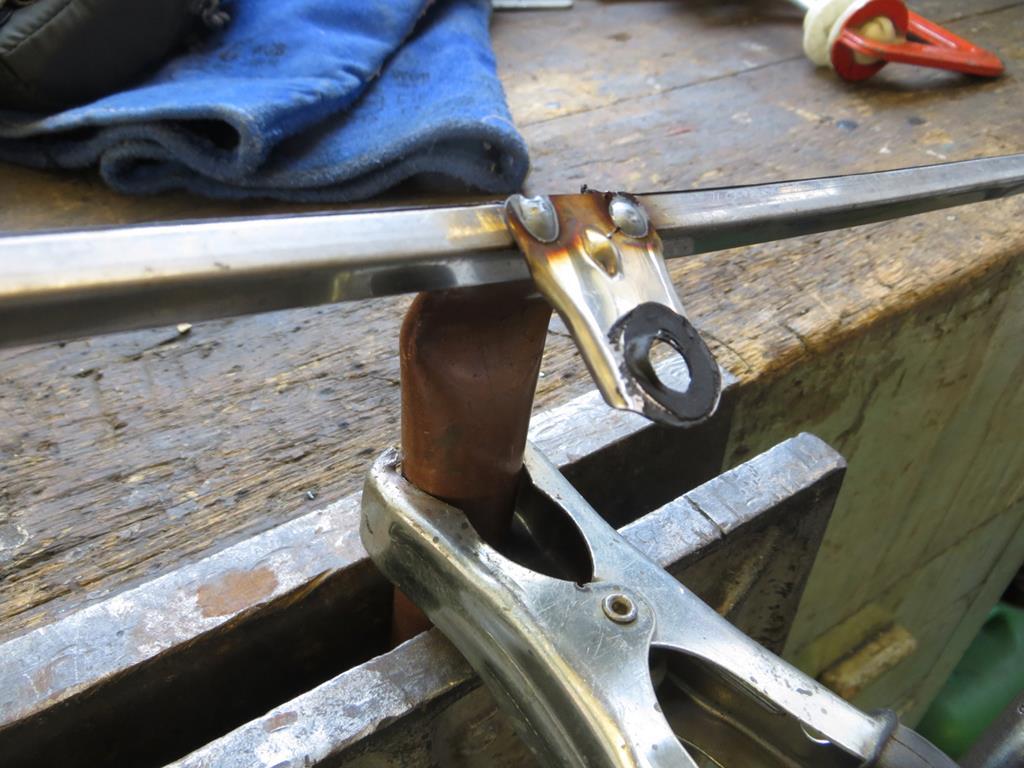 I’ll be honest, I made a slightly better job of one than the other but they are both fine. Neither are coming off. Because the welds are mild steel I thought a bit of paint for rust protection wouldn’t go amiss so it all got blown over with etch followed by black.  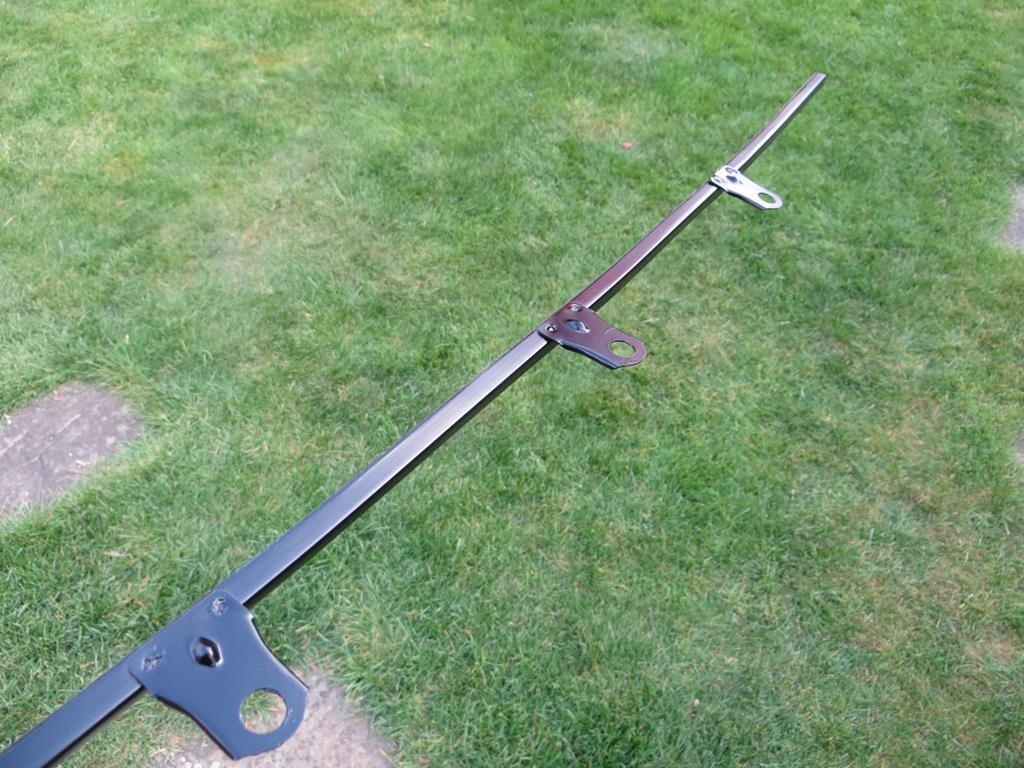 And that’s how it is now. I’ll probably glue it back to the spoiler top with some blobs of my favourite neutral cure silicone sealant. Hopefully that’ll stay put but still allow me to get it apart if I bust anymore of them off in future. Good! That was easy. What next? |
| |
|
|
adam73bgt
Club Retro Rides Member
Posts: 4,982
Club RR Member Number: 58
|
|
Apr 28, 2020 20:17:51 GMT
|
I really should stop reading adam73bgt's thread and explain how I’m going o fix some of this broken stuff. If it's any consolation I end up sitting here reading about your mudflap escapades instead of making progress on the various jobs I've got on the go  Taking the mudflaps off the back of my Legend the other week reminded me of your thread, but bizarrely for a car that is all too happy to rust away, I don't appear to need to resort to the MDF and fibreglass myself just yet  |
| |
|
|
bstardchild
Club Retro Rides Member
Posts: 14,962
Club RR Member Number: 71
|
|
Apr 28, 2020 20:47:32 GMT
|
I’ll probably glue it back to the spoiler top with some blobs of my favourite neutral cure silicone sealant. Hopefully that’ll stay put but still allow me to get it apart if I bust anymore of them off in future. Good! That was easy. What next? I'd be going for Sikaflex :-) But then I dislike having to fix stuff twice |
| |
|
|
teaboy
Posted a lot
   Make tea, not war.
Posts: 2,116
|
|
Apr 28, 2020 20:55:59 GMT
|
I’ll probably glue it back to the spoiler top with some blobs of my favourite neutral cure silicone sealant. Hopefully that’ll stay put but still allow me to get it apart if I bust anymore of them off in future. Good! That was easy. What next? I'd be going for Sikaflex :-) But then I dislike having to fix stuff twice Sweetie is mad for it. |
| |
|
|
bstardchild
Club Retro Rides Member
Posts: 14,962
Club RR Member Number: 71
|
|
Apr 28, 2020 21:04:25 GMT
|
I'd be going for Sikaflex :-) But then I dislike having to fix stuff twice Sweetie is mad for it. Gotta admit he's actually very resourceful and quite inventive but don't tell him that  |
| |
|
|
|
|
|
Apr 28, 2020 21:57:01 GMT
|
And very good looking, don't forget good looking... And modest!  |
| |
|
|
|
|
|
|
|
Anybody mention the hands?  |
| |
|
|


