|
|
|
|
|
|
I’d use a non-cyanate 2K, pro-grade product and take sensible precautions. I don’t see 1K products are that much less nasty yet they’re so hugely inferior in terms of durability. And brushing primer? OK on a bracket or suspension arm but on a panel? Only if you are into some SERIOUS self-flagellation ... sanding down each brush stroke’s ridges, over and over. Maybe a roller ... if you really have to.
Your sensible interweb friend in Connecticut,
I remain yours, humbly, etc
John
|
| |
|
|
|
|
|
|
|
|
|
And brushing primer? Only if you are into some SERIOUS self-flagellation John Hello! Did somebody want me!? Fair point about the roller. You aren't the first person to suggest that. I'll pull together my current thoughts about paint and scribble it up. I'm probably over thinking the whole subject. Well I know I am. I've been thinking about it for years. James |
| |
|
|
|
|
|
|
|
I’ve been thinking about the current state of the car... This is going to be a tedious post! I don’t take the MR2 off the road in the winter. It gets used all year round. So when I took the wing off I didn’t SORN the car because I had every intention of putting the new wing on (with a rattle can paint job) and using it. But I’m starting to realise that I’ve lost the weather for painting. Or at least, by the time I’m ready to weld the wing on I’ll have lost the weather. Actually, who am I kidding? I’ve already lost the weather. If it’s warm enough - it’s raining, and if not raining it’s cold. So, being sensible, I have to admit defeat and SORN the car for the winter. It’s on a Boris MOT at the moment which will run out soon so I’m going to have to SORN it anyway. Also I’m not going to have time to work on it even if the weather is ok. I want to get the decorating in the hall done this winter (or Mrs Sweetpea will divorce me). I want to put some railings on the decking. And my mother in law is just buying a new house after father in law died and that’s going to need some work before it’s habitable. So the car isn’t going to get done before next spring. And I’m upset about that because I want to go for a ride in it! I quite enjoy the feeling of having that little engine chasing me down the road sounding like it wants to stomp my brains out. That’s the bad news. But it does open up a few possibilities for the winter and beyond. First of all, if I’m not going to rush the paint I can do it ‘properly’. Secondly, if I’m starting to do a decent job of the paint I can finally sort this inaccurately coloured bumper out…  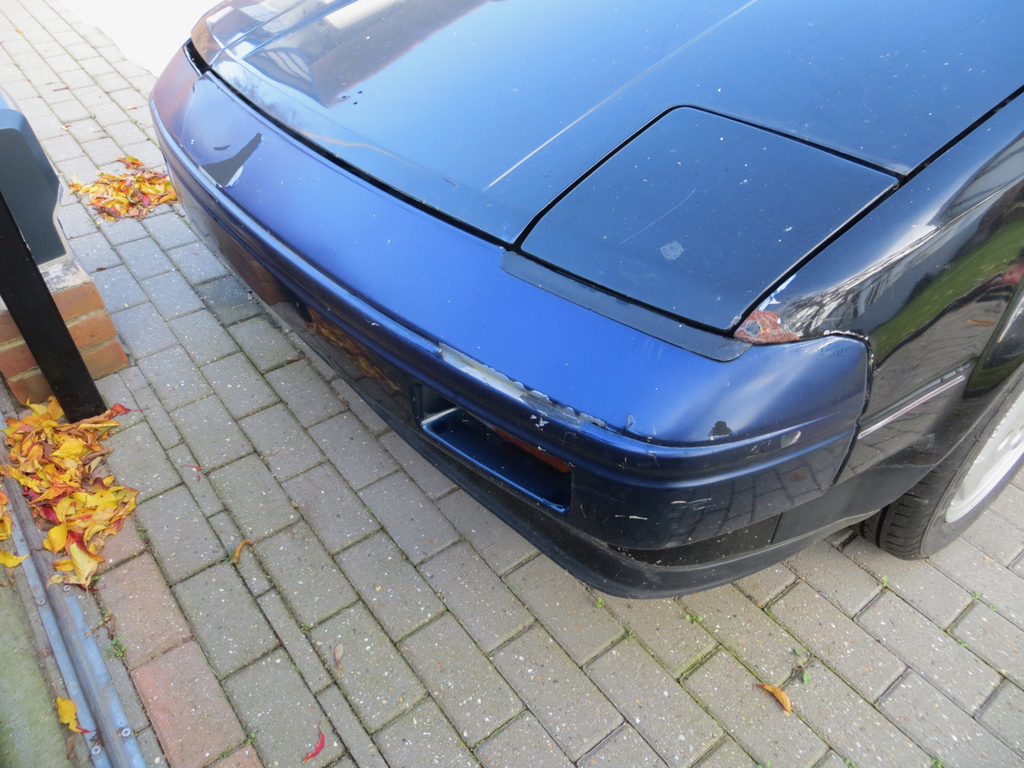 So a winter job will be to get the old paint off. Ideas on a post card please! The spoiler that I part repaired after the previous owner cracked it is suffering micro blistering (on the bits I didn’t work on). So it needs prepping and painting.  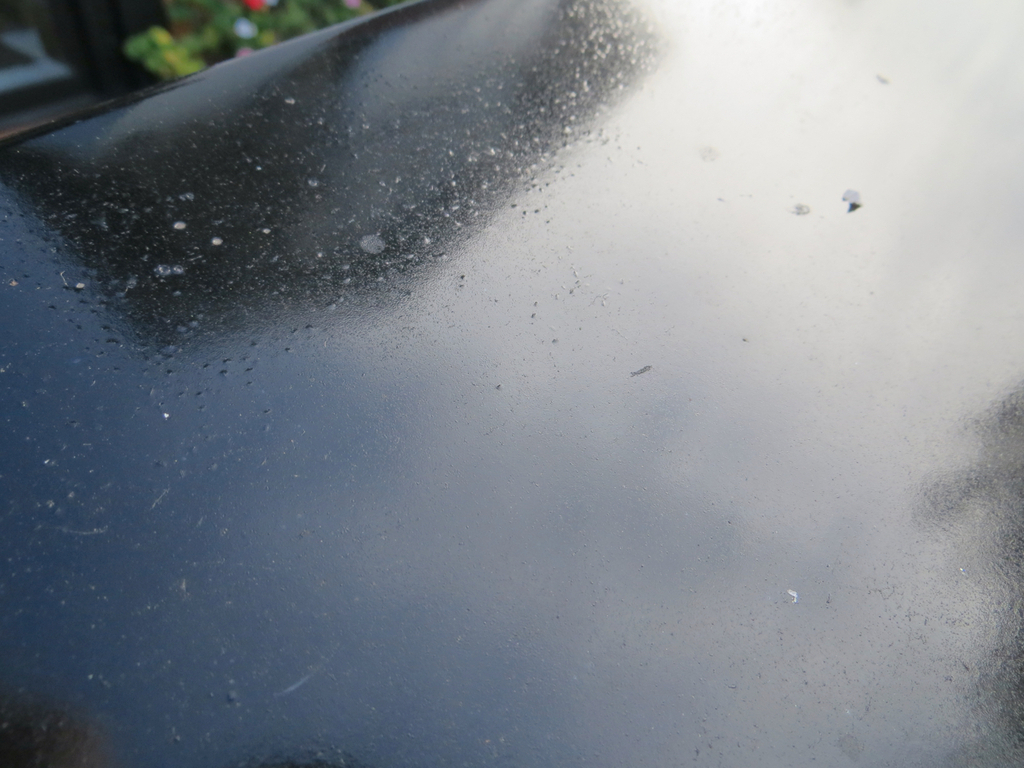 All the plastic trim round the rear window needs prepping and painting.  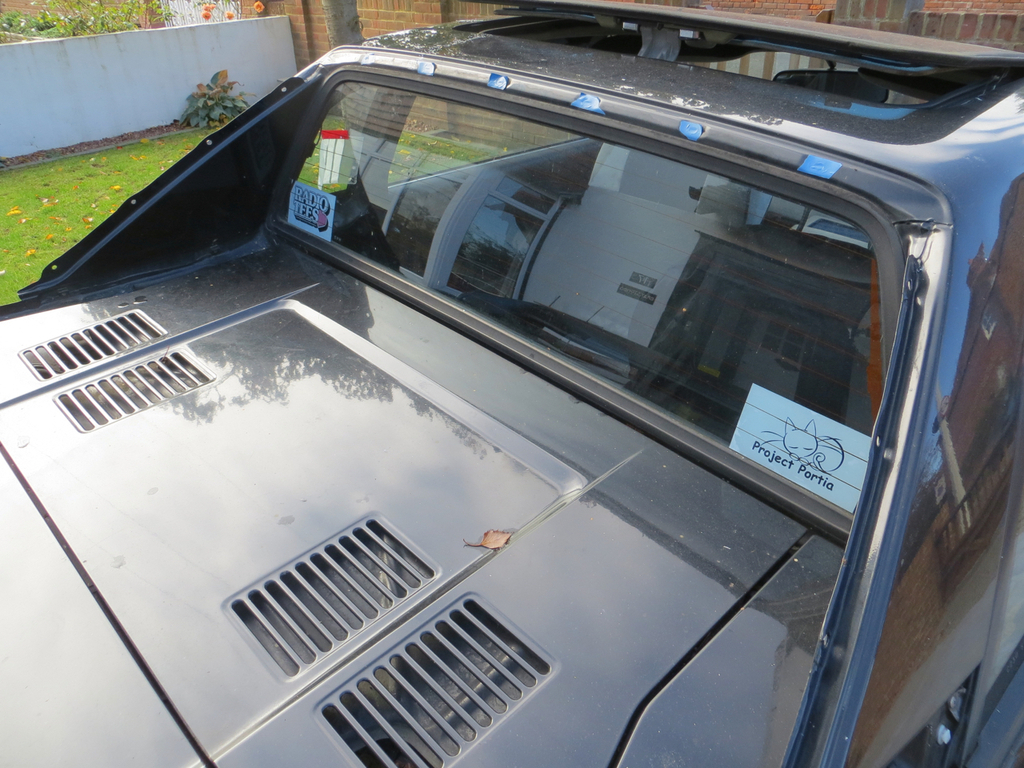 That’s hidden in the loft somewhere. The skirt needs paint. So there are plenty of bits to practice painting on if I get them ready. Then I can try the wing and see if I’ve learned anything. Not only that but this really needs fixing.  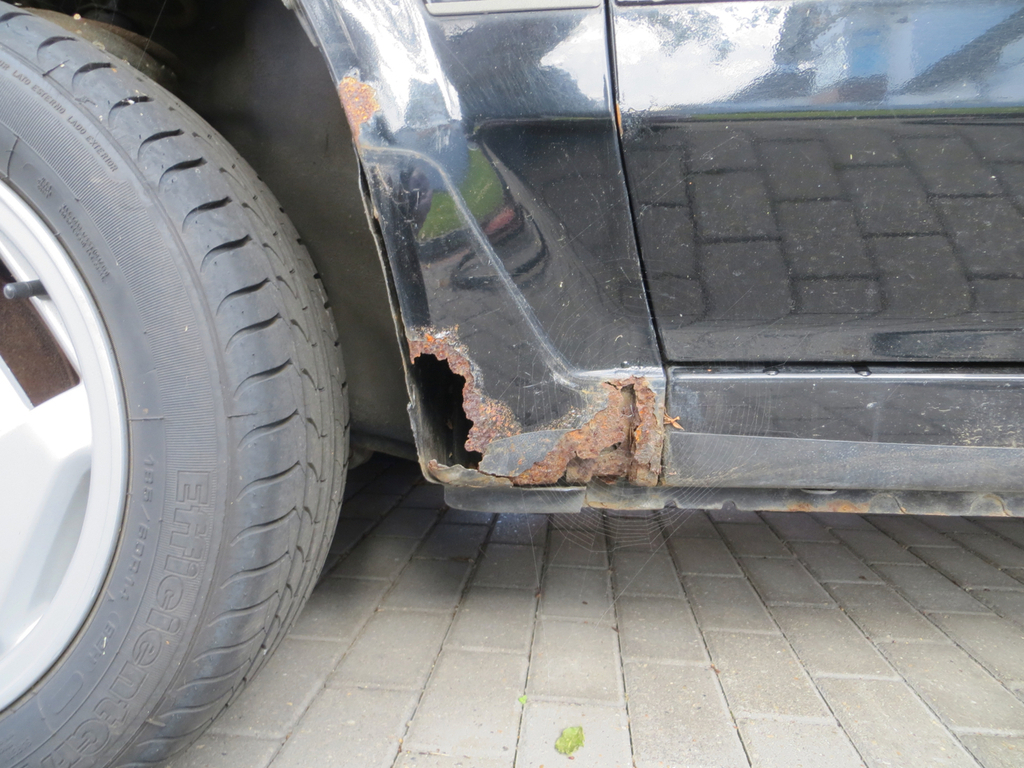 Cos. If I don’t there’ll be nothing left of the wing to weld to. And that can get paint too! And the same on the other side. I suppose I should do this hole in the rear valance too. It lets water into the boot.  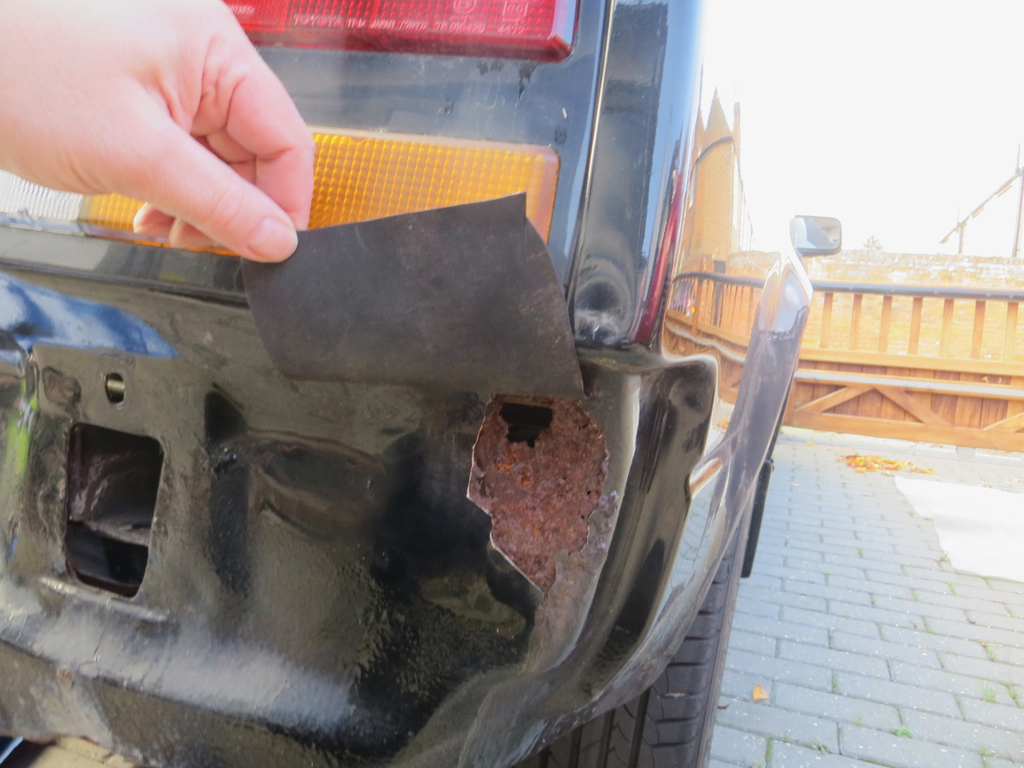 We aren’t short of things to do. So, yeah, I’m miffed that I’m not going to get the wing on this year. But there is plenty to do and I think it’s the sensible decision. James |
| |
|
|
|
|
|
|
|
|
Best decision I think. You are fixing it really to a high standard.
|
| |
|
|
jimi
Club Retro Rides Member
Posts: 2,240 
|
|
|
|
And brushing primer? OK on a bracket or suspension arm but on a panel? Only if you are into some SERIOUS self-flagellation ... sanding down each brush stroke’s ridges, over and over. I'd very much disagree with your assessment of brush painting, if you use the correct paint, correct brush and the proper technique there are no brush strokes to sand down. When I was in my teens back in the sixties and just getting into scooters, bikes and cars, the local bus company (Alexanders, long since taken over) had a big bus garage in the next town where all there buses were overhauled, repaired, serviced. At that time much of the repair work (smaller panels etc) was hand painted with cellulose. My dad (a painter and decorator to trade) hand painted my mum's Austin 1100 using paint "obtained" from a friend that worked for the bus company (buses were red, so it was red). After it was finished my friends and I used to play hunt the brush stroke, very few winners at that game ! If I hadn't seen him painting it I'd have said it was sprayed. This was hand painted (not the same red)  So was this, including the signwriting on the side panels 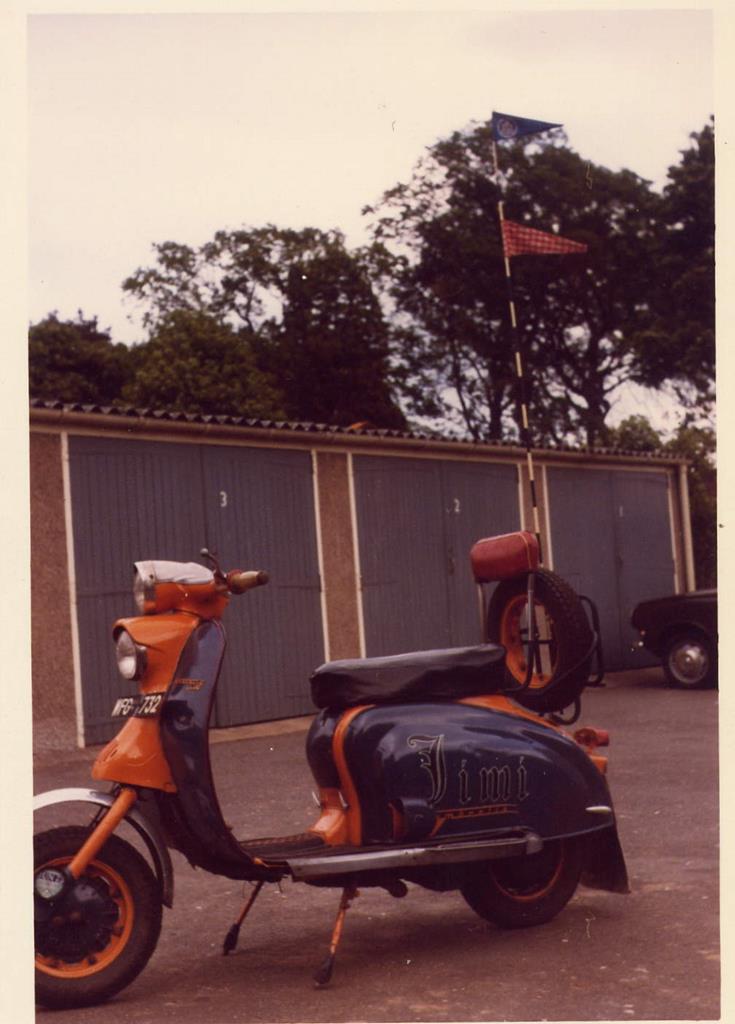 Don't forget spray painting cars didn't really come in until the twenties, before that all cars were hand painted. Apologies for leading your thread astray James, keep up the good work. |
| |
Last Edit: Nov 8, 2020 17:22:52 GMT by jimi
Black is not a colour ! .... Its the absence of colour
|
|
|
|
|
|
|
No problem Jimi. It's not like I stick to the subject always. Anyway, it's very much on topic. The problem is not that brush painting can be done very well indeed. The problem is whether I can do it at my first attempt with a random 2K paint when I don't know what I'm doing. I suspect I shouldn't be counting any chickens and probably should stock up on abrasive papers. Interestingly and slightly off topic... GKE, which would have been brush painted originally, is going to be sprayed I believe. James |
| |
|
|
|
|
|
|
|
This weekend the weather was much better than last. I’ve had a few good days working on the car. Yay! First job is to get the arch lip fitted. This bit…  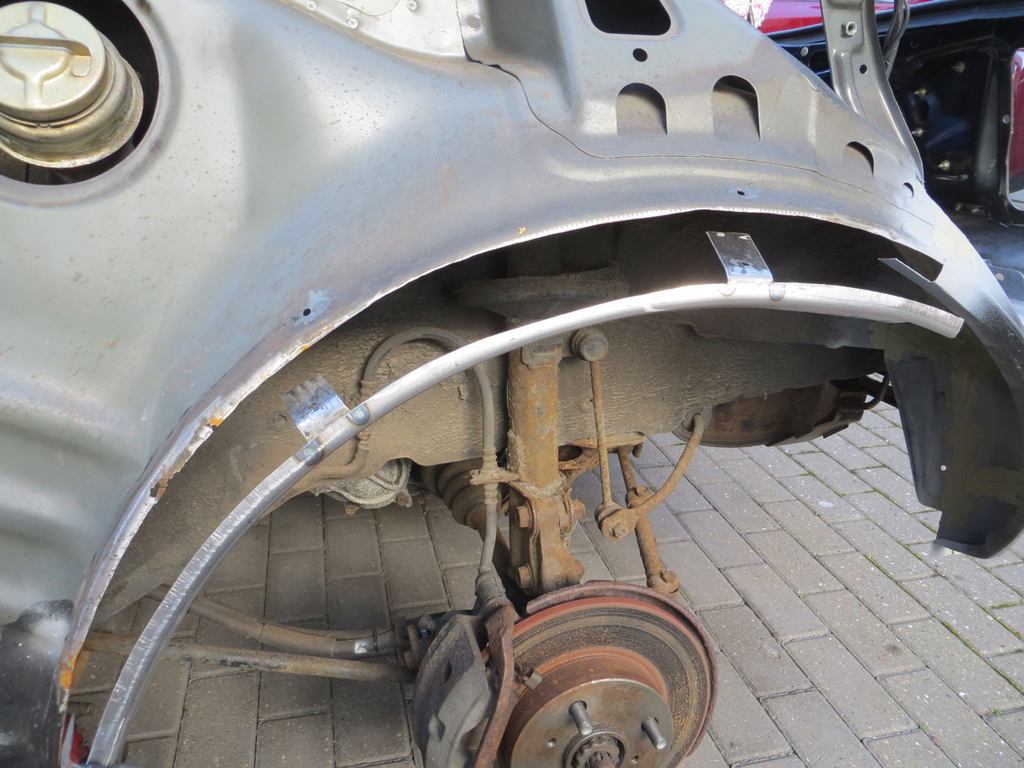 It was clecod back on the car and then spotted on.  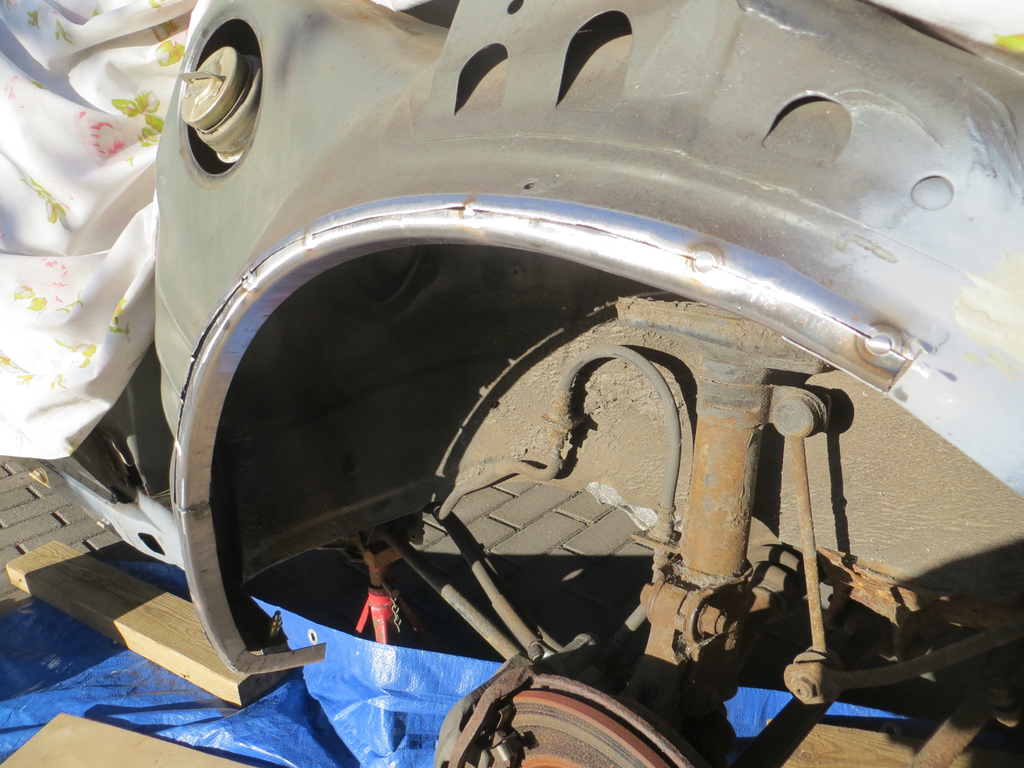 Next I wanted to fit the wing and make sure the inner arch was in the right place. It’d be really upsetting to weld it on properly and then find it had moved. As luck would have it it looks spot on.  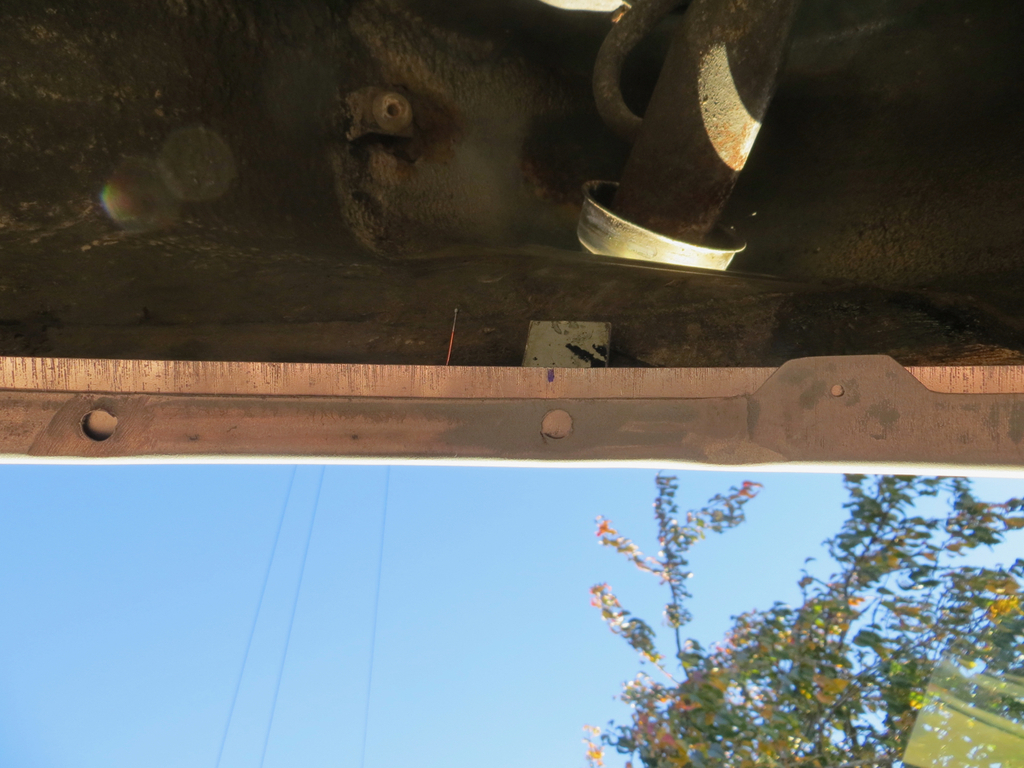 What you are looking at is the edge of the wing and the edge of the inner wing behind it. Nice and snug to each other. Like lovers spooning. The inner panel still needs trimming to width. A question though… Rather than plug weld the arch and then struggle to keep the water out of the seam… How about I don’t weld it at all and use Tigerseal (or something) to bond the joint? Is that an acceptable thing to do? It’ll be welded on all the way round the rest of the wing. Another job I need to do is mark that bit where the wing meets the bottom of the door shut. I’d left it long if you remember so it needed trimming to length. 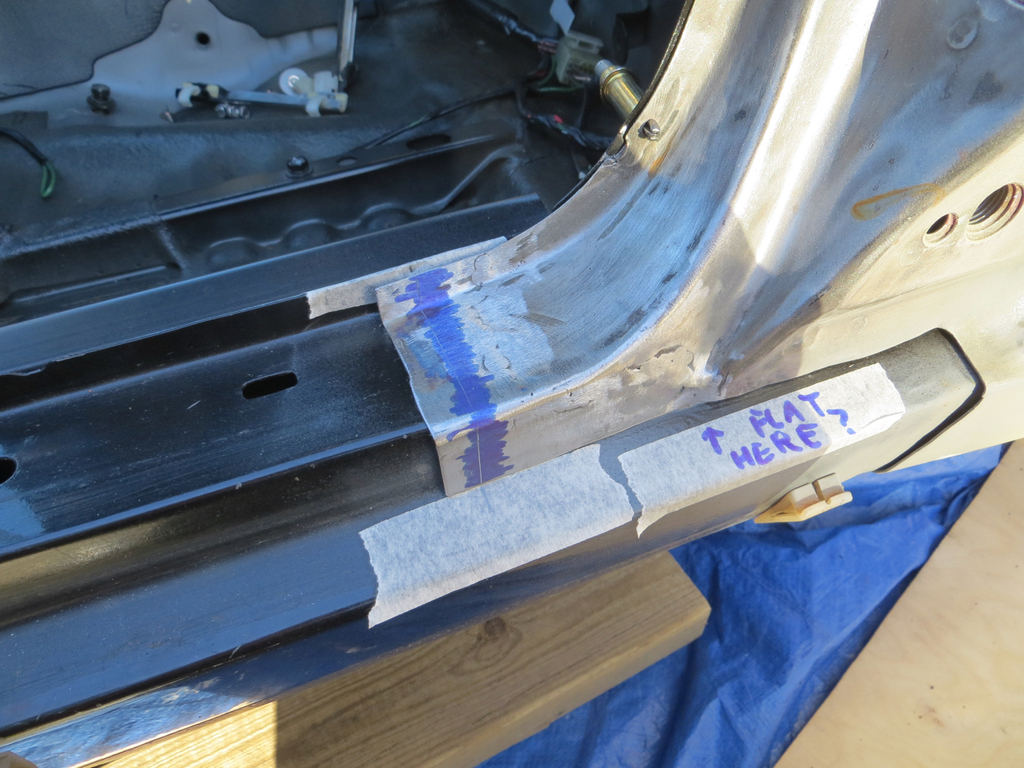  That done the wing comes off yet again and I can start the long job of welding the inner arch lip. The new lip is made of 1.1mm steel. The old one was, well, tin foil. So hopefully it’ll last long enough that I’ll not have to care about it again. Anyway, buzz buzz… 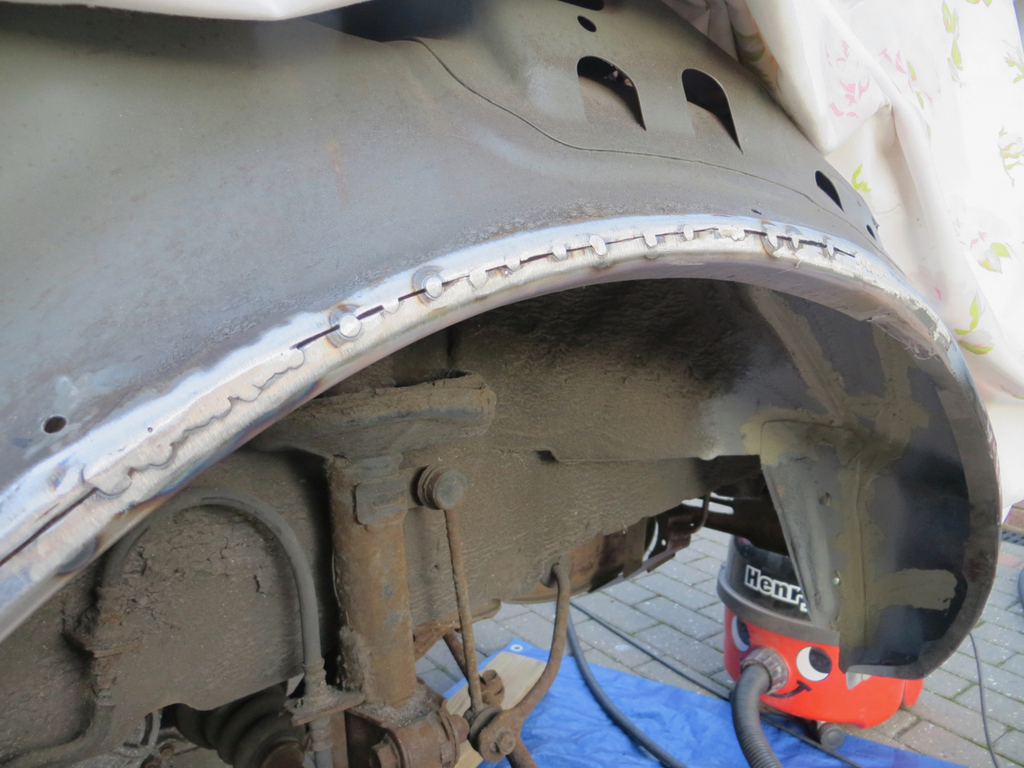 |
| |
|
|
|
|
|
|
|
The welding took a while to do.  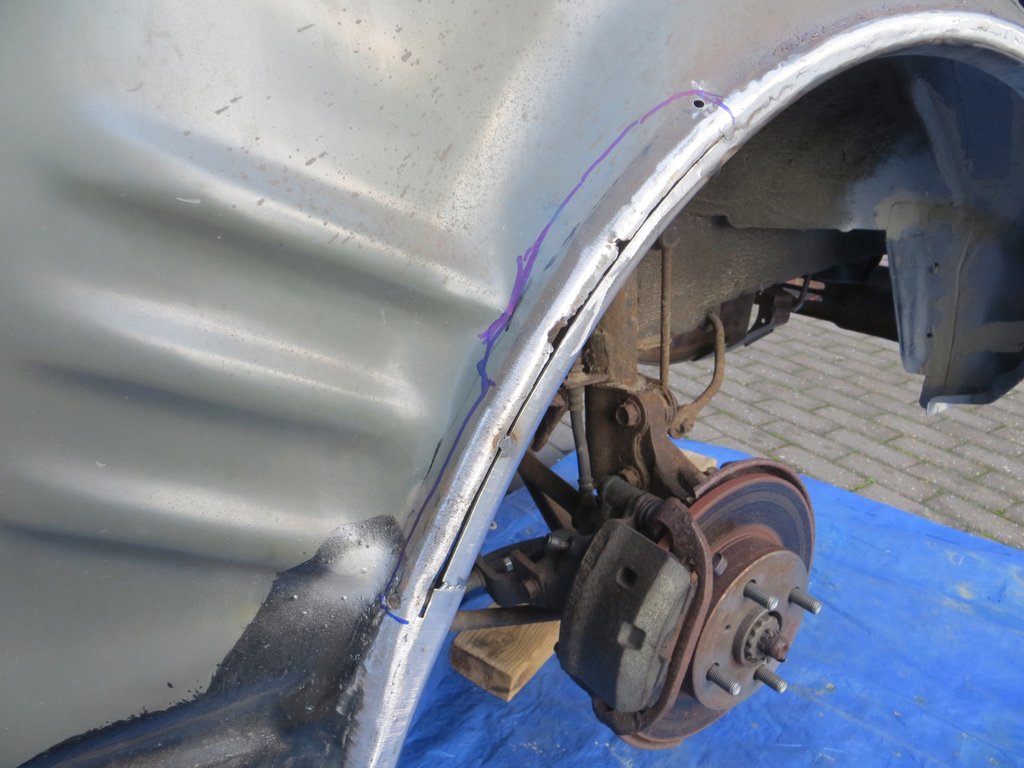 You’ve missed a bit! The bit I’ve marked in that photo has some corrosion on the inside. It’s not terrible and I could probably get away with it. But it’s easy to fix now so I might as well fix it. I used masking tape to make a template which was transferred to new metal and the rusty bit was chopped off the car.  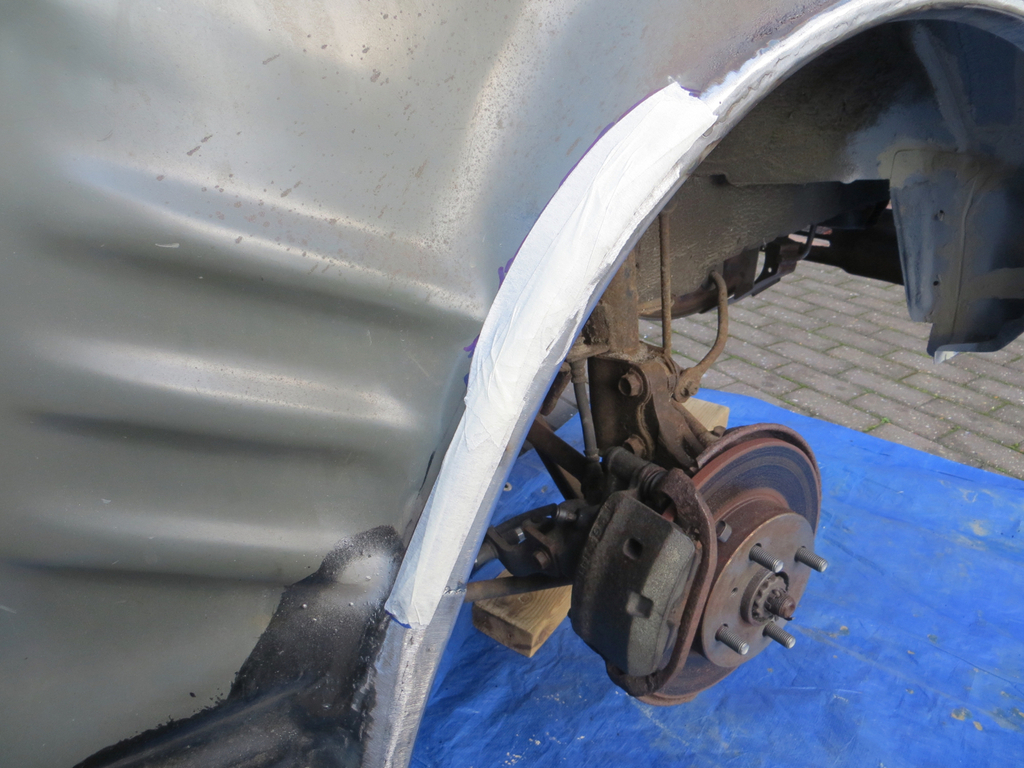 To put the corner in I thought my best bet was a bead roller. Shame I don’t have a bead roller. So I did it the old fashioned way with a hammer and vice.  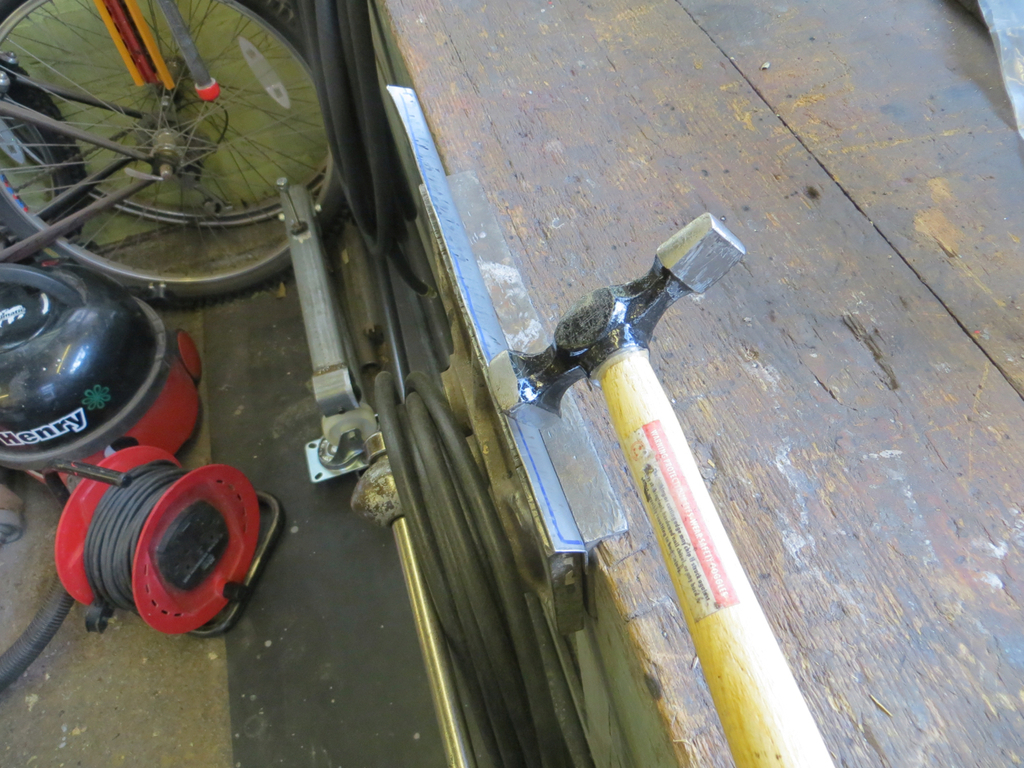 That got me something close but it needed the curve pulled into it. I do own a shrinker.  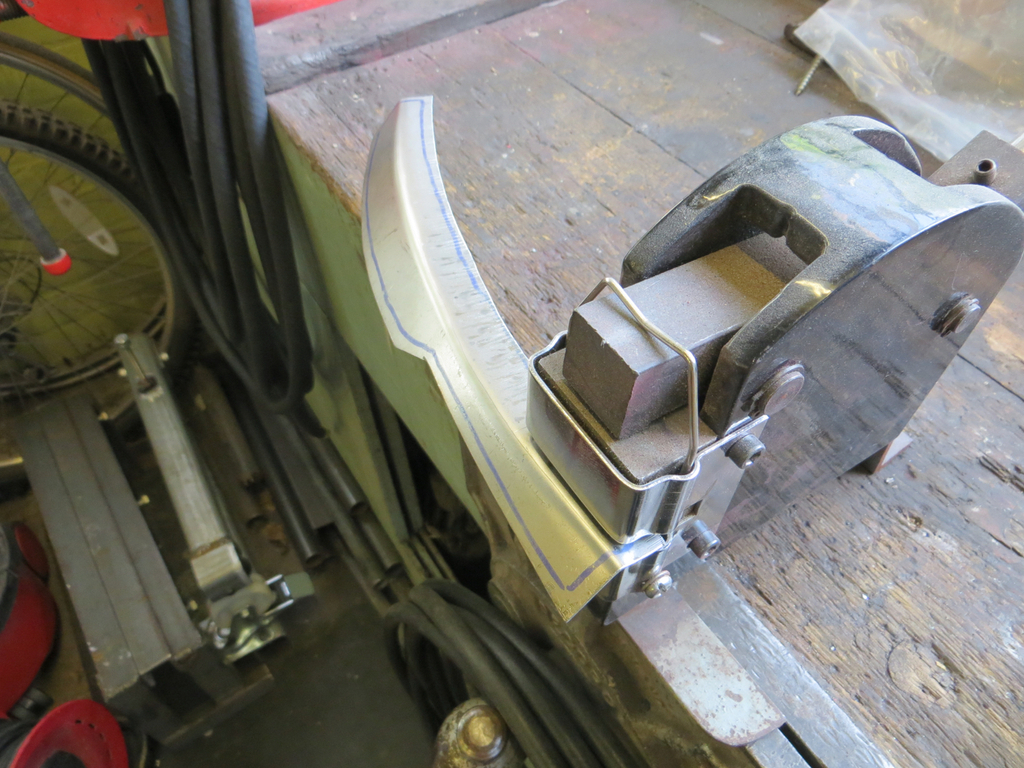 I knew a shrinker would be a handy tool when I was messing with the arches but I’ve used it a surprising amount. Anyway… Trimming and tweaking happened and eventually it dropped neatly in the hole.  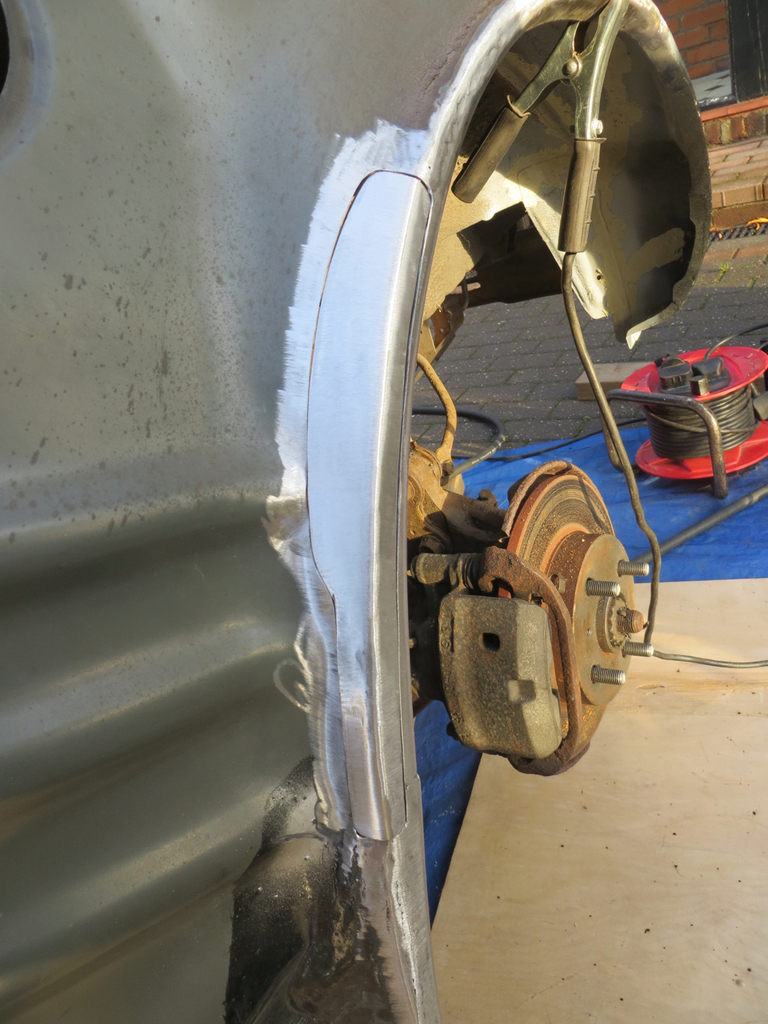 Such a good fit it seems a shame to have to weld it in. By the way, the gaps there are far too tight. You need a 1mm gap to weld into. What I did was tack it in and then run a 1mm disk in an air cut off tool down the joint to open it up. More to come! James |
| |
|
|
|
|
|
|
|
|
You could glue the arch, tigerseal will stick it and seal the joint but it won't provide any rigidity, you really need a structural adhesive, these are usually an epoxy cost quite bit and require a special gun.
I you paint it with weld through, seal the joint on the outside and use plenty of wax with a good creep from behind after paint it will last almost indefinitely.
|
| |
|
|
|
|
|
|
|
Thanks kevins. In terms of protection I'm not sure how good weld through is. Better than nothing I guess. Sealing the lip sounds tricky 'cos it must be a weak point in the sealant at the most critical point. I did wonder about seam welding the lip (very lightly) to seal it up. A bit over the top but it won't come off. And then a load of wax on the back side as you suggest. But even that causes a problem because the front half of the arch is not very accessible. It's structurally in the boot (which is behind the engine compartment) and largely inaccessible from inside the car. I'm going to have to have ago though. |
| |
Last Edit: Nov 9, 2020 20:17:26 GMT by Sweetpea
|
|
mk2cossie
Club Retro Rides Member
Posts: 3,063  Club RR Member Number: 77
|
|
|
|
I certainly wouldn't just bond the arch lip to the quarter panel. (The MOT manual stating it is NOT an acceptable method being something to do with it as well) How was it originally held together? Thats what I'd replicate if it had worked for 30 odd years  Always remember KISS for anything car related after all  Oh, and the work you have done so far looks very impressive indeed, especially for someone working at home out in the elements  |
| |
|
|
|
|
|
|
|
|
I ummed and aahed for ages before finally deciding to buy a shrinker/stretcher. I wouldn't be without it now. It's so handy for all sorts where panel fabricating is concerned. Thing is....if you go a tad too far either way, it's seems like a proper ball ache (at the time) to swap the jaws round to rectify the situation. That's why I'm going to ask the missus....when she's not listening....if I can buy a 2nd one!....problem sorted!
That's a cracking job you've done on that arch repair by the way 👍
|
| |
Opel Commodore A Coupe
Opel Rekord C Coupe
Opel Rekord C Saloon
Vauxhall Magnum Coupe V8 (Magnumania)
Mk1 Scirocco GLS
Mk1 Scirocco GLS (early chrome bumper)
Corrado G60
Mk1 Cortina 2 door Pre Airflow
Mk2 Escort 1300 2 Door
VW LT35 Tipper Truck
BMW 320D E91 Tourer
|
|
jimi
Club Retro Rides Member
Posts: 2,240 
|
|
|
|
(The MOT manual stating it is NOT an acceptable method being something to do with it as well) I thought the MOT reference referred to structural / load bearing areas ? The Appendix A diagrams don't show the wheel arches as being load bearing or structural. www.gov.uk/guidance/mot-inspection-manual-for-private-passenger-and-light-commercial-vehicles/appendix-a-structural-integrity-and-corrosionToyota's original method of assembly is what causes the arch corrosion on MK1's, The inner / outer arch lips were spot welded together with a foam strip between them, the foam holds water and the arches corrode from the inside out, when you see bubbling on the outside of a MK1 arch its already too late because its come through from the inside. It's a well known failure point on MK1's. Personnally I can't see a problem with bonding the arch lip, I seem to remember reading of someone doing it before. Mine had it's rear arches replaced many years ago. Rear arches, rear arch bottom corners (as James's picture) and sills are the most common corrosion points on MK1's |
| |
Last Edit: Nov 10, 2020 1:21:38 GMT by jimi
Black is not a colour ! .... Its the absence of colour
|
|
|
|
|
|
|
Just managed the whole 97 pages and just wanted to say "awesome work " In my opinion This thread opitimises the Ethos of Retro Rides , and your refusal to accept defeat should be applauded Great job Tony! Thank you so much. I can't believe you've read it all. I should say that you are the reason I came to Retro Rides. I'd bought the car (as a project) and was trying to work out how to sort out the rust problems. I had no idea where to start or what to do. I was surfing the web and found your 'Making Panels' thread. It was an inspiration and probably taught me more than any other single source. I was taking photos of what I was doing so I could remember how to put the car back together again, but also to write it up on an MR2 forum. But I learned so much on RR - mostly from your thread - that I thought I should give something back to the community. For what it's worth, this thread is my thanks for what you gave me. Great to finally 'meet' you! James Thanks James, very much the same reason I started posting, to give something back for the hours of joy and distraction that it brought Unfortunately work and life have conspired to get in the way for the last few years, but it’s been good to pop back recently and catch up with some old favourites and follow some new projects Tony |
| |
Last Edit: Nov 10, 2020 4:12:14 GMT by tonybmw
|
|
|
|
|
|
|
Personnally I can't see a problem with bonding the arch lip, I seem to remember reading of someone doing it before. Yeah, me too. I wish I could remember where I saw it. I've been thinking more about this... When the wing hooks onto the car it seems best to engage the top first and then 'clip in' the arch. But that causes a sliding movement across the lip which would scrape off the adhesive anyway. Practically it might be difficult to do even if it was acceptable. James |
| |
|
|
goldnrust
West Midlands
Minimalist
Posts: 1,889
|
|
Nov 10, 2020 13:58:12 GMT
|
Personally I'd want to weld the arch lip, as the joining of the inner and outer arch lips together like that create a good amount of strength to support the wing there. With it being a monocoque, not body on frame, on top of impact strength all sorts of loads from the suspension and drivetrain go through all of the panels. I you paint it with weld through, seal the joint on the outside and use plenty of wax with a good creep from behind after paint it will last almost indefinitely. That's what I'd do also, remembering that it's lasted 30 years so far on protection from the factory that probably wasn't as thorough. |
| |
Last Edit: Nov 10, 2020 18:37:28 GMT by goldnrust
|
|
|
|
|
Nov 10, 2020 20:28:59 GMT
|
remembering that it's lasted 30 years so far on protection from the factory that probably wasn't as thorough. It's a lovely idea spoiled only by the fact that the arch had completely rotted off and had been replaced already.  MR2's are famous for destroying the arches. Well, famous amongst the owners. Like jimi said, Toyota put something between the panels, presumably to keep water out. It didn't work. The interesting thing is that the right side of the car appears to be on its original arch. It's either been replaced very well or something. Not sure why but it's in really good condition. The area at the bottom of the wing completely rotted off the car twice before I got it. This was when I bought the car... 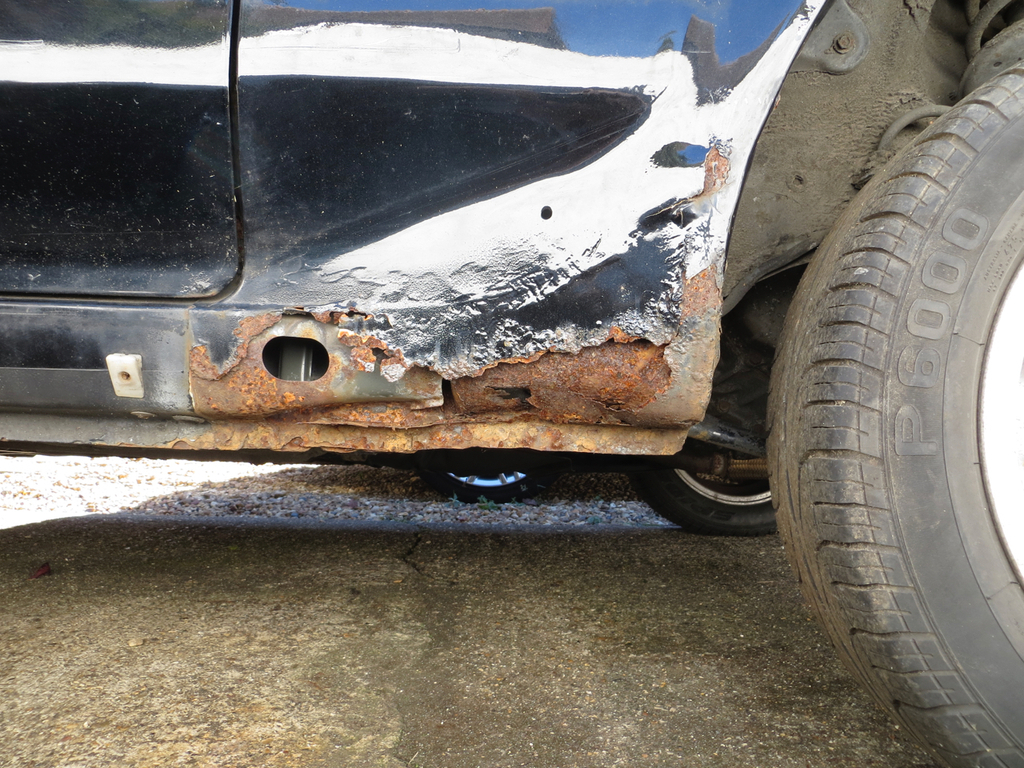 The bit you can't see (because it's missing) is the replacement panel.  I'm going to have to work hard to stop it doing it again. |
| |
Last Edit: Nov 10, 2020 20:31:12 GMT by Sweetpea
|
|
jimi
Club Retro Rides Member
Posts: 2,240 
|
|
Nov 10, 2020 21:07:49 GMT
|
You can get repair sections for the bottom of the rear arches, I bought them for mine when the sills were done, The welder reckoned they were well made, decent metal but needed a bit of fettling. I got the sills from the same guy, I think this is the same guy I got them from CLICKYAlthough you could probably make just a good a job making your own  |
| |
Last Edit: Nov 10, 2020 21:15:46 GMT by jimi
Black is not a colour ! .... Its the absence of colour
|
|
|
|
|
Nov 10, 2020 21:26:26 GMT
|
Yeah, I just made my own. Twice now!  |
| |
|
|
|
|
|
|
|
..... I suppose I should do this hole in the rear valance too. It lets water into the boot.   Love the work you've done so far. Not to be a downer, but does that chassis rail look rotten to you IRL, or is it just the picture? |
| |
|
|


 MR2's are famous for destroying the arches. Well, famous amongst the owners. Like

