|
|
|
|
|
This has taken a lot longer than I anticipated. But, I’m doing a half decent job so I can’t complain. When I bought the car I told myself that when I did a job it’d go back together as close to new condition as I could. In reality time pressures got the better of me and I’ve cut a few corners recently. This job though… Back to the old way of making it look like new. Or close to it. I have to be honest though. Getting a bit bored of cleaning and painting. Let me introduce you to Mr CV joint shield.  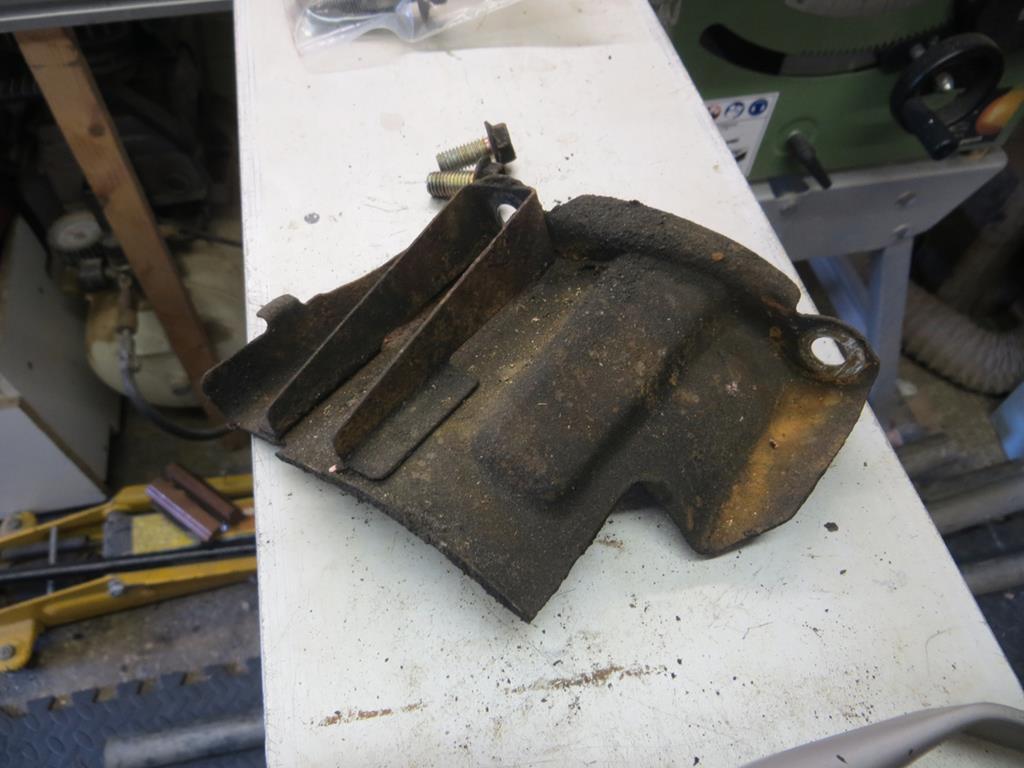 It sits on the gearbox over the passenger side drive shaft. No idea why. I doubt if the car would notice if it was missing. Maybe it stops crud spraying around the engine bay. Or stops wires getting tangled? Who knows. Some time in the sand blaster and it comes out like this. 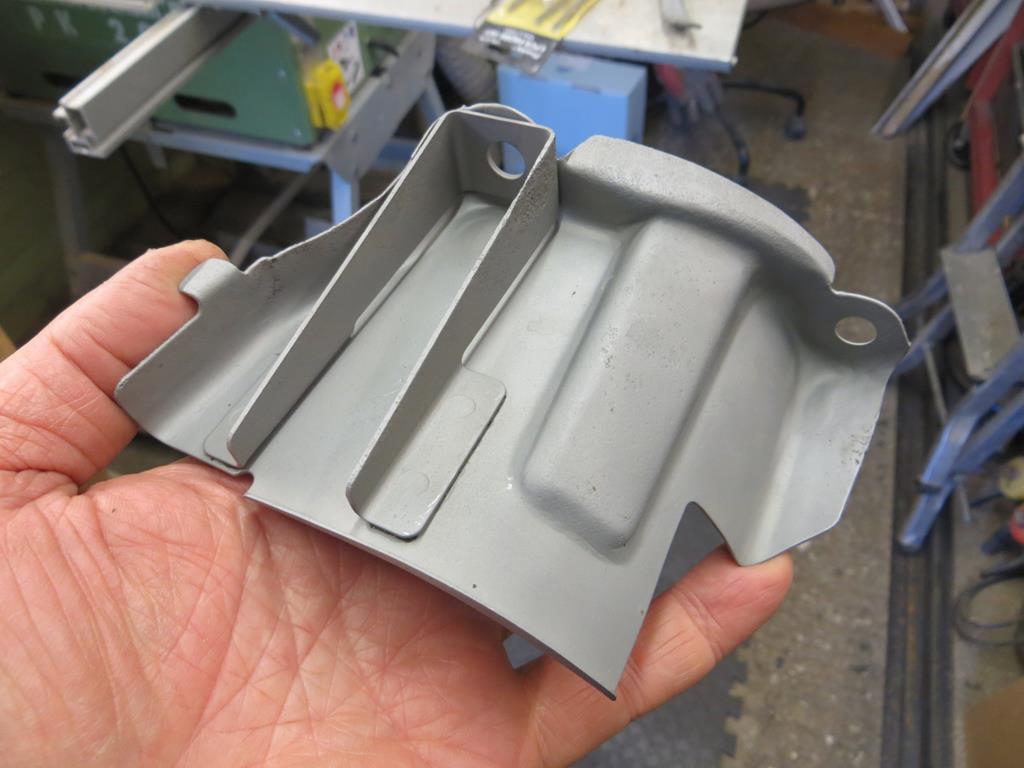  And then, later yet, it’s hanging from the garage ceiling with primer on it.  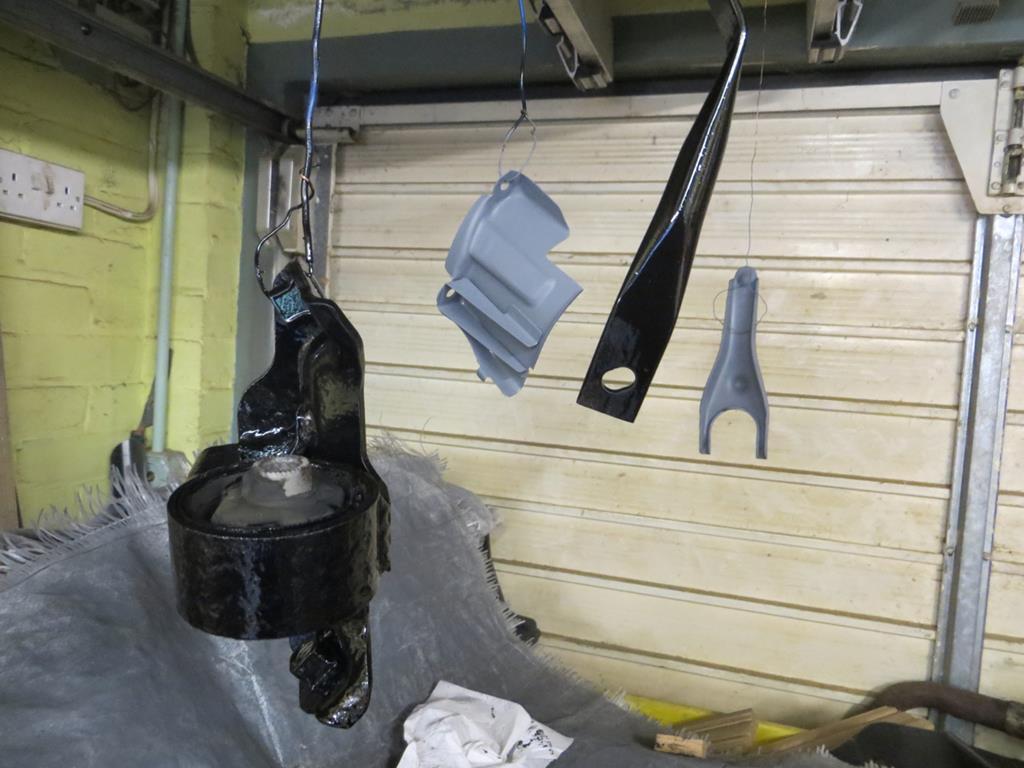 Along with yet more engine mounts (I’m sure I’ve done more mounts than I actually took off the car) and the clutch fork. Yeah, I know you are bored with pictures of things hanging from the garage ceiling. Well I’m bored of It too but I don’t see why you should be spared the pain! Next on the list of things to be cleaned is the starter which, like everything else, is covered in oil and mank.  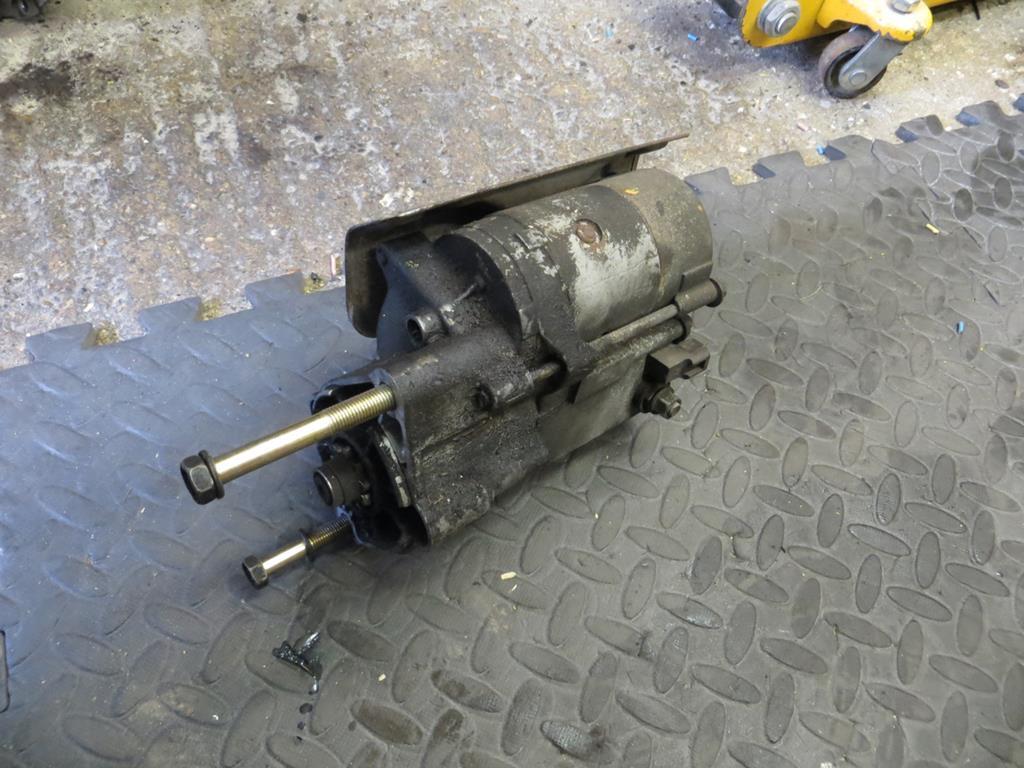 I do wonder about some owners. You go out to wash your car and inexplicably fail to clean the starter. Just because it’s tucked up behind the exhaust manifold and completely inaccessible people think it’s ok to not bother. Anyway, Now it looks like this.  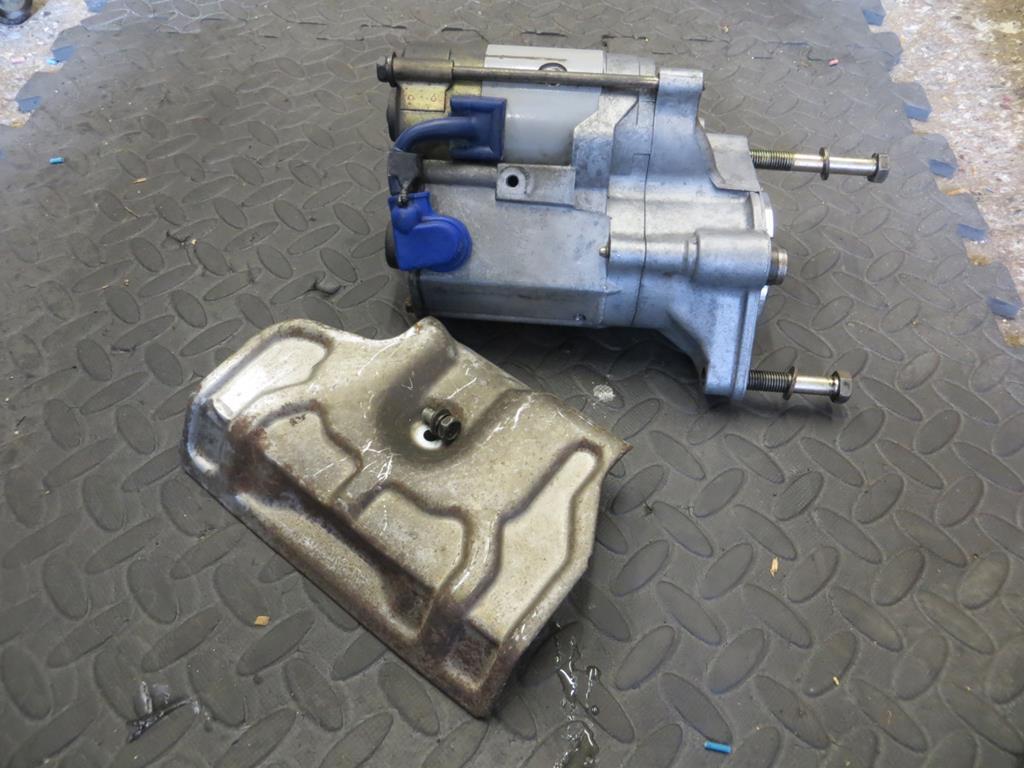 Not going to eat my dinner off it (that’s lunch for any south country folks that are reading) but at least I’m not going to get filthy hands sticking it back on the car. I don’t know what the dark staining on the heat shield is but it’s not coming off - so it can stay on. While the starter was off the car I thought I’d take a look at the starter switch contacts on the back of the solenoid.  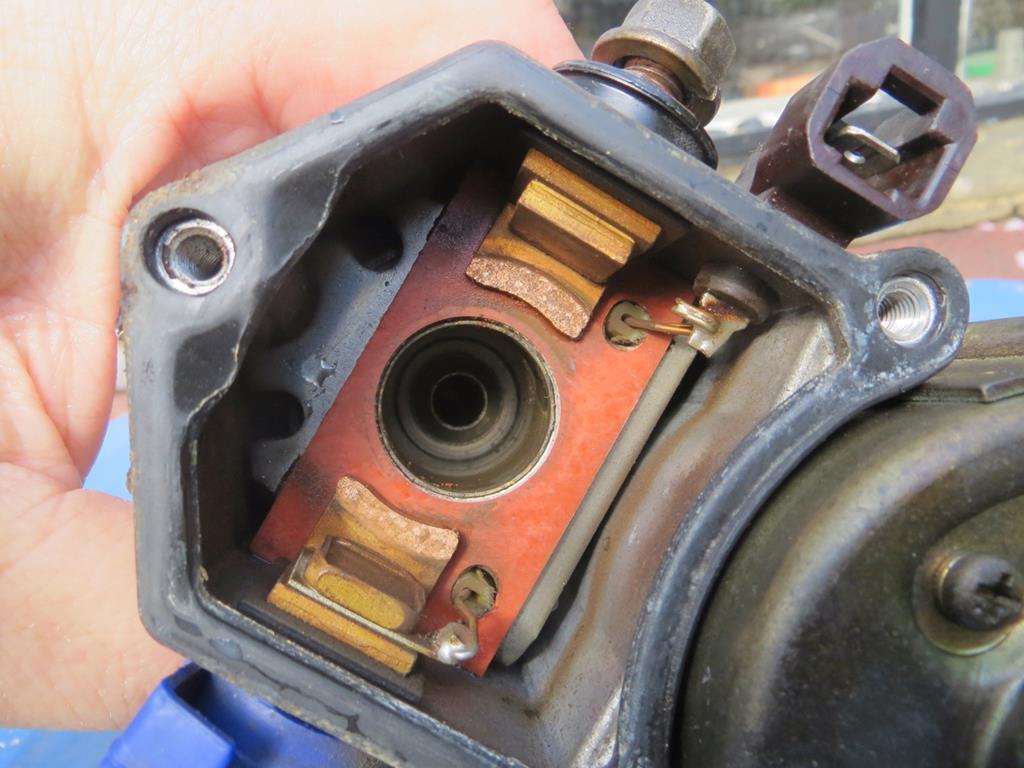 There is a circular piece on the back of the solenoid that bridges the two contacts you can see above. Invariably one side makes first and then the other side arks a little under load. That’s the side that gets eaten away which makes it lower so it contacts later so it arks and gets eaten away and so on. Eventually it won’t make contact and the starter fails. I had it once with a Corolla. I just made a new contact out of a bit of brass but this one has a bit of life left yet. It’s the top one that’s taking the wear in the photo above. Lastly, remember my scummy gearbox that came off the car looking like this.  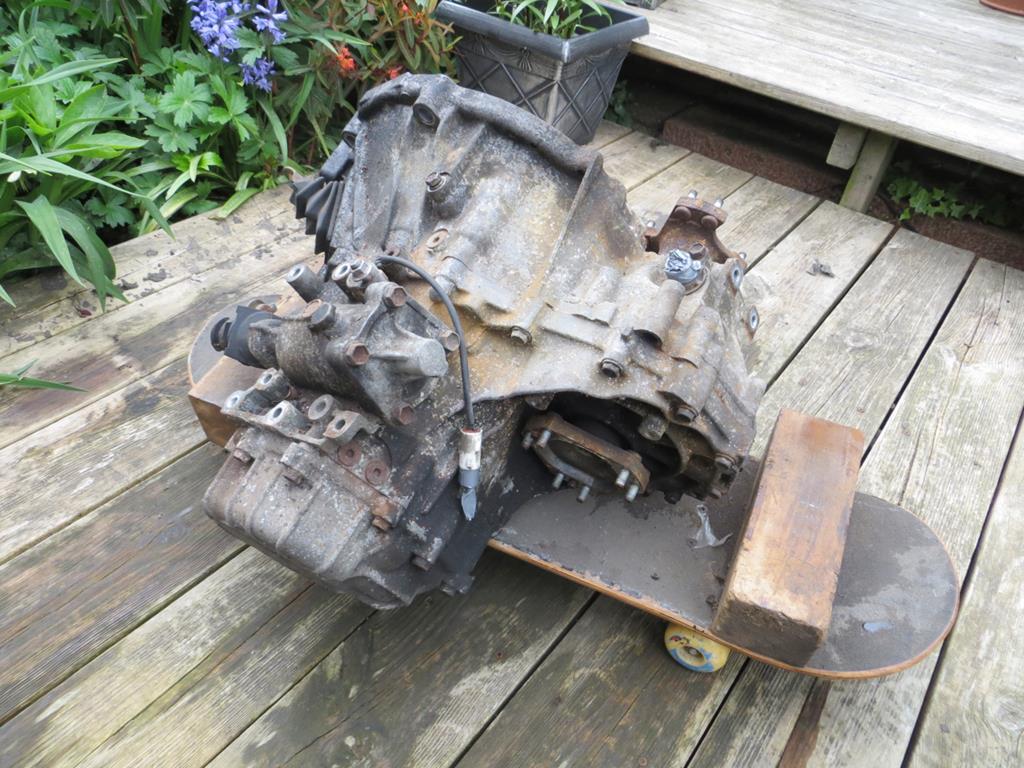 And was then jet washed, gunked, left in the rain, attacked with degreaser, power tools and so on. Well now it looks like this.  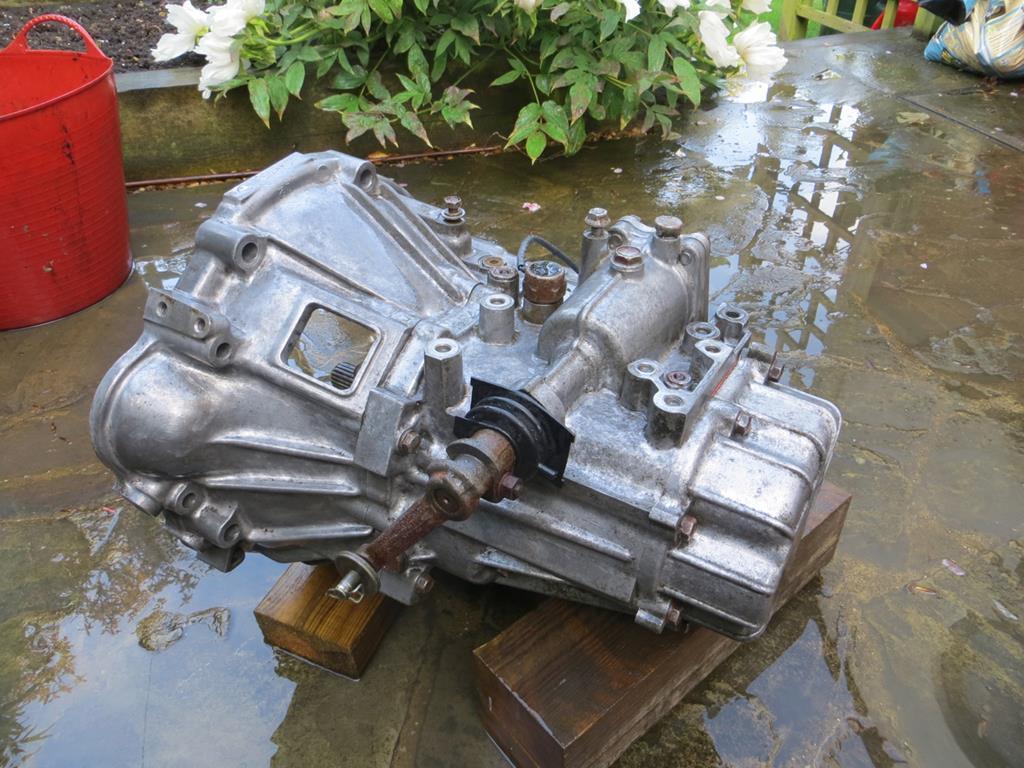  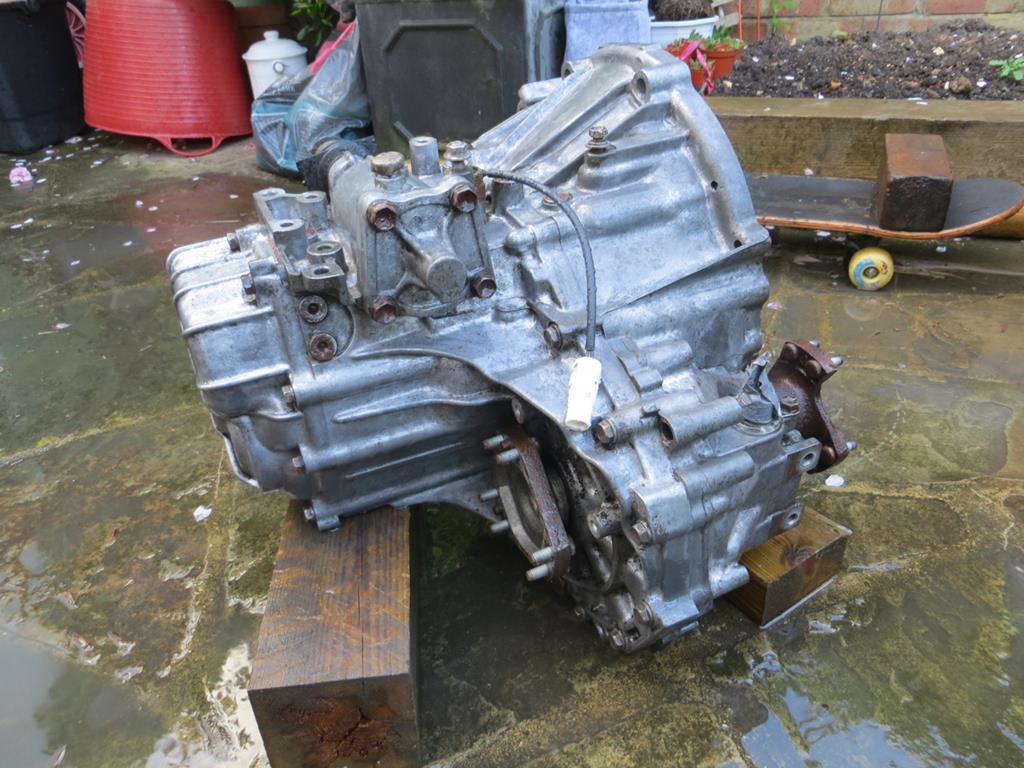 Not perfect but it’ll do. Better than it was by a country mile. James |
| |
|
|
|
|
trimtechniques
Part of things
  Porsche 928 4.7 ltrs of German grunt. Mazda MX-5 MK1 Dakar. VW T4 camper
Posts: 158
|
|
|
|
|
Brilliant read . I like your approach to the running restoration of the MR2. I also like the idea of saving money wherever you can.
You have inspired me out of the bewildering stupor I have been in recently over which job to tackle first in my fleet of rusting maybe one day classic cars (who am I kidding )
However today I woke up witha cold and my hip hurts. So made better use of the time reading your epic story.
There's always tomorrow to make a start!
|
| |
|
|
|
|
|
|
|
|
|
Thanks trimtechniques! Although the 'saving money' thing is probably just 'cos I'm a tight git! I was born in Glasgow to Yorkshire parents and spent my teens in North Yorkshire. There is no hope! peteh1969, thanks for digging that up but it's for a MK2 car. Admittedly I should measure the ones on my car before I put it back together 'cos they may well fit. Good of you to look though, thanks again! |
| |
|
|
|
|
|
|
|
The car is increasingly full of cleaned and painted parts and the garage is increasingly empty. Thank goodness. I’m close to putting it back together. This is fortunate because my sand blaster has a problem…  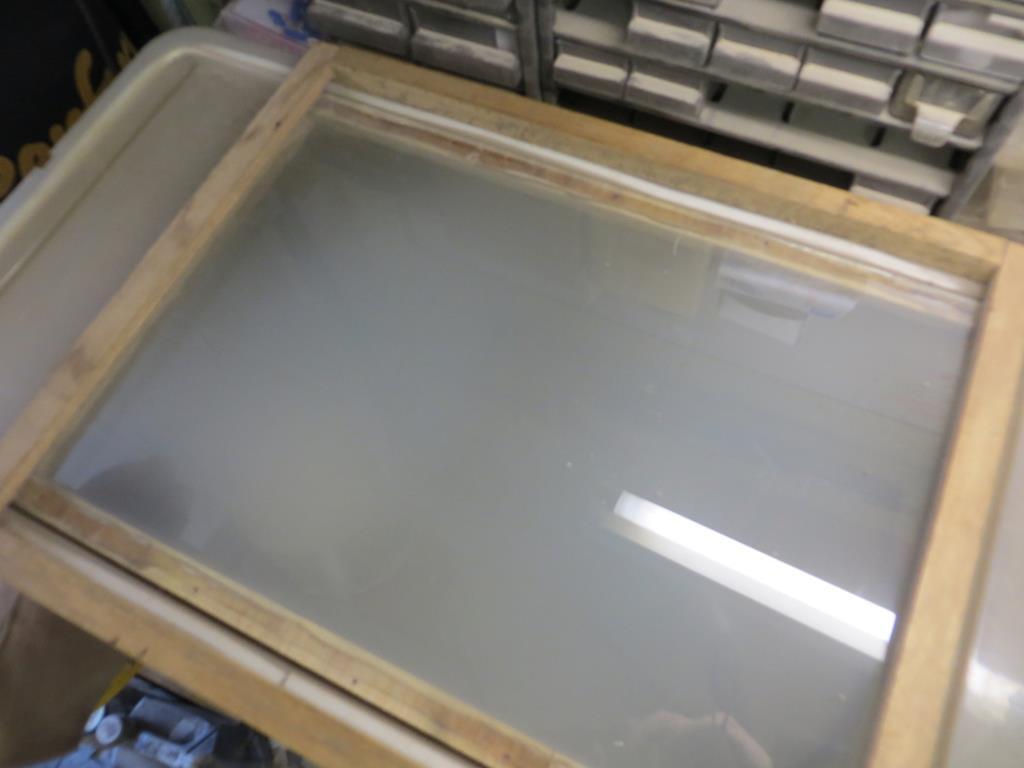 Yep, I’ve used it so much that the glass has become so badly etched that I can’t see through it. Theoretically it’s an easy fix. Buy a new bit of glass. There used to be a nice, handy glass shop in town but, evidently, the 3 pieces of glass that I’ve bought over the years weren’t enough to keep them in business. It’s now a micro brewery I think. I’ve never understood the concept. I mean, how ‘micro’ can you make a pint before it’s no longer a pint. Maybe it’s only for very small people? Is ‘micro’ now the socially acceptable way of referring to a ‘short  ’? The customers looked average height when I last walked past though. You see I’m very confused by the whole thing… Anyway, a little job on the car before the box goes back in.  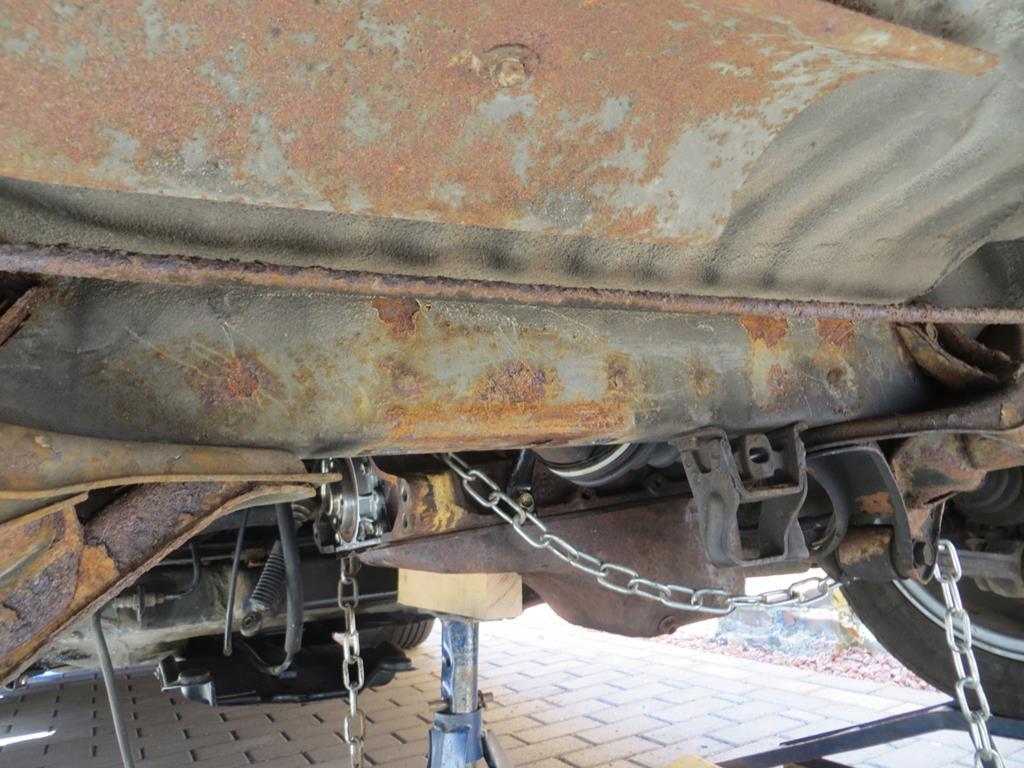 See the rusty cross member? Ignore the rusty thing at the top of the picture, that’s just the exhaust heat shield. The rear box mount bolts to the cross member so it needs sorting first.  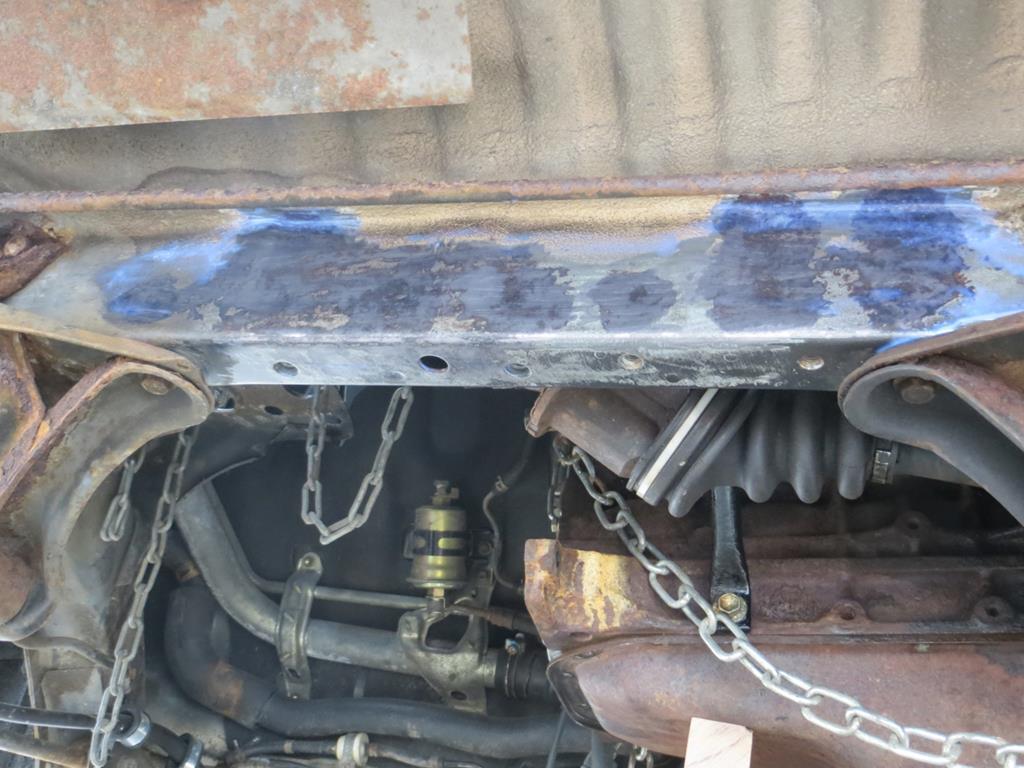 After attacking it with the Power File thingy it got painted with Hydrate 80 to deal with any remaining rust. And then a coat of paint.  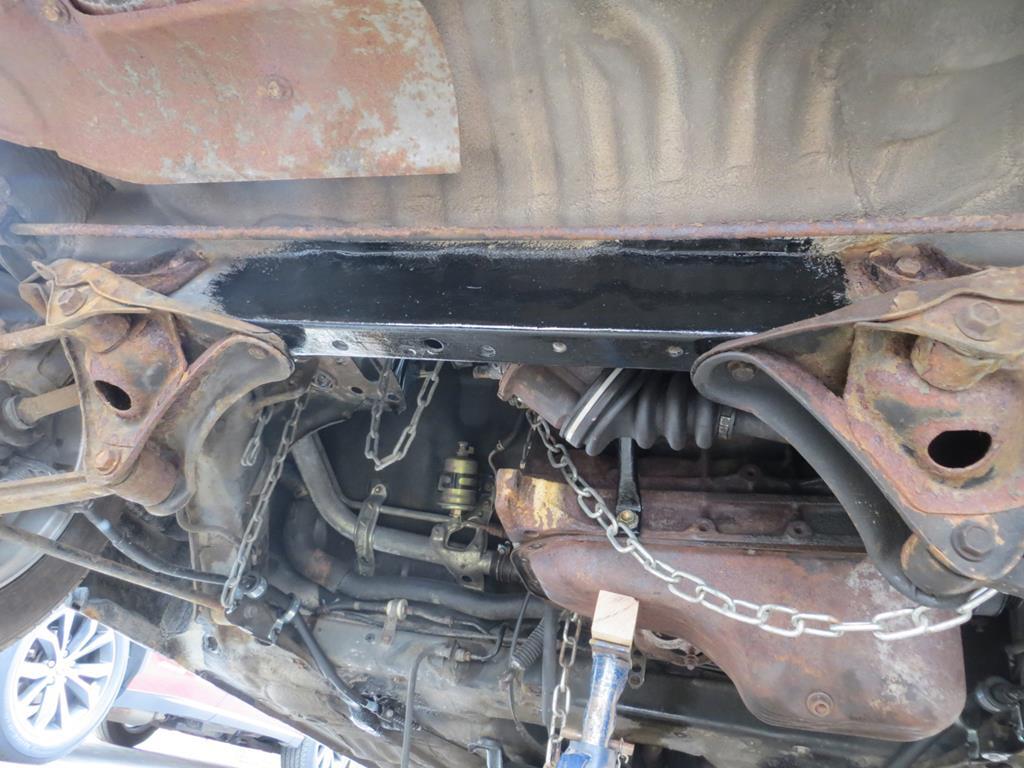 It needs some seam sealer to finish it off. And I may squirt some wax into the box section while I have access too. I need to do something about my Power File though. The roller on the far end of the arm keeps going on the wonk - the shaft keeps half dropping out - and it chucks the belt off. Poxy thing! Back in the garage we find the thermostat housing that I’d restored when I had the engine in bits.  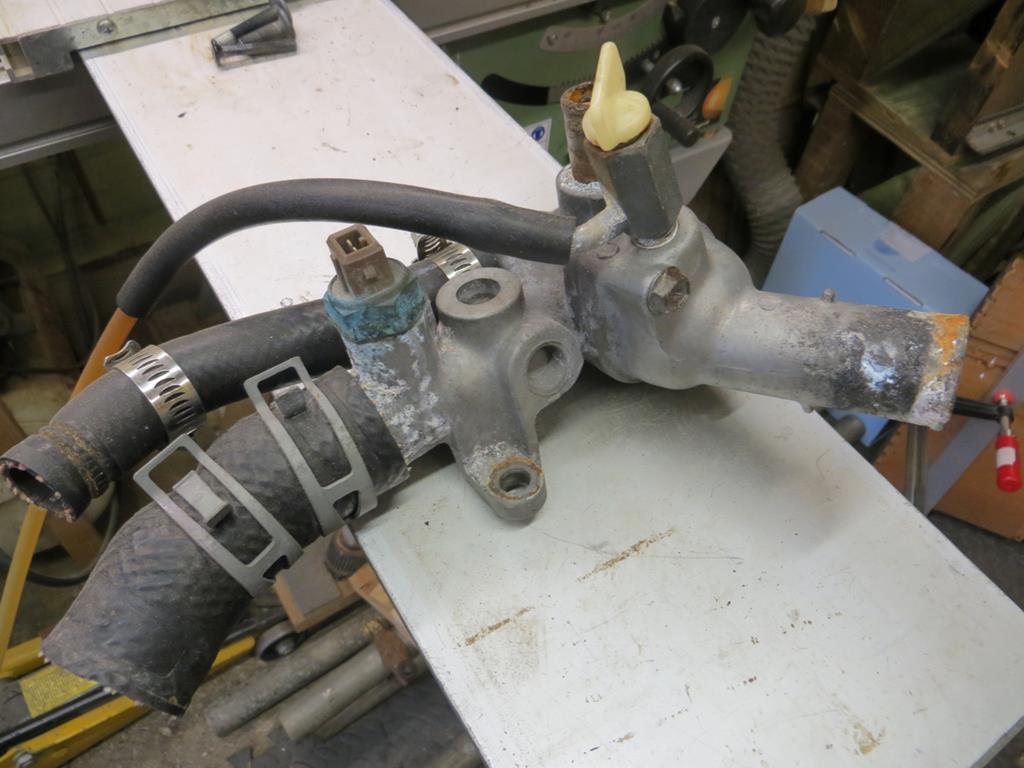 And, annoyingly, it was showing signs of leaking and corrosion. I think it leaked for a while when it first went back together and then dried up. But, of course, I’ve disturbed it again so it’s probably going to leak again. So it came apart again and had another trip through the media blaster.  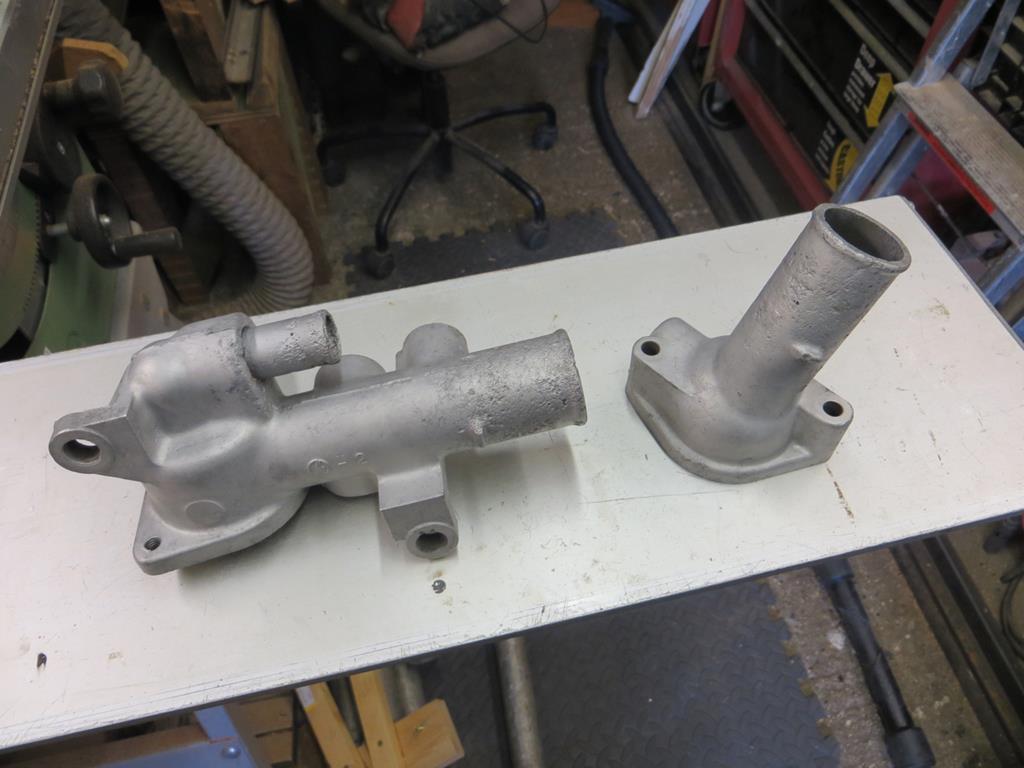 I suspect that the hoses may not be seating on the pitted connections.  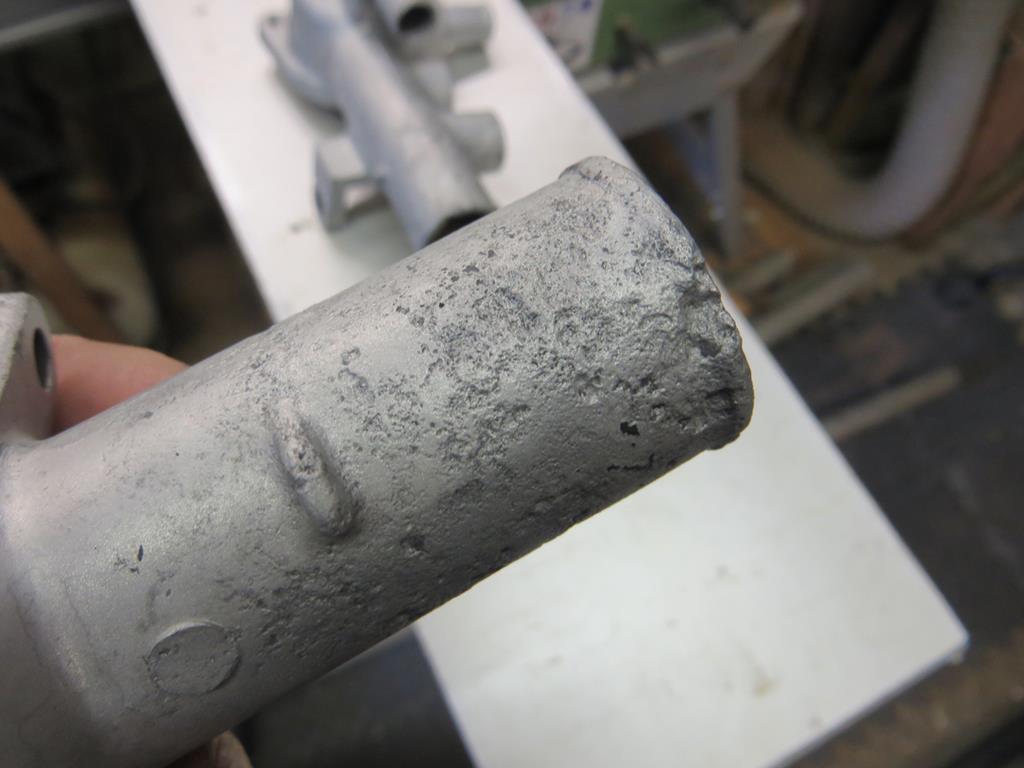 Hmmm. Out with the JB weld to make the necks good.  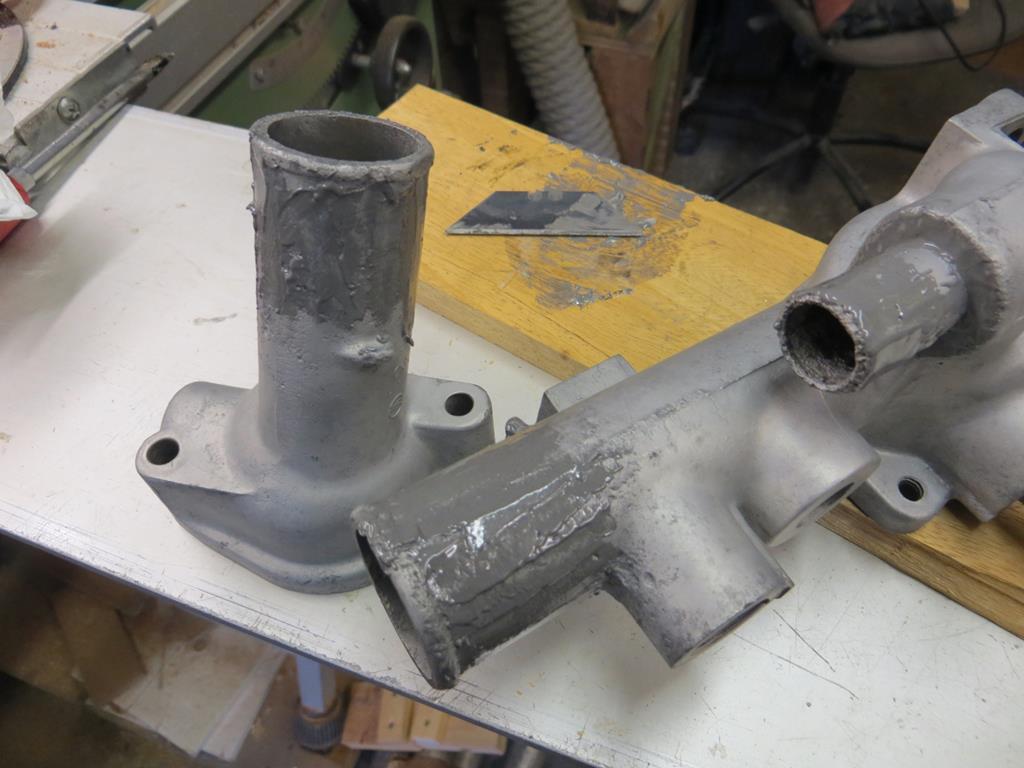 That’s going off at the moment and will then need sanding flush. I’ll replace the hose clips too. I think I have some stainless ones somewhere. And that’s about it apart from one elephant in the ointment. Or is that a fly in the room? I can’t remember… You see, dangling from the bottom of the car is the clutch slave cylinder and the brackets that hold it and the gear change cables to the gearbox.  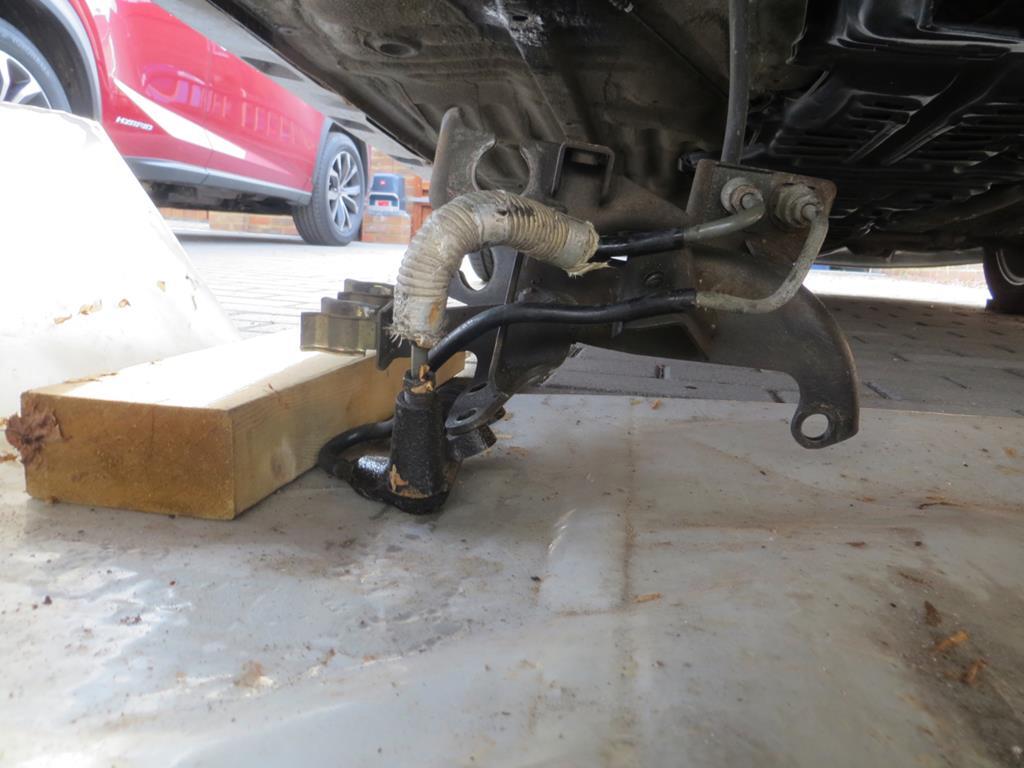 Being somewhat tied to the car by the hydraulic hose I was considering it to be part of the car. But I really can’t bolt that to the gearbox without cleaning and polishing it to within an inch of its life. That means breaking the hose connection, and that means risking the solid hose on the car. Hmmm. I don’t actually own a brake line spanner and I daren’t do it without. So off to Halfords (other crappy shops exist) who’d already sold the last one. Arrgh! James |
| |
|
|
|
|
|
|
|
|
the only place i can think of is bell glass in rainham.
|
| |
|
|
|
|
|
|
|
|
The place here was called Able Glass and I think they are still in Sittingbourne. I'll have to look them up.
There must be somewhere in Canterbury too. Or so you'd think.
|
| |
|
|
|
|
|
|
|
|
Can't just slot a hole in a cheap/spare ring spanner?
|
| |
|
|
|
|
|
|
|
|
When you replace it, might be worth getting some of the plastic film protectors for the inside of the glass, or if tight like me use OHP transparency film (remember those days?....) and tape down on the edges to stop the dust getting in between it and the glass.
|
| |
|
|
|
|
|
|
|
Can't just slot a hole in a cheap/spare ring spanner? The proper ones are really heavily built round the ring (not that it is a ring!) especially where it connects to the handle. I think if you cut a slot in a normal ring spanner it'd just open out or break. But, being the offspring of MgGyver, I'm now wondering if I could build up a ring spanner with weld and then cut a slot in it. Not sure what that would do to the temper of the steel though. I reckon it'd be really really angry...  If JB reads this he'll be so upset that I'd even consider abusing a tool like that. When you replace it, might be worth getting some of the plastic film protectors for the inside of the glass, or if tight like me use OHP transparency film (remember those days?....) and tape down on the edges to stop the dust getting in between it and the glass. On another forum somebody else just said the same thing, evidently, you can get stuff made for the job. Just need to find out where from. Good idea about OHP stuff though. I was wondering if you could get hold of that stuff they stick on train carriage windows. James |
| |
Last Edit: May 9, 2019 20:13:30 GMT by Sweetpea
|
|
Darkspeed
Club Retro Rides Member
Posts: 4,876
Club RR Member Number: 39
|
|
|
|
|
I was going to suggest Heli tape over the glass - but then realised that this was not the thread with chip in the headlamp - Honda Legend thread - but the glass in your blaster - but then thought what the hell perhaps it would work! But glass is probably cheaper.
|
| |
Last Edit: May 9, 2019 21:03:43 GMT by Darkspeed
|
|
|
|
|
|
|
|
You can buy clear safety film (stuff to make normal glass safer and more secure) on ebay for very little.
|
| |
|
|
|
|
|
May 12, 2019 19:22:49 GMT
|
At the end of the last exciting episode I’d built up the thermostat housing with JB weld to fill the pitting. This weekend I sanded it back. Shall we have a before and after photo? Ok. Since you ask so politely let’s do that… Before.  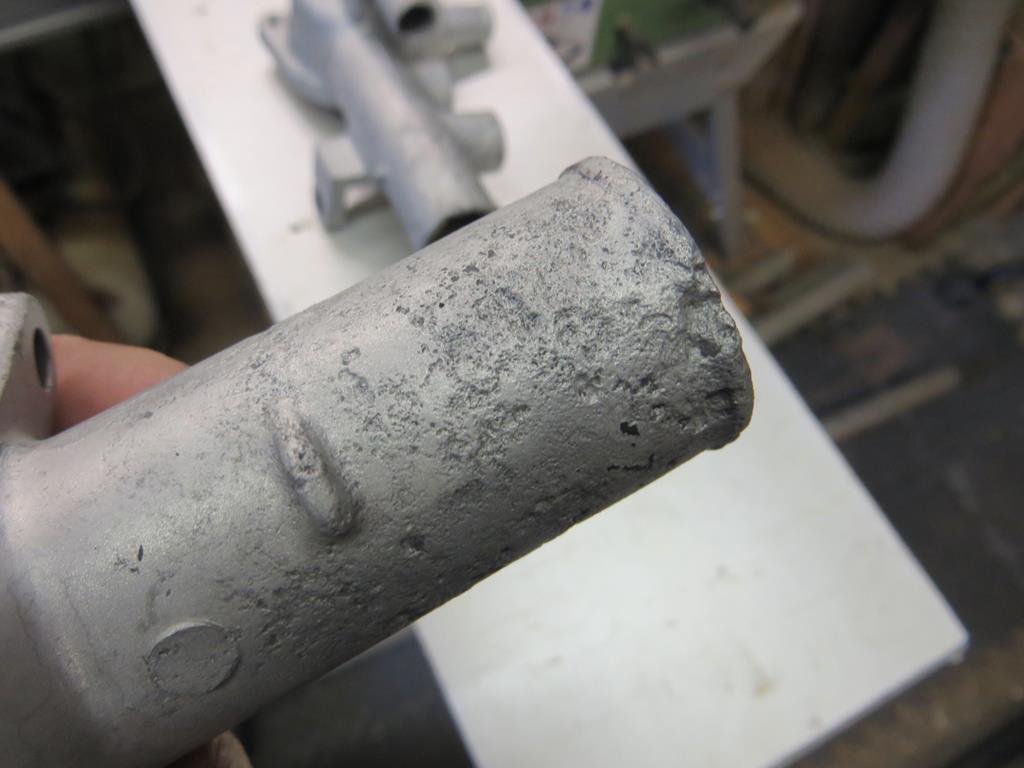 And after.  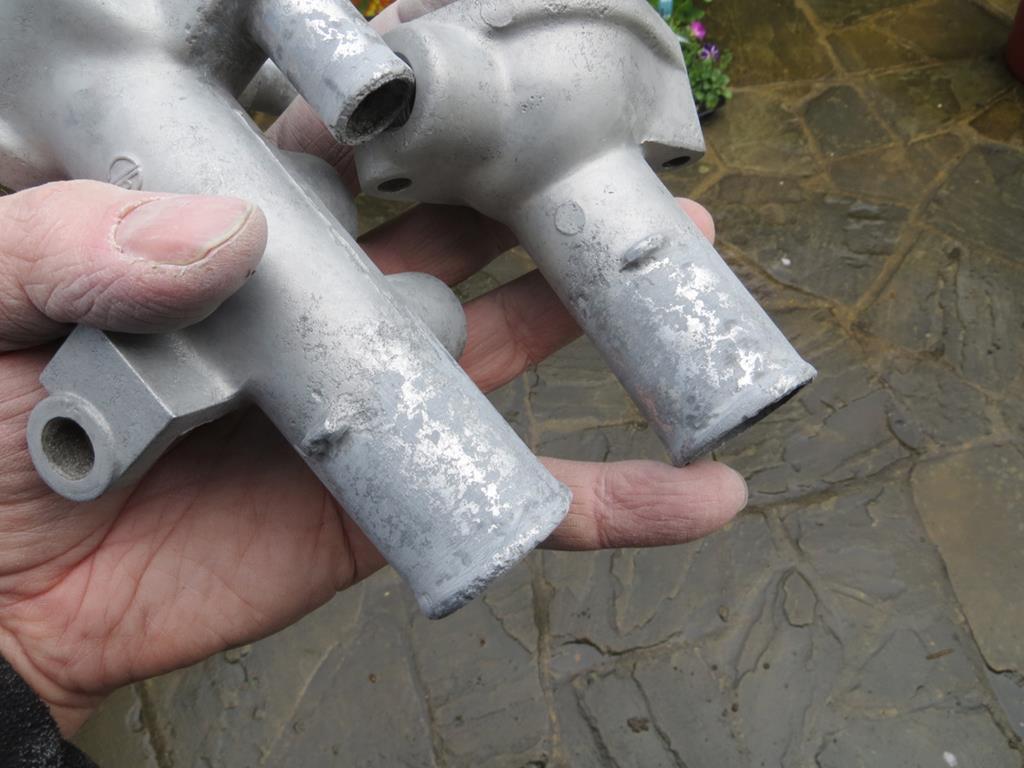 Hopefully that’ll allow the hoses to seal properly. And then I rebuilt the stat housing ready to go back on the car. 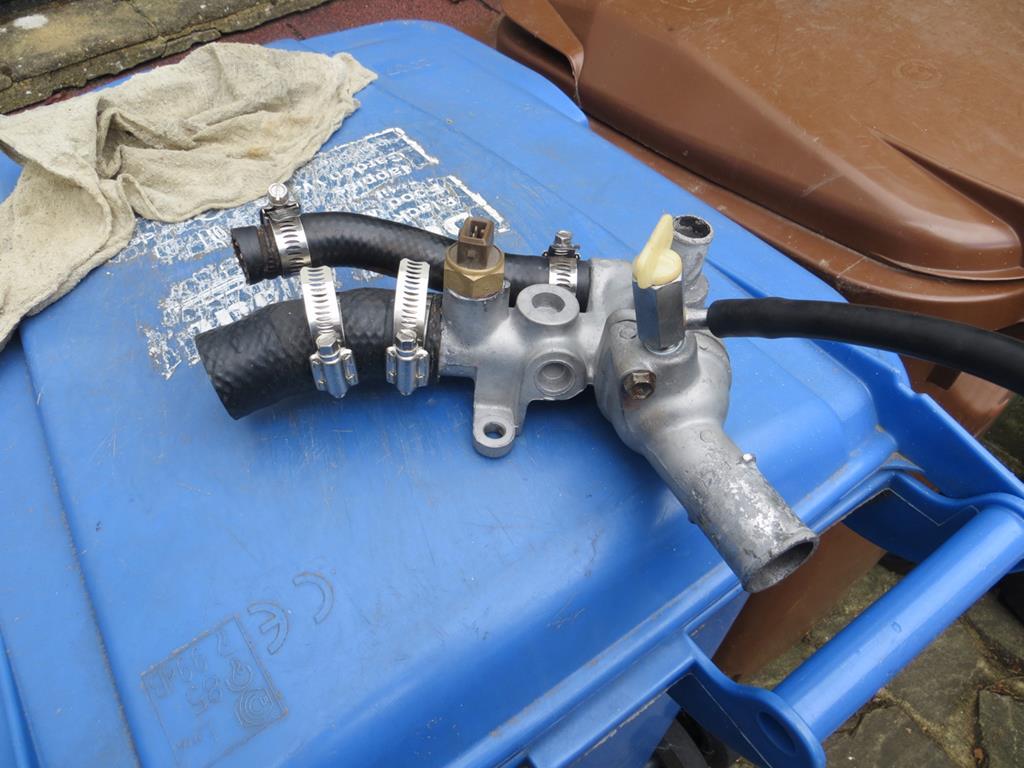 You see the tap on the top and vent pipe coming off it? I’ve managed to get that pointing in totally the wrong direction. I’ll wait until I offer it up to the car but I think I’ll have to spin it round. I don’t think it’ll work as it is. That done it was off tool shopping.  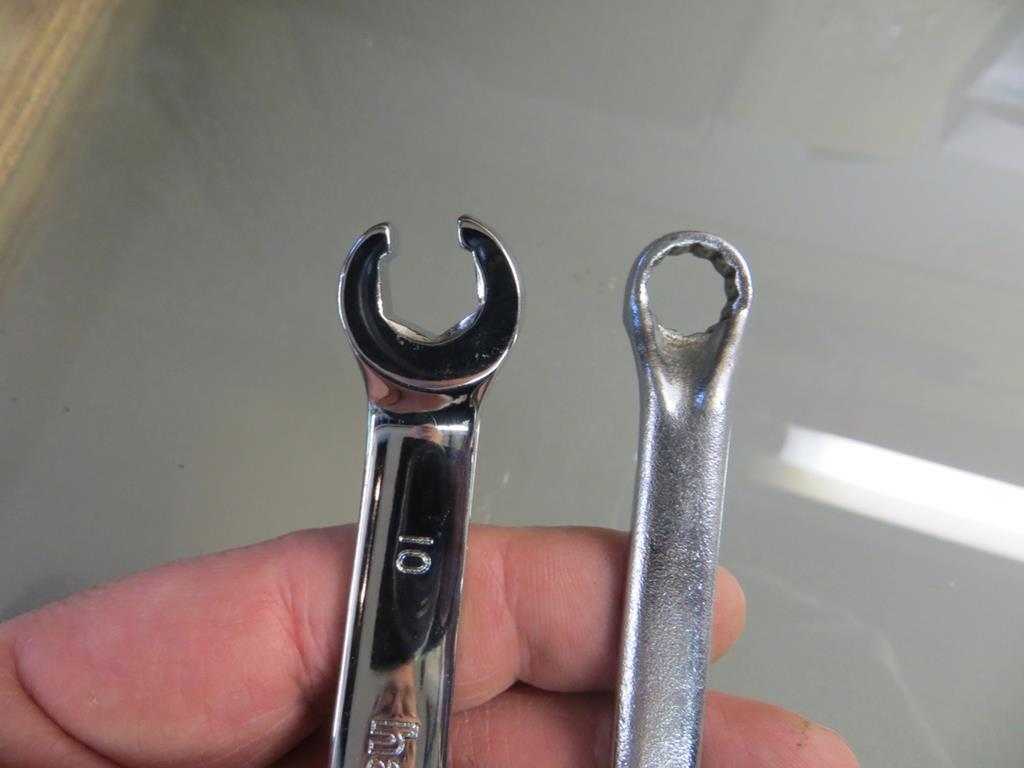 Impressive how well built the brake line spanner is compared to a normal ring spanner. Anyway this meant I could deal with the heffalump in the butter. Or something like that. 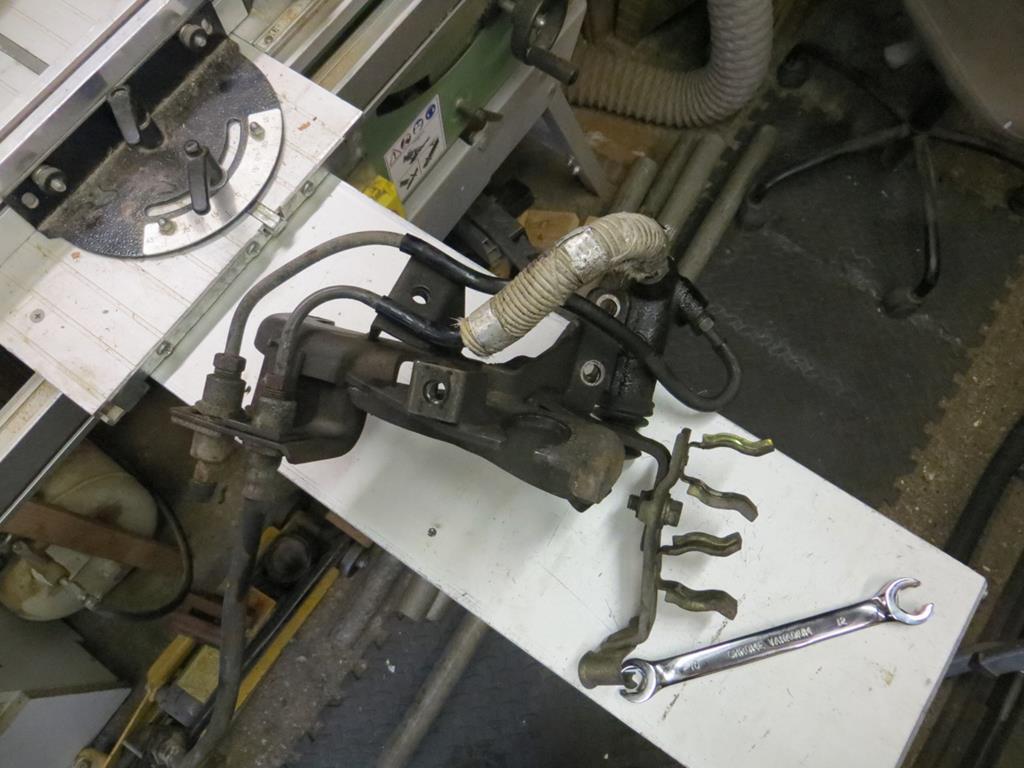 I’ve got the clutch slave off for some love and tenderness in the garage. |
| |
|
|
|
|
|
May 12, 2019 20:45:26 GMT
|
The clutch slave cylinder made a mess on the garage floor.  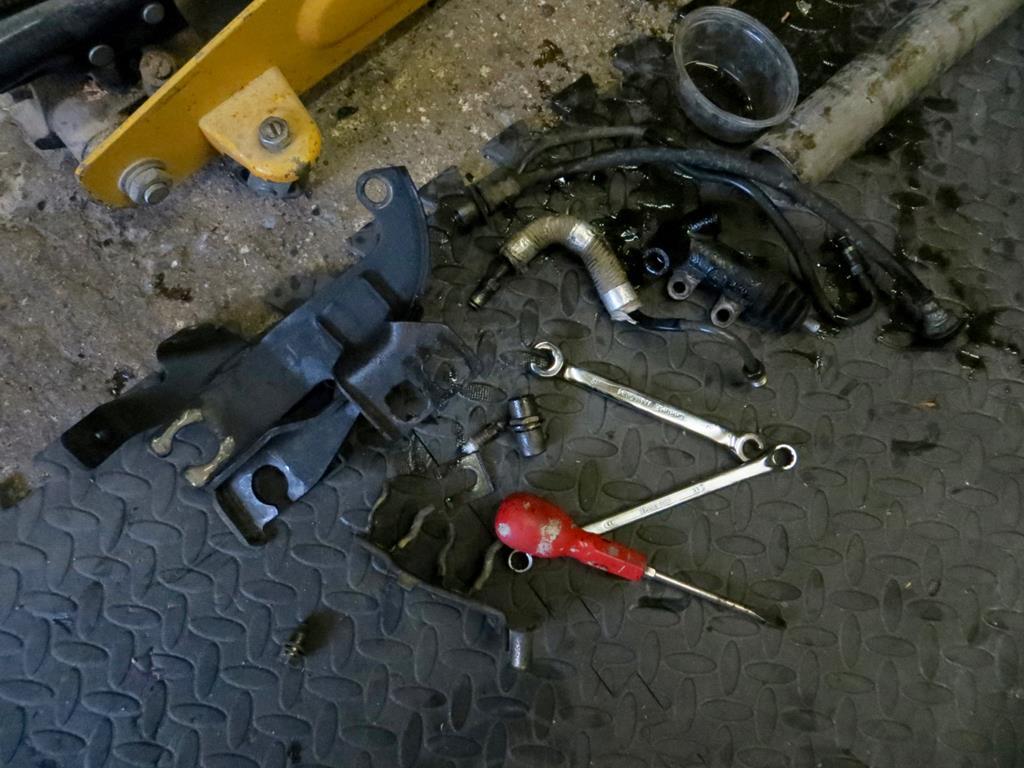 The fluid that came out of it was pretty terrible. I suspect it’s been in there since the car was built. I was going to leave the clutch slave alone. Well it was working fine so why mess with it? But when I saw the fluid that came out of it I thought I’d pop the piston out and take a look. Apart from some rubbish in the bottom of the cylinder it was fine so it all got a clean and paint to make it look pretty.  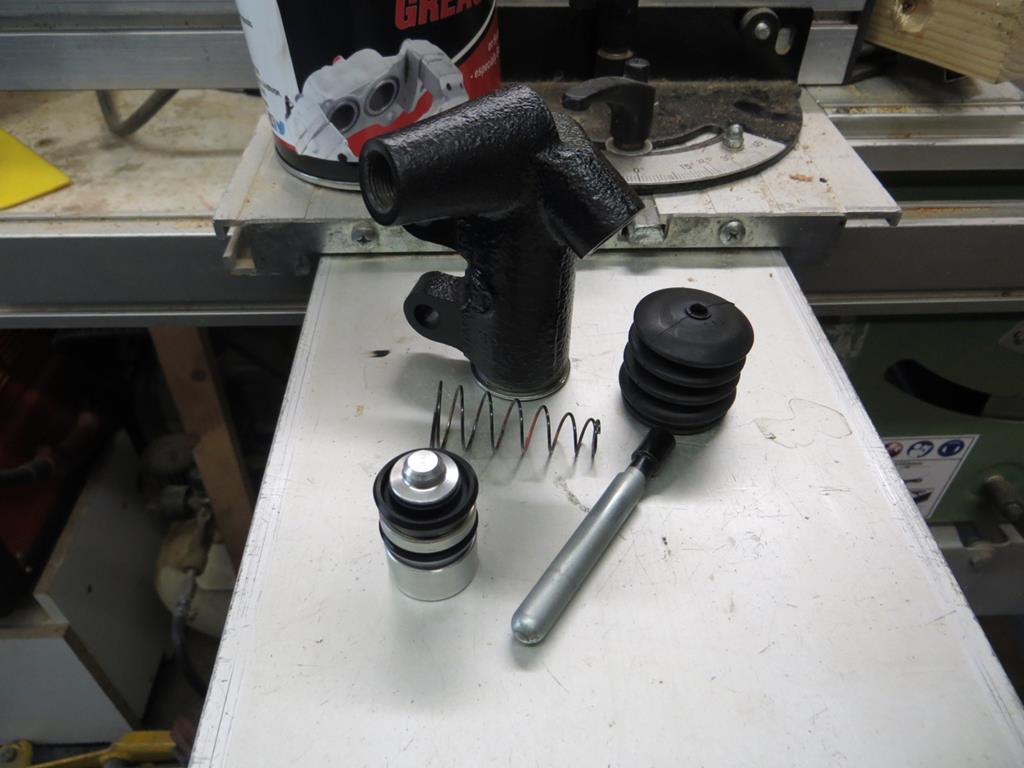 And then went back together. Still got the original seals on it because, well, I haven’t got any new ones. But they look good and so does the bore of the cylinder. I’ll keep an eye on it when it’s back on the car. Ready to go back on…  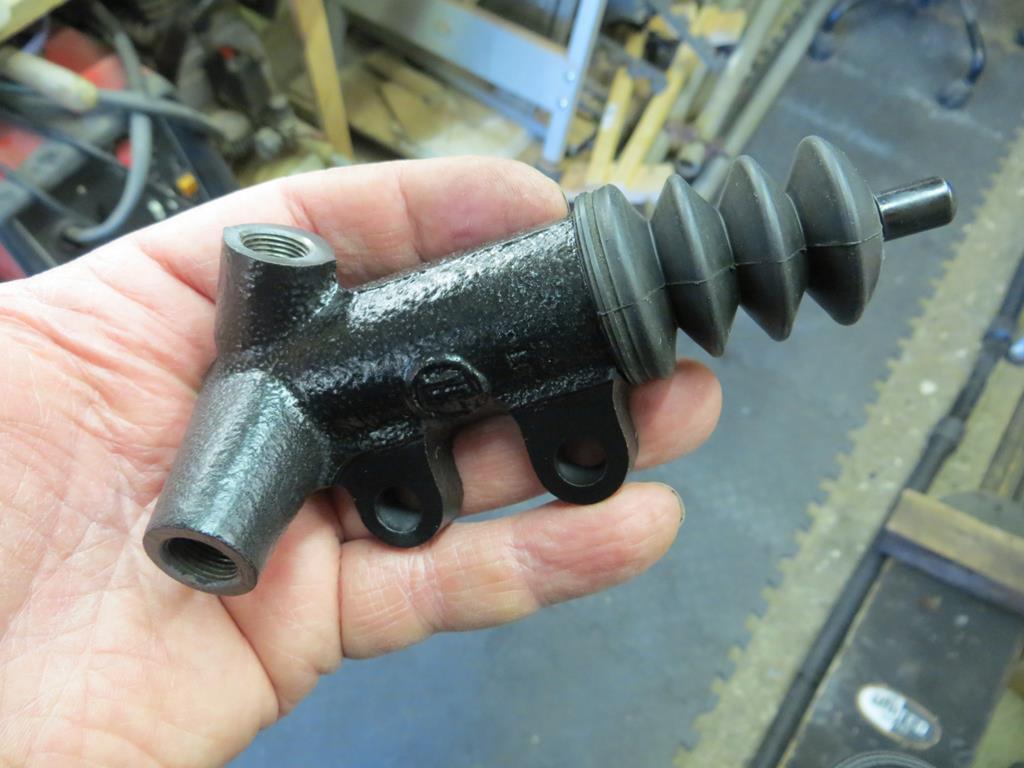 You know the Dutch artist MC Escher? He’s the bloke who came up with those impossible geometric drawings where a set of stairs goes up to a floor that’s below the one you left. Well it’s a little known fact (I’d say only very serious scholars know this) that later in life he worked in Japan for Toyota designing brackets. No really, he did… Look at this one he designed for the MR2.  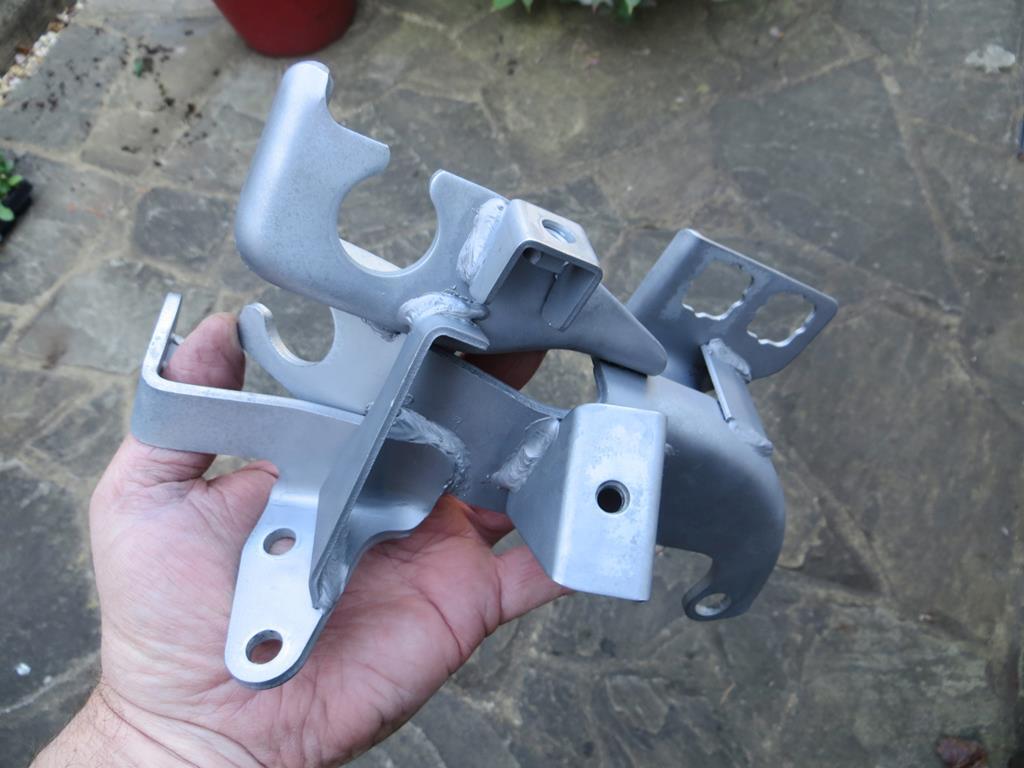 I’m sure that’s a physical impossibility. What’s even more impressive is that when MC Escher designed this in the early ‘80s he’d been dead for 10 years. What a remarkable man. You know I think it’s time to start putting this car back together. So I went to get the flywheel out of the boot.  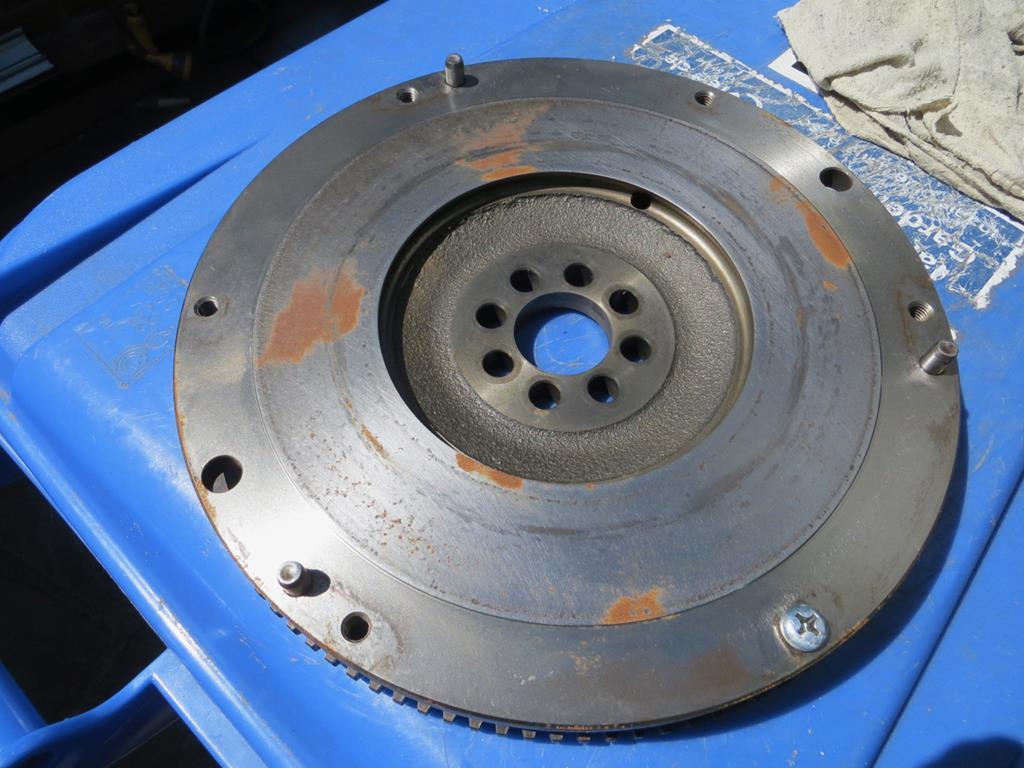 It was soaking wet with condensation. Ok so the surface rust is easy to fix but it rather suggests that water is still getting into the boot and I’l really not sure how. Made myself the obligatory clutch centering tool that all mechanics make when they find they don’t own a clutch centering tool.  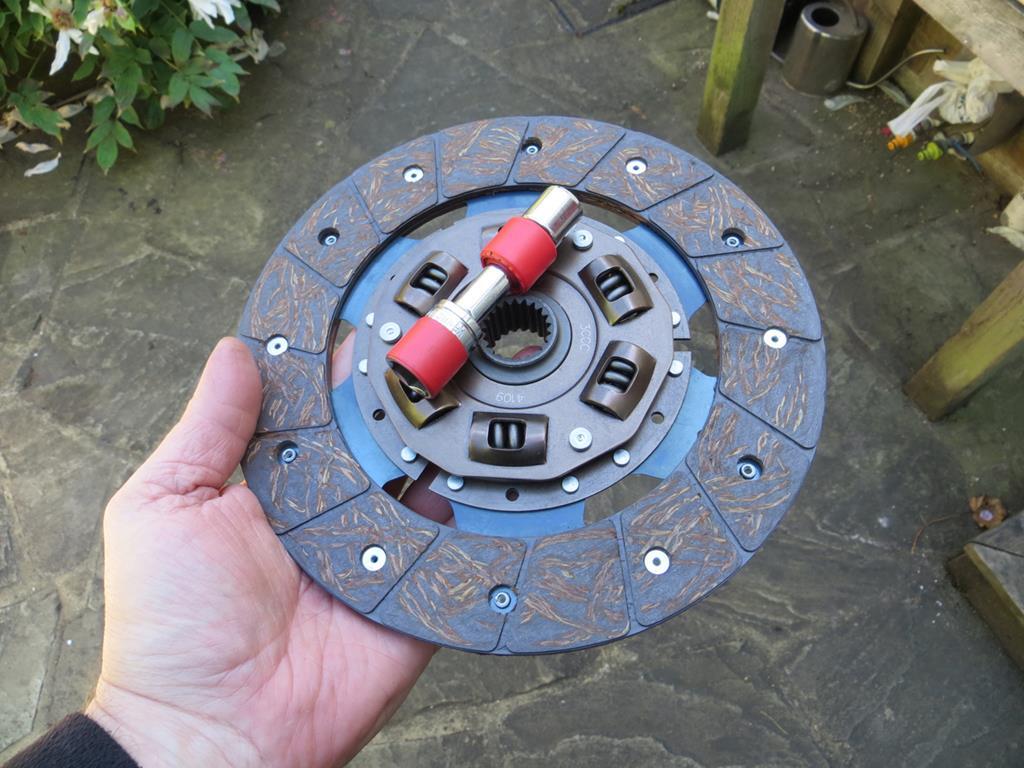 And, to cut a long story short, bolted the flywheel and clutch back on the motor.  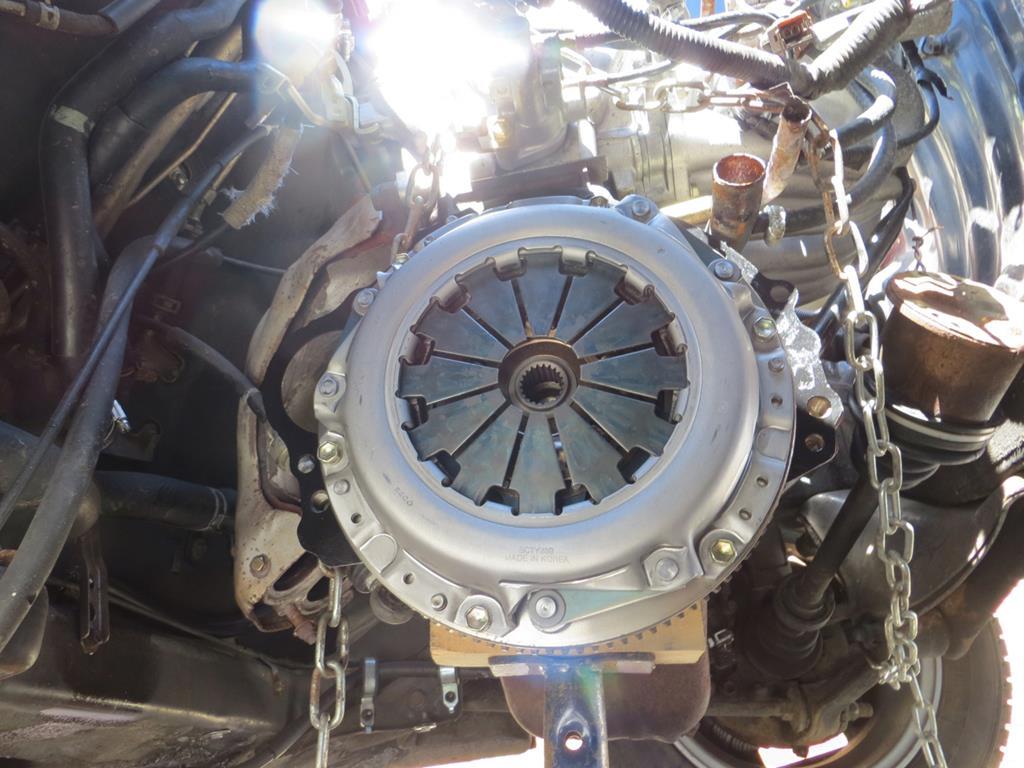 One last little job… Stick the new clutch release bearing in the bell housing.  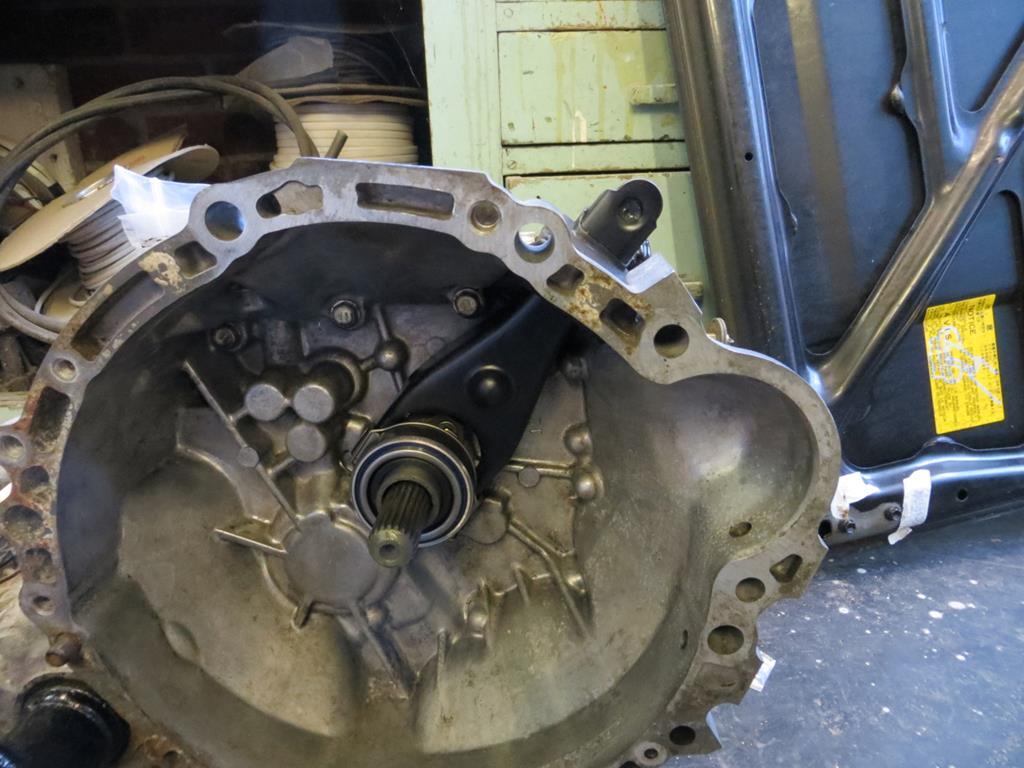 It was more or less at this point that I realised I hadn’t tried the clutch plate on the splines of the gearbox. Oops! Ah well, I’m sure it’ll be ok. Might find out next weekend if it doesn’t rain. James |
| |
|
|
The Doctor
Club Retro Rides Member
Posts: 3,448
Club RR Member Number: 48
|
|
May 12, 2019 20:59:45 GMT
|
|
I had my mates car apart this weekend for exactly that reason... Wrong splines in the clutchcentre...
It's only 4 days before we leave for the weekender anyways...
Great to see it coming back together!
|
| |
Last Edit: May 12, 2019 21:00:39 GMT by The Doctor
|
|
|
|
|
May 12, 2019 22:14:38 GMT
|
I had my mates car apart this weekend for exactly that reason... Wrong splines in the clutchcentre... It's only 4 days before we leave for the weekender anyways... Great to see it coming back together! So the box wouldn't fit back on? Or was it close enough to fit but not work? Sadly I won't be at the weekender. Not this time anyway. Maybe when I get the car in a presentable state I'll get there. It'll need to go on for a good few years mind! I've said I'll take it to a Goodwood breakfast meet when it's a bit tidier too. Another 10 years should have it sorted! Enjoy the weekend. I'll be looking at the reports! |
| |
|
|
The Doctor
Club Retro Rides Member
Posts: 3,448
Club RR Member Number: 48
|
|
|
|
Splines on the clutch where bigger then on the box, so it went on almost too easy (should've guessed something was wrong, never had a box go back on so easy, even though this was only a 25kg 4 speed from a RWD Corolla  ). Resulted in lots of noice, some nice vibration and no forward motion. Lesson learned here, check plate on input shaft first, saves 6 hours of work  |
| |
|
|
|
|
|
May 13, 2019 13:01:28 GMT
|
|
Hmmm. I think you've convinced me to take the clutch off and try it on the box.
It's only 6 bolts at the moment. I think I'd be nuts not to do it.
|
| |
|
|
|
|
|
May 13, 2019 14:30:11 GMT
|
It's been ages since I dropped by here. You're actually doing car stuff now!!!  |
| |
|
|
|
|
|
May 13, 2019 19:19:22 GMT
|
It's been ages since I dropped by here. You're actually doing car stuff now!!!  Shhhh! Don't tell the missus! |
| |
|
|


 ’? The customers looked average height when I last walked past though. You see I’m very confused by the whole thing…


 ).
).