eurogranada
Europe
To tinker or not to tinker, that is the question...
Posts: 2,556
|
|
Oct 24, 2013 12:49:20 GMT
|
You are certainly doing an excellent job & You shouldn't think that you can't do even some of the prepping. Judging by the standards of the work & finish on your 'smaller' parts, which are normally far harder to ensure a decent finish ,especially where you have curves & double curvatures, I think you'd do an excellent job. My uncle taught me to prep & spray nearly 40 years ago. In no way do I consider myself remotely good but at the time I had a Frog-eye Sprite that needed painting & he , quite sensibly. rather than do it himself , taught me how to do it. Yes there was 'orange peel' in some places, but then I learnt how to overcome that . I could always see, what appeared to me, to be bad bits & imperfections but most people thought it was a good job. To be honest with you with the amount you have on your plate , I'm amazed at the amount you get done. Respect to you. Thanks for the nice and kind words!! On the prep you mention. I'm not really sure which smaller parts you mean as all of the mechanical parts have only been blasted or sanded clean, then either painted or powedercoated. I've not used any fillers or any personal shaping capabilities to this point, apart from shaping metal into fitting patch panels that is. I have to agree that my parts look good, but that is mostly due to having a good base and clean parts and taking care while painting/coating. And still some parts I already know will once again rust in time. The body of the car contains no filler asof yet. It's all metal. Nicely dressed new welds and some less nicely dressed (but unfortunately not feasibly improvable) old welds. So despite it being nice that you want to encourage me to try prepping myself, I'm far from convinced I'd be able to pull it off. I've experienced on a set of hubcaps for instance that it really is a lot harder than it looks to get something straight, flat, correctly curved etc. And I want this car to be perfect. I will in future not shy away from smaller filler prepping projects like bycicles and stuff. I do agree that your grandfather did very well in not just helping you out, but teaching you!! I try to do the same with my son! He's seven, but really enjoys spending time with his old man and tightening nuts and bolts. It was him who was so very keen to see that on the left suspension arm the angle could be set with the bolt, but on the right it had no effect as on one side the disc did not rotate!! Clever little man! I'm even thinking of letting him inherit the car when he's old enough... |
| |
|
|
|
|
eurogranada
Europe
To tinker or not to tinker, that is the question...
Posts: 2,556
|
|
|
|
Well, I had to drop off my daily driver for it's annual MOT (APK) so left work a little early. That gave me the opportunity to shop for some gear oil for the diff. I had to walk home like a mule, with my 7,5 kg workcase and in the other hand 5 kg of oil, but it was worth it. Finally months after having put the centre diff case together it was now finally time to close it up. Due to a stuck filler plug, I had to resort to an alternative way of filling... 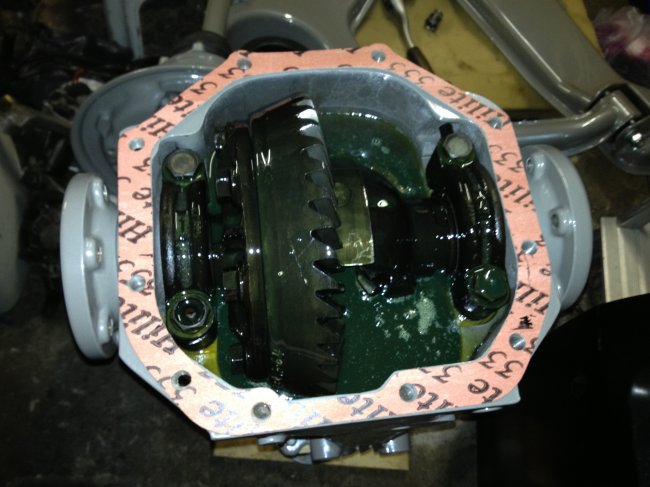 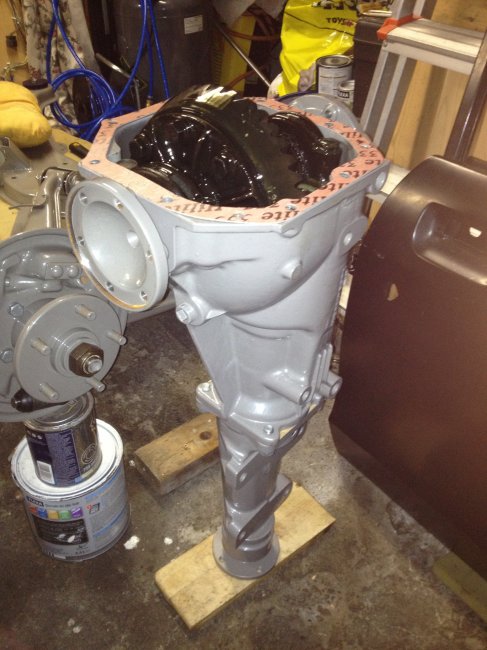 With a new gasket and bolts, I buttoned it up and it thankfully was leak free (I always have to keep myself from overtightening gaskets). 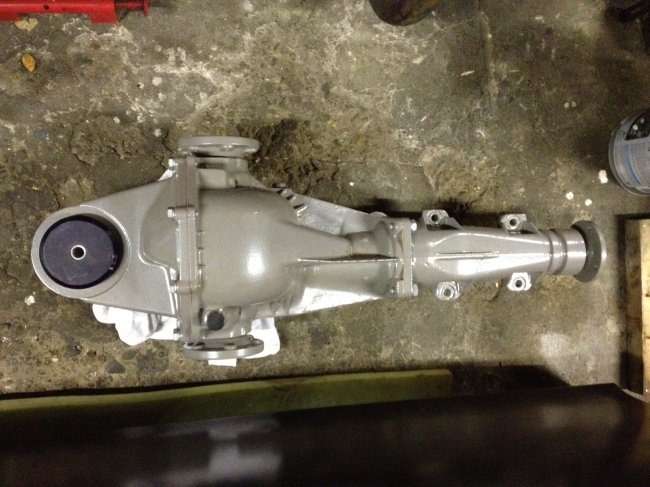 So I thought, well, let's put it in its place. So my son helped me raise the carrier from it's dolly so I could get the nuts on the bolts from below. He's really well into helping me at the moment! Such fun! 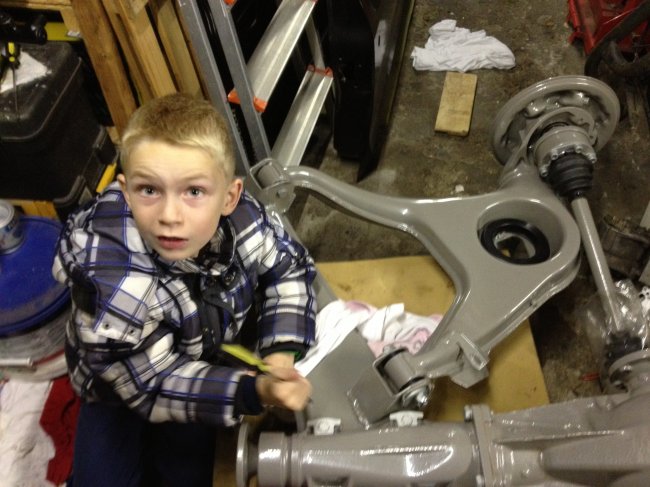 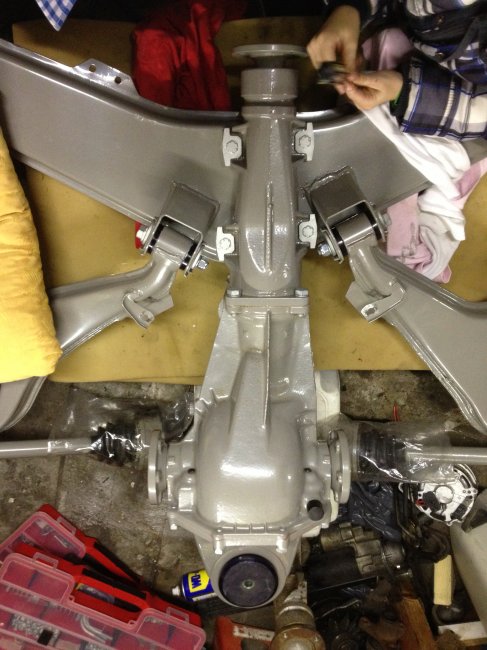 Unfortunately after all care that was taken, blasting, zink priming, powdercoating... some originally very rusty parts show some signs of the orange disease again. Disappointing, but what can you do. 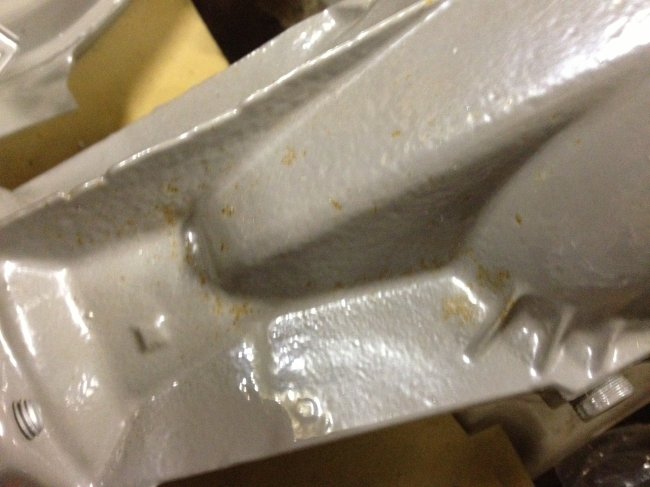 And the temporary end result for the evening. 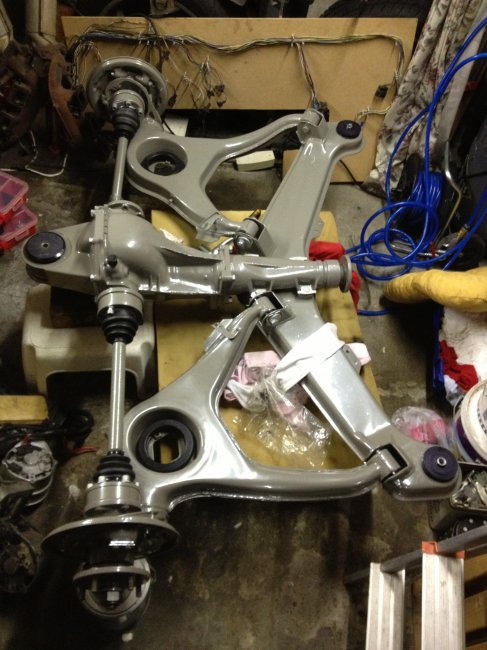 Still to do: - make sure enough grease is in the universal joints before permanently attaching them to the differential. - painting the shocks - bending the new brake lines to suit the suspension arms - attaching the exhaust hangers So should be an hours work to finish it up! I'm not finishing the brakes as yet since I need to wait for the new handbrake cable. |
| |
|
|
goldnrust
West Midlands
Minimalist
Posts: 1,887
|
|
|
|
It seems odd to me that rust would come through powder coat like that. Powder oat it's normally pretty impenetrable, so the rust just bubbles away below till the coating flakes off. Are you sure it's not some metal dusty stuck in the surface of the power coat? My plastic garage door looks a lot like that just where metal dust has settled on it then got wet in the rain and rusted on. Good work though man  That diff looks monstrously huge! |
| |
|
|
eurogranada
Europe
To tinker or not to tinker, that is the question...
Posts: 2,556
|
|
|
|
It seems odd to me that rust would come through powder coat like that. Powder oat it's normally pretty impenetrable, so the rust just bubbles away below till the coating flakes off. Are you sure it's not some metal dusty stuck in the surface of the power coat? My plastic garage door looks a lot like that just where metal dust has settled on it then got wet in the rain and rusted on. Good work though man  That diff looks monstrously huge! What you are saying was my first thought at the time, as off course some metalworks have gone on in that shed. But, I have kept al parts in bags, covered and I also always cleaned up the parts if for once I forgot. To be honest though, currently I only have two parts that show this effect. I'll try and spend some more time and see if it'll buff out? But as the diff was really really wel rusted, it could just be that there was still some rust in the pores before coating (although one followed the other directly). I will try and get it neater and will if necessary put some clear tectyl coating on. That should seal it and stop further development. And yes, it's a massive 3 piece beast! That diff. It's a heavy mother as well. It'll be fun getting it out of my shed as I have 80cm wide path behind it to get it through. So it'll have to be upright to get it out... And it weighs a ton as is! |
| |
|
|
|
|
|
Oct 27, 2013 17:47:20 GMT
|
|
Bilt hamber do all the stuff you need!!! i dip all of my stuff in DeoxC then paint on the treatment they do and then prime.If you just clean the items with a wire brush and do not dip them and treat the rust will come back...ask me how i know:)
|
| |
I would be rich if i had not spent so much money on Cars and fast women...oh, i did waste some of it as well!
|
|
foxy99
Posted a lot
  
Posts: 1,454
|
|
|
|
|
I think powdercoating is over-rated. Or, more accurately, it is only as good as the prep done by the operator - which you won't usually witness.
I know how meticulous the author has been in this build and I should perhaps re-read the thread to check if the powdercoat was farmed out to a professional but I have spent a fortune over the years having stuff powdercoated and it has rusted through despite never having been outside whilst stuff I have done myself with rattle cans or coach paint hasn't.
I once saw a guy at the powdercoaters rolling a freshly blasted truck wheel through a puddle from the blast shop to the paint booth. Makes you a bit wary.
|
| |
1974 Daimler Double-Six VDP
1965/67 Hillman Imp pick-up
1984 VW Polo breadvan
1970s Yamaha Twins (4)
1976 Honda SS50ZK1
|
|
eurogranada
Europe
To tinker or not to tinker, that is the question...
Posts: 2,556
|
|
|
|
|
I did indeed turn over the powdercoating to a professional. I had all items blasted by a professional car restorer with high standards. The items were coated as soon as possible after blasting. Also a zink primer powdercoat was first applied underneath the final colour layer.
I'm leaning more toward it being my own fault at the moment. I was able to wipe off a lot of the orange with just a quick wipe. This leads me to believe I may not have been as careful as I thought I had been with those parts. The thing is, the parts affected are also the parts that were still on my workbench (all be it covered/bagged) for a while when I was also doing all sorts of cleaning an prepping and possibly grinding. I'll have to take a little more time to really polish the coated affected areas and see if I can get rid of it completely. The fact that all other parts that were tucked away are still looking like new after two years in an open, moist, ventilated shed also seems to support that.
I have to say that I personally have never been impressed by por15, hammerite and or other (aerosol) products. I have allways taken care of prep and still items turned orange through the paint coats. My best experiences have been with blasted or thouroughly wire brushed items that have been sprayed with epoxy primer and then topcoat from my aircompressor and paintgun. But then I'm using a sikkens set of products and the source materials, a litre of paint, half a litre of hardener and the same for the topcoat set me back about a hundred euro's. But as I make only small amounts, I can do a lot with that.
Time is a bit shorter now, but I'll try and see if I can draw a final conclusion on this matter.
|
| |
|
|
eurogranada
Europe
To tinker or not to tinker, that is the question...
Posts: 2,556
|
|
|
|
|
Only a small update for now. I managed to get a small bit of work in on the Granada this weekend. As I noticed I was quite tired, I allowed myself an afternoon to regain some energy.
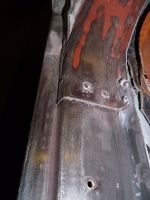
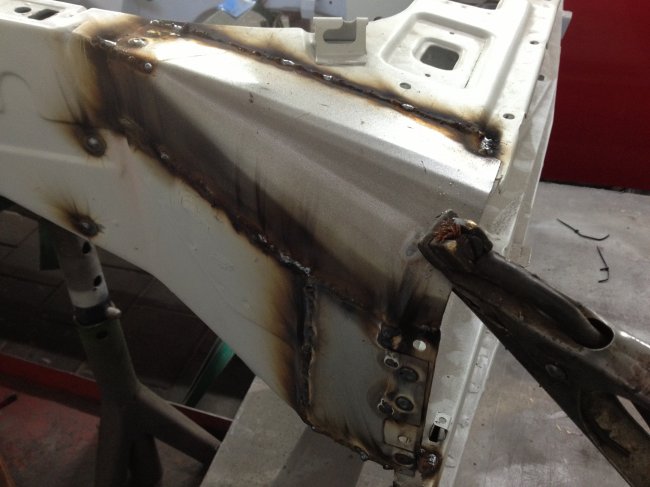
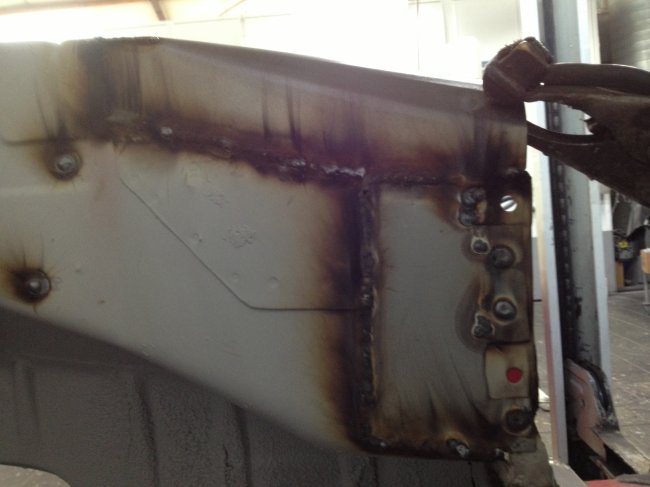
So the things I did were making up the brake lines for the rear suspension arms. Took some time to get them the way I wanted/liked them. Then Saturday I had two hours on the Granada body. I had planned to start seem sealing, but my friend wanted to do some welding. So down the car came and some welding was done. This meant I myself was not super useful. I clamped on some parts to be welded as I wanted them. I cleaned some paint from the edges so welding would be smooth. The goal was to finish the fron right section up to the windshield, but we didn't make it that far yet. Maybe tonight we'll be able to finish that. It was a good feeling to get on with the welding again, but it would have been nice had we been able to finish the whole body. Ah well, maybe tonight there will be some more time.
|
| |
|
|
eurogranada
Europe
To tinker or not to tinker, that is the question...
Posts: 2,556
|
|
|
|
|
Another small update. Spent two and a half hours on the granada yesterday. I first dressed the welds from last week and protected them and then my friend had an hour to do some more welding. The result is the front wing sections are all finished and the rear inner sill is now fully welded as well. Left to do is just the right rear trunk and a patch around the sunroof. Then the body will be done!
I started looking at the modifications the doors will need and given good measurements it should not be very difficult to get that done as well. I even looked into moving my wiper motor and think I have found a suitable location that should work.
|
| |
|
|
eurogranada
Europe
To tinker or not to tinker, that is the question...
Posts: 2,556
|
|
|
|
|
|
| |
|
|
|
|
|
|
|
good progress again  the rust treatment are a good idea, "brush it on and rust goes purple then dries black" type products. i've been using granville rust converter after getting components bright with abrasive of your choice (knotted wheel, DA sander, blasting, flap disks, whichever) |
| |
|
|
eurogranada
Europe
To tinker or not to tinker, that is the question...
Posts: 2,556
|
|
|
|
|
Thanks, funny that you consider it good progress while I feel like I'm at a standstill!
I had the body blasted and primed immediately. I also followed those actions through on all small parts. All cut and welded areas are also immediately primed with either epoxy or inox. I haven't had much need for the rust convertors yet, but if I need any, it is at hand. I find them especially useful in tight seems. I will be spending a lot of time/effort on seem sealing and rust proofing the structure of the car.
|
| |
|
|
|
|
|
|
|
hmm, standstill is not pulling the tarp off since LAST october  the rust converter was re: your diff casing, found it useful on rough cast items when i did my landy |
| |
|
|
|
|
|
|
|
|
As Darren Says, any progress is good progress, keep up the great work, and setting a deadline, always helps keep me focused
|
| |
|
|
eurogranada
Europe
To tinker or not to tinker, that is the question...
Posts: 2,556
|
|
|
|
hmm, standstill is not pulling the tarp off since LAST october  the rust converter was re: your diff casing, found it useful on rough cast items when i did my landy Ah, I understand the reference now. At the moment though I'm still leaning toward it being my own fault, it being caused by hot metal shavings burrying themselves in the powdercoat. I seem to be able to buff it out. At least in the areas I tried it on. But I still have to make time to do a proper job on that. But I never saw the end result after just blasting, as for sake of speed, the stuff went straight on to powdercoat, so it may still have been wise to use a rust treatment product on it. |
| |
|
|
eurogranada
Europe
To tinker or not to tinker, that is the question...
Posts: 2,556
|
|
|
|
As Darren Says, any progress is good progress, keep up the great work, and setting a deadline, always helps keep me focused Thanks!! Maybe I'm being to hard on myself... It's just that feeling of being soooooo close and yet not really getting to the end. At least there is a firm plan of action now so I will be able to move somewhat forward. First though, we're going to enjoy a free family weekend in a family resort that was offered to us as a result of my daughter having survived cancer at the age of 3,5-5. Some nice family time awaits, so the granny will have to wait as well. It couldn't have come at a better time, as in a week and a half my wife has her surgery. After that; full on with both the car and the home remodel... |
| |
|
|
eurogranada
Europe
To tinker or not to tinker, that is the question...
Posts: 2,556
|
|
|
|
|
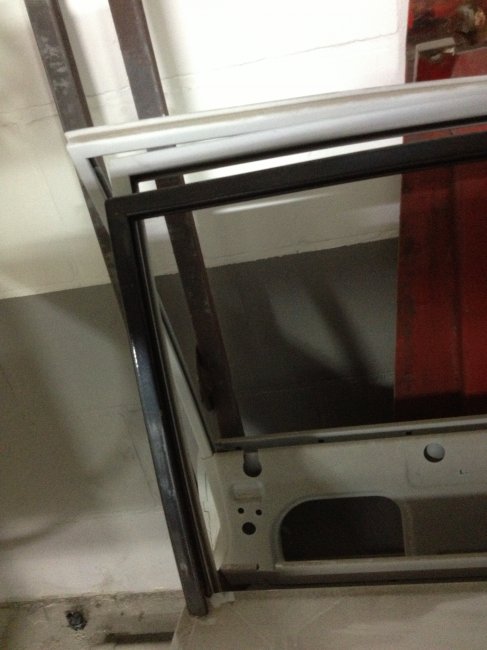
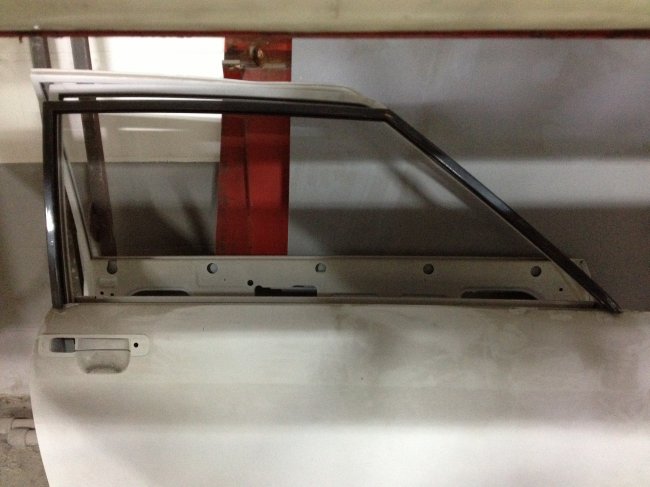
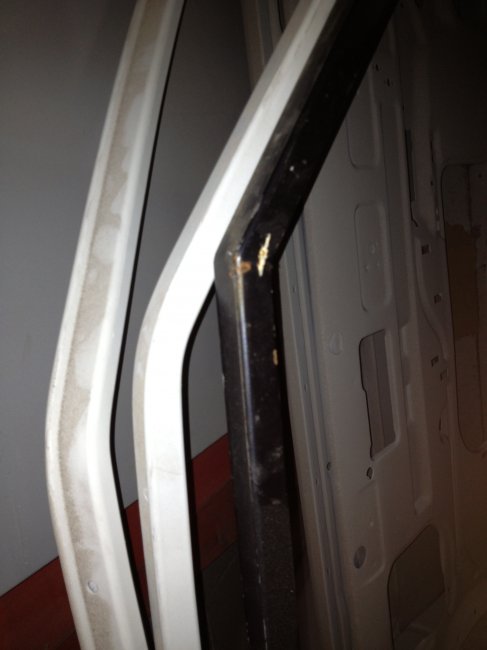
Started cutting up a perfectly good door window channel yesterday. It's pretty tricky work. Getting the dimensions right is not so hard, getting the repair section angled right is a lot more of a challenge. As for welding there is a small air gap between the pieces, you can change the angle quite considerably. To counter that I think I'm going to put on the chrome trim that covers the edge and to make 100% sure we'll also be hanging the doors for a test fit after tacking.
For strength, I've chosen to cut the rear section up high, about an inch under the corner of the frame, while the front section is cut about 2 inches up from the bottom of the door frame so the join can be made in a flat section. The logic behind this is that a 2 door car often gets closed by the window frame. I tend to do that using the rear upright frame section. By cutting that up high the part I tend to grab still has most of its strengt coming from within the door itself. I was afraid that if I cut that low, it would be more prone to cracking from the stresses of opening and closing. Time will tell I guess.
So far I'm right on track to get everything prepped for our welding session next weekend, but it will be a bit of hard work to get there. After that: a good cleanout/up of the car, sealing the seams and bodyschutzing so it can get back on it's wheels!
Subgoal is having a rolling shell with prepped engine compartment, floor and boot, possibly interior by mid december! And as soon as that is done it will be off to get prepped for paint!
|
| |
|
|
eurogranada
Europe
To tinker or not to tinker, that is the question...
Posts: 2,556
|
|
Nov 19, 2013 10:07:31 GMT
|
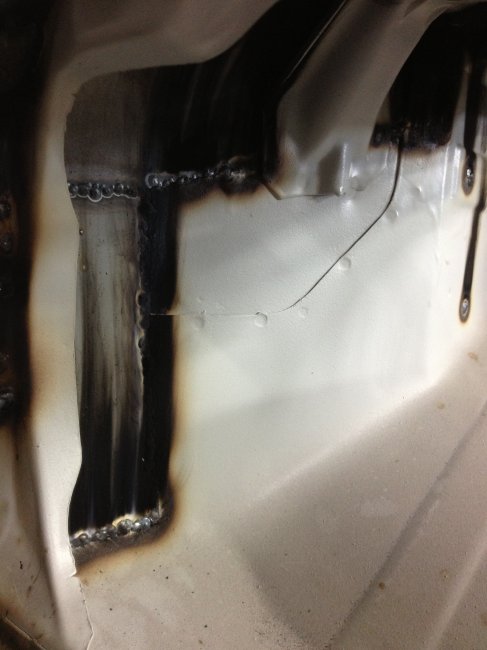
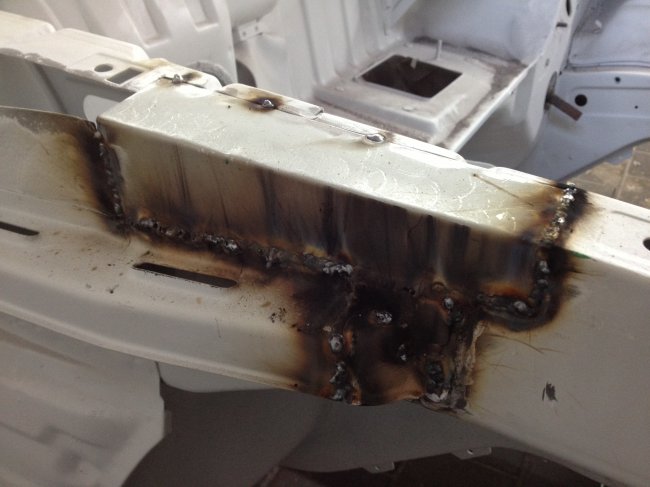
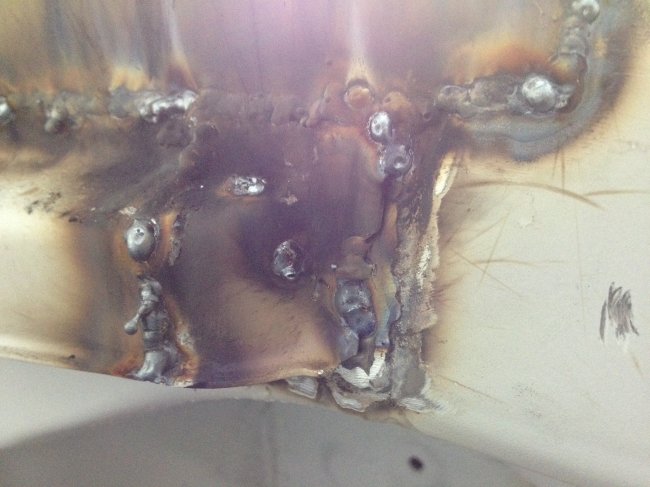
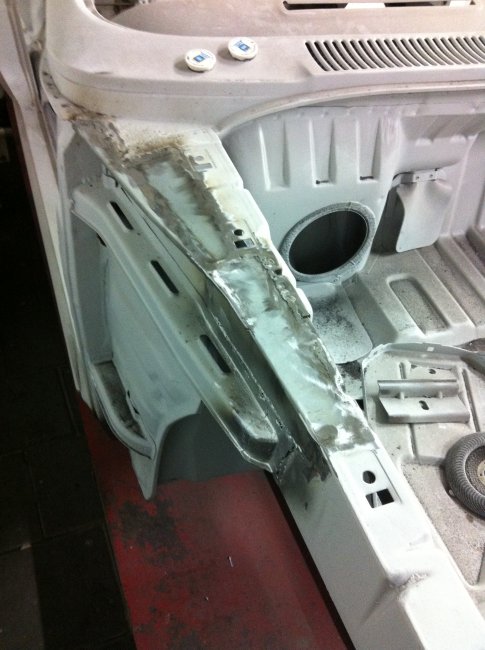
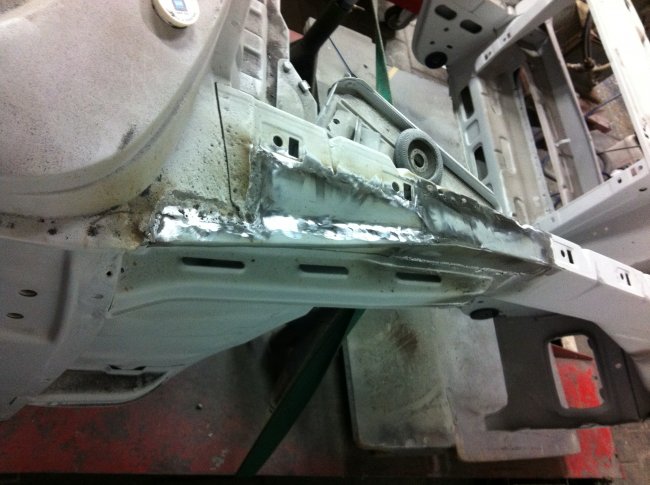
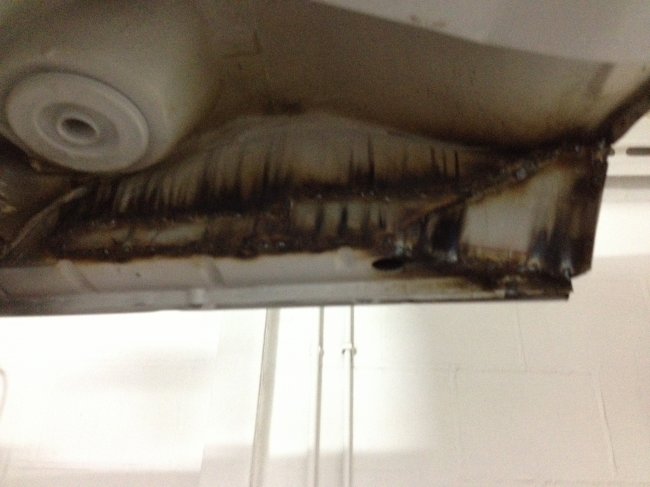
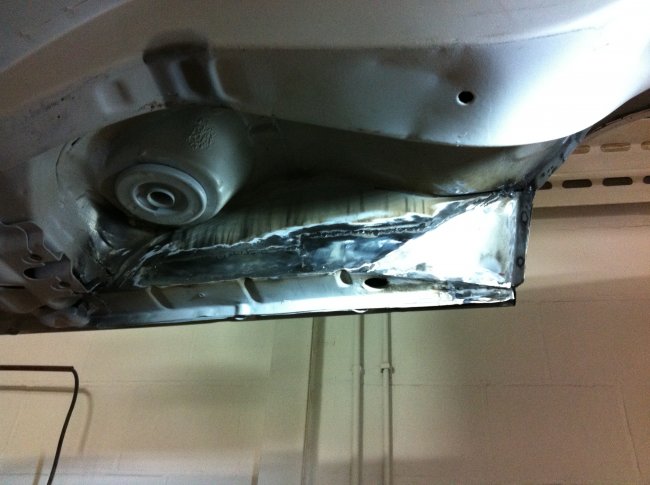
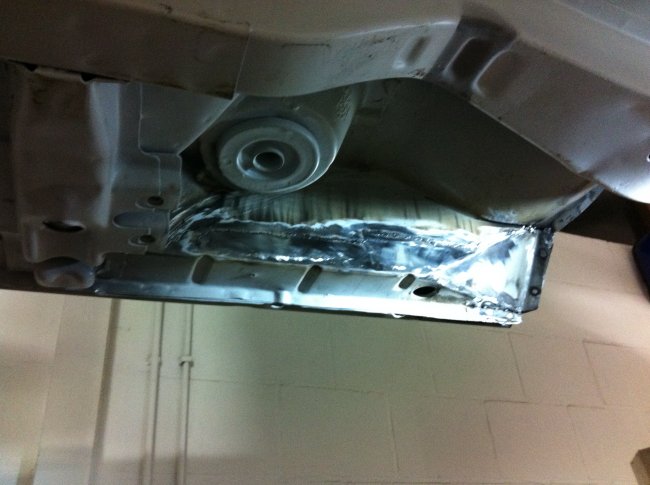
Another milestone has been achieved! The body of my Mk1 Granada coupe is now 100% rust free!! The weldathon on it is finished!! It still took quite some time as there were two delicate repairs to be done. One to the right rear corner and one on the roof. Both now executed very nicely. I didn't yet get to welding the doors or fixing the two small repairs on the front wing. I did however cut the door window frames to size. Now the challenge is to get them back on angled right. For that the doors have to be hung. So it'll have to wait somewhat for the focus is now on cleaning and prepping the floors to get it mobile. Plan of attack: - hoover the hell out of it! It's acquired a lot of dust sitting and obviously a lot of metal shavings from cutting and grinding metal/welds. I think this alone will take half a day! - seam seal the floors back to front - bodyschutz the floors back to front - bodyschutz the boot - Paint the engine compartment - Put the mechanicals on - hang and weld the doors All of the above should be done by mid december. Some pictures: 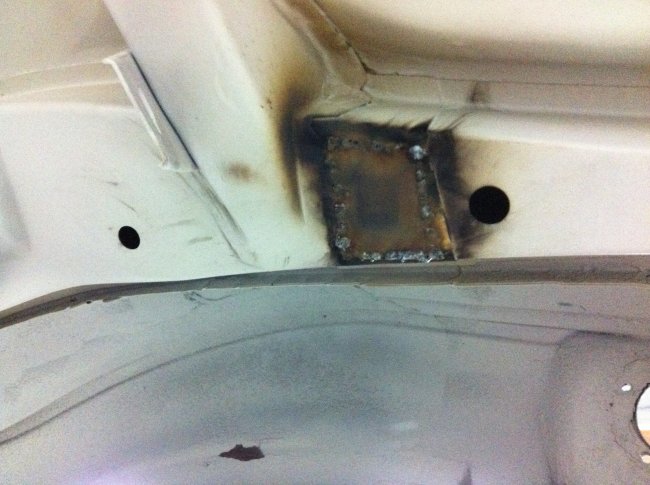 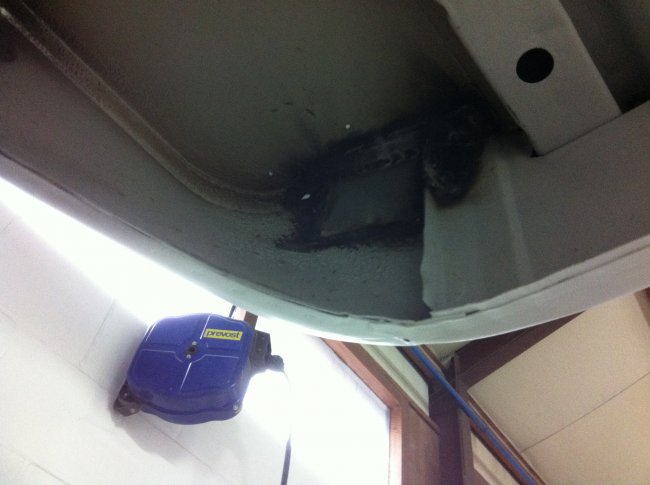 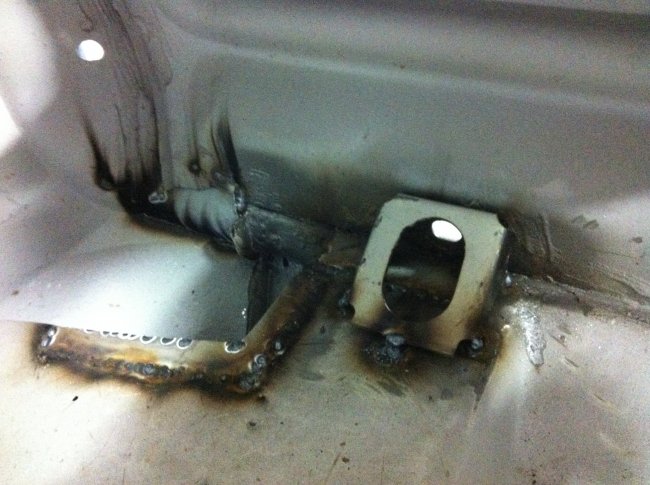 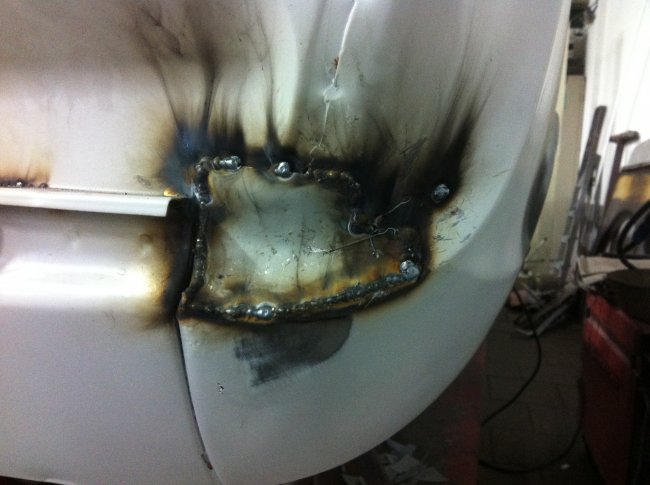 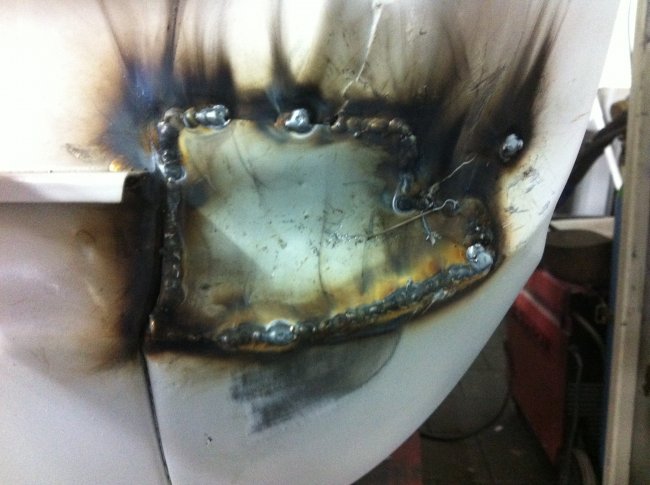 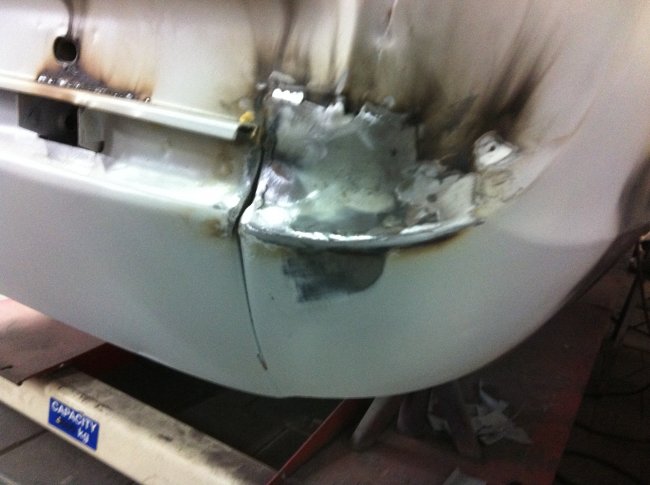 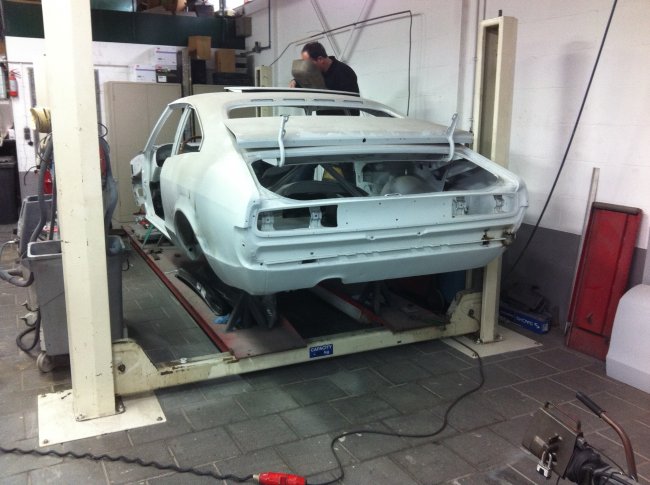 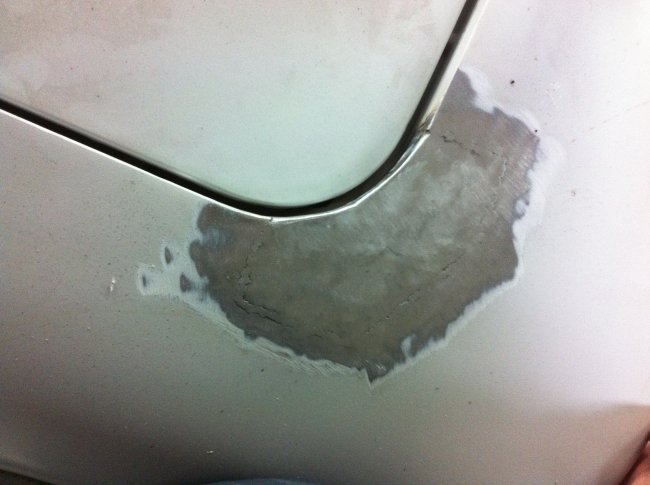 |
| |
|
|
eternaloptimist
Posted a lot
   Too many projects, not enough time or space...
Posts: 2,578
|
|
Nov 19, 2013 19:44:15 GMT
|
|
Rust free! That's quite some achievement. Great standards you're working to.
|
| |
XC70, VW split screen crew cab, Standard Ten
|
|
eurogranada
Europe
To tinker or not to tinker, that is the question...
Posts: 2,556
|
|
|
|
|
It feels good to know it now is rust free, yes! And thank you for your comment on my standards. Yes they are high, but still I don't have the illusion the car will stay as good, as fresh and clean as it is now forever. There is too much that you can't control. You can't get at all the rust for instance. Where panels are spotwelded together, impossible to get to. Maybe by chemical dipping, but that brings another set of factors in to play to consider. No I've tried doing the best I could to keep it looking nice for years to come but we don't live in great climats for old steel hulks over here now do we?!
On to the next tasks!
|
| |
|
|


 That diff looks monstrously huge!